Category Archives: Patchwork

Modern Plus Quilts Blog Hop

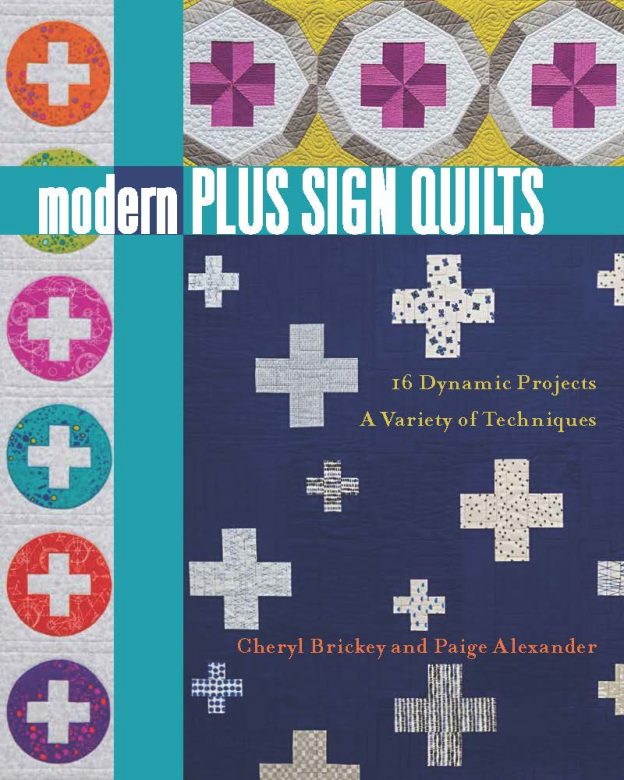
The release of Modern Plus Sign Quilts, written by Paige Alexander and Cheryl Brickey is being celebrated with a blog hop this week and next. I am so happy to take part in celebrating this book.  I have long been a fan of plus quilts and made one a while back.  I called it Positively Floating and you can see it here. Adding a book devoted to modern interpretations of plus quilts is the perfect thing for my collection of quilting books.

There are a couple of things I really appreciate about this book. One is the ease of most of the patterns Paige and Cheryl designed.  I am not usually one for fussy quilts with tons of pieces to cut and points to match up.  While there are some advanced, challenging patterns in the book, there are also lots of options for simpler designs. Also, there is a nice write up on the history of plus quilts which I really enjoyed.  Finally, with many of the patterns, the authors included an illustration of a suggested layout for cutting the pieces such that you get the most out of the fabric needed. This is really helpful for me as I just don’t have a strong ability to see spatial relationships and often (more often than you’d think) will cut my pieces and find I don’t have quite enough fabric.  This is because I don’t always choose the most efficient cutting plan.  Part of me attributes this to the fact that for years I sewed clothing, not quilts.  Clothing patterns always show the best way to lay out the pieces on the fabric – so I never had to figure this out for myself.  Anyway, I think this was a great addition to the quilt book and you don’t see it in many books that are published.

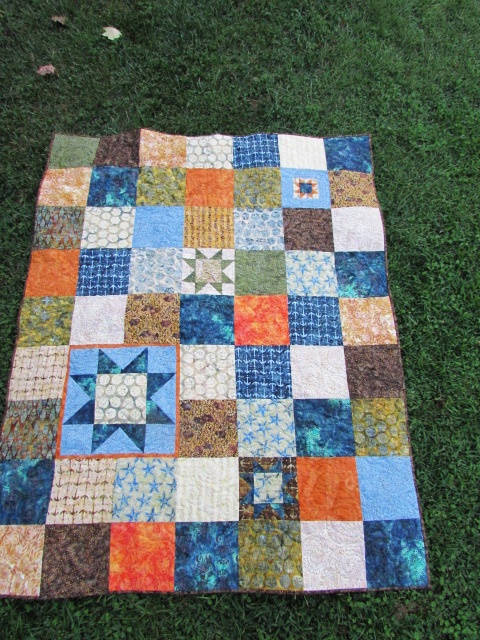
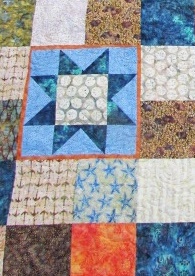
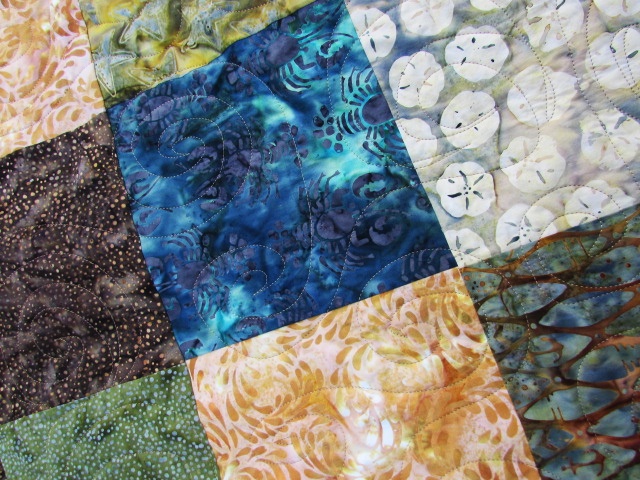
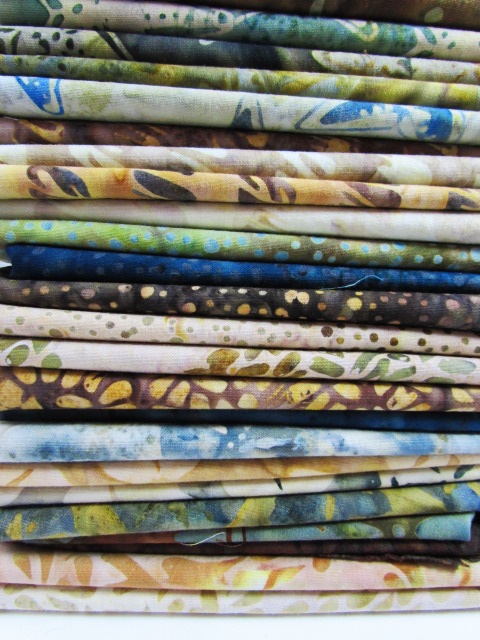
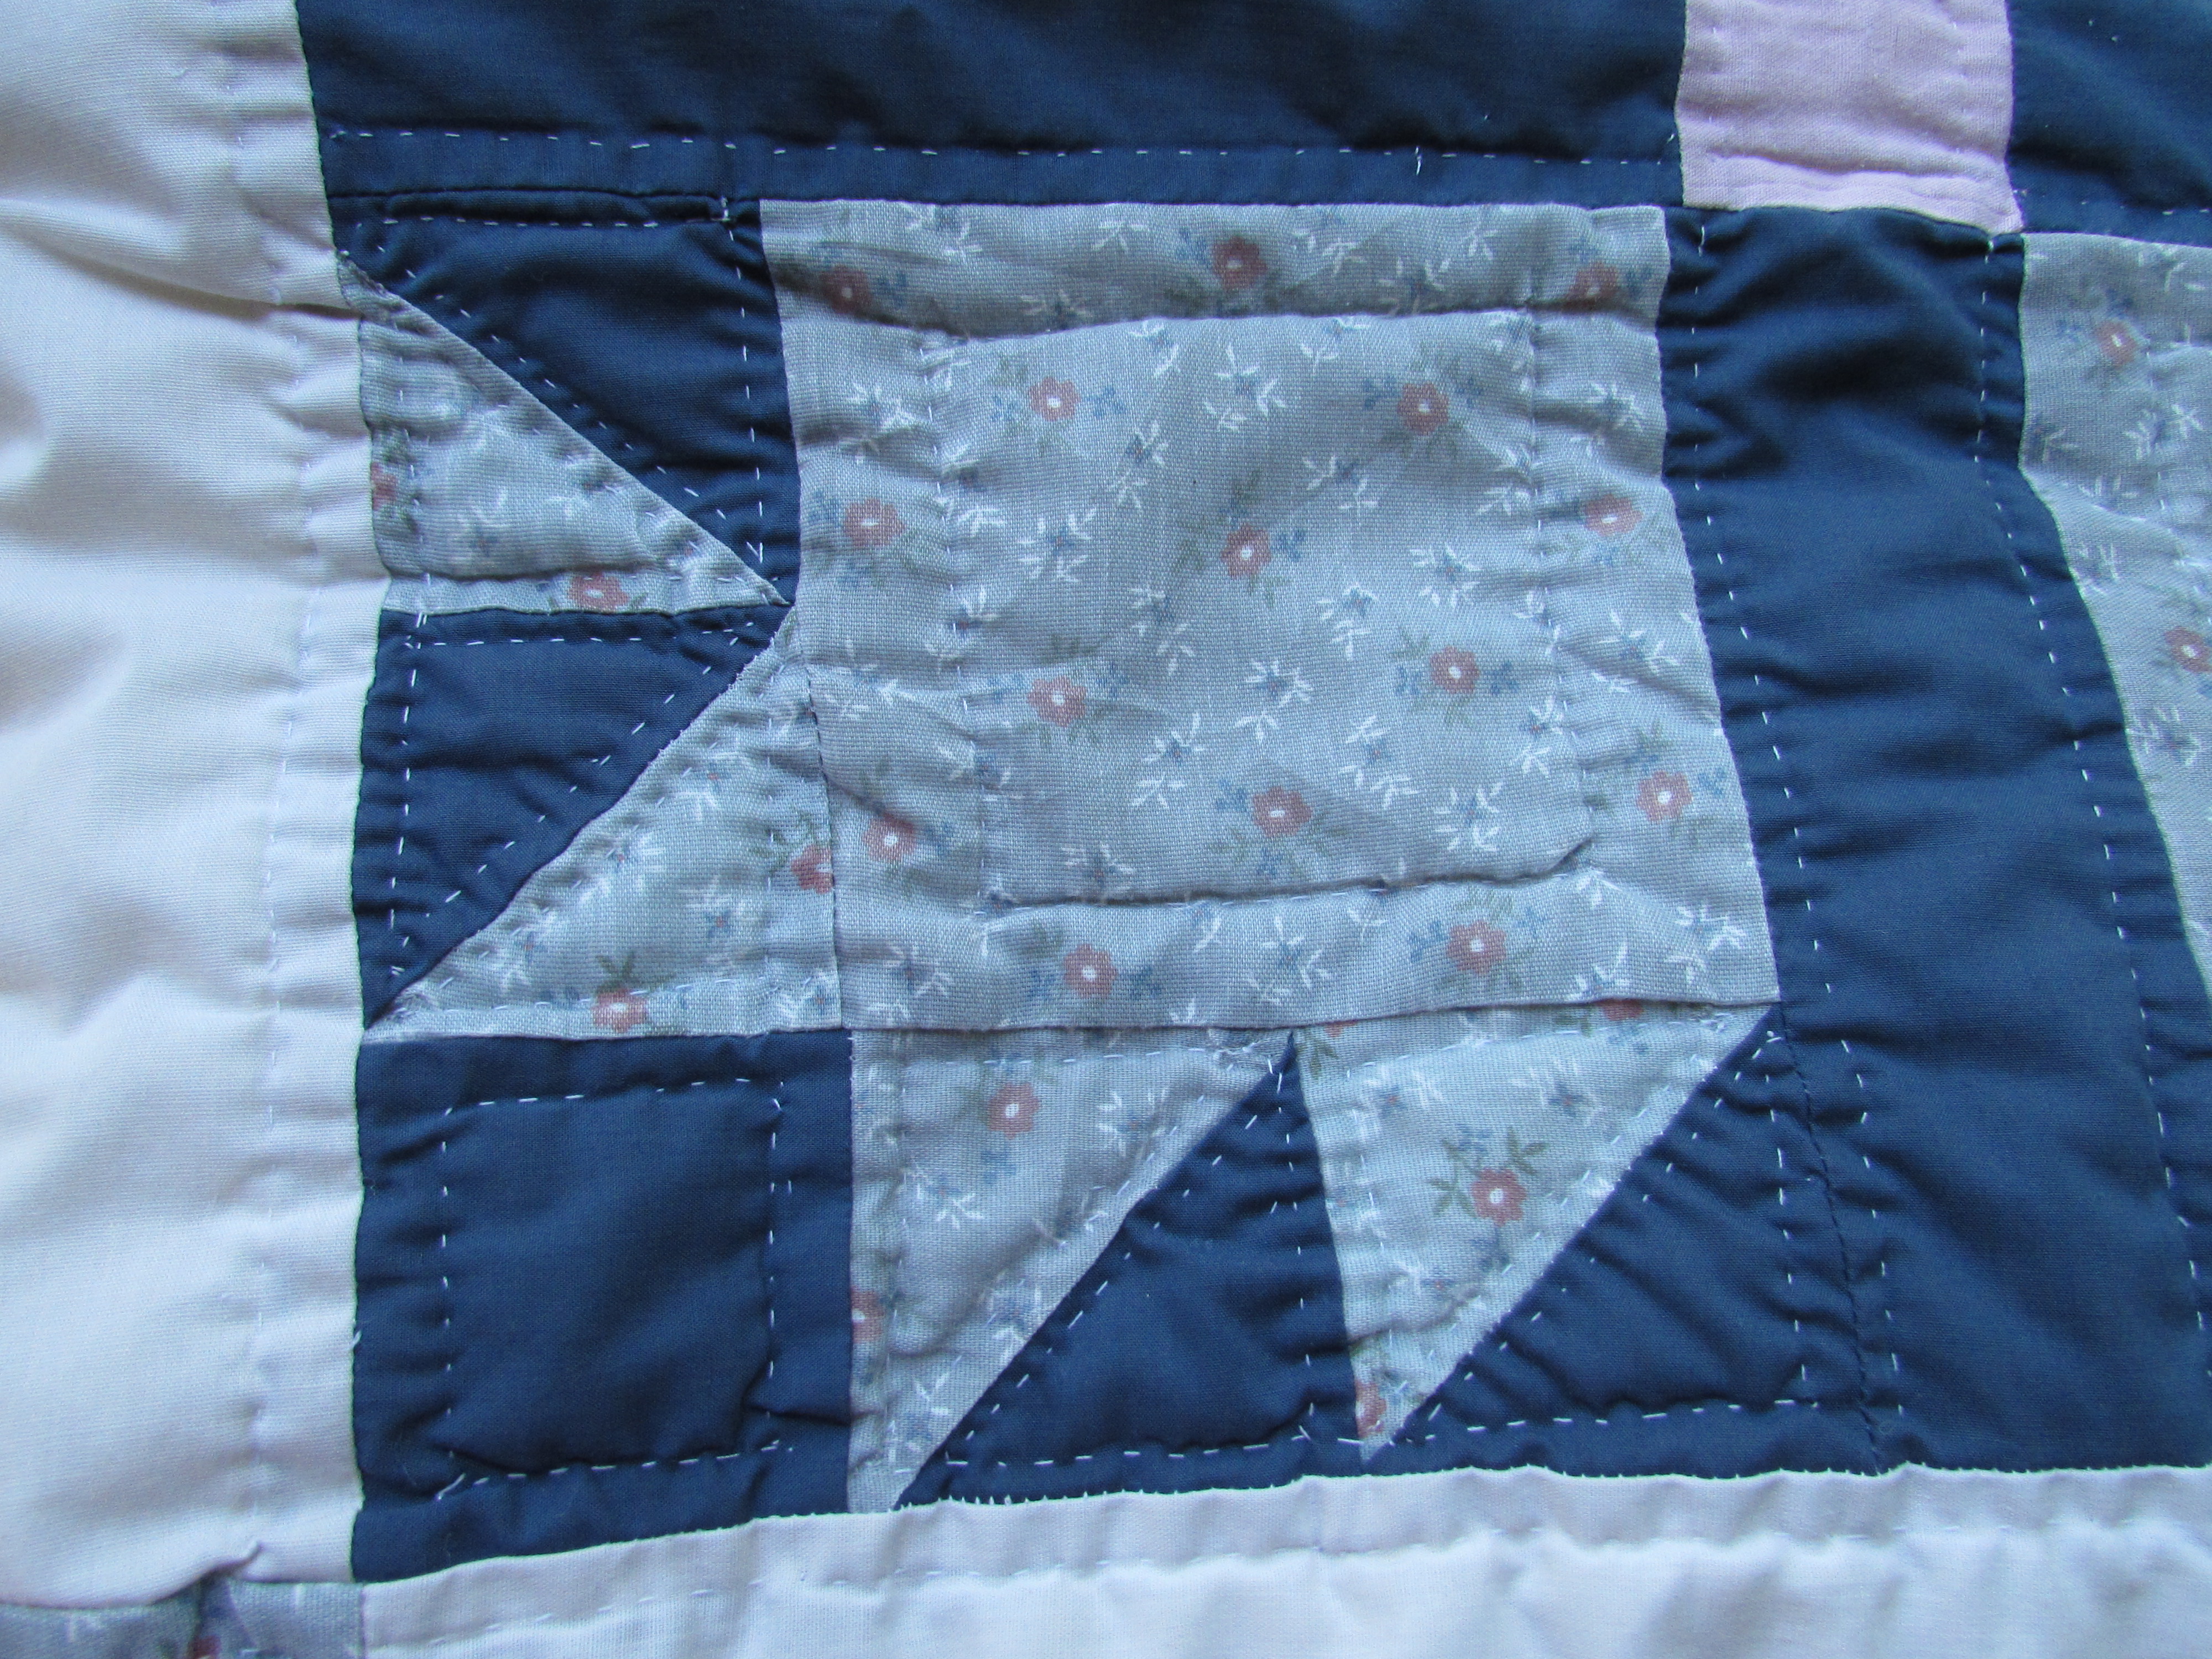
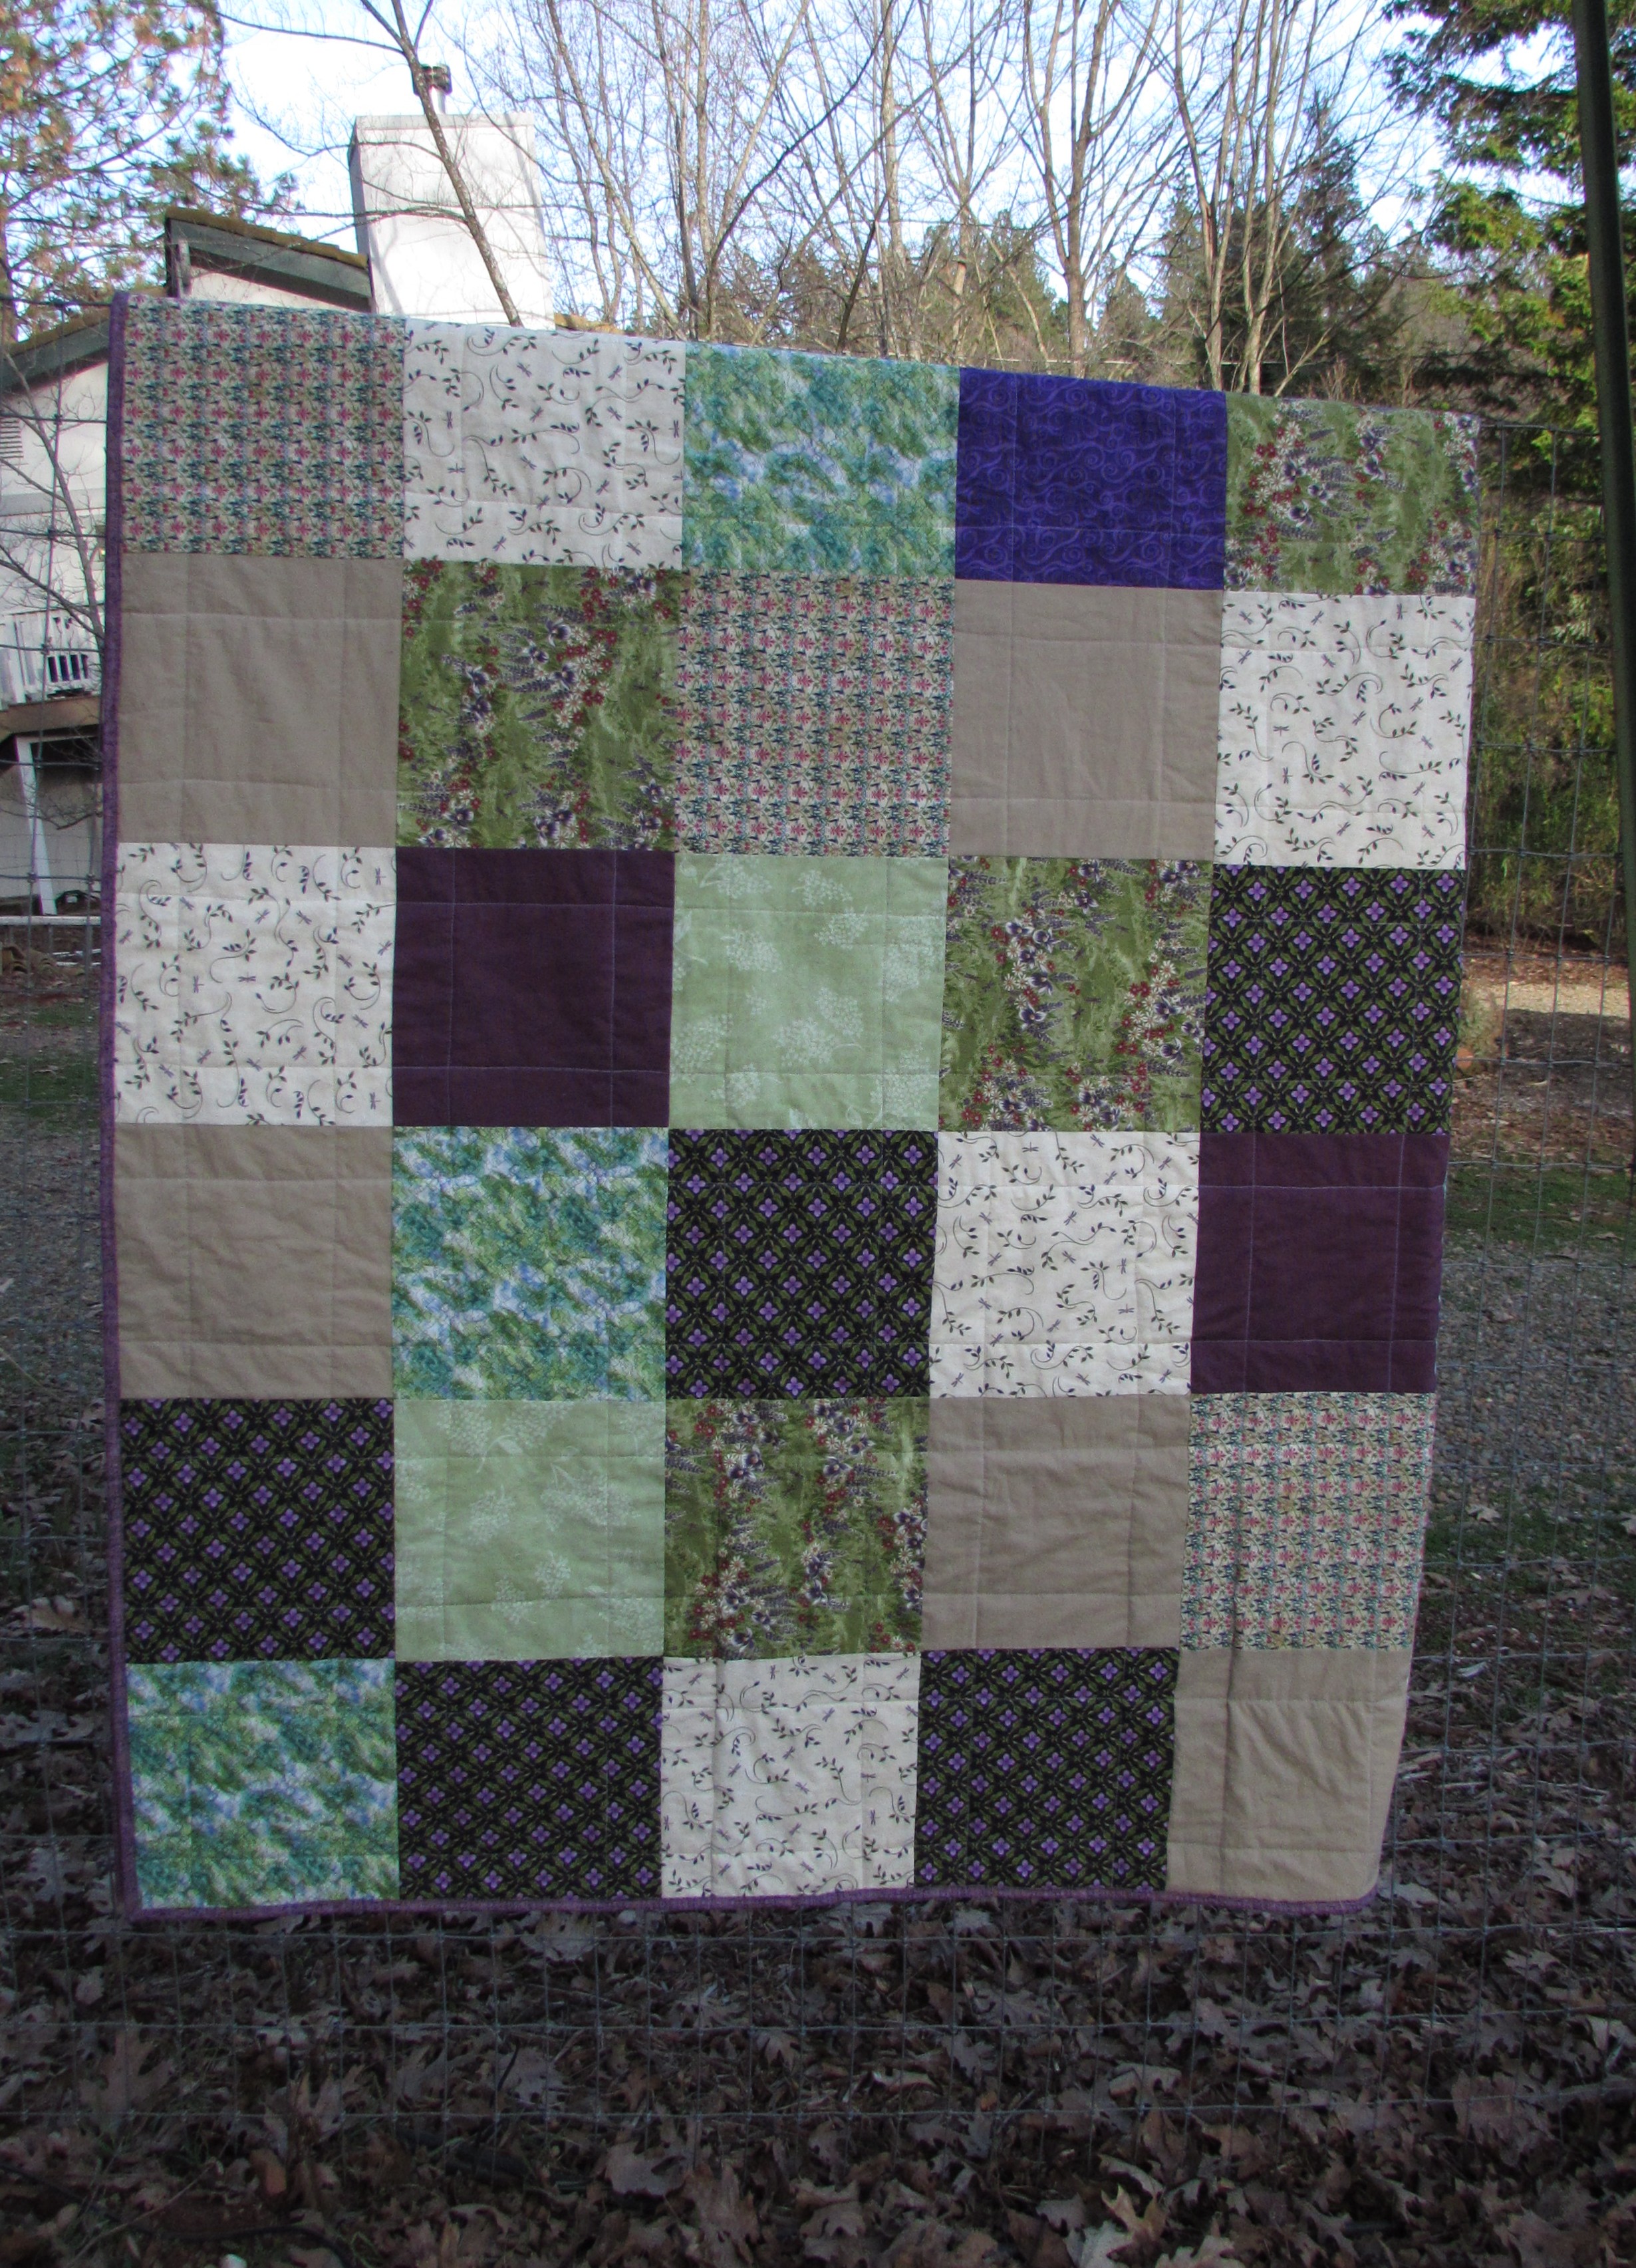
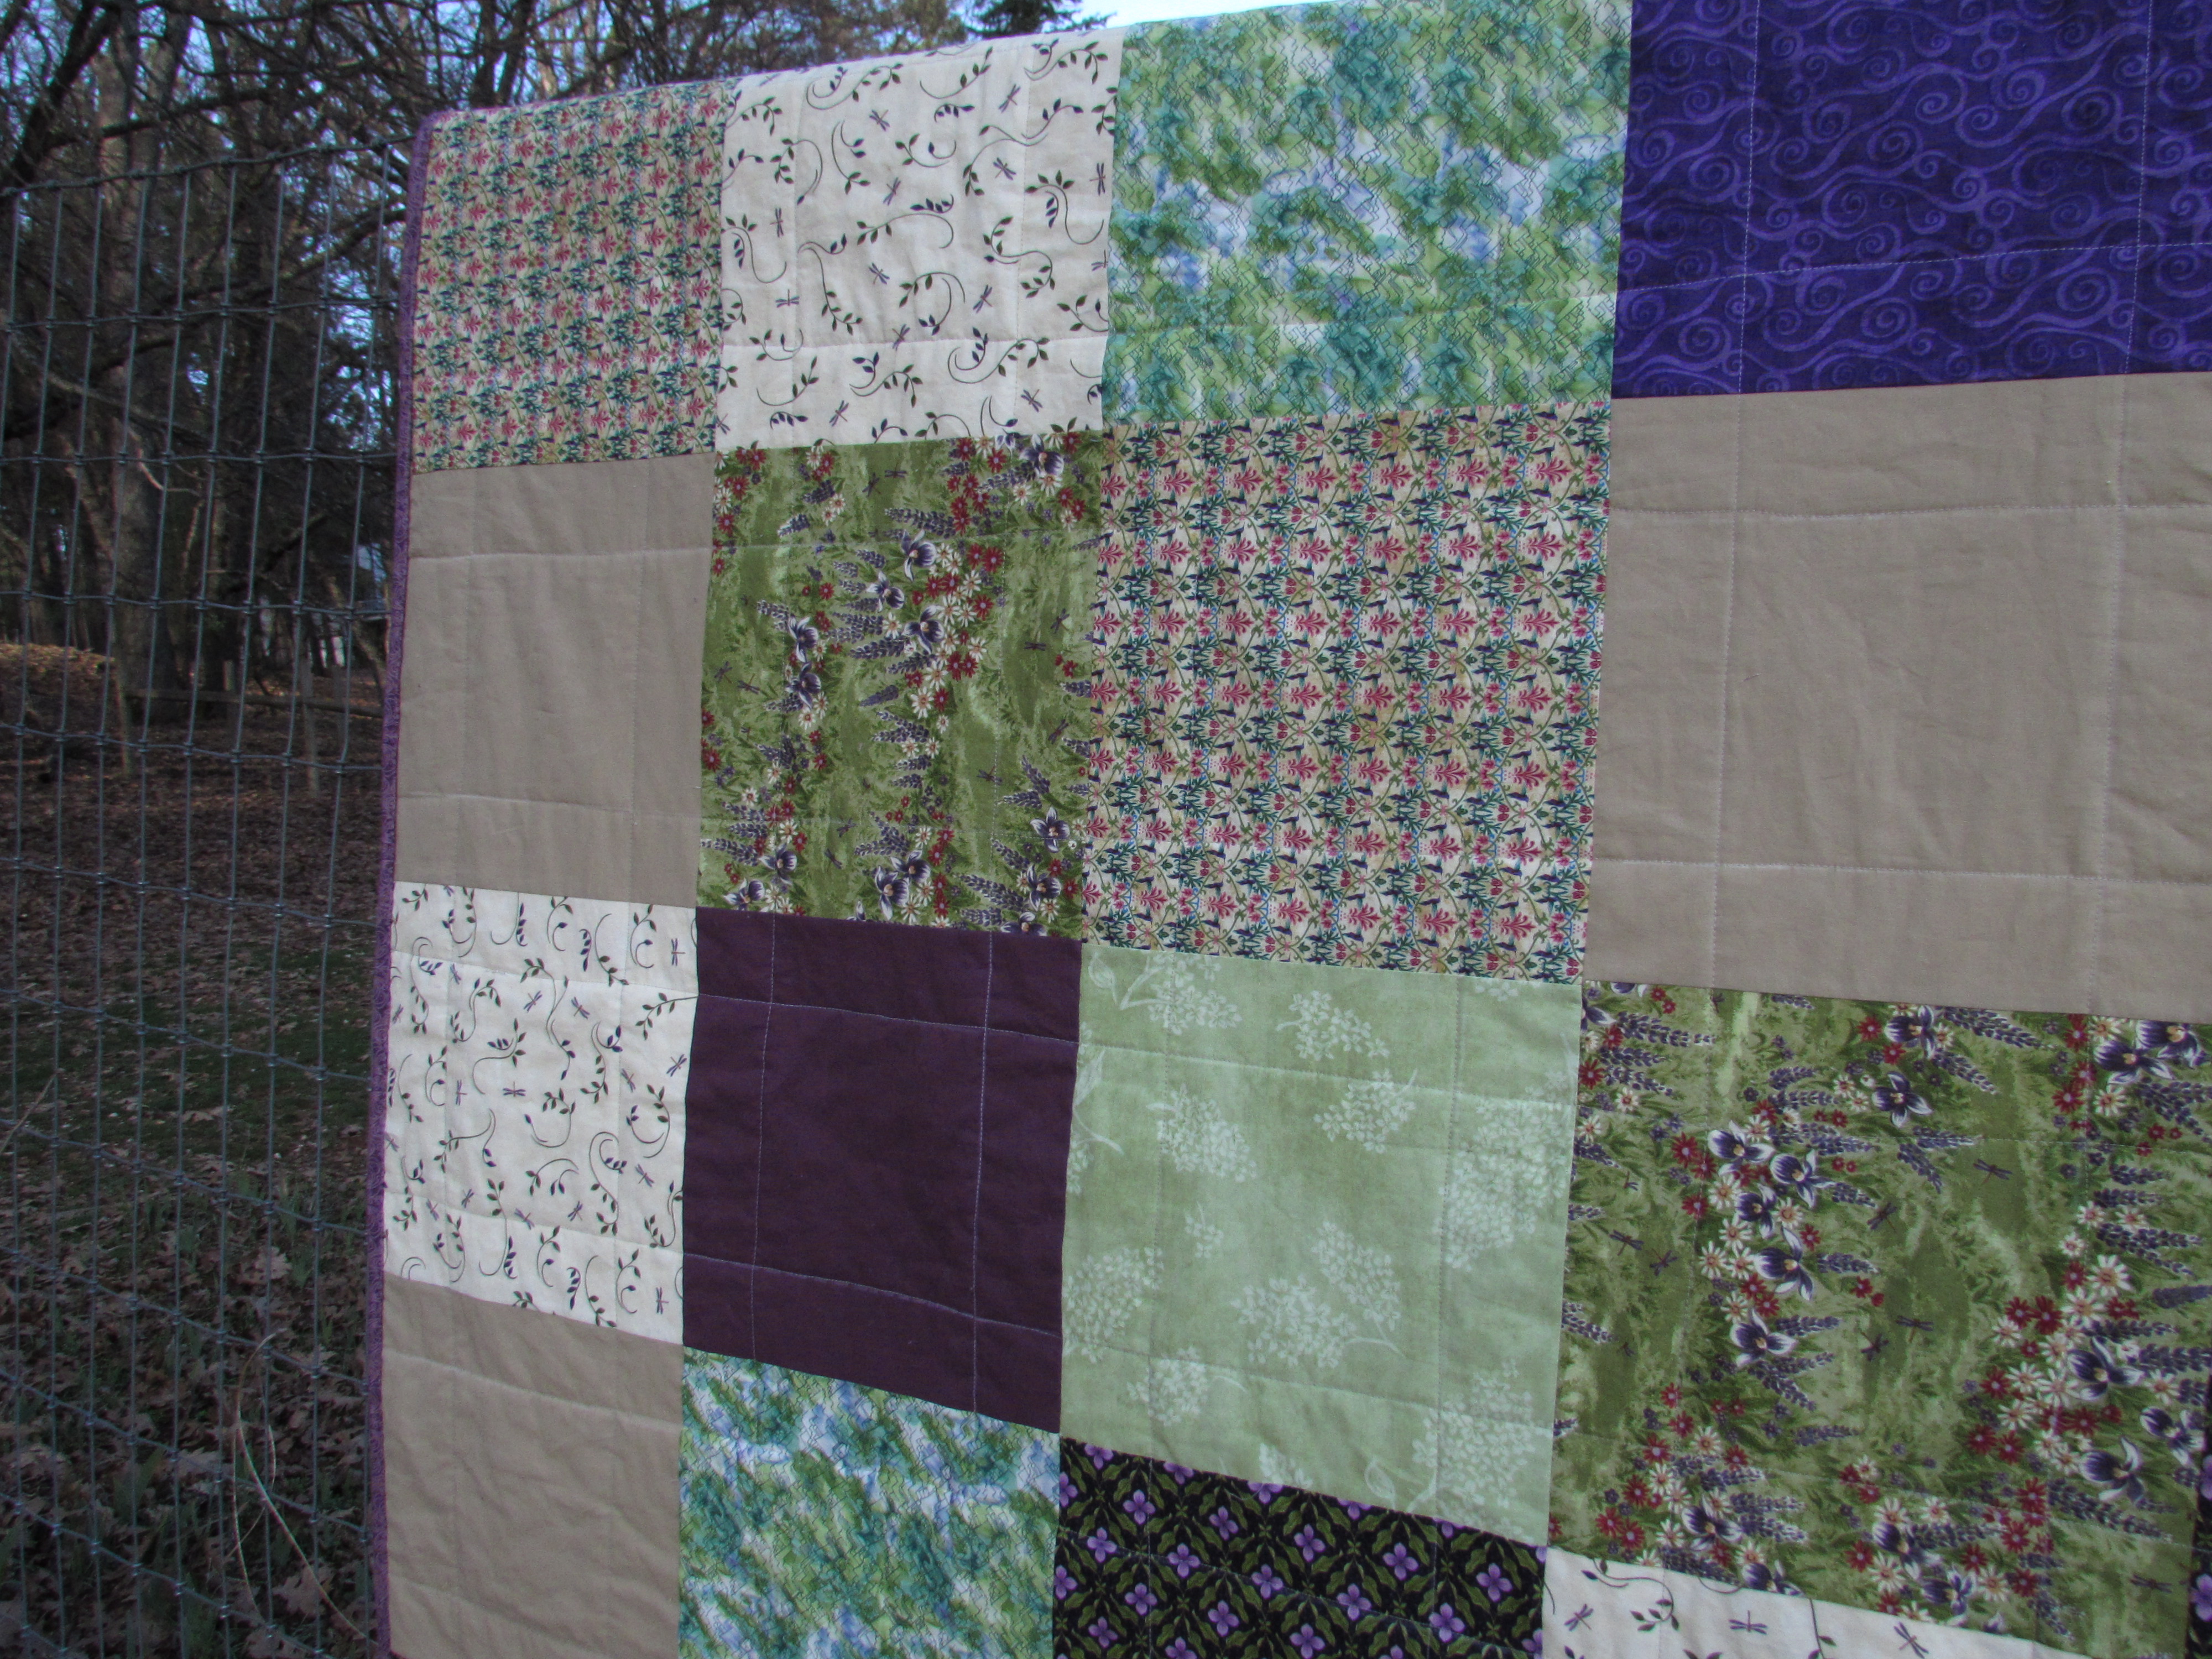
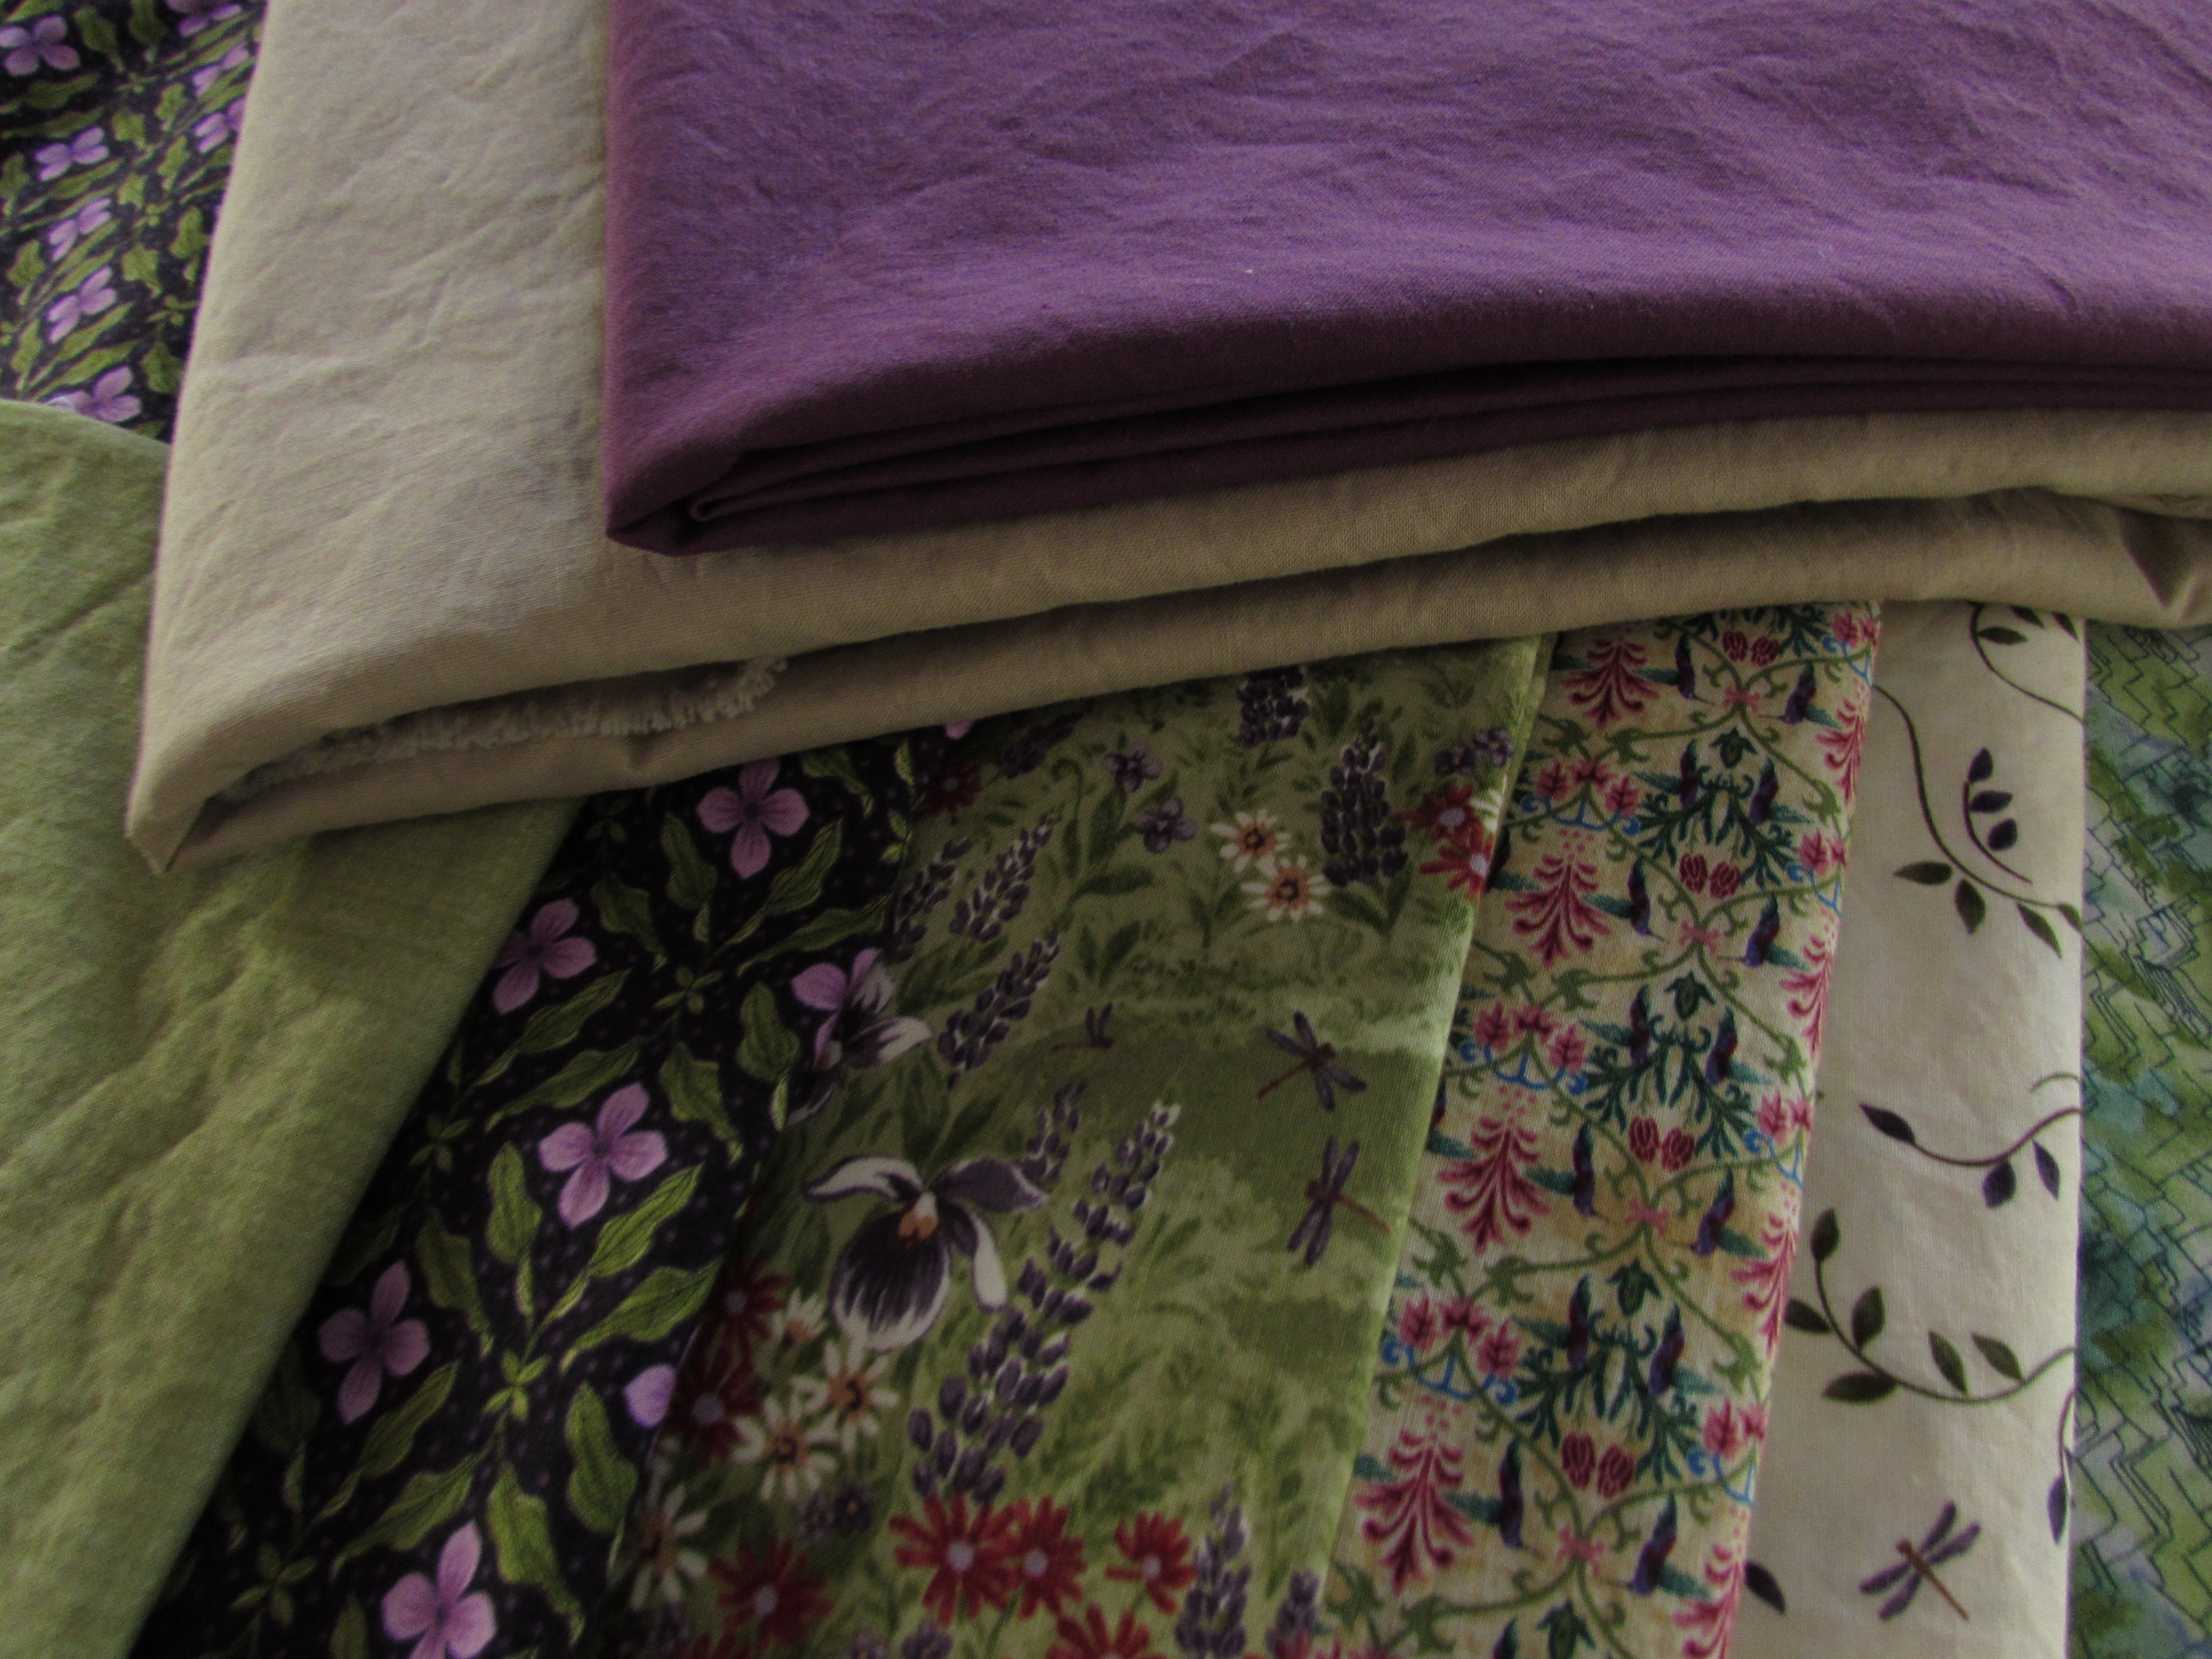
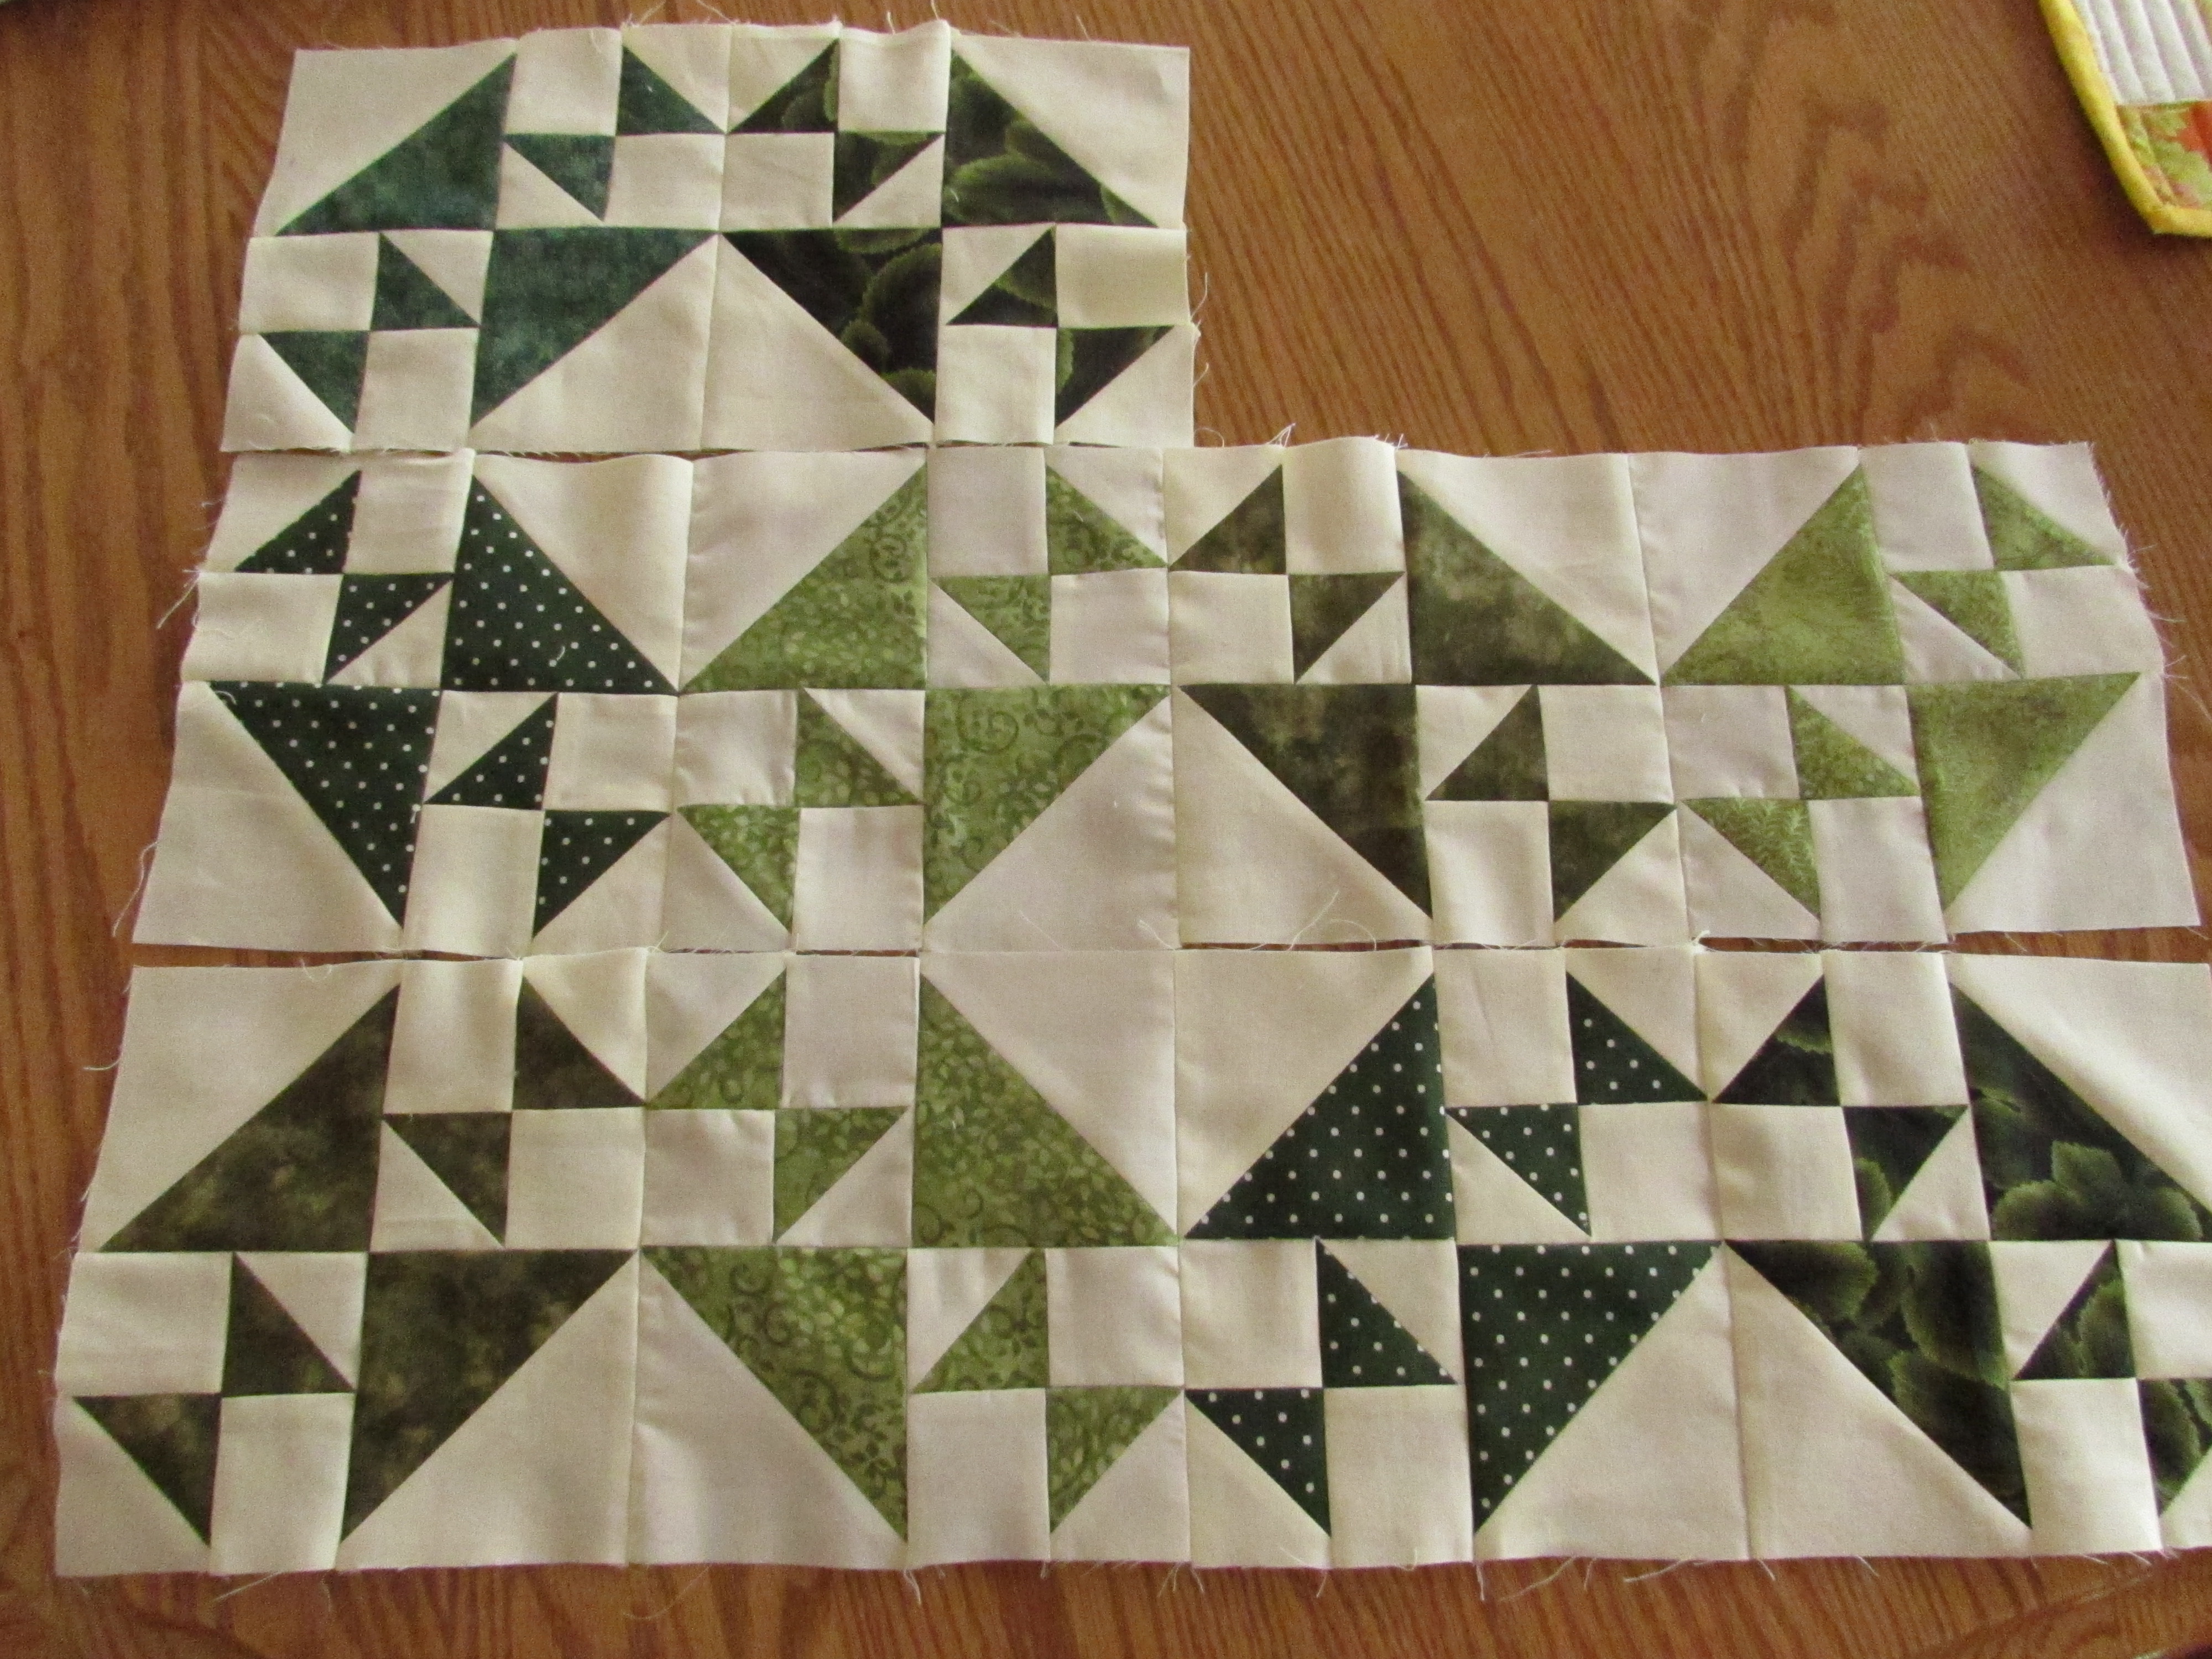
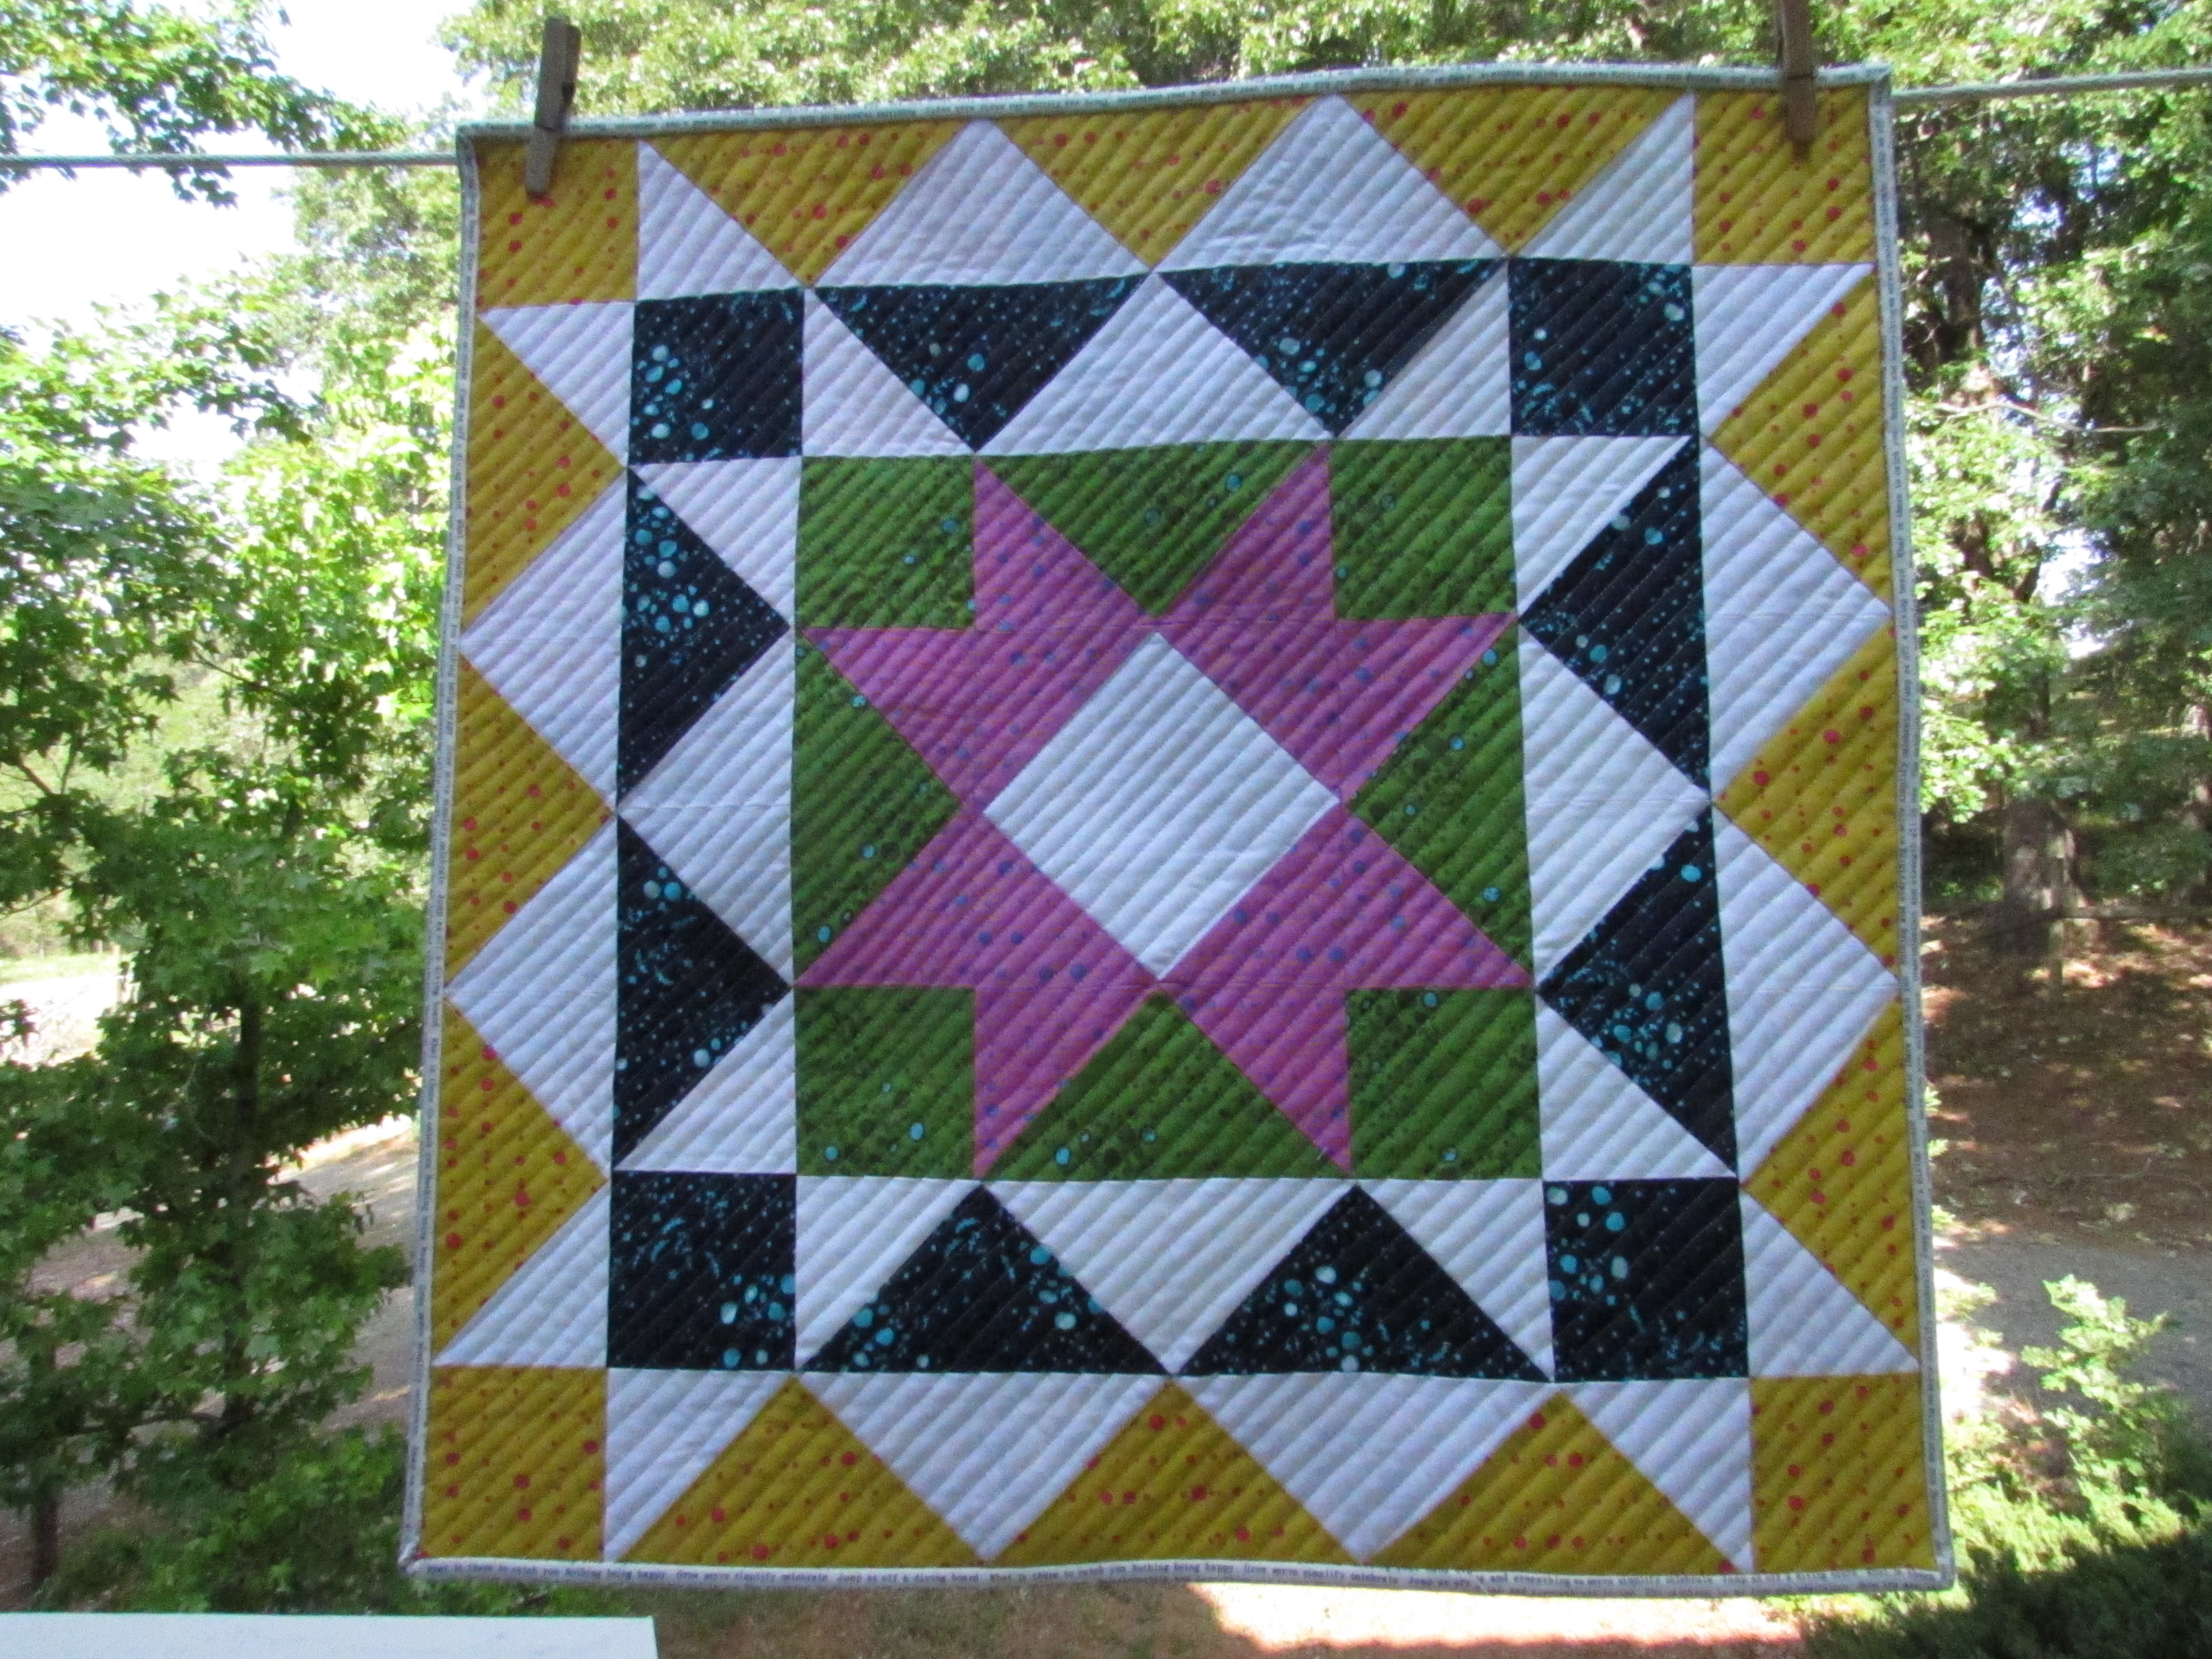
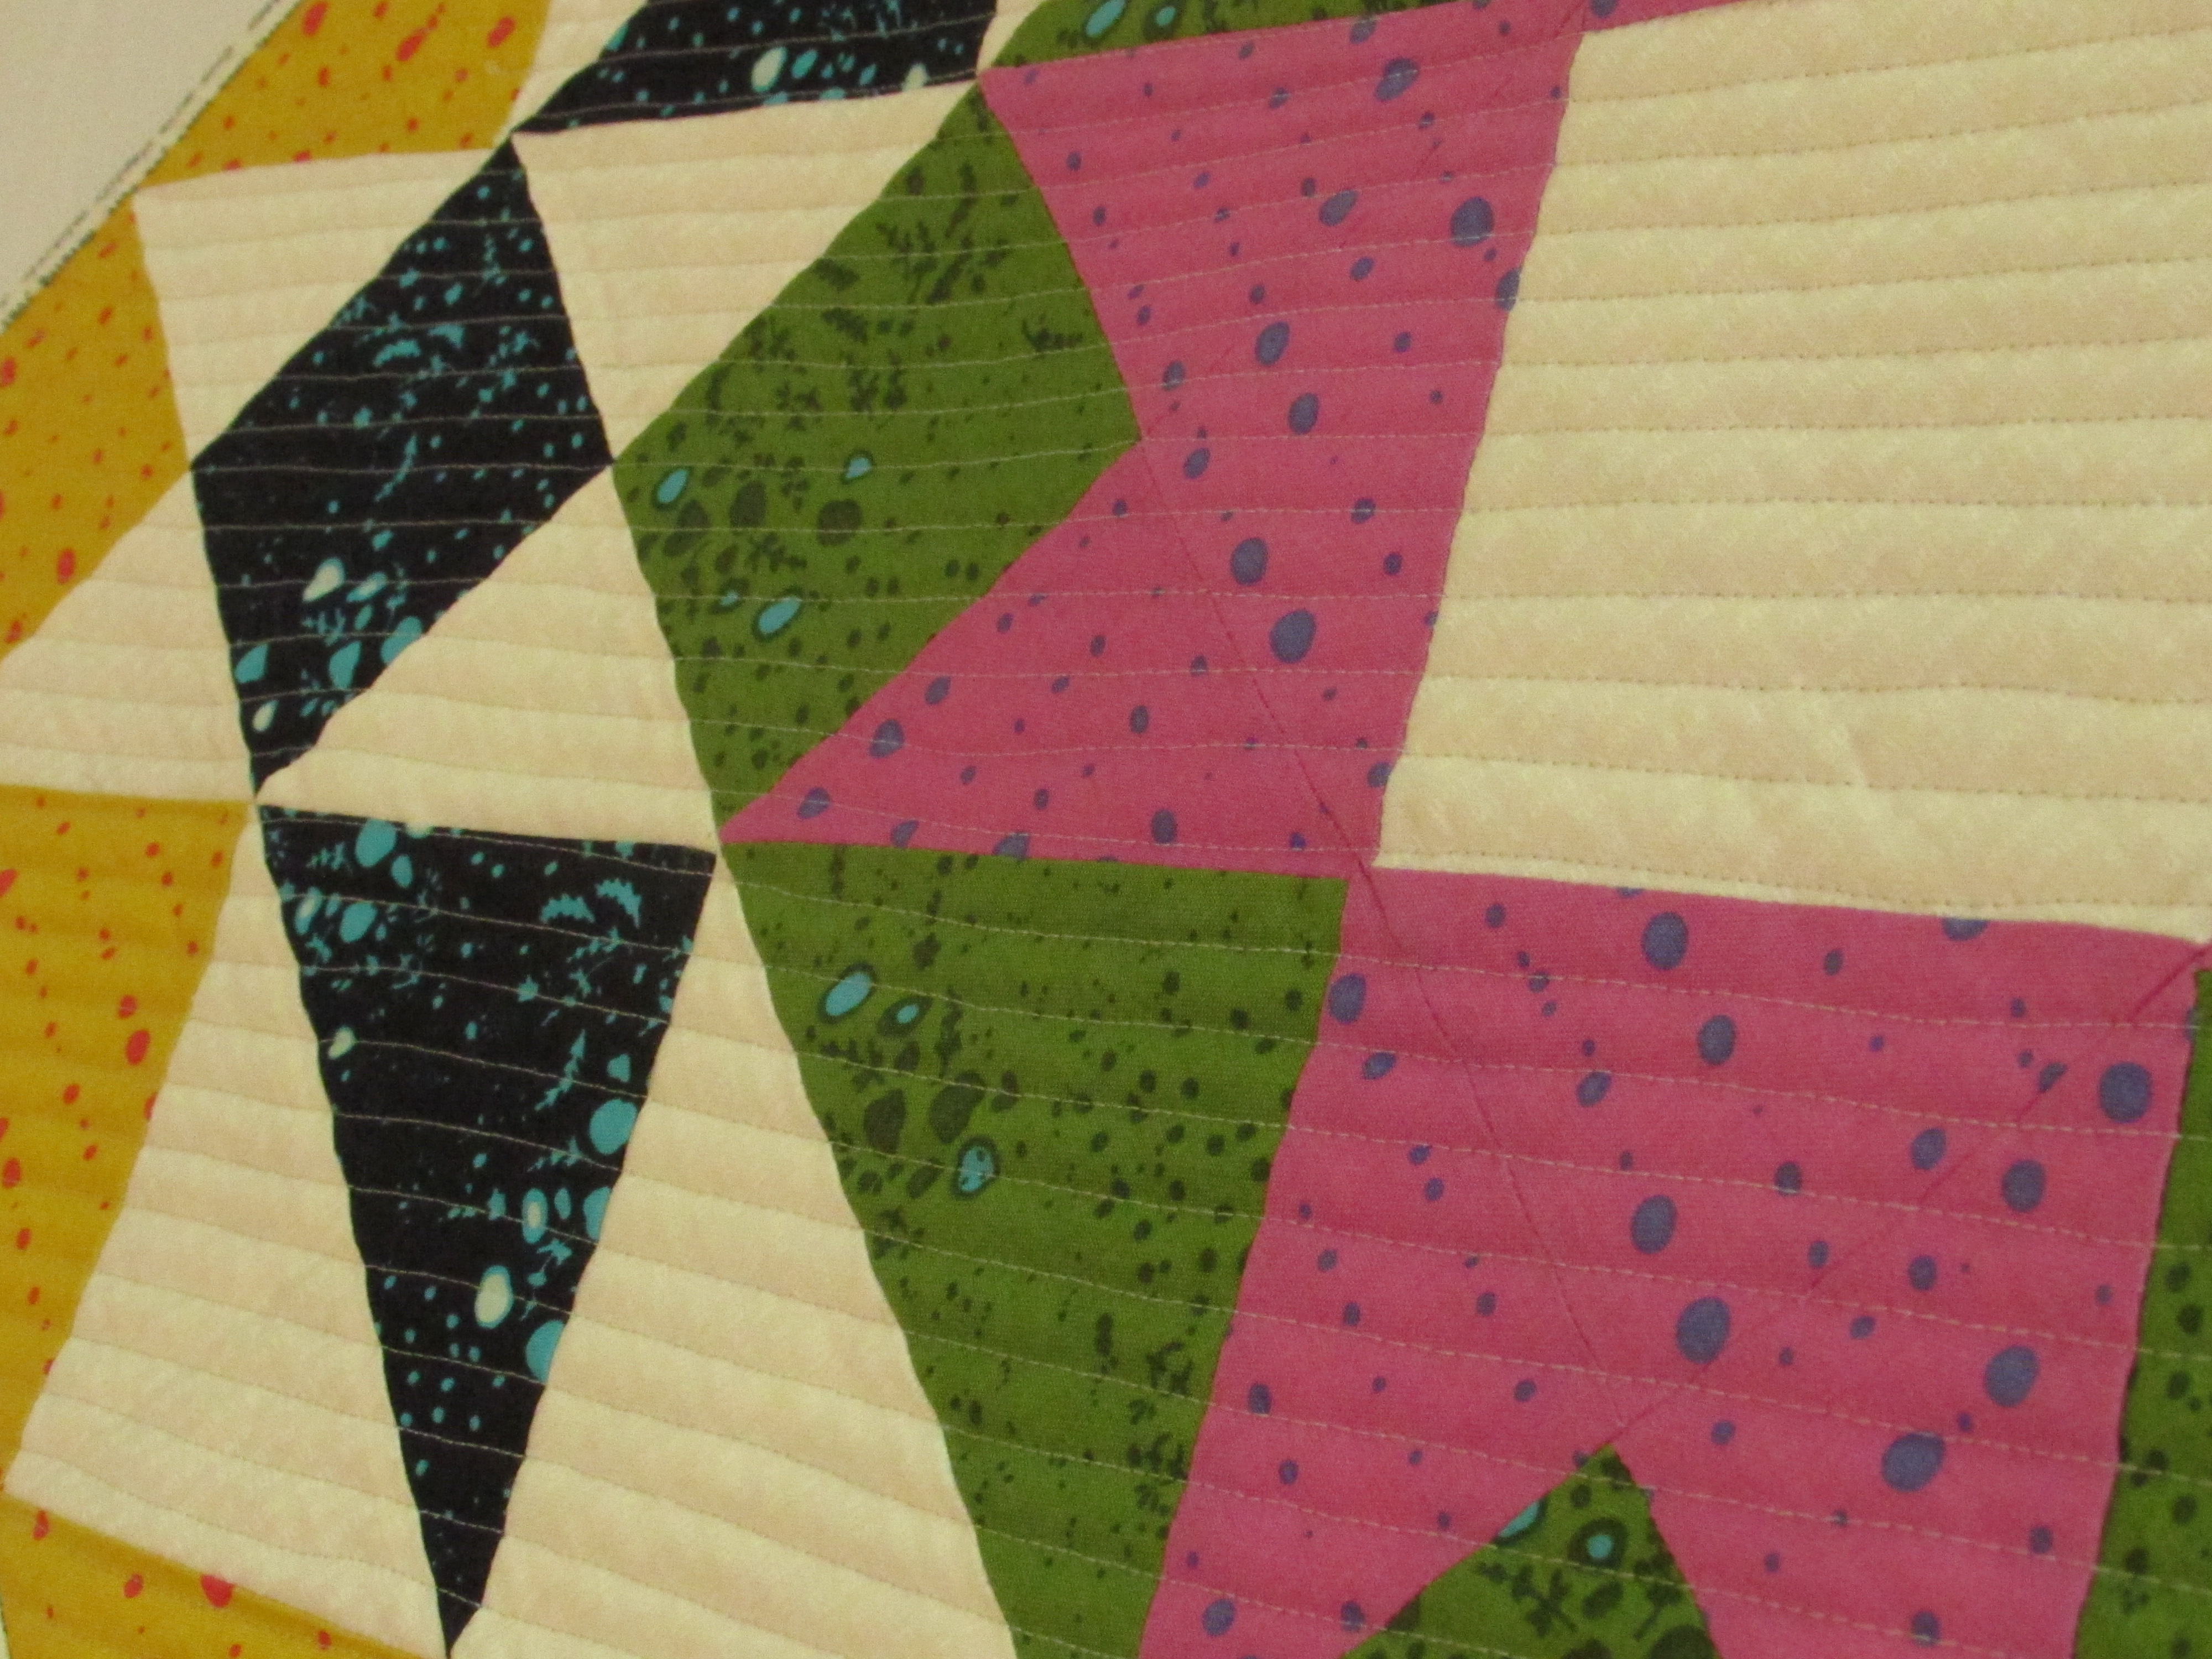
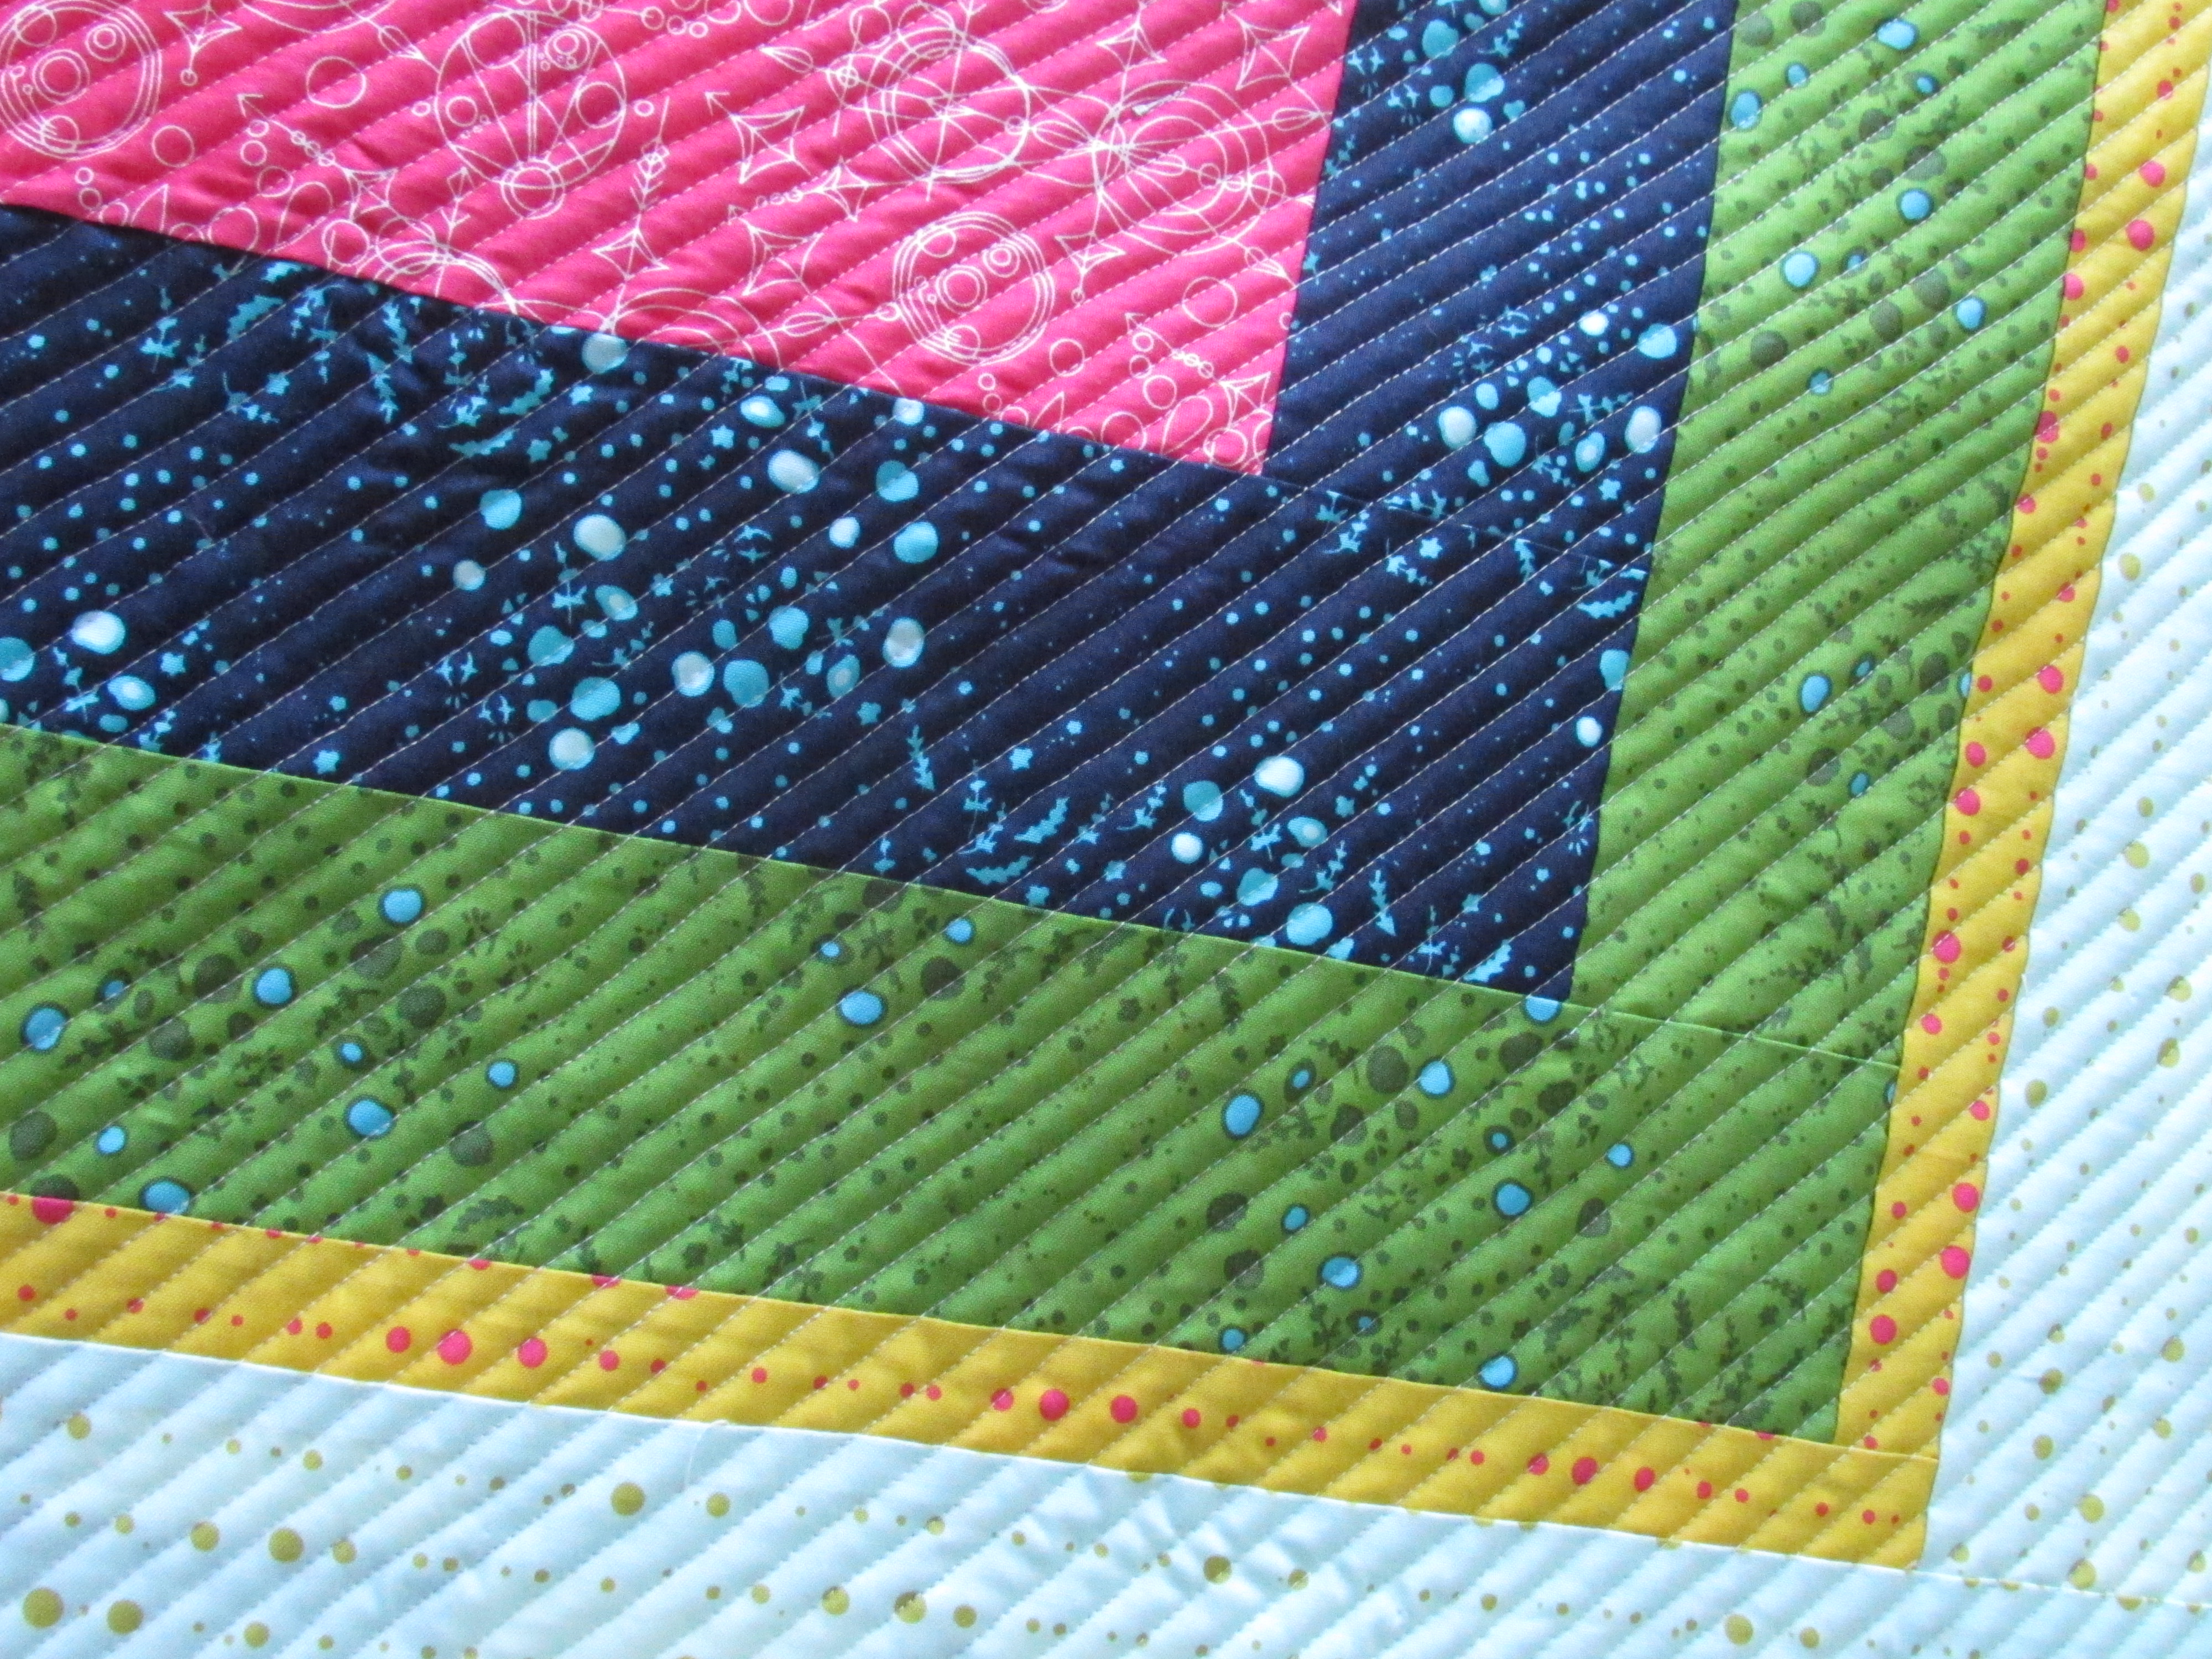
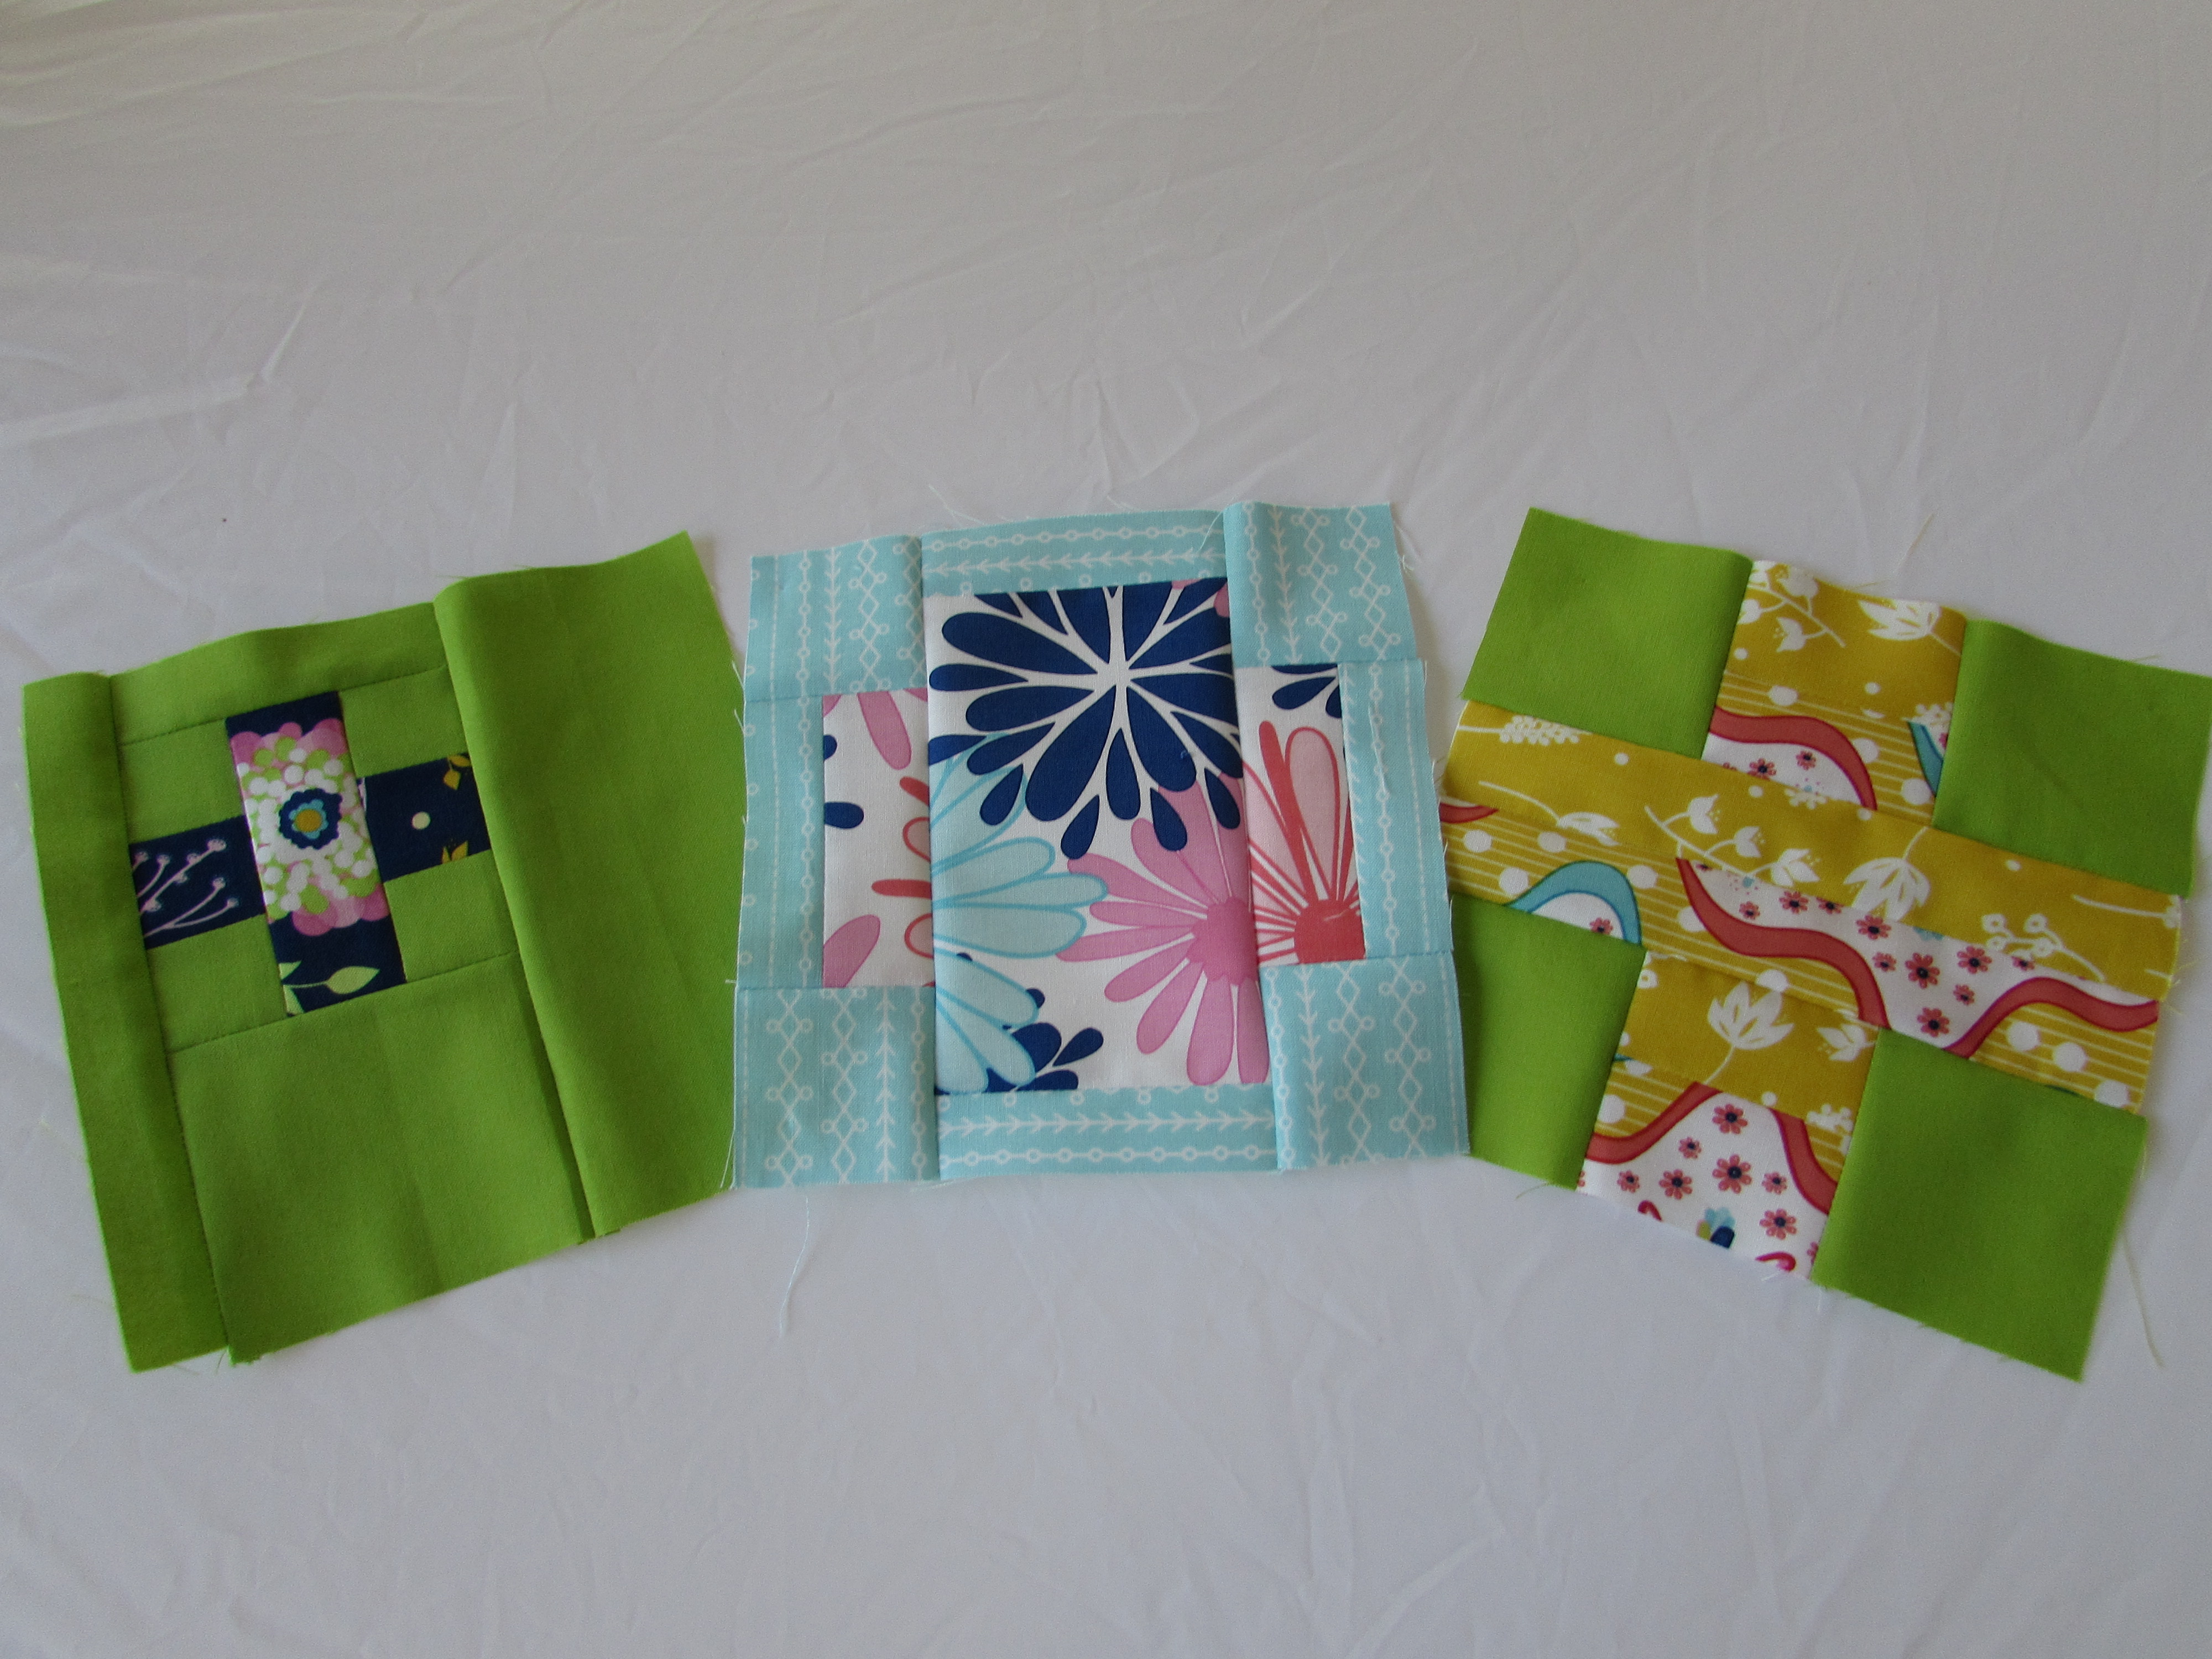
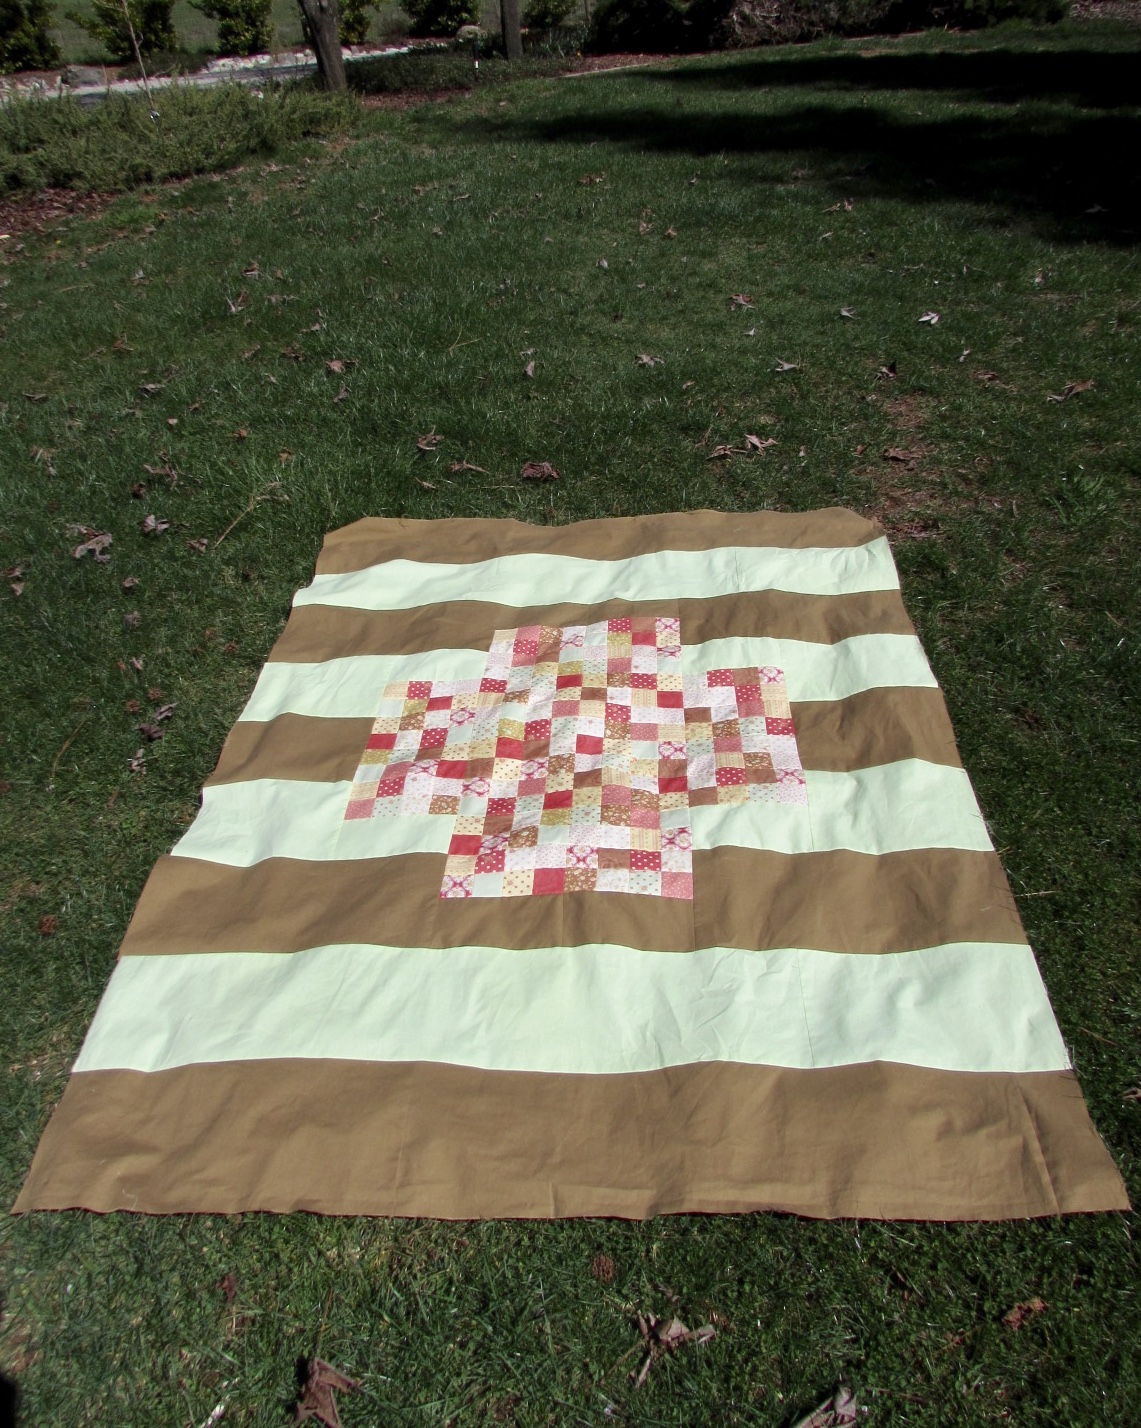
Let’s move on to the quilt I made.  This is the pattern called Postage Plus.  It is based on a postage stamp quilt (basically small patchwork) used to build the plus.  The oversized plus is set into a bold pattern of stripes.  This gives a very modern result.  The book shows a quilt with a gray and white background which is looked really clean.  When I chose to make this pattern, it was so I could use up an older Moda jelly roll that I purchased from a destash last year over at Academic Quilter.  Using strip piecing with a jelly roll made this quilt a very simple project to assemble.

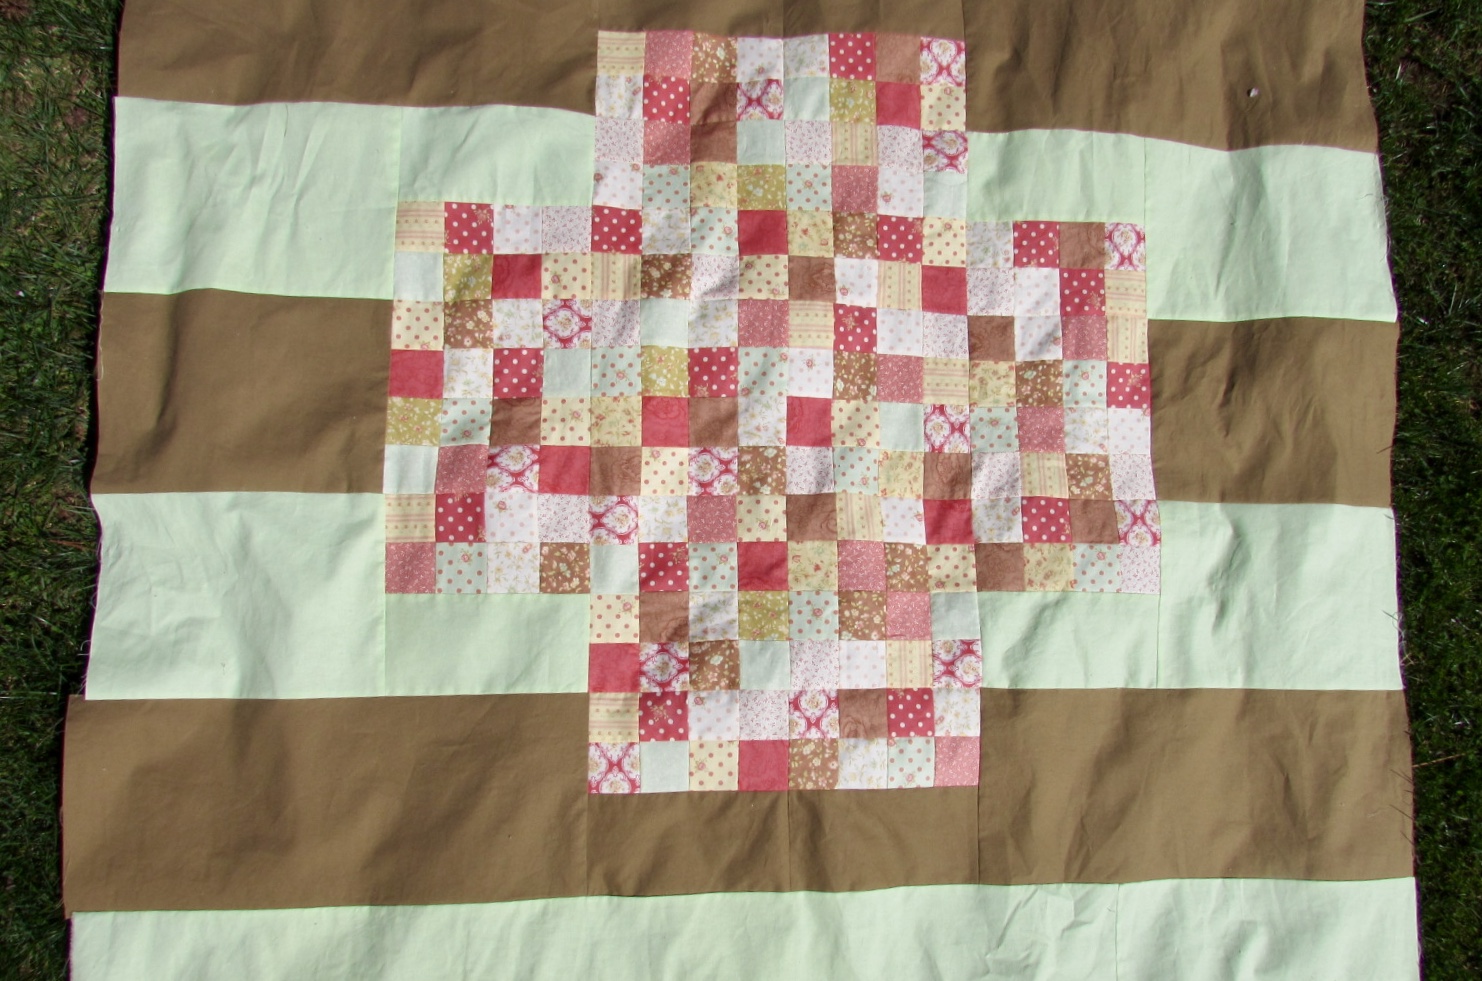
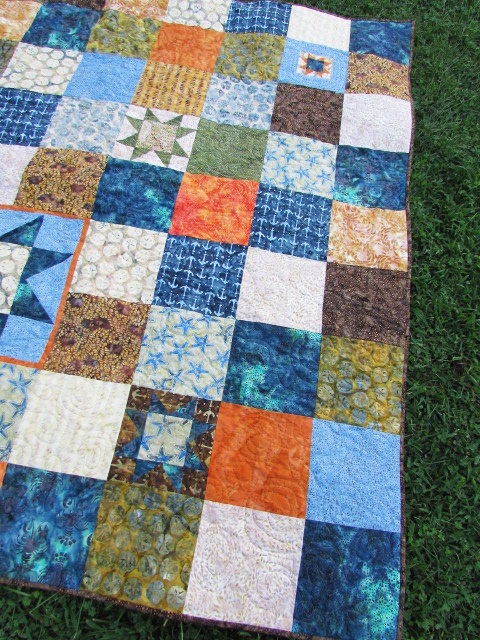
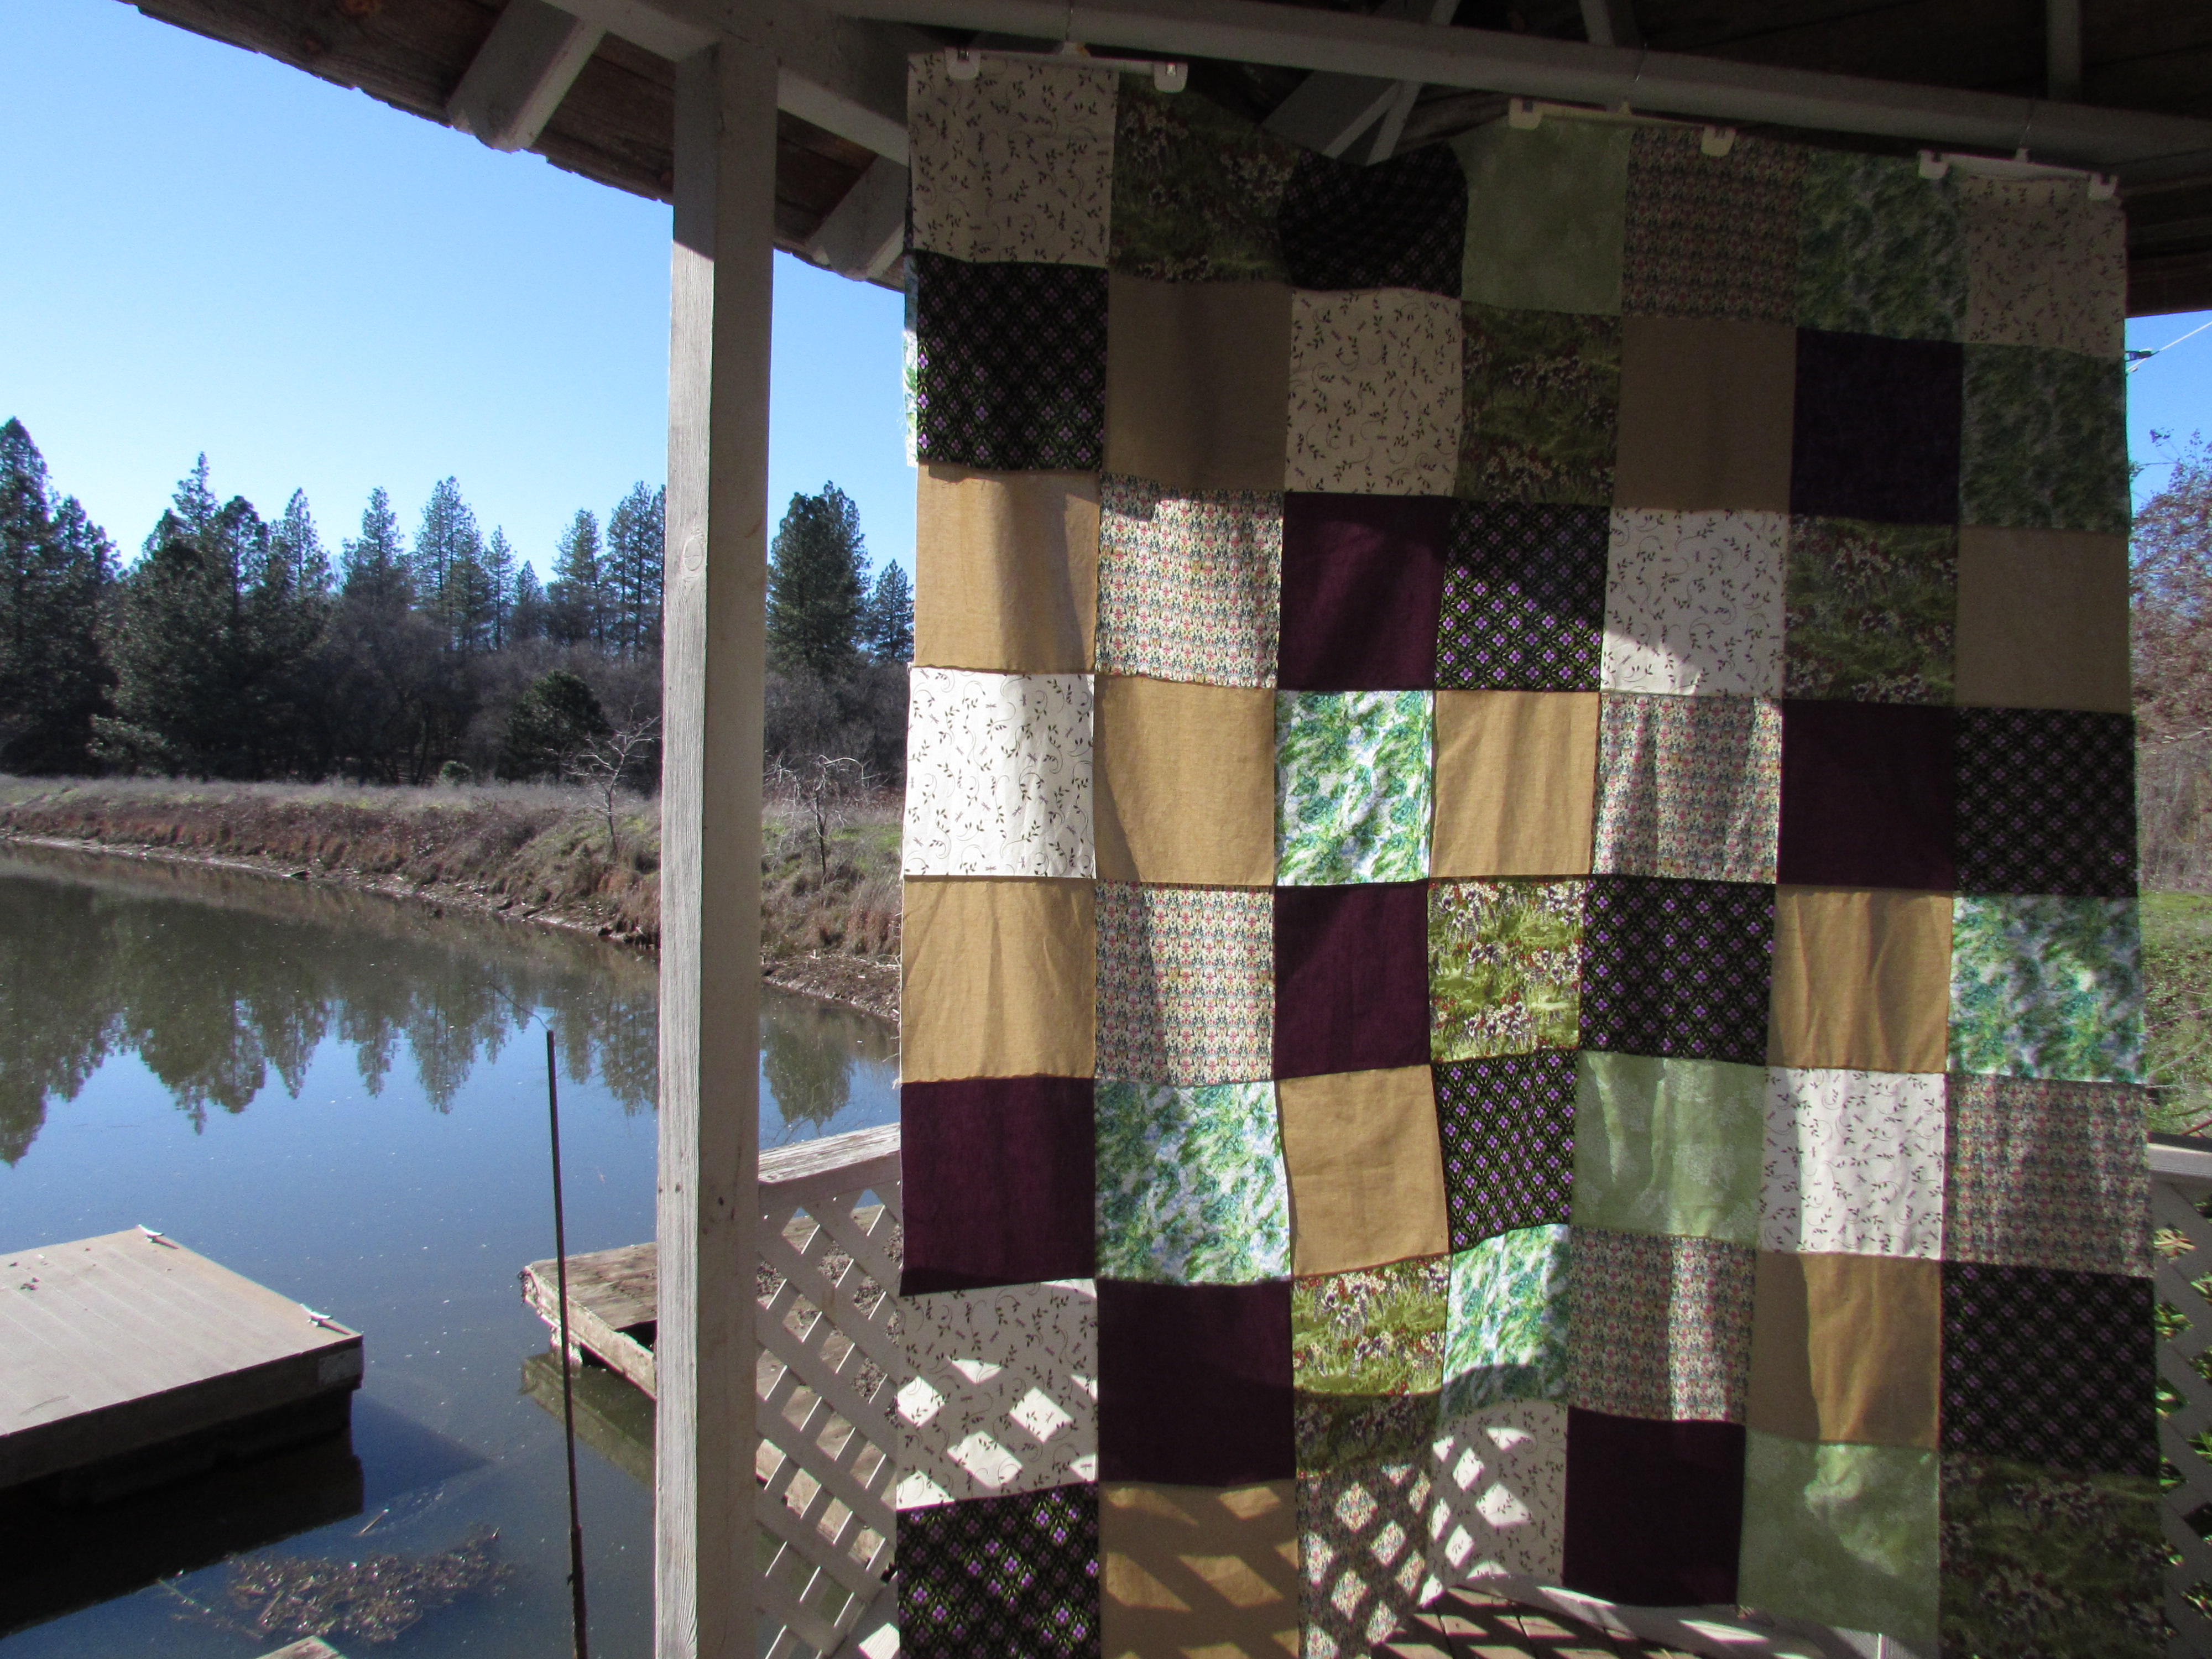
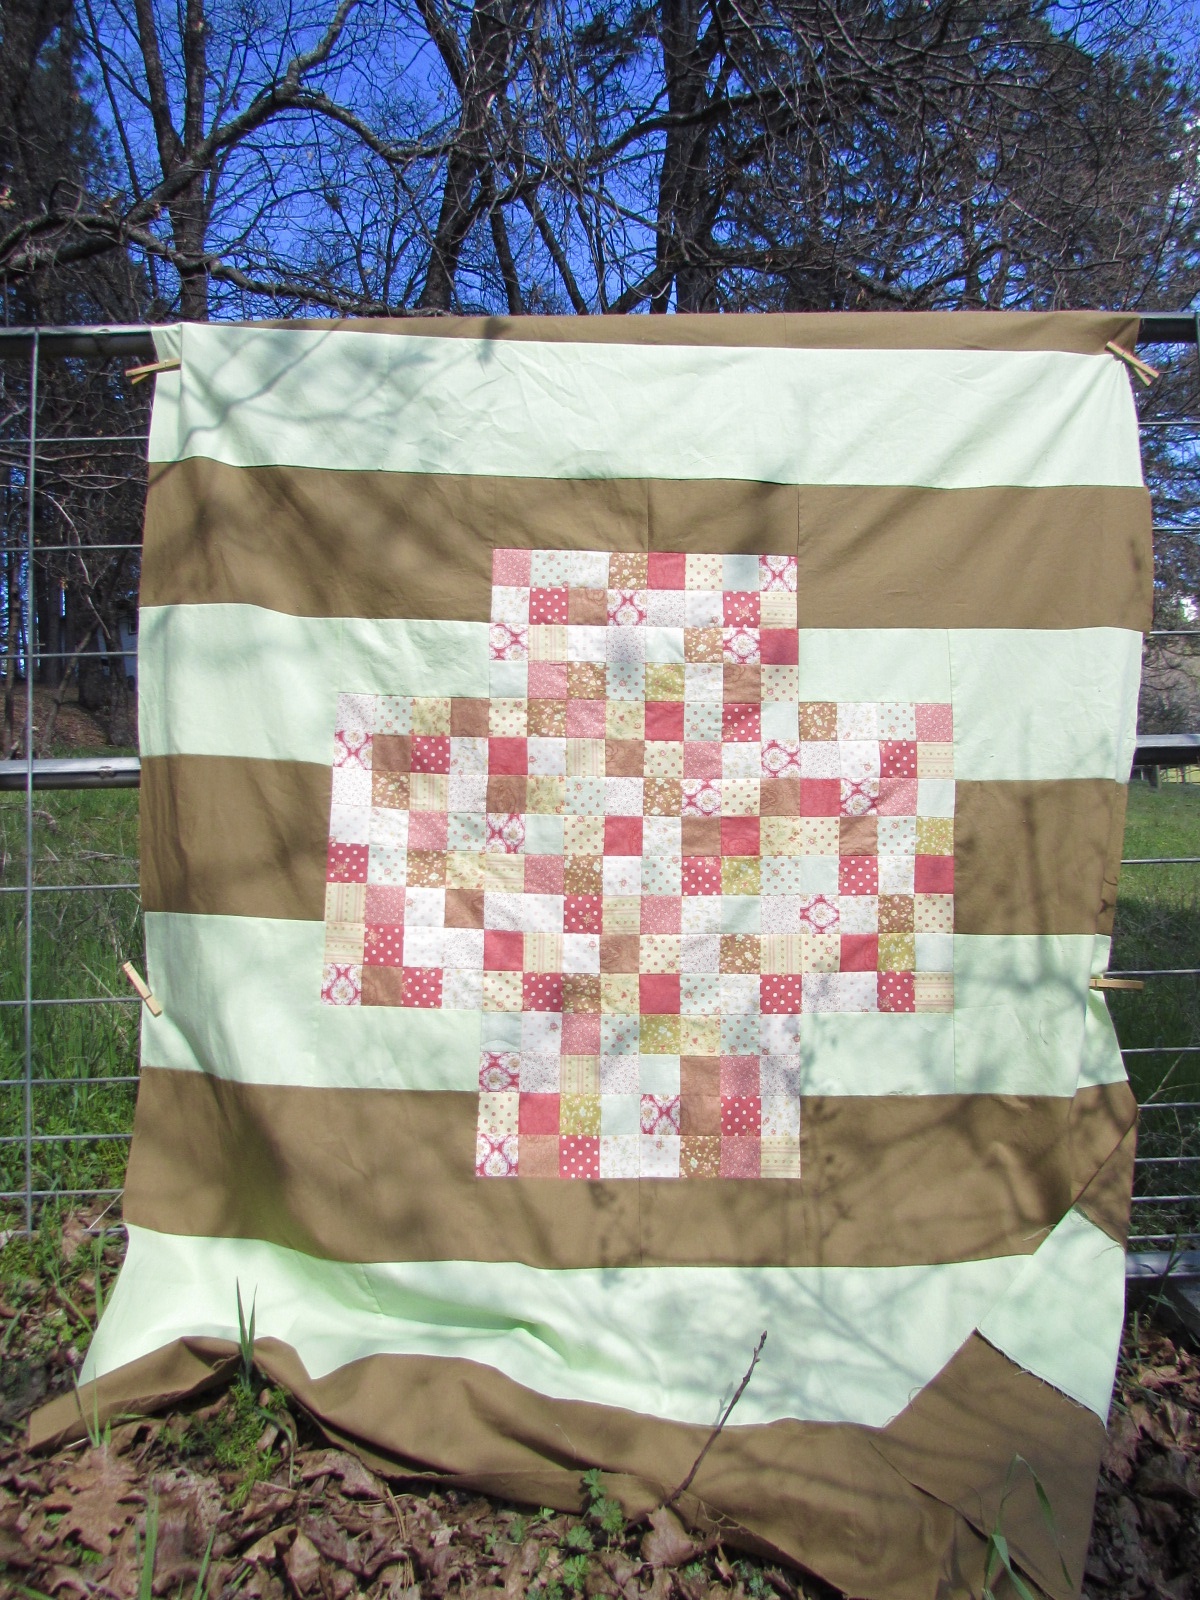
The quilt came together so quickly.  I love using the stripes to bring out the brown and green shades in the patchwork. The colors make me think of ice cream for some reason.  Lime sherbet or coffee ice cream, which would you choose?  I would go for coffee ice cream every time!

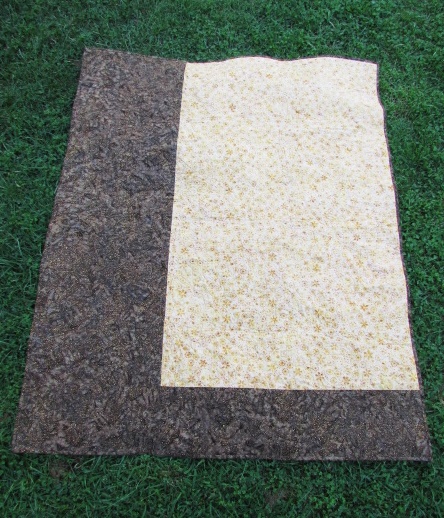
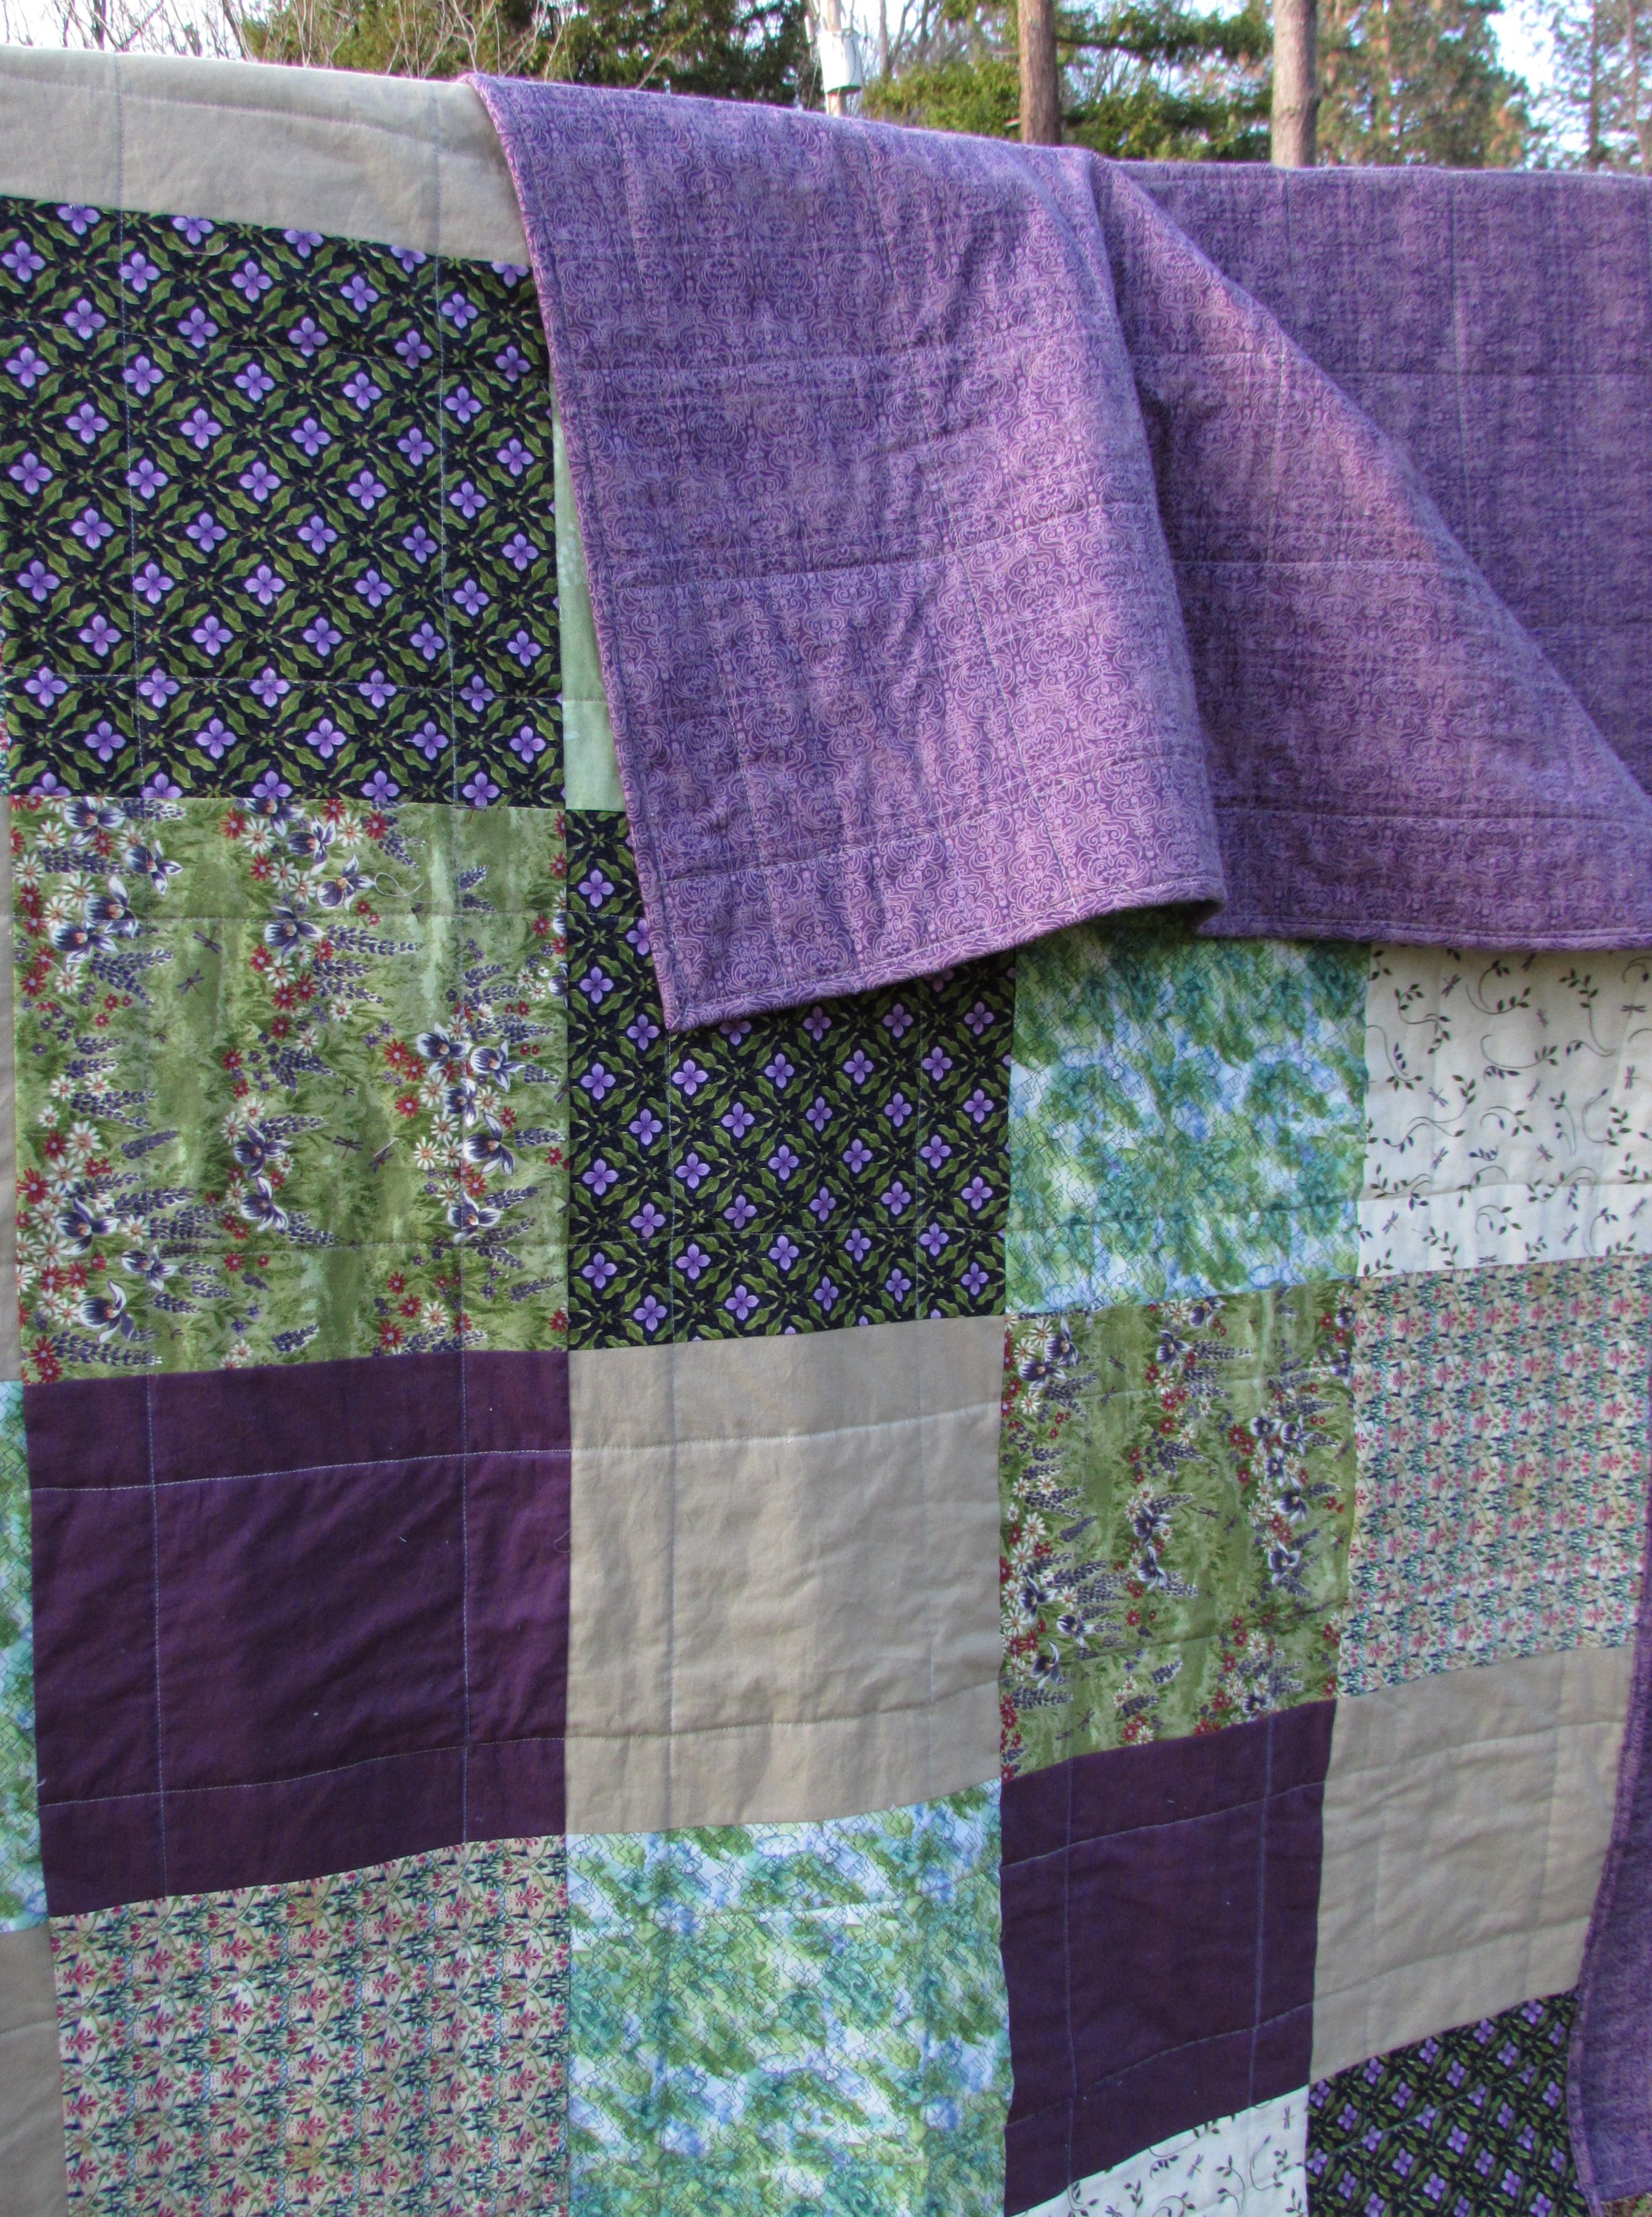
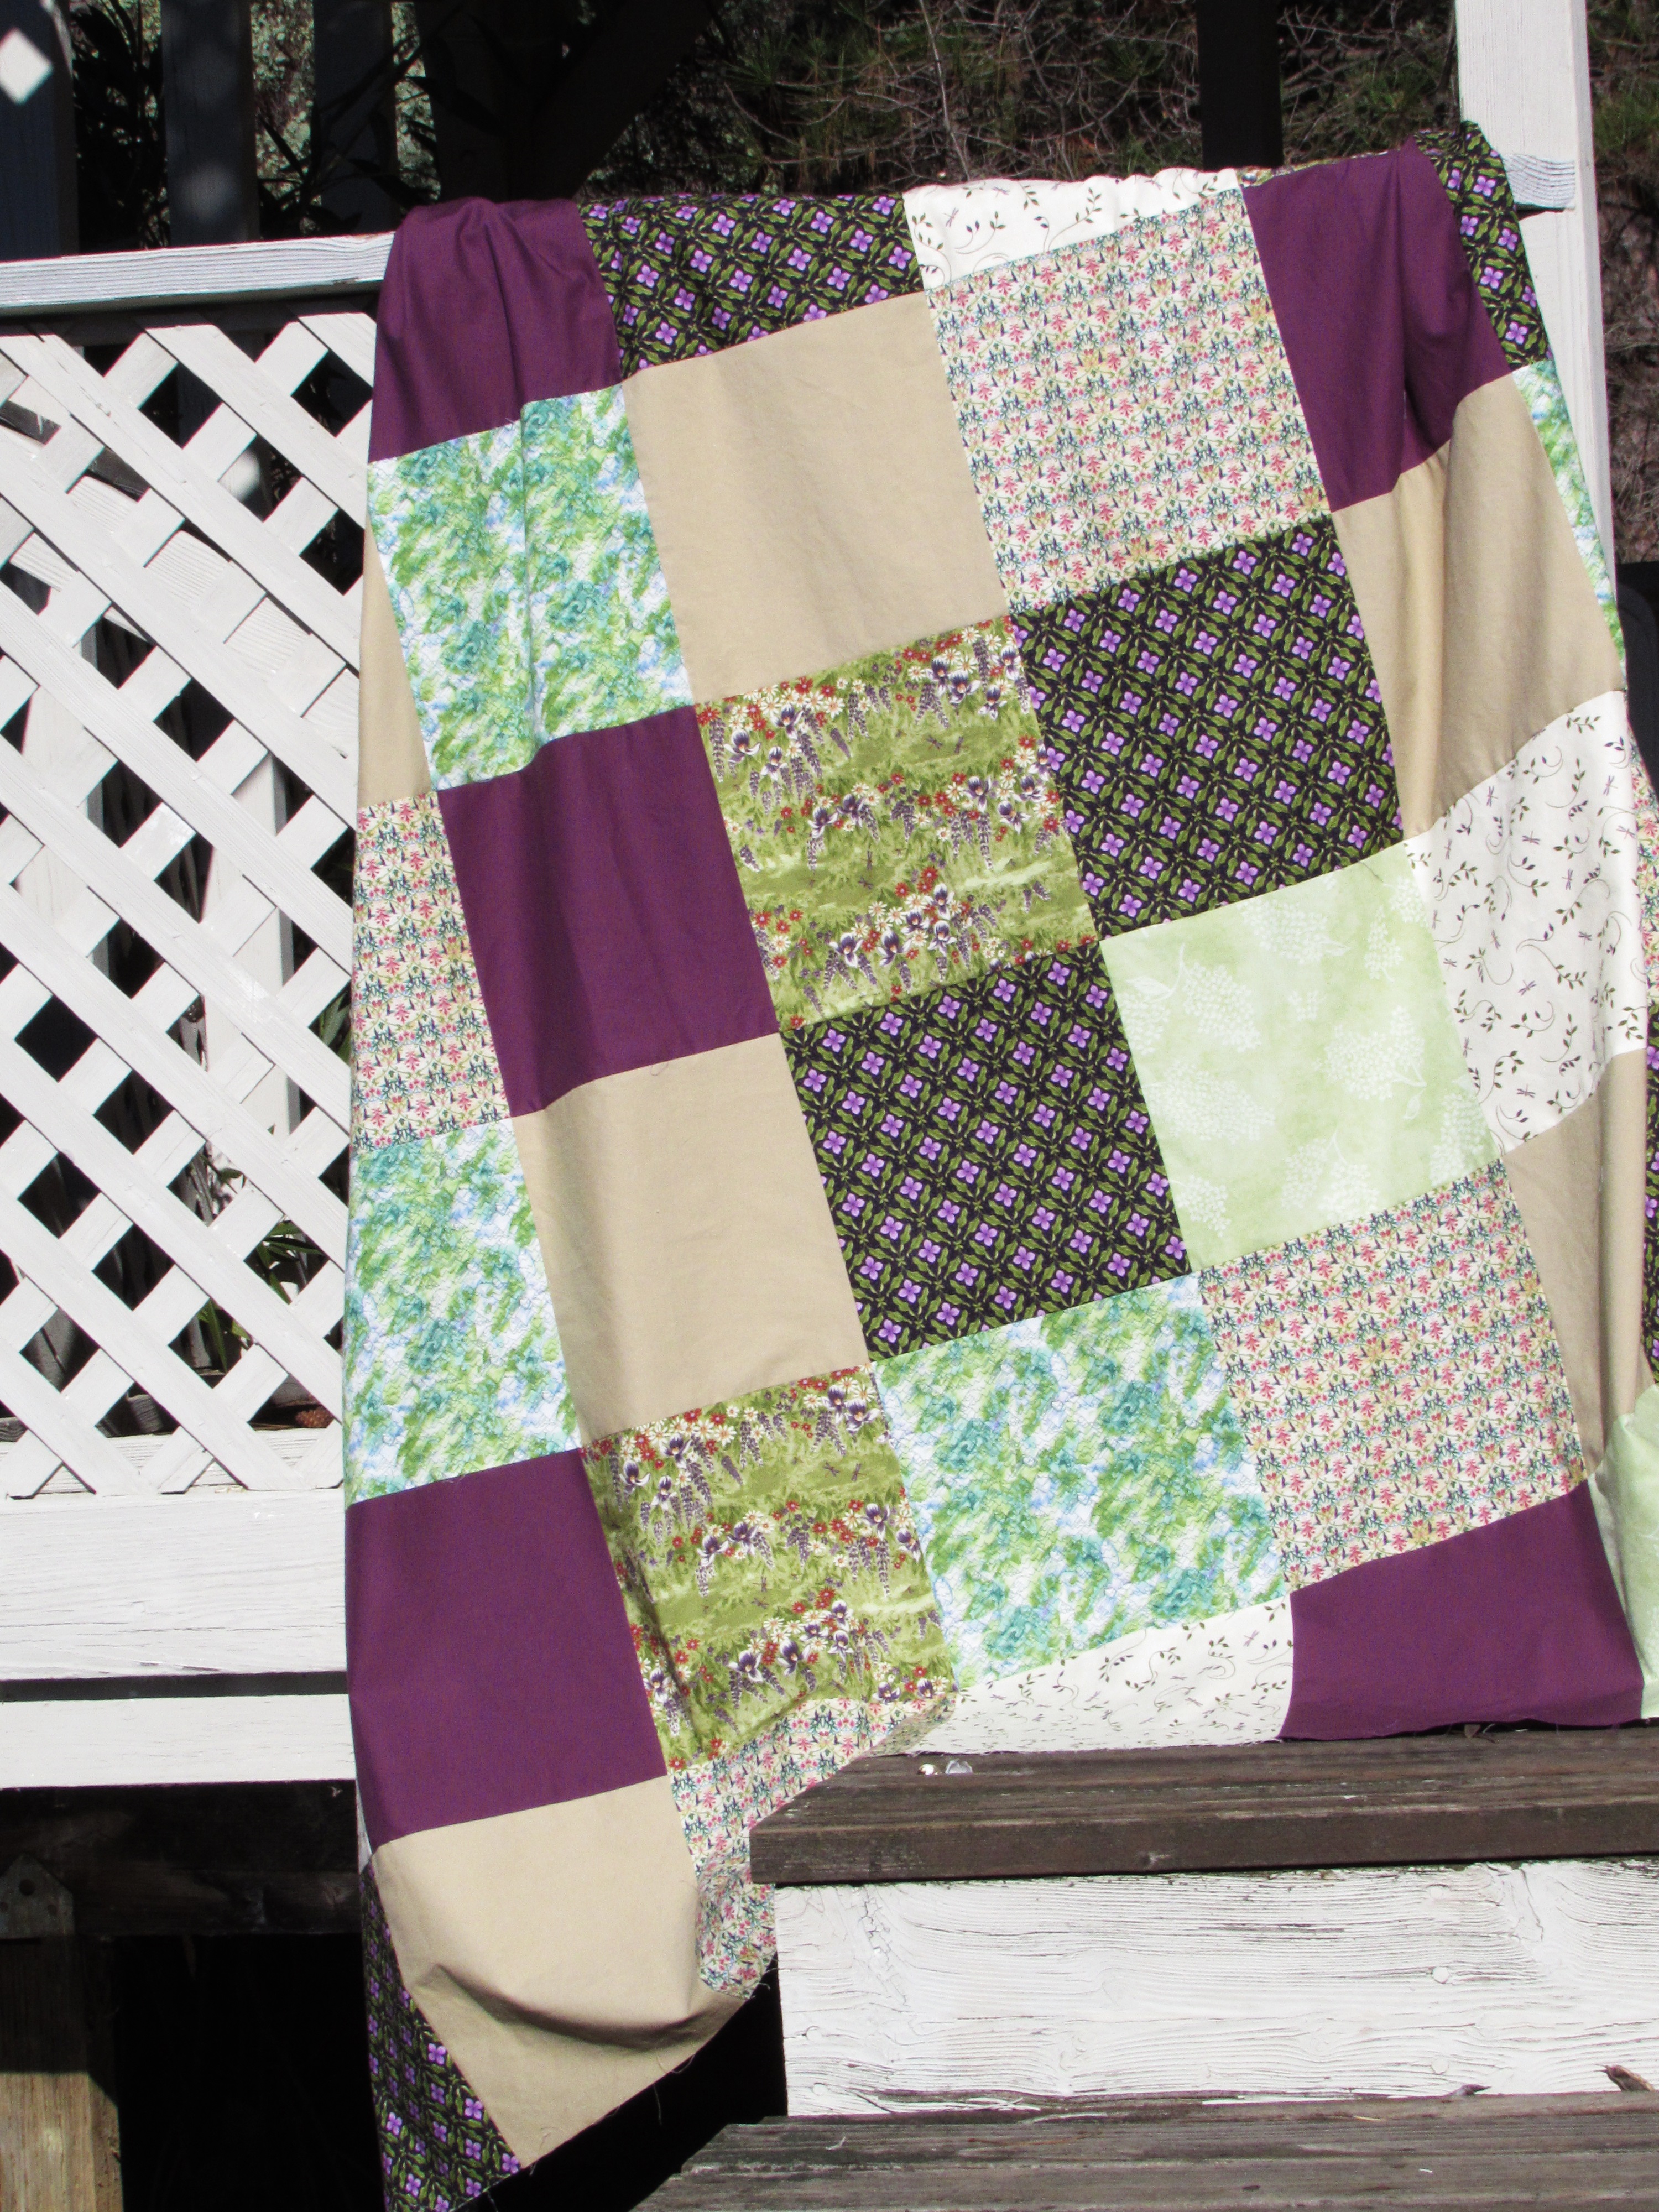
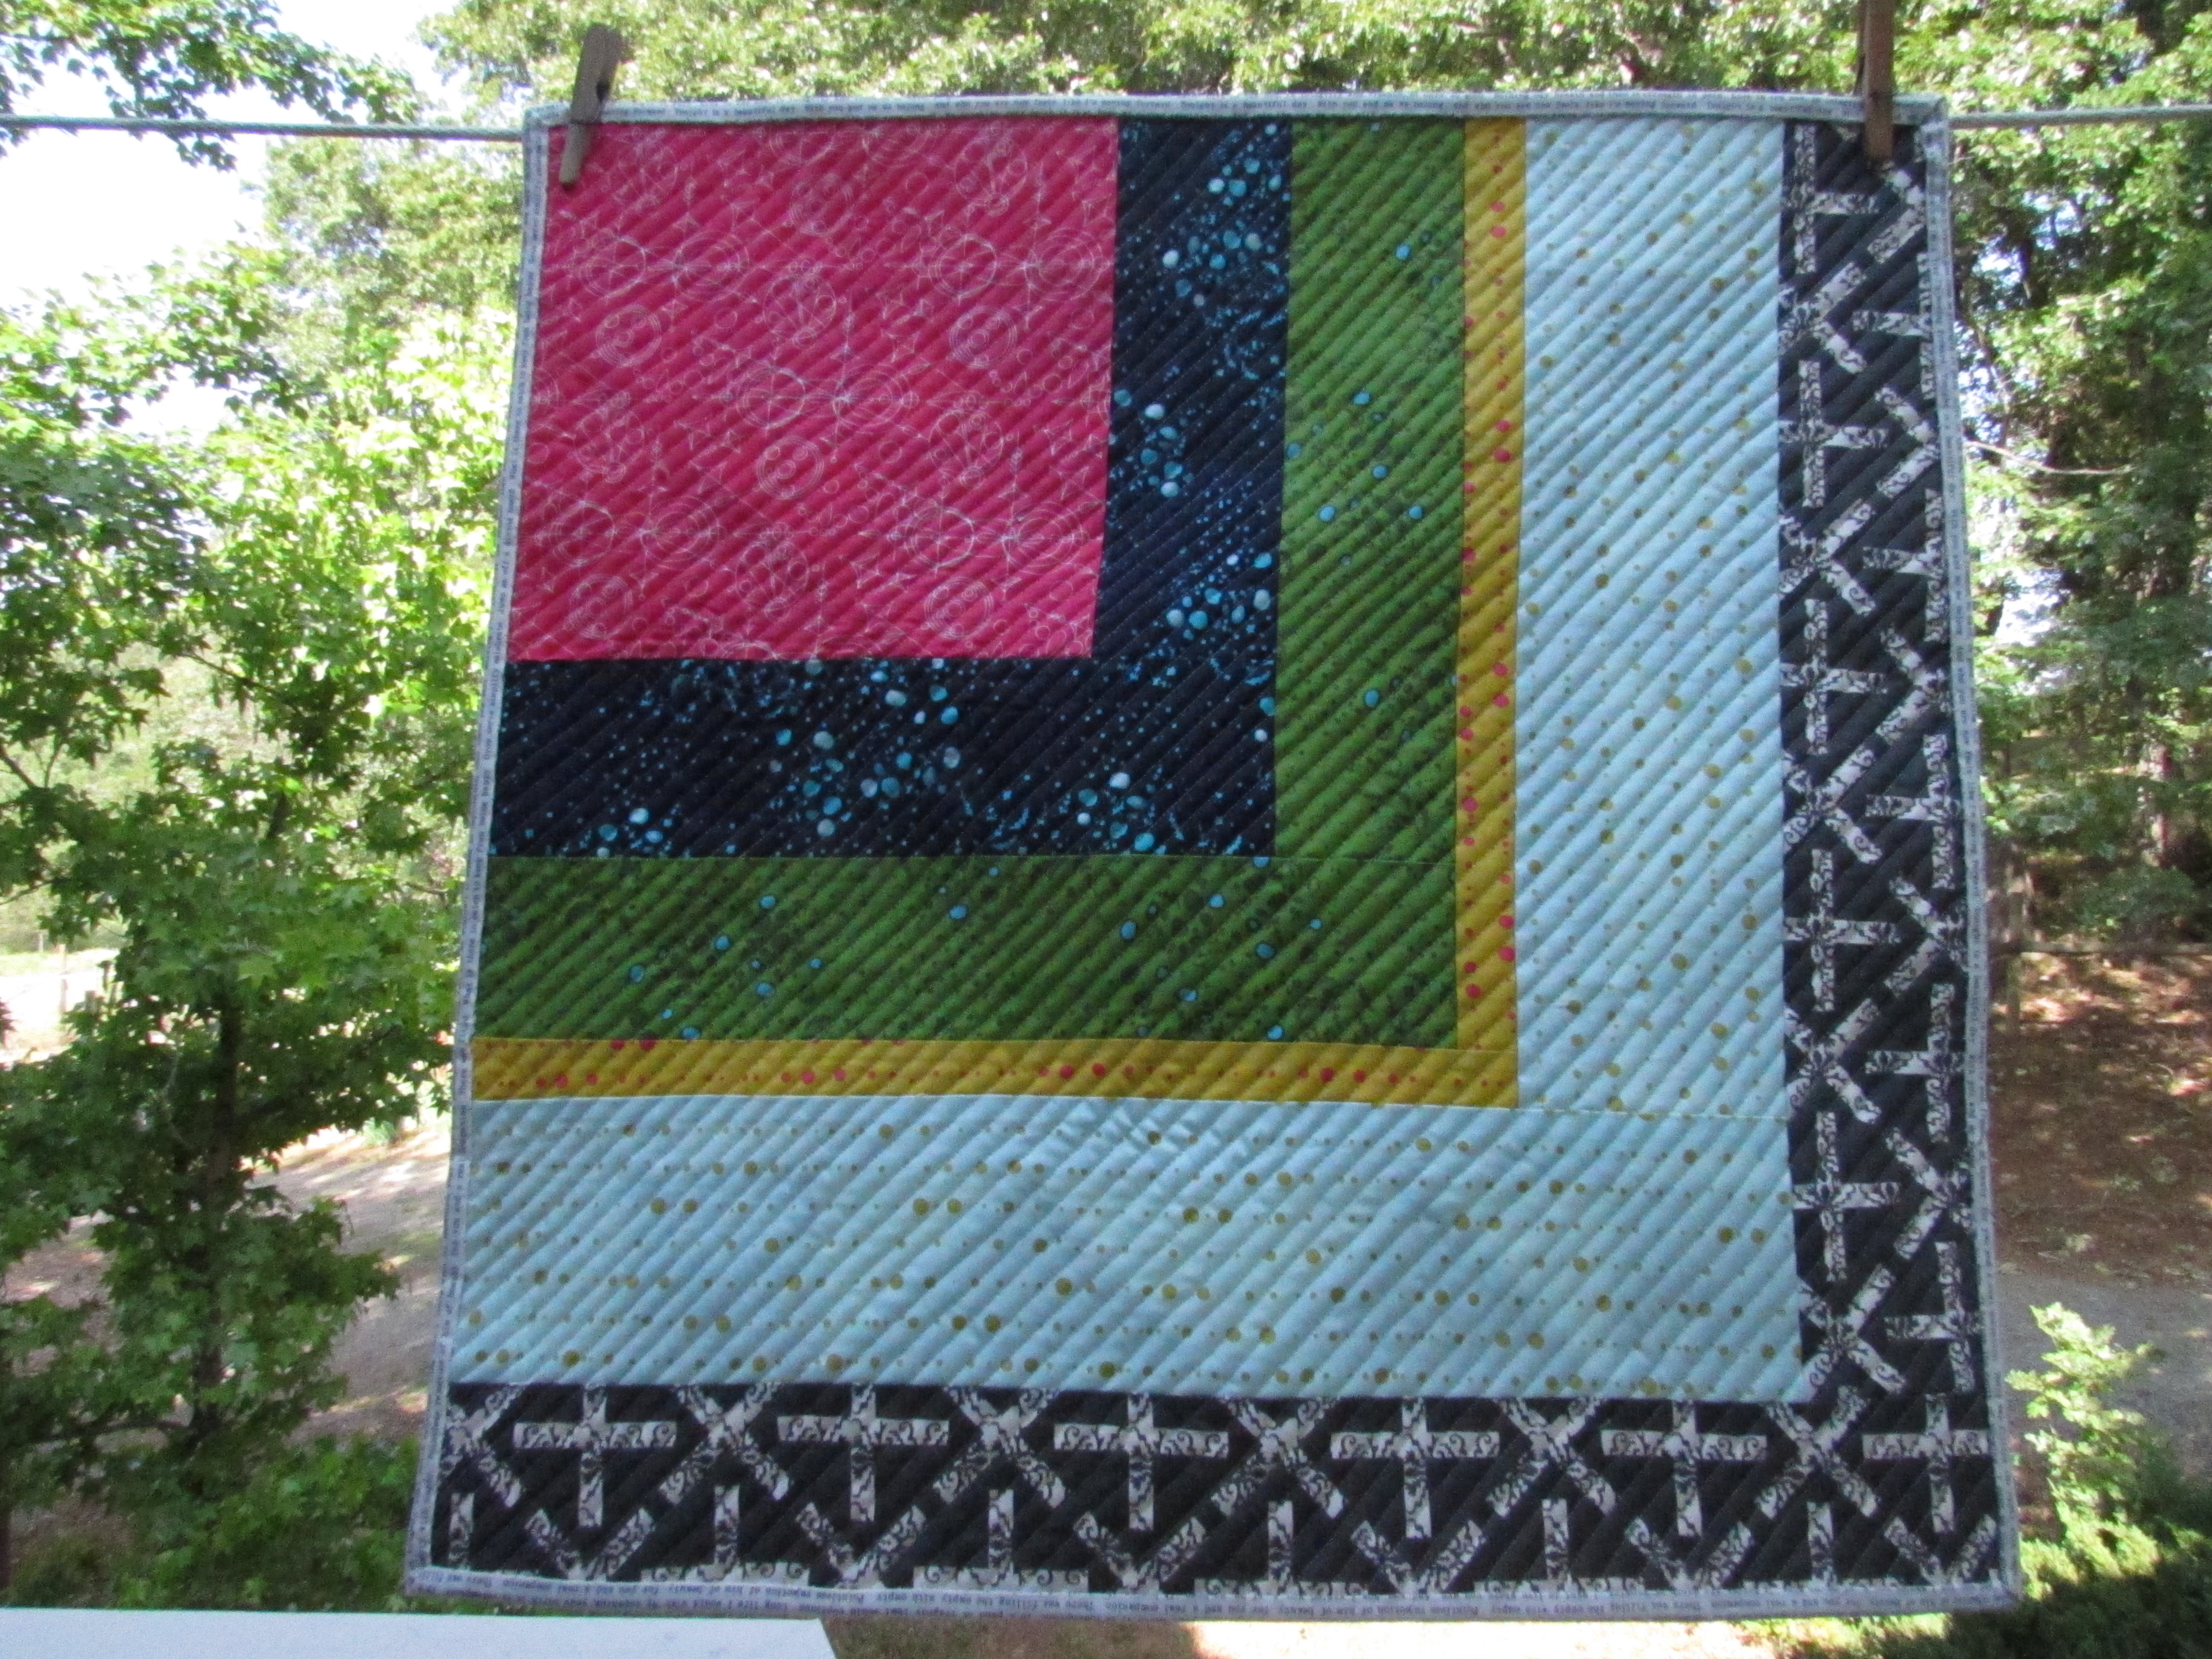
You might notice I am sharing a quilt top, not a finished quilt.  If you are a fan of Instagram, you probably saw the posts where I was unhappily removing a large amount of long arm quilting gone bad.  Ugh!  I took this quilt top and loaded it on a long arm at my friend’s house.  For whatever reason, I couldn’t use her machine and obtain a good result.  It just looked horrid. I am far from a perfectionist and will often leave issues such as wobbles, mistakes, or points that don’t quite work out in the quilt. (Maybe I am too lazy to fix things like this). But this was bad.  Even the lazy quilter in me couldn’t just ignore it.  So I stopped, after quilting about 25% of the top, removed it from the frame, took it home and unpicked it.  Really, it wasn’t too awful a task and I am happy I fixed this.

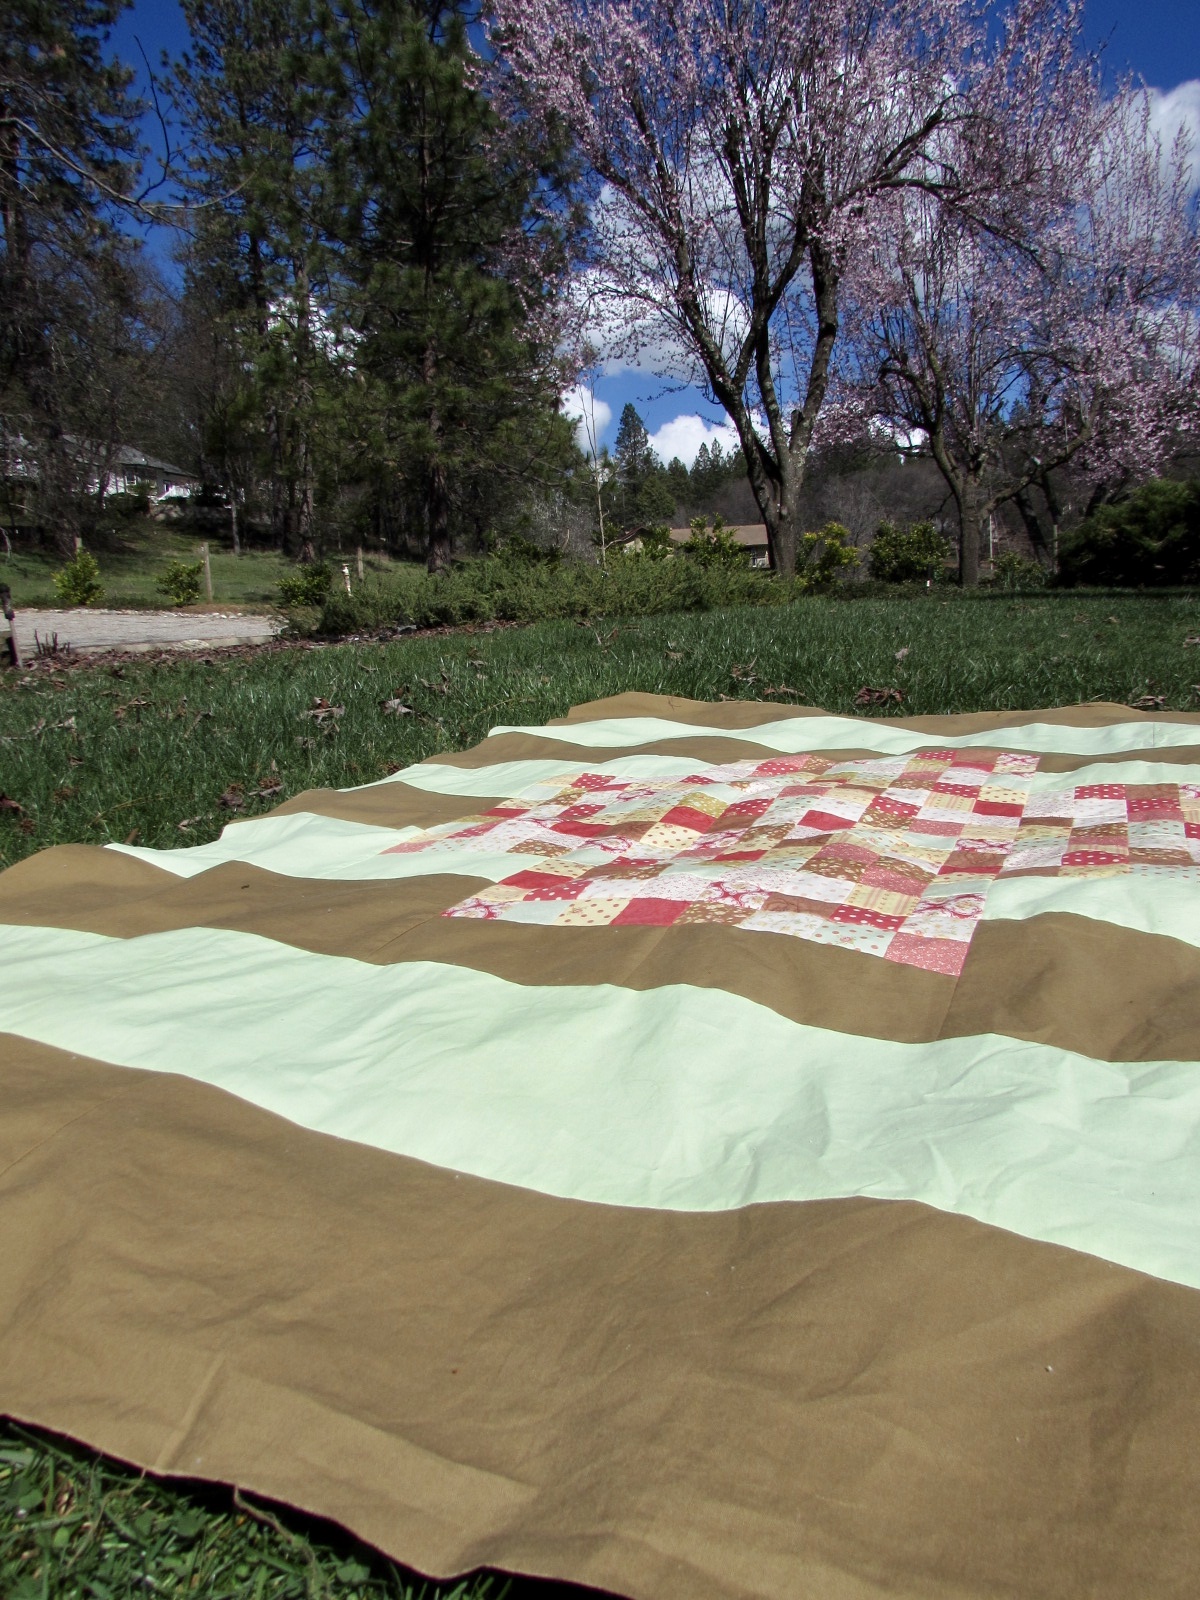
I am eager to load it on the machine at the same shop where I have been renting time.  I have an appointment on Friday of this week and will be able to quilt this up then.  Off topic here, but take a look at the blue skies we enjoyed yesterday.  It was a gorgeous day and I am lucky to have taken photos then.  Today it is fierce, pouring rain – not a day to be outside.  Sure changed dramatically over night!

In closing, I strongly recommend Modern Plus Quilts.  The book is top notch with creative patterns of varied complexity , nice tips and clear information – a book well done.  The blog hop goes on all of this week and through next week.  Paige and Cheryl are offering giveaways each day so be sure to hop over there and enter the giveaways.  Lots of fun happening in blogland these days!

Below is the schedule for the hop
Monday, March 12
     Cheryl @Meadow Mist Designs
     Paige @Quilted Blooms
Tuesday, March 13
     Signature Plus
          Soma @Whims and Fancies
          Ann @Brown Paws Quilting
          Kitty @Night Quilter
     Tribal Plus
          Sophie @Luna Lovequilts
          Afton @Quilt Mod
          Shelley @The Carpenter’s Daughter Who Quilts
Wednesday, March 14th
     Plus Surround
          Jayne @Twiggy and Opal
          Jen @A Dream and A Stitch
          Abigail @Cut&Alter
     Kaleidoscope Plus
          Yvonne @Quilting Jetgirl
          Sandra @mmm!quilts
          Karen @Run Sew Fun
Thursday, March 15th
     Postage Plus
         Linda @Flourishing Palms
         Bernie @Needle and Foot
         Liz @Savor Every Stitch
         Stacey @Stacey in Stitches
     Rick Rack Runner
         Michelle @From Bolts to Beauty
         Patty @Elm Street Quilts
         Melanie @A Bit of Scrap Stuff
Friday, March 16th
     Row Addition
          Myra @Busty Hands Quilts
          Izzy @Dizzy Quilts
     Transparency Chains
          Christa @Christa Quilts
Monday, March 19th
     Faceted Rings
          Jessica @Quilty Habit
          Cindy @Hyacinth Quilt Designs
          Jennifer @Inquiring Quilter
     Petal Plus
          Julie @The Crafty Quilter
Tuesday, March 20th
     Message in a Bottle
          Tish @TishNWonderland
          Judy @Sew Some Sunshine
          Emily @The Darling Dogwood
     Cute as a Button
         Wanda @Wanda’s Life Sampler
          Karen @Tu-Na Quilts, Travels and Eats
          Katherine @Sew Me Something Good
Wednesday, March 21st
     Celestial
          Anja @Anja Quilts
          Kate @Smiles From Kate
          Sue @Sevenoaks Street Quilts
     Pinwheel Plus
          Carole @From My Carolina Home
          Alison @Little Bunny Quilts
Thursday, March 22nd
     Intertwined
          Debbie @Esch House Quilts
          Laura @Slice of Pi Quilts
          Beth @Cooking Up Quilts
     Bear Claw Plus
          Janice @Color Creating and Quilting
          Joanne @Quilts by Joanne
Friday, March 23rd
     Cheryl @Meadow Mist Designs
     Paige @Quilted Blooms

Linking to my favorites. Find them at the top of the page, under Link Ups.

This post contains affiliate links which means if you make a purchase by clicking on them, I will receive a small payment. This does not change the purchase price to you in any fashion.

Back to School Blog Hop with Island Batik


It has cooled off significantly and summer has definitely come to an end.  Julia is back to school and homework has begun in full force. This change in routine has been happening in our house for 27 years now, since my eldest started school back in 1990. That is a lot of back to school shopping, first day of school pictures, and back to school nights over the years.

I have mentioned I have five sisters and between us we have 21 children.  All of these kids but Julia have either graduated college or are in college now. California kids are fortunate to have a lot of universities to apply to and many of those are on the long stretch of coast that runs up and down the western side of the state. In fact, of the 21 grandchildren, only five selected universities that were not on, or very near, the beach. My three older kids went to school either in San Diego or in San Luis Obsipo, both coastal areas.  I think after growing up in the mountains, the three boys loved the change of moving to the coast. For several years, back to school meant waving the boys off as they headed toward the coast (lucky guys all three!)

When Island Batik sent me a 1/2 yard bundle of their collection called Seas the Day, it made me think of our gorgeous coastline. This line features starfish, boat anchors, sand dollars, lobsters, rope and netting and the most wonderful blue and green watery prints. The Island Batik ambassadors were asked to make anything we like as long as it was larger than 36″ square so we could really showcase the beautiful fabric. Thinking about it for just a bit, I decided to go with a large patchwork quilt, one big enough a college kid could easily take it to one of those tiny dorm rooms along our Pacific coast.

I cut 8 1/2″ squares and started to lay them out.  The prints are so fun but it needed something else.  I saw a large patchwork quilt made by Amy Smart from Diary of a Quilter, and she added a few saw tooth star blocks to it for a little something extra. She has a great tutorial for saw tooth star blocks on her blog which was helpful.  Click here for Amy’s Sawtooth Star tutorial. The great part is she maps out the cuts you need to do for multiple size stars which made it really quick to make a number of them.  I really like the look of sprinkling a few star blocks in varying sizes to the mix. Isn’t the little four inch star up at the top, right corner a cute one?

For the largest star, I bordered it in orange to set it off. The narrow orange frame works well.

As I mentioned in my last post, I took this to the local long arm shop (well, sort of local – it is a 45 minute drive from here!) and rented time on a machine to quilt it.  After a little refresher course on how to use the machine, I got into quilting it up. I did simple spirals and a few loops as an all over design.

In all honesty, I completely forgot how difficult it can be to get a nice round spiral with the long arm.  If I don’t go relatively fast, the spirals elongate and become ovals.  Since I have not had a lot of practice, I don’t feel comfortable moving quickly because it takes me time to plan my path as I go.  The oval shapes don’t bother me though. I like the quilting for the most part. It was so much fun and sooooo much quicker to quilt it on the long arm.

For the backing, I used two pieces of yardage provided by Island Batik – neither was quite large enough to back it as one piece but by using them together, I had plenty. I used the rest of the brown print to bind the quilt as well.

Seas the Day – by Island Batik

I am a big fan of batiks  and love the look of this quilt. It probably won’t go off to college with anyone but it sure makes me think of our gorgeous coastline! If you would like to have your own bundle of these batiks, I might just be able to make to make that happen!  I have a set of fat quarters which includes most of the prints. I didn’t have exactly of all of them left after making this quilt but there are quite a few to share with one lucky winner.

Most of these cuts (26 pieces in all) are fat quarters. Maybe four or five are standard 1/4 yard cuts, depending on how I used the piece. A few may be just shy of being a fat quarter? But there is a lot of fabric here, probably over six yards altogether.

Island Batik Seas the Day stack

To win this coastal lover’s bundle, please leave a comment and tell me if you prefer the coast or the mountains on a vacation getaway.  For a second entry, please follow me — lots of choices on how to follow. There are buttons at the upper right for my social media platforms.  Or, sign up to receive my newsletter, also at the upper right. Just tell me how you follow!

Thank you to Island Batik for this generous gift of fabric. I love the quilt I made and I am sure the lucky winner of the remaining fat quarters will make something gorgeous as well!

Linking to my favorites. Check the list at the top of the page, under Link Ups.


Vintage Heaven

It’s finished! The bed in my sewing room is currently sporting a gorgeous quilt made of vintage sheets that I have collected, thrifted and received as gifts over the past two years. I love it and the springlike, feminine look it brings to the sewing room. I am calling this one “Romantical” which is how one loyal reader described it when I posted last week. What a cute word.

yellow picture edited

Quilting this  went so fast since I did straight line quilting on both diagonals of the quilt. Because I was stitching across seven inch squares, it was not a problem to just eyeball it. No marking made for very fast stitching. For a short time I considered quilting only one of the diagonals. But it was finished so fast and quickly became evident that it really wanted to be quilted in both directions.
After receiving such helpful input on selecting the binding via comments on last week’s post, I went with the pink striped binding. I debated cutting the binding strips on the bias since I had enough fabric to do so. But that would have created some waste so I decided against it. Look at it though! It looks great, especially next to the squares of the same fabric. I had another one of those fortunate occurrences when the fabrics line up just so, as though I worked diligently to make it happen. But you and I both know me better than that. Happy coincidence!

yellow 2


Do you see the sweet backing I used? It was a queen size flat sheet that was brand new. The little floral is so pretty and works well with the binding too.

yellow 3
My quilt model and I went outside to take some photos. It was mid-afternoon and the sun was a bit too bright. The pictures are fun even though the colors of the quilt look a bit washed out.

IMG_6759

My model was in rare form so I took advantage.

IMG_6765

This was such a simple and satisfying project. Having a quick finish like this has left me in the mood to tackle something that takes a bit more thought. My nephew is getting married in September so I think a quilt is in order for him and his bride. I have a couple of months to work on it which is plenty of time. I have two stacks of fabric pulled and I keep deliberating between them. I’ll show you the pull once I make some decisions.

Thanks to all who left comments on yesterday’s post about social media. It made for good discussion. If you haven’t had a chance to read it, check it out and let me know your thoughts.

Linking today with my favorites, Amanda Jean over at Crazy Mom Quilts and Sarah at Confessions of a Fabric Addict. Links to both can be found at the top of the page, under Link Ups.

Vintage Patchwork Quilt

For the past several years I have kept my eye peeled, looking for vintage cotton/polyester blend sheets. They show up now and then in thrift stores. It takes some time to build up a collection because many of the pieces that are available are too worn to use. But if you are patient, it is possible to find pieces that are in new (still in the packaging) or like new condition.

IMG_6252

My collection has finally grown to the point where I had enough variety to make a large quilt with it.  The photo above shows the majority of my collection less just a few pieces that I bought after taking the picture. (By the way, if you are a lover of vintage sheets, I have many listed in my Etsy shop. Take a look.) I was a bit concerned that I didn’t have enough change in value with these pieces but it has worked out well.  The overall look is very soft and feminine.  I decided I would make a simple patchwork quilt, which is definitely my overall favorite quilt. I originally cut 9″ squares but they looked way too big so I trimmed them down to 7″ squares, a much better size. Created some waste but I am glad I cut them down. If you follow me on Instagram, you have probably seen some pictures of this project in process.

It was quite a feat to lay them out and get the balance that I wanted. At first I tried to just generally group the squares by colorway and make it flow. That didn’t work. The colors are not defined, or saturated, enough to get a good result. Picking up the squares and trying again, I organized them into diagonal rows with the same fabric in each row but still sorting by color. This was much more effective and it was the look I liked best.

image2

This picture was my guide so I could be sure I was sewing patches together in the correct order.

It really didn’t take very long to get the top assembled. Once I did, I decided I would also make matching pillow cases for the quilt. (I used a very simple pattern from the book Home Sewn that I reviewed last week.)

IMG_6741The bed is going to be so pretty when this is finished. Not sure if you remember but I also made a few throw pillows last summer and they use many of the same fabrics. What do you think?

IMG_6742This quilt is a bit of a monster. I’ve only ever quilted one other queen size quilt and it wasn’t easy. I think I will quilt this with my walking foot and do straight lines on the diagonal, running both directions. That should be a manageable approach.

Julia was so kind as to help me layer this on the floor. It was much easier than doing it alone. I had a brand new sheet that I saved to use as the backing making this an incredibly affordable quilt.

IMG_7096

At this point, I have a quilt top finished, basted and ready to go. Hopefully, I will get it done soon as I want to put it back on the bed! Want to throw in a vote for binding? I am thinking of using the pink stripe that I used for the pillow cases. What do you think?

Linking to my favorites this week. Check them out at the top of the page, under Link Ups.

Our Bear Claw Quilt

Over the years, I have collected some very pretty quilts. Each has a great deal of sentimental value to me for different reasons. Today I want to share one of them with you.

img_20160528_5261

This quilt was given to me as a gift by some very sweet friends. In the early 1990’s we lived in State College, Pennsylvania for two years. When we were moving back to California, our friends, John and Lois, came by early in the morning the day before we left. Knowing that I had a love of quilts, they brought me a quilt they purchased on a trip through the Appalachian Mountains.

This very traditional quilt is large enough for a queen size bed.  Over the years we have enjoyed this quilt so much. It has become very faded and thin and has a few ink stains on it but it still has years and years of use left.

img_20160528_5262 v2

As each quilt always does, our bear claw quilt has its own special charm. Part of what makes it charming is the simplicity of the fabrics that were used to make it as well as the very simple hand quilting. More than that though, are the mistakes made by the quilter! It makes me smile every time I look at this claw that is pointing the wrong way. (The blue spot on the sashing is the ink stain I mentioned.)

img_20160528_5270

There is another mistake, one that seems more likely to be missed by the quilter than a whole block pointing the wrong way. Take a look at this poor bear’s toe. Ouch.

img_20160528_5268

Our quilt is so sweet and filled with its own unique character. The sashing and borders are a very simple muslin, lots of the points are cut off, some of the blocks are topsy-turvy but it has been a special part of our family for over 20 years.  Right now it lives on our bed in the Downieville house, keeping us cozy until I make the Dear Stella quilt.

Linking to Jen at Quarter Inch From the Edge as well as Let’s Bee Social.

Finished the First One

I finished the first of the two extra long twin bed quilts that I am making for Julia’s room in Downieville. It is simple and so cozy. Green (my favorite), purple and tan are the colors and most of the prints feature florals and  hummingbirds, plus one abstract print of mountains. This is the perfect theme for a quilt that will live in a house along the river, in the mountains.

IMG_20160204_4565This quilt is a bit of a beast to photograph; with 10″ blocks, it finished at 70″ x 100″.  You can see that I quilted straight lines along all seams, two inches in. I marked most of the lines with a chalk marker which made it very easy to quilt.

IMG_20160204_4566

It is backed in a violet fabric with a scroll print. I bound it in the same fabric. It is a piece from Jo-Ann’s that Julia chose.

IMG_20160204_4569

I have just enough of the backing left over to make a pillow case which will finish things off nicely. I am looking forward to taking the quilt up to Downieville. I will be up there this afternoon to work on the opportunity quilt for the guild. What is better than an afternoon of sewing? We have had spring-like weather here and my daffodils are all ready to bloom. It is a nice break but we need to get back to winter and a lot more rain. Hopefully soon!

What are you working on? Tell me in the comments!

Linking to Let’s Bee Social and Finish It Up Friday. Links to these sites, and more, are found at the top of the page under Link Ups.


Simple Patchwork

Some months ago, I bought yardage to make two quilts for the twin beds up at the Downieville house. Currently those beds are just lovely, piled high with old blankets and sleeping bags. Ugh. I had been sketching and playing with different ideas for these quilts until I realized that I wanted the quilts to be finished.  Done, not sketched. Usable, not being planned.  Know what I mean?

I pulled the fabric and washed it all.

IMG_20160115_4470

Then I added a few more scraps from my purples and greens.

IMG_20160115_4468

Working swiftly, I cut piles of 10.5″ blocks.  Here is where some planning would have come in handy! The fabrics are all 42″ wide so once I squared the fabric, I was able to cut three blocks and then ended up with a nine-inch piece. I should have made the blocks an inch smaller and I would have utilized the yardage far more efficiently. I now have a stack of 9″ scraps. My plan is to make the second quilt with smaller squares or to frame those 9″ blocks and bring them up to 10.5″.  Not sure yet.

I laid them out on the spare bed and started sewing. I put very little thought into which square went where, obviously trying to not put any of the same side by side. It is seven blocks wide by 10 blocks high, so measures 70×100″. It is oversized because the beds are extra long twins and Julia said she wanted the quilts to be really big. (She must be pretty cold, sleeping downstairs!)

IMG_20160127_4514

The colors look a bit washed out as the sun was so bright. I took this out at our gazebo on the pond. We have this pond on the edge of our property. The water level is steadily increasing with all of the welcome rain we have had. Winter is harsh and the berm along the edge is not very green at this time of year.

IMG_20160127_4517I have a simple purple print for the backing and binding. But first, I need to wash and prepare it. My plan is to get it sandwiched, quilted and bound in the next week.  Then I will start the second one. At least one bed will look decent!

There is something to be said for a simple, get-it-done project.

Linking to Crazy Mom Quilts and Let’s Bee Social this week!

May Goals

Setting goals on a monthly basis, as I have been doing this year, seems to make the time buzz by even faster. I am not sure this is a good thing.  My goals for this month were to finish my Alison Glass Mini Quilt for my first swap, make the row of green blocks for the RSC15 project that I am doing, and to finish two bunk bed bags (a custom order for a friend). Here we are with four days to spare and it is all completed!

It was kind of one of those silver lining deals. I finished the bunk bed bags first (posted about them here). After that I completed the mini quilt. I didn’t think I would get to the Classic Stitches Row Quilt (my RSC15 project) but things are always changing, right? I was supposed to go visit some family in Houston last week but I was knocked flat with a succession of migraines. I ended up not going at the last minute. This was a huge disappointment for me, but certainly wasn’t the first (and won’t be the last) time that I have had to cancel plans due to migraines. Once I was past the worst of it, I was left with a couple of unexpected days to sew (that is the silver lining!) I cut into a pile of green scrap and came up with a row of Losses and Crosses blocks which were the Classic Stitches BOM for May.

IMG_20150525_3352

I made the simpler version of the blocks that Mari offered up for this month. These blocks are a bit fussy and I decided I could only make so many 2″ HST’s without going crazy. I like the blocks though I think they are better suited to a larger layout so that the secondary patterns show up. You don’t get the full effect in one row of six inch blocks.  If they are clustered together, the effect is very nice.

IMG_20150525_3374

This row quilt is growing and growing. I am trying to decide if I want to keep making all of the rows with six inch blocks or if I should make some rows with larger blocks to add variation. I need to decide this soon since I am nearly half done.

IMG_20150525_3357

The mini quilt turned out great. Very glad to have this finished and also that I am able to link up with ALYOF since I missed that boat in April!  I just packed it up to ship it off to my partner in Michigan. Kind of hard to gIve it up so I really hope she love it!  I am excited to see what sort of mini I will receive.

IMG_20150521_3368

I have quite a bit of Alison Glass fabric so I made a pieced back for it.

IMG_20150521_3370

I love the dense quilting.

IMG_20150521_3373

My points match up well which I am quite proud of. I have been working on precision and it is finally improving.

IMG_20150521_3371

Looks like it is time to think about what to work on in June! I have several things in process so it will help to block it out and make a plan.

Linking up with Lorna at Let’s Bee Social and Amanda Jean at Finish It Up Friday, as well as ALYOF at Sew Bittersweet Designs and Angela at So Scrappy.


A Vintage Pillow Finish

Last week I decided to cut into my collection of vintage sheets and play with them. I made two pillow tops. One of which I took up to Downieville last weekend to practice hand quilting. This was my first attempt at hand stitching. I didn’t get that one quite finished but it is looking pretty good so far. I did finish another one though. I plan to use them on the guest bed, which unfortunately is located in my sewing room and often cannot be found underneath all of the projects that lie on top of it.  Ha ha.

I used Corey Yoder’s Scattered Squares pattern which was published on the Mode Bakeshop website last summer. Corey designed the pattern to be made with a mini charm pack. I decided to adjust it a bit and use 3 & 1/2″ squares since I was cutting my squares anyway. Simple straight line quilting was used with a spacing of about 3/4″ or so. I didn’t measure or mark this, rather I used the edge of the walking foot as my guide.

image

I used a sheet to make an envelope backing. If you need a tutorial for this, there is a great one over at Crazy Mom Quilts. Super simple and takes no time at all.

image

This afternoon I decided to play with the Tula PInk City Sampler book that I wrote about in my last post. This is going to be a fun project. I made three blocks today and they came together easily. These are all from a section of the book that features various cross block patterns. I am liking the look of this already! Each block finishes at 6 1/2″. Three down and who knows how many to finish it.

IMG_20150403_3039Hope everyone has a wonderful weekend!

UPDATE: I forgot to include my April goal for ALYOF!! Yikes – I plan to make three gifts this month. I think each will be a tablerunner, though one may be a mini quilt wall hanging. Finishing these three gifts are my goal for April. Phew!!

Linking to Crazy Mom Quilts (yay – she is back after her month away from the blog!) and also Sew Bittersweet Designs for ALOYF!!


Yellow stars – Done!

Another finish! Trying to get things all finished up for March. These stars are my RSC15 project for this month. The color is yellow and these turned out so cute.

image


Two of the stars have a bit of a mistake. However, I am calling this creative design. Mostly because I don’t feel like ripping it out.  Do you see the mistakes? Hint, hint, look at the star that is second to the left in the picture above.

image

Here are the first three rows of the quilt. I am following along with Mari over at Academic Quilter. She is posts a new block for this row quilt the first Tuesday of each month. Looking forward to seeing what is up for April!

We are going to work on the house in Downieville this weekend so I won’t get a lot of sewing done. I do plan to take up some hand sewing. I am making some throw pillows for the guest bed and I am going to try hand quilting one while I am up there. I have never hand quilted before so we’ll see how it goes. Are there any tricks? Advice is more than welcome. I plan to quilt straight lines running on the diagonal. Hope everyone has a great weekend!

Linking to Angela at So Scrappy for this month’s RSC15 challenge.