Yearly Archives: 2016

Weekly Wip Update

Let’s start off with the fun fact that this is my 200th post. That is sort of cool. 🙂

The last week didn’t include as much sewing time as I would have liked. I lost a couple of days because I was down with a bug. I managed to watch a few episodes of Downton Abbey though so it wasn’t a total loss. (I just discovered the show a few months ago and luckily, Amazon streams it. I have been devouring this soap opera lately, with the Dowager Countess being my favorite character.)

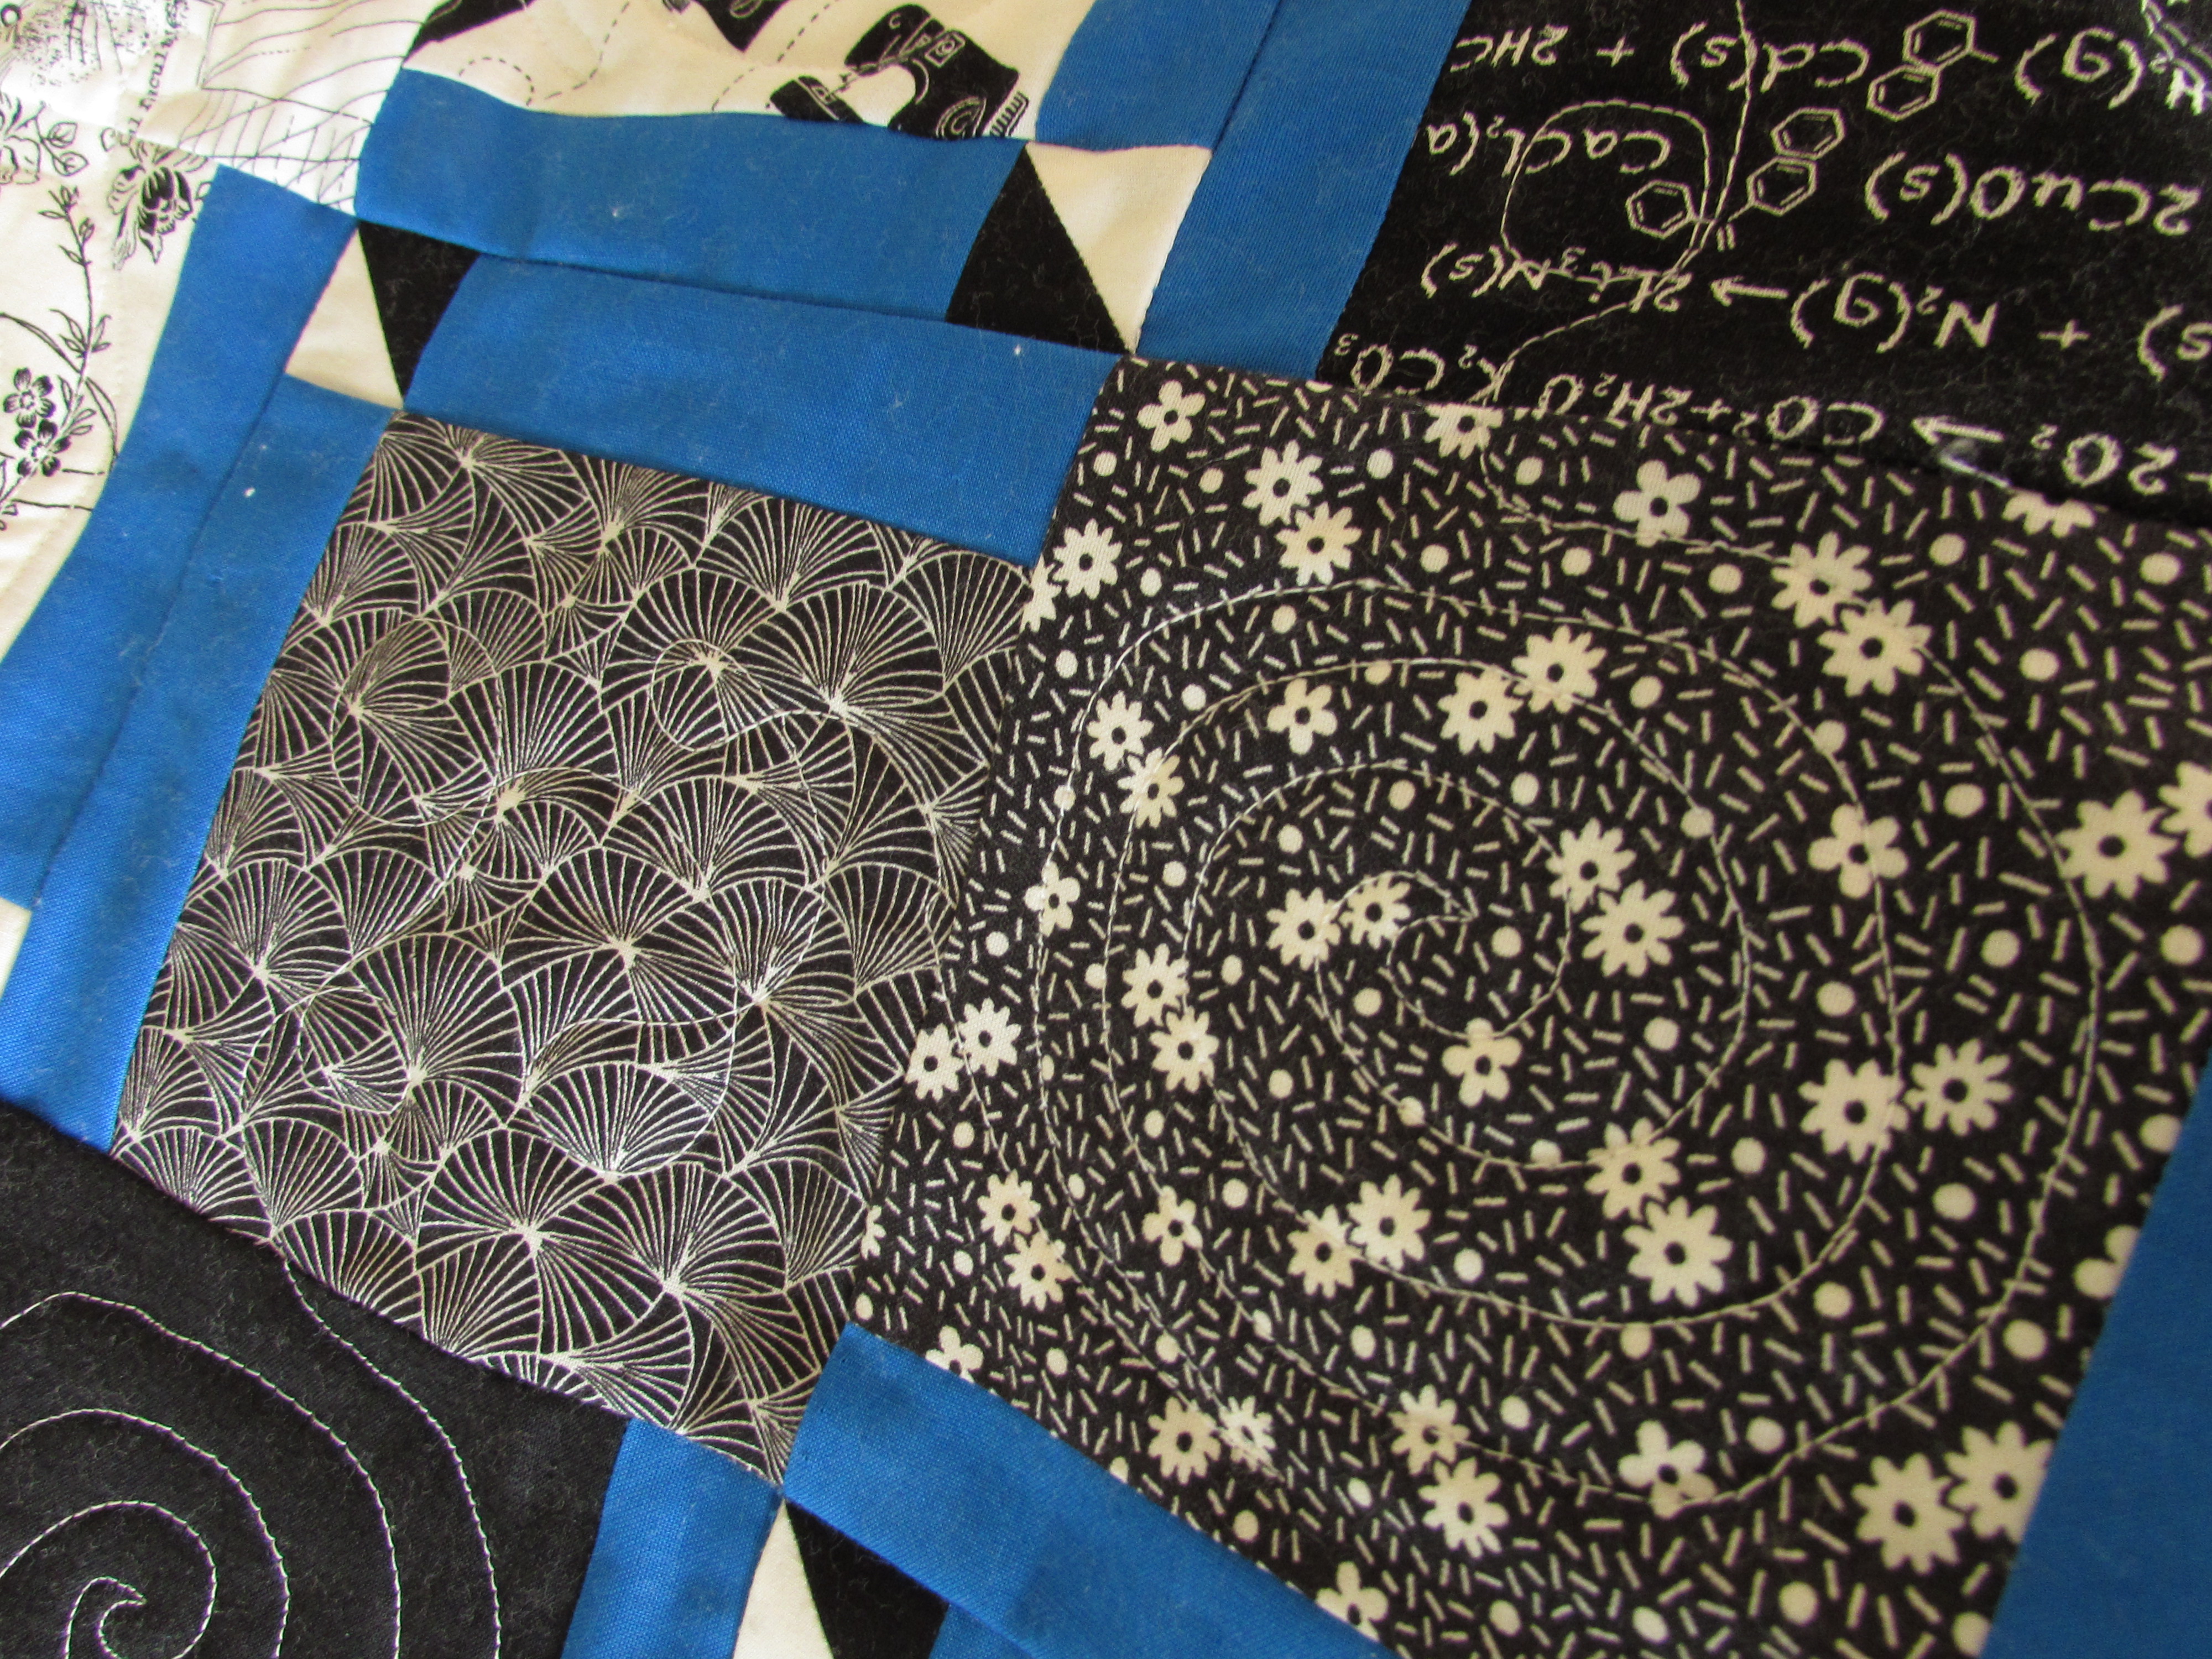
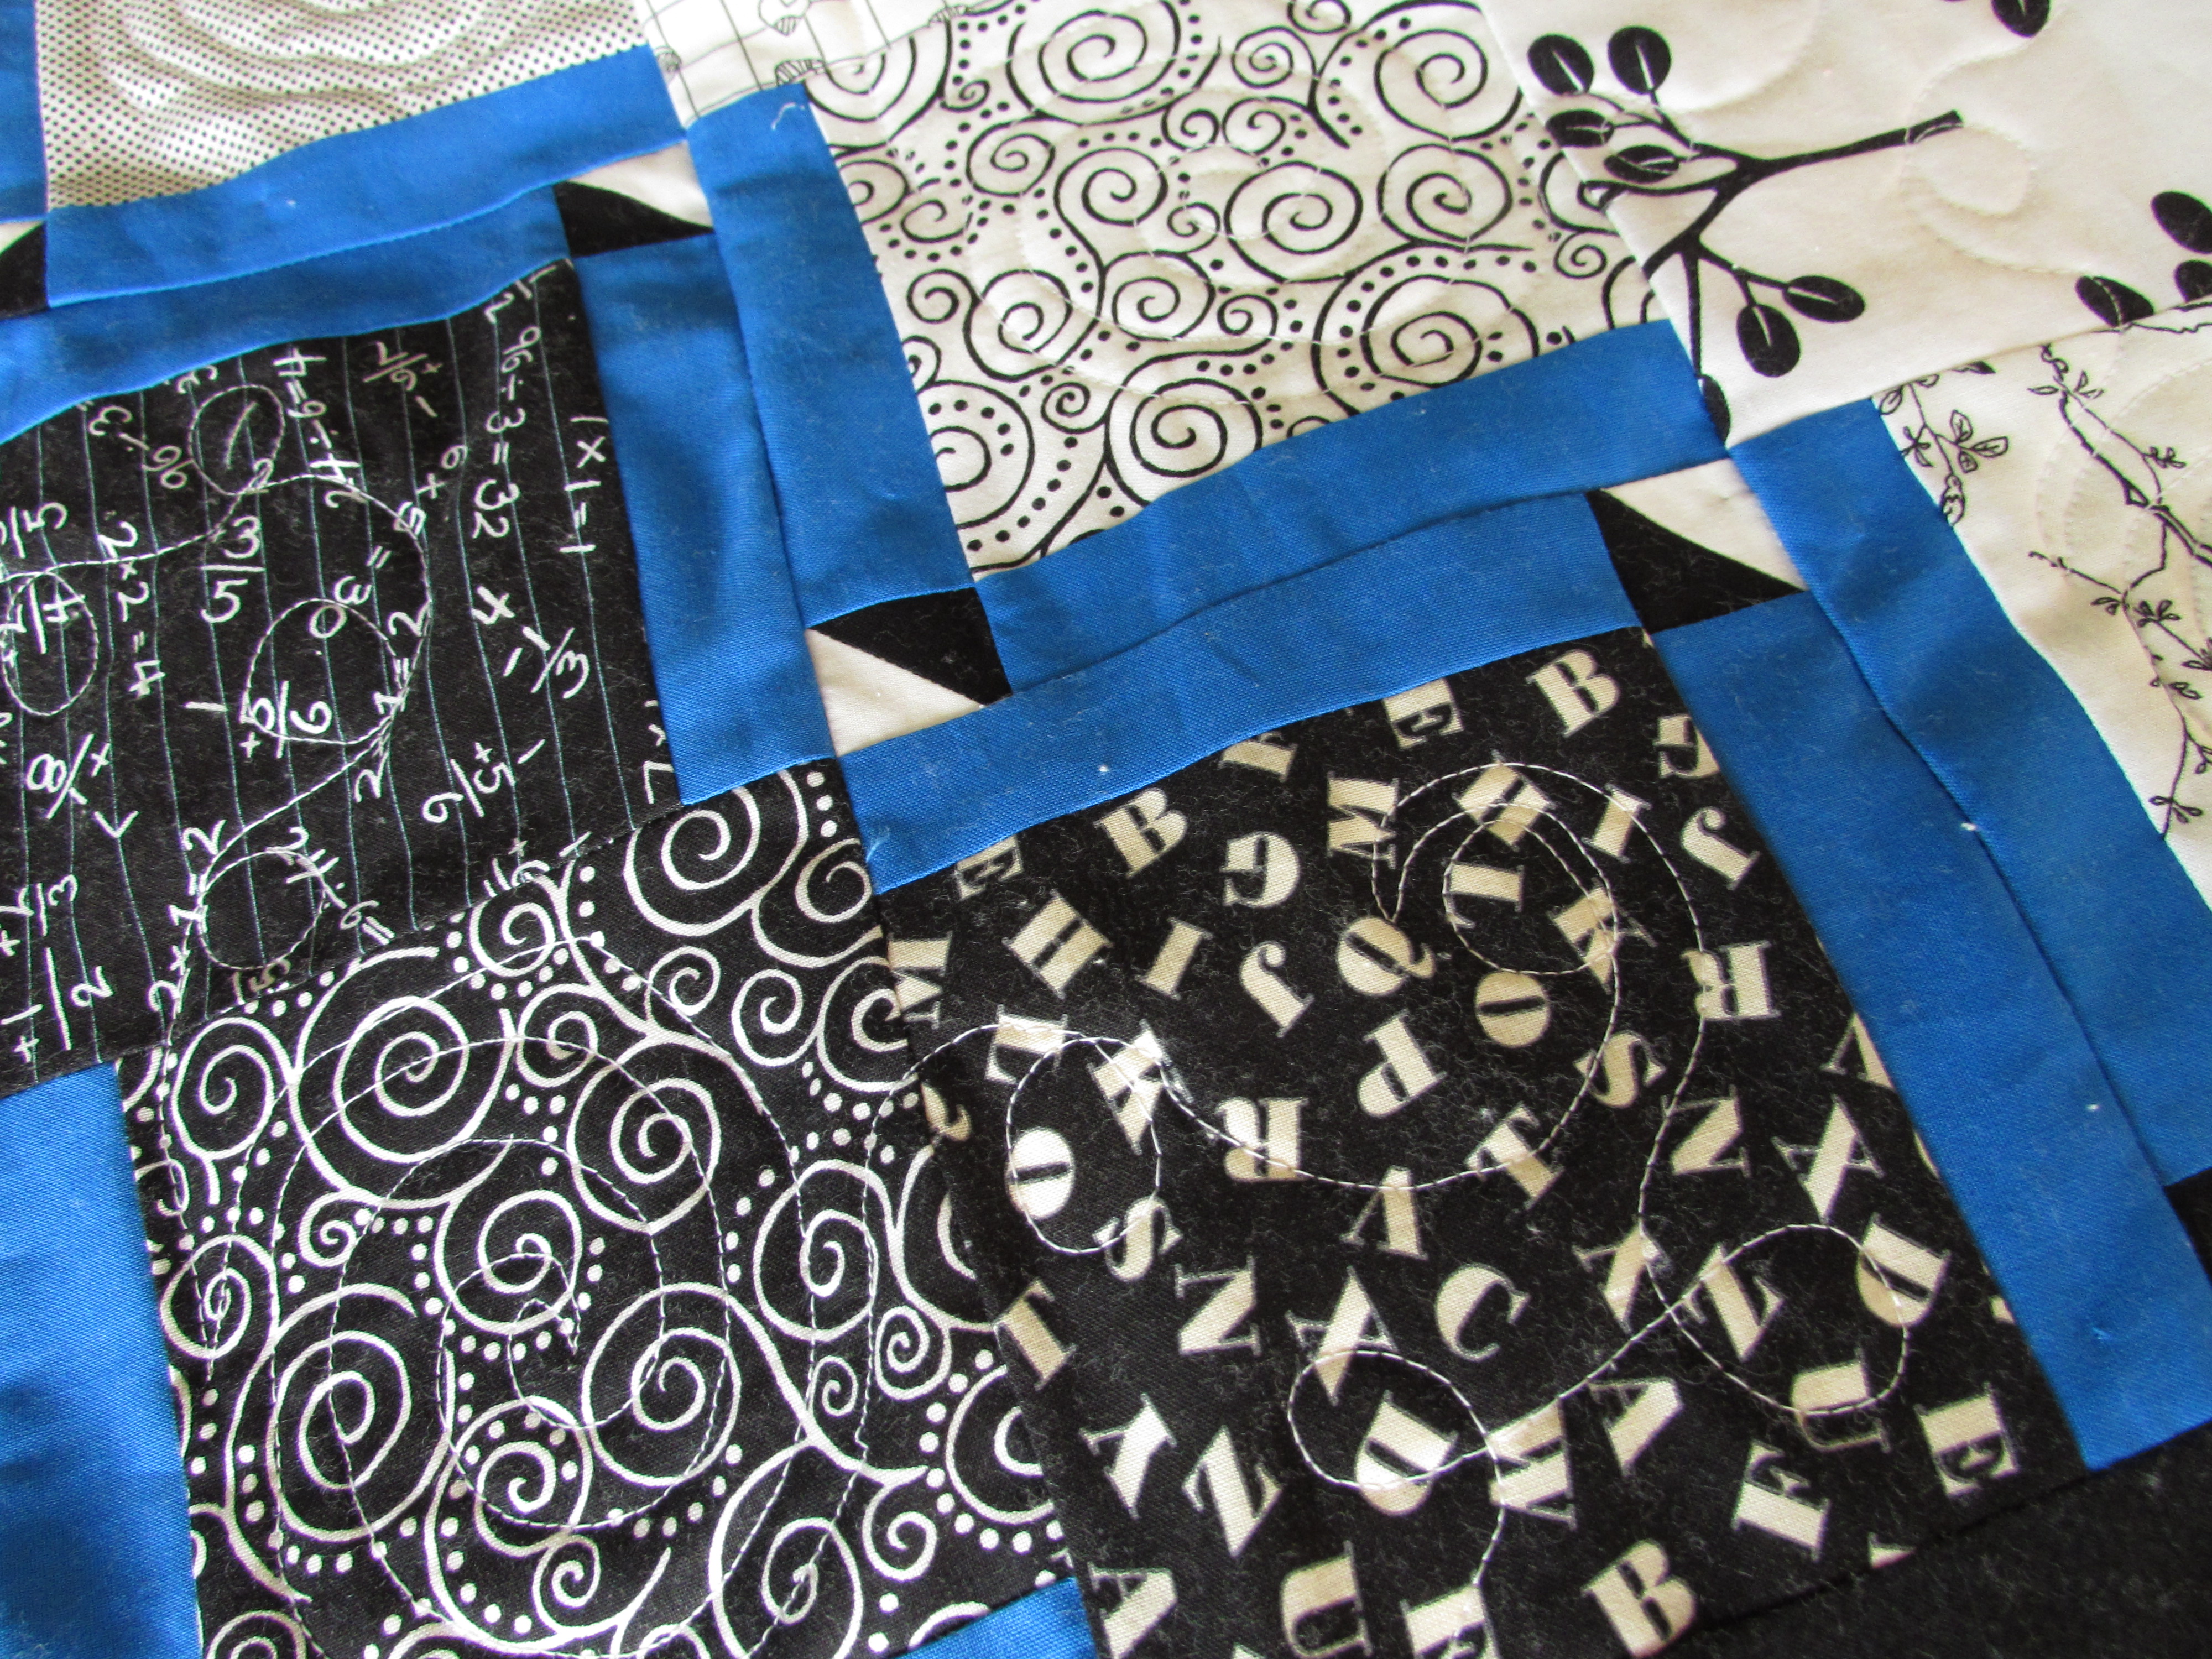
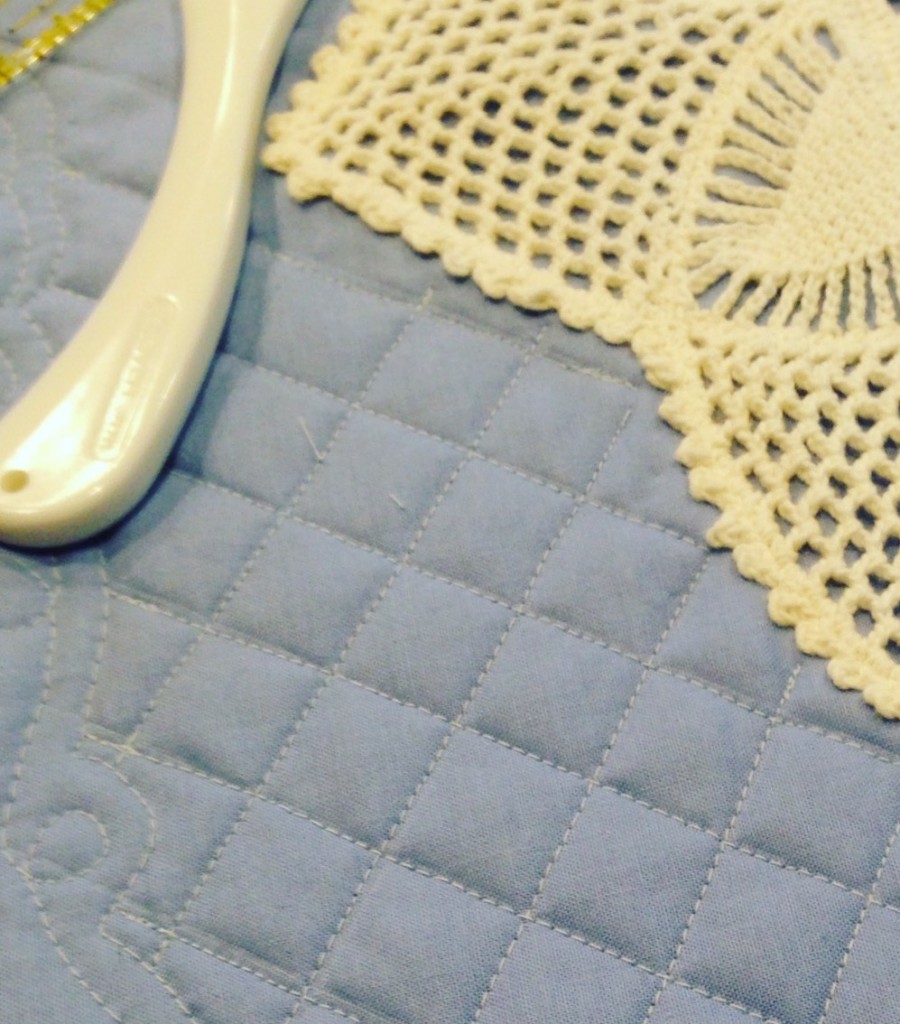
The days that I was able to spend time sewing were mostly productive. I made a few new French Press cozies for my Etsy shop. Beyond that, I started quilting my black and white Stepping Stones quilt. So far, I am quilting along the diagonal, following the black and white squares. I have not touched the tiny HST’s or the blue strips. My thought is to finish the black and white charms and then decide what, if anything, to do with the other smaller parts.

I am using white thread and the quilting is coming along nicely. However, the white stitching doesn’t show up well for pictures.

img_20160509_5110

I have been alternating quilting a large spiral and then in the next square quilting a loopy design.

img_20160509_5109

I have quilted about 1/3 so far. Other projects beckoned though and I set this aside for a few days.

I have been having a blast working on my sewalong with Tami of Sew Much for Free Time. Every time I make another friend via this blog, I am just blown away by the ease of the relationship. By now we have been emailing back and forth with progress pictures and ideas. It is so much fun. Our 241 Totebags are swiftly moving toward completion! Working with a friend has kept both of us on track and has somehow made the project seem to come together quickly.  This is my second project using a Noodlehead pattern or tutorial and the directions are just wonderful. So far, I have constructed the entire outer bag and have been working on prepping the inside portion.

image

These prints are bright, fun and maybe a little wild but I think they are perfect for the intended recipient.

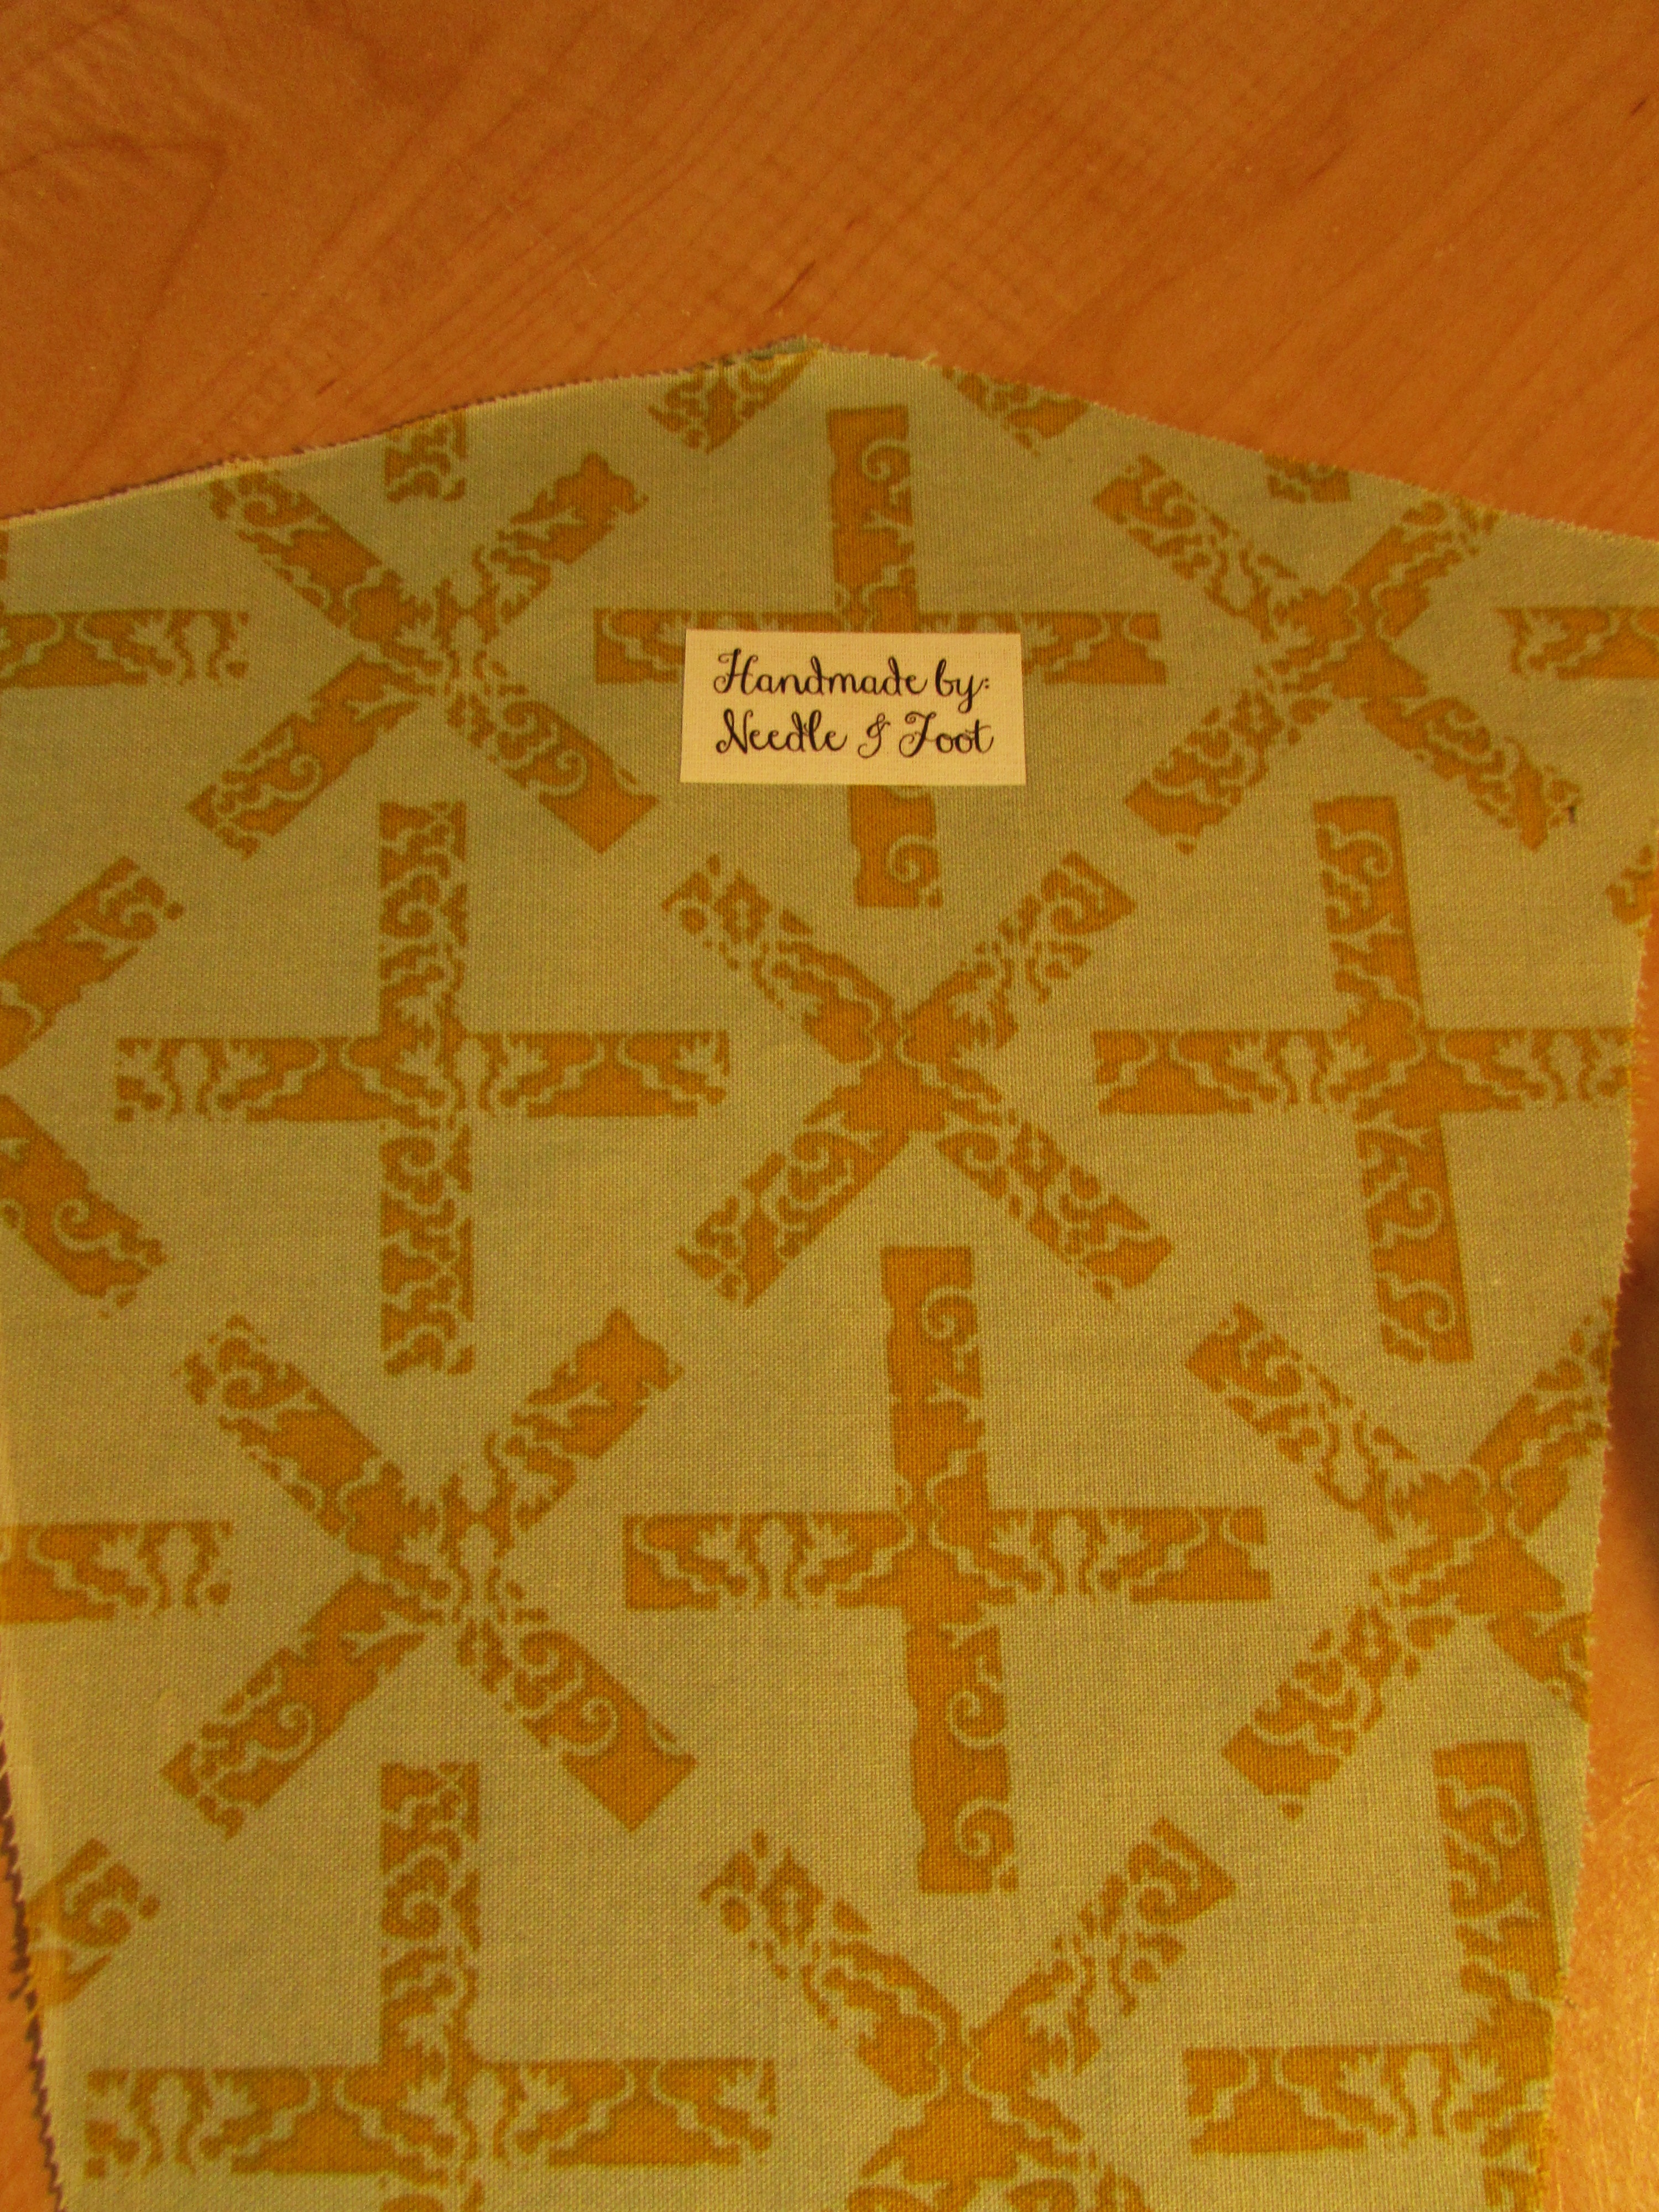
For the inside, I added one of my Needle and Foot labels. I have just a few left as I normally put these on product that goes into my Etsy shop.

img_20160509_5096

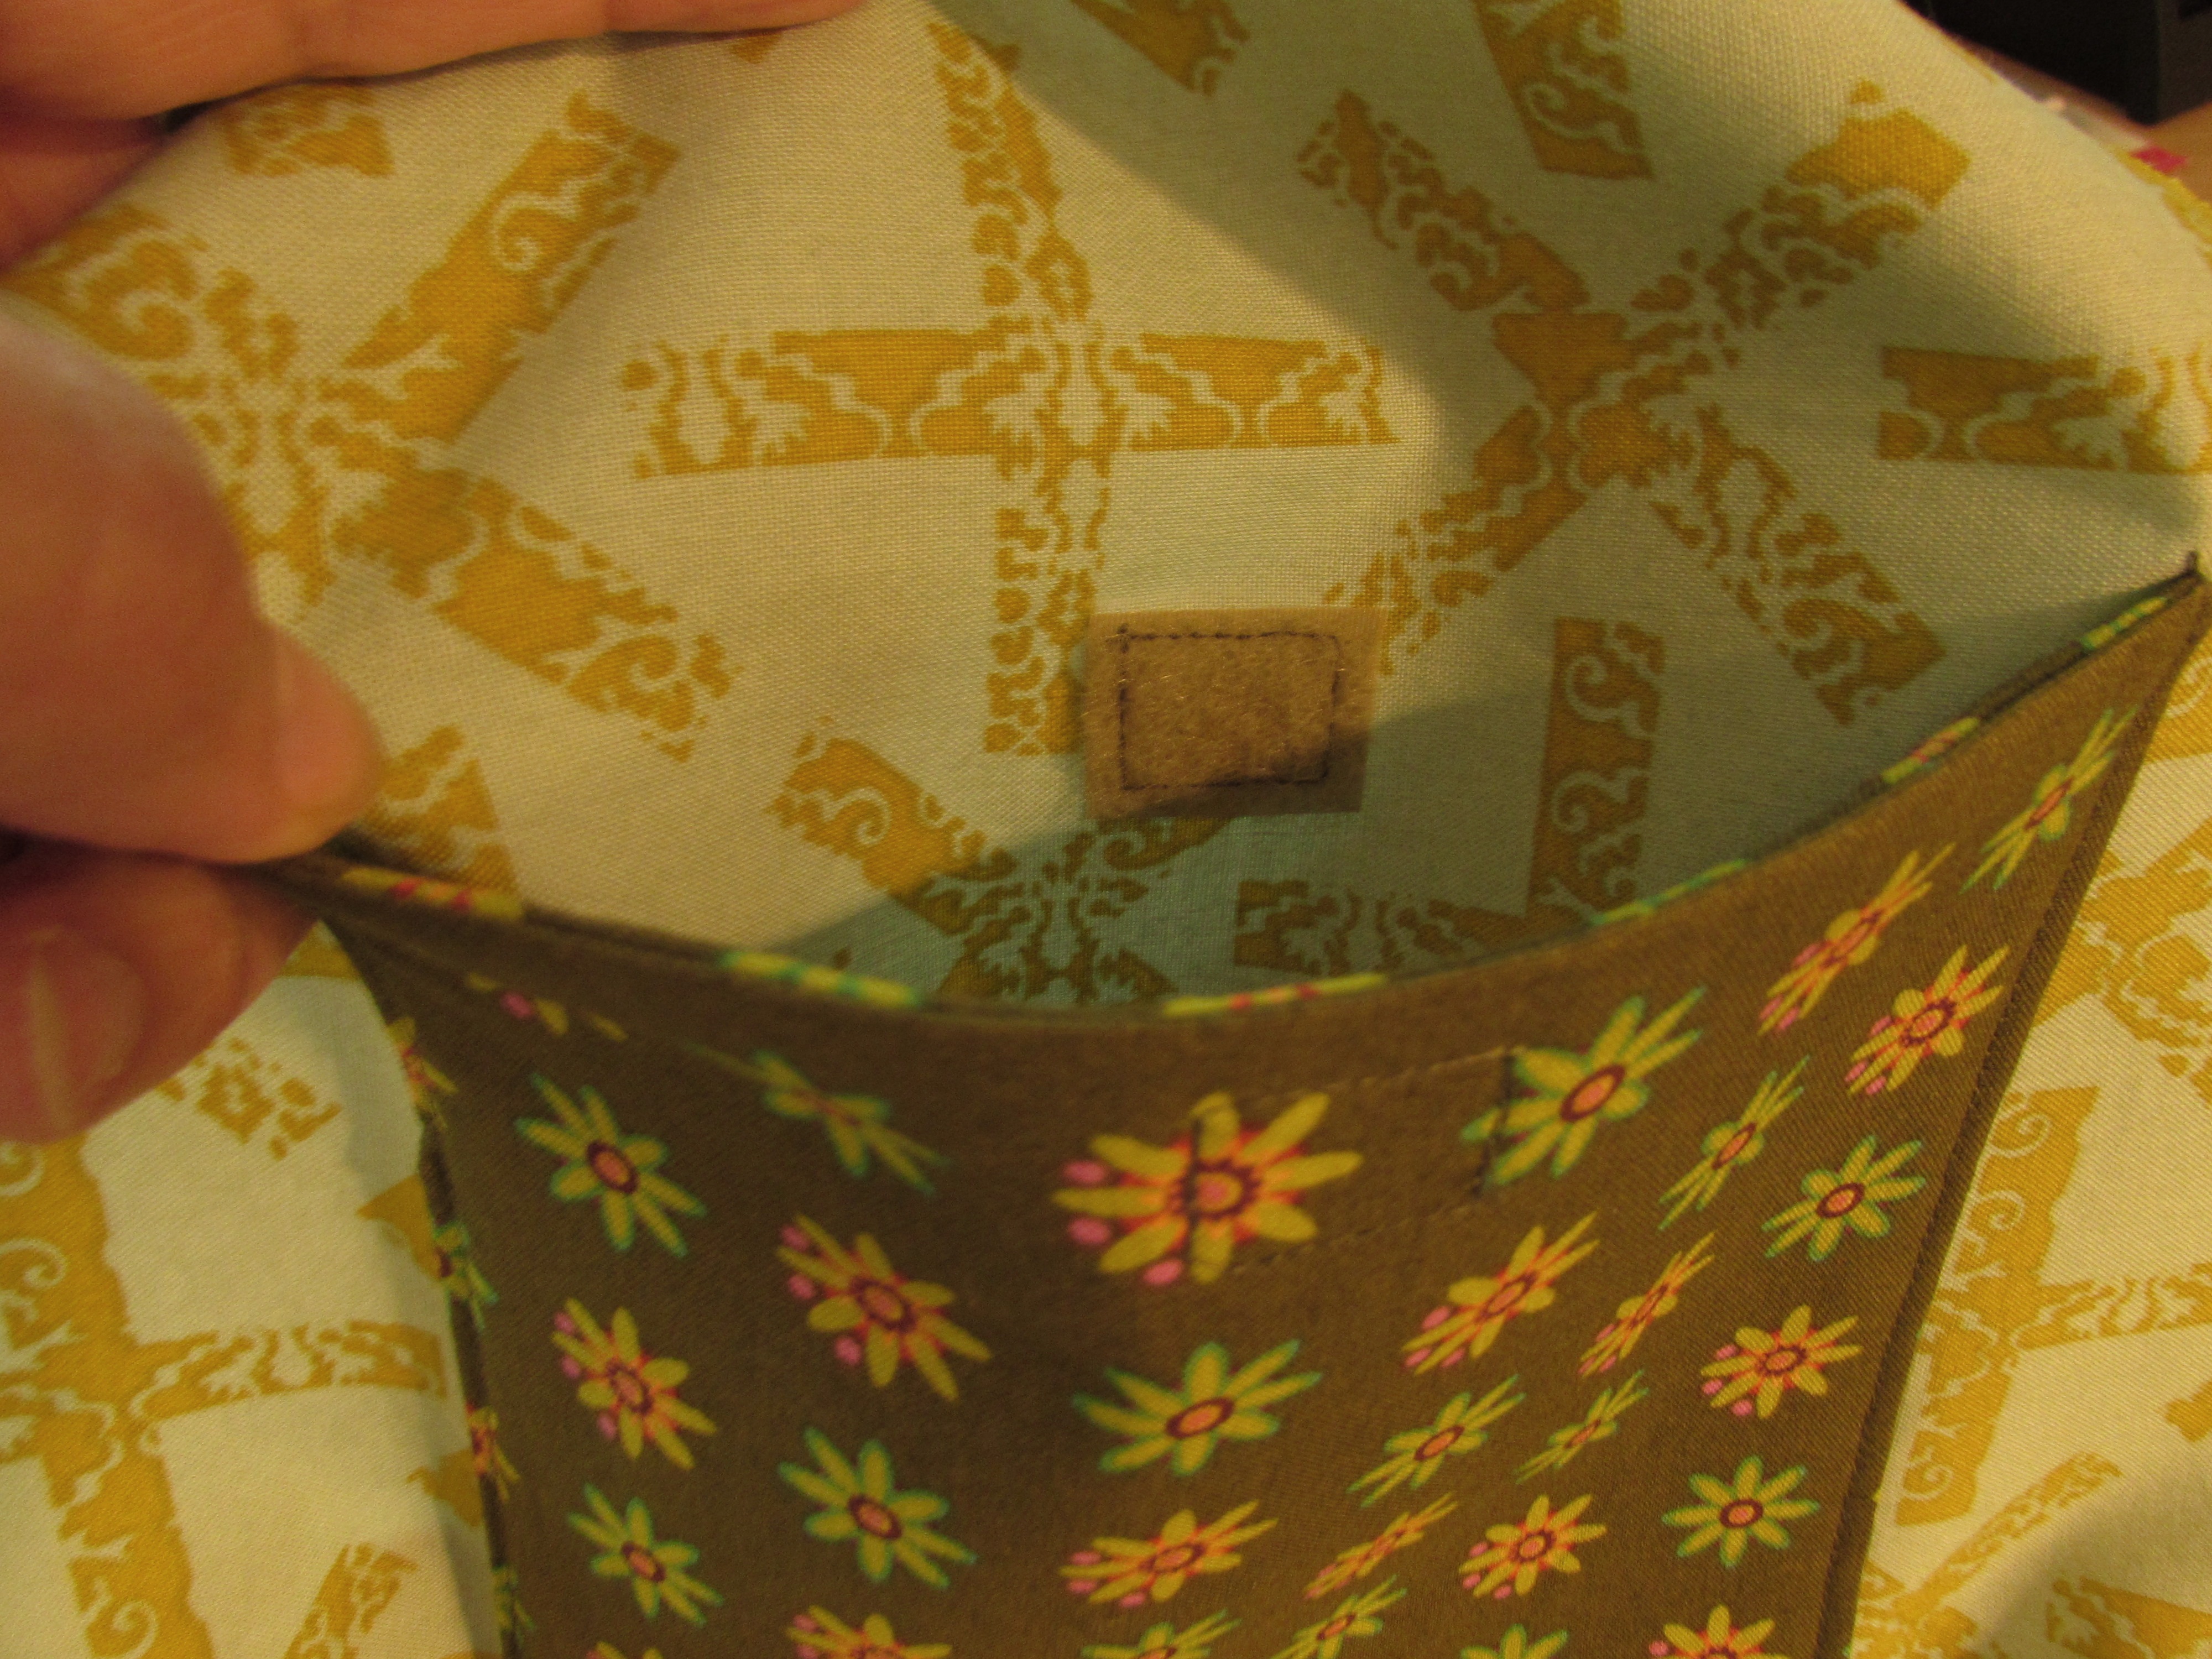
There are options for zipper pockets on the outer portion but I politely declined the option. (Read, I was too lazy to fuss with a zipper.) I did add a square of Velcro to the patch pocket on the inside (I was feeling guilty.)

img_20160509_5097

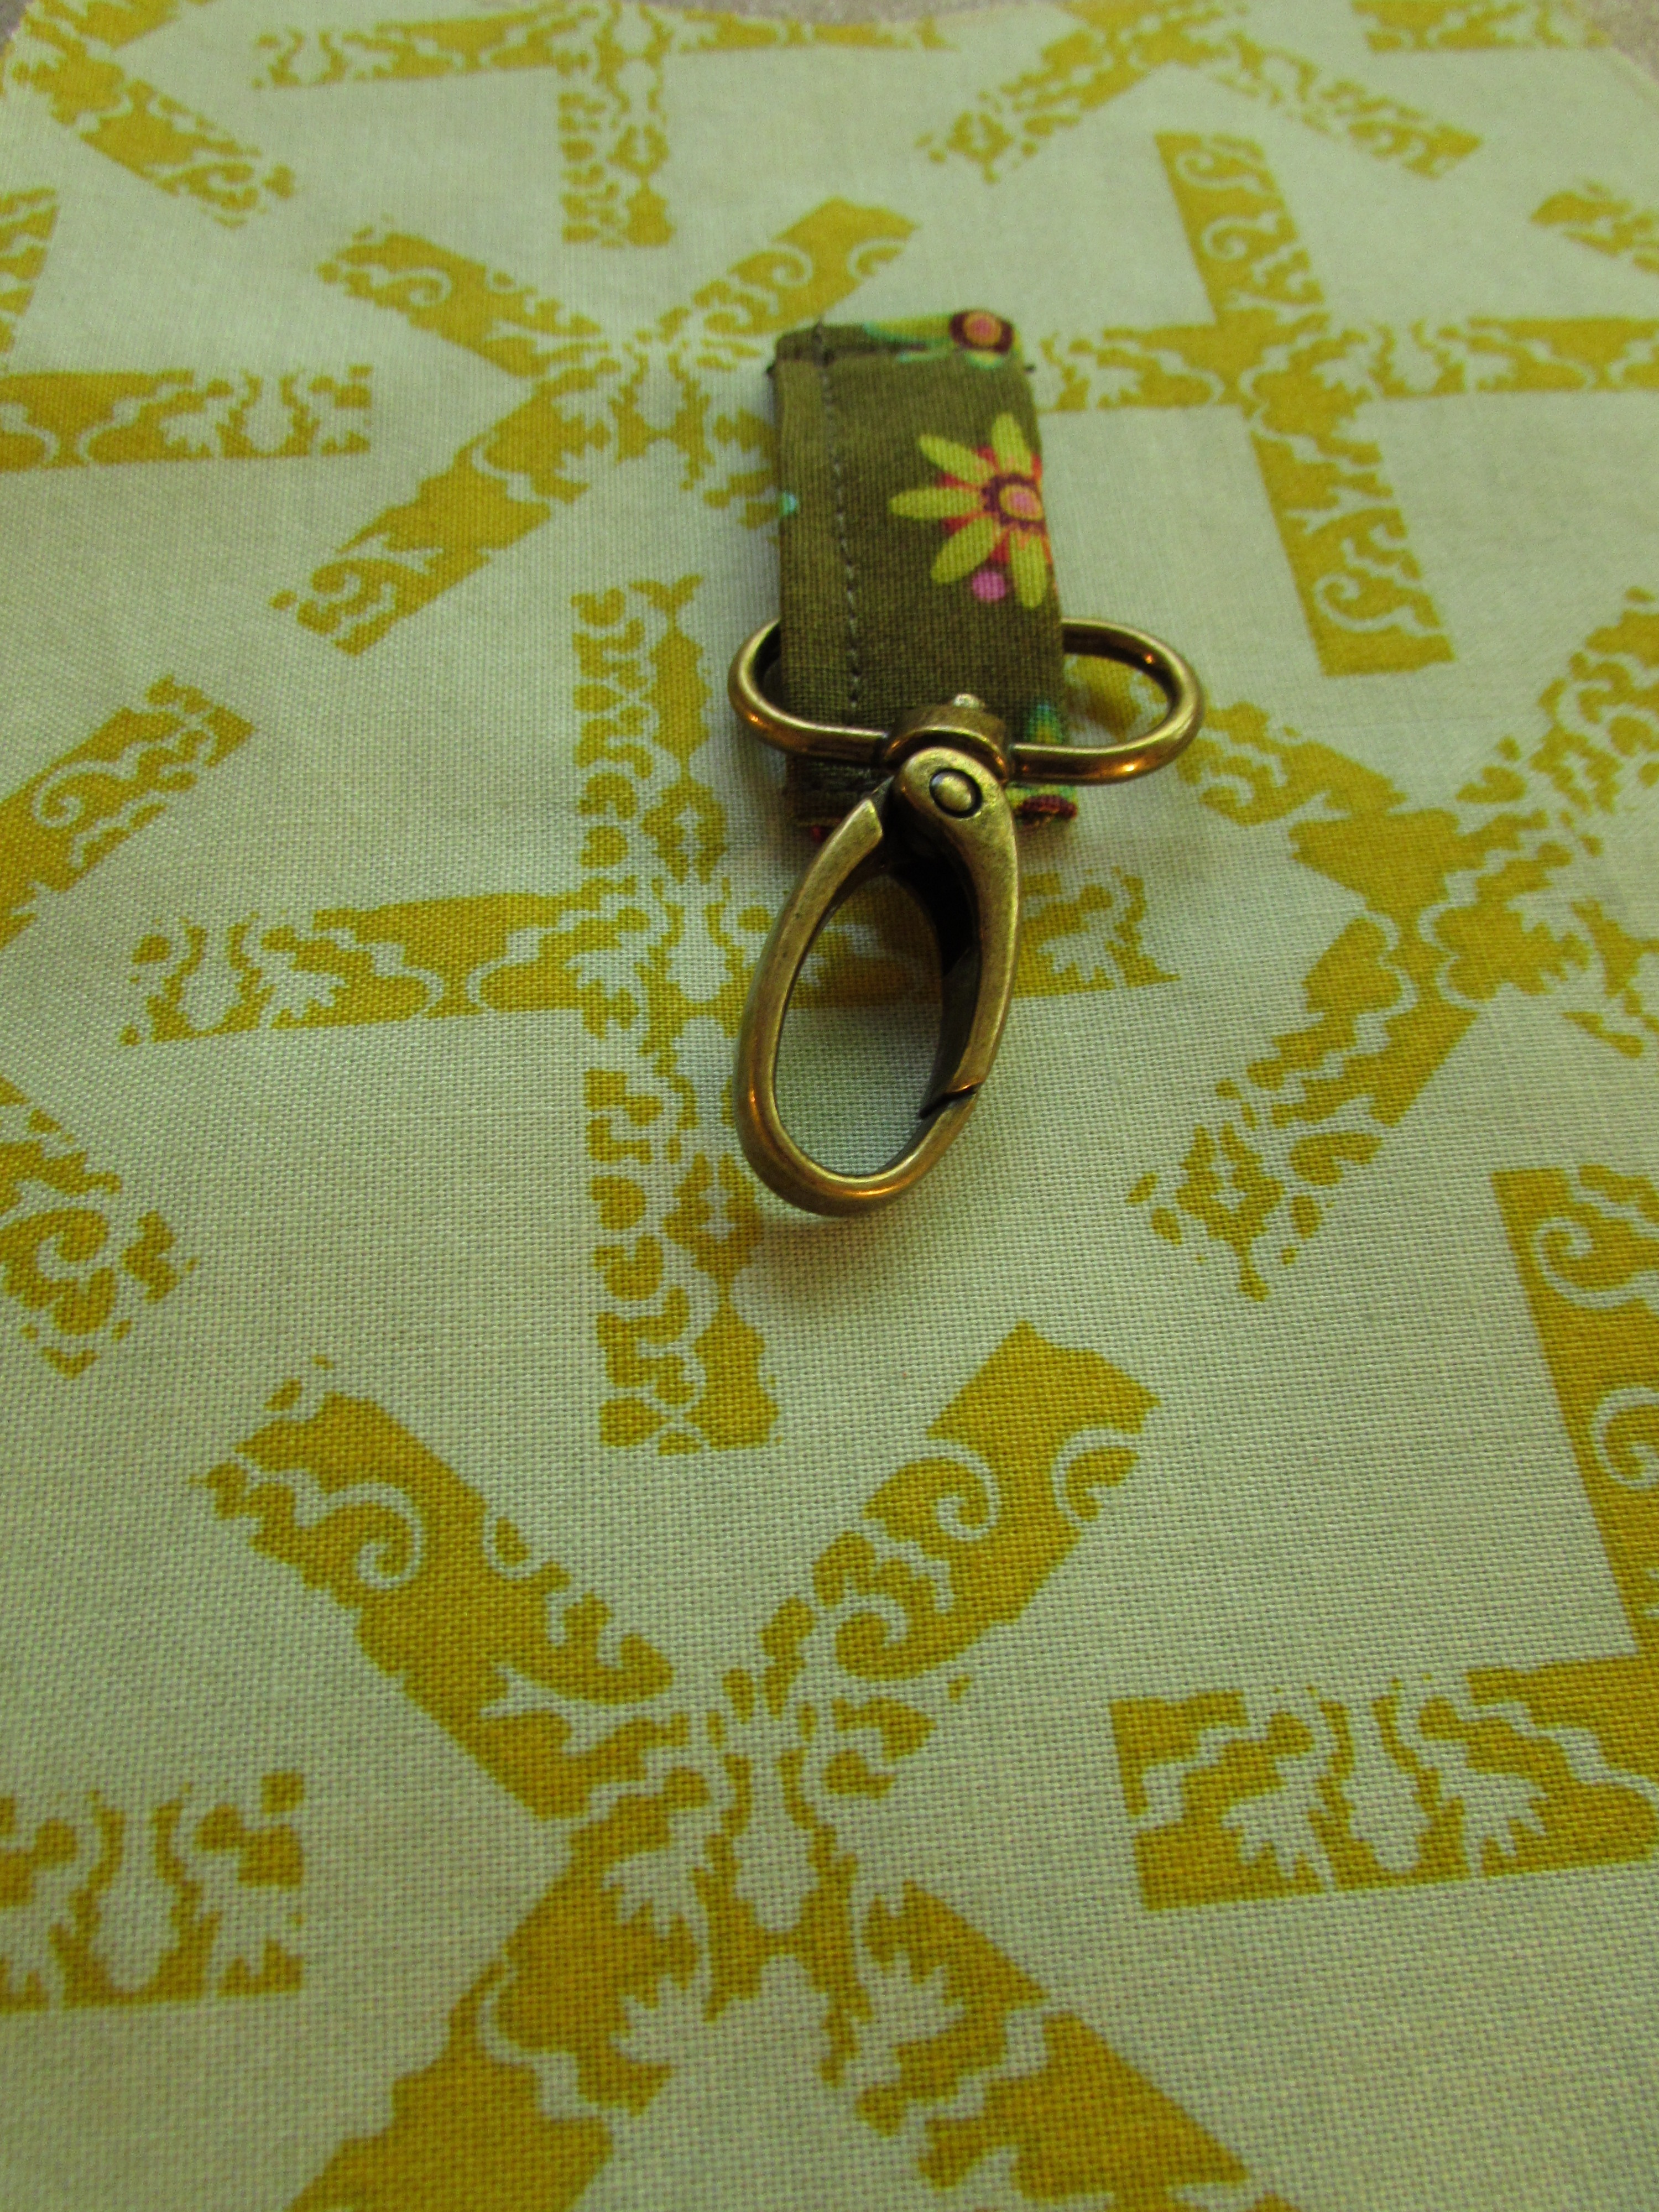
Finally, I made a little attachment to hang a  key chain holder. I love these little guys; saves so much time not having to hunt to the bottom of your bag to find your keys. There is a coordinating key fob in the works.

img_20160509_5098

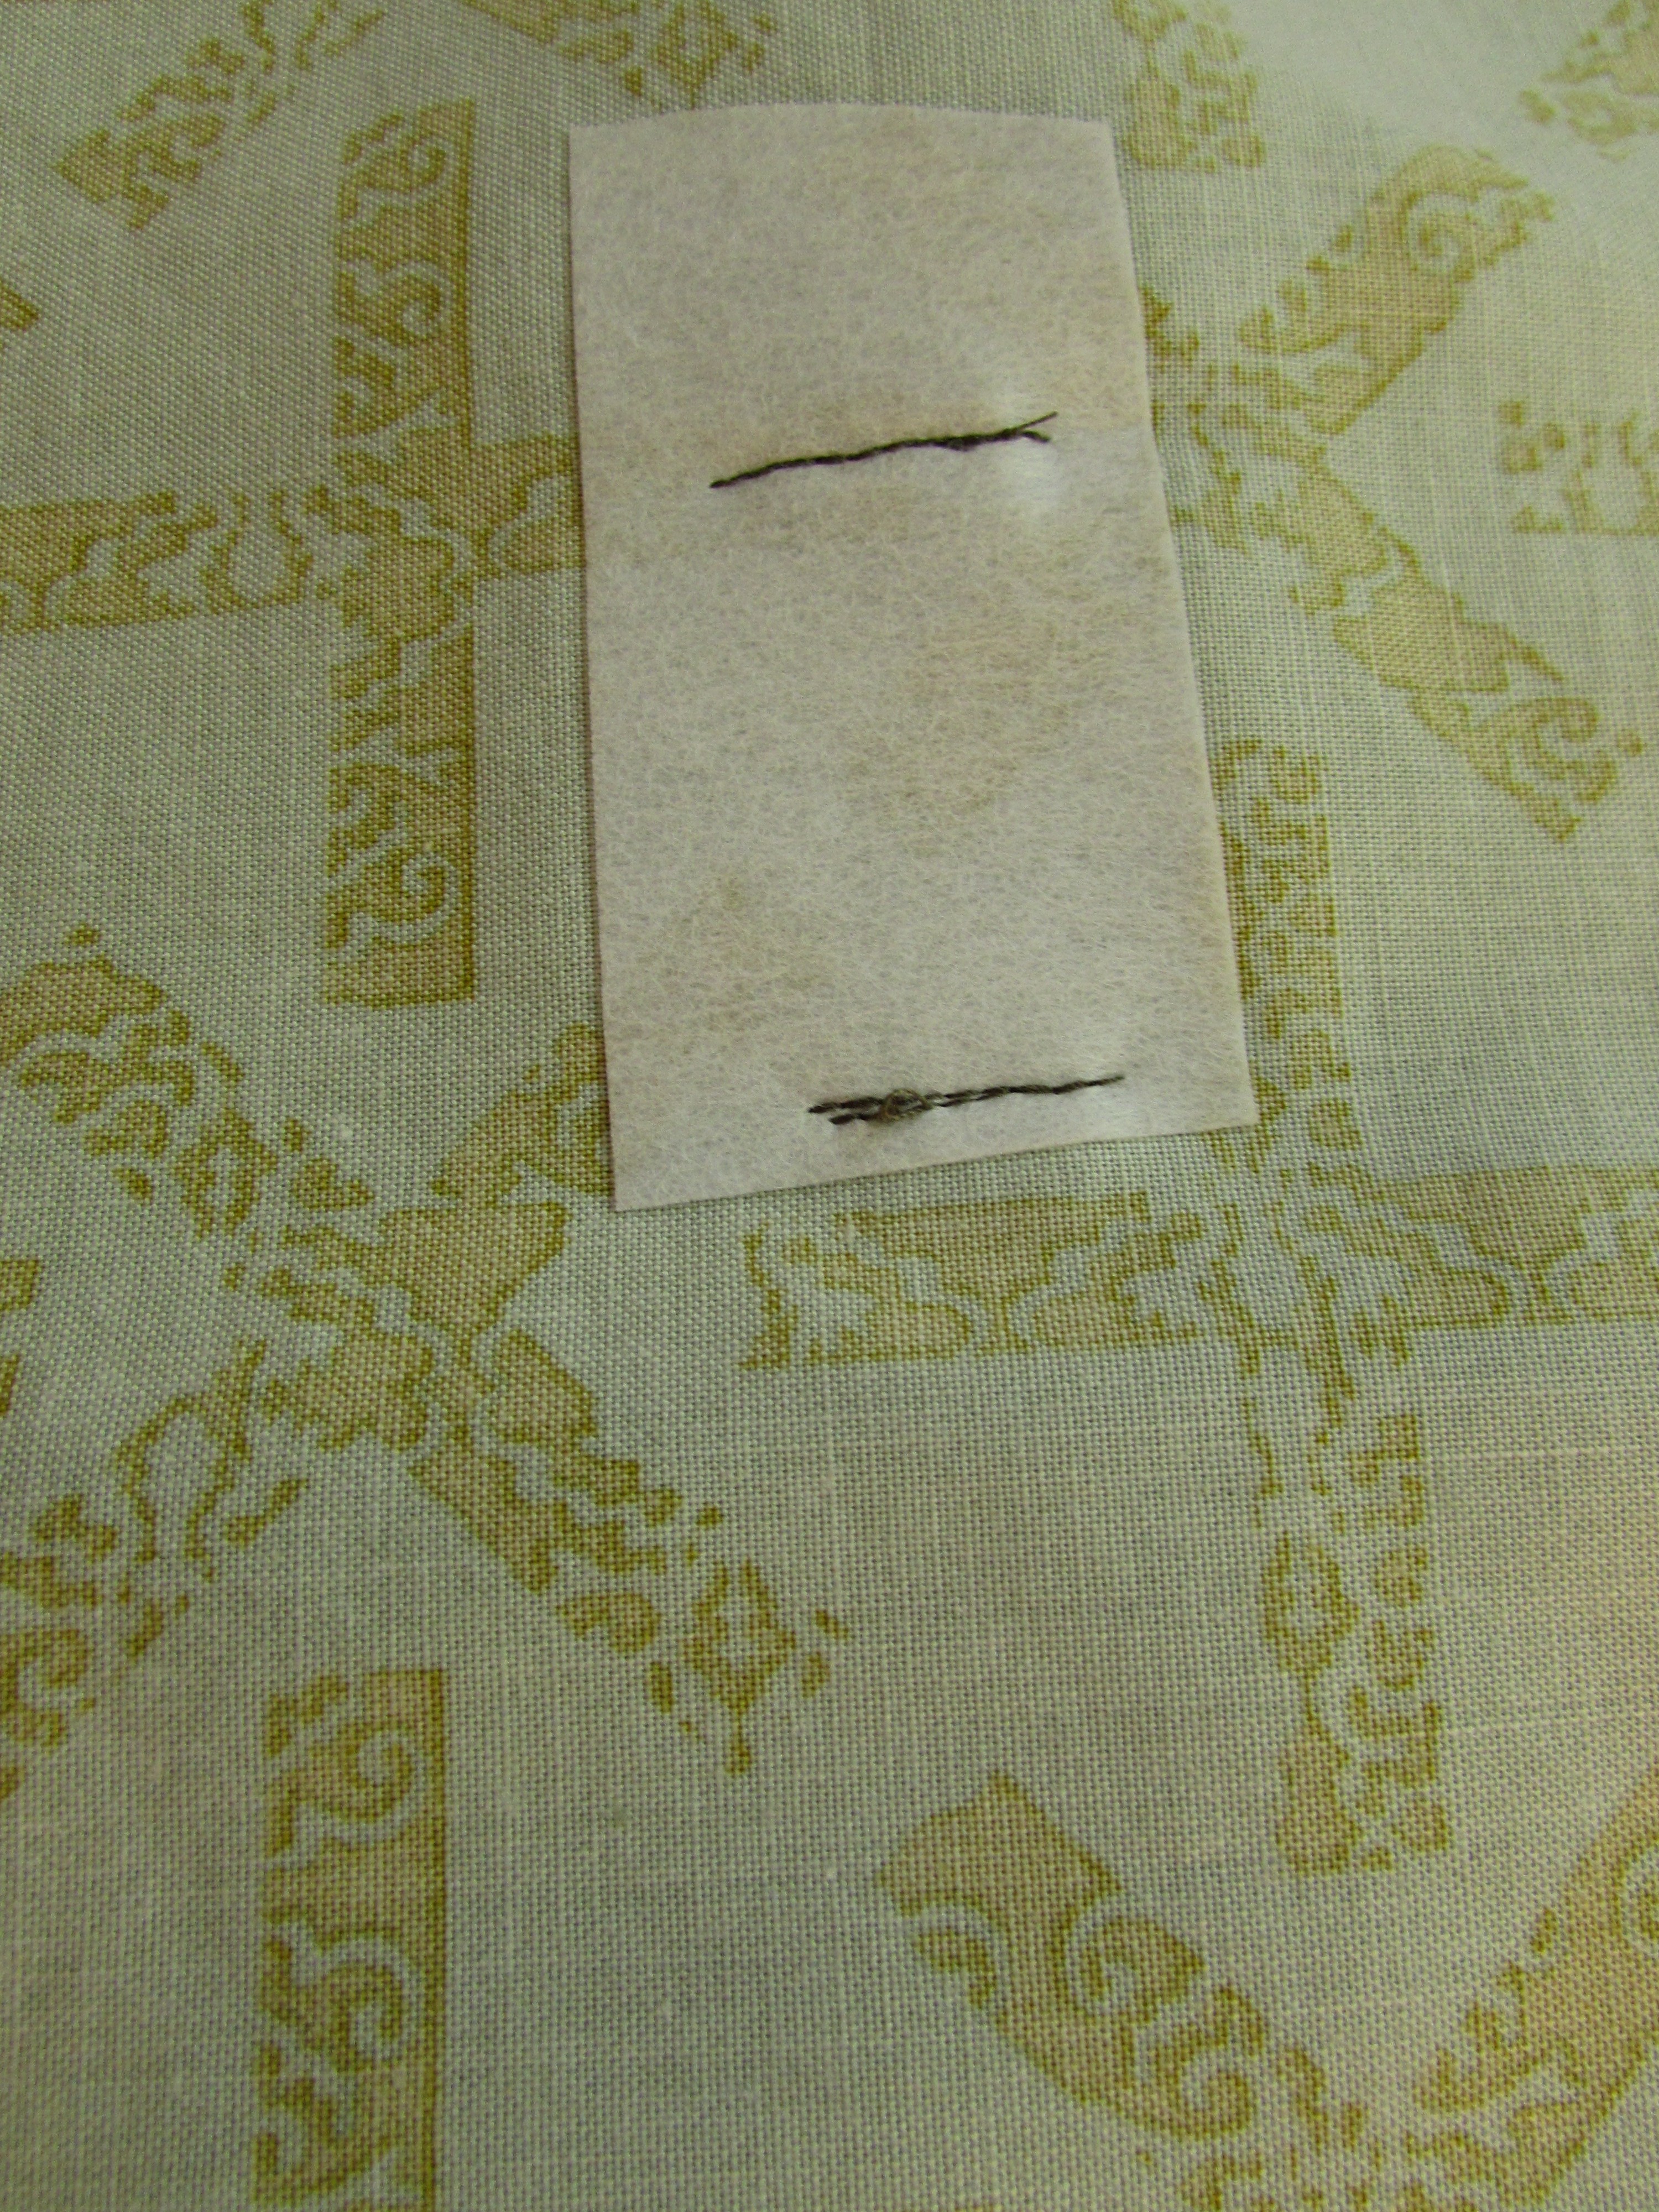
Because there will be a bit of tugging each time the keys are hooked and unhooked, I fused some stabilizer to the back for support.

img_20160509_5099

The lining portion of the purse and the shoulder strap should go together quickly. I’m pretty excited about the whole thing and have a feeling I will make another one for myself.

Yesterday I posted a progress picture on Instagram and guess who commented? Um, Anna Graham, from Noodlehead. Looks like we are sewing buddies now. 😉

image

.What a great project this has been. I am going to have to find another fun sewalong/quiltalong type of activity after this. If you have a minute, check out Tami’s progress. Seeing the same pattern come together in two very different colorways is very interesting. They each look very unique.

Linking to Linky Tuesday, Let’s Bee Social and Sew Cute Tuesday! All links are found as always, at the top of the page, under Link Ups.

Craftsy Update:  In celebration of their 5th anniversary, Craftsy will hold a great sale of kits and supplies running May 12th through the 15th. Check it out here!

may craftsy

(I am a Craftsy affiliate and will receive a small payment for any sales that occur via my blog.)

The Saga Continues

Remember the tale of the quilter who needed a piece of velcro and her ensuing trips to Ben Franklins? As happened with “If You Give a Mouse a Cookie”, there is a sequel which must be shared. After the success of Laura Numeroff’s first book , the sequels began popping up with regularity. There was “If You Give a Moose a Muffin” and “If You Give a Pig a Pancake” among others.  Here is the next chapter to my story, If You Give a Quilter a Bargain.

At the end of the first chapter of this story, you might remember that this quilter had returned to Ben Franklin to pick up a piece of Allison Glass fabric to add to the pile being used to make a 241 totebag. While there, an amazing discovery was made where the whole Asuka line by Dear Stella was found on the $5.99 table. I thought that was where the story would end. But no, it was not to be.

Last week the May is for Maker’s challenge was brought to the forefront of the quilty blogger community and everyone was joyfully diving in to buy patterns designed by individual makers (as opposed to those working for large companies.) This blogger happens to love a good cause. Especially a cause that is supported by shopping.
In my related post last week, I stated that I would buy a pattern to use to make a quilt with the Dear Stella fabric. It took a lot of shopping to finally settle on the pattern I wanted to make. There are endless numbers of gorgeous patterns to be had on Etsy and Craftsy both. So many great designs that it was very hard to choose. I started looking at the blogs of my favorite quilters who also sold patterns. I did web searches. I went to my lovely Etsy shopping app and my Craftsy shopping app. Finally I had to just put away my iPad to let my brain settle down, knowing that once I did so, the right pattern would rise to the top of the frenzy.

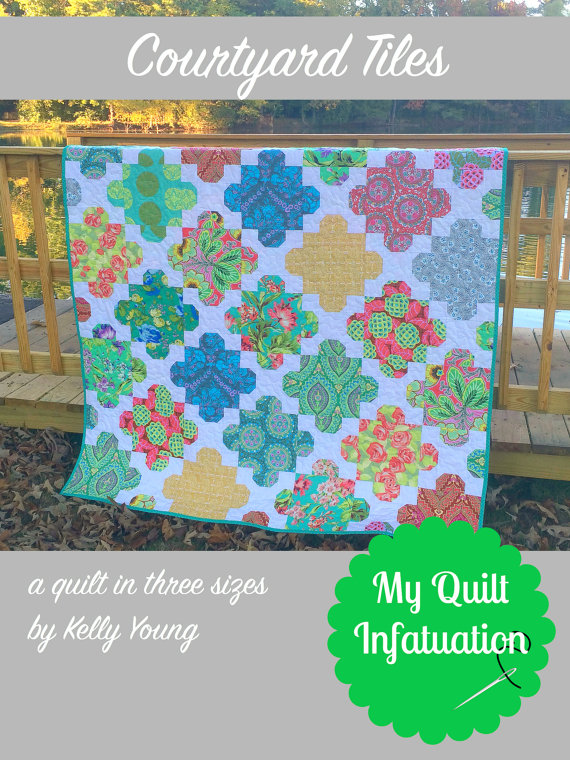
It did. Here it is; Courtyard Tiles by Kelly Young of My Quilt Infatuation. One of my parameters for choosing a pattern was that it have a large scale design because some of the Asuka pieces have large focus prints. Also, because I am making this for a queen size bed, I didn’t want to piece something too fussy with loads of points to match, angles to cut, etc.

courtyard tiles pattern

This pattern will be great from both angles – not a lot of fussy piecing, and plenty of room for the fabrics to shine. I love that the blocks give an impression of a curve but really they are pieced with rectangles and small triangles to create that curved look. Here is where the saga continues. Looking at the requirements for the queen size, I found I needed another 1.5 yards. Yep, I had to go back to Ben Franklin’s.

image

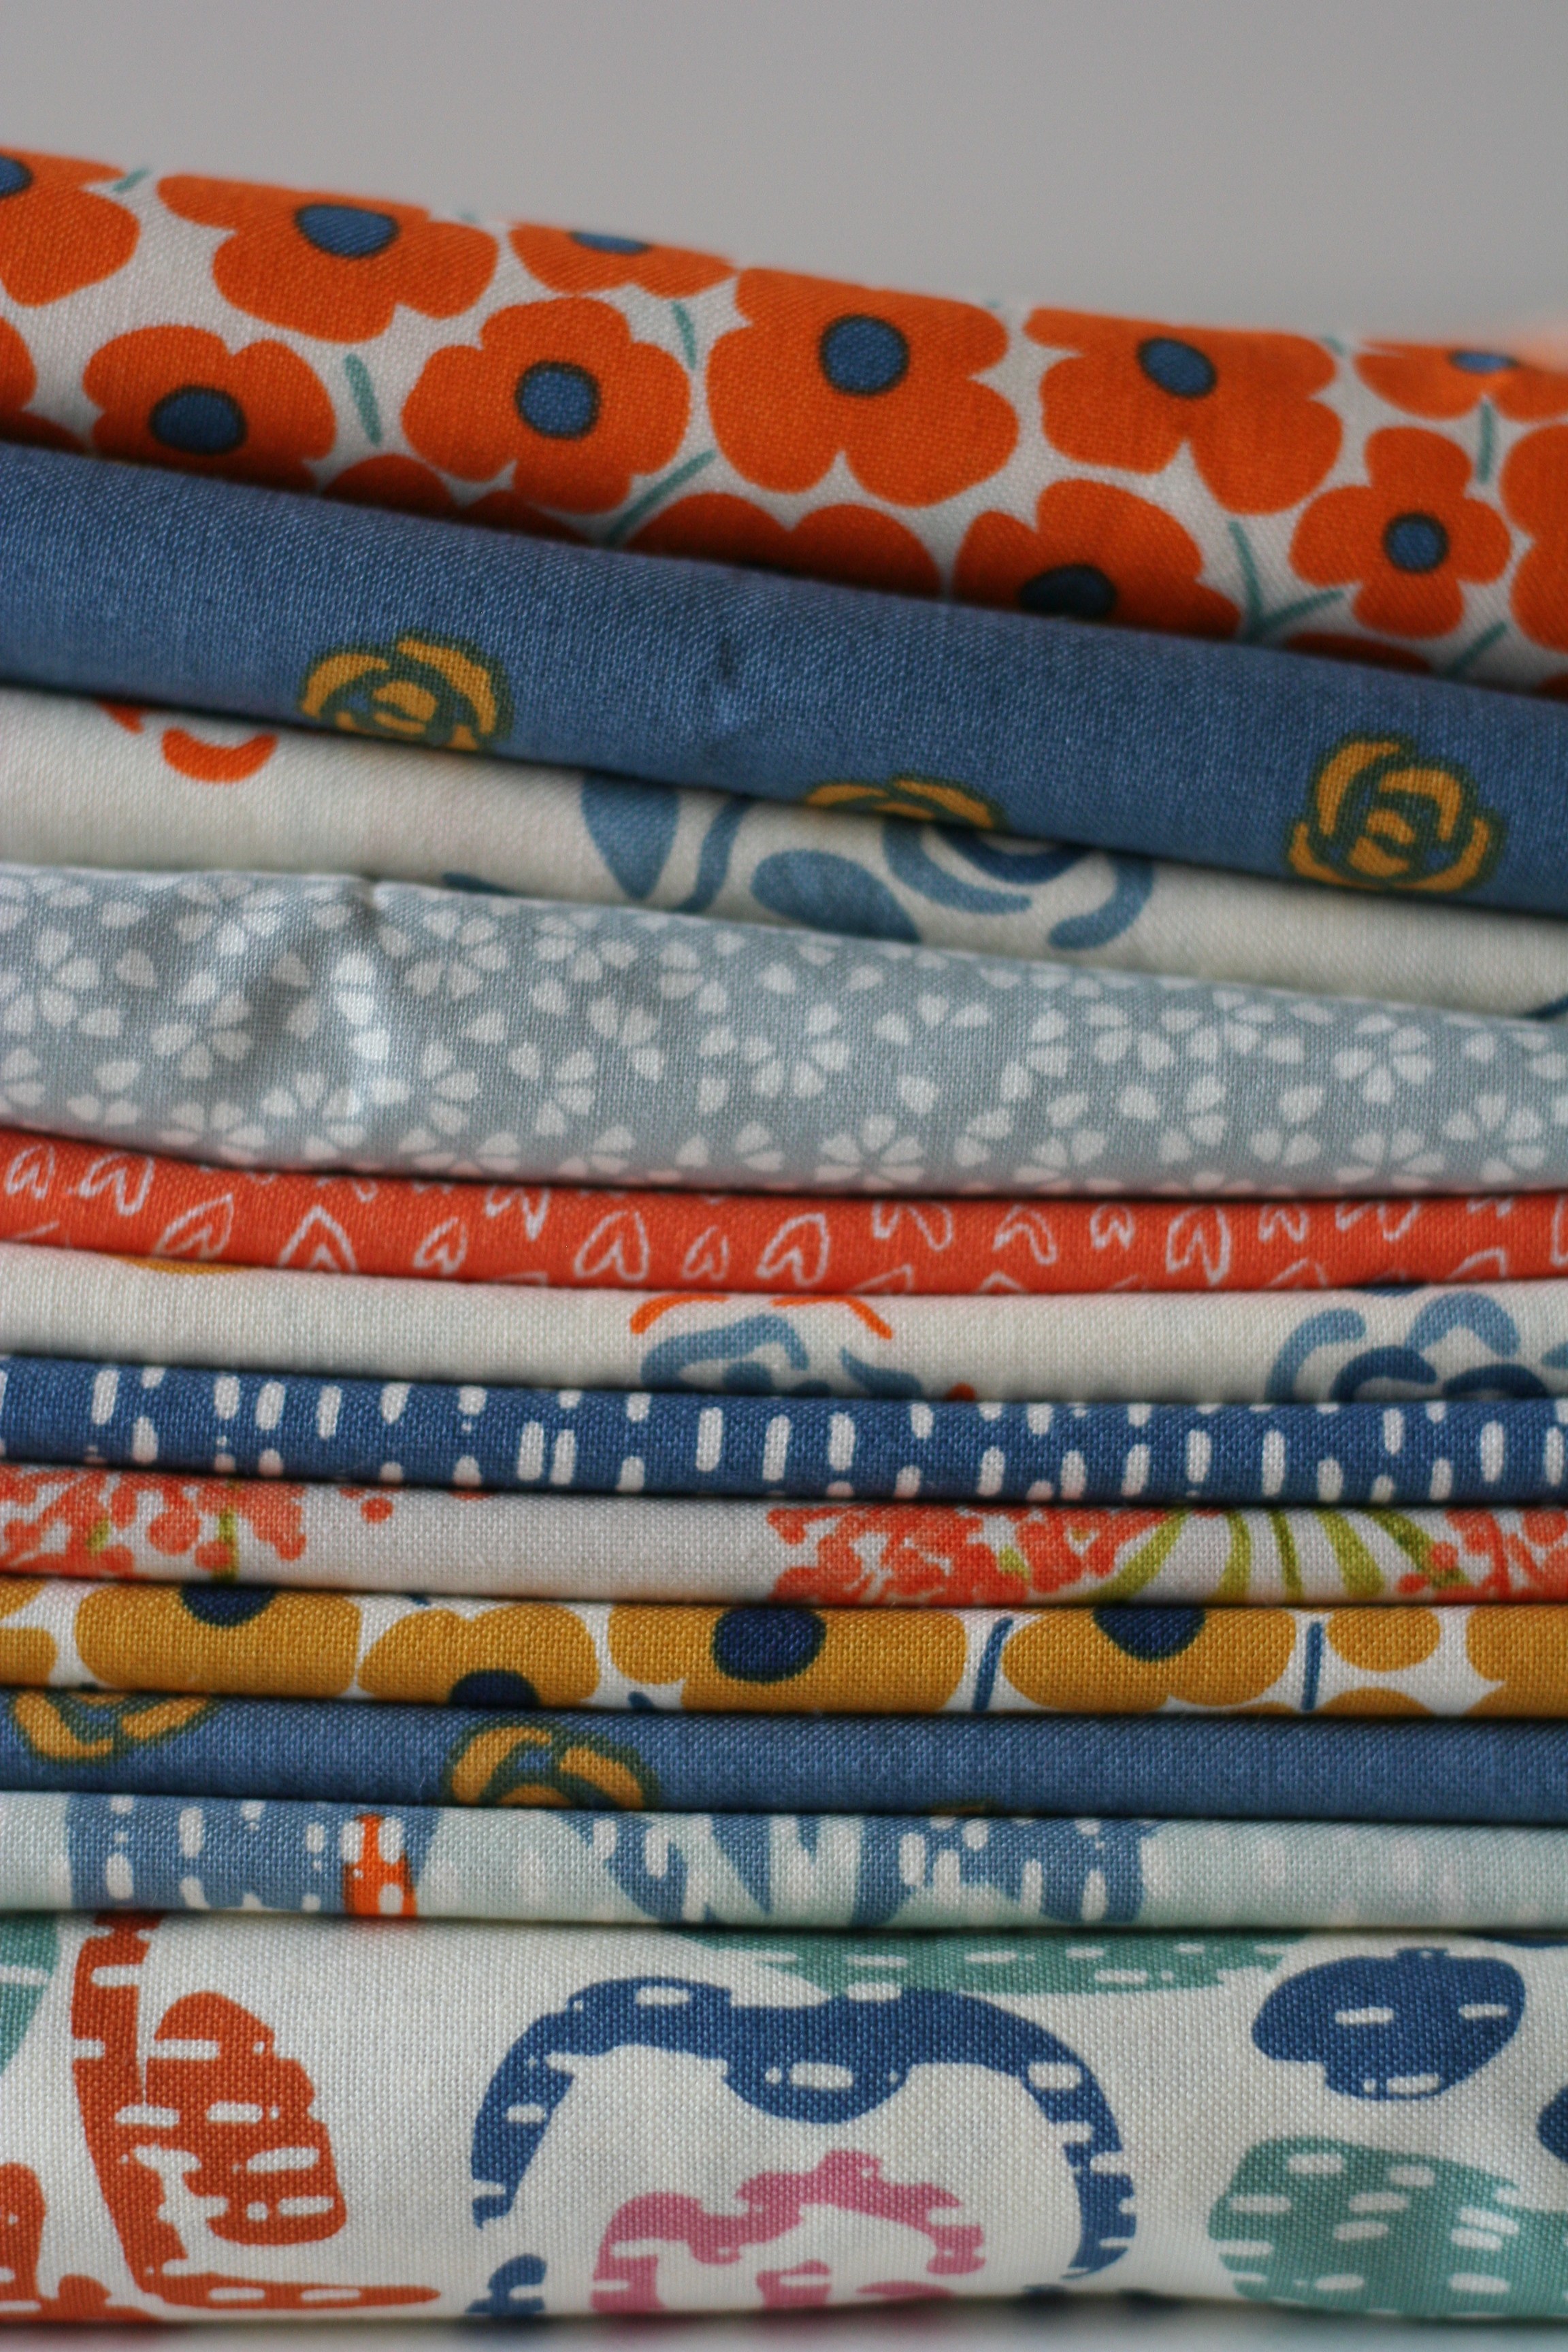
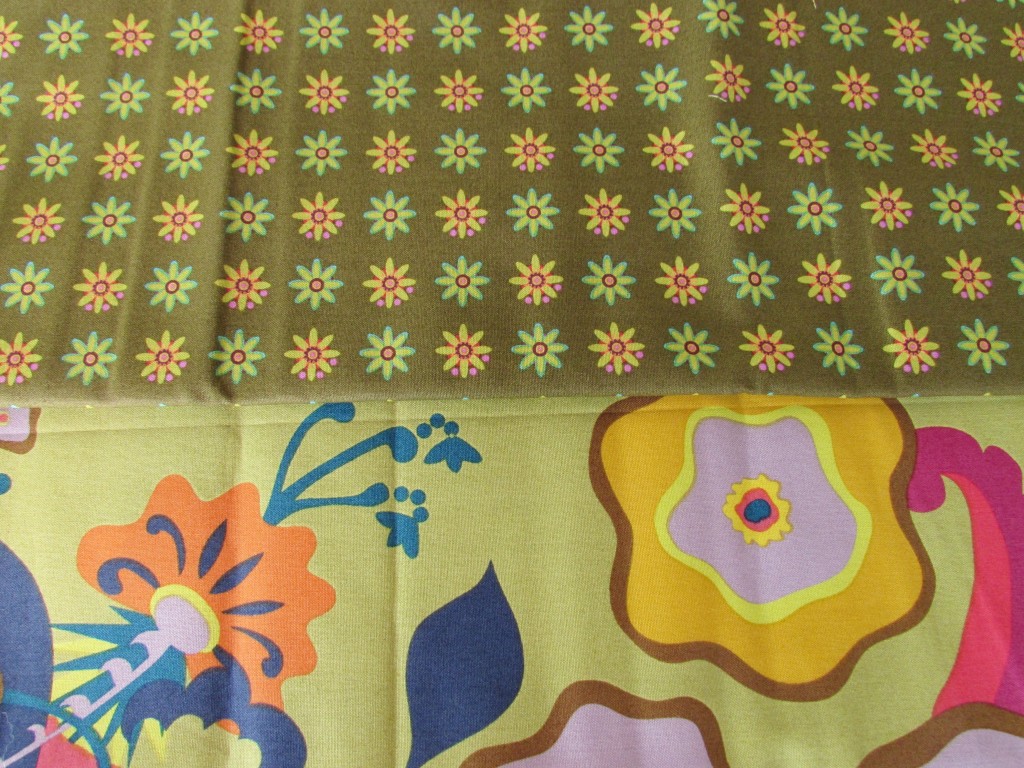
Fortunately for this shopper, there were still a few pieces of the Asuka line left. There were also a few pieces of Dear Stella that coordinated with the Asuka line. No longer were they all stacked together nice and neat. That’s ok – the thrill of the hunt makes it that much more satisfying. I started searching.

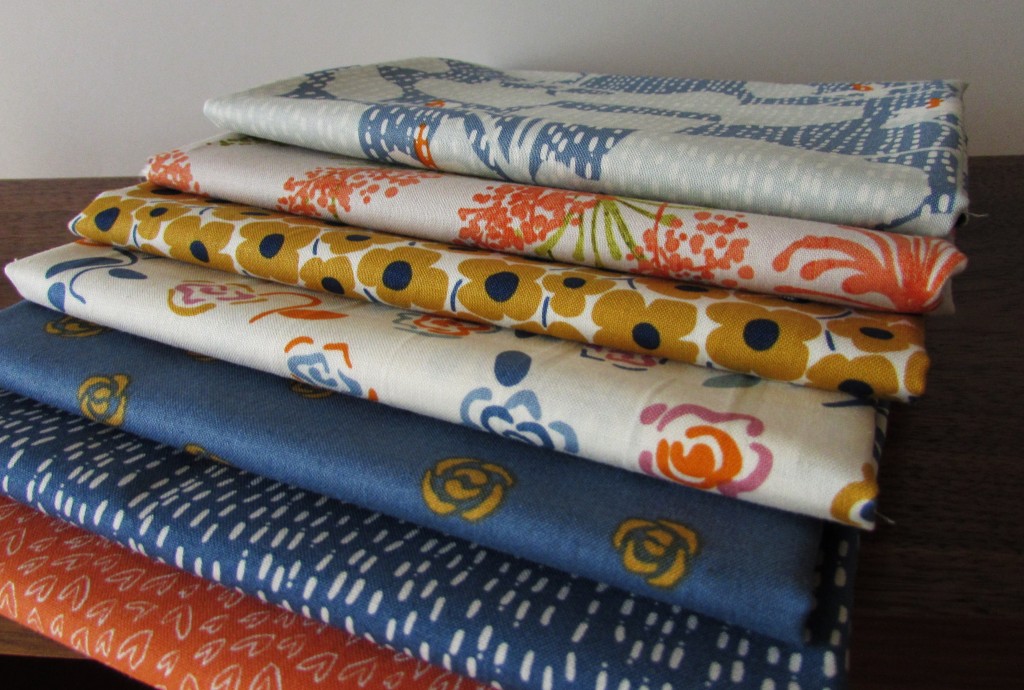
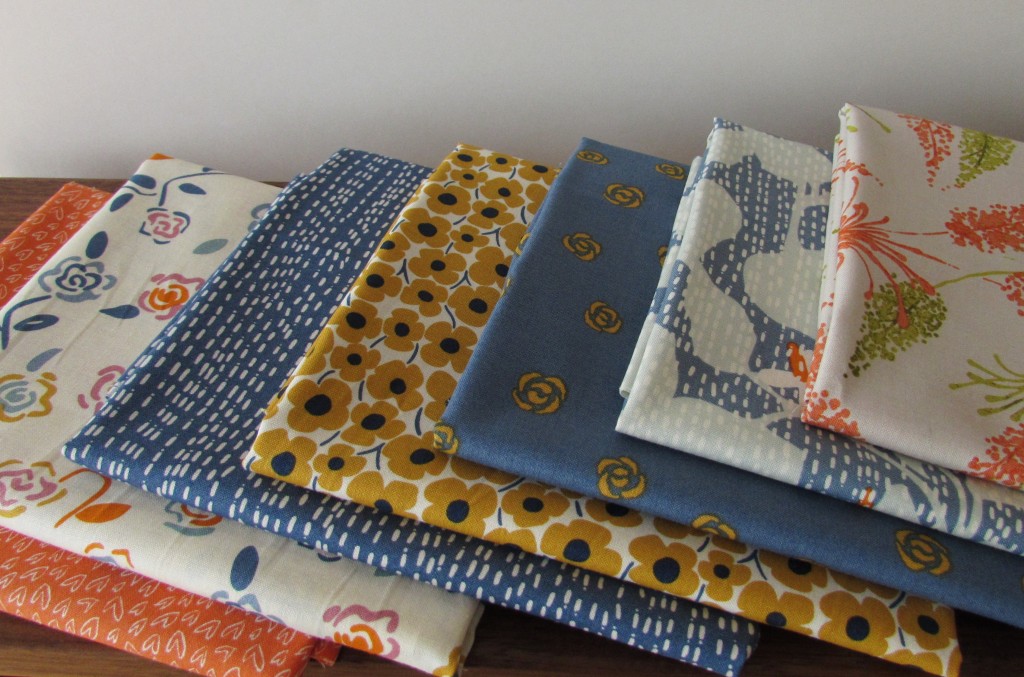
I found several pieces that I had not purchased during my last trip. The orange flowers with the blue centers, the larger scale print (on the bottom to the far left) and the gray dot (on the bottom, middle of the row). I also bought a bit more of two pieces that I already had.
image

I have enough of the print fabrics to begin piecing the quilt. I have not yet purchased the background fabric. I can’t decide what color I want to use.  Currently, the choice is between a very pale gray or a crisp white. My decision is complicated by the fact that some of these fabrics show a creamy white and others have a very crisp white. Oh, how I struggle with color! If you have any input, I would appreciate hearing your thoughts.

Of course, I would be lying if I said this was the end of my story. Once the decision is made about the background fabric, there is still the backing fabric and the binding to be selected. No, this story has only just begun. I am excited to get going on it, but first I need to finish up a few projects that are close to completion.

Linking to Sunday Stash and Main Crush Monday. (You’ll find these links at the top of the page, under Link Ups.)


Mid-week WIP Update

Lots of projects in various stages in my sewing room this week. It is actually kind of fun to have multiple things going on. I sew a while, cut for a bit, practice a little FMQ – none of it feels tedious because I am moving back and forth between projects.

My main sewing machine is being very cranky right now so I am sewing on my smaller machine. I love this machine though – the tension is not sensitive and it sews like a little work horse. Much like The Little Engine That Could, this machine just keeps going (I think I can, I think I can.) I really miss the needle down feature and the thread cutter on my bigger machine though. Makes such a difference when I am sewing for a long period of time.

Anyway…  Here is what’s going on:

I am working on my 241 tote bag that I mentioned in this post last week. This project has become so much fun because after reading that post, Tami from Sew Much for Free Time commented that she was also going to make a 241 tote. We did a bit of emailing back and forth and decided we would have our own little sew along. After working on my Stepping Stones quilt though the quilt along at Inquiring Quilter, I found I really enjoy the social aspect of the project. I love seeing everyone’s progress, having others to ask questions and get input, and seeing the fabric choices and how much that changes the pattern that we are all using. I think working on this tote with Tami will be the same. We set up a few deadlines for progress and hope to finish up together. It is low key though. If life gets in the way, so be it. We are just enjoying our virtual time sewing together! If you want to see Tami’s progress, hop over.  We are just getting started. Anyone that wants to, is more than welcome to join us. Leave me a comment if you want more info.

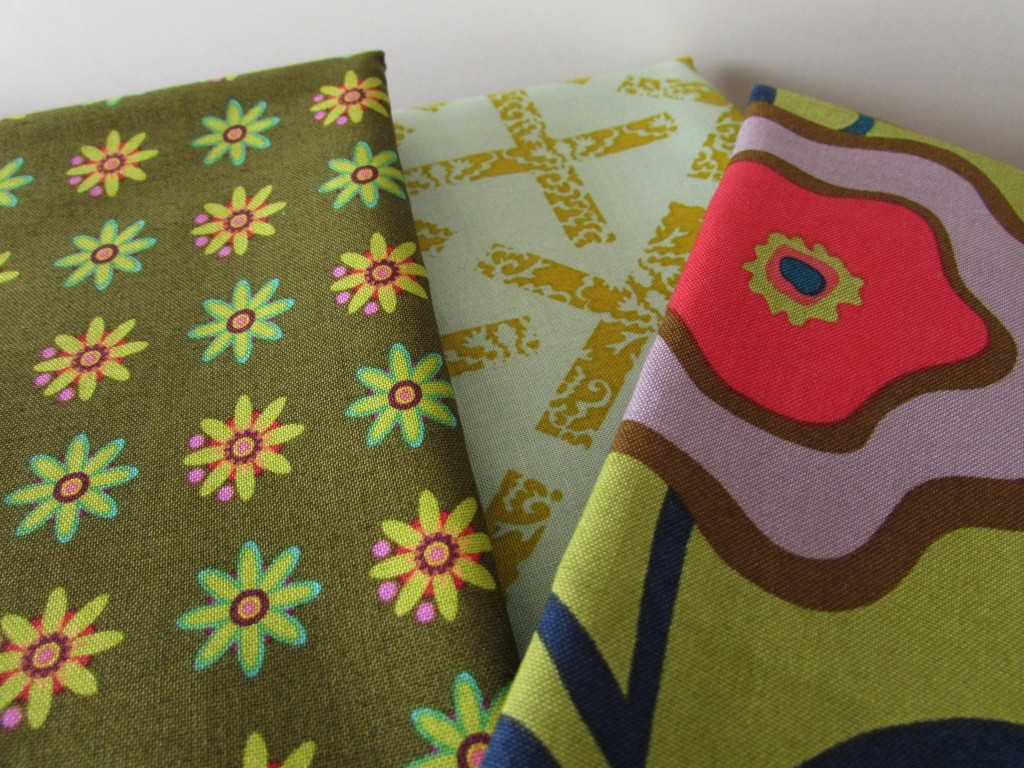
By today, we are both aiming to have our bags cut out and pieces prepared. I spent yesterday morning prepping everything. I plan on using these Allison Glass fabrics.

img_20160423_4915

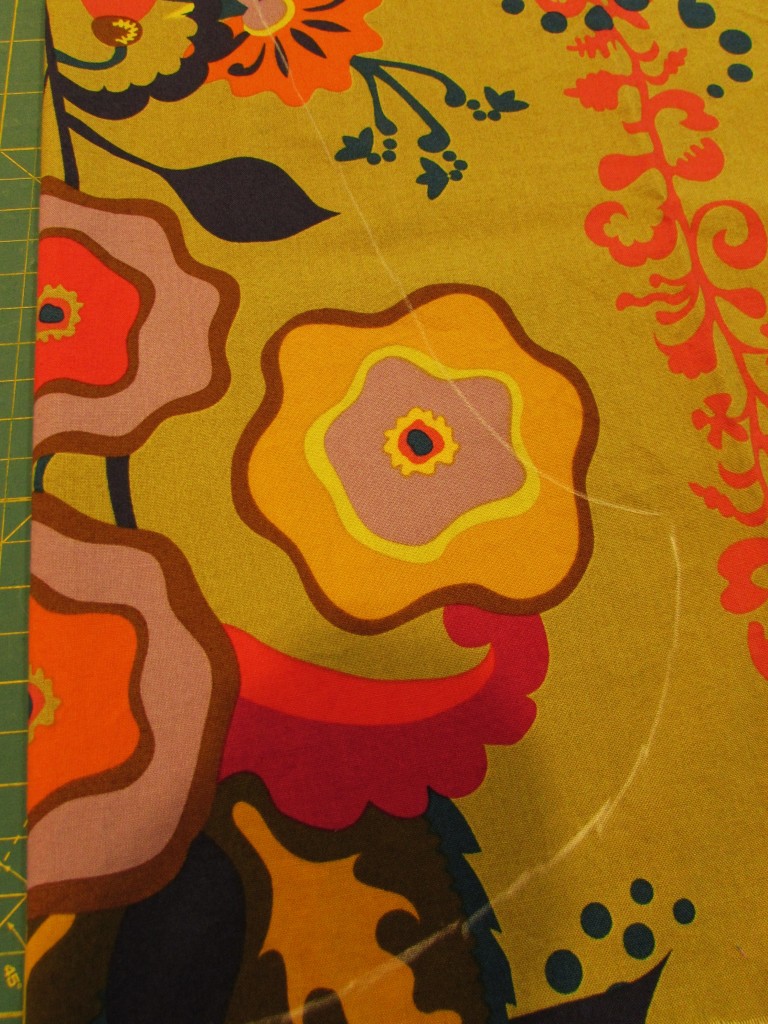
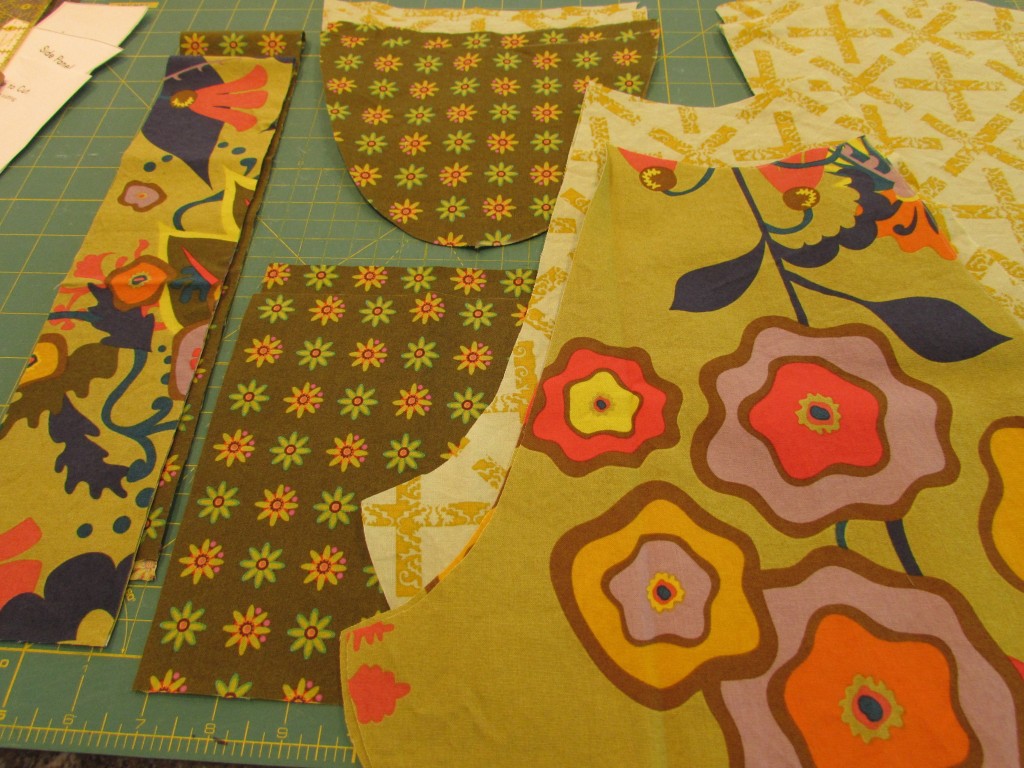
The pattern seems very straight forward so I doubt there will be much difficulty makijng this bag. I traced my pieces with a chalk marker and cut from there. Printing the pieces on regular printer paper made for thick pieces. I didn’t want to pin and cut them because there might be some inaccuracy. Tracing the pieces was quick. (When I was cutting pieces, I took the pictures under the kitchen lights which distorts the color.)

img_20160503_5013

Once the pieces were cut, I fused the interfacing to the outer pieces.

img_20160503_5015

I’m really excited about this project. It is going to be perfect for my niece’s birthday gift.

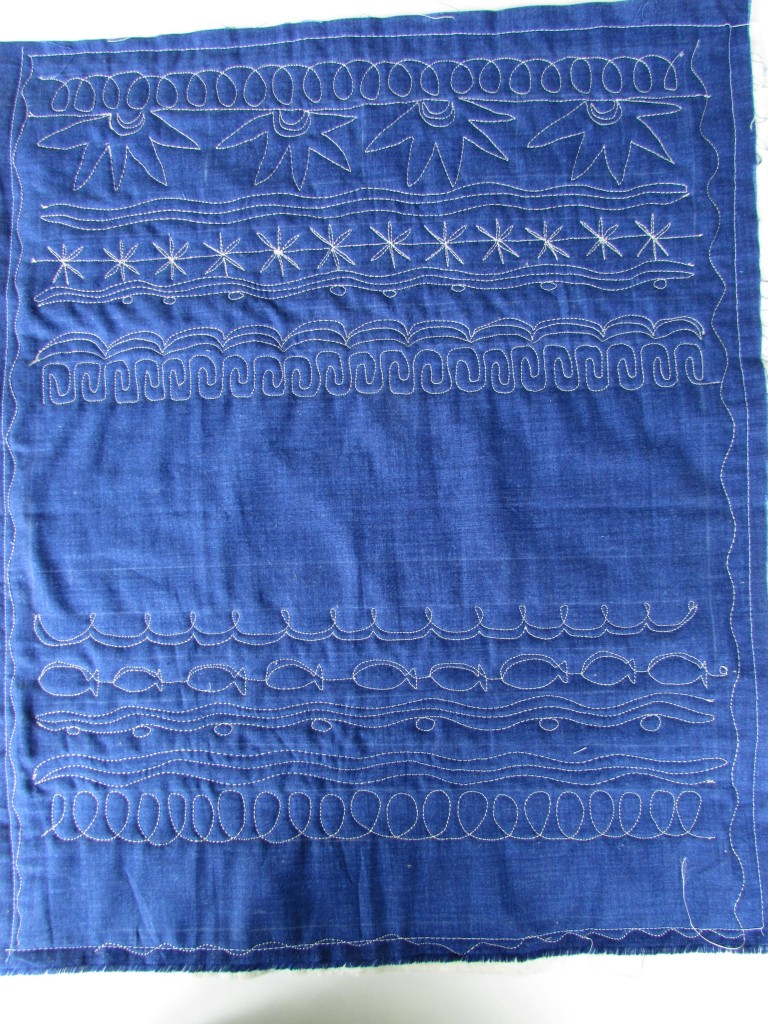
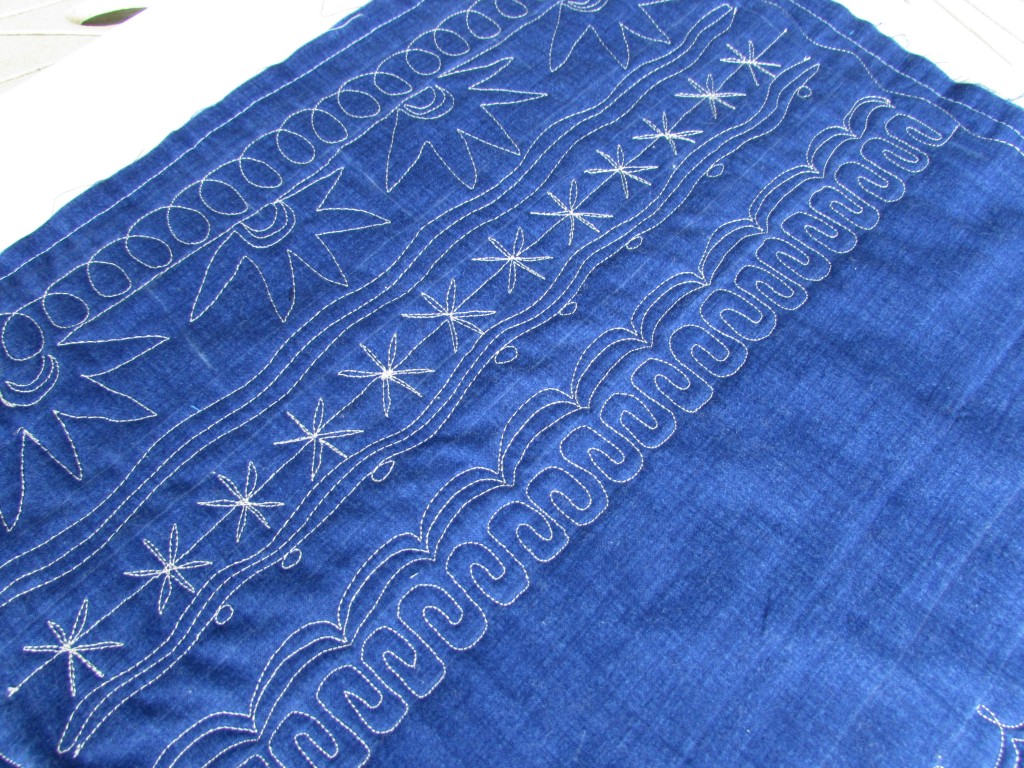
Besides working on prepping the bag, I also did some FMQ on the Mystery quilt along that Lori Kenedy is hosting over at the Inbox Jaunt. This week we were instructed to quilt little stars and suns. Lori calls them Spirograph Suns though we did a simplified version of them. The motif is so fun and you’ll find the tutorial here.

img_20160503_5020

We only have a few more sections to quilt and I think I will be a little sad to see this finish up. I love that the structure of this QAL only requires I quilt two lines each week. Not time consuming but it forces me to practice two new motifs each week.  (Also, take a look at my fish.  I feel like I stitched my fishies going upstream. Shouldn’t they should swim from left to right…. I must have gotten turned around (not all that unusual for this quilter.) 😉

img_20160503_5022

My Stepping Stones quilt is basted and ready to be quilted. I am looking forward to the weekly post tomorrow as she plans to give some ideas on possible quilting motifs for this pattern. Choosing how I will quilt something is still a challenge for me but maybe I will be inspired by Jennifer’s post tomorrow.

Finally, I am working on a mini that I will share later this week. It is going to be cute though. Here is a sneak peek.

image

I am going for an old-fashioned, vintage feel and I think it is coming together well.

OK – what do you have going on in your sewing room? i would love to hear.

Linking this post up with all sorts of fun sites. Take a look at the list. You’ll find it at the top of the page, under Link Ups.

**************************************************************************

Just in case you need an idea for Mother’s Day gifts (for a friend, your mom, even yourself  – even if you aren’t a mom!)  Craftsy has awesome classes and I can’t imagine a crafty mom who wouldn’t love one (or two, or three…) Classes last longer than flowers and they are way more affordable! Click here to check it out.

MothersDay (2)Craftsy

Pattern Testing

This week we have been reading and talking about the idea of supporting all of the Indie pattern designers that are working so hard to design and release original patterns. Besides purchasing these lovely patterns we can also offer our time as pattern testers.  Two weeks ago I was reading a couple of posts by Mihaela of A Beautiful Day. She blogs from Romania  (don’t you love the ease with which we are able to befriend quilters from all over through this blogosphere.)  Mihaela is working on a new pattern she calls Urban Folk Quilt. In one of her posts she asked for some testers that would help to verify that her English all translates correctly. I happily volunteered. It is hard enough to design patterns, figure out the measurements, draw up the instructions etc. But to do this in a language that is not your primary one must be very challenging.

You can be sure, language isn’t an issue for Mihaela. Her English is just wonderful and I did not  find even one problem with her pattern and/or the translation to English. She includes every detail of instruction and sometimes more than one would expect. She discusses how to confirm that your blocks line up correctly, how to properly bind a quilt, and suggests ways to avoid block distortion. Overall, this pattern is complete and a great tool for the beginning quilter. I loved making it and would happily make another (and probably will!)

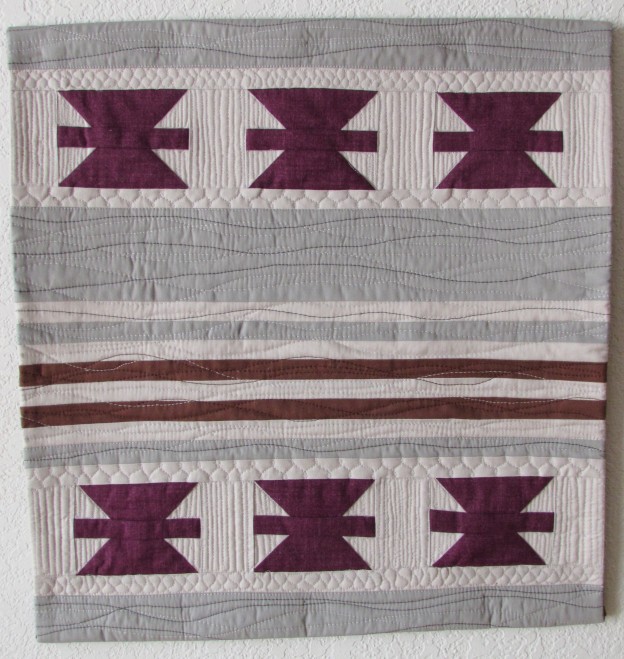
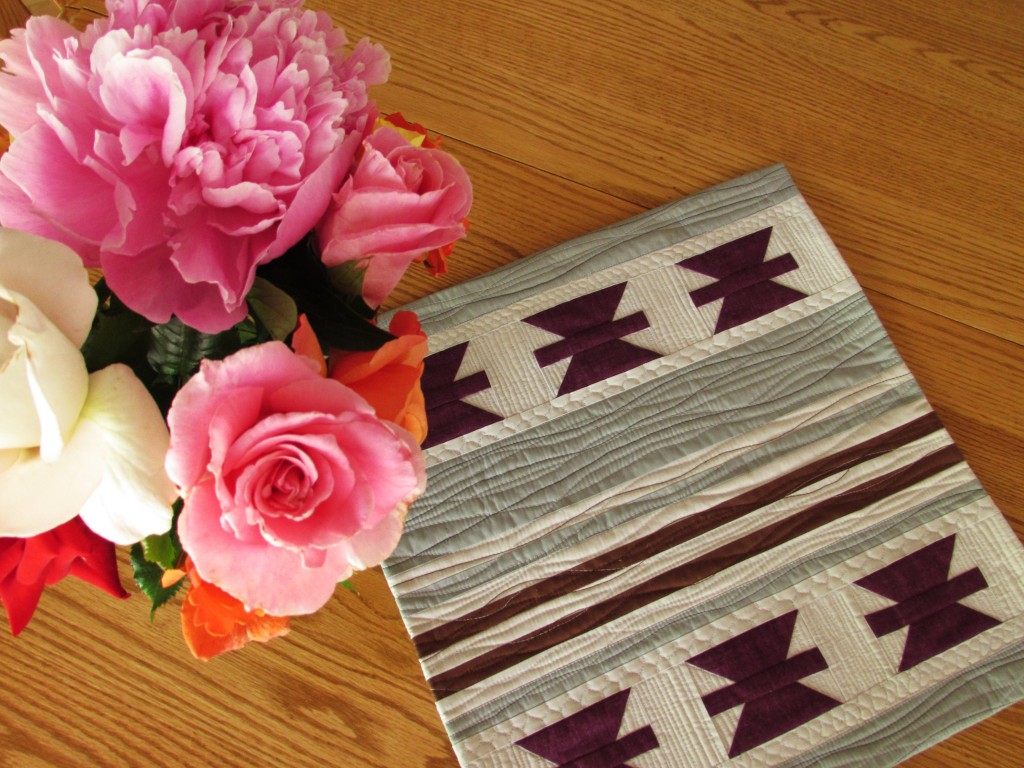
img_20160501_5006

For this project, I chose colors that would work in our master bathroom.  There are lots of bare walls in there. Bathrooms don’t rate very high on my need-to-decorate scale. Especially the master – who sees it besides Ray and I? I decided to make something to spruce it up. These colors work wonderfully.

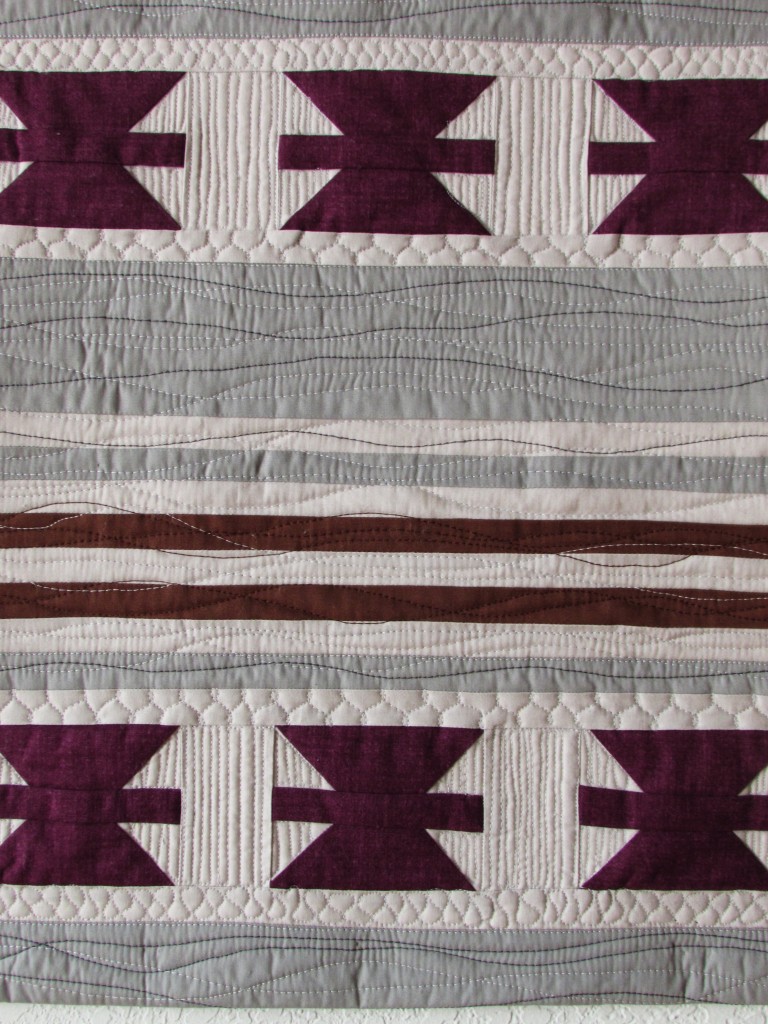
I had so much fun quilting this. Finishing at 16 1/2″ squared, it was small enough to feel secure in trying new things.  This quilt design feels a bit southwestern to me. It reminds me of a couple of throws that Ray bought some years ago on a trip to Mexico.  This inspired me to quilt wavy lines, in three colors, across the horizontal stripes. Using the dark and light gray as well as the brown gives nice texture to the stripes.

img_20160501_5002

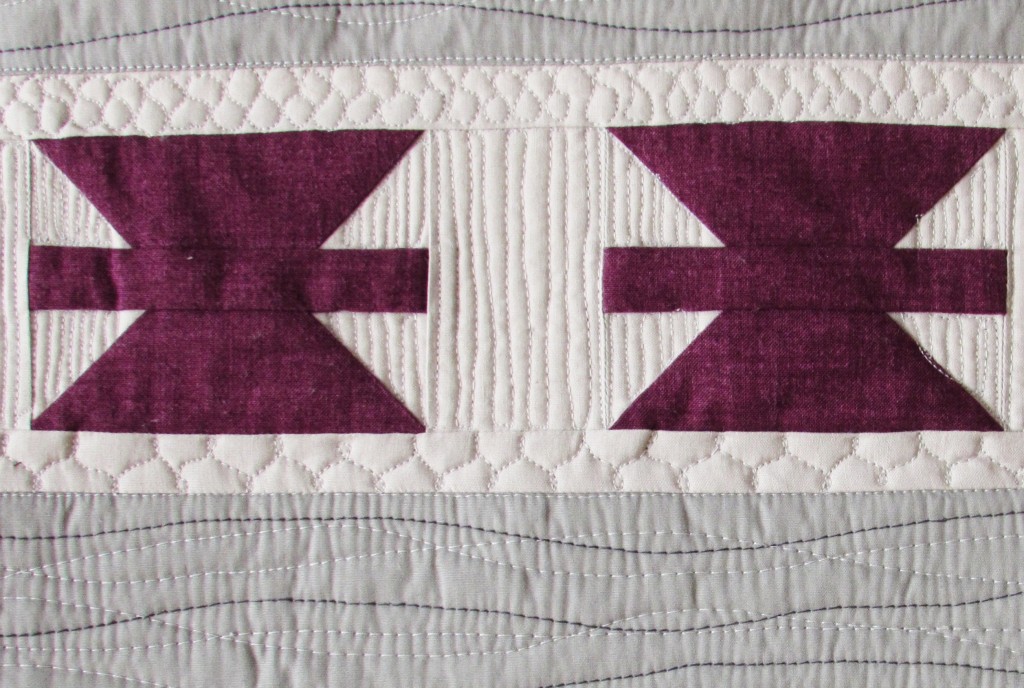
Within the two rows of pieced blocks I used matchstick quilting. Having never quilted these narrow stripes before, I tried quilting with my darning/FMQ foot and with the walking foot.

img_20160501_5001

Both work – the walking foot creates much straighter lines but oh my, it was taking forever! Having to stop and turn the quilt at each end was more than annoying. If it was a larger space being quilted, I would try the walking foot again. After a short stint of this though, I switched to my darning foot and FMQ’d the lines. They have a bit of an organic wobble to them but it still look ok. I love how the purple blocks have a bit of a puffiness to them from the tight quilting that surrounds them. Above and below each pieced row, I did some teeny tiny FMQ. Those rows are only one inch tall – it was a challenge to keep the movement flowing in such a small space.

What a fun project this was. Testing this pattern was an easy way to help another quilter out. There are lots of opportunities to test patterns. Be sure that you can meet the timeframe of the pattern designer though. Most likely she is relying on you to complete the task by a certain date so she can release the pattern. Speaking of which, Mihaela is releasing this pattern today!   Check it out and show her some quilting love. It would make a great mini, table topper, or you could use it as a pillow cover if you add the backing to it.

Linking to several of my favorites, including Freemotion Mavericks, Finish it up Friday, and Off the Wall Fridays. Links to all of these are available at the top of the page, under Link Ups.

*****************************************************************************

Just in case you need an idea for Mother’s Day gifts (for a friend, your mom, yourself  – even if you aren’t a mom!)  Craftsy has awesome classes and I can’t imagine a crafty mom who wouldn’t love one (or two, or three…) Classes last longer than flowers and they are way more affordable! Click here to check it out.

MothersDay (2)Craftsy

(Always reminding you that I am a Craftsy affiliate which means if you click through from my site and make a purchase, I will be compensated.)

May is for Makers


mayisformakersbutton-1(pp_w225_h225)

The idea of supporting all of the Indie Designers is being (understandably) touted heavily among quilting blogs this week. It started with a post by Lindsey Rhodes which has everyone thinking about the balance of expecting/wanting everything for free via the internet and supporting the amazing people that spend so much time working on patterns and are trying to eek out a bit of finanacial return on their efforts. I am as guilty as the next maker for using the free ideas (which are endlessly abundant) and passing on actually buying patterns. It isn’t a question of fairness or honesty. I am not using ideas that are not published for other’s use. However, I have a huge appreciation for the work that goes into the published patterns. Especially after writing my first tutorials — those take such a long time. But a pattern for a quilt is a much more difficult undertaking.

In celebration of May Makers, and as a show of my gratitude for all of the knowledge I have gained for not a penny,  I will purchase a couple of patterns for my upcoming projects. I have my amazing Dear Stella fabric sitting there waiting for me to decide what to do with it. I plan to shop the patterns and find the perfect one for that gorgeous stack of pretty. I hope this might inspire one or two readers to go out and shop the talented makers that are out there. Craftsy has lovely, well-written patterns for sale and most all of your favorite quilters have a shop linking from their blog. Show them some love.

In other news, my fabric purchasing self-control was severely put to the test yesterday!  I worked at the “Country Store” during our local quilt show. If you are unfamiliar, the Country Store is a place where guild members can offer up items they no long want and sell them with some of the proceeds going to the guild and some to the seller. Oh my goodness, the deals that were available!! It was so tempting to buy fabric. I was working the checkout line and was drooling over the fabric that people were buying. Fat quarters for $1.00, or less! Kits that were purchased and never made, items that were completed and no longer wanted, yardage and notions galore. So much temptataion. I do NOT need fabric right now. You know that as well as I do! I kept my drooling to myself and used all of my willpower to come home having spent only $2.50. 🙂

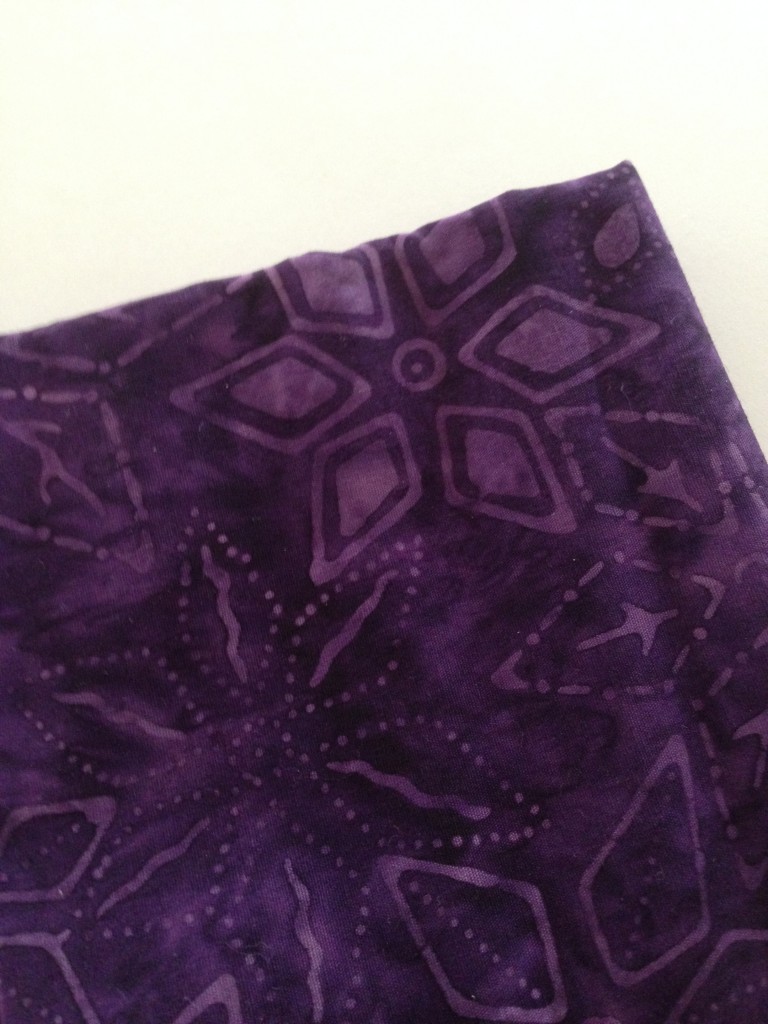
I bought one purple batik fat quarter for all of 50 cents. My purple stash is depleted after making my scrappy projects for the month of March. One fat quarter doesn’t restore the scrap bin, but I don’t have any purple projects in the making right now so it’s fine.

purple

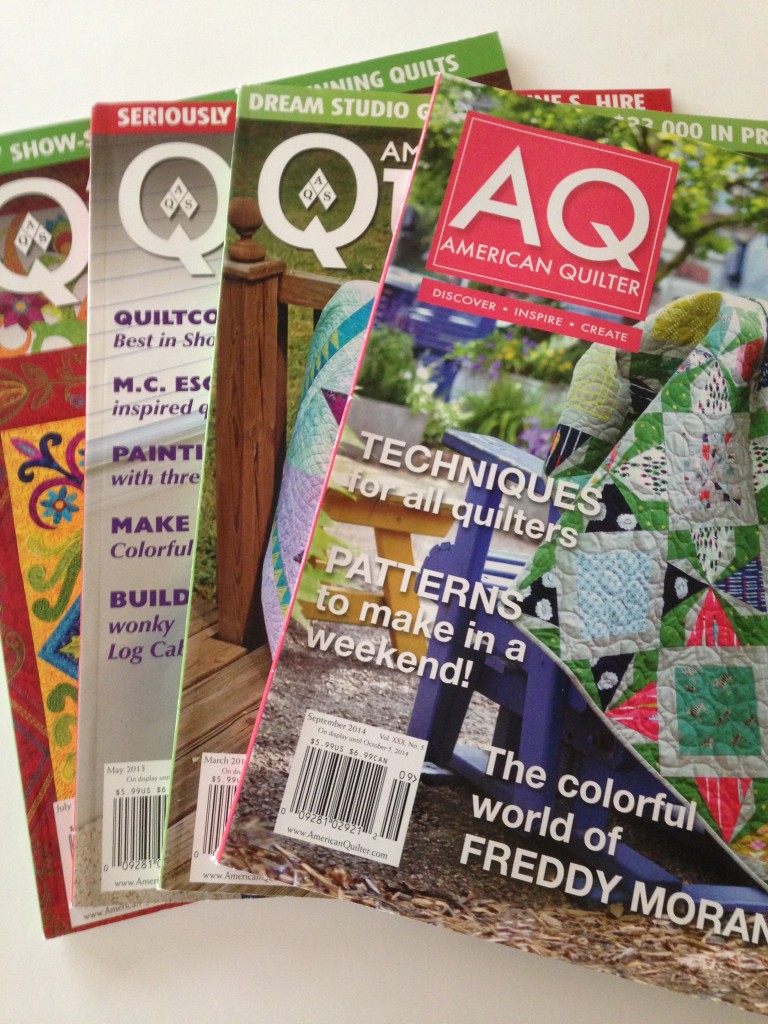
I bought this stack or 2013/14 American Quilter magazines for $2.00 I LOVE quilting magazines but the budget only goes so far. These will be read cover to cover – numerous times each! I think American Quilter has very good articles on the artistic  side of modern quilting. Plus there are tutorials on FMQ from my favorite, Lori Kennedy of The Inbox Jaunt. In keeping with my recycling philosophy, I will pass these along to a quilty friend or two when I am done with them.

magazine

It was hard to pass up all of the bargains yesterday but just because it is ‘only a few dollars’ or ‘nearly free’ doesn’t mean I need to add it to the collections of fabric which overflow from my closet. It becomes almost overwhelming!

Time to go search for the perfect pattern to use when I start my Dear Stella project!

Linking to Main Crush Monday and Sunday Stash. Links to both are available at the top of the page, under Link Ups.

Stepping Stones Quilt

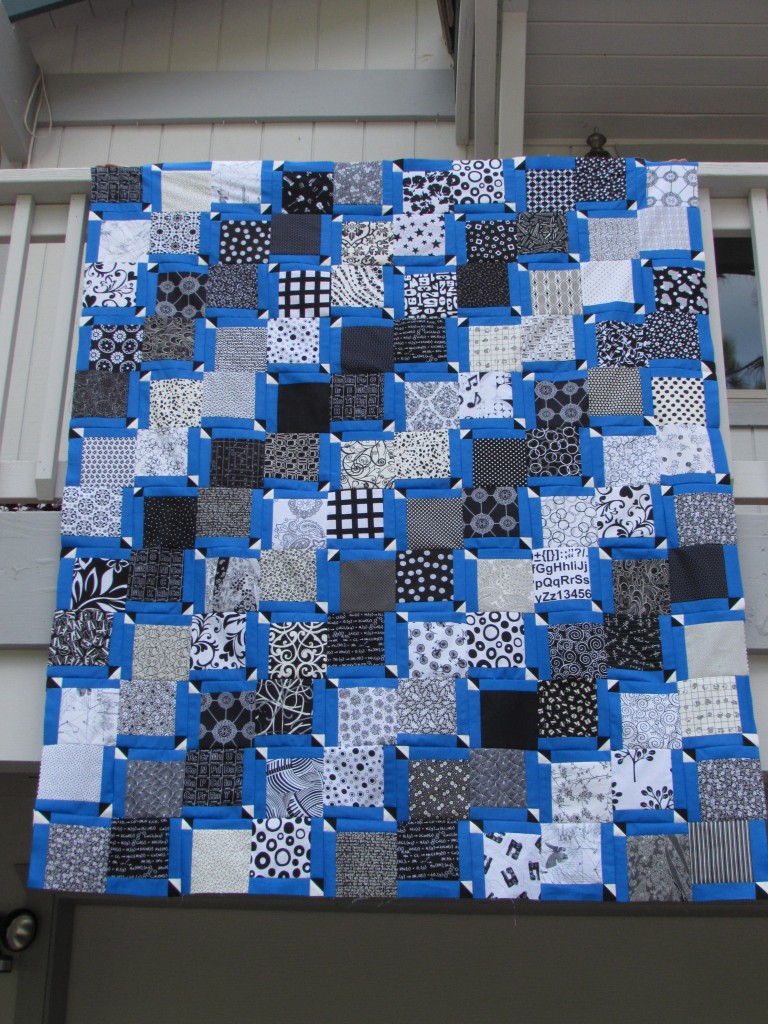
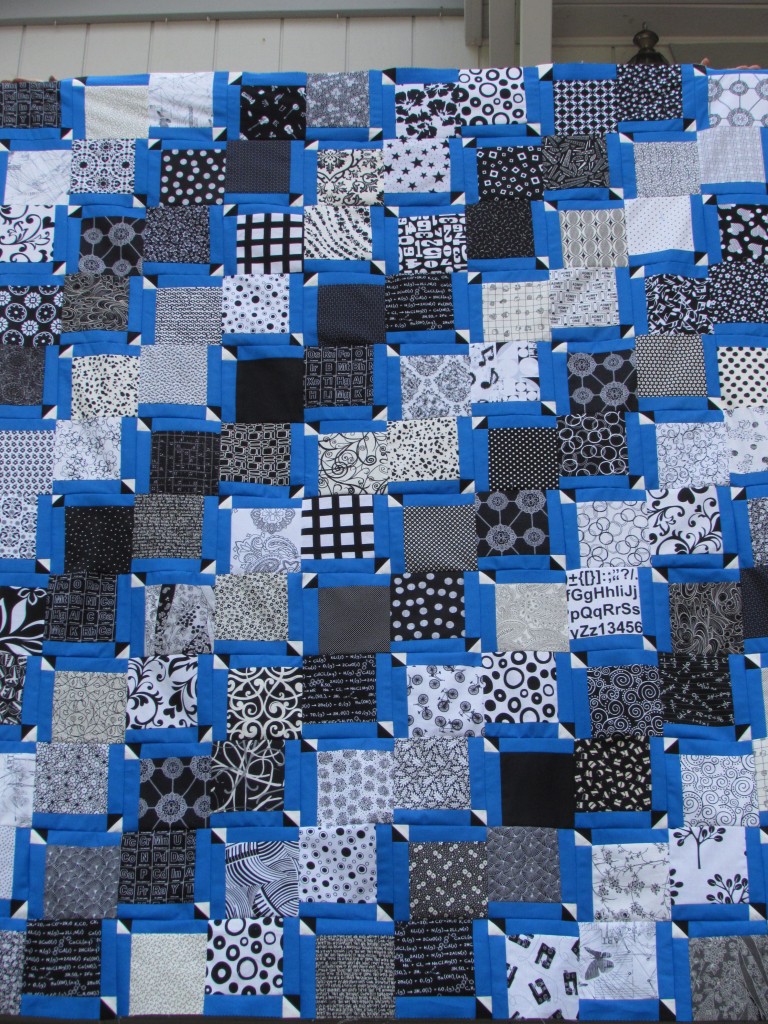
I am so excited about the progress made on my Stepping Stones quilt. I have been following along with Jennifer’s quilt along over at The Inquiring Quilter.  Jennifer did an excellent job with all of the explanations which made this a very fun project. The Stepping Stones pattern is simple which made the piecing quite easy. It was the number of blocks and tiny HST’s that took a while! Remember I chose to use a collection of black and white charm squares that I collected over the past couple of years. I chose a cobalt blue to trim the blocks with. It came together just as I had hoped!

img_20160424_4937

I made 143 blocks but only used 132 of them. Once I started playing with the layout, I decided that I didn’t want it quite as big as I had thought. I am sure I will be able to use the extra blocks for something fun. Laying out the blocks was a challenge. I wanted to be sure that the stepping stone effect was dramatic so I divided my blocks into light and dark values. There were many that were in between, in the medium value pile so to speak. It would have been good to have a few more in the darker shades. At any rate, playing with this number of blocks was a little crazy making.

image

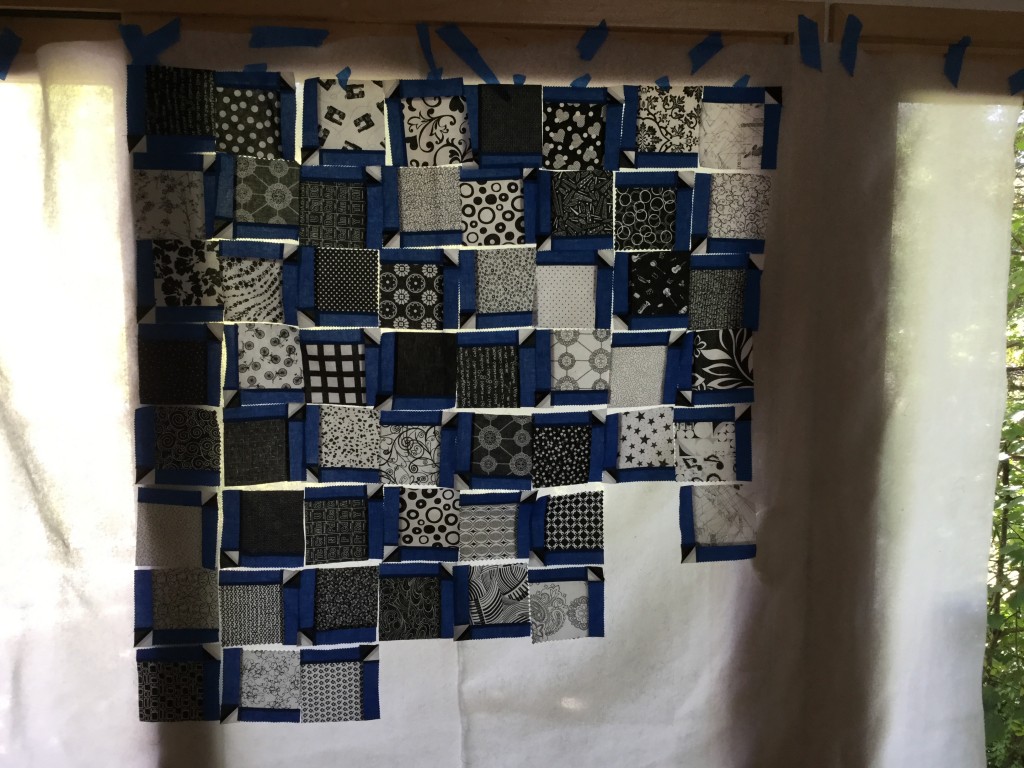
My design wall is small so it was of no help here. Because I really wanted to lay this out so I could look at it straight ahead, I decided to take a huge piece of polyester batting that I had and tape it to a wall for use as a design board. Hmmm… this was problematic in that I don’t have a lot of empty wall space. We have lots and lots of windows in our house. Hoping for the best, I taped the batting up over a window and began to play with the blocks.

image

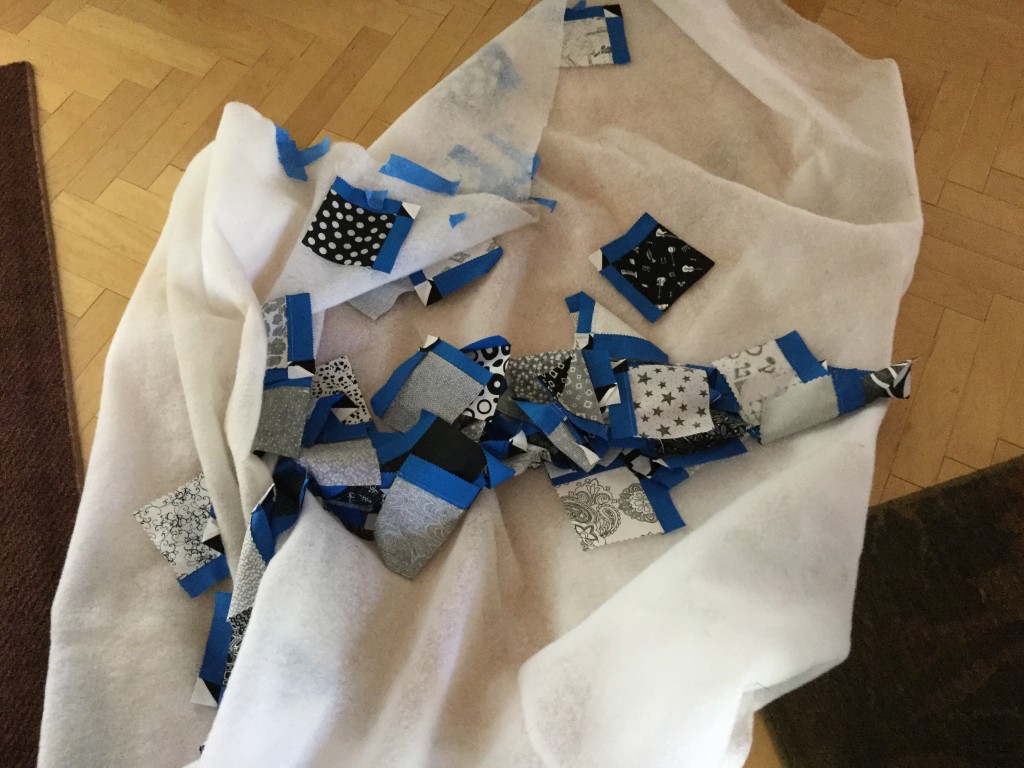
Let’s just say, things didn’t go well. Not at all! I had taped the batting to the moulding around the windows which left too much space between the batting and the window. When I put a square up, the motion of gently pressing it to the batting invariably caused one (or many) of the other blocks to flutter off.  Also, using poly batting was a mistake. It doesn’t stick as well as normal batting (like Warm and Natural).  Jeez! It was no time before this happened.

image

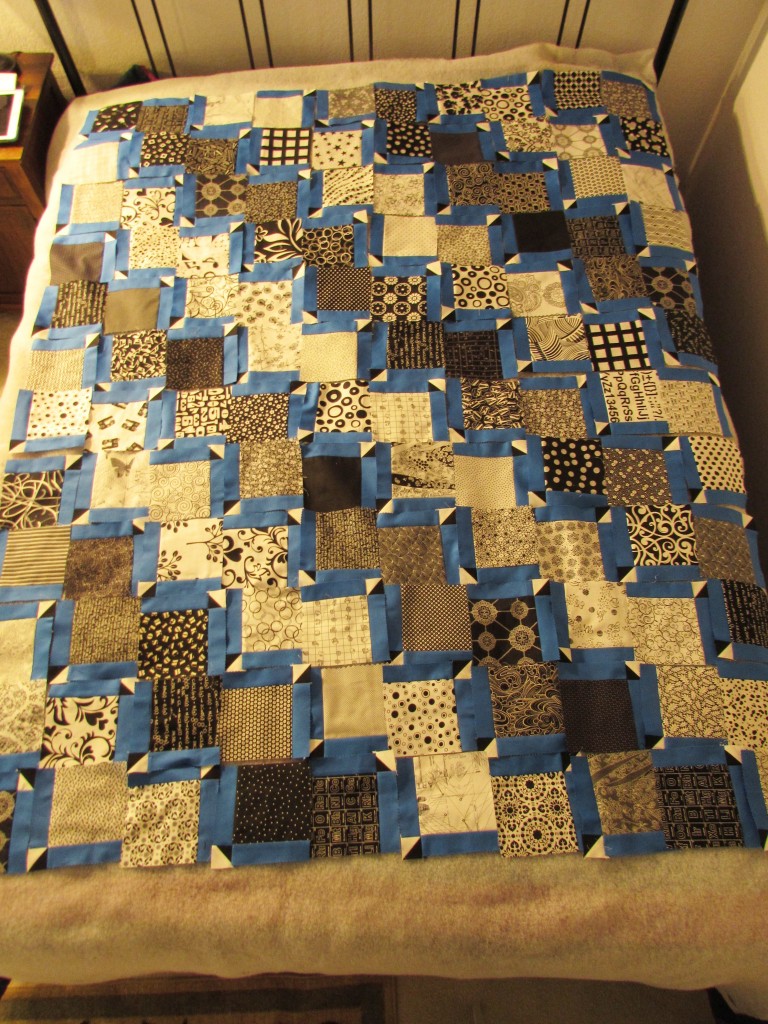
Everything came tumbling down. I gave in and went to lay it out on the guest bed. I have mentioned before that my spatial perception is hugely challenged. For the most part, I am unable visualize how something will turn out. I need to lay it down and keep playing until it works.  This was the next challenge in the process.  I used some cool text prints in this quilt and I wanted them to be placed in the same direction so all of the text read properly (e.g. not sideways or upside down). Seems like this should have been easy…. not so much. Can you see the text prints that are all going sideways here?

img_20160420_4878

I laid it out numerous times with the steps angling in one direction but each time, the text prints were sideways. Finally it made sense to me that all of the blocks had to angle in the opposite direction for the text prints to place correctly. So I picked up the blocks and reversed the placement which set the text blocks in the correct direction. It took a total of four attempts before I got the layout to work. A lesson in patience, for sure. At one point I was groaning and grumbling while working on this. Ray passed by and muttered something like, “how nice that you have such a satisfying hobby”.  😉

img_20160424_4936

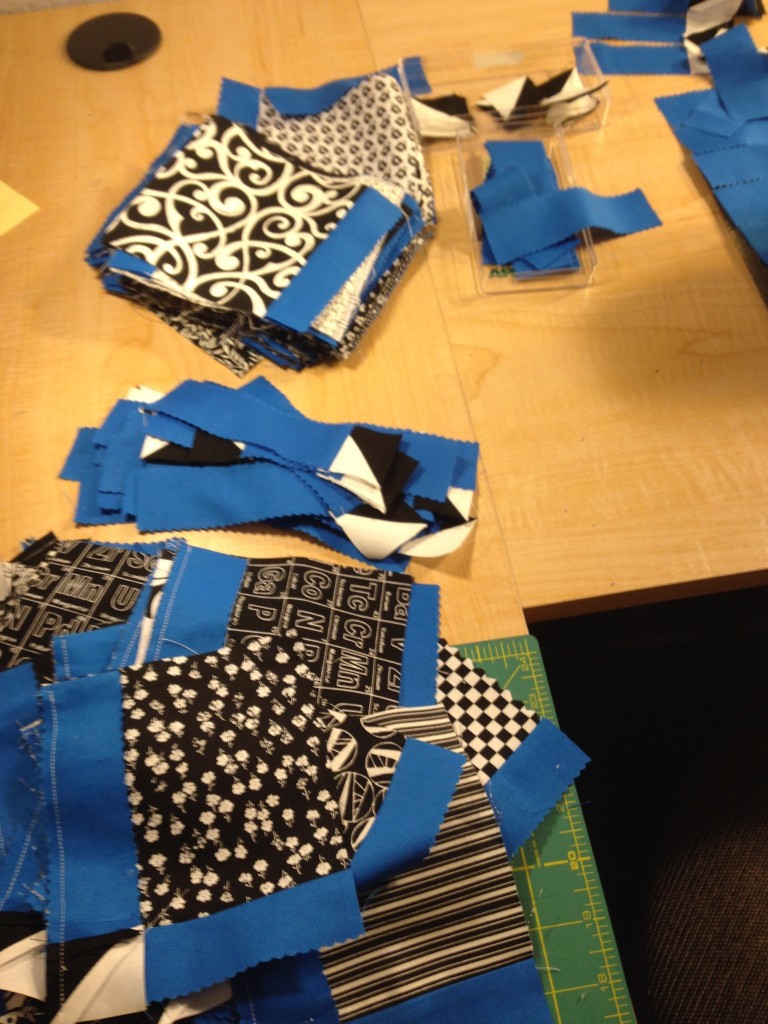
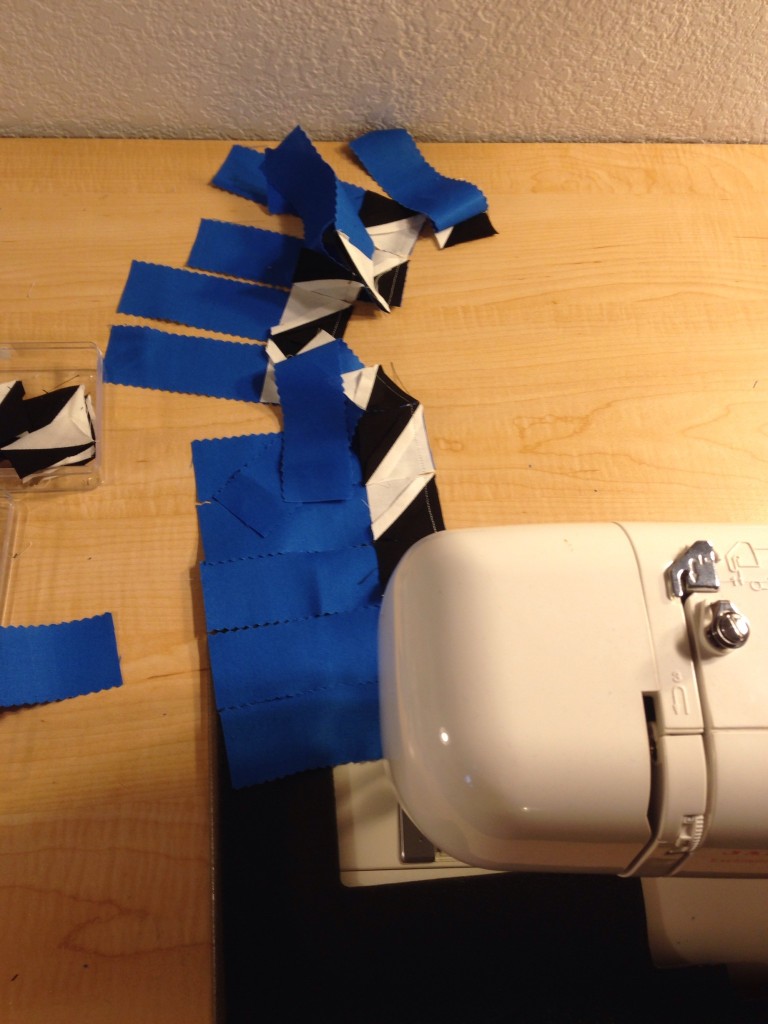
I loved making this quilt top. As is usually the case, I learned from it. The HST’s are solid black and white and finished at 1 1/2 inches – fairly small if you ask me! At first I thought I would try to orient them so that they all pointed in the same direction. This was even more crazy making than the text prints. Not long into the process of piecing the strips with the HST’s I gave up on that idea. It wasn’t worth the strain on my spatially challenged brain and I just sewed them in whichever direction they landed on the strips.

image

Chain piecing came in handy here. It made things flow much faster, especially since I wasn’t worrying about the direction of the points.

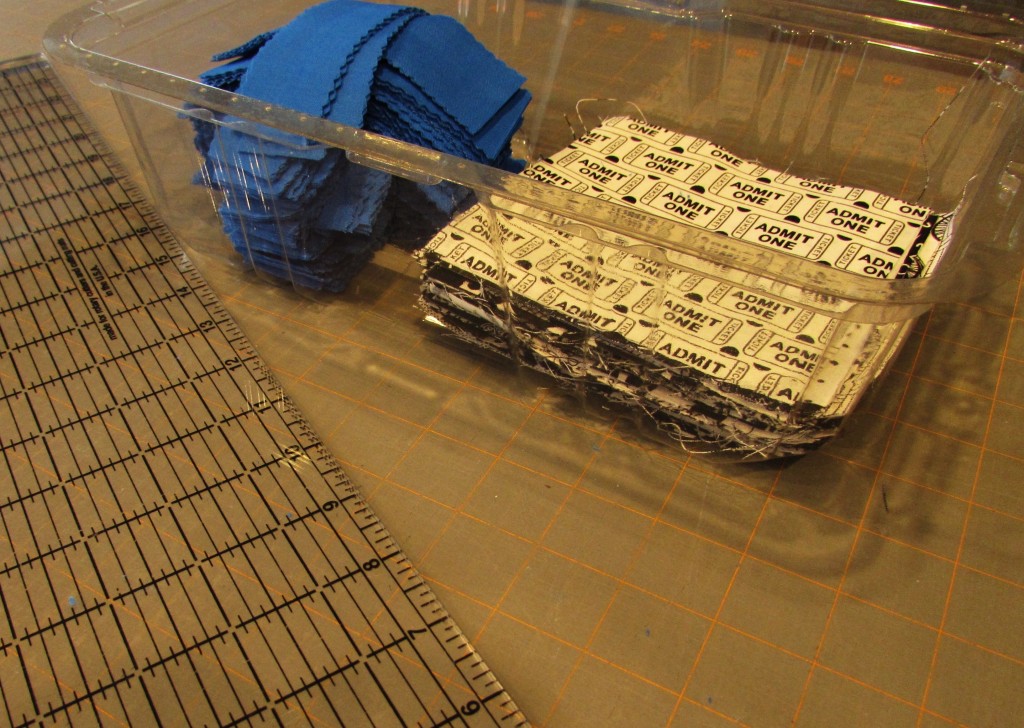
Here is one last tip that came about while making this quilt top. I had loads of pieces to keep together during the process.  I found one of those plastic bins that spinach and salad greens come in. It was a great container to keep everything together. It even has a lid that I could set on top when I wasn’t actively working on this.  Very handy and it is reusing something rather than throwing it in the trash. Win-Win.

step stones begins

The next step is to prepare my backing. I am pretty excited about this part too! (Really amazing how little it takes to make me happy!!) I ordered the backing from Connecting Threads and chose a piece from the Good Neighbors line by Amanda Jean Nyberg. I love the colors, the price was so reasonable, and it works quite well with the black, white and cobalt blue of the top.

image

This fabric feels just wonderful. I am such a tactile person but I love when the fabric has that solid yet silky hand to it.  Off to prewash the backing and stitch it up. Then on to my least favorite task of quilting, basting the quilt sandwich!

Hope you are all finding time to sew a bit.

If you are finding the time and are in need of supplies, check out the sale this weekend at Craftsy.  Lots of deals to be had!

craftsy sale 4_29

(I am an affiliate of Craftsy, meaning if you click through a link on my page and purchase, I do receive a small payment.)

Linking to all of my favorites this week. Links are found at the top of the page, under Link Ups.

Oops!

oops (1)

Hi Everyone –

This morning a post that I had written earlier was accidentally published. It was a tutorial for reusable lunch bags. I wrote the post and then did some research and found out that the cloth I used for the bags was NOT food safe. So I unscheduled the post because I was working to find a different fabric to use. I planned to update the post with new photos and the new information but somehow it published early this morning. I am not sure how that happened but to my surprise, there it was first thing this morning!  Darn it. 🙁

At any rate, do not use oil cloth for this type of project. It is NOT food safe. I am on the hunt for fabric that will work but it is a challenge. I know it exists but I don’t know that it is available for retail sale. If anyone know of any, I would hugely appreciate it if you left a comment with the information.

Thanks for your understanding. I apologize for the accidental post!


If You Give a Quilter a Bargain…

On Tuesday I was running a few errands. Among other things, I ran in to Ben Franklin’s for a strip of velcro. I came home with this. (Plus the strip of velcro.)

image

Really, it was not intended! I was supposed to be picking Julia up from school so I was there not even ten minutes. As she cut the velcro strip, the clerk (who knows me well) suggested I might want to take a quick look at the flat fold table because there were lots of new pieces out. Ben Franklin’s always has a table with stacks of fabric folded (taken off the bolt). Frequently there are treasures on that table but you have to spend a bit of time searching. The majority of the fabric found here is traditional or novelty pieces.  Anything on the table is $5.99 per yard, a very good price.

img_20160421_4872

I immediately spotted a large selection of fabric from the Field Day line by Allison Glass. This is my favorite of all of her lines. It is an older one (2013) and for the most part isn’t readily available. Actually, Allison Glass isn’t available in Grass Valley at all.  When I did the Allison Glass swap last year, I had to drive to the San Jose area to get the fabric (300 miles round trip). I could have ordered it on-line but I really wanted to see the colors together. She covers such a huge span of the rainbow and I wasn’t sure which colors I was going to work with. It was a huge find to see these sitting on the flat fold table!

img_20160421_4873

I am using these two to make a 241 tote from Anna at Noodlehead. There are a few occasions coming up that I need gifts for. This will be perfect for one of them.

img_20160421_4877

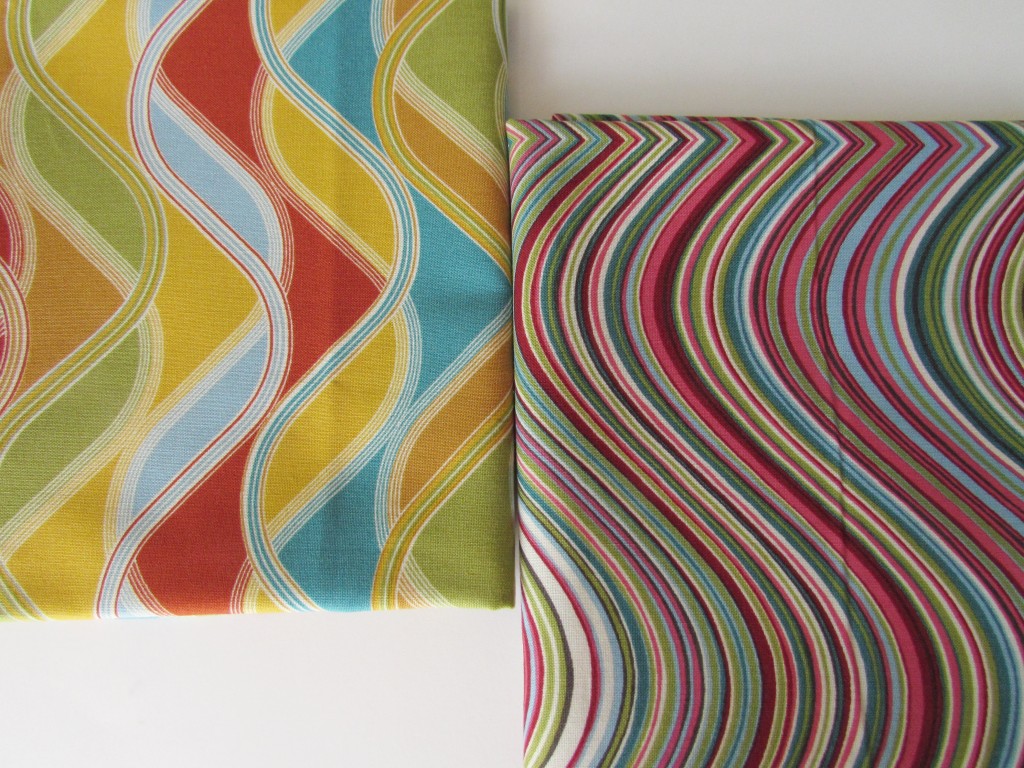
These two pieces are from the Vantage Point line by Robert Kaufman. Wavy Stripe Retro and Picton Patchwork will both be used for Chemex Cozies that I sell in my Etsy shop. I love both of them. Remember when you were little and got to make those Spin Art paintings? I always imagined that mine would look like the fabric on the right. Never got even close but those were fun to make. Julia still has one of those – maybe I should give it another try.

img_20160421_4876

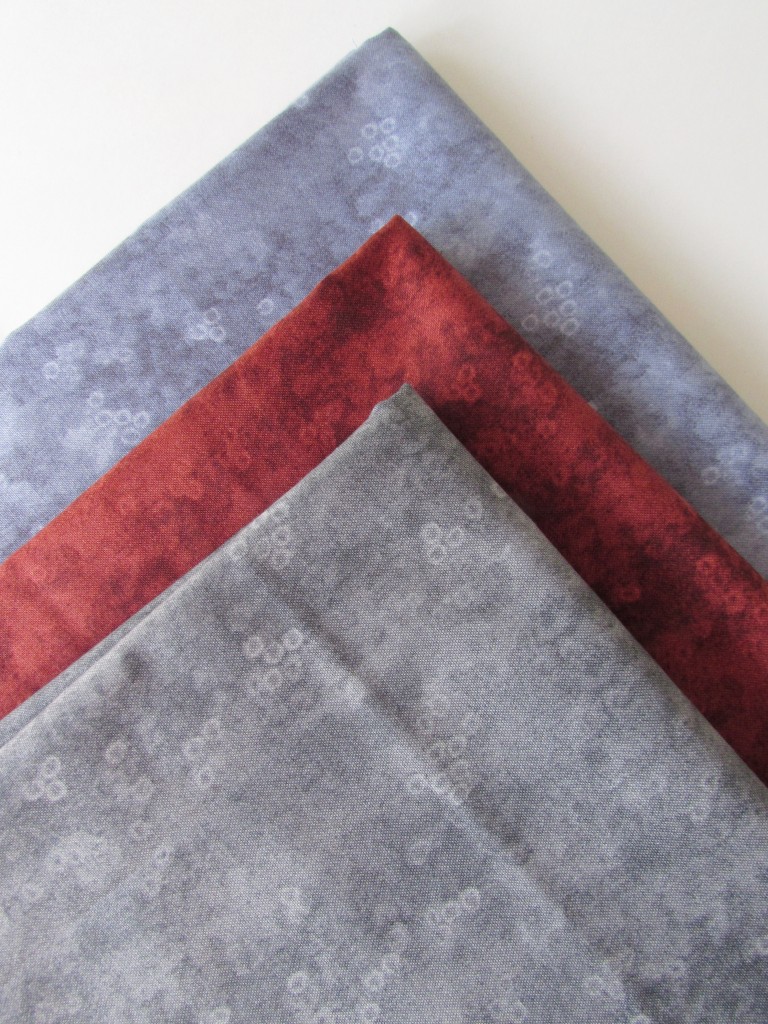
Look at the rich colors in this stack. Who doesn’t need a few new blenders in her stash? At $5.99/yard, this was an easy decision.

Here is the hard part. Oh, if only the story ended here. But it doesn’t. You know me, I am nothing but honest.

I bought the yardage from the Field Day collection and purchased the 241 Tote pattern over at Noodlehead the following day. Looking at the requirements, I found I was short one piece of fabric for the tote. Yes, I could probably have found something in my stash that would work, but I knew that stack of Allison Glass treasure was just sitting there at Ben Franklin’s. How could I not return? It was just one more yard…. (I know, I know.)

img_20160423_4915

So I bought the piece in the center. Perfect. Now I had enough to make the tote.

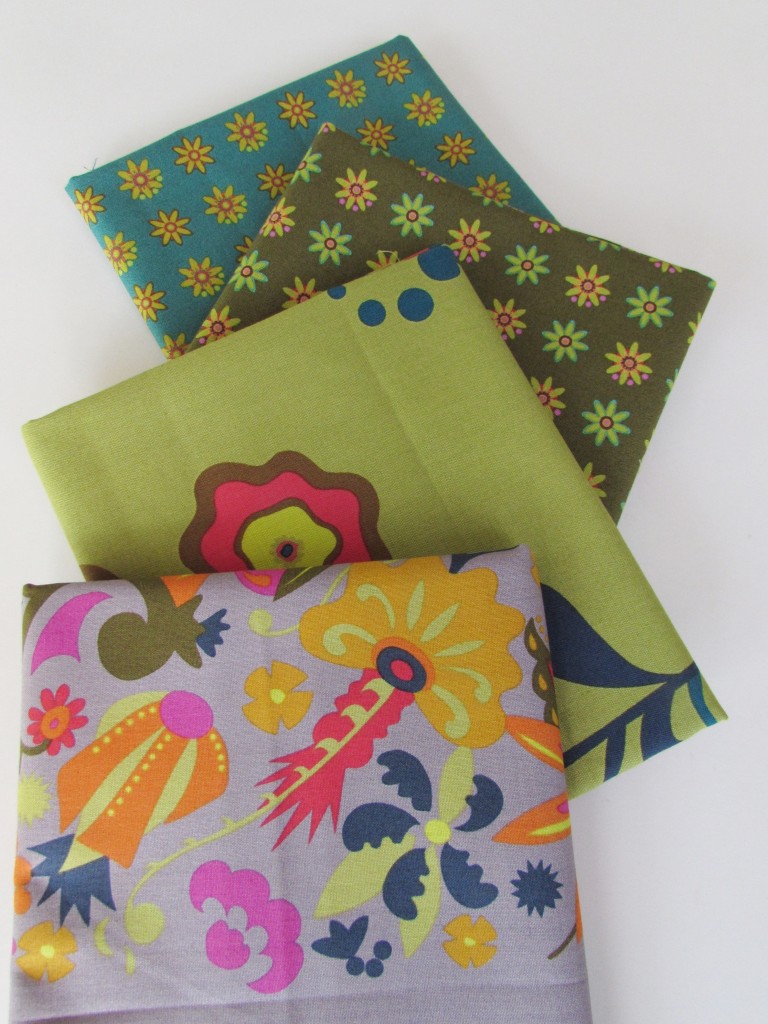
Guess what? When I pulled that piece out of the stacks of flat folds, you won’t believe what happened. There, in plain sight, was the nearly complete line of Asuka by Dear Stella. Which is just crazy – this line was only released last summer. What a treasure.

img_20160423_4912

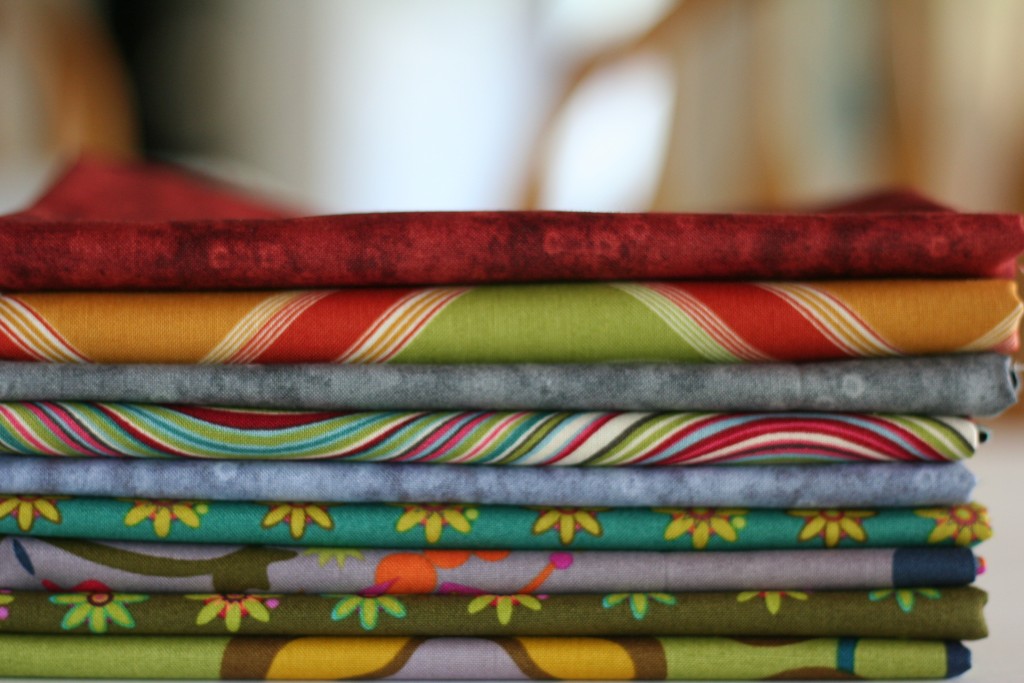
It was amazing – a stack of Dear Stella just sitting there, waiting for me and for only $5.99 per yard!  I love this line – the colors are exquisite. Showing only minimal restraint, I limited myself to the seven pieces you see here.

img_20160423_4913


The piece on the top is not from the Asuka line. I am not sure which it belongs to, but I like the fact that it adds a pop of green to the palette.  Such a thrilling experience. 😉

I now have a total of three yards of Dear Stella to play with and spent $18.00. (I know, let’s not talk about the total cost of all of my treasures. I am minimizing the impact here.)

Remember the book, If You Give a Mouse a Cookie?  That pretty much covers this whole experience. Velcro, led to the Vantage Point pieces, then to Allison Glass, which took me to Noodlehead, which then looped me back over to Allison Glass and finally took me right on over to Dear Stella. Oh dear, dear, Dear Stella.

Linking to Sunday Stash over at Molli Sparkles and also at Main Crush Monday.


Lone Pine

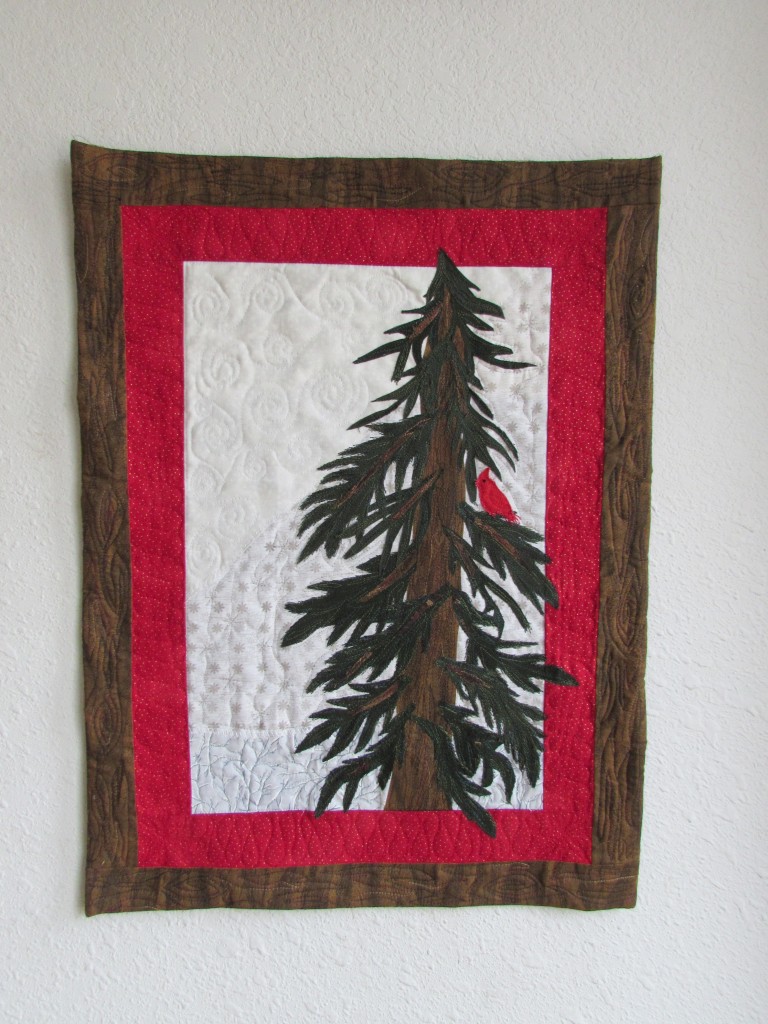
Last night I finished my Lone Pine art quilt. I am so glad I resurrected this UFO and finished it. Two years ago I pinned a lovely art quilt that is listed in an Etsy shop, Prairie Fiber Arts. I just loved it and I based my project on hers. Overall, I am very happy with the finish.

img_20160421_4886

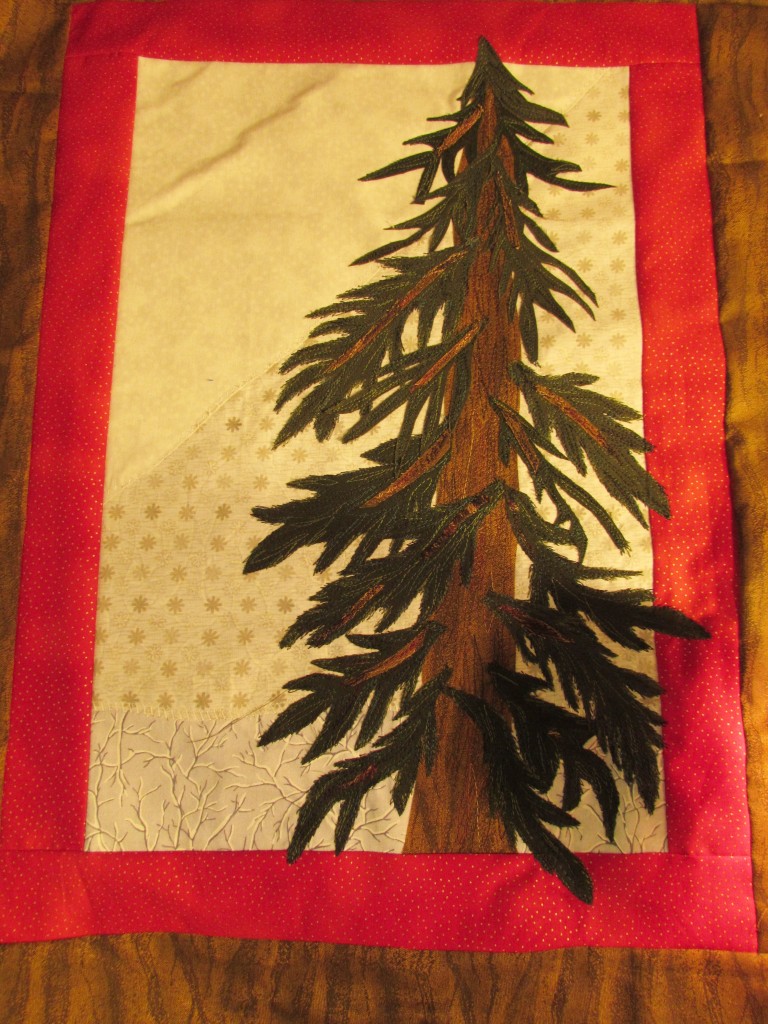
The background is pieced with three different low volume fabrics that exude winter. Once the background was pieced I added both the red and brown borders. I wanted to be able to let the boughs from the tree extend into the border. I fused some stabilizer to the back before I started any applique. Because I wasn’t exactly sure where I would be fusing the applique, I applied the stabilizer to the entire back side. You can see on the below picture that somehow I bubbled part of the background. Once I removed the stabilizer it all smoothed out.

img_20160415_4846

The stabilizer was problematic. It took quite a bit of time to remove it. I finally compromised and left a fair amount of it behind the tree. With the thread sketching, it was close to impossible to get all of the paper off.

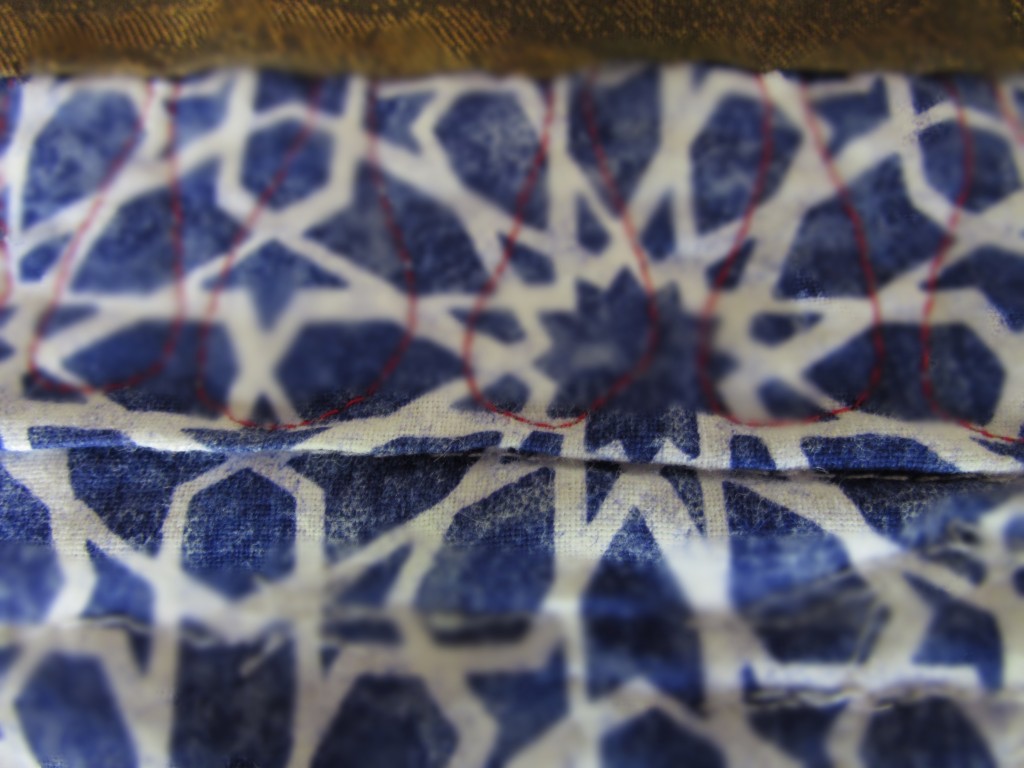
Once the tree and my little cardinal were complete, I sandwiched top, batting and backing and planned my quilting. For whatever reason, I quilted the red border first and then worked the inside. I ended up with a pesky fold on the backing. It must not have been pin basted tightly enough.

img_20160421_4891

By the way, what was I thinking when I used this blue and white fabric for the backing. I know it doesn’t really matter, but every time I see the backing I wonder at my choice. Honestly, I think it was that I was so excited to quilt it that I didn’t even stop and think about the back. Yikes!

I am not going to list the negatives here.  Rather, I will celebrate what I love most about this piece.

img_20160421_4884 - Copy

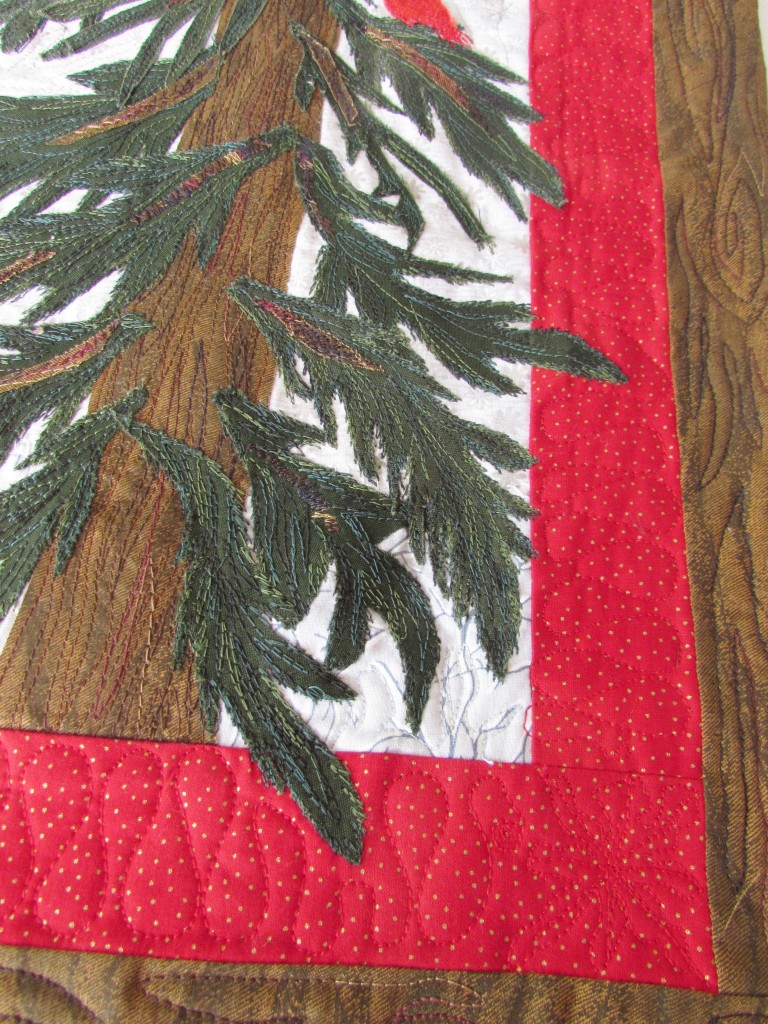
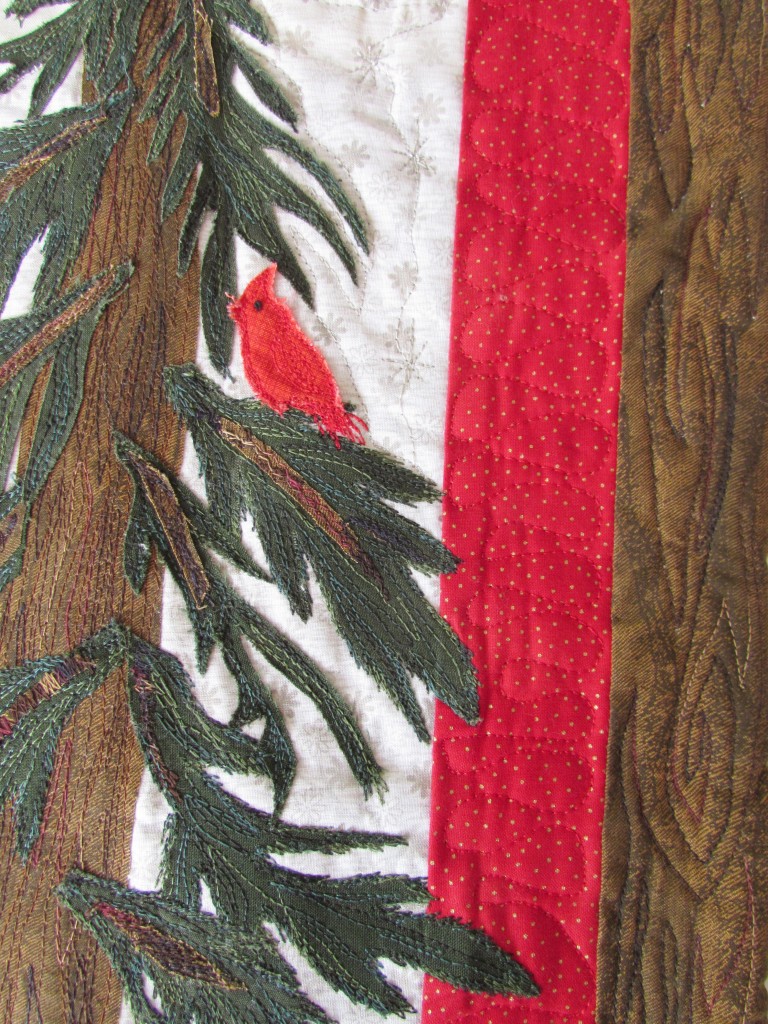
I love, love, love the thread sketching on the pine boughs. To give texture and color to the tree,  I used a variegated green YLI thread.  For the branch that makes up the core of the bough, I fused teeny tiny strips of bark and then thread sketched over it tightly. Again, I used a variegated brown YLI thread. I love the texture obtained with YLI threads. I also ran stitches up and down the main trunk of the tree. (I did most of that stitching prior to adding the boughs.I am also happy with the boughs that extend over into the red. I wasn’t exactly sure how to handle this when I was quilting the ribbons on the red. I made shorter waves where I had to. Rather than turn the corner with the ribbons on the red border, I stopped and made a little snowflake in each corner and then moved back into the ribbon motif. Hard to see with the red thread but I am pleased.

img_20160421_4882

I love cardinals and we don’t get them at my house.  When we lived in State College, PA, we had many that would visit the feeder in the winter. They are such a pretty suprise. My little bird would look like any sort of bird and only by making her red did she become a cardinal. (Drawing isn’t my forte!)  On the outer border, I quilted wavy lines and did some pointy spirals to imitate the knots in a piece of wood. (Tutorial is available here from The Inbox Jaunt.)

It was an easy call to use a facing rather than a traditional binding on this project.  For those who haven’t faced a quilt yet, here is an excellent tutorial by Terry Aske. If you have not had the opportunity to look at Terry’s art quilts, please do. She is very talented!

This was so much fun. It makes me look forward to another small and satisfying project like this. The weekend is nearly here. We are supposed to have cooler days and maybe a bit of rain. Hope you all have a wonderful weekend.

Linking to Free Motion Mavericks, Finish it Up Friday, Off the Wall Friday, and Can I Get a Whoop-Whoop. All links are listed at the top of the page under link ups.


Using Incognito Mode

I learned something new this weekend and wanted to share it with you. When I am writing a blog post and using various links, I test them before I publish the post. In an effort to publish a usable bit of information for the reader, it seems best that the links work as intended, right?

When I was working on my review of Lori Kennedy’s “From Doodle to Design” class on Craftsy the other day, I was trying to test my links to her class on the Craftsy website. As an affiliate of Craftsy, I receive a small payment if anyone purchases something through my blog. Naturally, I wanted the links to work properly. 😉  The problem was that when I clicked through the link, it took me to my personal Craftsy account, not the main page that I intended to link to. This was because my Chrome browser was keeping track (as it is designed to) of my browser history and taking me to the last Craftsy place I had been.

I asked Ian (my youngest son) to test the link from his laptop. He was sitting at the table with me editing photos on his laptop while I was fussing with this. He suggested I open an “incognito” window and test it myself. I never knew this was even a “thing”.  Using Chrome, if you press Ctrl-Shift-N (all at the same time) it will open a new tab on your browser. This tab will be working privately, meaning it will not see your history, or cookies, that are generally available.  When I tested my link while “incognito”, it worked exactly as intended because I was testing from a clean slate, so to speak. Another way to use incognito browsing on a Windows computer is to click on the 3 thin lines at the top of the screen, in the upper right corner. The drop down menu will offer ‘New Incognito Window’ as a choice. That will take you to the same thing. Again, this window will not access your history so you have the clean slate I was talking about. Browsing the web using an incognito window also means that your history isn’t saved when working with this screen.

After learning about this ability to browse Incognito, I took advantage of it and tried to search for my Facebook page. I have the privacy on my Facebook page locked down fairly tightly. I wasn’t able to access it at all. That was good to see.

Could be that this is old news to you and I am late to the party here, but I am happy to add this to my process when I am proofing a post before hitting the publish button. Hopefully it will help you too if you hadn’t already heard of this.  If you have questions, leave them in the comments and I will find an answer (probably by calling Ian but still….)  🙂

Linking up with Stephanie today over at Late Night Quilter. Come take a look at her Tips & Tutorials Tuesday. There is always something to learn each week at this link up!