Yearly Archives: 2017

Make Wall Quilts – Book Review & Giveaway

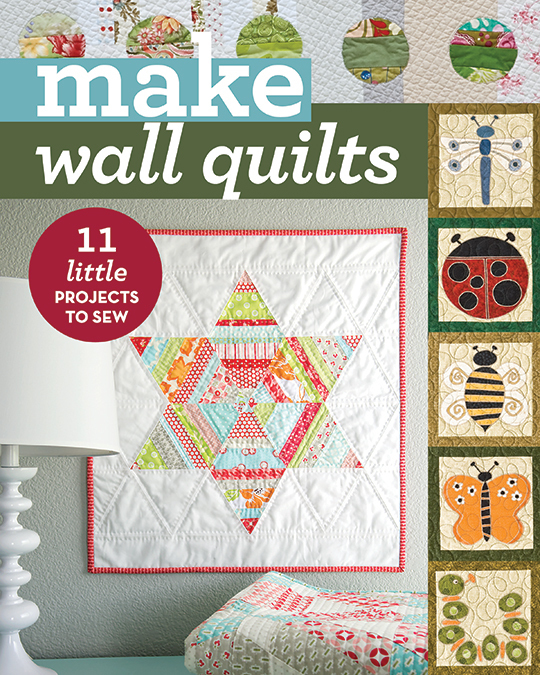
Today I would like to share a book review with you.  C & T Publishing asked me to review one of their new books, Make Wall Quilts: 11 Little Projects to Sew (Make Series). In a nutshell, I would say I love everything about the book except for the title.  The title didn’t grab me and as I clicked on the link to the book, I was going in with a negative attitude.  Luckily the actual book is wonderful.  I suppose this means one shouldn’t judge a book by its title!

This book is a compilation of eleven different wall, or mini, quilts.  Each is from a different, well known quilt designer.  There are projects from Camille Roskelly, Kim Schaefer, Rebecca Bryan and Heidi Staples in the book as well as several others.  Taking projects from books previously published by the designers is a genius idea as it provides a variety of styles in one book.  You probably know just from reading the names above that the book contains modern and traditional projects made with a variety off techniques.  I am a fan of reading quilt books (no surprise there!) but each one usually has a particular theme or style to it.  With this book, the quilter can try a variety of styles and techniques. The projects are not large which means they are easily accomplished.

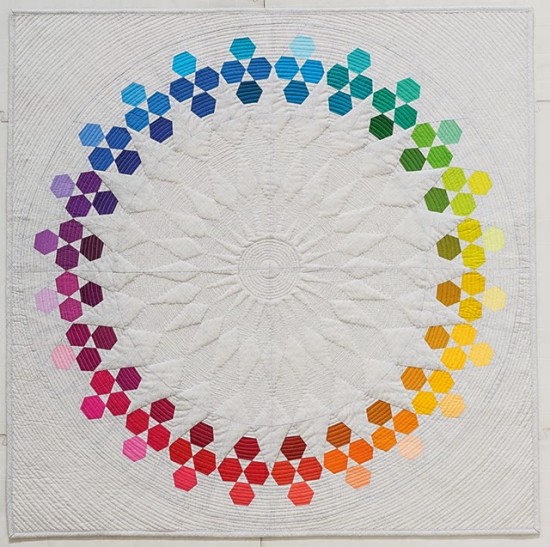
Well, all except one!  For me the Huckleberry Quilt designed by Rebecca  Bryan looks challenging and maybe out of my skill range.  But this is a good thing – it further affirms the book has something for everyone from the beginner to the more experienced quilter.  The fact that this riff on a color wheel requires 72 different color fabrics is enough to intimidate me.  I have enough difficulty choosing color and if I had to choose 72 different solids I might go right over the edge. But while you are here, take a look at the quilting on this piece.  Stunning!

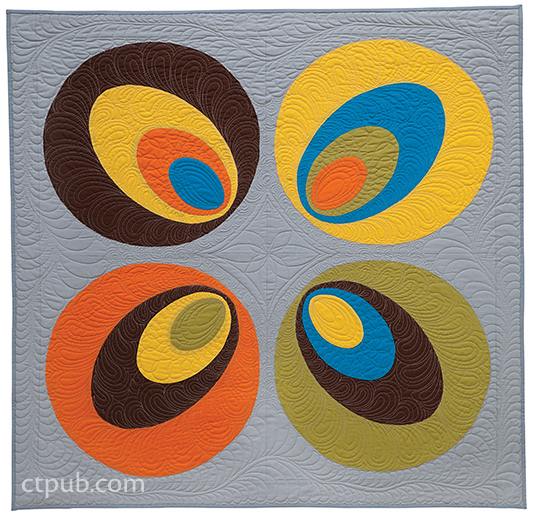
The reader might choose to make a modern applique project or a traditional one. I really like the look of this quilt designed by Jennifer Dick, appropriately called Mod. Again just take a look at the quilting here. Gorgeous!

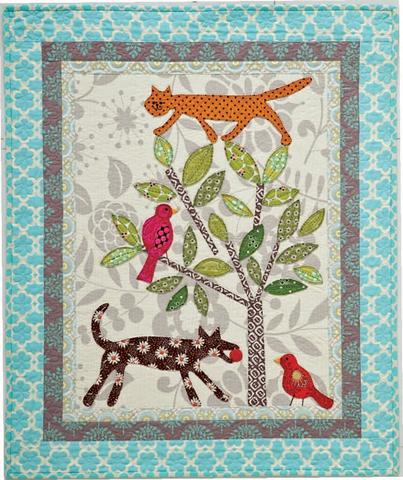
Quilters who favor traditional applique might enjoy this one.  Called Outside In, this project was designed by Becky Goldsmith. It is a larger piece, finishing at 30″ x 36″ but very doable.  I love the cat at the top.  She has attitude.

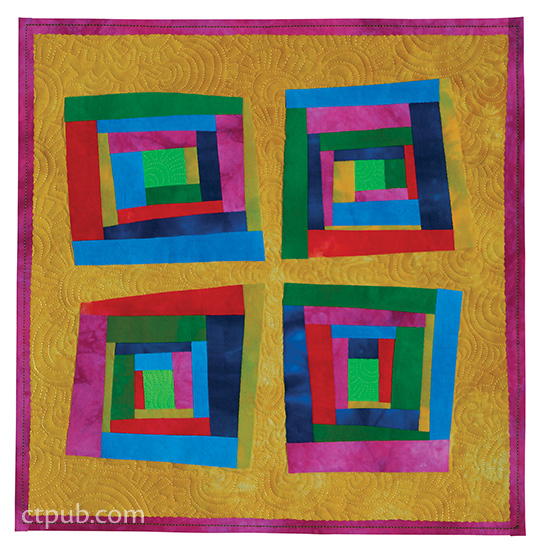
Quilters without improv piecing experience might like to learn from the Lazy Log Cabin project designed by Laura Wasilowski. The blocks in the piece are six inches with the total quilt finishing at 17″ square.  It is Laura’s use of bold color which makes this project stand out to me.

Most of the projects in this book could easily be expanded to a larger size quilt if the reader wanted to make a baby or lap size quilt with the project.  This further exemplifies the flexibility of the book.  I really give high praise to C & T for curating this great selection of projects and publishing them in one book.

C&T has generously offered a copy of the e-book to give away to one lucky reader. But if you are not the winner, I do recommend purchasing this book, either for your library or as a gift.  It is a lovely collection of a variety of projects, truly a something-for-everyone kind of book.

To enter to win a copy, please leave a comment on this post.   Tell me what your favorite quilting technique is at the moment.  Is it EPP, paper piecing, improv piecing, traditional block piecing, applique? What do you enjoy most?  Giveaway will be open until Friday and I will pick a winner on Saturday.

If you would like to purchase the hard copy of the book, it is on sale at Amazon for a steal of a price! (Affiliate Link)

I doubt I will post again this week so let me wish you a Happy Thanksgiving. I do love this time of year. Celebrating gratitude for all we are blessed with feels good and reminds us that even if we are enduring difficulty, we still have much to be thankful for.

Note:  Needle & Foot is an Amazon Affiliate meaning if you were to click through and purchase the book, I will receive a small stipend for the purchase.

Winter Friends Christmas Stockings

While visiting my son, daughter in law, and grand baby in Vermont last month we talked about the holidays.  This is the first Christmas we will be apart.  My daughter in law is working her second year of her residency as a radiologist.  Apparently the second year residents don’t have the best work schedule.  She is working over Thanksgiving and Christmas both.  So the three of them will be celebrating holidays in between her shifts at the hospital.  Such is the life of a new doctor.

Always ones to look at the bright side, my son and DIL are kind of excited about Christmas though.  Because they have always traveled to California for Christmas since they married in 2010, they have never had their own Christmas tree or stockings.  They have an 8 month old daughter and it is time to begin their own family Christmas traditions.  When my DIL asked me to make them stockings I was so pleased.  What a fun project to tackle.  I showed her pictures of the fabrics I have in my shop and she chose the Winter Friends line by PB Textiles.  This is so perfect since they are a very outdoorsy family living in Vermont. What better theme than woodland creatures, Christmas trees and snowmen?

I was looking around on Pinterest for inspiration when I asked the kids what they had in mind.  They said to make them coordinate with the set of fabrics but to make each stocking with a different design.  So this is exactly what I set out to do!

First I wanted a template for the size of the stocking.  I remembered I had an old pattern from Simplicity that was designed by Eleanor Burns (of Quilt In a Day fame.) The size of the stocking wasn’t exactly right but it was enough to get me going.  I cut stocking shapes from batting and that is what I quilted my piece work to. From there I looked for ideas on line.  I found this tutorial by Amy Smart (Diary of a Quilter) and liked the idea of doing a ‘quilt as you go’ strip pieced design for one of the stockings.  Beyond that, I thought I would do a basic patchwork design and just go from there.

The strip pieced QAYG stocking was a breeze.  It came together easily.  This was the first stocking and I did use a few strips from other Christmas fabric scraps.  I kind of wish I had not done that because for the next two stockings I stuck with just the five Winter Friends prints.  Not a huge deal though. For the QAYG process, I cut random width strips and sewed one on top of the other beginning in the middle and working out to both the top and bottom.  Once the strips were sewn to the batting I trimmed to the stocking shape.

What originally got me wanting to add other pieces was this bit of text saying “the stockings were hung” which I thought cute to include. It looks cute and the colors match well enough so I left it as is.

For the next two stockings I made rows of patchwork which I then used for the stocking front in the same QAYG fashion.  I fussy cut the blocks featuring the larger snowmen, deer, woodland animals, and Christmas trees. These were alternated with 2 1/2″ squares of the other prints. I love the way the patchwork looks when set on point. This is my favorite of the stockings.

The second patchwork stocking is also really sweet.  I made little four patch blocks, fussy cutting the squirrels and hedge hogs to be used with the green snowflake print and the plaid print.  The four-patch squares are a little wonky but I am calling that a charming design feature.  😉

I sewed a curved piece of a cross hatch neutral fabric over the toe of each stocking to make it look sock-like.  I also embroidered a line of stitching to decorate it a bit more.  The toe pieces were hand cut so each one is different from the next.

The back side of each stocking is made with the larger print.  This decision was made purely out of laziness.  I had enough of this fabric in the sewing room at the time and would have had to walk all the way downstairs to grab more fabric if I chose a different one. How lazy can a quilter get???

I don’t know what the kids plan as far as family size but for now they have three stockings made.  I set aside enough fabric to be able to make two more stockings should the family grow!  I might not have exactly enough but they will still match the original stockings well enough. I am really happy with the stockings and hope the kids use them for many years to come.

In celebration of the upcoming holiday season, I have put all of the holiday fabric in my shop on sale for the weekend.  Use code HOLIDAYFABRIC25 to receive 25% off any of the Christmas fabrics listed.  I hope you will take advantage of this great sale which will run through end of day on Sunday, November 19th. Orders will ship out first thing Monday morning so you will have your fabric in plenty of time to do some holiday sewing!

I am linking up with my favorite linky parties. For more information, click on Link Ups at the top of the page.

Fourth Show All Wrapped Up

Last weekend my sister and I worked as vendors at the quilt show for the Pioneer Quilt Guild of Rocklin, CA.  The show was held in Roseville which is about a 40 minute drive from my home.  Set up was Friday night which was slightly unusual. Since my generous sister had accumulated a zillion points with Holiday Inn, she treated us to a hotel rather than driving back and forth. It was a treat to stay in town rather than drive home after we finished setting up. Also, we were able to get there early on Saturday to put finishing touches on the booth before the show opened.

The show was great.  The guild is rather small but quite talented. You’ll be surprised to find out I didn’t take even one picture of the quilts on display.  So strange for me.  I think it was just too busy.  The show was not juried but I did go and vote for my favorite in each category.  I liked their system for displaying the quilts.  Each category was displayed together and there was a painted clothespin with the color of the pin denoting the category of quilts.  So if you saw a purple clothespin for example, that meant you were in the medium size, pieced quilts.

Saturday was busy until about 2pm and then it just dragged.  I think there were some Veteran’s Day activities in the afternoon that pulled customers/viewers away from the show. It made me nervous because usually the first day of the show has been the busiest and the second day much quieter.  Patti and I were nervously anticipating a very quiet day on Sunday.

We were pleasantly surprised because Sunday was very busy and we had so many customers.


Also, Julia spent the day with us on Sunday. She had fun talking with customers and putting bolts away after I cut fabric.


Patti, owner of Etsy shop Ferrari Handmade, had a very successful weekend. She brought only her holiday dresses and the coordinating doll dresses.  This is the perfect time of year for her shop and there were many grandmas at the show who liked and purchased the dresses for their grand daughters.  She also had a number of custom orders which she is busily sewing away on this week. The incredible technology we have these days enabled her to sell a custom dress for a grand daughter in Florida. It was really fun to watch the grandmas FaceTime with her daughter in Florida so she could show the fabric choices for the dresses.  Patti was able to get details right then by talking with the mom as she took the necessary measurements on the little girl. Gotta love technology!


Patti constructed this super cute fireplace to decorate our booth and give it a festive feel.  Julia was so funny as she tried to emulate an excited child sitting by the fire (a string of battery operated lights.)


As always we learned a few things with this show.

#1 – If you put the candy jar behind yourself because the work table is too small, one goes through candy much faster!  I suppose people are more ‘comfortable’ taking candy when it is less visible?  How funny.  So we ran out on Saturday afternoon and had to restock for Sunday’s customers!

#2.  We wrapped little holiday fat quarters with ribbon and hung them from our Christmas tree like ornaments.  However we didn’t post a sign with pricing and we didn’t sell even one!  We sold tons of fat quarters from the basket where the sign hung but not even one from the tree.  So, while it looked cute, it wasn’t an effective display.

#3.  As I had hoped, having samples made with fabric available for sale really boosts sales.  I had the small quilt made with the Shine panel as well as the Panda Garden whole cloth quilt on display.  Numerous sales resulted from this as they drew interest from the shoppers.

This is the last show I am doing for 2017.  I am looking at the shows for 2017 and deciding which to do.  My sister has a busy month booked for December.  She will be doing a weekly outdoor event up here called Victorian Christmas. Hopefully I will be able to help by working in her booth (if my head cooperates and I am not dealing with a migraine.) Whether I work in the booth or not, she will certainly be successful – especially after seeing the success of her efforts over the weekend!

The holiday season is going strong for me and i am sewing lots of cozies for both French Press coffee pots as well as Chemex pots. I have several Christmas projects I want to make/finish so I need to stay organized if I am going to get it all done.  I am sure you are feeling the same way as November marches on and the holidays begin.  Enjoy the sewing time and don’t stress over it!

Sam’s Quilt

The sports jersey quilt is finished!  This is the second t-shirt quilt I have made, the first one being for my niece, Lil (Sam’s cousin.) The jersey quilt was a good learning experience, but what quilt isn’t? There is always something new to try or a skill to further practice.


The biggest challenge was definitely piecing those slick, polyester pieces of the jerseys.  Second to that would be working with the rubbery decals used for his number and the logos.  They were much thicker than one would think.  Other than those two issues, this was a breeze to make. You can read progress posts about putting it together here and here.

To quilt this rather heavy project, I rented time at the long arm shop.  It would have been difficult to feed it through the throat of my home machine because the decals are thick and stiff, making the quilt unwieldy. Once I had it loaded on the machine I quilted it with lots of interlocking squares.  It looks like a nice, masculine motif and works great with the blocky pattern of the quilt.

Sam’s football number was 50, just like his father’s was when he played.

I tried to avoid quilting through the rubbery decals and numbers.  Instead I went around and inbetween them wherever I could. It was really difficult to keep the quilt flat while quilting it. I cannot tell you why, the heft of it or maybe the slick jerseys? If I were quilting it at home, I would have guessed I didn’t baste it well enough. But when we loaded it on the long arm (the gal at the shop kindly helped me) it seemed very straight and flat.  At any rate, it is not tightly quilted. The quilt has a puffiness to it.  It doesn’t bother me though.  I plan to wash it today before I mail it off and it is likely to crinkle up a bit when the batting and cotton fabrics shrink up a little.


Remember I pieced the backing so I could use up a few more jerseys?  This is the first time I loaded a backing that really had to be straight on the long arm to line up well with the front.  It was mostly a success – the logos are straight but they aren’t centered across the back.  Side note, it has been quite rainy this week which is wonderful. I kept waiting for a clearing in the weather so I could take some photos.  Finally, Julia said we better just to take pictures Mom.  So off we went in the rain.  I put a beach towel under the quilt and she held it over the railing.  Such a dedicated quilt holder!!  You can see the towel shows under that edge on the left. 😉  Ok, back on topic – I love the way the back looks and it shows the quilting pattern off a bit.  I keep looking at the larger spaces near the decals and wonder if I should add some quilting there?  Do you have any input?  Are those unquilted spaces too large?

The binding is an older stripe with 1 1/2″ widths red and gray.  At first I was hesitant to use it because the red wasn’t exactly the shade I wanted but there are so many different reds in this quilt between jersey colors and the sashing I used that it worked well in the end. The bold, chunky look of the stripe fits with the blocky pattern of the quilt just fine.


So this one is finished and will be sent off to Sam early next week.  The long arm practice continues.  It is tons of fun but has a definite learning curve to it.  My skills are improving but I need so much more practice.  It motivates me to finish up some of my projects so I can go back and practice some more!

Now sewing time for me over the next couple of days. This weekend my sister and I are working the Pioneer Quilt Guild’s show in Roseville.  If you are local and planning to attend, please come say hello!  I am excited to see the quilts hanging and meet members of the Pioneer guild!

Sewing Room News

The season has definitely shifted to full blown fall around here.  We had a great rainy weekend and the colors are gorgeous.  The shot above was taken a few days ago up at the pond on the edge of our property.

I have a few fun things to share with you.  You may have noticed that Craftsy has been evolving and changing over the past year or so.  They started to carry their own brand of fabric (Boundless) as well as yarn (Cloudborn).  Now they are offering a subscription plan to the videos offered for sale on their site.  This is an interesting proposal for those crafters that regularly purchase and view Craftsy videos.

The subscription is similar to that offered on Creative Bug but the Craftsy site offers many, many more classes in all sorts of subjects than Creative Bug does.  Of course, you get what you pay for, right?  The Craftsy subscription comes at a higher price.  For $14.99 per month, or $120.00 per year, the subscriber has full access to all of the classes in the Craftsy library.  There is no contract tying the subscriber to the plan for a certain number of months to enjoy full access.  (Of course if you pay for a year up front, you are subscribing for the twelve months.)

The interactive qualities, class notes, and discussions, are all available with the subscription. But you do not own the class, meaning when you decide to cancel the subscription you will no longer have access to the classes.  I think there is merit to their plan. Right now, Craftsy is offering a two week free trial of their subscription service.  Certainly worth taking advantage of, especially if you were considering purchasing a class in particular.  You now have the chance to watch the class and decide if it covers what you need before purchasing it.  There are lots of options how to utilize this new service.

As for sewing and fabric news, I am working on finishing up the binding on my nephew’s jersey quilt.  I decided to machine stitch it to both the front and back.  I am somewhat sure my nephew will not look at the binding and wonder why his Aunt Bernie didn’t hand stitch the back of the binding.  😉  Also, the quilt is made of jersey knits that have been stabilized.  It is pretty heavy and I don’t want the binding to come apart when the quilt is laundered.  I found one spot where the quilting stitches look a bit funky on the back side and I will take those stitches out and repair it on my machine.  I think I have thread that is close enough so it won’t be noticeable. Hopefully I will finish that up and then have a fun finish to share with you.

Last week I got lucky on my thrift store prowl.  I was having lunch with my mother in law who lives about an hour or so from me.  I saw a local thrift store that looked interesting and stopped in.  They had three rolls of knit fabric, each one 60″ wide.  I really love the color of one roll, a dusty purple and I grabbed it.  It was taped tightly so I couldn’t unroll it and check to see if it was in good shape. But I decided to take the chance on it.  If it didn’t turn out to be clean and in good shape, my $12.00 was going to a good cause (Hospice). But guess what?? It turned out to be really nice fabric and there is probably at least five yards on the roll. It will be fun to sew something up with this. I am not sure exactly what yet.  Nightgown? T-Shirt? There is plenty on the roll so maybe both?? As always, I look at a piece of fabric and it is so fun to think of the potential in it.

Hoping your week is going well and you are fitting in a bit of sewing time here and there!

Linking to Main Crush Monday at Cooking Up Quilts and a few others. Take a peek at the tab at the top of the page, Link Ups, for more linky parties.

(This post contains affiliate links meaning if you were to click through and make a purchase, I would receive a small compensation for that purchase.)


Playful Pandas Whole Cloth Quilt

I don’t know about you but I am really lazy about getting my sewing machines serviced.  I procrastinate, put it off longer and longer with my usual excuse being ‘I clean out the bobbin housing all the time so it must be fine’. But oh my gosh, think about how often I use these machines of mine.  The poor things need to be taken care of!

When my smaller Janome refused to stitch more than two inches without giving me grief, I realized it was time.  I took it to a woman in town who is a whiz with machine repair and maintenance.  She kept it for a few days and worked her magic. Some $80 later, my machine is purring along. What a huge difference!!  When I picked the machine up, Debbie had a sandwich size Zip Lok bag filled with lint and gunk. I can’t imagine how she got it all out of there but she did. The machine is like new!

I decided to take advantage of this amazing transformation and practice some free motion quilting. I have not been doing too much quilting at home because the machines were not cooperating (now I know why!)  To have a nice big canvas to play with, I chose to do a simple whole cloth quilt.  Have you seen Art Gallery’s line of fabric called Pandalicious? Of course it  features adorable panda bears. Designed by the very talented Katarina Roccella, these prints are really sweet and just filled with the personality of spunky pandas. I have a few pieces of the line in my shop and decided to play with the feature fabric.

Panda Garden Recess is a large scale print which tells the story of panda families frolicking in a garden of pastel blues and greens. I cut  a 40″ piece of this fabric and a 44″ piece of Hidden Panda for the backing. After trimming the top to a 40″ square and quickly pin basting the layers together, I started quilting loops. My machine was entirely cooperative and the tension was perfect. It is much more fun to quilt when my equipment is properly taken care of.  🙂


The quilting took no time at all.  After squaring it up, I decided it needed something more than just the binding.  I had a large scrap of a jade green solid in my stash and cut some 1 1/2″ strips to make a flange.  I am always, always a fan of a flanged binding!

As I mentioned earlier, the adorable backing is called Hidden Panda.  It is another of my favorite prints. The loopy quilting I did (which doesn’t really show up in the pictures) works well with the curve of the print.  Looking back, it would also have worked to quilt the piece from the back, by quilting along or tracing the curves. Another project for another day!

There you have it.  My machine is back to its amazing self and I have a sweet quilt as a result.  Next weekend is the quilt show for the Pioneer Quilter’s Guild where I will be a vendor.  It is going to be held in Roseville so if you are a local, come out, say hi, and enjoy the show!  I will use the quilt to show off this fun fabric in the booth.  After that, maybe it is destined for Project Linus or a spot in my Etsy shop.  I haven’t yet decided.

We are supposed to have a wet, rainy weekend and I am prepared!!  I have two projects currently vying for my time so I am very much looking forward to a quiet weekend in the sewing room.  There is also a tiny quilt show scheduled for the weekend and I may hop over there to take a look at the quilts.  We shall see!  Hope you have something fun planned as well!  Enjoy the weekend.

Linking to my usual favorites as well as one new to me;  Finished or Not Friday over at Busy Hands Quilts.  Check them out at the top of the page, under Link Ups.

Mickey Mouse – A Simple Halloween Costume

Julia has always come up with fun ideas for what she wants to be for Halloween.  Over the years, she has dressed up as Wednesday Addams, a devil, a ladybug, and a bat to name a few. This year she decided to dress up as Mickey Mouse.  She is long past the age of trick-or-treating but her high school has an annual Halloween Dance and they all dress up for that.

Did you know that Mickey Mouse was developed by Walt Disney and the very talented Ub Iwerks in 1928? He is the official mascot of the Walt Disney Company and has been making people smile for years.

“I only hope that we never lose sight of one thing – that it was all started by a mouse.”

— Walt Disney, Disneyland; October 27, 1954

Simple Mickey Mouse shorts!

Let me tell you, Mickey Mouse was such an easy costume to put together.  Julia had black leggings and a black t-shirt to use so the main task was to make the red shorts and the Mickey ears.  For the shorts, we dashed out to Ben Franklin and bought a 1/2 yard of red fleece.  I used a pattern I had for pajama pants and did a few alterations to the pattern pieces before cutting them out.  I had to make the waist sit a bit lower, shorten the inseam quite a bit and add a pocket to the right side. (Pockets are a must-have on all clothing so she can keep her phone nearby!) Between cutting, fitting, adjusting, and sewing them — the shorts took about an hour or so to make.  Julia cut two white ovals out of felt and I lightly tacked them to the shorts. She plans to use them as pj shorts so it will be easy to take the buttons off when she is through being Mickey.

The only challenge (and it wasn’t a huge deal) was making the Mickey Mouse ears.  I had a remnant of black vinyl on hand and we cut circles out of that.  But the vinyl proved to heavy and the ears constantly flopped over.  Browsing ideas on Pinterest, we found a great alternative using black poster board and a head band. This called for another trip to Ben Franklin!  I was extremely proud of my self control when I was able to go into the shop, grab the head band and poster board and not even wander through the fabric department.  Didn’t even go near it!  This is probably the first time I have achieved this feat and may well be the last! While I did go get the supplies, I didn’t actually make the ears.  Julia and Ray took care of that.  Here is a link to the site they used if you need inspiration.

It would appear Mickey is tiring of this photo shoot!

We couldn’t think of an easy way to achieve yellow shoes so she skipped it.  But really, she looked so cute – Seemed like they all had fun at the dance too.  Living out in the country, we don’t really get trick-or-treaters so Halloween night is usually quiet for us.  I hope you all have more treats than tricks tonight!


Sewcial Bee Sampler Quilt Finish

I am so happy with the finish of my Sewcial Bee Sampler quilt.  I loved making the blocks along with the billions of other quilters that followed along with this QAL hosted earlier this year by Sharon Holland and Maureen Cracknell. I posted progress shots along the way as I made the blocks, but just in case you didn’t know, the QAL included 25 blocks but I stopped after making 20.  This quilt is a comfortable size for a lap quilt and I felt like if I went for the full twenty-five blocks, this would just be set aside and not finished.  The colors of the quilt are so pretty and I was anxious to finish it and use it.

After sashing the blocks and rows with Mesh Joy, a gorgeous low volume print from Sharon’s Gossamer line, I took the quilt over to the long arm shop where I rent a machine.  For the backing, I used a piece of soft vintage gingham that I purchased at a thrift store over the summer. The light brown color is lovely and works well with the quilt top.

When I picked the binding, I was trying to choose between two fabrics, Terra Firma in deep yellow and Twinklestar Berry  from the Garden Dreamer line by Maureen Cracknell.  I couldn’t make up my mind so I asked Julia to choose between  them and she immediately went to the Twinklestar fabric.  It works well with the front and back.

I took it to the long arm shop a few weeks back and quilted it with a loose meander pattern. Because each block is different and the quilt is fairly busy, it made sense to keep the quilting simple.  More importantly, I wanted to use this quilting time to practice my control on the long arm and by using such a basic quilt motif, I could focus on the speed and evenness of the stitches on the long arm.  It was really helpful to practice like that.  It amazed me how little time it took to quilt it!

I really like the loft the quilt has with the loose quilting.  This quilt is so cozy.

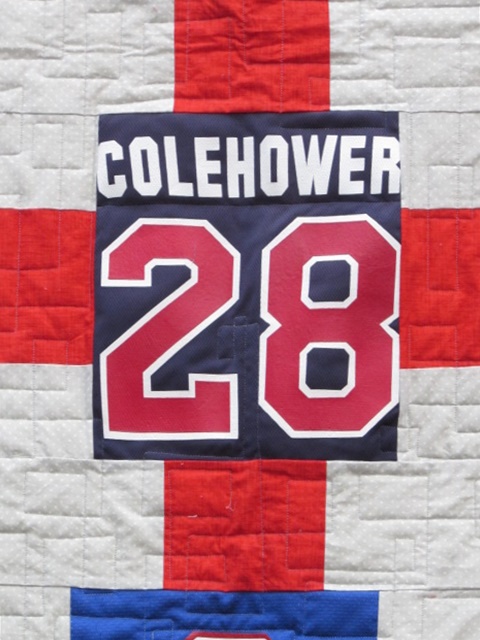
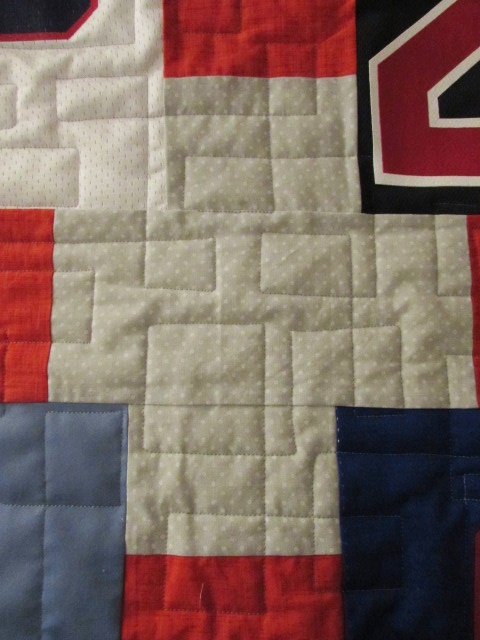
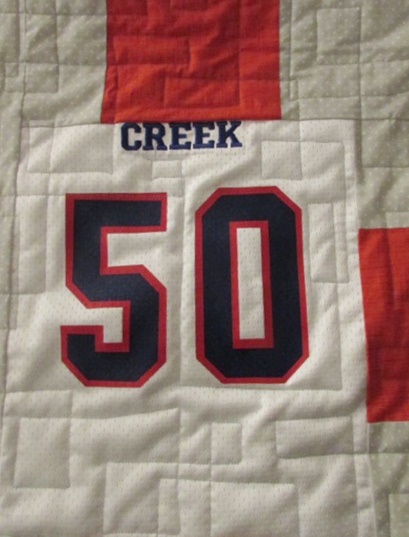
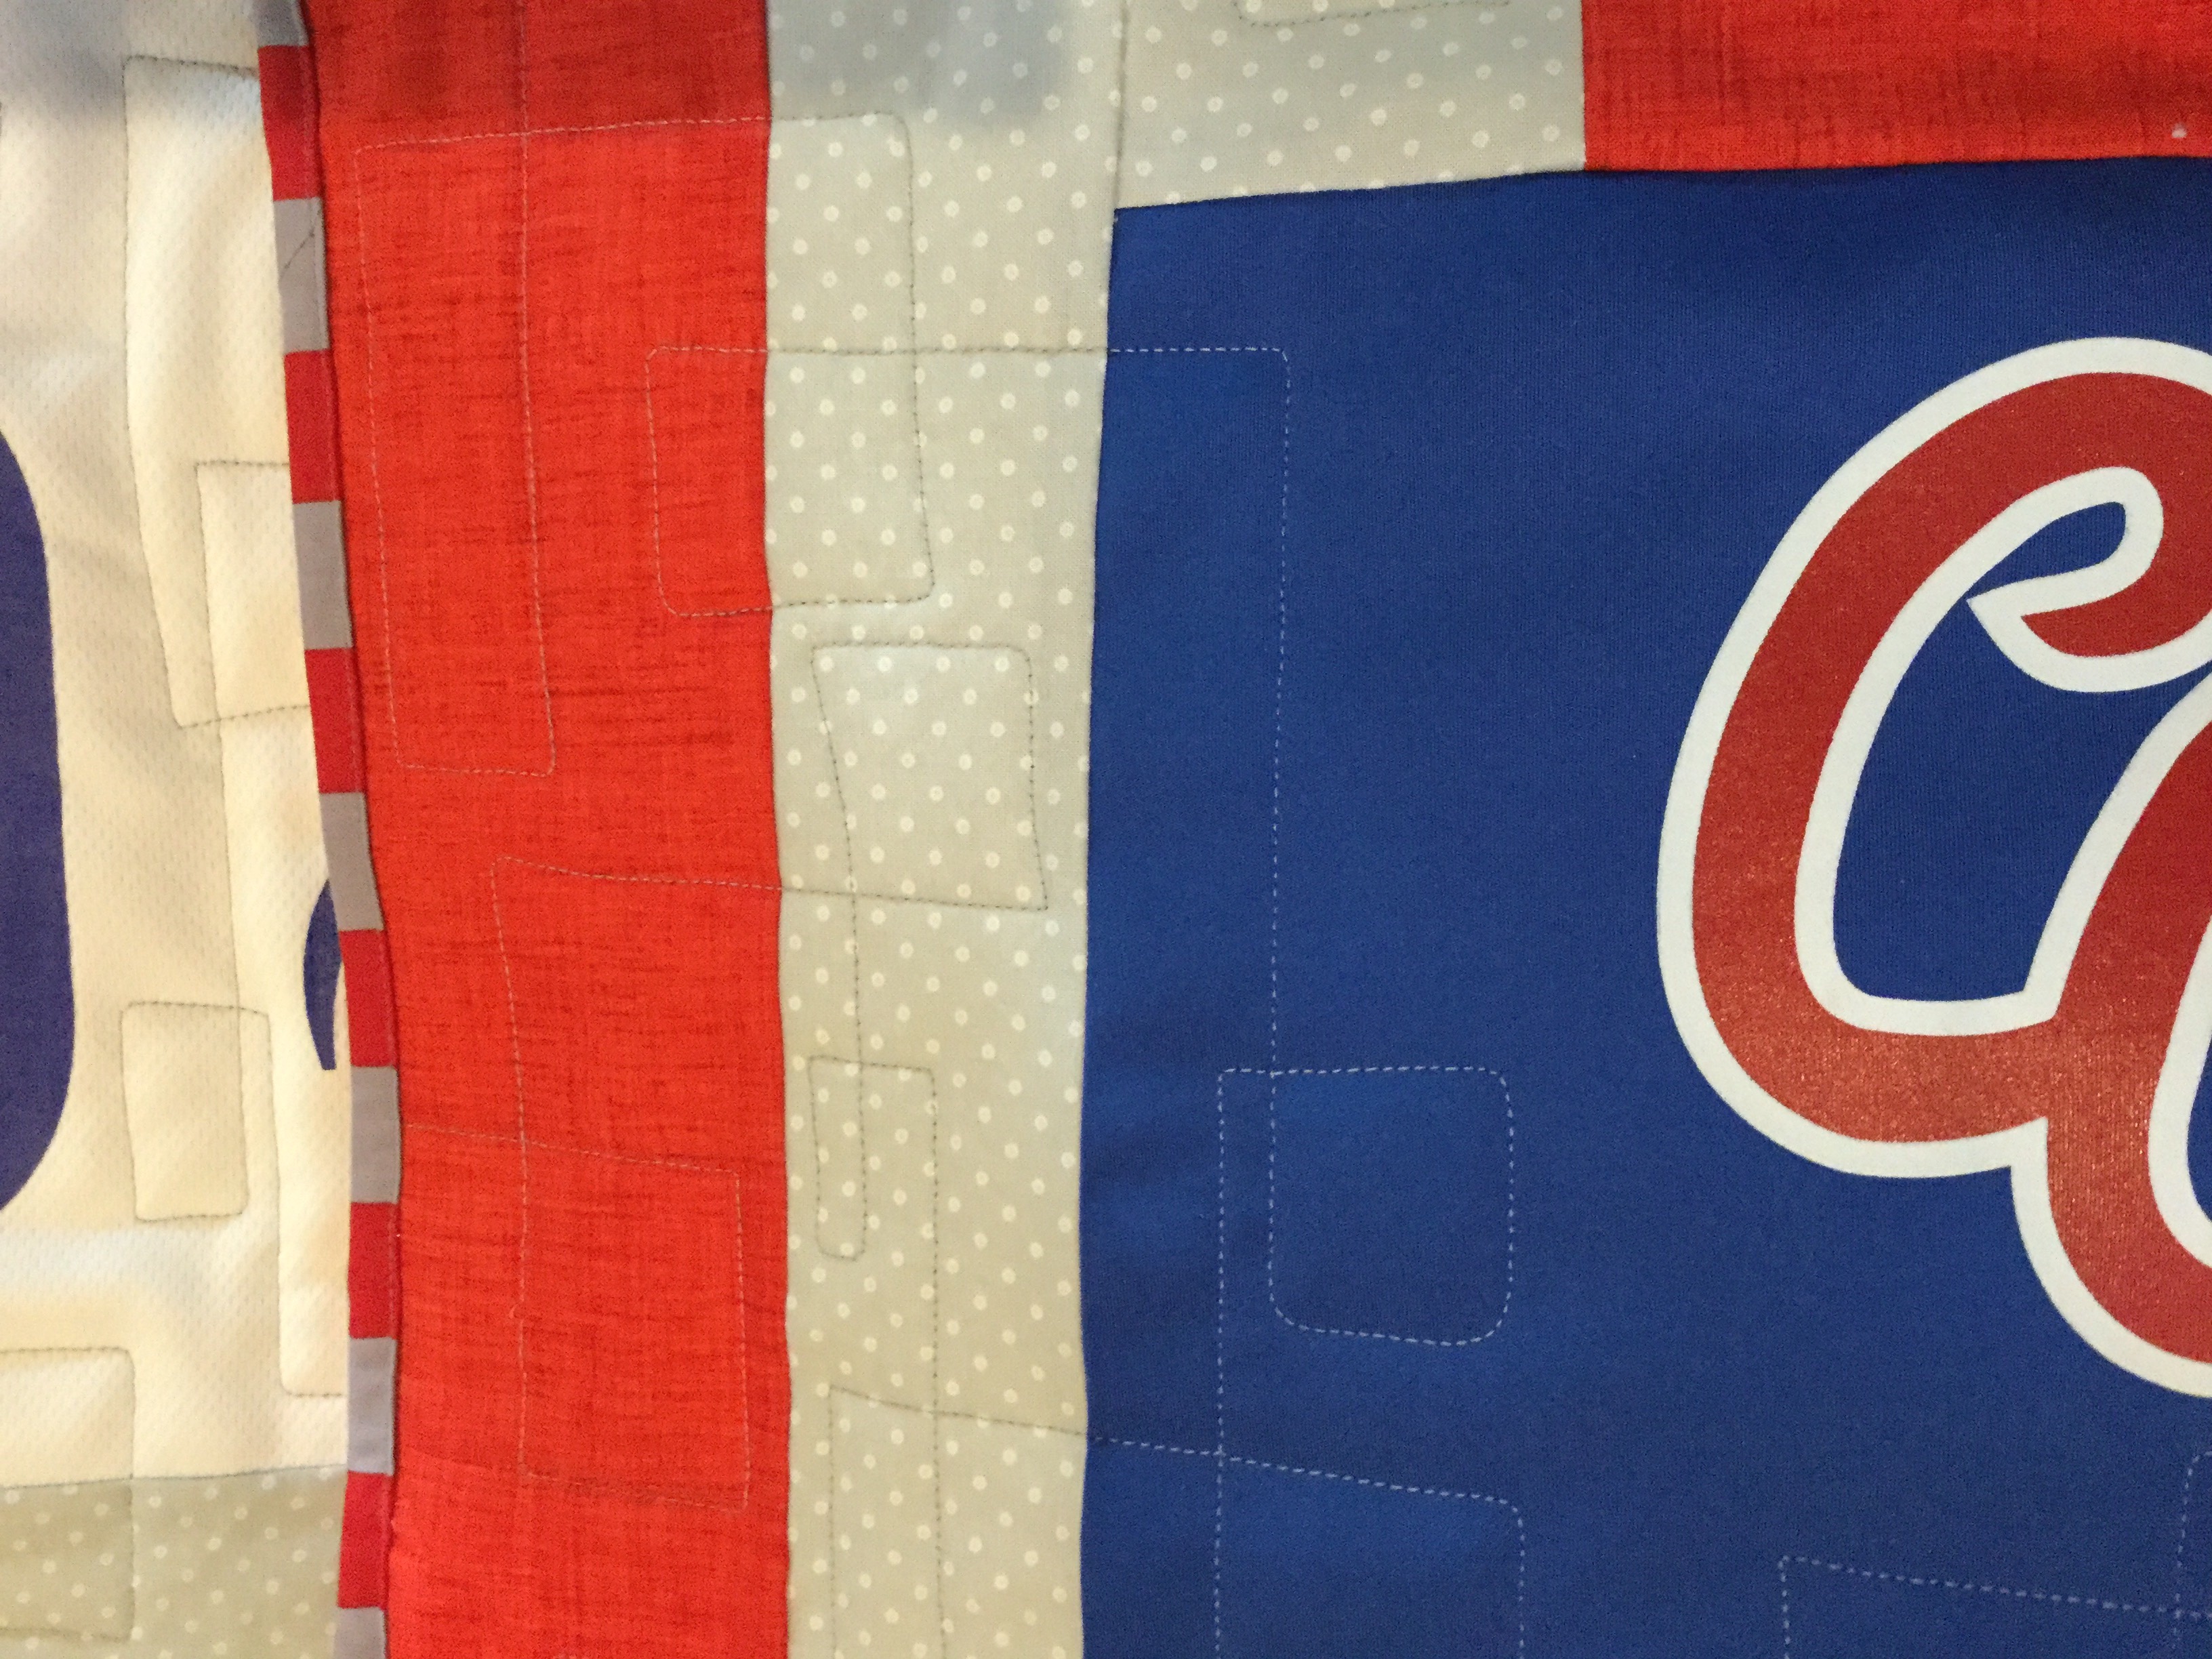
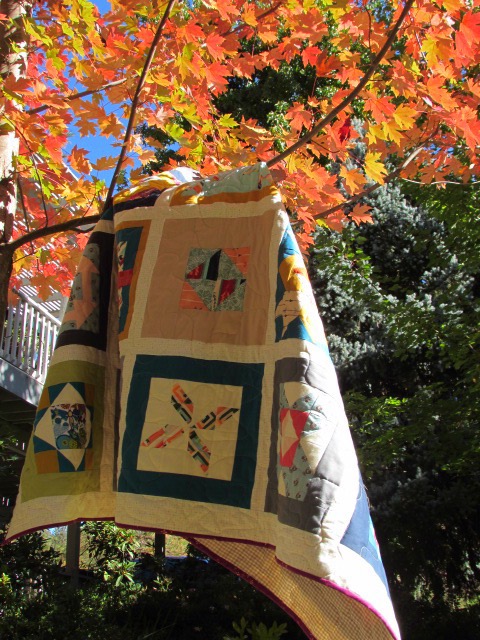
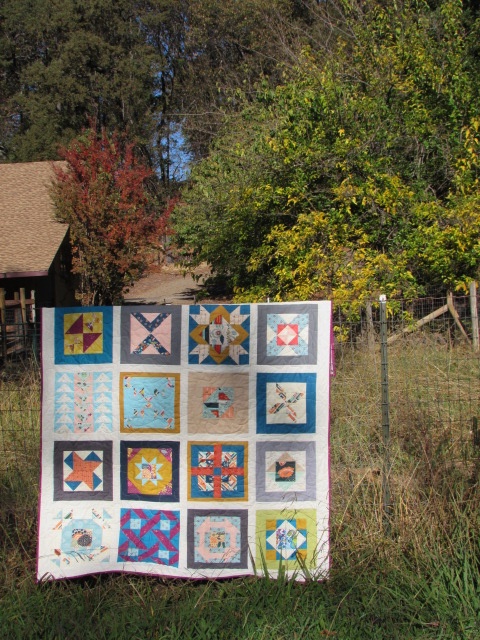
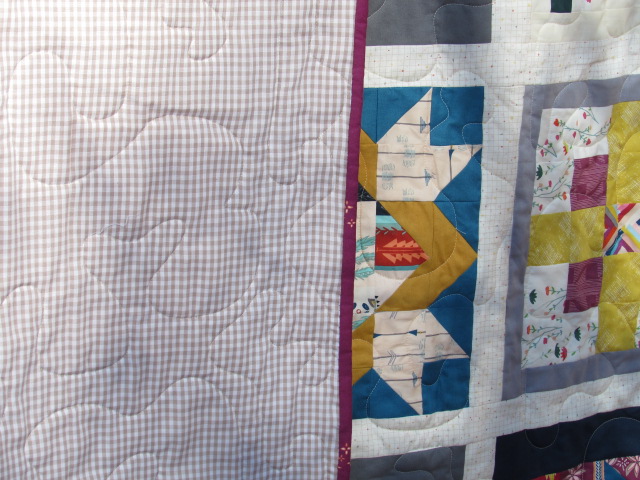
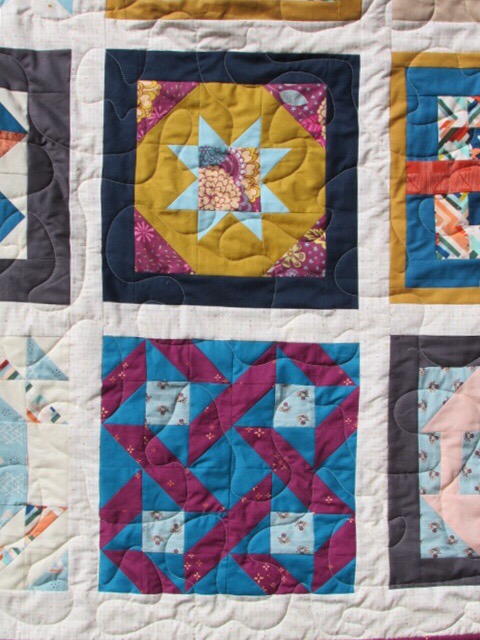
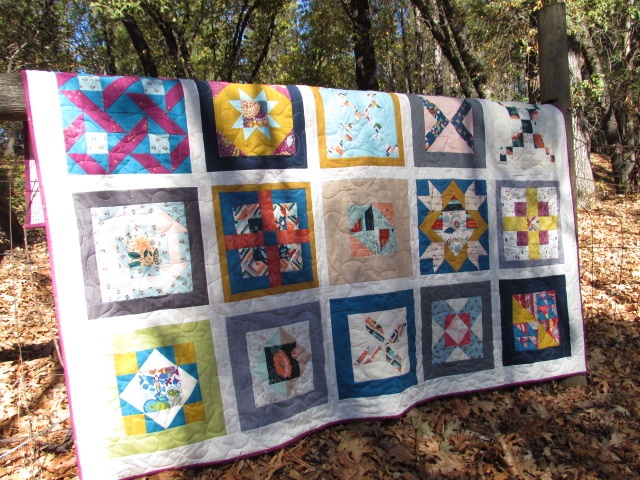
The rich colors – cheddar yellow, the deep blues and the raspberry colors are my favorites.  This was such a fun quilt to make.  I know there are a lot of QAL’s popping up for the new year.  I think I will look through them and choose one. I have two more quilts in process and I hope I can finish those up before starting another one.  Tomorrow I plan to take my nephew’s jersey quilt to the long arm shop and quilt it.  Hurray for finishing up some projects!!

Have a wonderful weekend all!  Linking to some of my favorites. Please feel free to check them out at the top of the page, under Link Ups.

Fussy Cutters Club, Book Review and Giveaway!

Today is my day to post a review and host a giveaway of a fun new quilt book.  If you are here for the first time via the blog hop, welcome!  The book of the day is Angie Wilson’s Fussy Cutter’s Club published by C&T Publishing.  You may know Angie as she is the queen of online quilt alongs and swaps. She thrives on leading large groups of quilters through complicated projects such as her current QAL making Jen Kingwell’s Gypsy Wife Quilt – not for the faint of heart for sure.  For more info on the events she is currently leading and has done in the past, click here.

It was about two months ago when I was invited by C&T Pubs to review Angie’s upcoming book.  Right away I was intrigued by the title of the book and the gorgeous cover.  I know we aren’t supposed to judge a book by its cover, but come on.  Look at this cover!  It just pulls the reader in at the get go.  Angie’s reputation for mad skills with fabric play and use of color assured me the book would be worth the time to read, review and create with.

The premise of the book is to learn to look at your stash with a new perspective – Angie teaches the reader to use your fabric by cutting into it and emphasizing the bits you love the most.  The book is well written and the instructions for each of the 14 projects are precise and easy to understand.  Angie takes the reader through the design process, how to best use your fabrics, color theory and more, prior to introducing projects. She really did a great job with this book.  The projects range from the very simple to quite complex (again, look at the cover!)

For my project, I chose to make the tote bag.  Angie rated it as an Intermediate project but with her clearly written instructions, I didn’t have any trouble. Following Angie’s thoughts on color for this project, I chose a limited palette.

My bag is built around a piece of vintage fabric I have from the 1950’s.  It is  a kitschy print featuring red, brown and black kitchen appliances, clocks and coffee cups.  I loved the idea of using vinyl for the bottom of the bag (looks great and gives durability) and found this textured vinyl at Ben Franklin.  Once I had my focus fabric and the vinyl, the rest of the fabric was pulled from my scrap bins.

Since the red coffee cup was the primary focus, I decided to use mainly black, brown and white with the occasional pop of red. Most of my fabrics had a vintage look to them except the coffee themed text prints.  Those are clearly current and modern but I liked the idea of including the coffee text with the other fabrics, to further the coffee theme of the bag.   The main fabrics I fussy cut were the coffee cups and saucers, the text prints, and the tiny black coffee pots on the vintage fabric.

Making the slabs for the outside of the bag was really fun – I have improv pieced in the past, but it has been a long while.  Putting these scraps together was very satisfying.  I did reduce the size of the bag by a few inches in width and length. I am fairly short and the bag seemed like it would be too big for me at the original size but breaking it down to reduce it was easy.

The two main slabs and the vinyl bottom are assembled here

I learned quite a bit about fussy cutting.  Like anything, the more you do it, the better it becomes. Looking back, I feel I should have trimmed the bits I fussy cut closer in. I left too much peripheral pattern and that detracts from the focal point.  Note the cup and saucer below.  I think if I would have trimmed it down a bit and removed the little bits of coffee pots, it would have been much cleaner. In the picture above, take a look at the text print.  Were I to do this again, I would not allow the other words to appear. I really only wanted the word “coffee” to be the focus.  But live and learn (or sew and learn?).  Next time I will remember these bits and pieces that really make a difference in a project.


When assembling the bag, Angie’s instructions called for me to line the outer pieces with fusible interfacing and then to apply fusible batting.  I was skeptical at first but it really makes the structure of the bag a nice combination of crisp and soft (does that make sense?)  The addition of the fusible interfacing gave it a nice shape. Once I had those layers assembled, I used simple straight line quilting to hold all three pieces in place.

Her pattern calls for fabric straps but I had plenty of the vinyl so I decided to make the straps with that instead. I like the look of it and was pleasantly surprised that my machine had no issue stitching through several layers of vinyl. (I did use a heavy duty jeans needle.)

My model shows just how cute this tote bag is!

Overall, it was a great project and I felt the book was a great inspiration  to look at my fabric with a different perspective.  The tote is really fun (as you can see with my always available bag model.) It traveled with me to Vermont last week and when combined with the cross body bag I made, it was the perfect set up.

This is just one example of the projects that Angie designed for her book.  There are thirteen others though, including pillows, coasters, minis and zip pouches. To take a look at some of the projects, here is a list of the bloggers celebrating this new book.  Check them out for lots of inspiration as well as several chances to win a copy of the Fussy Cutters Club book!  As with most book giveaways, if the winner is international, an e-book will be provided.  If in the states, you will receive a hard copy of the book.

To enter to win, please leave a comment telling me your current go-to quilt book (I guarantee if you purchase or receive this book, it will be right up there on the list!) I will leave the giveaway open through Saturday, October 28th and will announce a winner on Sunday.


Linking up with lots of my favorites – most are listed at the top of the page, under Link Ups.  Also linking to Elm Street Quilts annual Bag It event.  Check that out here!

Thrifted Stash Update


It has been a long time since I have written a Sunday Stash post.  Maybe because I have been buying fabric constantly over the past months for my shop and it would be really boring if I wrote about each addition.  Technically, that isn’t my stash, but it is fabric and I do acquire it on a regular basis.

But today I want to share a couple of finds I had at the thrift store over the last several weeks. Every once in a while, I get lucky and find nice quality duvet covers in the thrift shop.  I remember finding one a couple of years ago and using one half of it to back a scrappy quilt I had just made.

Duvet covers tend to be a quality cotton with more heft than quilting cottons.  Thicker than sheets, they can be really durable. The first one I found is a pretty green color, maybe sage green or a dusty green?  It has a gingham pattern on both sides, one check larger than the other. After separating the fop from the bottom and removing the hemmed or finished edges, both of these pieces netted out at 77″ x 84″.  I should be able to back two lap size quilts with these and I paid a whopping $5.00 for the entire thing.  There are no worn spots or stains – they look wonderful.

This is the next one I found.  It is heavier than the green gingham – maybe similar to ticking or duck cloth? I took it home and laundered it. Then after removing buttons along one open edge, I split the top from bottom and removed the finished edges.  It is a bit smaller, finishing at 60″ x 76″.  As with the green pieces, it is free of spots or worn areas. I am thinking of a few different projects I may use these for.  I am not sure if I will back a quilt with it because it is a little bit narrow. The neutral taupe color will be easily worked into a number of projects,  I am thinking I will use this for some Christmas projects I have yet to begin. You’ll have to wait until later to hear about these. 😉  For whatever reason, this duvet cover was a little bit more expensive but I happily paid $9.50 for it.  It is still a lot of great fabric for the price! (Side note:  I no issue paying a little more for items like this because the main thrift shops I frequent are in support of our local Hospice organization and I am very happy to support such an important group of caregivers.)

Anyway – that is the latest with regard to my stash. If you venture into a thrift store, take a quick peek at the linens area – I am thrilled when I find something like this because backing a quilt can be an expensive part of the project!