Author Archives: Bernie

Ferrari Handmade – Grand Opening Celebration

Today I have something really fun to share with you. This week my sister Patti is celebrating the grand opening of her shop, Ferrari Handmade!!  She has been working incredibly hard on this for several months now and she is ready to invite you to come and browse her shop.

Let me take a few minutes to introduce you to Patti.  Of the six of us sisters, she is number three and I am number four which means…. yes, she is older than me. I will admit this gives me satisfaction in a sort of unhealthy way.  It is readily apparent in the photo above. I am the baby and she is to the right of me — even at this age, she is clearly older and wiser than I. (I love this picture – two more girls were born not long after this.)

Patti and I shared a bedroom growing up and we fought constantly.  Like, really and truly — all the time. Funny how once you live apart you miss the person that drove you nuts for so long. We would love to live near each other again.  We share a love of sewing and we both took sewing classes from Mrs. Handley back in high school.  She haunts us somewhat and if we have a sewing mistake or a major project fail, we will say “Mrs. Handley would be so disappointed.”  (I wrote about Mrs. Handley a long while back if you want to hear more about our esteemed sewing teacher.)  Yes, Patti and I have been sewing a long while now.

We both made lots of our clothes during high school (remember,  my father owned a fabric store so we had ‘easy access’.). Not long after high school, Patti moved to Southern California, married and started her family. (Click here for a post about the bridal gown she made for her wedding.)

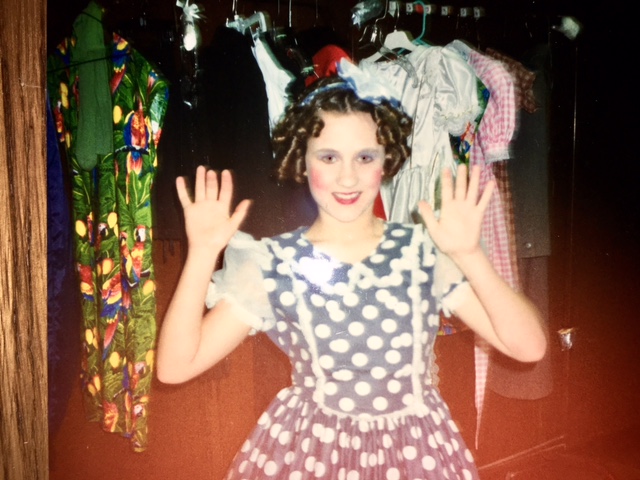
Once Patti started having children, her sewing changed a bit and she began sewing for her kids.  She has a five children, three girls and two boys. One of the things Patti really enjoyed was making costumes for her children. Her girls were very involved in theater when they were in high school and she made costumes for them.

Maria playing the part of Tina Denmark, in the play “Ruthless”

As Patti’s kids grew up and began their own families, she shifted her sewing priorities yet again and began to focus on her grand children.  Hers are very lucky grand kids because she has made some really fun costumes for them.

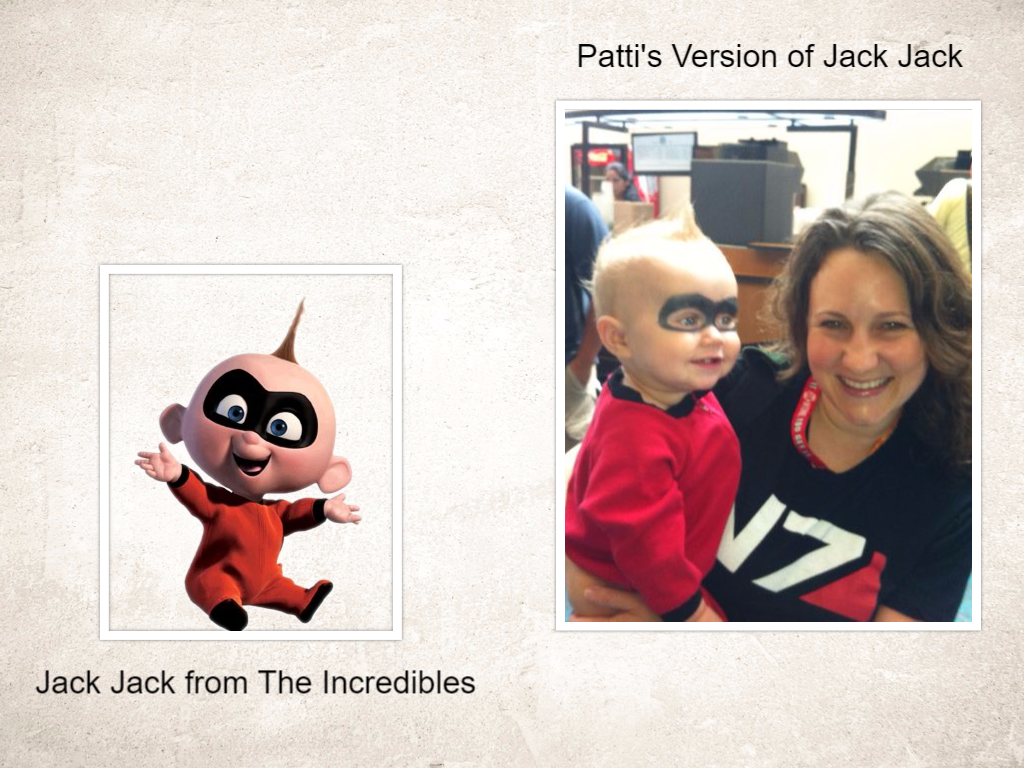
When her first grandson, Jack, was just a baby, his mother, Maria (same girl as the one that played Tina Denmark in the costume above)  had to speak at Comic Con in Southern California. She asked Patti to make a costume so she could dress him up as Jack-Jack, from the kids’ movie, The Incredible’s.

Last year, two of her grand daughters wanted to dress up as Princess Lolly and Queen Frostine from the kids’ Candyland game.  Grandma came through and the girls were adorable.

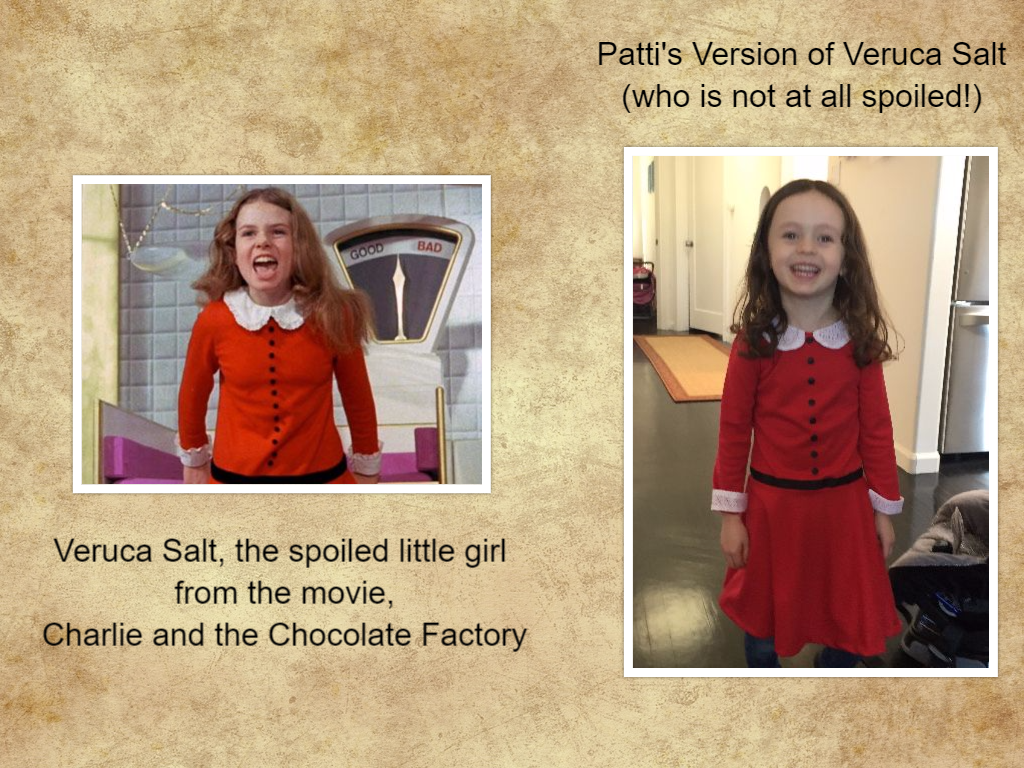
The older grand daughter (Queen Frostine) had a recent obsession of Veruca Salt, the character in Charlie and the Chocolate Factory movie.  She was thrilled with this costume from her Grandma.

Am I getting the idea across?  She loves to sew and she sews a lot! It came time to think of another way to put her sewing to work for her.  Now that her children are out of the house, she has a lot more time.  I have written before about how helpful she has been by working the quilt shows with me.  As we spent time together preparing for and working the shows,  the more she thought about having her own business.  She loves creating these wonderful outfits for her kids and wanted to expand on this hobby of hers.

And so it began. Ferrari Handmade came to fruition just days after she decided to open a shop. Once Patti decides to do something, there is no going back.  She epitomizes the phrase, “Go big or go home”.  She commits and dives in. Patti began researching fabrics and selecting designs and creating dresses. She had a soft opening at the last quilt show we worked and she was quite successful. She sold a number of dresses and little tote bags and took home orders for custom work.

She has been sewing fiend over the past weeks.

She is lucky to have a great studio to work in. I may be a wee bit envious. Ok, yes, I am envious – it is a lovely space. (Real life crafting comment though…. she made me promise to tell you it never looks this clean. She wasn’t ready to go public with a picture of a messy space just yet.)  😉

Her inventory grows daily as does her selection in her Etsy shop. Right now she is focused on creating a dress in each of the fabrics she has on the shelf. She is making sizes 2T through girl’s size 8.  I really like the system she utilizes for stocking her shop. She lists at least one finished dress which the customer is welcome to order, or the customer can place an order for that dress in a size that works for her child. Patti will take the order and ship the dress within five business days (though she is usually faster than that– she does not seem to require very much sleep.)

I think one factor  setting Patti’s product apart from others, is her use of trim work and unique accents. Most of her dresses have piping accents at the sleeve, bodice or neckline and many have ruffles or under skirts in coordinating fabric.

Her fabric selections are the perfect combination of pretty and practical.  She uses quality cottons which are easily washed, so her dresses are beautiful but also practical for children; ready to be worn and played in.

Of all she has made for this season, this is my favorite.

I love the dark blue celestial pattern with that bit of gold trim peeking out at the sleeve and from the hem of the lining.


How about these snowmen on blue – it is great for the holidays but could easily be worn all through the winter months.

This dress features snowflakes on a deep red background. I should note that Patti uses a very generous hem so these can be worn for a long while before the child out grows the dress.


This sweet holiday dress has a rustic feel to it.  Patti chose a print featuring Christmas ornaments decorating a background of pine. I love the bias strip of plaid she used to accent the bottom of the dress.

Handmade doll dresses to match your little one’s dress.

One more thing I have to show you.  Patti also makes doll dresses that fit American Girl Dolls, or other dolls that are 18 inches tall.  I love this!! How fun to surprise your little one with a matching dress for her doll. If you are shopping and select a dress for your special girl, you can also order a matching dress.  She has some in stock but will happily take orders for others to match the dress you are purchasing.

Hopefully you now have an idea of the style and excellent quality of the items made by Ferrari Handmade. Because so many of you either have children or grandchildren, or a special child in your life, I know you will be happy to hear Patti is offering a custom dress to one lucky winner.  To enter the giveaway, you need to do two things.  First hop over to her shop and take a peek at the dresses she has listed so far.  Come back and comment here to tell us which dress is your favorite. (Hoping this will provide some input on the fabric choices she is using and then she can plan accordingly.)  The other requirement is to either like her Etsy shop so you can keep track of what she is offering, or to follow @ferrarihandmade on Instagram. Either way, you will then be able to hear about any promotions or new product that might be available in her shop. So, you have two simple tasks to complete and you may win a lovely handmade dress for your special girl.

Additionally, readers can use the coupon code GRANDOPENING20 to receive 20% off any orders at Ferrari Handmade.  This coupon is valid through the end of day on October 10th.  Definitely a great deal on a gorgeous gift for a little one.

Thank you for taking part in this celebration of Ferrari Handmade. I am so proud of my sister and the work she has done to get this up and running. If you feel so inclined, please share the  news of her shop with any of your friends who might appreciate Patti’s work. It takes a village and I love the way our community supports each other!  Good luck with the giveaway!

Sewcial Bee Sampler Quilt Top

This week didn’t go quite as planned.  But I have learned to be flexible because my week rarely goes as planned.  I had scheduled time to quilt Sam’s jersey quilt at the long arm shop but this plan was derailed by a migraine.  Fortunately, the woman running the shop is very flexible and was able to reschedule me to Thursday of next week.  Hopefully, that will work out for me as I am really looking forward to quilting it.

After a day of recuperating, I pulled out my blocks made with the Sewcial Bee Sampler during the spring and summer.  I loved this QAL which was hosted by Maureen Cracknell and Sharon Holland. For the majority of my blocks I used scraps of Fleet and Flourish (designed by Maureen) and solids from my stash.  Toward the end though, I added in a bit of Garden Dreamer and one scrap from Alison Glass because I was really running out of Fleet and Flourish.  Thankfully, these all worked well together.

Somehow time got away from me toward the end of the quilt along and I completed only 20 of the 25 blocks designed for the quilt. I pulled out the blocks, looked them over and decided that 20 blocks was plenty.  These are 12 inch blocks and there is sashing, so the quilt makes a generous lap size. Even without the last five blocks, it finished at 58″ x 72″. I love these blocks and wanted to finish this one up.

I used Mesh Joy, from Sharon Holland’s Gossamer line for the sashing.  This low value print is a huge favorite of mine. Actually, it is a favorite of many which was made clear by how quickly I sold out of two full bolts of it. The colors and grid like print are really soft and work with so many colors. I am please by the way it enhances my blocks. Between the colors, Maureen’s fabrics, the sashing and the block design, I am thrilled with this quilt top. Samplers are a favorite of mine, second only to basic, simple patchwork. It is fun to see the varied design of the blocks, some with large chunky shapes and others with smaller, detailed designs. Sashing is a life saver for me as I am not a precise quilter. With sashing, I know my less than perfectly pieced blocks won’t need to line up corner to corner.

I think I will try quilting this project at the long arm shop too. I want to do a loose all-over pattern so it is soft and cozy. It is second in line, after Sam’s jersey quilt.

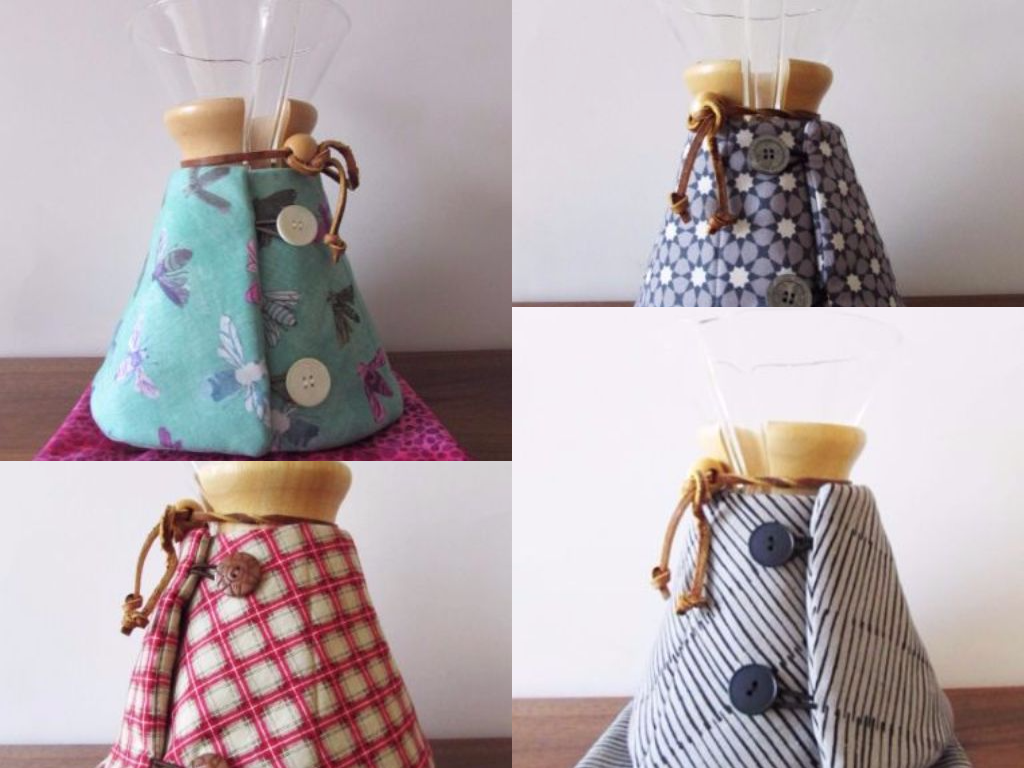
Chemex cozies for my shop

Besides finishing up the Sewcial Bee quilt top, I have been making Chemex Cozies for my shop. It is getting to be the time of year for holiday shopping (I know, it is still 80 degrees outside and fall has barely begun!) so I need replenish stock in my shop.  It has been fun to shop my own store for fabric to make these.

With holiday shopping around the corner, my shop will become busier than usual.  I need to look at the sewing I hope to accomplish during the last part of the year and prioritize.  My personal sewing tends to be less during this time as my Etsy projects and holiday gift sewing increases. I had planned to take part in the Wayward Transparency QAL hosted by Yvonne of Quilting Jetgirl. I love the pattern she created for the event, so much so that I am sponsoring the event with a giveaway prize. However, this isn’t the right time for me to begin another quilt. If you haven’t looked at this event yet, I highly recommend it. The pattern is really cool and the transparency effect is striking.  The QAL for this striking lap size quilt has barely begun with fabric selection happening now.

Julia and I are heading up to Apple Hill this weekend. About an hour’s drive from here, there are lots of you-pick places, yummy Apple Cider donuts, pumpkins and all things autumnal.  I am looking forward to spending the day with her out and about.  I hope you have something fun planned for this weekend too!

Be sure to stop by next week. I have a fun post and giveaway to share on Tuesday!
Linking to my favorite places. Please check out the links at the top of the page, under Link Ups. See you back here next week!
 

Jersey Quilt Progress

Happy first day of Autumn! I love this time of year and the change of season that is happening these days.

This week I took a look at the jersey quilt I am making for my nephew and decided the quilt top wasn’t quite large enough for this very tall guy.  I added 3 1/2 inch borders to all sides to enlarge it.

There were some smaller emblems that had been on the sleeves of a few jerseys and it seemed like a good place to use them.

I put the American flag on two corners.  (Number 50 was his father’s number when he played football for Stanford. I wonder if Sam requested the number, not too likely it was a coincidence, right?)

On the other two corners I used these bear paw prints. His high school mascot was the Bruins. This one is a funny coincidence because the high school mascot for my boys here in California, several  states away, was also the Bruins.

Now the quilt top measures about 56″ by 76″ which will be a bit better for this guy.

Besides adding to the quilt top, I also pieced the backing.  Wanting to use up a few more jersey logos, I made a strip with the last three.

The strip was the inserted into a piece of the light gray polka-dotted wide back that I used for piecing the front. I am hoping to reserve some time on a long arm machine next week so I can quilt this.  It will present a few challenges. One is the difference between the jersey blocks and the cotton pieces. There is some wave to it. Also, this is the first time I will have a pieced back on the frame. I need to make sure it is loaded nice and straight so it doesn’t come out slanted when it is quilted together. I am sure Kendra, the assistant at the shop, will help me with this. Finally, I need to better understand the order of things when quilting a project on a long arm. Once loaded on the frame, I want to do a simple all over pattern on the body of the quilt and then quilt something different on the borders. Do I do the center first and then roll it back to the top and do the borders? That seems cumbersome but I am not sure how else to do this without tons of stops and starts on the borders? I would love to hear hear how you handle this. Actually, I could easily quilt the main part and then do the borders at home on my machine. Options, options. Leave a comment if you have input on this–there is always something to learn.

I also spent time in the kitchen using up the bounty of tomatoes we are picking in the garden right now. I posted on Instagram that I have been making tomato jam.  I thought I would publish a link to the recipe I use from the Use Real Butter website. (Don’t you love that blog name?)  I have been making this for several years now.   It is a great mix of sweet and tangy that is great on burgers as well as spread with Brie on slices of baguette.  The combination of tomatoes, sugar, tart green apple, onion, and vinegar is really yummy.

When I made this batch I reduced the sugar by 1/4 cup and didn’t notice any difference. It is always good to be conservative with sugar if possible. Once it is all mixed up, I just let it simmer without a lid on the pot for a couple of hours. The pot needs to be watched and stirred often or the bottom will scorch. (n one batch I got sucked into blog reading and burnt the bottom. It wasn’t a total loss because I could just skim the top off and keep that. Luckily it didn’t taste scorched. But the yield was certainly smaller.

Once it cooks down, it can be canned in jars and processed in a water bath. Or, do as I did, and put it is small containers, label them, and freeze it. Much simpler!

Today is the last day to enter the giveaway for a 26 piece bundle of Island Batik.  Click here to enter.  Hope you all have something fun planned for the weekend.  My cousin is out here visiting (from Louisiana) and I am looking forward to spending time with her. Happy Friday!!

Quilt Show Recap

Last weekend my sister, Patti, and I worked at the Elk Grove Quilt Show. It was a beautiful weekend and attendance was great. I loved meeting the women from the Elk Grove guild. They were really warm and friendly. There were some issues with the wi-fi and the server had to be rebooted numerous times.  The vendor chairperson never lost her smile and was a delight to deal with. They hold a quilt show every other year and one could tell they really look forward to this event. Attention was paid to each detail and the show was wonderful.

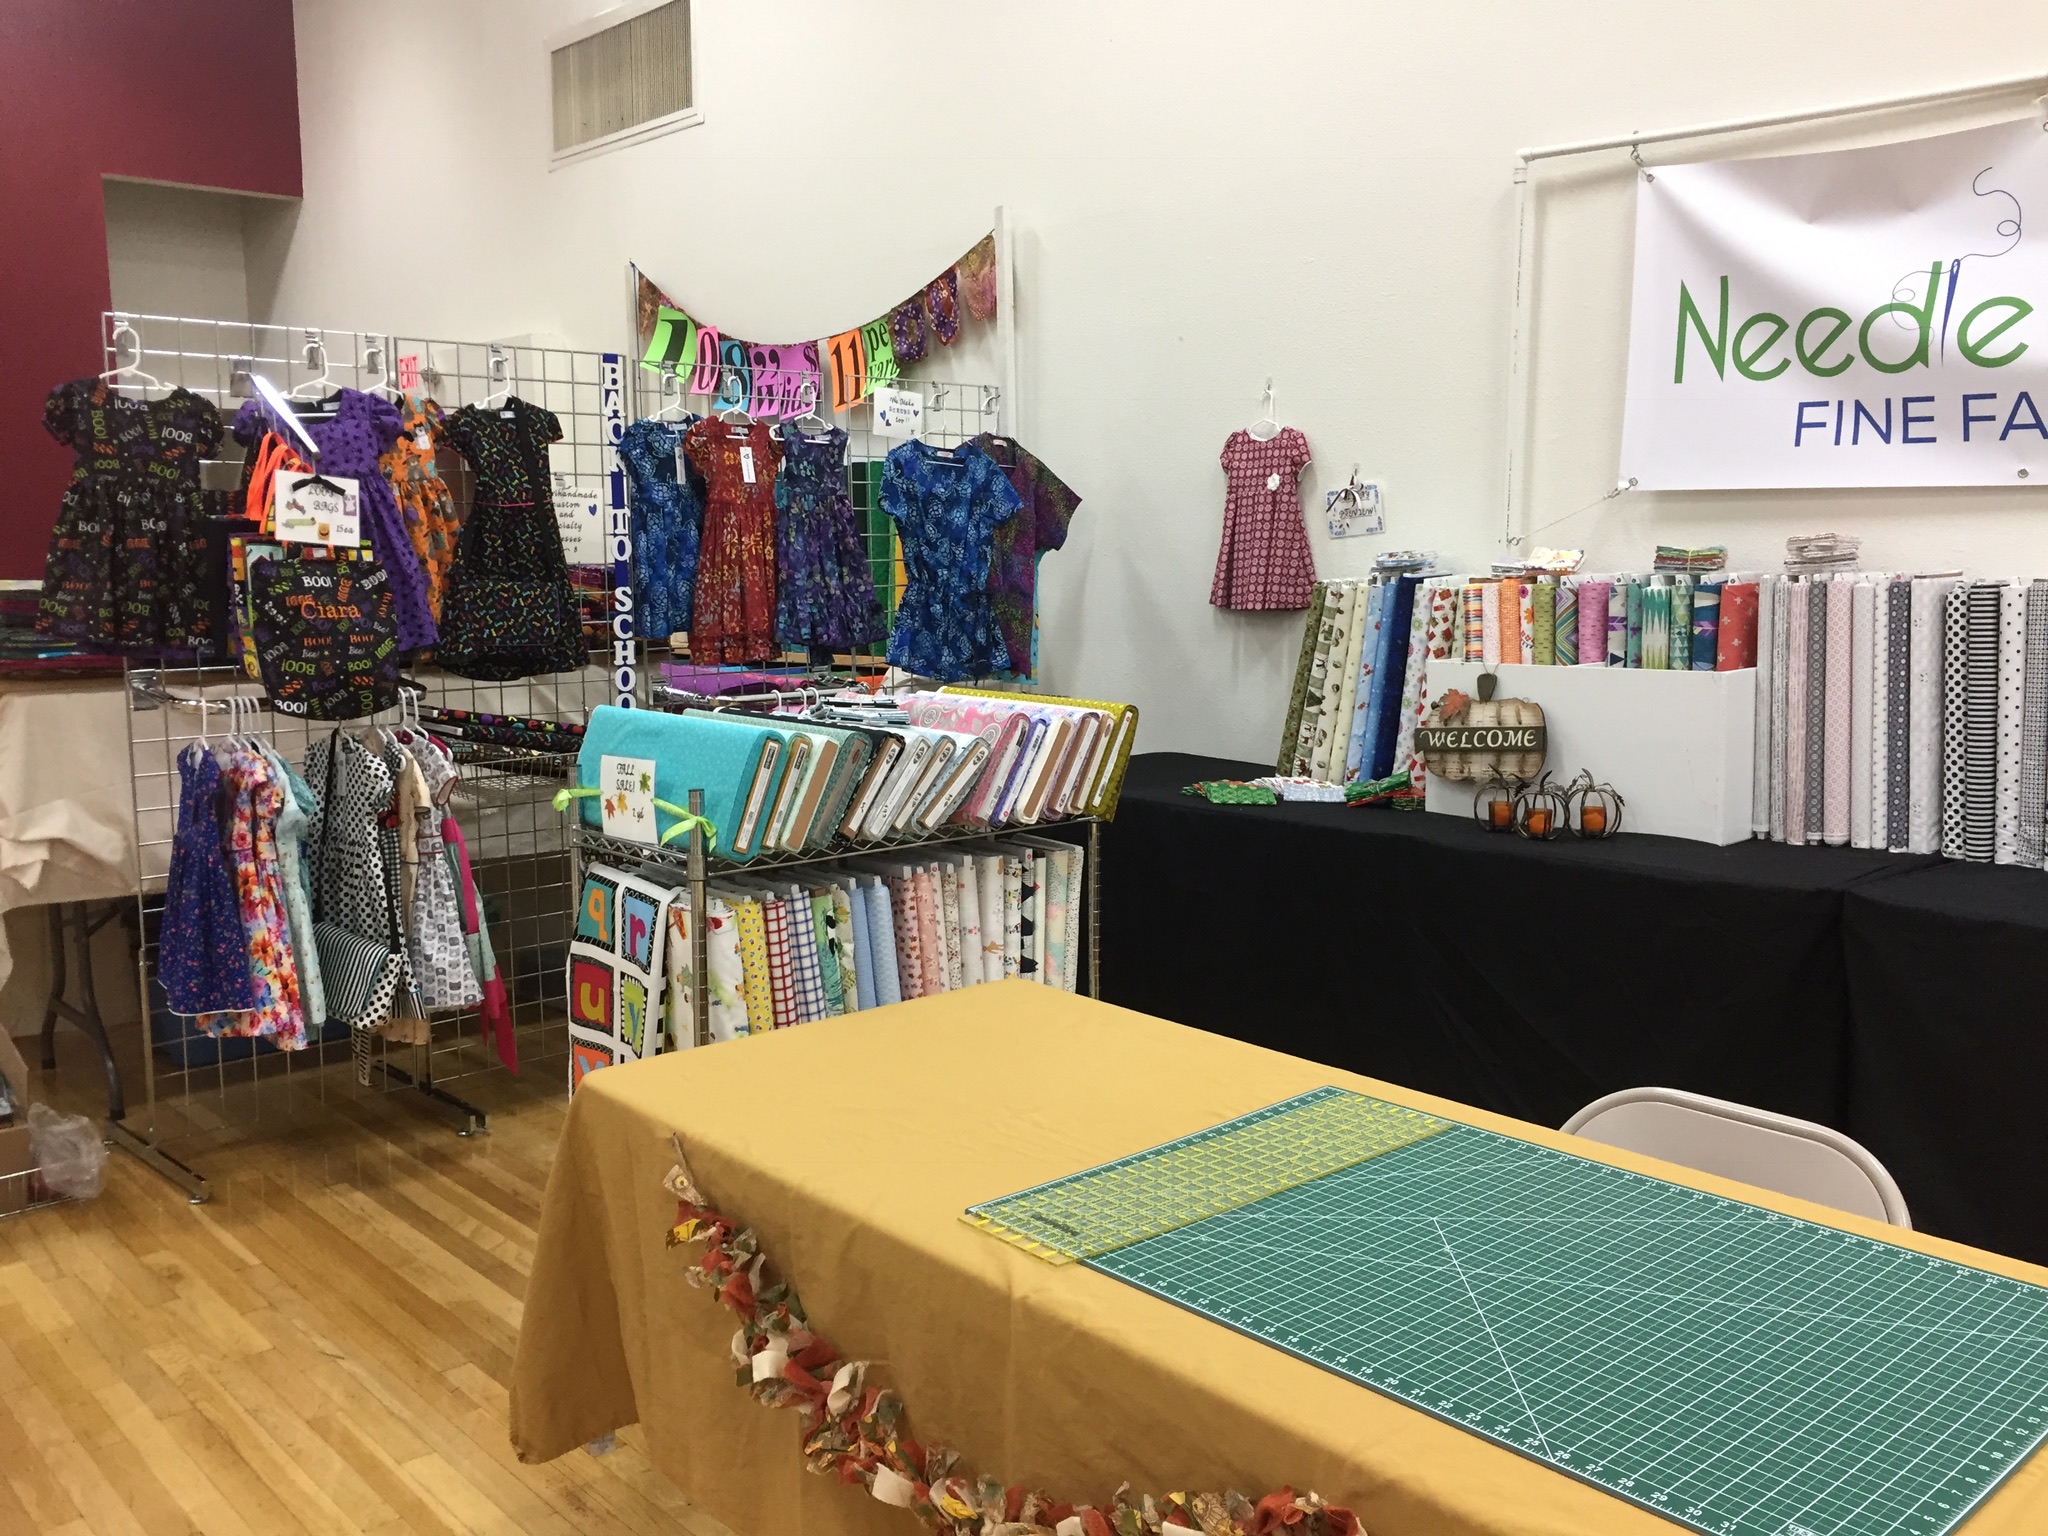
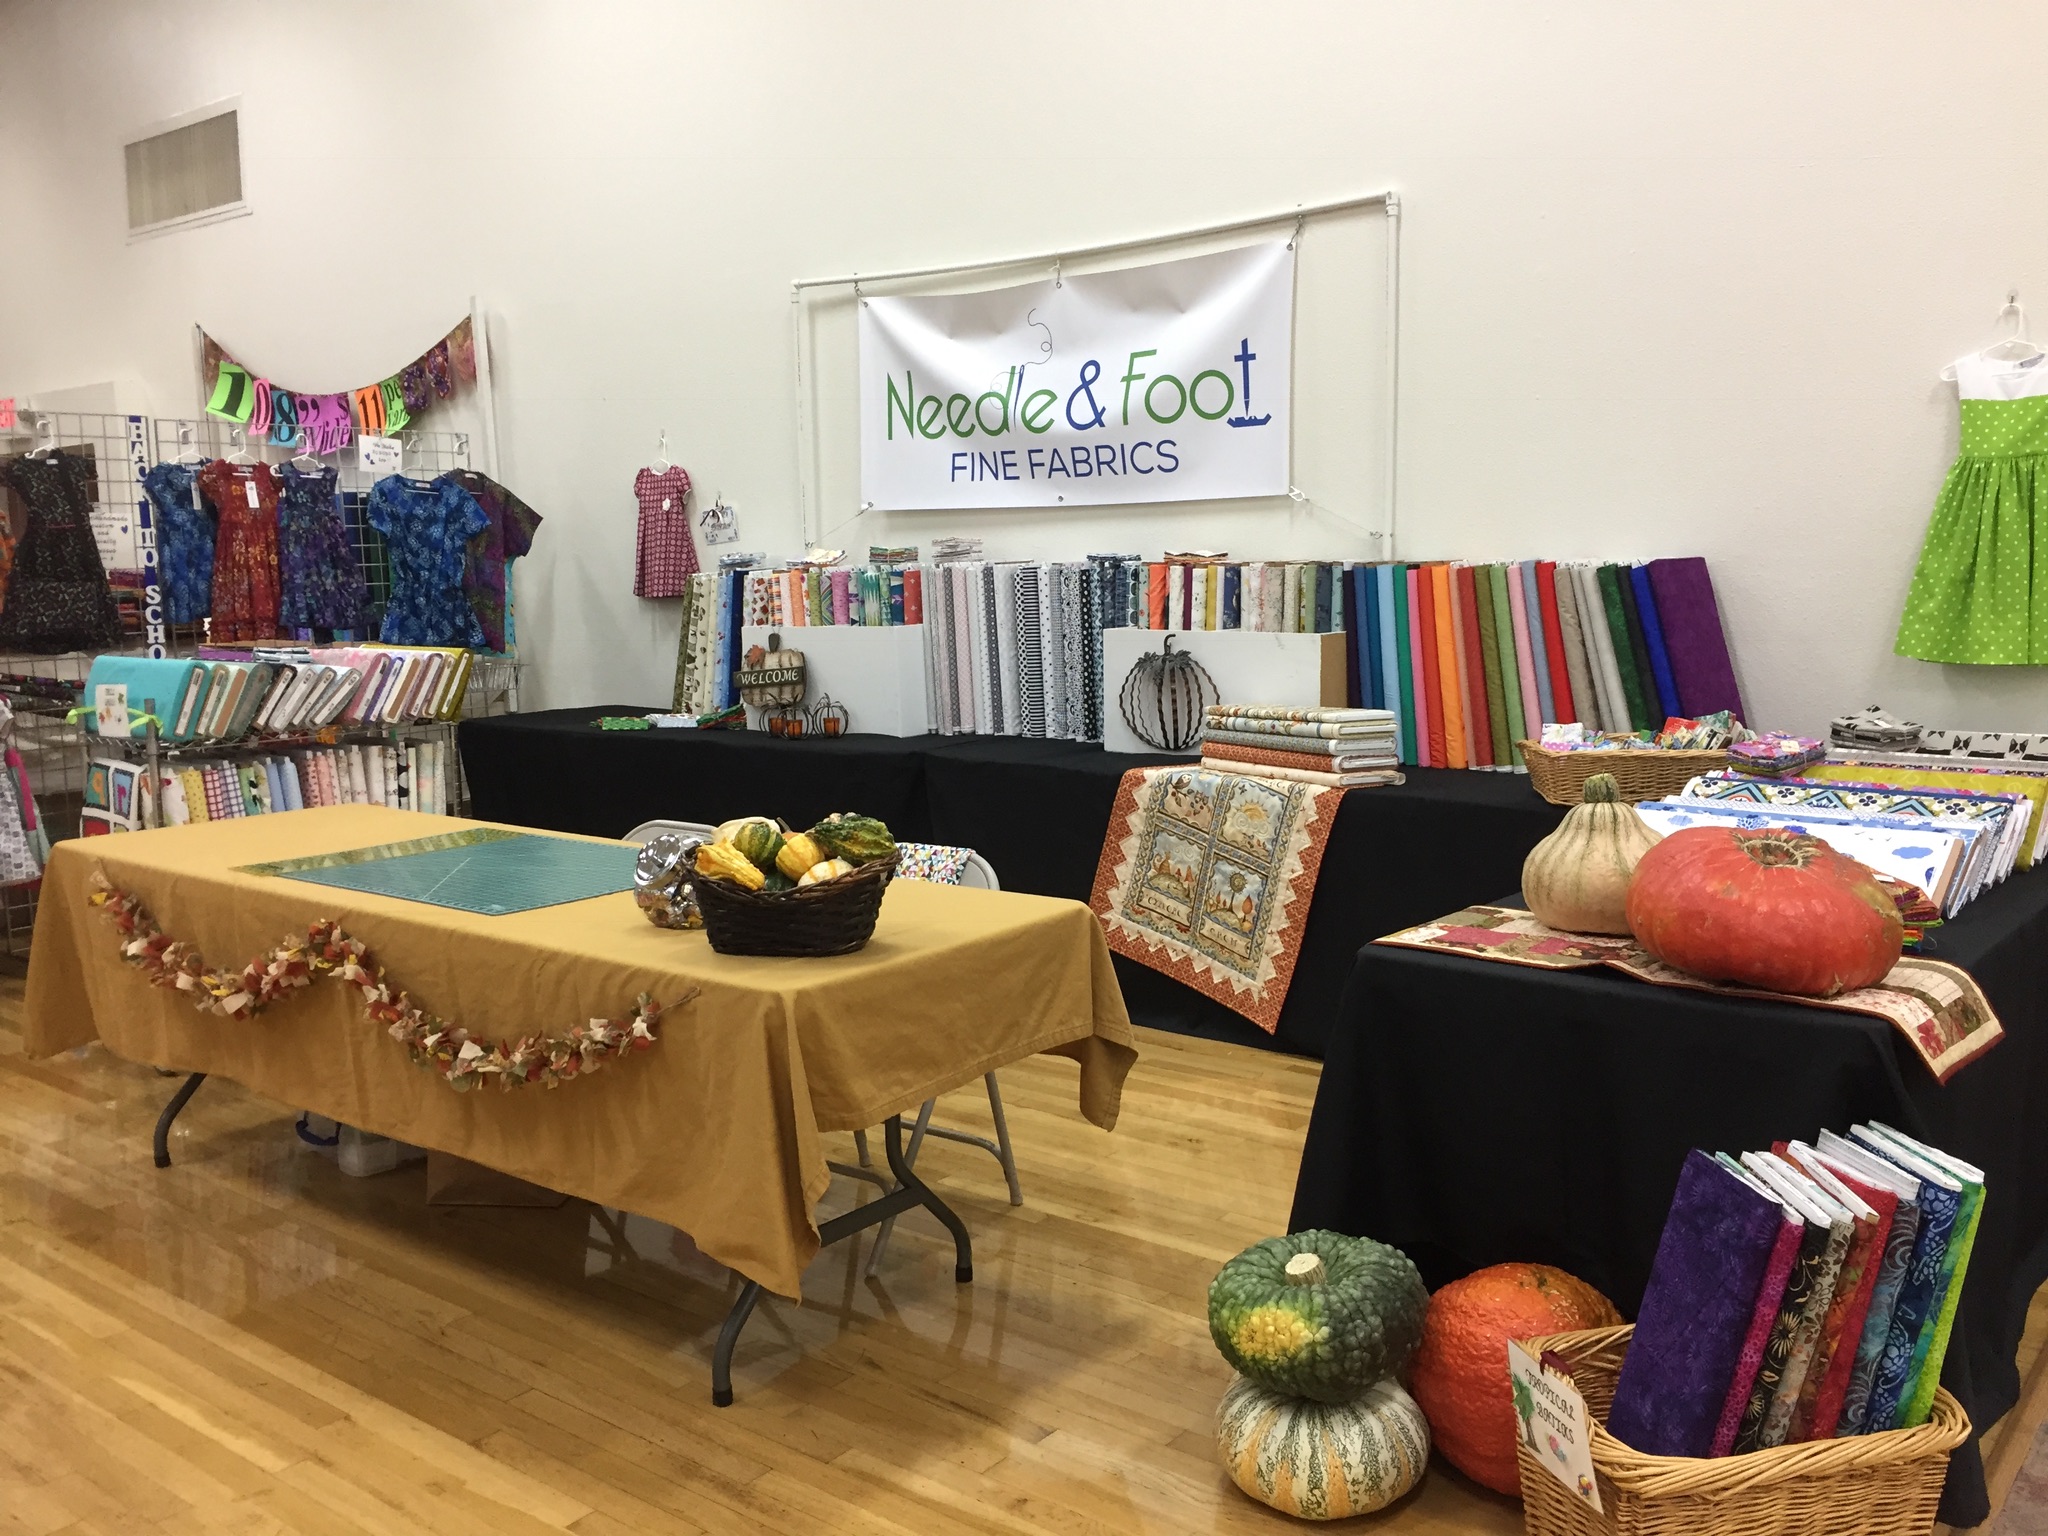
This is the third show Patti and I have done.  She brought a great selection of hand made children’s dresses, messenger bags, and Halloween Loot bags. These were well received and she sold quite a few things. (To see more of her work, check out her shop, Ferrari Handmade.)

We had fun decorating the booth with pumpkins, gourds, and fall colors.

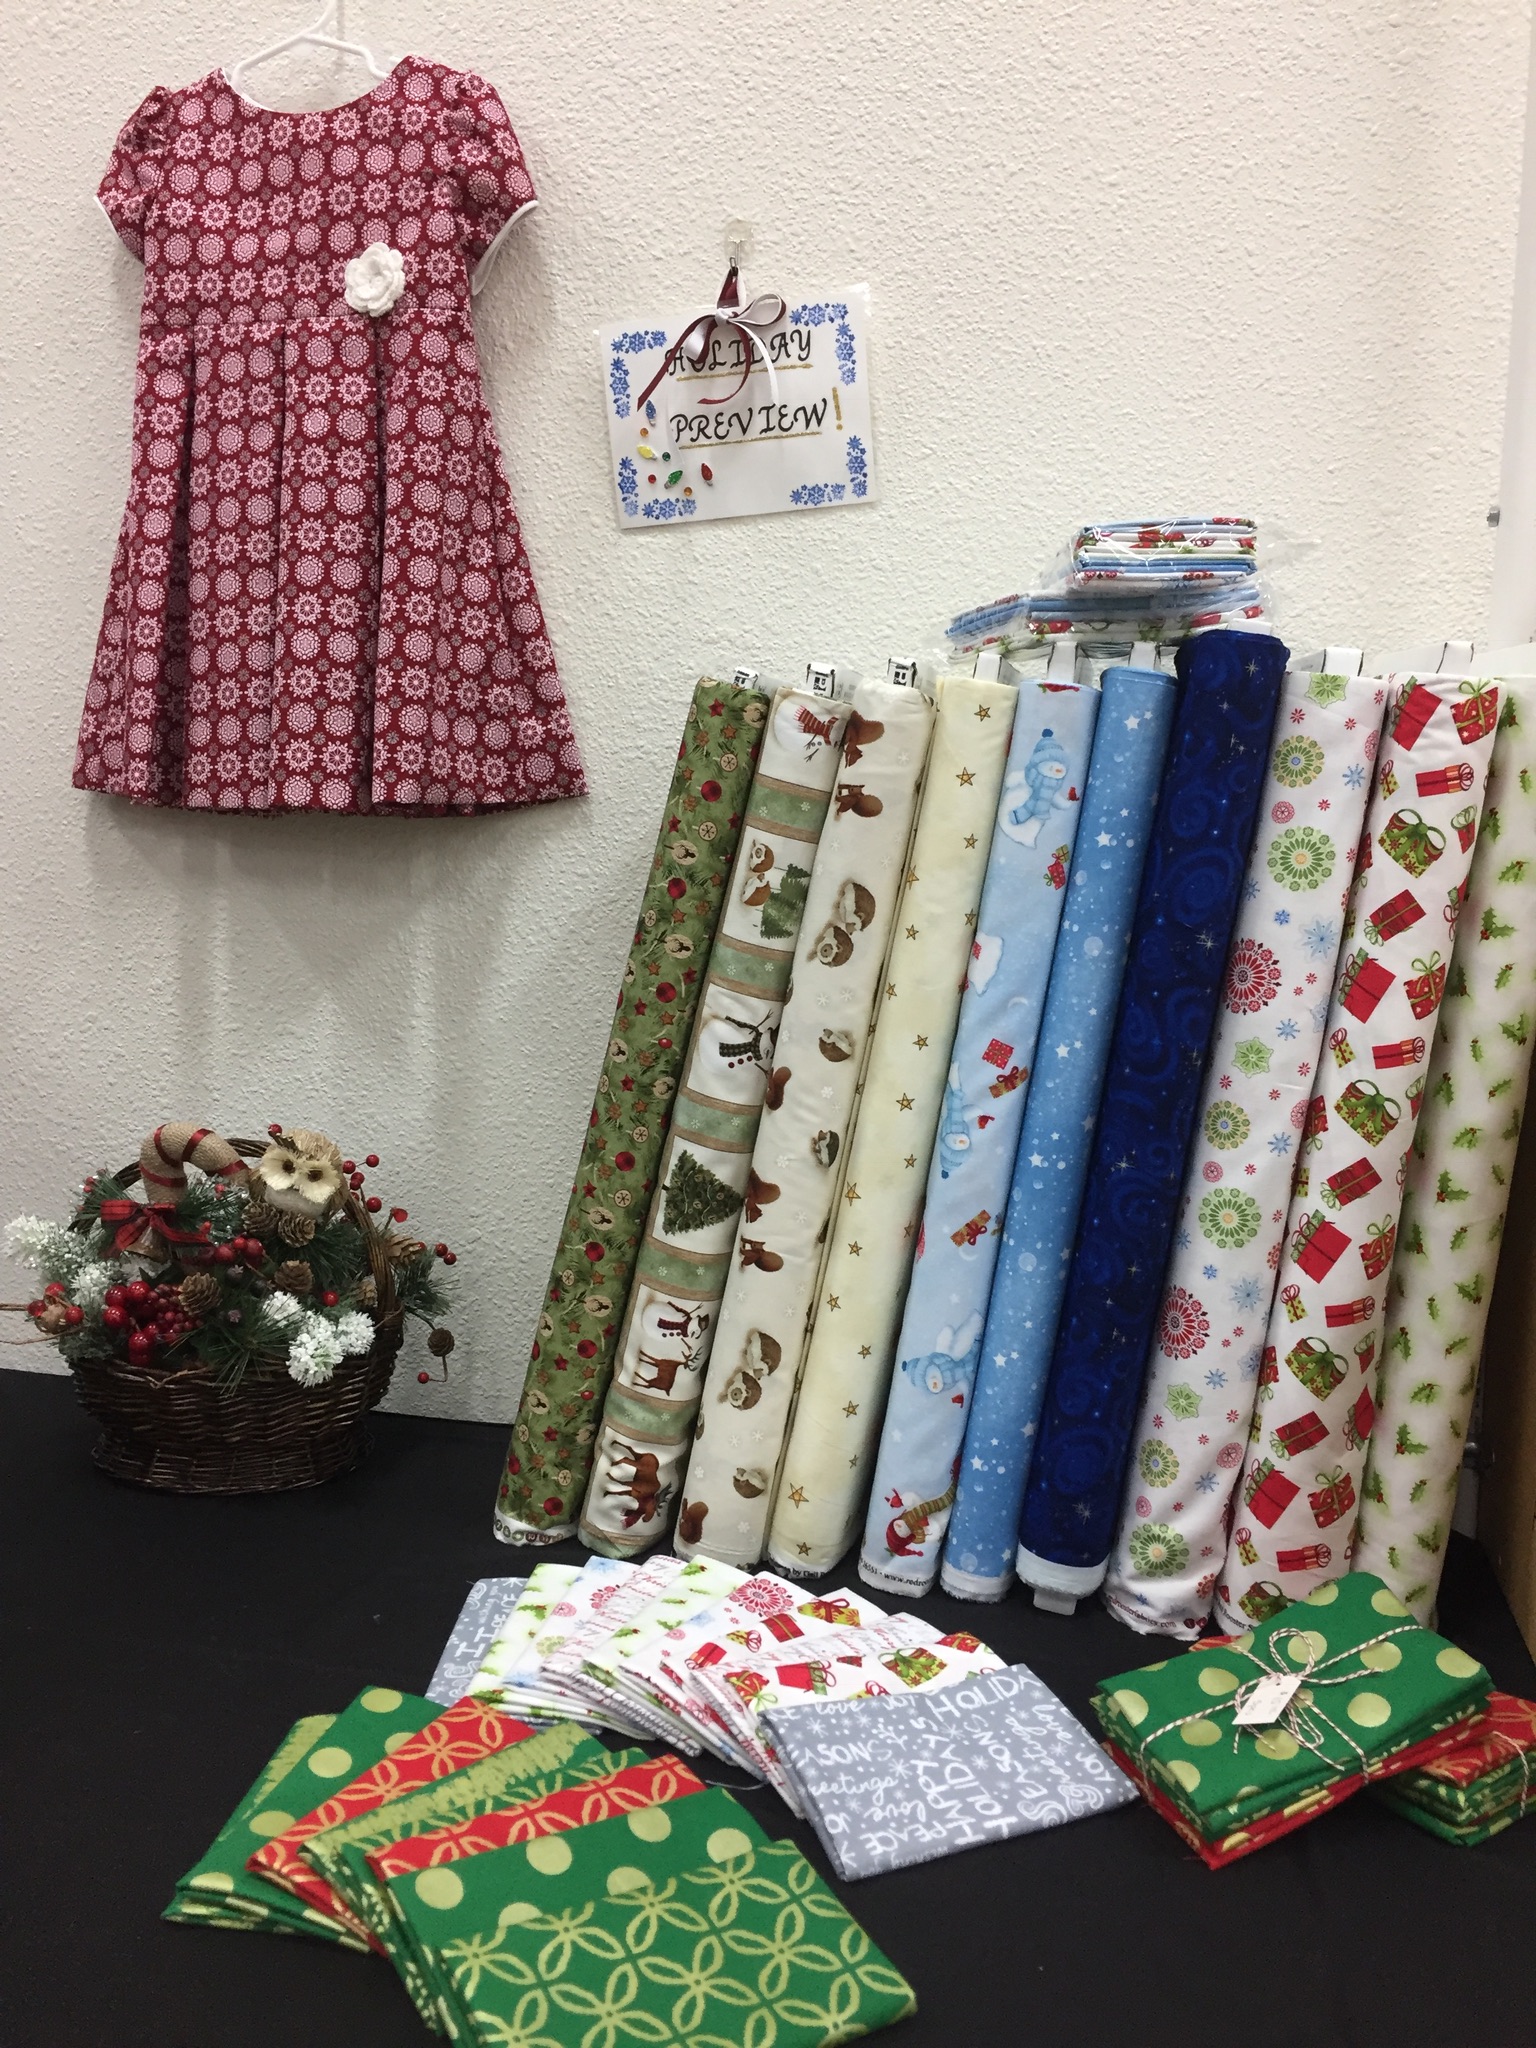
Even though it is early, we had one small corner with Christmas fabrics, both yardage and fat quarters. As we did at the Grass Valley show, on day 2 – Sunday – we moved around some bolts that were not attracting attention on Saturday. In doing so, we had a number of sales from those bolts. It is a constant learning curve which Patti and I are really enjoying.

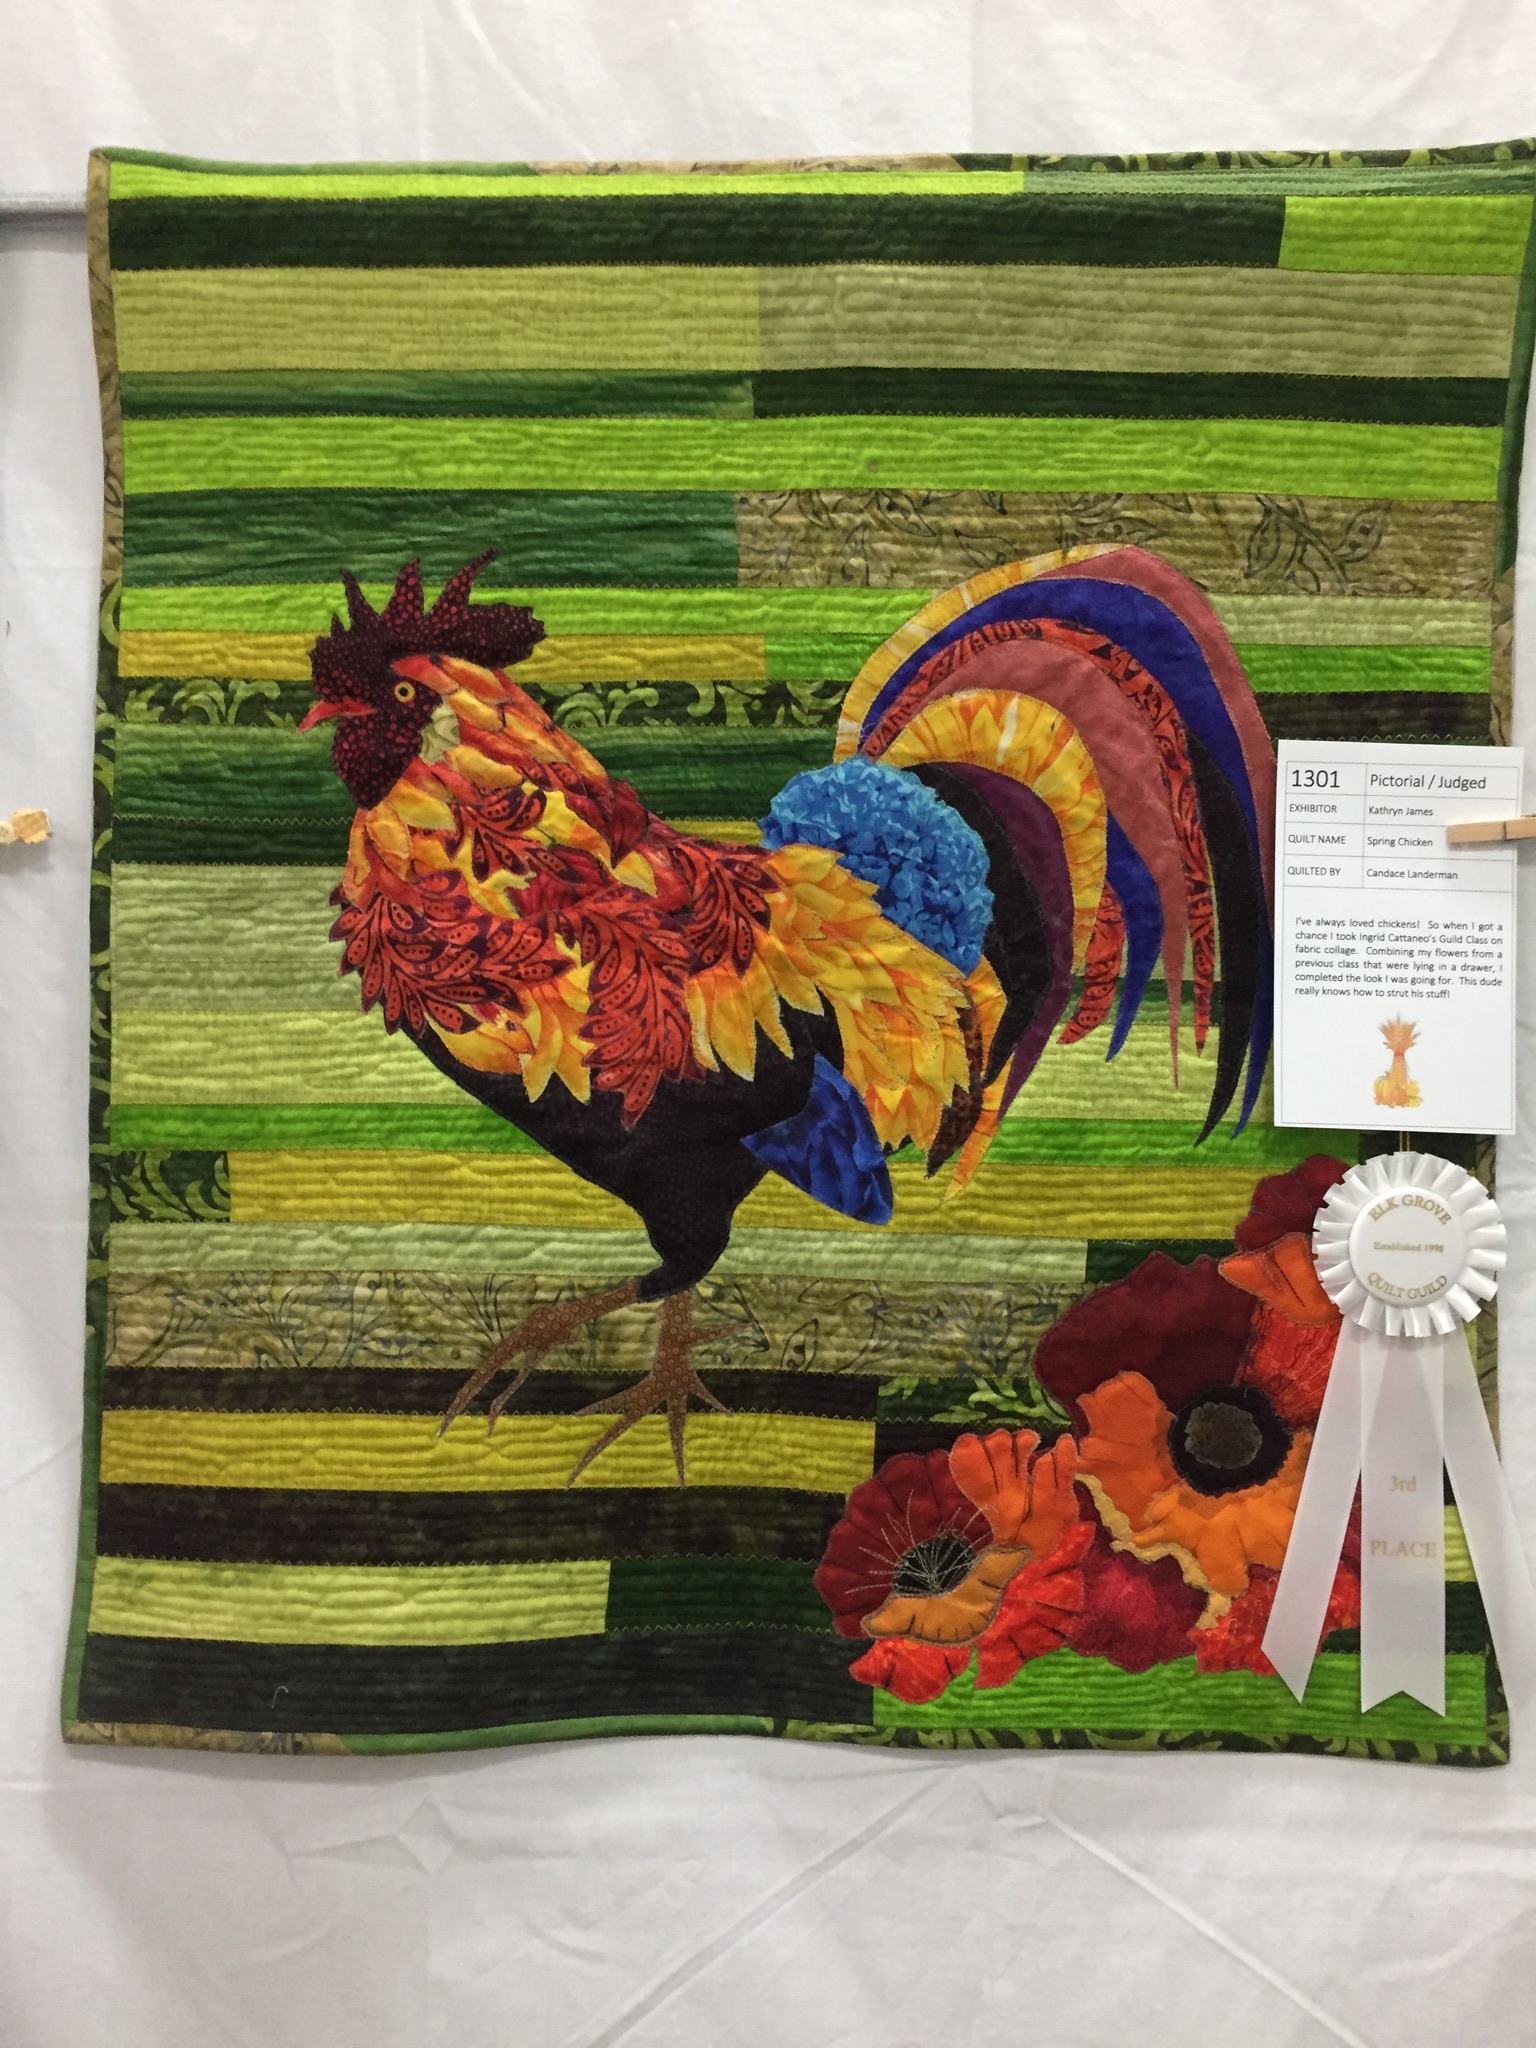
This guild is small but mighty, I believe they told me they have 75 members. They are one very talented group. So many quilts caught my eye. Let me show you a few of them.


I am a country girl and was smitten with this rooster.

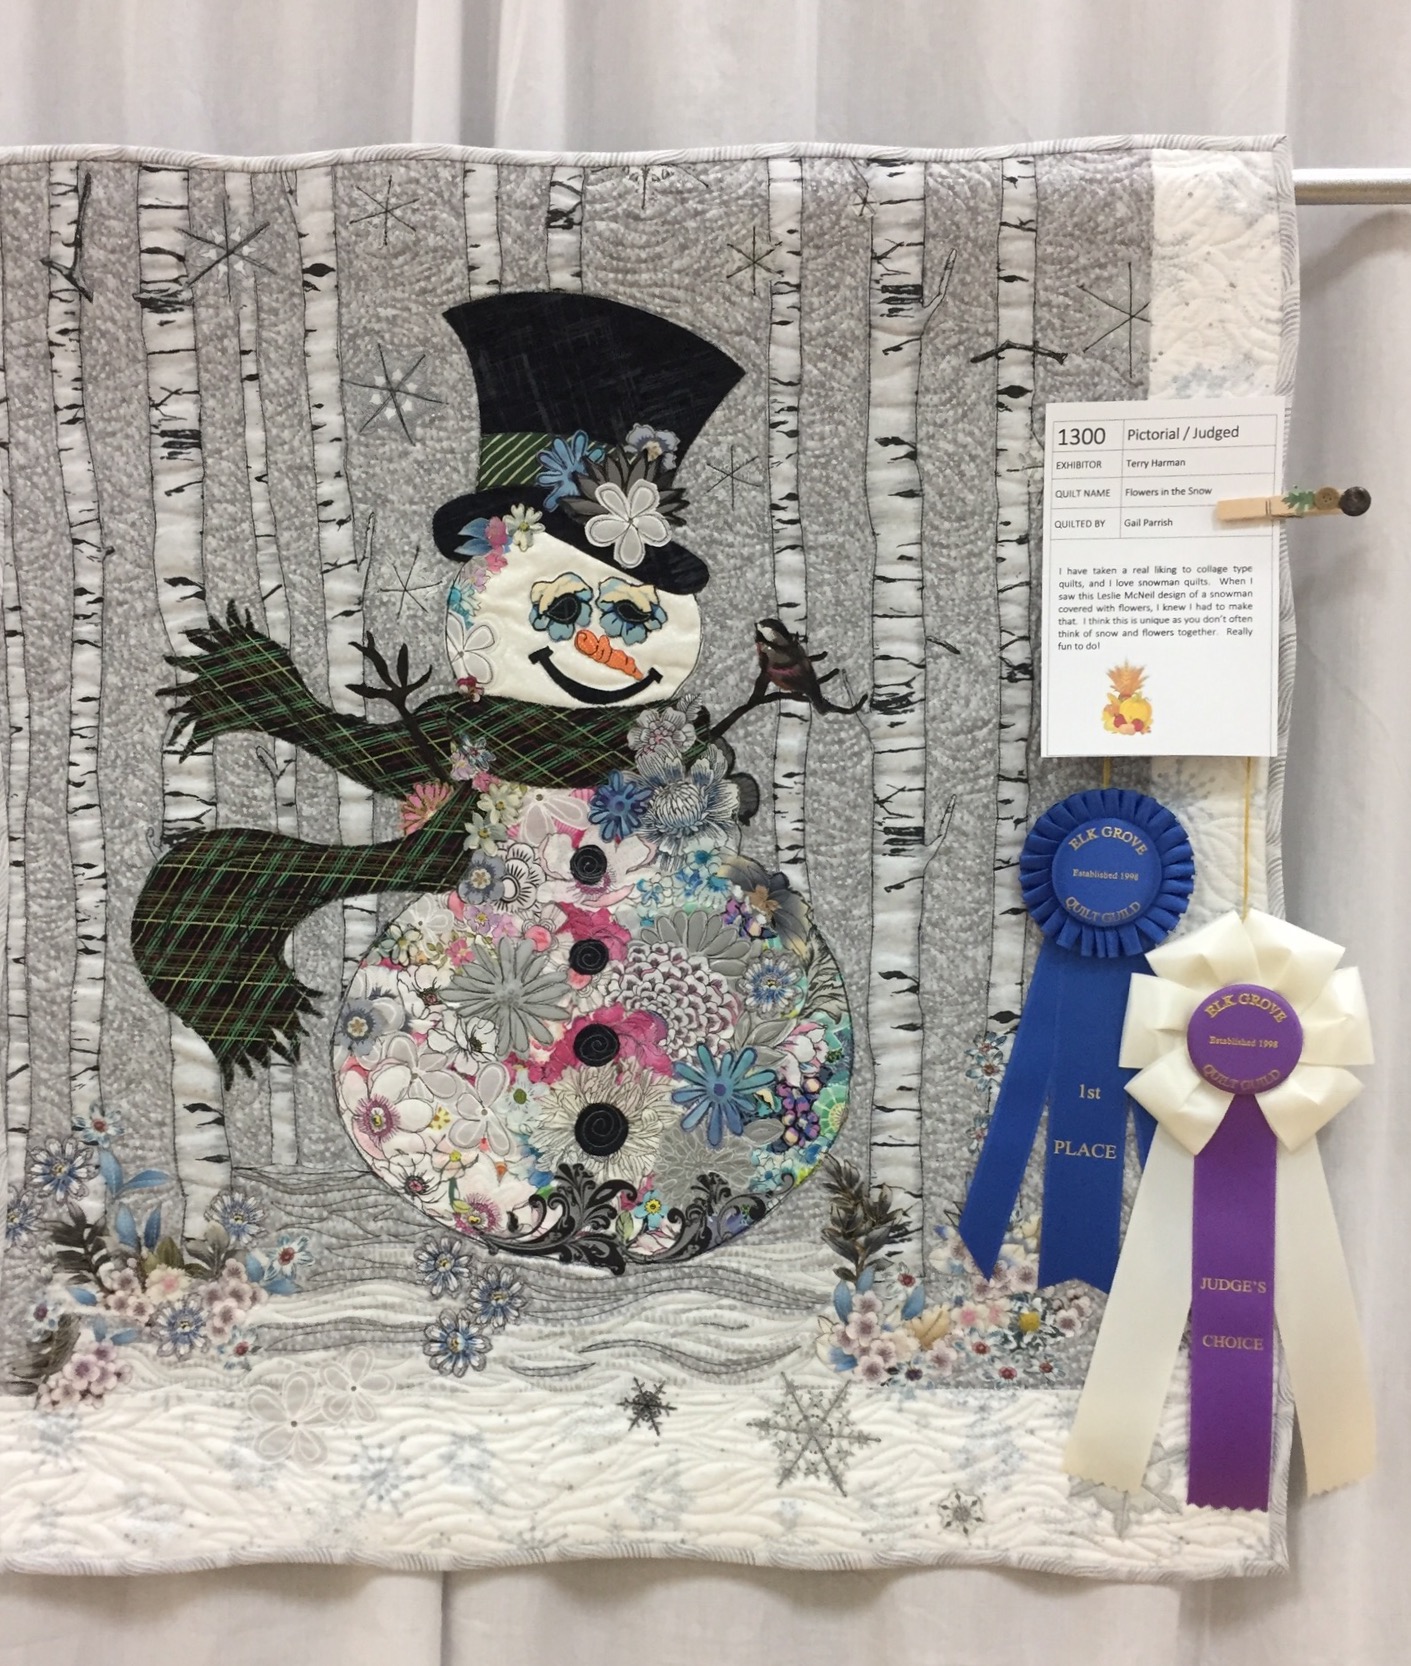
The use of floral prints and fabric painting made for a really unique quilt with the creation of this snowman. (Or snow-woman?)

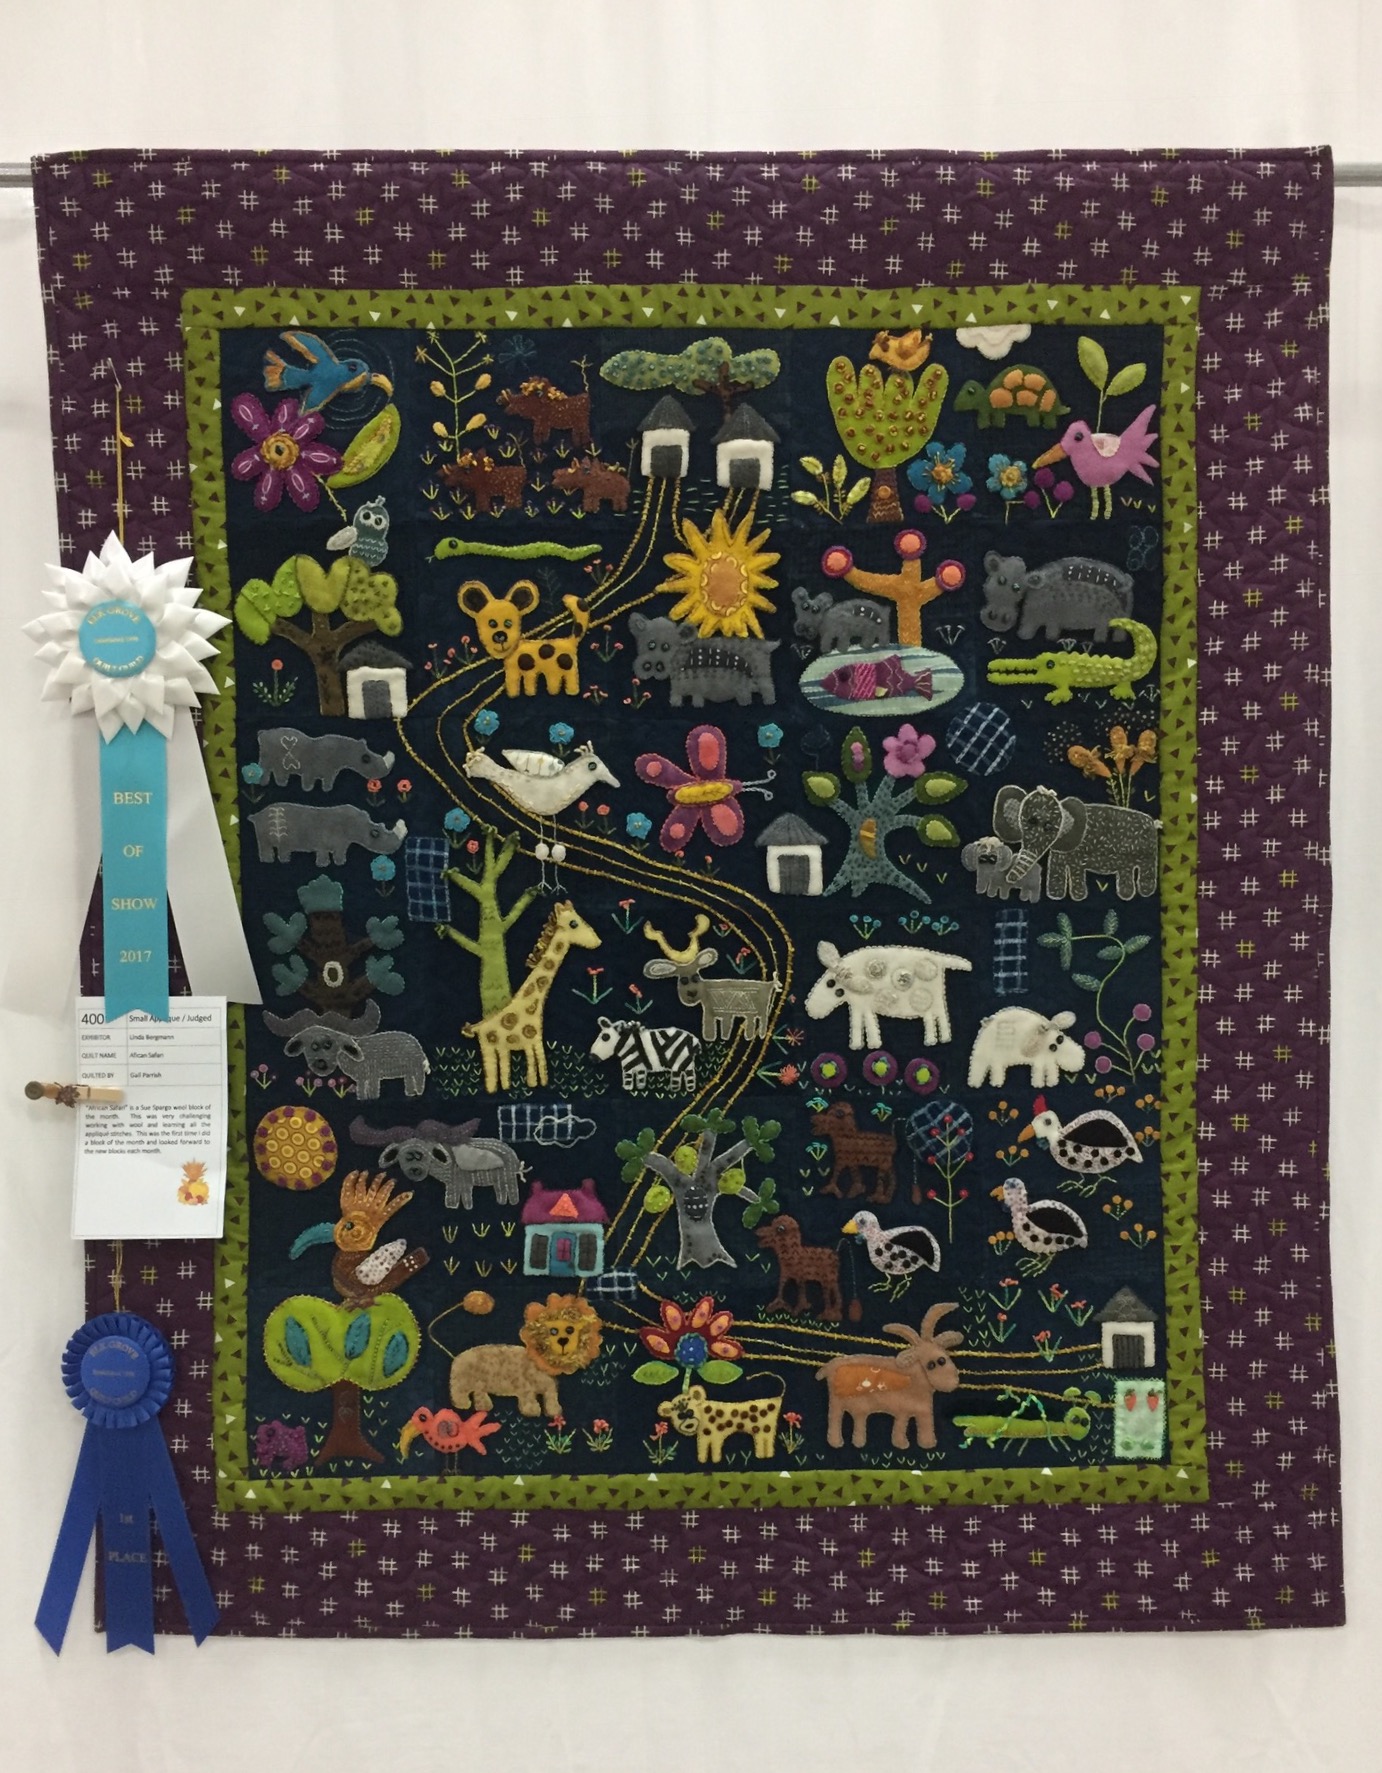
The photo does not do this quilt justice. Titled African Safari, it won Best of Show and it was well deserved. The applique was fantastic and the hand stitched detail work was spot on. I loved it.

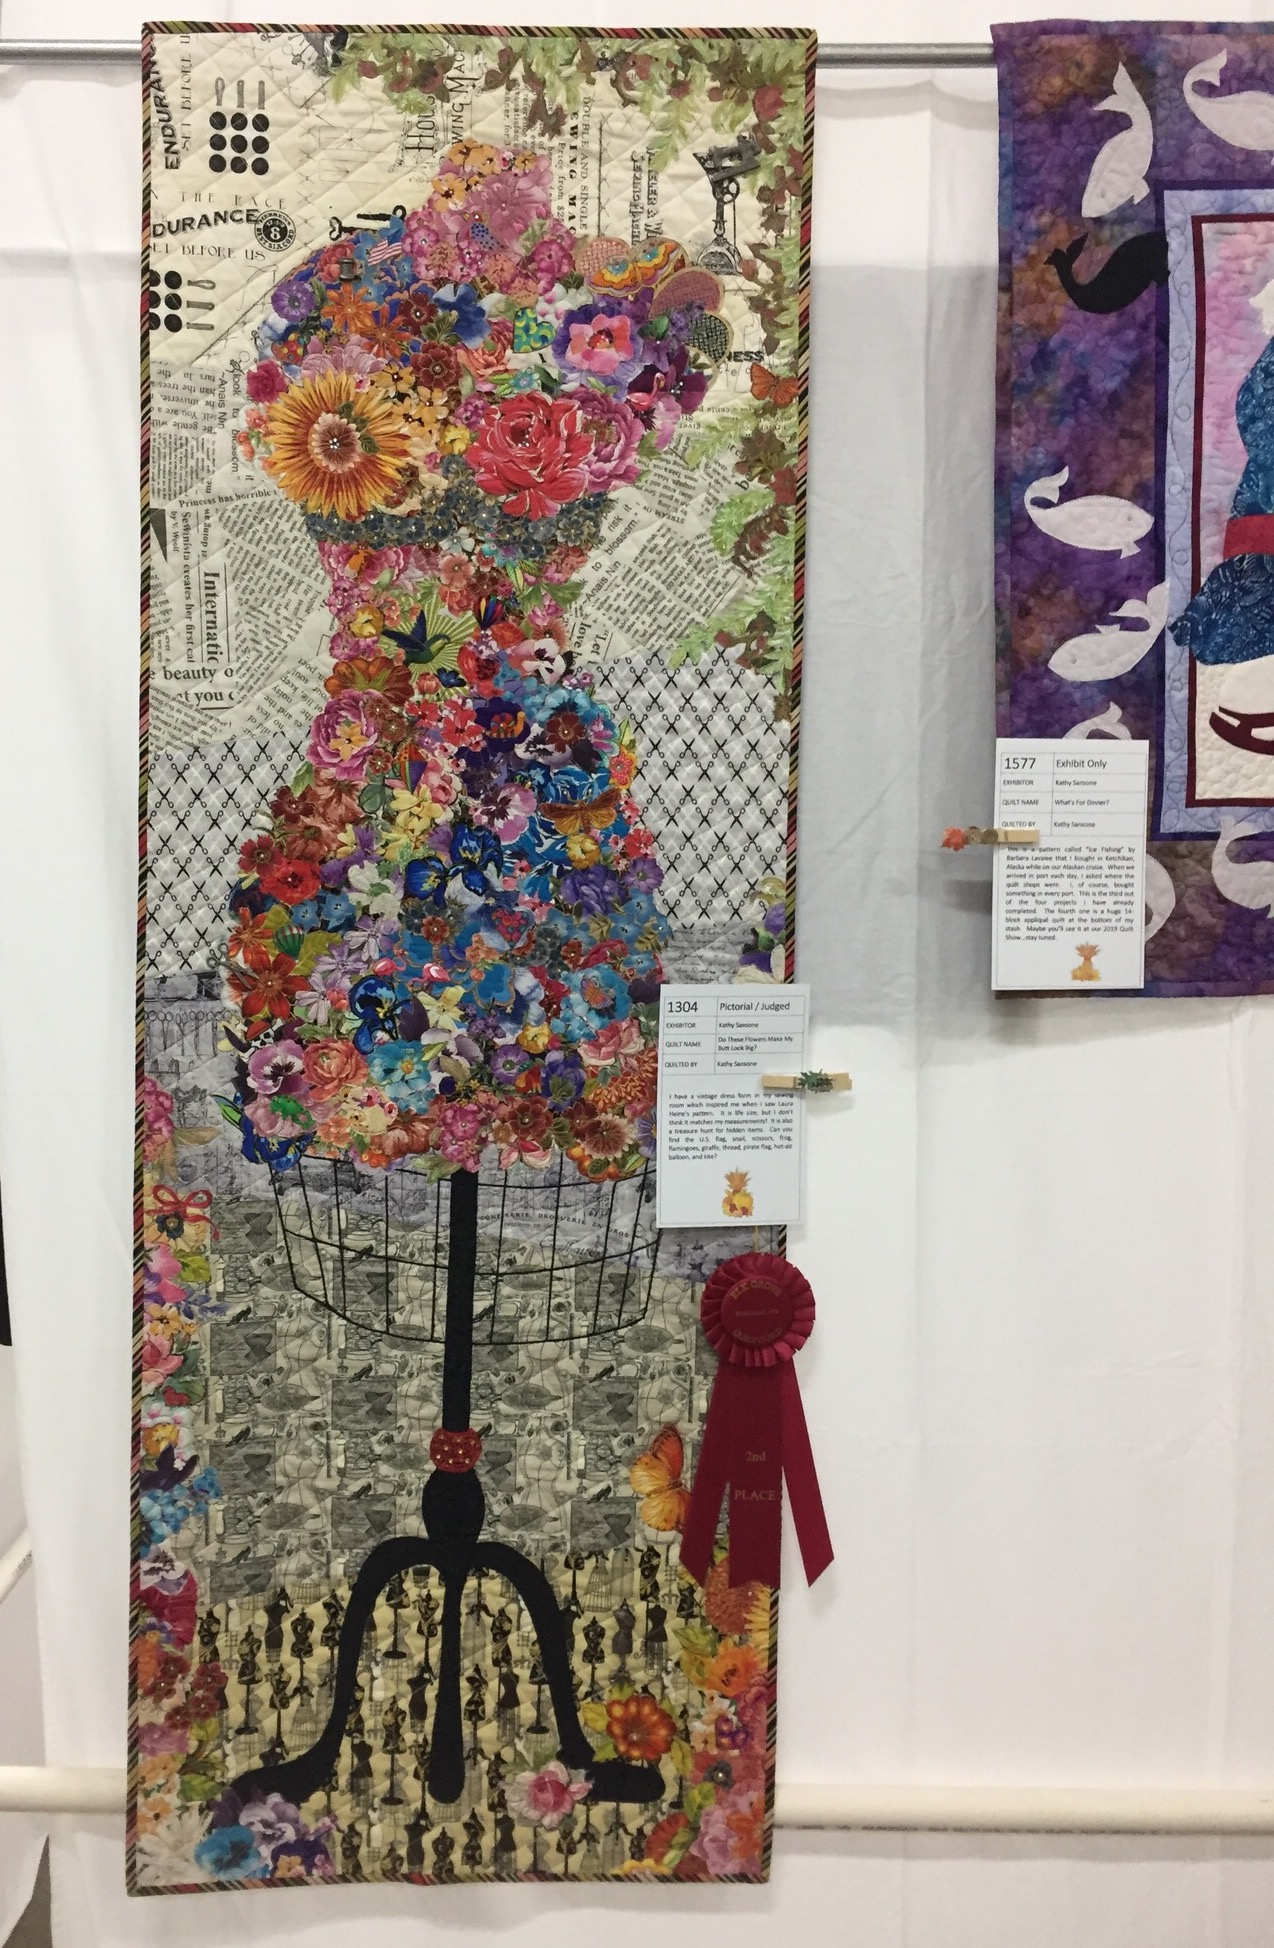
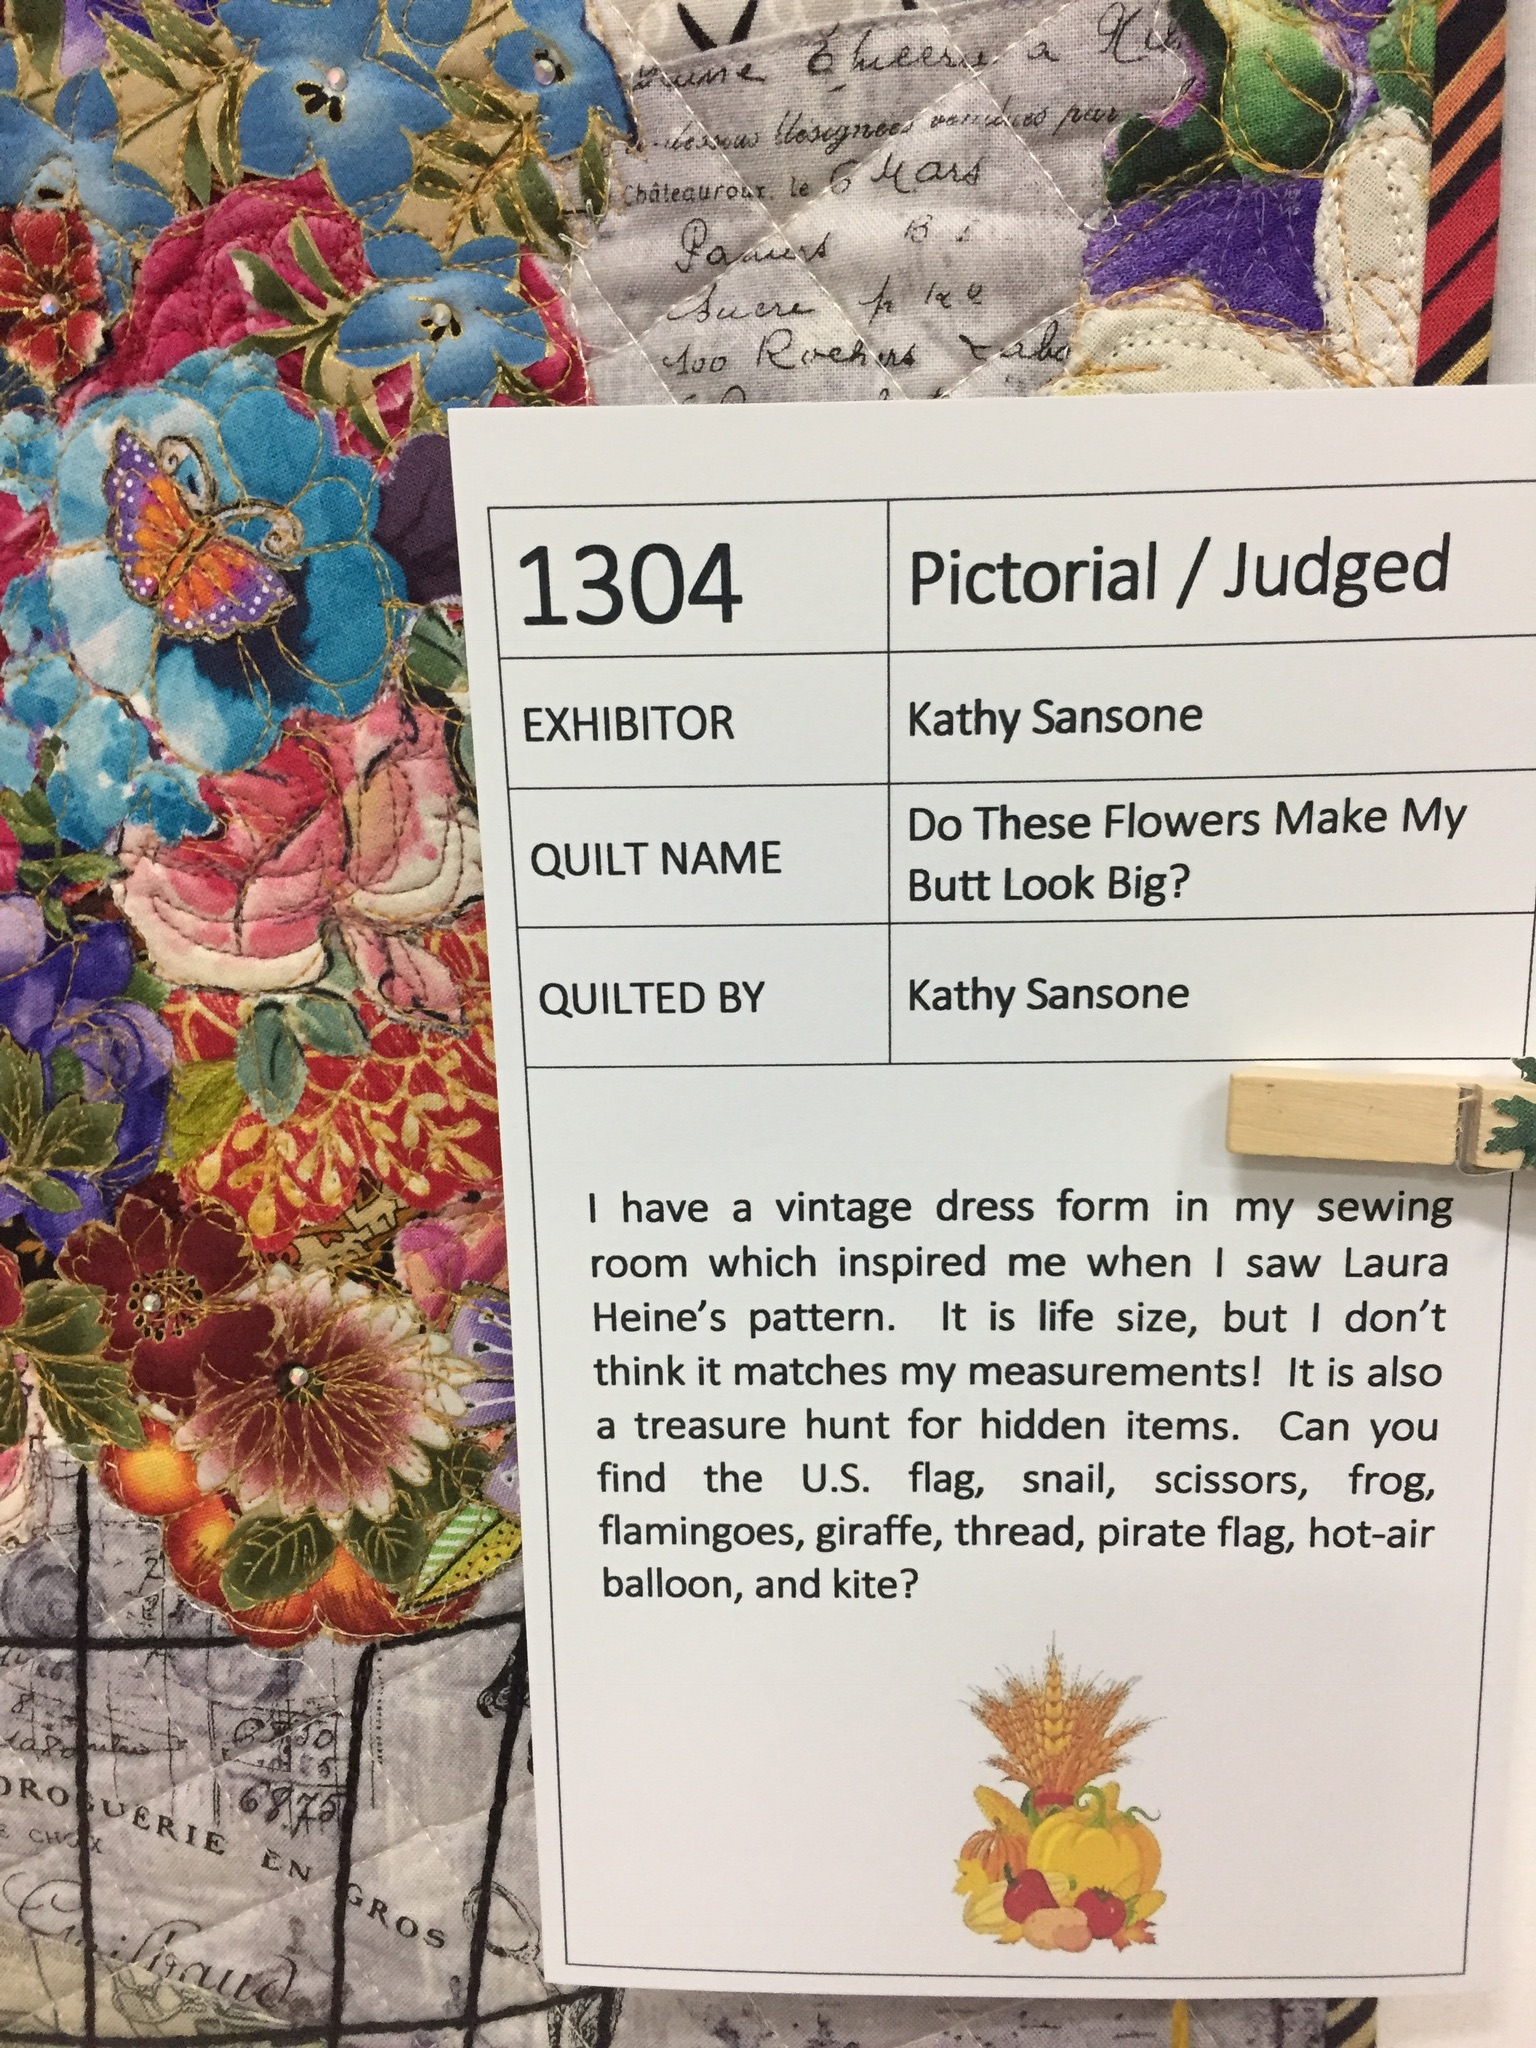
This was probably my favorite of all. The quilter used gorgeous florals to create a vintage seamstress’ dress form. The use of individually cut flowers to create the shape was genius. She also hid little items in the collage which added a fun element.

I love the title too. 🙂

Yesterday I spent the day reorganizing fabric and putting everything away. It was a great show and I turned over a lot of fabric which is great because you know what that means…..  I get to buy more!

Today will be clean-the-house-day.  It is in a sorry state, for sure. Hoping for a sewing day tomorrow. I have some pieces ready to cut and organize for the backing of the jersey quilt I am making for my nephew. I want to get that done and make an appointment at the long arm shop for next week. I can’t wait to practice with the long arm again.

I hope you all had a lovely weekend. We are having incredible fall weather this week (but next week it is heating back up.) Oh well, I will take it while it is here! In case you missed it, I posted my blog hop post for Island Batik yesterday. There is a great giveaway of 26 fat quarters! Check it out here. There is still time to enter.


Back to School Blog Hop with Island Batik


It has cooled off significantly and summer has definitely come to an end.  Julia is back to school and homework has begun in full force. This change in routine has been happening in our house for 27 years now, since my eldest started school back in 1990. That is a lot of back to school shopping, first day of school pictures, and back to school nights over the years.

I have mentioned I have five sisters and between us we have 21 children.  All of these kids but Julia have either graduated college or are in college now. California kids are fortunate to have a lot of universities to apply to and many of those are on the long stretch of coast that runs up and down the western side of the state. In fact, of the 21 grandchildren, only five selected universities that were not on, or very near, the beach. My three older kids went to school either in San Diego or in San Luis Obsipo, both coastal areas.  I think after growing up in the mountains, the three boys loved the change of moving to the coast. For several years, back to school meant waving the boys off as they headed toward the coast (lucky guys all three!)

When Island Batik sent me a 1/2 yard bundle of their collection called Seas the Day, it made me think of our gorgeous coastline. This line features starfish, boat anchors, sand dollars, lobsters, rope and netting and the most wonderful blue and green watery prints. The Island Batik ambassadors were asked to make anything we like as long as it was larger than 36″ square so we could really showcase the beautiful fabric. Thinking about it for just a bit, I decided to go with a large patchwork quilt, one big enough a college kid could easily take it to one of those tiny dorm rooms along our Pacific coast.

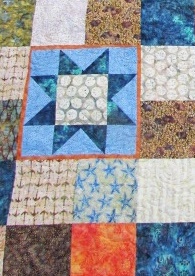
I cut 8 1/2″ squares and started to lay them out.  The prints are so fun but it needed something else.  I saw a large patchwork quilt made by Amy Smart from Diary of a Quilter, and she added a few saw tooth star blocks to it for a little something extra. She has a great tutorial for saw tooth star blocks on her blog which was helpful.  Click here for Amy’s Sawtooth Star tutorial. The great part is she maps out the cuts you need to do for multiple size stars which made it really quick to make a number of them.  I really like the look of sprinkling a few star blocks in varying sizes to the mix. Isn’t the little four inch star up at the top, right corner a cute one?

For the largest star, I bordered it in orange to set it off. The narrow orange frame works well.

As I mentioned in my last post, I took this to the local long arm shop (well, sort of local – it is a 45 minute drive from here!) and rented time on a machine to quilt it.  After a little refresher course on how to use the machine, I got into quilting it up. I did simple spirals and a few loops as an all over design.

In all honesty, I completely forgot how difficult it can be to get a nice round spiral with the long arm.  If I don’t go relatively fast, the spirals elongate and become ovals.  Since I have not had a lot of practice, I don’t feel comfortable moving quickly because it takes me time to plan my path as I go.  The oval shapes don’t bother me though. I like the quilting for the most part. It was so much fun and sooooo much quicker to quilt it on the long arm.

For the backing, I used two pieces of yardage provided by Island Batik – neither was quite large enough to back it as one piece but by using them together, I had plenty. I used the rest of the brown print to bind the quilt as well.

Seas the Day – by Island Batik

I am a big fan of batiks  and love the look of this quilt. It probably won’t go off to college with anyone but it sure makes me think of our gorgeous coastline! If you would like to have your own bundle of these batiks, I might just be able to make to make that happen!  I have a set of fat quarters which includes most of the prints. I didn’t have exactly of all of them left after making this quilt but there are quite a few to share with one lucky winner.

Most of these cuts (26 pieces in all) are fat quarters. Maybe four or five are standard 1/4 yard cuts, depending on how I used the piece. A few may be just shy of being a fat quarter? But there is a lot of fabric here, probably over six yards altogether.

Island Batik Seas the Day stack

To win this coastal lover’s bundle, please leave a comment and tell me if you prefer the coast or the mountains on a vacation getaway.  For a second entry, please follow me — lots of choices on how to follow. There are buttons at the upper right for my social media platforms.  Or, sign up to receive my newsletter, also at the upper right. Just tell me how you follow!

Thank you to Island Batik for this generous gift of fabric. I love the quilt I made and I am sure the lucky winner of the remaining fat quarters will make something gorgeous as well!

Linking to my favorites. Check the list at the top of the page, under Link Ups.


Mid-week Update

What a crazy month September has been. Horrible weather is affecting so many – hurricanes, flooding, fires – too much rain in many places and such a shortage in others. I hope you haven’t been adversely affected by all of this.  But for those who have, I am sorry for what you are enduring.  We haven’t had as much wildfire activity nearby as we usually due in late summer.  Today it is substantially cooler than it has been and I am so thankful.  Maybe fall weather is coming to our part of the state.

I wanted to share a few things with you.  The first is to show you a mini I won from a giveaway held at Quilting Jetgirl. Yvonne celebrated her birthday earlier this month with an incredibly generous giveaway where she gave a box of fabric from her stash, a gift certificate to Hawthorne Threads, and two pieces she had made. I was so lucky to win this mini, called Sidekick Sampler.

I just love it. The background is deep purple which was challenging to photograph for some reason.  The star is made with light blue and lavender fabrics. It is just exquisite.   Yvonne has a well deserved reputation for precision piece work and lovely quilting. This mini displays both.

Quilting this with an all over motif of stars was the perfect choice for this piece. I was thrilled to receive it and quickly added it to the wall over my sewing machine.

What a generous way to celebrate a birthday by giving such awesome gifts to others.  Don’t you love Yvonne’s labels? Thank you Yvonne!:-)

I have done a bit of sewing this week, though not as much as I would like.  Last week I took a quilt top to the local long arm shop that rents time on their machines.  I hadn’t been there for just about a year and it took a while to remember everything. The woman that works there was so patiently helpful as I tried load the quilt – there are so many details involved in that process and I definitely needed a refresher.  Once I got going though, the quilting went quite well.  I am excited to share this quilt and if you come back on Monday you’ll see it.  I made it for the Back to School blog hop that is ongoing with the Island Batik Ambassadors and my day to post is the 18th. Luckily I got it done and spent the past two nights stitching the binding to the back side. Be sure to check out the post on Monday as I have a wonderful giveaway  to go along with this blog hop.

Much of my time this week is being spent preparing for another quilt show. I will be a vendor at the Elk Grove Quilt Guild’s show this weekend. I am looking forward to it and the Vendor Chairwoman for the show has been a delight to work with. This show is just over an hour from my house so it is pretty convenient. My sister (Ferrari Handmade) is working it with me and I am so looking forward to spending the weekend with her. If you are local to the area and plan to attend the show, please be sure to come by and say hi.
Finally, I drew names for the two winners of the Shine fabric panel and border scraps. Lucky winners, Roxie and Tami, should have their fabric in hand by now.  I asked readers for recipes or foods they love to make when autumn rolls around.

Roxie said:

I love candy roaster squash pie. It is like pumpkin pie or sweet potato pie. I know it is fall when I put this in the oven and smell the great aroma!

Tami commented:

This is so cute! That “Just shine” panel would be fun for a little wall quilt to hang by my desk at school, or even a floor cushion for the reading area. Its really a darling print! Our favorite fall tradition is soup on Sunday. We usually manage to come up with a different soup every weekend until Thanksgiving! my girls pick recipes and we try them out. Starting with cheeseburger soup tomorrow! Good luck at the show next weekend!

I have not heard of candy roaster squash pie but if it is anything like pumpkin pie, it sounds great to me.  Soup on Sundays sounds like a wonderful tradition to have when the cooler weather comes.  Hope Tami and Roxie enjoy the fabric.

See you all back here on Monday to celebrate some gorgeous Island Batik fabrics.

Making Connections; Quilting Book Review & Bloghop

About two weeks ago, I was contacted by C&T Publishing asking if I would provide a review of one of their newest quilting books. Always up for learning something new or reading pretty much anything about quilting, I was happy to help.

The author, Dorie Hruska, is a long arm quilter, mom, and blogger.  She has her website,  Forever Quilting, set up as both her blog and her professional site for her long arm business. I really enjoyed looking at her gallery to see the work she has done for others. Her quilting style is lovely with many intricate patterns.

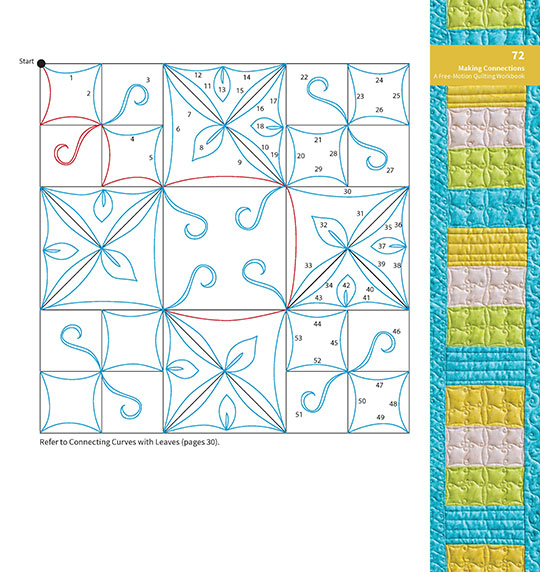
The book, Making Connections, is all about free motion and long arm quilting. The goalof the book is to help the quilter choose a motif or pattern for the quilt and then to set a travel path up for moving around the quilt in the most efficient manner, with the least amount of starts and stops possible.  This is really appealing to me. Like many of you, I struggle with how  to quilt something once that quilt top is done.

Reading this book through, I noticed two things that I really liked.  It is written as a workbook with very clear illustrations and directions. The practice builds in complexity as the reader learns the steps.  Also, there are lots of grids printed in the book to draw on.  The grids are bigger than graph paper but not quite big enough. When I practiced, I copied the page and enlarged it on our printer.  Finally, the book is printed in landscape orientation, not portrait. This makes it much easier to use as you don’t have the binding on the left side making it awkward to draw.

I took away a few really helpful ideas from Dorie’s book:

  1. Doodle the design before quilting.  I know this, we all know this, but it helps so much! There is such muscle memory in free motion quilting and by drawing it several times over, that routine settles into our brain before we begin quilting.
  2. While doodling the design and then while quilting, think, or say, the pattern you are moving in to keep you on track.  For example, Up, Down, Over, Up, Down, Over – or whatever works.  When Dorie maps out a path in the book, she sets this up for the quilter. As a beginner quilter at best, this was pretty helpful.  Seems so simple, but that little mantra was kinda cool. 🙂
  3. Don’t try to quilt the whole design in one pass.  Dorie layers the design so you might do one pass, the come back and add a layer to add another detail.  I get this and think, eventually, it will be helpful to me.  I am not quite there yet.  Some of the designs she illustrates for the reader are quite complex. She does use different colors so you know which pass you are working on each time. Also, she numbers the path so you can see what direction she is taking you in. This is quite helpful.

Note the complexity of the design, stitched in several passes.

The method used in this book is based on grids.  The perfect example is basic patchwork, or nine patch blocks, where there is an obvious grid.  The more experienced quilter would be able to apply it to more complicated blocks.

I didn’t have a quilt top on hand that would work for this so I didn’t actually quilt anything.  I did do some drawing to get that path ingrained into my brain though.  After drawing a bit, I made a quilt sandwich with some scraps of fabric and batting.  I drew a 3″ grid on it to practice.  Once I got going, my sewing machine gave me fits.   So, I had to quit and I took the machine in for service.  I have been putting it off and now it was sending me very clear messages that it wasn’t going to perform well! But ugly as the stitching was, the idea worked – I knew how to move along the design without getting stuck in a corner somewhere.  This methodology requires planning though.  It isn’t one where you move freely around on the quilt top, filling in sections as you go along.

If I were asked, I would tell the readers this is probably a book for an intermediate quilter. I think I could follow it for the basic design and travel flow but I don’t think, as a beginner, I could layer the designs and achieve a nice result.

Overall, I enjoyed the book and think it is a valuable resource for my library.  As I continue to practice, this will be very helpful.  Dorie and C& T Publishing have generously provided a book for me to giveaway to a lucky reader.  If the winner lives in the US, a hard copy will be sent.  For winners outside of the US, an Ebook will be provided. For those of you that want to go ahead and purchase the book, it is available through C&T Pubs or directly from Dorie’s website (she will send an autographed copy!)

To enter to win, please leave a comment on this post.  If you follow me on Instagram or Facebook, you are welcome to leave a 2nd comment for another entry.  Sign up for my newsletter (which is sent out every month) for another entry.  (Sign up form is at the top of the page on the right side.)  That is three possible chances to win!!

THIS GIVEAWAY IS NOW CLOSED.

For even more chances, please visit the other bloggers involved in this hop.  Lots of gorgeous quilting has been done to display all this book offers. Go check it out!  Here is the schedule:

BLOG HOP SCHEDULE

Friday September 1st

C&T Publishing Blog@ctpublishing on Instagram

Monday September 4th

Holly Anne Knight Blog@stringandstory on Instagram

Susan Arnold Blog@quiltfabrication on Instagram

Tuesday September 5th

Becca Fenstermaker Blog@prettypiney on Instagram

Teri Lucas Blog@genqmag on Instagram

Wednesday September 6th

Sherry Shish Blog@poweredbyquilting on Instagram

Pam Morgan Blog@sweetlittlestitches on Instagram

Thursday September 7th

Katy S Blog@katyquilts on Instagram

Laura Piland Blog@sliceofpiquilts on Instagram

Friday September 8th

Suzy Webster Blog@websterquilt on Instagram

Bernie Kringel Blog@needleandfoot on Instagram  — You’re here!!!

Monday September 11th

Jamie Mueller Blog@sunflower_quilt on Instagram

Nancy Scott Blog@masterpiecequilting on Instagram

Tuesday September 12th

Sherri Noel Blog@rebeccamaedesigns on Instagram

Anorina Morris Blog@sameliasmum on Instagram

Wednesday September 13th

Yvonne Fuchs Blog@quiltingjetgirl on Instagram

Barbie Mills Blog@thequiltingmill on Instagram

Thursday September 14th

Afton Warrick Blog@quiltingmod on Instagram

Kathy Bruckman Blog@kathyskwiltsandmore on Instagram

Friday September 15th

Susan Arnold Blog@quiltfabrication on Instagram

Dorie Hruska Blog@foreverquilting on Instagram

Sunshine and Inspiration

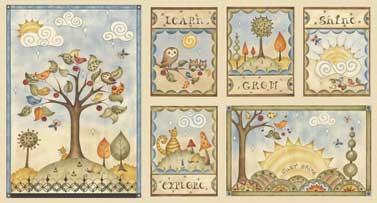
Sunshine has been all to strong in my part of the world. We have had such an intensely hot summer this year. Craving fall, I decided to make something with this cute panel from the Red Rooster fabric line called Shine. This was designed by Jackie Paton and it is adorable. Autumnal colors, inspirational phrases, sunshine, kitties, owls — so much cuteness wrapped up into one fabric line! I have had it in the shop for a short while now and it has sold really well. Because I have a quilt show I am working later this month, I wanted to make up a sample with this fabric. It will decorate the booth a bit and maybe inspire shoppers to take a look at this sweet fabric.

The panel consists of six different items that can be used individually or in one project. I decided to use the four small blocks from the panel as well as some strips of the border print. I also used a bit of each of the three accent fabrics I have available. It was so fun to sew something with these colors. C’mon fall!!

The piecing was quick – just some sashing of the four rectangles and then a few borders to add color and whimsy. The best part was choosing how to quilt it. I took some time and stitched around the perimeter of each rectangle to anchor things. Next I followed the print of the blue and green border and echoed circles around the print.

The panels are really sweet and I spent just a little time thread sketching some of the bits of the scenes such as the clouds, the sun, that sweet kitty and the wise owl.


The outermost border was made with flying geese and rectangles. I love the way it came out.  (Shout out to Mari of Academic Quilter who helped me when I got stuck figuring out what size blocks would work best. Thank you Mari!) I like the deep rust color of this fabric. So much so that I also used it as the binding.

A quick modeling session before school this morning!

Lady really wanted to be included in this photo shoot.  She is also concerned that there are no dogs, only cats, featured in this fabric line. Why would I use such fabric?? Well, for one reason,  I like the little inspirational words – Learn, Shine, Explore and Grow. The fall colors make me happy and I could totally see this project of mine hanging in a classroom, library, kid’s playroom – or maybe even downstairs in my shop! It will be a fun one to hang in my booth at the next show. I will be a vendor in Sacramento over the weekend of September 15-17th. This little quilt will surely add some fun to the booth.

Measures about 14″ x 21″

Measures about 10″ x 15″.

Since I only used a part of the panel, I would love to share the two pieces that are left. I also have some of the border print that I cut into but didn’t use up.  I will divide the border fabric and the two pieces into two bundles and give it to two lucky quilters who would like to use it. One bundle will have the larger piece with the tree.  The other bundle will have the piece featuring the sun.  I would love to see what you make with these!!


If you would like to throw your name in the hat, please leave a comment and tell me what recipe is your go-to fall food. I am all about muffins – apple, pumpkin, cinnamon & sugar – Yum.  Should you want the other accent fabrics you can find them here.

Sam’s Jersey Quilt

A while back, my sister asked if I would make a quilt with some of the jerseys her son, Sam, had worn over the years.  My sister’s family is quite the opposite of mine.  They are all about sports – football, skiing, running, baseball, lacrosse – they all play something!  The family also follows pro sports, both football and baseball.  My family? Um, not so much. In fact, one year when a dance Julia attended (in junior high) was sports themed and the kids were supposed to wear a shirt from their favorite team, we had nothing. No favorite team, no t shirts or pennants – nothing!  She ended up borrowing a t-shirt from her cousin to wear for the dance, making her a Giants baseball fan for those three hours.

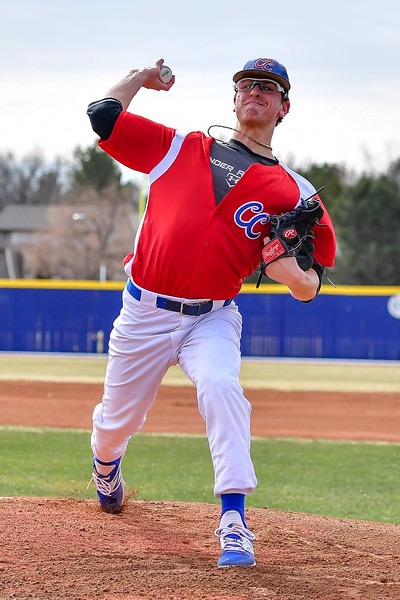
Sam pitching for Varsity baseball at Cherry Creek High School in Colorado.

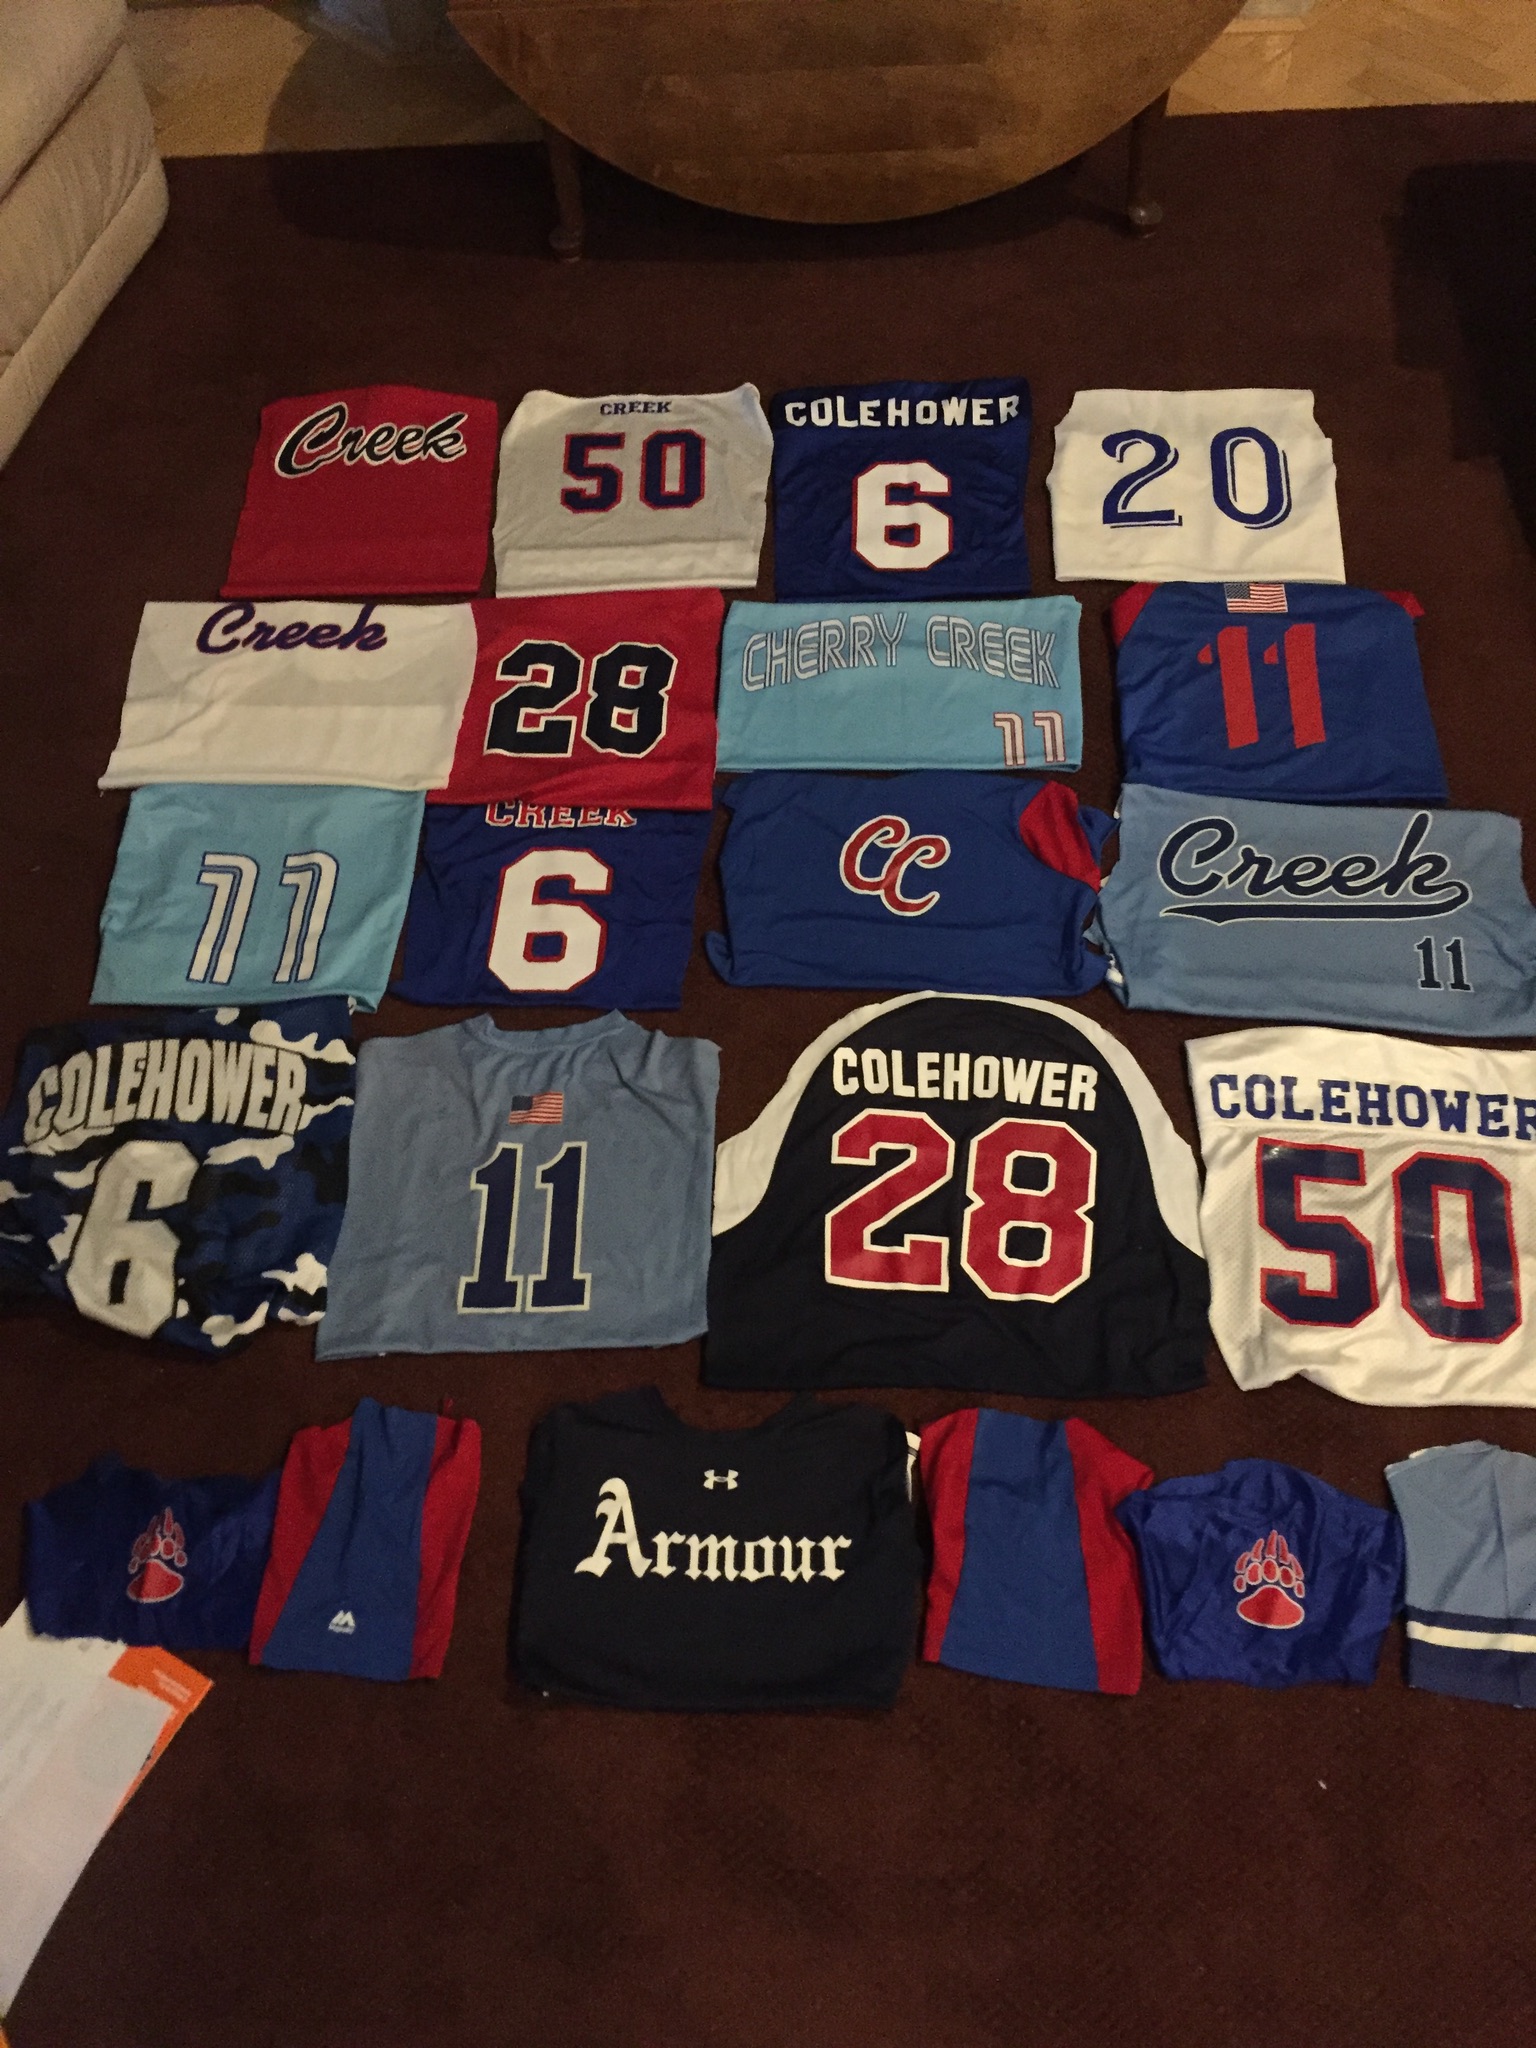
Sam just graduated high school and is off to college in Colorado where he will pitch for their baseball team.  He has played baseball for years and also played football in high school and with all of that, he has amassed quite the stack of jerseys.  It was fun to look through the jerseys he sent me, but wow, I was so hesitant to start his quilt. I have had the jerseys sitting in the sewing room since April. I would look and think about it but then fold them up and put them away. That slick jersey material and the rubbery numbers and logos made me nervous.

Love the intensity of Sam’s expression in this shot.

I asked around for suggestions and ideas and lots of people came to my rescue.  Namely, Sarah Craig, of Confessions of a Fabric Addict, who has made loads of memory quilts.  She and I emailed a few times and she gave me a few tips and also recommended a fusible interfacing by June Tailor that she likes.

My first step was to cut the front from the back of each shirt at the side seams.  I also saved any smaller logos from the sleeves.

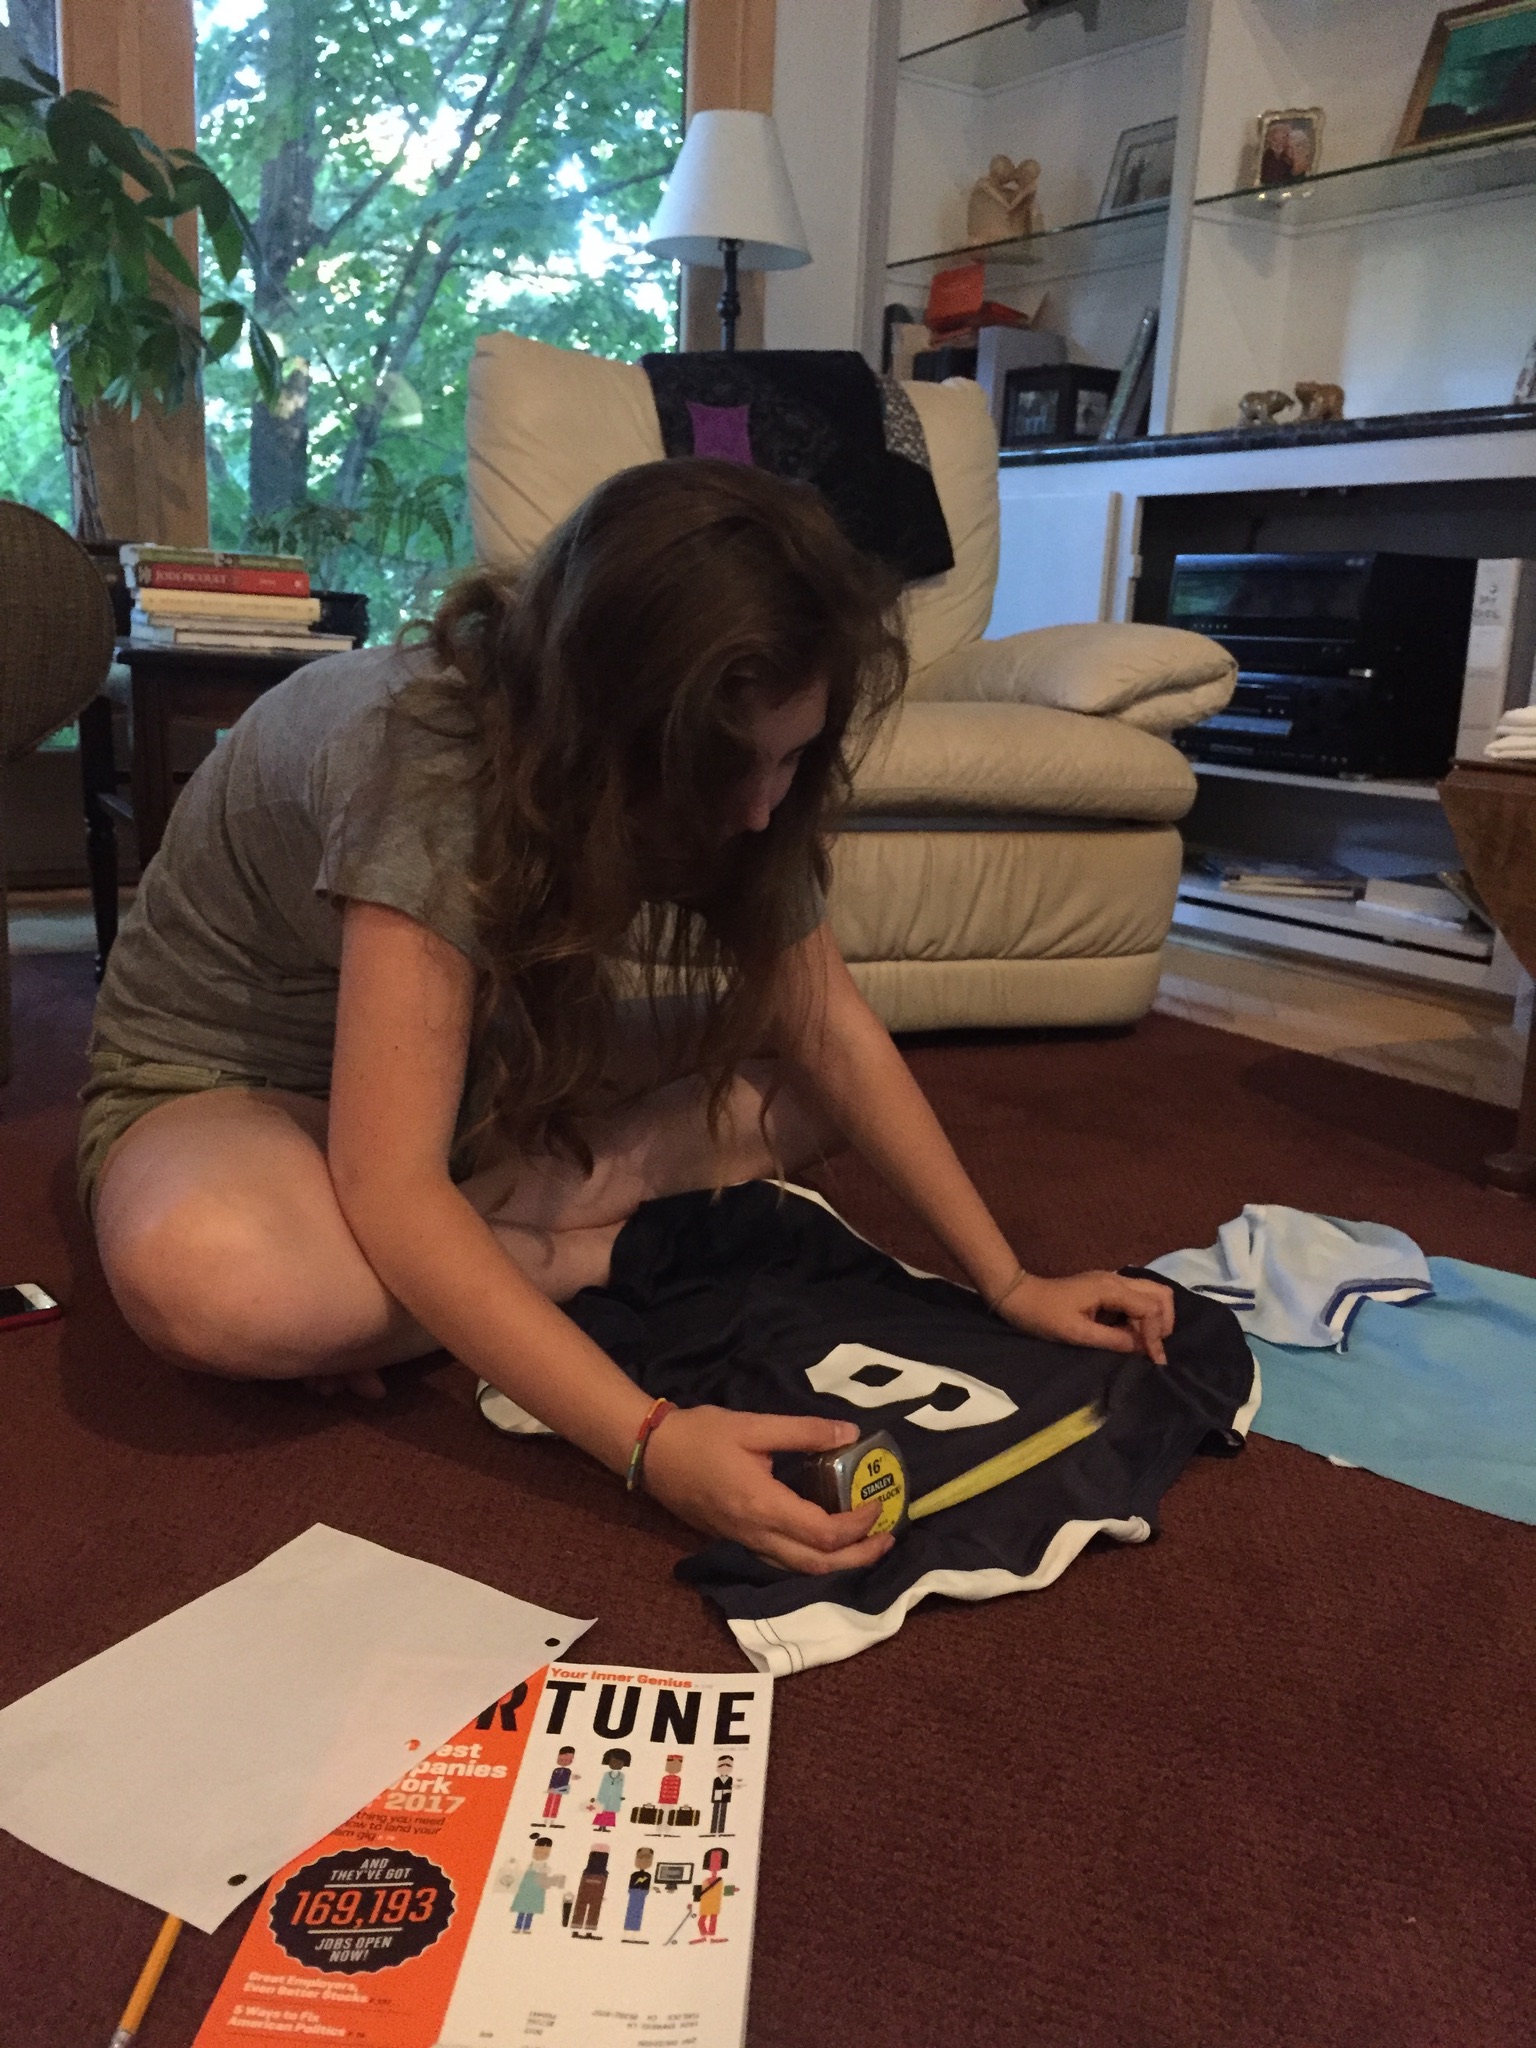
Julia helped me with this and we sort of folded the shirt fronts and backs into similar size squares and laid them out on the floor. Once I got to that point, I just didn’t know what I wanted to do.  So, I did what any sane quilter would do and put it back in the bag and set it aside. 🙂

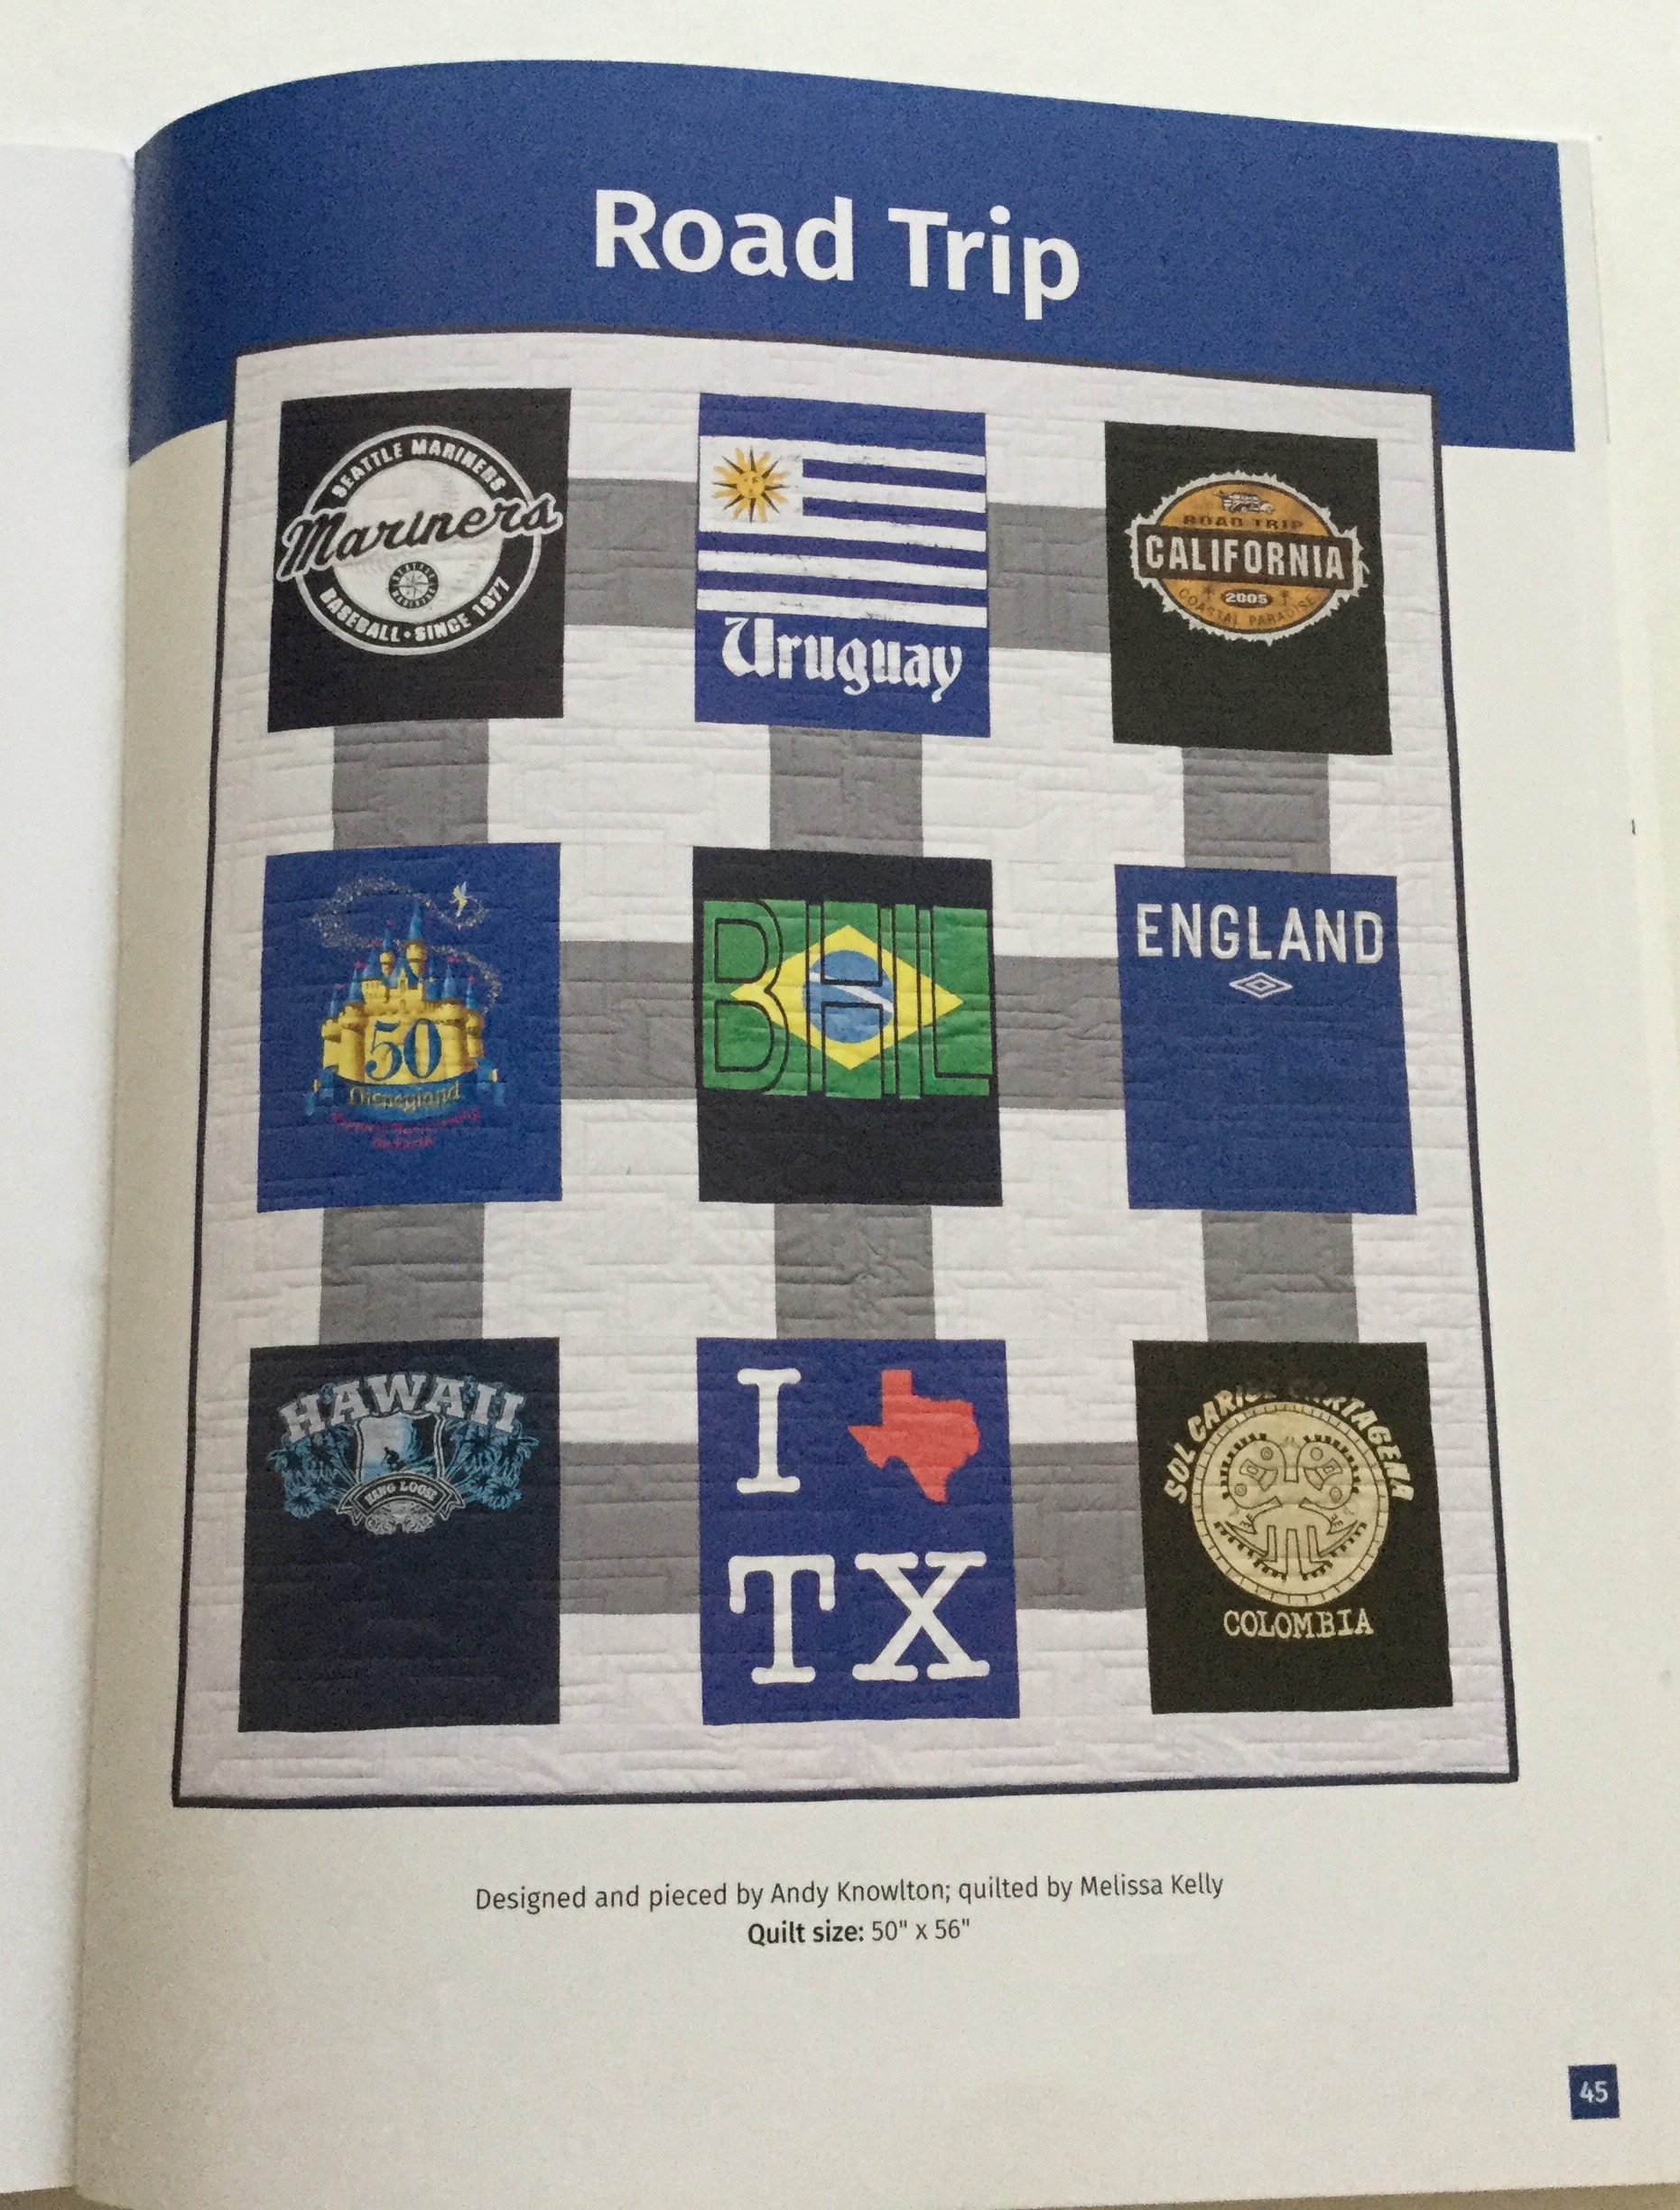
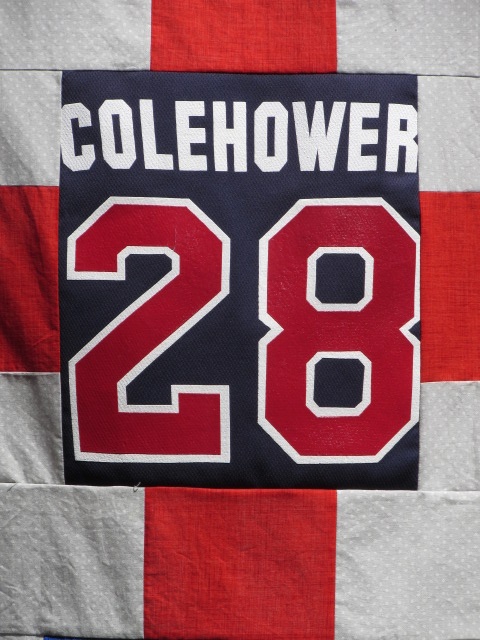
Finally, I did a little more research and found this book, Terrific T-Shirt Quilts, by Karen Burns.   It has been very helpful.  Somehow, I couldn’t picture what I wanted this quilt to look like. It definitely needed to be masculine and with red, blue and dark blue jersey and logos, there was no question it was a guy’s quilt. But it needed some sort of structure or organization.  When I saw this quilt, it gave me just what I wanted. This pattern calls for the shirts to be cut to 12″ x 14″ and stabilized with fusible interfacing.  The June Tailor interfacing recommended by Sarah worked really well. It is a woven fabric and adhered to the slick jersey fabric without any problem. Getting the logos to work within the 12″ x 14″ block was tricky.  Some of the logos were too wide, others were featured up at the top of the fabric (just below the seam line across the shoulders in the jersey). Because of this, the designs are not centered well within the blocks. This doesn’t bother me a whole lot though.

I love this block with his last name on it but I barely fit it within the 12″ width requirement.

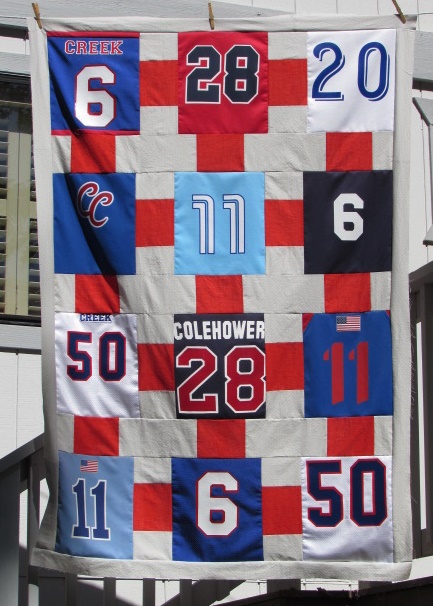
After getting the jerseys prepped and cut, I started to work on the sashing and border pieces.  After checking in with Juanita (my sister and Sam’s mother) I decided on gray and red for the fabrics. As luck would have it, I had a great gray and white polka dot in my shop. It is actually a wide back fabric by Red Rooster (and it just happens to be available here!!) In addition to the gray and white polka dot, I chose a cherry red textured solid by PB Textiles. (Why yes, thank you for asking, I do happen to carry it in my shop.  Click here!)

Doesn’t it look great??  I am so happy with it and hopefully Sam will like it as well!  I added a fourth row of blocks so I could use more of the jerseys. Plus it needed the extra length – Sam is a tall guy.  With the fourth row, the length grew to 72″. I have some ideas about using the little logos from the sleeves, as well as some of the wider logos that wouldn’t fit in the quilt top design, to make a pieced backing. For now though, I need to set this project aside once again.

Before I can finish Sam’s quilt, I need to finish a different project I am working on.  I am reviewing a new book by Dorie Hruska, called Making Connections. It is a great tool for free motion quilting or long arm quilting with a continuous flow, thereby avoiding starts and stops.  Remember my post about my entries at the fair when the judge commented she could see too many starts and stops?  Well, this is helping me correct that!! There will be a fun blog hop which begins on Monday (but my post won’t come up until September 8th. ) I will be hosting a giveaway of one copy of the book so be sure to come back and check it out!

Have a great weekend everyone!  It is going to be insanely hot so I will be inside taking advantage of the A/C and sewing.  How about you?

Linking to my favorites – check them out at the top of the page, under Link Ups.

(This is an affiliate post, meaning if you click through and purchase Dorie’s book, I will receive a small commission.)


Quilt Exhibit Recap

Last week I posted a little catch up on the fair, Julia’s pig Ella, and the purse I made for her.  In the comments, Yvonne of Quilting Jetgirl, reminded me I hadn’t said anything about the quilts I entered in the local fair.  I had originally planned to enter three quilts and that is what I technically signed up for.  As I got the quilts out to add the hanging sleeves, I noticed that I had machine stitched the binding to the Positively Floating plus quilt. In all honesty, I can’t remember why I machine stitched that one. Maybe I just wasn’t in the mood to stitch the binding down? Usually I kind of enjoy that last bit of stitching on a project.  At any rate, it didn’t make sense to enter that quilt because I was fairly sure the judge wouldn’t appreciate a machine stitched binding. Additionally, I had procrastinated on making the sleeves, it was the night before I had to bring them over to the fairgrounds, and I was running short on time. So I didn’t enter the plus quilt.

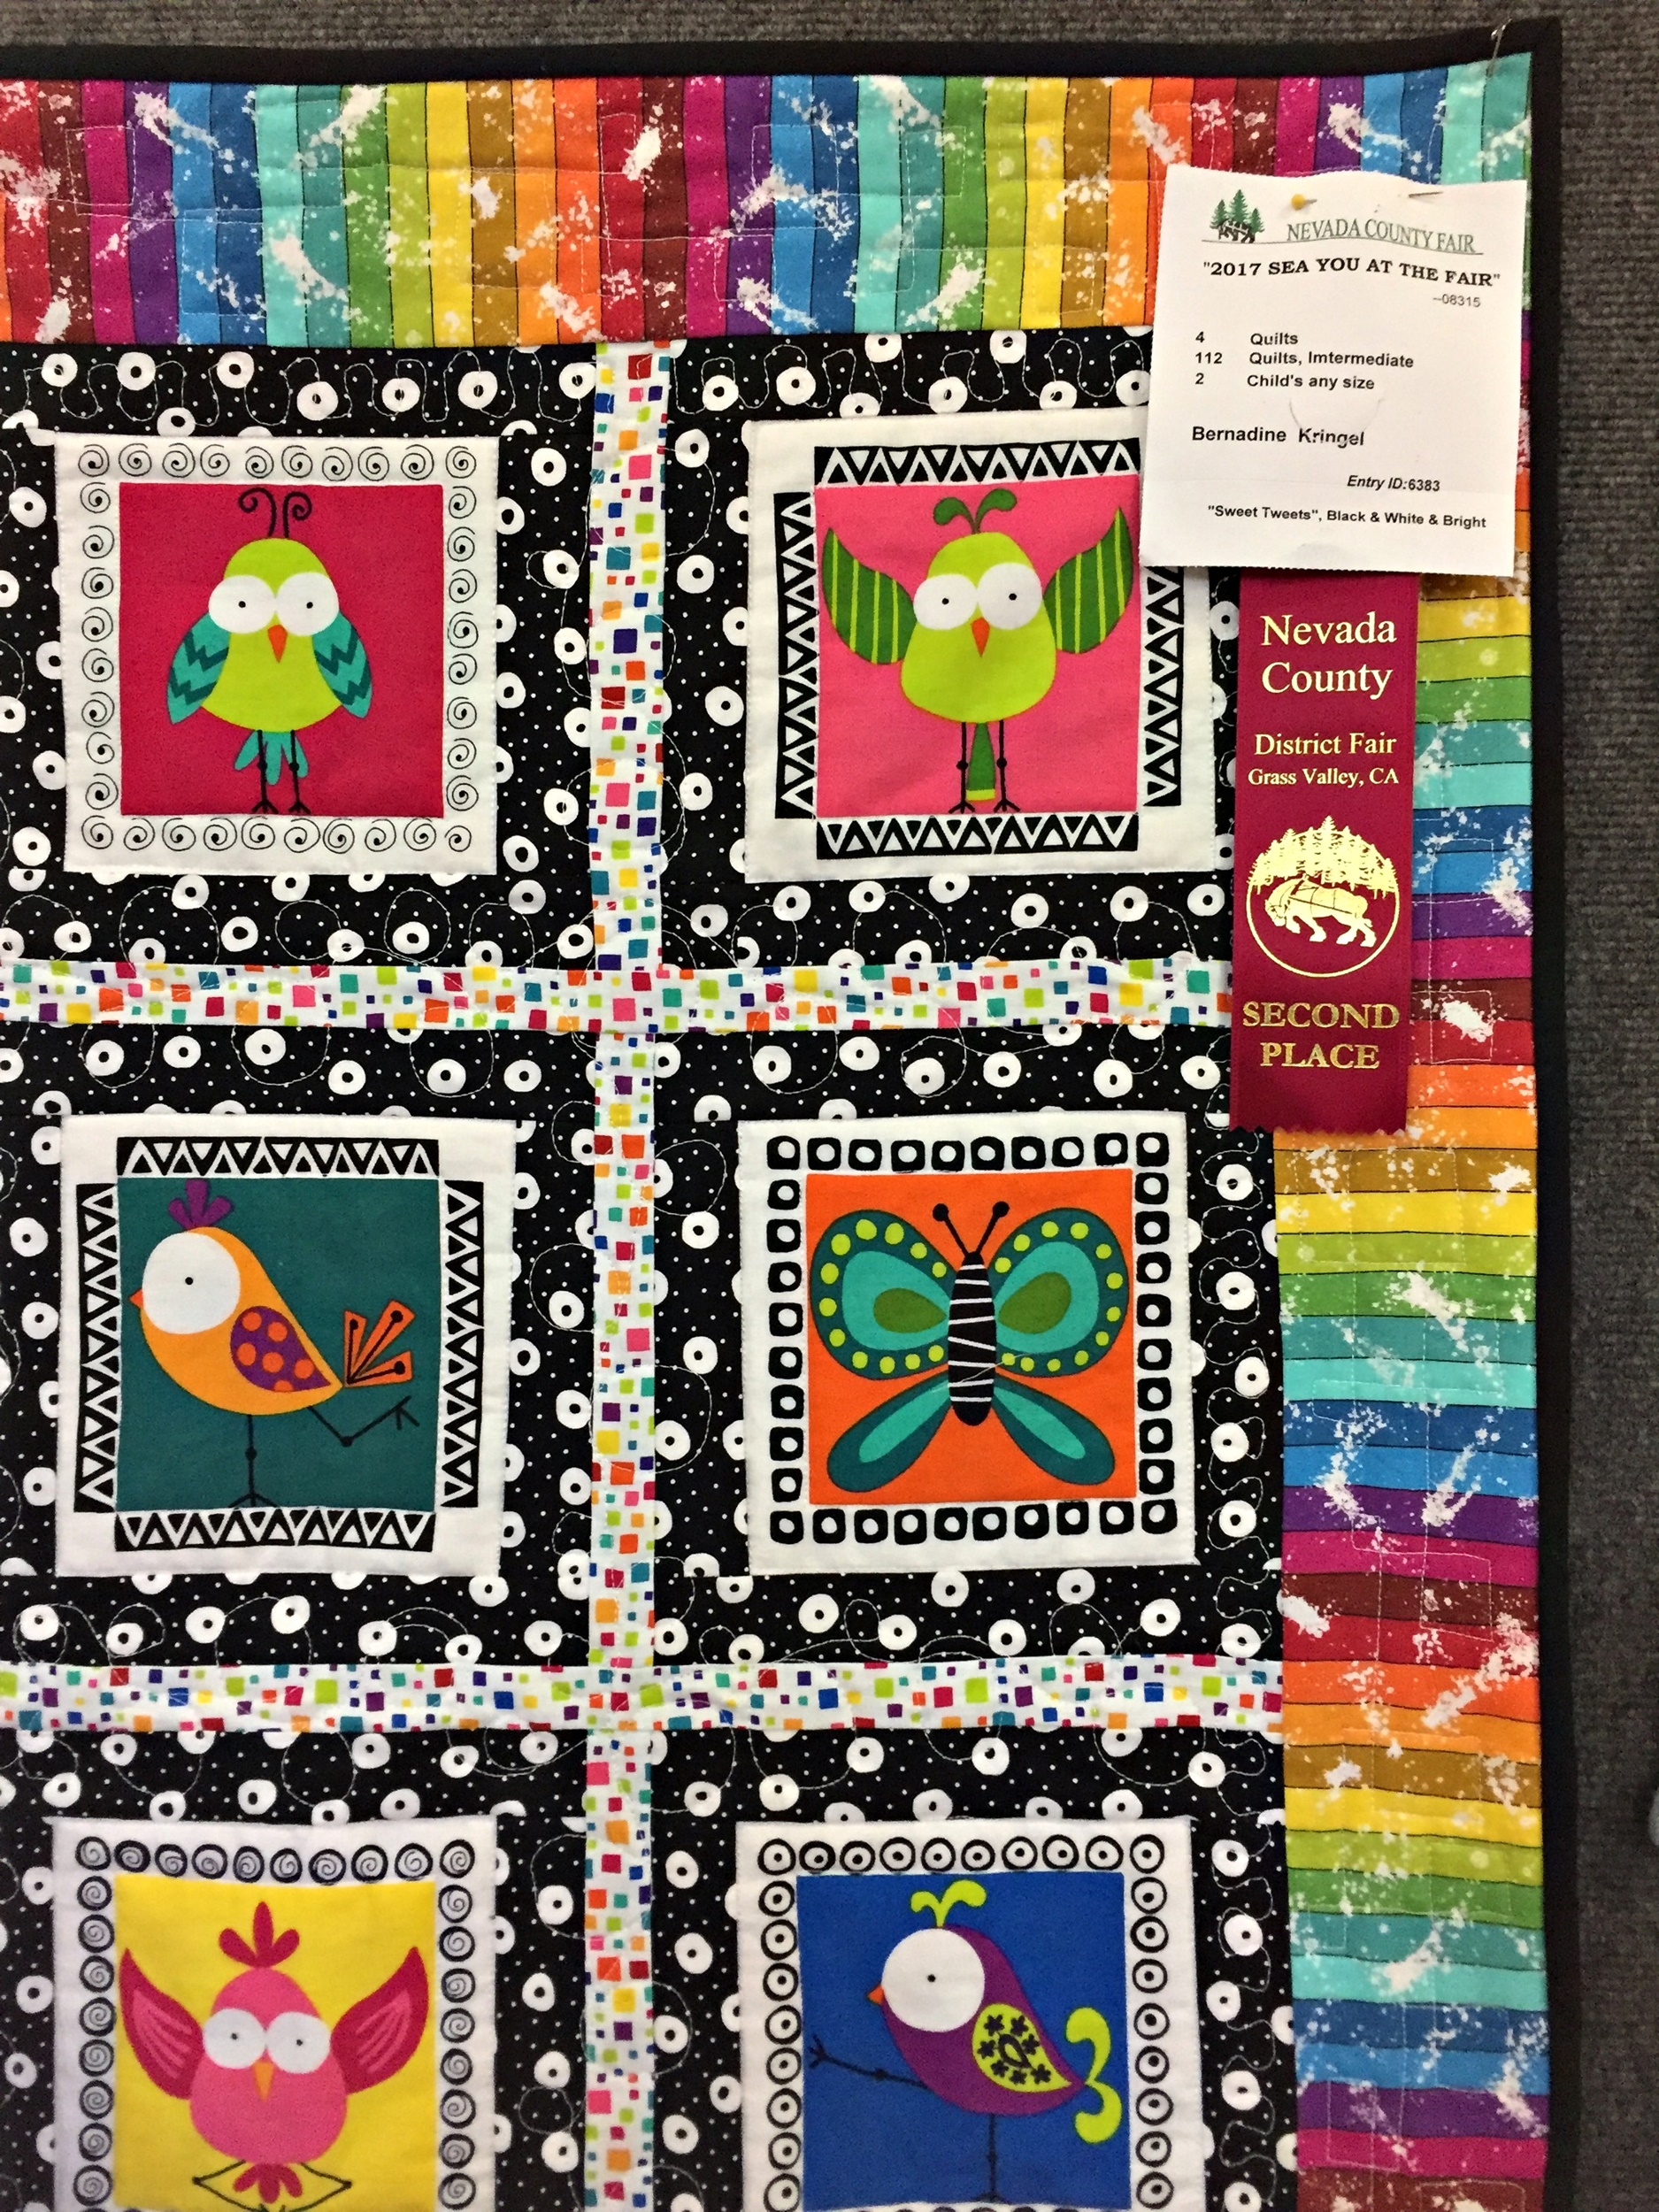
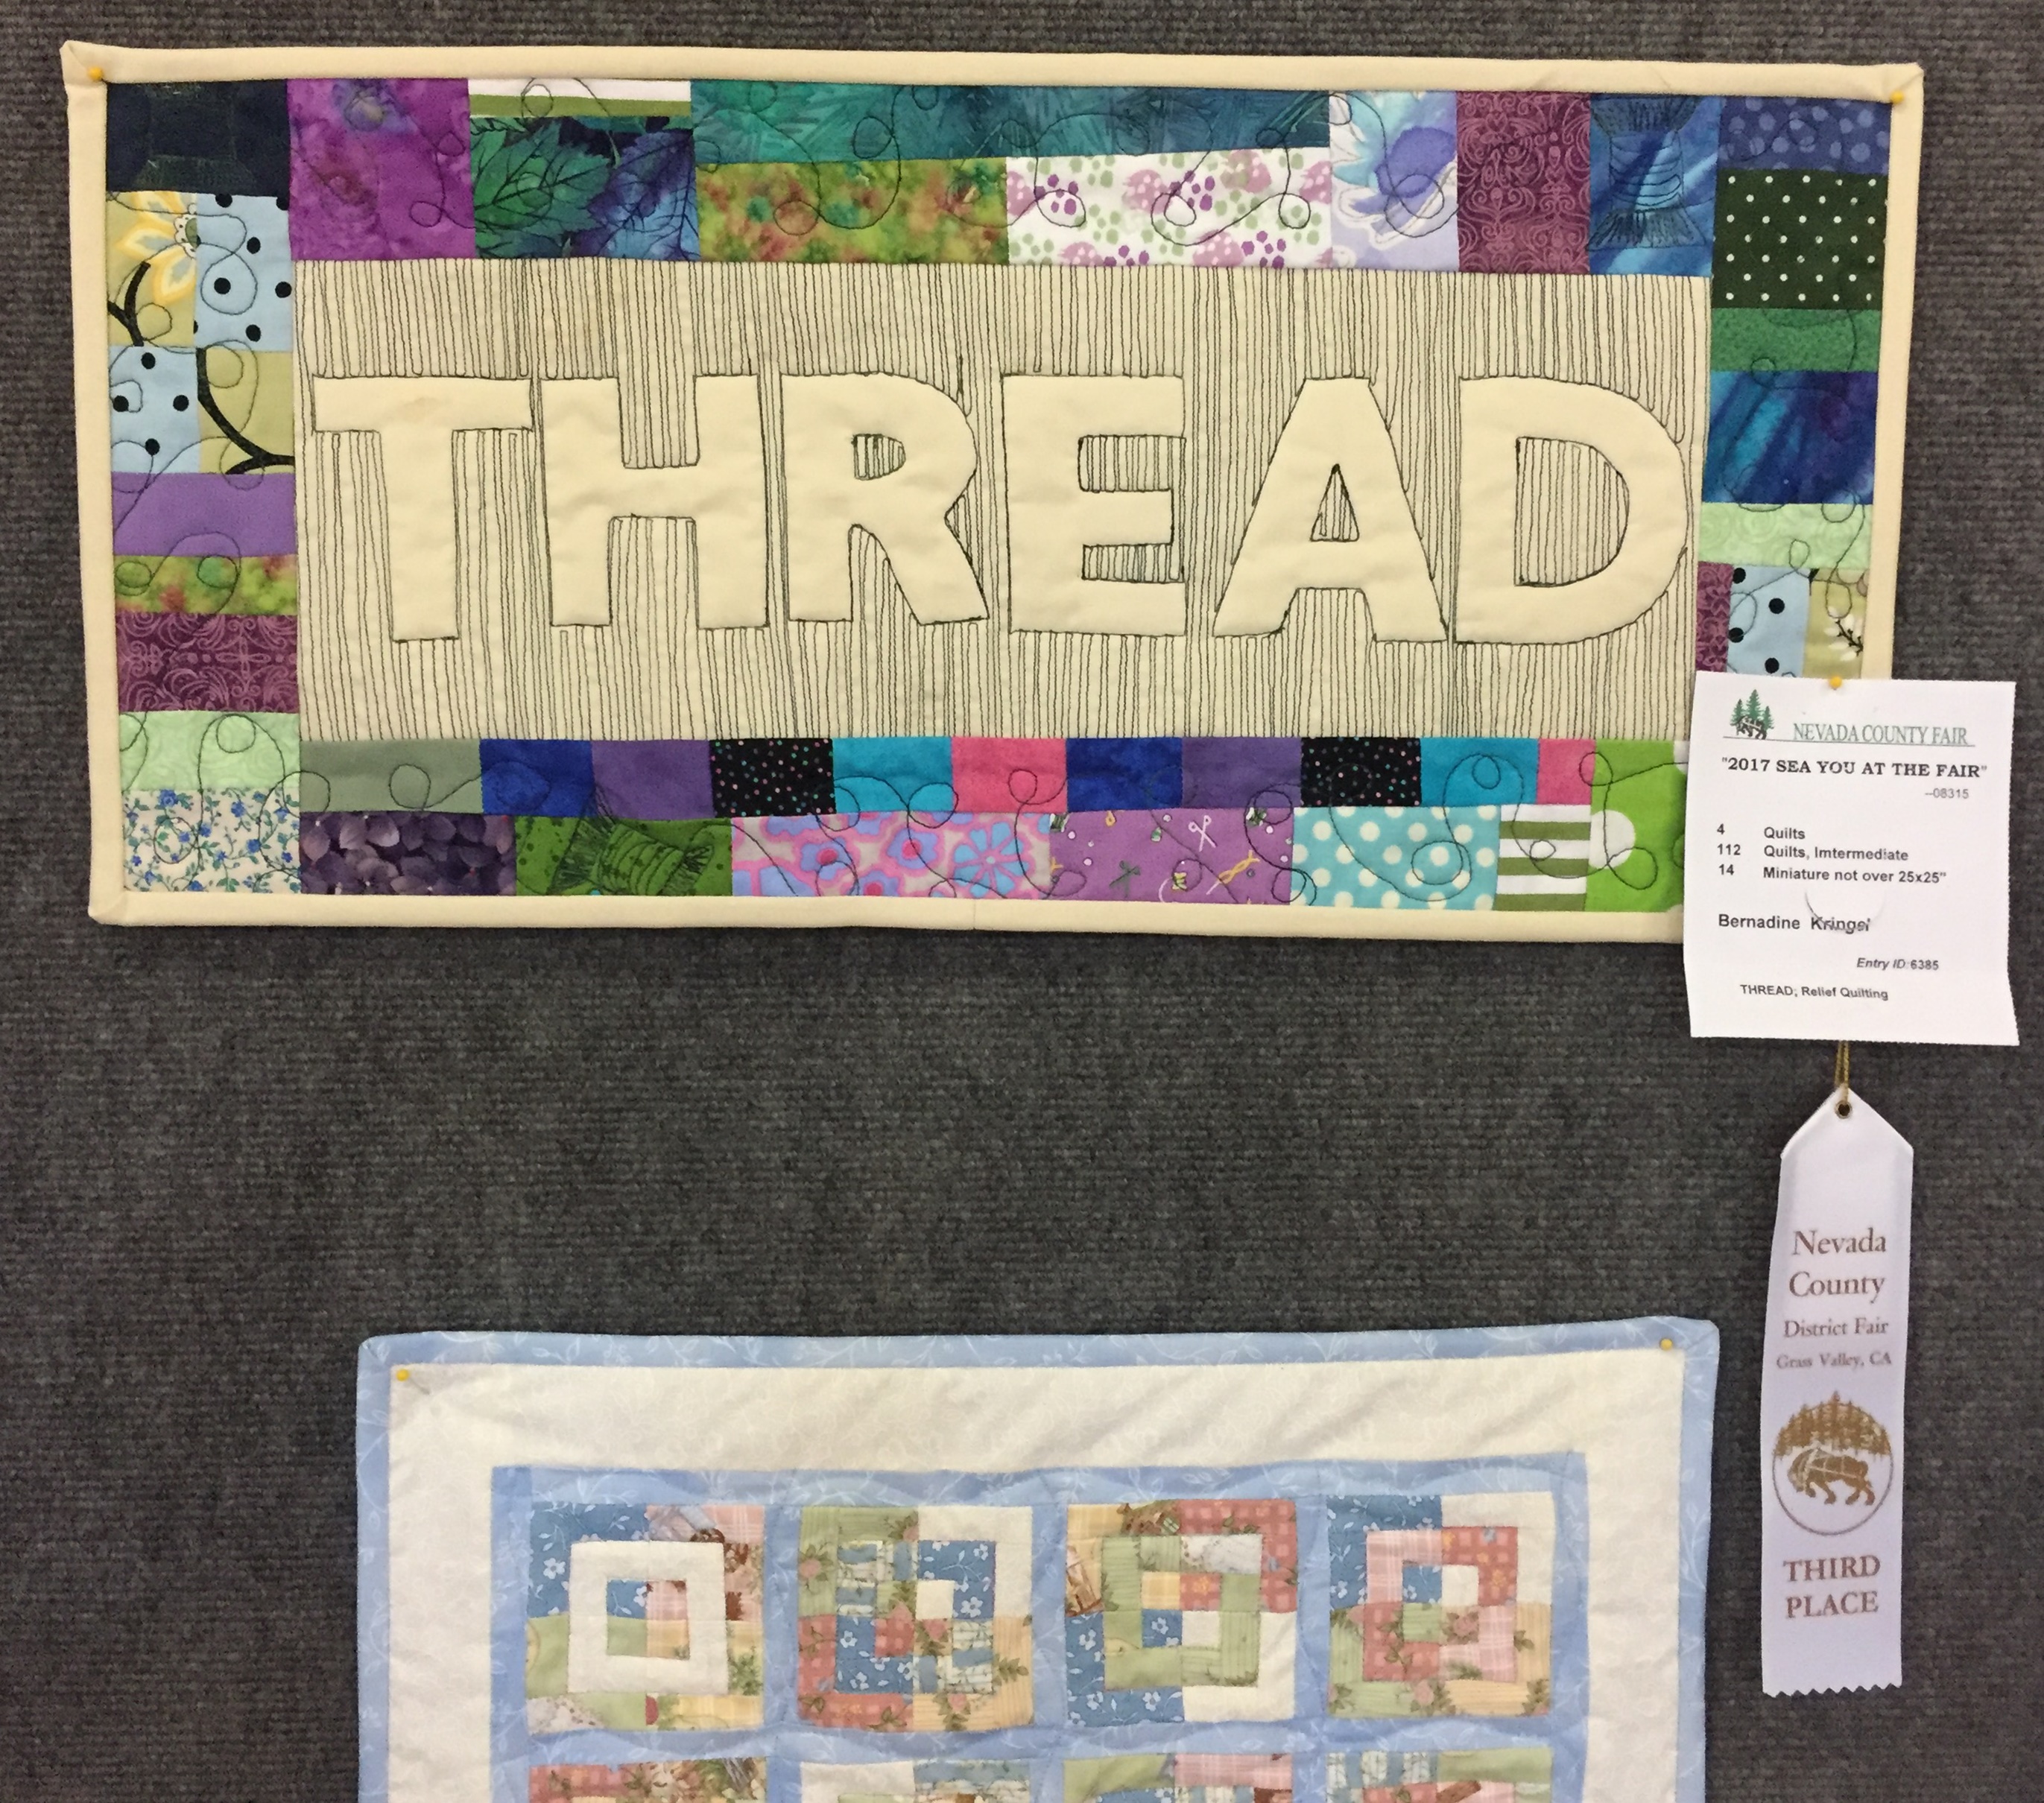
I did enter the relief quilted THREAD project and the Sweet Tweets baby quilt. I got a second place ribbon on the Sweet Tweets baby quilt.

Third place, the quilt below mine was 2nd place.

I received a third place ribbon on the THREAD project. Now before we all get excited, I will tell you the rest.  I am nothing, if not honest, right?  This is a very small show – all contained within one room and may 150 entries at most (including all garments, stitchery, knitting and quilts)  In the baby quilt category, there were two entries.  In the mini quilts of this size, there were three.  As my sister Patti wisely told me, the glass is half full – you got a 2nd and a 3rd place.  But my logical side says, meh, I got last out of three and 2nd out of two.  Either way, I am happy. I think I got over my fear of having someone look at my project and pick it apart (no pun intended!)  It was interesting to read the comments.  Here is a bit of what the judge wrote:

On the baby quilt:  She liked the fabric selection and the fussy cut blocks. She found the quilting design appropriate and noted my stitches were not all the same length. Binding was well done but quilt does not lie flat.

On the relief quilt:  Thread play noted and appreciated. Starts and stops should not be visible, addition of quilted thread spools noted and appreciated. Binding needs improvement.

So – it was an interesting experience.  I am not a terribly competitive person so usually, I don’t feel compelled to think of the judge’s perspective as I make projects.  I suppose if I decide to enter things again, I need to pay more attention to the details.

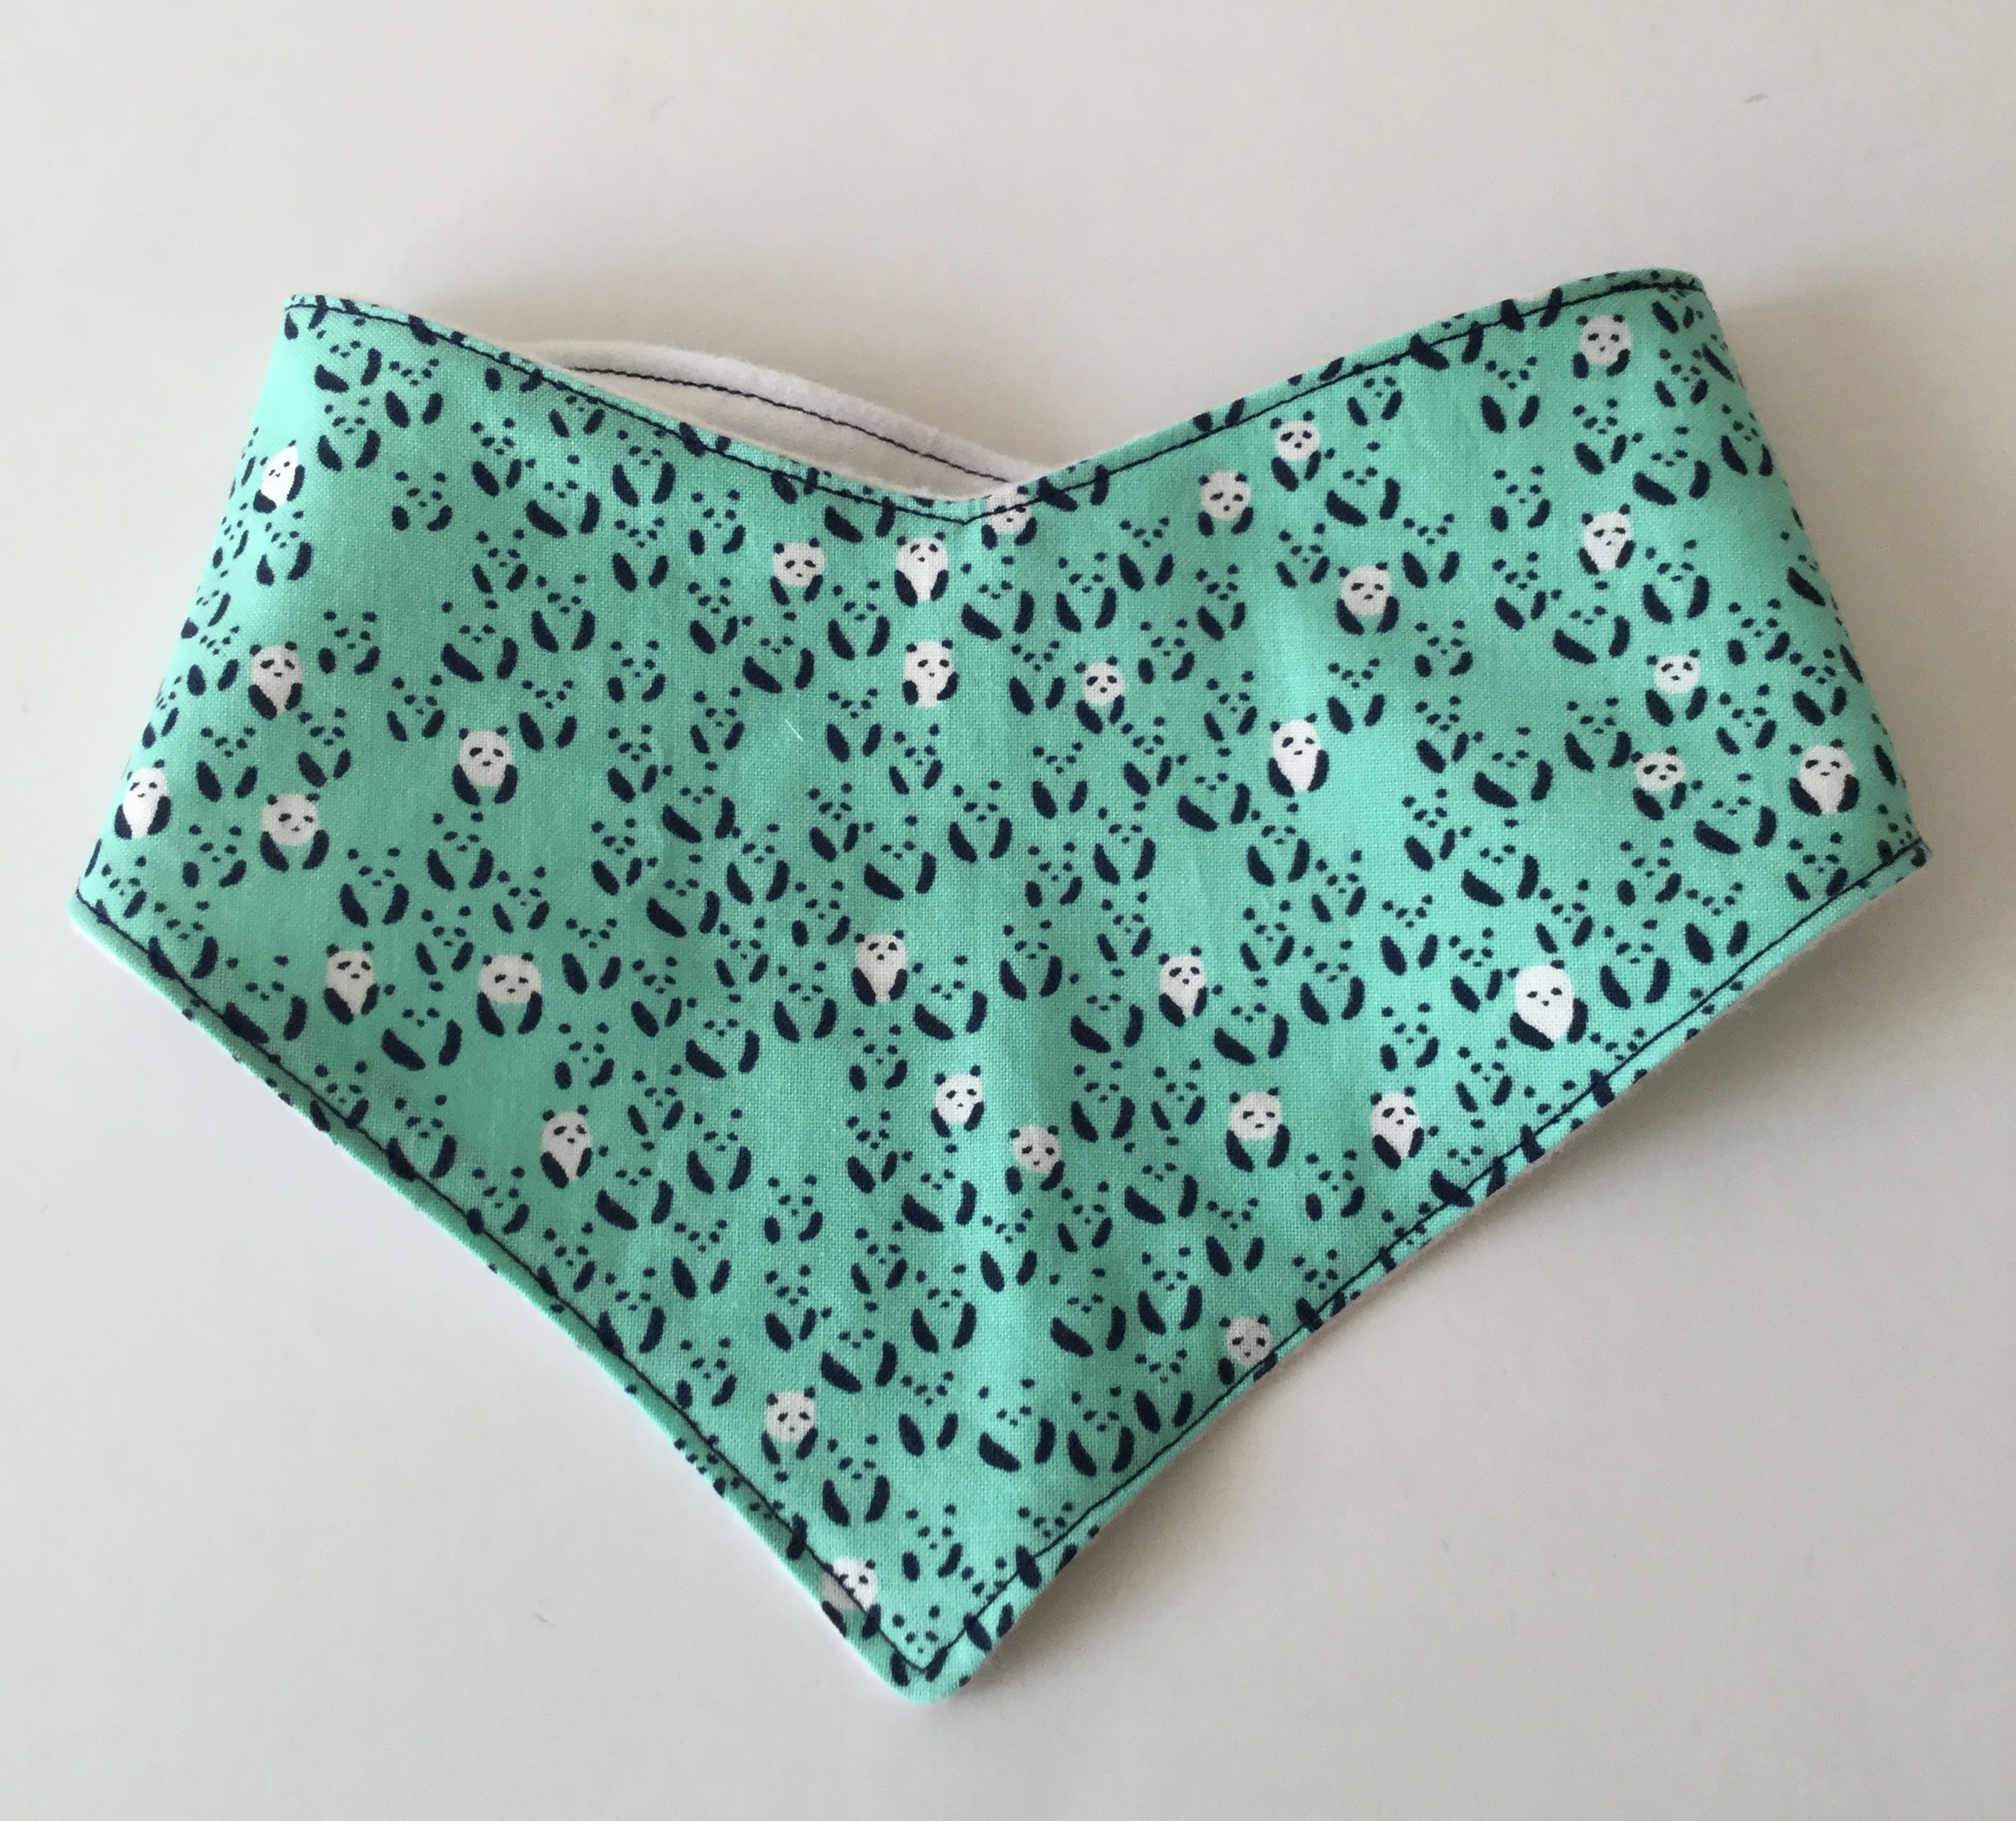
Yesterday I was having fun making a few bandana bibs for my little grand baby.  My son, his wife and the baby got to California yesterday after a few flight delays and weather issues. They are spending time in the Bay Area, about 150 miles from here and will come up here Wednesday.  The baby will be working on teething soon which means all of that drooling that comes with it. I thought bandana bibs might be nice for this. The first one is made with a Cotton & Steel print, Panda Bebe, a white flannel backing and a tiny velcro closure. After I made it, I decided it might be a tad bit on the small side.

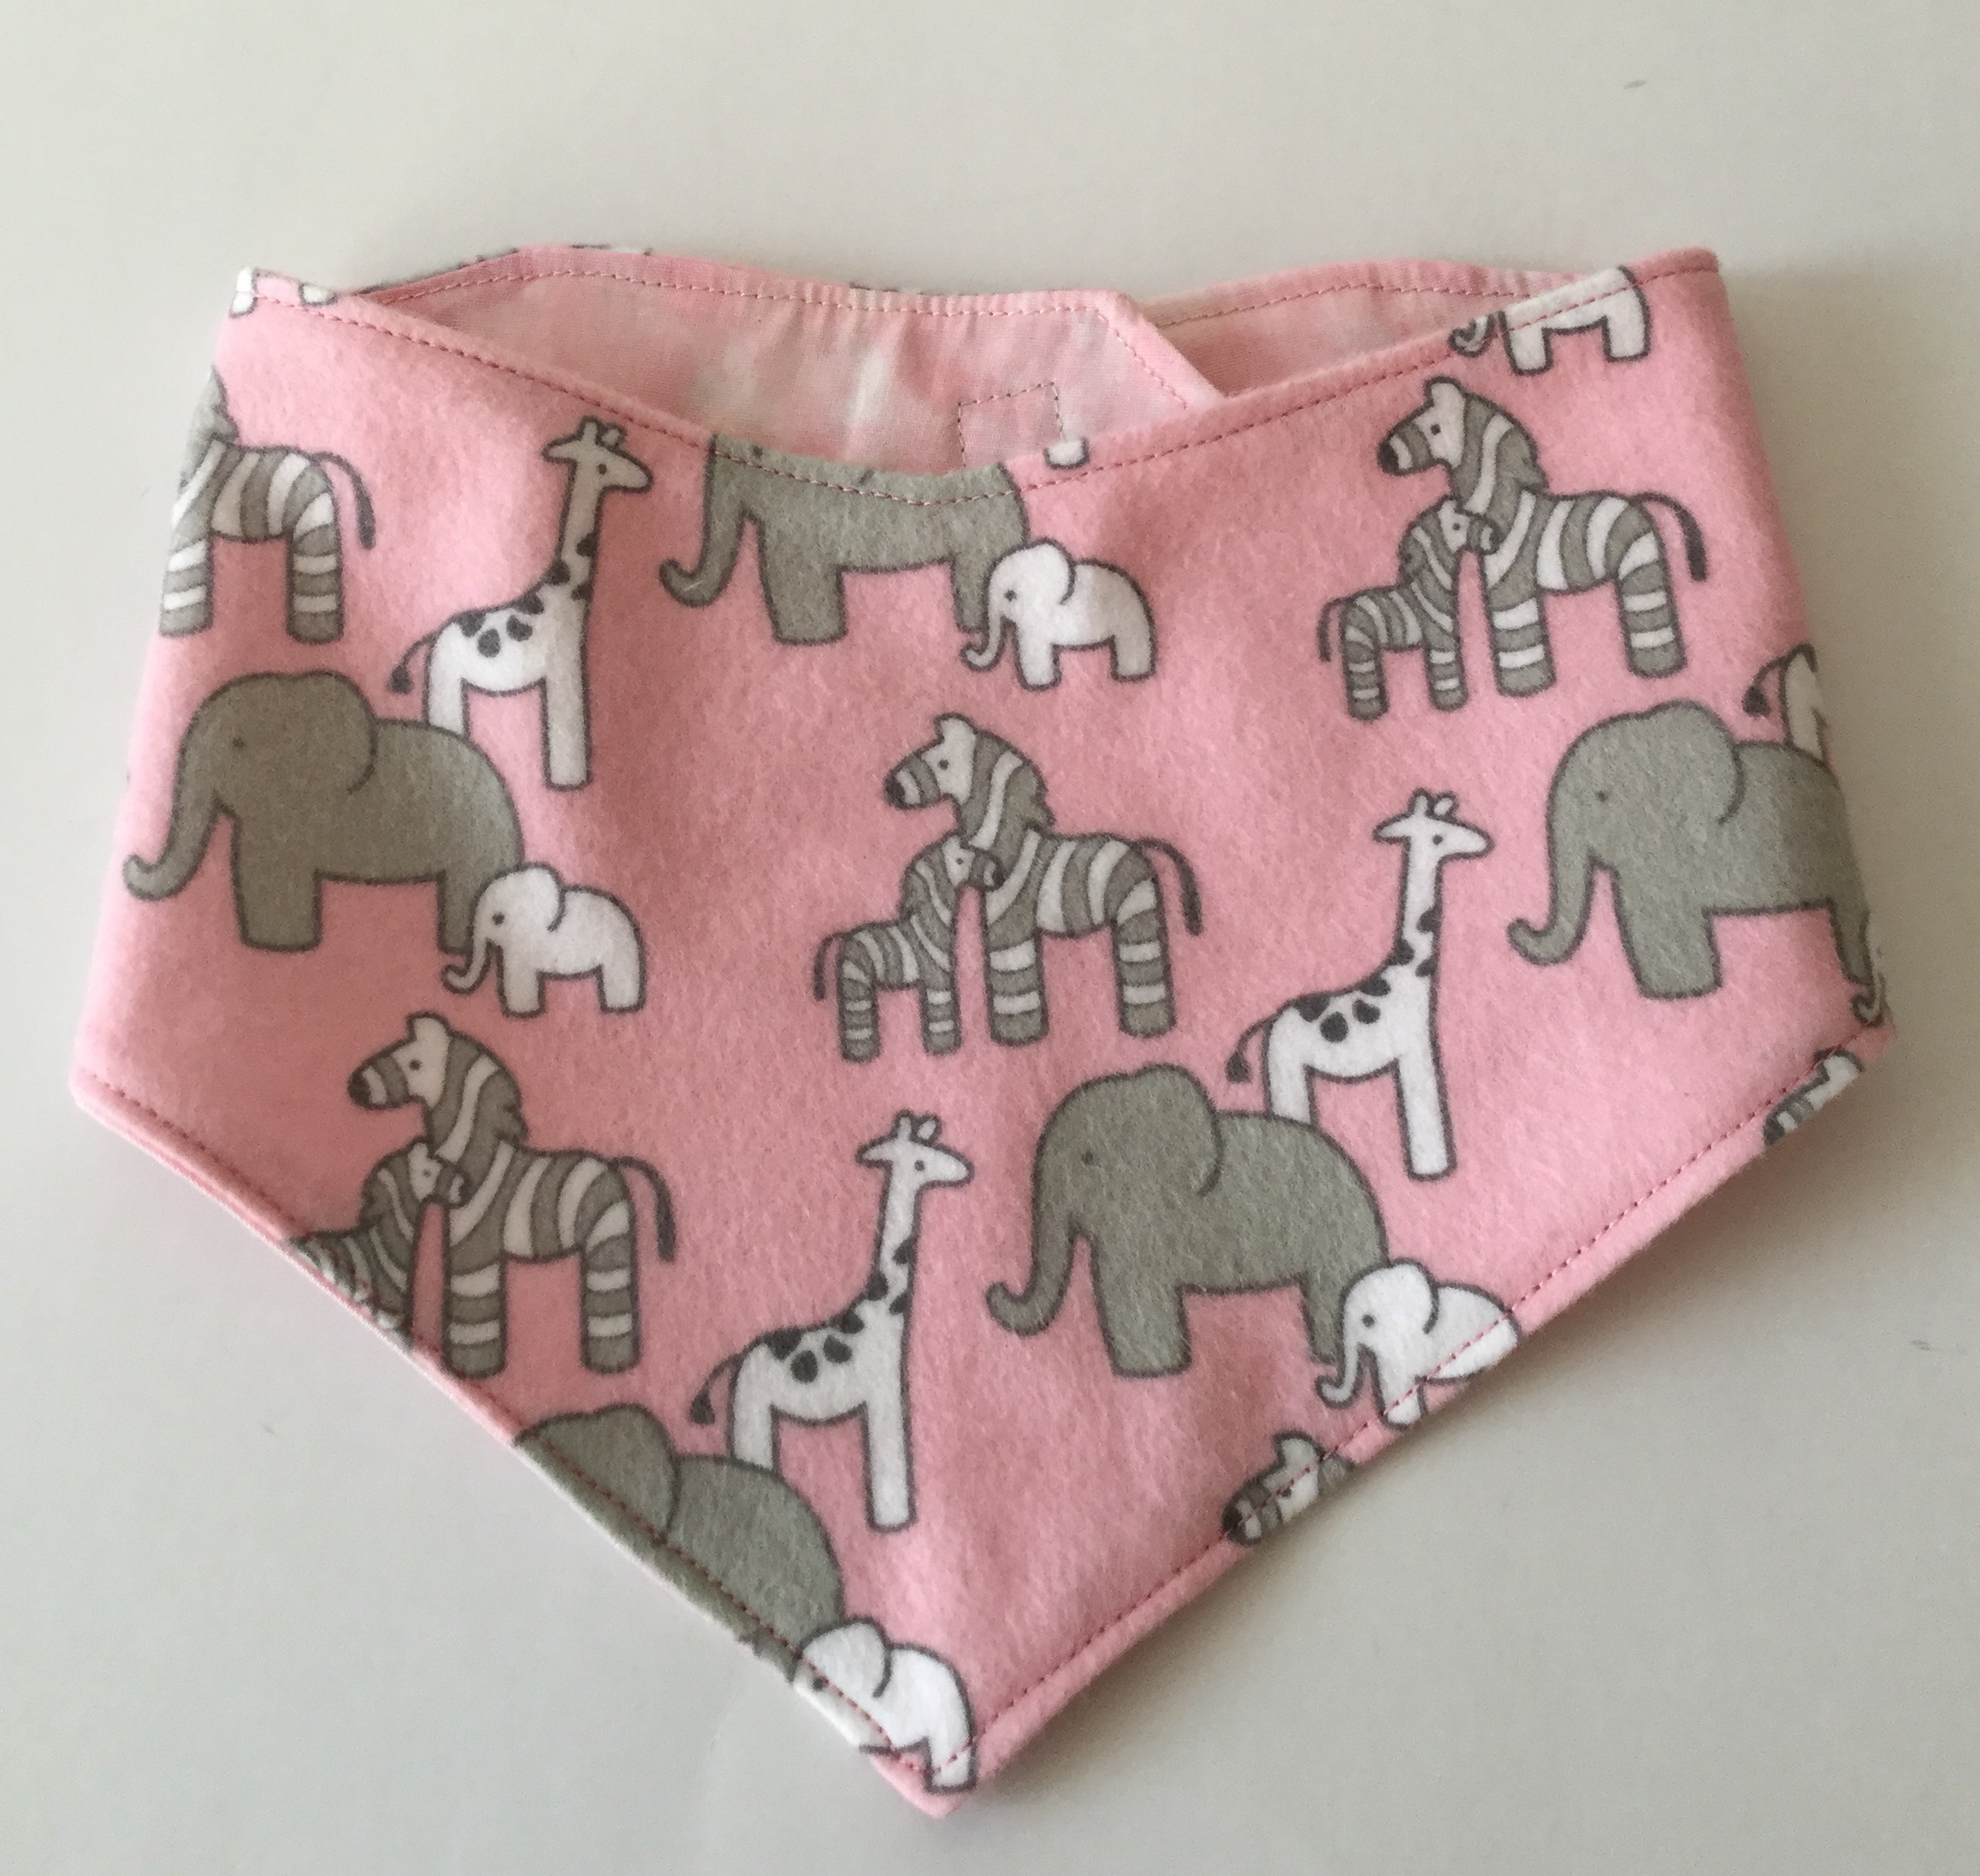
I took the template and cut it to be a couple of inches longer. The second bib was made with a cute flannel scrap I had and a pink lining.  I suspect this one is long enough. They were fun to make and such a quick project. The template I used was from Grey House Harbor, a DIY website with lots of tutorials. It will be fun to see if these fit baby girl when she gets here.

Finally, today Needle and Foot is the sponsor of this week’s podcast at While She Naps. The host and author at this site, Abby Glassenberg, is someone I have long admired. So much so, I wrote a review of her newsletter and podcast a while back. When the opportunity came about to sponsor a podcast, I was more than happy to do so.  Abby’s strength lies in the breadth of subjects she covers both in her blog, newsletter and podcast. I hope you will click through and listen to today’s interview with Jamie Chalmers, otherwise known as Mr. X Stitch. His site boldly claims to be the world’s best contemporary needle crafts and embroidery site. You may have noticed that embroidery and cross stitch, among other styles of needle crafts, are trending these days.  Jamie’s hugely popular site features “Cute ThingsArty Things, and Rude Things as well as all other sorts of stitchy goodness“. I am looking forward to hearing the podcast today and getting to know more about Chalmers. As added incentive, Needle and Foot will be offering a discount to Abby’s and Jamie’s fans – you’ll need to go over and listen to find out the details though!