Author Archives: Bernie

Mosaic Mystery Quilt Kits

It is the first week of July, so you know what that means, right? The annual Meadow Mist Mystery Quilt kicks off! Cheryl Brickey of Meadow Mist Designs is back with her 5th annual mystery quilt, called the Mosaic Mystery, beginning on Thursday, July 4th.  This confident beginner level quilt along is completely free to join and has a relaxed pace with monthly instructions posted on the first Thursday of each month.  All quilt instructions will be posted on the Meadow Mist Designs blog and you can find all information about the quilt along on the Mosaic Mystery page.  Join over 3,700 other quilters in the friendly and quite active Meadow Mist Designs Facebook Group .  Cheryl is also offering a non-mystery option for those that want to join in, but would rather see the design ahead of time.  You can sign up for the non-mystery option here

This year I am involved on a couple of levels. Needle and Foot is sponsoring two different prizes during the event, one in August and another at the final reveal when the QAL wraps up. Additionally, Needle and Foot has two kits curated specifically for the Mosaic Mystery Quilt. This is really exciting! Cheryl and I worked together to create two kits, each with very different vibes.

For some quilters, a Mystery Quilt can be somewhat daunting. It might feel a bit nerve wracking to pick fabrics without knowing what the pattern looks like. To this end, Cheryl and I thought it would be nice to have kits available for you to choose from. Both collections contain a selection of fabrics from Art Gallery Fabric, with a solid as the background and three prints used in the quilt and as the binding.

One of my kits contain three prints from the Sun Kissed line. Designed by Maureen Cracknell, these fabrics are summery and so cheerful. The Sun Kissed kit is available here.
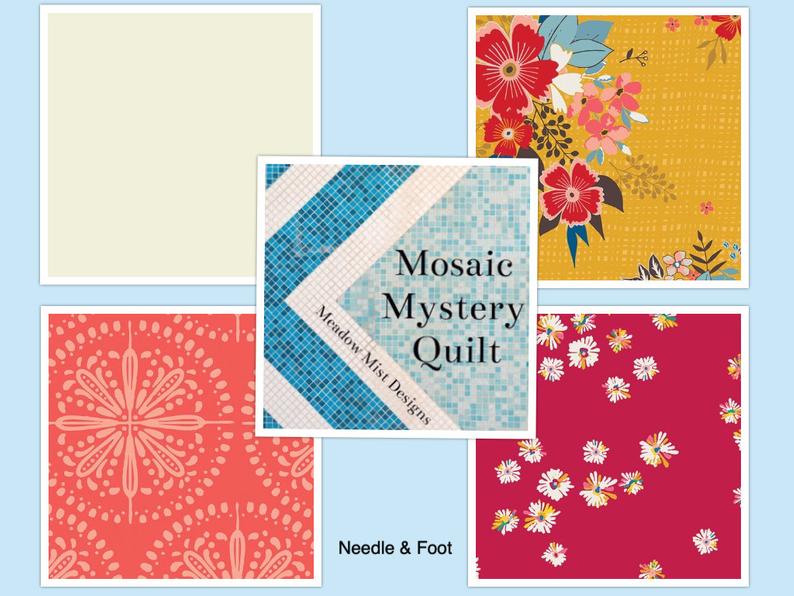
Going clockwise, there is Linen for the background, Summer Dress Dreams, Hazy Daisies in Scarlet, and Bandana in Grapefruit.
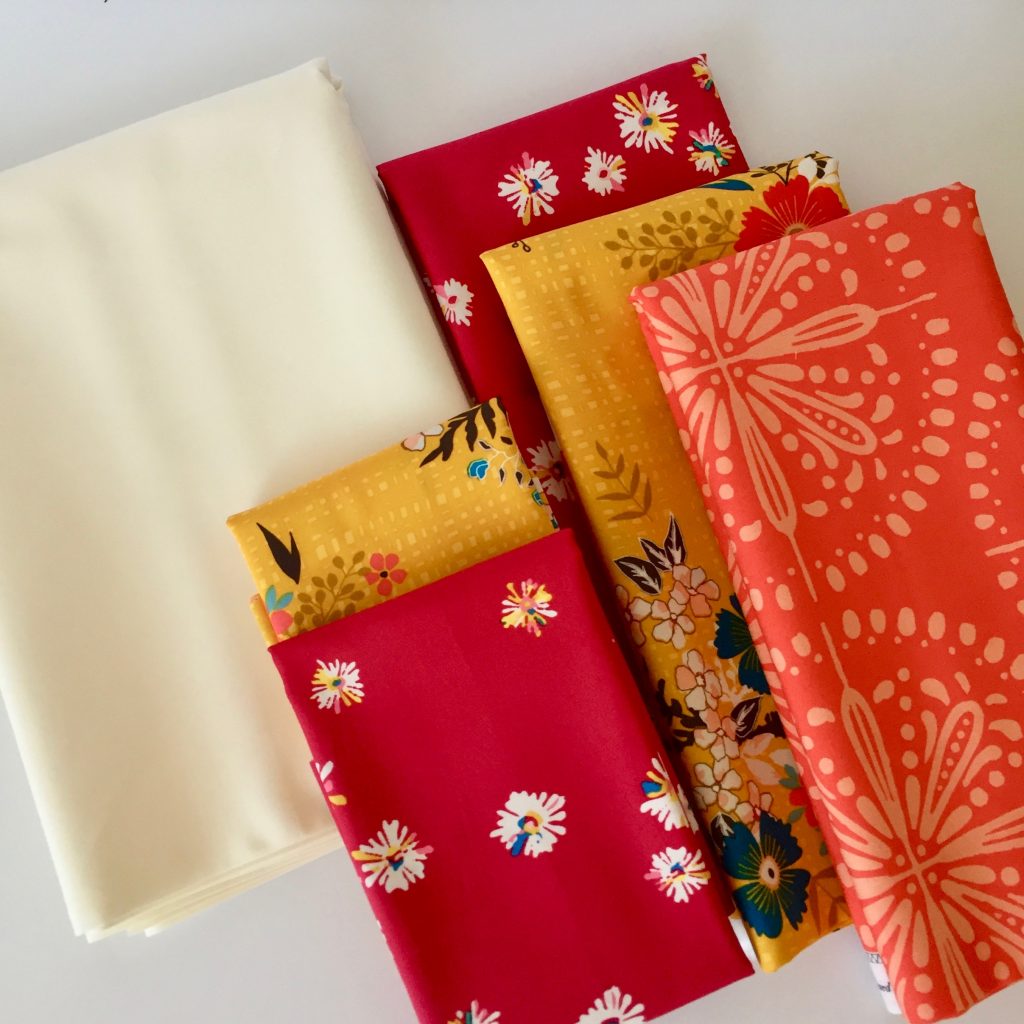
The prints include large and medium scales which just happen to work well with the design of the Mystery Quilt.
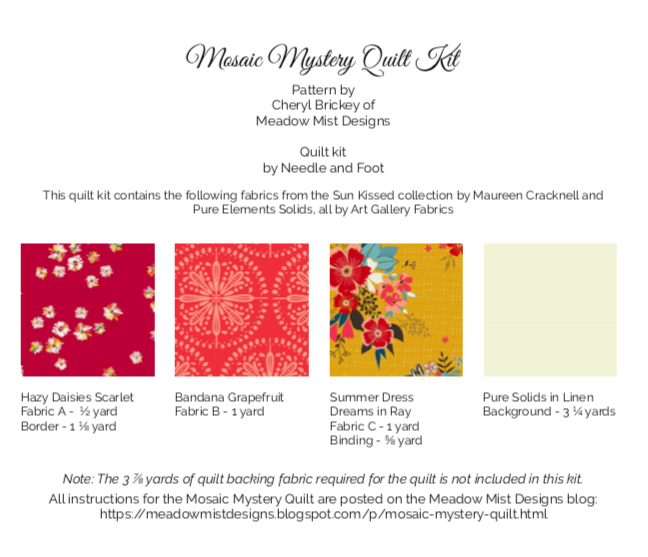
Above are the details on the Sun Kissed kit for your review.

This stunning kit contains print fabrics from Pat Bravo’s Matchmade line. Created by Pat as a line of blenders, the range of color used for the Matchmade fabrics is bold and saturated. To see more details, click here.
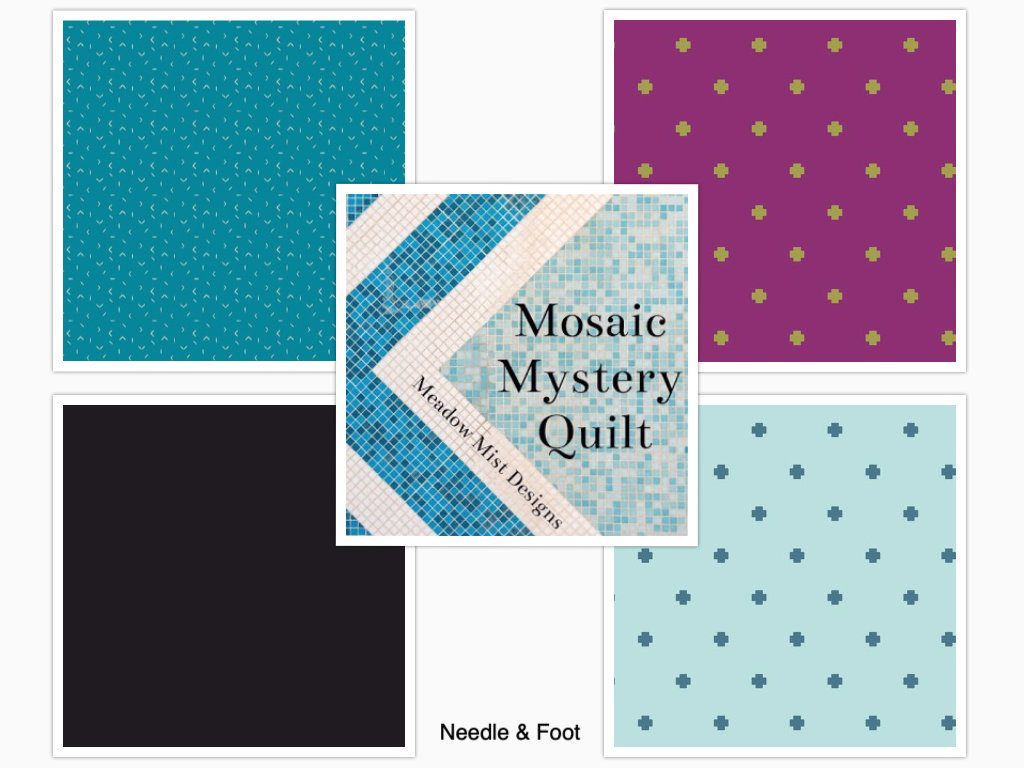
The background is a solid black called Caviar. The prints starting in the top left and going clockwise; Indication Midnight, Positivity Berry, and Positivity Midnight.
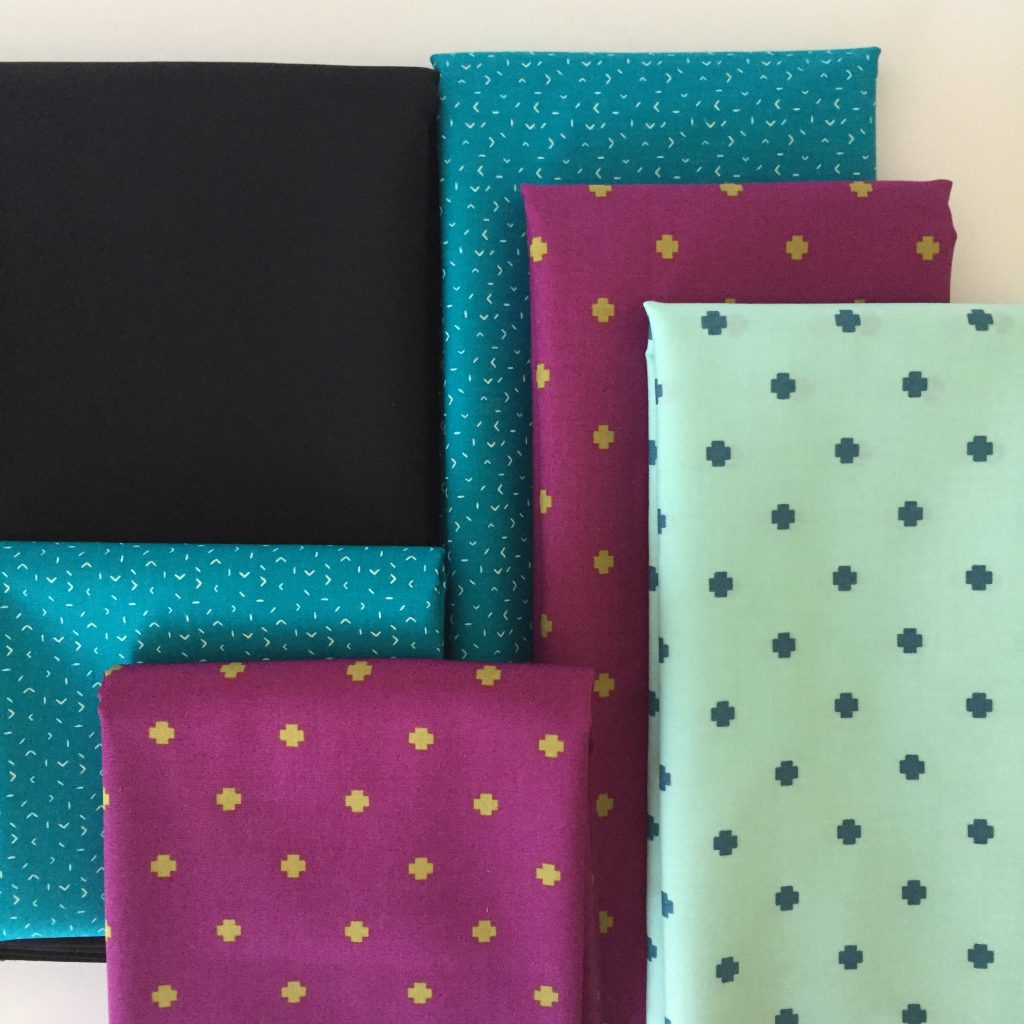
This kit is very modern with strong contrast. The prints are small scale and not the primary focus of the kit. The color is the focus – shades of teal and berry with a dramatic black background. Gorgeous!
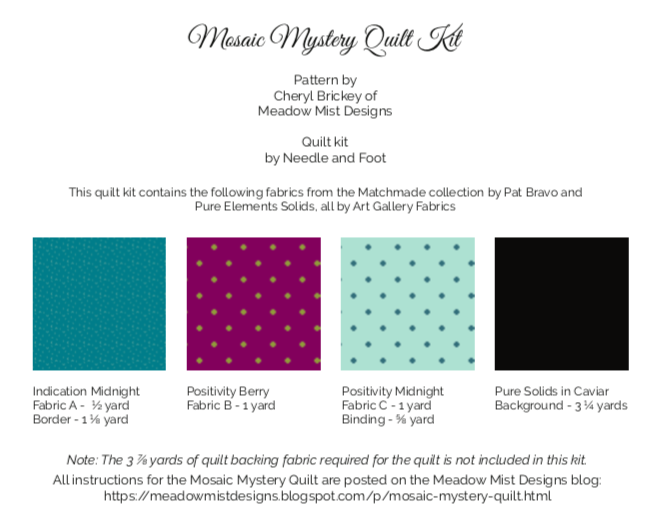
Here are some details on the Matchmade kit for you to review.

I have had such a great experience working with Cheryl creating these two kits for you. If you are someone who is intimidated by the prospect of selecting fabrics for a mystery quilt pattern, be sure to take a look at the kits. Cheryl and I tried to create two very different kits, both modern with bold colors and yet each with a very different feel to them. Using strictly Art Gallery Fabrics in the kits means they are of the highest quality. Kits do not include the backing fabric or batting. However, I do have fabrics in stock that work really well for the backings for both kits. You can see backing suggestions when you click through to the kit links.

There are a number of each kit available in the shop. Come take a look! If you have any questions about the QAL – hop over to Cheryl’s so she can assist. Questions about the kits? Leave them in the comments or shoot me an email. And…. just to have some fun, let’s take a vote. Which kit is your favorite? Let me know in the comments. I am so curious.

A Memory Quilt for Susie

Over the past two years or so, I lost contact with my friend Susie. We used to take long walks together, never running out of chit-chat. We both really enjoyed it but life got so that we fell out of the routine. In January of this year, I contacted her about a volunteer commitment we both work on and she told me her husband had recently passed away of lung cancer. I didn’t even know Rick had been ill. I felt awful that we had lost touch and I hadn’t been around to support her during his very serious illness. I know all too well how important it is to have friends helping you during such a dark, painful time.
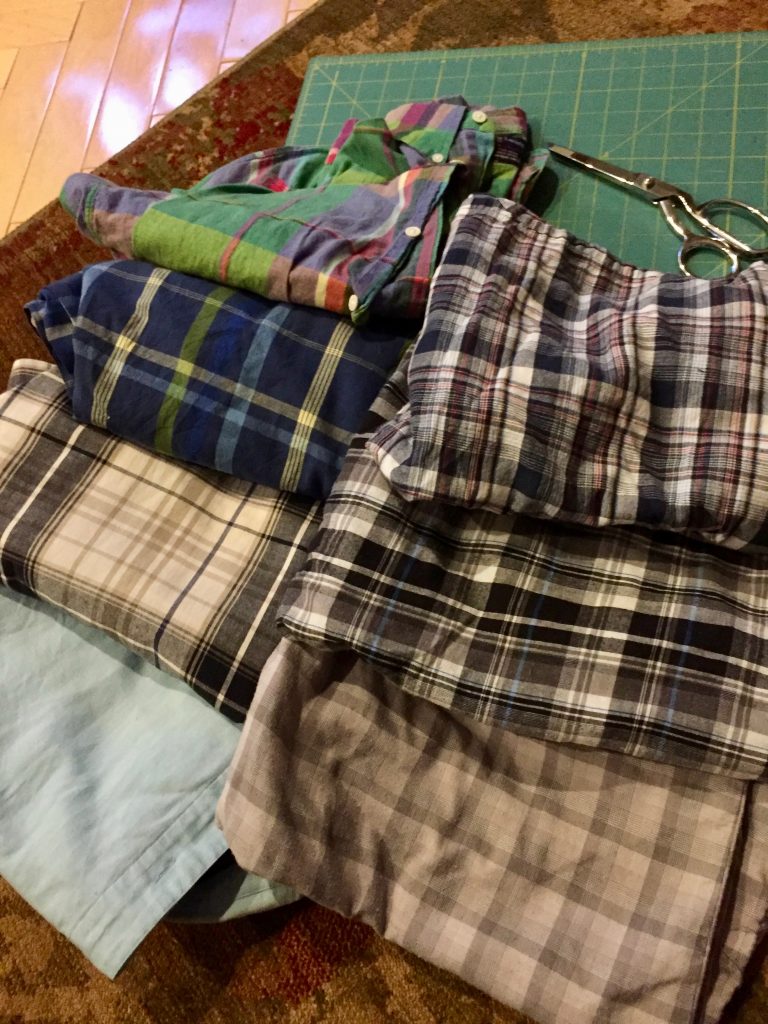
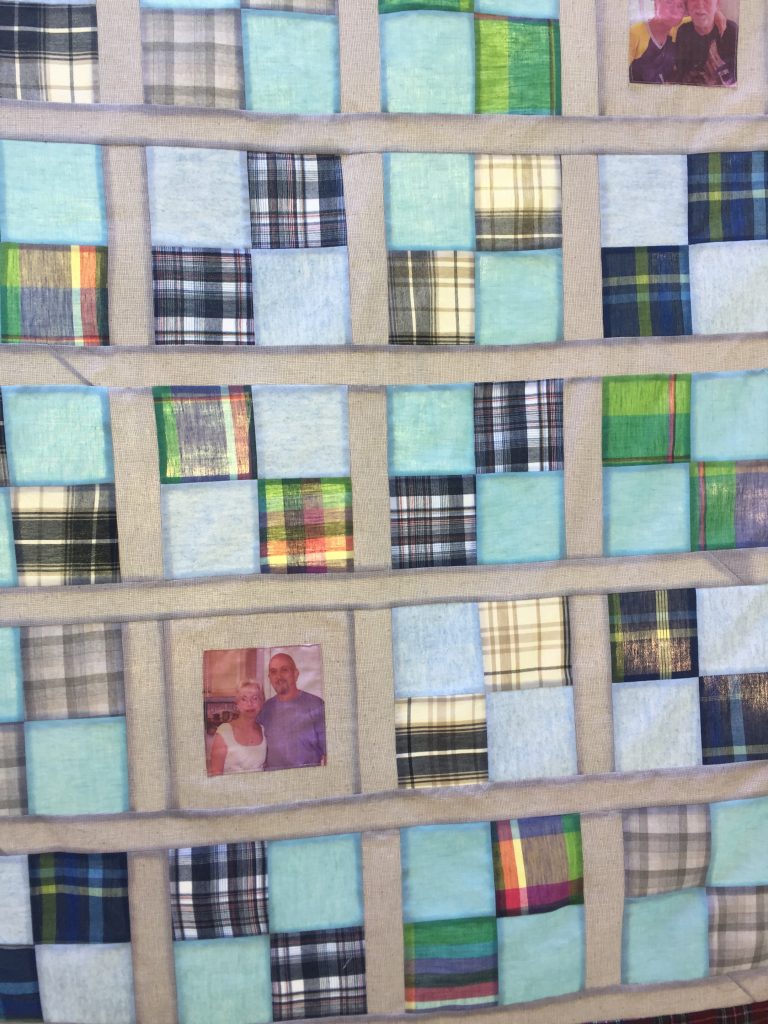
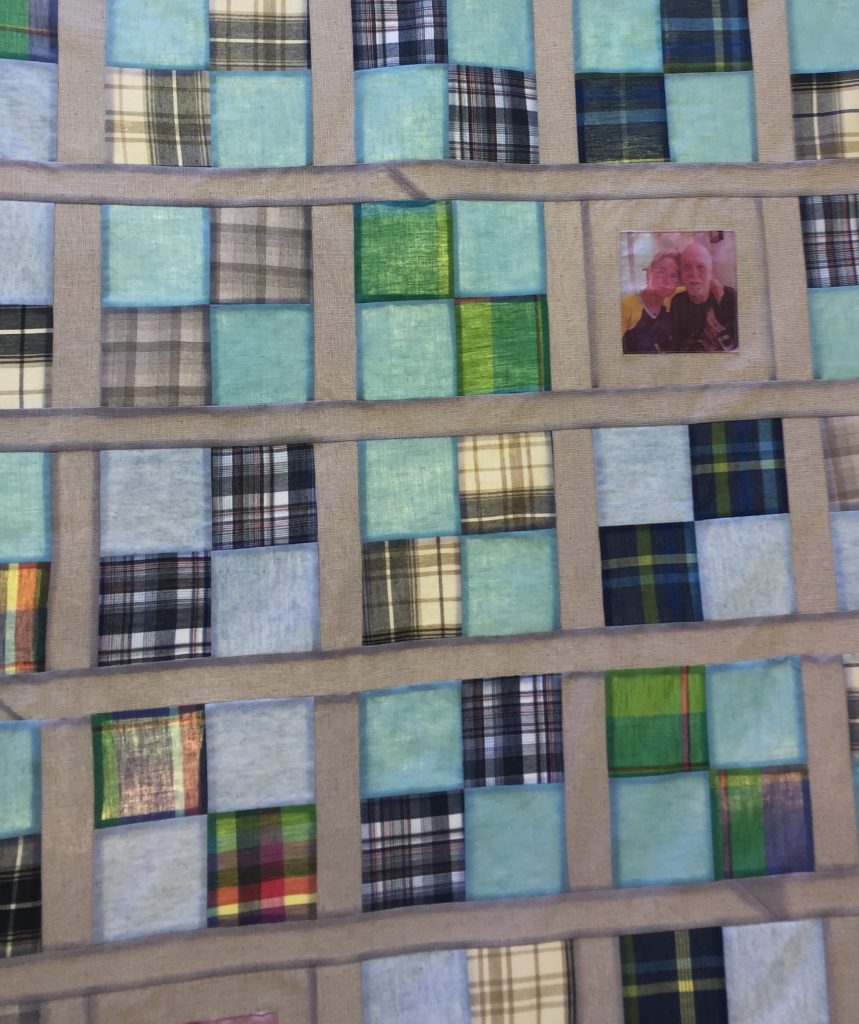
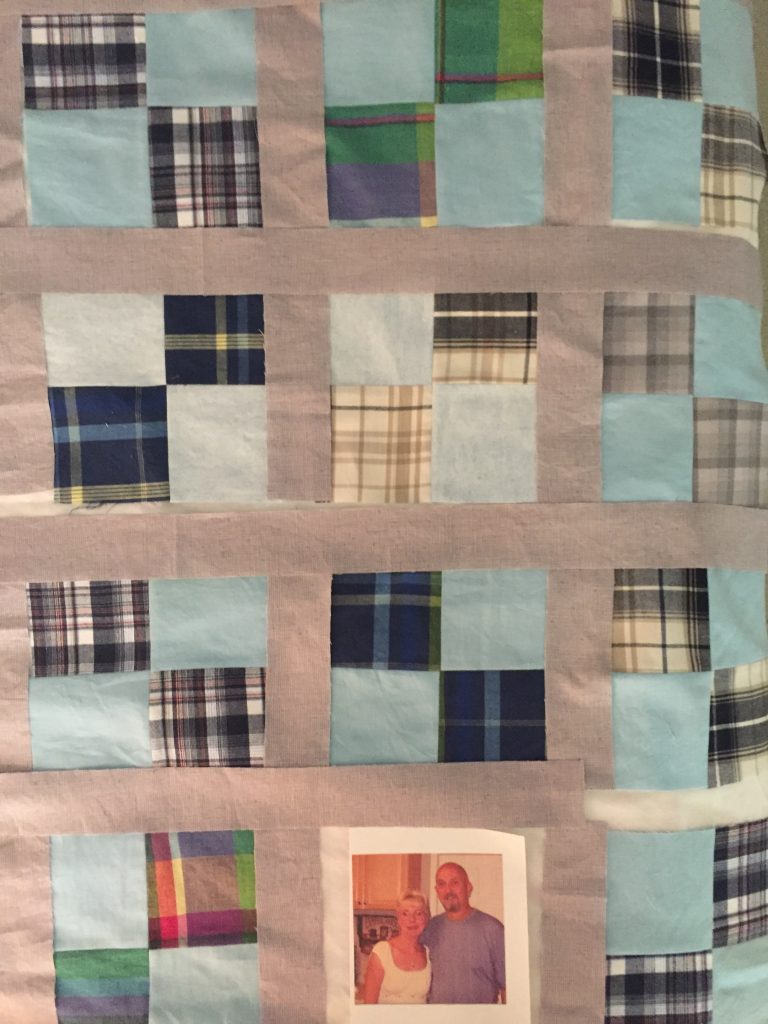
We got together a couple of times soon after and I offered to make a quilt for her with Rick’s clothes, whenever she thought she would be ready to part with some of his shirts. About a month later, she brought me a large bag containing his bathrobe, some shirts and shorts. We took a look at everything and talked about whether she was ok with me cutting them up. Then we looked at different quilts I had pinned to a memory quilt board on Pinterest. She was drawn to a simple four patch block with sashing. Easy enough to make! Susie also asked if I would include two photos of her with Rick she had printed on fabric. I haven’t used that sort of thing before but of course I was happy to add them to a block.

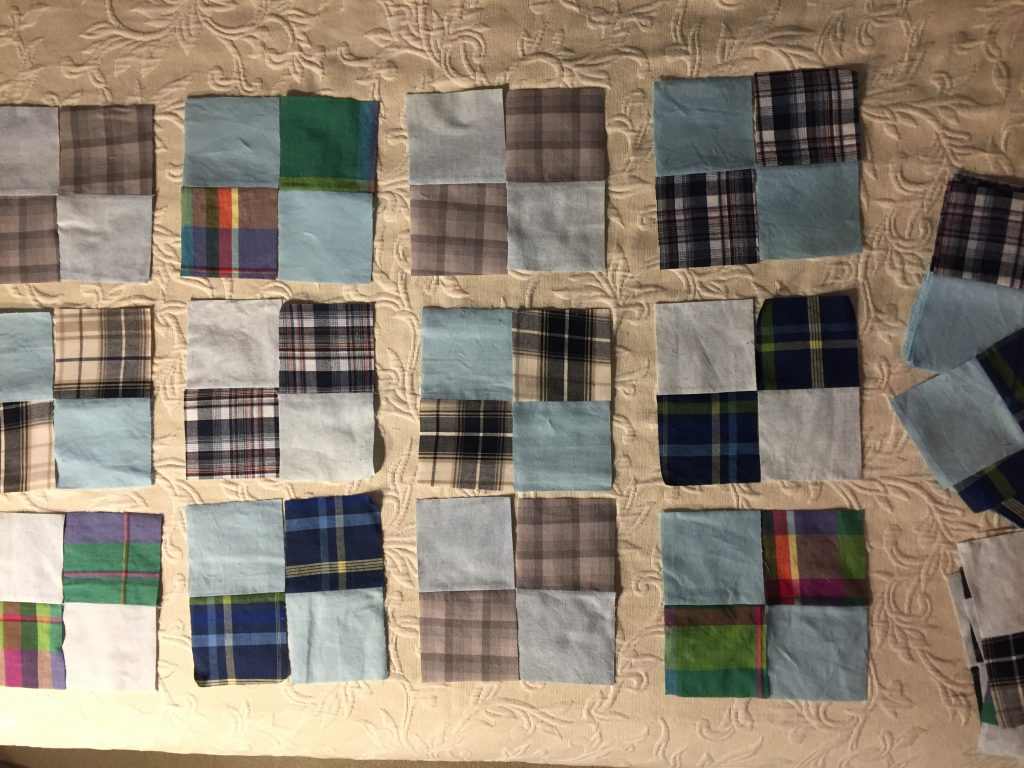
Looking at the collection of shirts and shorts, it seemed best to use the two pairs of solid blue shorts and then two plaids for each four patch. Susie looked in the shop downstairs and chose a very neutral textured solid for the sashing and border.

Making four patch blocks

Working with clothing that has been worn is a bit tricky. Susie chose the items Rick favored most because she had the sweetest memories of him in those shirts or shorts. Of course this means some of them were well worn. I wish I could remember who it was, but on Instagram, a nice quilter reminded me to back any thin fabrics with a stabilizer of sorts. This was perfect. I fused a woven interfacing to the back of some of the chunks of fabric before I cut the strips. Once that was done, I cut 3 1/2″ strips wherever I could. Then made strip sets and sliced them up to make the four patch blocks.

What a sweet photo of Rick and Susie

The next step was to create two blocks where I could utilize the pictures of Rick and Susie. I wasn’t really sure how to do this? The fabric they were printed on seemed to fray easily so I didn’t want to stitch a border directly to the printed piece. Instead I chose to fuse the photo to a square cut from the neutral sashing fabric. After fusing it (with each edge pressed under to create a clean look) I topstitched around the perimeter.

Another sweet picture!

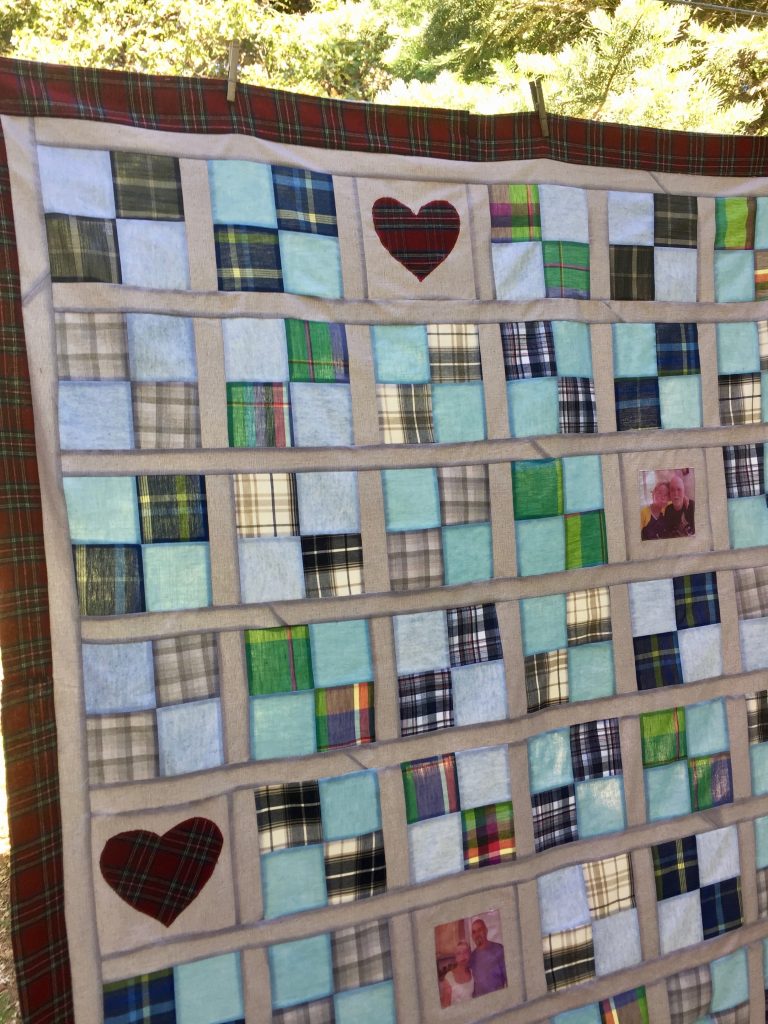
I think that worked quite well. One limiting factor was the shorts I used as a solid. I ran out of that fabric with two blocks to go. What to do? I decided to cut two more plain blocks from the sashing fabric. Then I took bits of the flannel bathrobe and cut two hearts from it. Those were fused to the background squares and appliquéd to the fabric. They look very cute and I like the pop of the deep red plaid.

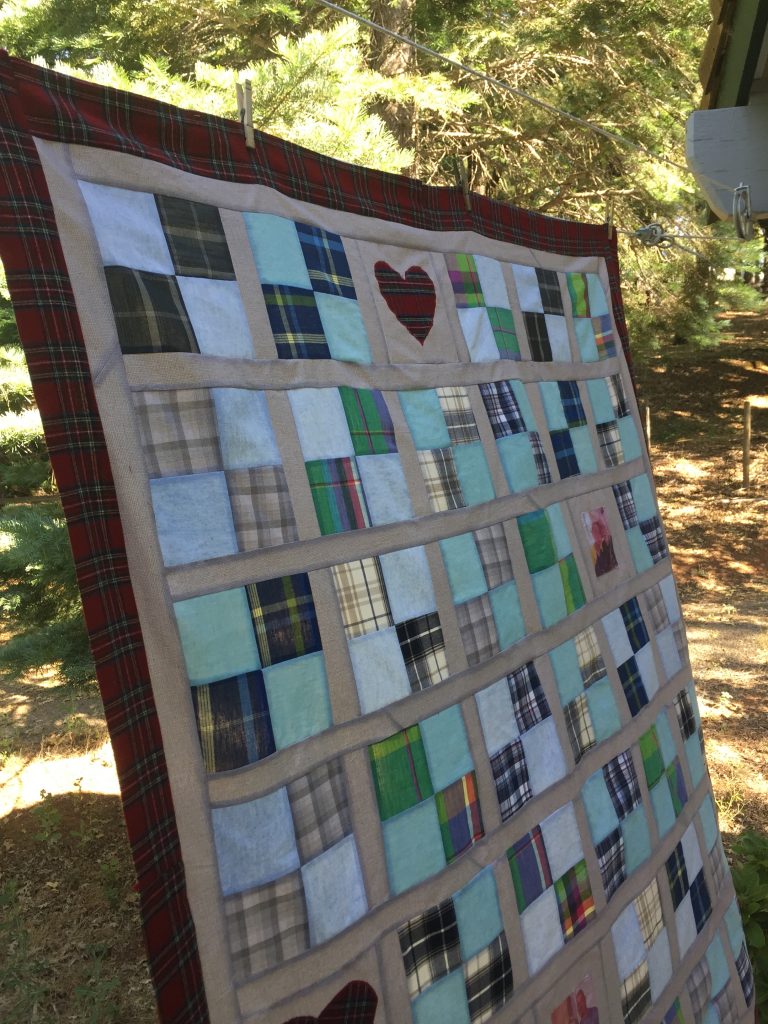
Finally, we agreed the red plaid flannel robe would be the perfect outer border. I really love how the red flannel gives a cozy and rustic look to the quilt top.

This photo captures the true colors best.

The quilt top measures roughly 60″ x 70″ which should be perfect for my very tiny friend. Now I need to choose a backing and get it basted. This is the type of project I really enjoy. It holds meaning and comfort for my friend. I really regret not having made something like this when Mark – my first husband – died in 1994. I was overwhelmed with being widowed, single parenting my boys etc. Sewing was not at the forefront of my mind – in fact I didn’t really sew for many years after that. Making this for Susie is very satisfying. I am really looking forward to quilting it up so she can enjoy it. September will mark the one year anniversary of Rick’s death and I want to be sure she has this before then.

Linking to my usual spots – check them out at the top of the page, under Link Ups.

Watch for a special post coming up on Friday!! Until then, to my US readers, have a wonderful Fourth of July holiday! Also, I have a fantastic giveaway happening today and tomorrow over on my Instagram feed. Be sure to check it out. 🙂

Making Pink Baskets

A few days ago my grand daughter face timed with me. She had a very specific request. “Grammy, I need a basket.” After chatting for a bit, she showed me how her parents had strung a line across a wall in the living room. It is right at her height and she now has a place to clip her art work on display. Sort of her own continuous gallery showing! But it seems she has nowhere to keep her extra clothespins and this was bothering her. Who am I to deny a toddler in need?

When asked what color, she immediately replied pink. Of course in the mind of a two year old, I wonder was that the first color that came to mind? Is pink her favorite color (or was it on that particular day?) No matter. I have plenty of pink fabric. 🙂

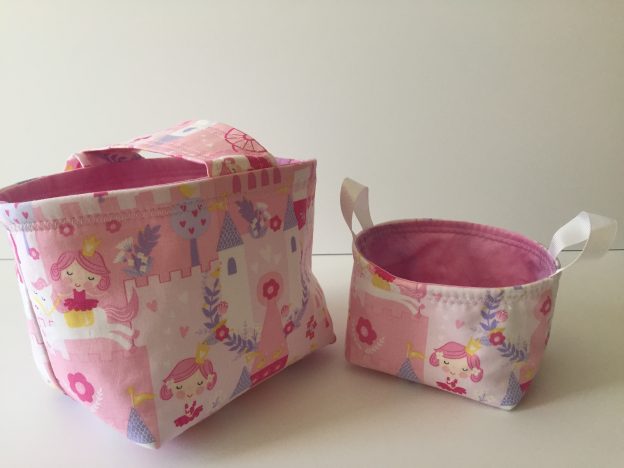
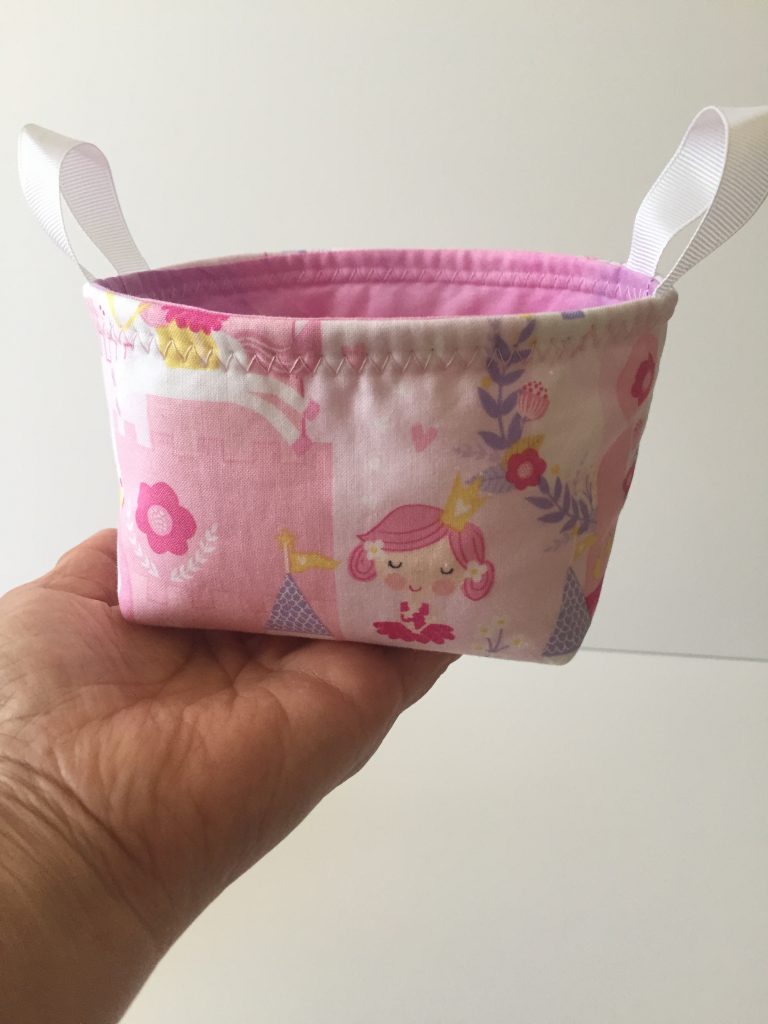
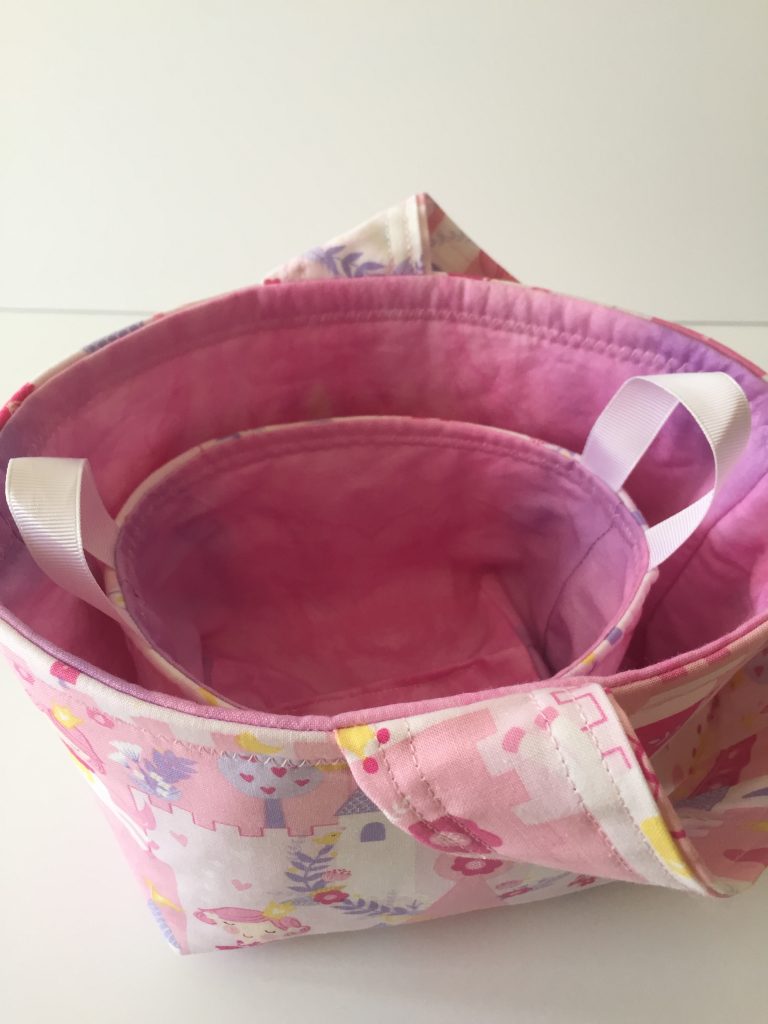
I used the ever-popular pattern for the One Hour Basket over at Kelby Sews as the starting point. I have made these a couple of times before and it truly takes only an hour (or less) to make. But the pattern size was too large. I cut it back and used rectangles measuring 6″ x 9″ for this little one. The little loopy handles are two bits of gross grain ribbon. I didn’t ever measure the finished size but you can see in relation to my hand, it isn’t large. Perfect for a few clothespins.

If one basket is fun, how about two?

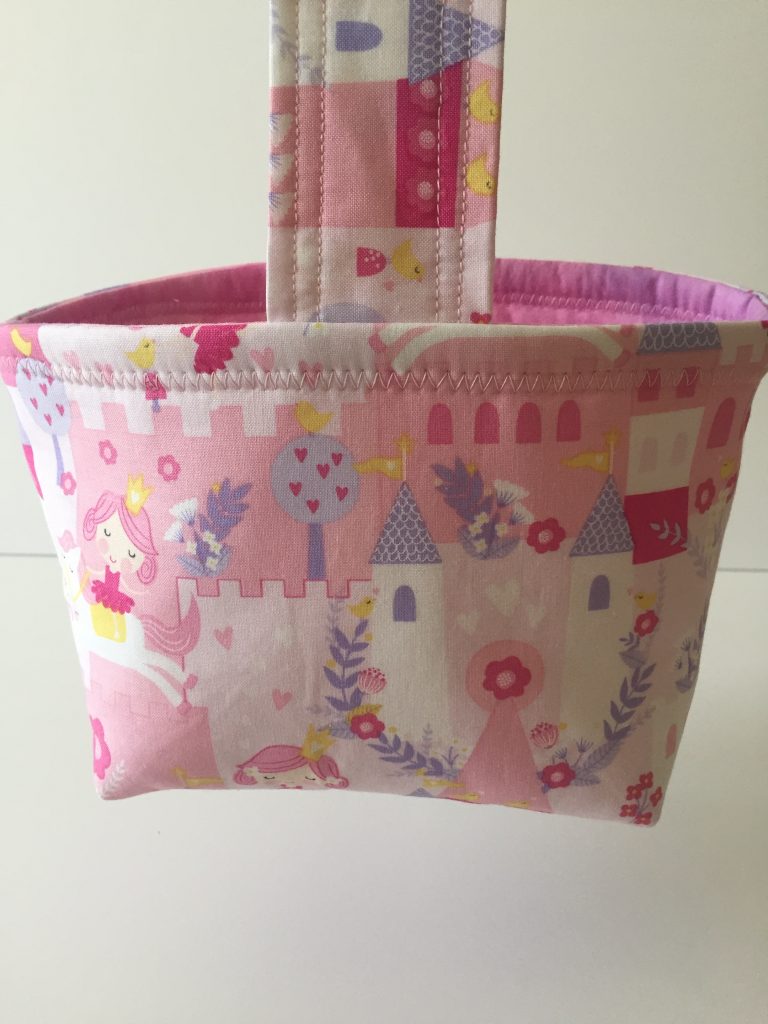
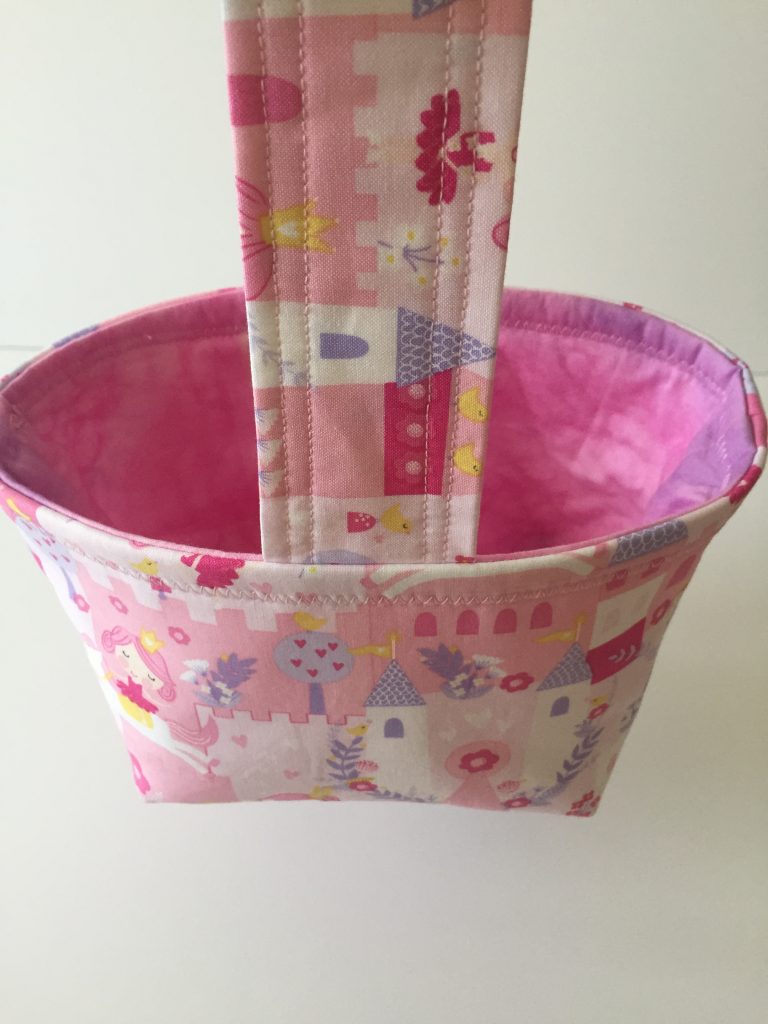
When I chose the piece of fabric down in my shop, I wasn’t really thinking and cut a 1/2 yard. The print is from Timeless Treasures Kidz and it is adorable. Loads of pink, with princesses and castles too. Since I had the extra fabric, it seemed like I ought to go ahead and make another basket. This one was cut with rectangles measuring 9″ x 12″. Like the tiny basket, I adhered a fusible Pellon batting to the outer fabric. But with this larger version, I also fused a stiff interfacing to the lining fabric to give it more structure.

I made a handle so she can easily carry this one around if she wants to. The lining was from my stash – Julia had some wild pajama pants years ago with this faux tie dyed fabric.

Two baskets from Grammy

Aren’t they cute? It was fun to make them and to think of H playing with them. When I finished them yesterday, I texted a picture of them so she could see. She was apparently quite pleased. However about 15 minutes later the UPS truck went up their road. It was distressing for her to see him drive by. She thought he was going to stop and drop off the package from Grammy. Poor thing. The timing just seemed perfect to her. Hopefully her package will come on Saturday.

This was definitely a fun little project to whip up. I will link up with Sandra at MMM Quilts when she has her next DREAMI link up as this was surely one of those Drop Everything and Make It sort of projects!

If a Tree Falls on My Driveway

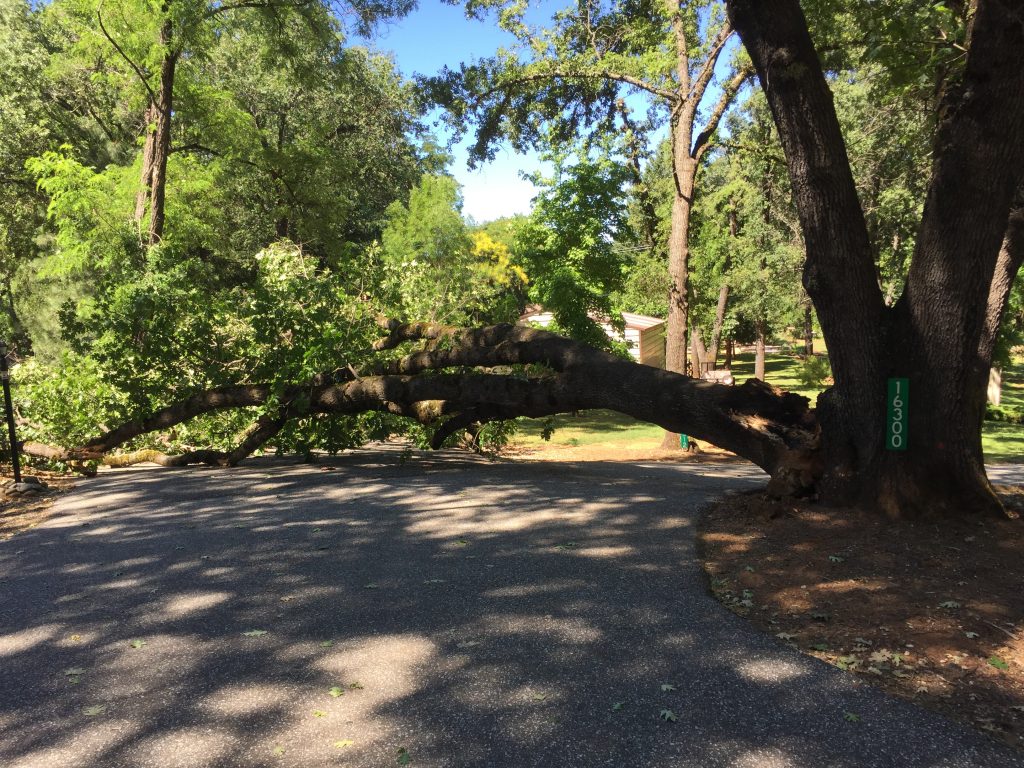
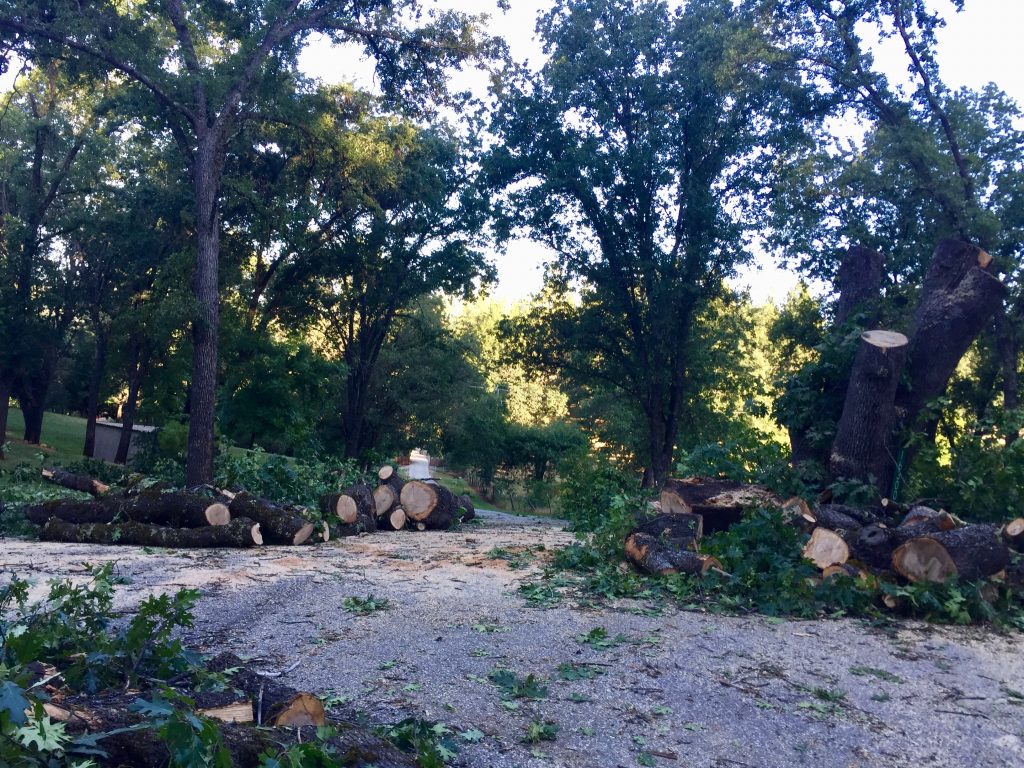
You would think I would hear it, right?? On Saturday night, sometime between Julia getting home at 10:30 pm and 10:30 the next morning, a huge portion of an even bigger Heritage Oak tree crashed to the ground at the top of my driveway.

Standing at the top of my driveway

I can’t believe I didn’t hear it but nope, I didn’t hear a thing. This fuels the whole philosophical debate about ‘if a tree falls in the forest and no one hears it, does it make a sound’. It is hard to describe the size of the gorgeous tree. If the fallen limb were upright and Julia and I were trying to reach our arms around the trunk, our hands would not meet. They wouldn’t even be close. The tree is estimated to be over 400 years old. Isn’t that impressive? 400 years!

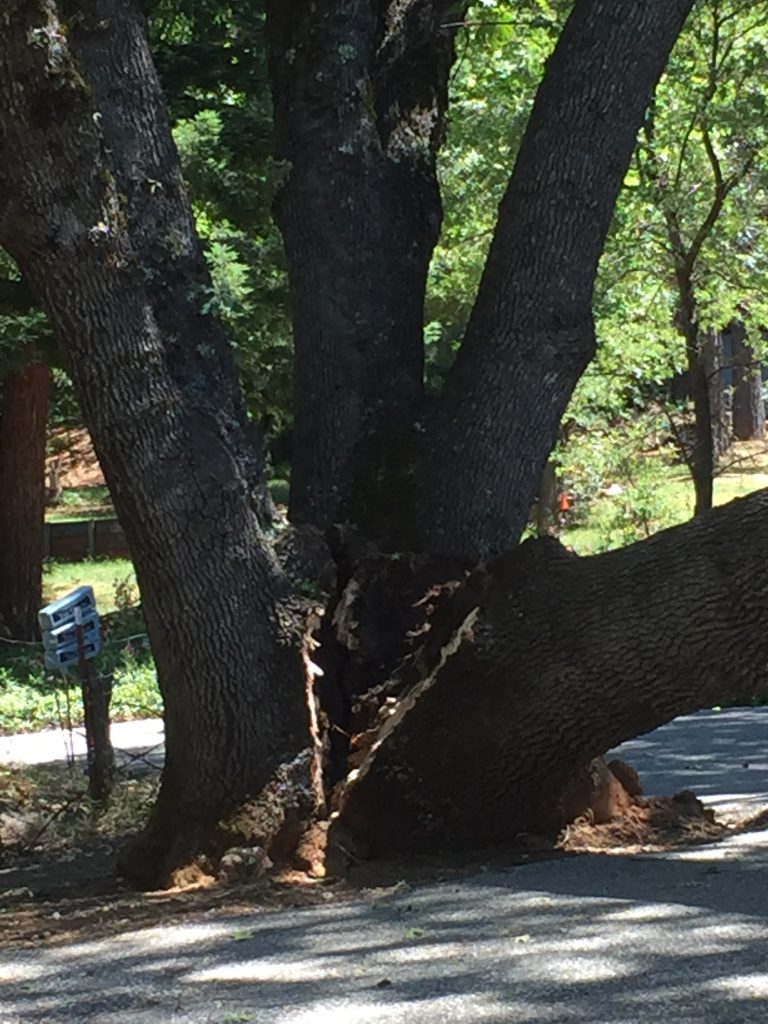
There were four main trunks coming off of the tree and a bit of a well in the center. I suppose, over the many years, the rainwater settled in that little valley and slowly rotted the base. Our neighbors, whose property this tree is actually on, are very careful people and had an arborist check the tree regularly because of its massive size. He thought the tree was quite healthy. Which it was, really, but for the center of that massive base which had rotted.

Sunday morning my parents came by for a visit and had to tell me my driveway was blocked and this tree had fallen. What a surprise, I had no idea! Dad and I took a closer look and saw the split that went all the way though the base of the tree. It was clear the other portion of the tree would likely fall. However, when this portion fell, it would hit a series of power lines overhead. This was really scary and we called the power company immediately. It took about four hours for the emergency team to get out here but as soon as they saw what was going on, they shut off the power to that line.

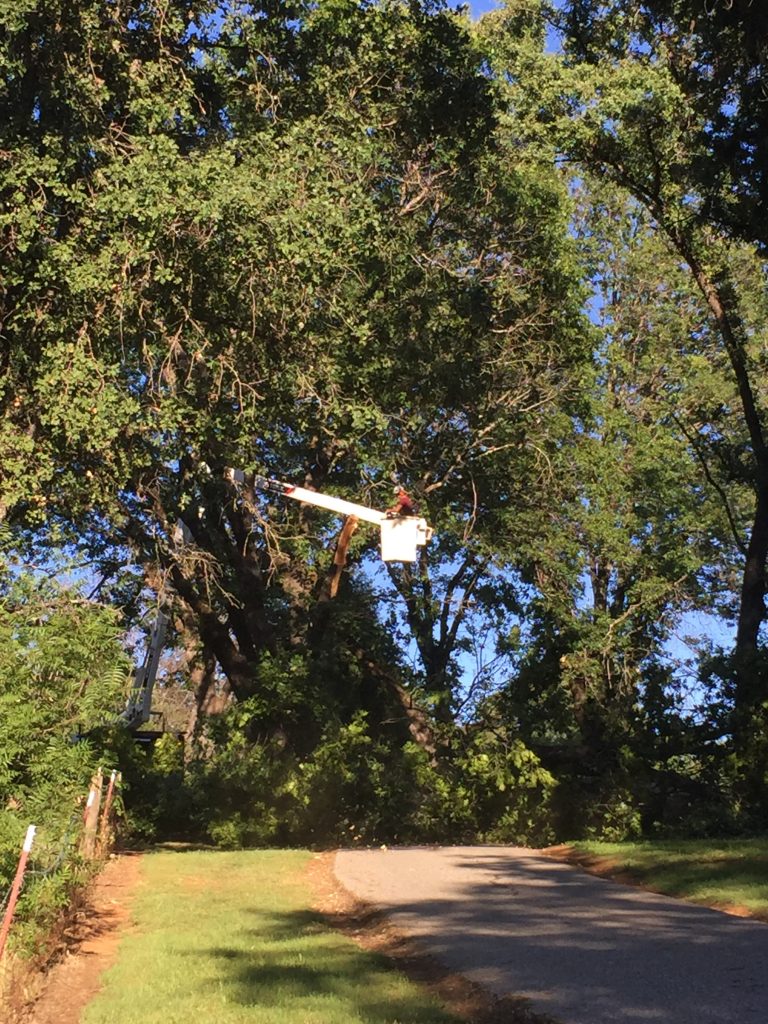
Within the hour, they had a team of tree trimmers out to the site. I felt badly about these guys having to work on a Sunday afternoon but was very grateful they were there. It felt even worse to see them chopping the tree up, bit by bit. We watched them work for quite a while. Neighbors were coming out and lamenting the loss of this enormous shade tree.

The tree trimmers were actually still working in the dark when we went to bed Sunday night. This morning we walked up the driveway to see how it looked. They had done a great job of trying to clear pathways so we and the neighbors could get in and out of our properties. There is still much work to be done however. It is astounding how much wood and debris are up there all from the one tree.

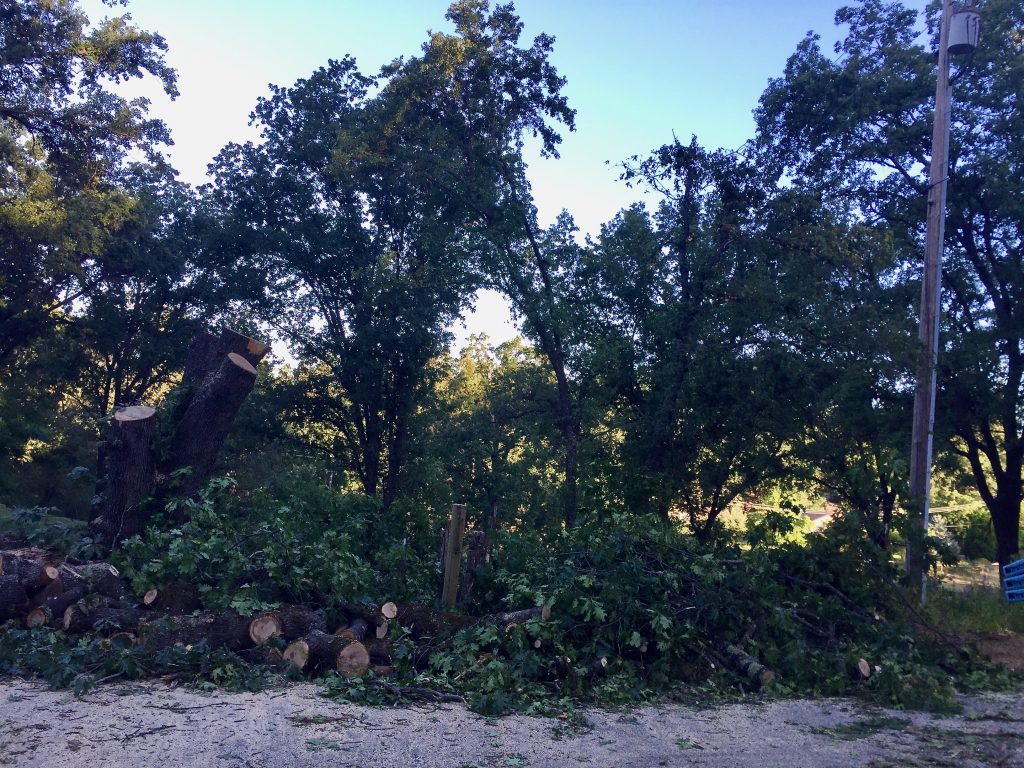
In the picture above one can see the close proximity from the tree stump, on the left, to the power pole, on the right. It was really a dangerous situation one the tree was found to be at risk of falling. Now that the danger has been taken care of, my neighbors can be heard with chain saws trying to clear some of the wood. We are all comforted by the fact that nothing was damaged and no one was hurt by this. It surprises me how bothered I am by the loss of the tree, something that has been the landmark to our house all these years. When giving directions we always tell people to look for the massive oak at the top of our driveway. Now it isn’t there anymore. Something is always changing and right now, for us, it is the look of our neighborhood.

Feeling Accomplished

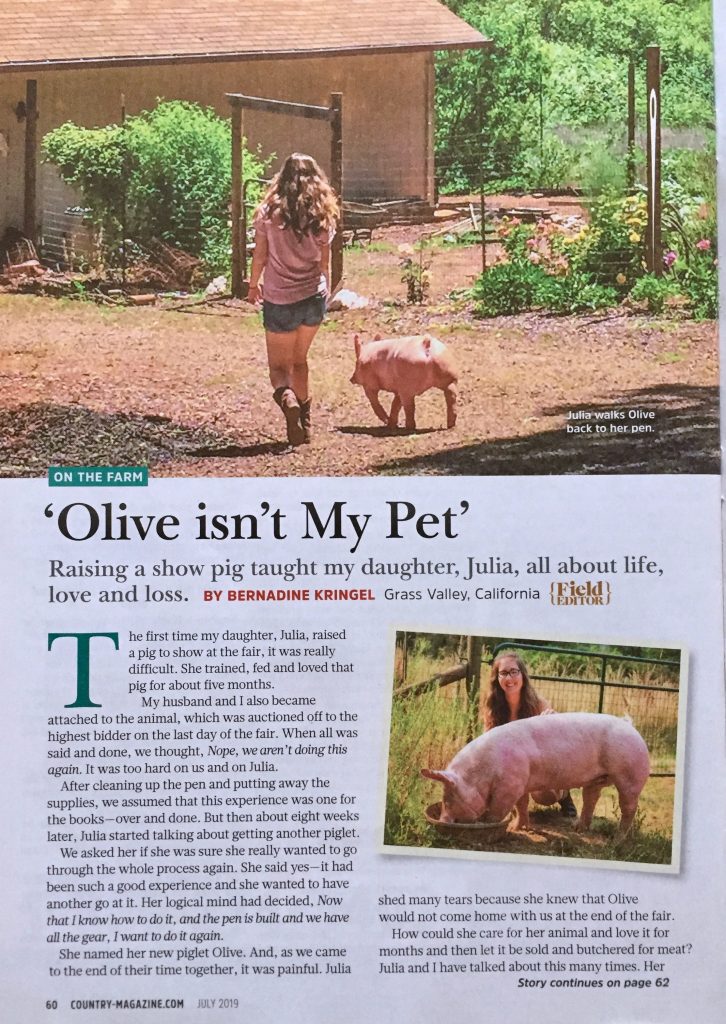
Last fall I wrote a post to explain our family’s thoughts about raising show pigs. I had received a number of questions and comments about how hard it must be for Julia to raise these cute animals and then give them up at auction when fair time rolled around. The post generated a lot of comments and generally reader’s liked it. Janine of Quilts From the Little House, suggested I submit it to be published. (Thank you Janine!) I thought about it for a bit and decided to give it a go.

In November sent it in to Country Extra which is a smaller supplement to the magazine, Country. But I didn’t hear back from them so I assumed it was not something they wanted to use. Then in April I received an email asking to use the story in their June/July issue. Success!

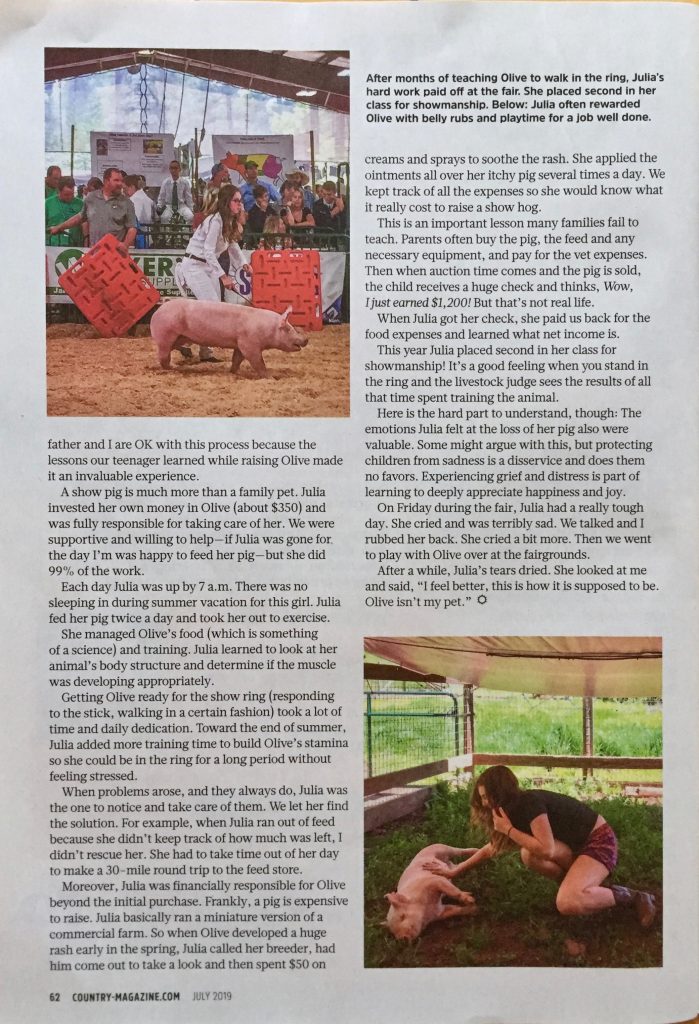
Yesterday I received a print copy. It is a fun experience to see my story in print. There’s my girl and Olive!

I very much appreciated how careful the editors were to retain the feeling of the essay while having to shorten it. They sent me the proof to check for any errors or changes that were needed. The woman I worked with was so friendly. It makes me feel good about the whole process and certainly willing to do it again should any idea come up worth writing about.

Susie’s Memory Quilt

As for the sewing room, I have been working on the memory quilt for my friend Susie. Her husband passed away last September and in the spring she asked me to make a quilt using his shirts. It is really coming along nicely. Today I will finish sashing it. She gave me his red plaid robe that I plan to cut up for the outermost border. I think the red is going to look great. She is happy with the progress and I am honored to make this for her.

Woohoo!! Art Gallery is on sale to day!

Today is the last day of the sale on Art Gallery Fabric in my shop. Be sure to come check it out – tons of gorgeous yardage is 20% off. Happy Sewing!

Linking up with my usuals and also with Em’s Scrapbag, Moving It Forward Monday – check out the projects in this link up for some fun inspiration.

Back to the Real World

After a fantastic ten days of family time, my kids have gone back home to their lives and I am getting caught up here at home. We all enjoyed our time together and I am so happy they were here to celebrate Julia’s graduation from high school. It was so much fun to have this long visit together.

My last post was celebrating my five year blogging anniversary! I want to let you know who the giveaway winners were.

For the charitable donation, Jinger S. was selected by the handy dandy Random Number Generator. Her charity of choice is the Alzheimer’s Association. She has family members who were or still are suffering from this insidious disease. I am happy to donate $50 to this cause. I hope someday there will be some way to prevent the disease or at very least, stop its progression. Interestingly, June is Alzheimer’s Awareness month so the timing of this giveaway couldn’t be better. If you would like to see a few of the facts and figures about Alzheimer’s, click here.

For the handmade wooden point turner, Random Number Generator chose Robbin G. Robbin is a reader who actively participates on the blog. I always enjoy her comments on my posts and I am happy to send this prize off to her!

Last Wednesday, during an incredibly hot evening, Julia graduated from high school. I was so proud of her and her classmates as they all completed this phase of life. She had such a great experience at Ghidotti and I know she will grow even more when she goes off to college in September.

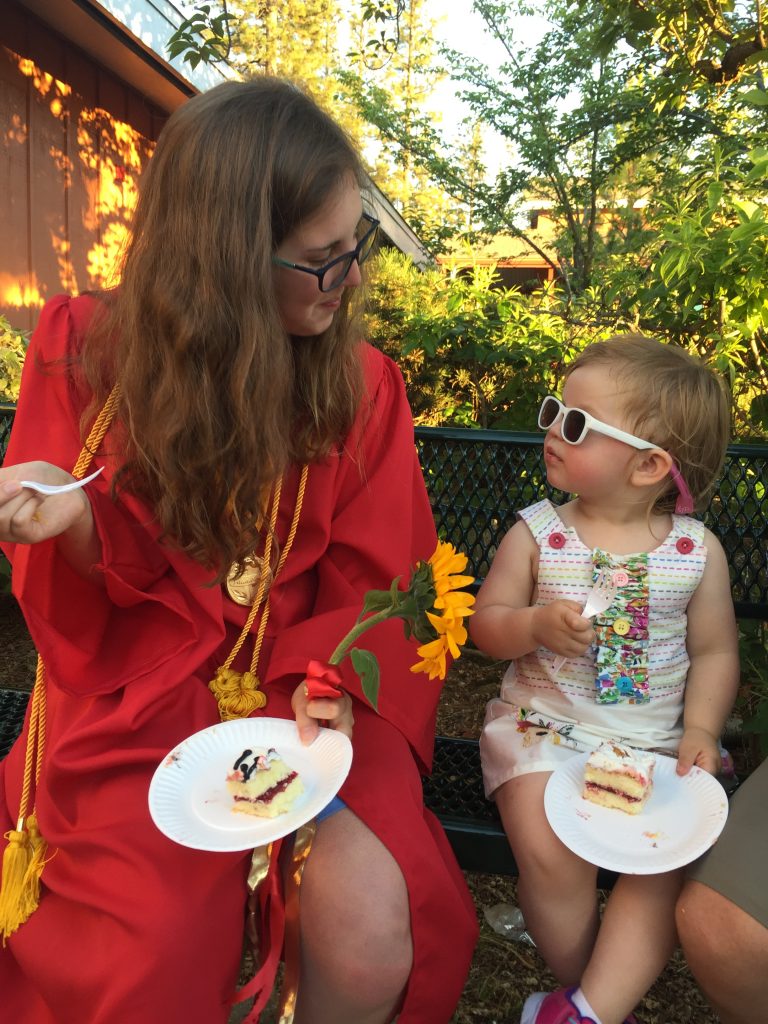
Having cake together after graduation.

My grand daughter endured the hot, long (and for her quite boring) commencement like a champ. The high school is quite small, Julia’s class had 43 students in it. The Parent Association provides cake and lemonade at a reception after commencement. I love this picture of H looking up to her Auntie Julia.

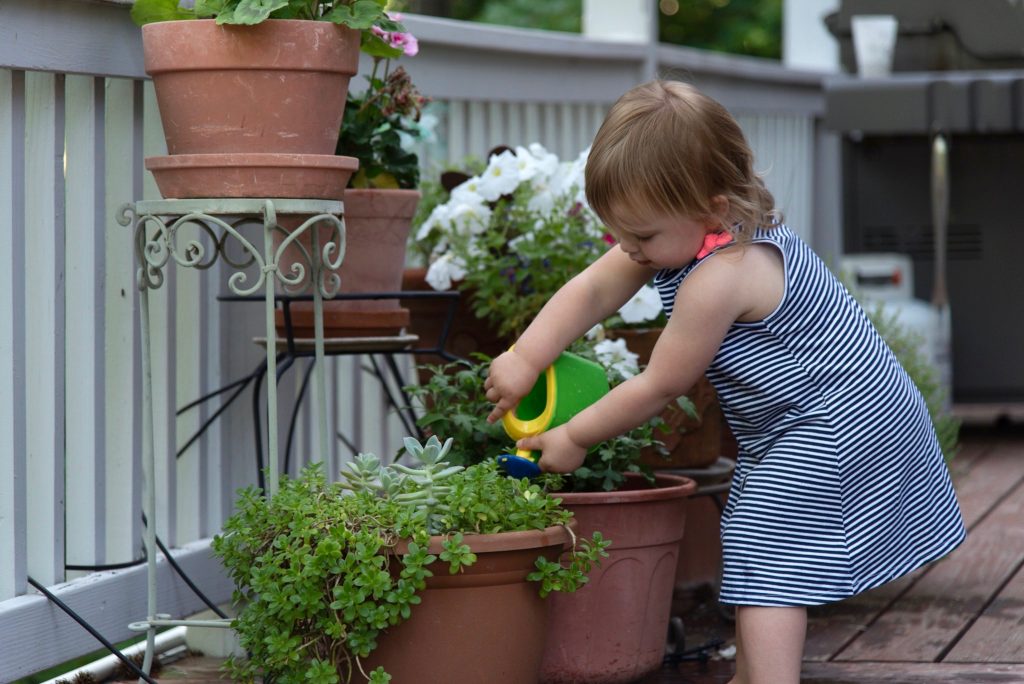
The rest of the week was spent celebrating graduation with a family party and just hanging out on a stay-cation of sorts. H loved watering with this little watering can I picked up for her at the Dollar Store. Luckily it was really warm so my plants didn’t mind her zealous watering routine. Haha.

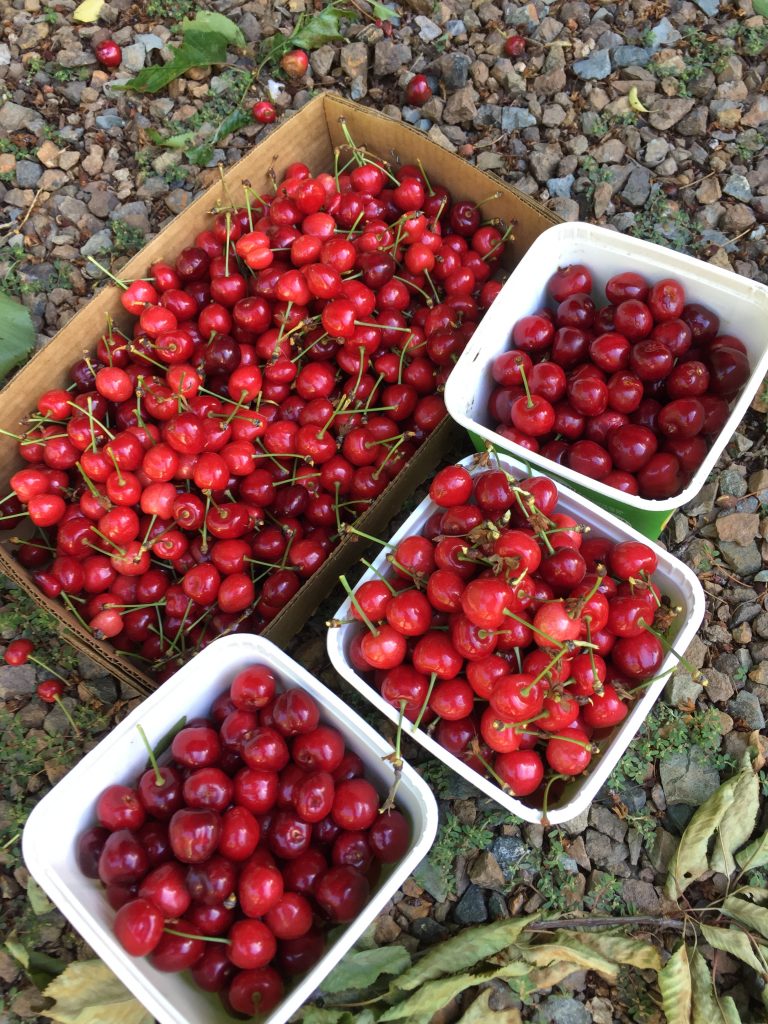
As usual, the cherry tree ripened all at once! We have so many cherries. Ray spent some time pitting fruit and freezing it. We were too busy to can or cook jam. Hopefully later on we can get to it. Cherries rot so quickly but we were able to take advantage of some of the fruit.

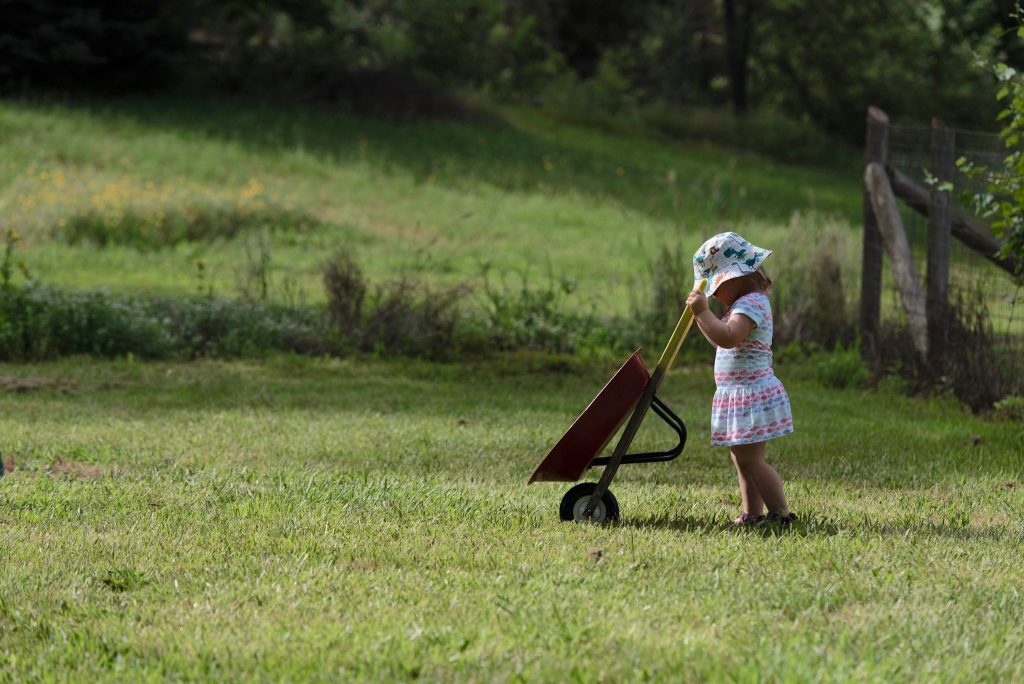
Aside from her watering chores, this girl enjoyed pushing a little red wheelbarrow around the property. Isn’t she the cutest?

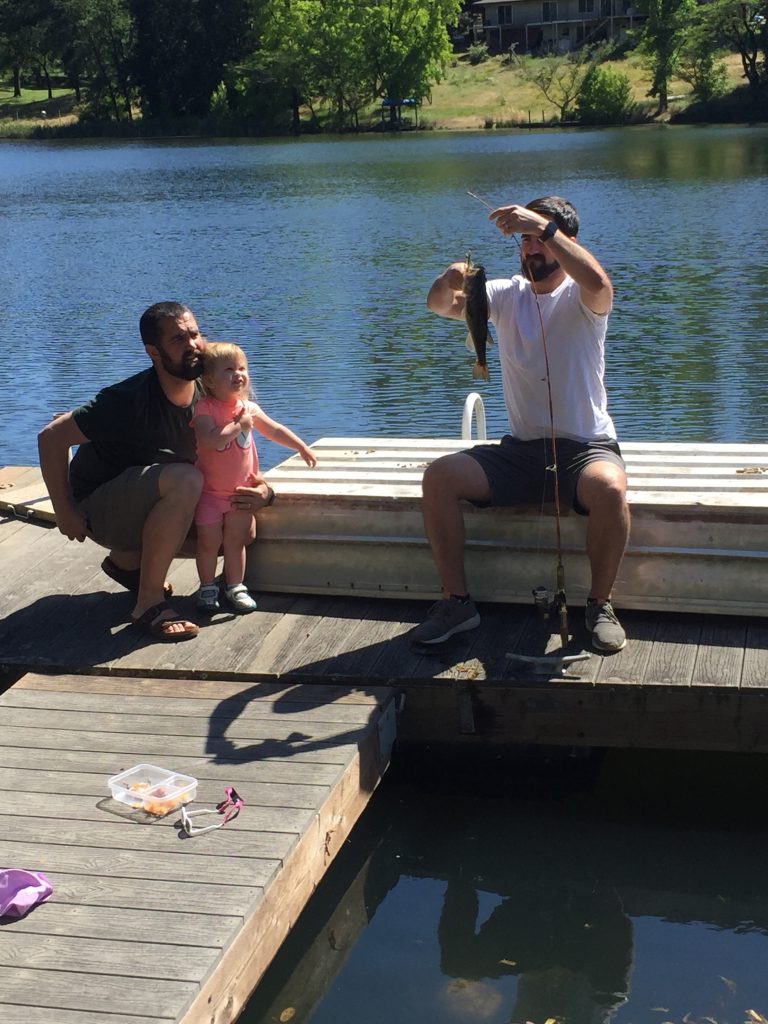
We also spent an afternoon on the pond at the edge of our property. My son, Ian, caught a bass and it was fun to see H’s response. She was enthralled with the whole process and enjoyed watching the fish swim off when he was set free.

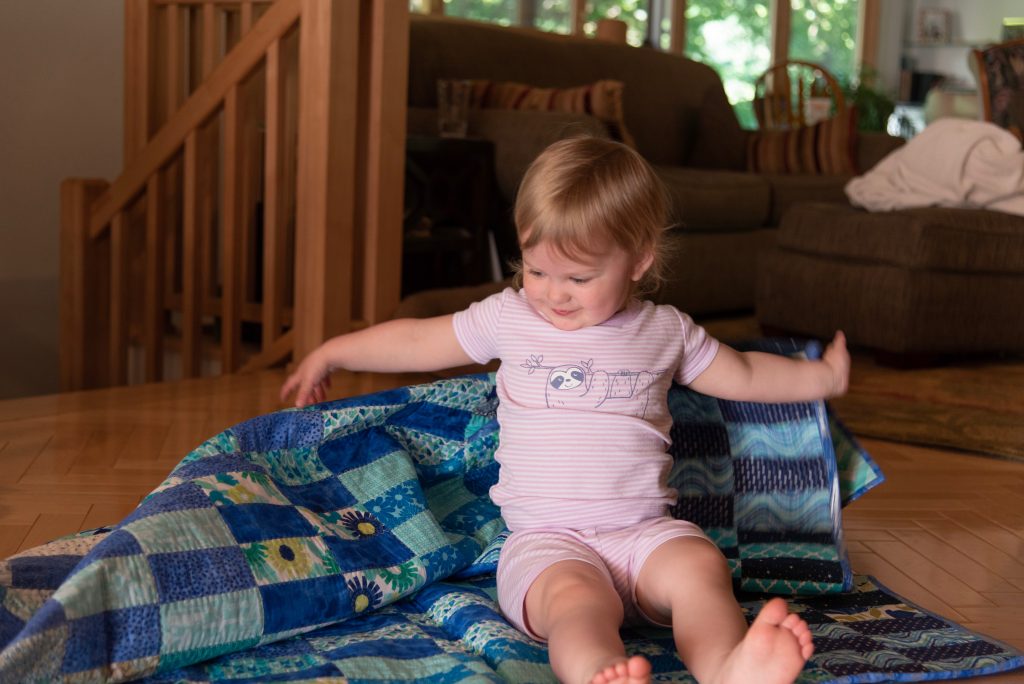
Today my plan is to clean up the house a bit. There are toys strewn everywhere. Then I need to open the many boxes of Mercyful Quilts that arrived last week. The only package I did open last week contained this gorgeous piece by Preeti of Sew Preeti Quilts. Preeti named it Oasis and you will surely enjoy her post telling more about the quilt. My grand daughter clearly approves of this donation. It is so pretty and has an hombre effect with the blues gradually changing shade. Thanks so much Preeti.

Once the house is (somewhat) under control, I need to baste my Squared Away quilt top. I am excited to quilt this one up. It is going to be a warm day so this will be a perfect way to spend the afternoon. How about you??

Five Years of Needle & Foot

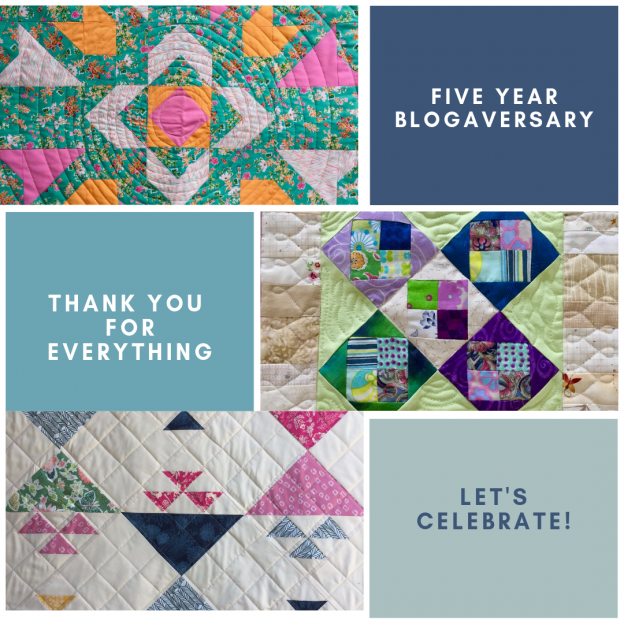
Yep – it was five years ago today I published my first post here on the blog. Seems I blinked a few times and suddenly it is 2019. I have published 512 posts, made hundreds of friends, learned many lessons about quilting, life, and community. It has been incredibly rewarding and even though blogging isn’t the popular force it once was, I am still here.

The blog has grown into a really satisfying business for me as well as a creative outlet. I have enjoyed hosting a number of community service projects such as my Share the Love campaign where we all sewed doll quilts for Amy and A Doll Like Me. Collecting quilts for Mercy Hospital in Sacramento has been and continues to be a heartwarming experience as quilters from all over the country send quilts for families who are dealing with the death of a family member. Mercyful Quilts has been more successful than I could have imagined.

Blogging (for me) is such a great way to keep a journal of my projects, business, community service endeavors and even the silly stories of my family. I enjoy conversing with Needle and Foot readers and hope I provide some entertainment as well. A few days ago I received a note from a reader and she told me this, “Please know that as a caretaker for my husband who is disabled by brain tumor and stroke, you and Sew Preeti Quilts and the Academic Quilter help keep me sane. (I miss Crazy Mom and Finish it up Friday humongously.) Some day I may be able to participate, but for now, please don’t quit.” This reader has no idea how much her note means to me. For many, sewing does much to keep us sane. It is therapeutic and creative, both of which are so important. So dear reader, not to worry, I am not going anywhere.

Five years deserves to be celebrated. This year I have two ideas! First of all, I would like to do another charitable giveaway. In prior years, I have asked readers to comment and tell me about their favorite charity. Using Random Number Generator, I will select a winner and contribute $50 to that reader’s charity. It is really interesting to read about the organizations other people are supporting. So please enter (only once) in the comments and tell all of us about the organization that is meaningful to you. Of course this is open worldwide – enter whether you reside in the US or another country.

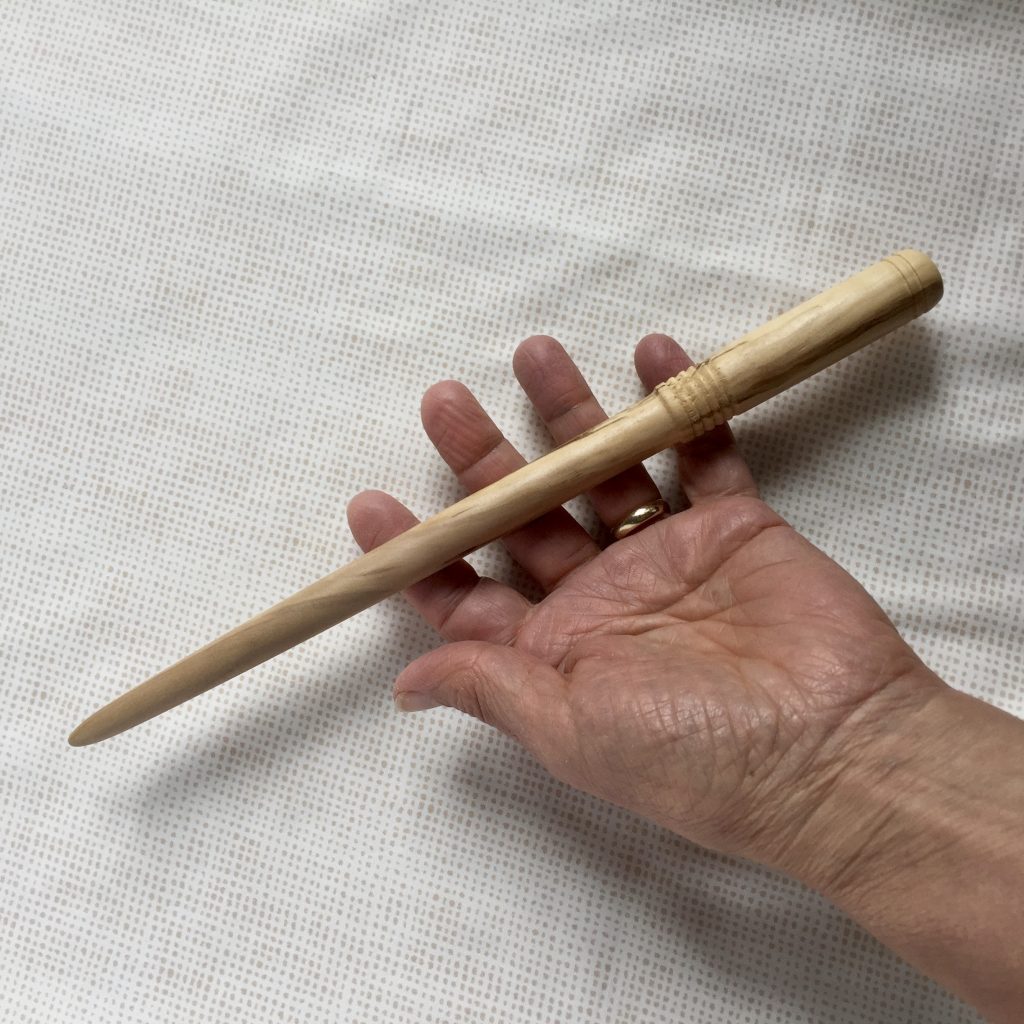
Second idea is this – The traditional gift of the fifth anniversary is wooden. As you might know, my husband makes gorgeous wooden items. I will draw a second winner and that person will receive a beautiful wooden point turner. These point turners are perfect for opening the corners on a pillow, tote bag, zip pouch and more. One lucky commenter will be picked to win a handmade point turner.

Both giveaways are picked from the same pool of comments. Winner will be drawn on Friday, June 7th. Good luck to all! Thank you so much for continuing to read and interact with me here at Needle and Foot. Our community is an incredible source of creativity and kindness in this world and I am grateful to be a part of it.

Squared Away Quilt Top

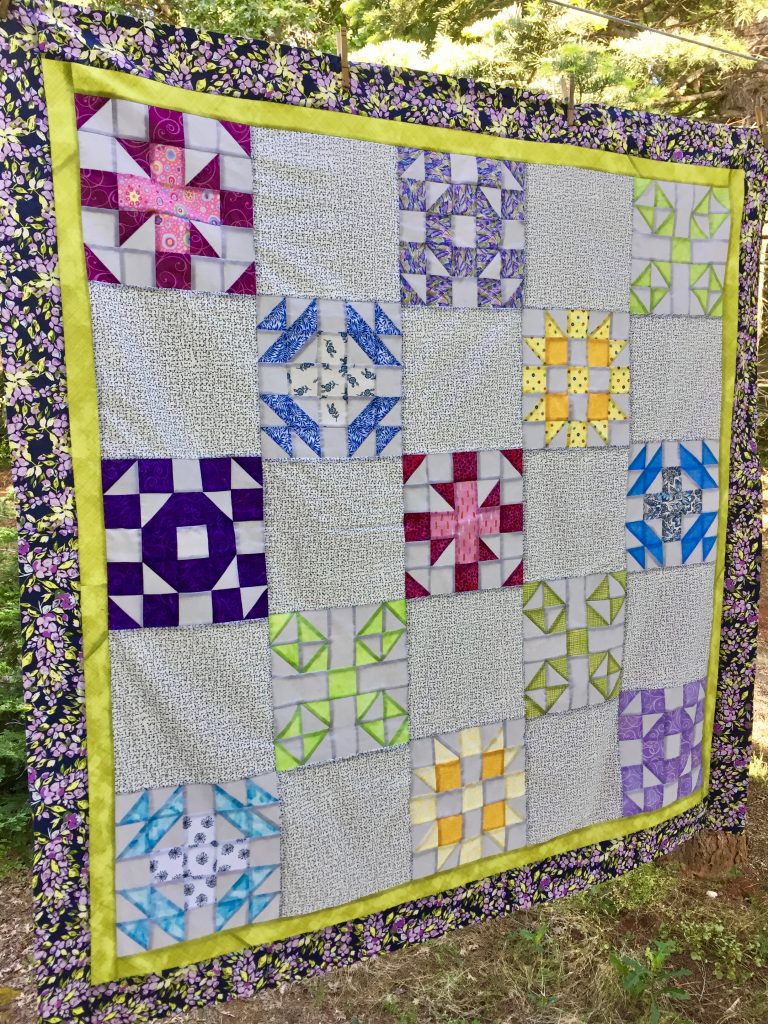
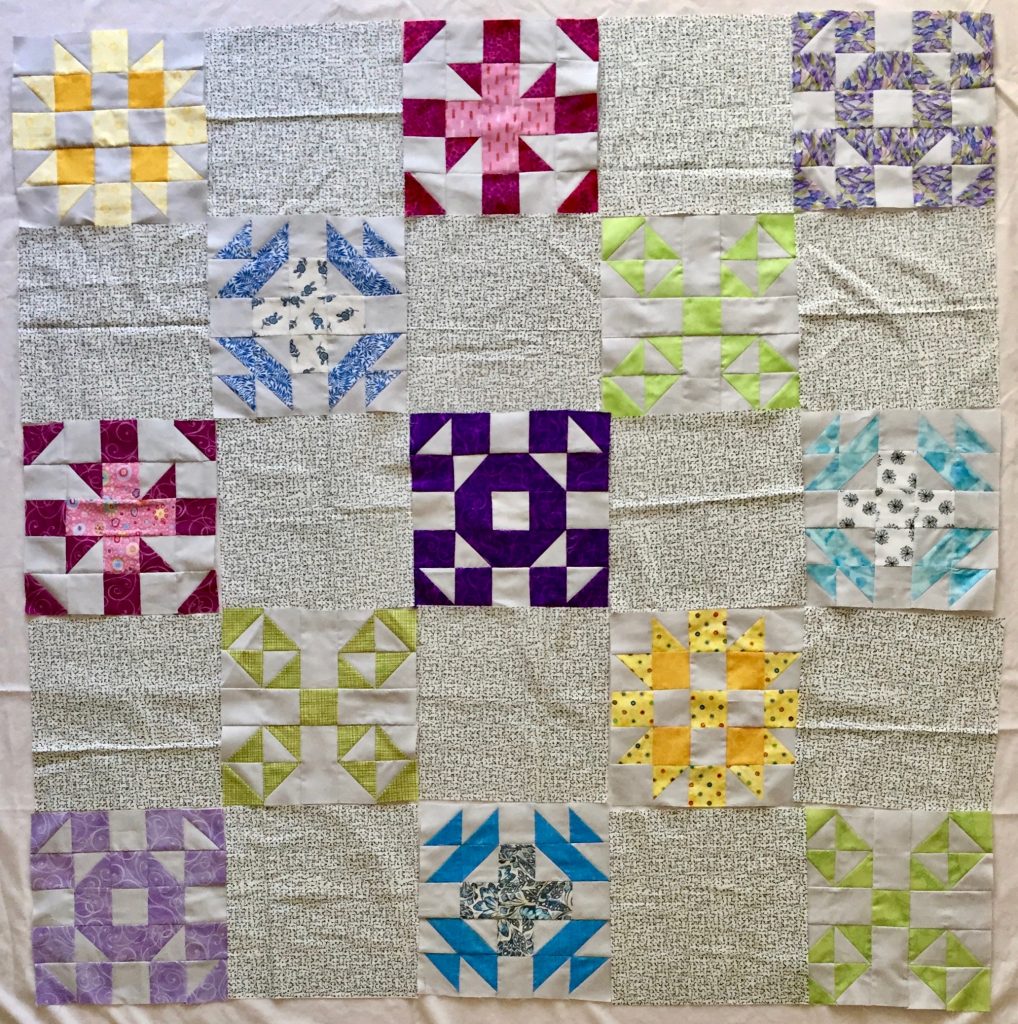
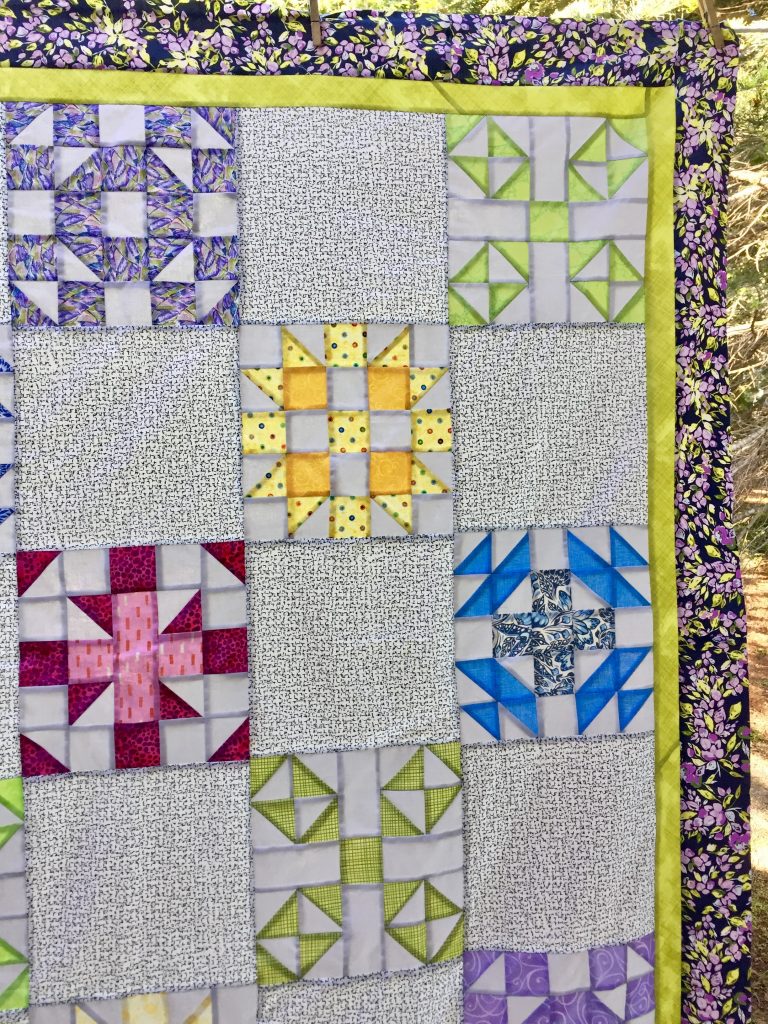
The pieces to this quilt top have been stacked up for such a long time! I am so excited to have pieced the top together – finally!! In 2018 I had the best of intentions to sew along with Mari and her Squared Away BOM. Who knows what happened though? I only got about 1/2 way through and set it aside, never completing all of the blocks.

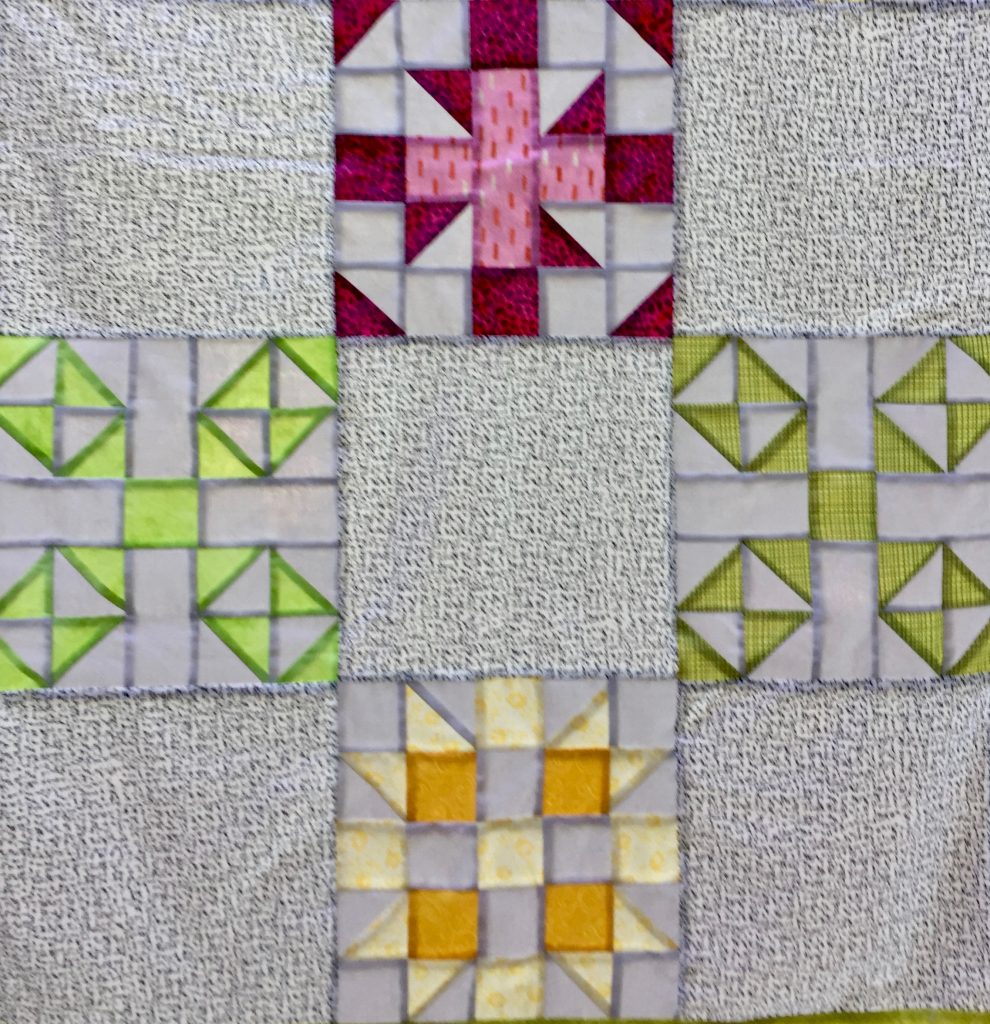
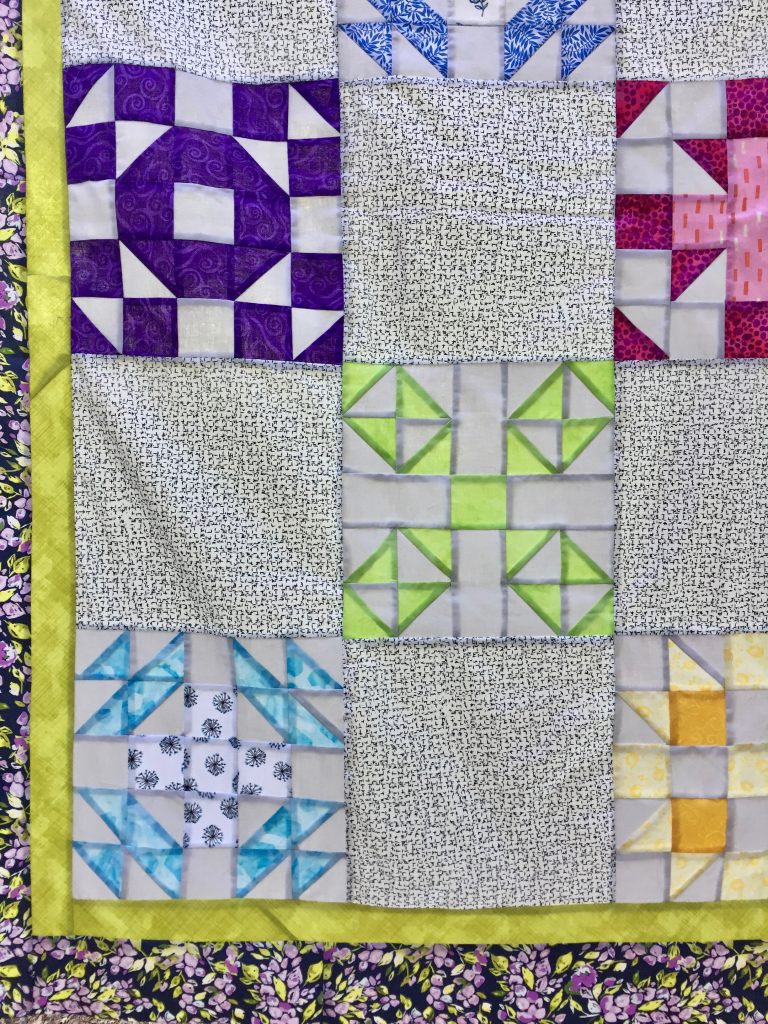
When I was moaning and groaning to Mari about my lack of fortitude and asking her what the heck would I do with these pretty blocks, she said to put them together with some solid blocks and make a top. It is very clear she is the teacher and I am the student, and I am forever grateful. Being an obedient but not timely student, I did as she suggested. Back in February I cut lots of 10 1/2″ squares of a piece of yardage I had from Pat Bravo’s Dare line. Then it sat for a while. I stitched the squares and the pieced blocks together soon after. Then….. it sat for a while. See my pattern? It is not very efficient.

I started to look around in the shop wondering what would work for borders and found the perfect combination!

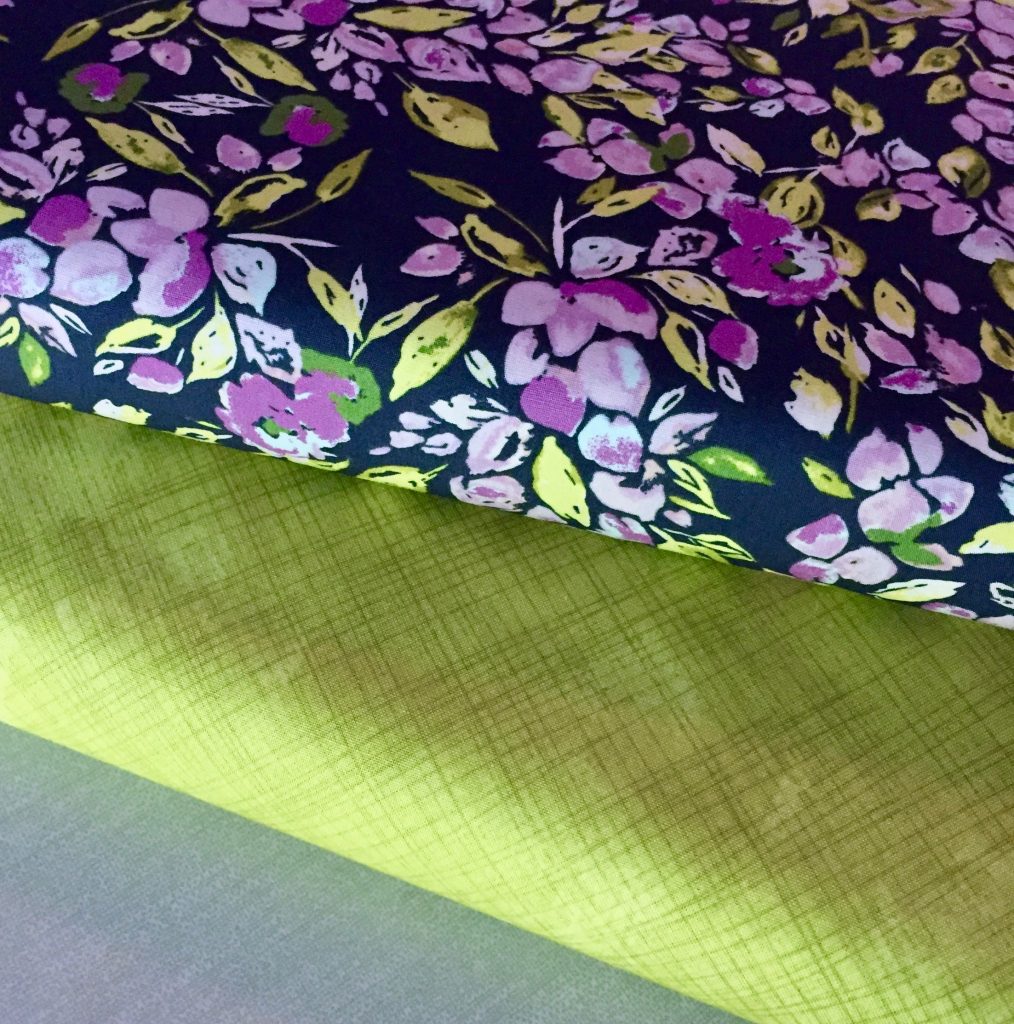
I love the celery green textured solid with this floral from BariJ’s Sage line. Don’t they look great? There are quite a few green blocks as well as purples and this pulled it all together.

I couldn’t be more pleased. (Well, that isn’t exactly true. If a quilting fairy would come slip into the sewing room tonight, prepare the backing and pin baste this baby, then I would be absolutely thrilled.) That isn’t likely to happen though so the backing choice will be decided upon soon.

It is really a pretty quilt top though. I am motivated to finish this one up now.

I did press it and hang it in the closet for now though. Julia has high school graduation next week. We have a family reunion on Saturday and …. guess who is coming in on Saturday night???

I can’t wait!! They will be here for ten days which is lots of Grammy time. I will be off-line for much of that time because, you know, I have lots of important things to do.

Linking up with:

Needle and Thread Thursday, Brag About Your Beauties, as well as this week’s TGIFF over at MMM! Quilts.

Spring Equals Birthdays & Proms

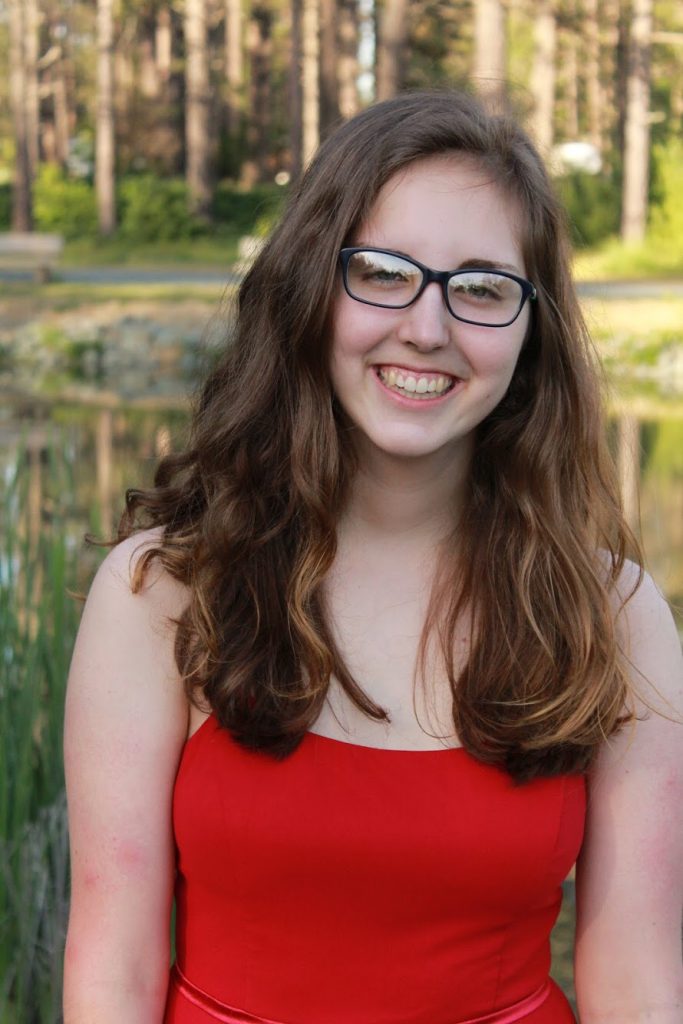
May has been such a busy month! School is winding down – senior year is coming to a close for Julia. Plus we have celebrated her 18th birthday and she went to her Senior Prom. Crazy to see this girl finishing up high school because it was only a few weeks ago that I felt like such an awful mother as I left her crying on the first day of Kindergarten. Such is life, right?

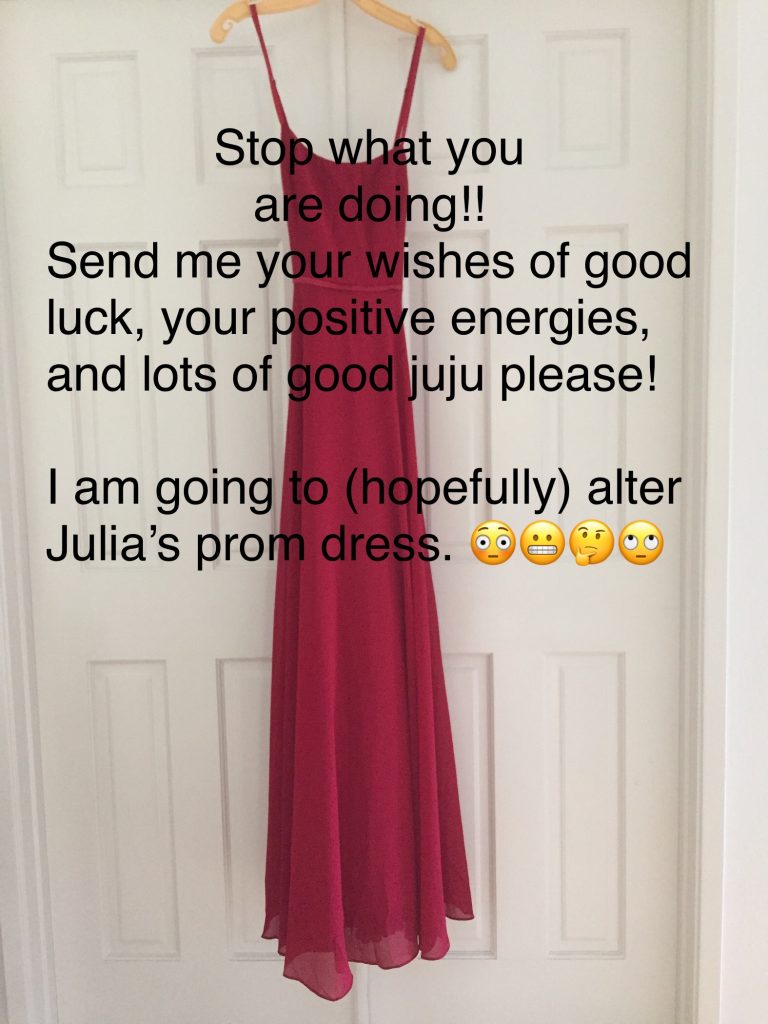
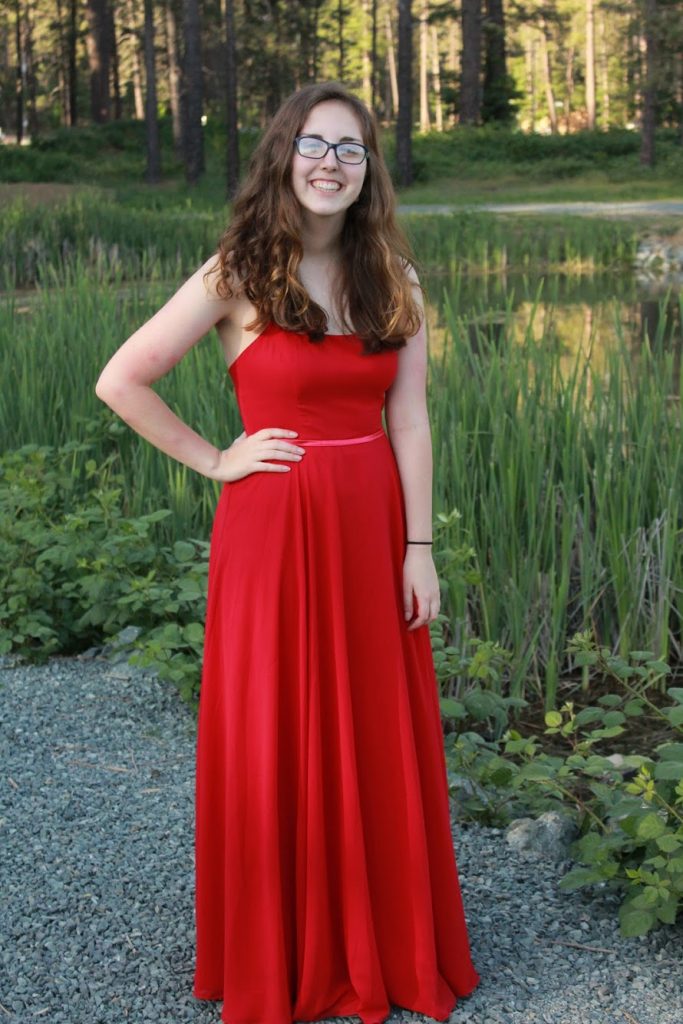
A few weeks ago, I posted this desperate plea on Instagram and Facebook. Julia’s prom dress didn’t really fit well and she asked if I could fix it. This was the week before prom. Being the confident sewist, I immediately suggested we return it and quickly find another dress. But she #1 – threw away the receipt and tags and #2 – said she loved this dress and wanted to wear it. OK, I promised to do what I could. The main issue was the lining was too snug around her waist. I looked at letting it out and adding some width to the side seams. But I suspected I would end up with something bulky that wouldn’t lay flat. My brilliant daughter, who doesn’t sew, asked if I couldn’t just lift the lining up, folding it right sides together, sewing all the way around, which would make it a little wider at her ribs. Does this make sense to you? It worked like a charm and was super easy. Sort of hard to explain though.

Photo credit to Natalie Webster.

The next issue was the hem. It was really long and she didn’t want to be tripping over it at the dance. I was a bit leary of this task because the outer fabric was a slippery chiffon. But with the help of YouTube, it was not hard at all. The video I watched instructed me to pin it about 1/4″ longer than I wanted it to be. Press it and stitch all the way around. Then trim the excess as close as possible to the seam line. Finally, roll that stitched line to the inside, pin and press and stitch again. I was amazed by how wonky the original hem was. There was no way to straighten it so Julia and I figured if we hadn’t noticed how wavy it was before, no one else would either and I just stitched it – crooked as can be.

Photo credit to Natalie Webster.

Hiding under that pretty dress are black sneakers because my daughter won’t wear much else!

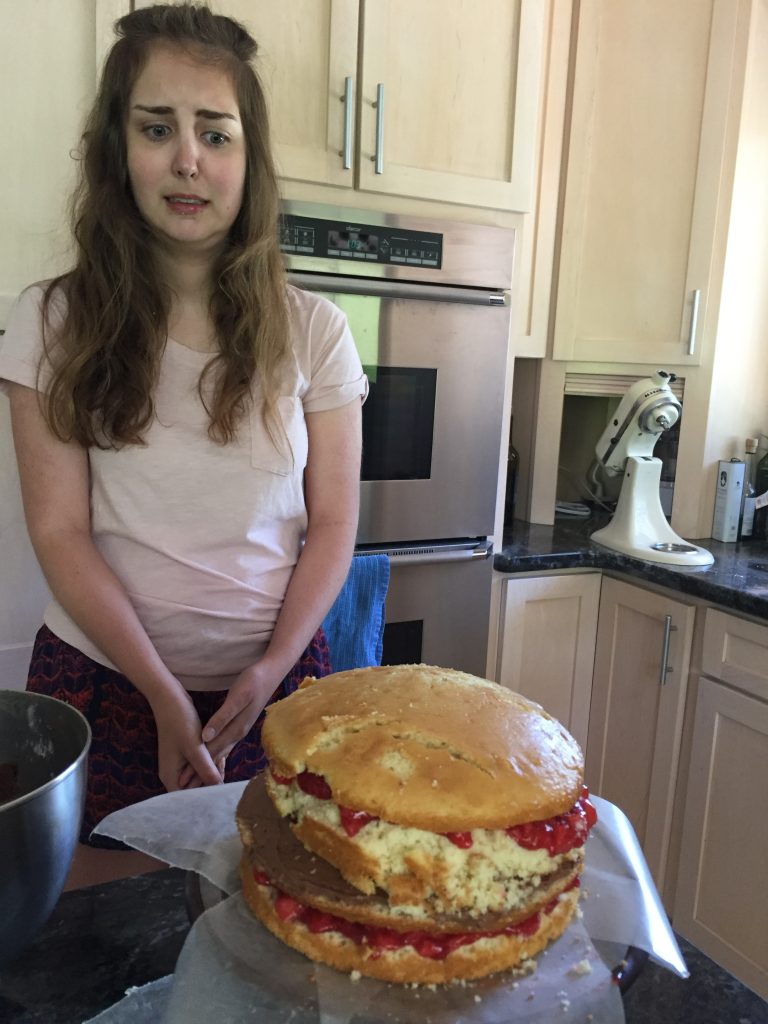
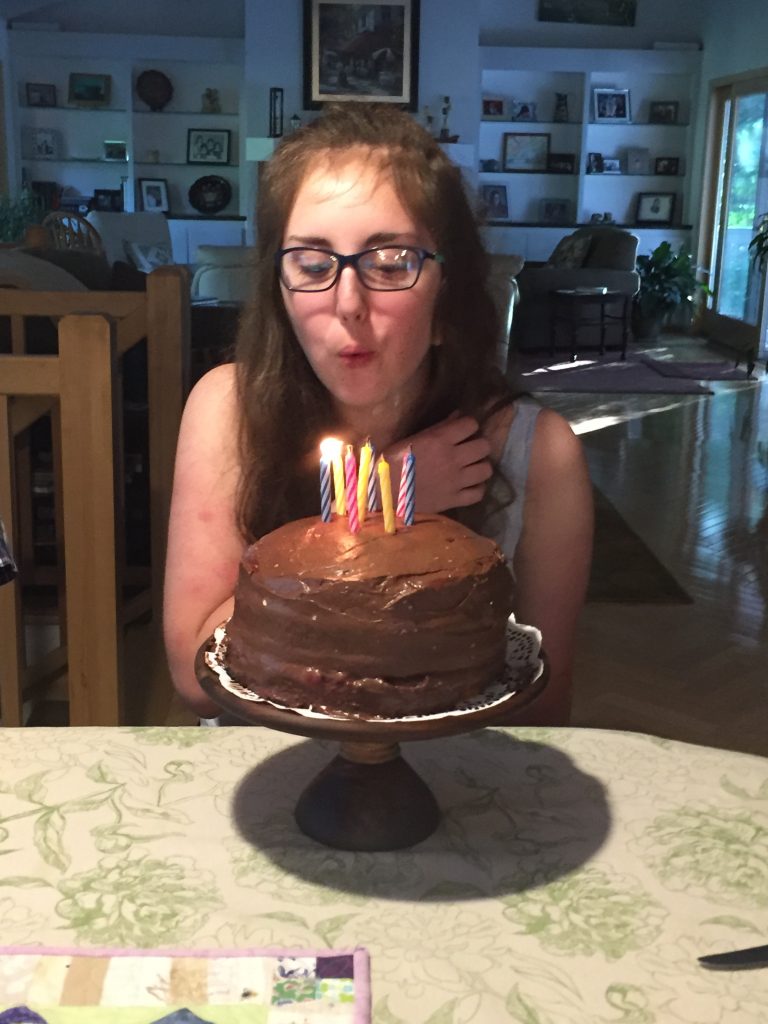
Following the prom, we celebrated Julia’s 18th birthday. Not sure if you remember but last year I made a cake for her 17th birthday and was not entirely successful!

This was one ugly cake!

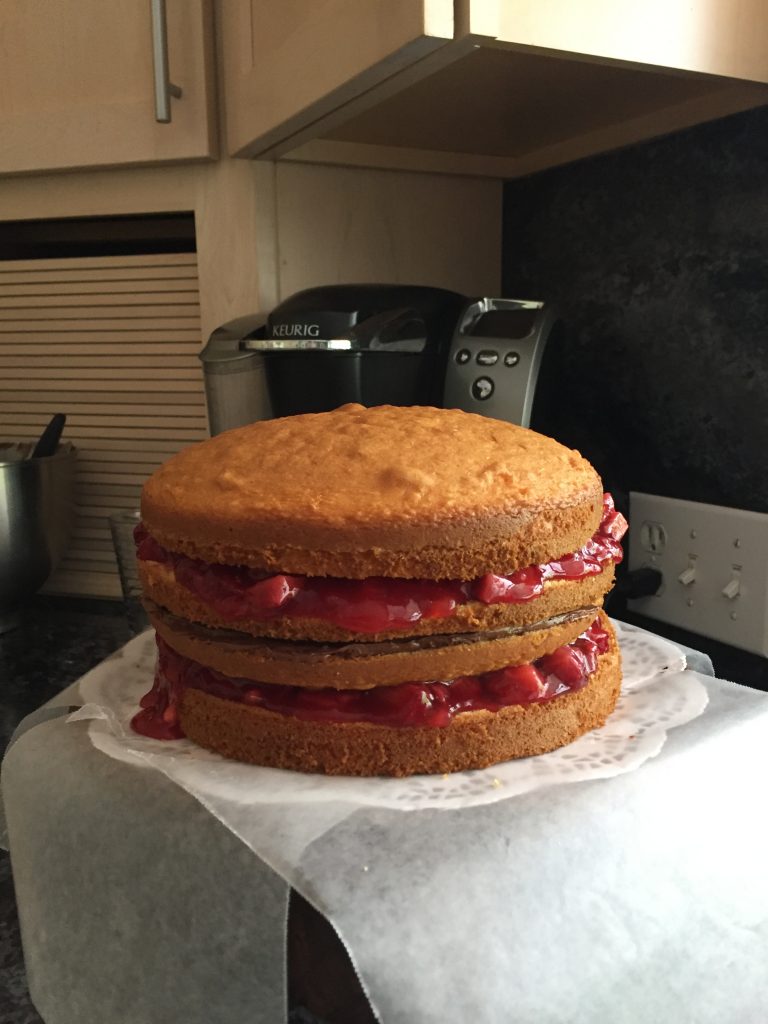
This year Julia asked for the same yellow cake with strawberry filling and chocolate frosting. I wanted to use a cake mix again but with better results. My trusty internet sources advised adding an extra egg yolk and replacing the required water with milk. I did both of these, though I used almond milk to keep it dairy free for my husband. Also, another site suggested adding a couple of tablespoons of any pudding mix that would match the flavor of the cake. I had an old box of butterscotch pudding that likely expired in 2010 or so. I opened it and added two tablespoons and tossed the rest. Guess what? It worked wonderfully.

Such an improved version!

Julia was happy and we are hoping her wishes come true for this year!

With all of this, plus two different awards nights at school, I haven’t done tons of sewing. One thing I am working on though is quilting a top given to me by a family friend. She actually donated three finished quilts to Mercyful Quilts. Then she sent me four tops she had, asking if I would finish them and donate those as well. I don’t normally do this because it takes a bit of time which I am sorely lacking, but she was so sweet to donate the other quilts and I agreed. I know they all won’t be finished terribly soon but I am working on the first one.

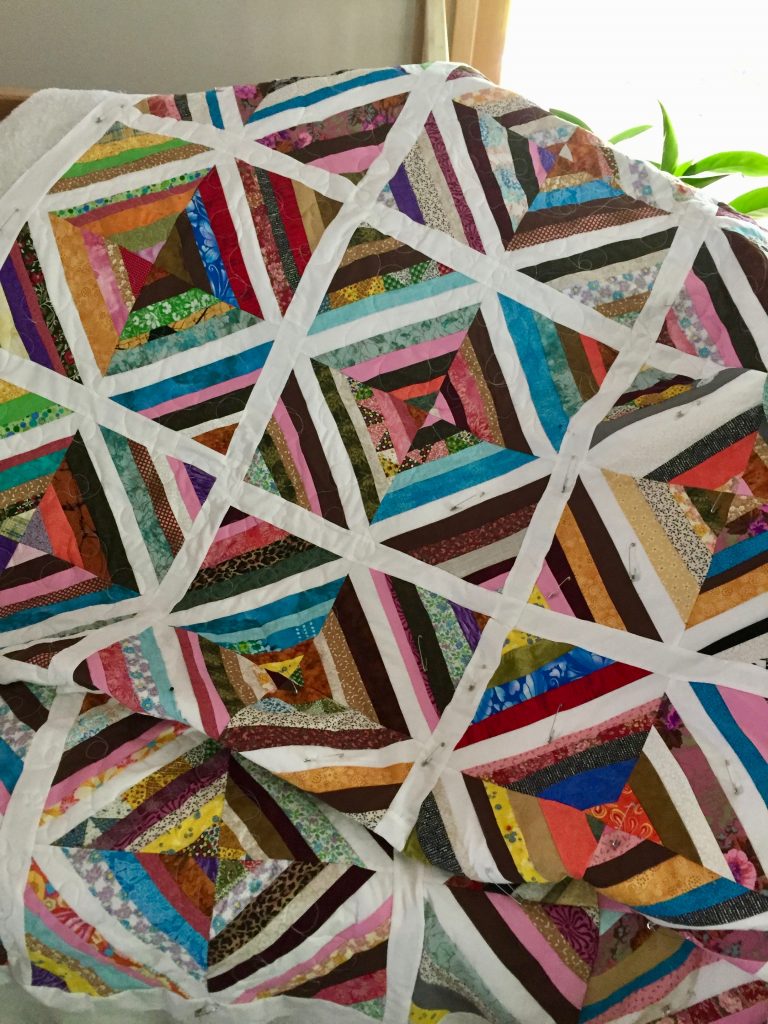
This string quilt was probably made a while back. There are many fabrics that look to be circa 1980’s and it is very pretty. Unfortunately, it doesn’t lie anywhere close to flat. I don’t think these string blocks were pieced with any sort of foundation paper or fabric, making them quite stretchy. I pressed it and starched it before pin basting. While pin basting, I took little tucks all over the place and hand stitched them which really helped. When I get to those bits, I quilt heavily over them so they won’t come apart. I am just using a loopy meander which is quite forgiving when I come to a section that is wavy. After binding and washing this it will, hopefully, crinkle up and be very cozy.

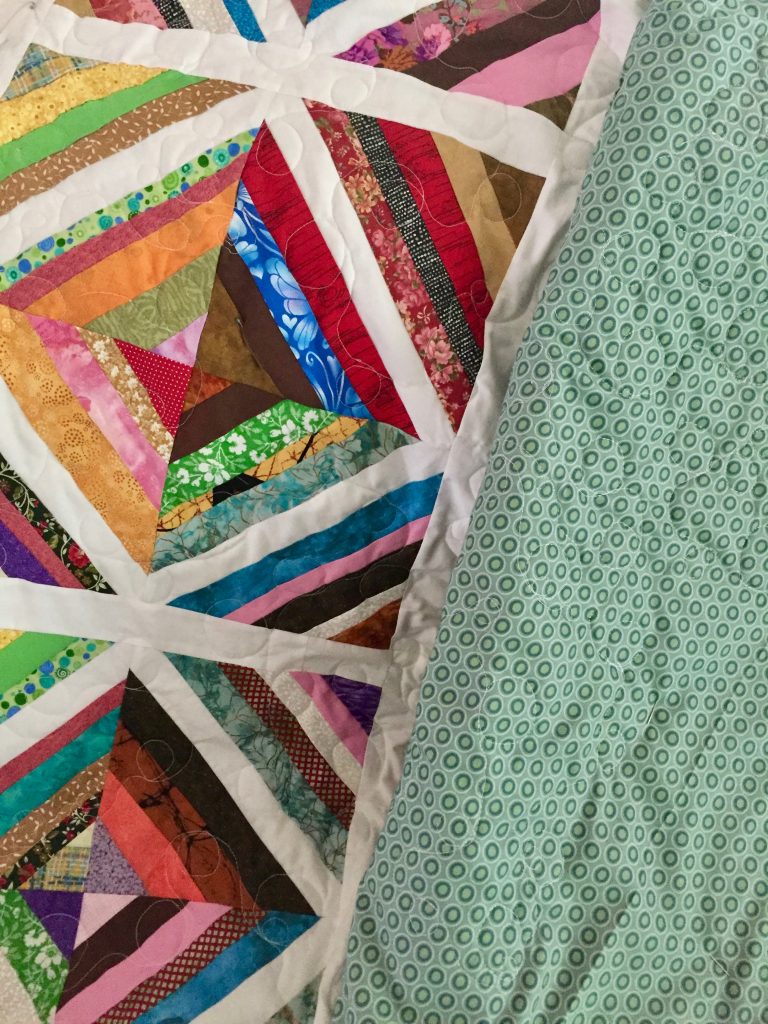
The backing is from the sale section in my shop. It is an Oval Elements piece from Art Gallery Fabric. Fabric for the binding has yet to be selected though. I am just about out of thread (which is silly since I am quilting it with white thread) so I won’t get too much farther on this today. I am counting this as my one project for Hands 2 Help and it should be finished early next week.

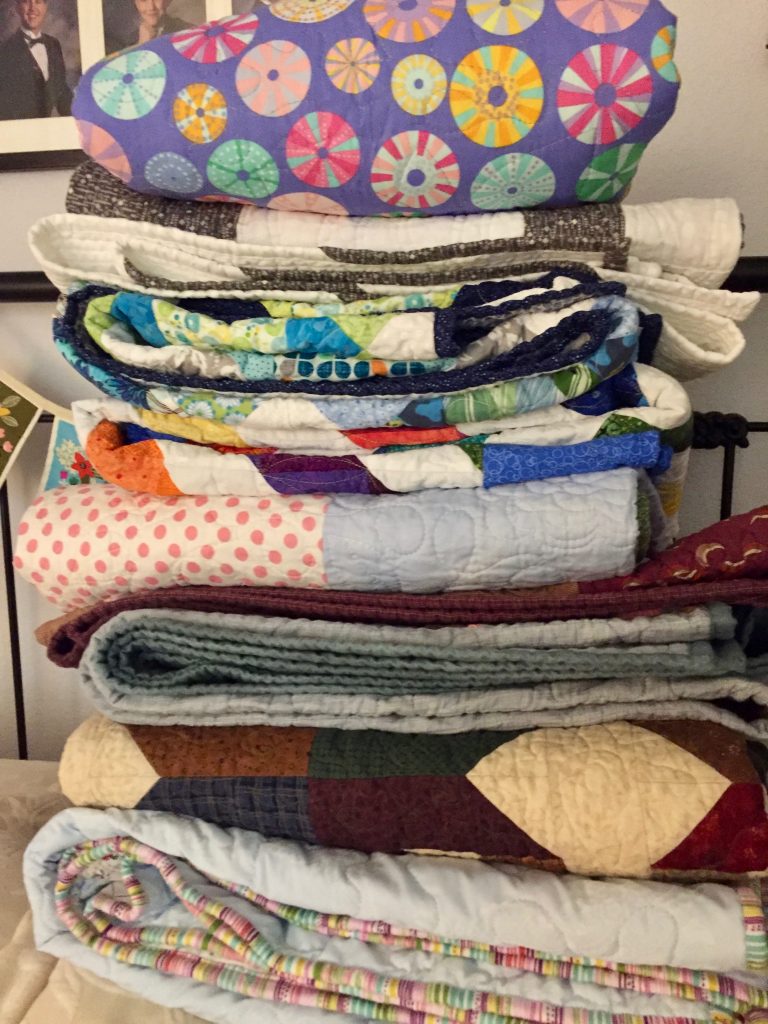
The quilts continue to arrive for Mercy Hospital and the Mercyful Quilts drive. The Hands 2 Help event at Confessions of a Fabric Addict has been amazing. I cannot even believe the number of quilts made for all of these deserving organizations . Just so inspiring. Some quilters have made 4 or 5 quilts – some even more than that. I have this stack and another box full ready for pick up. Judging by the emails I have received and blog posts I am reading, there are many more on the way. Thank you to all of you generous quilters!!

I hope everyone has a lovely long weekend. In the US, Monday is Memorial Day which many mark as the beginning of summer. We have had rainy, gloomy weather all week so it sure doesn’t feel summery here!

Sewing with Stretch Knit Fabrics

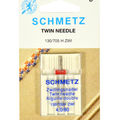
Sewing with knit fabrics, making t-shirts and tank tops is not terribly difficult. I have made a number of them. However I am usually less than satisfied with the finished look, especially the hem and the neckline. The other day I was reading a post by Leanne at Devoted Quilter and she shared a pretty blue t-shirt she made. By using a double needle (or twin needle) she was able to achieve a nice finish at the hem and neckline.

These are available everywhere – Jo-Anns, Amazon, etc.

Some time back, I purchased a double needle, fully intending to try this. But for whatever reason, the needle landed in the drawer with lots of other needles and was forgotten. Leanne’s success gave me just the push I needed to give it a try. I looked on-line to see if there was anything special about threading my machine (Janome 6500) for this needle. My machine has two posts for thread which is mandatory. But threading it was nearly the same as using only one spool of thread. I didn’t want to buy two spools of the same color thread since this isn’t a color I will use often. Instead, I wound an extra bobbin and used it on the second post. This worked just fine.

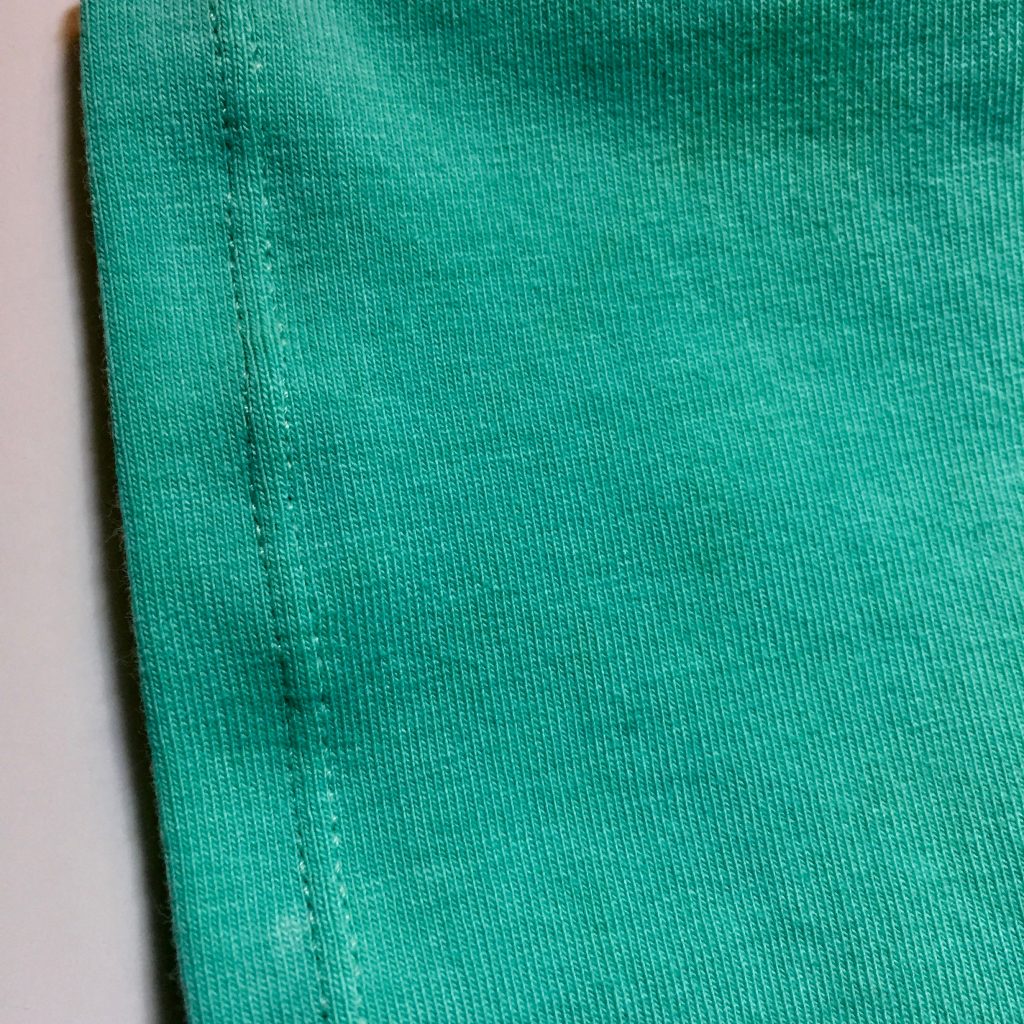
Two very neat rows of topstitching forming the hem of the sleeve.

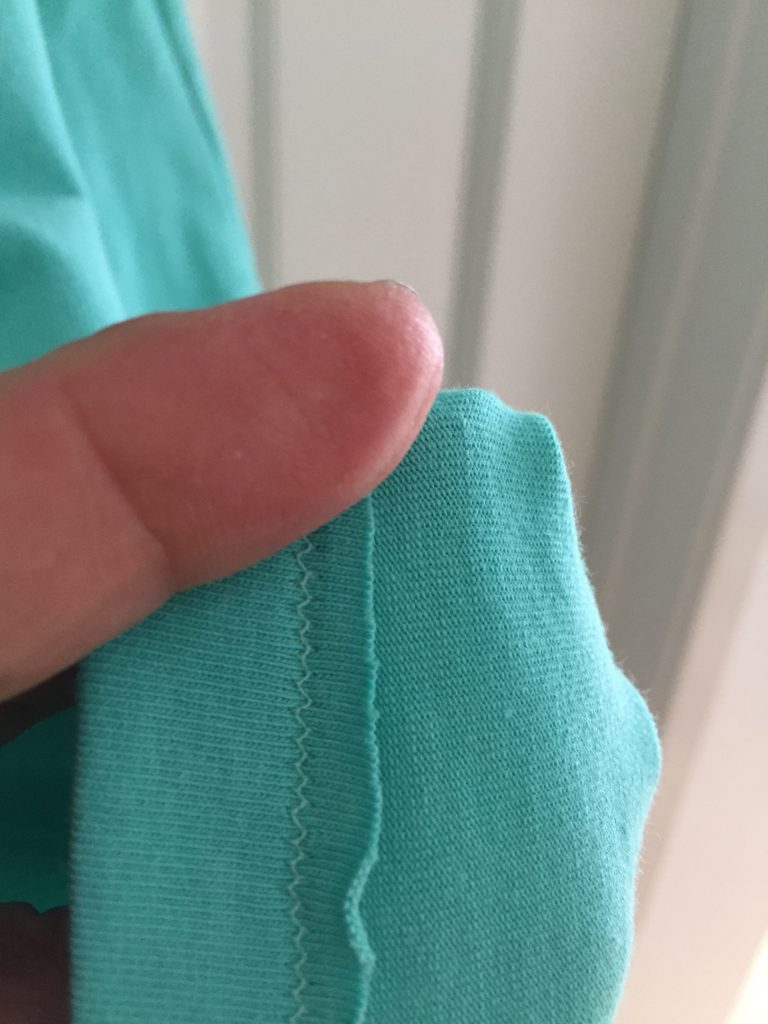
Sewing with a twin needle is interesting in that you must stitch from the right (or the top) side of the garment. The twin stitching shows on top and the bottom stitching has an interesting zig zag pattern achieved from the use on two needles on top and only one bobbin on the bottom.

This is how the back side looks.

This is the part I think is so magical. When I first tried using the needle and a a few scraps, I wasn’t at all sure what the bottom would look like as I didn’t really understand how one bobbin would deal with two threads.

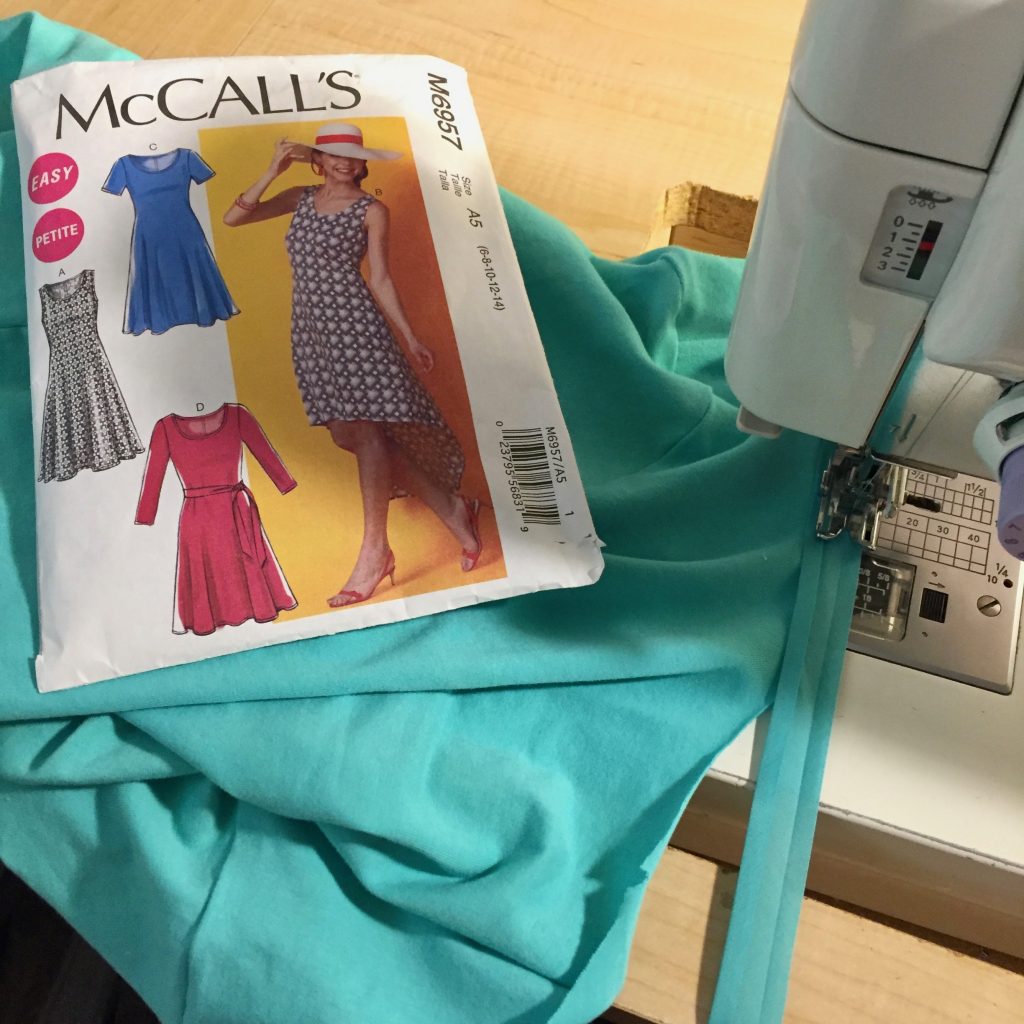
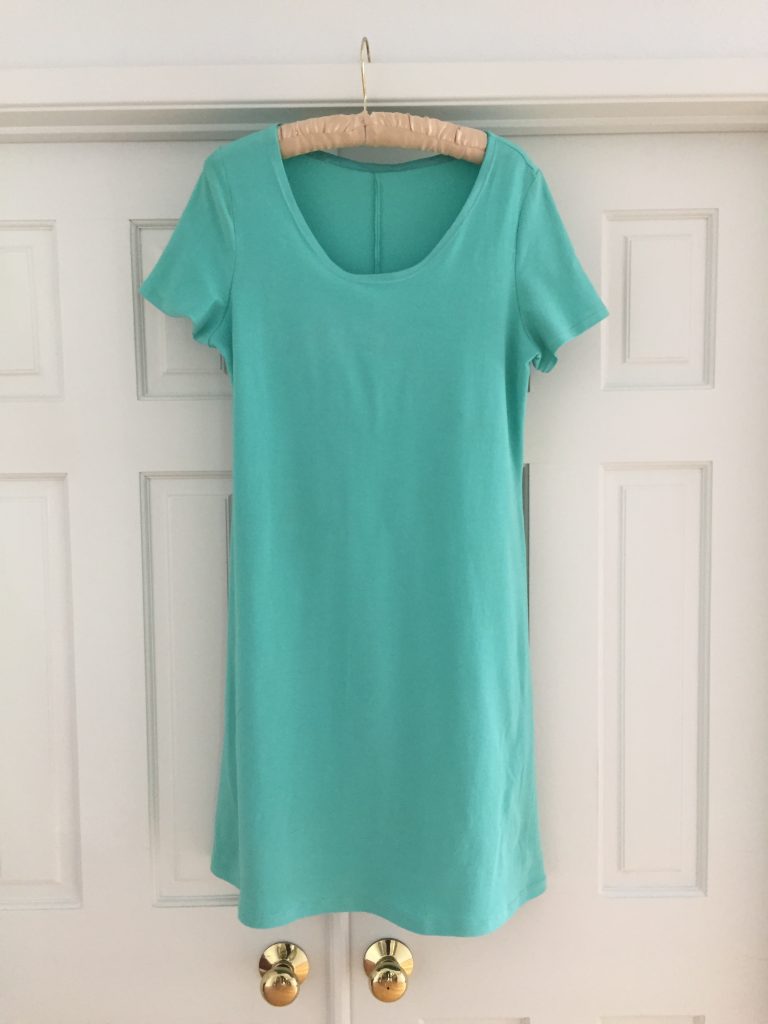
Ok, here are a few details about this project. Using McCall’s M6957 and my thrifted stretch knit fabric, I made a very simple t-shirt dress. I cut the top at a size 12 and graded the waist and hip area to a 14 so it wouldn’t hug at the belly (because that isn’t a look I need to share with the world). 😉 The cut of this simple dress is really comfortable and the fact there are only three pieces to the pattern makes it a very easy project to put together.

I have had this green knit fabric in the drawer for about a year now. I picked it up at a garage sale from someone who was clearing out a lot of fabric. (That was a great sale and I was fortunate to purchase a large stack of knit fabric in good condition). I thought I would use this piece of fabric because if the fit wasn’t good there wasn’t a big loss since there was only a few dollars investment.

I got lucky though and the fit is great. I don’t have a picture of it on me because as I write this, I don’t have anyone to take a photo. Selfies are not my forte so I am not going to bother. Maybe I will post one later on. For now, you get the boring picture of it hanging from the door.

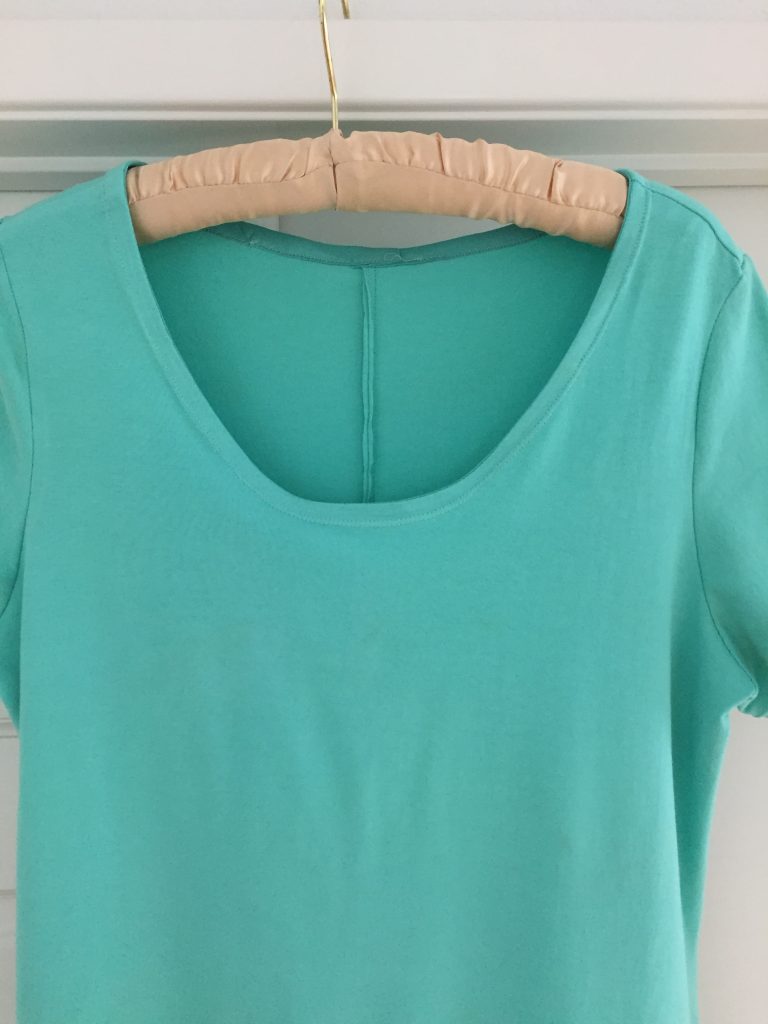
In my opinion the double needle makes all the difference. The hemline, hem of the sleeves and the topstitching of the neckline look so clean. It really elevates the finish of this dress. One thing to note, the pattern instructions told me to just fold the neckline in toward the wrong side and topstitch. I don’t like that method as it usually makes a wavy neckline and it allows too much stretch.

Instead, I attached single fold bias tape and then folded that to the inside and topstitched it. This way, I have a cotton strip creating shape to the neckline. It lays flat and looks really nice. I also reinforced the shoulder seams with bias tape so they wouldn’t stretch. After sewing the shoulder seams and checking the fit, I took a small piece of bias tape, laid it over the seam line and stitched it down. A very easy task and it will prevent the seams from stretching.

Now that I feel confident about the fit and look of this pattern, I want to make another one. I have lots of nice knits and look forward to using them. I think I will make a sleeveless version since we have such warm summers.

Hoping all of you enjoy the weekend. We will likely have a fairly quiet weekend. Julia is studying for finals. My husband wrenched his back and is limping around trying to let it heal. No big plans for the Kringel’s this weekend!

Linking to my usuals – check them out at the top of the page under Link Ups.