Tag Archives: relief quilting

A Harmonious Finish

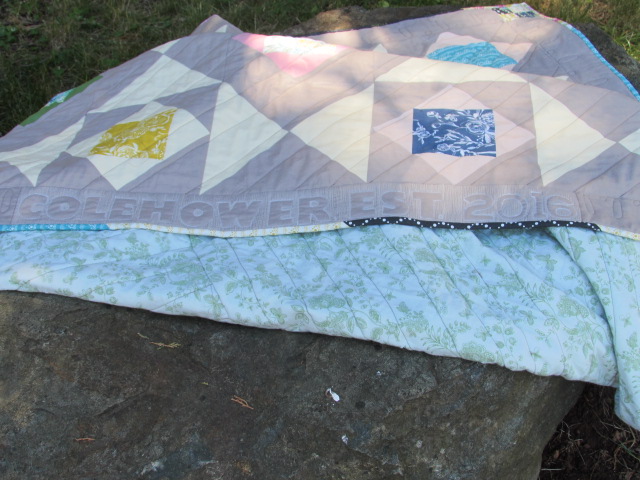
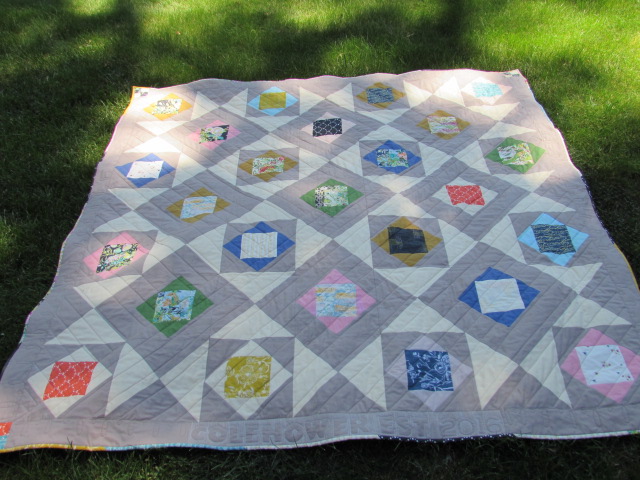
This week I finished my Harmony quilt. I will finally be able to send it off to my nephew and his wife as their wedding gift. Doesn’t some rule of etiquette say you can give a wedding present within the first year and it is still ‘proper’? According to this post on Manners Monday of the Huffington Post, I am still within the time frame. Though really, who would refuse a wedding gift because it was late? At least I am finally giving it to them!!

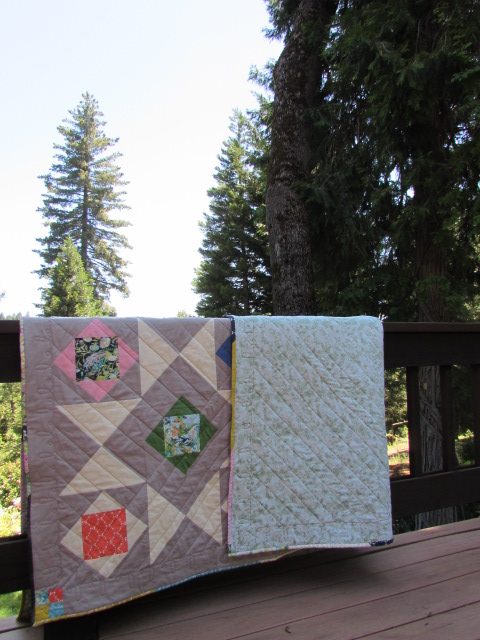
You might remember I made the quilt top a long time ago. I used a fat eighth set of Millie Fleur by BariJ for the centers and Moda solids, Fig Tree Cream and Stone. The pattern is one that alternates hourglass blocks and economy blocks, each of which finished at 9 1/2″. I love the look of this pattern and feel proud to have drawn it myself and figured it out without a pattern (I don’t do that too often.)

I wanted to quilt it on a long arm because there is lots of cool negative space and it would have been fun to play with it. However, that just never worked out and in the interest of time and wanting to complete this quilt, I opted to quilt it at home.  It is fairly large at 74″ square so I decided against free motion quilting and settled for straight line with my walking foot. I did a diagonal line across the middle. For one side I did vertical lines all the way out and on the other side I quilted horizontal lines. I like the effect.

My favorite part of the quilt is the bottom border where I relief quilted their last name and the words EST. 2016.  It is a sweet reminder of when they married and established their family of two (plus a couple of dogs!!) As with my other relief quilting projects, I fused stabilizer to the back of the border strip (before it was attached to the quilt) Once the letters were traced on to the border, I used my darning foot and created the design by free motion quilting around the shapes of the letters and numbers.  After attaching the border strip and quilting the body of the quilt, I took the darning foot and FMQ’d the outline of each letter and number to quilt that section of the border and make the letters stand out and puff up a bit.

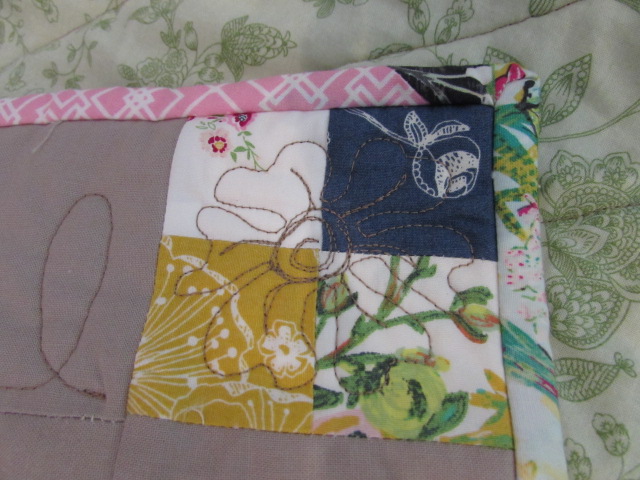
On the corners I used a four patch block as a cornerstone.  On each of these I quilted a little flower. The borders were free motion quilted with a pattern of loops, alternating small and large ones.

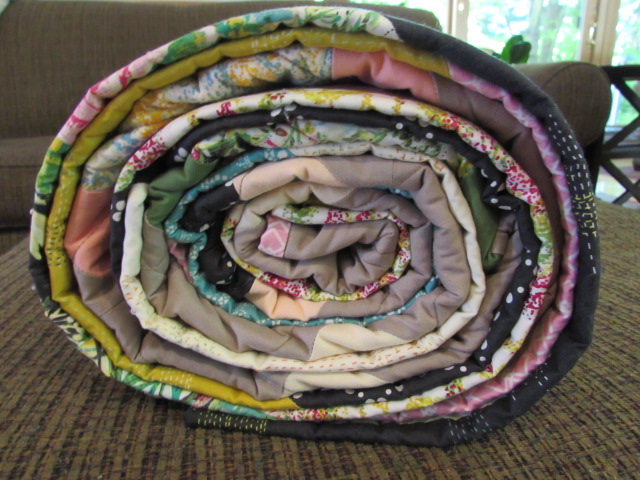
To finish it off, I made a scrappy binding!  I am such a fan of scrappy bindings. Luckily, I had just enough of the Millie Fleur fabric left to make the binding.

The backing is a green, floral wide back I purchased long ago and I couldn’t honestly say what it is. I can say I love the ease of a wide back for backing. Pieced backs are very cool and give you sort of a double sided quilt but wide backs (108″ wide) provide ease of use and a speedy finish. (Plus I have a large piece of it leftover which is kind of nice!)  In fact, I recently bought the first bolt of wide back, a small gray polka dot by Red Rooster and it is listed in my shop.  Just in case you need some. 🙂
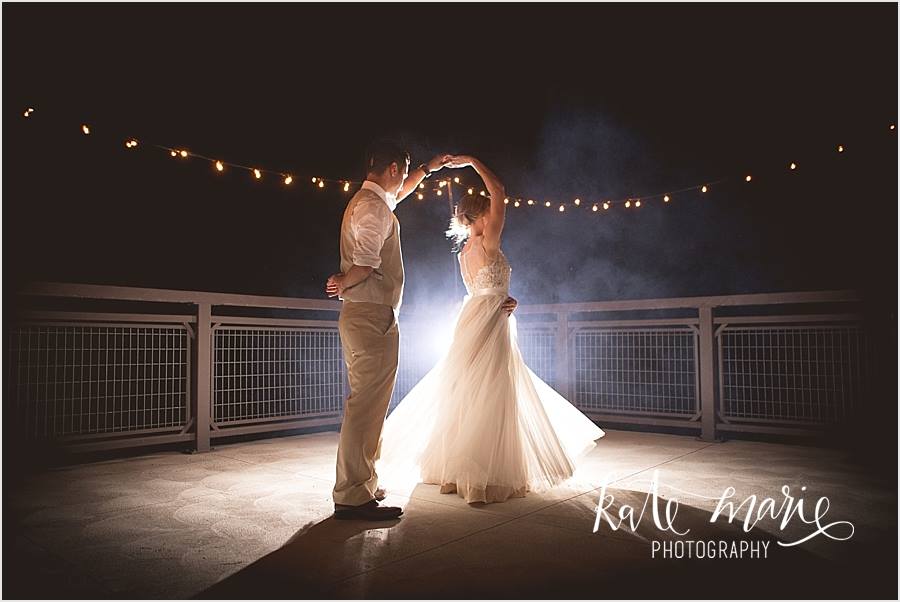
I can’t wait for the kids to receive their quilt.  I was really sad to have missed this wedding last year. From the pictures they shared, it was just a gorgeous day for my nephew and his new wife. I am sharing a picture of them dancing at their wedding. Breathtaking, aren’t they? I hope they love the quilt and use it happily for years to come.

If you haven’t yet signed up, I would love to have you sign up for my newsletter. Sent monthly, it contains updates about new fabrics I have in the shop and promotions that will run that month for newsletter readers. Sign up form is on the right side of your screen, toward the top.

Linking to my favorites, each of which can be found at the top of the page, under Link Ups.


Quilt Bloggers Festival

It is likely that you all have been seeing the posts about the Blogger’s Quilt Festival that is currently going on at Amy’s Creative Side.  This event is such a great source of inspiration. All kinds of quilt bloggers link up their favorite projects within the categories that Amy had set up (e.g. large quilt, small quilt, original design, art quilt, scrappy quilt, etc)  I have not participated before but have enjoyed looking at the work of so many talented quilters.  Viewers can vote for their favorites in each category and prizes are generously awarded. There are also some prizes awarded in a drawing of all those who enter.

IMG_7289

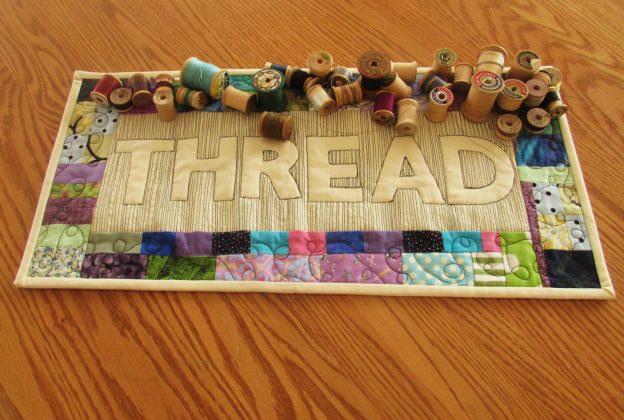
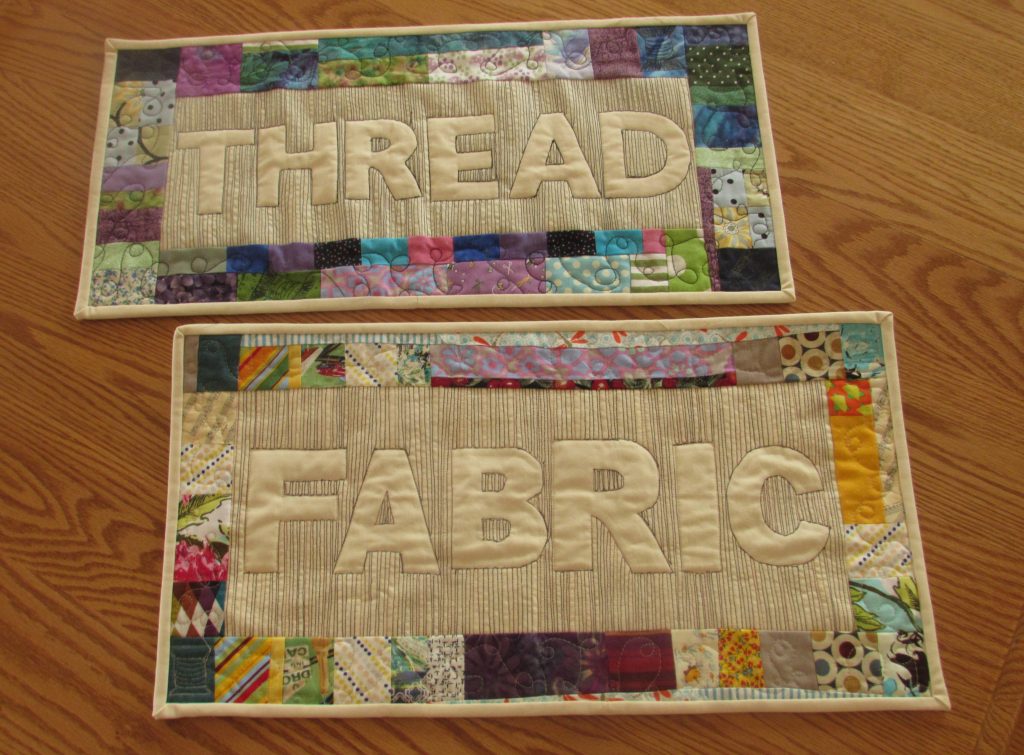
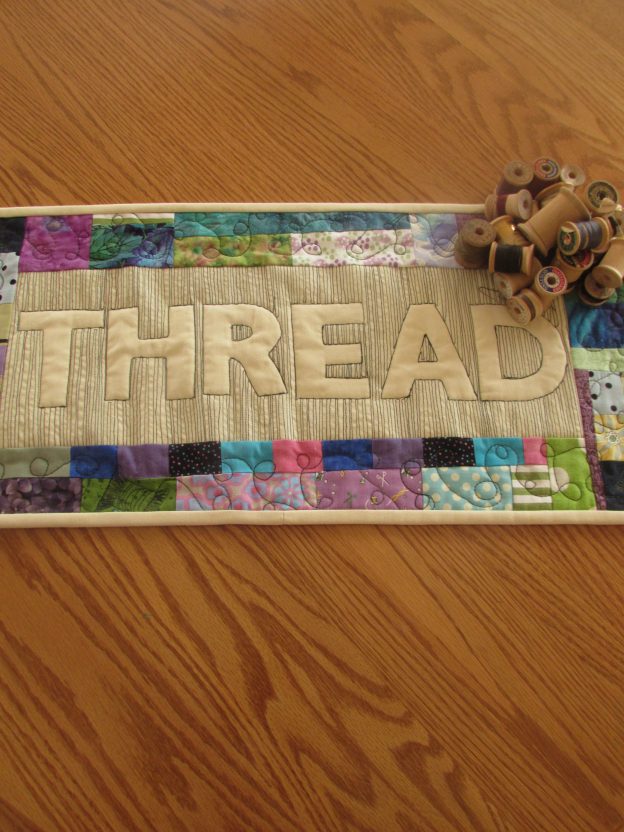
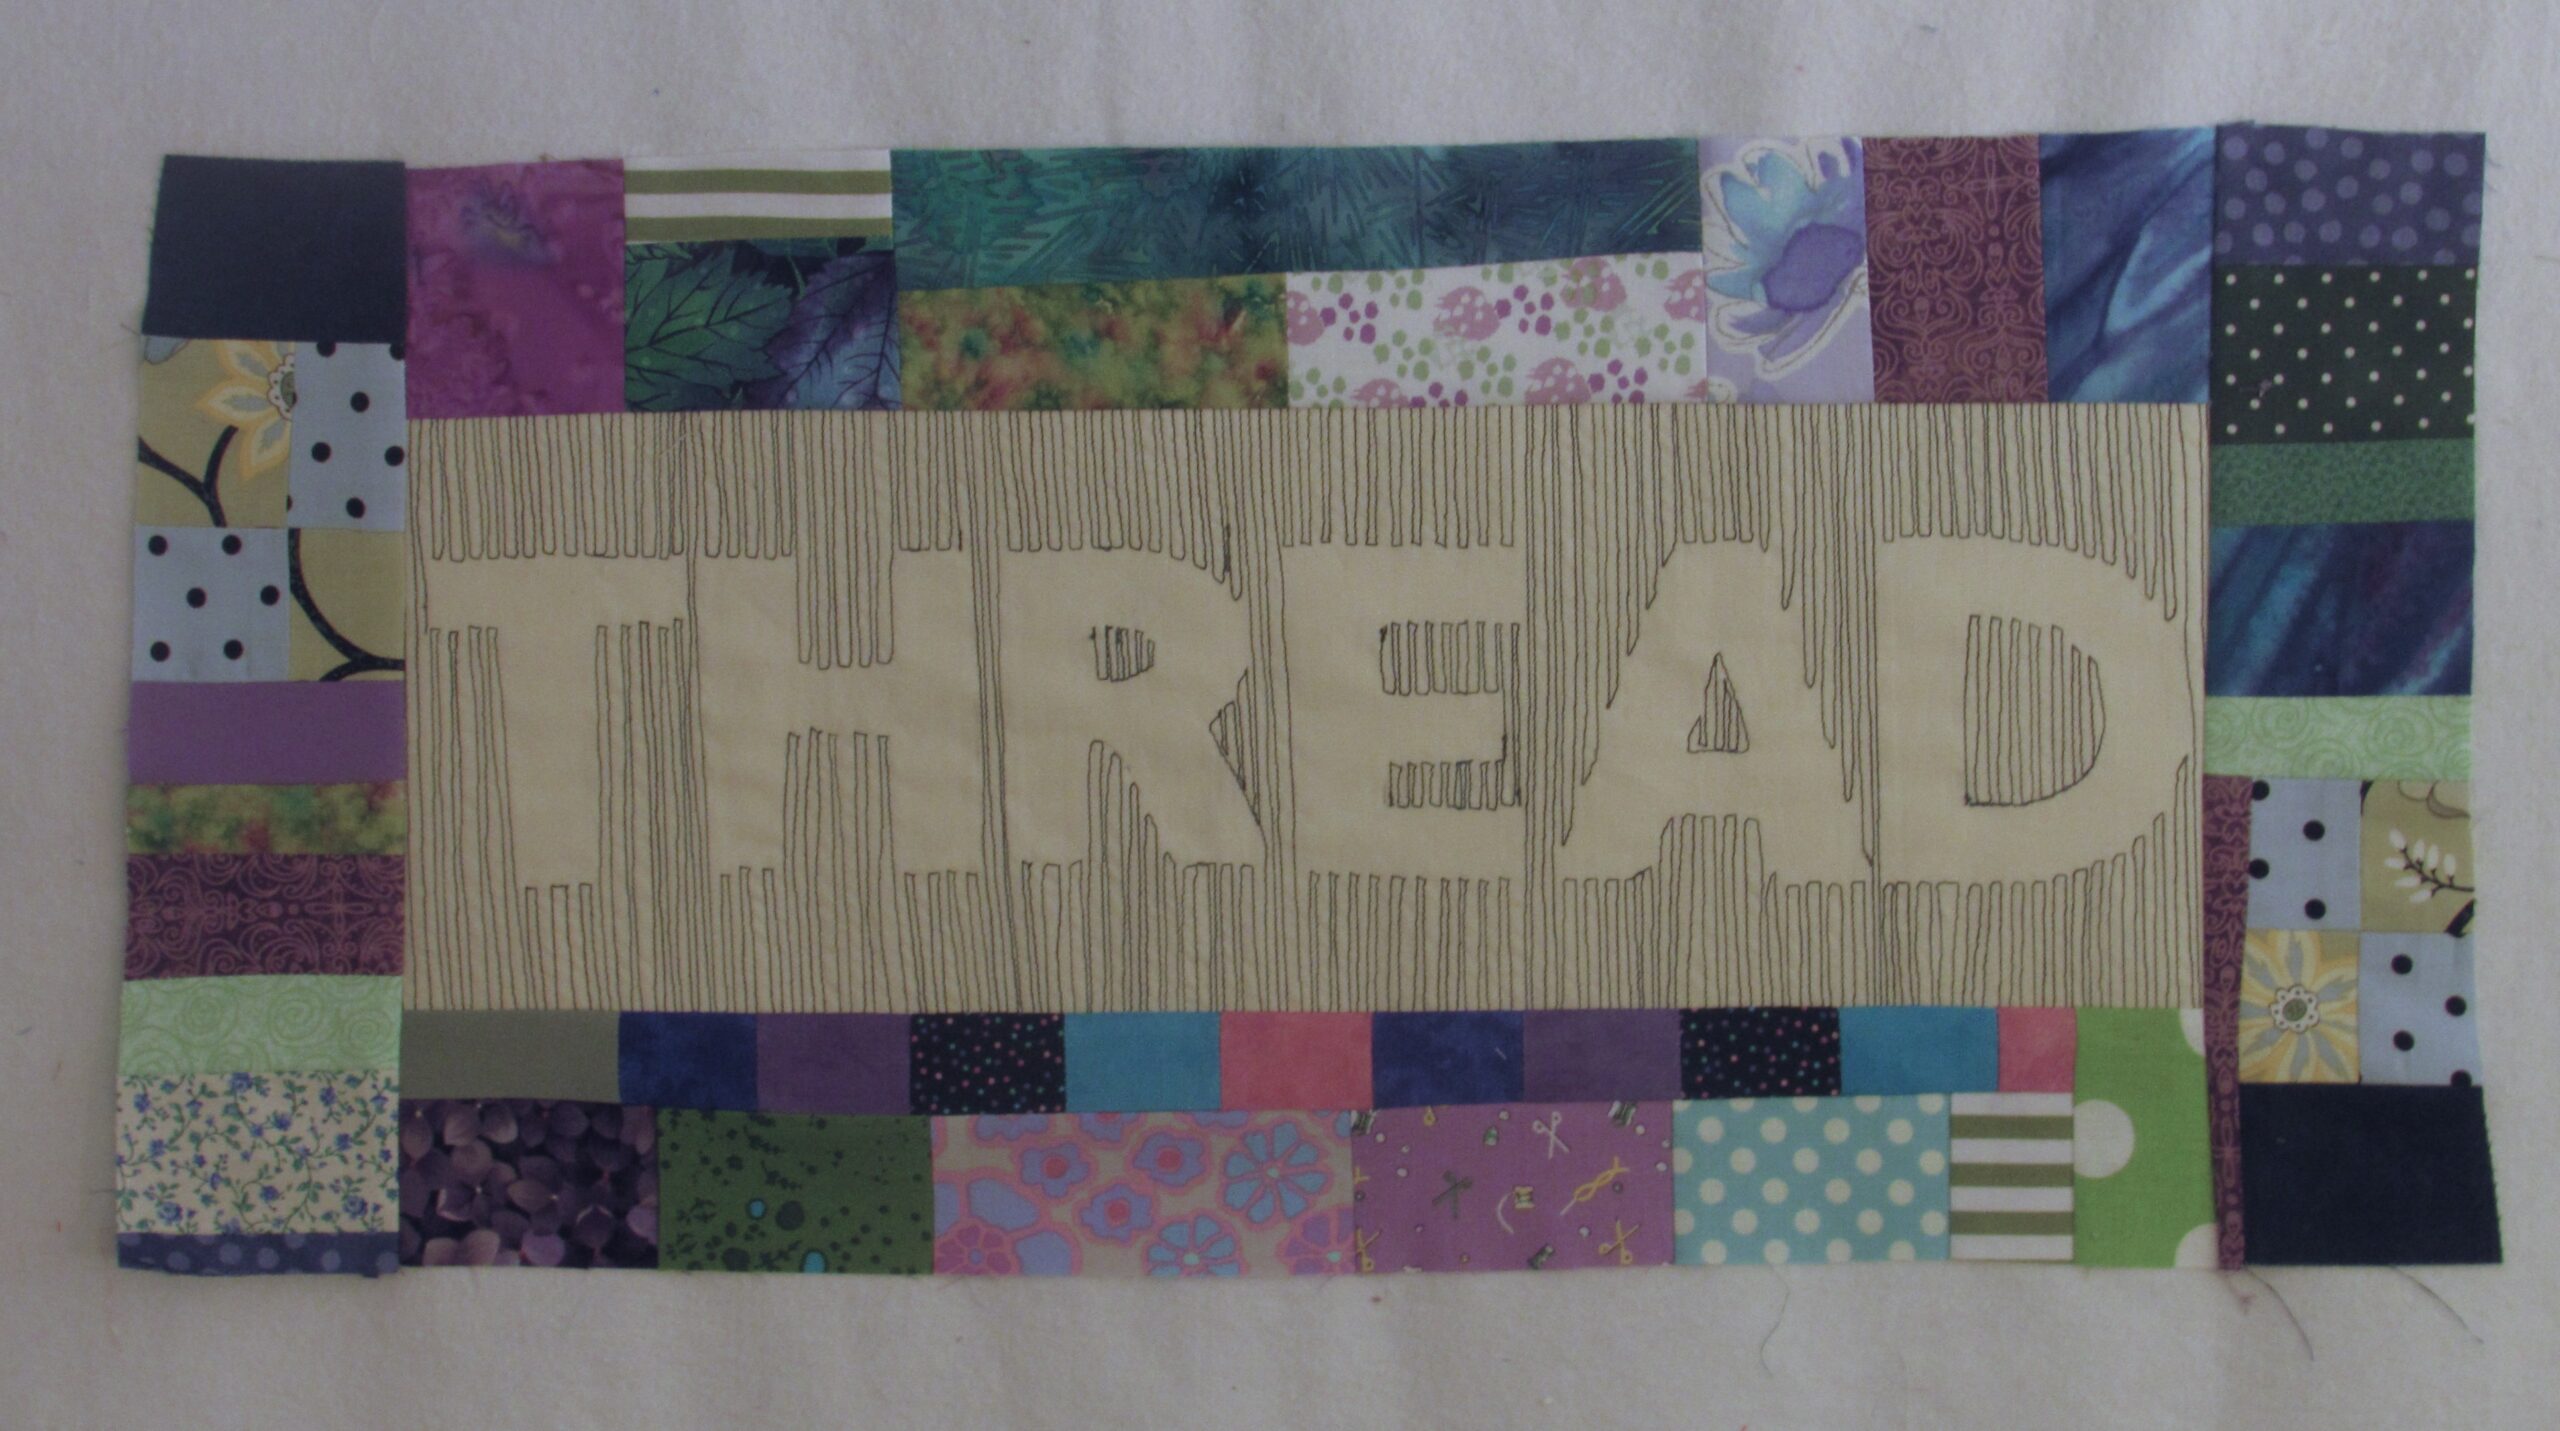
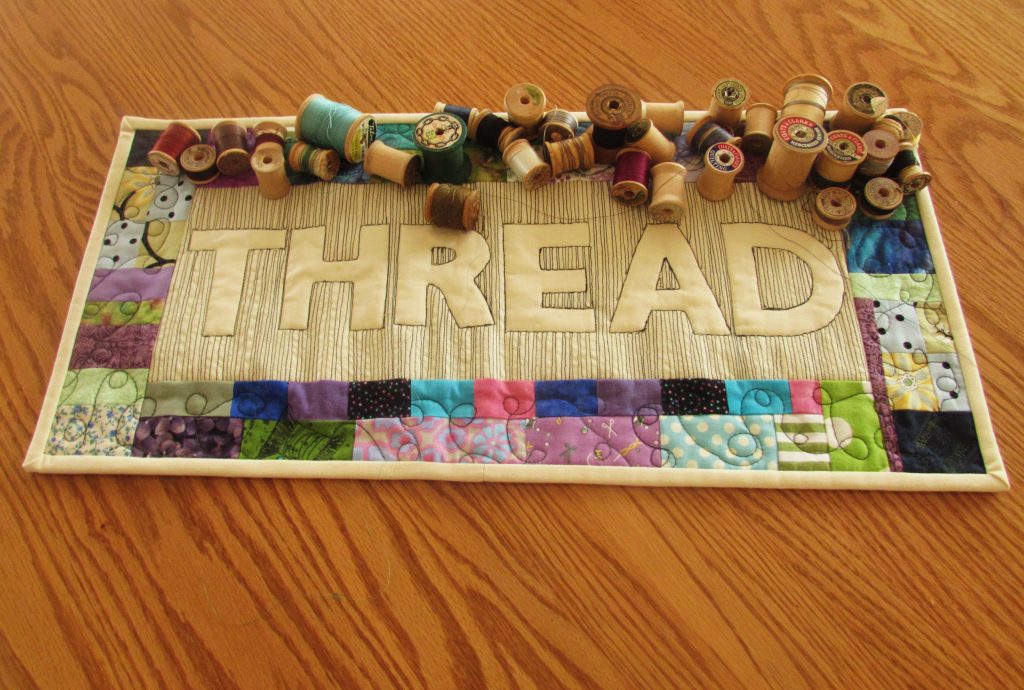
This year I am going to enter my THREAD quilt in the mini quilt category. You might remember this project because it was quite recent. If you are new to the blog and want more details, click here. I made a set of two that hang in my sewing room but only THREAD is being entered. I just love seeing both of them together though!

IMG_7286

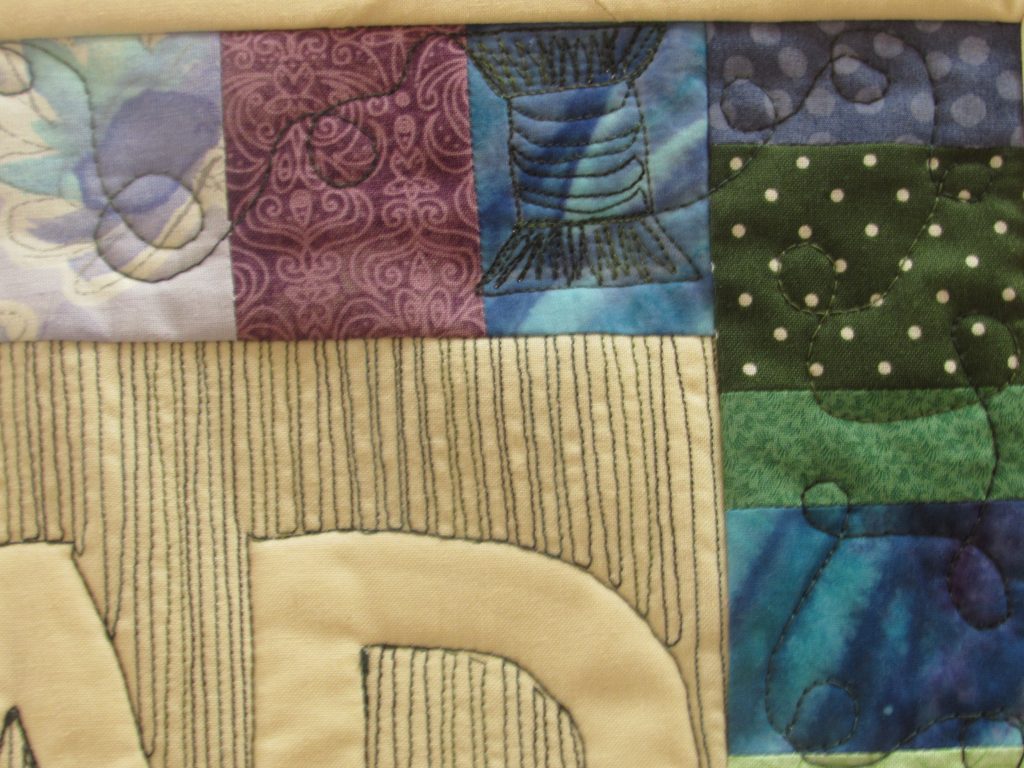
I had so much fun quilting this. There are a few spools incorporated into the border quilting.

IMG_7287

If you are interested in trying to make one for your sewing room, I have a tutorial written up for you. It is a very simple process to relief quilt the word on the center. Of course you could swap the word out for anything. QUILT, CREATE, IMAGINE – any of those would be fantastic.

I hope you will check out the entries over at Amy’s. If you are interested, there are a few more days where the festival is open for bloggers to link to. Voting doesn’t open until Sunday, the 25th.  It is worth popping over to Amy’s — there are so many wonderful quilts to ooh and ahh over. Have fun!!

Relief Quilting Tutorial – Thread

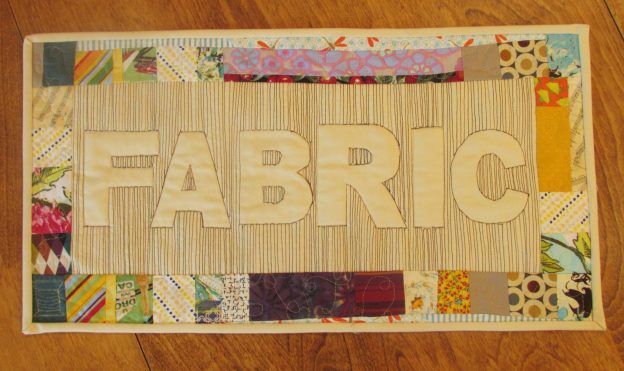
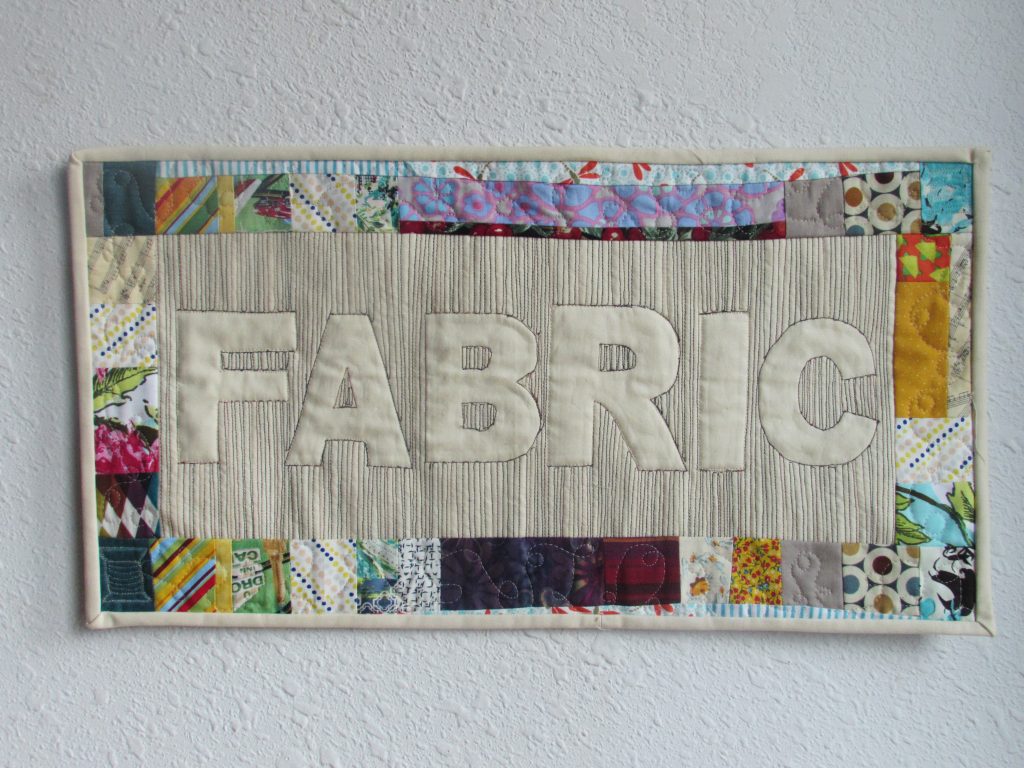
I really enjoyed playing with relief quilting when I made my FABRIC mini quilt a couple of weeks ago. So much so that I decided to make another one! I took plenty of pictures while making it so I could post a tutorial. I hope you will give it a try. The effect is wonderful and it is such an easy process.

This time I wanted to try stitching the word on a piece of fabric with fusible stabilizer and then building the quilt from there. It worked out wonderfully. Since I already had one mini that said FABRIC, I decided to make another that said THREAD. This idea was inspired by a comment left on the first post by Diana, of A Red Delicious Life.  She mentioned wanting to make one to hang above her thread. I decided to do the same. Now I have one to hang above the closet where I store fabric and another to hang above the thread collection hanging on the wall in my sewing room. Thanks Diana!!

Let’s get started.

I am going to provide the sizes that I used but this is so flexible. Increase or decrease as you like. My quilt finished at 11″ x 23″ so if you want a different size, adjust accordingly.

Materials List:

  • Background Fabric: one rectangle measuring 7″ x 19″
  • Heavyweight fusible interfacting: one rectangle measuring 7″ x 19″
  • Scraps for your border
  • Stencils for tracing the word THREAD. I used letters that were 3″ high.
  • Frixion pen or similar fabric marking pen
  • Binding fabric:  Two strips that are 2 1/2″ by 42″ (Width of fabric)
  • Quilting thread.  I used YLI thread in a variegated green and loved it!

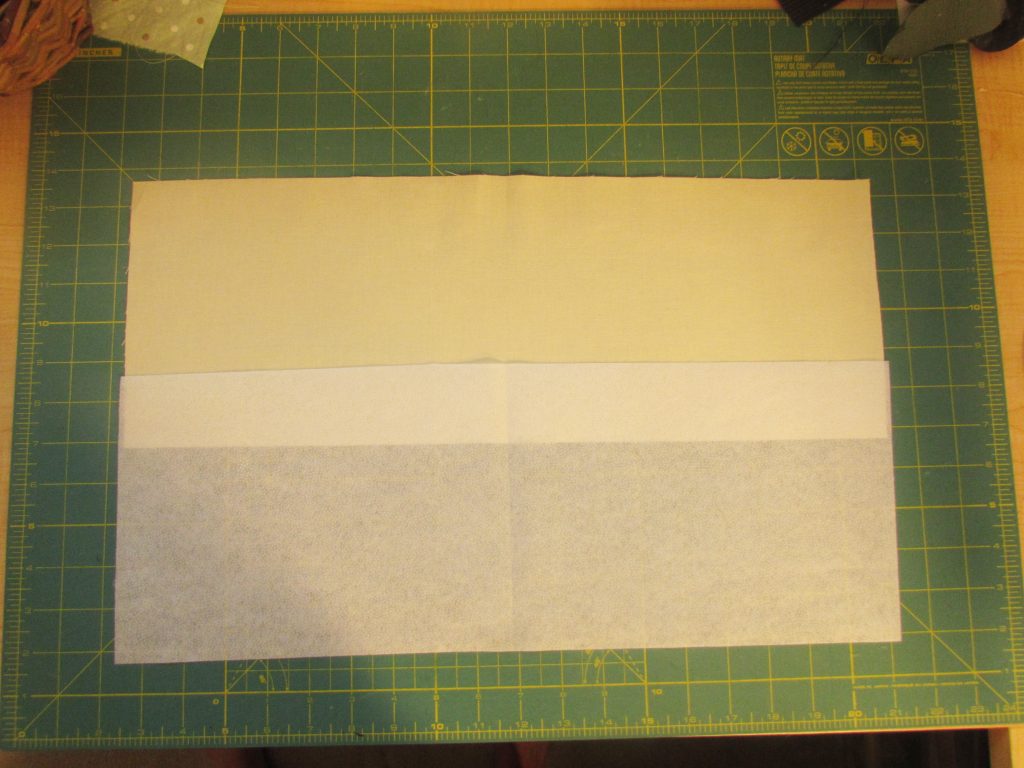
IMG_7181Take your background fabric and fuse the stabilizer to the wrong side of the fabric. Follow manufacturer’s instructions if you are not familiar with this process.

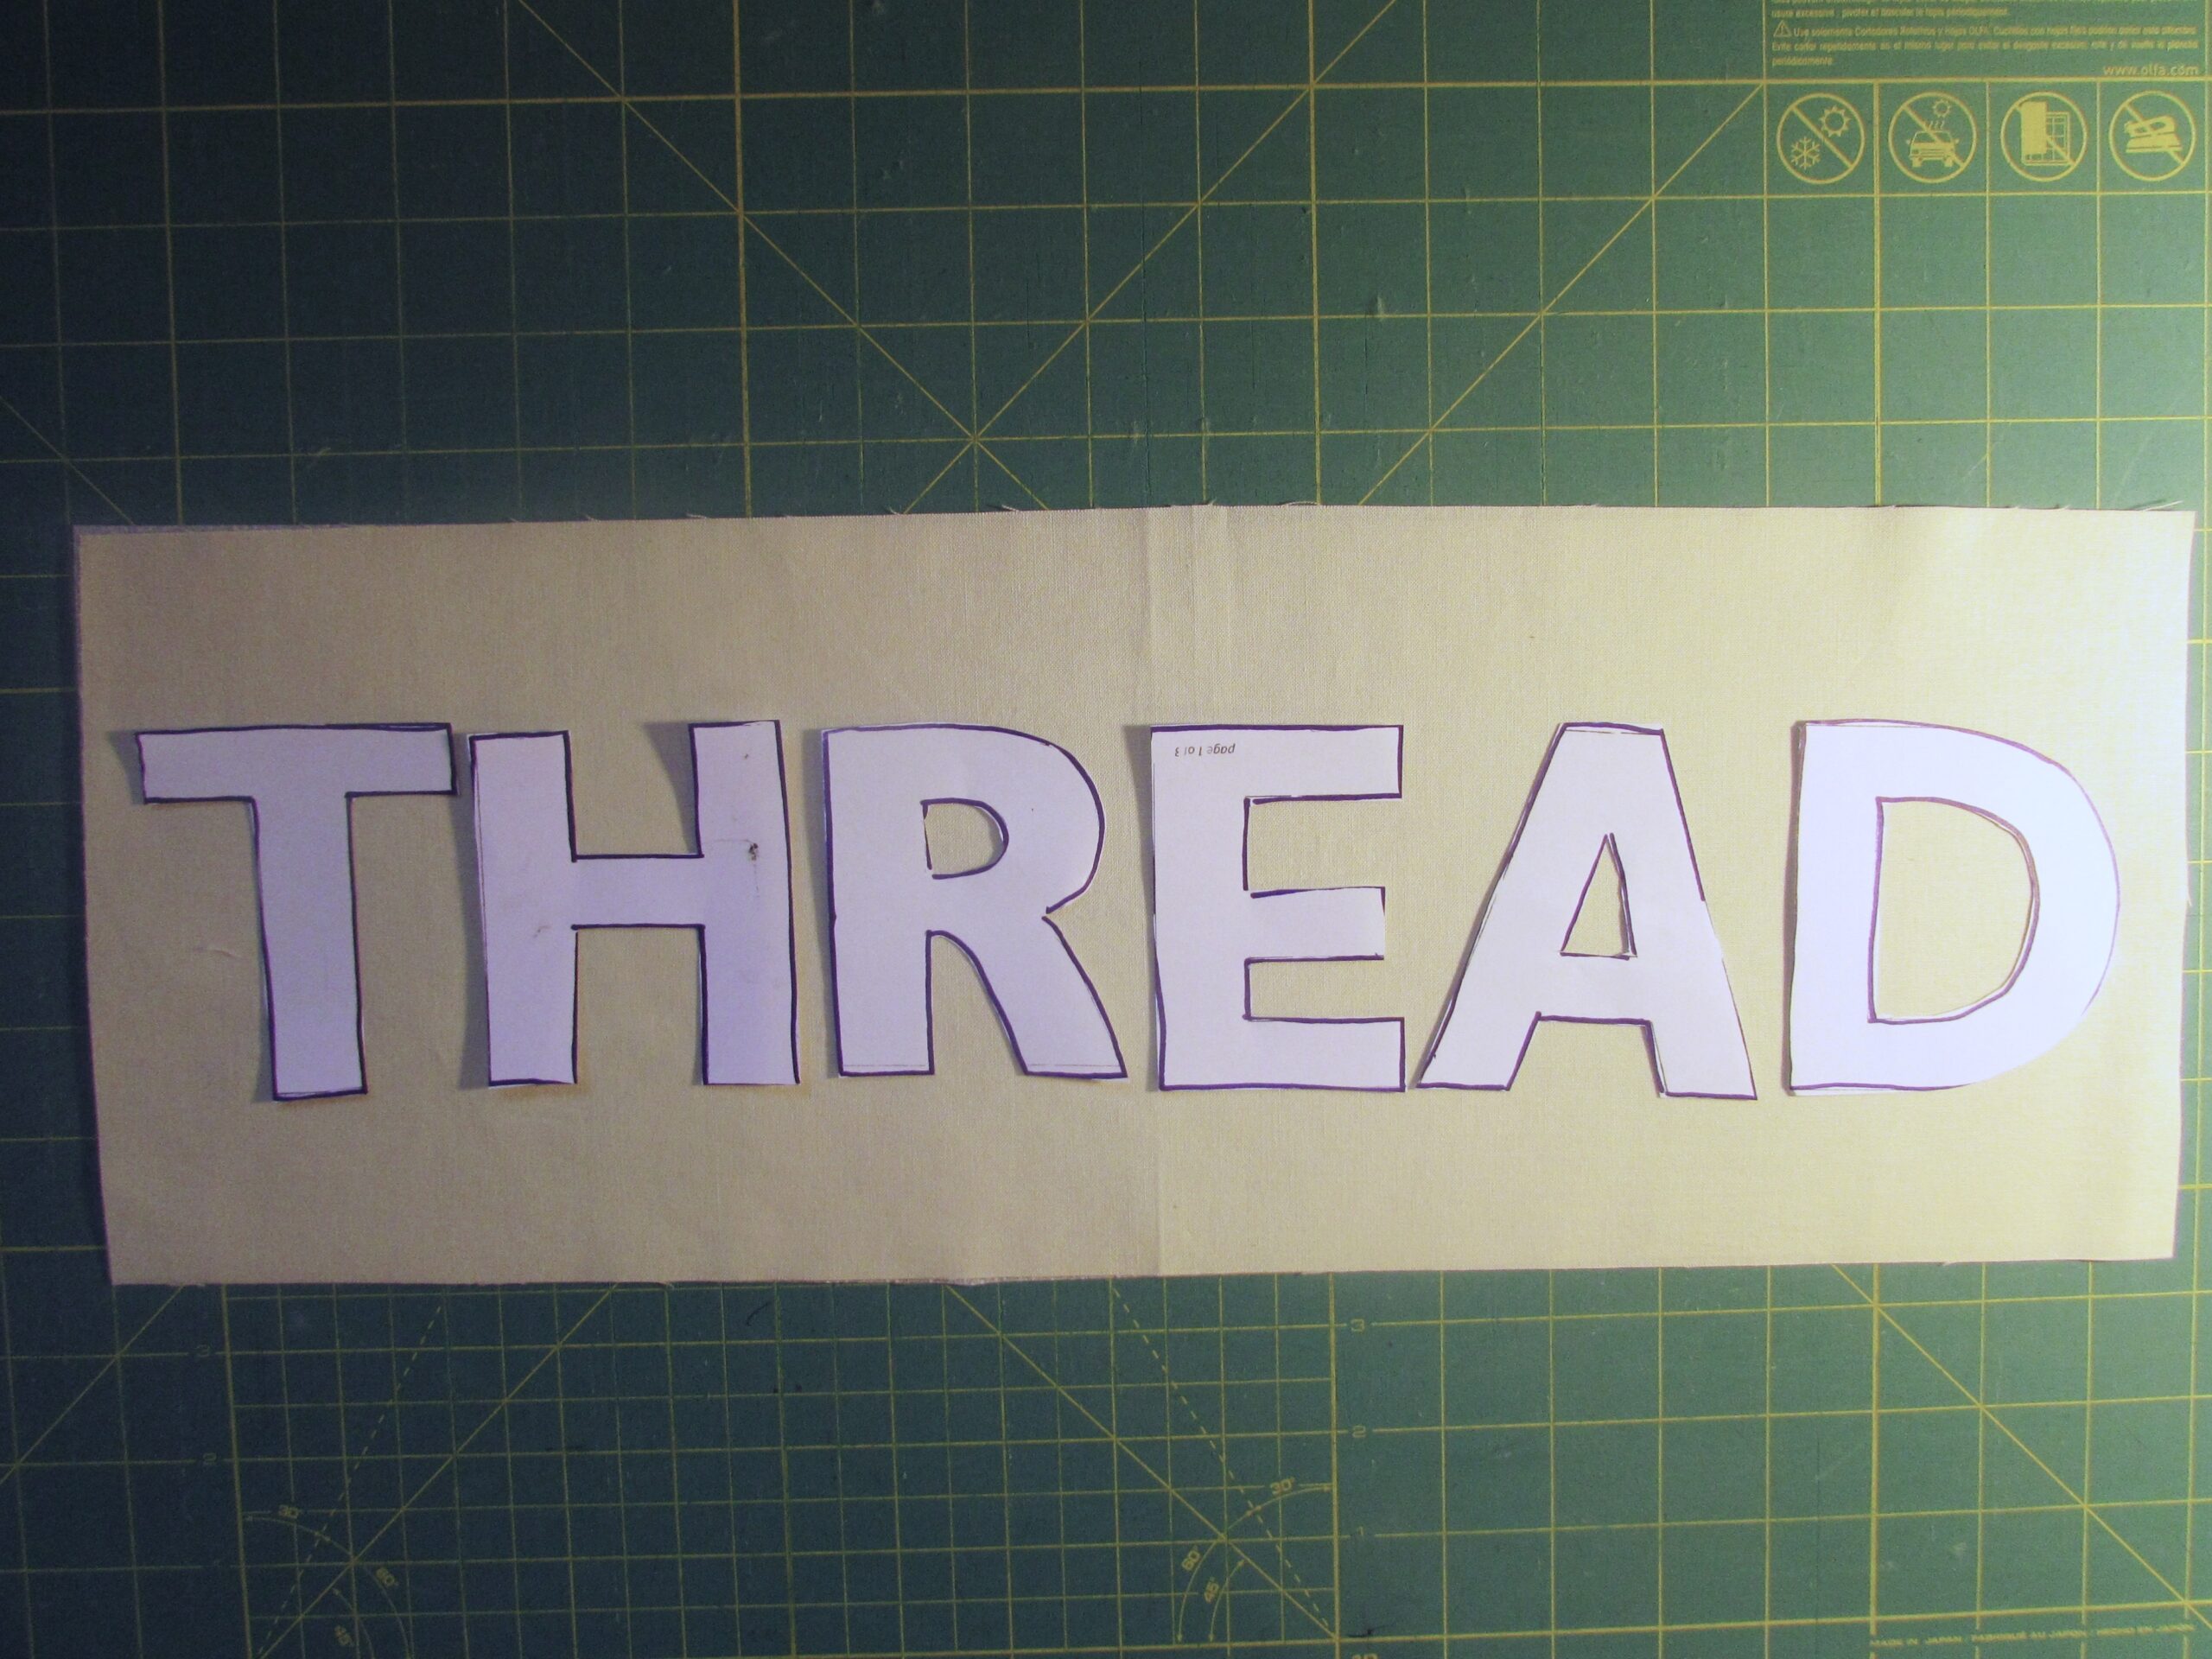
Trace the word on the fabric with the fabric safe marking pen of your choice. I didn’t leave very much room between the letters because I liked the way this looked. You could certainly adjust this to your taste. Also, I didn’t leave a ton of room on either side. Again, adjust as needed by cutting your background wider if you like.

IMG_7185

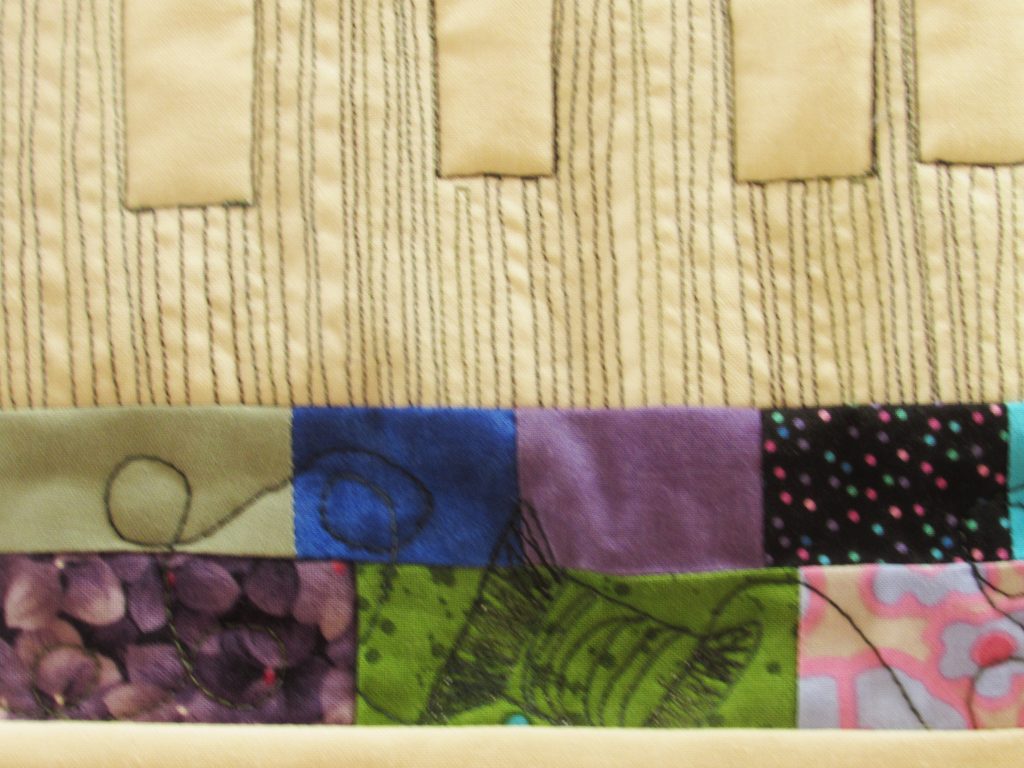
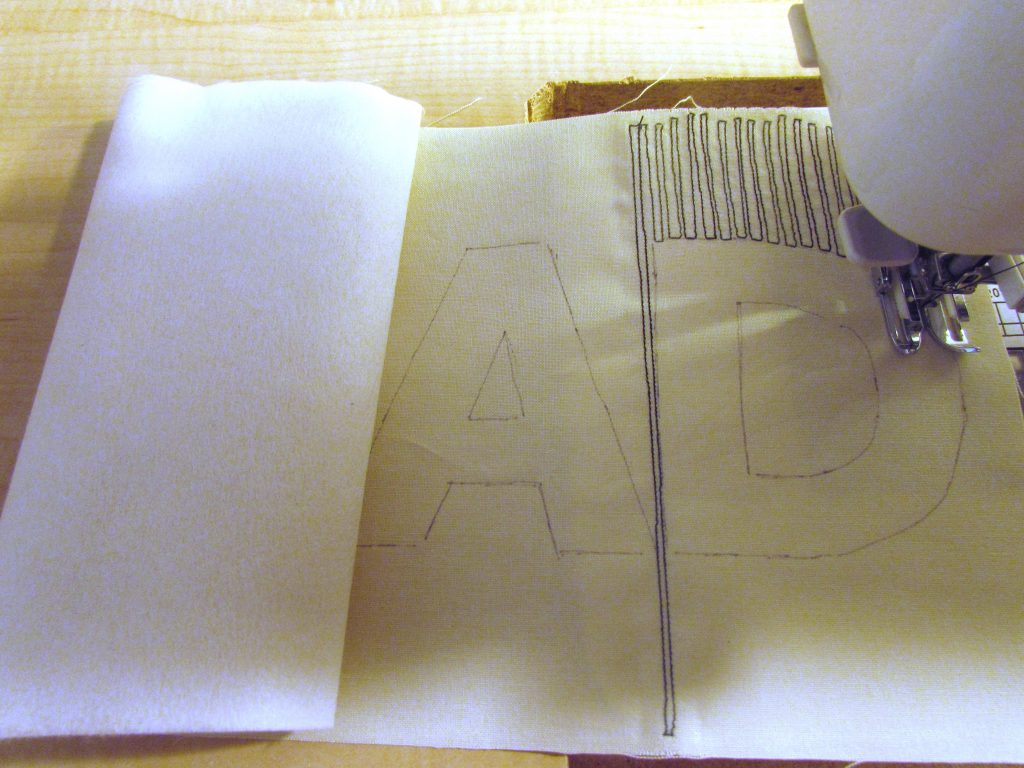
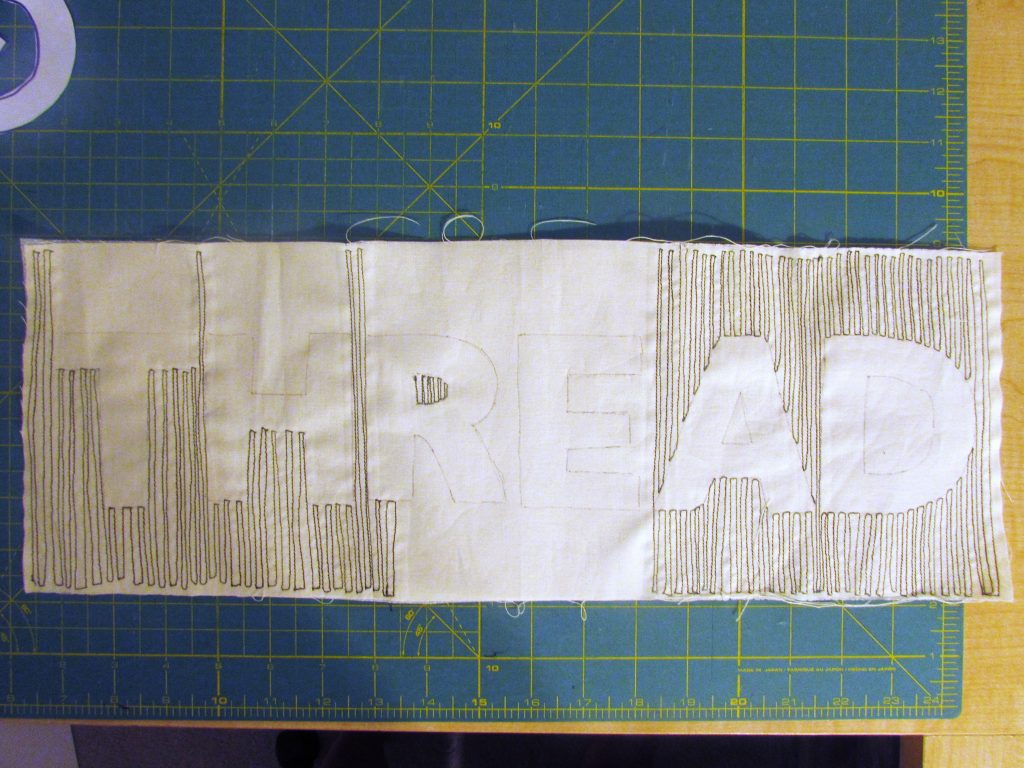
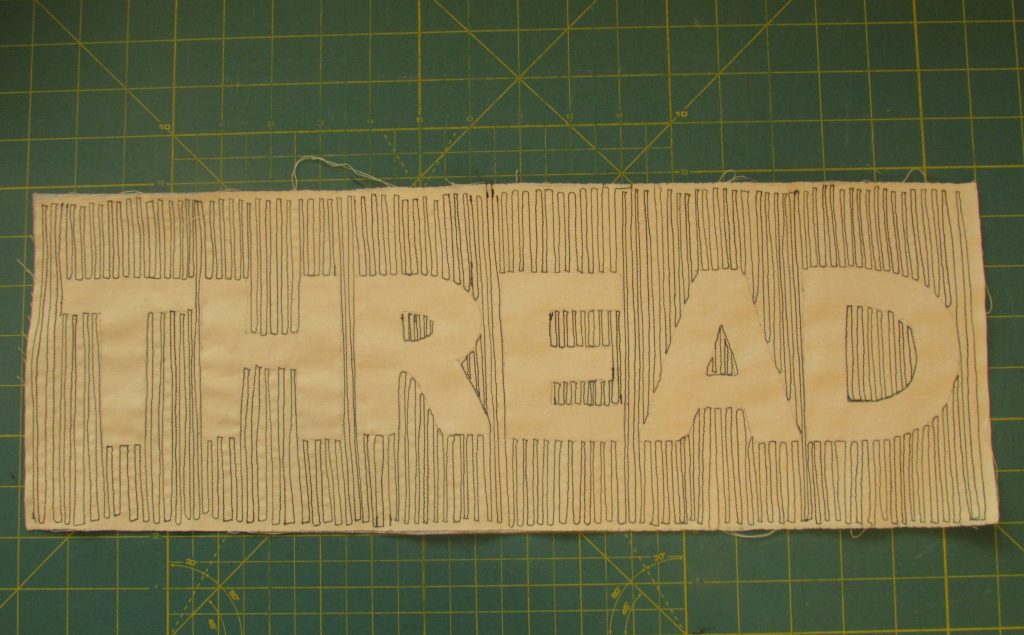
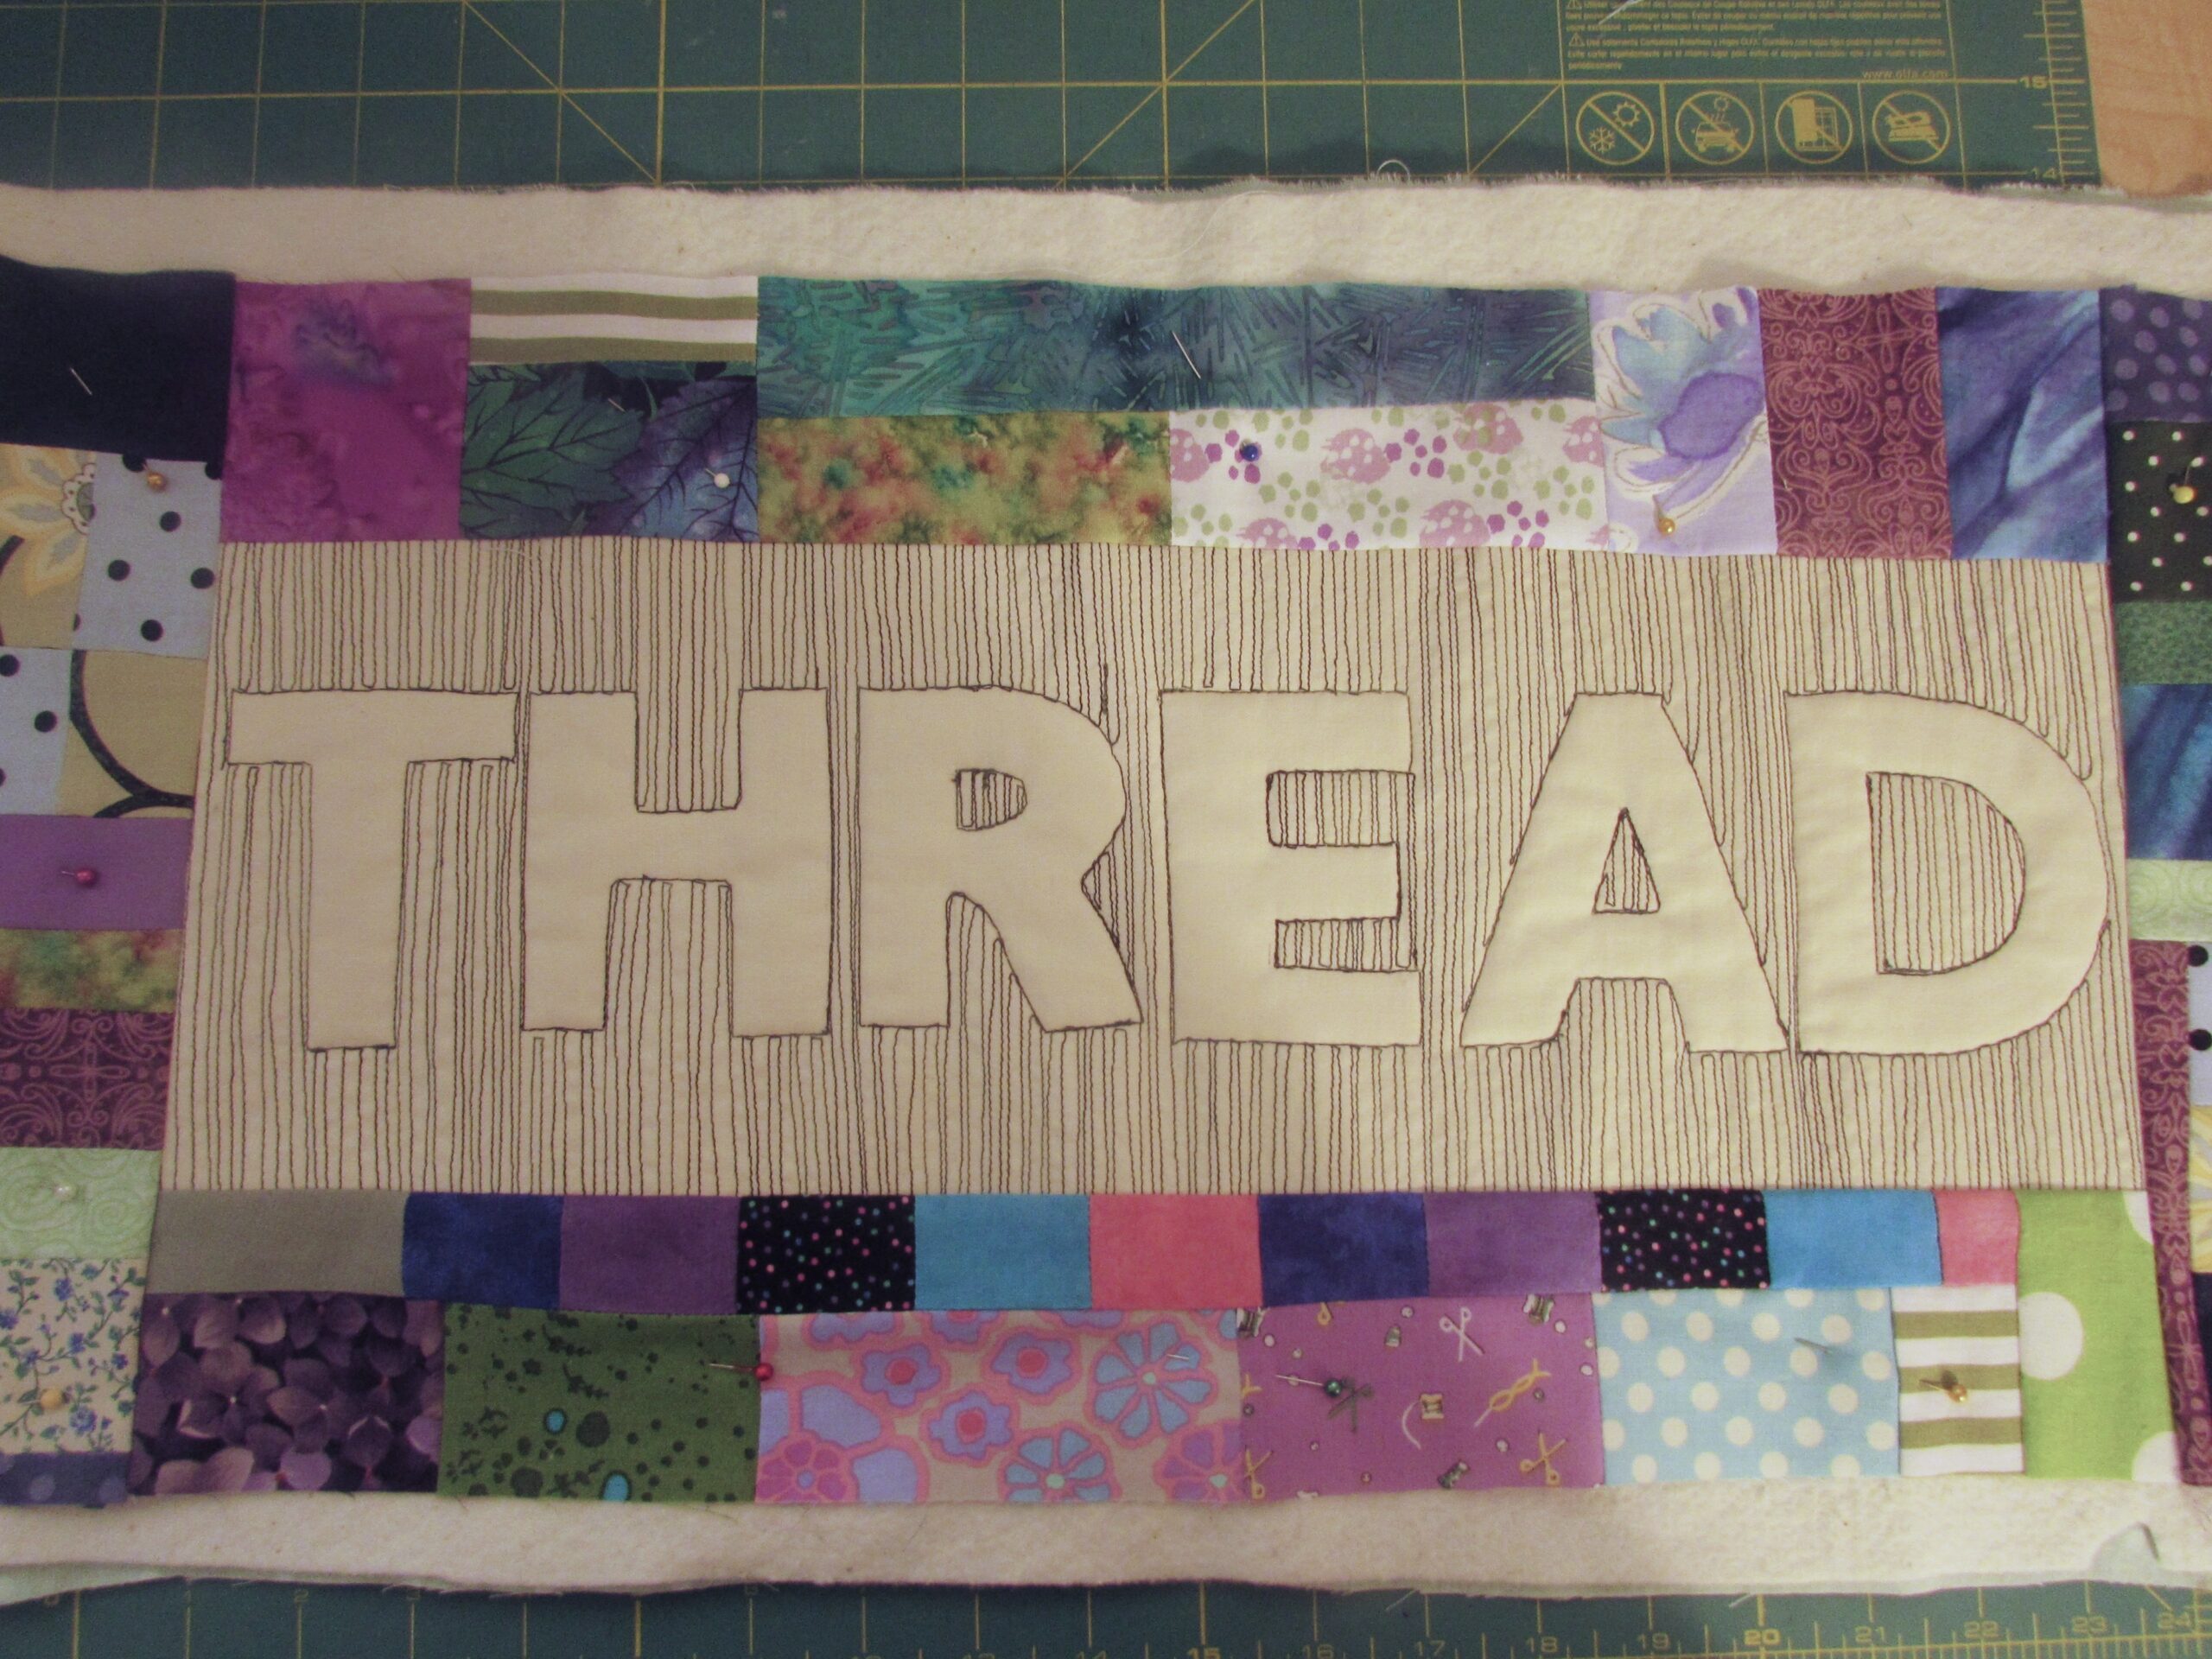
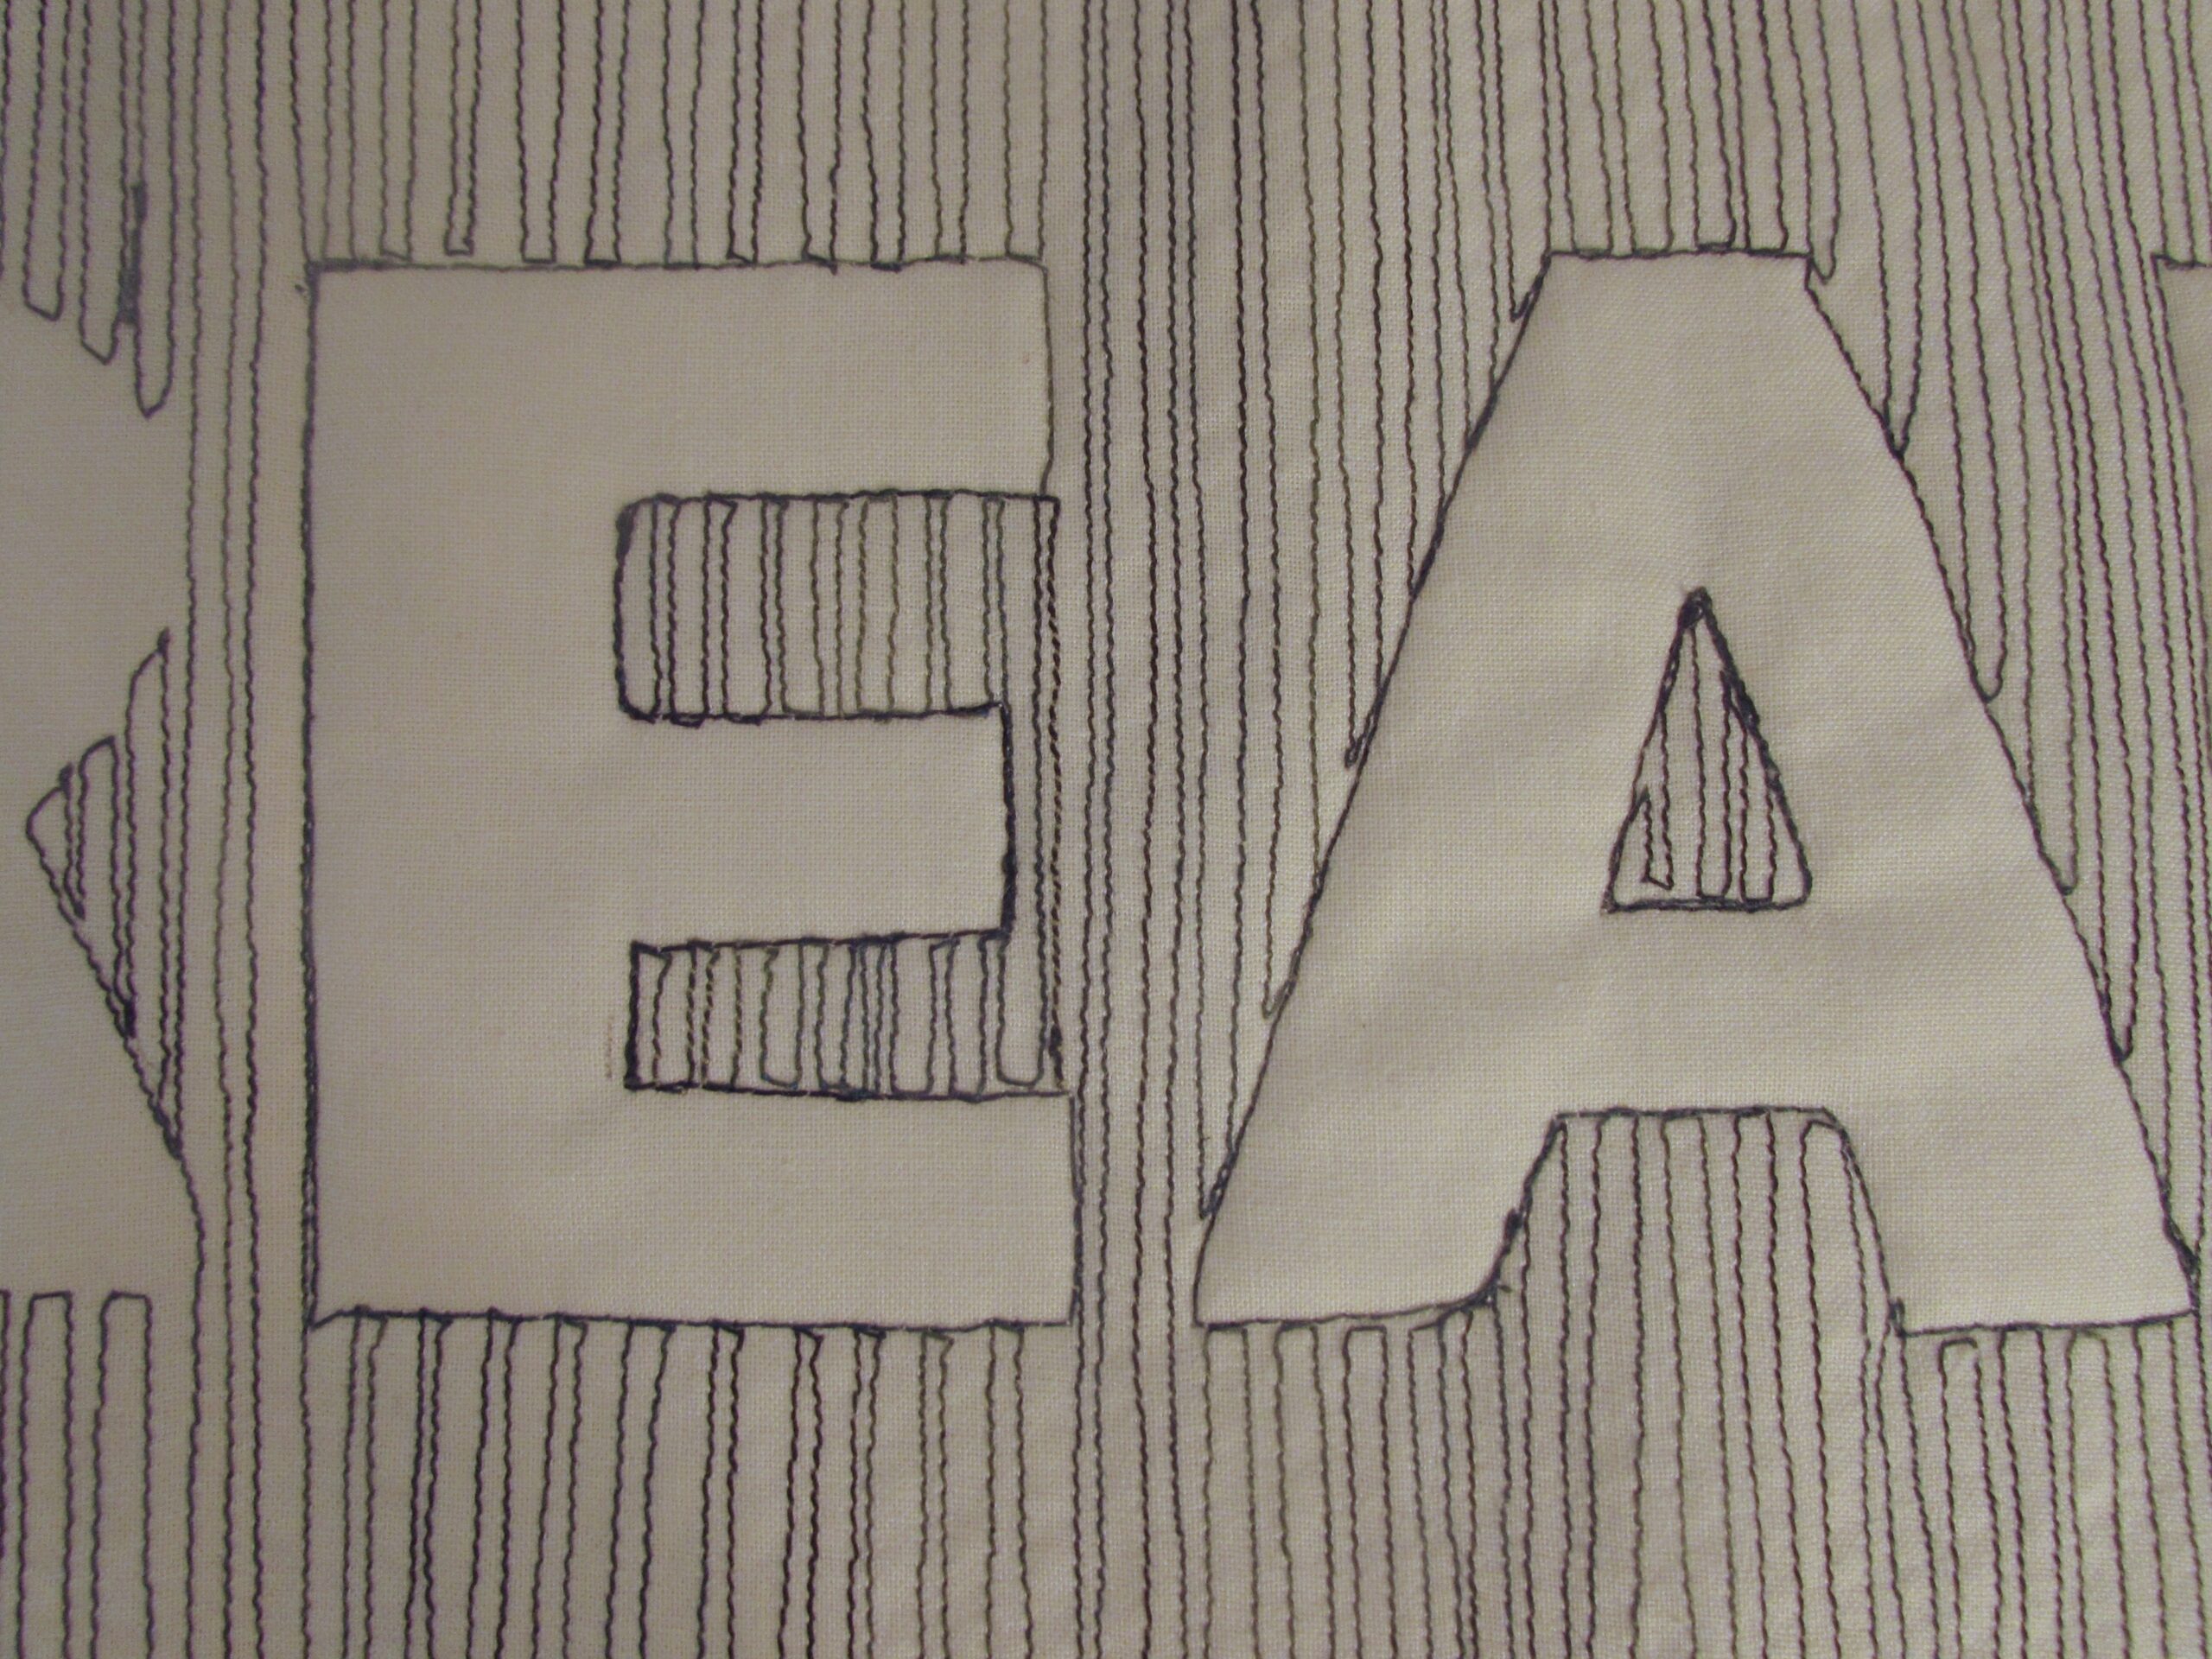
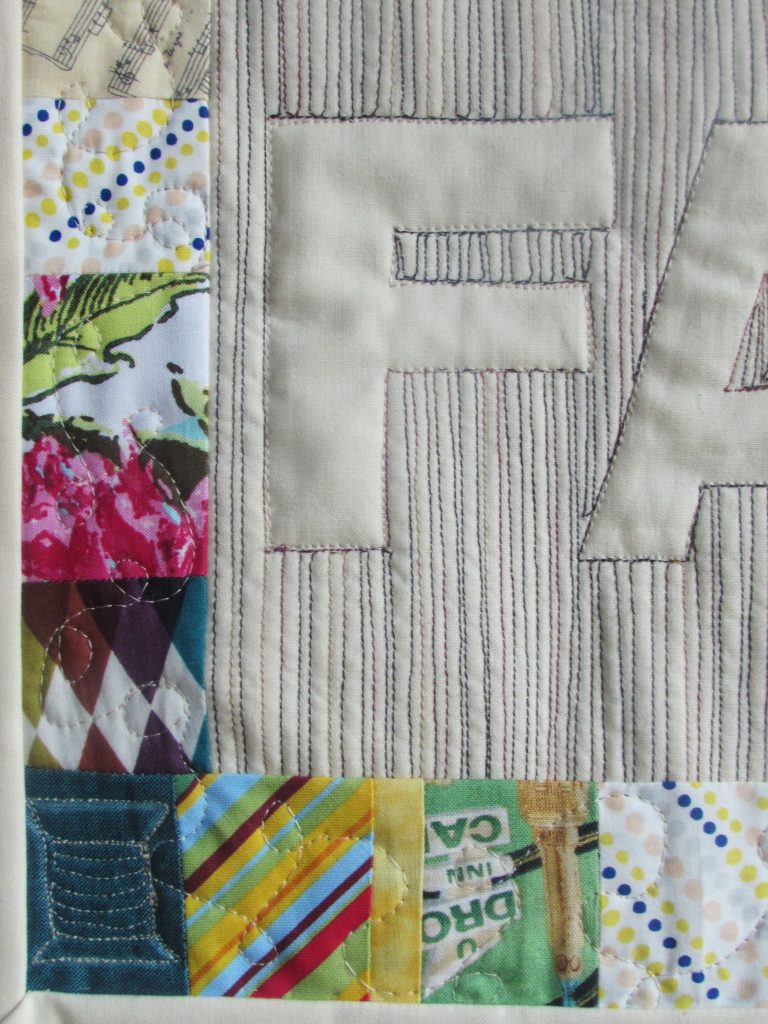
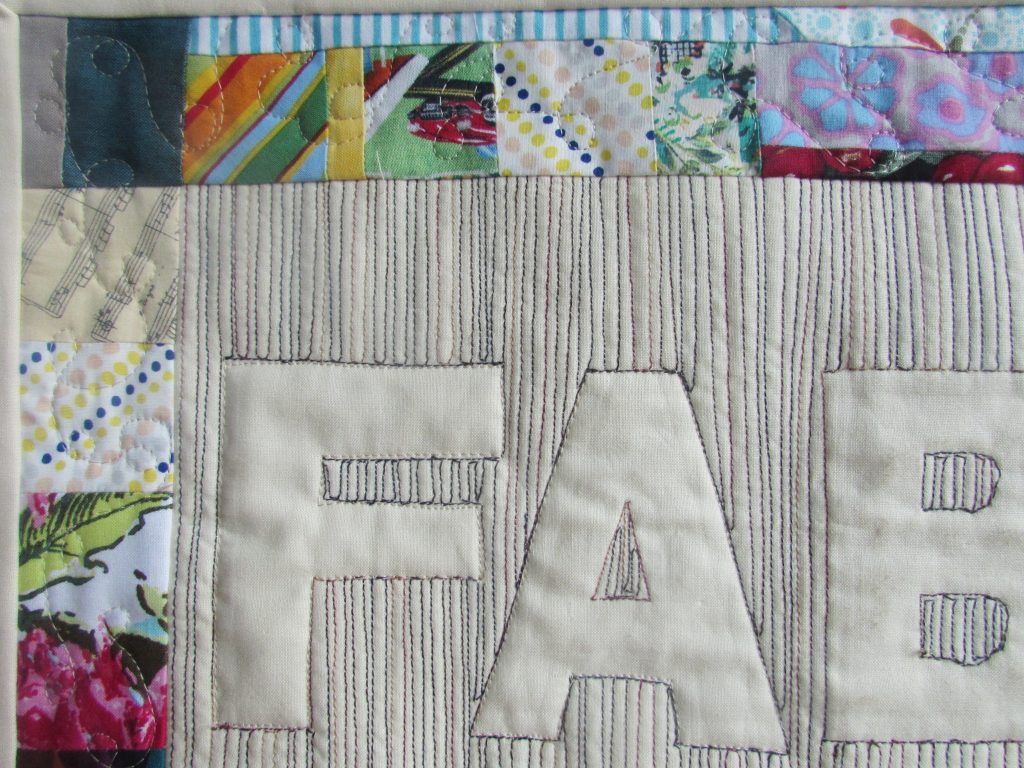
Using a walking foot, begin stitching long straight rows above, below and between the letters. I didn’t stitch the outline of the letters. This happens later on when you are quilting everything together. For now, just fill in every bit of space above, below and between each letter. You might choose to use a free motion foot for the little openings within a letter (e.g. the A and the D) so you don’t have to start and stop, twisting the fabric. I kept working with the walking foot because the block is small and easily rotates. Each time I came to the botton or top and needed to move to the next line, I very slowly stitched one stitch over, sometimes doing so by manually turning the wheel on the machine so I moved just one stitch. This kept my rows extremely close together. If you have a needle down function, this helps. Just go one stitch and let the needle stay down while you turn the piece. Now and then, the width looked to wide to me and I would back up and fill in with another line of stitching. Remember you will be viewing this from a distance and it looks much better that way. While stitching, you are looking at it from 6-8″ away and you’ll see every wobble. Not a problem. You are going for the overall effect.

IMG_7186

See how the word starts to come to life? I love that! Now keep on stitching!IMG_7206

Making good progress here.  The word is complete and it is time to begin working on your border.

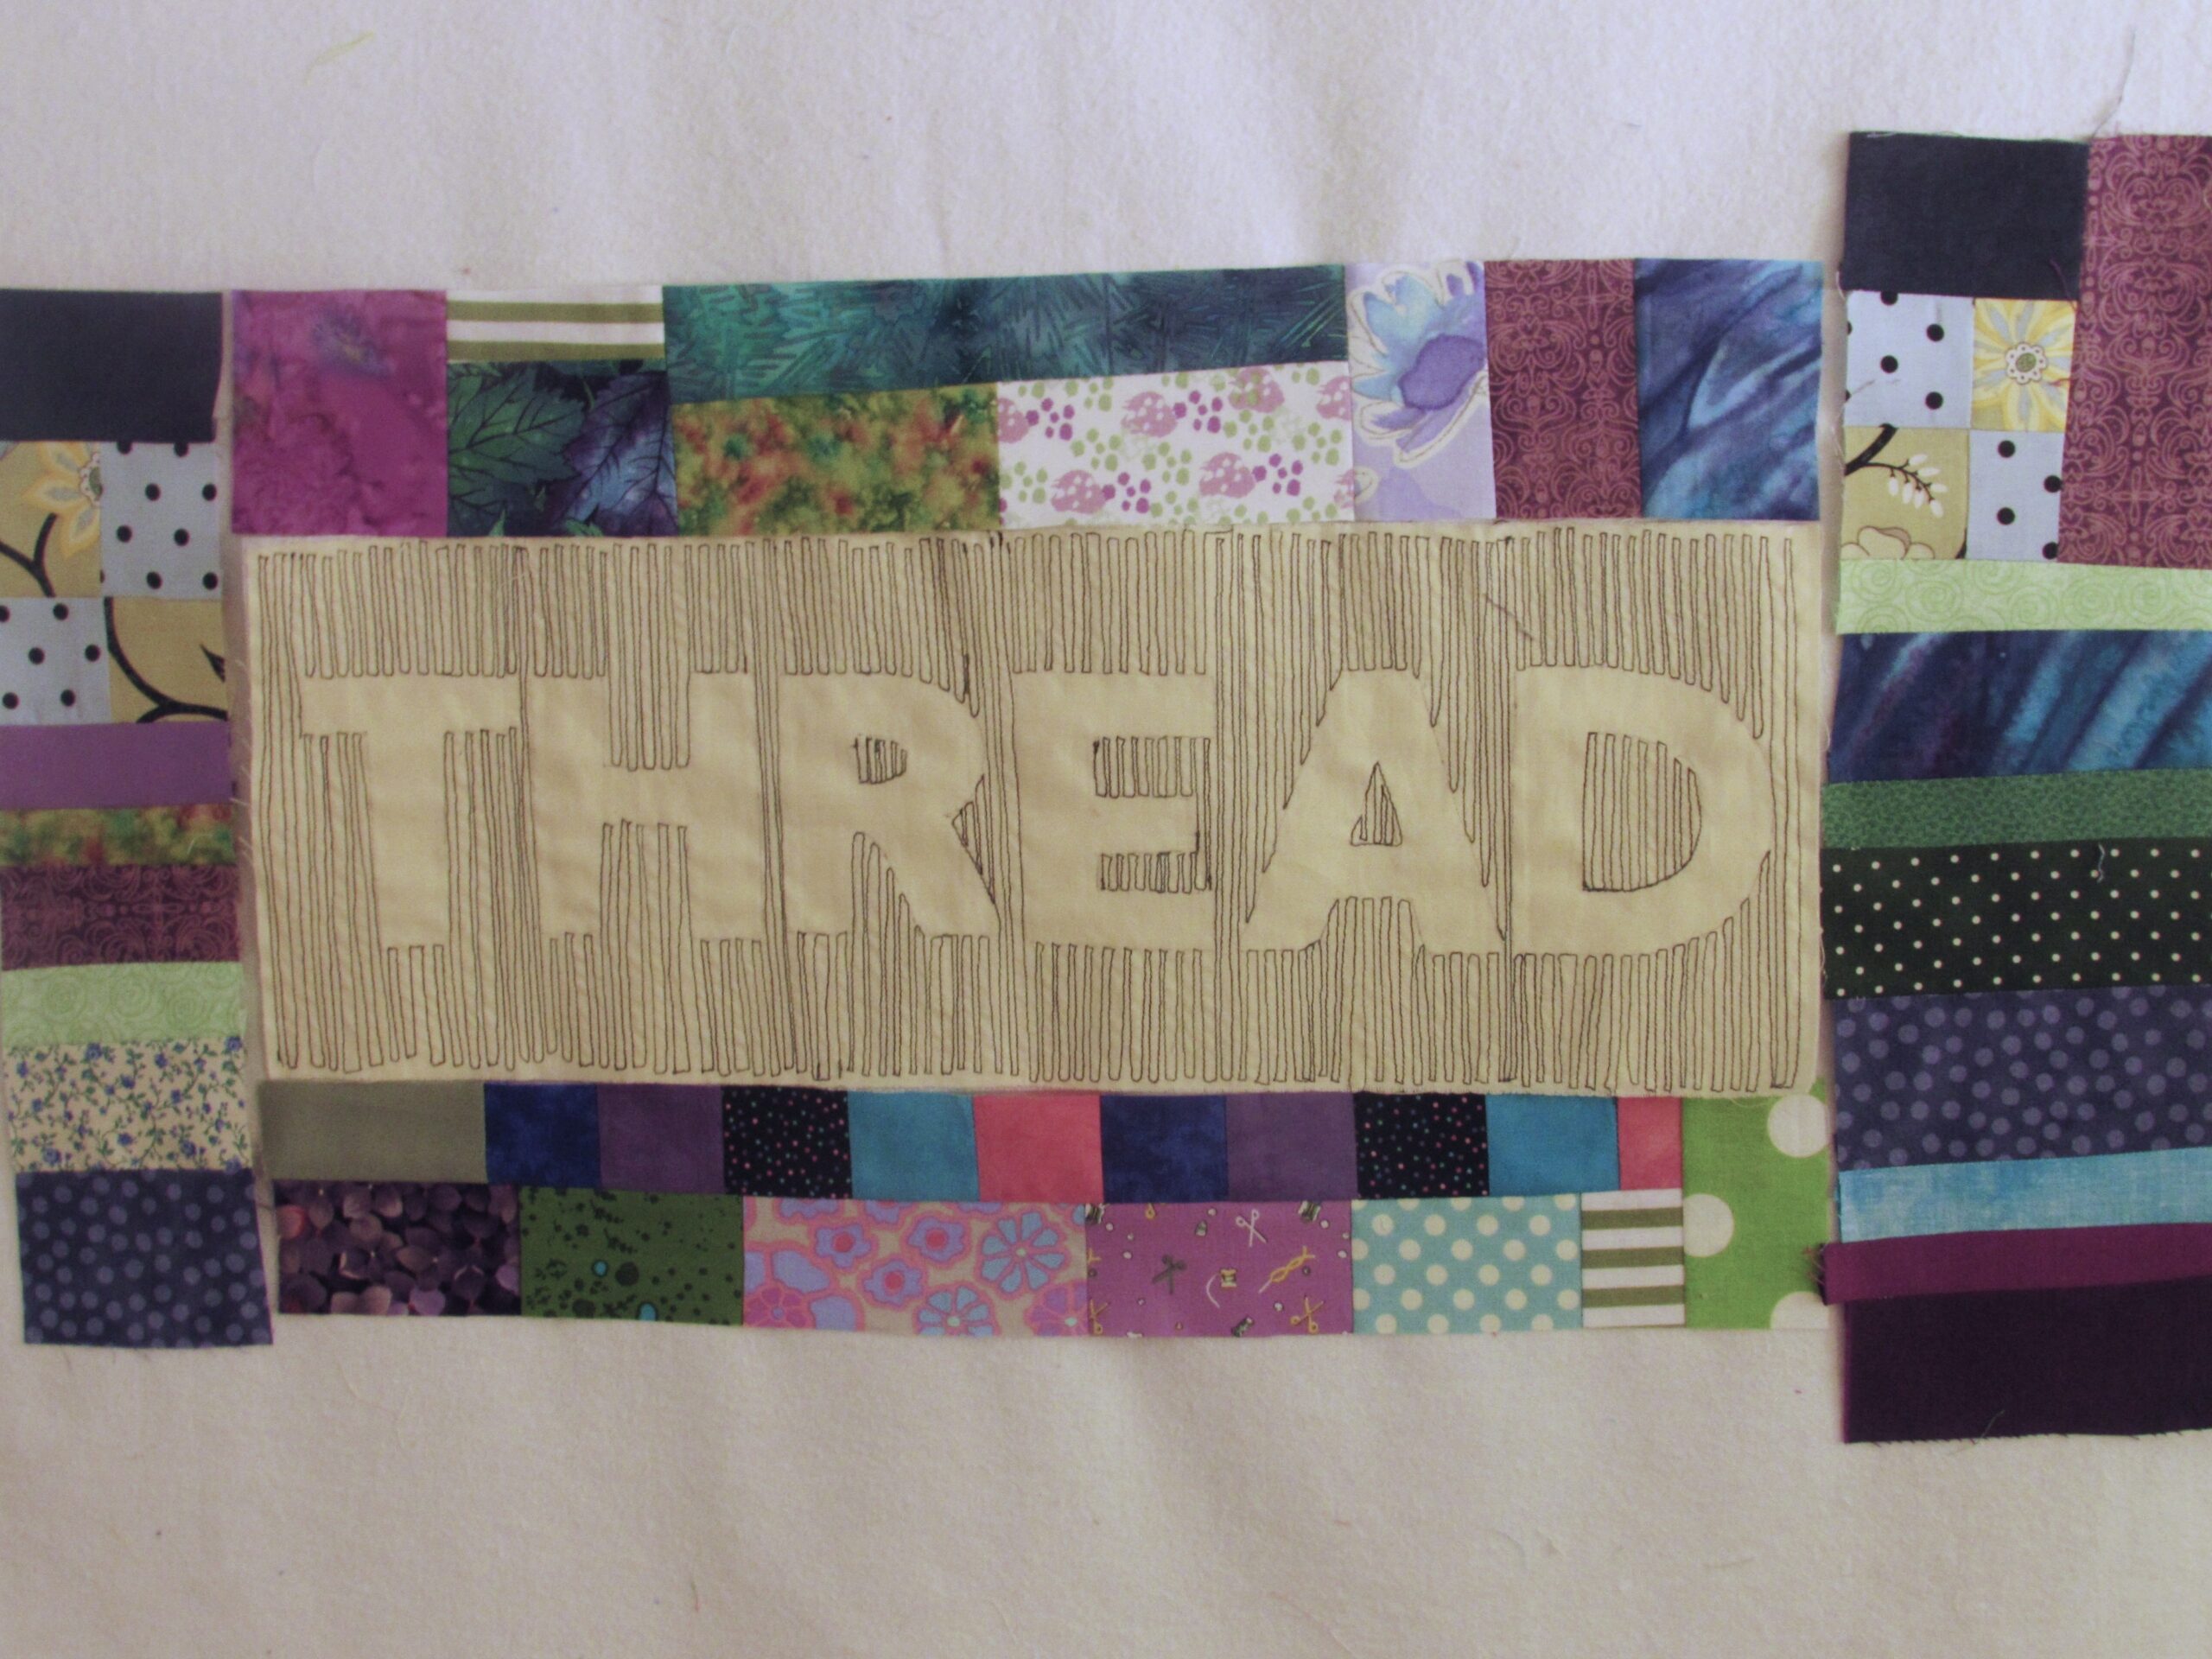
I made an improv border by taking squares and rectangles in my color scheme (basically greens, purples and blues) and built four pieces, two for the ends and two for the top and bottom. I didn’t worry about size too much. I made them a bit longer than the side I wanted to sew them to and since I wanted to have them trim out to 3 inches, I made sure the whole thing measured wider than 3 inches.  Note:  If you are not comfortable with this scrappy improv process, I recommend grabbing a copy of 15 Minutes of Play by Victoria Findlay Wolfe at your library. She does an excellent job of guiding you through.  Alternatively, Amanda Jean Nyberg at Crazy Mom Quilts did a Quiltalong last summer called Scrap Vortex. In this post, she talks about building with scraps. It might be of help to you.

After playing with them on the design wall, I trimmed each to a width of 3″. I sewed the top and bottom borders on first and then added each side.

The next step is to make a quilt sandwich with your top, the batting and your backing fabric. I pieced the batting from scraps I had. Just pin it around the border tightly since you are going to quilt in the center first. My batting was just barely bigger than the top but since it was such a small piece I felt ok with that. Normally I use batting that is a good two inches larger than the top all the way around.

Continue to use your walking foot and slowly stitch around each letter. It is a bit like connecting the dots as you want to trace over the place where you stitched over to the next line. Just move slowly and turn frequently (with your needle down while turning) when stitching over a curve.

I love the way the letters come to life when quilted to the batting.  Next I moved on to the border. I love the little spools of thread that I quilted on the first piece and carried them through to this piece as well. Considering the thread theme of this project, it worked well.

IMG_7287

With each spool, I filled in the top and bottom so they would show up a bit better. If you like this idea, take a look at this tutorial of Lori Kennedy’s over at the Inbox Jaunt.

IMG_7286

The spools are whimsical and they add a bit of movement to the quilting as the ‘thread’ flows off each spool.

Once you complete the quilting, trim, square and bind. Finished!

IMG_7298

Isn’t this adorable?????

IMG_7289

And both of them together?? All kinds of cuteness. What fun (and easy) projects both of these were. I have the sleeve sewn on to FABRIC but still need to make a sleeve for THREAD. They will be on the wall soon. I’ll post a picture next week.

I hope my explanation is helpful. If you make one, let me know. I would love to see it!

I’ll be linking to the usuals which can be found at the top of the page, under Link Ups.

Relief Quilting – Learning Something New

I have been remiss in posting lately. It has been really hectic and I haven’t had time to sit with my laptop. What little free time there was, I spent in front of the sewing machine. A girl’s got her priorities, right? As summer came to a close, Julia had the typical teenager desire to pack as much as she could into those last few days. That is fine – she will soon be a slave to homework and won’t have a lot of free time. There were movies to see, shopping to do, and friends to hang out with. School started Wednesday and so another year begins.

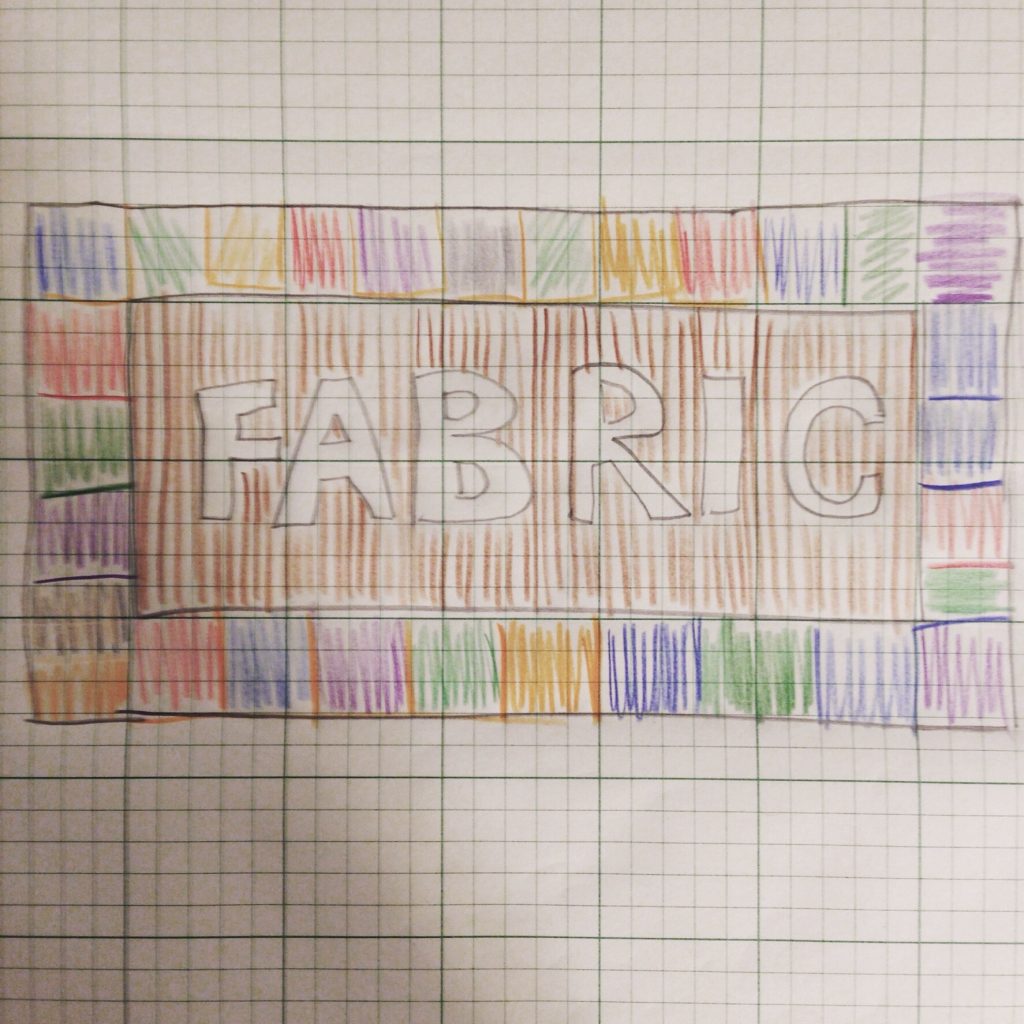
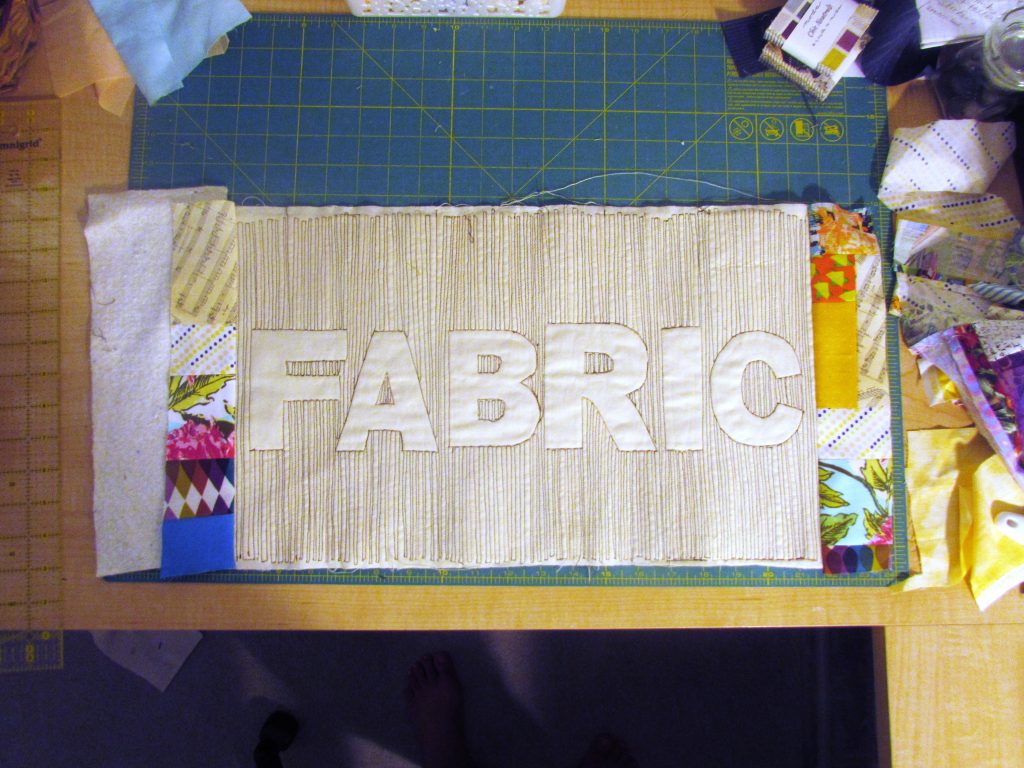
When it is busy I like to have a simple project to work on during those 15 minutes of sewing time that present themselves now and then. I have been wanting to try relief quilting for quite a while now. Over a year ago, I read a cute post over at Night Quilter where Kitty explained her process of relief quilting a name on a baby quilt. I love the look and have been planning to give it a try. I pulled out some graph paper and fabric scraps and got started.

image

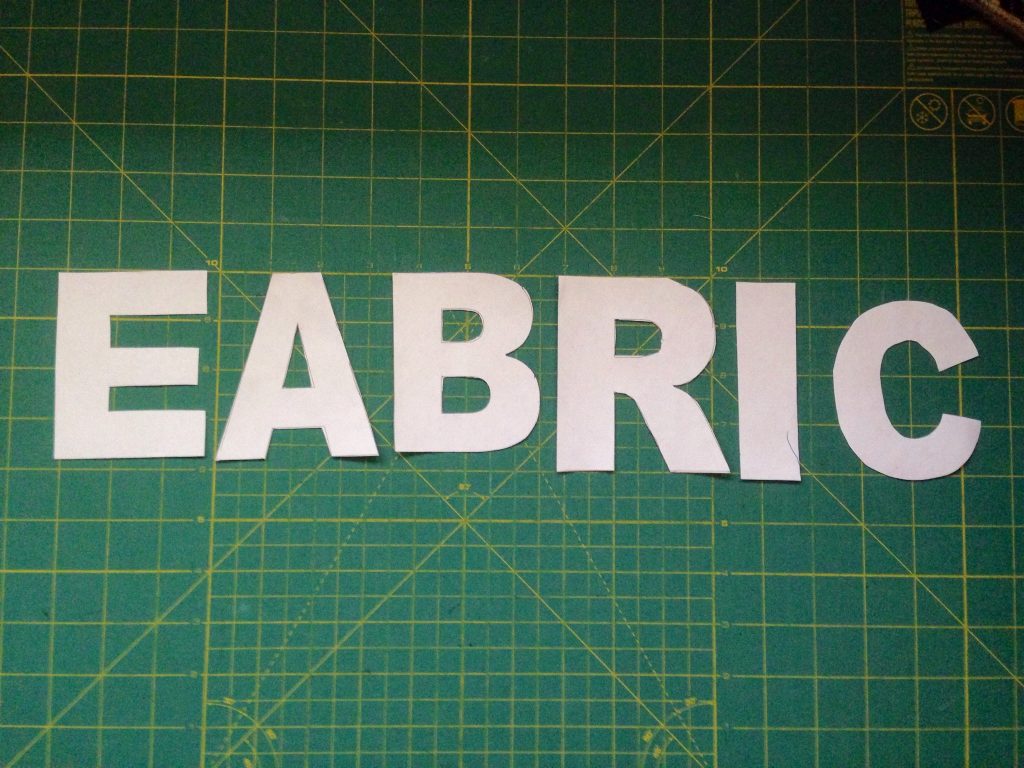
After creating this incredibly inspiring sketch of the project that was floating in my head, I brought out some alphabet stencils that I have. I don’t have the whole alphabet but it was enough to get going. I used the E in place of the F. For some reason, the R was a bit bigger than the rest. I think there are multiple sets in the zip-lok bag and these letters weren’t really from the same set.

image

Next I found a rectangular scrap of some Kona cotton and traced the letters, centering them as best I could. I didn’t measure this at all. I used a Frixion pen to trace them. I am not a huge fan of Frixion pens for marking but I figured this was just a practice piece so I wasn’t too worried about the final result. Isn’t there something totally freeing about working on a practice piece? Knowing it isn’t going to be your best work and it doesn’t have to be spot on allows one to sit down and have fun. No pressure.

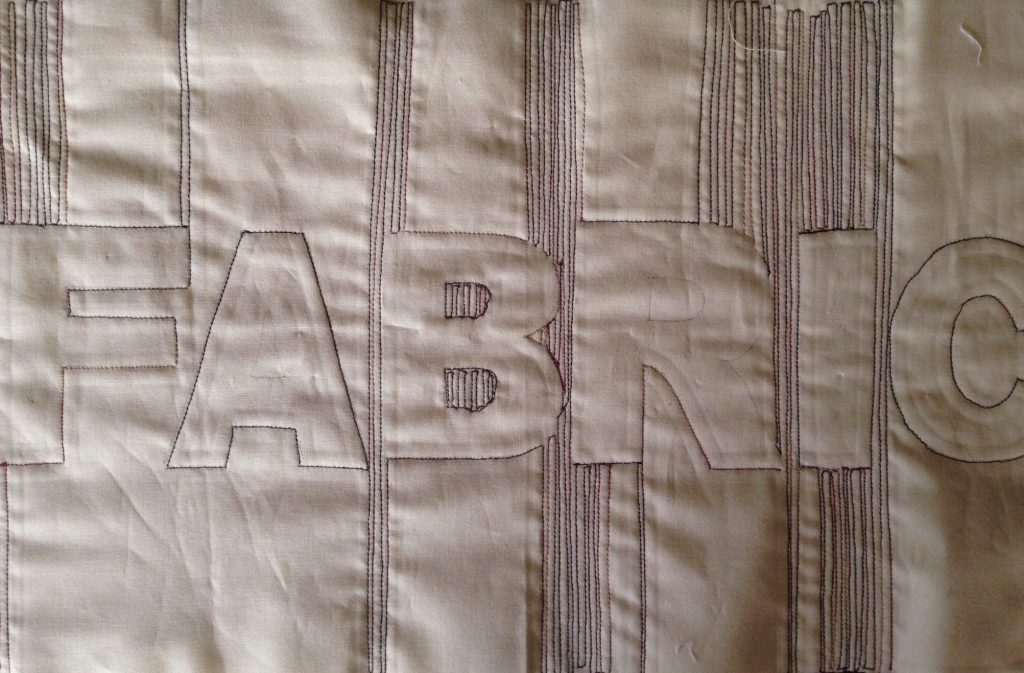
I placed the fabric on top of the batting (which was a large piece that I had created with batting scrap). Using a walking foot, I started to fill in the areas around the letters I had traced. I used tight, straight-line quilting. Without a real plan, I was sort of all over the place – just filling in areas.

image

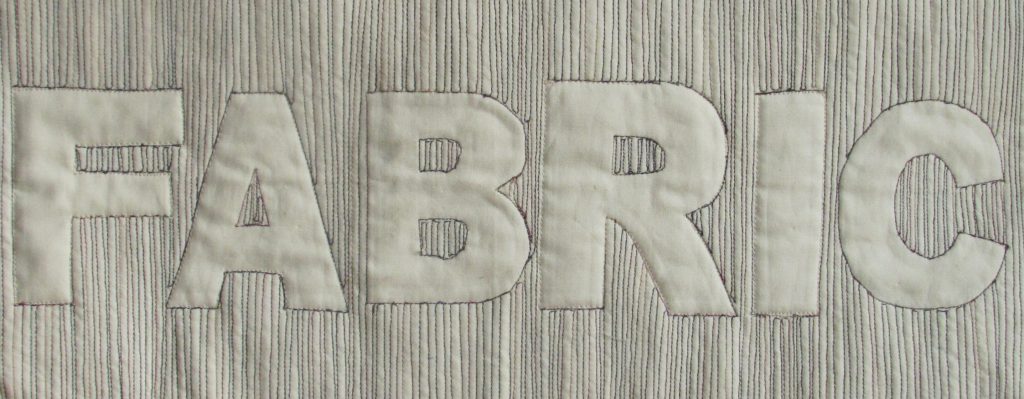
In retrospect, I see that I didn’t need to stitch as wide a swath above and below the letters. With my next attempt, I will plan a bit further and decide how far I really need to stitch. I wasted quite a bit of thread with the extra quilting. I used a variegated YLI thread which provided a nice bold look. The more I use YLI thread, the more I love it. The texture is provides is just wonderful.

When the quilting was done I was just thrilled with the look, even with the slightly oversized R!  😉

IMG_7166

When I first sketched the project out, I planned to use a stack of 2 1/2″ squares that I have collected to make a border for this. Once I got to this point though, I changed my mind. This guy was calling out for a scrappy, improv border. With my bin of bright, multicolored scraps, I began piecing bits together with only a rough idea of what I wanted the result to be. For the borders I created two large improv pieces that were both more than five inches wide. Then I sliced each in half lengthwise, creating 4 strips measuring 2 1/2″ wide.

IMG_7155

I laid them, right sides together, on both sides and stitched the border on. It was a bit of a Quilt as You Go project, since I was just sewing right on top of the base fabric and the batting. The bottom borders were stitched a few inches below and above the lettering. (This is where it became very clear that I didn’t need to quilt as high and low as I had done.)

Borders on and pressed, all that was left was to make baste the top to a backing and quilt it. I thought it would be cute to FMQ a spool of thread in one corner and then have the “thread” spooling off of it, looping along the borders.

IMG_7167

After creating that little spool, I wished I had used a solid fabric on each corner so I could place spools on all four of them. I did put one on another corner but it doesn’t show up very well with the print fabric. The overall look is cute though, isn’t it?

IMG_7169I love all the bits of different fabric that surround this piece. They bring back a little memory of whatever project they were originally used in. A piece of green dotted fabric was used for the backing (I think I got it out of the remnant bin at Jo-Ann’s) and I bound it with the same Kona that is in the center.

IMG_7165

As always, I would do a few things differently the next time I made this sort of project.  If I were doing this sort of thing as a part of a larger quilt, I would fuse stabilizer behind the solid fabric and do the relief quilting over just the fabric (sans batting). Then I would incorporate the block into the larger project. Once I was quilting the larger project, I would use a walking foot to outline the letters (to quilt the block down).

I need to make a sleeve for it and then I will hang it above my sewing machine. This was great fun and I am really pleased with the result. I encourage you to give it a try. Let me know if you have any questions or check out Kitty’s tutorial.

Linking up all over the place – for details, look at the top of the page, under Link Ups.
Copy of 1200x627_handmade-holiday_sew

Weekends are the time to shop Craftsy. This weekend they are having a Black Friday “When You Need It” sale on kits and supplies. If you are hoping to make handmade gifts in time for the holidays, it is a good time to make a plan and stock up. I love the kits at Craftsy – the fabric is often a huge bargain and no one will know if you use that fabric for a different purpose. I am loving this Benartex quilt kit – 100 charms and 3 yards of fabric?  Another one is the Eclipse kit,  which uses the Allison Glass Sunprints line. There are almost 18 yards of fabric included and the pattern is gorgeous.

blowout sale

If fabric isn’t your thing this weekend, there is also a great sale on books over at C&T. They are having a $5.00 Blowout Sale and many great quilting titles are on sale. I love C&T – they are the publishers of so many of our favorite quilty books. Check it out! Sale runs through the end of day on Sunday, August 21st.

(This post contains affiliate links.)