Category Archives: RSC Challenge

Not a lot of sewing going on

I haven’t spent a whole lot of time at the sewing machine this week. Lots of regular life going on and my neck was being sort of cranky. But that’s ok. I did get a few odds and ends done.

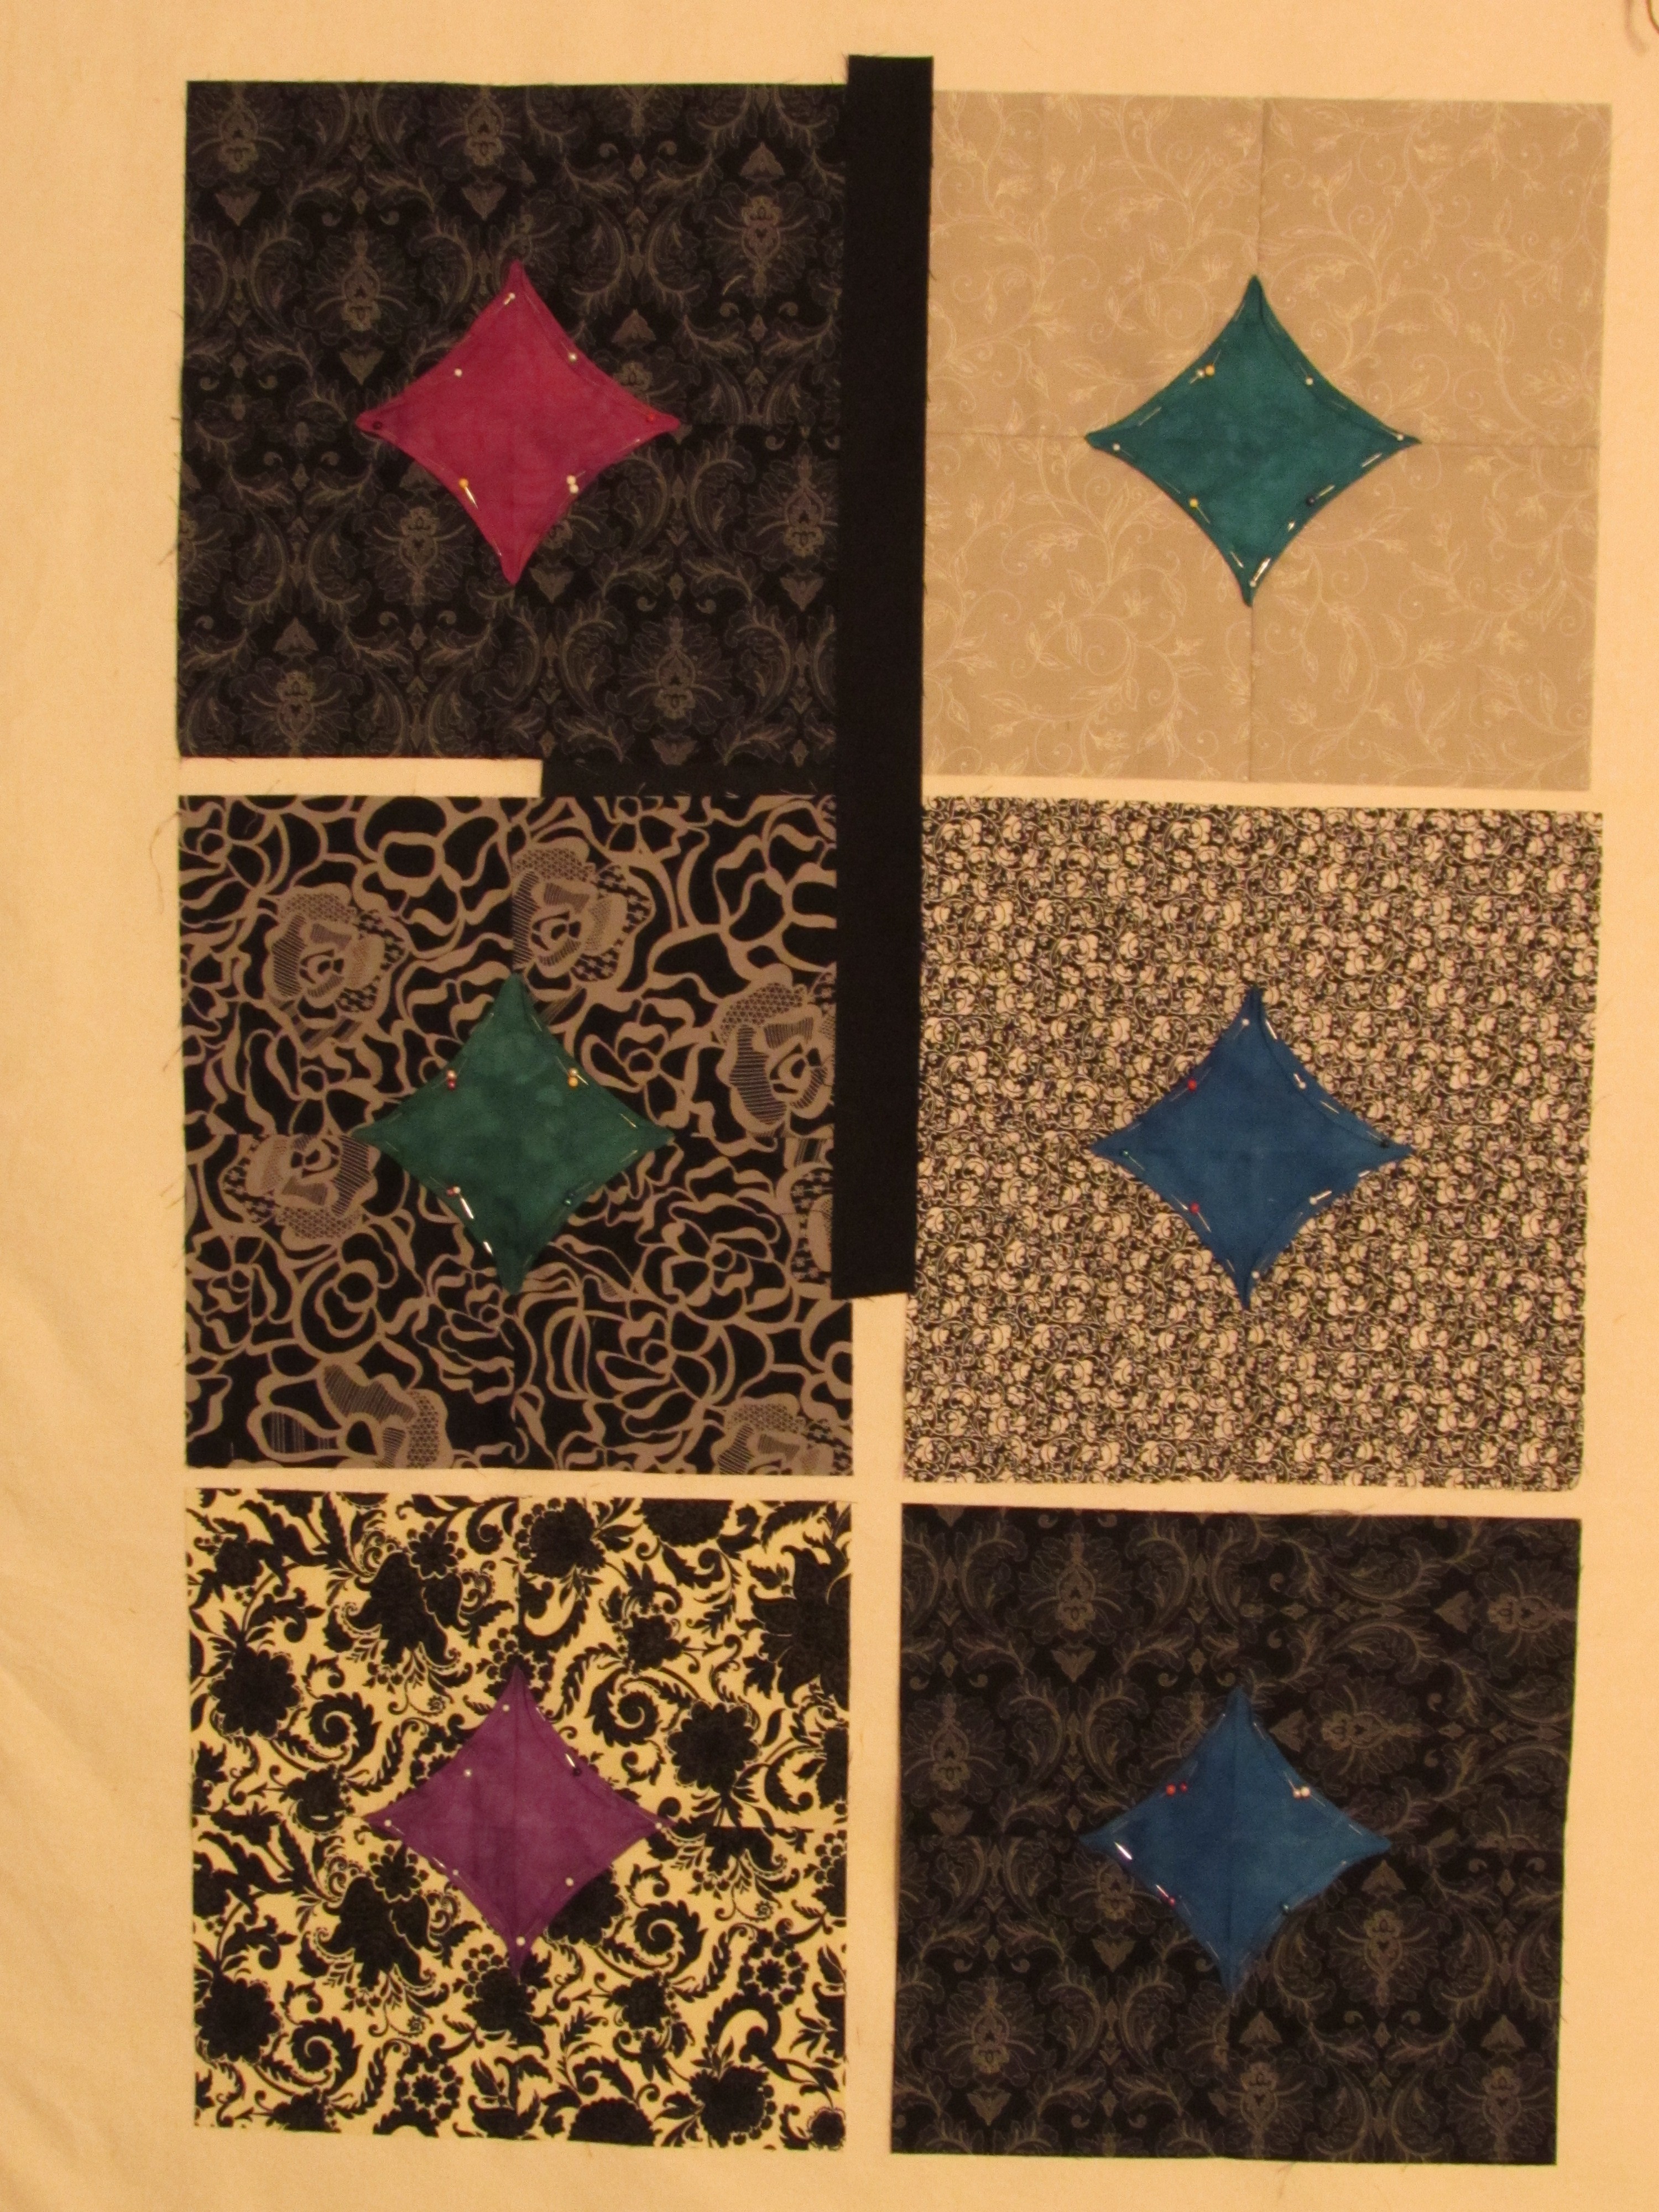
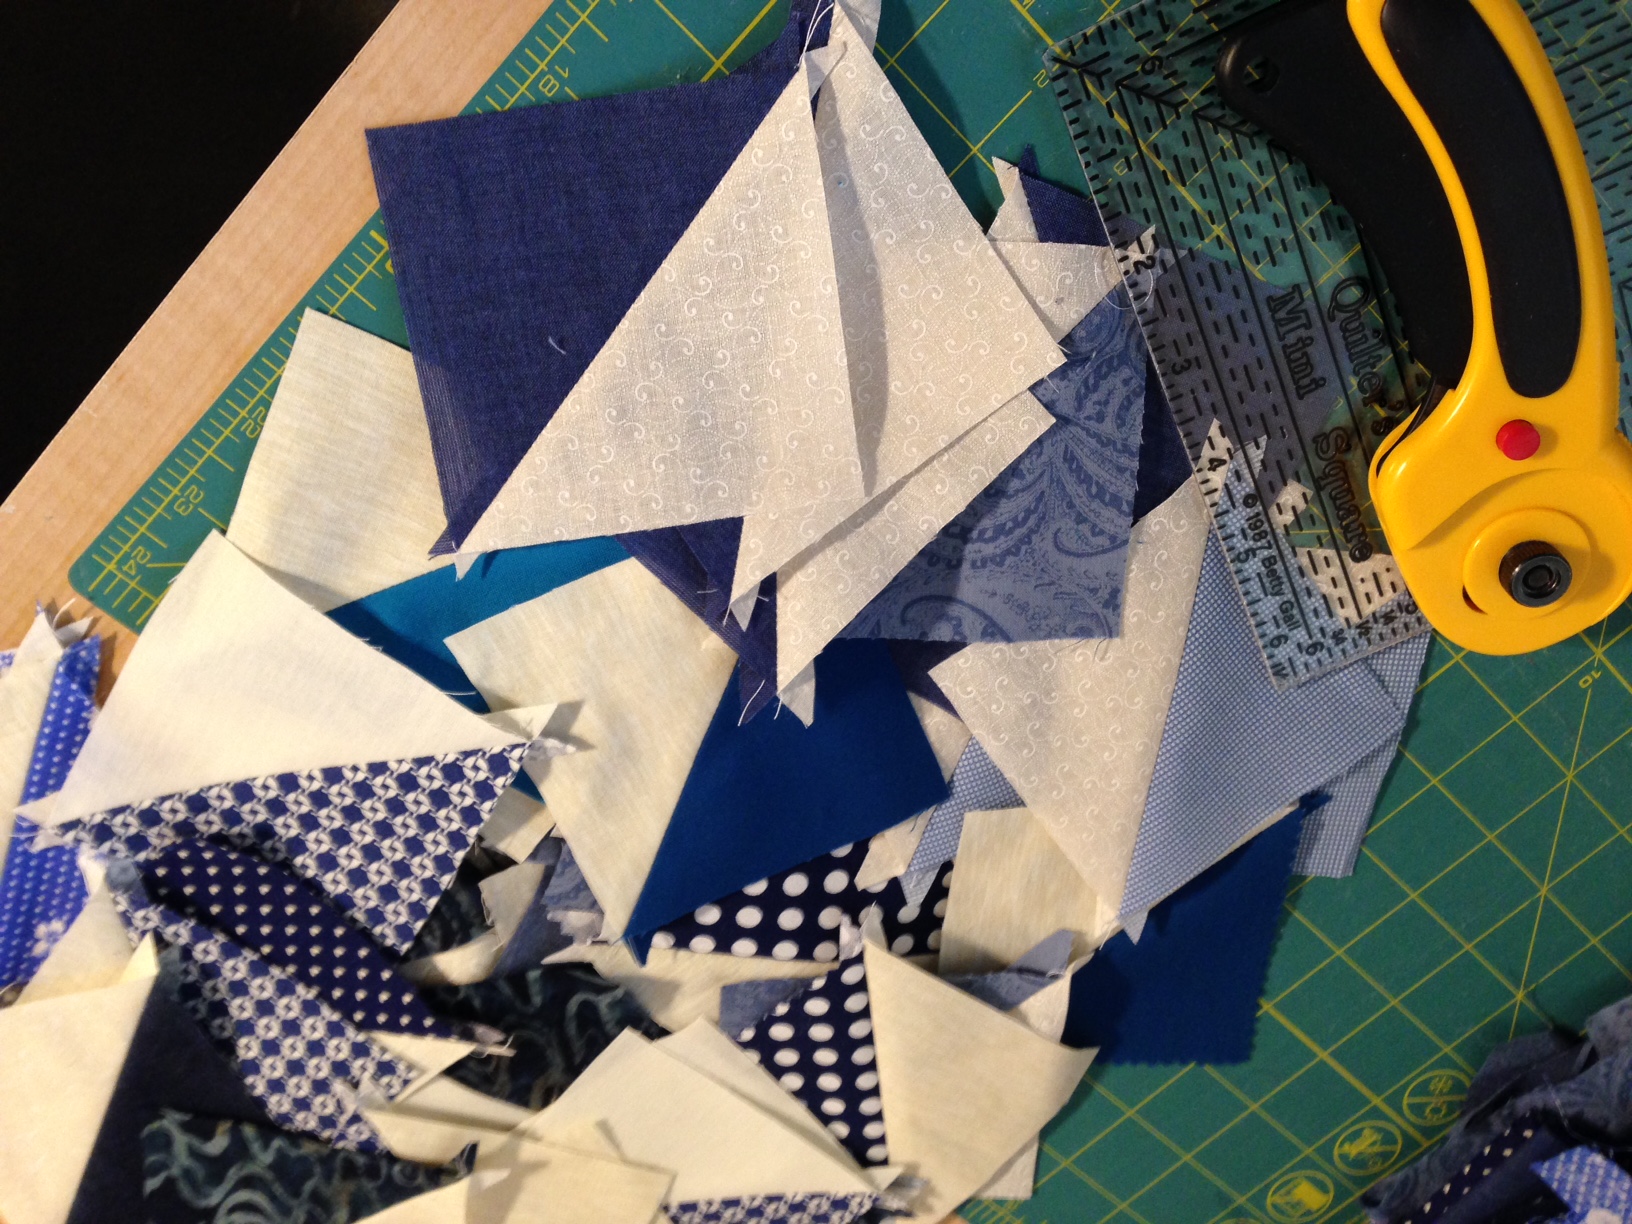
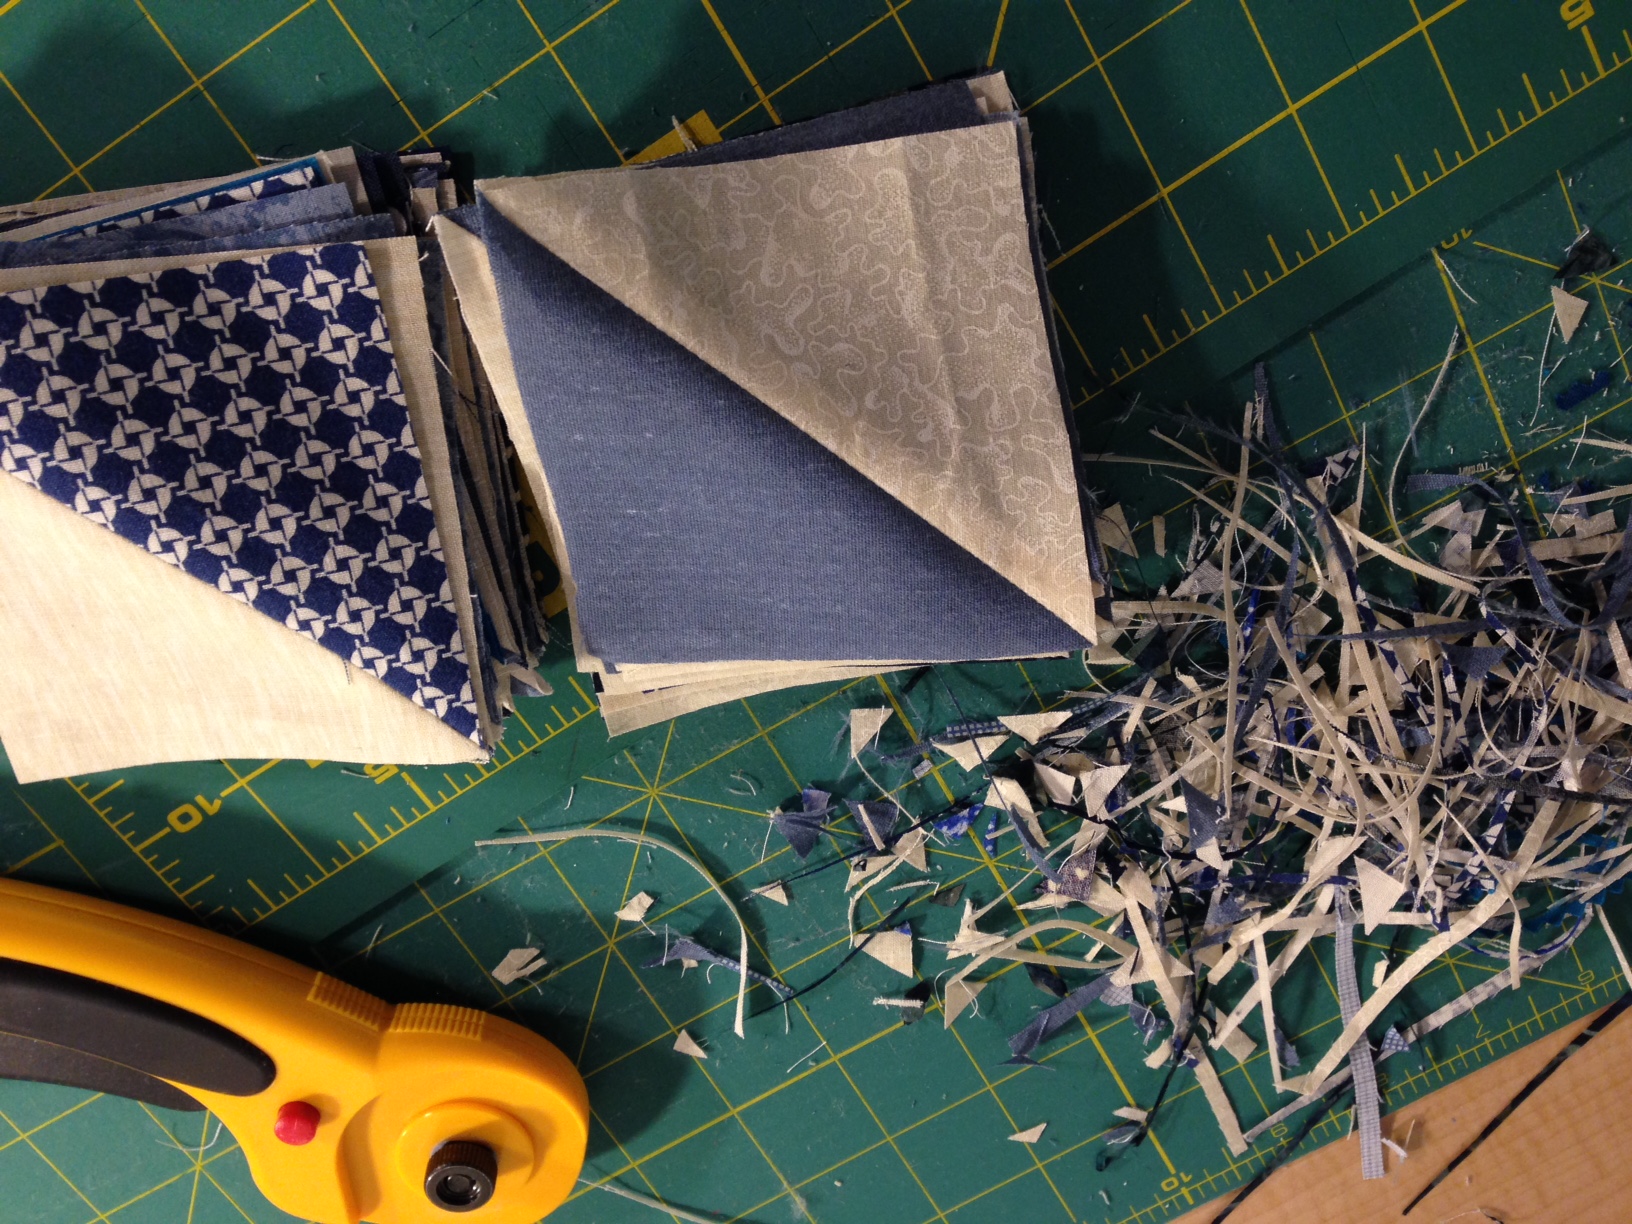
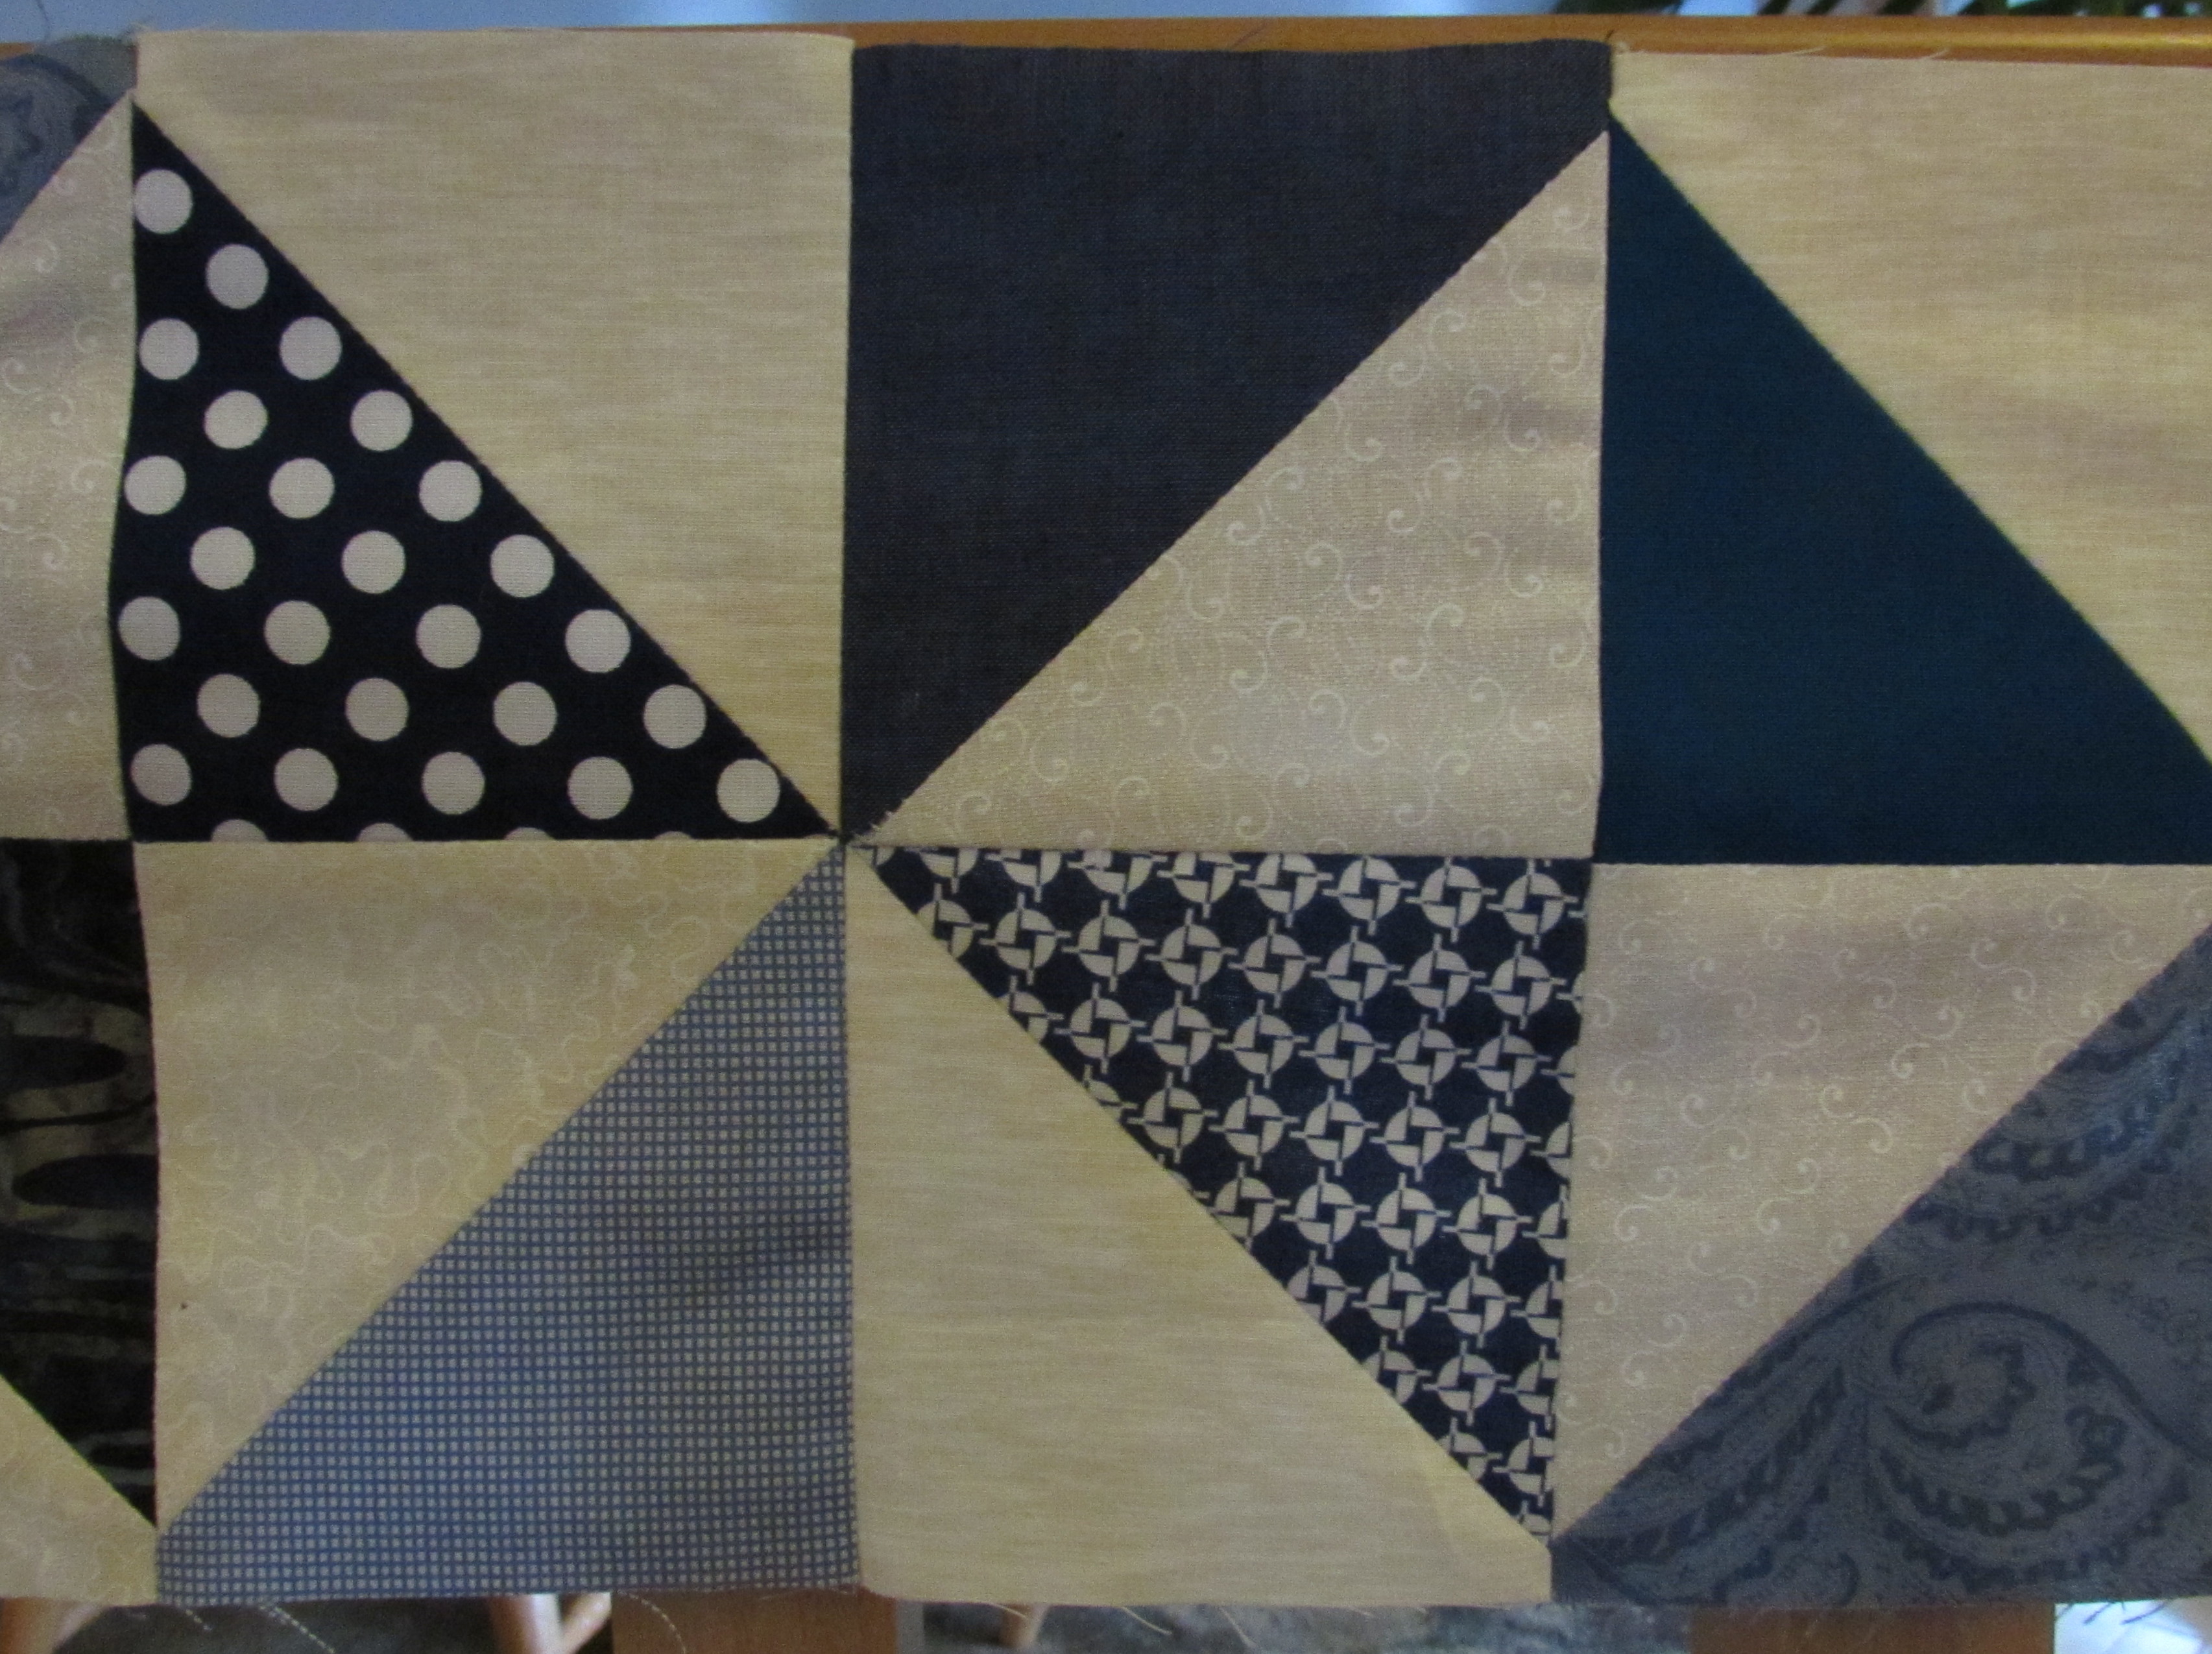
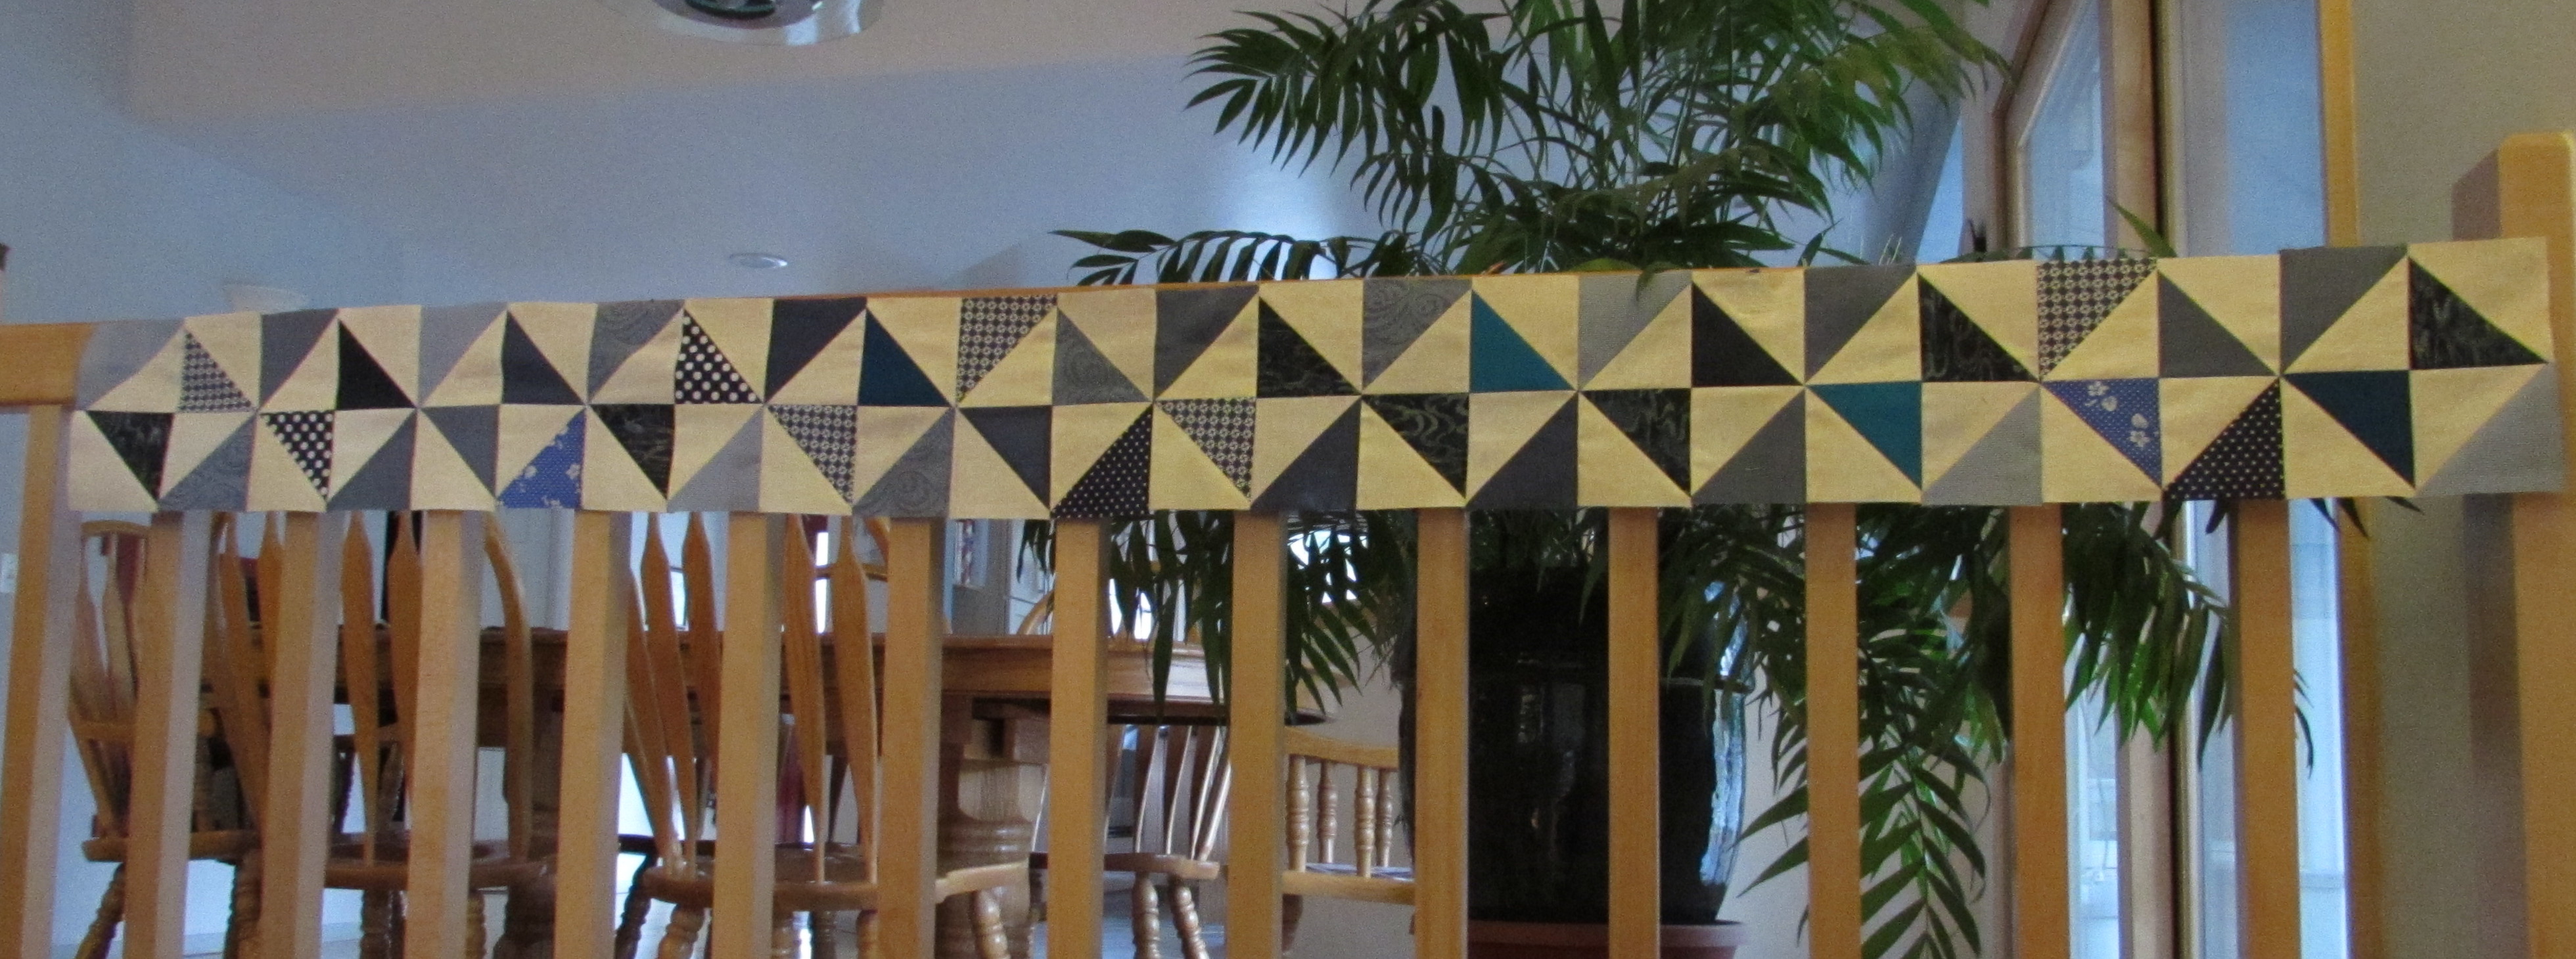
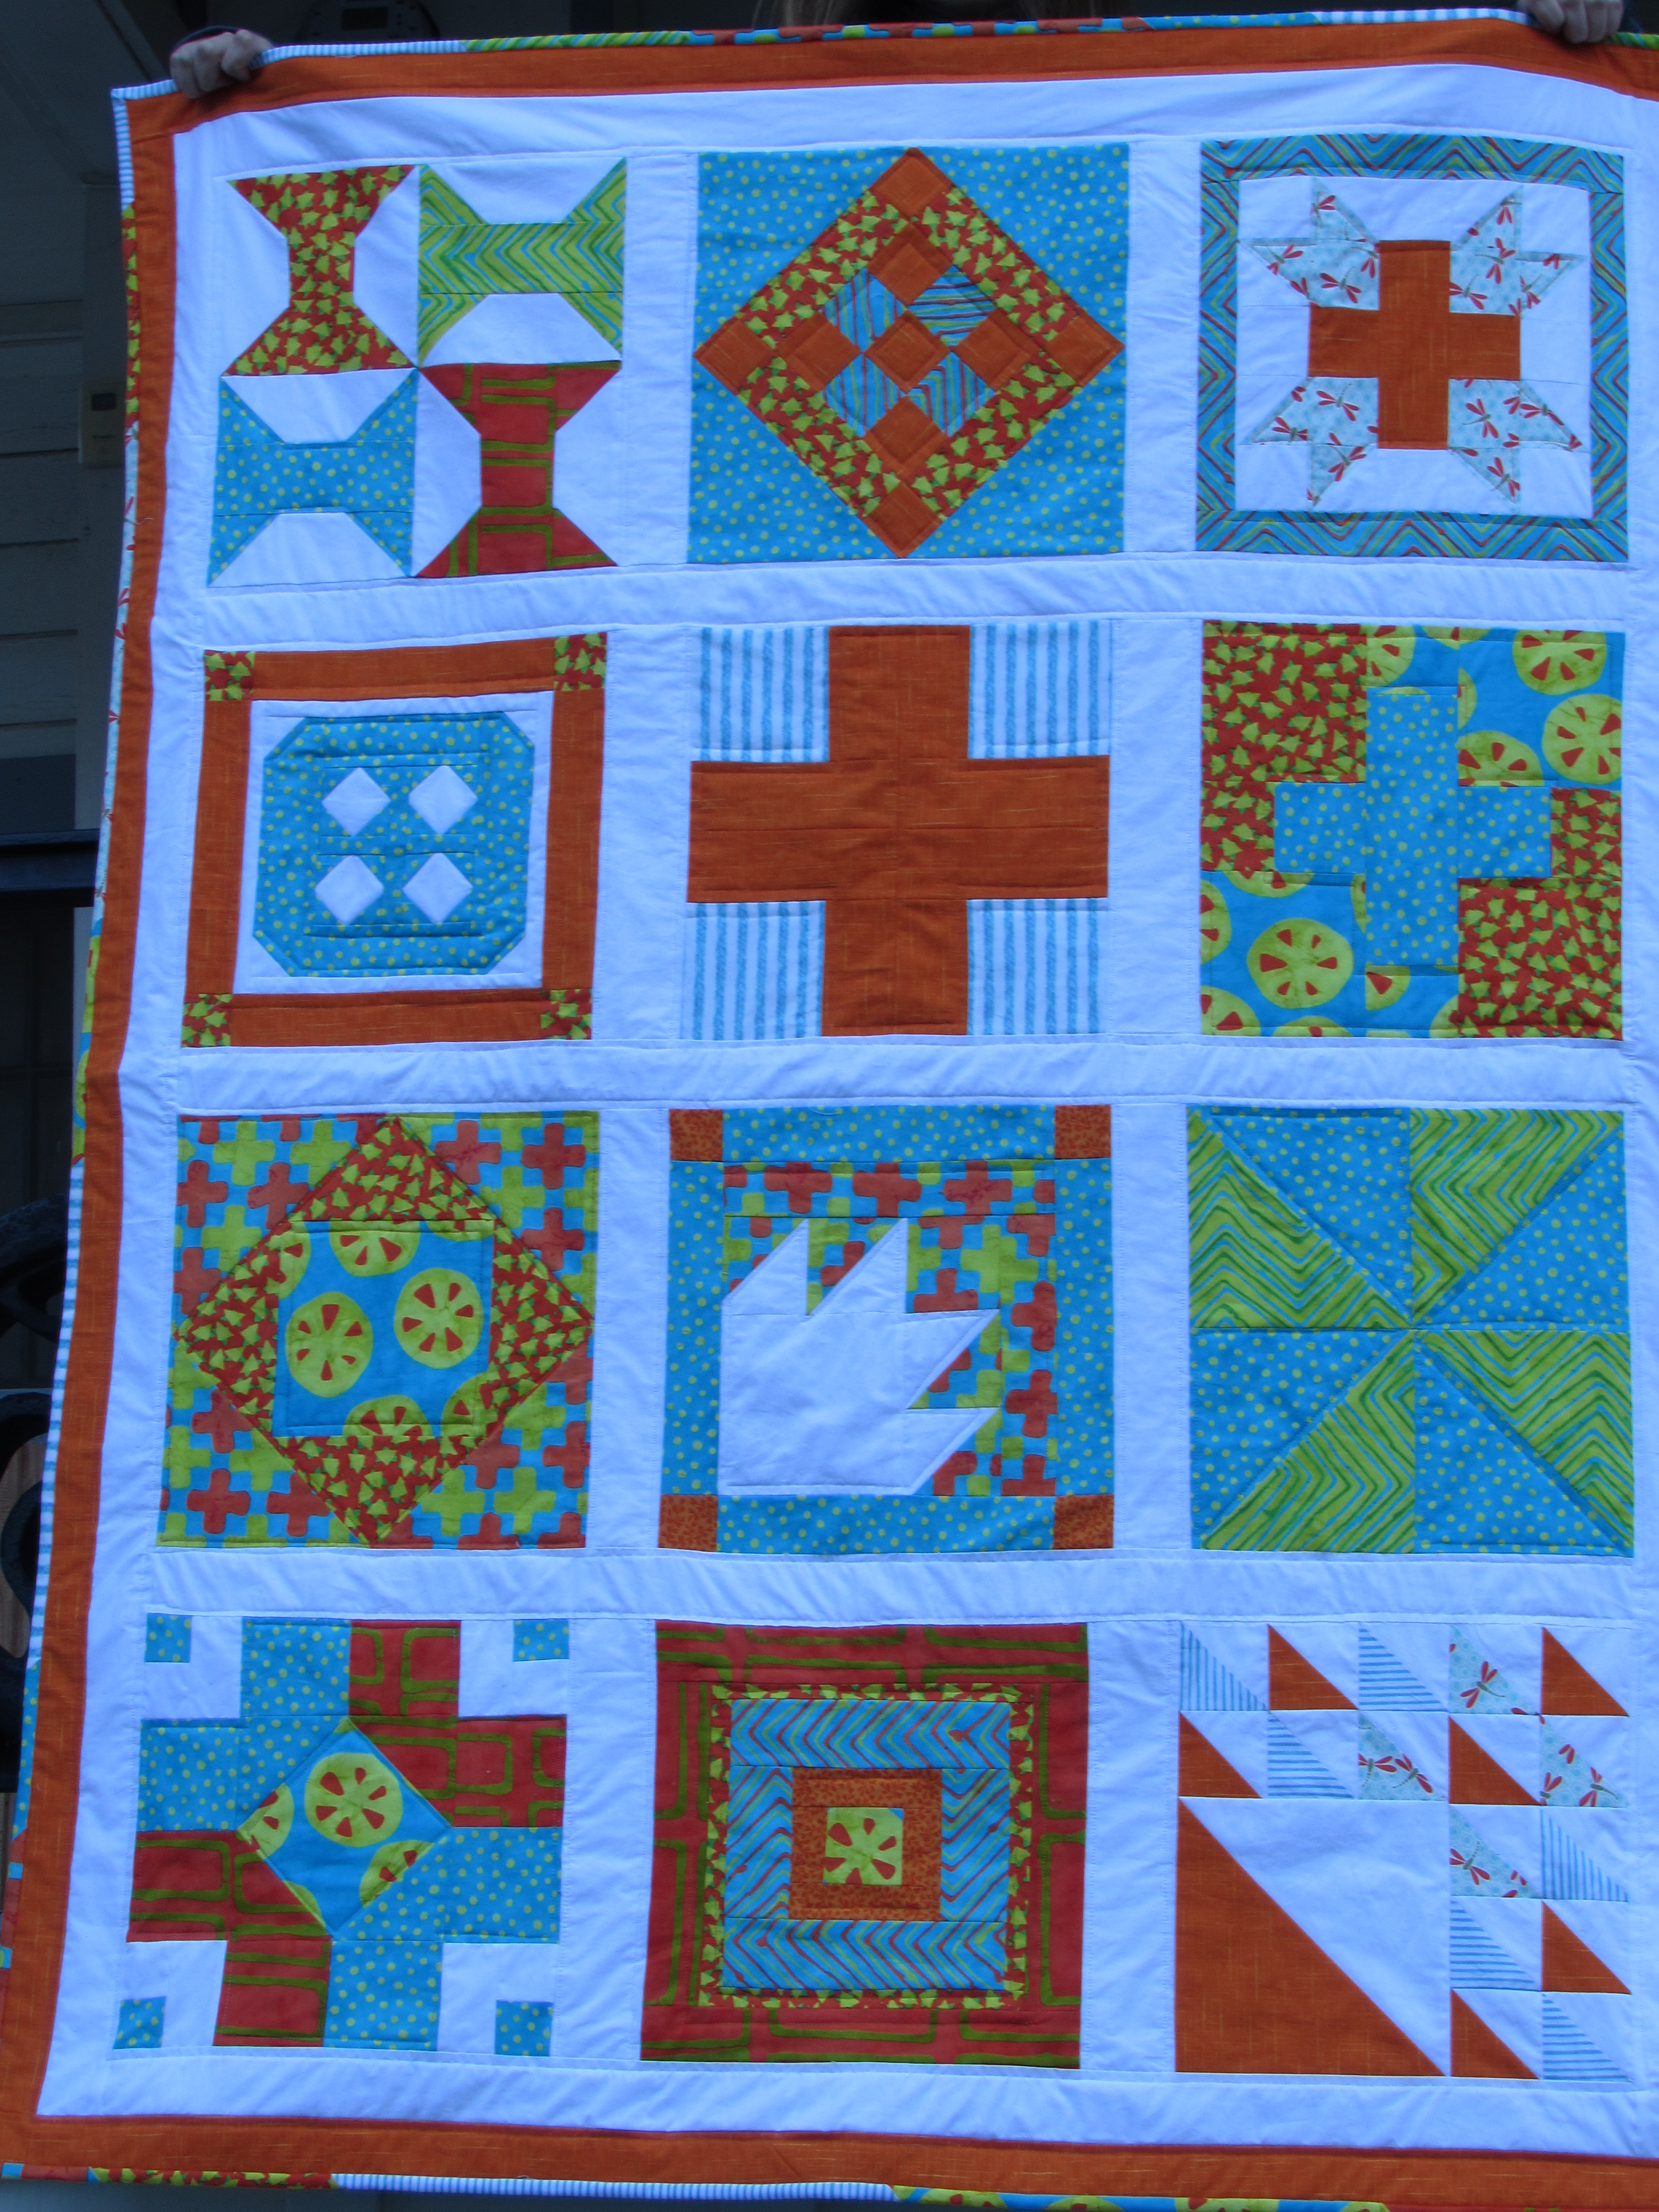
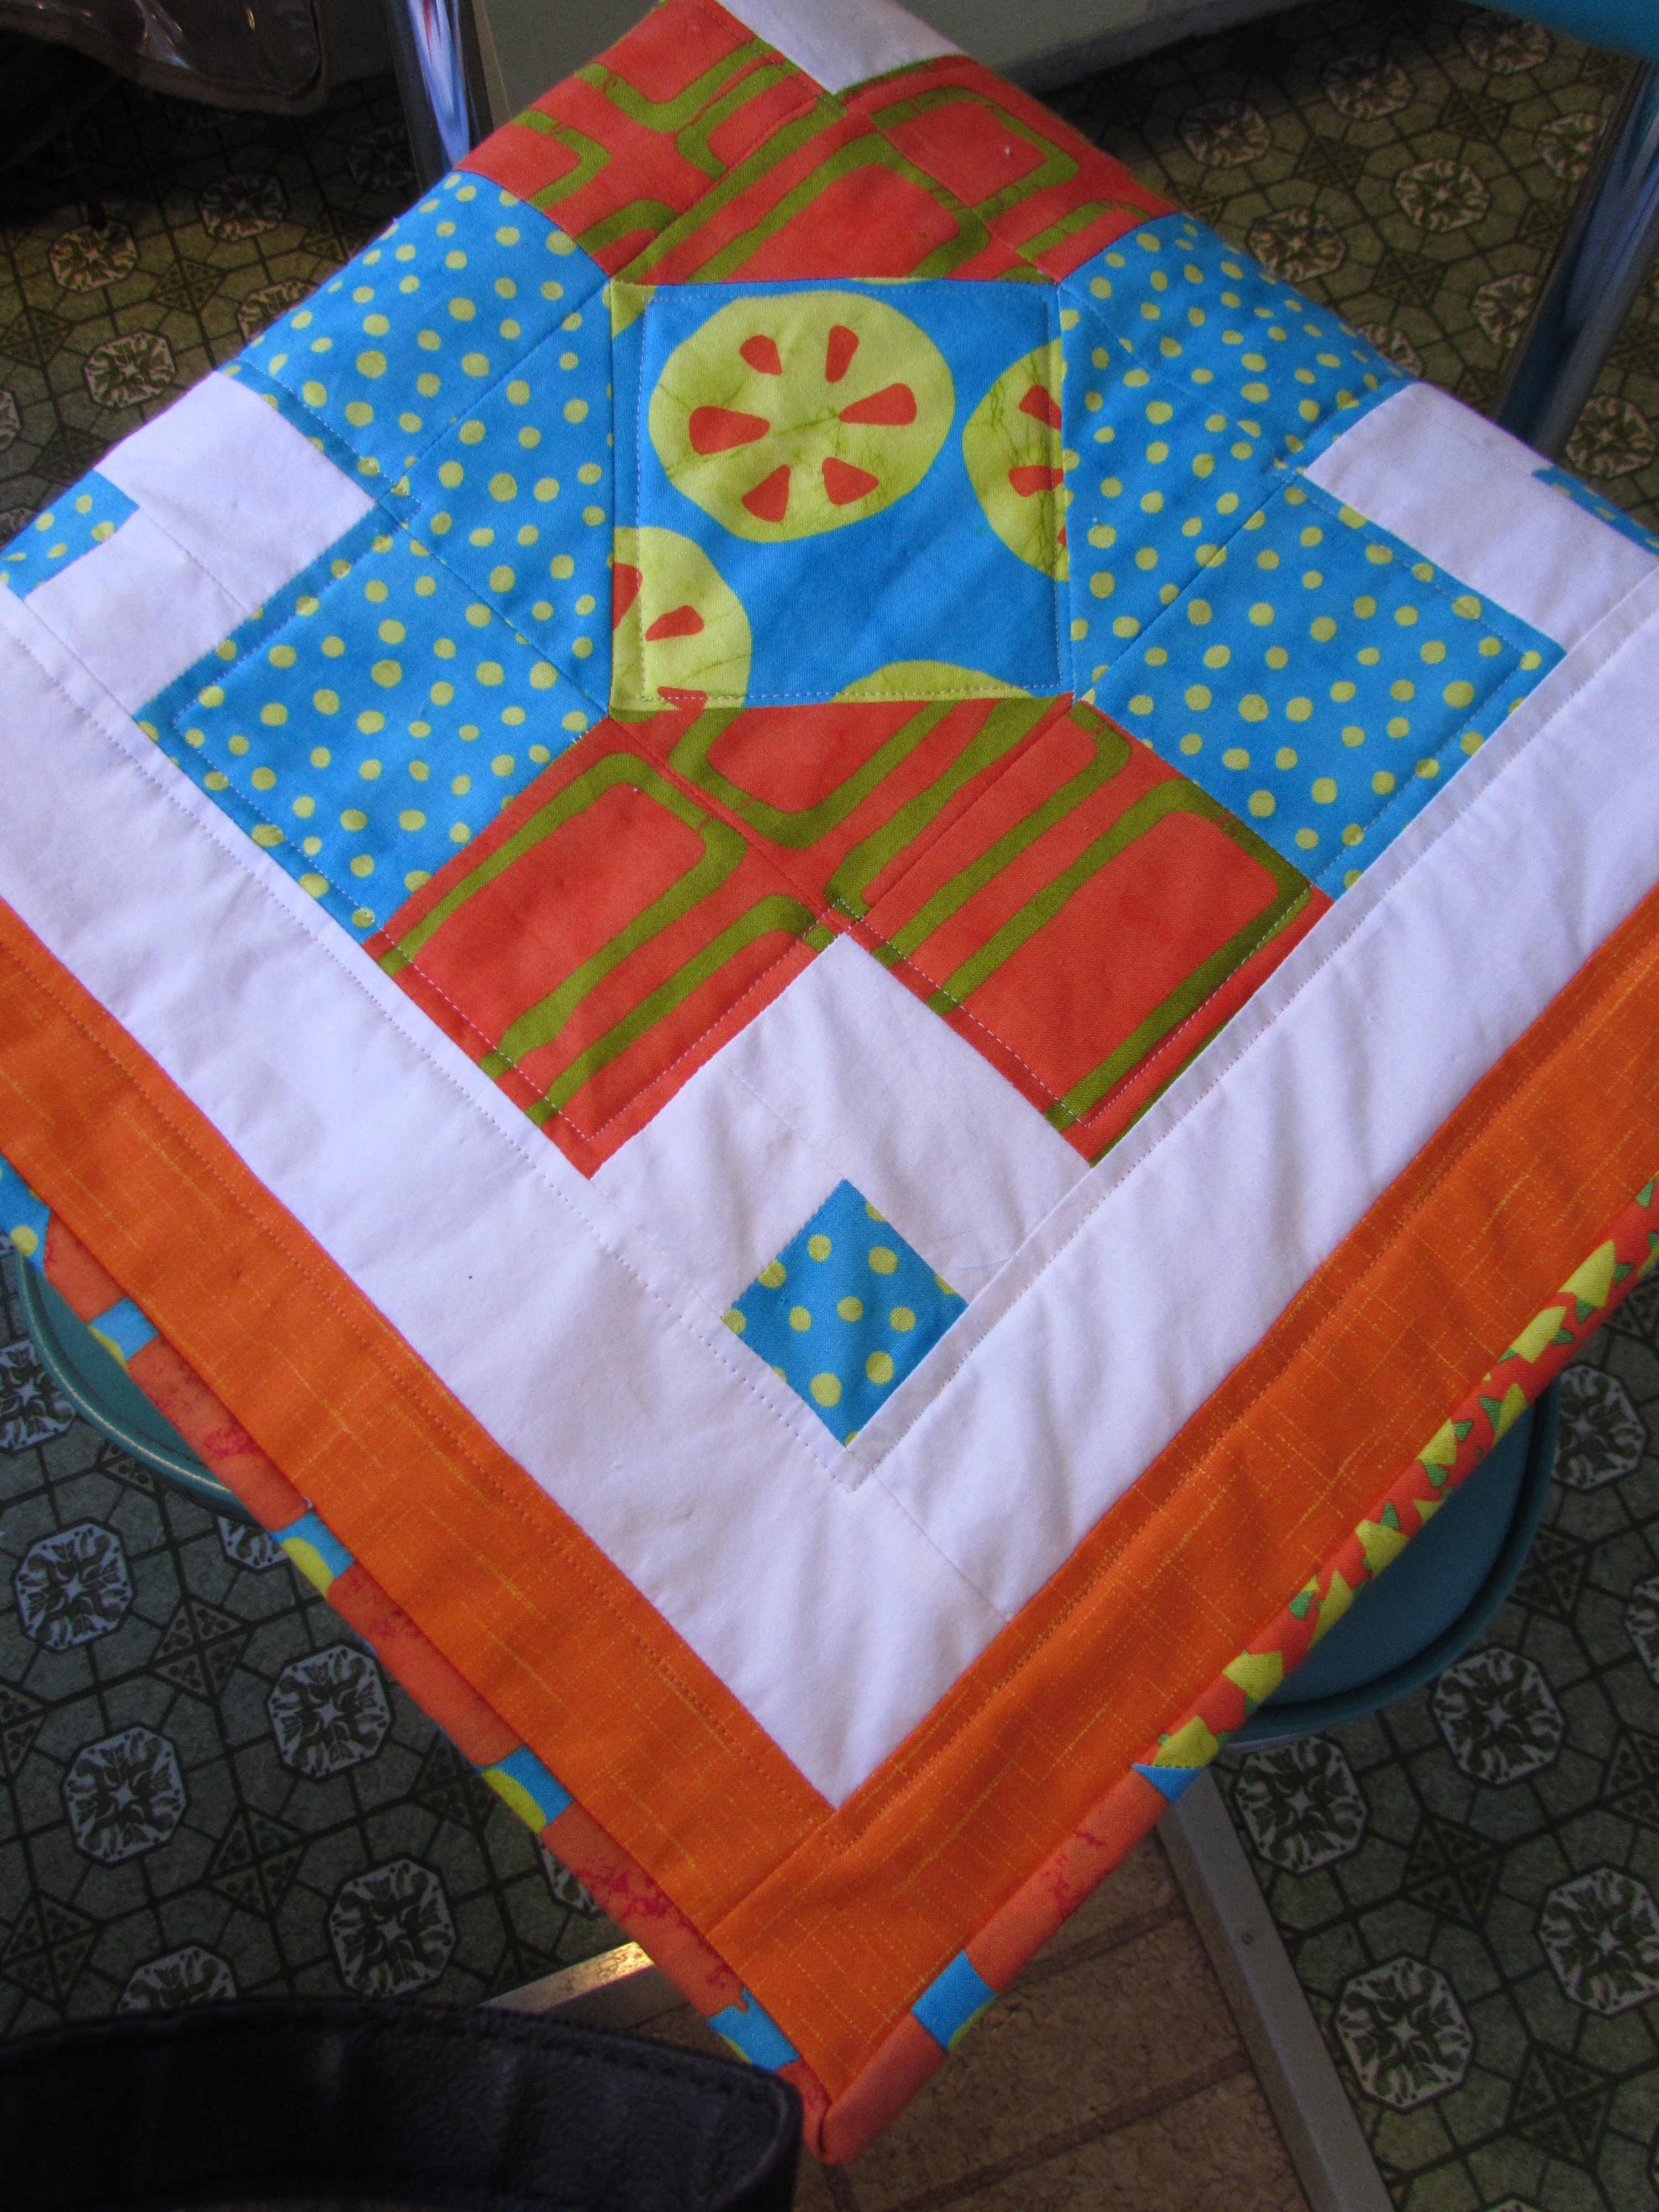
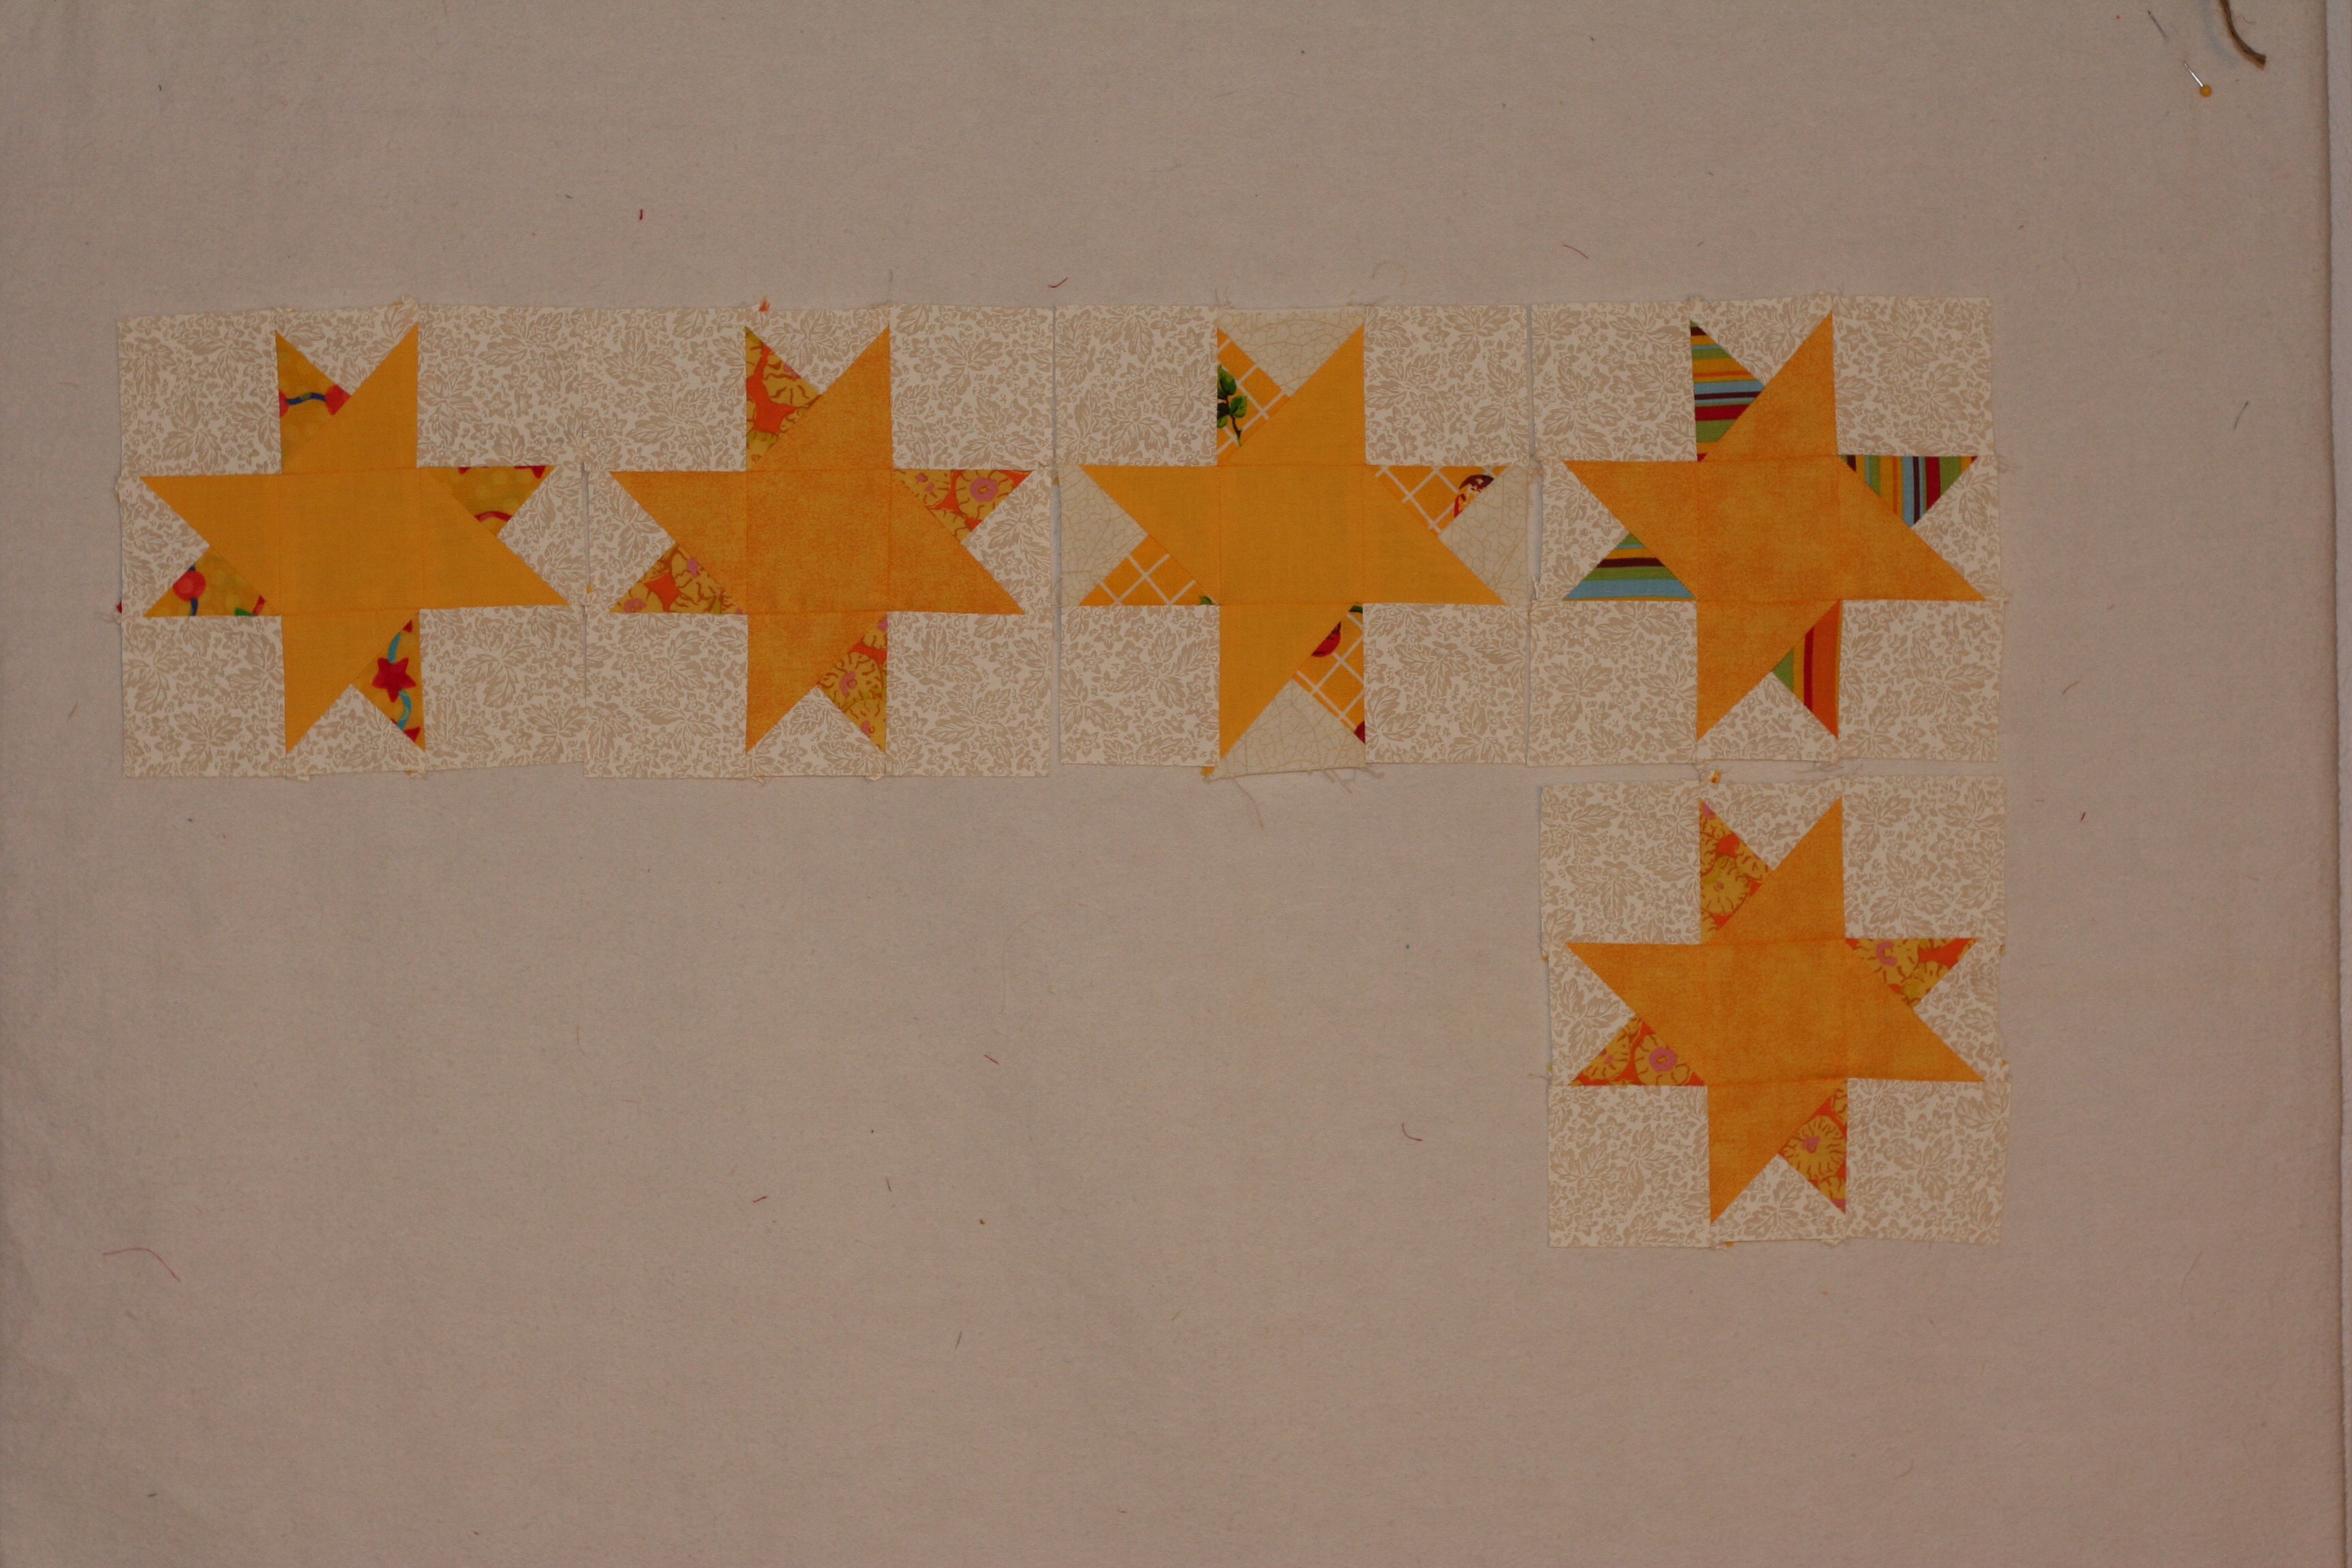
For RSC15 I am working on the March blocks from the Classic Stitches BOM over at Academic Quilter. I only finished five of the ten blocks but they are really fun.

image

For the kitchen in our Downieville house we decided to put in pleated shades. In keeping with the vintage look of the kitchen, I ordered a Waverly plaid that was printed in yellow, blue and green to make valances. We have green and yellow on the walls and I just put a 1950’s formica table in the eating area. It is gray with turquoise trim and the chairs have turquoise vinyl on the seats. I love pulling all of the colors together with these valances. I made a valance for each of the four kitchen windows. Hopefully we will be up there working on the house over spring break so I can hang these soon.

image

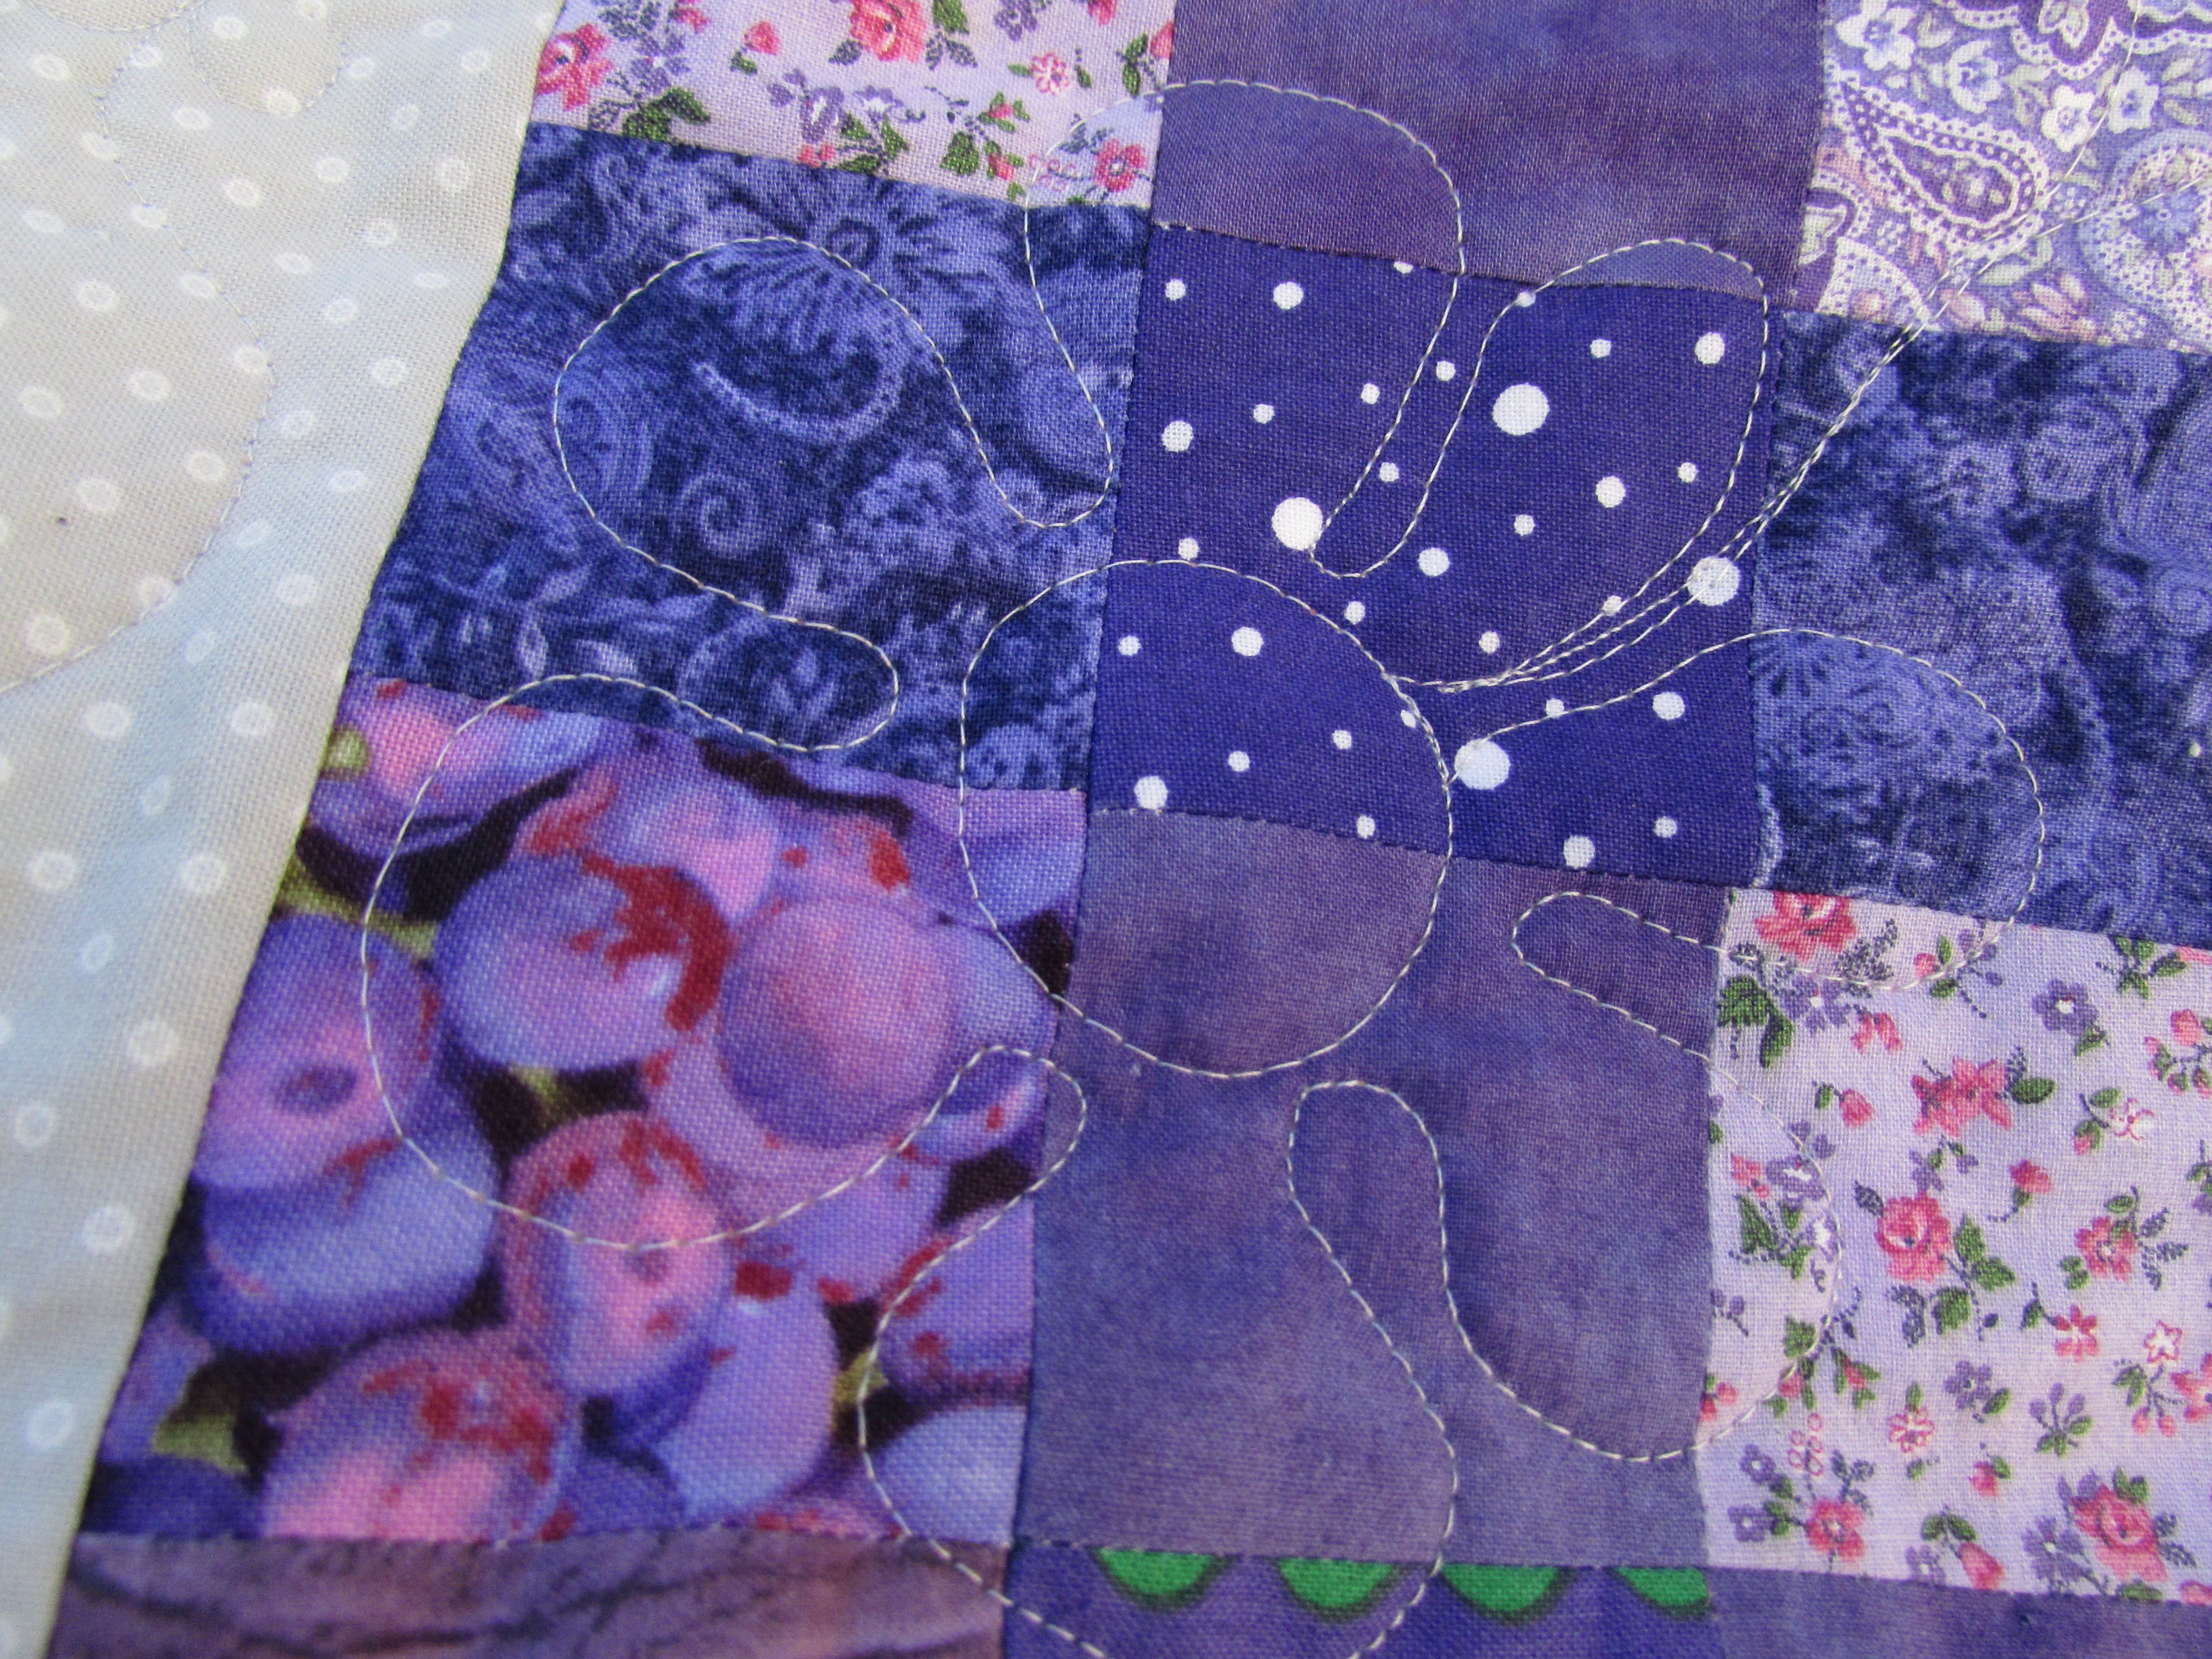
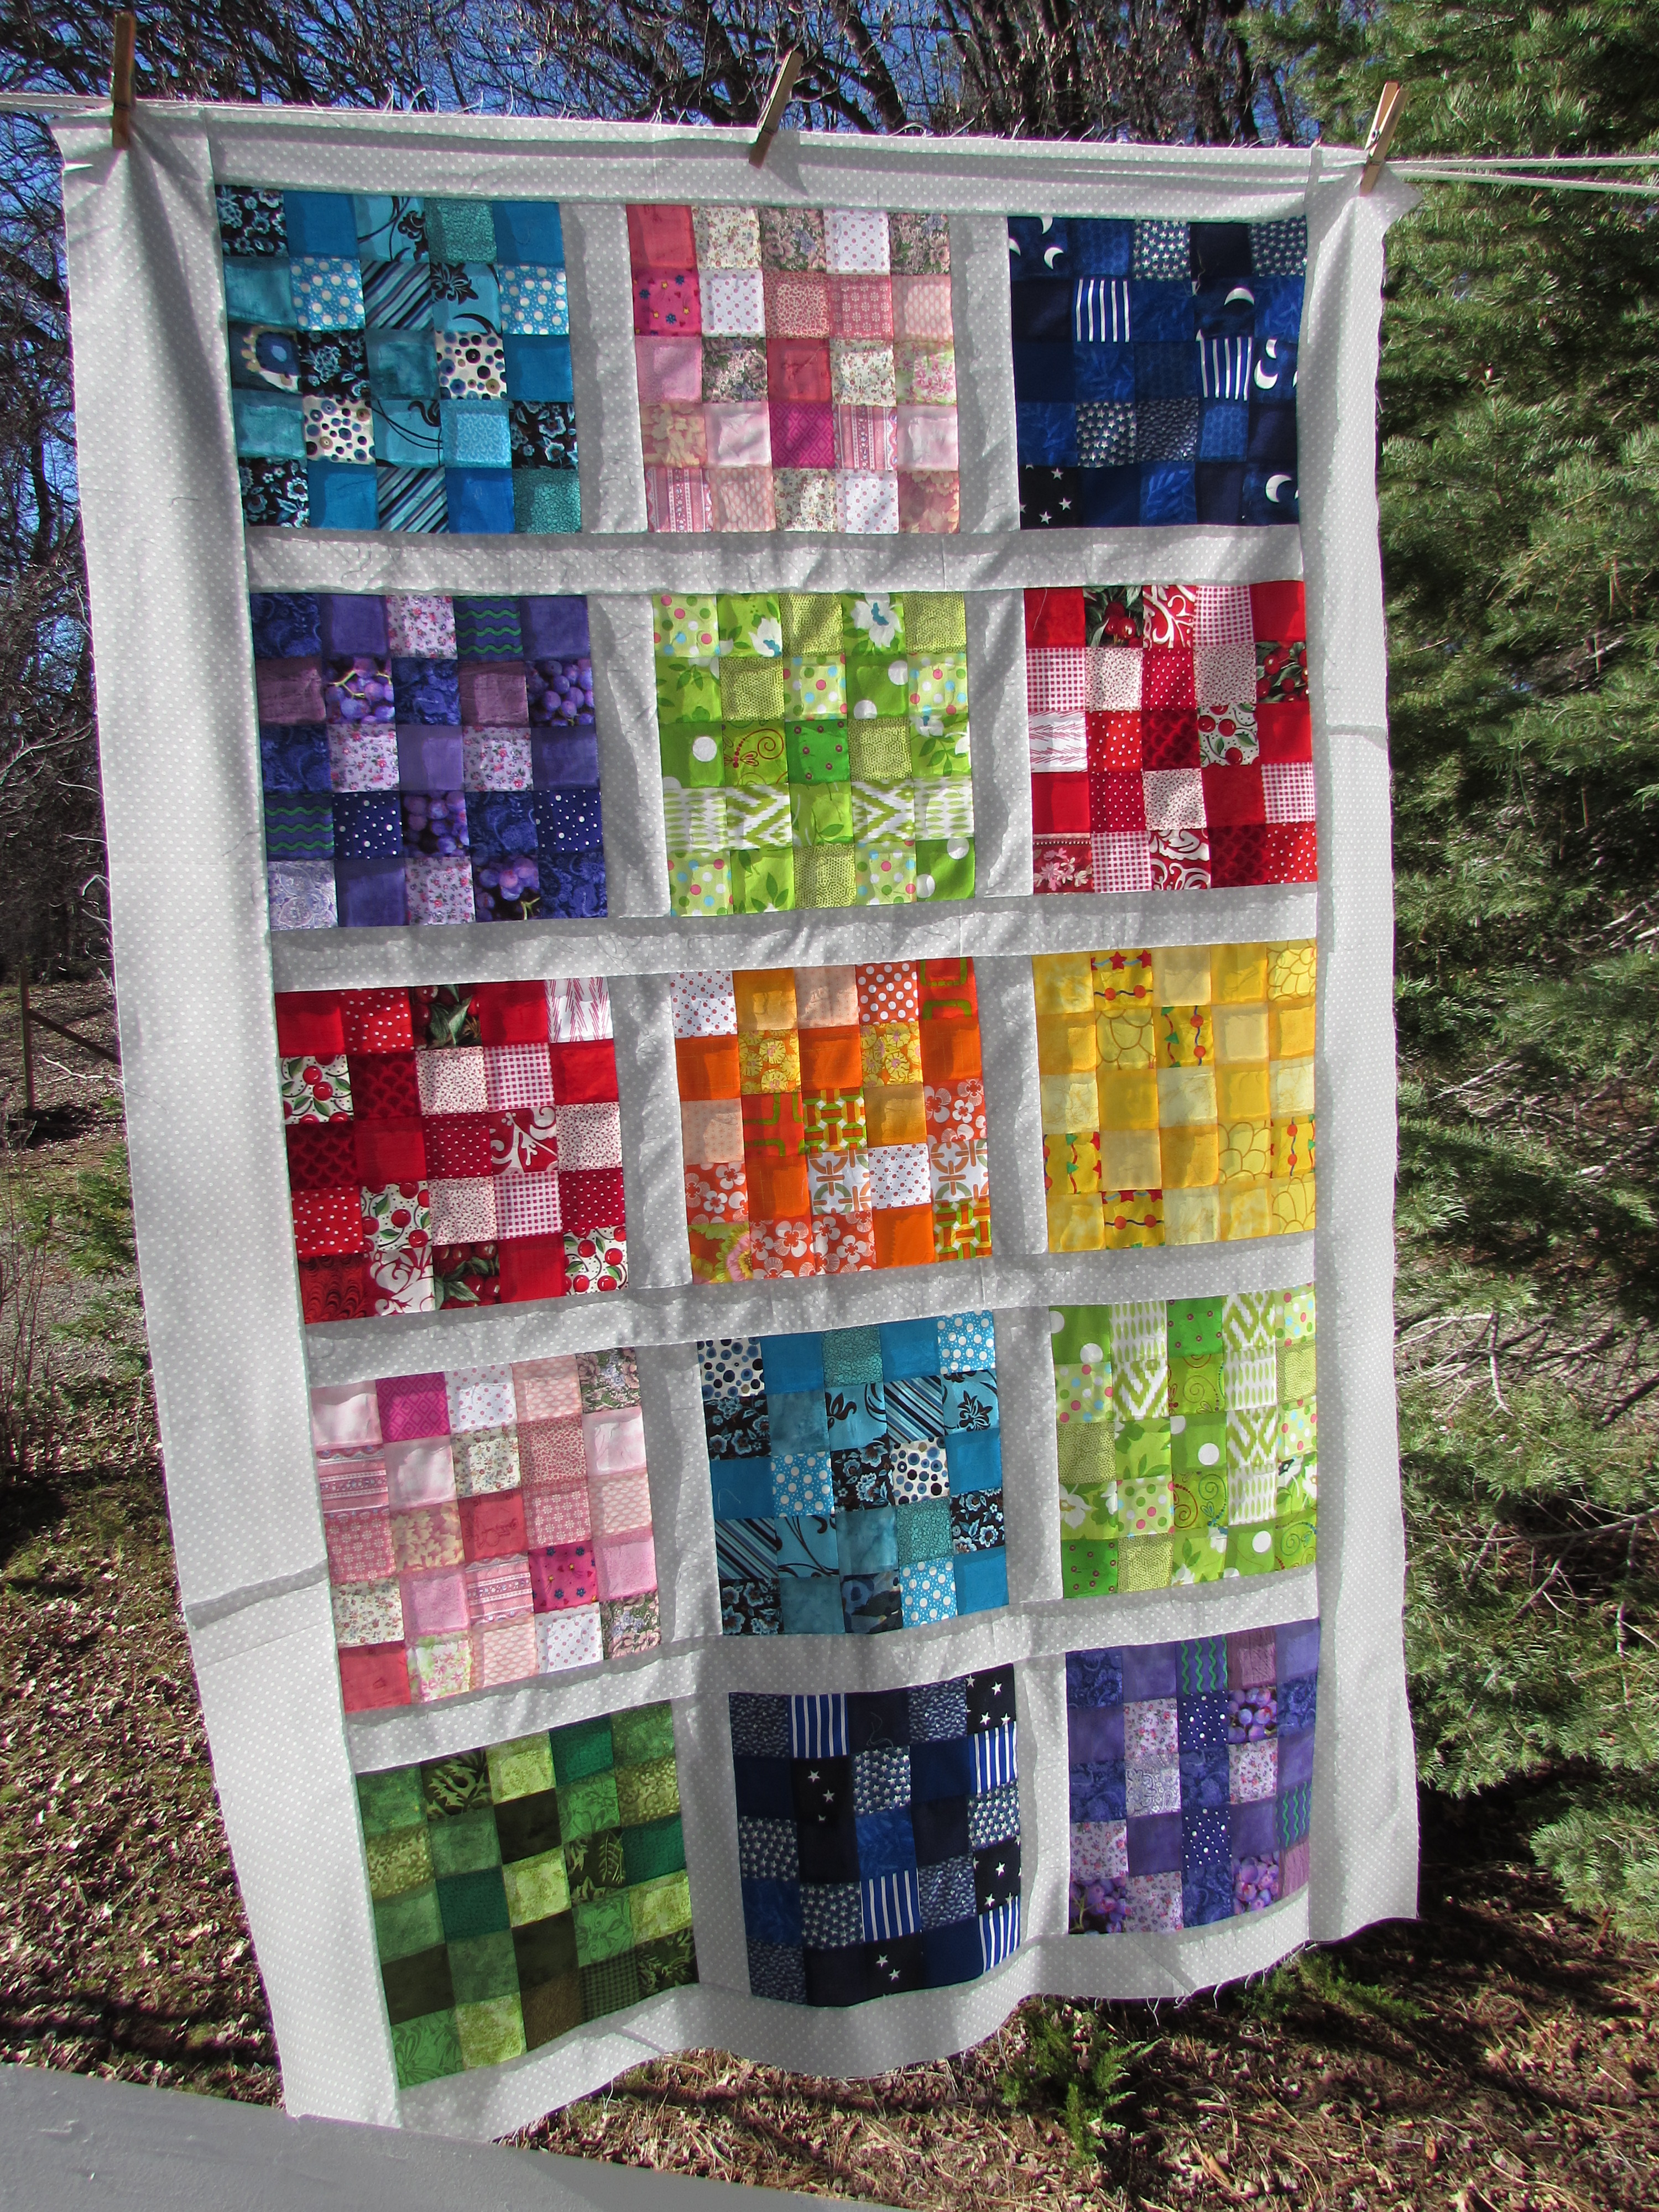
I’ve also worked a bit on the quilting for the neutrals quilt. I have a newfound appreciation with my Hera marker (which is made by Clover). I bought this (inexpensive) little tool months ago and each time I use it, I am so impressed by it. If you don’t have one, this tool is used to mark lines for quilting. No worry about removing ink or chalk after you sew. It is so cool. I have been marking the lines on the neutrals quilt with it.

image

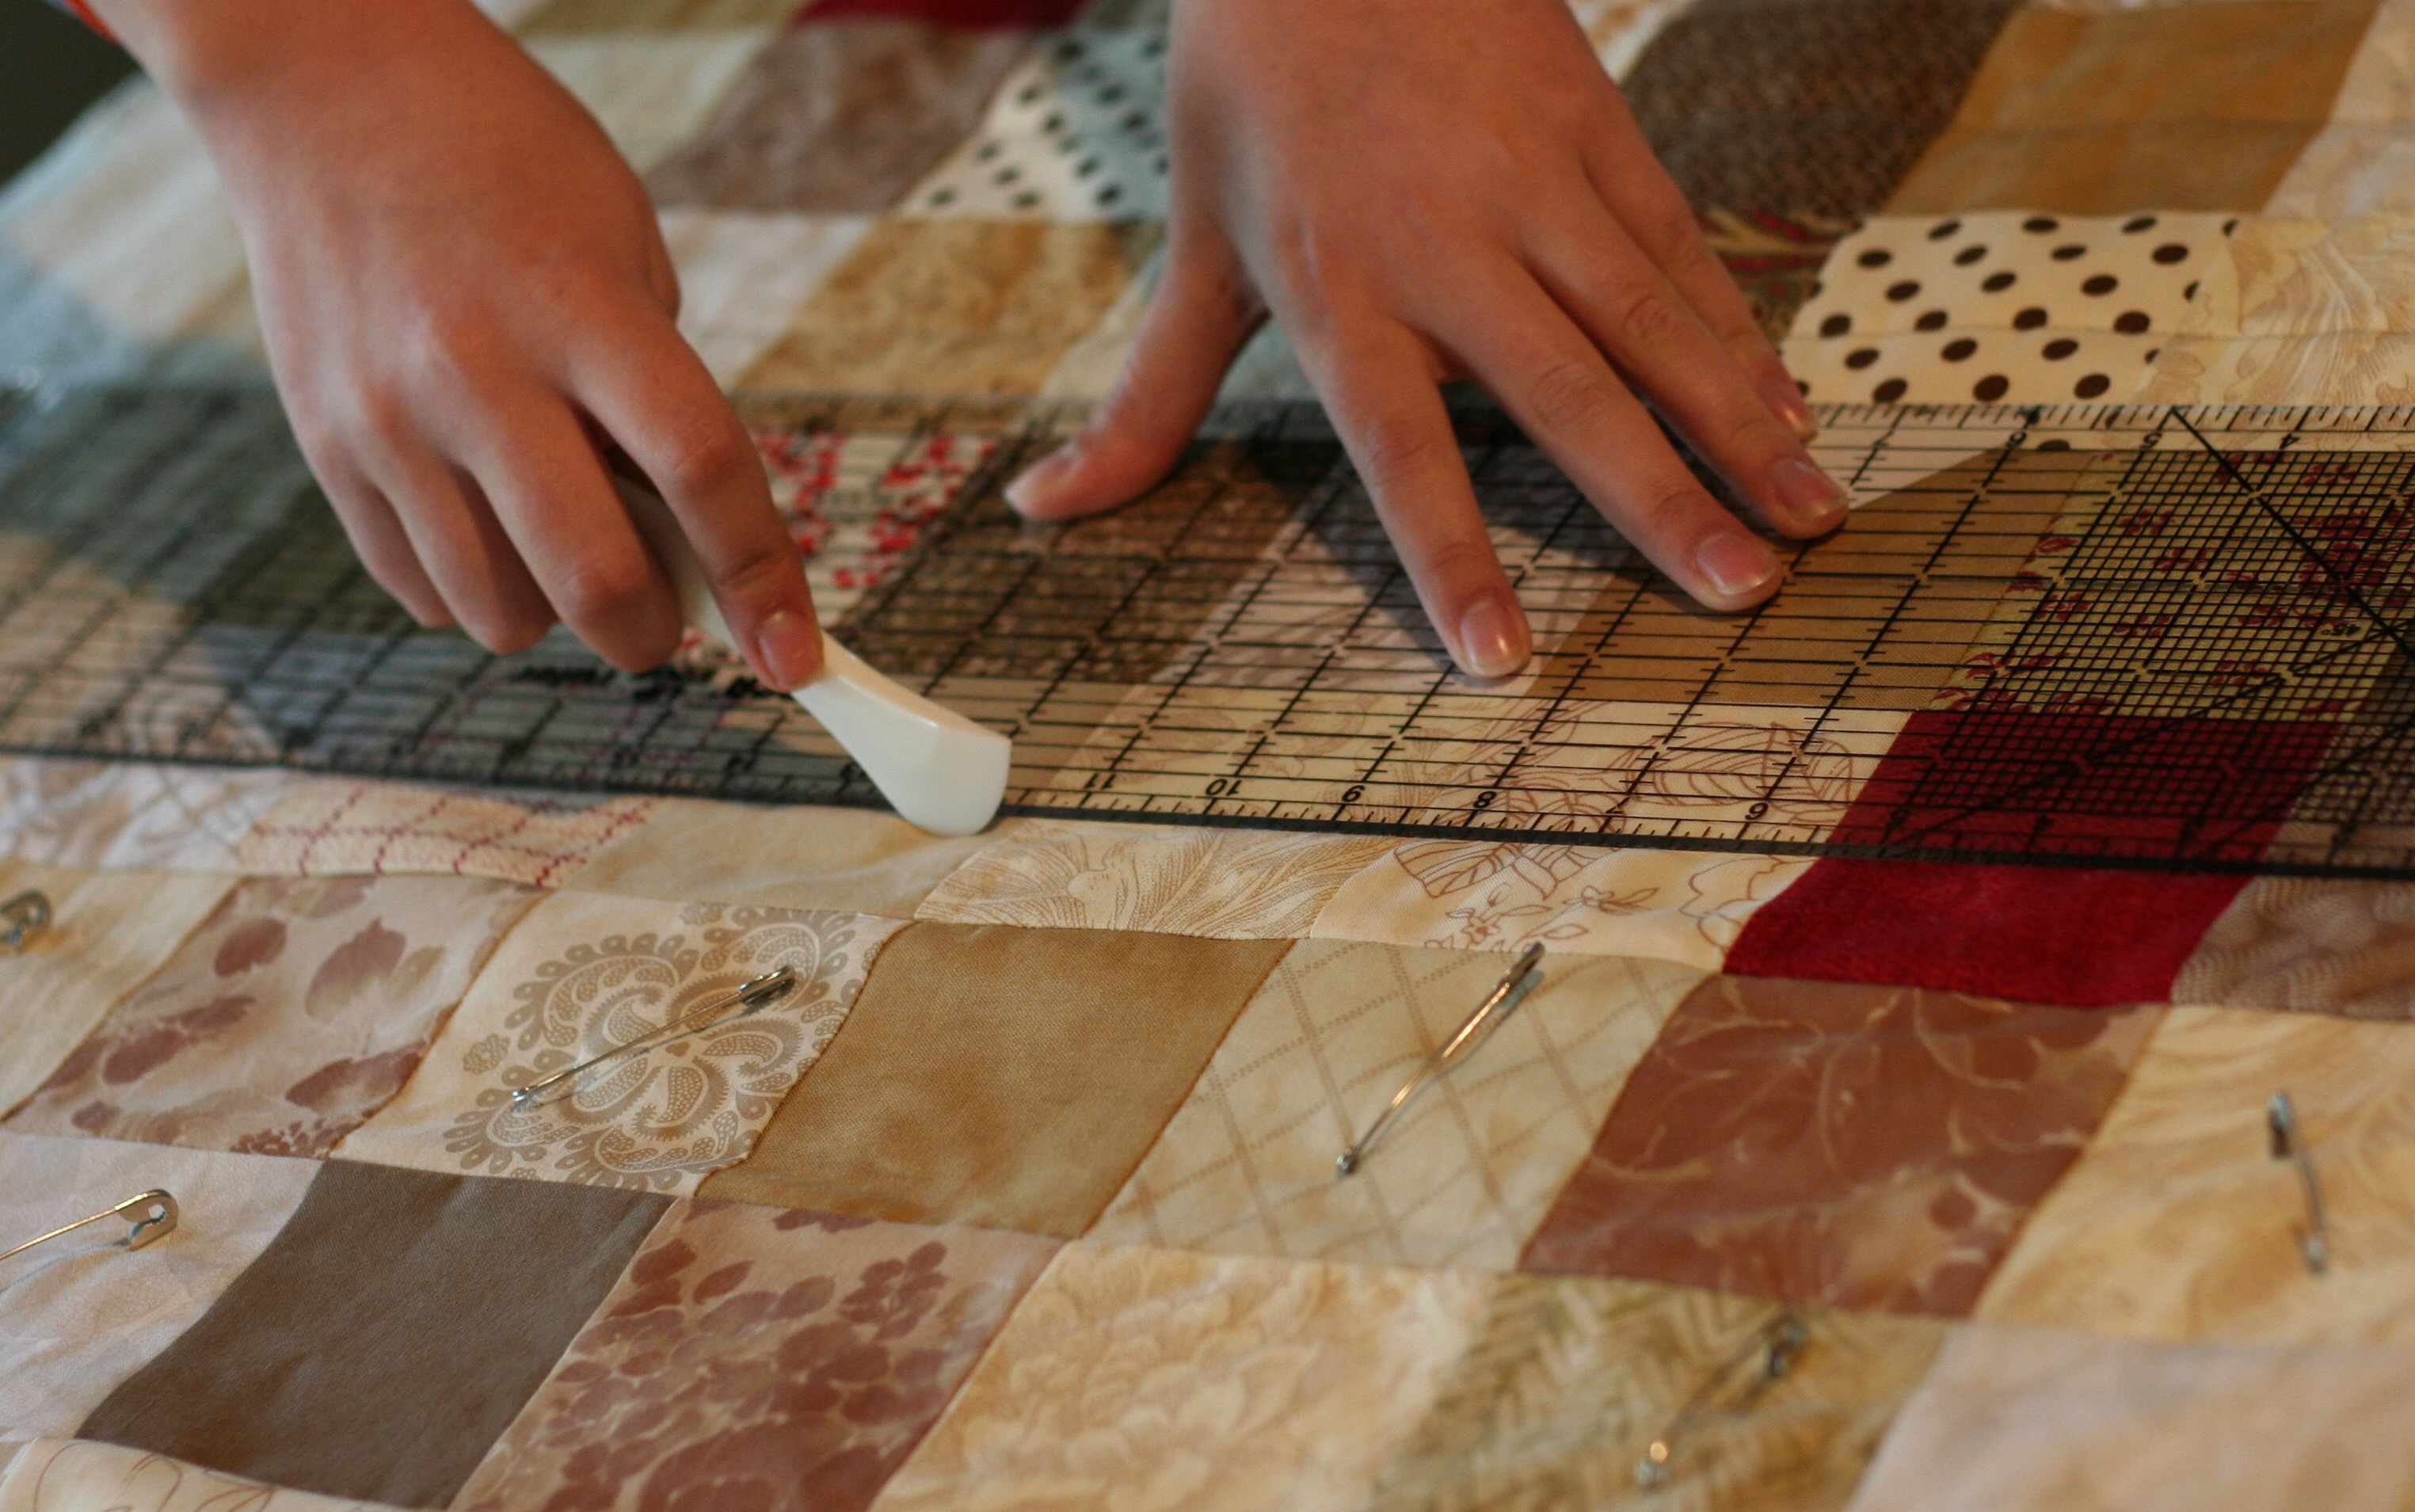
The lines aren’t always easy to see. But the indentation left by the Hera marker is enough to guide me along. I don’t mark more than two lines at a time because the indentation doesn’t last very long. If you mark a line and don’t like what it looks like, a simple spritz of water (lightly sprayed) will remove the mark, as will smoothing the fabric with your hands. I don’t know that I would rely on this for intricate marking, but for straight lines it works great. If you want a quick tutorial on using a Hera marker here is a brief video – though it is so simple, not much instruction is needed.

image

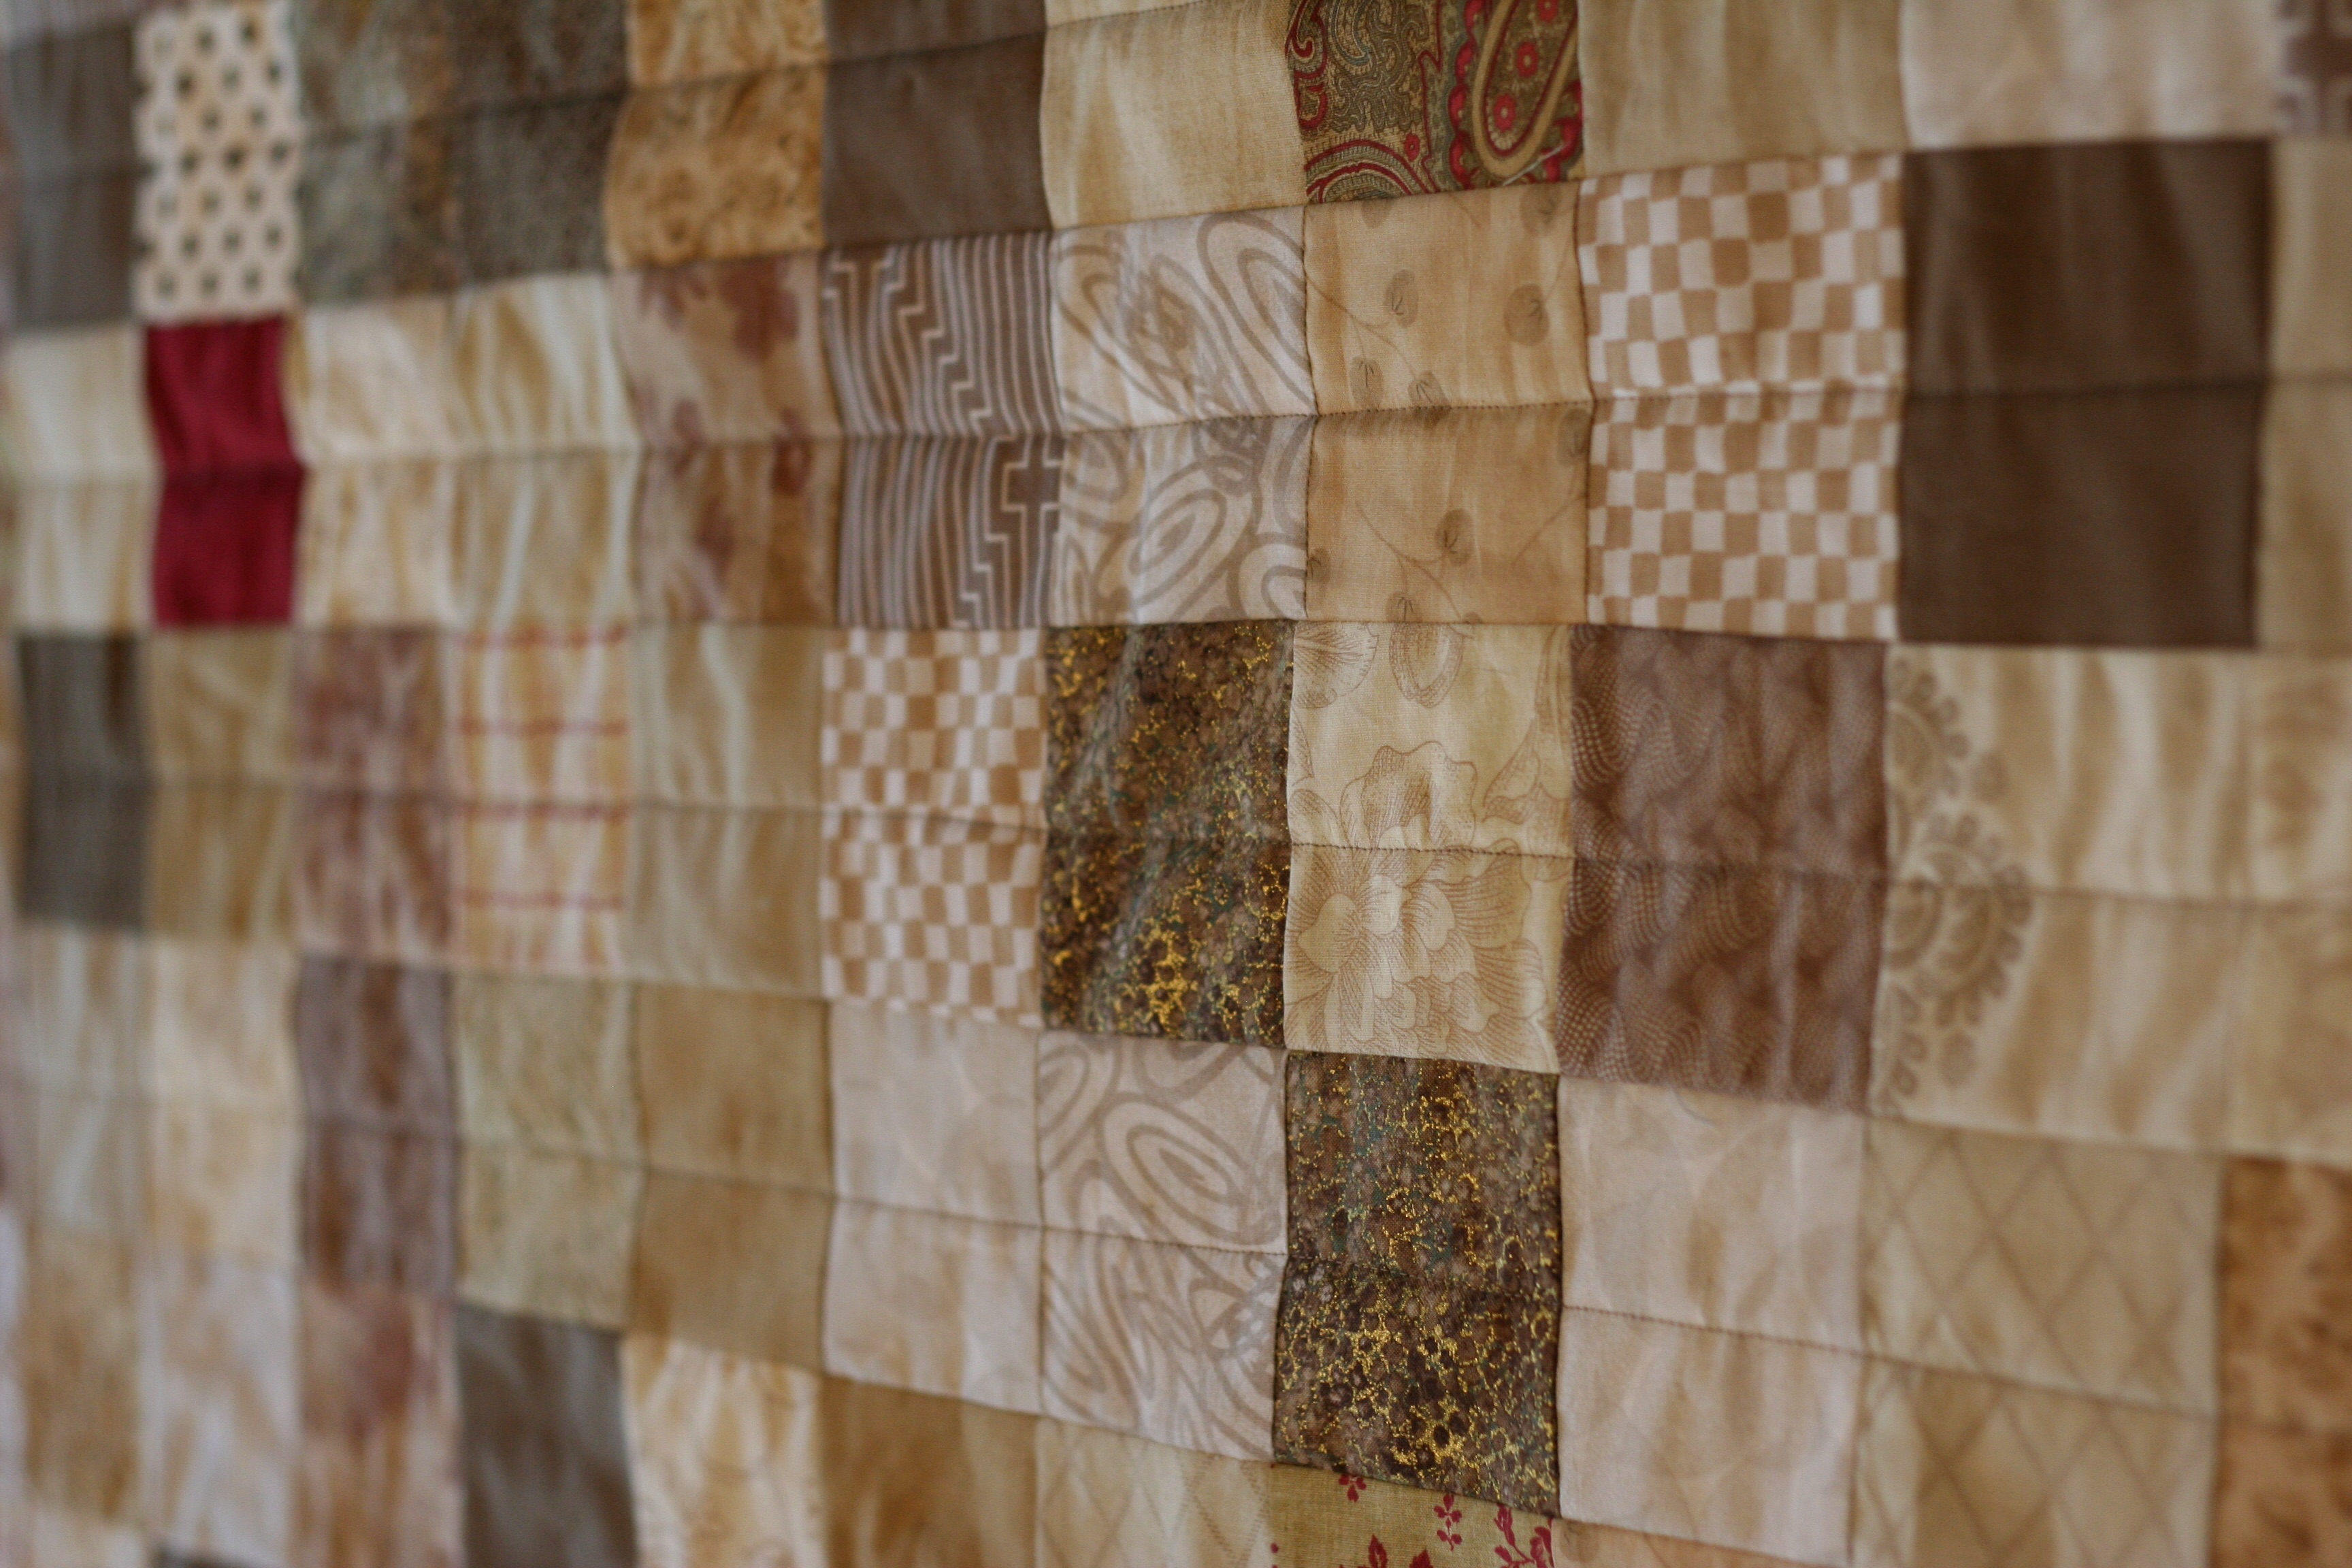
I am quilting down the center of each three inch square and when I finish this direction, I will quilt down the center, going the other way.

image

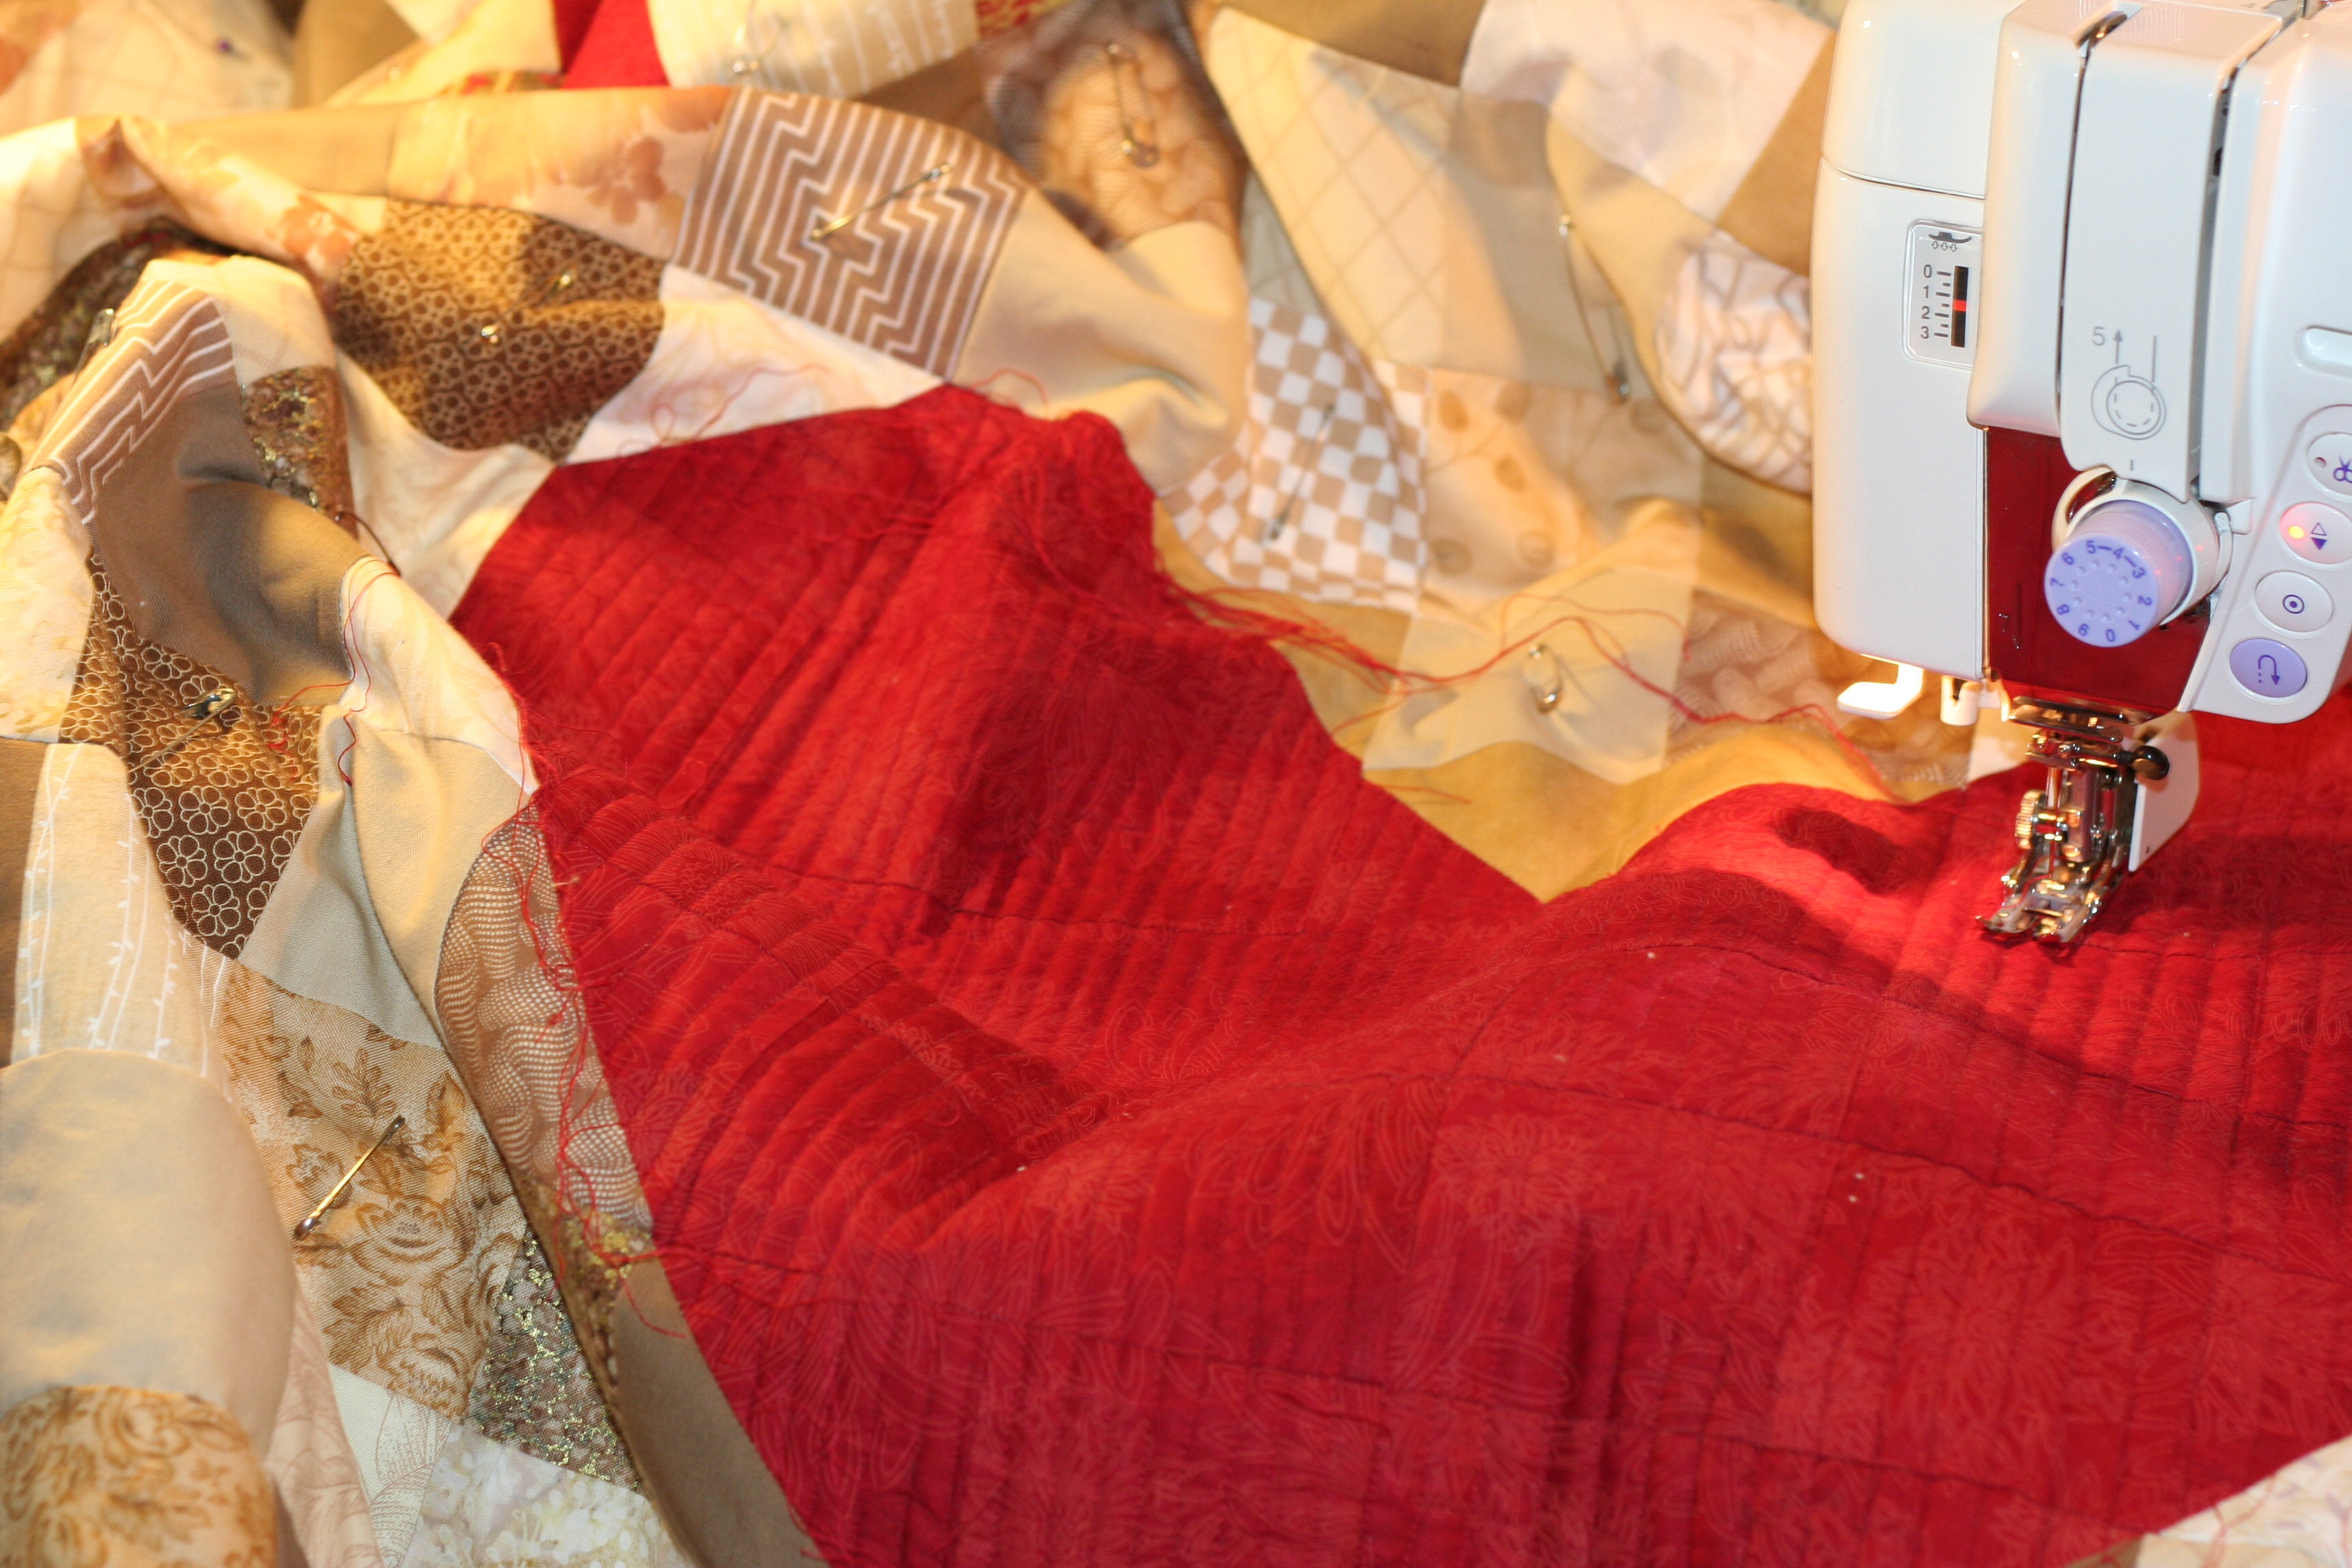
For the heart I used lines that were much closer together. I didn’t mark these, just used the edge of the walking foot to judge the distance. It seems to solidify the heart, almost removing the lines of the patchwork. Looking good so far. Should make my (ALYOF) goal of completing this quit in March. Yahoo!

I was lucky enough to have one of my sisters here for a couple of days to visit this week. What a treat. Even better, her son was also here briefly. My nephew and his wife live in Japan which means I don’t see him very often. We used to live next door to each other when the kids were growing up and I miss having them around all the time. Family visits are the best. That’s the update for the past week or so. Hope everyone is doing well and spending some time with at the sewing machine and some time hanging with family. Best of both worlds!

Linking to Freemotion by the River and Let’s Bee Social. As always, links to these sites are available at the top of the page, under Link Ups. This post is also linked to Stephanie and Michelle at Late Night Quilter for Tips and Tutorials Tuesday.

Two Down and One to Go

Yay!! Got my second UFO of three finished up this week. Completing these three quilts is on my list of 2015 goals. Going well so far. I’m very glad to be done quilting this one. It didn’t take long either. I don’t know what the deal is. I think I get bored about 1/2 way through the quilting process. It looks great though. It was a bit narrow so I added a green border to each long side for width.

IMG_20150128_2830To quilt it I free motioned large, loopy flowers all over the top. They reminded me of the flowers girls would draw in the margins of the notebook when you are supposed to be taking notes in junior high but your mind is wandering. Anyway, I mean I’m pretty sure I saw the other girls doing this…..

IMG_20150128_2832

Oddly enough, the flowers also brought to mind a weird memory of this PE teacher I had when I was probably 8 or 9 years old (so we are talking 1968 or 1969 here – hippy days). I went to a parochial school through 8th grade. Mostly we had nuns for teachers and usually the classroom teacher/nun was also your PE teacher. But for a while, we had a young woman that as our PE teacher.  I bet she wasn’t more than 21 or 22 and I thought she was SOOO cool. For one thing, she wasn’t a nun and she was young. (To me, the nuns seemed old no matter their age since I couldn’t see their hair.) For another, her name was, get this…. Flower!! Looking back, I’m guessing that wasn’t her legal name but that was what we called her.  Shocking, right? It sure was to me. Ahh… the 1960’s.

IMG_20150128_2833I also quilted flowers along the gray borders. Once I got to the green, I switched to a medium sized leaf. Kind of wish I had switched to green thread when I quilted that portion. Oh well. I also attached the binding by machine on both front and back sides. Not sure I like that as well but I gave it a try.

In my on-going resolve to upcycle, I used a duvet cover for the backing. I found it at a thrift store for $7.00 and it is huge. I will easily back a couple a quilts with it. One side of the duvet cover is a green stripe and the other is a green floral print. I had the green binding sitting in my stash so this quilt is all scrappy and used a good portion of my stash. The only piece I purchased directly for this project is the gray print that I sashed the blocks with. Not too shabby.

IMG_20150128_2836

Trying to start the new year out right with better scrap management habits. (Wow, “scrap management” sounds so quilty-dorky!) But really. When I trimmed the excess off around the perimeter of the quilt I actually trimmed the scrap into usable pieces. This is definitely a first for me. Three inch and 2 inch strips plus a stack charm squares!! It hardly took any extra time and it’s done.

IMG_20150126_2824Not exactly sure what I will work on next. I want to do some piecing. I need a break from quilting for a while.  I have some blocks that have been sitting around for a while. I don’t love them, know what I mean? I think I am going to create a quilt to donate to a fundraiser at my daughter’s middle school.

20141006_1774The lighting on this picture is horrible. (I took it at night with my phone.) I think I will set the blocks on point and sash them with black. I have a cute black and white print for the backing and maybe I can find a jewel toned batik to use for a border and binding. Hopefully that will jazz this up a bit.

Linking to Freemotion at the River, Lorna at Sew Fresh Quilts and Amanda Jean at Crazy Mom Quilts. Links to these amazing ladies are found at the top of the page under Link Ups.

Will also be linking this post to A Lovely Year of Finishes as this completes my January goal.  Hurray for that – three days before month end.


The Advisory Board Comes Through

Yesterday I spent the day recuperating from some sort of intestinal bug. I spent a bit of time pitying myself in the morning since I had spent a good portion of the week prior down with migraines. Once I completed that task (the pity party) I decided to move forward. One can only enjoy that sort of thing for so long.

I decided to look at www.vistaprint.com and play with designing a business card for Needle and Foot.  The day prior to being sick, I was in our local kitchen goods store, The Wooden Spoon. (Isn’t that a cute name?) I was comparing the eight cup Chemex and the ten cup pot. I have a customer on Etsy that wants a ten cup cover and I had not yet made a pattern for that size. The manager was so gracious when I explained what I was doing and that I hoped to avoid actually buying the ten cup pot (they are sort of spendy and I already have the six and eight cup model). Once she saw what I was making, she asked for a business card to show the owner because she thought they might be interested in talking with me at some point. Alas, no business card had I. So I did what any other professional would do and wrote my contact info on a scrap of paper that I dug from the darkest depths of my purse. You should know that the nuns always gave me a hard-earned “C” in cursive/handwriting all those years back so it is sure that I left a gorgeous note. Hope they don’t lose it. Hence the need for something a bit more professional.  Off to Vistaprint.

After I created what I thought looked like a good draft I submitted it to my Advisory Board of Five (aka my five sisters). Oh, the helpful information that I gleaned from them.  The texting session went as follows:

Me:

Here it is, what do you think? I know the picture is blurred and I am working on that but how about the information?

Them :

  • I like the picture. Make the picture bigger.
  • Add ‘Quilter Extrordinaire’ under the name.
  • Now you can use the cards to put in those fishbowls at restaurants and win free lunches. This is the only reason I have business cards. I haven’t won yet but I feel it happening at some point.
  • Oh, I actually won a free lunch doing that at Noodles & Co. (In my old life.) <this advisor is currently retired.>
  • See, they pay for themselves.

Me:

Thanks. Now, do I order 100 or go big and get the 10,000 pack? Buying in bulk is always more economical you know.

Them:

  • Do they have a ten pack??
  • 100 doesn’t seem like enough but 10,000 would allow you to wallpaper a room in the Downieville house <that is the house we are currently renovating.>

It is always best to have support like this when making critical decisions. The expertise and wisdom run deep within this group. If you don’t have this type of support I highly recommend you go out and adopt a few sisters for yourself.

Other than designing business cards (I bought the 100 pack, by the way) I did a little bit of sewing. Prior to getting sick, I decided to start working on the first row of Mari’s Classic Stitches BOM. She is making the first row with Broken Dishes blocks which are created with HST’s. I am not usually a fan of HST’s – all the trimming and squaring up that is required gets to me after a while. But the block is cute and I really want to do this row quilt for RSC2015. I dug in. The color for January is blue which I have plenty of scraps for. Unfortunately my first attempt was not entirely successful. I read the instructions wrong and made HST’s that were three inches when squared off. The instructions actually said to make them so they were 3″ finished (like when sewn into the block.) This means I should have squared them to 3 1/2″. Dang it. Luckily after making the first 24 HST’s I put them on the design wall to play with them. Soon as they were up there I knew they were too small. So that stack went into a Ziploc bag to be used some other day, in some other way.

I started over and it all went as it should. Got the HST’s put together (and it didn’t take long.)

IMG_1712It’s that trimming. Why isn’t there a better way? Or is there? Does anyone have any good tips for trimming HST’s? My method for making HST’s is to cut two square and put them right sides together. I have a little tool to draw two lines that are each 1/4″ from the diaganol. I sew those two lines and cut them apart down the center. The method works but maybe I am missing something wonderful that would allow me to love making HST’s? If so, please leave me a comment with your suggestion!! I will be ever grateful as sooo many blocks are based on HST’s.

IMG_1713

Enough whining. The trimming was completed. The fun part is piecing the blocks. Here they are – almost done and hanging on the wall.

20150116_2740One good thing is that with this project, I noticed that my points are getting more accurate. Not all of them… but some actually look like this:

20150116_2744

And, ta da! First row of the quilt is done. Yay! (Hard to take a picture of this as it finished at 60″ long and it is raining out. This will do for now.) Row one complete!

20150116_2742

Hope you all have a wonderful weekend. Linking to Lorna at Let’s Bee Social and Amanda Jean at Crazy Mom Quilts. Both of these links are found at the top of my page, under Link Ups. Also linking to Angela at So Scrappy for RSC15 and with Megan at Sew Stitching Cute’s link up.


Interrupted Plans

It’s all about flexibility, right? After setting my goals for this year I started thinking about the best way to achieve them. I want to make some progress with my quilting skills and also need to spend time on my Etsy shop to keep it growing. I decided to make a schedule of sorts. My nature is to hop from one thing to another and that is usually inefficient. I start something, sew and then move to something else. No real plan. So, I decided I would earmark some time twice a week to sew on my products for the Etsy shop. Any other sewing time that was available would be used for quilting projects.

Ahh…. the best laid plans. The week just didn’t allow for a schedule!  If you are a local reader you probably remember we had some pretty crazy winds last week.  Which led to this:

IMG_0263I wasn’t home when this tree fell over but my kids were and they texted me this picture. Yikes! So, with a tree that size on the ground, we had to call the tree guy to come deal with it. One thing led to another, as so often happens, and we ended up with this:

20150105_2721

No point having the tree guy come out and only clean up the fallen tree.  He took out another tree, cleaned this pine you see above and topped two more trees. Might as well get it all done. So this created activity around here and I was distracted from sewing the first day or so.

Woke up with a migraine on late Monday night. I get lots of migraines…. not very fun. I have learned over the years that the day after a migraine my brain is frighteningly similar to a plate of scrambled eggs. I cannot focus or think straight and driving is not even an option. Cutting fabric is such a waste – might as well just throw it away because it won’t be straight, accurate or even close to the right size. If I sew it is highly likely that I will stitch something wrong sides together or upside down. Don’t ask me how I know, but trust me, I do. So instead of sewing that day I sorted scraps.  I had been tossing my scraps into a paper grocery sack under my sewing table for the past 8 or 9 months and it was full.

IMG_3018

It was fun to look through all of it. Remembering all the projects that I had made over the past year or so. Didn’t take me long to get it sorted into little piles by color.

IMG_3020Apparently red, green, blue and brown were mycolors for last year. Very little pink and only one tiny scrap of yellow. Kind of funny to see it all sorted out. I found some jars that I had in the basement which held about 1/2 of this and the other 1/2 is sitting in Ziploc bags until I figure something out. Anyone want to make me some of those cute fabric boxes that other quilters use for scraps in their adorable, organized sewing rooms? That would be great, thank you very much.

IMG_3060I left the blue and white scraps out as that is the January color for RSC15. I took a quick peek at the first row for Mari’s Classic Stitches BOM at Academic Quilter and plan to get started on that fairly soon. The block is a Broken Dishes pattern using lots of HST’s. It will be fun to get started on those. She has several options for block size with each row so I need to figure out a plan before I start cutting.

I do have a couple of finishes for this week. Sunday I got the RSC14 quilt top assembled. It is so pretty. I sashed it with a light gray polka dot fabric.

20150106_2679

I’m very happy with the way this one turned out. I wanted to add some width so the border on each side is 4 inches rather than two like the top and bottom strips.  At this point I am making good progress on this one and should have it sandwiched, quilted and bound by end of the month. (I hope, I hope!)

20150106_2684I also managed to finish up a couple of Chemex Coffee Pot cozies for my Etsy shop. This one is my favorite for the week. The fabric is from an Alexander Henry line (Dia De Los Muertos). Most of the line was a little weird for me but this piece is so fun. I wish I had bought more of it.

20150107_2713So the week was kind of crazy. I wasn’t really able to work to the schedule that I had planned on. It’s ok. There’s always next week. Hope all of you are working on something fun!

Linking up with sweet Lorna at Let’s Bee Social, Connie over at Freemotion by the RIver and Amanda Jean at Crazy Mom Quilts. What a talented trio. Pop over and check out all the work that is linked up with these blogs. The links are posted at the top of the page, under Link Ups.


One down, Two to go!

One down, two to go!  In my last post I outlined some goals I have for my quilting in 2015. One of which was to finish my three UFO’s before starting a new quilt. So here is the first one, the Aurifil Designer 2014 BOM quilt. You might remember that I only made nine of the Aurifil blocks and then did three blocks of my choosing.

The back (shown here by my lovely quilt model) is a sweet blue polka dot, one of Riley Blake’s La Creme line.

20150103_2662


Technically I am calling this a 2014 finish because all I did yesterday was to sew the back of the binding on, the bulk of it was made in 2014. So bright and happy.

20150103_2661

You might remember that I only made nine of the Aurifil blocks and then did three blocks of my choosing. To quilt it, I used my walking foot and outlined various shapes within each block. Also I quilted a 1/4″ line inside of each side of the sashing. I ended up using three different thread colors on the top, white, orange and a light gray. I kept white in the bobbin for all three colors though.

20150103_2663

We we spent the New Year’s holiday at the Downieville house. Remember, the tiny bungalow we bought after I saw it during a Quilt Retreat weekend up here? Ray has been coming up about every other weekend to work on it. Julia and I have come a couple of times to clean. This weekend Ray made great progress on replacing a large amount of the (very old and unsafe) knob and tube wiring.  Lots of this was done from the attic which is sort of unpleasant considering all the dust and insulation up there. Yuk. Julia pulled nails from the exposed studs in the bedroom. She also did some mopping. What a trooper. I sanded a few shelves in the kitchen cabinets and scrubbed down a bedroom that is technically in the basement but is actually one of the more normal rooms in this house. We are definitely making progress.

i think my next project will be to sash the blocks for the RSC2014 challenge. I am setting the finish of this quilt as my goaI for January. I am linking up with Sew Bittersweet Designs ALYOF (A Lovely Year of Finishes) which is a fun challenge for quilters to set a goal or two each month. It is a good way to keep organized and be sure to finish what you set out to do. I will link my goal(s) at the beginning of the month on her site and then report in at the end of the month.

I also plan to participate in RSC2015 as well (as always, this is sponsored by Angela at So Scrappy). This year I am going to follow along with a row quilt BOM that Mari is doing over at her blog, Academic Quilter. She will be posting the block for the first row on Tuesday of next week. I am very much looking forward to see what her plan is. (Completing the January row is another goal for ALOYF).  I appreciate that Mari has taken the time to sketch the rows out and do the math for the blocks as that takes time. Since she did it, I don’t have to! It will be fun to work through this with her. If you are interested in using up some scraps, I expect this to be a great project!

Linking to Crazy Mom Quilts. If you haven’t read her post today, please do. It inspired me to see all that she accomplished in 2014. Wow!! ALso linking to Sew Bittersweet Designs ALOYF.