Hello all and Happy New Year to you. I hope the holidays were pleasant for all of you. While this year was definitely not how we normally celebrate, we did enjoy them. We scheduled a Zoom call with our three boys who live away from home and that was great. Also, my son set up a Zoom so we could just quietly watch the girls’ Christmas morning excitement. That was especially great – seeing them so excited, opening their gifts. Sometimes I wish I could just have a webcam to the girls’ play room and watch them all the time. However, that would also mean I would get absolutely nothing done. They are so entertaining.
This year our tradition of making some holiday gifts continued. I wanted to show you some of them.
Bookmarks!
Have you made these bookmarks before? There are loads of tutorials for them on the internet and they are super fun. It is made to slip over the corner of the page to keep your place. I used a stack of miscellaneous charm squares I had for these. I tucked them into cards for my sisters and included them in gifts to (most of?) the family. Coincidentally, I also received one in the mail from a quilting friend which was a fun surprise!
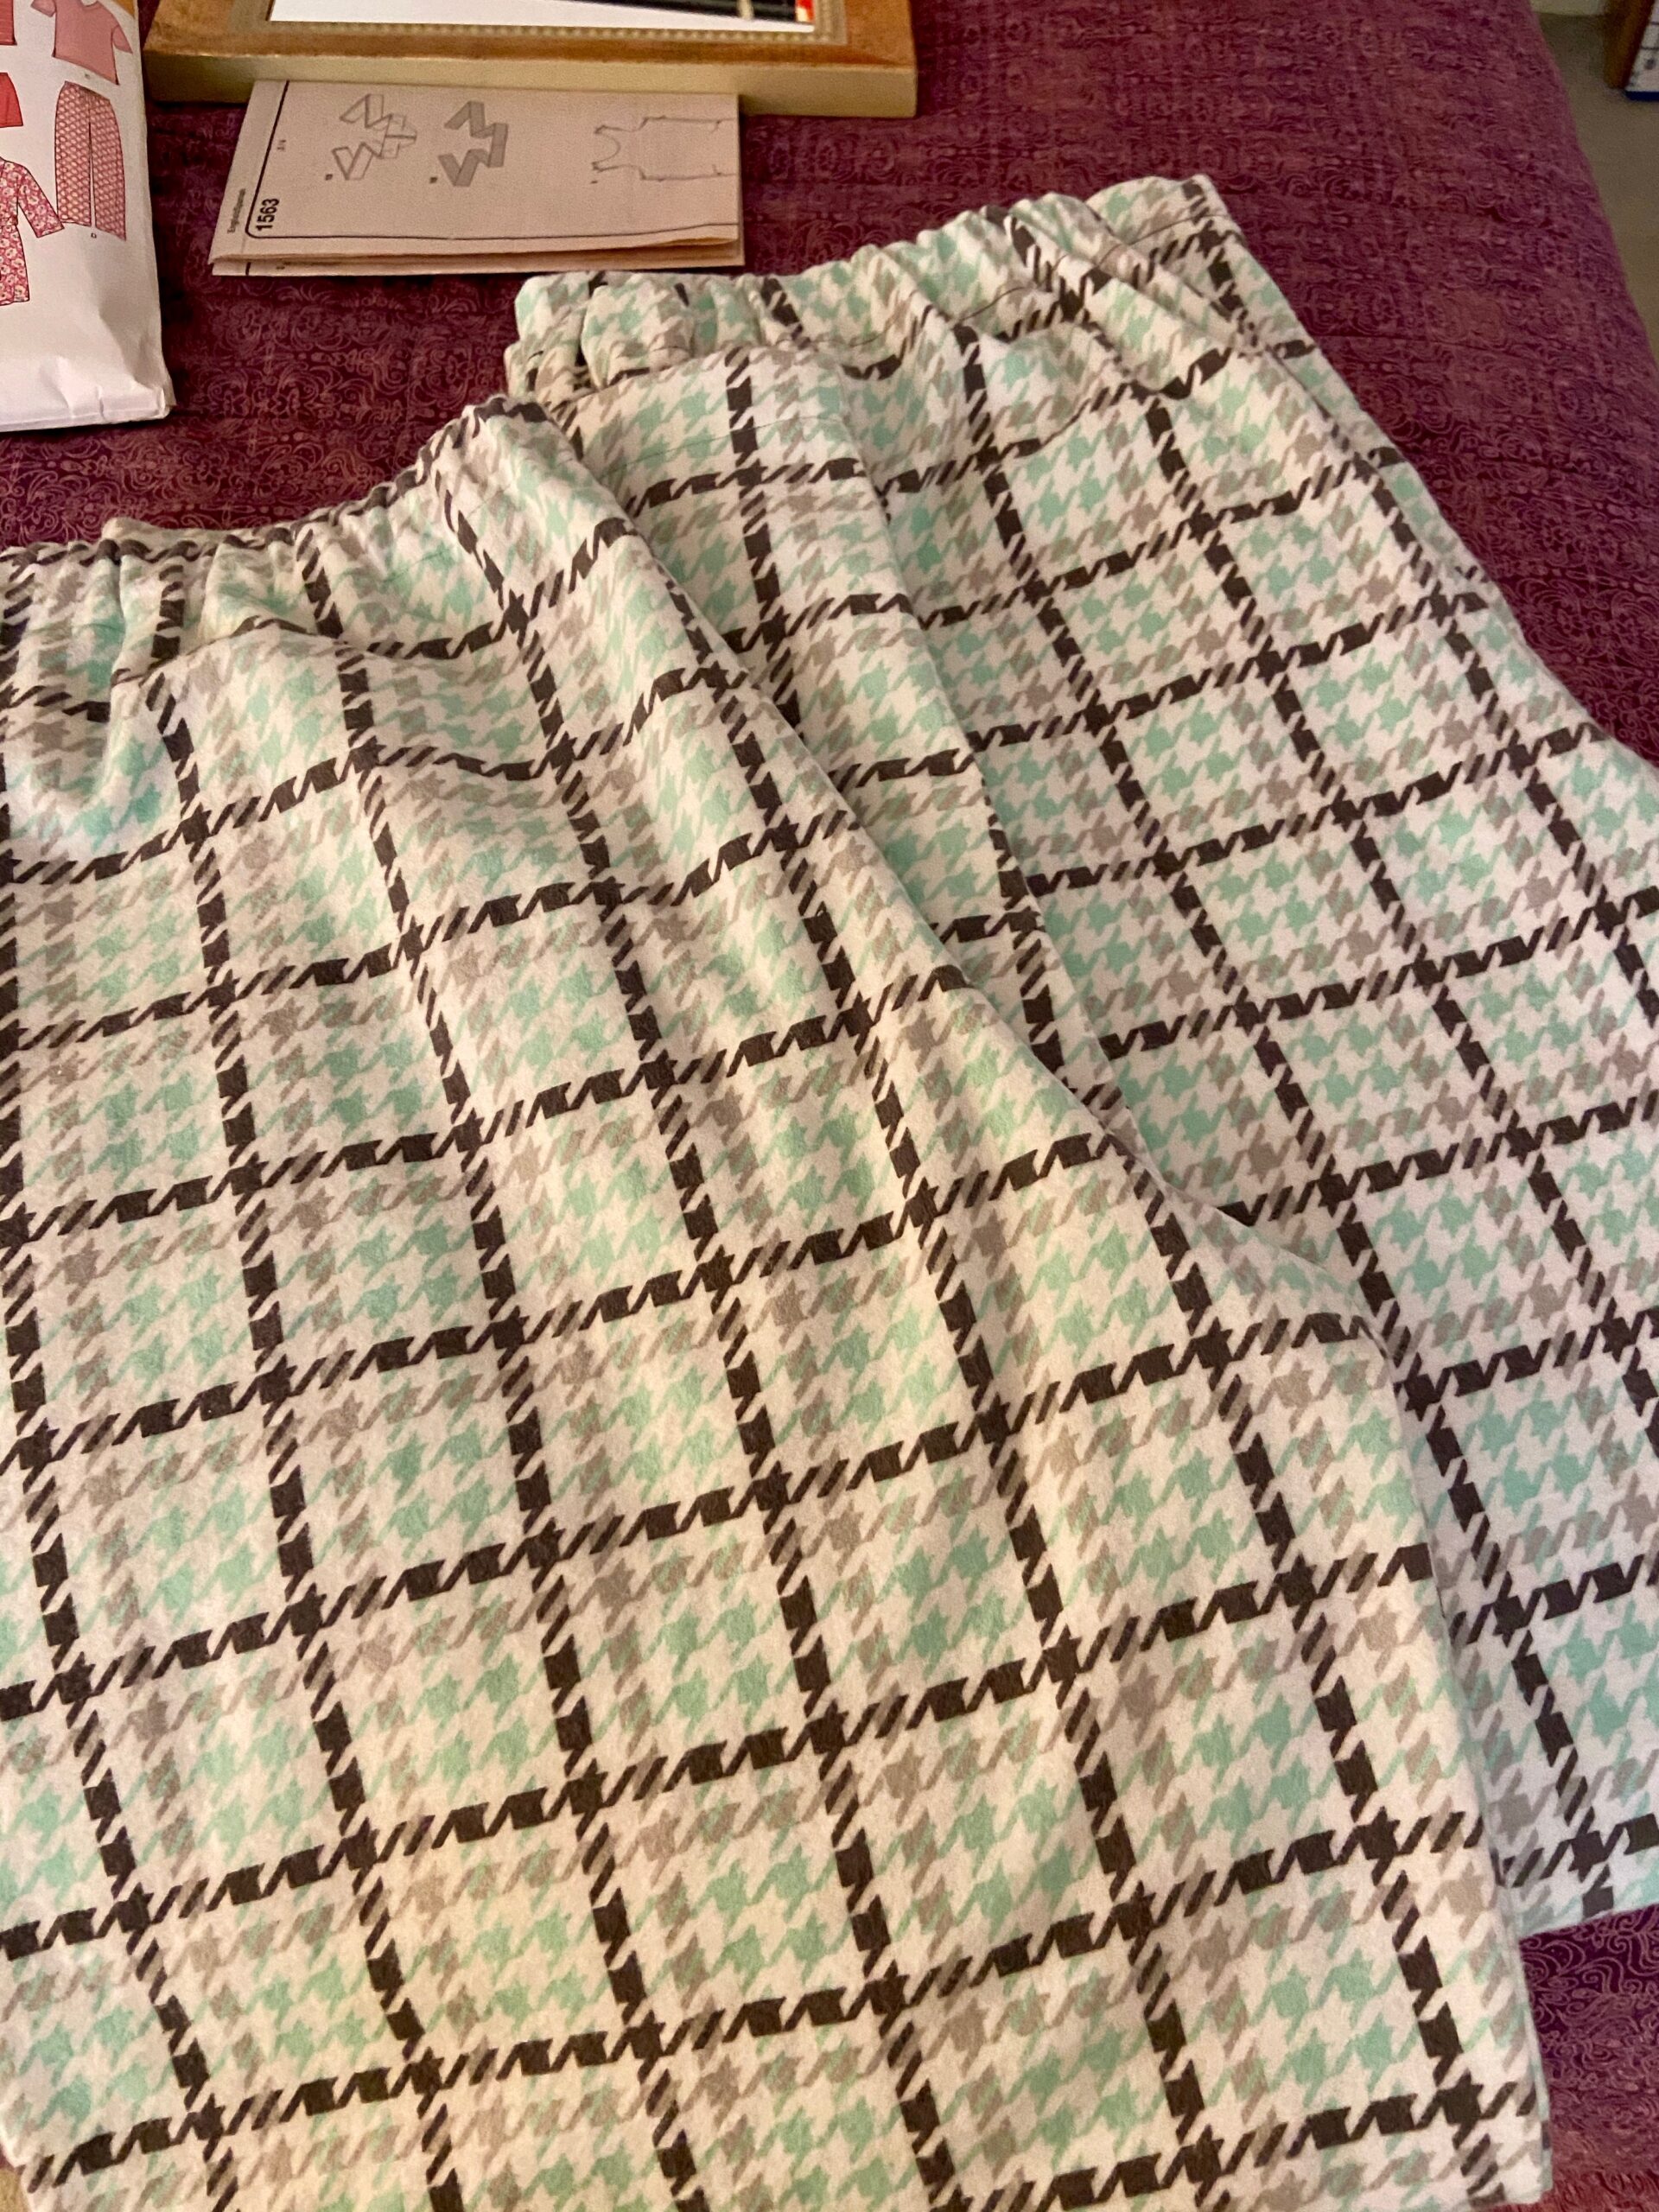
Pajama Pants
I made three pair of pajama pants. The two above were made for my parents. I believe this is their first pair of matching pj’s and I am hoping they will take a picture of both of them when they wear them.
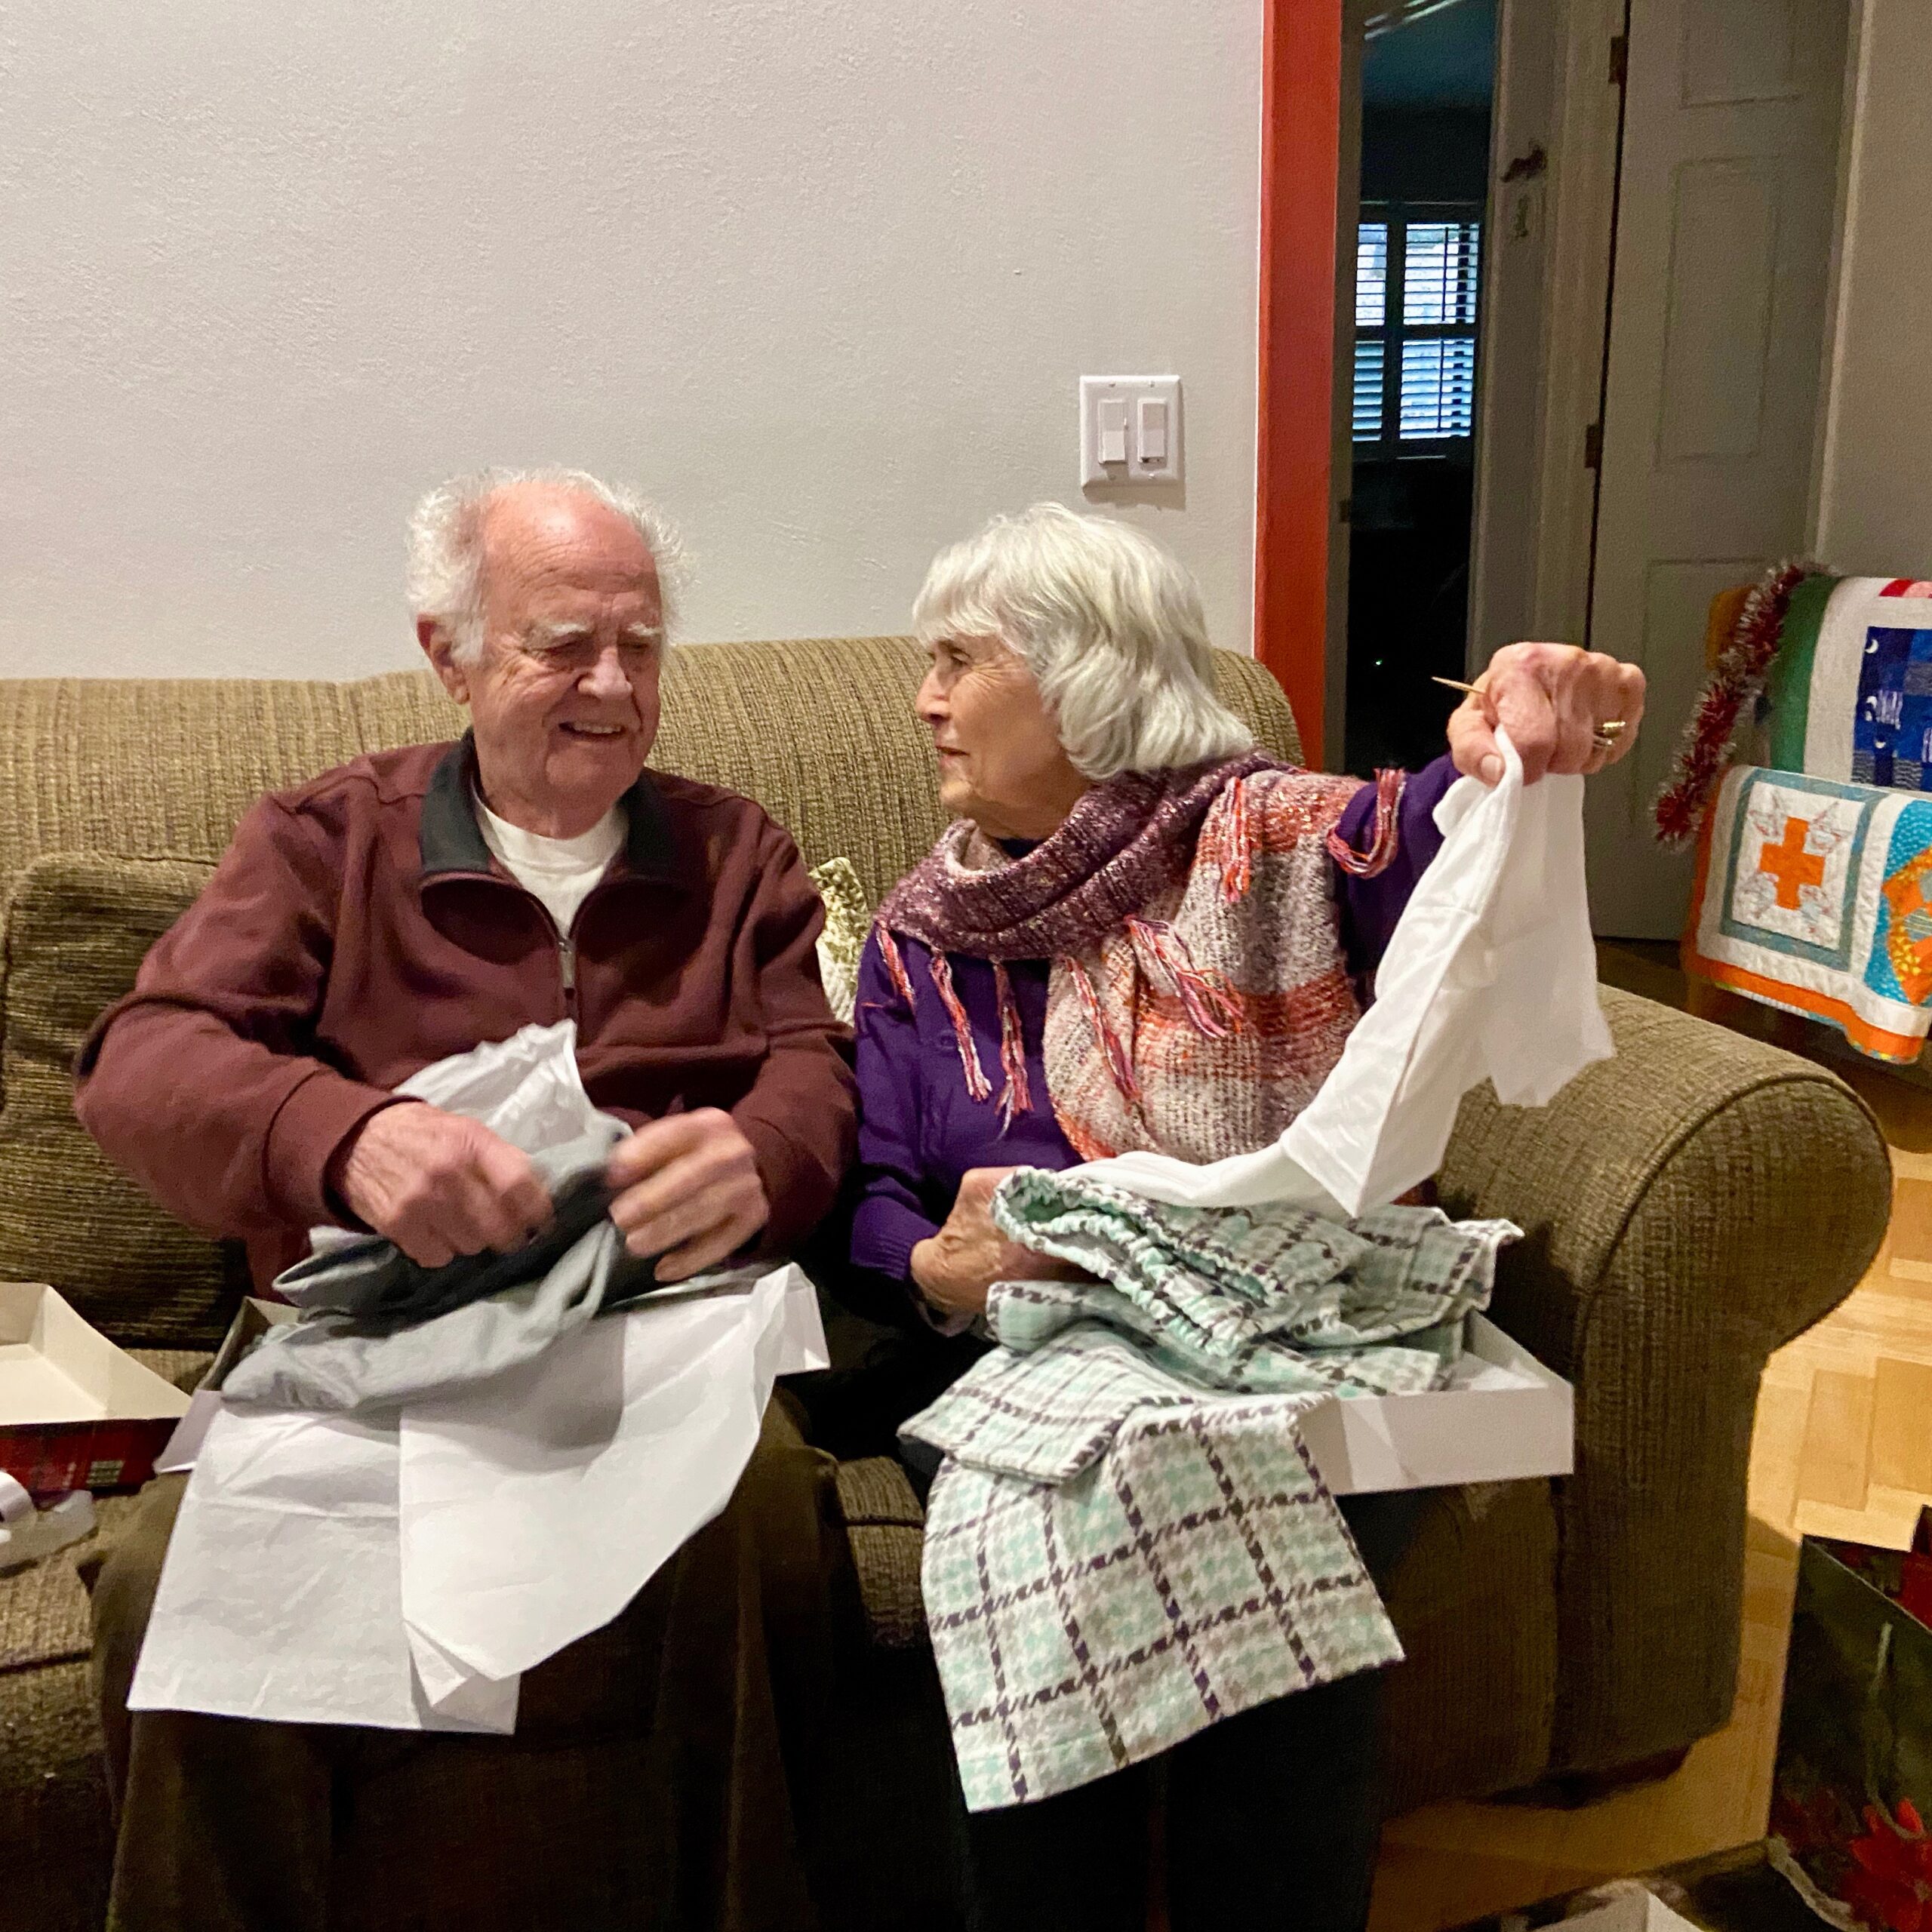
Opening gifts.
They seemed quite happy with the idea of matching jammies though I did get them different color t-shirts to go with them.
Julia and Townes
This is the only picture I could find of Julia in her new pj pants. Cute polar bear flannel, right? You will also see Townes in this photo. Julia is fostering him for the shelter. This is the third dog she has fostered and he is such a sweet animal.
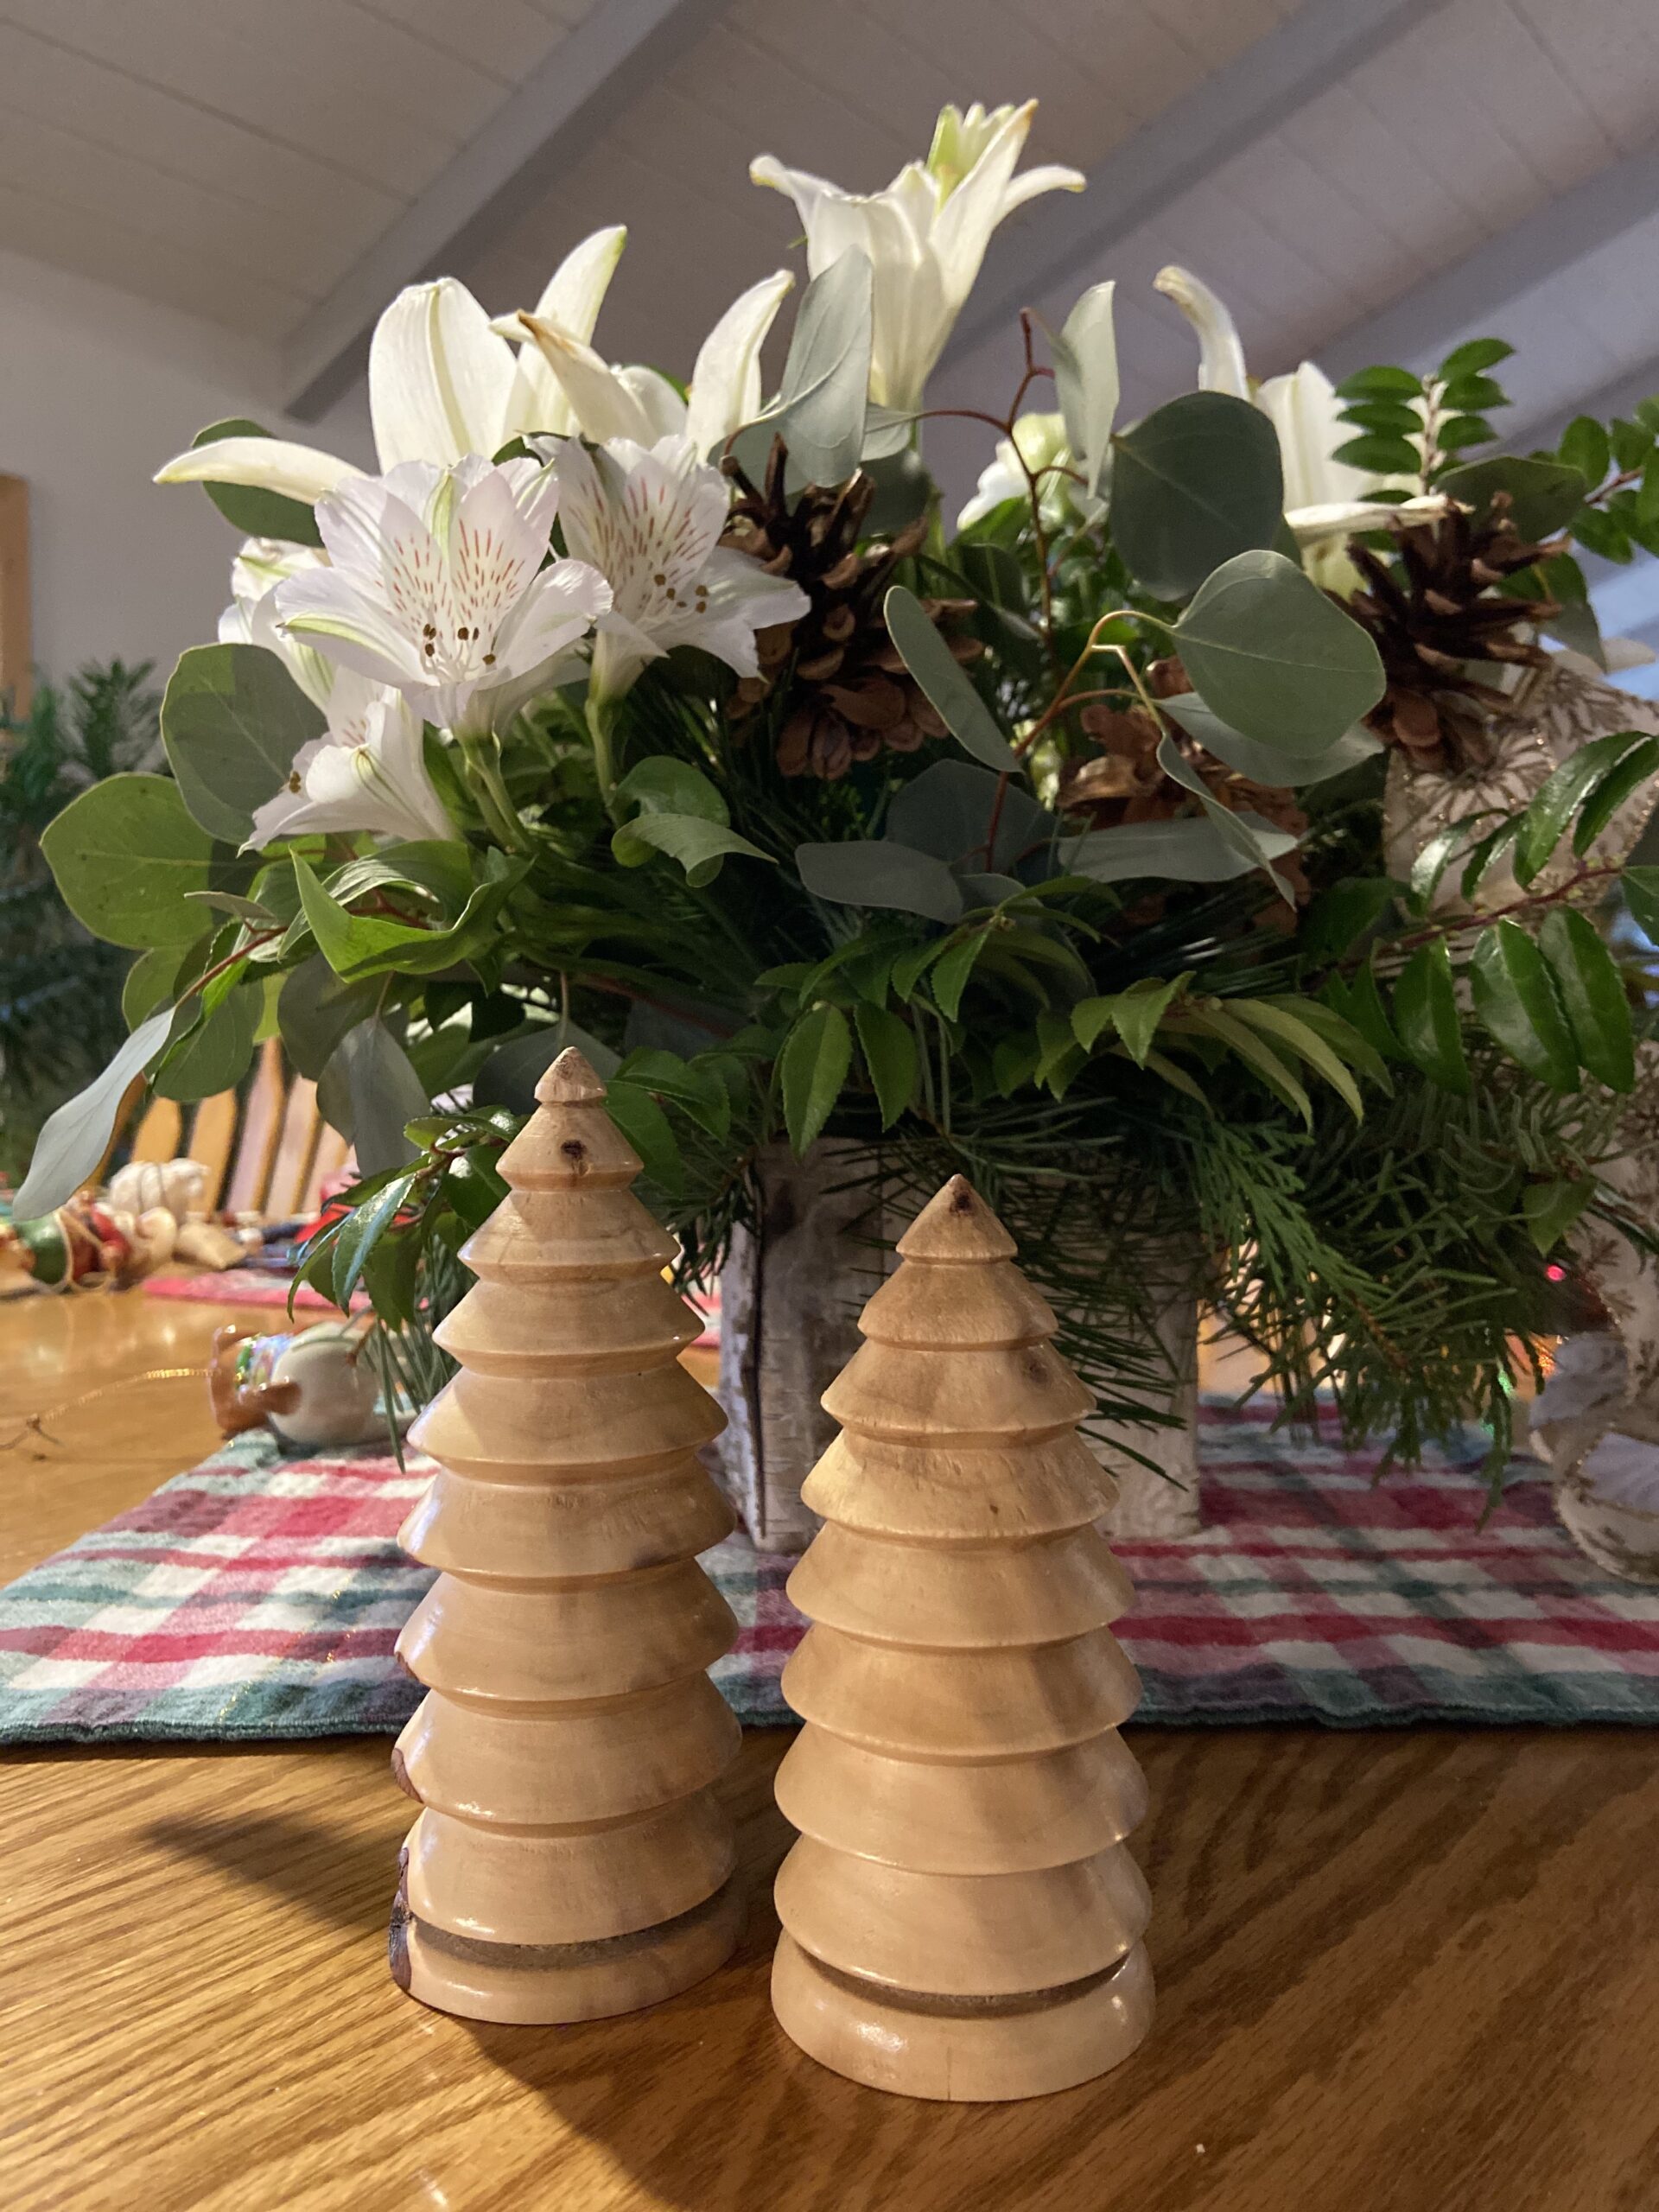
Wooden Christmas Trees
My husband made a set of these sweet Christmas trees, enough for one for each of our children plus our parents. I love these and they are definitely one of my favorite of all the things he has made. So simple and really pretty.
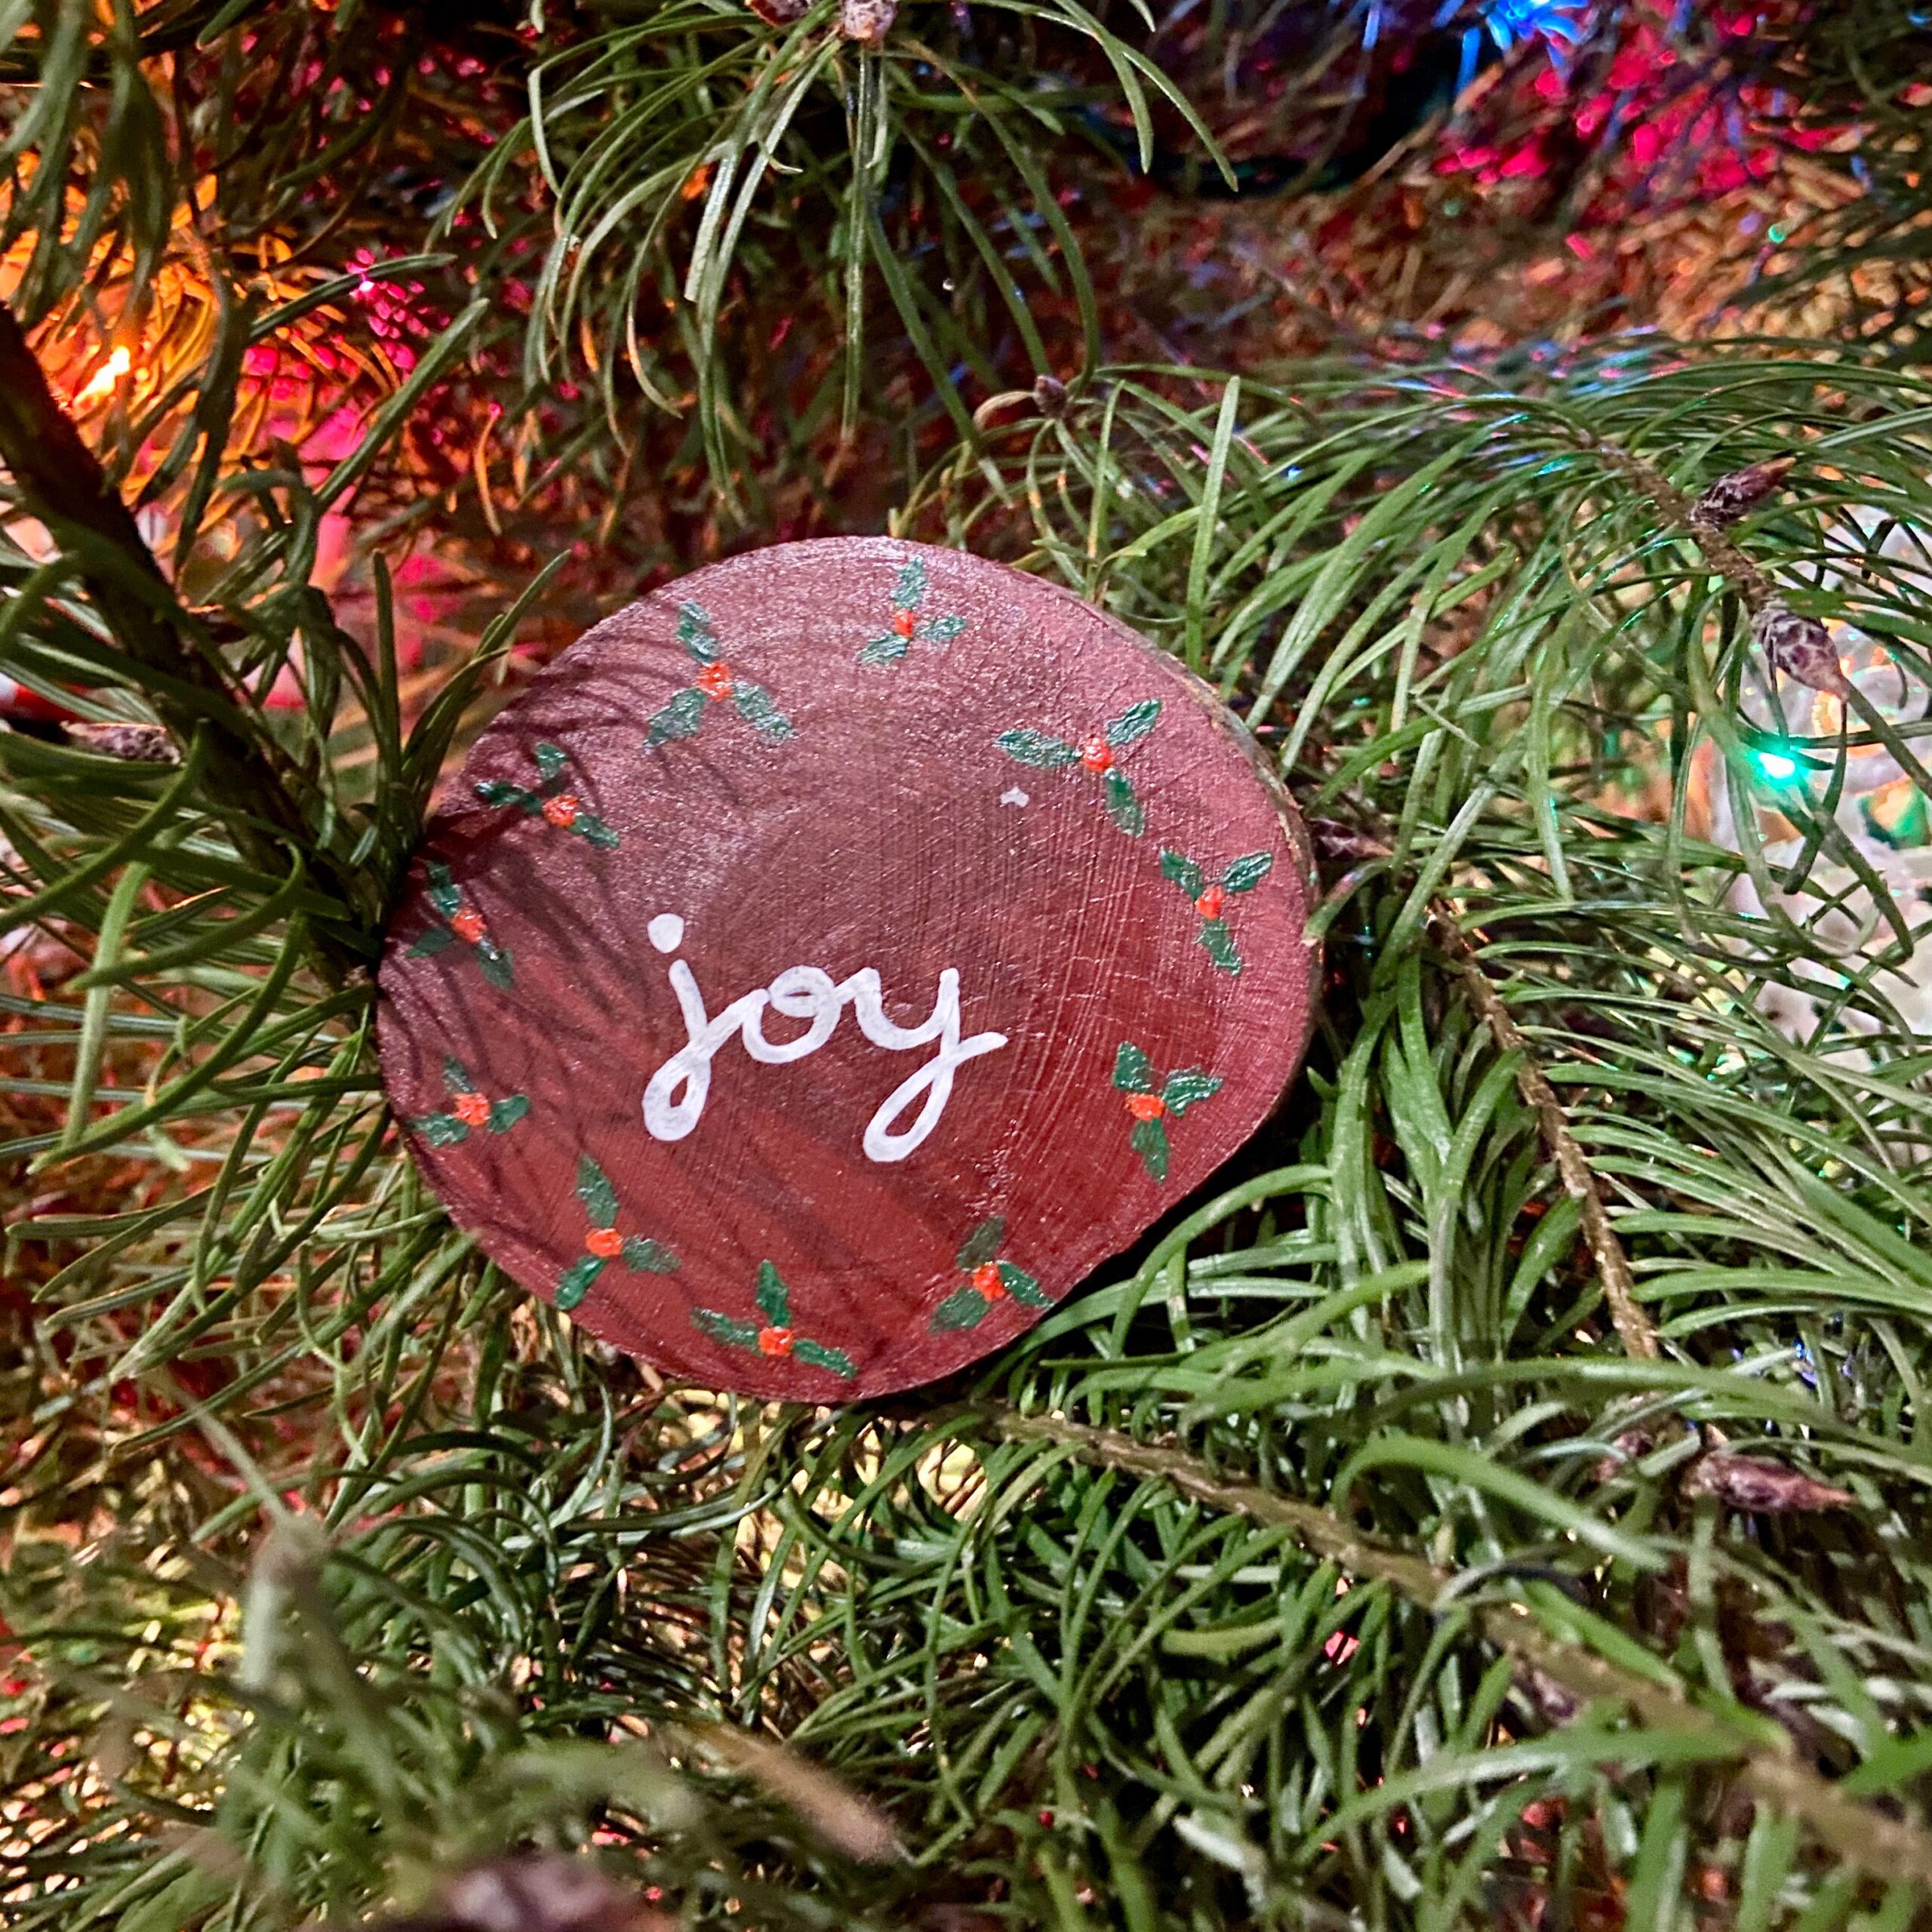
Julia painted this wooden ornament for me. A while back, Ray sliced a branch into small rounds and gave them to her to craft with. She has made several ornaments so far. Mine is so sweet. She made one for Ray as well but he keeps it in our room and I failed to grab a picture of it for this post. It is a cute camping scene of a lone tent in the mountains. Perfect for him!
I also made two aprons, one for Julia and one for my daughter-in-law, Shar. I don’t (yet?) have any good photos of those gifts though.
I do love making gifts for people. I am happy to see Julia also making some gifts. It makes gift giving even more special. Today is going to be the take-down-the-holiday-decorations-day. How about you? As much as I love Christmas, I am ready to get the house back to normal. Enjoy the weekend everyone!
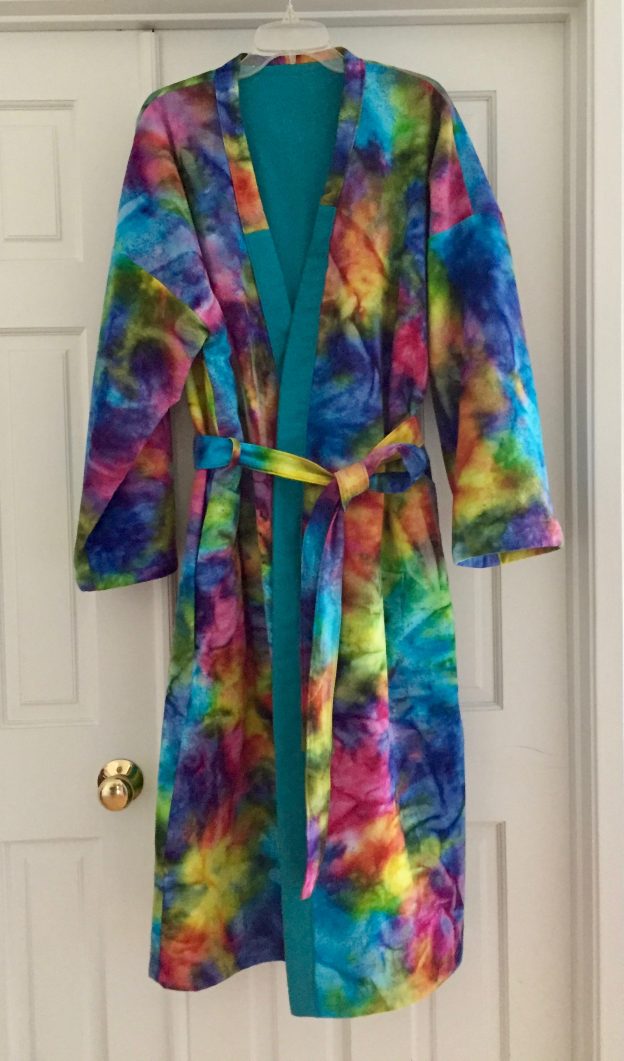
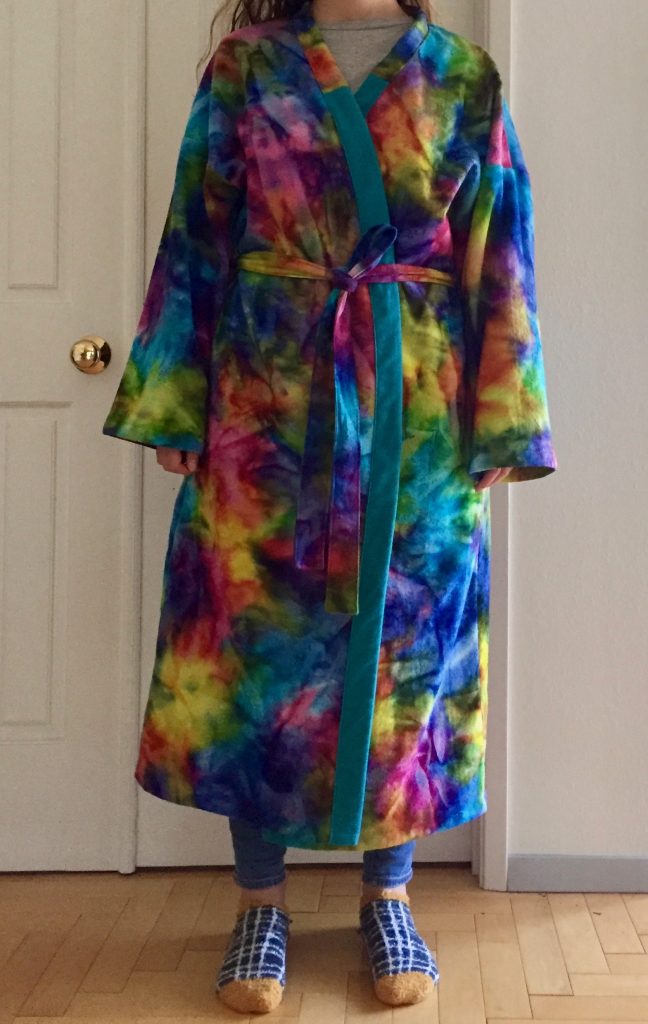
Back in October my daughter told me her friend was wanting a new bathrobe. To which I replied (as you would I am sure) “Oh, well why don’t I make one for him?” Any excuse to sew something, am I right? Anyway, Balam (her friend) was excited and even told me no one had ever made any clothing for him. I certainly didn’t need to hear anymore than that.
A few weeks later, Balam and I met at Ben Franklin to choose a fabric. I had hoped for a thick terrycloth or a nice fleece. No luck finding either one. I steered Balam over to the flannels. You need to know Balam has some wild taste in clothing. He is often wearing really bright Hawaiian shirts. He and Julia like combing thrift stores for fun clothes and both of them usually have on some pretty crazy socks. When Balam spotted a section of tie-dyed flannels his eyes lit up. I tried to steer him over to the blue and green tie-dyed flannel but clearly it was far too subdued for him.
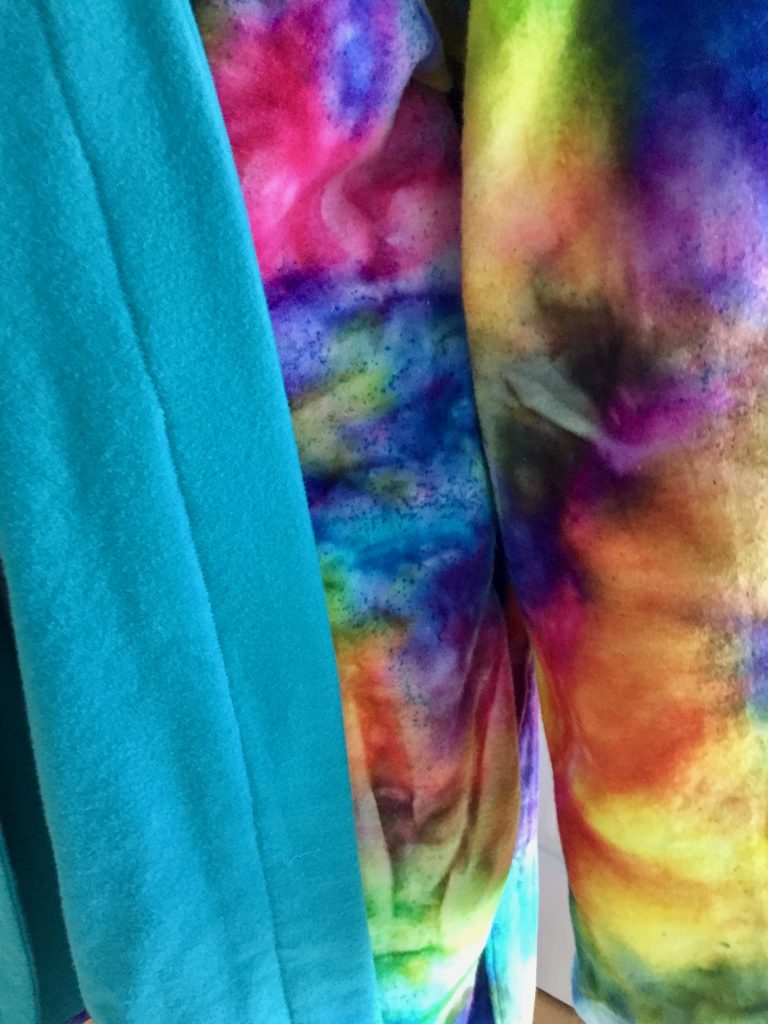
I have been calling this project the Coat of Many Colors or the Robe of Many Colors since I started working on it. I got home with the fabric and washed it with several color catchers and then dried it in a hot dryer. After cutting out the pieces, Julia and I were looking at it. It felt too thin for a bathrobe. With the one layer of flannel, it just didn’t have a cozy feel to it. This was over Thanksgiving weekend. We hopped on-line to see what was on sale at Jo-Ann’s. There was a teal blue flannel for $2.99 per yard and it was a great match. Score!
The lining made the robe so much cozier and it matched really well.
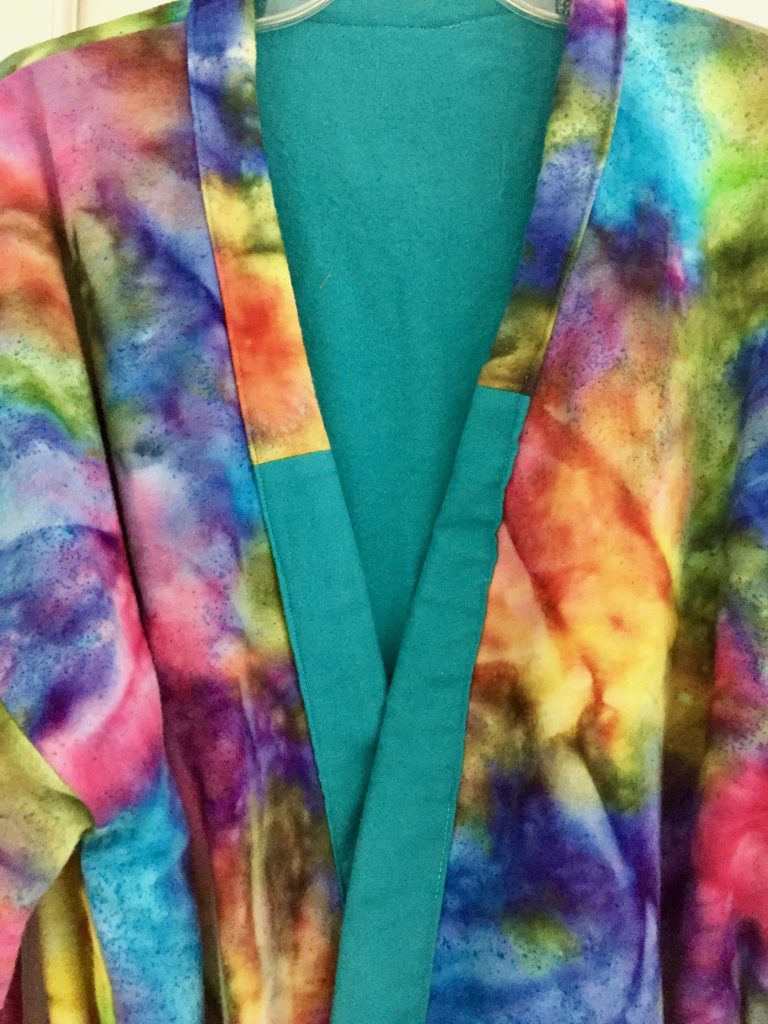
When the solid flannel arrived a few days later, I cut out the same set of pieces (front, back and sleeves). I had already constructed the outer portion with the tie-dyed fabric and now I put the blue lining together. It went together very quickly as this was a super easy pattern. Inserting the lining, wrong sides together with the outer fabric was simple. Then I carefully pinned the edges together along the neckline and all the way down the front opening. I top-stitched the outer robe and lining together at the shoulder seams to anchor everything. Then I ran a basting stitch around the entire open edges, up each side of the front and around the back of the neck.
I was ready to finish the open edges in front when I realized I didn’t have quite enough of either the teal fabric or the brightly colored fabric. So I used both. I put the bright portion around the back of the neck and slightly extending into the front. The rest was finished in teal.
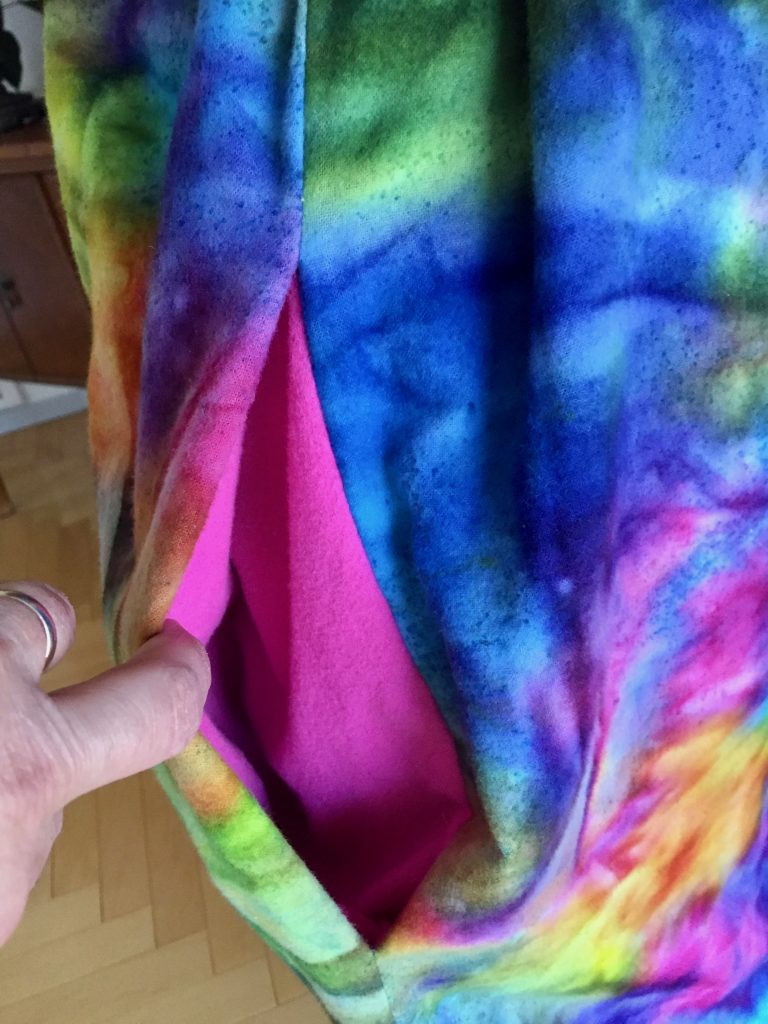
A pop of hot pink in the pockets.
For fun, I used a hot pink flannel for the inner pockets, which Balam really liked. He was so appreciative when he received the robe yesterday. All smiles and he wore it over his jeans all the way through dinner. Isn’t that the best?
Julia modeled for me even though this is a bit too big for her.
This was a super fun and very easy make. Balam is really happy with it which makes me so satisfied. Most likely this will be my last finish for 2019.
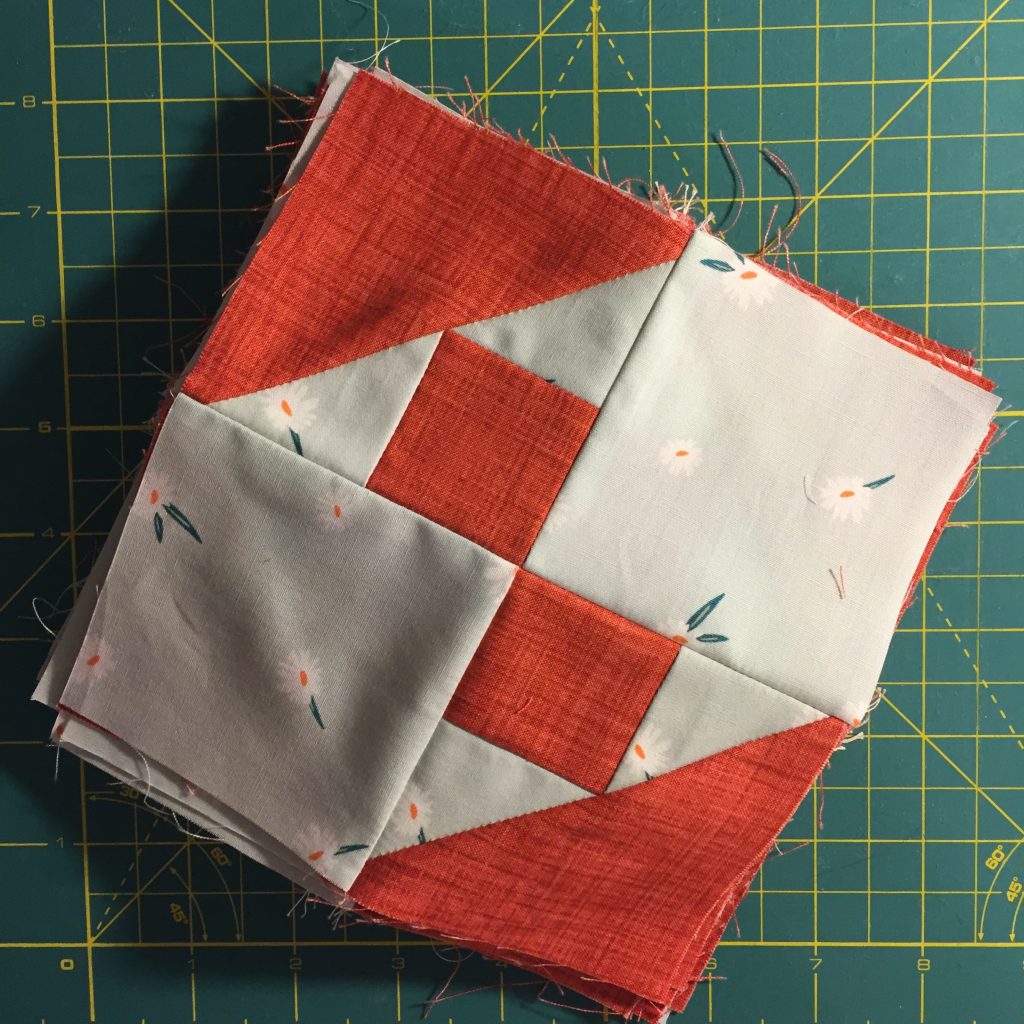
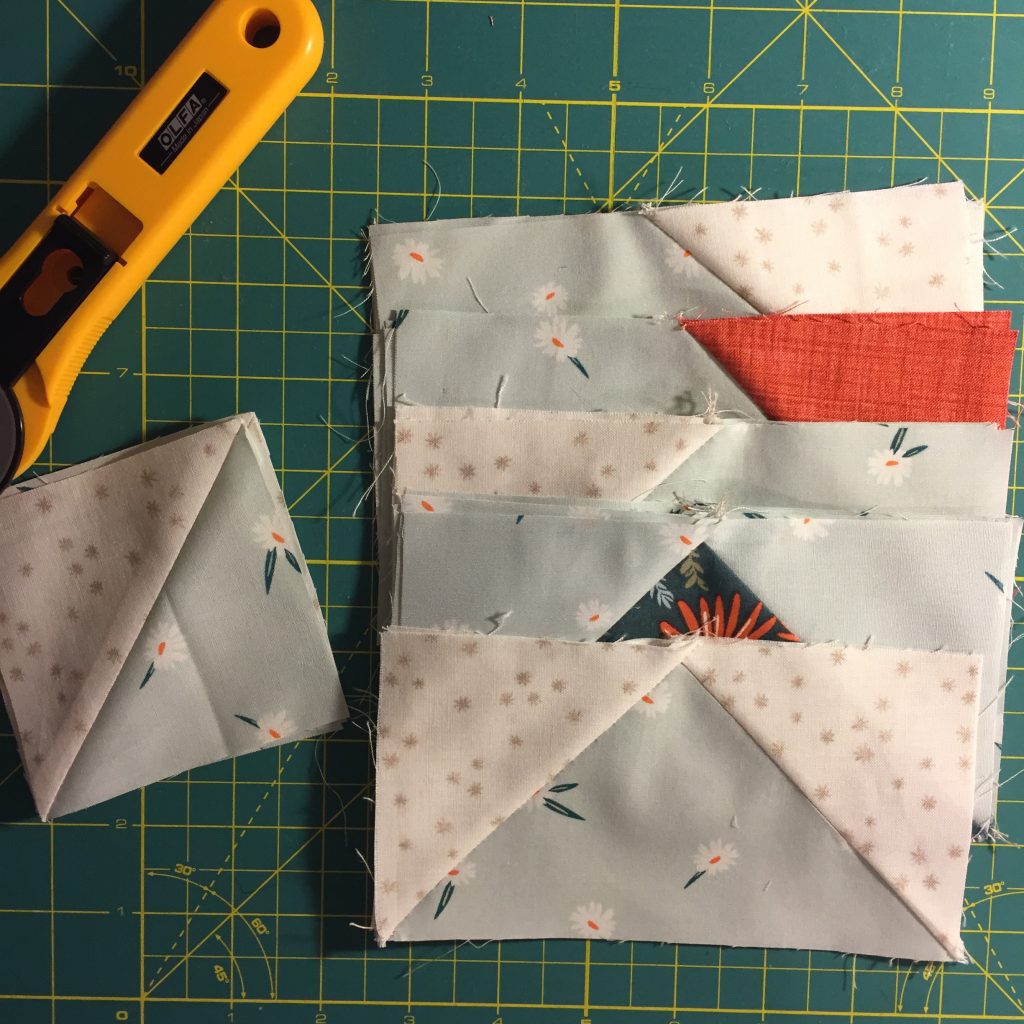
November’s blocks.December’s Flying Geese blocks.
Today I worked to get caught up on my piecing for the Mosaic Mystery QAL. I have to say, I am tickled to have these finished up. For one reason or another, it seems like I rarely keep up with these quilt alongs. Because I was sick a lot in late November and early December, I fell way behind. But with a few nice, long sewing sessions, I am all caught up! Now I can begin piecing this quilt when the next set of instructions are released. WooHoo!!! Since I am on top of this QAL, I think I will go ahead and start the Push-Pull QAL with Quilting Jetgirl in January. I keep looking at fabrics for that one and haven’t quite made up my mind yet. Decisions, decisions…
Here we are at the end of 2019! I would love to reduce the inventory in the shop for end of year and tax purposes! How about a huge sale? Just in case you are inclined to help me out with this??? For today and tomorrow only, 20% off all yardage! Even better, 50% off Clearance, Remnants, Bargains, Winter and Autumn fabric, and End of Bolt pieces. This is a sale not to be missed!
Happy New Year everyone! I am looking forward to all sorts of fun, creativity and quilting in 2020. How about you?
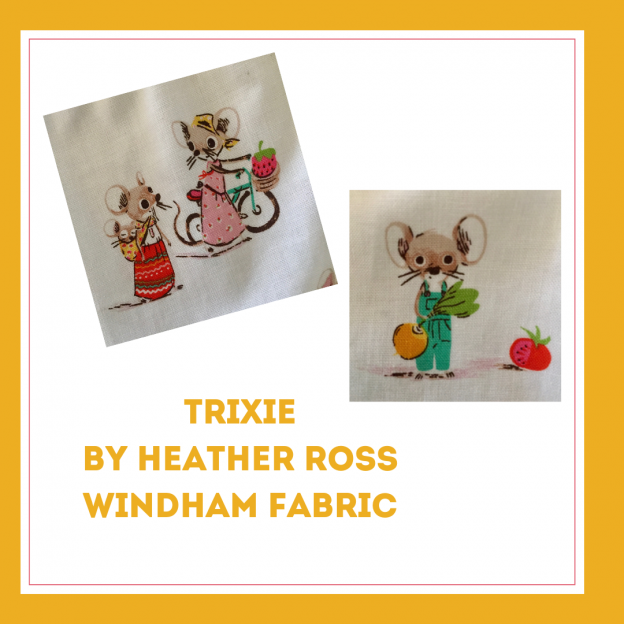
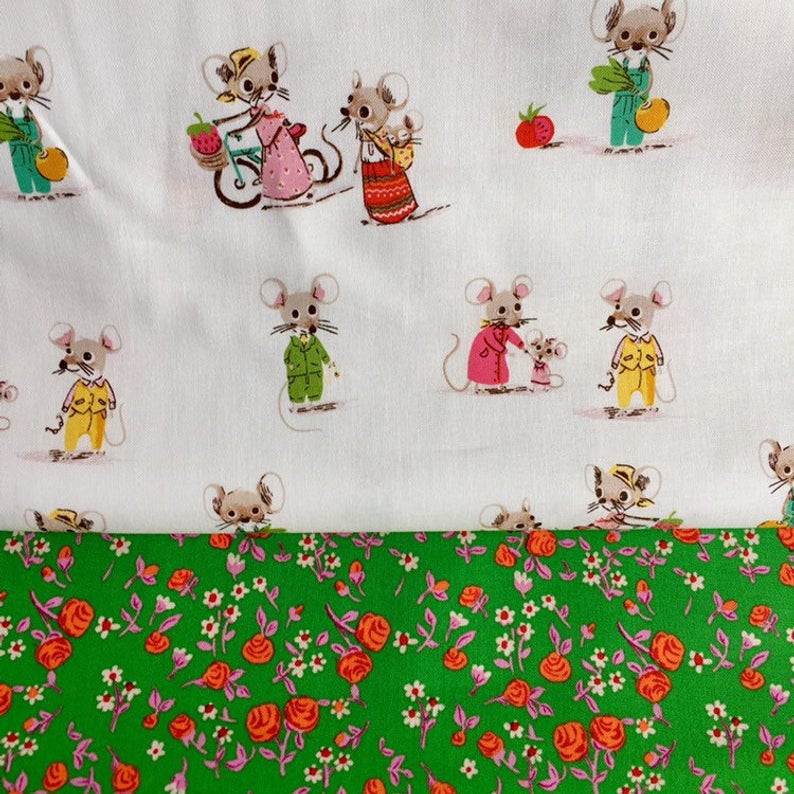
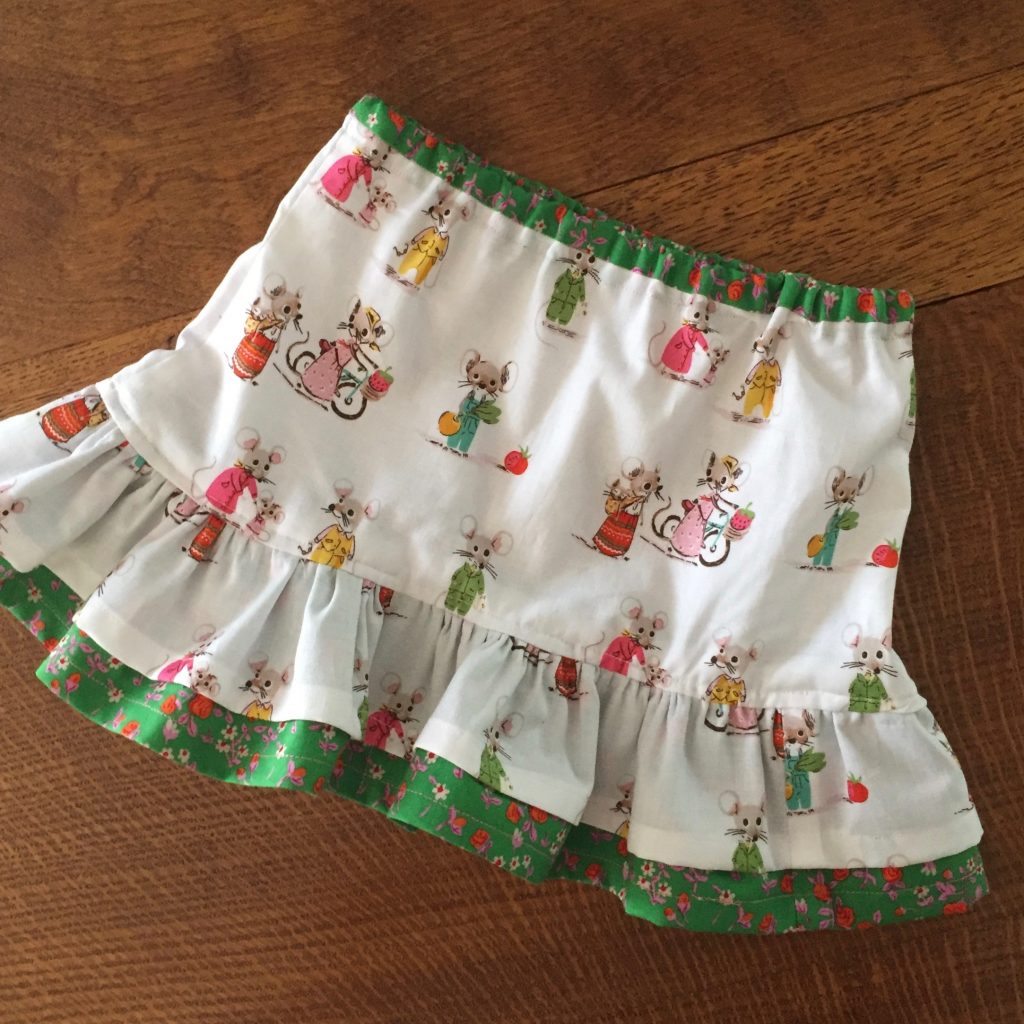
Another distraction popped up the other day. I have been wanting to make something for my grand daughter with the new Trixie fabric. This piece was designed by Heather Ross and it features two little mice, Trixie and her friend Thomas. I really love it! By the time I ordered it, a few key pieces were already sold out. However, I do have these two sweet bolts in the store.
I am fully aware the fabric in the shop is supposed to be sold. That is the goal. However, it is really difficult not to cut into certain bolts and this is one of those. These little mice are too cute. In real life, I have a huge issue with rodents, mice, etc. Ugh! But these, I can handle these little critters!
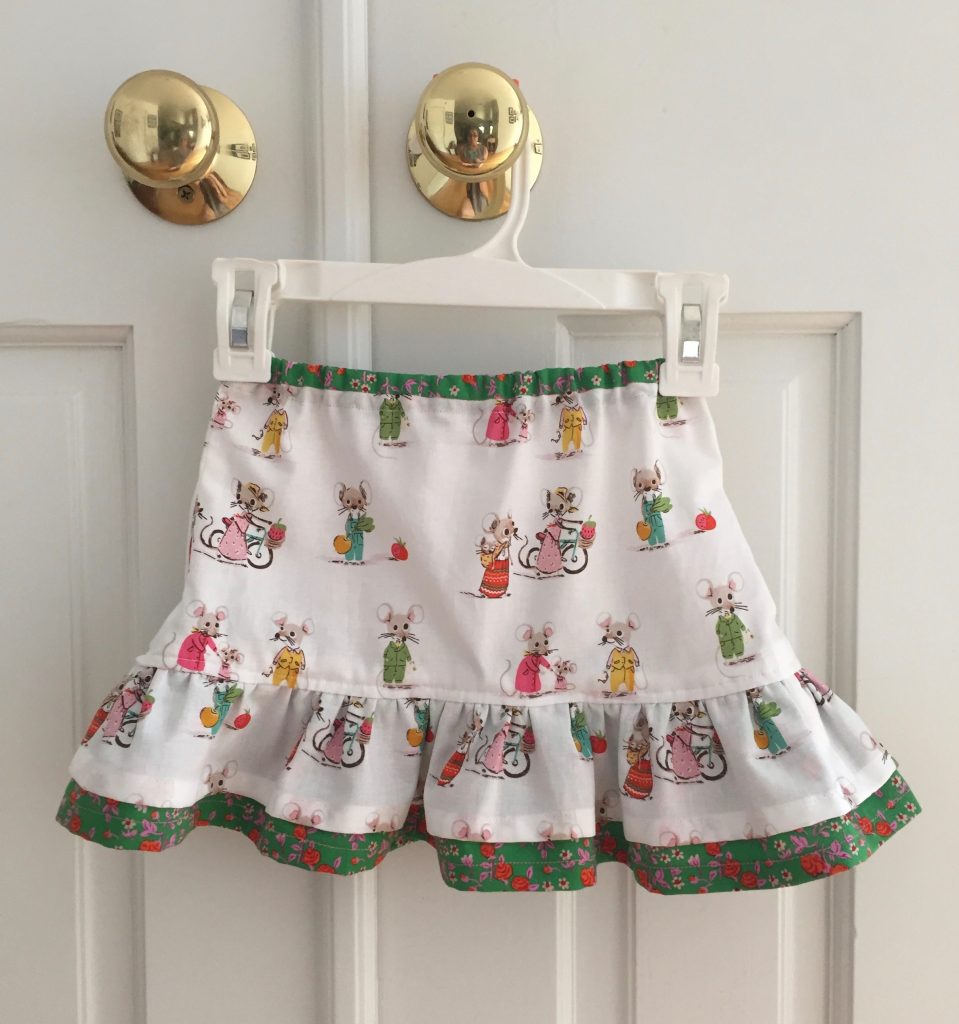
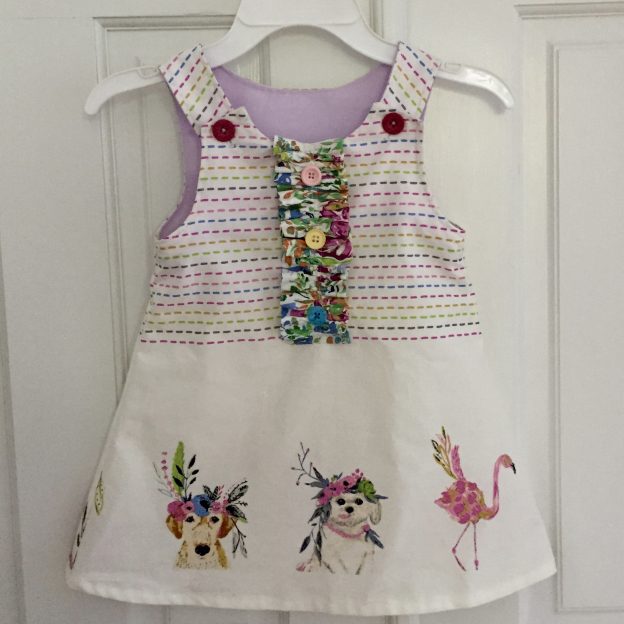
The pattern was a freebie from SewCanShe.com. This little skirt is so simple to make. The length of the skirt seemed quite short so I added a bit more length by adding on the second ruffle with the green floral.
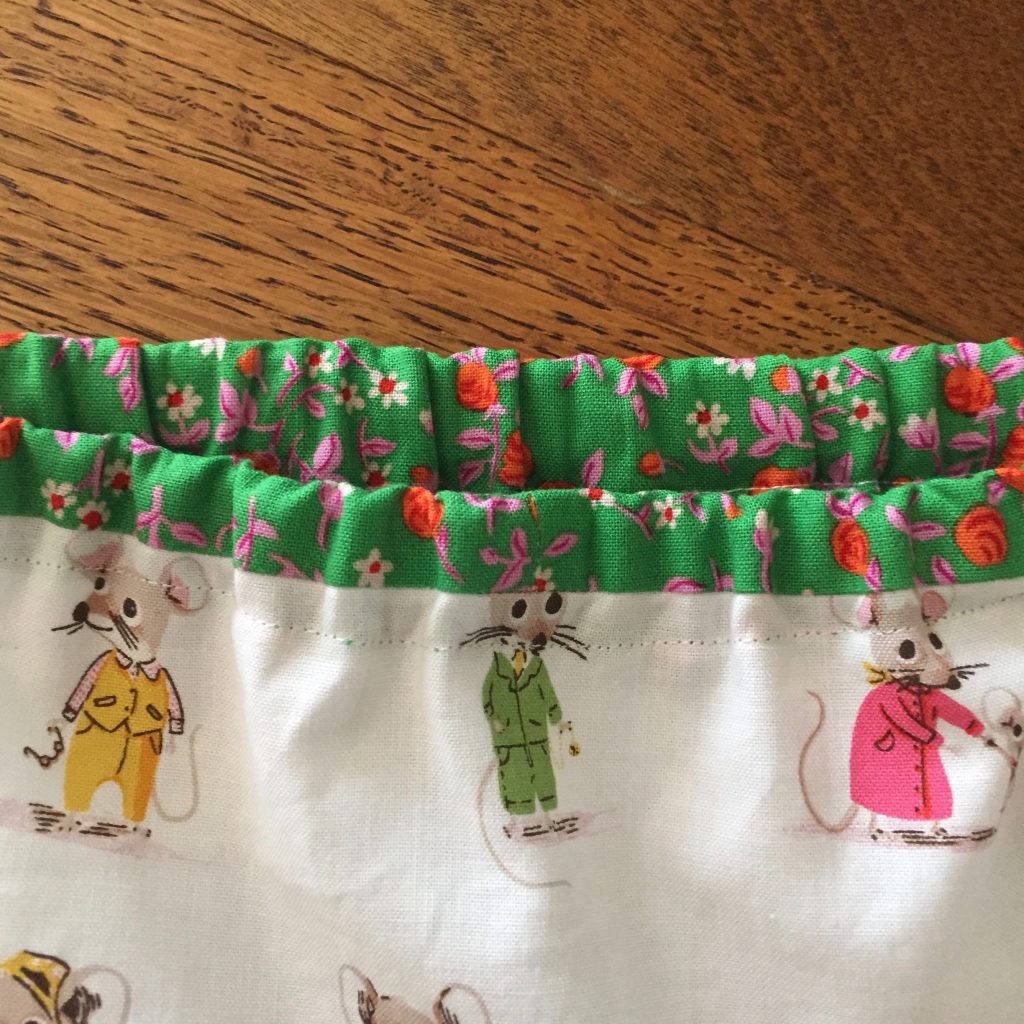
I was also able to add some length by stitching a band of the floral around the top of the skirt. I used that to create the casing for the elastic. This added about one inch to the overall length. I love the way that pop of green looks at the top too!
I packaged up the skirt this morning and will mail it off to Vermont tomorrow morning. The elastic is not yet stitched together. I really wasn’t sure if I was making the waist the correct size so I am hoping my daughter in law can check the fit and then stitch it together. I know H will love these little mice with the bicycles.
Heather Ross creates such whimsical designs. Trixie is no exception. For those of you who are really into fussy cutting, the design lends itself perfectly! Hopefully it will fit H and I can share a picture of her wearing it soon.
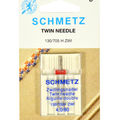
Sewing with knit fabrics, making t-shirts and tank tops is not terribly difficult. I have made a number of them. However I am usually less than satisfied with the finished look, especially the hem and the neckline. The other day I was reading a post by Leanne at Devoted Quilter and she shared a pretty blue t-shirt she made. By using a double needle (or twin needle) she was able to achieve a nice finish at the hem and neckline.
These are available everywhere – Jo-Anns, Amazon, etc.
Some time back, I purchased a double needle, fully intending to try this. But for whatever reason, the needle landed in the drawer with lots of other needles and was forgotten. Leanne’s success gave me just the push I needed to give it a try. I looked on-line to see if there was anything special about threading my machine (Janome 6500) for this needle. My machine has two posts for thread which is mandatory. But threading it was nearly the same as using only one spool of thread. I didn’t want to buy two spools of the same color thread since this isn’t a color I will use often. Instead, I wound an extra bobbin and used it on the second post. This worked just fine.
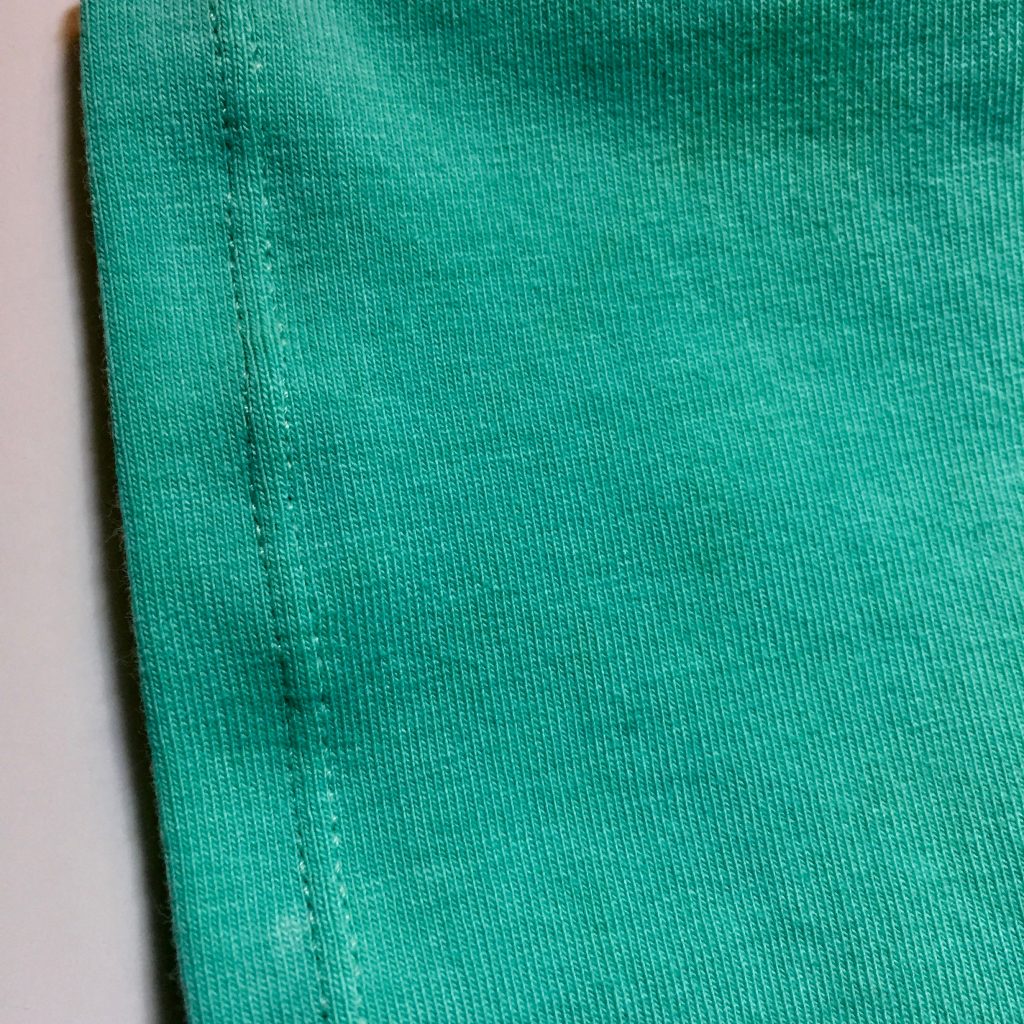
Two very neat rows of topstitching forming the hem of the sleeve.
Sewing with a twin needle is interesting in that you must stitch from the right (or the top) side of the garment. The twin stitching shows on top and the bottom stitching has an interesting zig zag pattern achieved from the use on two needles on top and only one bobbin on the bottom.
This is how the back side looks.
This is the part I think is so magical. When I first tried using the needle and a a few scraps, I wasn’t at all sure what the bottom would look like as I didn’t really understand how one bobbin would deal with two threads.
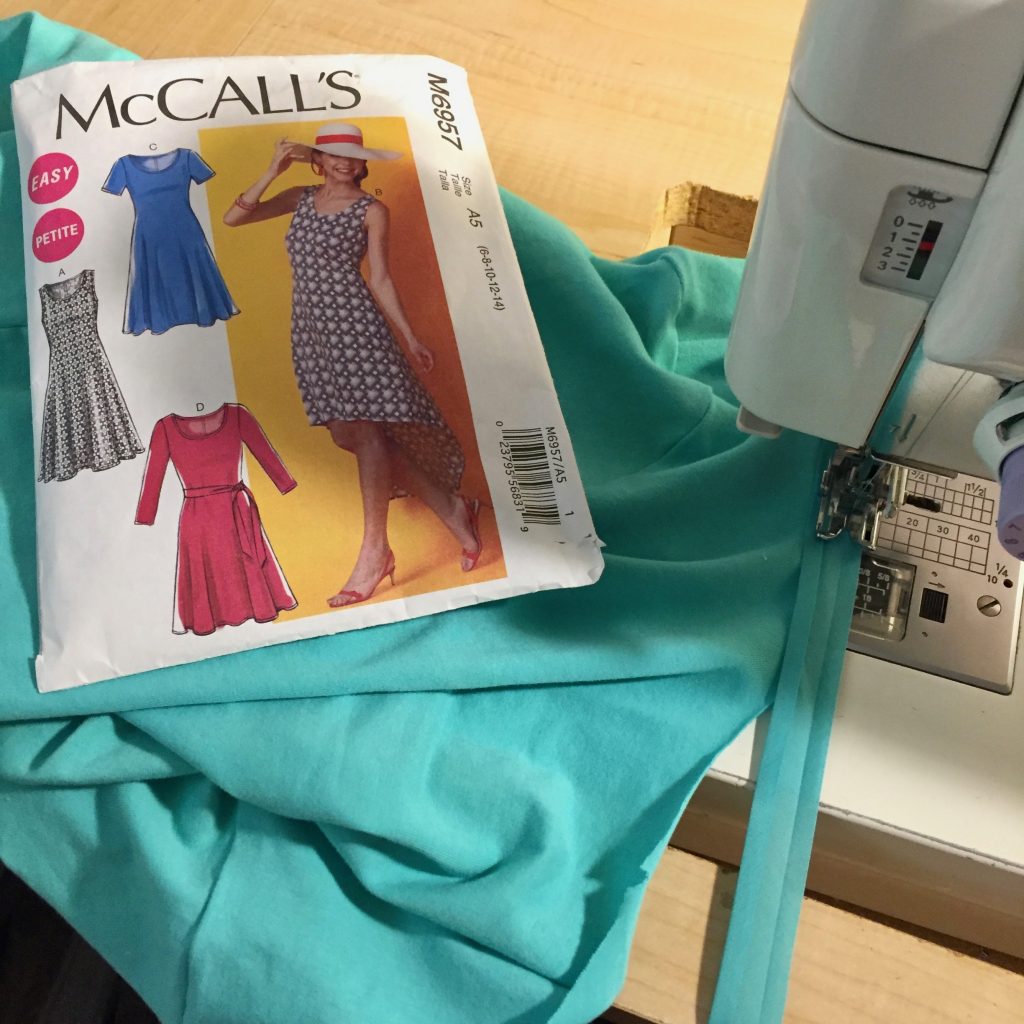
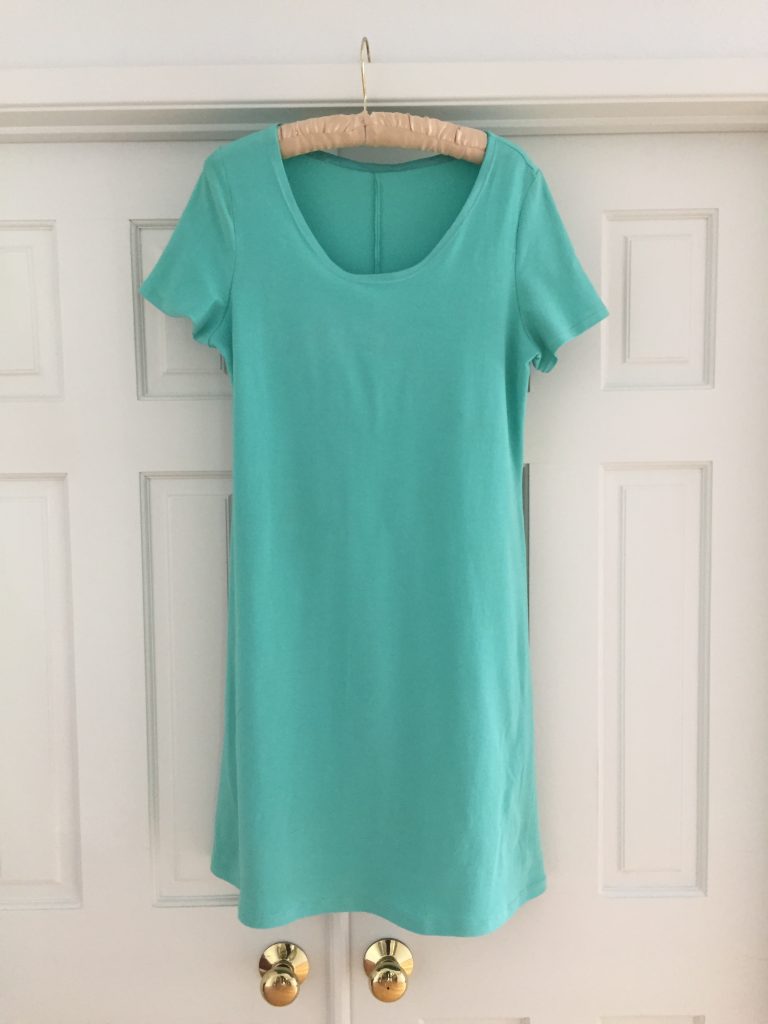
Ok, here are a few details about this project. Using McCall’s M6957 and my thrifted stretch knit fabric, I made a very simple t-shirt dress. I cut the top at a size 12 and graded the waist and hip area to a 14 so it wouldn’t hug at the belly (because that isn’t a look I need to share with the world). 😉 The cut of this simple dress is really comfortable and the fact there are only three pieces to the pattern makes it a very easy project to put together.
I have had this green knit fabric in the drawer for about a year now. I picked it up at a garage sale from someone who was clearing out a lot of fabric. (That was a great sale and I was fortunate to purchase a large stack of knit fabric in good condition). I thought I would use this piece of fabric because if the fit wasn’t good there wasn’t a big loss since there was only a few dollars investment.
I got lucky though and the fit is great. I don’t have a picture of it on me because as I write this, I don’t have anyone to take a photo. Selfies are not my forte so I am not going to bother. Maybe I will post one later on. For now, you get the boring picture of it hanging from the door.
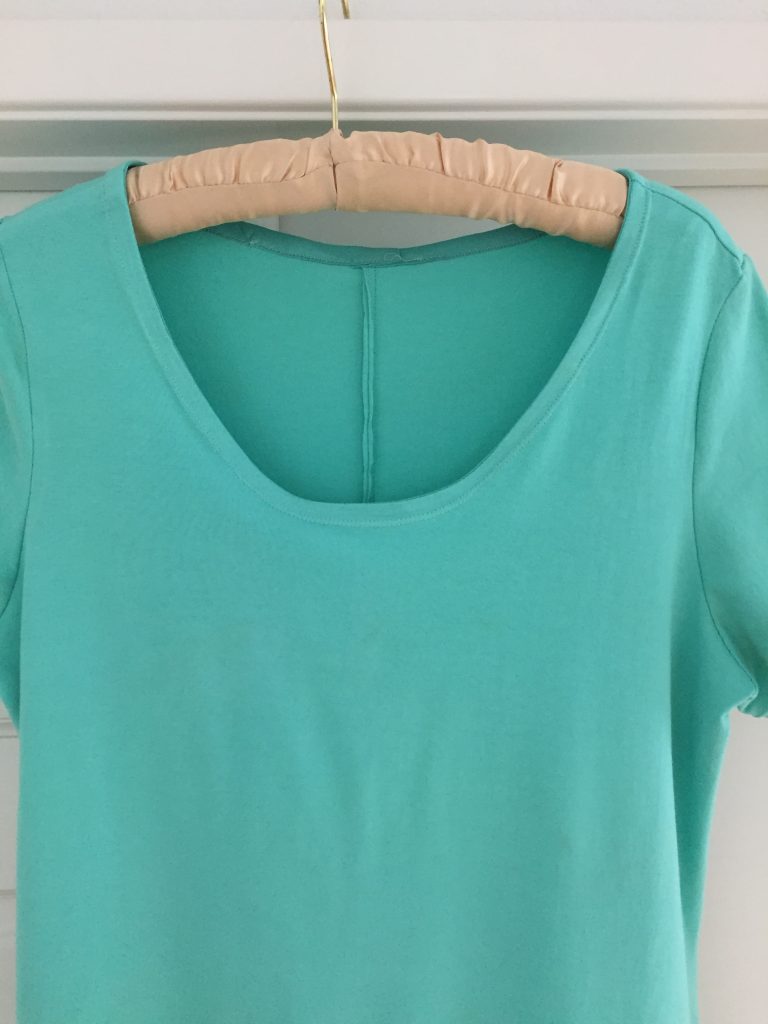
In my opinion the double needle makes all the difference. The hemline, hem of the sleeves and the topstitching of the neckline look so clean. It really elevates the finish of this dress. One thing to note, the pattern instructions told me to just fold the neckline in toward the wrong side and topstitch. I don’t like that method as it usually makes a wavy neckline and it allows too much stretch.
Instead, I attached single fold bias tape and then folded that to the inside and topstitched it. This way, I have a cotton strip creating shape to the neckline. It lays flat and looks really nice. I also reinforced the shoulder seams with bias tape so they wouldn’t stretch. After sewing the shoulder seams and checking the fit, I took a small piece of bias tape, laid it over the seam line and stitched it down. A very easy task and it will prevent the seams from stretching.
Now that I feel confident about the fit and look of this pattern, I want to make another one. I have lots of nice knits and look forward to using them. I think I will make a sleeveless version since we have such warm summers.
Hoping all of you enjoy the weekend. We will likely have a fairly quiet weekend. Julia is studying for finals. My husband wrenched his back and is limping around trying to let it heal. No big plans for the Kringel’s this weekend!
Linking to my usuals – check them out at the top of the page under Link Ups.
I saw a funny graphic on Facebook the other day. It isn’t something I made up and I don’t know to whom I would credit this but it resonated with me.
Of course, it is even worse now. It isn’t a couple of years out. Next year is 2020 so, 30 years ago will be 1990. How can that be? Thirty years ago seems such a long while back. However 1990 doesn’t seem that long ago. Ah, I am such the philosopher. These are the deep thoughts I have been having as we move into 2019 – 😉
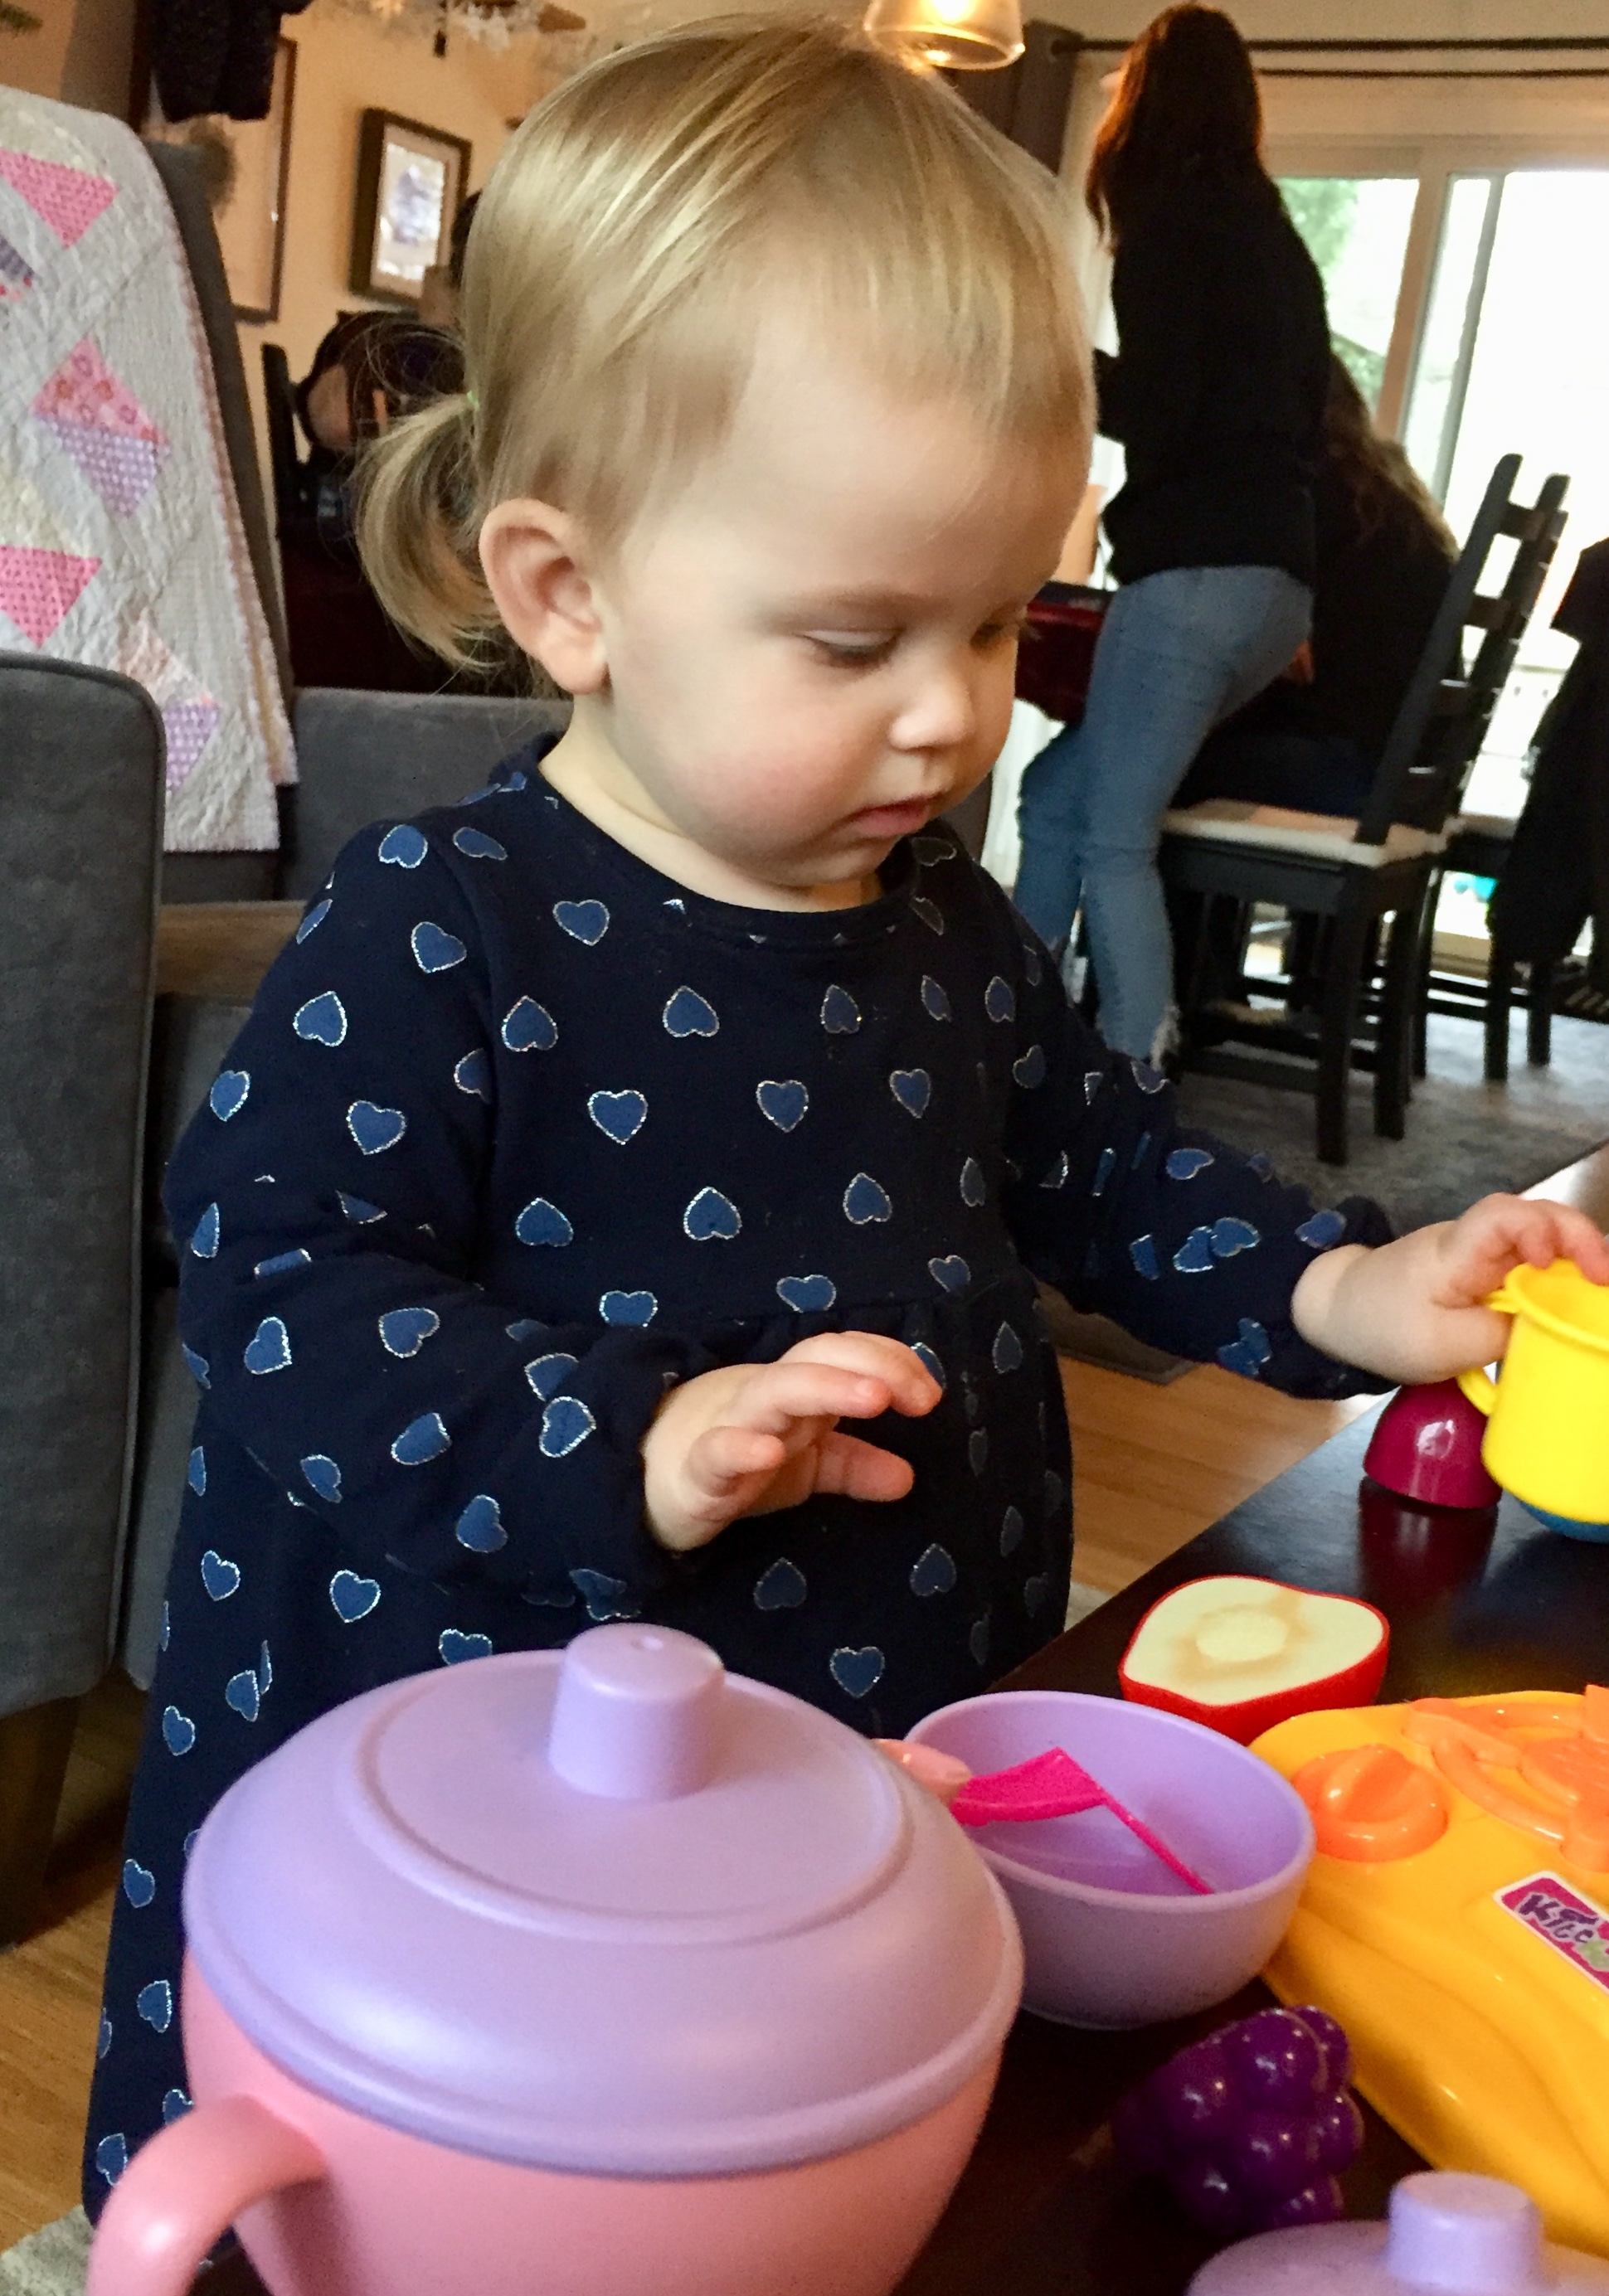
I have had the pleasure of spending the New Year’s holiday with my oldest son and DIL in Vermont. It has been a wonderful week of family time – my middle son and his wife drove here from Toronto for the holiday. My grand daughter has been charming – I gave her a little plastic tea set for Christmas and we have had a number of tea parties with her stuffed animals.. I am surprised to see how quickly she fell into this pretend routine of pouring tea (she calls it ‘pepper tea’ as she can’t quite say peppermint tea). She adds a spoonful of sugar, stirs the tea and then blows on it to cool it off for her hedge hog and her Elmo doll. I love it!
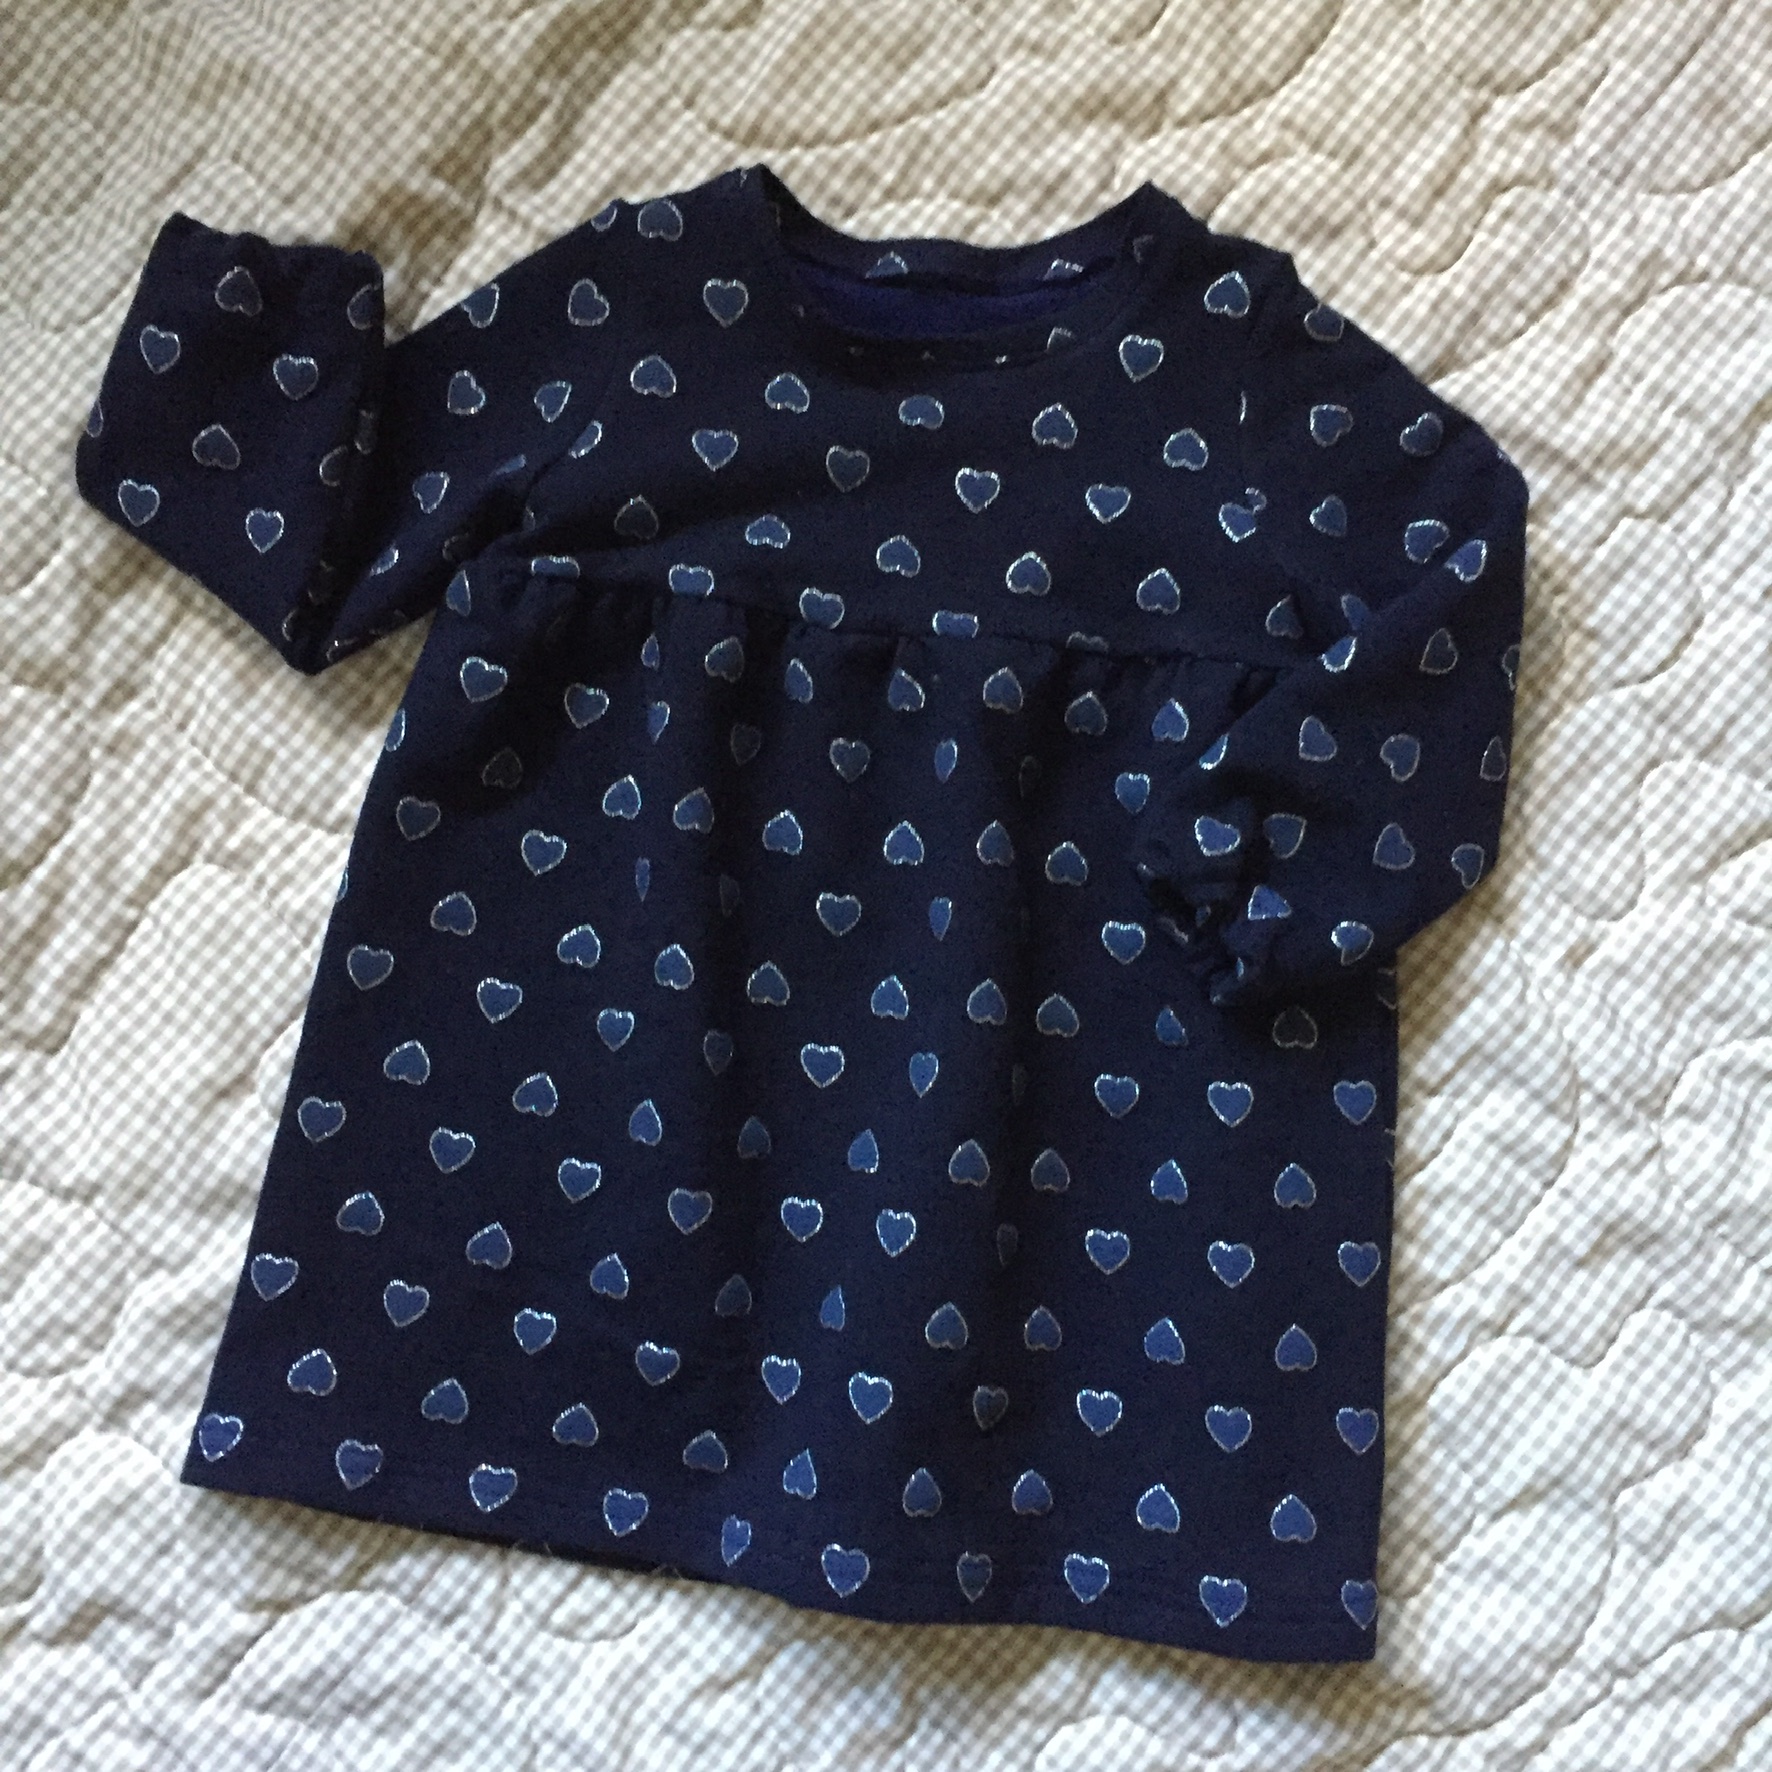
I also brought her a little dress that I made a couple of days before flying out. This is the first time I have sewn anything with a Burda pattern. The directions were clearly explained though so I didn’t have any issues. When I was making this, my DIL’s mother was visiting in Vermont so I was able to ask her to take a few measurements for me. I made a size 2 and, for the most part, it fits nicely
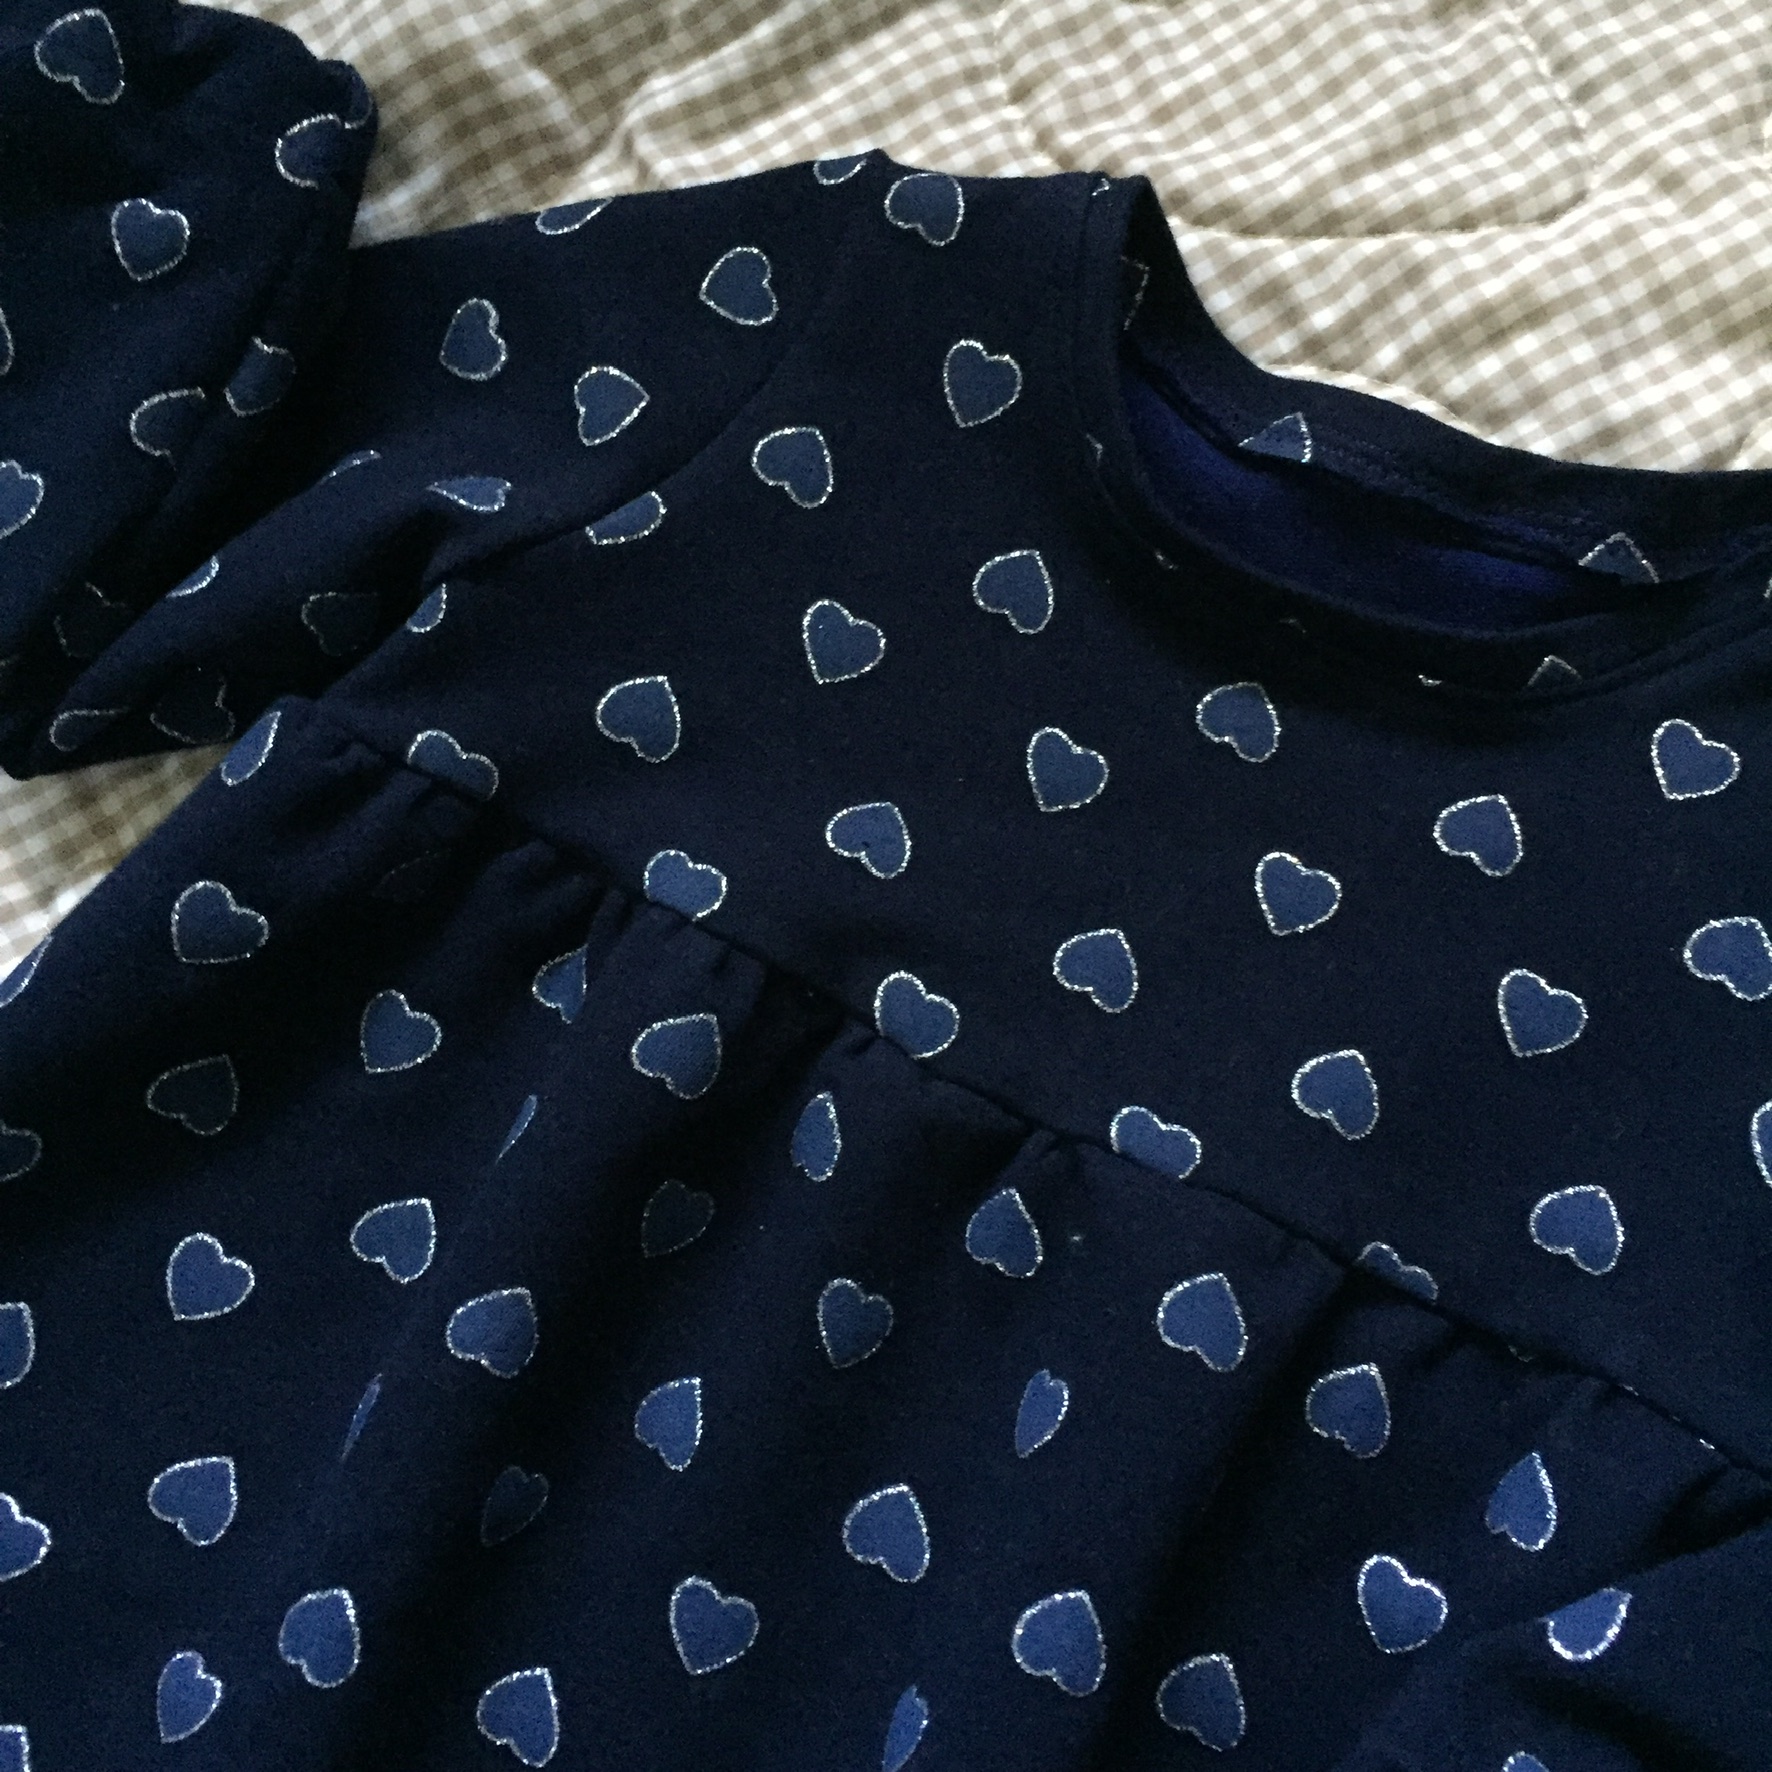
The fabric is a soft and cozy fleece from Jo-Ann Fabrics. It is a deep navy with little hearts outlined in silver. H called them stars, maybe because they are sort of sparkly?
The neckline is finished with a strip of the same fabric. I am STILL having issues with my serger so I finished the seams with a small zig zag stitch and then trimmed the seams. It worked just fine.
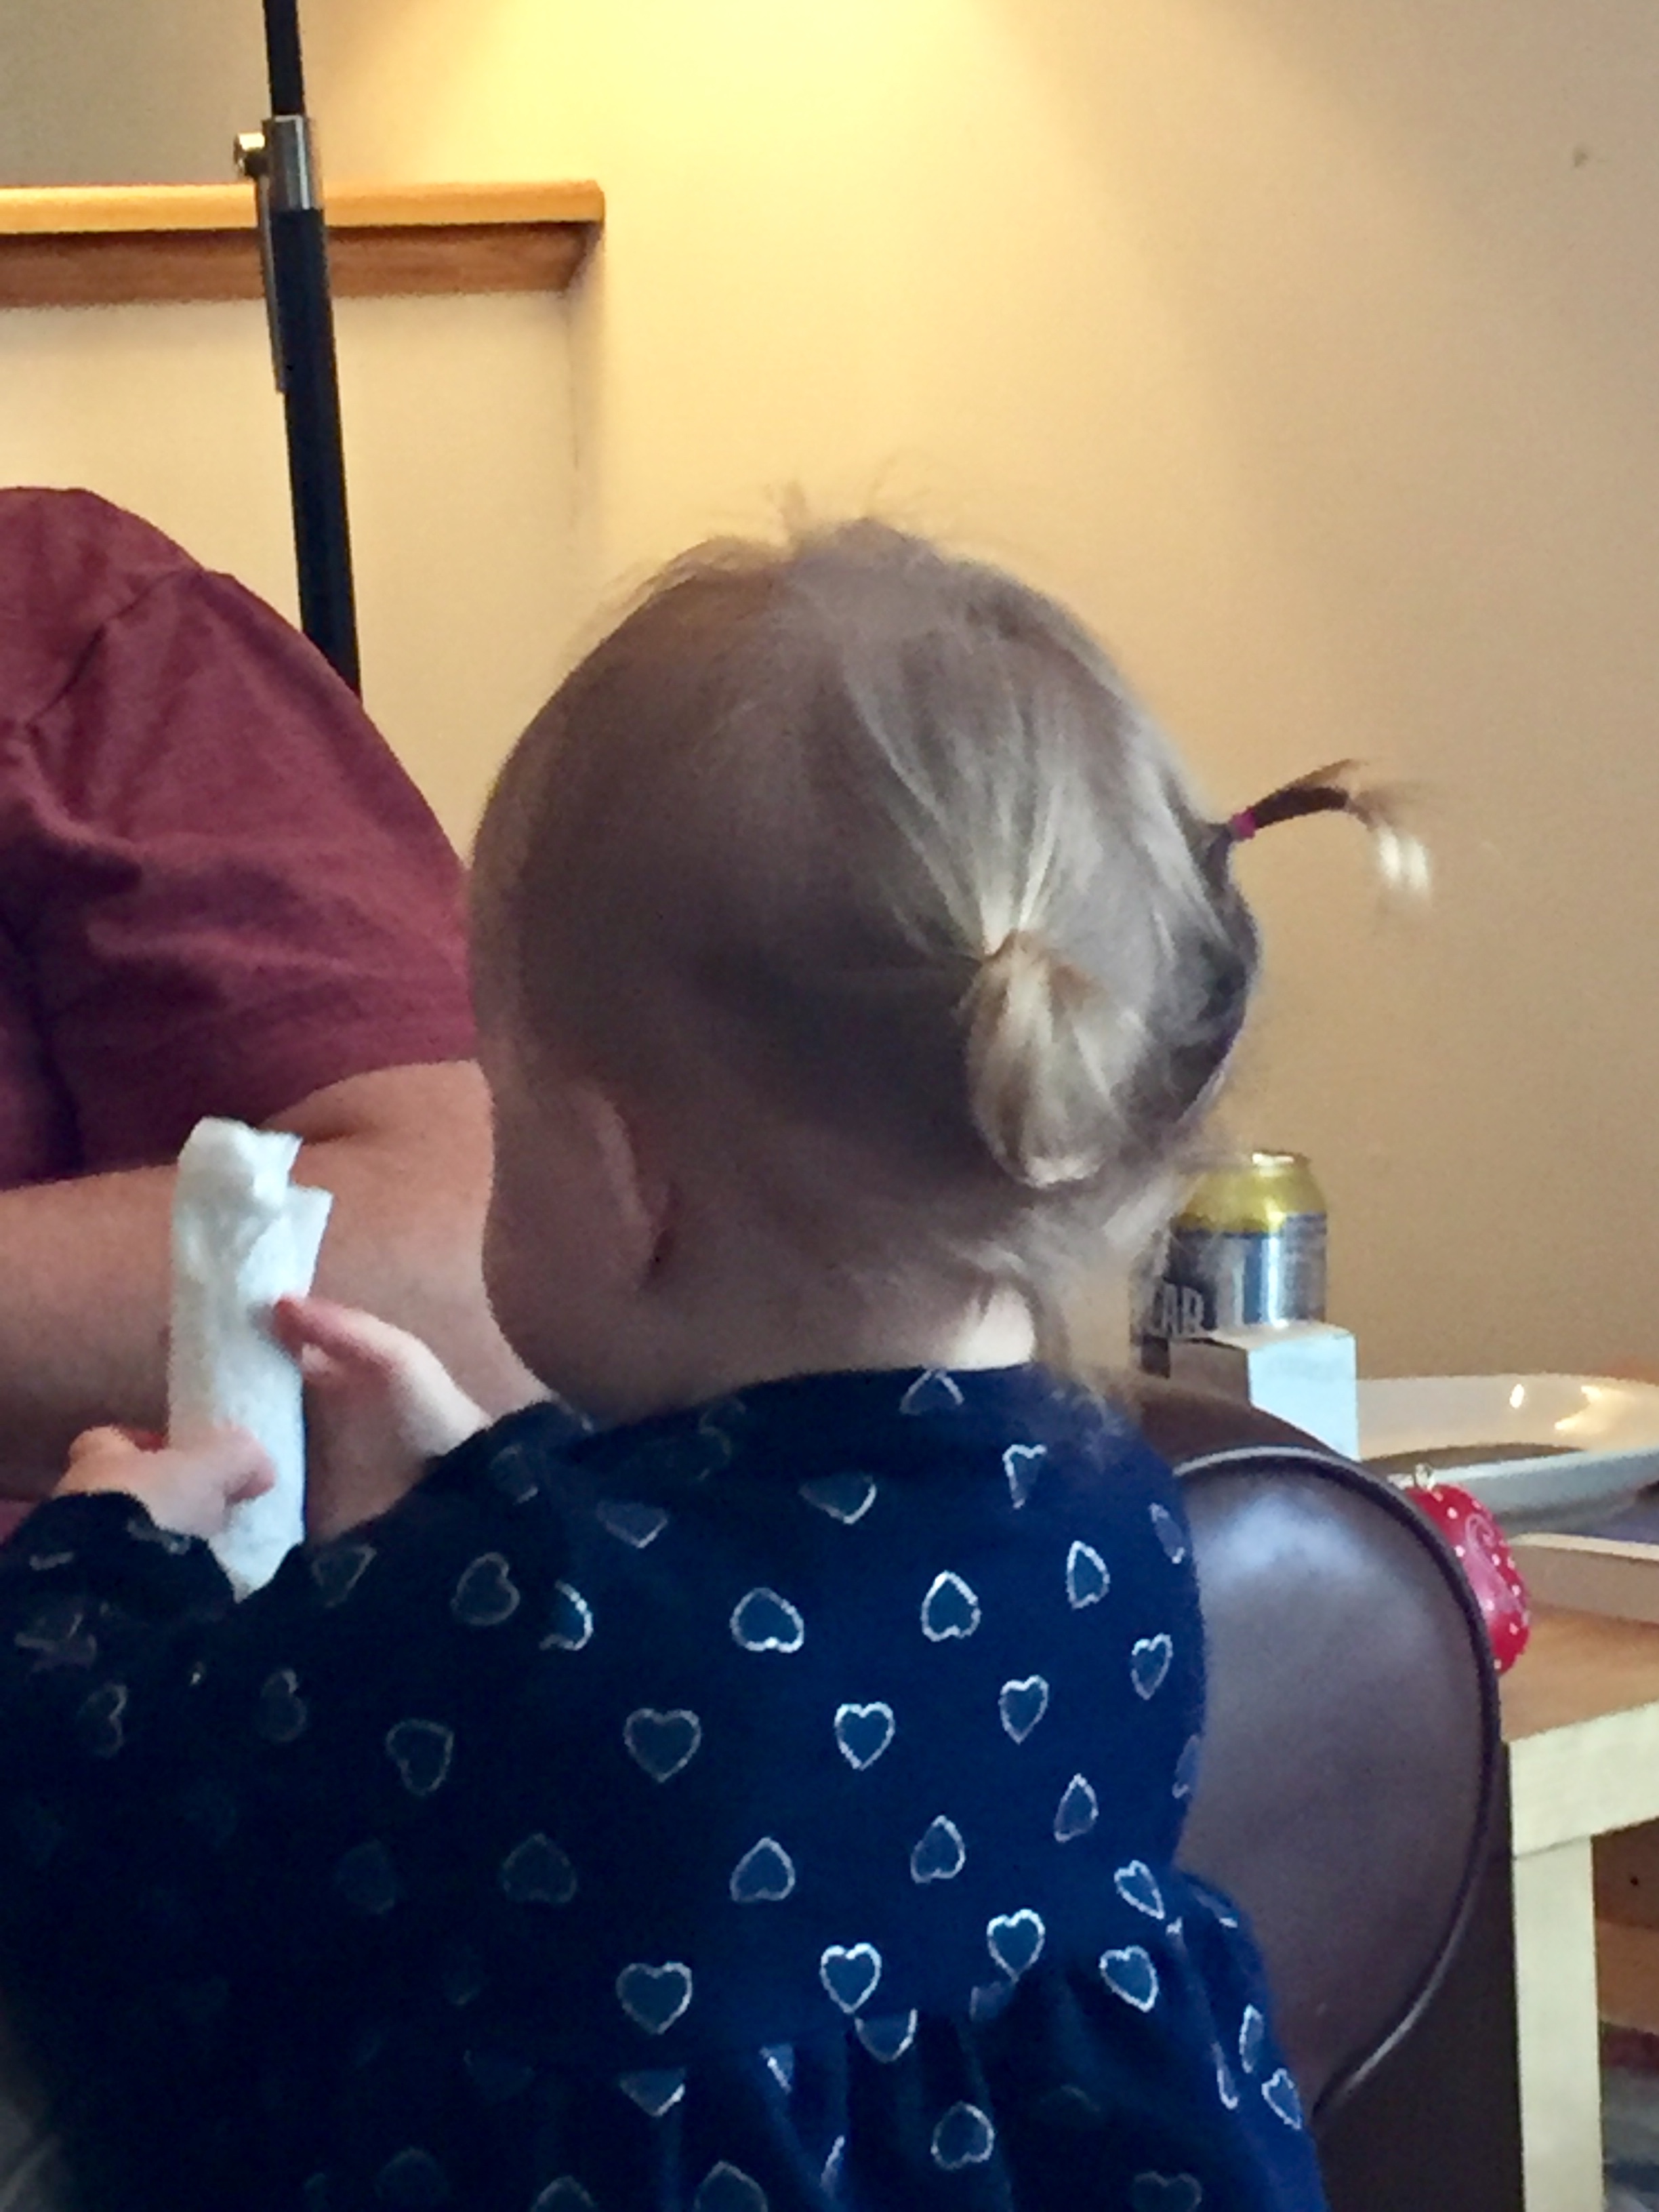
Here is a cute picture of H wearing her new dress. Is she not absolutley adorable??
Earlier that same day, she asked Grammy to put ‘pretty-pretties’ in her hair which means a pony tail. She has so little hair, but I did the best I could! She makes me smile.
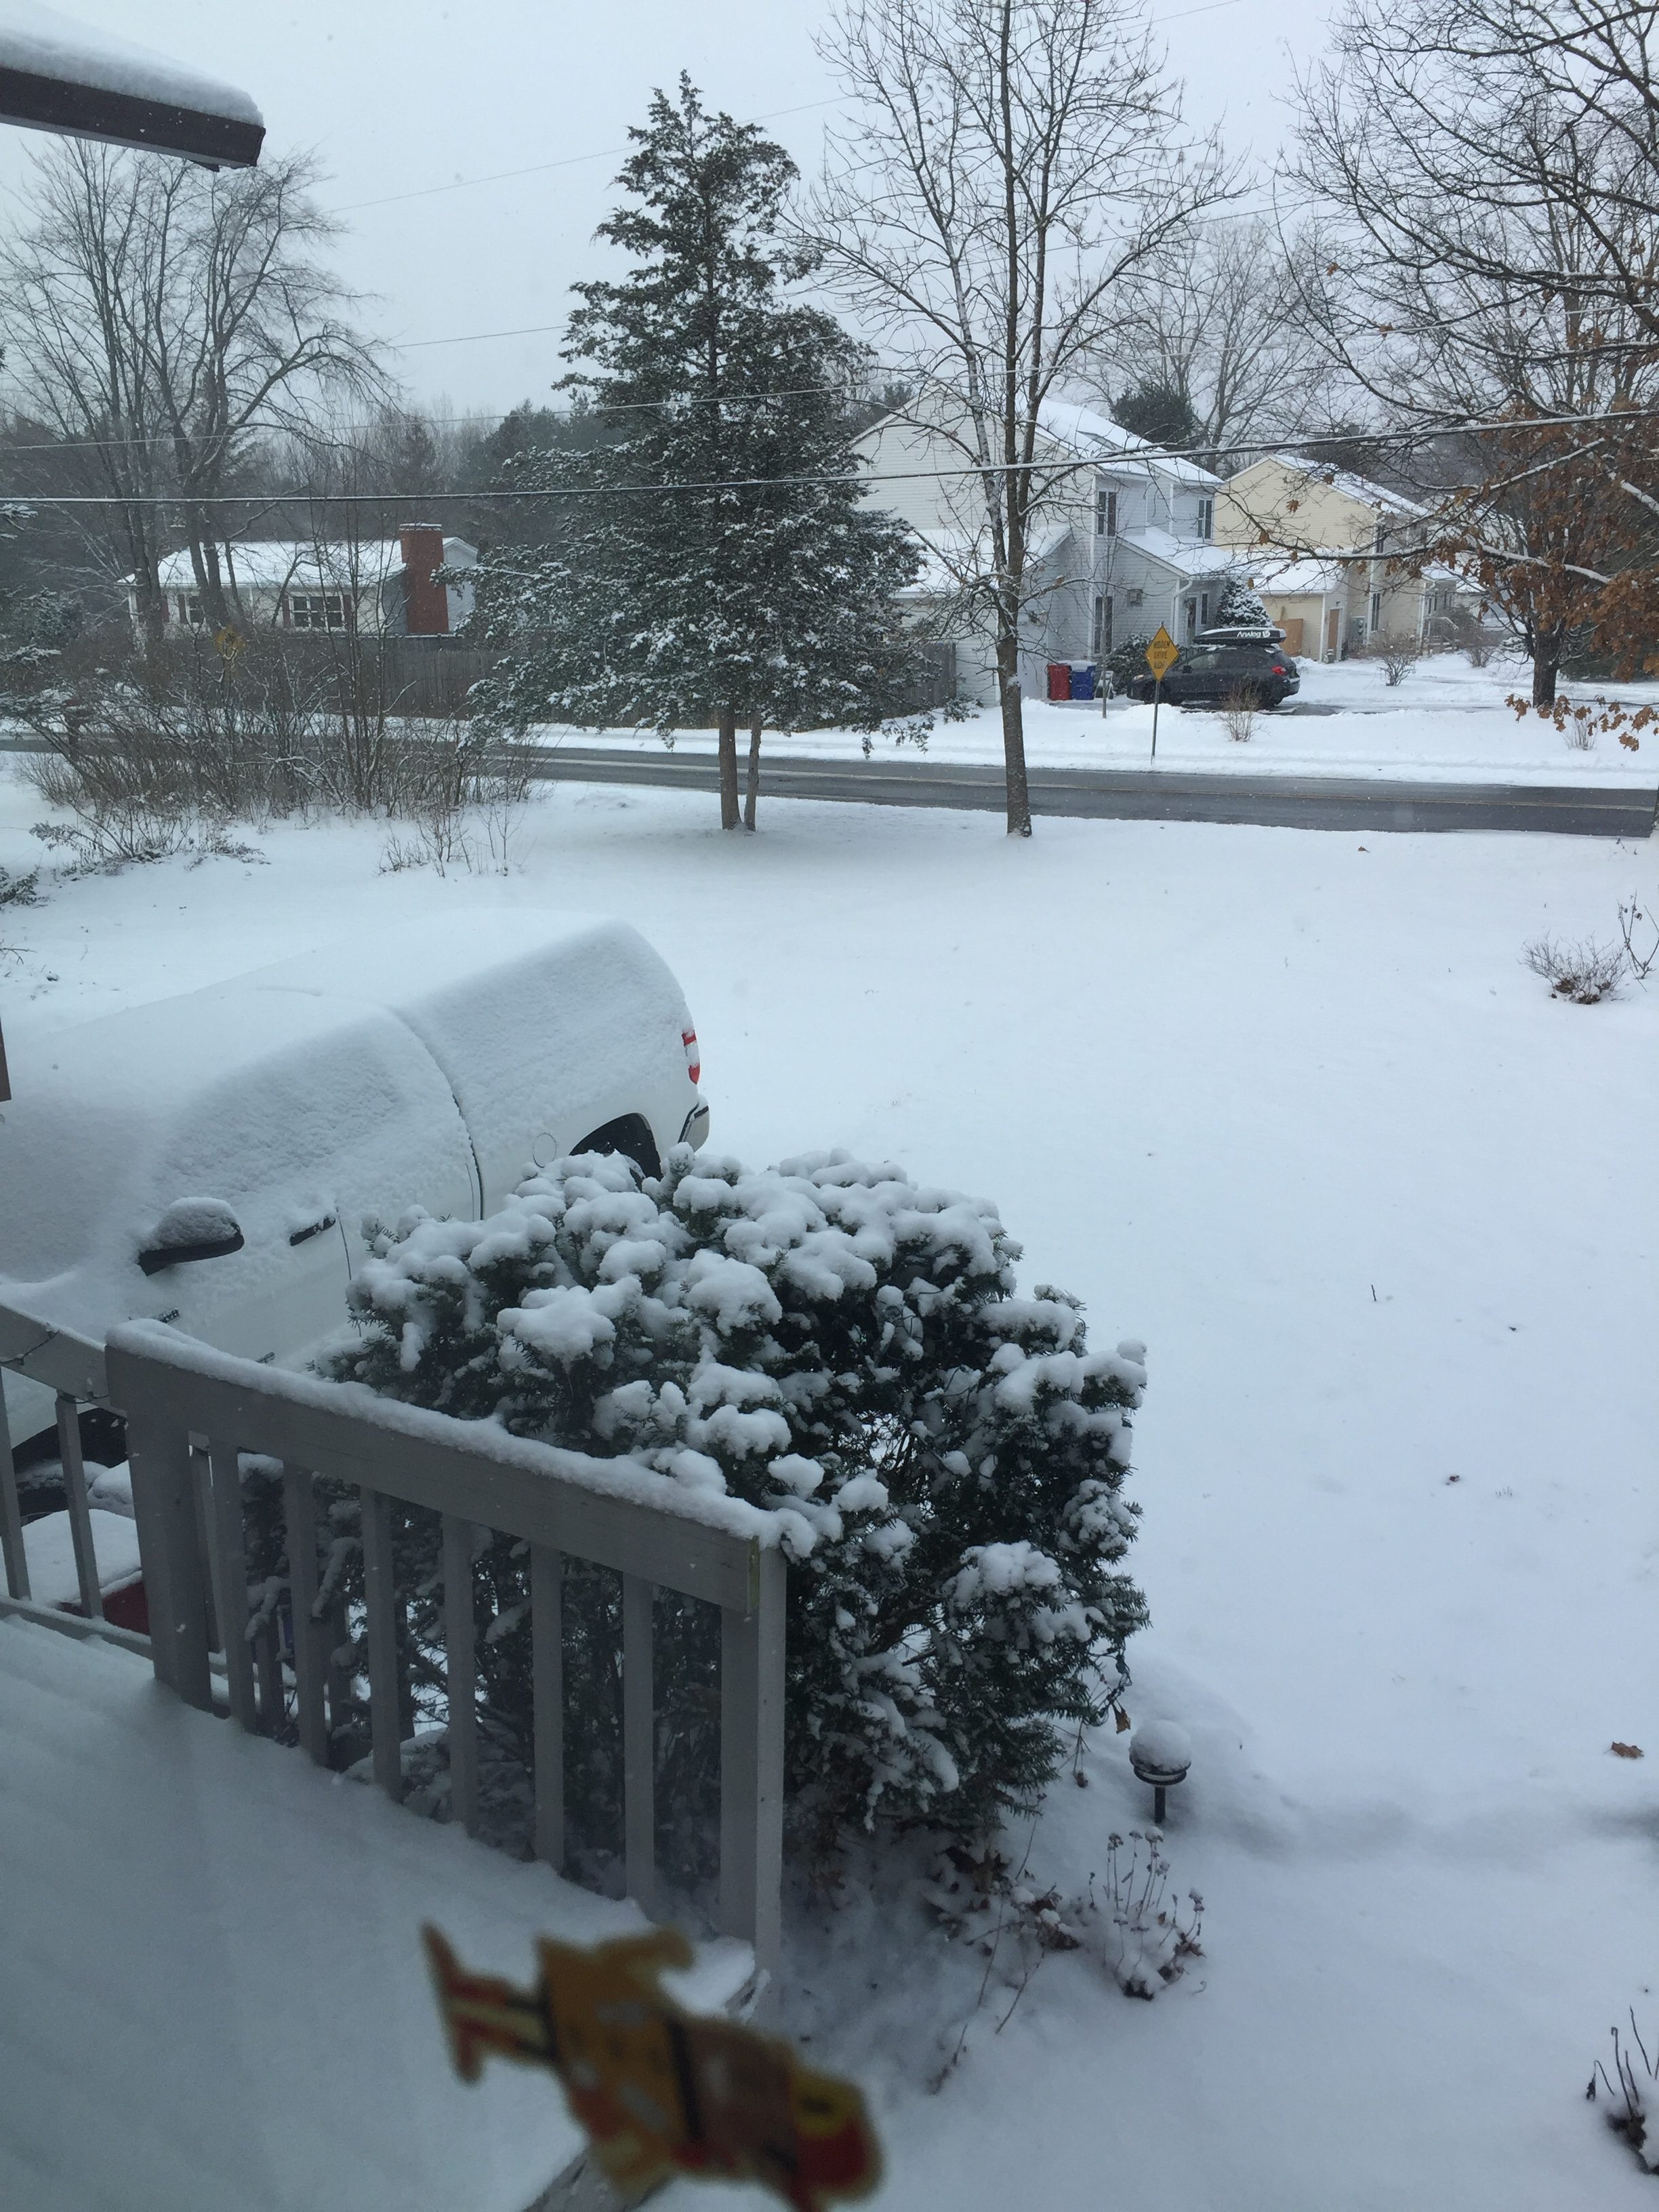
This morning we woke to a little bit of snow. Perfect timing – we get to have just a bit of wintry weather before heading back to California tomorrow to the real world. School starts next week for Julia and I have orders to ship. We had such a great visit though – Vermont life is pretty wonderful!
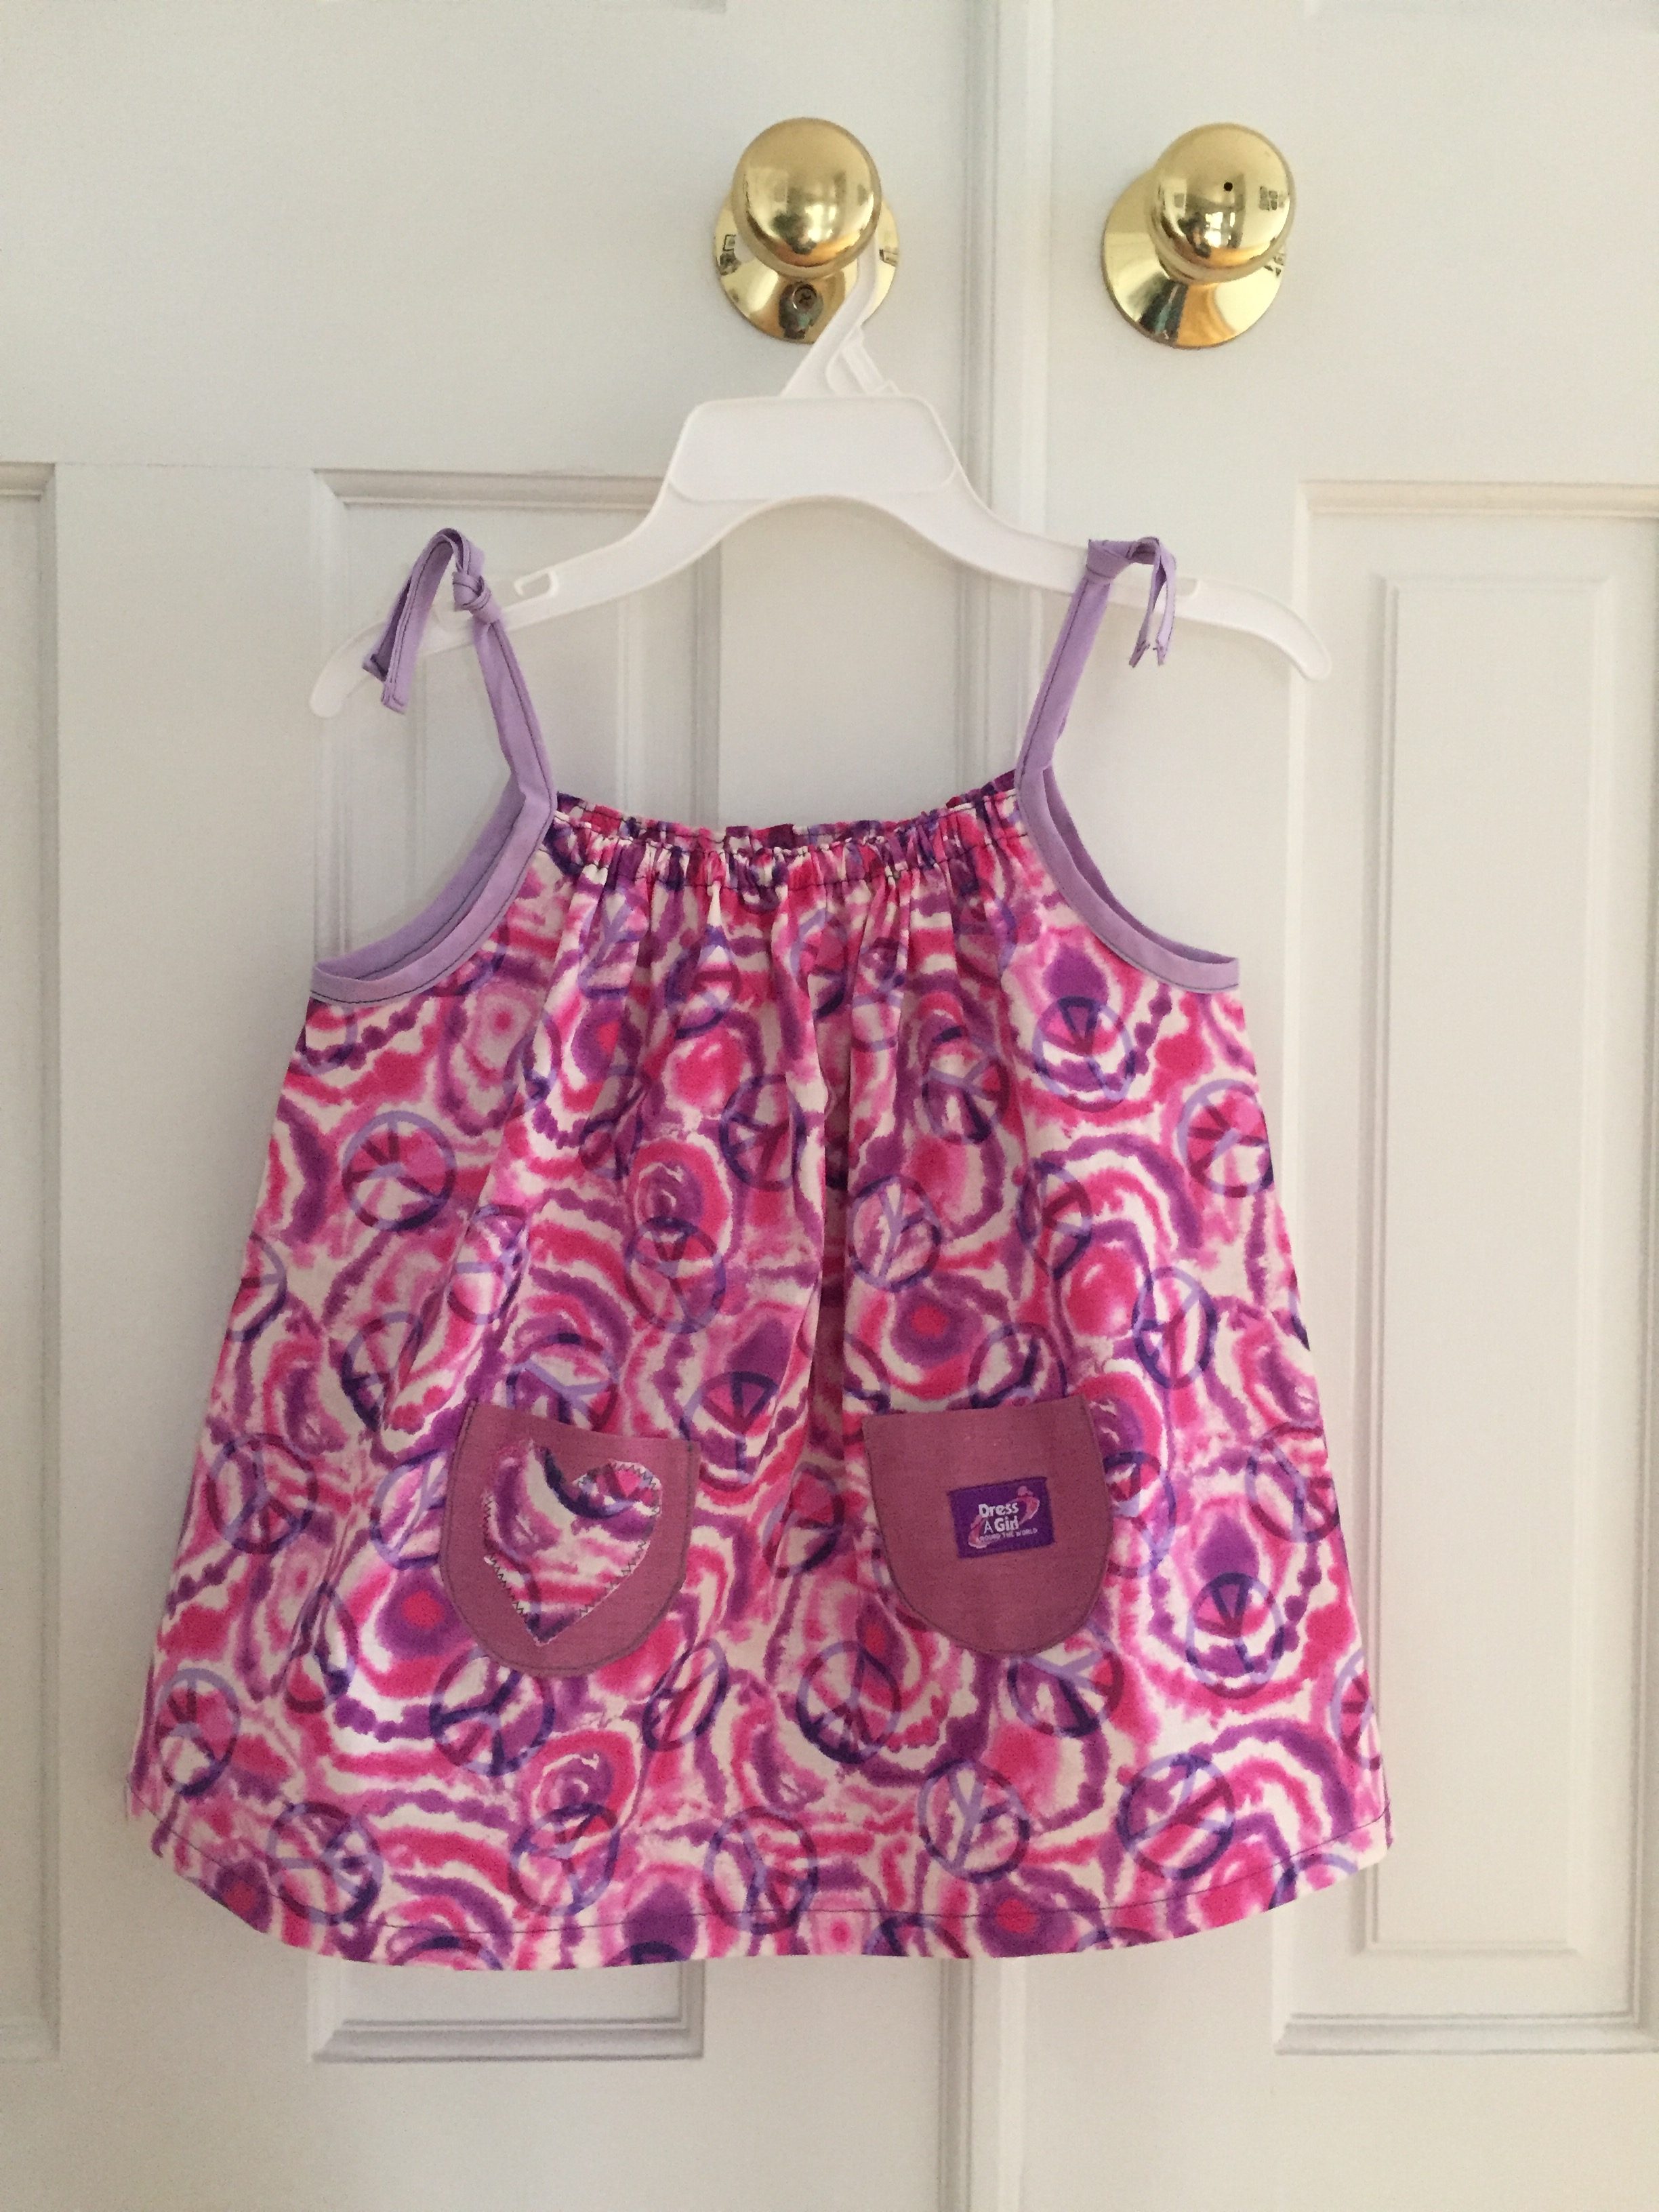
I have a quick, cute, feel-good finish to share today. I know I am a bit late to the party but I (finally) made a little dress to donate to the Dress a Girl Around the World program. I have read lots of posts over the years about others making these sweet dresses. I am happy to finally have joined in and made one too!
Dress a Girl Around the World is a campaign under the non-profit called Hope 4 Women International. They hope to bring dignity to girls and women throughout the world. It is such a simple thing – wanting a girl to have a dress to wear. They are sent to many different third world countries. While this organization has many goals they are trying to fulfill with the program, it is their basic mission to make girls and women of all ages feel worthy that moves me the most. In so many of these countries, females are undervalued or even not valued at all. While one dress isn’t going to correct the problem, it will bring a smile to the sweet face of a girl who has never had her own dress. Also, many of the people working in these countries and delivering the dresses have said that dressing a girl in a clean dress with the Dress a Girl label attached on the outside, shows this child is being cared for. Sometimes this is enough to ward of predators (criminals involved in human trafficking.) If these little dresses can have this sort of impact even a couple of times over, that is enough reason for me to make one.
Finished seams are a requirement for making these dresses.
There are lots of guidelines for making these dresses. While they originally began by making the dressed with pillow cases, this is no longer the method. Quality cotton fabric is longer lasting and this is what they ask be used in the dresses. If you are interested, you can read about this requirement and others here. The biggest thing is coordinating with an ambassador in your area. There are many available and their contact info can be found here.
This label is sewn to the outside of each dress.
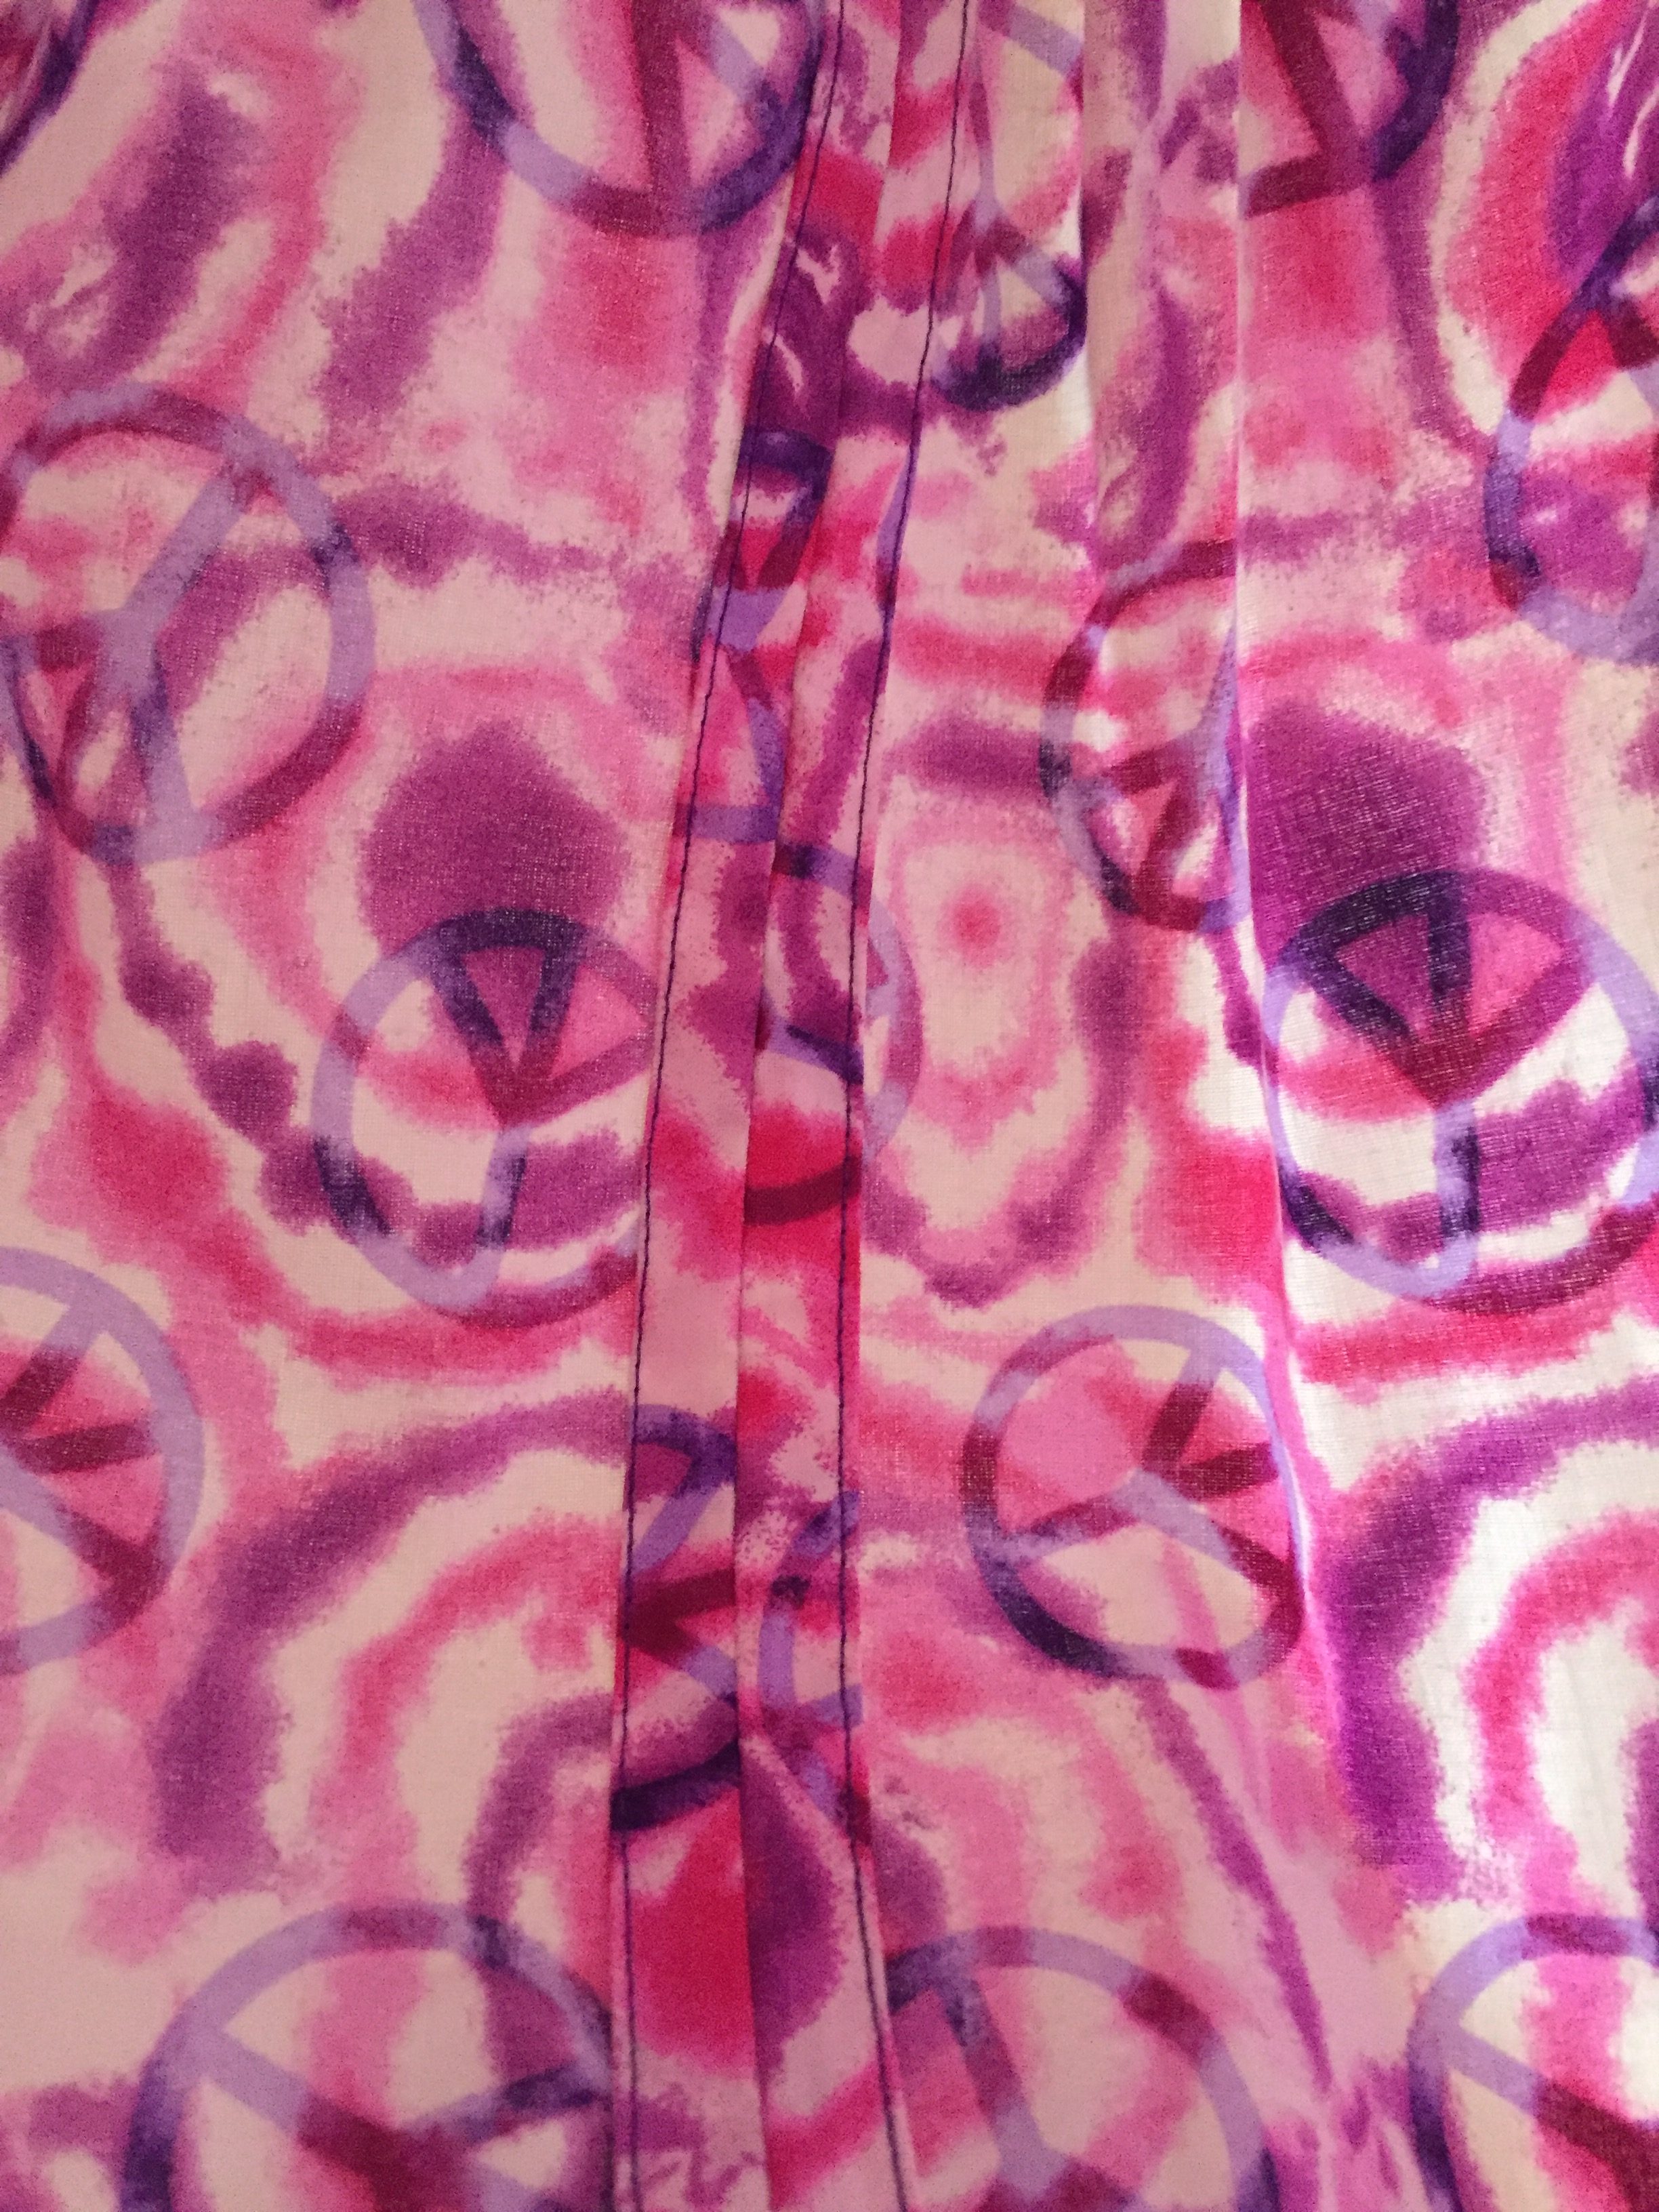
As for me, our local Soroptomist club held a drive to have dresses made by locals who enjoy sewing. I was referred to them and happily made a dress. It was a very simple project and took maybe a couple of hours at most. The little dress looks to be about a size three so for a little one. I hope she loves the fun pink and purple colors and the little heart on the pocket. As you likely already know, I love these sorts of projects – they just have satisfaction and purpose written all over them.
Linking up for the last time with Finish it Up Friday at Crazy Mom Quilts. Sniff, sniff. I will surely miss reading Amanda Jean’s blog posts and wish her well in her next adventure. Other links ups are found at the top of the page under Link Ups.
Did you happen to read about the series of Quilting Cozy mystery novels in yesterday’s post? If not, go and take a peek. You can enter to win the books in a giveaway too!
Newsletter!
Have you signed up for my newsletter? It is published every month or so and contains information about my shop, new arrivals, sales, and events. Click here to sign up!
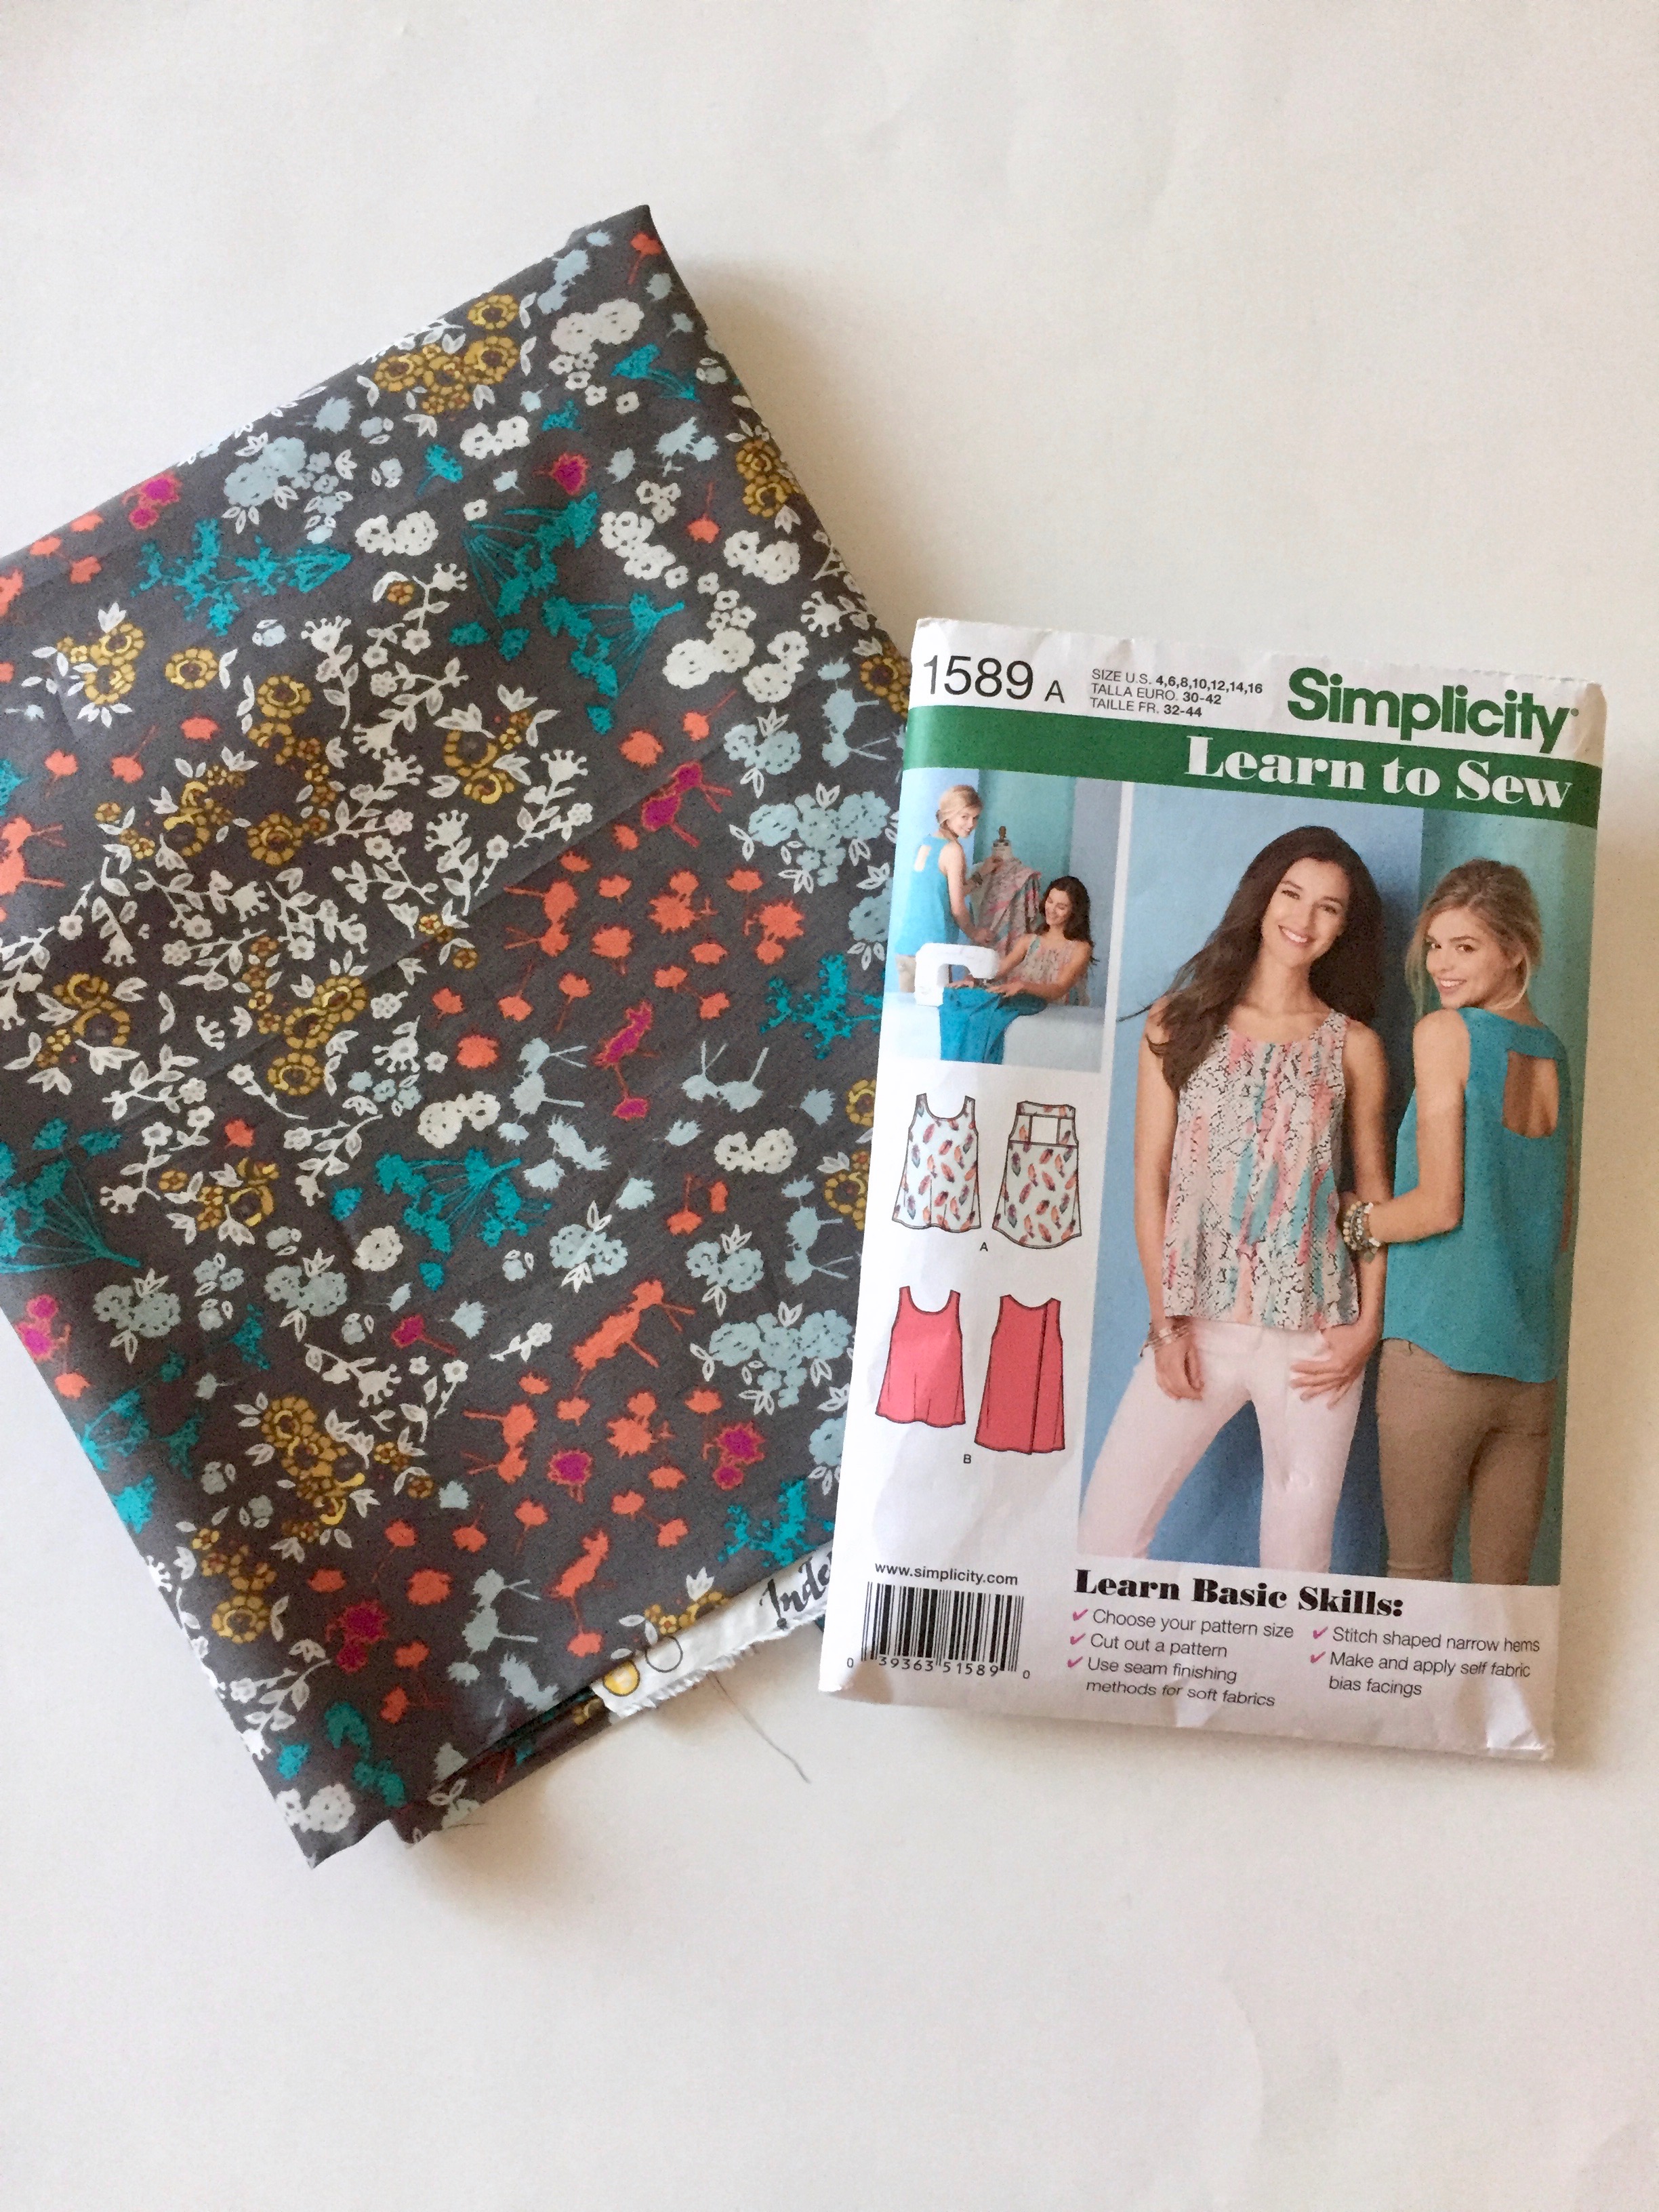
When I was in Vermont in early September, I took along a number of sewing projects to work on. One of those was a piece of pretty voile (designed by Katarina Roccella for Art Gallery Fabric) and a blouse pattern. I haven’t used voile before and wanted to try it out. In case you aren’t familiar, voile is a lightweight cotton with a higher thread count making it softer and sort of flowy (is that a word?). It washes well and can be used for garments or quilting. Anyway, I thought I would give it a try. One thing I wanted was a blouse that didn’t have to be ironed after washing and this one doesn’t. If taken out of the dryer right away, it looks lovely.
I chose Simplicity pattern 1589 because of its simple construction. Two pattern pieces, just the front and back. It literally took about an hour and one half to make. I used French seams for the two side seams and the shoulder seams so the inside finish is very clean. The neckline and armholes are finished with blue bias tape. The pattern calls for bias cut strips of the same fabric but I am too frugal for that. Bias strips leave so much waste and I like the pop of color that shows now and then from the coordinated bias tape.
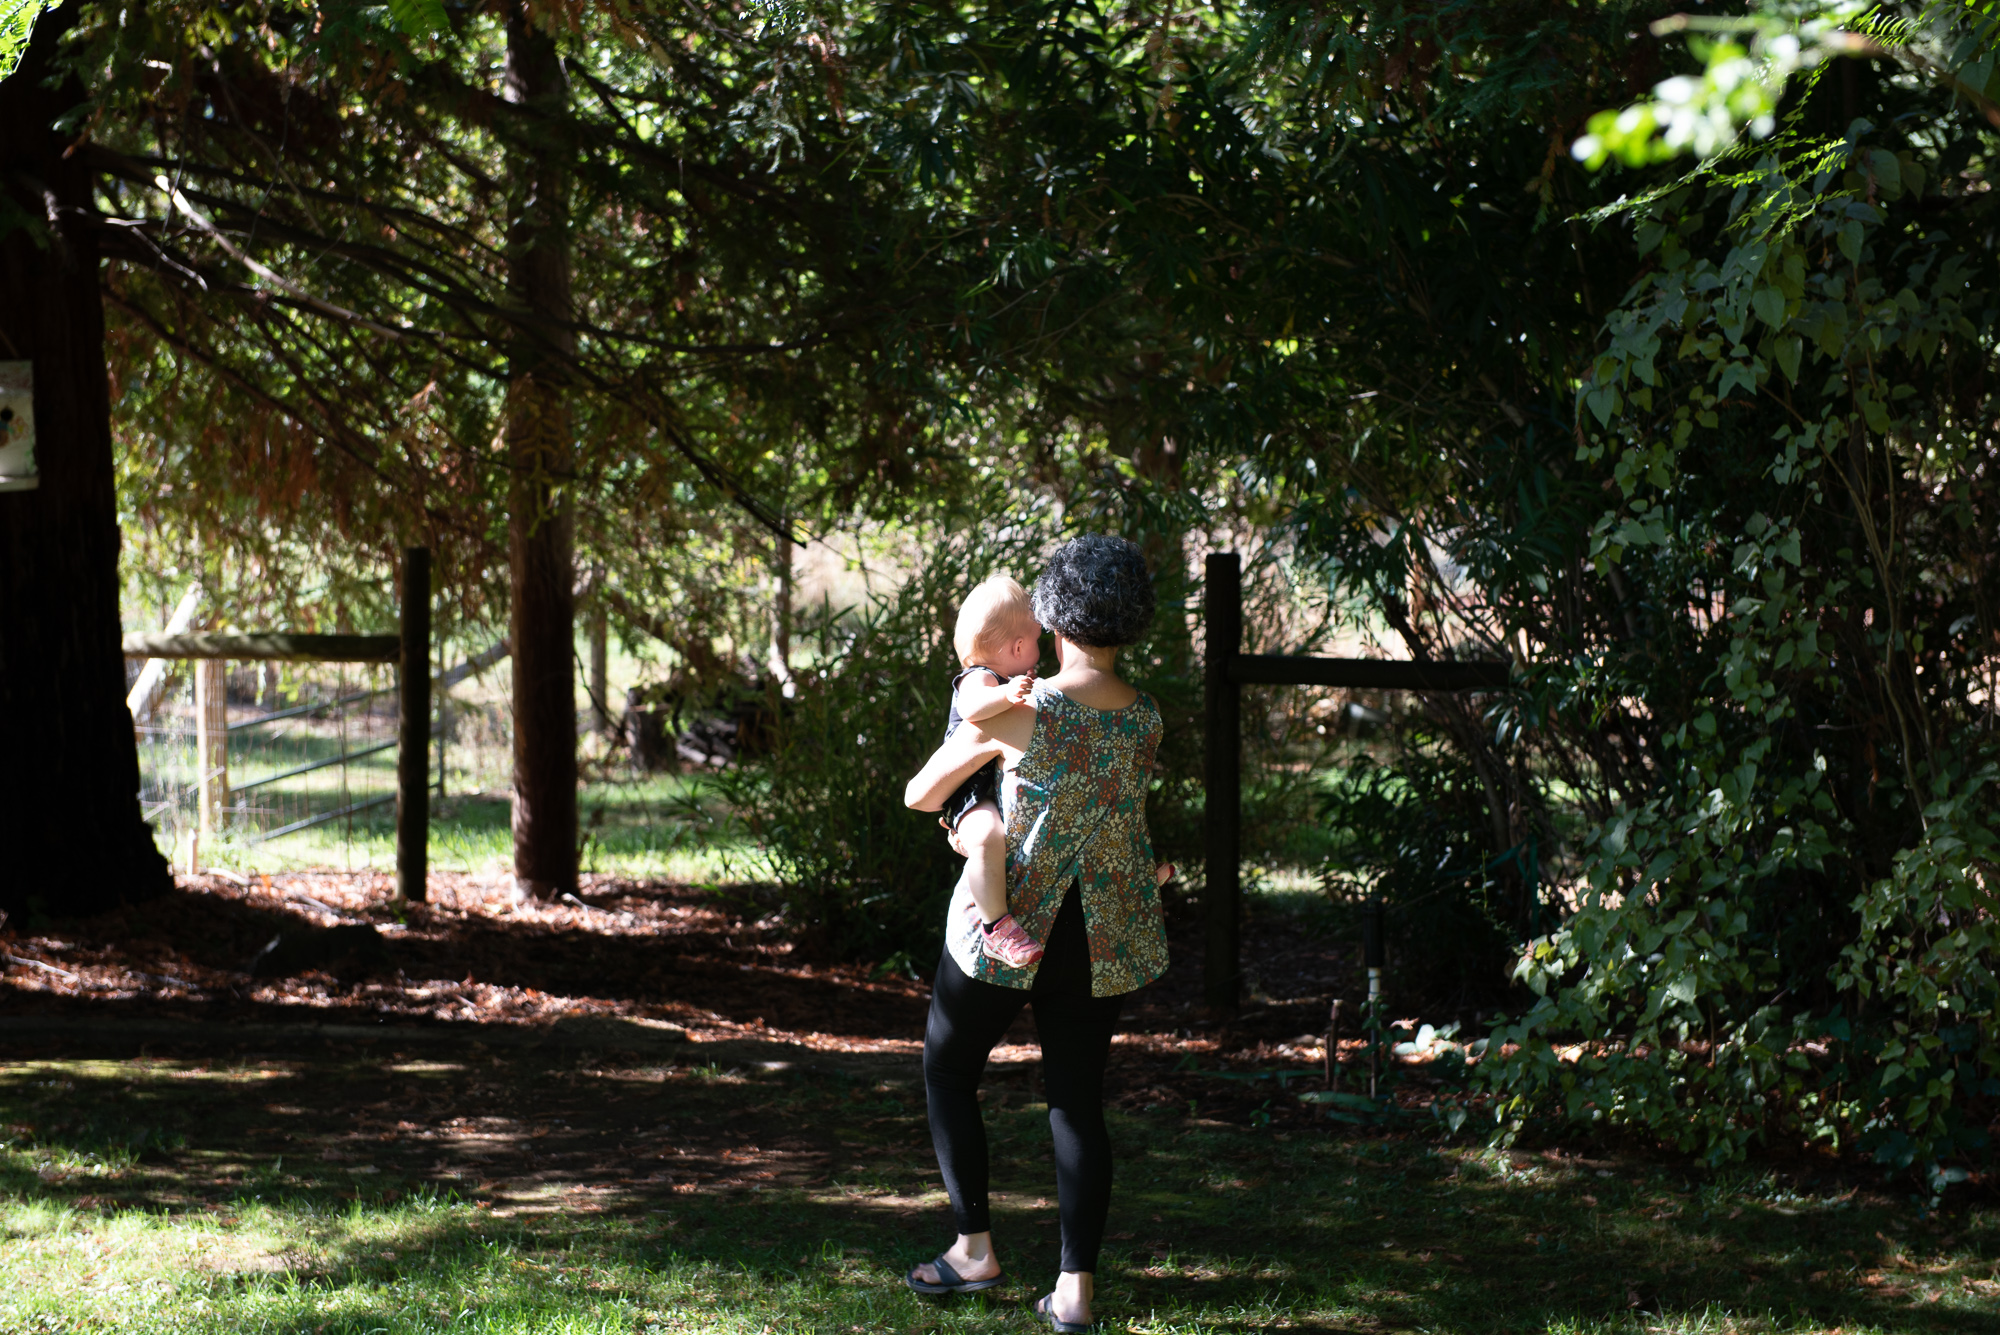
I don’t have a normal set of pictures to show you. My husband had taken some for me but most of them weren’t all that good so I decided to show you the shirt in action, so to speak. I had it on while H was here last week and my son takes about 100 pictures daily of her so the shirt is featured in a number of them!
The pattern is fun because the back is just two overlapping pieces whose center edges are cut on a diagonal. The opening goes all the way up to the neckline but when it blows open, it really only does so at the bottom because of the overlap. Does that make sense?
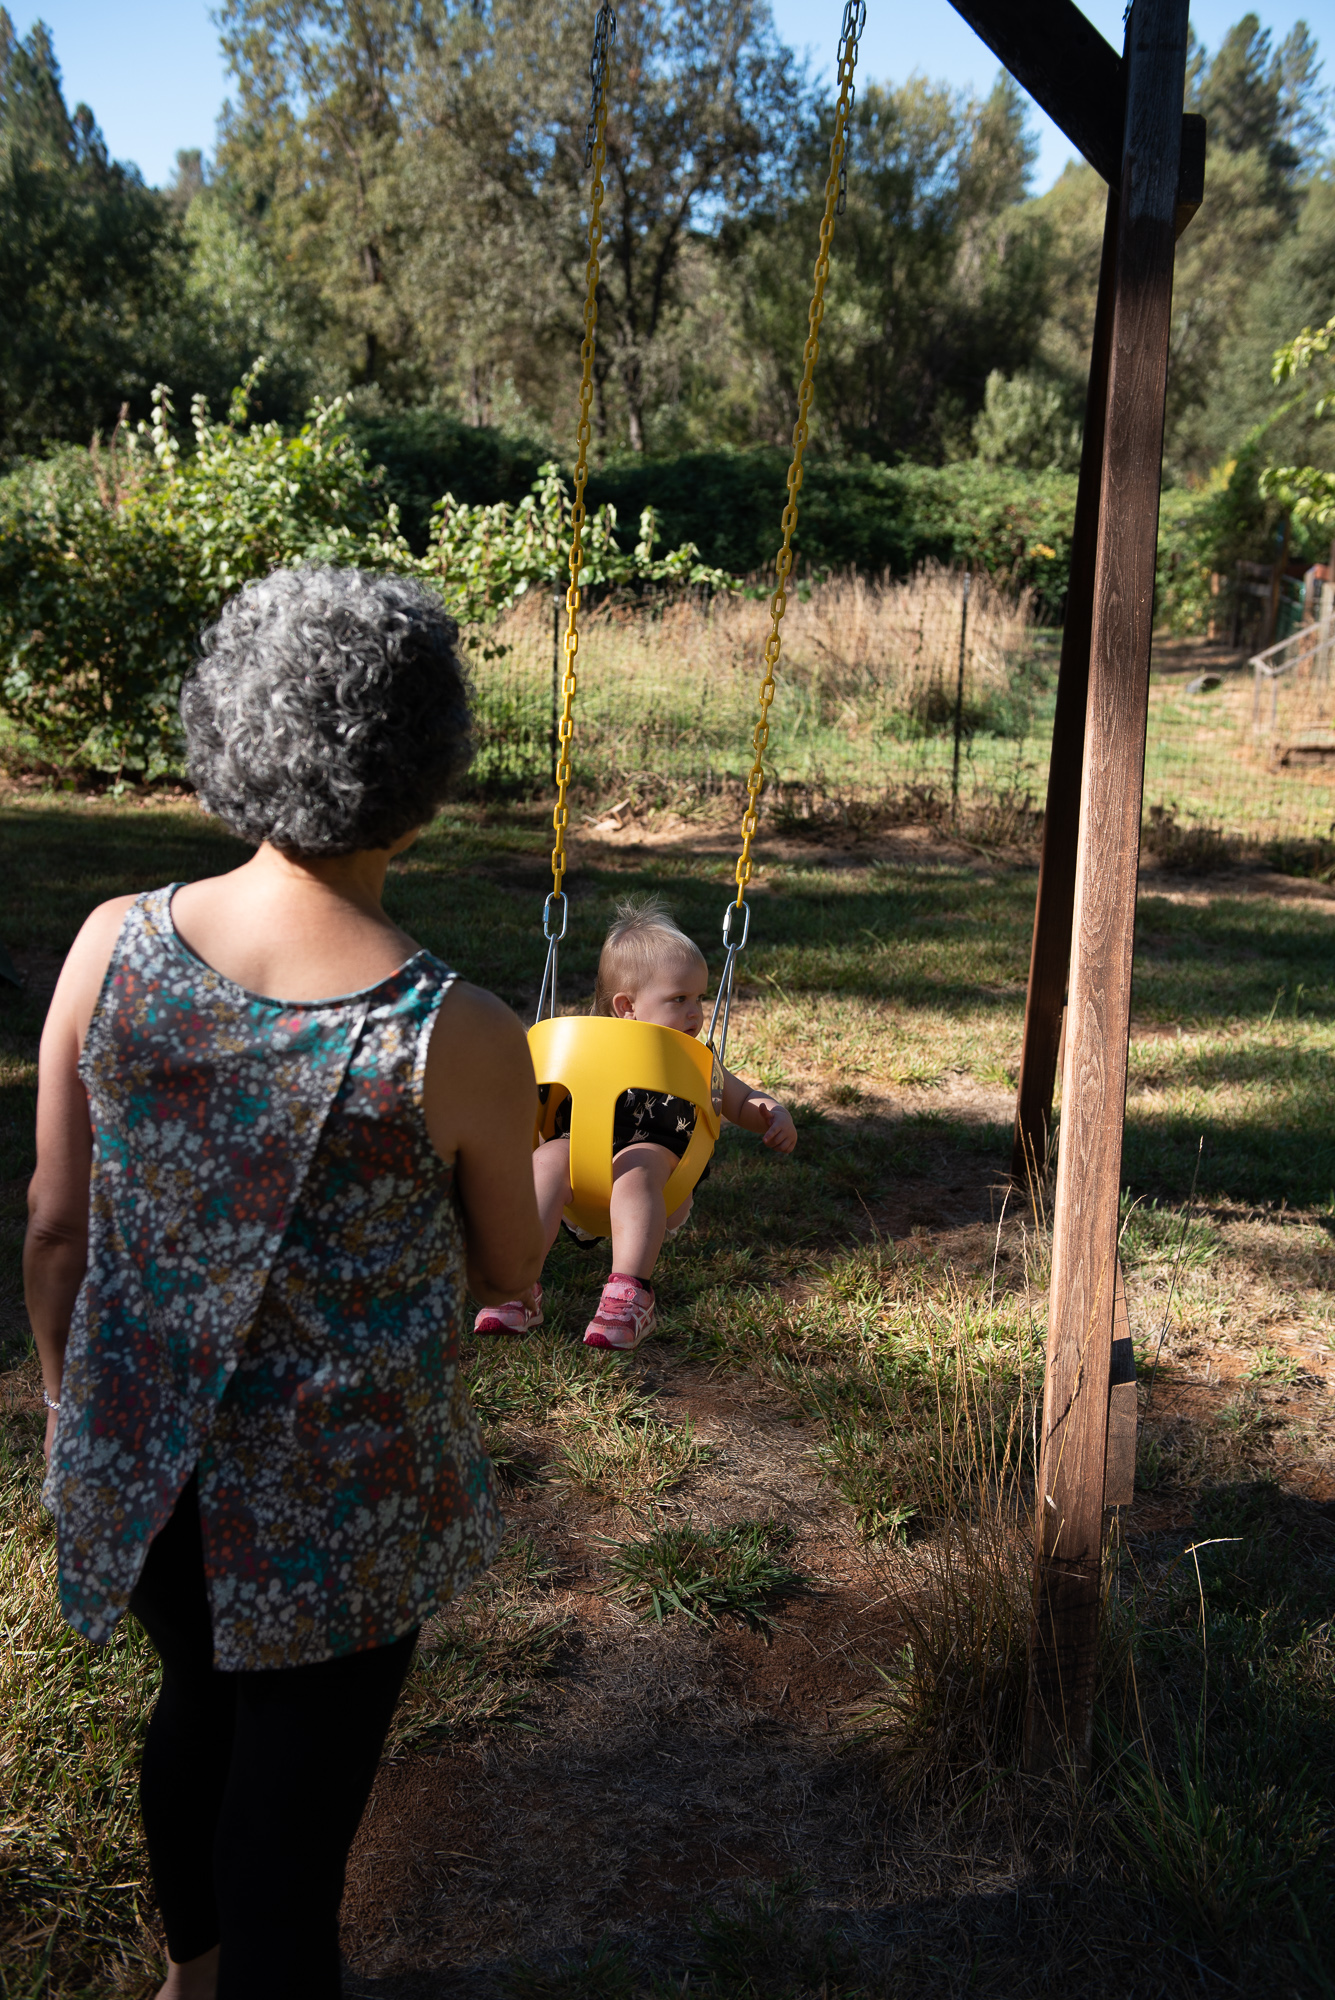
Tomato picking was a favorite part of H’s morning with Grammy. However she was picking them green, orange and any color between!
It is long enough to wear with leggings which I like. I did lower the front hem as much as possible. It has that hi-low hem feature that is trendy these days but I didn’t want it to be as prevalent as the pattern had called for.
You can see the diagonal cut on the back pieces here. I think it is a fun design.
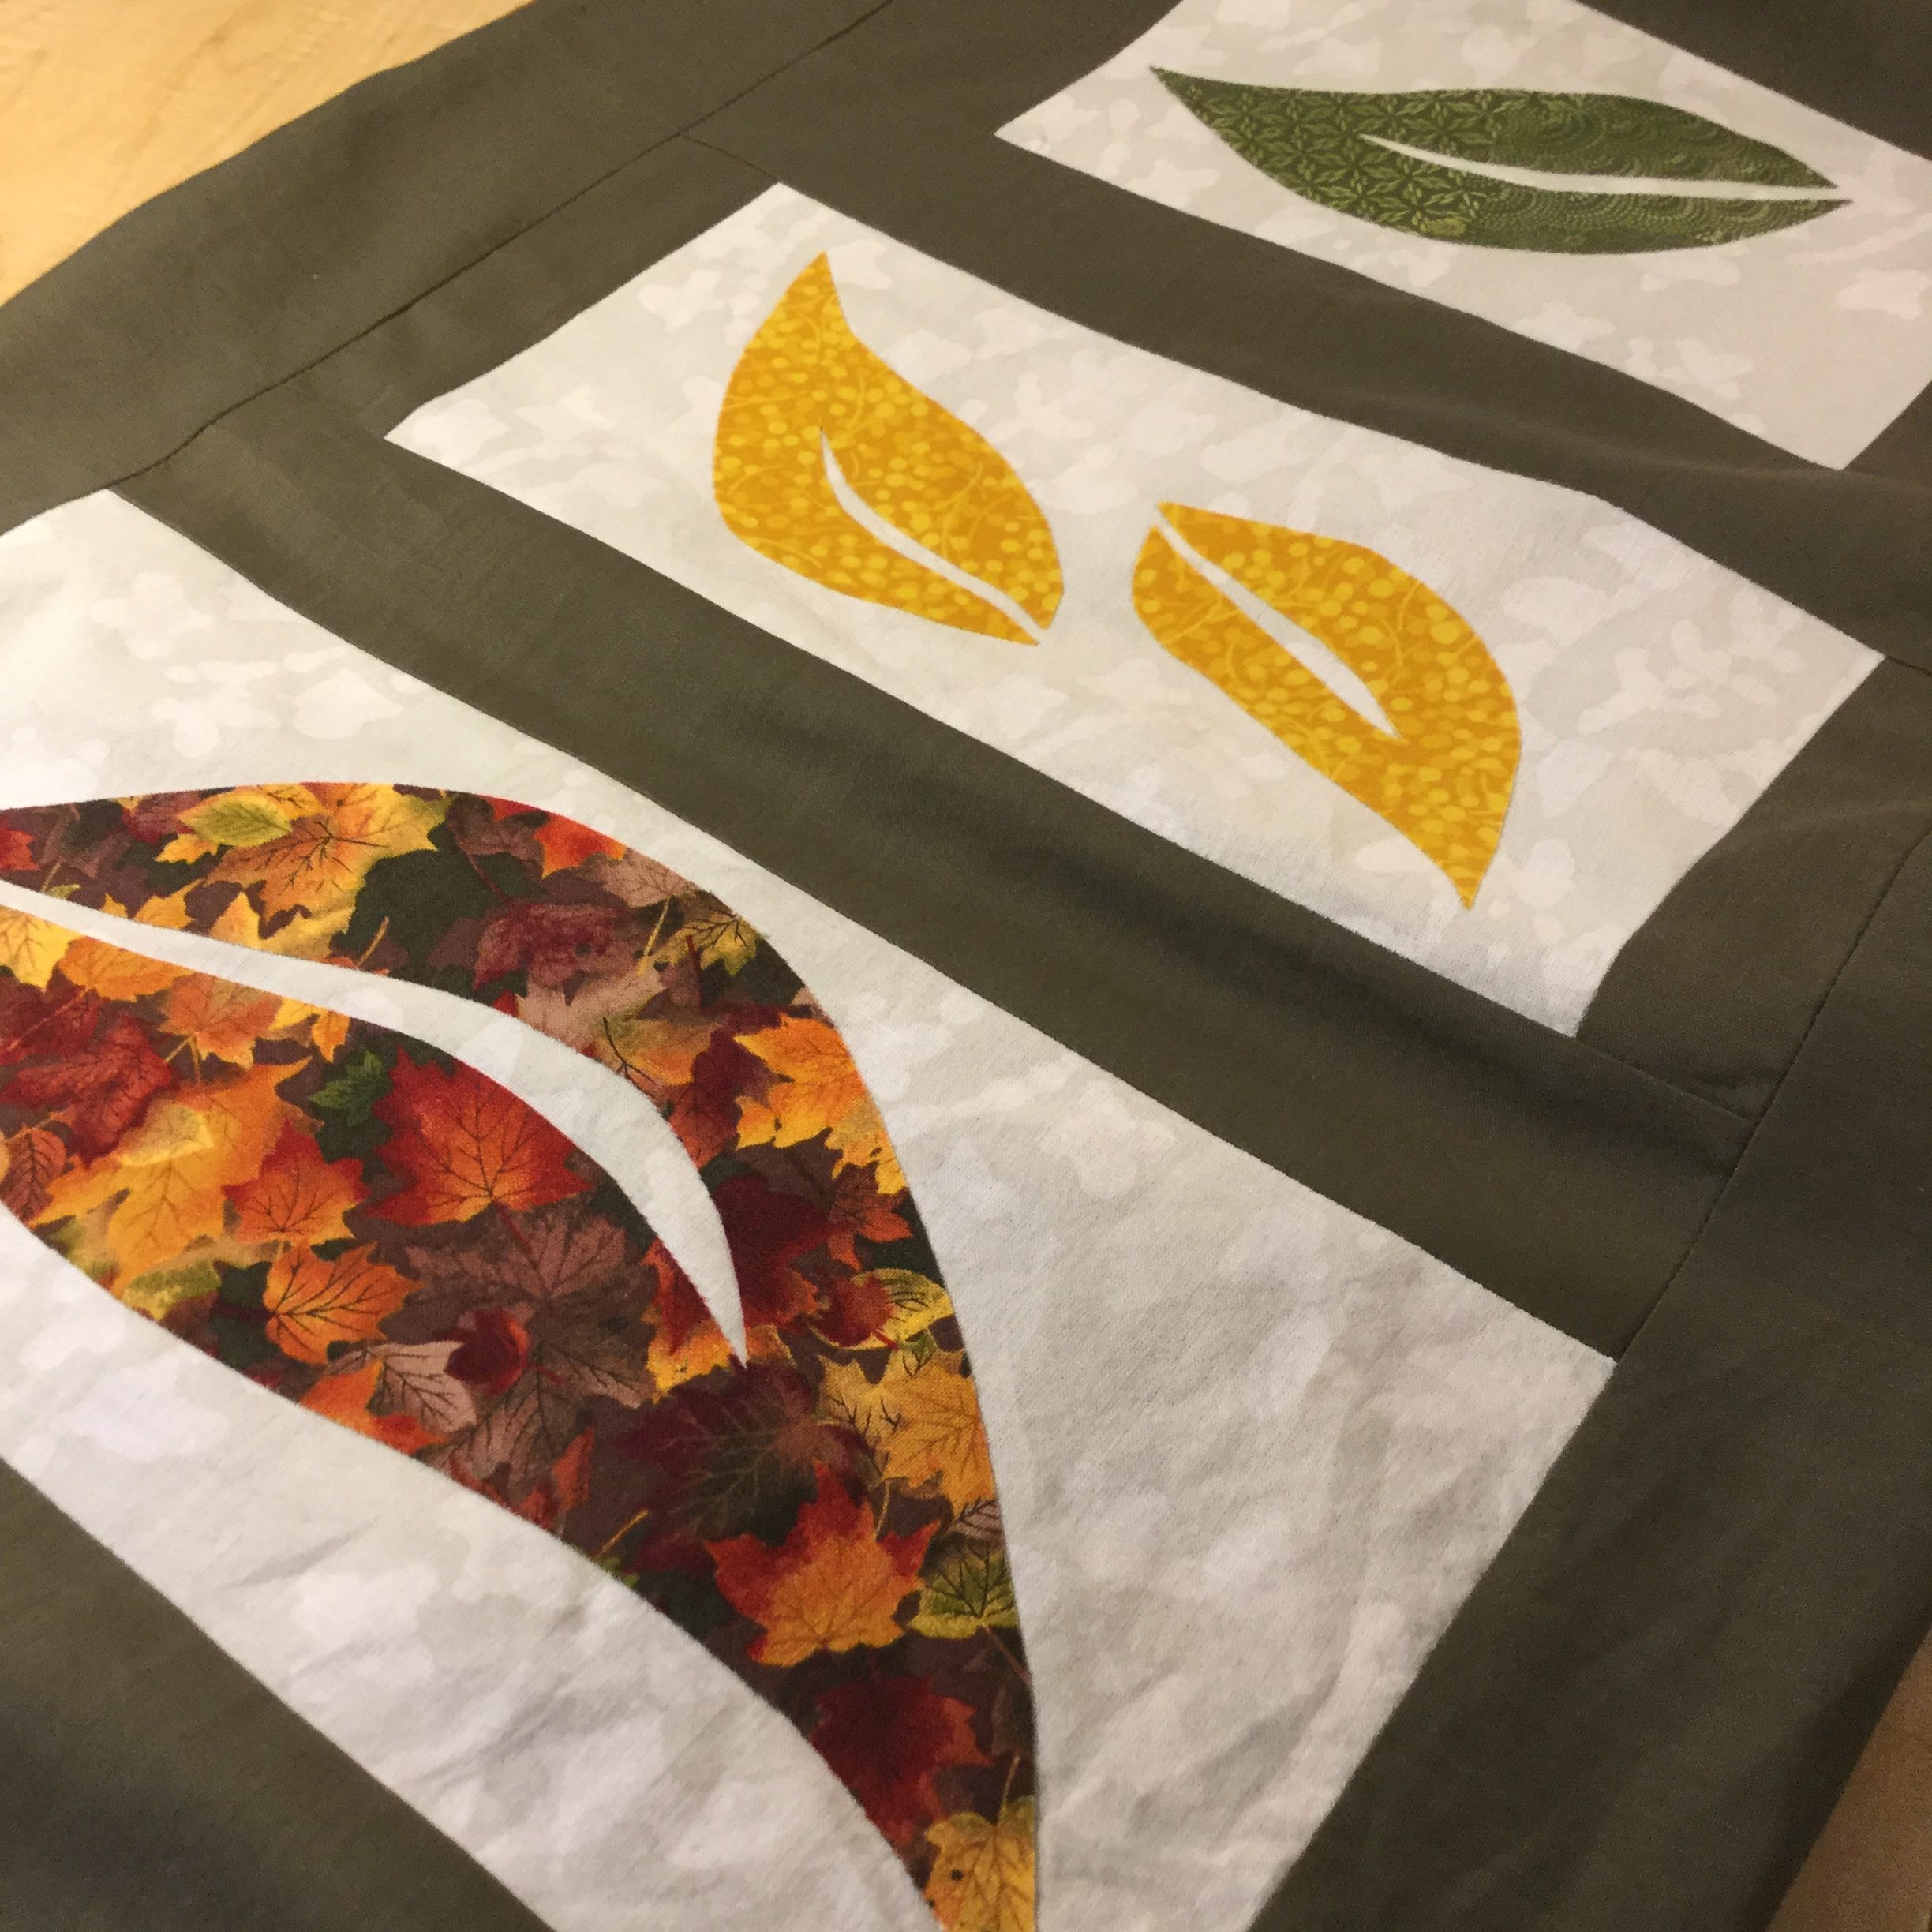
Falling For You table runner
So, another blouse is done and now I have time to finish up a few other projects that are near completion. I started this table runner before the wedding and should be able to finish it up this afternoon. I am going to make H a Halloween costume so I want to get the sewing table cleaned off before I start it. The pattern is ordered but I haven’t shopped for fabric yet. She is going to be a lion and will be the cutest lion out there!
Finally, if you are in the mood for some fall colors, all of the autumn fabrics in my shop are 25% off today. Come take a look – there are some really pretty pieces and they are a great deal. Precuts, bundles and yardage are all available. Also, hop over to either Instagram or Facebook and enter to win a cute bundle of Halloween fabrics. Today is the last day of the sale and the last day to enter the giveaway! Hope you will come and join in!
Today I found myself getting frustrated because I have so much I should be doing and no energy. After a two day migraine it usually takes me two or three days to get back on track. This weekend is a big one because my son is getting married on Saturday. My kids all come home on Thursday which is so great. Anyway, I felt like I should be cleaning house or doing yard work, etc and really my body is rebelling and saying I should take it easy. So I went in the sewing room. Time in the sewing room is often a cure-all, right??
New Look Pattern 6578 and Radiant Menagerie Fabric by BariJ
I had most of this cute little dress made already. I started it at the beginning of August and when it came time to put the buttonholes on it (a task I dislike) I hung it up in the closet and pretended it wasn’t there. But it is so cute and it called to me this morning so I pulled it out. I wanted to make it for my grand daughter but it is late in the season so I made a size 3T in the hopes she will wear it next summer.
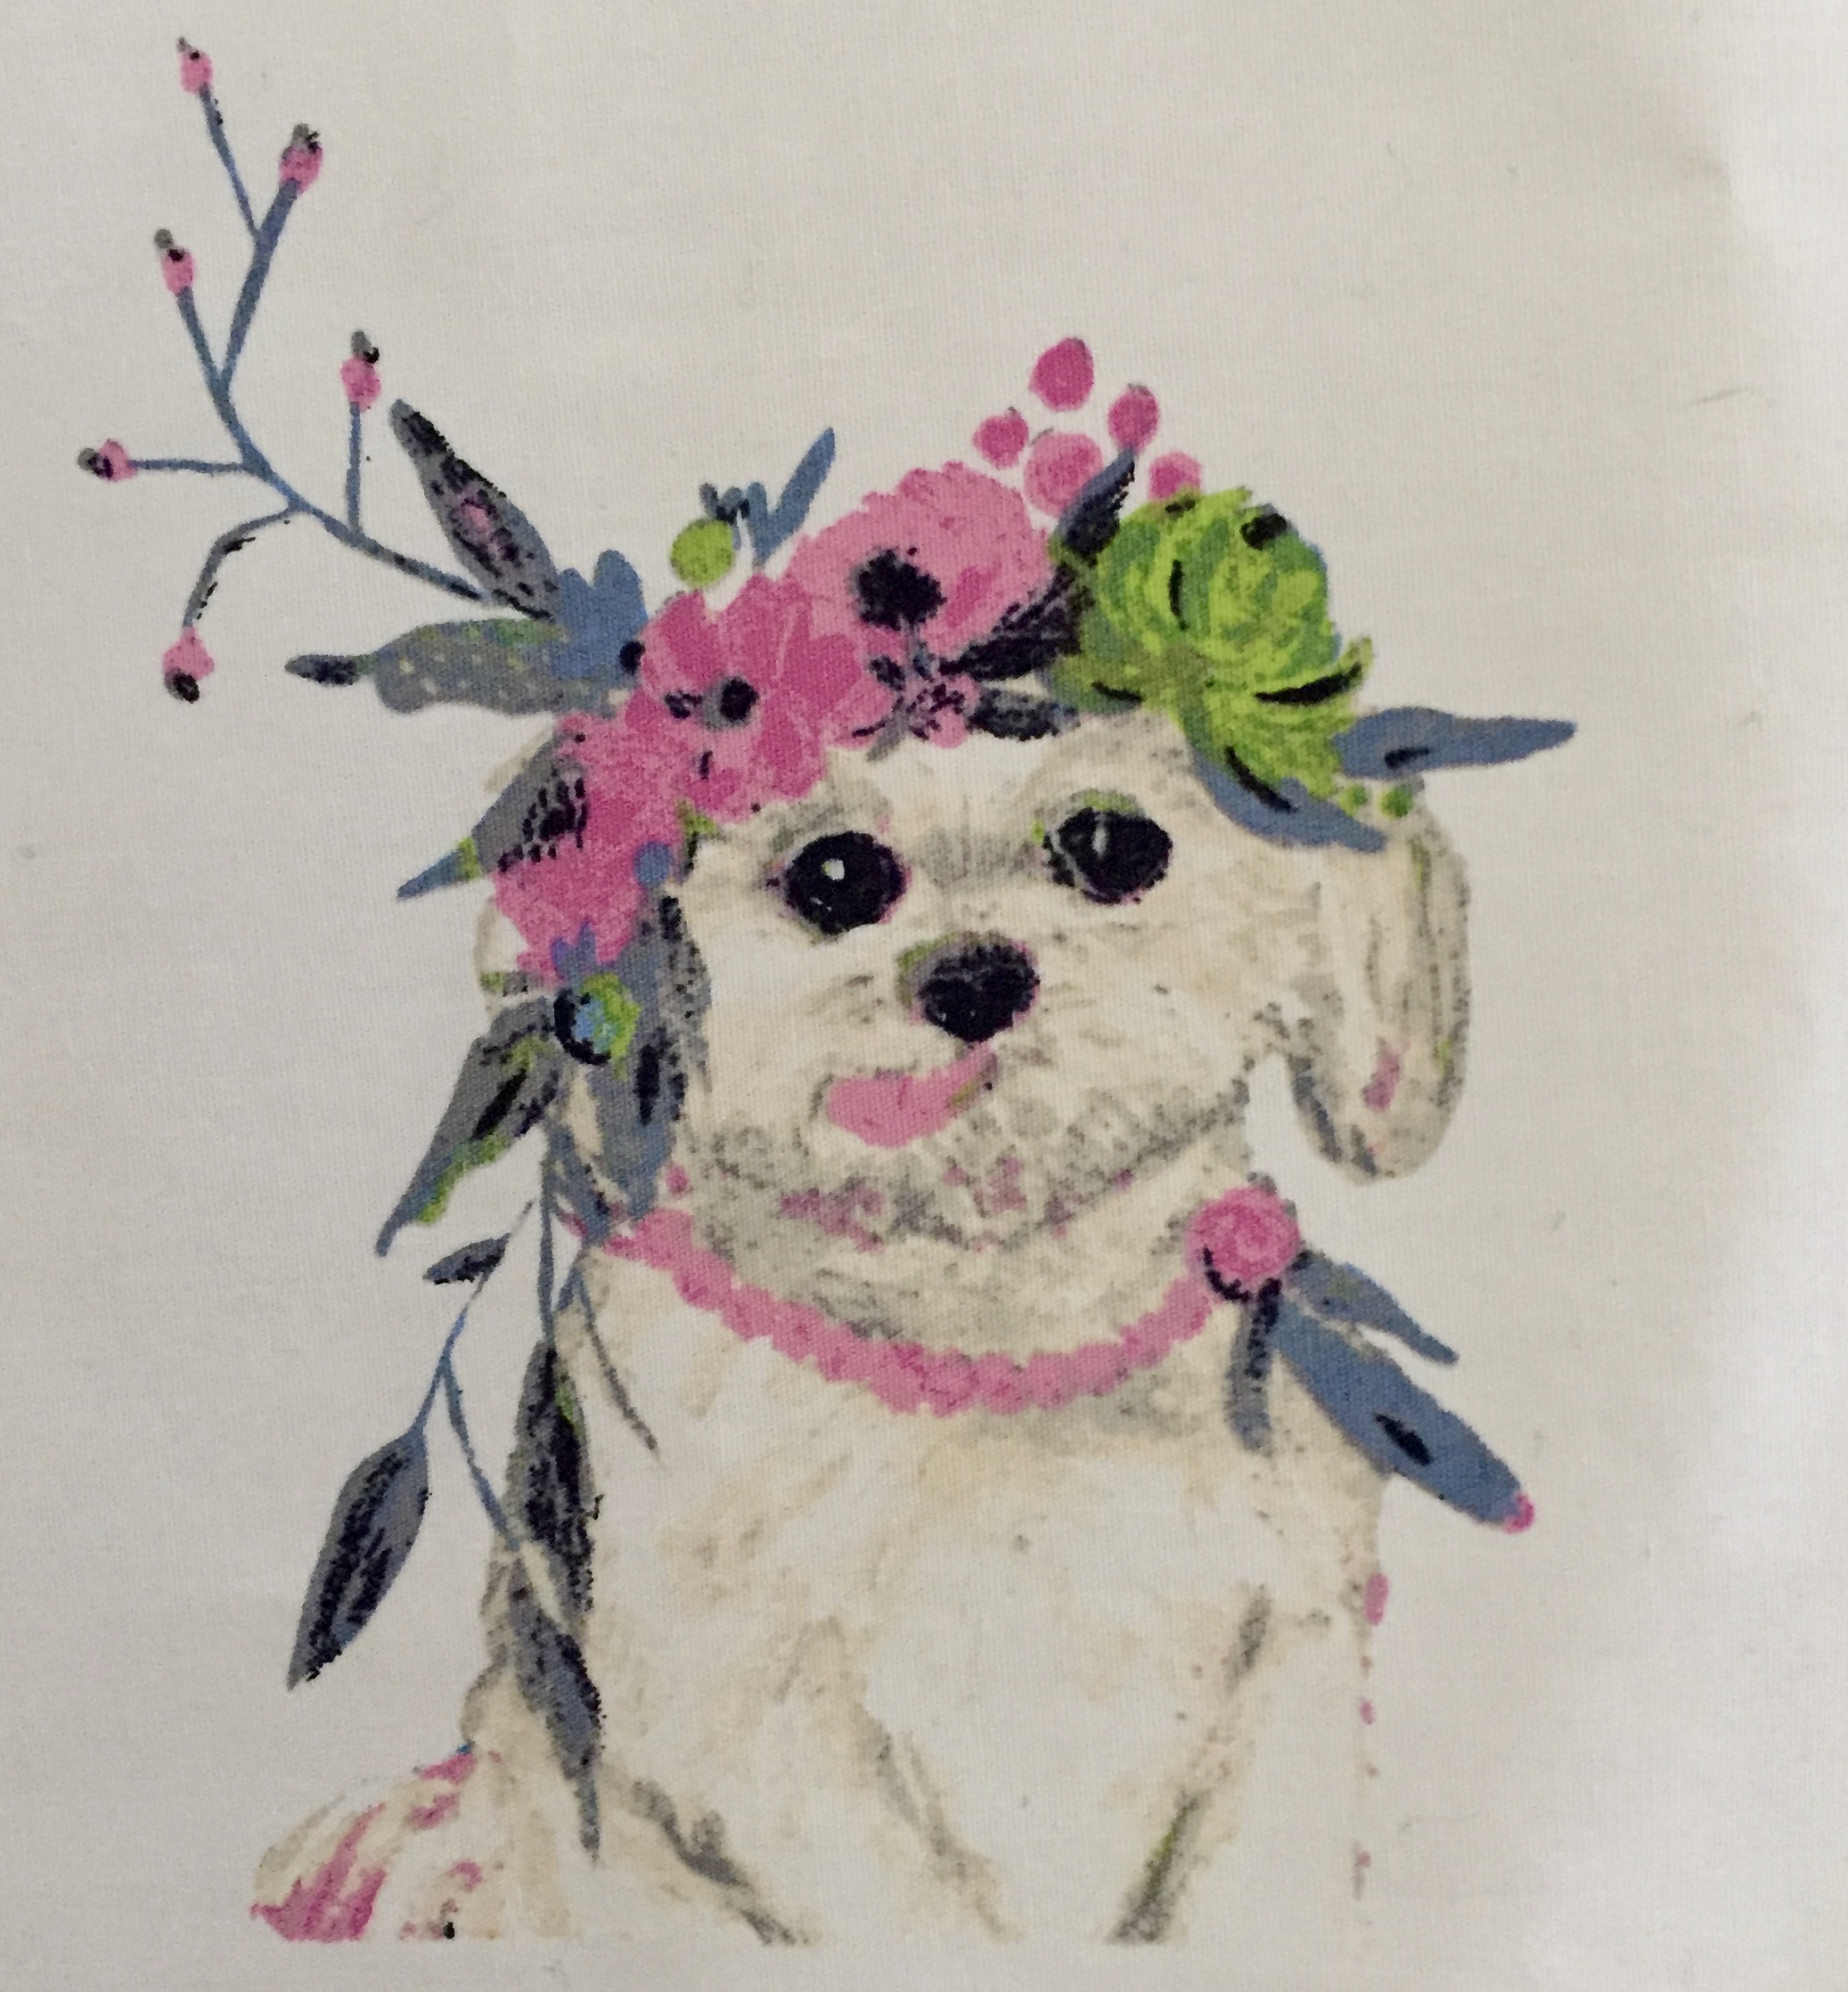
The fabric is called Radiant Menagerie (from Indigo & Aster) and was designed by the talented BariJ. I LOVE her aesthetic and carry a lot of her fabric in my shop (Wild Bloom, Indigo and Aster and now Virtuosa.) If you aren’t familiar with BariJ, she is a talented artist whose work is often quite feminine and usually features large floral designs. Her paintings are very pretty and some are quite whimsical. Take a look at her work here.
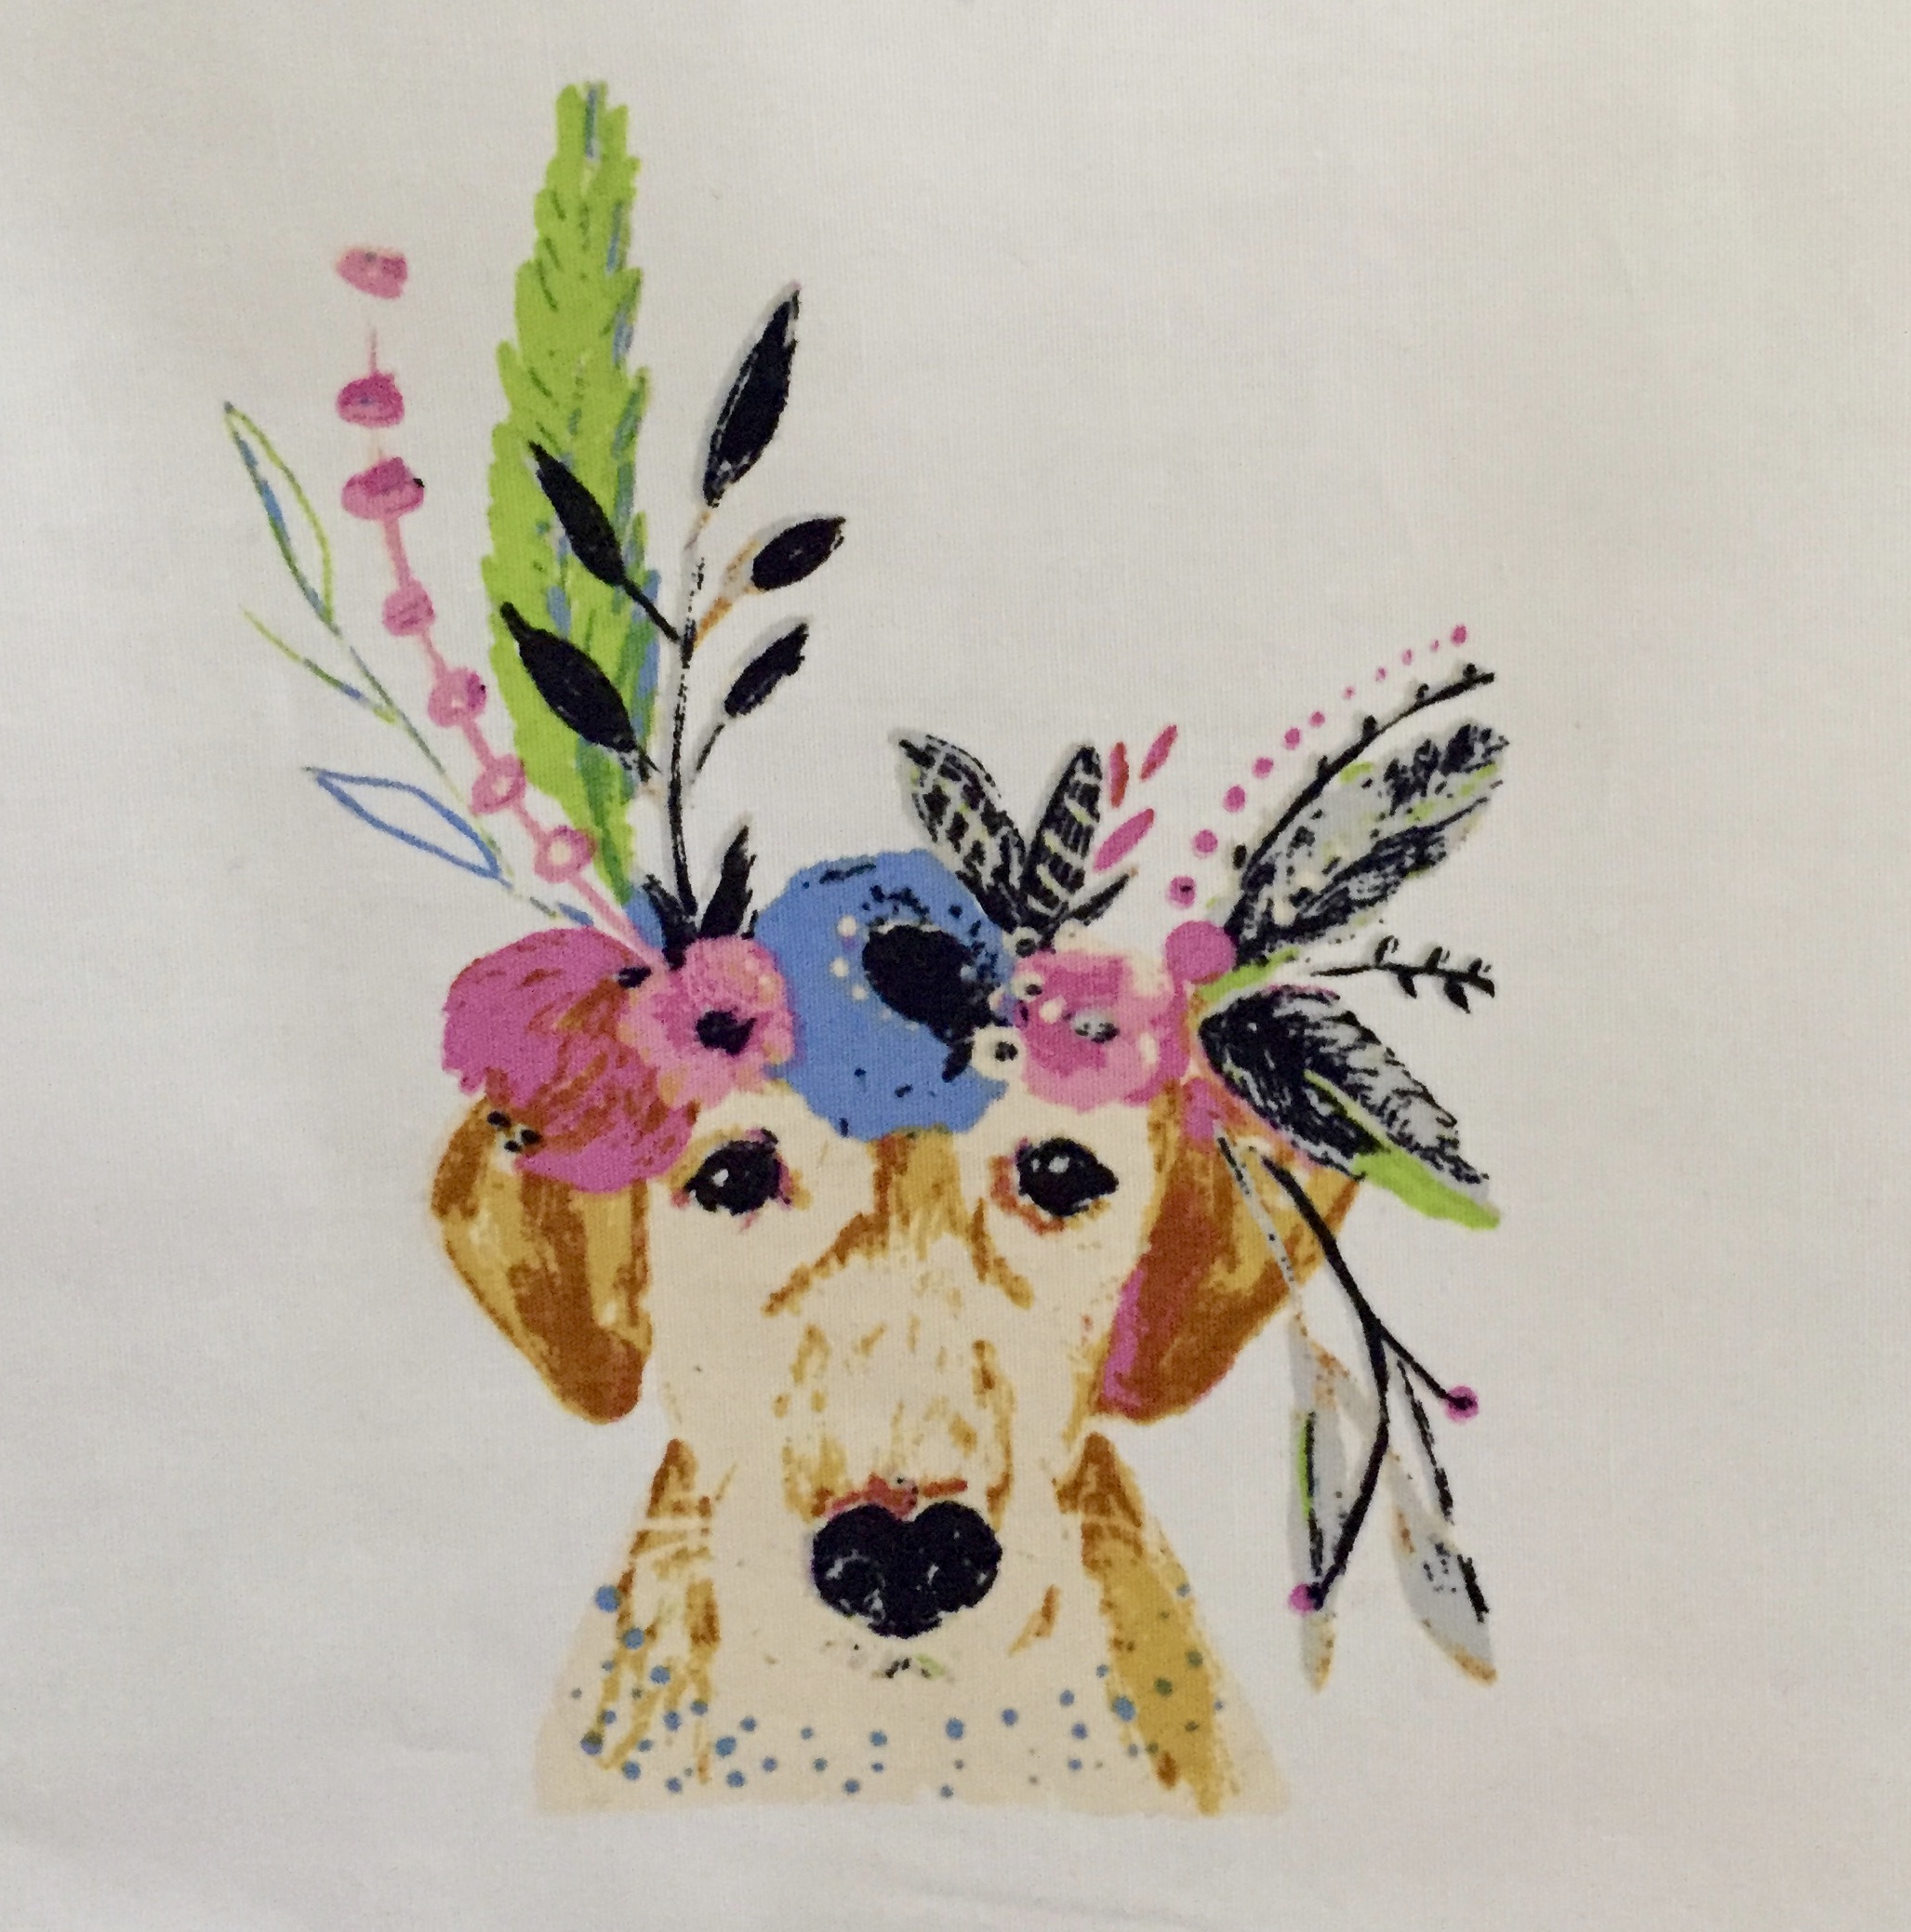
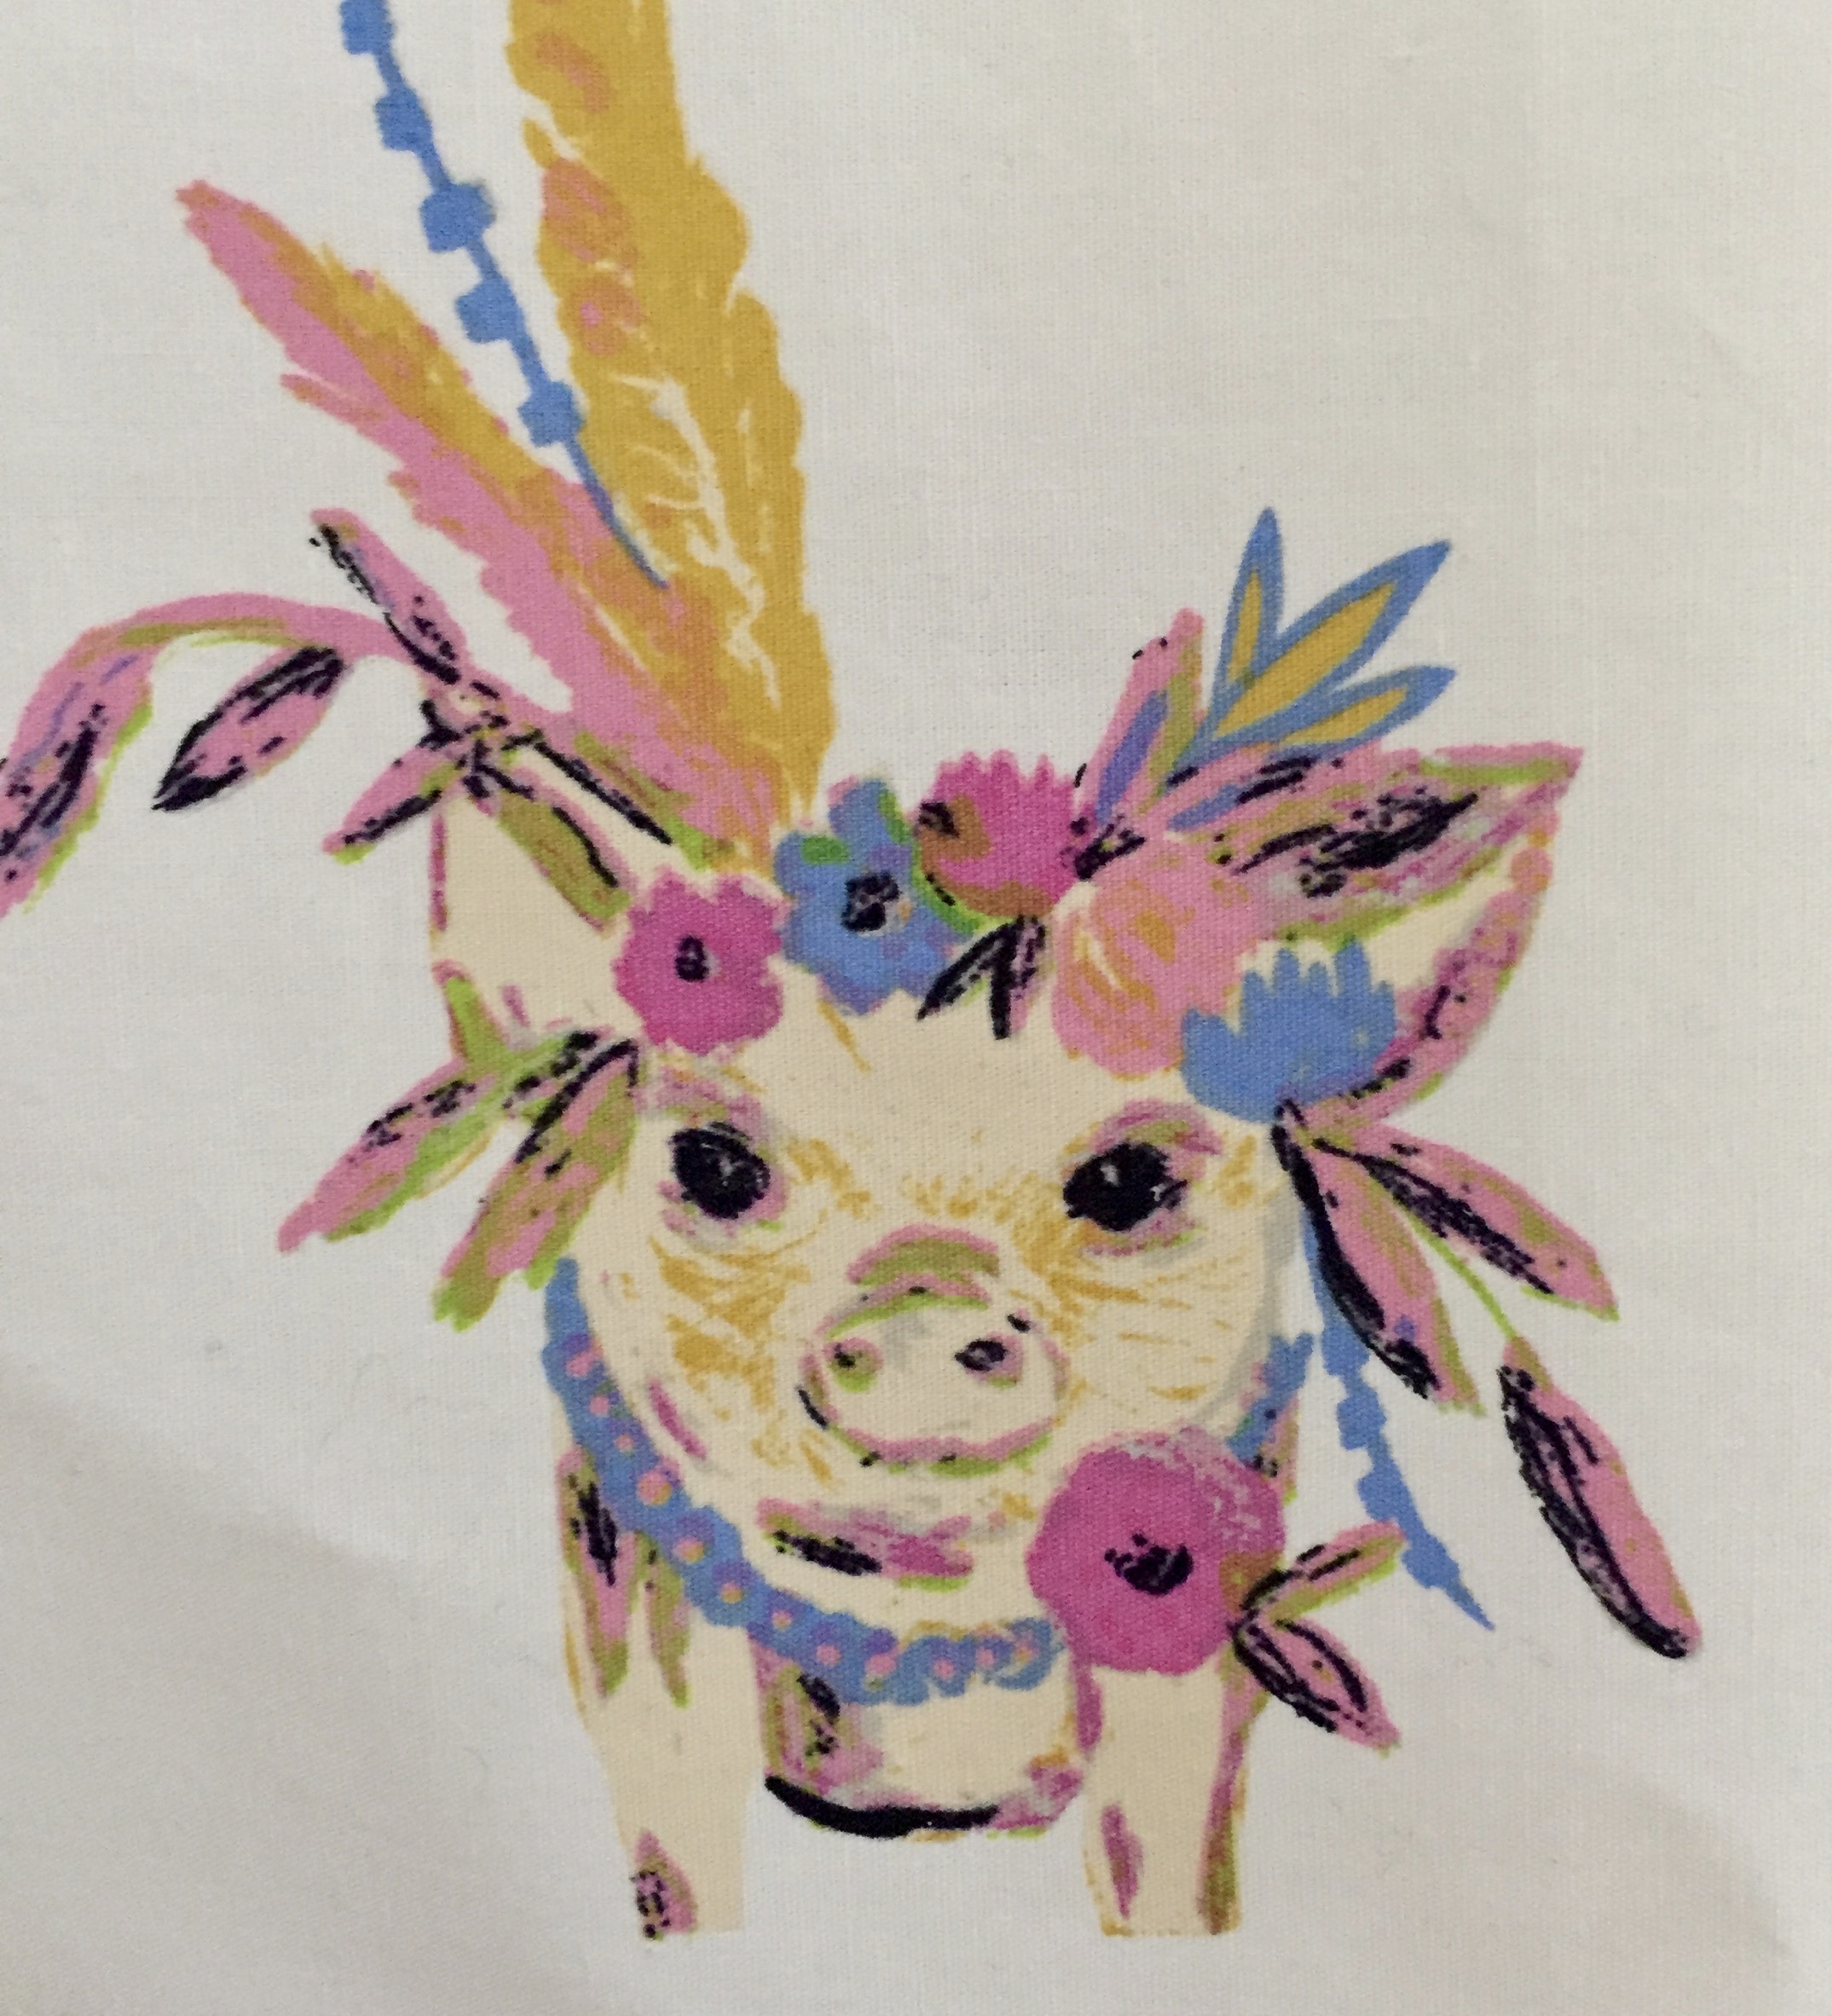
She has a lot of animals sporting floral crowns and I was thrilled to see her include them in the Indigo & Aster line (produced by Art Gallery Fabric).
Probably my favorite of the animals, no surprise there, right?
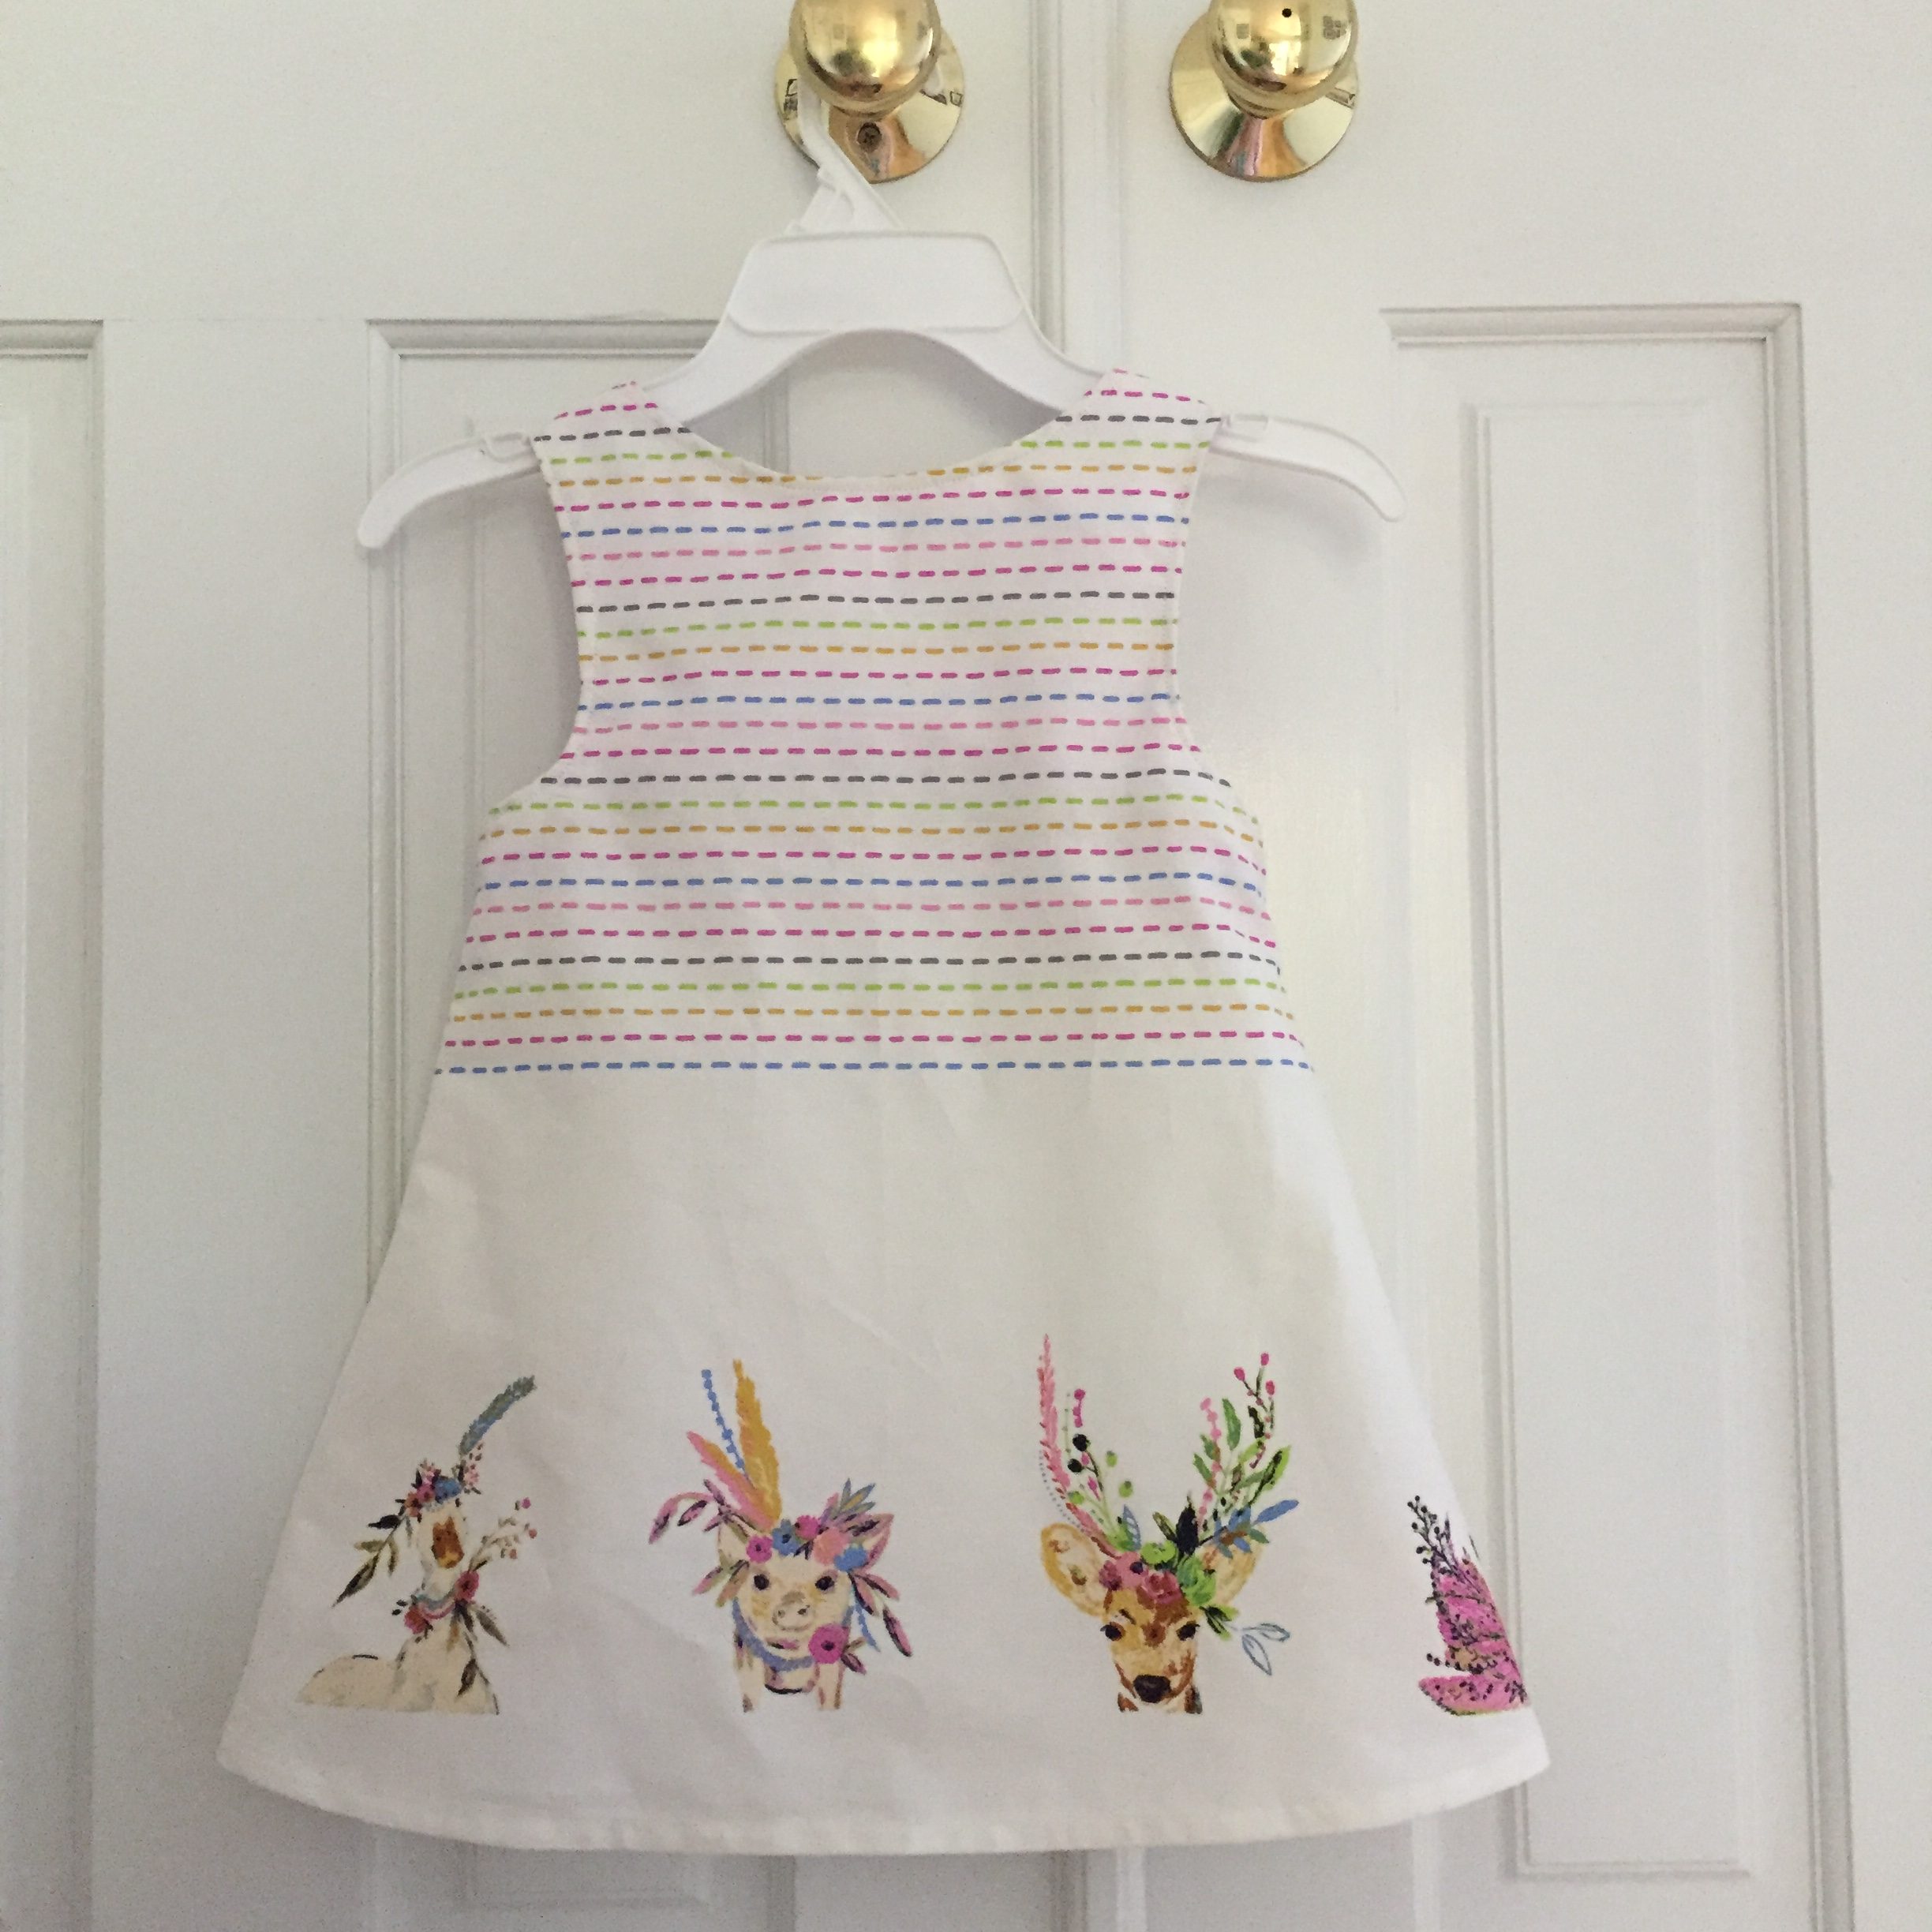
The fabric that features the animals is called Radiant Menagerie and is a border fabric of sorts. Each selvage edge is lined with the various animals.
In between the selvages are stripes in coordinating colors or pink, orange, green and blue. The stripes are actually dotted lines. So when using this piece in a quilt, it is simple to fussy cut the animals and then use the stripes as a coordinate.
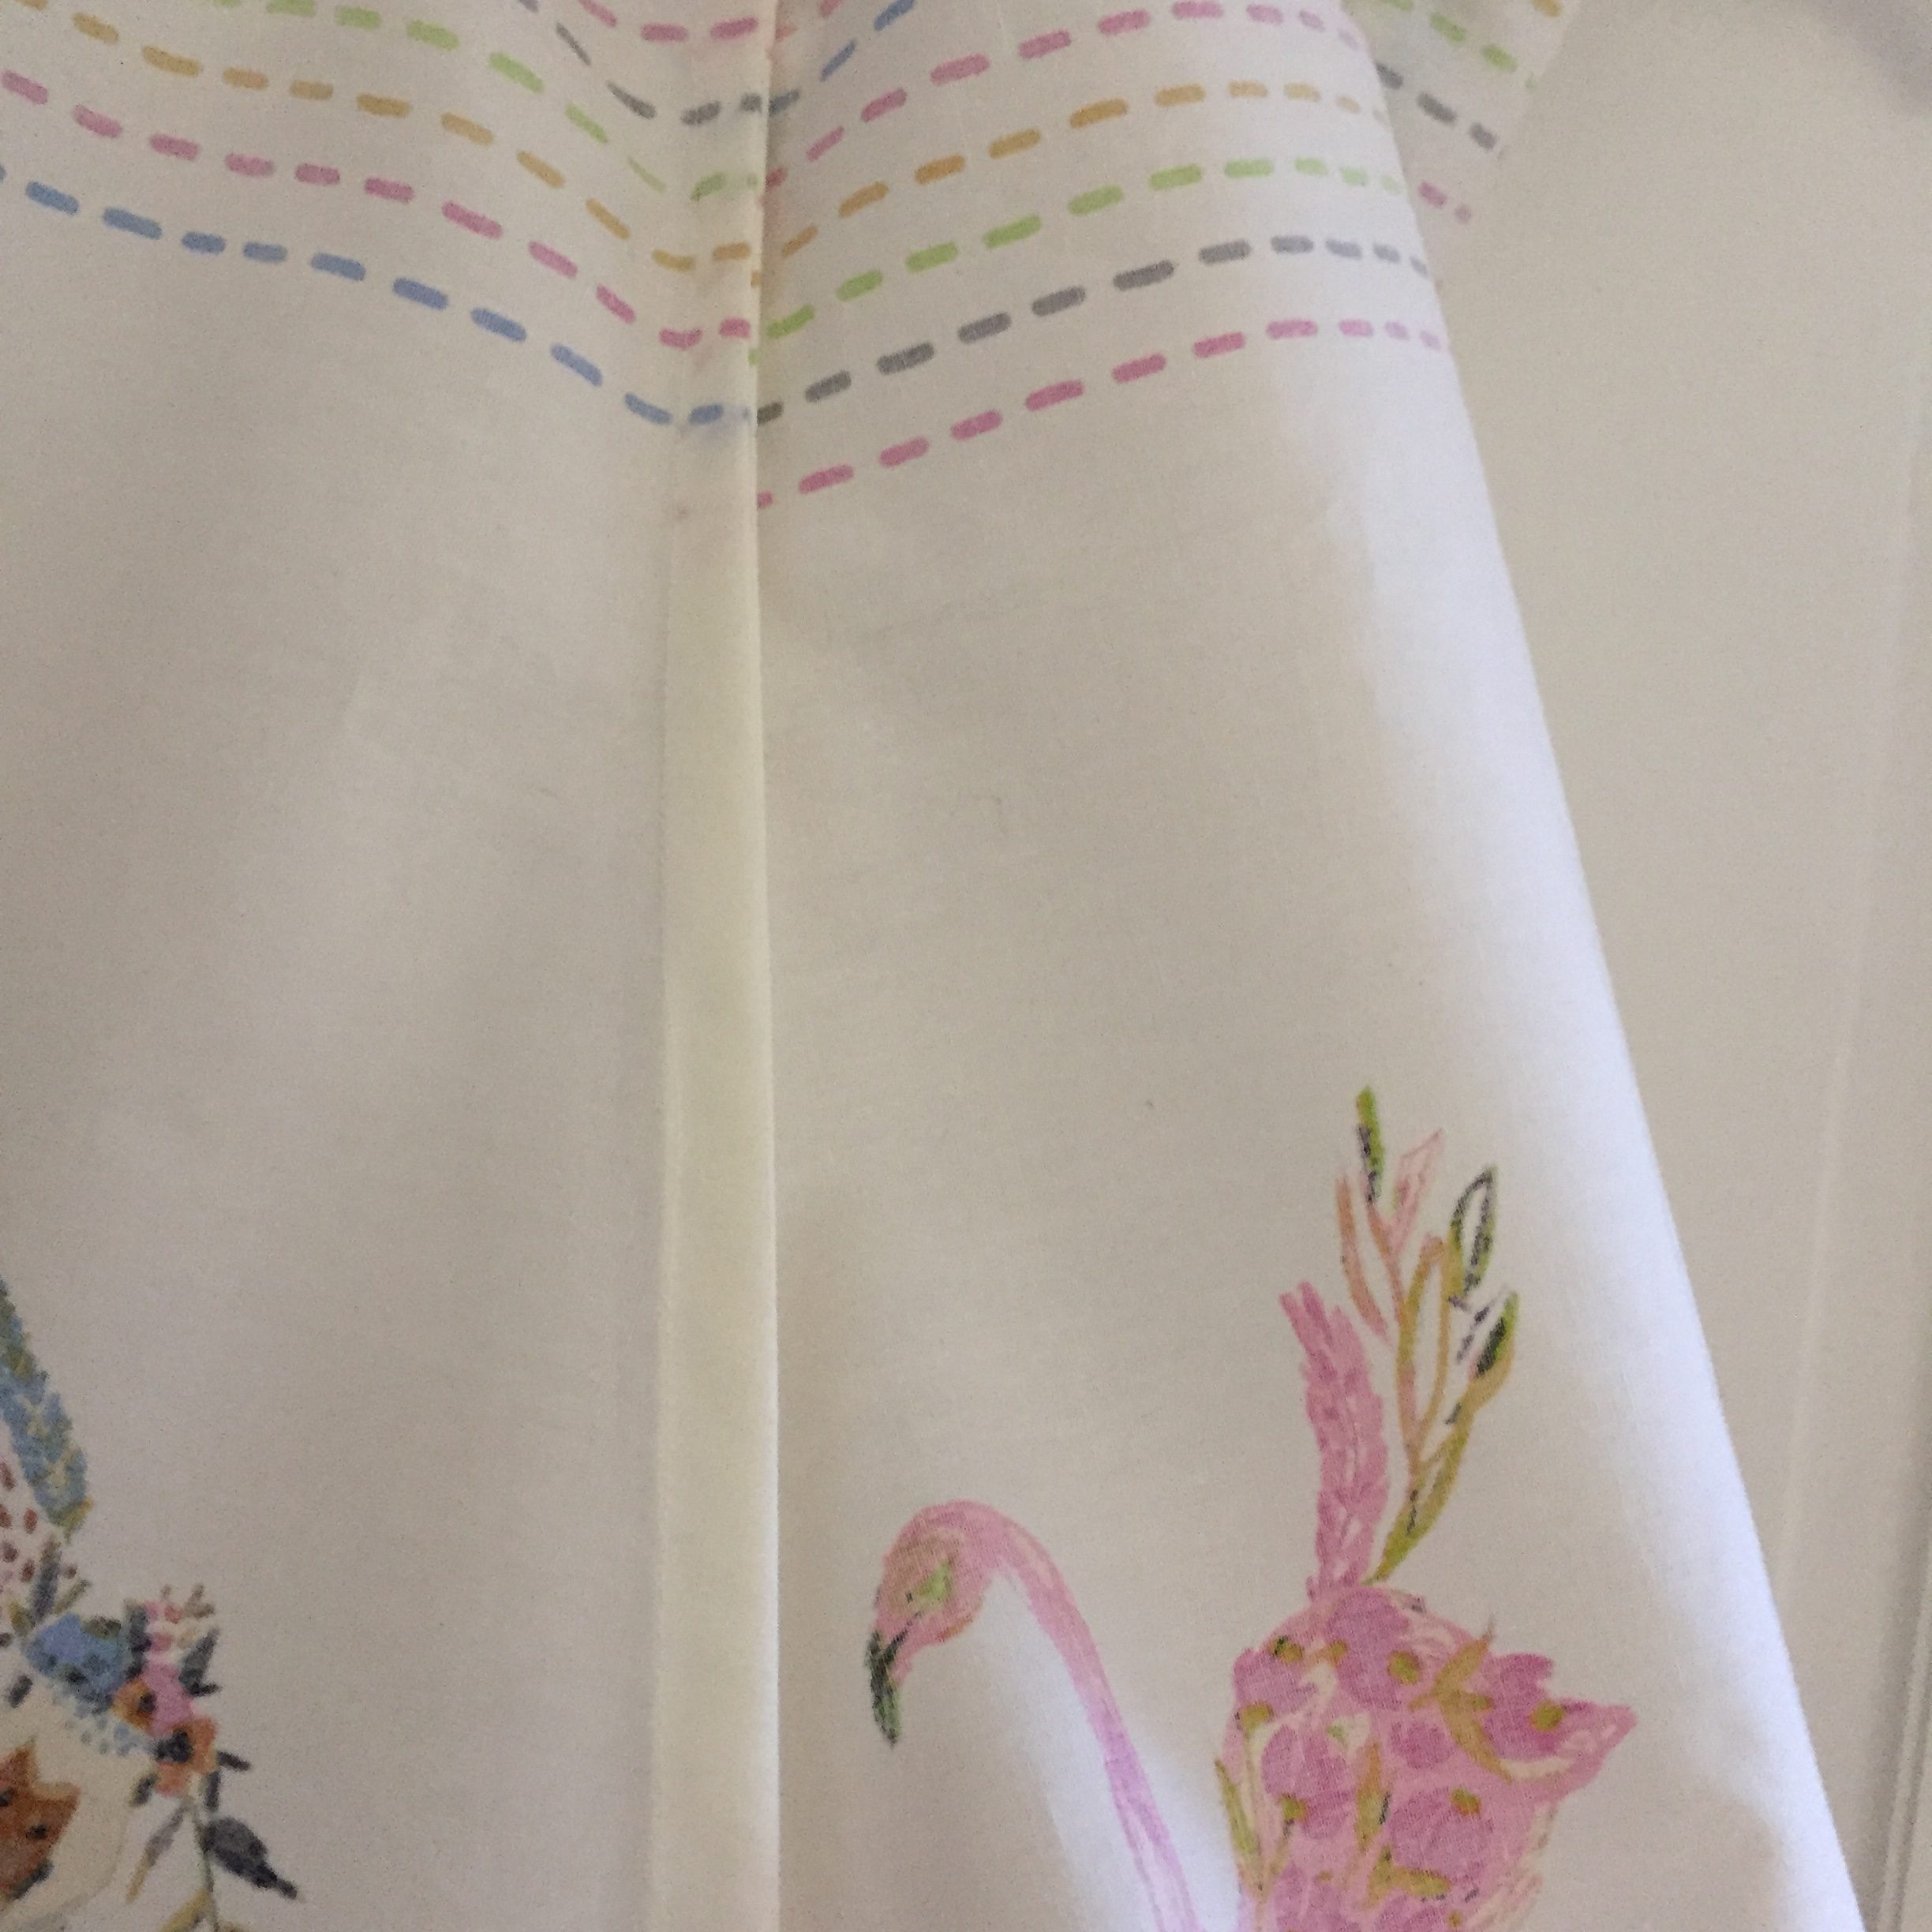
I wanted to use this as a dress so I was careful to choose a simple pattern with a straight hemline (as opposed to curved.) This enabled me to use the striped portion as the bodice of the dress and the animals as the bottom. The back side of the dress mirrors the front with animals parading across the bottom and the colorful stripe at the top.
Front ruffle detailing.
As if it wasn’t colorful enough already, I decided to take it a step further. Using a four inch wide strip of La Floraison Lit (another piece in the line) I sewed a tube with the fabric and turned it right side out. Then I ran two lines of stitching down the center (with a long, loose stitch) so I could gather that tube into a ruffle. A quick hunt through my buttons resulted in these cute, colorful buttons to add to the ruffle. I really like the extra detail this adds to the dress..
Finished French Seams
My serger is (still!) not cooperating with me so I finished the seams with French seams. This will prevent any fraying. I do love French seams. They are easy and give a really nice finished look to the garment.
Lavender facing on the inside.
Because the fabric in a nice lightweight cotton, I didn’t want to use the dress fabric for the interior facings around the neckline and armholes. It showed through and didn’t look very polished. Instead, I used a scrap of a lavender solid (I think a Moda Bella piece)). It looks pretty to see that lavender bit popping through.
The dress is adorable and while I am certain it will be too big for now, I can look forward to seeing it on her next spring or summer. These little projects are so much fun. They don’t take a whole lot of fabric and I love seeing her in something I made.
It felt good to sit and sew the bits needed to finish this little dress up. Tomorrow I should have a lot more energy to be able to get things done for our big weekend. I am over the moon about this wedding as I really think these two are perfect for each other. We are so happy to welcome Shar into the family! I will share more about the wedding once everything quiets down again.
Sharing with my favorites, including a new linky party hosted by Michelle at From Bolt to Beauty. It is called Brag About Your Beauties and happens on the 2nd, 3rd and 4th Fridays of the month. Be sure to check it out!
Newsletter!
Have you signed up for my newsletter? It is published every month or so and is full of information about my shop, new arrivals, sales, and events. Click here to sign up!
Happy Friday! Before I get going here, I want to thank everyone for the great response to the July Blogger Bundle. It is a beauty and I am happy to announce that Kathie L will be receiving a bundle in the mail soon. She won the drawing for the giveaway! Yay for happy, squishy mail – it’s coming your way Kathie!
I actually do have a finish to share – not a quilt finish but something to check off the WIP list nonetheless. I began making a pair of pants in May – Well, I actually bought the fabric over a year ago and it sat on a shelf until May. But then Me Made May rolled around and I got excited about making some clothes. I got these nearly done in May – they only needed to be hemmed. It took me until mid-July to hem them. Why?? Now it is too hot to wear pants. Silly me.
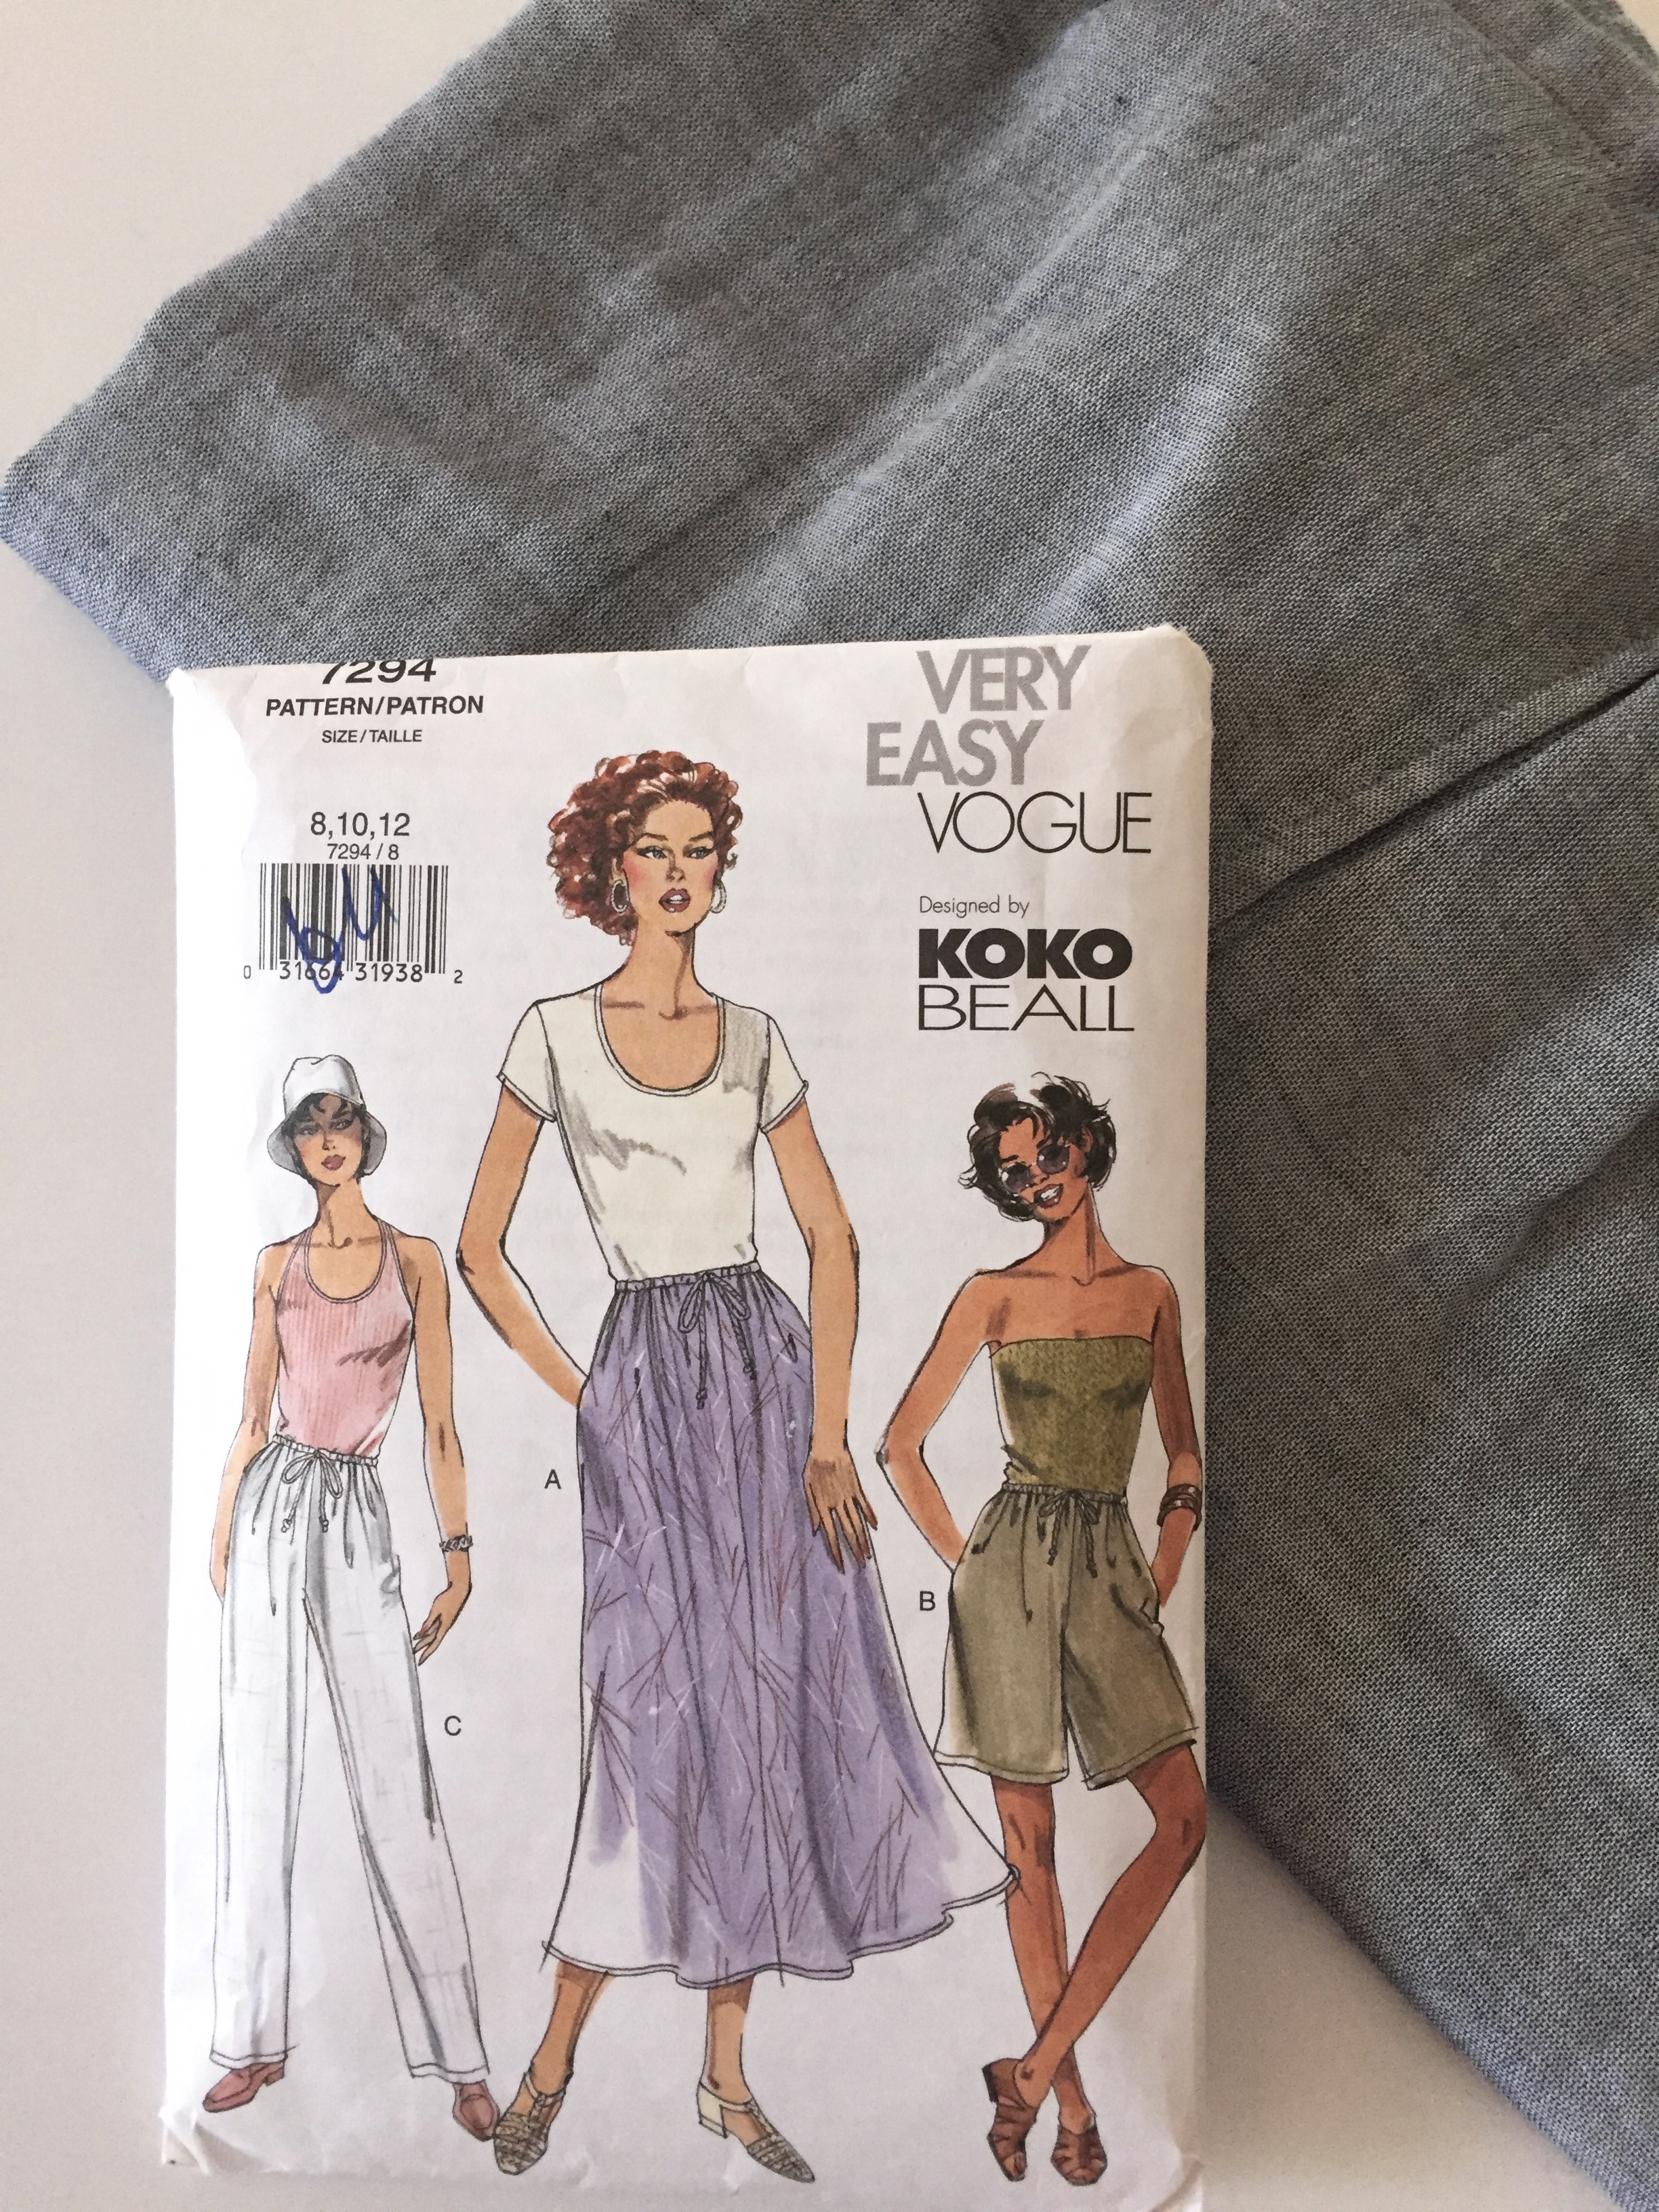
So these were a very easy make. The pattern for these was Vogue 7294. The pattern was from 2001 and the pants had a high waisted cut. I took a few inches out of the rise so they would hit me below the waist. There isn’t a waistband – just a simple elastic waist. I don’t tuck my shirts in so this won’t be an issue.
The biggest issue I ran into was the fabric I chose for the pants. It was not a good choice at all! It is too light weight and it frayed continually, making it a pain to sew with. I did the best I could, making sure to finish each seam with a zig zag stitch to help with the fraying. My plan is to hand wash these (in the washing machine – my washer has a “hand wash” cycle) and hang them to dry. I really have no idea how long they will last? For all I know, they may disintegrate upon first wearing.
I was concerned that this lightweight material would make the pants look like pajamas. To be honest, they do look a lot like pj’s. But I like them anyway. They are comfortable and they have pockets in them!! However, I am afraid to use said pockets because of the lightweight, easily frayed fabric. Yikes, these are going to be some high maintenance pants! 😉
In closing, does anyone need a good book to read over the summer? I just finished two and both of them were excellent. The first one was The Spool of Blue Thread, by Anne Tyler. I am a huge fan of Anne Tyler’s. She writes such great stories about regular people. I love how she develops her characters. The reader always comes away feeling like he really knows those people. Great read!
The second book I read is the The Book of Unknown Americans, by Cristina Henriquez. It iss a timely novel about several families who came to the US from various countries such as Mexico, Puerto Rico and Venezuela. The relationships between the families, their history, and a love story between two young teens make this book hard to put down. Have you read anything good lately? I am ready for another book.
Hope everyone has a great weekend. We are having lunch with my in-laws on Saturday and then we will be home all day Sunday. Supposedly it isn’t supposed to be over 90 degrees this weekend so that will be a nice break from this crazy heatwave.
Linking to lots of linky parties. See them at the top of the page, under Link Ups.
Newsletter!
Have you signed up for my newsletter? It is published every month or so and is full of information about my shop, new arrivals, sales, and events. Click here to sign up!
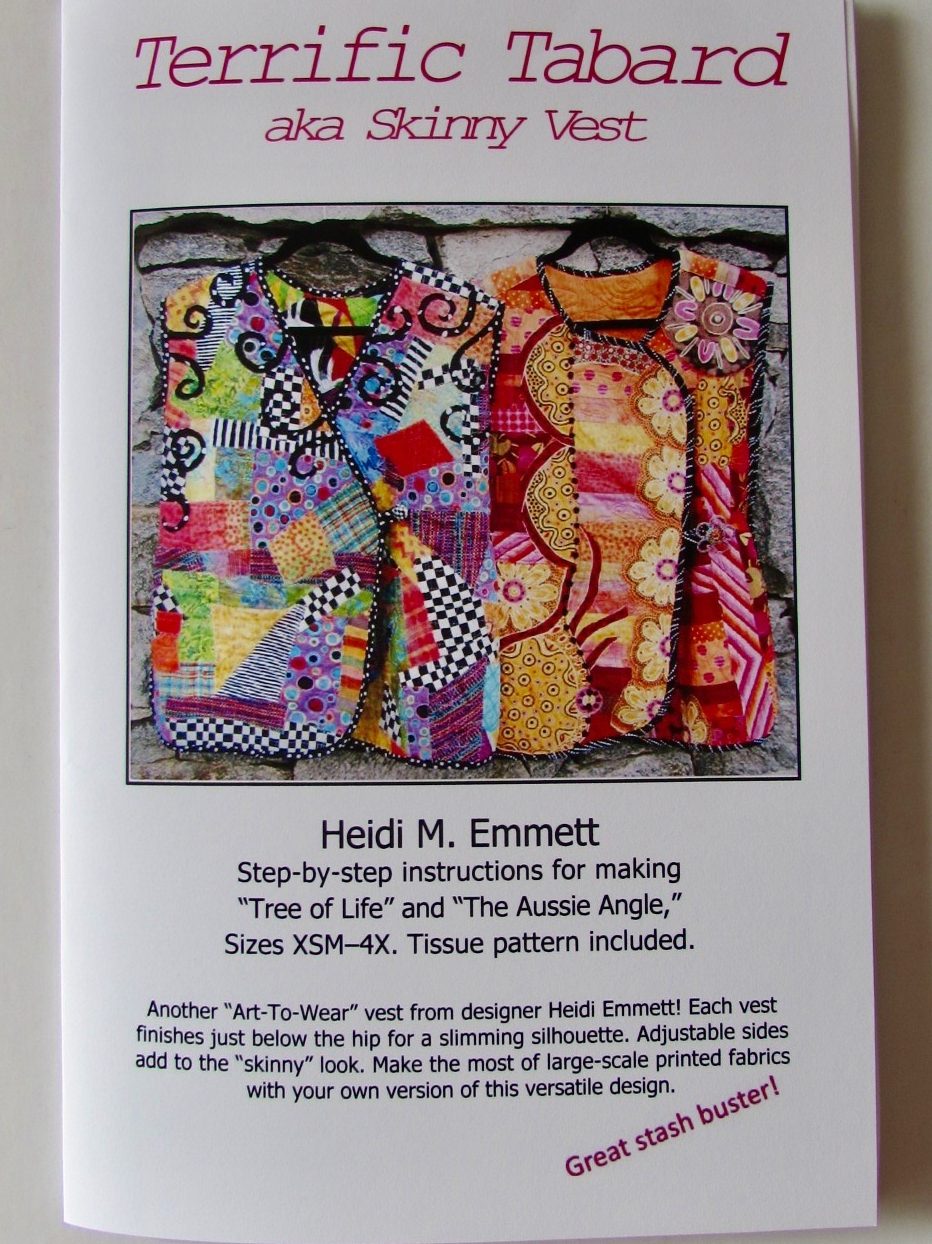
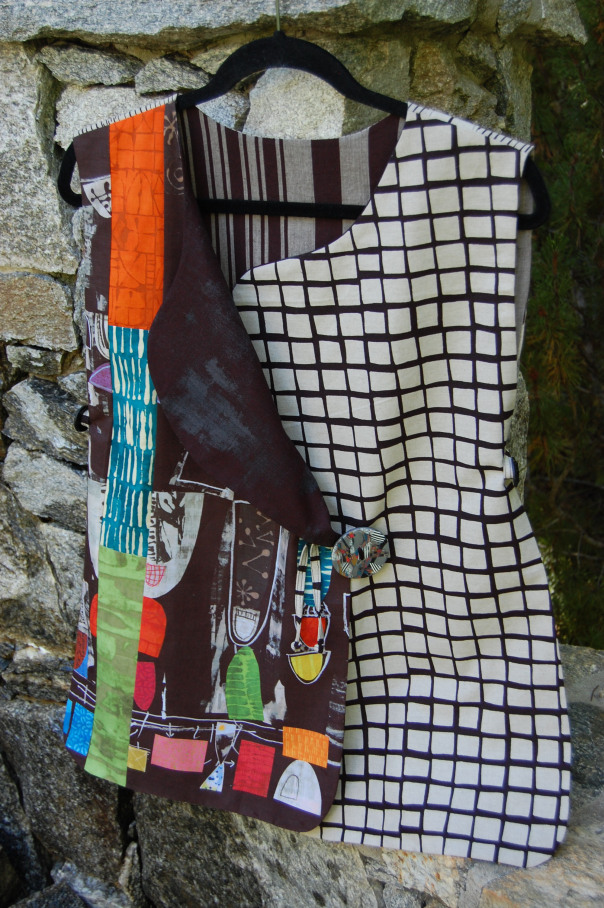
Hi Everyone – I am back from our back-to-back vacations! Both trips were awesome but as always, home sweet home! After a relaxing time away, I am ready to jump back into my blogging/sewing/shop routine. Today I have a really special post to share with you. I would like to introduce you to Heidi Emmett. Heidi is a really talented pattern designer and I am proud to carry a number of her patterns in my pattern shop. To do justice to this introduction, I need to tell you a bit more! Heidi lives in Grass Valley and we are both in the same quilt guild. Heidi makes both quilts and garments, designs clothing patterns, teaches sewing classes at an annual retreat up at Lake Tahoe and is generally a creative maker at heart. She also owned a brick and mortar fabric shop in Grass Valley for quite a few years. She is a person with what seems like unlimited energy and is constantly making or designing something. About a month ago, she and I chatted at a guild meeting and we were brainstorming ways we could work together since we both have so many common interests. As a result, I have begun to carry her patterns in my pattern shop. She had purchased some of the Sarah Golden linen blends from me at the quilt show last May with the intent to make one of her Terrific Tabard vests. Today she will share the vest she made and explain the process she used to make it. I hope you enjoy the post. If you have any questions for Heidi, be sure to leave them in the comments and she will post a reply to you there. I hope you all will enjoy getting to know Heidi as she is a creative force to be reckoned with!
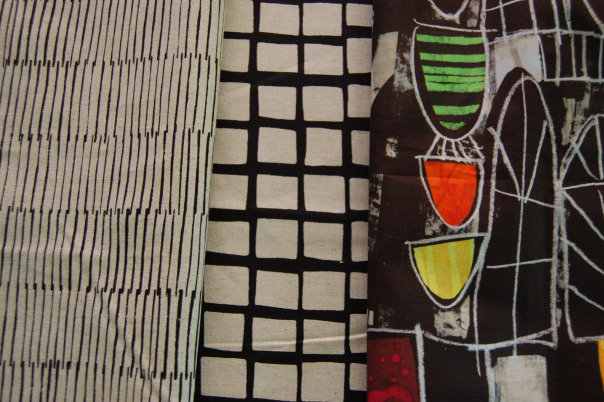
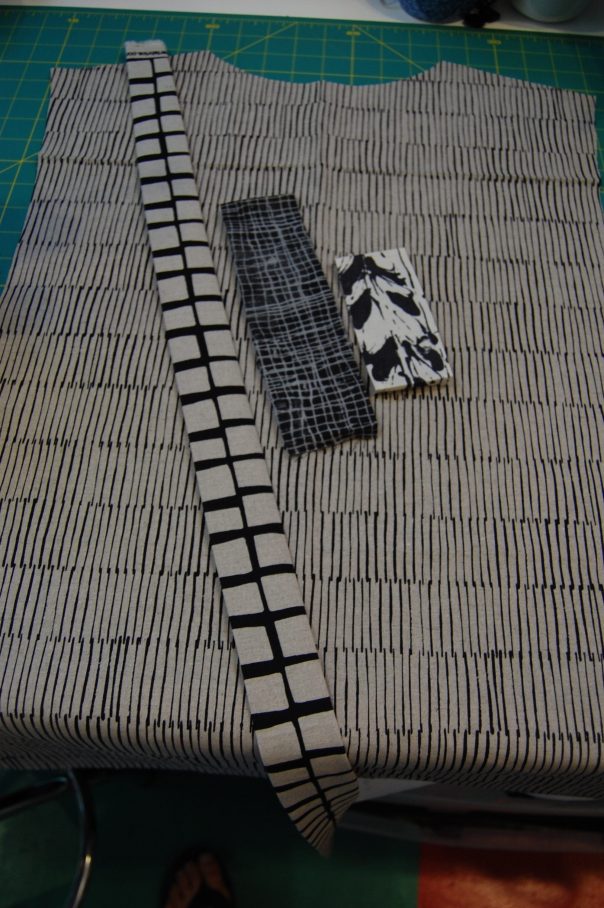
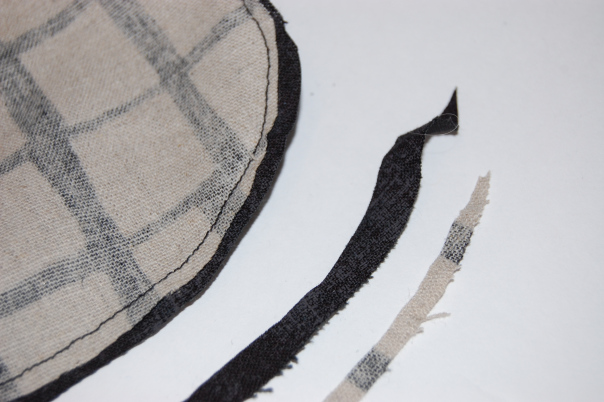
I’m going for a whole new look (than the cover shot above) with the linen blends I got from Bernie’s Etsy shop. Let me show you what I did to create a sophisticated and smooth Terrific Tabard. I started with two linen blends from Bernie. I absolutely LOVE linen! And these two linens by Andover Fabric are neutrals that will work with ANY other palette of colors. The piece with the columns of lines is called Lines (appropriate enough!) and the piece with the checked pattern is called Squares on Tailored Cloth. Both were designed by Sarah Golden and are available in Bernie’s shop.
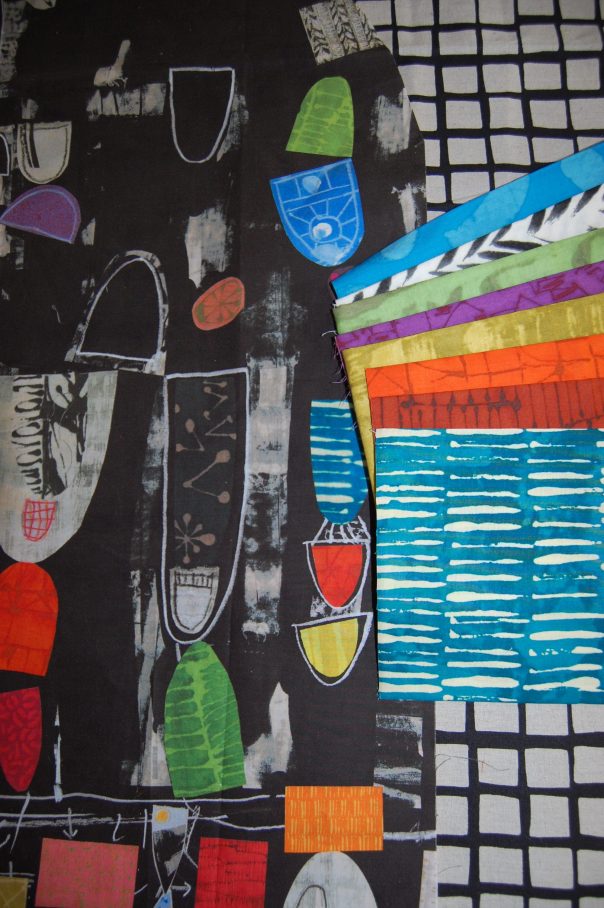
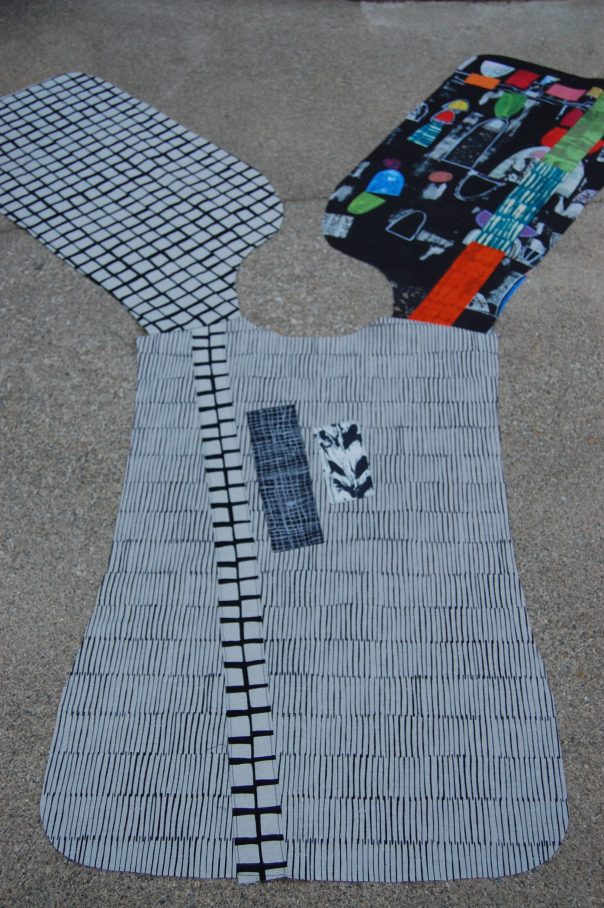
I went to Quilt Market in Portland, OR this past May and was able to buy a modern black and brightly colored panel by Marcia Derse. This panel won’t be available in stores until October. I immediately thought to use it as a part of my Tabard vest!
Fortunately, I also snagged some very small pieces from Marcia’s newest collection, again available in October. The linen fabric is just perfect with these prints.
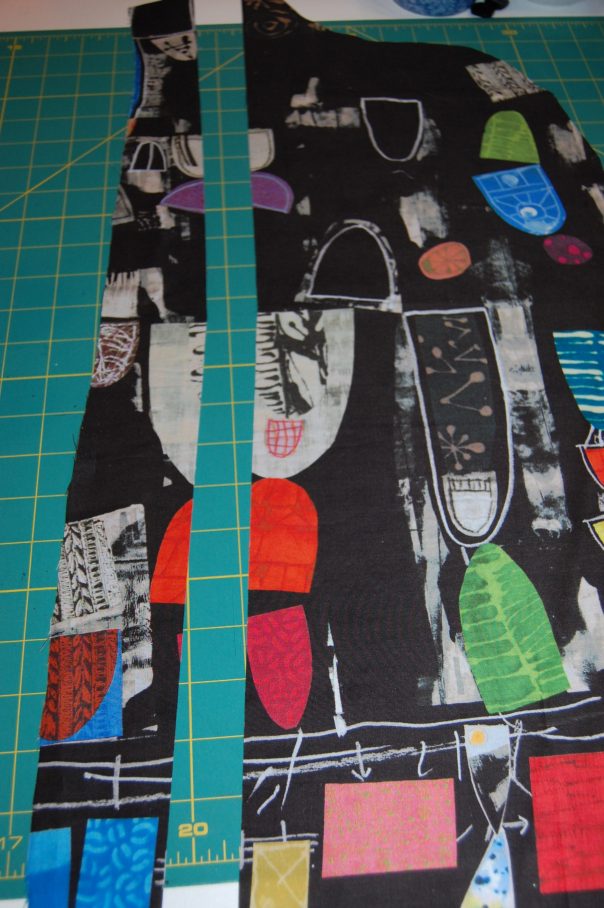
Most of my patterns have tissue pattern pieces included (I always include a range of sizes in one pattern). Notice I have taken a lengthwise fold in some of the tissue (closest to the side, not the center). I did this because I want to insert some improv strips to add color and visual interest to the vest.
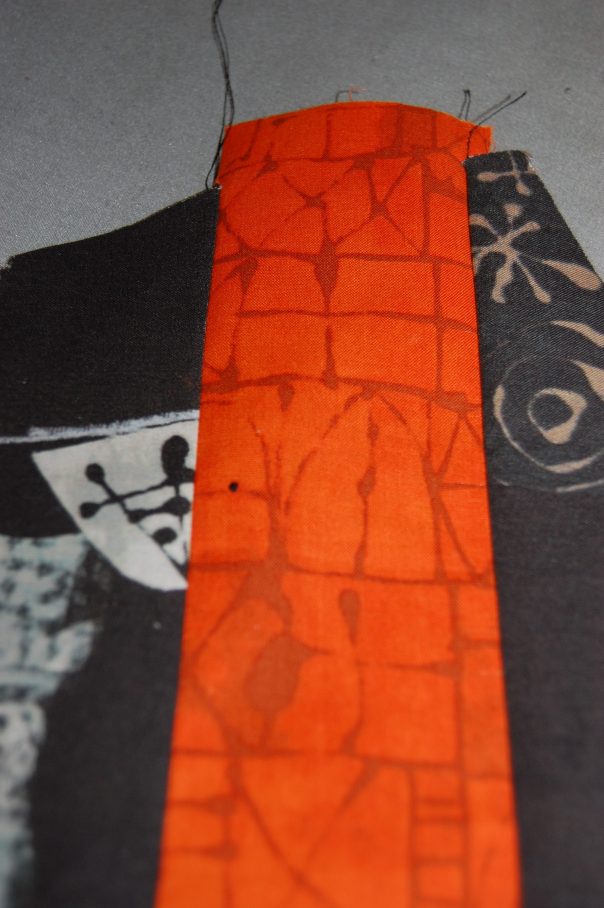
I love lots of bold color and plan to use bits of the smaller Marcia Derse pieces to create a long strip of fabric. Remember when I cut out this piece I pinched out some, so now I have to fill it back in with something.
I first cut the panel apart near the pinched out area all the way up through the shoulder area. Tip: Always cut wherever you pinch it out, then you can replace that space with your accent fabric and bring it back to size again. It is a fun and creative trick.
I cut up a few of those colorful pieces and sewed them together and then stitched them to either side of what I cut apart.
Always line up other seams and plan to have extra on either end to trim off. I do not like to run short. I will just snip, snip, the orange fabric in line with the shoulder seam.
While I let the fashion layer dictate what each section will look like, I always, ALWAYS, strive for a long and lean look. I want your eyes to see the whole design in an up and down fashion as this tends to be much more flattering than looking side to side.
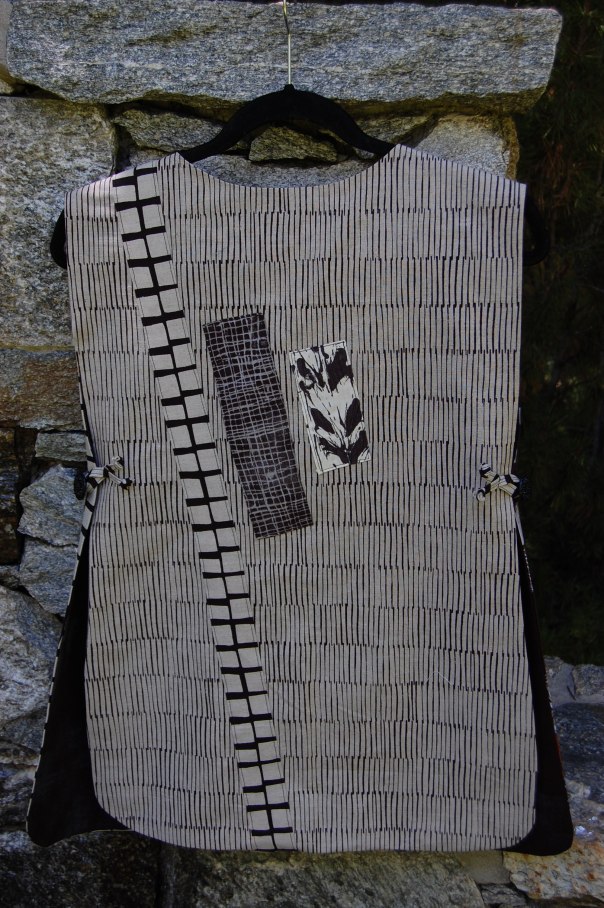
Preparing the embellishments for the back of the vest
When I created the back piece, I wanted to add some embellishment to it as well. For this, I used an applique process rather than slicing and inserting a strip. I cut the pieces I wanted and folded the raw edges under and pressed them. Next I pinned them in place and top-stitched around the edges to attach them to the back as well as finish those raw edges. I didn’t fuse them first though you certainly could if you preferred that method.
After stitching the front pieces to the back, in most other “quilted” version of Terrific Tabard, I would be layering the vest with batting right now (sometimes even before the shoulder seams are stitched together) and quilting all three pieces. Then the vest would be finished off with quilt style binding (albeit much narrower than a quilt binding). These instructions are included in the pattern. But THIS vest will have no batting. I chose to line it traditionally which means no binding necessary! This version really goes together quickly.
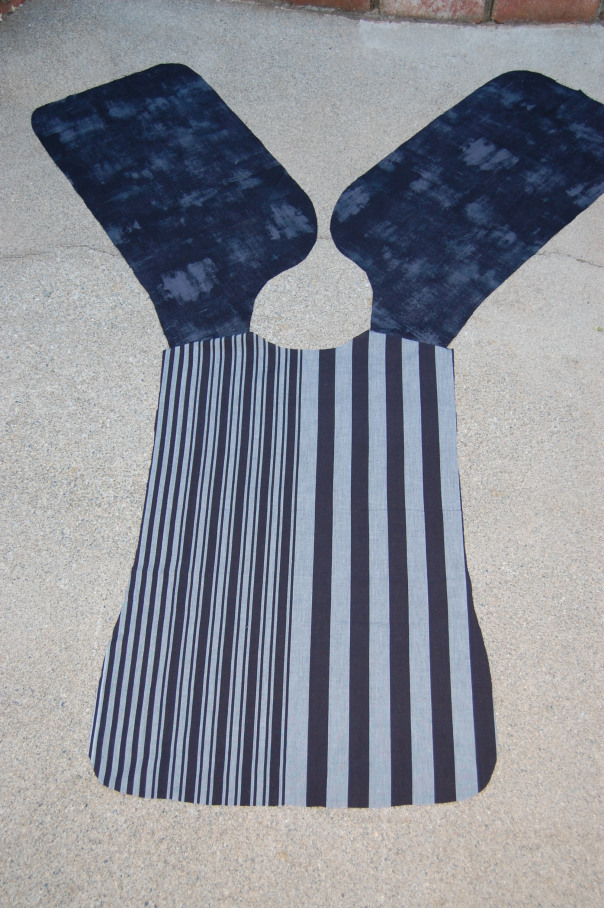
Front and back lining pieces stitched at the shoulders
The two front lining pieces are “Grunge” in black. The back piece lining is a very old (no longer being made) Kaffe Fassett stripe. To line this I pinned it, right sides together, and stitched all the way around using a 1/4″ seam allowance. I made sure to leave about a 6-8″ opening on one side so I could turn it right side out.
Grading a curved seam.
Very carefully grade the seams on the curved portions. Grading just means trimming one piece smaller than the other. When you turn the whole piece inside out and begin to press, press, press (that’s the secret to a beautifully lined piece), all the rounded edges will fall into place as you press. Tip: On dark fabrics use a press cloth (a piece of muslin works) on top of the fabric before you press. Sometimes you get a shine, even on linen.
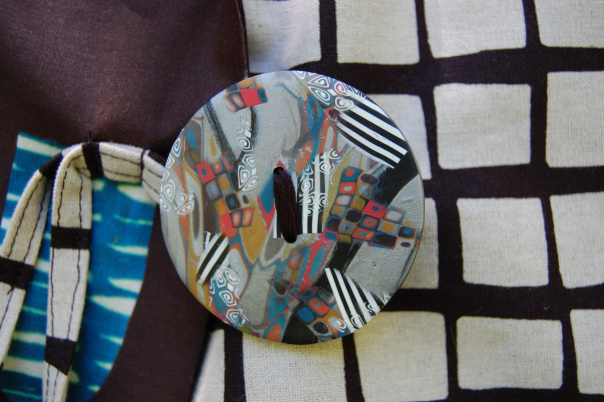
Handmade buttons by Sandra Bruce
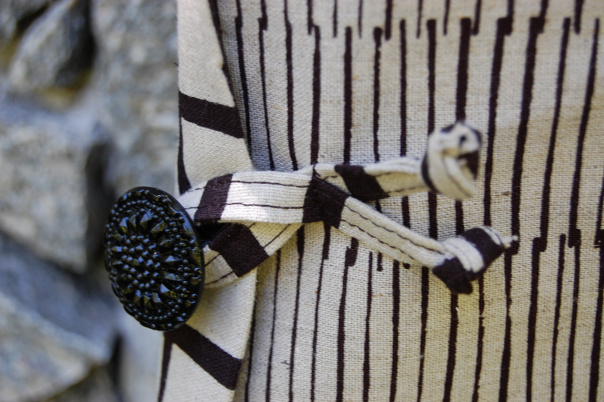
I have a rather large collection of buttons. Here is a group of handmade polymer buttons by the talented Sandra Bruce. I love to buy the buttons I like, knowing that someday, I’ll have the perfect button for a project. Forget buttonholes. I use strips of fabric that have been folded and pressed and stitched into place.
The polymer button I chose for the front is very intricate and it’s really BIG, but I think it blends in nicely.
The two side buttons are from my glass button stash. I know, I know, it’s a sickness, but one I don’t want to get over. Ha, ha.
It’s finished!!
I love my new vest. I can’t wait to wear it (not sure when since it is still summer!), but I’ll be ready when cooler weather comes.
Here is the finished back side of the vest. I love the look of the larger scale linen print slicing through the narrower lines.
Worn with just one lapel folded out.
One last way to style this Terrific Tabard, fold back the lapel on just one side.
If you like what you have seen, please join me at Designs by Heidi for more fun and creative happenings. I love sewing “Art to Wear.” You can also follow me on Instagram to see the latest patterns and classes I offer. Thank you again Bernie for letting me join in with you all at Needle & Foot.