Category Archives: Sewing Clothing

New Shorts for Summer

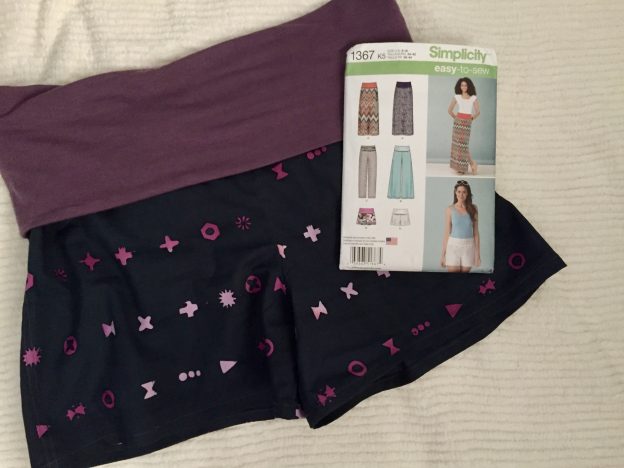
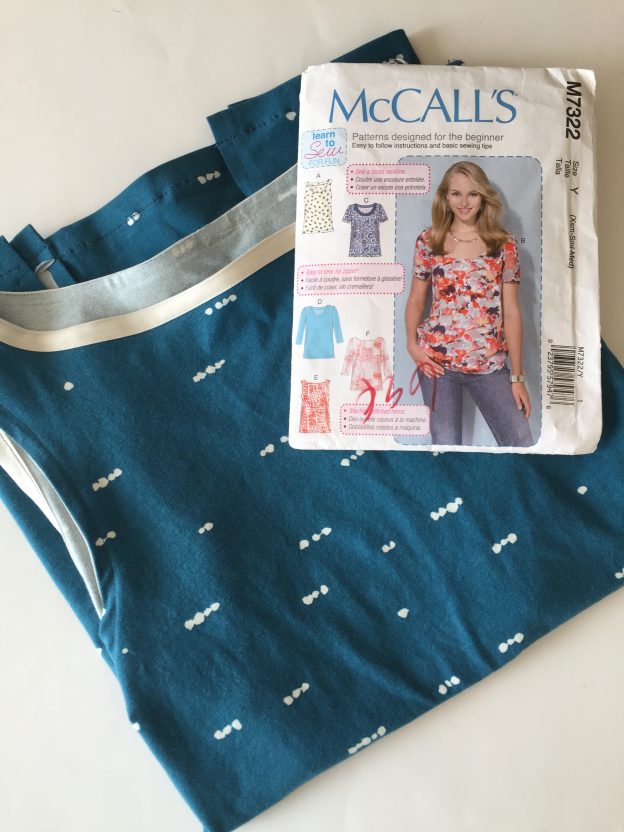
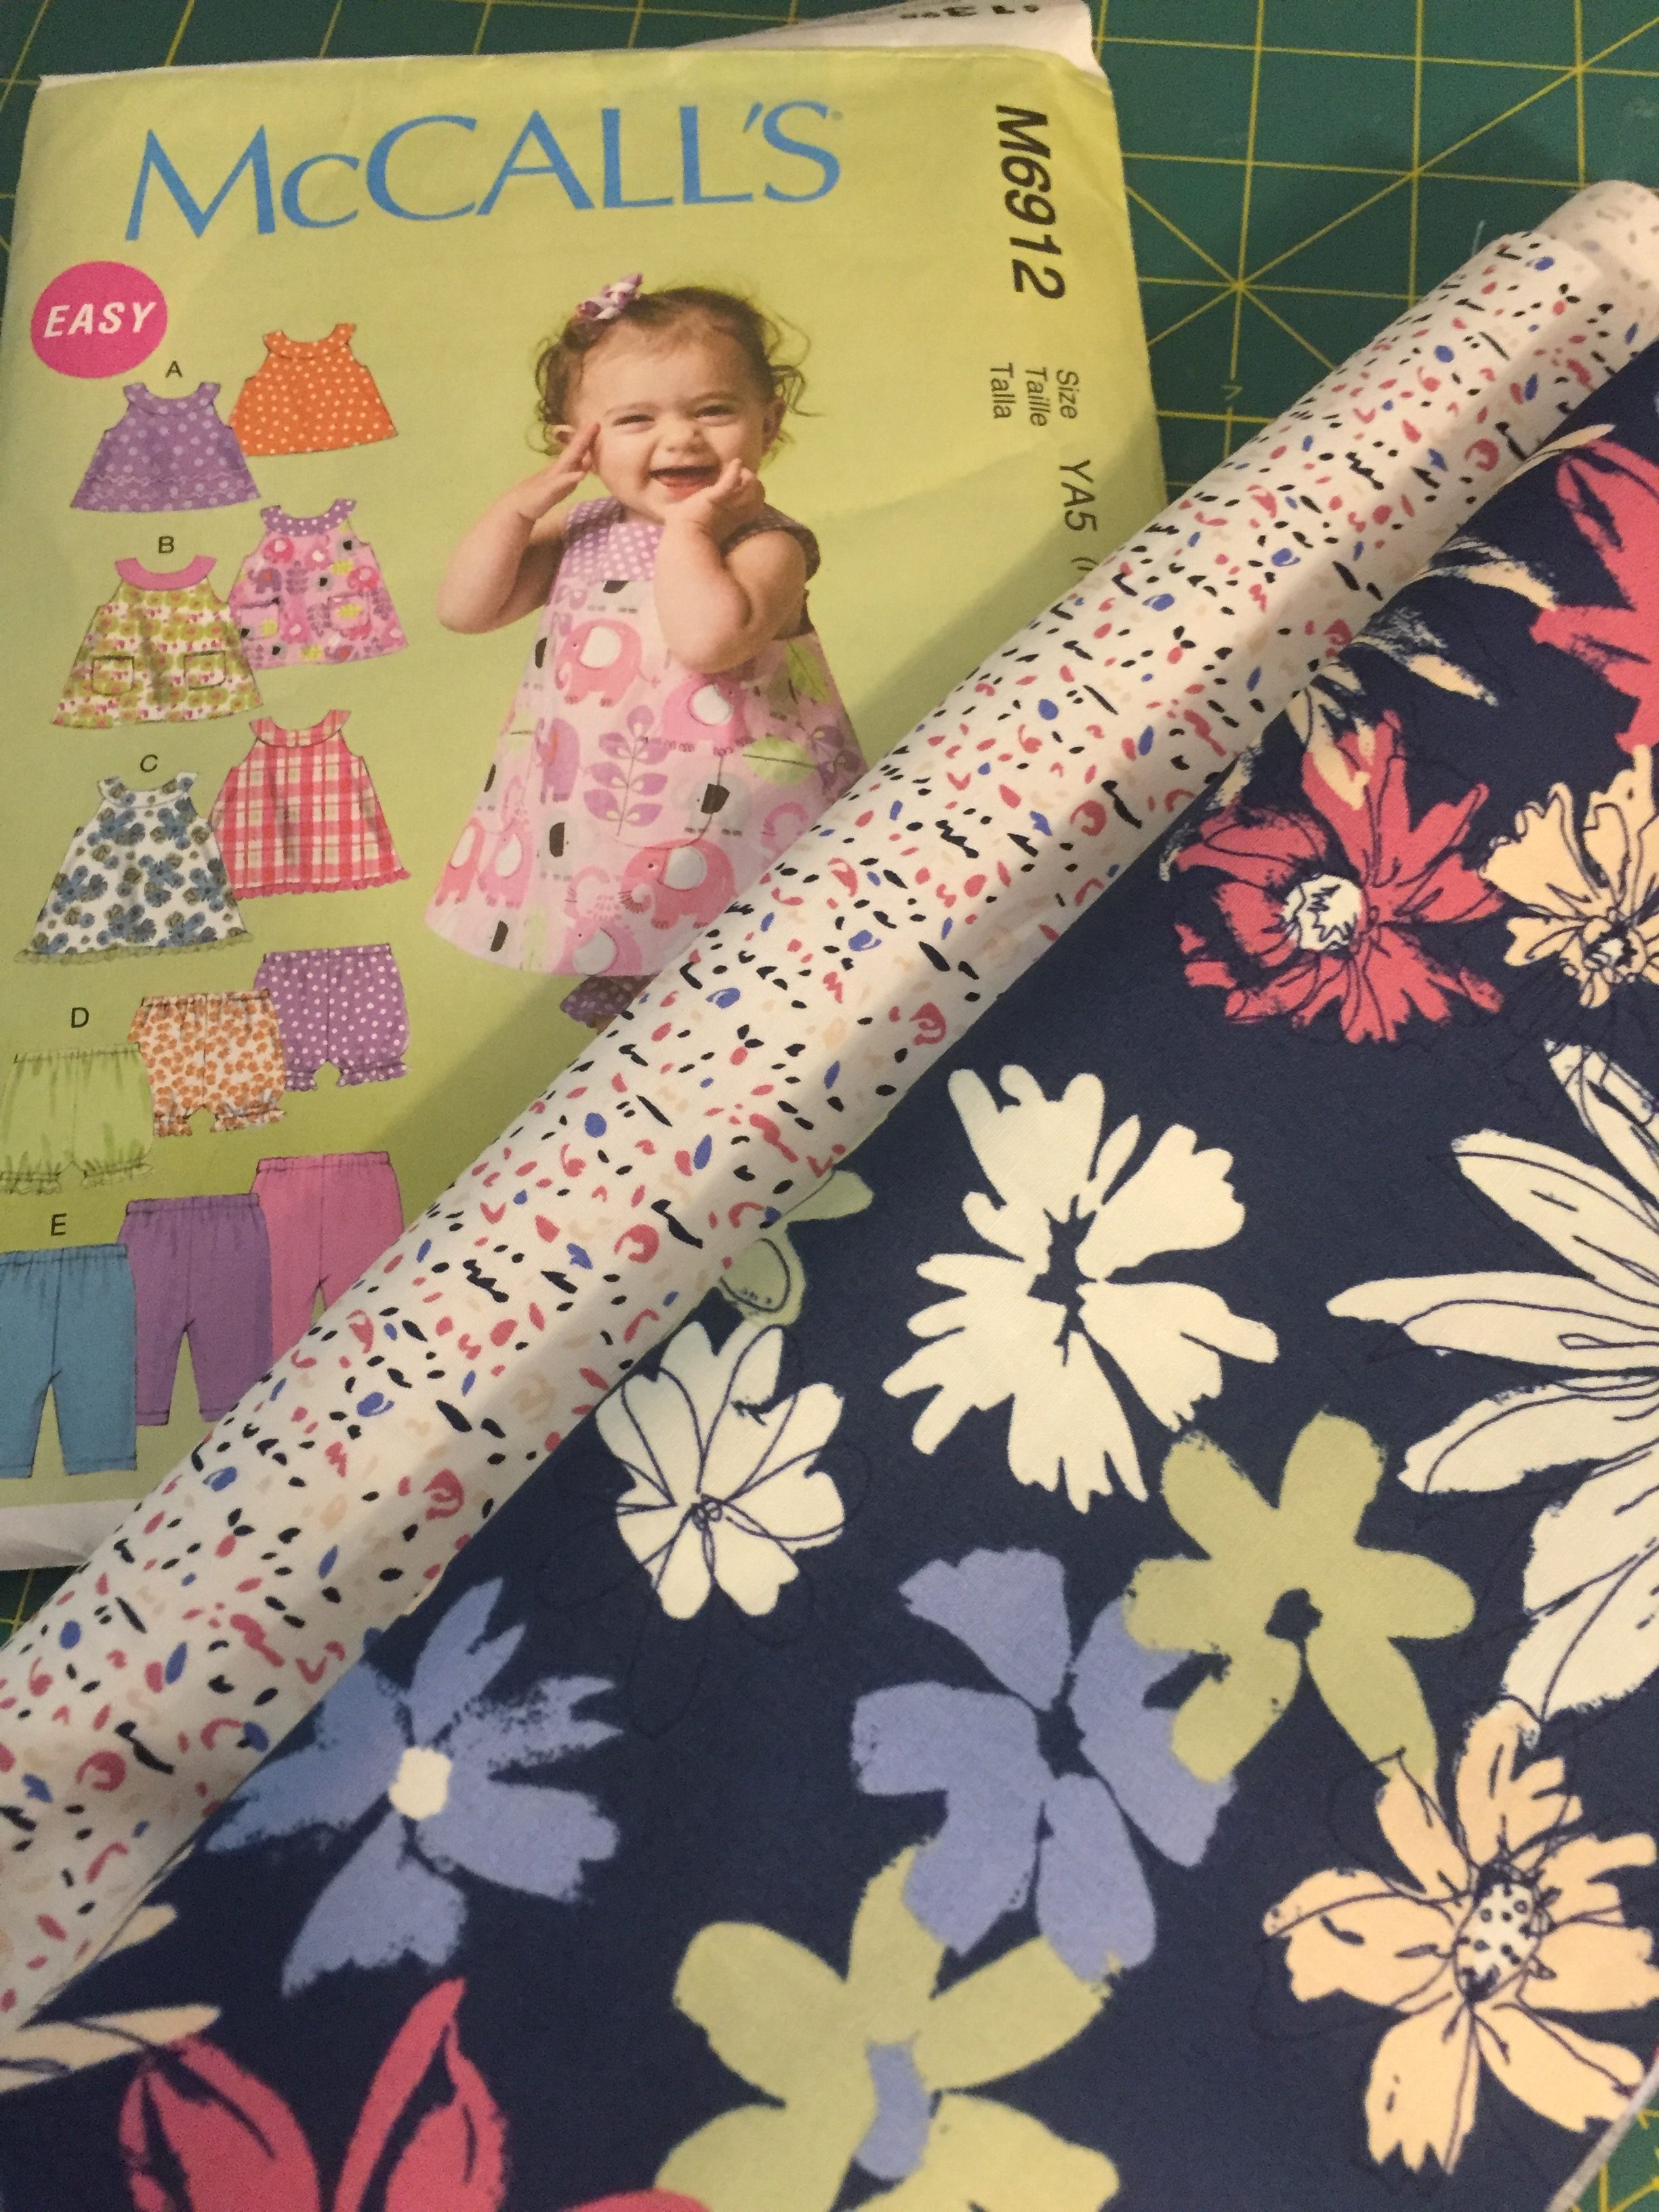
Honestly, I cannot remember the last time I sewed a pair of shorts?  Its been a long time, like a really long time! Maybe sometime in the 1980’s or so?  Anyway, during one of my obsessive trips to a thrift store, I picked up a Simplicity easy-to-sew pattern for pants, shorts and a skirt made with woven fabric and a knit fold-over waistband.  I have a knit skirt like this and it is really comfortable.  I was a bit curious about making this combination of woven and knit fabric and decided to give it a try.

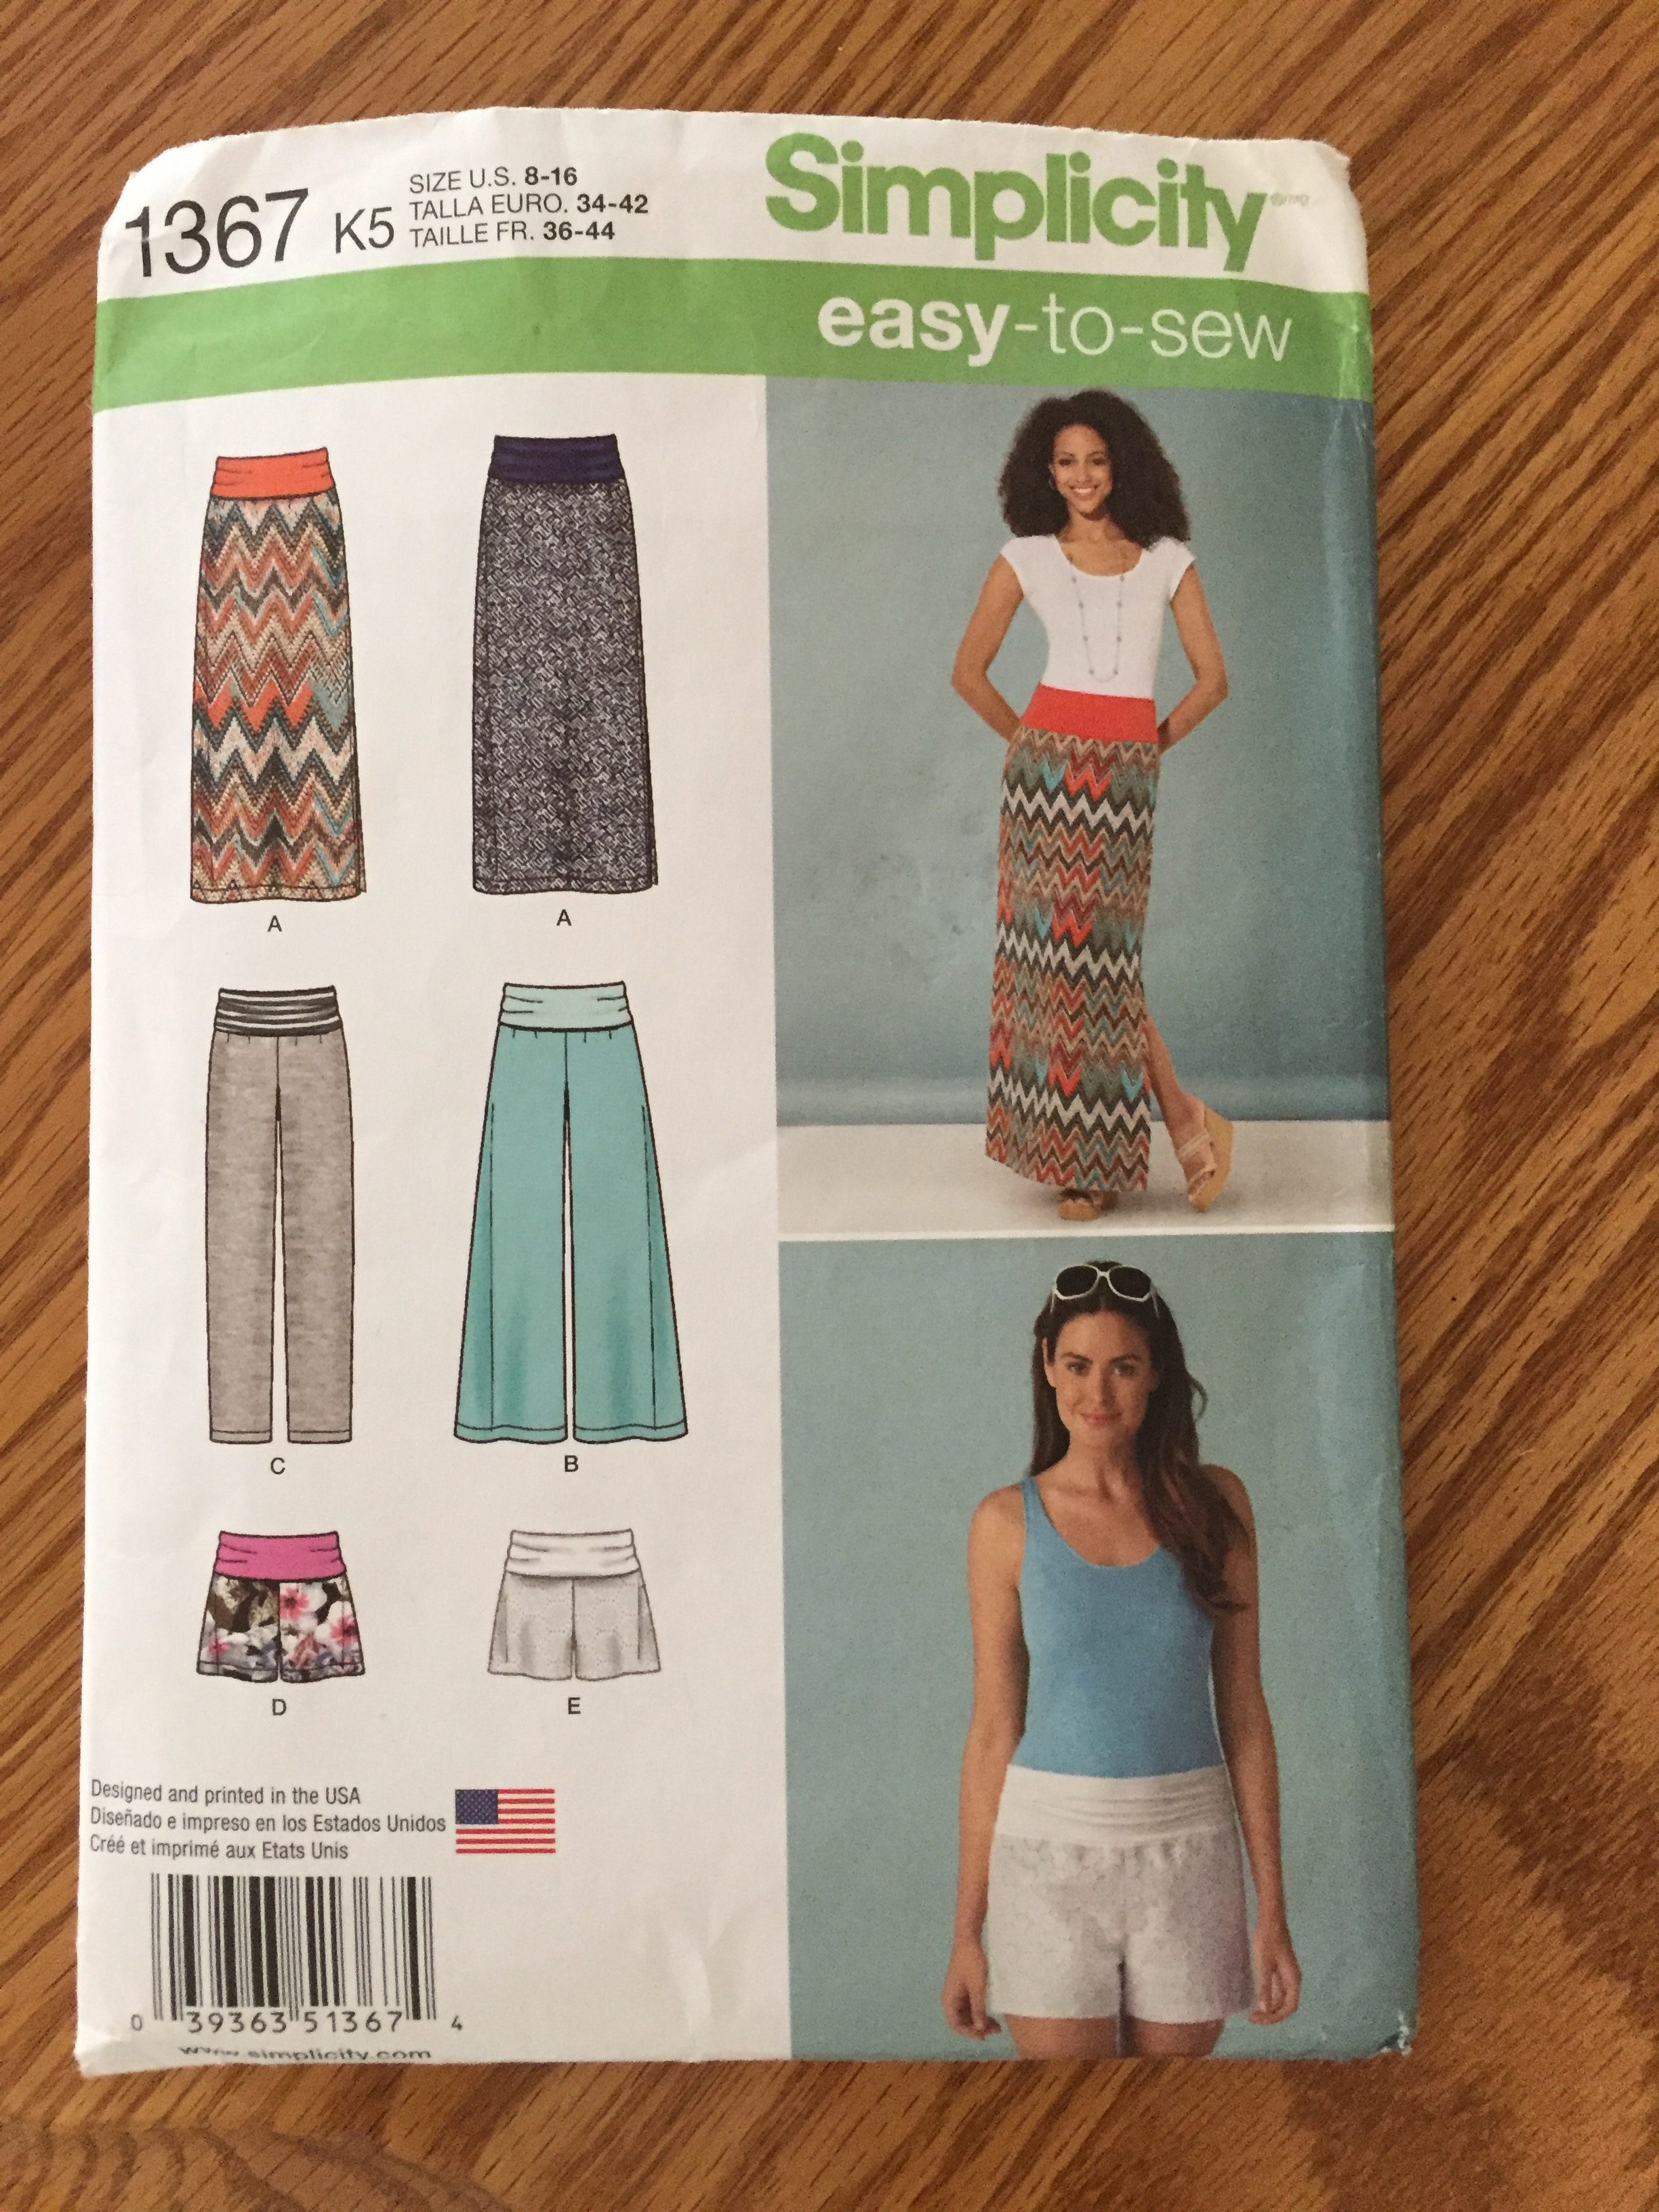
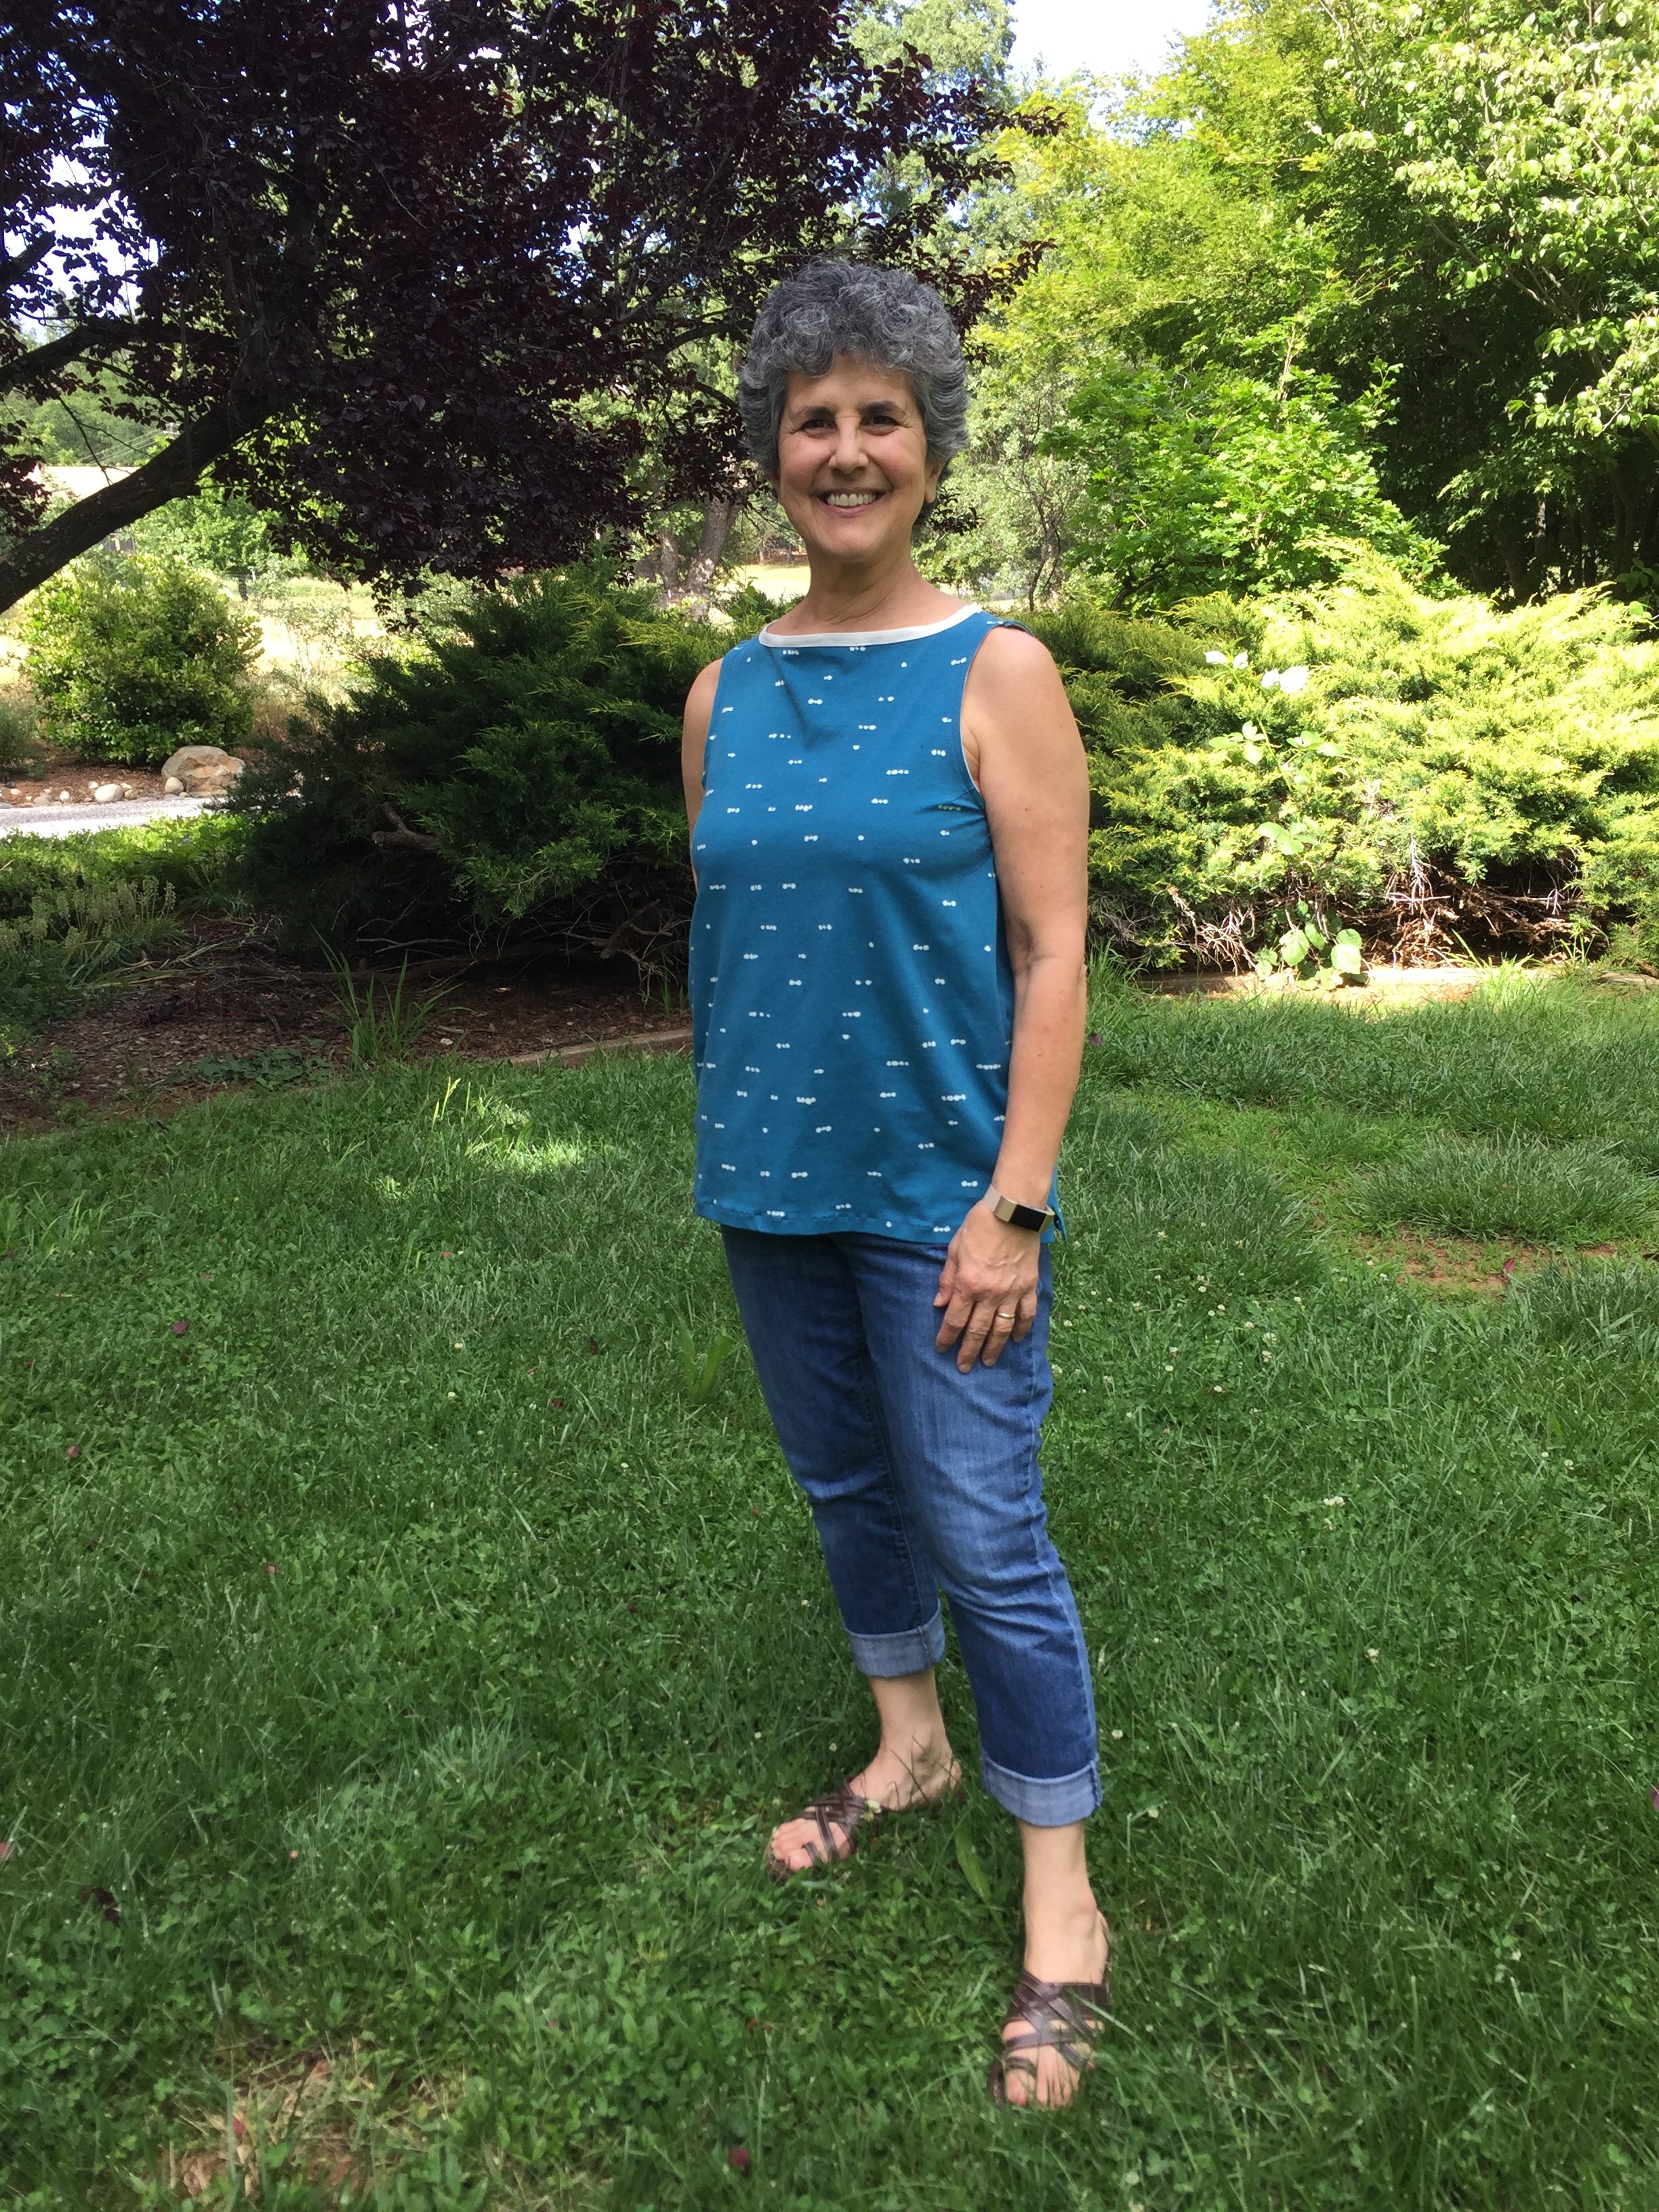
The first (and only) hurdle was deciding what size to cut.  I am sure I am not alone when I say I dislike measuring my hips and waist.  The number is never what I think it should be, which is to say I think I should be the same size as when I made that last pair of shorts.  Ha.  Guess what? I am not.  When I took measurements and looked at the pattern, it indicated I should make the shorts as a size 14.  The vanity running through me said, well that is clearly a mistake because I don’t wear that size.  Truth be told, I almost cut the pattern out as a 10 (which is my ready to wear size).  Vanity runs strong and deep my friends. At that point,  I had to have a very firm talk with myself. It went something like this:  What does it matter if you cut a size 14?  Well, of course it matters – it means I have gone from a size 10 to a 14.  No, no it doesn’t and if you cut these at a size ten, they won’t fit and you will be so irritated. On and on we went, the two of us inside my head.  Finally the pragmatist won and the vain side lost.  I cut them as a size 14 and here I am telling all the world about it – well, at least the portion of the world who reads my blog.

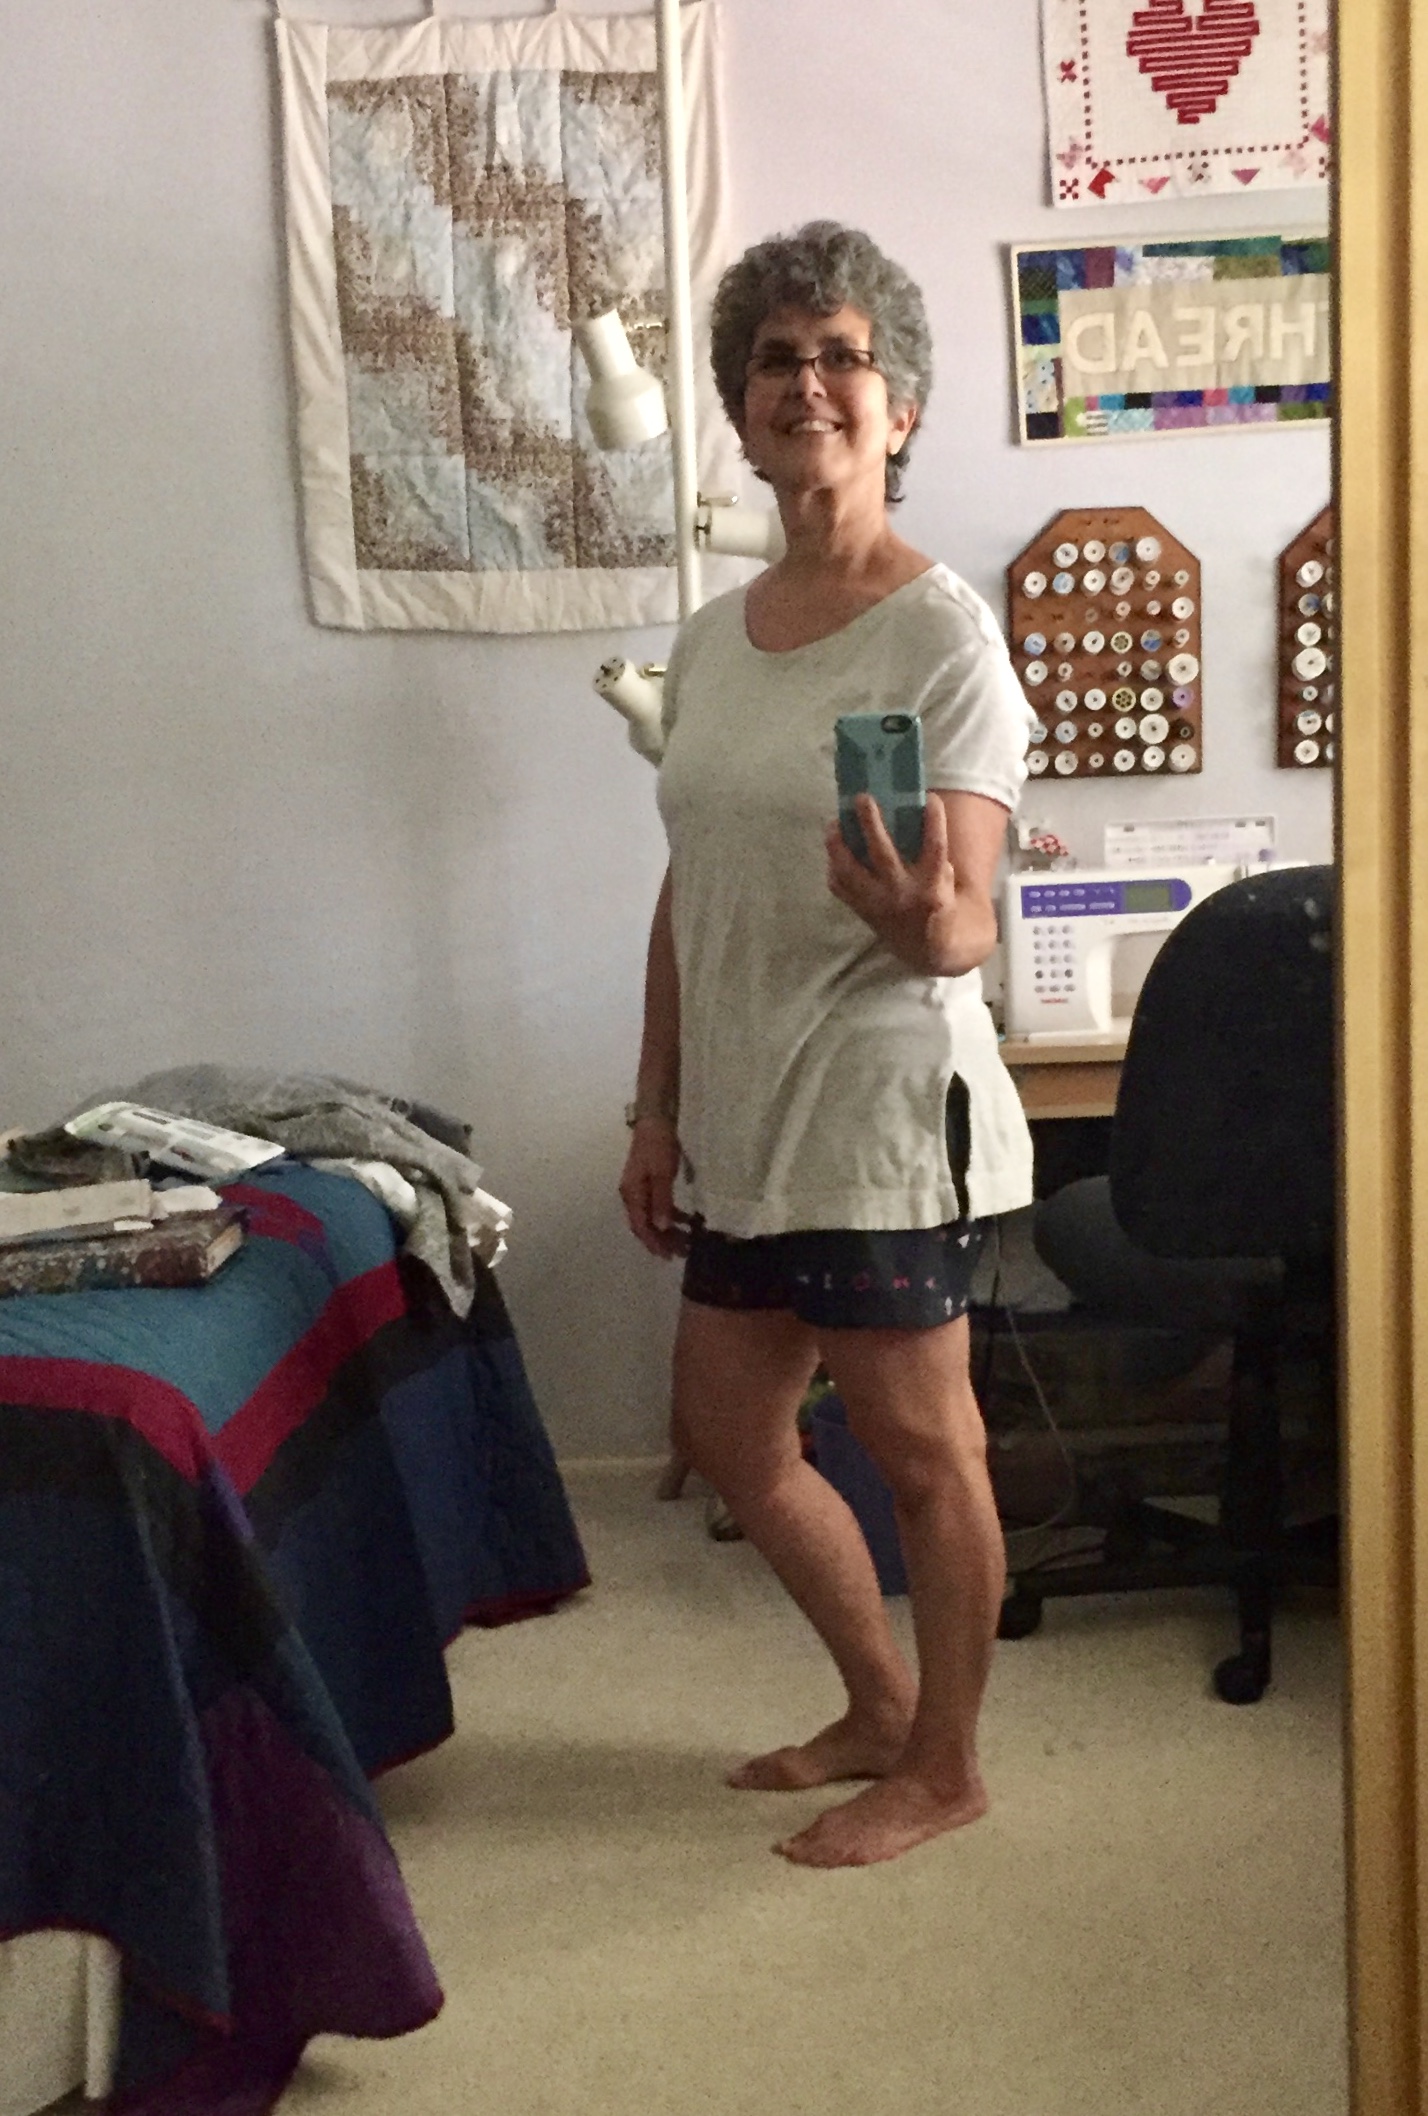
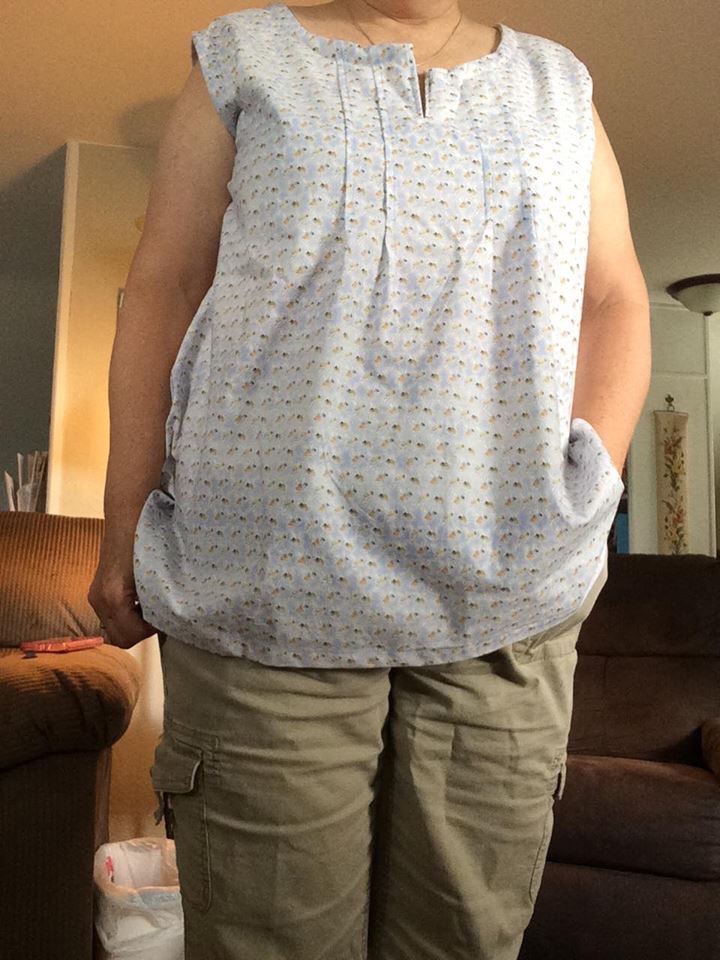
Shorts that actually fit!!

Guess what?  The shorts took maybe an hour to make and THEY FIT GREAT!!  Shout that to the world – in handmade shorts, I wear a 14 and I made a pair that fit!!!

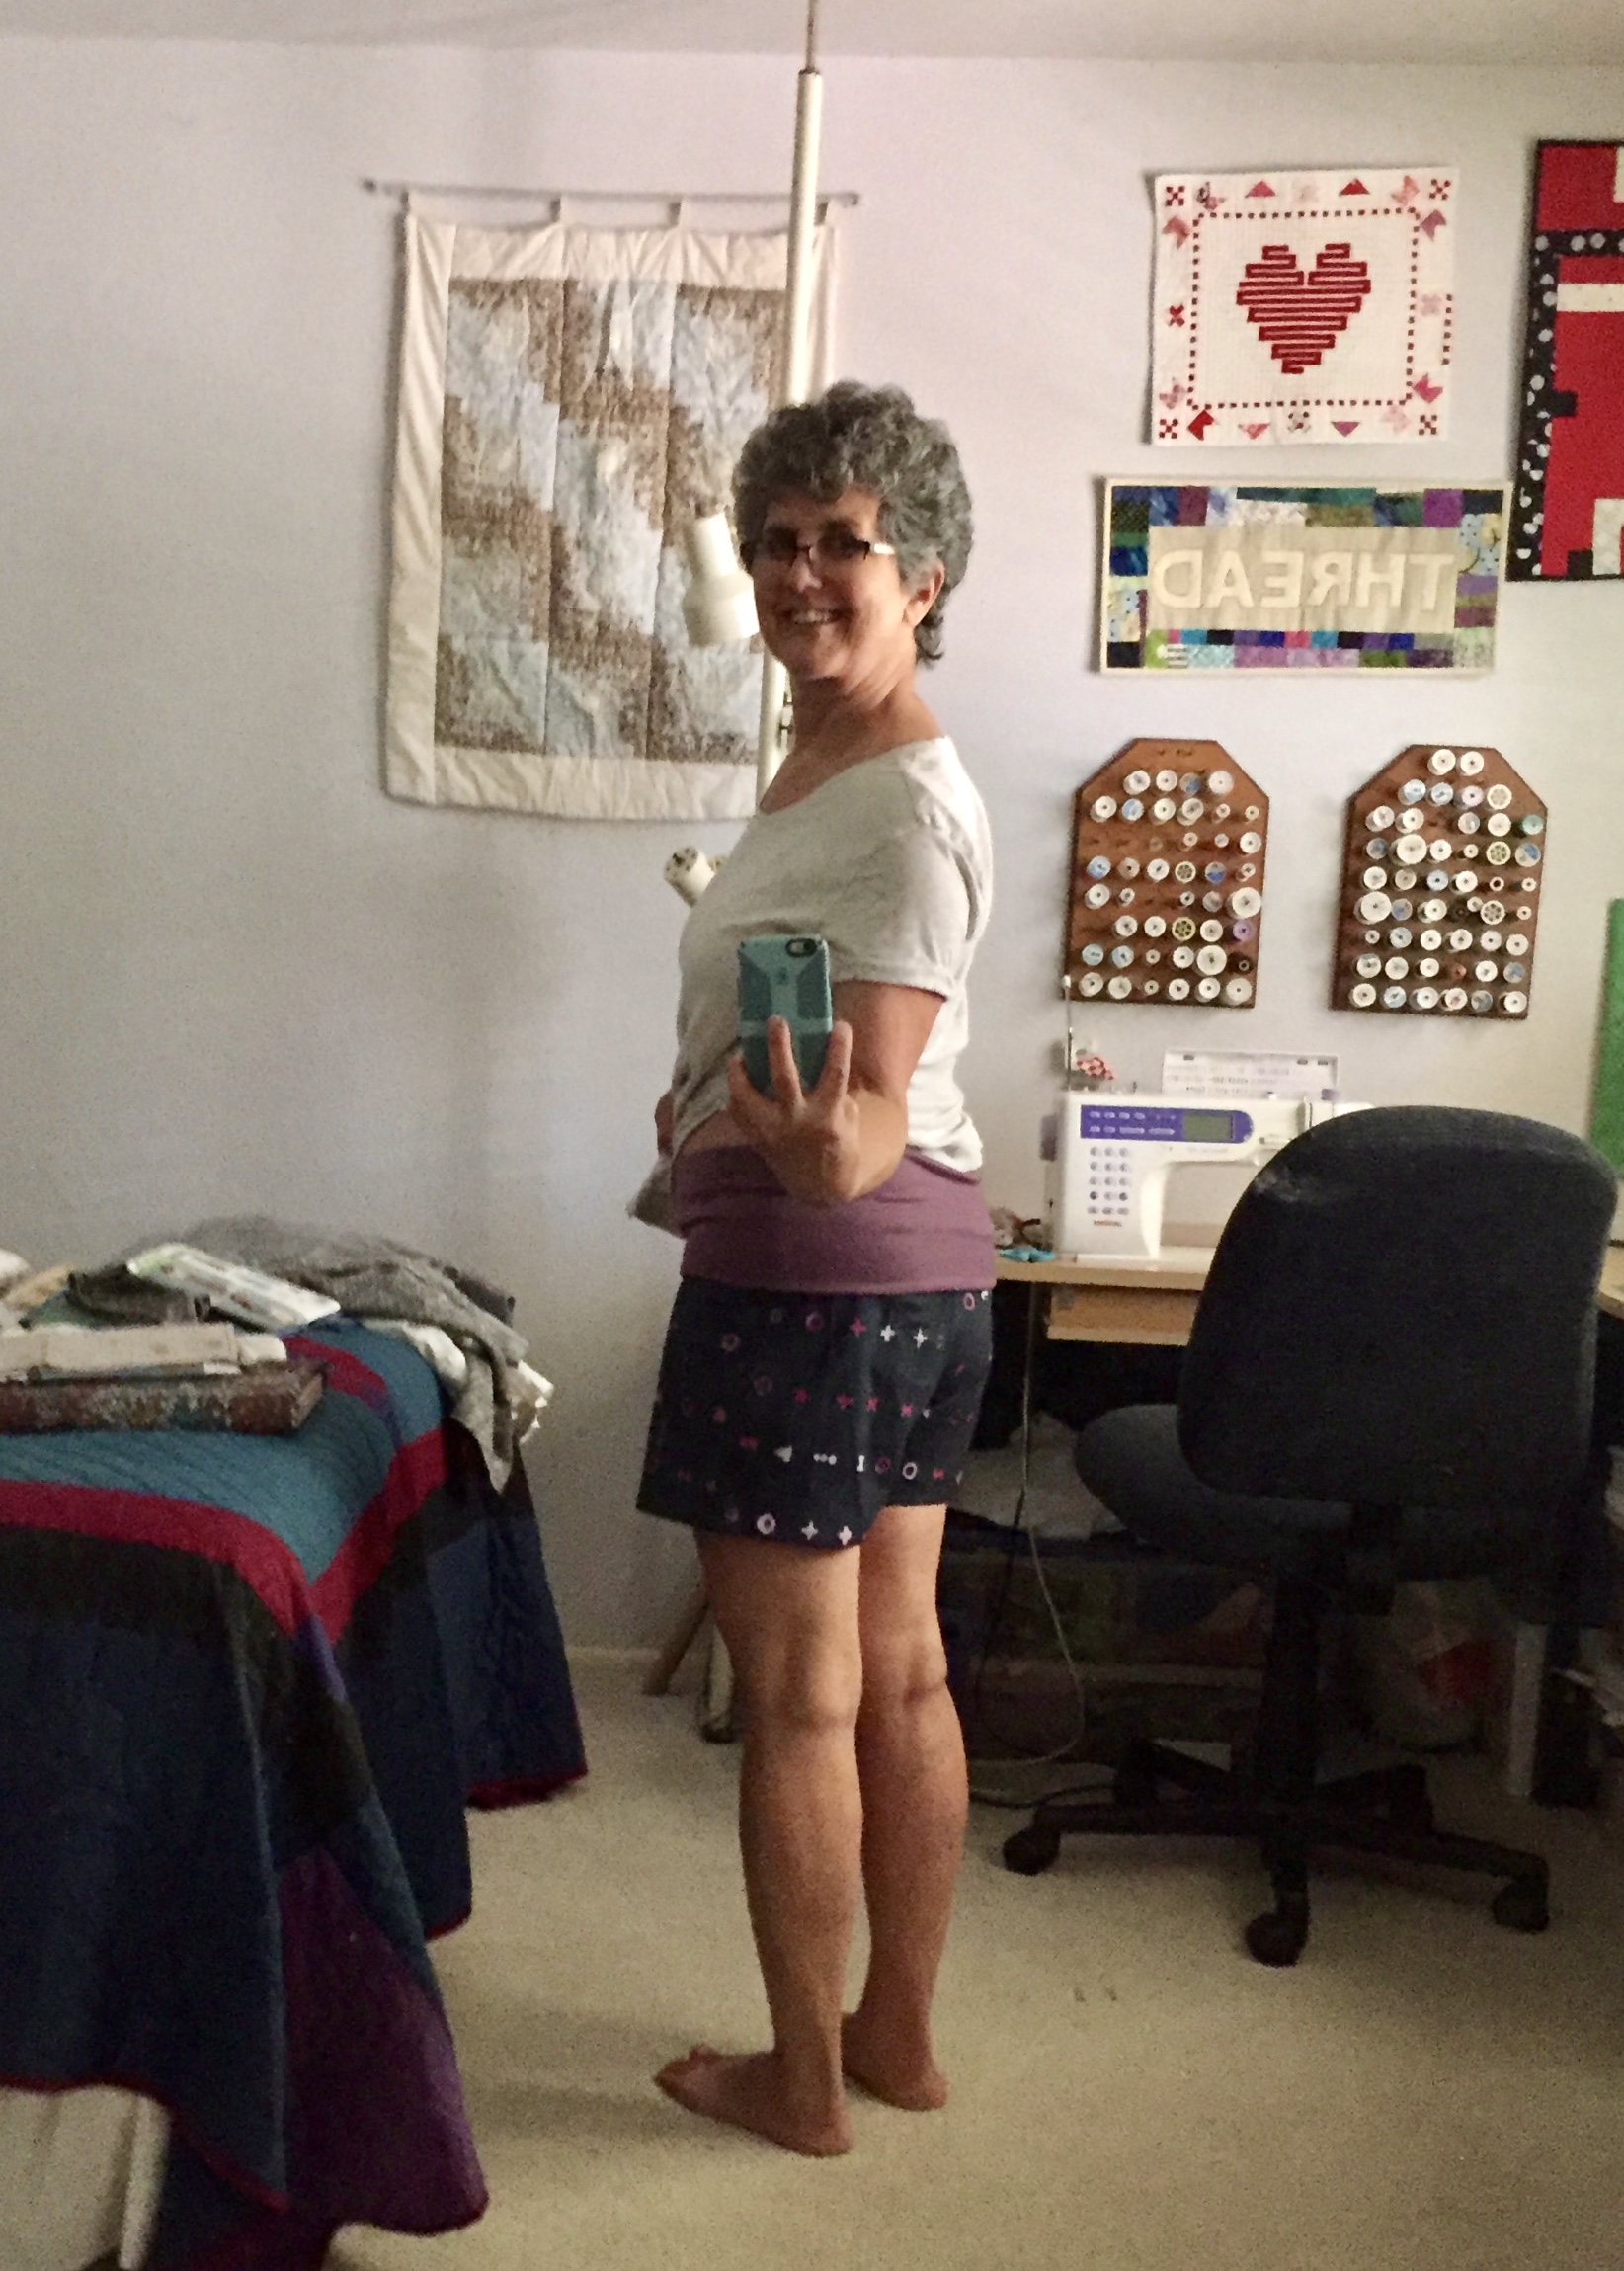
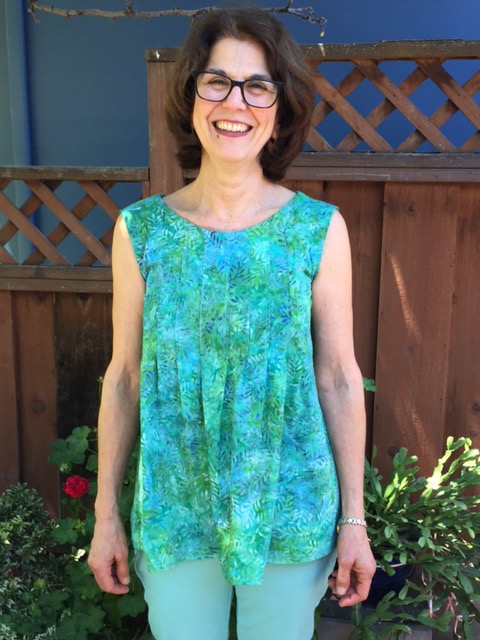
Woven shorts with a knit waistband = comfortable!

I debated whether to actually take a photo of the waistband but decided I should because I am being all mature and accepting of whatever size I am and the waistband is the cool part of the shorts. (If that isn’t a run-on sentence, I don’t know what is.). I love the fabric I used – it is from Alison Glass’ Handcrafted line of batiks and is called Artifact in Navy. (Click the link if you want to check it out in the shop.). Overall, I love these and will wear them a lot.  My only disappointment is I didn’t put pockets on them.  I like having a pocket for my phone and car or house key if I go for a walk.  I think I can put a patch pocket on the back side still and that will fix things right up!  The next pair are going to be in knit fabric for top and bottom.  I want to see how that changes things up.  I suppose my take away from this project has to be that the numbers are just numbers.  My hips are what they are and if you want something to work, just follow the size and measurements as laid out on the pattern.  They didn’t put those numbers there to make me mad, rather they put them there so I could be successful with the project.

Community Service Quilt, Pine Tree Quilt Guild

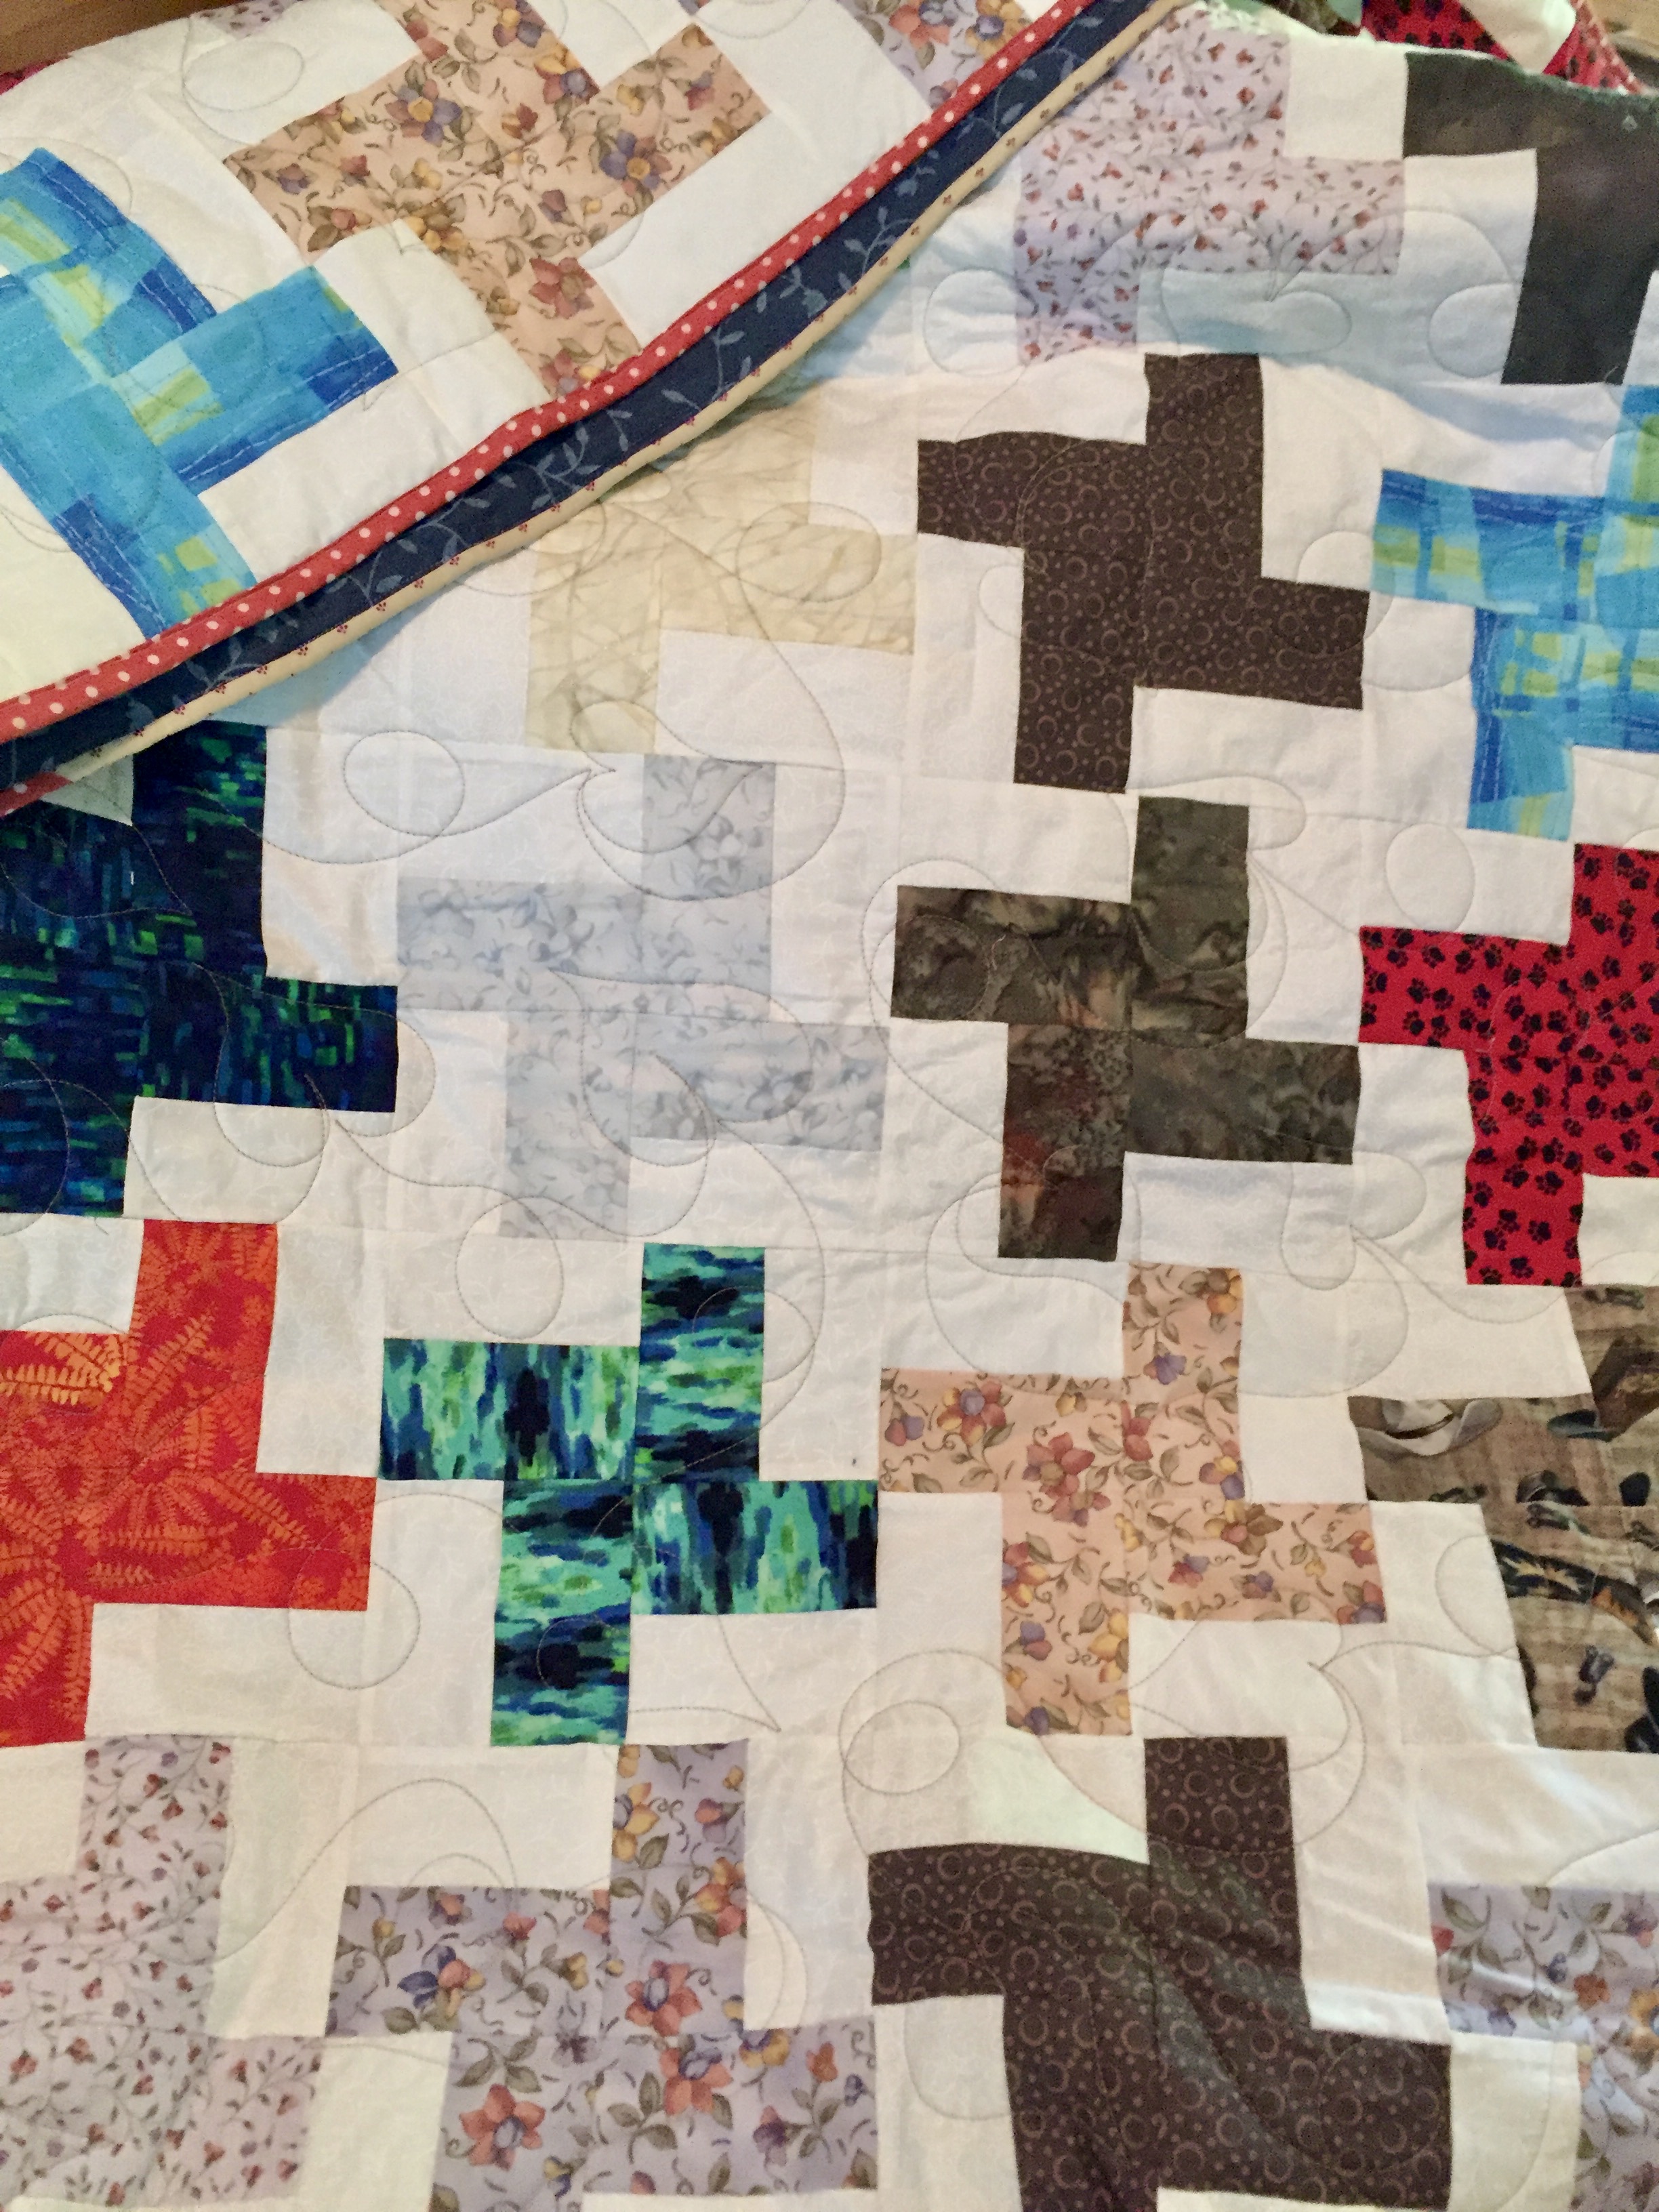
One other quick sewing project I did last week was to bind a quilt that someone in my guild made for Community Service.  This project was pieced and quilted, it just needed someone to bind it.  I happen to enjoy binding so that was an easy one to help with. When I got it home, I saw the binding was made and was quite narrow.  The maker cut a two inch strip where I usually cut 2 1/4 and sometimes 2 1/2″ strips.  I decided to machine stitch it to both front and back sides so it would be really durable.

As I came to the end of the binding strip, I realized it wasn’t going to be long enough.  I should have checked it before I started but I made the assumption that the maker had done that.  Looked like it was going to be a scrappy binding.  I found a little print that seemed to work with the polka dot binding provided with the quilt.  It all looks fine.

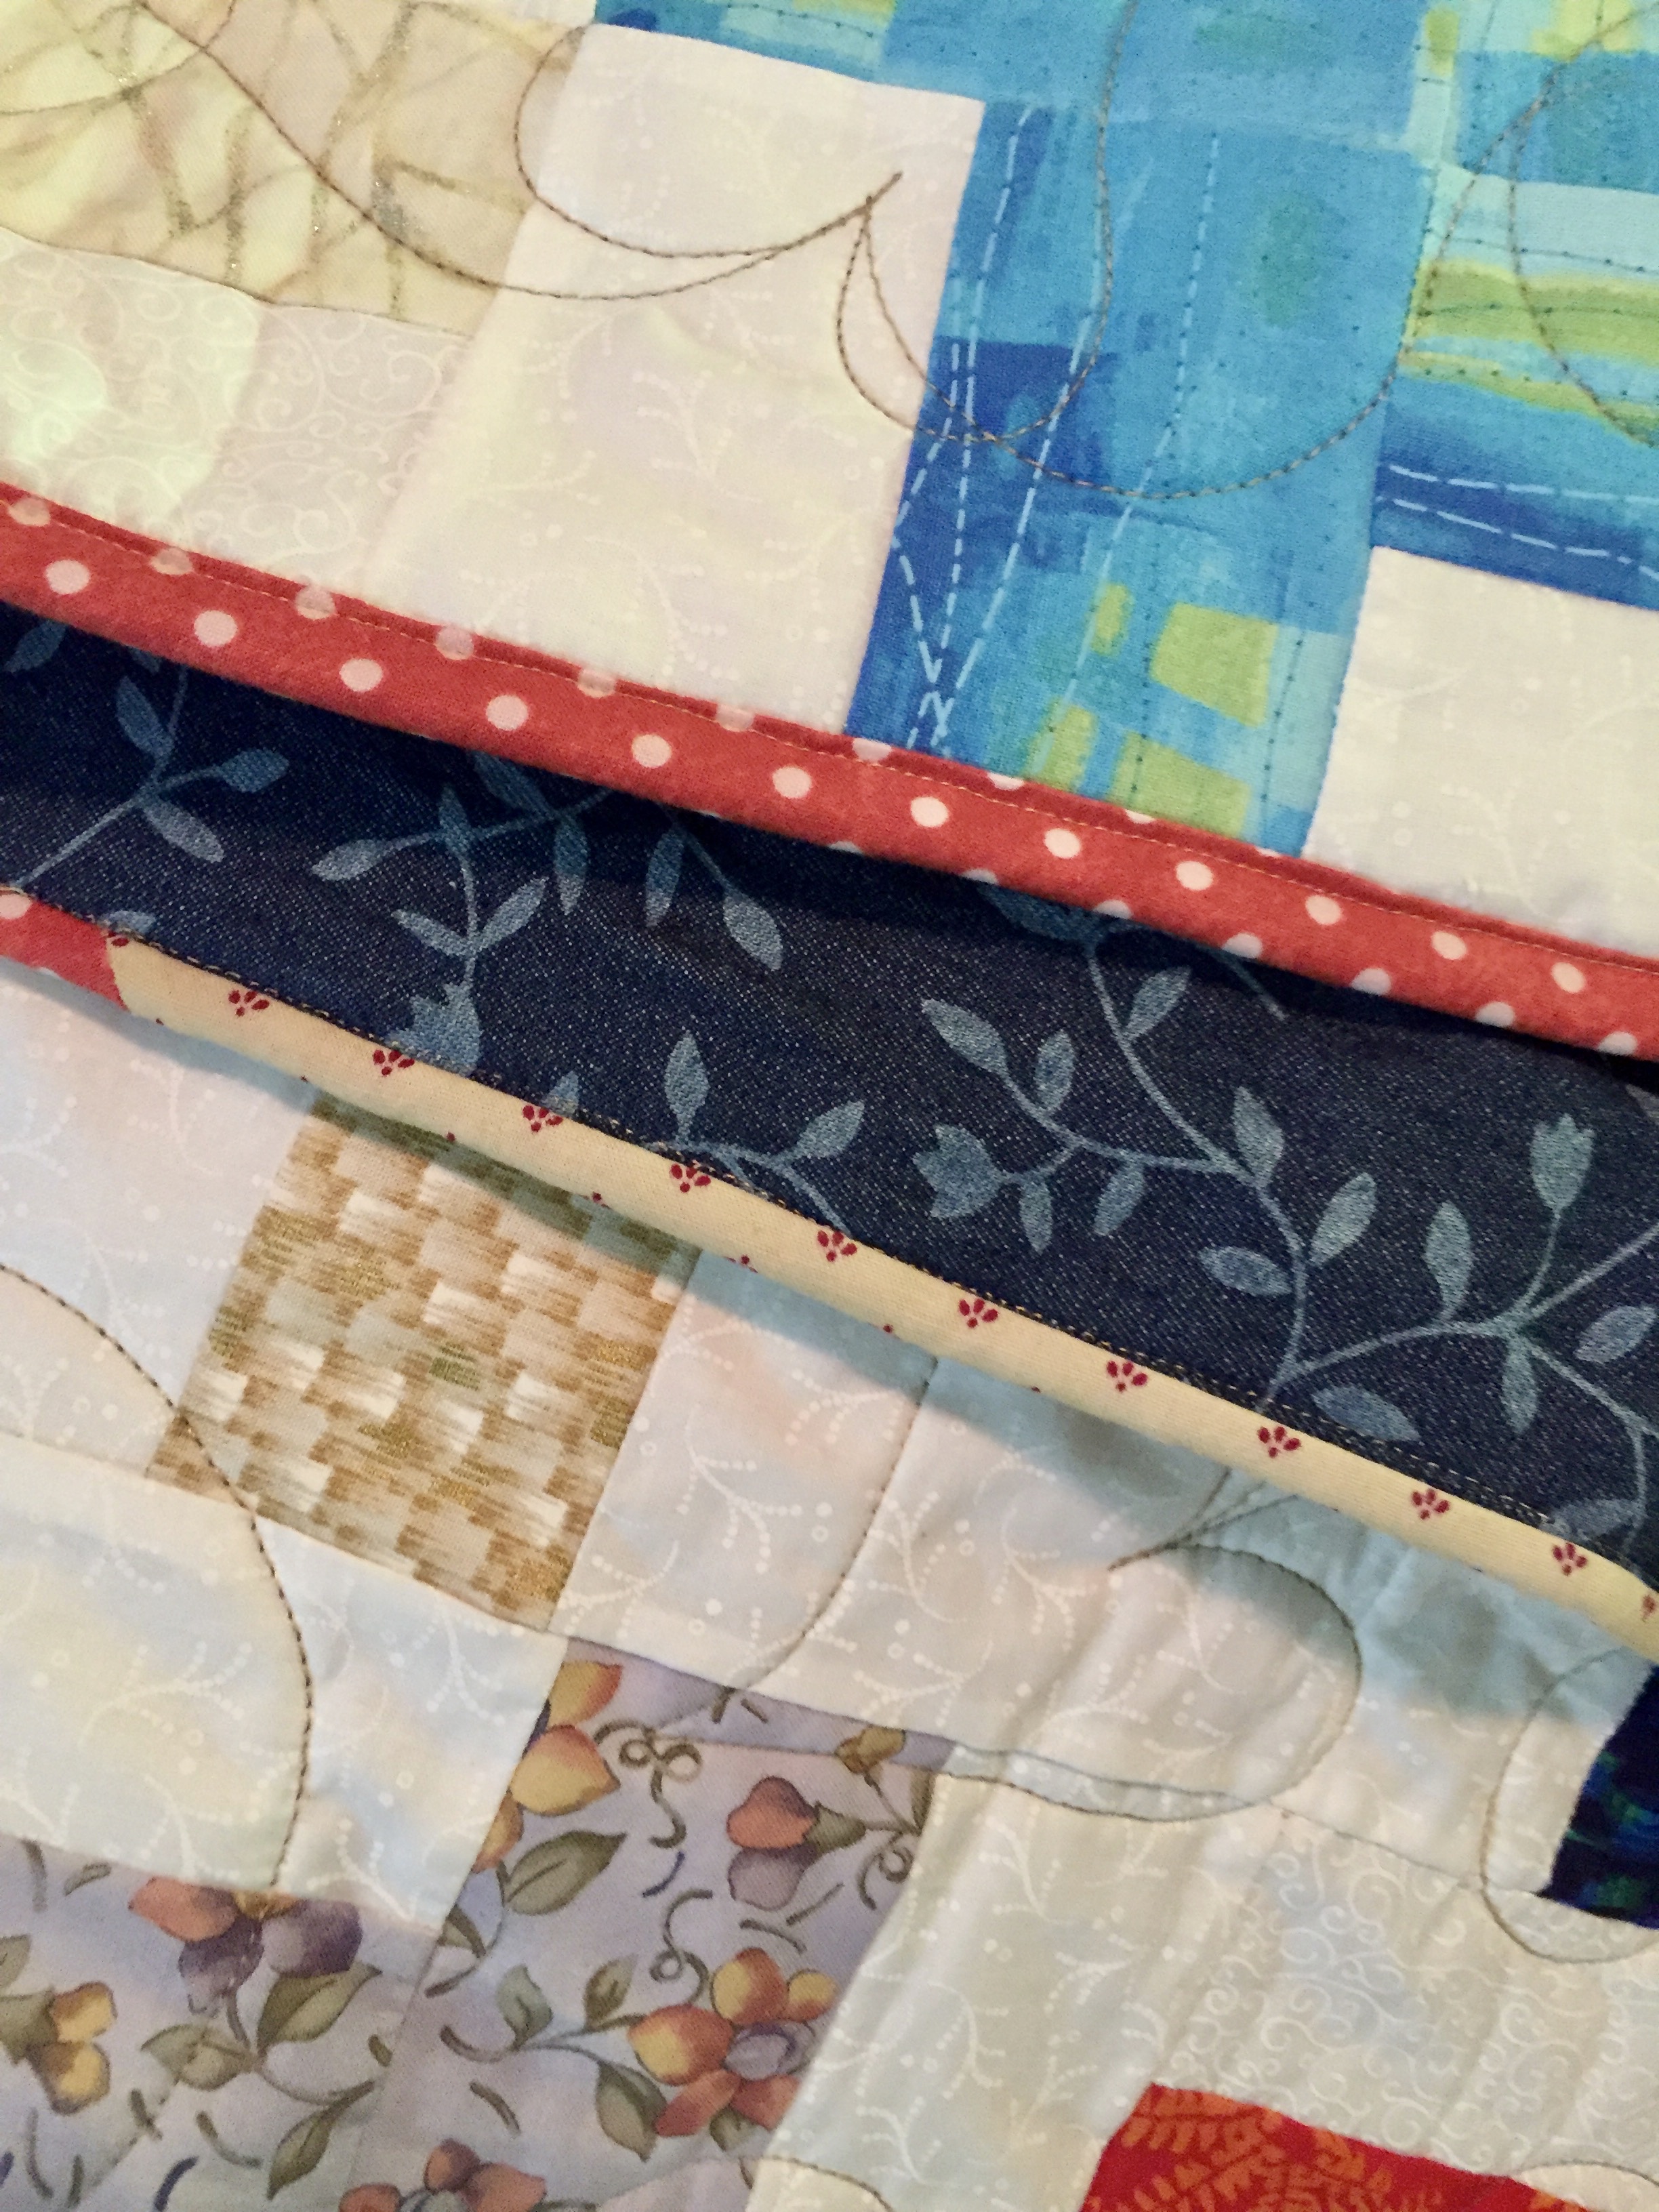
Pieced binding for the win!

I especially like the backing for the quilt.  It is a nice denim with a printed pattern.  This quilt will last for a long time.  It is earmarked for the local foster youth program.  When the kids age out of the system at 18 years old, our guild gives them a quilt to add to their belongings. This one will work for a guy or girl.

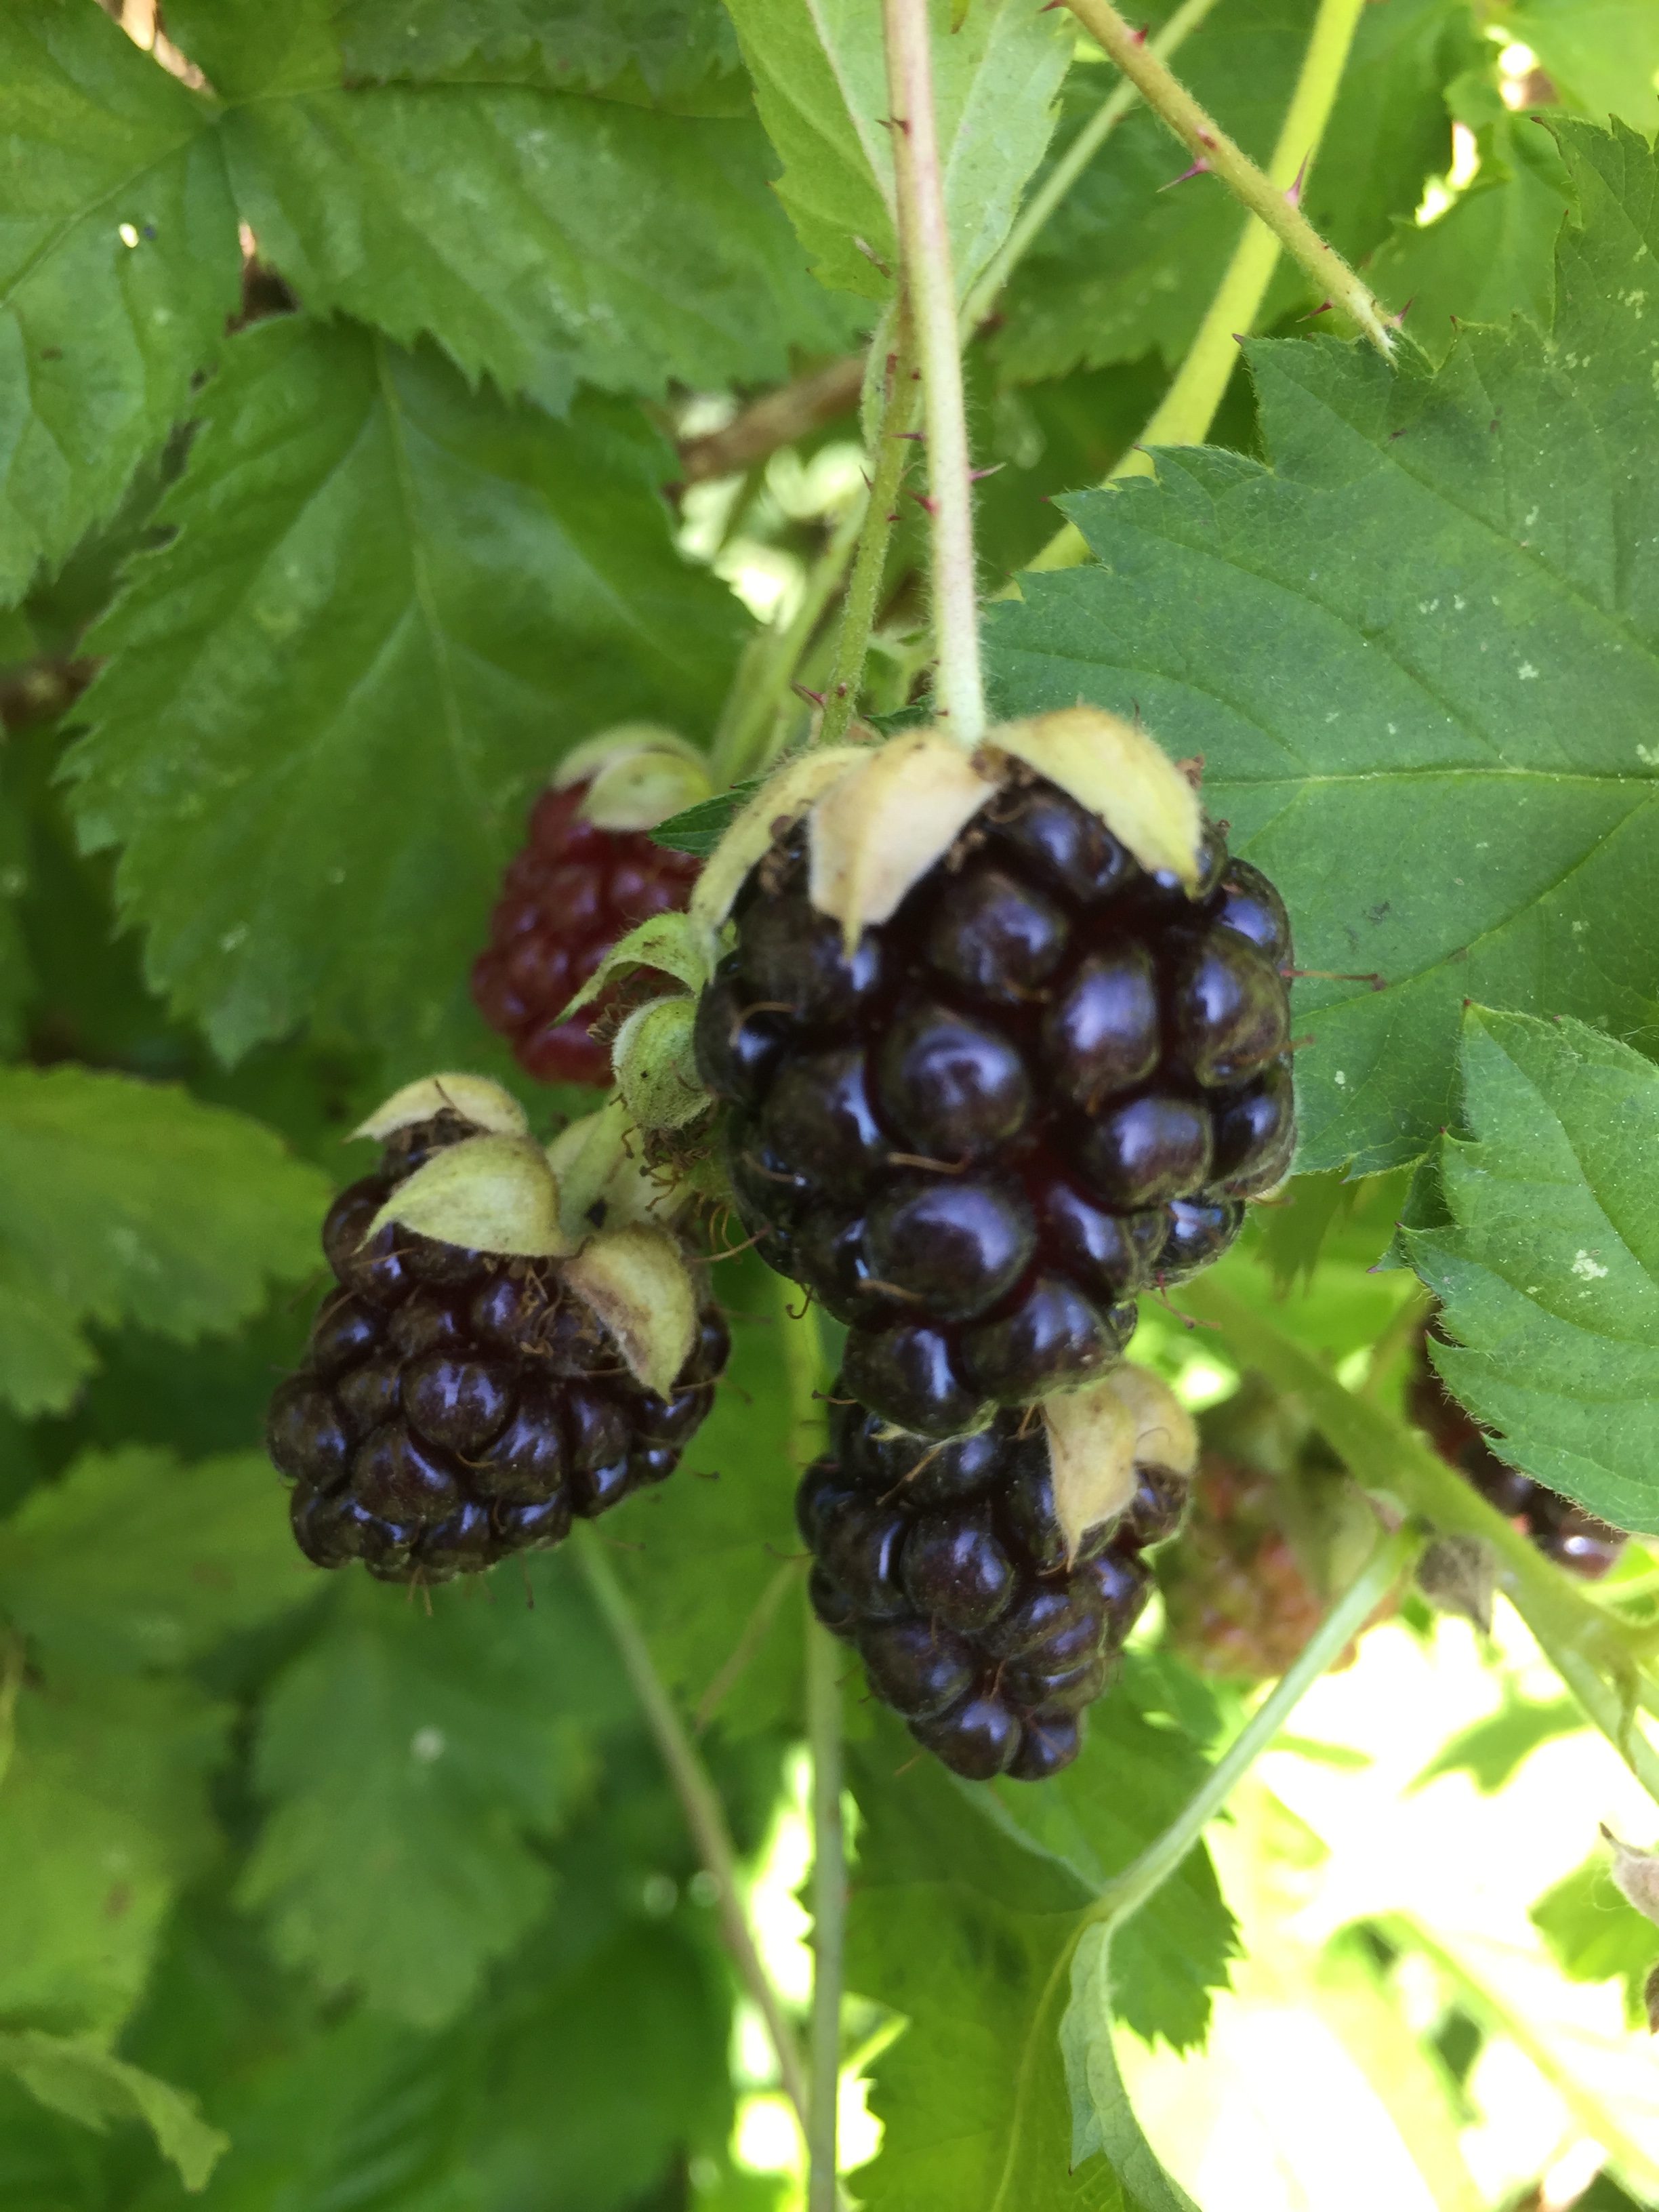
Delicious boysenberries, or are they?

Last story of the day…..  on Saturday, over the weekend, I was picking berries early in the morning.  It was gorgeous out and there are a zillion berries right now.  I popped one in my mouth and guess what?  There was a beetle on the underside of the berry.  Ugh!  It was horrible.  There I was having my zen moment picking berries all alone and all of a sudden, I was spitting beetle out of my mouth.  Yuk!!!  I will be a little more careful before tossing another berry in my mouth.  🙂

Reminder – I will be back on Wednesday this week with the June Blogger Bundle.  It was curated by Paige Alexander of Quilted Blooms and I am really excited to see what she has made with the fabrics!  See you there!!

Linking to Cooking Up Quilts, Lets Bee Social, and TGIFF.  Info is at the top of the page, under Link Ups.

Newsletter!

Have you signed up for my newsletter?  It is published every month or so and is full of information about my shop, new arrivals, sales, and events.  Click here to sign up!

boatneck t-shirt

Boatneck T-shirt Finish

Today is the last day of May, which means it is also the last day of Me Made May for this year. I had hopes of making one new garment each week.  While I didn’t quite get there, I am close!  I made a mauve t-shirt, a black and white t-shirt dress, a boatneck tank top and almost finished a pair of pants.  Not too bad!  I also cut out a pair of shorts but didn’t get farther than that. It was really a fun series of projects and I feel like my rusty garment sewing skills are improving.

Let’s take a look at the simple tank top I made.  In actuality, it wasn’t as simple as I had hoped!  Combining a McCall’s pattern (M7322) with a great piece of knit fabric called Morse Dot Blue, I cut out a boatneck tank top. The knit is from Art Gallery Fabric (it is available in my shop) and is just lovely – great quality and feels so comfy.  I chose to make a size large because I thought it would be easier to size down than up and my measurements showed me to be between a medium and a large. I also skipped cutting out neck and armhole facing pieces as I don’t like having that extra fabric to tuck into place. It is a cleaner, simpler, finish to bind the arms and neckline with bias tape.

It became apparent right away that the shirt was going to be too boxy in shape.  I decided to cut in the armholes to give it more shape at the shoulders.

Yikes, the armholes look terrible!

When I did this, it made the armhole openings too big.  Look at the photo above and you’ll see they are cut too deeply.  Somehow I didn’t notice how far off the fit was until taking photos! The camera doesn’t lie.  🙂

Ugh, at this point, the armholes and shoulder seams were sewn with a stretch stitch and then a zig zag beyond that. Determined to fix this, I decided I would need to take a wider seam at the shoulders to lift the shirt and then tighten up the underarms. This photo is a close up and you can see how tiny the seams of the stretch stitch are.  I couldn’t unpick these without damaging the fabric, plus it was taking forever to rip out the seams.  Instead, I decided to cut the shoulder seam off completely and restitch it.  The seam binding finish wasn’t as clean but it worked.  For the underarm, I cut a narrow strip out of the first three inches of the seam and sewed it back together on an angle.  Not pretty but at least it was served the purpose of closing up that armhole a bit.

boatneck t-shirt

Looking back, I should have taken a picture with my hand on my hip again so you could compare, but it does fit much better.

boatneck tank

The fit is so much better with those two alterations. The shape of the armhole is what I was going for in the first place.  Side note, looking at the pictures, one has to wonder how on earth did my hair get so gray!? When Julia took the photos for me, I specifically asked her to make me appear taller, less gray and about 35 years old.  She promised to do her best but I am pretty sure I look at least 57 and barely 5’4″ in all of these shots.  (It is so weird to post pics of myself – Sigh…)

As I made these changes to the shirt, I pondered why I was willing to spend the money and more importantly, the time, to make such a simple shirt.  I can pop into Target or Ross and pick up a tank top for not a lot of money and no time at all.  Sewing something for myself is satisfying and I enjoy the challenge.  It makes me so happy to see a resurgence of interest in sewing, both in quilting and garment sewing.  Seems like the high school Home Ec classes I took are a thing of the past (unfortunately) so it is nice to see the hobbies being taken up.  Hopefully this means they will be taught to others and passed along to new generations of kids and grandkids.

The pants I made are pretty cute.  Once I hem them, I will share them with you.  The shorts will be set aside but not for too long.  I want to have them to wear this summer.

Linking up with my favorites.  To see the links I use, go to the top of the page and click on Link Ups!

Newsletter!

Have you signed up for my newsletter?  It is published every month or so and is full of information about my shop, new arrivals, sales, and events.  Click here to sign up!

SaveSave

T-Shirt Dress Finished!

Inspired by all of the wonderful makes being shared on Instagram this month for the Me Made May event, I made a simple t-shirt dress last week.  Three weeks ago or more, I spied this black and white knit fabric at Ben Franklin’s.  It was 20% off which made it a good deal.  When I first saw it, I thought it would be a cute t-shirt.  However, once I got ready to cut it out, I realized I had more than enough for a dress.

t-shirt dress

Because I liked the fit of the Blanc t-shirt I made with that mauve fabric, it seemed reasonable to just extend the length of the pattern and create a dress. I figured if it didn’t look right, I could trim the length and wear it as a shirt.  Once I had the pattern pieces and fabric laid out, I took an old t-shirt dress I have worn for the last couple of summers and put it on top to determine the length and width of the lower part of the dress.

After cutting it out, it is just a couple of seams to put it together.  The neckline is finished with bias tape and each seam is finished with a wide zig zag stitch. (I know, I should have used the serger but it is in the shop.  A story for another post!)

Once I had the shoulder seams together, I slipped it on and saw the length was a bit shorter than I wanted.  I debated adding a block of solid black to the bottom for length but honestly, I didn’t feel like driving to the store.  (Living where we do, a run to Ben Franklin is about a 20 mile round trip.) Instead, I finished the hemline with the same black bias tape.  That way I didn’t lose any length to turning under the fabric for a hem.  It worked really well and made it just long enough to wear.

Overall, I like the dress.  The fit isn’t perfect but I will enjoy wearing it. I have really been enjoying making things to wear lately. Me Made May was a great way to jump back into garment sewing.  How about you?  Do you have the itch to make something too? I have a pair of pants in process that I am unsure about.  The seem like they are going to fit well but the fabric is very soft and I fear they are going to look like pajama pants.  If this is the case, well I guess I will have a new pair of pj pants! We shall see.

I am linking up with all sorts of fun linkys.  Please check them out at the top of the page, under Link Ups!

SaveSave

SaveSave

Me Made May

Do any of you follow, or get involved in, Me Made May each year?  This event is one to encourage garment sewing and was started years ago.  Now in its ninth year, it is a very popular sewing celebration that happens on many social media platforms. It is the creation of Zoe from So Zo, What Do You Know.  She is a sewist living in the UK and she often blogs about garment sewing and sustainable sewing.

Me Made May is a unique event in that each participant really sets up their own challenge.  Many, many of the sewists will challenge themselves to wear only their handmade clothing each day of the month (some even take it as far as handmade underwear, camisoles and/or bras).  Others may set a personal challenge to wear something handmade once each week.  Others might set out to create some handmade garments during the month.  There really isn’t a right or wrong way to go about it.  I also like that there is no judging, no voting, no huge prizes driving everyone. People share their makes, their sewing ideas and plans with each other – usually on Instagram #mmm18 or #memademay2018 or by blogging.  (Just to give some perspective on the size of this event, it began 6 days ago.  As of this writing on Sunday afternoon, there are over 4,000 posts in#memademay2018.) It celebrates a mutual love of sewing – be it incredibly intricate and fitted garments, or a basic t-shirt.

blanc t-shirt

Which is exactly what I made last week!

Several months ago, I thrifted a bolt (yep, I have a lot of it) of this mauve stretch knit fabric.  I had no idea what I would do with it at the time but I figured I would think of something.  The fabric in general is in great condition.  There are a few spots on the selvage that have a small hole which don’t really cause any issue since they are on the selvage. Thinking I wanted to make a t-shirt, I scouted the internet and posed the question on Facebook, asking for pattern recommendations. One pattern designer that was recommended is Blank Slate Patterns. I liked both the look and simplicity of the Blanc T Shirt.  You can buy the pattern, or if you are a member of their Facebook group, it is a free download.

blanc t-shirt

The pattern has two pieces. Well actually, it is a pdf download and there are 20 pages to print. But 16 of those pages create two pattern pieces. It is sized from XS to XL.  Really, this is a simple process – just takes a little bit of tape and scissors. Not a big deal.

I decided this first round would be a practice session.  I purposely cut it out as a size large because it is easier to size down than up. Plus I was hoping for a loose, kind of flowy look?  Is flowy a word?  Probably not but you know what I mean.

It takes no time to sew front to back. Once I tried it on and decided I liked the fit, I ran a loose zig zag stitch over each seam to finish it off.  Really I should have set up the serger to do this and get a nice finish but you know… it was in the closet…. the sewing table was a mess…. it just seemed like to much work. Maybe next time.

After finishing the seams, all that was left was a bit of finish works. Hemming the bottom and the sleeves came next.  Finally I finished the neckline with purchased bias tape. The only hiccup in the project was the bottom hem.  I ran two lines of stitching and there are several wobbles in the second line.  I am not sure why it happened.  It doesn’t bother me enough to rip it out though. If I were to want a double stitched line I think I would try using a double needle.  I bought one a long time ago but have not yet practiced with it.

blanc t-shirt

I love these little projects because of the quick finish. It is really satisfying to cut out a couple of pieces and then have a t-shirt to wear the next day.  I am going to make one more in this pretty black knit that I bought.  My plan after that is to make something a bit more challenging. I have two patterns sitting out that I keep looking at and debating which to try first.  Stay tuned for more in Me Made May!

Linking up all over the place.  Check out the link parties I enjoy!  They are listed at the top of the page, under Link Ups.

Sketchbook Summer Dress

We had a great weekend!  I love a weekend combined with family time, sewing time and outside time.  That is the perfect combination for me.

gordon and quilt

My great-nephew and the quilt I made for him.

The family time consisted a of great visit Sunday morning with my niece and her family.  She and her husband live in the Bay Area and have three children.  Her youngest is about 15 months old and this is the first time I have met him. I did make him a quilt last year though.  Isn’t he adorable?   Somehow life gets busy, migraines derail plans, and it just never worked out. for me to meet him until yesterday.  He was a delightful, happy little boy.  They stayed up at my parents for the night.  The kids had not yet experienced snow and were really excited to play in the snow, making snowballs and trying to make snow angels.  Mom doesn’t have snow just now but if they drove up the highway about 20 minutes they would be able to find some. This is a very busy family with three kids, ages six, four and one.  I remember those days as both joyful and tiring.

Sewing time was used to finish up a sundress and bloomers for my grand daughter. This was a really fun project.  I recently received an order from Art Gallery Fabric which included a selection of Sketchbook.  This line was designed by the talented Sharon Holland and features fabrics that look as though they were reproduced from her notebook full of doodles.  I love the colors; navy, with dusty greens, blues, yellows and pinks. I have a quilt show coming up the first weekend of May so I am preparing for it.  I will make a few samples to better display the fabrics I am bringing.  I offered to make a sundress for my grand daughter and asked my DIL to select two fabrics from this line.

Such a sweet outfit for summer!

She chose a sweet combination of the large floral piece, Ink Outburst Atelier for the dress and Speckled Lapis for the lining and bloomers. The choice is great. I love the large scale floral – the colors are great for a toddler but not the typical juvenile fabric.  With no zippers or buttons needed, this is one fast outfit.  I used a McCall’s pattern, number M6912.  The sundress is totally reversible – might come in handy at some point.  If she spills on the front of her dress, just take it off and turn it inside out!

The bloomers are also a quick sew.  I love the bit of ruffle at the thighs.  I used a wide bias tape to make the casing for the elastic.  If you sew it just above the hem of the leg, it gathers nicely and makes the sweet ruffle.  When I was in Vermont a few weeks ago, I measured my grand baby’s chubby legs so I would have an idea for the length of elastic.  I think it is nice and loose so it doesn’t get uncomfortable.  My DIL does have a sewing machine so she can adjust the elastic if needed.

sketchbook bloomers

I put a little label on the back so it is easier to tell the front from the back. I hope it isn’t itchy though.  Again, it is easily removed if necessary.  I look forward to seeing the outfit on her, maybe when we are on vacation this summer.

As for the outside time portion of the weekend, we took Julia to select another piglet to raise and show at the county fair in August.  She really loved doing this last year.  She and my husband got the pen all ready for her new piggie on Saturday morning.

Checking out a litter of piglets with the breeder.

Sunday we drove out to the breeder’s ranch about 25 miles from our home.  This breeder is just a great guy.  He is very knowledgeable and relates very well to teenagers. He and Julia took some time to look at all of the piglets and choose one with good physical structure and a (hopefully) easy going temperament. The litter in this pen are about eight weeks old.

Olive

Welcoming her new piglet to the pen.

Julia quickly gravitated to this little gilt. She was born in February and is currently about 60 pounds.

Olive

Letting Olive check out her new home.

Her name is Olive and she is very curious.  Julia has a calm presence with her, making Olive feel calm and secure.  She was sniffing and rooting everywhere.

When she discovered her neighbors in the chicken coop, Olive became really vocal.  She was happy though – I guess she was just making friends with the hens (who wouldn’t give her the time of day!)  Julia is thrilled with her choice and I think the two of the will be good buddies.

The weekend was full and so enjoyable.  I hope yours was the same.  I will be linking up all over quilting blogland.  Please be sure to check out the link ups I use at the top of the page, under Link Ups.


SaveSaveSaveSave

SaveSave

SaveSave

SaveSave

Christmas Project Finish

Last weekend I made the cutest leggings for my Vermont grand baby.  This morning I took a few pictures to share with you. They will go off in the mail this afternoon so she can wear them for the holiday season.

I was in Jo-Ann’s about a month ago and picked up this adorable reindeer fabric.  I love the expressions on the face of these deer.  At the time, I was hoping to make one-piece pajamas or a little dress with the fabric but I didn’t buy enough.  Drat .  I had enough for leggings though.

As usual, I perused Pinterest and found this free pattern. It was just perfect, very simple and it went up to size 2T. My sweet grand daughter is a chunk and I didn’t want the pants to be too tight. The pattern is from Toddah.net and prints out on four pieces of 8 1/2 x 11 paper. The instructions are simple and if you are just learning to sew, I recommend this project. It is beginner friendly.

It took all of 45 minutes to cut and sew the legging.  I used a tiny zig zag stich while sewing so there is some give with the knit fabric.

Each seam was finished with an extra zig zag stitch. I wasn’t exactly sure about the length. I had an inseam measurement of ten inches from her mama but it seemed long. I put elastic at the ankles. That way if they are long, they can bunch up at the ankles.

Last finishing touch was to stitch an X at the back of the waist so it is easier to tell front from back. I can’t wait to see how these fit.

While I was working on these, I kept thinking about the kids’ Christmas stockings. I felt like they needed an embellishment at the top. I took a run to Ben Franklin and found this red twill tape with a white stripe. It has a rustic look that I thought worked great with the Winter Friends fabric. When I got home, I asked my husband to make some rustic buttons for me.  He found a maple branch and sliced some rounds from it.  Then he drilled two needle-size holes for stitching, sanded and put some finish on them.  They are SOOOOO cool.  I was thrilled with the finish of the buttons. (You can bet I will ask him for more of these in the future. He whipped them out in no time. What a talented guy!)

The twill tape would surely fray over the years so I stitched a teensy hem at each end and painted a bit of white glue over the ends.  I think that will help the tape remain intact.

What do you think?  I feel like this is the icing on the cake. The stockings feel finished now.

Do you want to see a button up close?  Yes, I thought so.

OK – This is it. No more blogging until after Thanksgiving Day.  This afternoon Julia and I have a date to make pumpkin pie, fudge and the dough for tomorrow’s rolls.  Happy holidays to you and your family!

Linking up with my favorites.  You’ll find the URL’s at the top of the page, under Link Ups.

Finally, if you haven’t yet signed up for my newsletter, now is a good time.  I have a fun Black Friday event planned.  Sign up here.

Sew Along Finish!

Today we are celebrating the finish of the Summer Sew Along. Together there were about twenty sewists that made a shirt using Butterick pattern number B6024. If you are just seeing this and want to check out the sew along from the beginning, click here.  This is the first time I have hosted a Sew Along. I truly enjoyed every bit of it.  I had a few frustrations as I finished up the shirt and I am anxious to see and hear how everyone else fared with the finishing touches on their shirt.   So, let’s take a look at my finished shirt!

The fabric I selected is called Filaments Ethereal from Art Gallery Fabric’s collection called Gossamer.  Actually of the group of us sewing, there will be at least five people with this shirt in a fabric from the Gossamer line.  It was a popular choice for summer.

For the most part, I am satisfied with the fit. The first time I made it, I decided it was a teensy bit tight across the back and shoulders. So with this one, I made it a little bit larger. I may have gone too far the other way and it is a little bigger than I wanted. I know, I know, I am being too picky. The fit is always the biggest challenge with sewing clothes.

The shirt hangs well and it is super comfortable. The Art Gallery fabric, as always, is so light, making it perfect for summer.

I think, were I to make it again, I would make the version with sleeves. I like it just a bit better. But really, what a fun project this was. I would definitely host something like this again. Sewing with friends, whether in real life or virtual life, is always a fun time.

Here is one of the member’s of the sew along.  Rosemary joined in and she chose to make the version with pin tucks across the front. She did such a great job and I think it looks beautiful on her. That fabric is wonderful! It looks like her puppy approves too!

 
Here is my sister Tina. She joined in and sewed with us. She has been sewing for a long while but hadn’t made any garments for a while and wanted a refresher. She did a great job on the shirt!

The picture above is from Cate. She chose a lightweight blue fabric for her blouse. It is just perfect for summer.  It looks so pretty!

I have a link up below so people can share their finishes with everyone. I hope you will scroll through and take a look. The link up will remain open for about ten days.  Not everyone has finished their shirt yet so I want them to have the chance to link up when they are done.


Finally here is a heads up on a great promotion over at Craftsy during this long holiday weekend.  Might be the perfect time to select a new class for less than $20.00! So many excellent classes are available and once your purchase it you have it forever. What a great way to build your library. (Affiliate post)

Summer Sew Along – Day 5

Hi Everyone! I have been enjoying seeing pictures of your shirts on Instagram and Facebook. There is lots of sewing going on and they all look wonderful.  Today is really the final ‘how-to’ post for this sew along. We will put the bias binding on the neckline and arm holes and finally, hem the shirt! Easy Peasy, right?  Well, I thought so but honestly, the armholes gave me so much grief!! I think the problem, for me anyway, was the width of the bias binding piece. I will explain as we go.

To begin, you need to mark the center dots that are printed on the paper pattern pieces, both the neck binding and the armhole binding.  Those dots notate the center of the back side of the neckline as well as the top of the shoulder for the armhole.

Let’s attach the neck binding first. After marking it, fold the binding in half, lengthwise – wrong sides together – and press (just like when binding a quilt). Next you will pin that folded binding to the neckline.  When I pin something like this, I first pin the center back point. Then I match up those notches, there is one on either end of the binding. After those three points are pinned, ease the rest in and pin it well.

When I got to the end of side of the binding strip, I folded it back, then pinned and pressed it. This will tuck the raw edge of the binding strip in so when you stitch it down to the inside, you have a neatly finished edge.

The directions call for a 3/8″ seam allowance when stitching the neckline. I only point this out because it veers from the 5/8″ allowance we have been  using up to now.

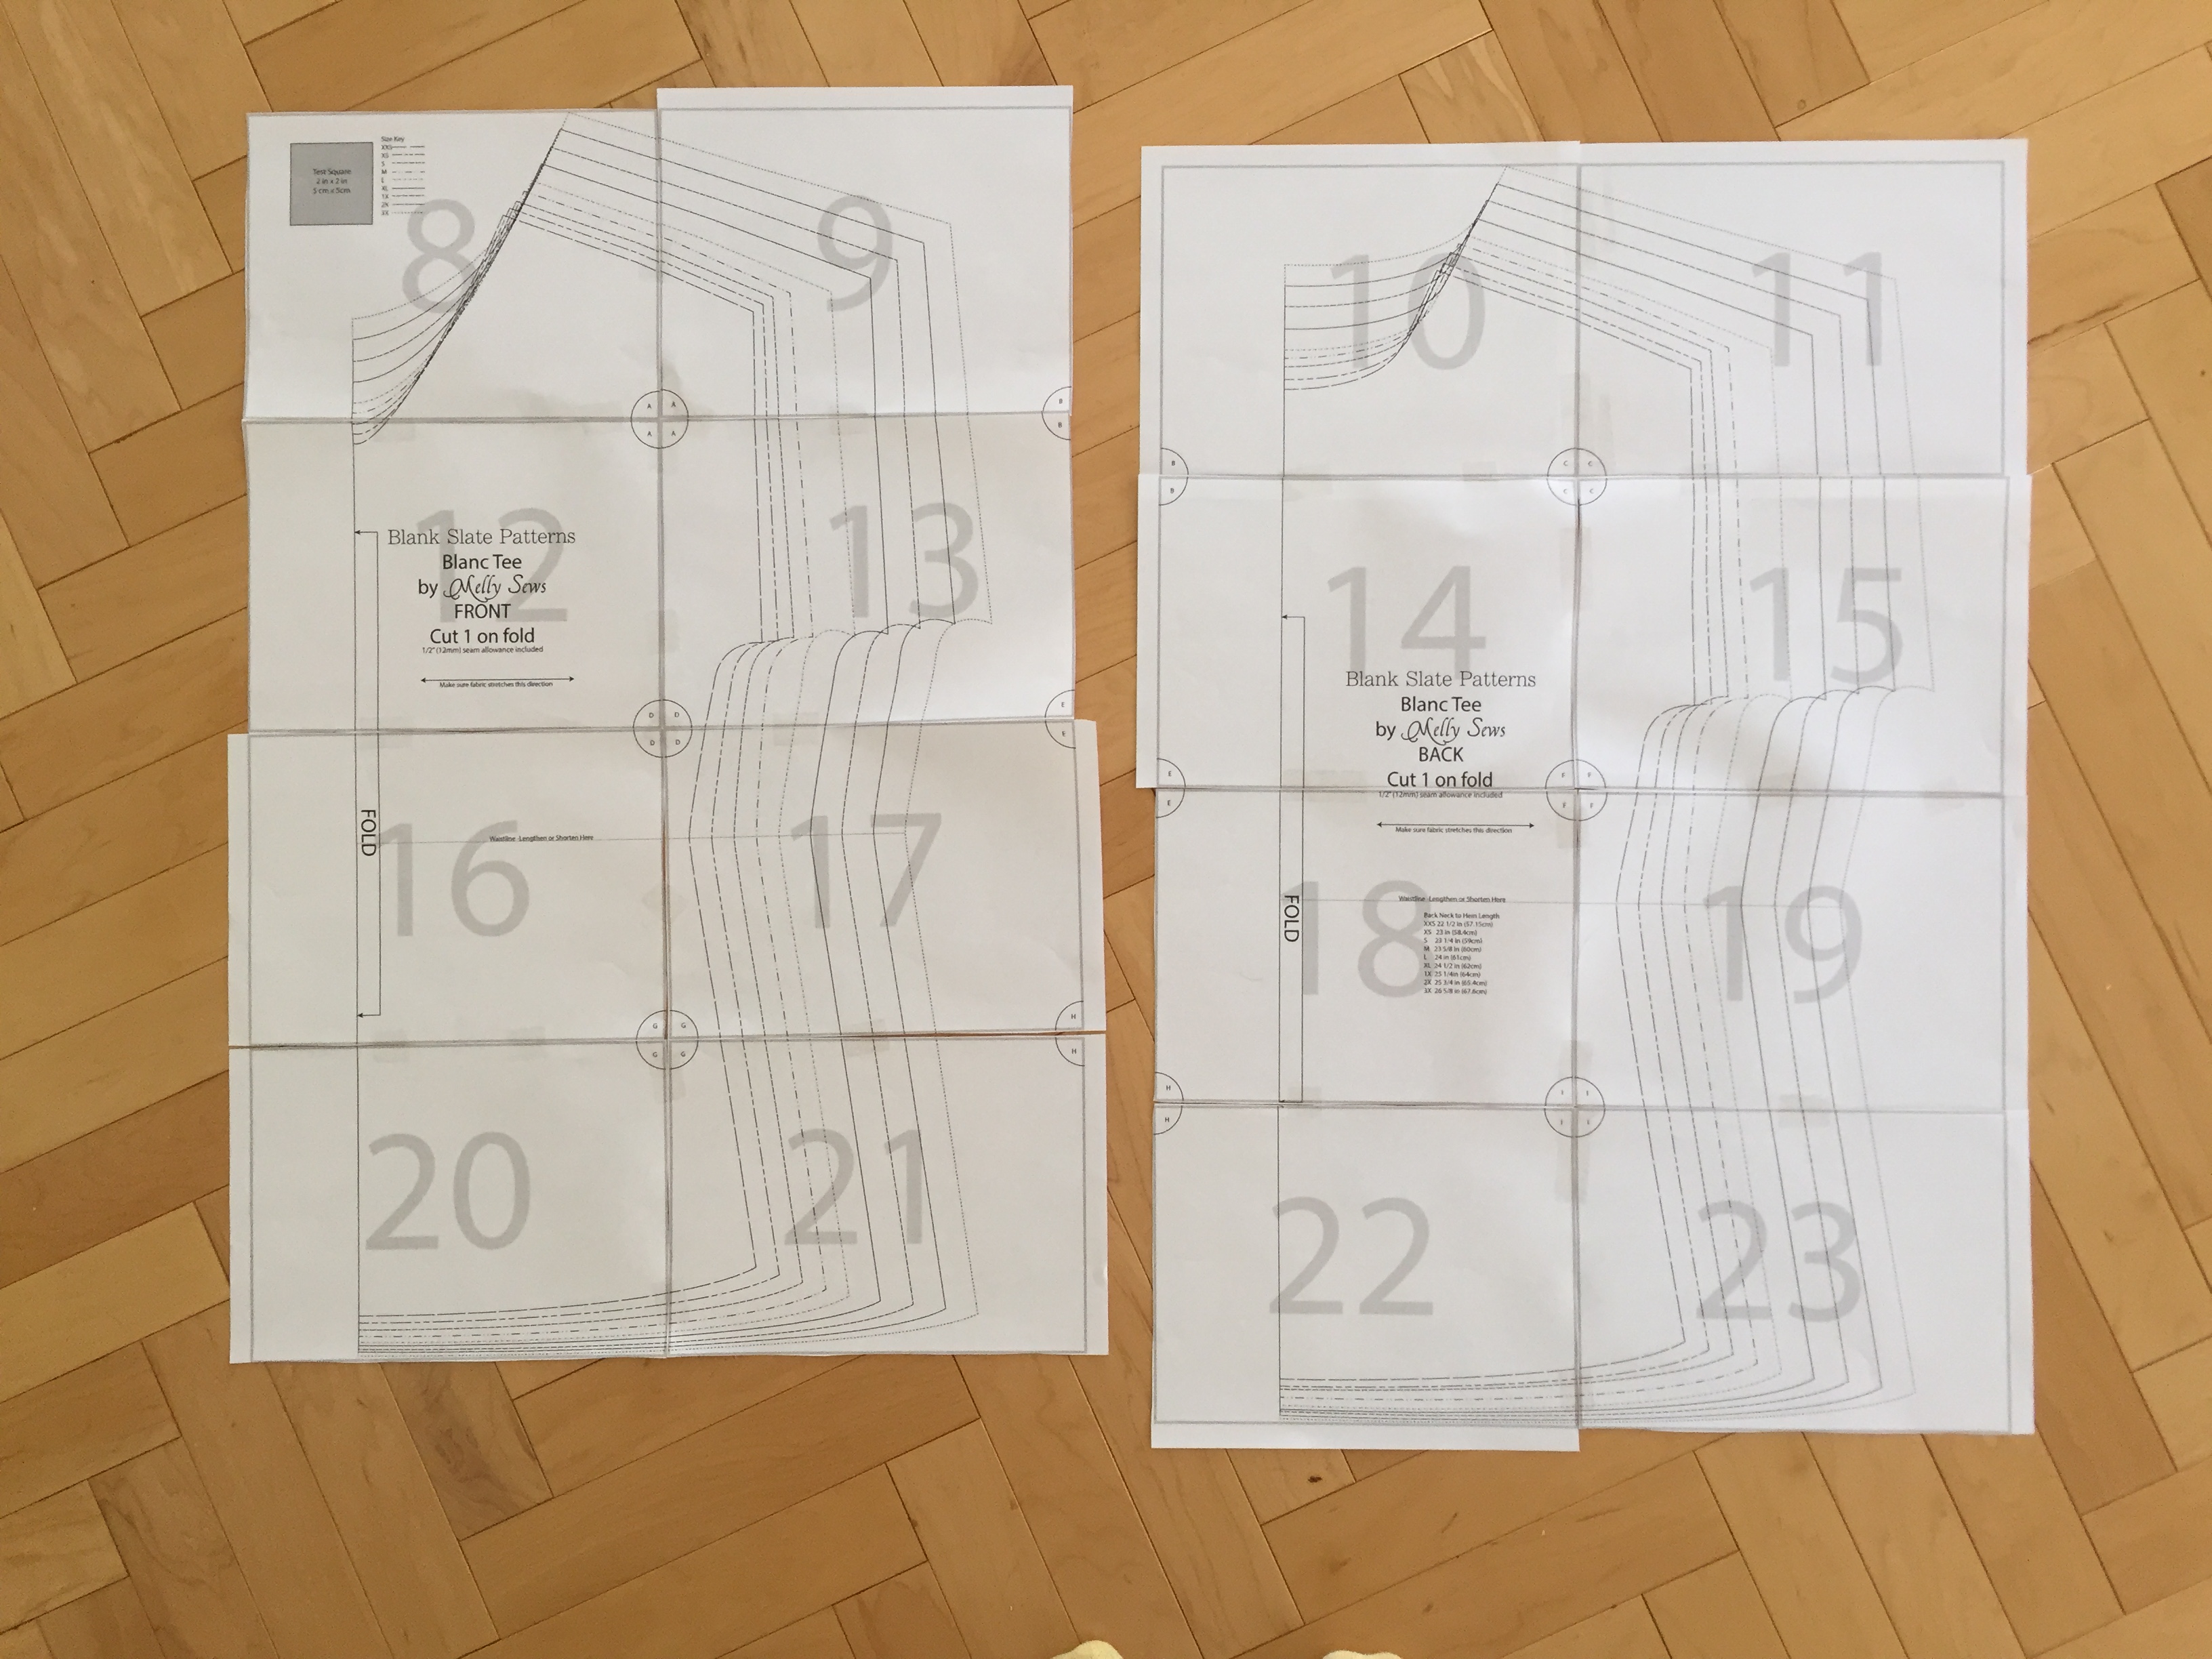
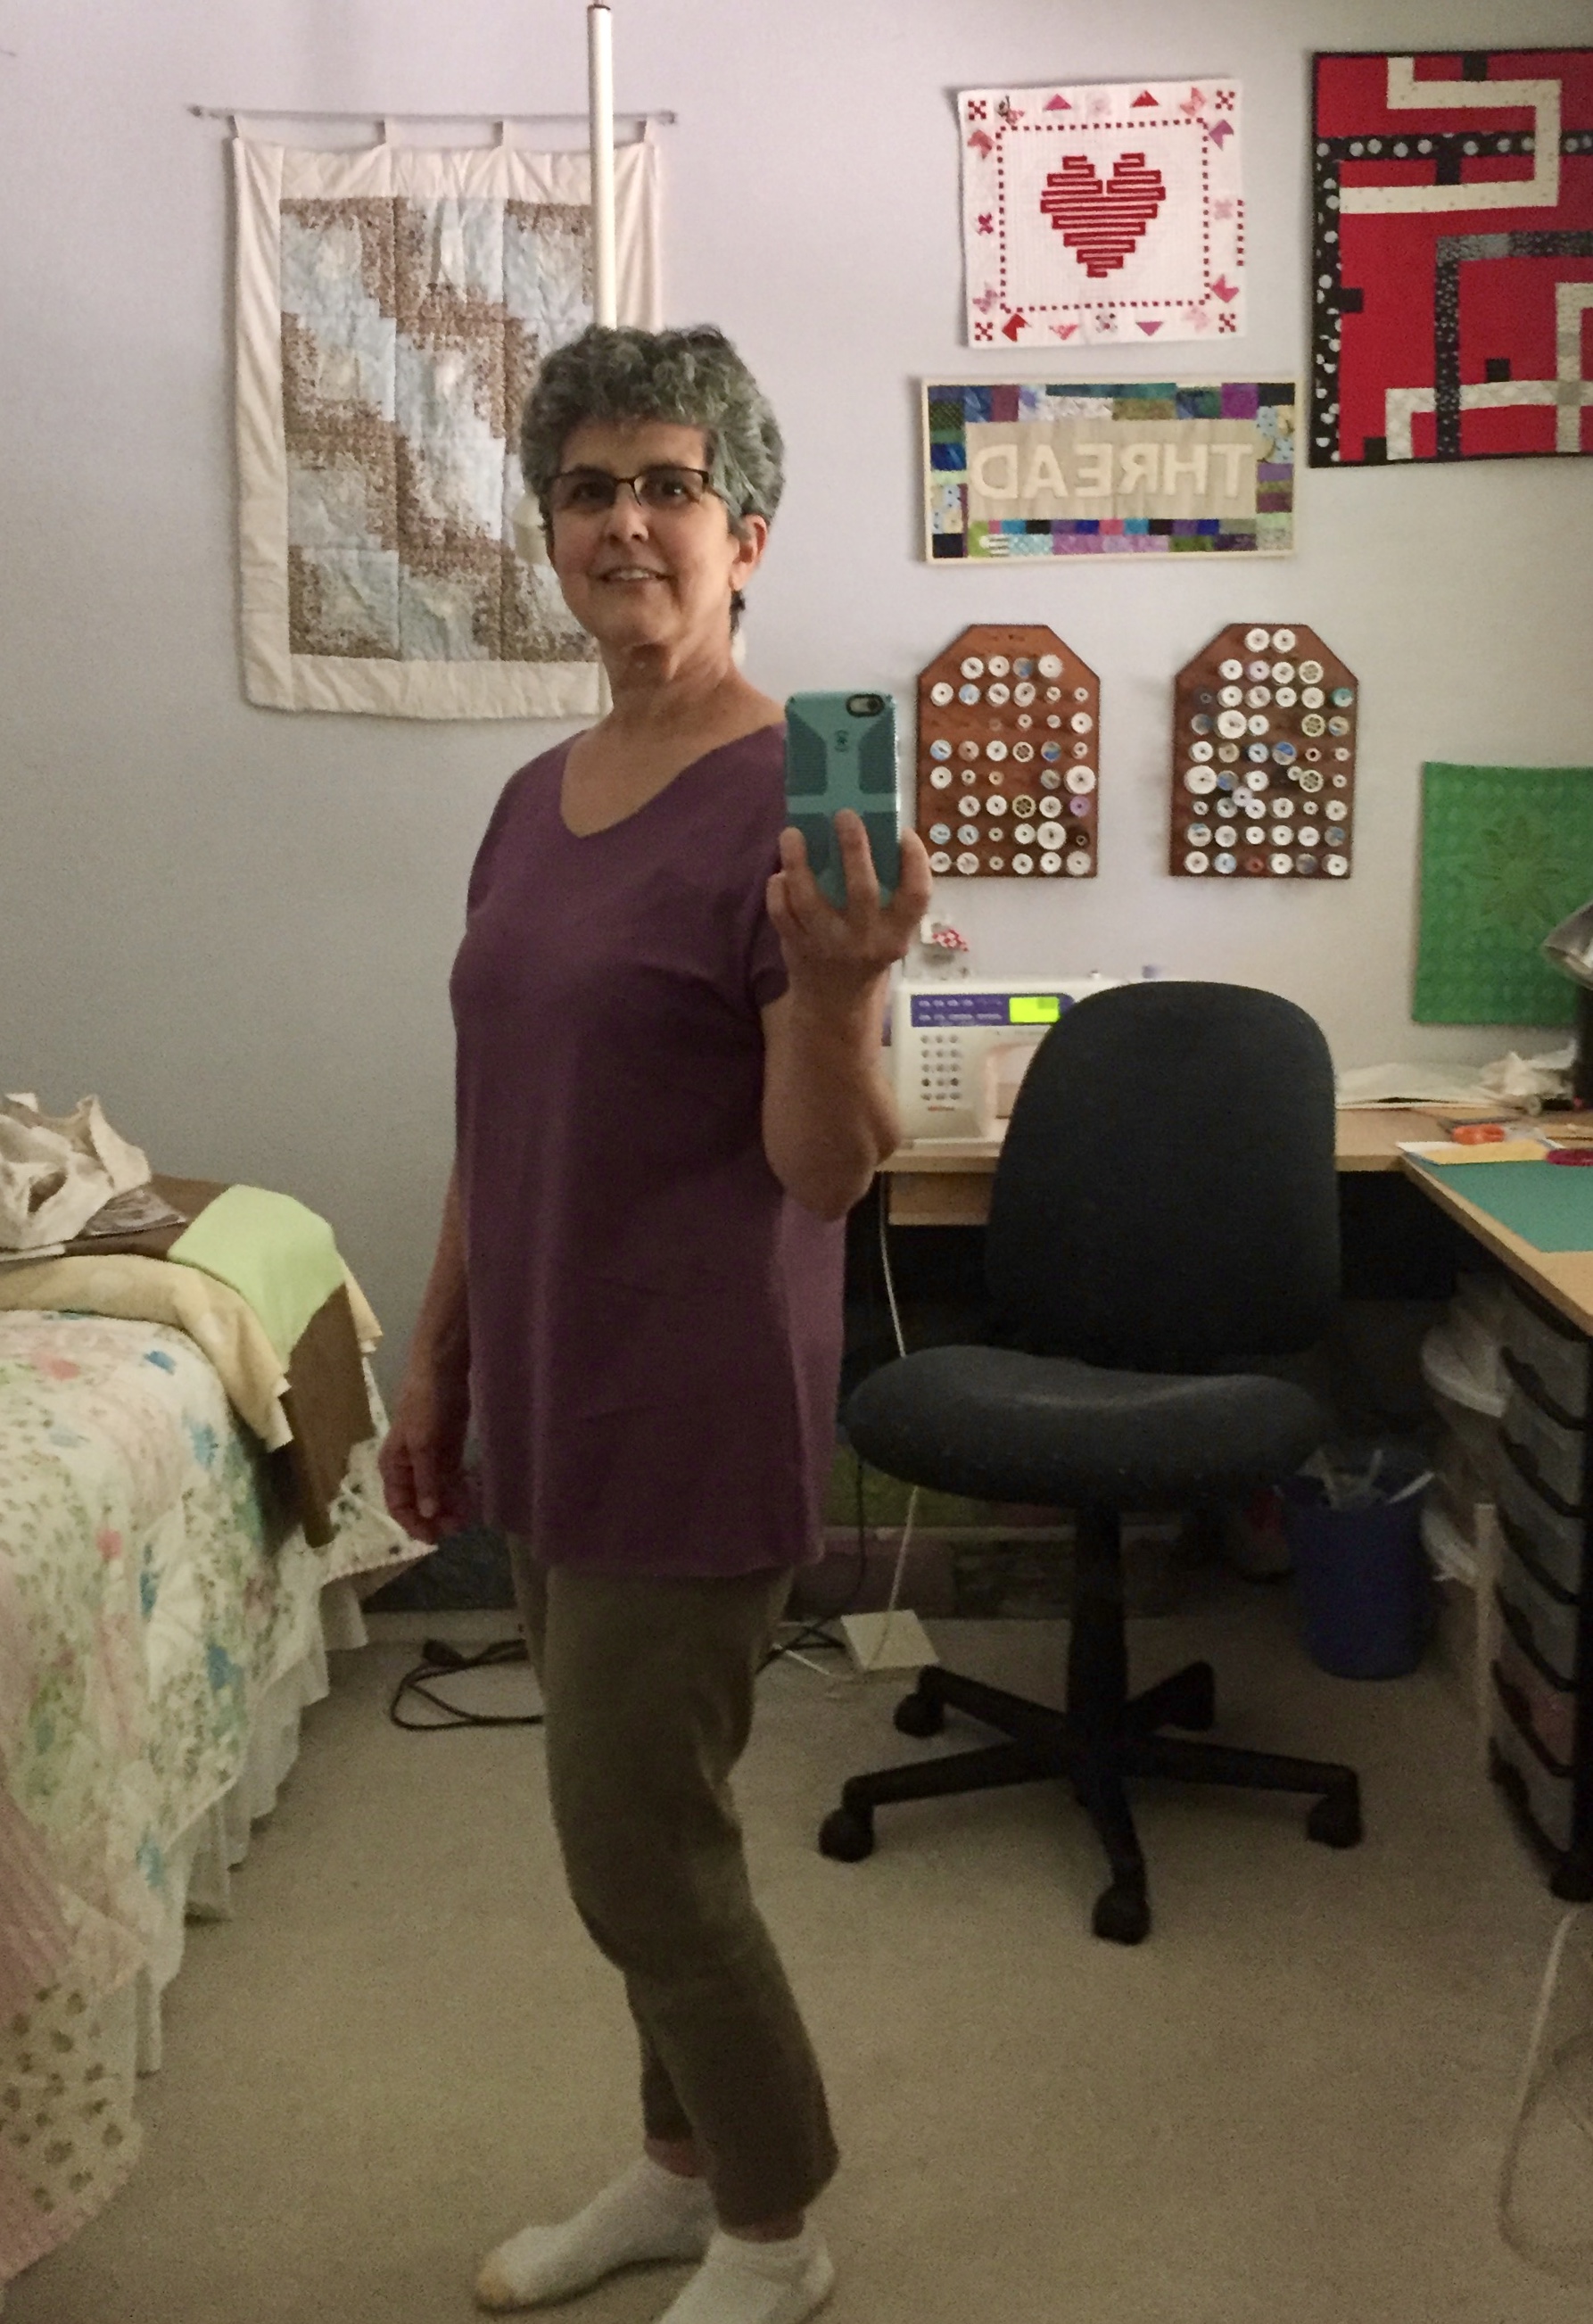
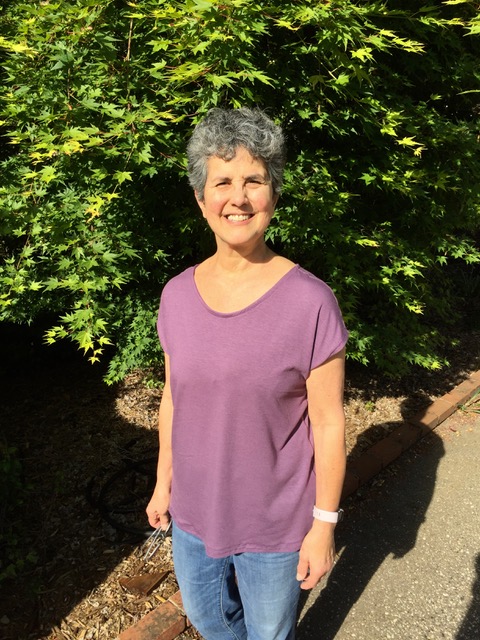
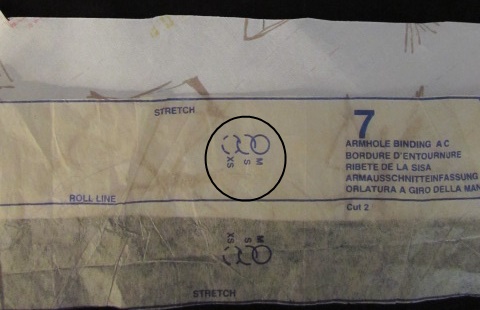
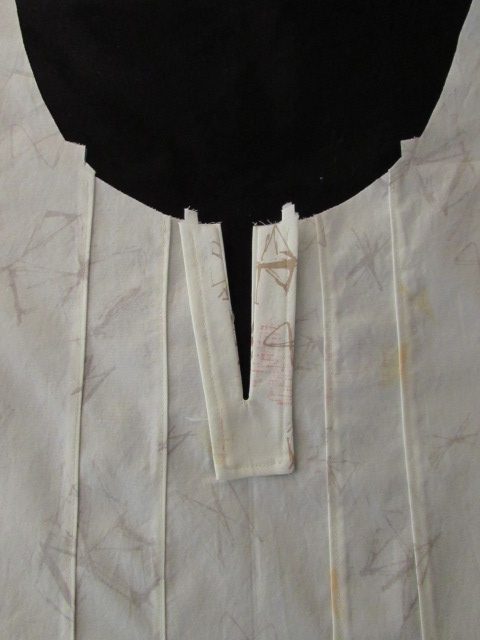
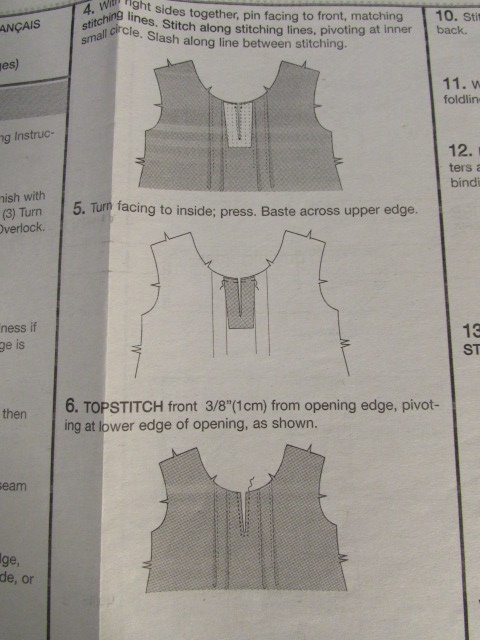
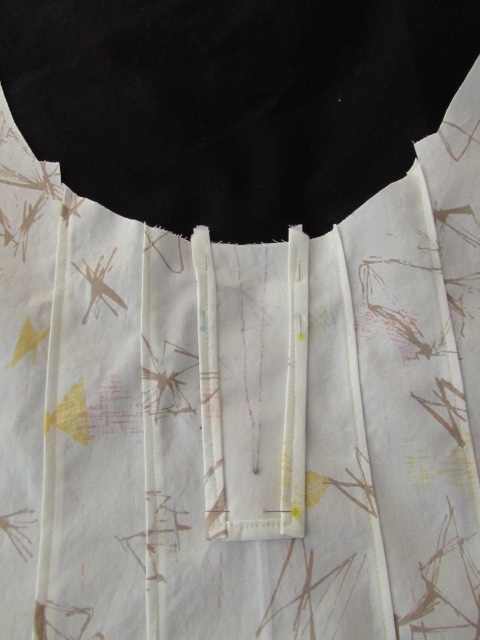
Stitch the binding to the shirt, making sure the fabric below the binding stays flat and smooth. Just take it slow and you will be fine. Remember the strip is cut on the bias which allows some stretch. You shouldn’t need to stretch it but you will be able to ease it around the curves nicely. Then clip the neckline a few times from the inside. Do not cut through your stitches though. I like to do this because I think it allows the binding to fold in over the curved edge nicely. Go ahead and press your seam and then fold the binding to the inside and press it down. Slip stitch the binding to the inside of the the shirt, including both ends.

The process is mostly the same for the armholes. However you will stitch the ends of each binding piece together (with a 5/8″ allowance) so that you have a circular piece, pressing that seam after stitching. Then, again, fold wrong sides together and press. Match that center marking with the shoulder seam and the stitched seam with the side seam at the bottom of the armhole. Then match your notches. Following that, ease the rest in and pin well.  Stitch with a 5/8″ seam allowance.

Before going any further, press the seam and turn the binding in toward the inside of the shirt. Press it and see if the binding lays flat. This is where I ran into difficulties. For me, the binding was too tight. I kept taking it off and fiddling around with it.  Finally, the only way I could get a finish I was happy with, was to fold the binding in after stitching it. I stitched it at 5/8″ and then folded it in half to make it narrower and pressed it. Then I folded it to the inside and slip stitched it down. If you look at the picture, you will see it is rather narrow, compared to the neck binding. Honestly, I cannot really say what went wrong for me here but it sure made me crazy for a little while there.

But it lays flat and looks ‘good enough’.  The first time I made this pattern, I put short sleeves on it and that was simpler! Hoping this isn’t a problem for you. I can’t figure out if I cut something to the wrong size or what?? I hope you don’t have this issue. If you do though, be patient and work with that binding piece. Message me via Facebook or Instagram and I will try to help.

That very last step is to hem the shirt.  I am assuming you know how to do this but really it is so simple.  Fold up 1/2″ to the inside and press.  Then fold it again, to the inside, and press again.  Pin along the edge and machine stitch the hemline.  Ta Da!!! A finished shirt! I can’t wait to see all of your blouses. Let’s meet up here next week and share the finish. You can link up a blog post if you like as well as post pictures on Facebook and Instagram.  Rather than figure out how to link an Instagram post here, please email me a picture of your finished shirt (on you or on the hanger!) and I will share them in the last post.

As always, please let me know if you need help.  Have fun finishing your shirt up and I look forward to seeing them next week!

Summer Sew Along-Day 4

Good morning all.  I hope your shirts are progressing and that none of you are experiencing any frustrations.  From what I have heard and seen, it looks like there are some really pretty shirts coming together. Yay! If you have made it to this point, then it is time to check the fit and start stitching the main seams together. If you are not quite there yet, no problem.  You will catch up! If you are new to this event, click here to start at the beginning.

In this post we are going to talk about methods to use for finishing the seams. I think a nicely finished seam makes so much difference. The seams won’t fray and it won’t look ‘homemade’ with clean, finished seams. There are a several choices but for this project, we will talk about two finishing methods.

  • French Seams, my favorite
  • Seams finished with a zig zag stitch

I am going to mainly focus on French seams for our project.  This will work in most cases. Where it might not work is if, after you try on your shirt, you decide to sew narrow seams to help with the fit (if it is a bit tight.)  If this is the case, you may not have enough seam allowance to create the French seams. In this case, I would suggest you sew your seam, press it and then run a zig zag stitch to keep the seam from fraying.  The finished seam would look like fine and and fraying would be greatly reduced. Each of our machines are different so I will not provide settings for the size of the zig zag stitch. I would suggest you play with a scrap, running a straight seam and then zig zag next to it to see what size works for the amount of seam allowance you have to work with. As always, I am happy to help if you have trouble with this.

Before we talk about French seams, let’s make sure the fit of your shirt is good. Pin both shoulder seams and one side seam together on the 5/8″ seam line. Pin it wrong sides together.

Slip the shirt over your head and put one arm through that side that is pinned.

I have finished the back seam. The shoulder and one side seam are pinned.

If you have someone around to help you, have them pin the other side together for you once you have the shirt on.

Back seam is finished, one side and both shoulders are pinned.

Check to see if the shirt is comfortable across the bust line.  Really, with this shirt, that is the only area that might give you trouble.  Check if the armholes are fitting well. Does the shoulder seam need to be taken in or let out at all?  If the shirt is tight across the bust line, try opening up that seam a bit.  Take the shirt off and pin instead at the 3/8″ seam line. This reduces the seams on each side by 1/4″ which gives you 1/2″ more room. Hopefully this will open it up enough. You can also open up the seam on the back of the shirt to give more room.  If this is not enough we can talk about putting a triangular gusset in at the top of the side seams but let’s do this together as needed. Leave a comment if we need to tackle this.  🙂

If the shirt feels baggy, you can increase your seam allowance.  Like above, take the shirt off and pin it tighter, maybe at 7/8″ on each side seam. This would reduce the fit by 1/4″ on each side for a total of 1/2″ decrease.  Increasing the seam allowance at the side may mean you need to play with the shoulder seams.  You also have that back seam to play with to add or reduce the size of the shirt. You will need to play with it. But by doing this with pins and a mirror (and a friend if possible) you should be able to find the sweet spot where you are pleased with the fit.

French seams begin by stitching wrong sides together. Kind of feels strange but you will pin your seam and take a 1/4″ seam with the wrong sides of the fabric together. It will look like you are sewing it inside out. Remember though, if you have increased your seam allowance to make the shirt tighter, you will need to trim your seam allowance appropriately, before sewing this 1/4″ seam.

In the photo above, the fabric is wrong sides together and the seam is stitched at 1/4″ seam allowance.  You need to trim any notches or frayed threads at this point so the line is clean. Then turn the shirt inside out, so it is right sides together. Press the seam lines, massaging the seam so it is tight and well pressed.

In the photo above, the first seam is stitched, the shirt is turned so fabric is right sides together. Pin if needed and stitch a 3/8″ seam line. Press again. Turn it right side out and check for any fray that may be caught in the seam and showing.  Likely it is nice and clean but if there is any fray, carefully trim the bits of thread.

Back,shoulder and side seams are finished.

Regarding the order of things, it is best to sew the back seam first. Second you will finish the shoulder seams, sewing the back to the front. Slip it on again and check your fit. Finally, sew the two side seams.

We are almost there!!  I’ll be back on Monday with a post on finishing the neck line and arm holes. Then you just hem the bottom and it is a finish!!

I hope you are enjoying this project. Do not even hesitate to ask if you need my help. You can leave messages via Facebook comment, Messenger, or a comment on the blog and I will be right back with you.

Just a reminder, you may sign up for my newsletter while visiting the blog. The sign up form is at the top of the page on the right.  You will receive a monthly newsletter telling you what is new with my shop and about any promotions or events that might be coming up.

Summer Sew Along – Day Three

You’re back! I hope that means you were able to lay out and cut your fabric pieces. If you had any trouble, don’t hesitate to email me at [email protected]. Or, you can always leave a comment on the blog or the Facebook page. I am happy to help.

Today we are going to take our time and work on the details that make the front of the shirt unique. I think these details are both challenging and fun. If you take it slow, you will have good results. We are going to mark the lines for the pin tucks and also the stitching and cutting line for the slit at the center of the neckline. The portions of the instruction sheet we will be working on are numbers 1 through 6.

NOTE: For marking, I used a Frixion pen (the one that erases with the heat of the iron.) You should use whatever is comfortable for you. For the pin tucks we are marking on the front of the shirt so make sure it will come out easily. A piece of chalk would be good.  Because my fabric is light in color, chalk wasn’t an option for me. Plus I want my markings to show in a photo for the blog so I needed a darker color.

We will mark the center stitching line first.  It is easiest to mark this on the facing piece, rather than directly on to the front of the shirt.  You need to fuse the interfacing to the wrong side of piece number 3 first. When the interfacing is fused, lay the paper pattern piece back over the interfacing side. Fold back the bottom of the paper and make a mark the bottom of the slit.

Fold back the paper lengthwise on the dotted line and trace your stitching line. Then fold back the other side along that broken line and trace the opposite stitching line.

I noticed that the drawing of the slit comes to a deep point. I did not sew that far down because there would not be any seam allowance alongside the stitching line at the deepest point of the V.  Instead, I traced and stitched a shorter, wider V on my piece.

Once you have your facing piece marked, you need to finish the edge of the facing so it doesn’t unravel or fray when it is washed. I always fold a very narrow 1/4″ to the wrong side around the three outer edges (both long sides and the bottom). Press that first fold.  Then fold it again and press that second fold. Pin to keep it in place as you stitch.

NOTE:  Just like with free motion quilting, it is always best to draw your bobbin thread up to the top before you begin stitching. This will prevent that little rat’s nest of messy stitches that occur now and then. Also, with any stitching on a garment, stitch forward about two stitches, reverse for two stitches and then begin to sew.  You need to reverse so that your stitches are locked down and don’t unravel.

Press after stitching. If you are using a Frixion pen, remember not to iron over your markings or you will have to trace a second time. (Ummm….don’t ask me how I know this.) Once your facing edges are finished, set it aside for now.


I feel like explaining the pin tucks with the written word is a bit of a challenge so, with the help of my daughter, I made my first ever YouTube clip. I think this will give you a good idea of how to fold the pin tucks. If the video doesn’t work in your browser, click here.

Now let’s mark the pin tuck lines.  This will be much like marking the line on the facing piece. This time, fold the paper pattern back on the broken line (your stitching line). Use a clear ruler or straight edge to draw a line on the fabric from the top to the dot at the end of the stitching line. You will mark these twice on each side of the front piece.  After you do the first side, remove the pins from the piece and turn the fabric over. Lay the piece down (should be upside down this time) and mark the two lines on the other side of the front piece. It is hard to see my lines so I drew over one to give you the idea of what I mean. Ignore the fact that I couldn’t line my hand drawn line with the computer drawn line! I definitely need some lessons on using graphic art tools!

 When you have all four lines drawn, it will look something like this. Again, my hand drawn lines are faint.

Next we will make the folds and pin the tucks in place. You want to pick up the fold at the notch and take it to the side. Finger press and pin in place. Remember, if it is folded in the correct direction, the notch will make a nice smooth curve for the neckline. Pin down to that dot we marked for the end of the tuck.

Top stitch each of the pin tucks, drawing your bobbin thread to the top before beginning the seam.  Also, be sure to reverse for two stitches and then proceed to the end of the tuck. How does it look?


The next step is to attach the facing.  Take the piece and lay it right sides together on the front piece. It will be centered between the tucks.

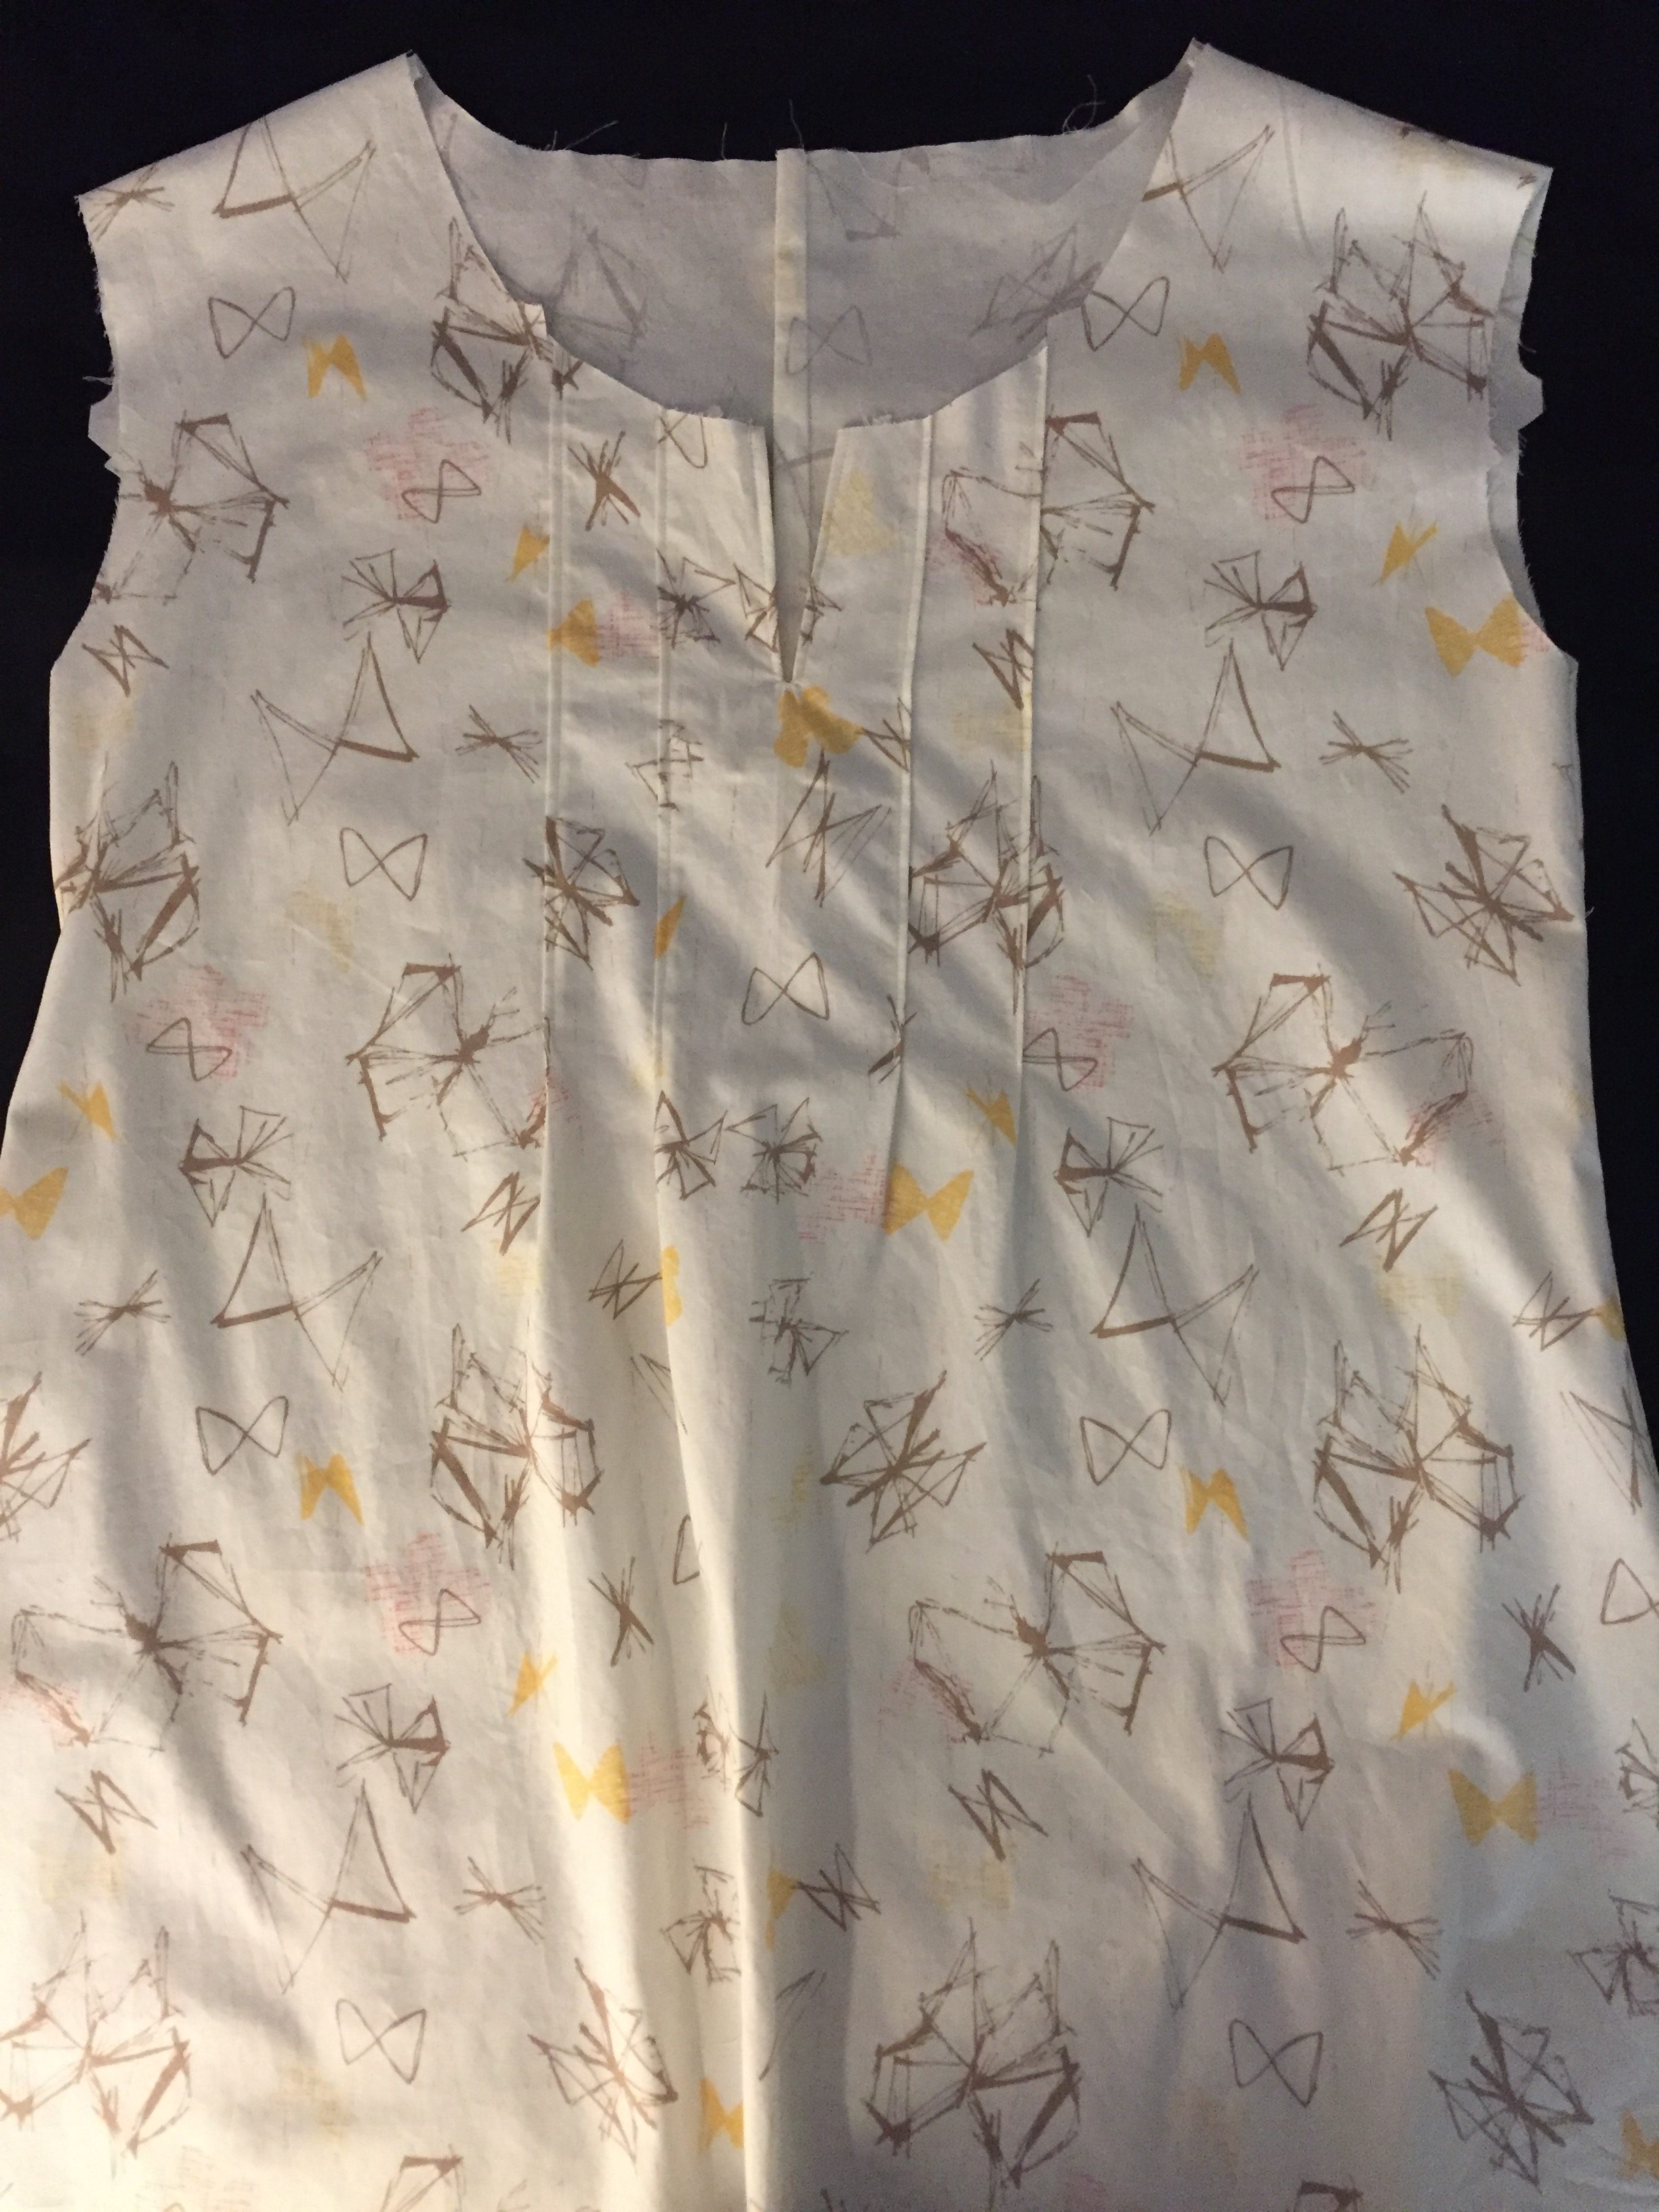
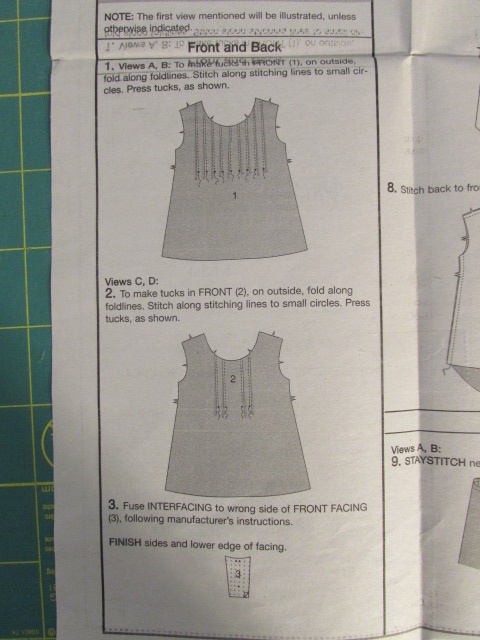
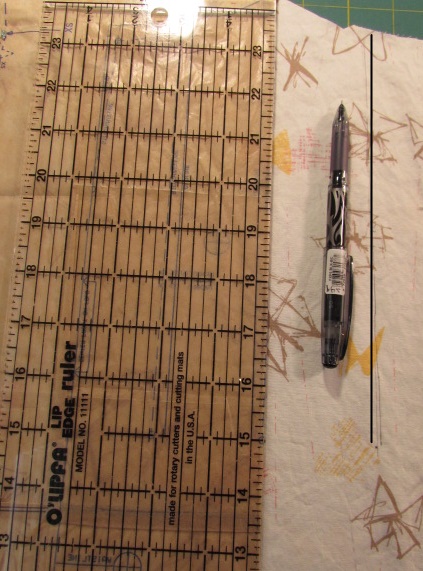
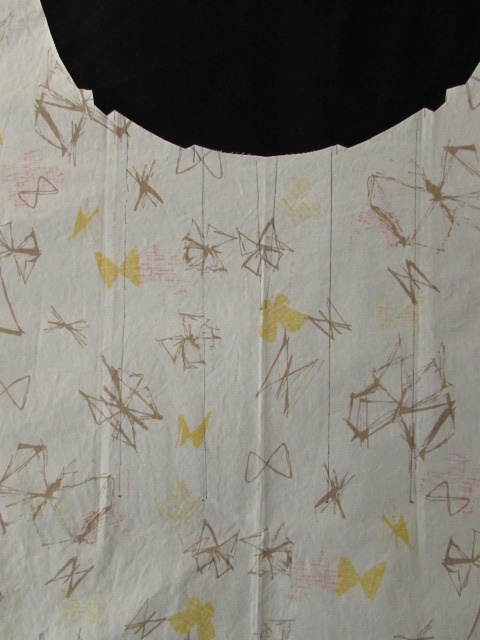
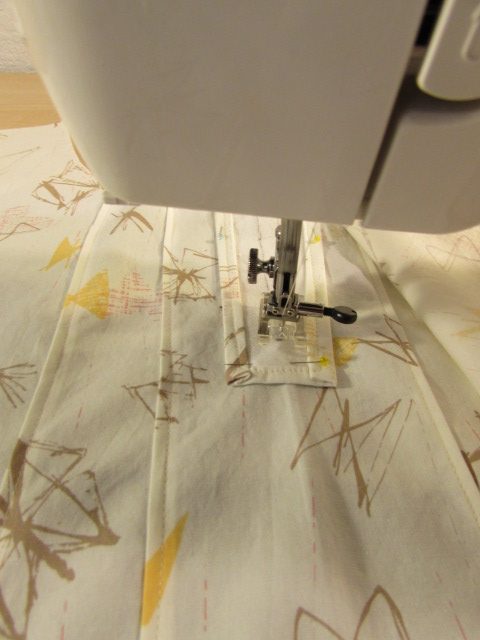
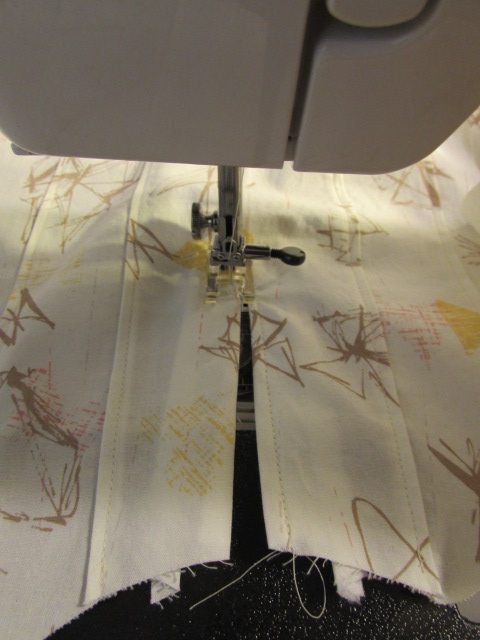
Pin in place. (I know… my markings are a bit wiggly.) Sew just a hair to the right of the stitching line.  Take it slow here. This is probably the fussiest part of this project.  Stitch down to the point and put your needle down to hold your spot.

Pivot, by turning the fabric, and stitch 2 or 3 stitches. You will need to have this bit of room when you clip this seam. Then with your needle down, pivot the fabric again and stitch back up to the top of the neckline.

Press  your seam.  Just press the facing as it lays on the front of the shirt to smooth your seam. Next you will carefully cut the slit between the two long rows of stitching down to the point (where you made those two stitches and pivoted).

Make sure not to cut through the stitches. Now turn the facing to the inside of the shirt. You will likely have to massage the facing a bit to get it to lay flat. Use some steam and iron the front of the shirt with the facing on the inside.

The last step for today is to top stitch the opening in the neckline. Pull your bobbin thread to the top and stitch a uniform line no more than 1/4″ from the seam.  I stitched mine at 1/8″ because I wanted to reinforce the facing seam.  There is so little seam allowance here and I think a tight top stitching will prevent any problems.

Now that the front of this shirt is complete, you can breathe a sigh of relief. This was the toughest part. Hurray for you!

The next post will be on Friday, June 23rd. On Friday we will check the fit, learn about finishing seams, and sew the back, shoulder and side seams. Easy Peasy!  See you then.

Please do not hesitate to ask questions. If you are wondering something, it is likely there is another reader wanting to know the very same thing. Leave a question and I will get back to you!!