Owning Our Imperfections

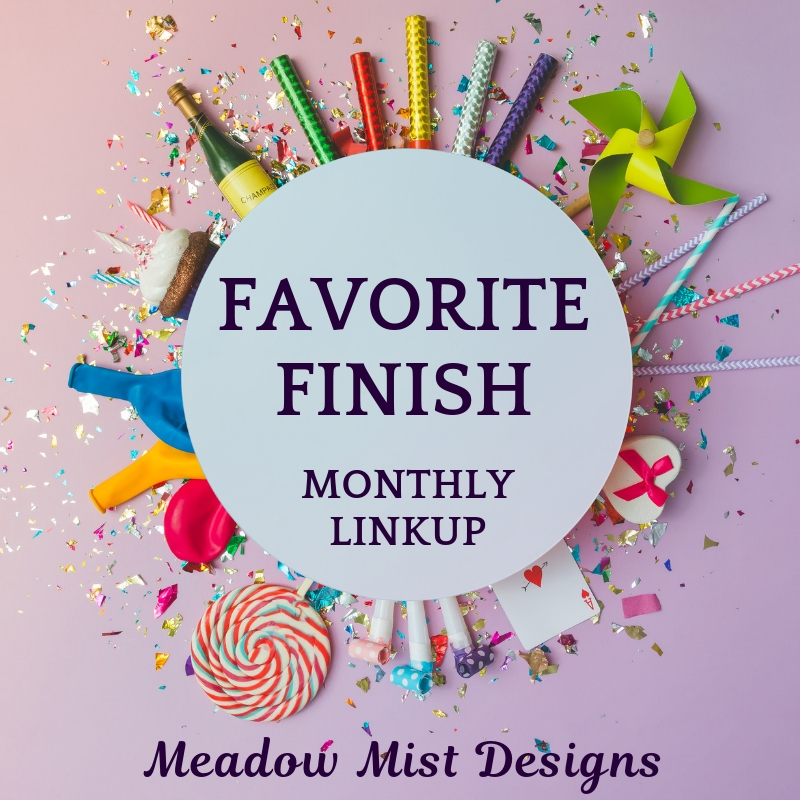
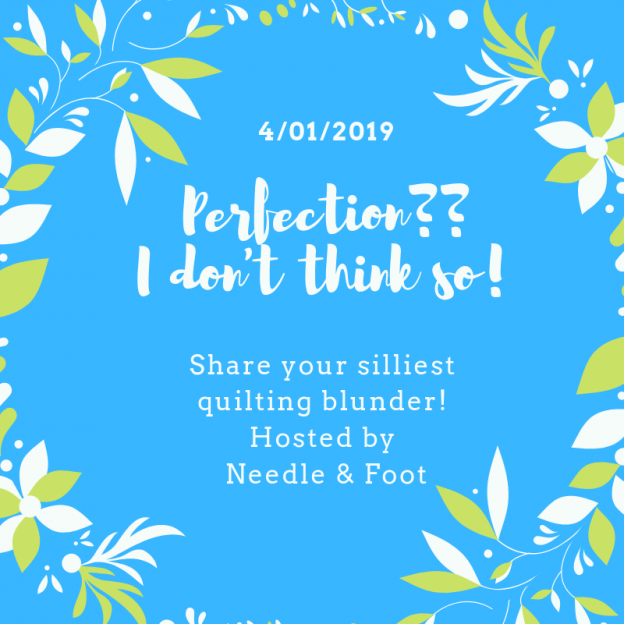
Not sure if you read my previous blog post but I want to remind everyone that on April 1st (next week) I am hosting an event inviting everyone to share their mistakes, goofs, boo-boos and misunderstandings about quilting (or sewing in general)! It is often disconcerting to look at the world of perfection that is usually shared on social media. There are some who generously share their errors along with their gorgeous quilts. But it isn’t often enough. At times, this leads to a feeling of discouragement. Surely I am not the only one who has scrolled Instagram and come away feeling like everyone’s quilts are so much better than mine. Quilting isn’t done to one-up the next person but it is hard to avoid this feeling. Maybe it just depends on my state of mind on any given day but it happens.

Let’s build each other up by taking a view of quilting in real life! Share a mistake you made, chuckle at yourself, explain how it taught you something or maybe how you fixed it. (If you threw it out, explain why you decided to). This will be so much fun!

From our very generous sponsor, Art Gallery Fabric

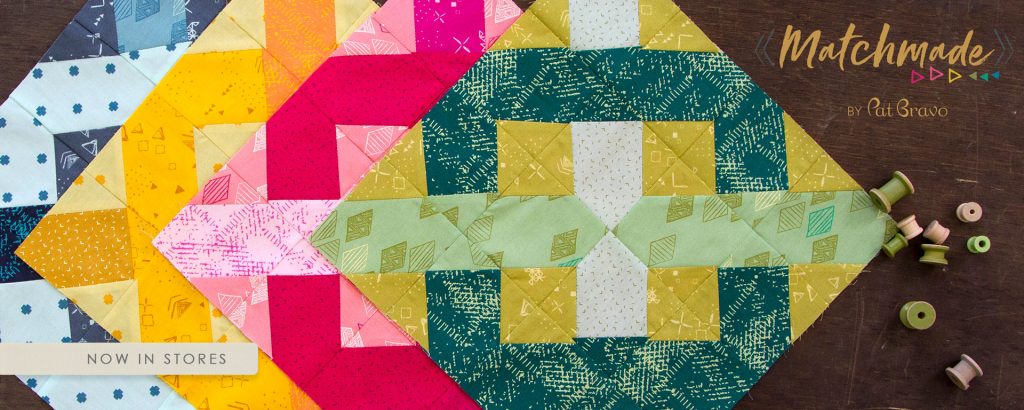
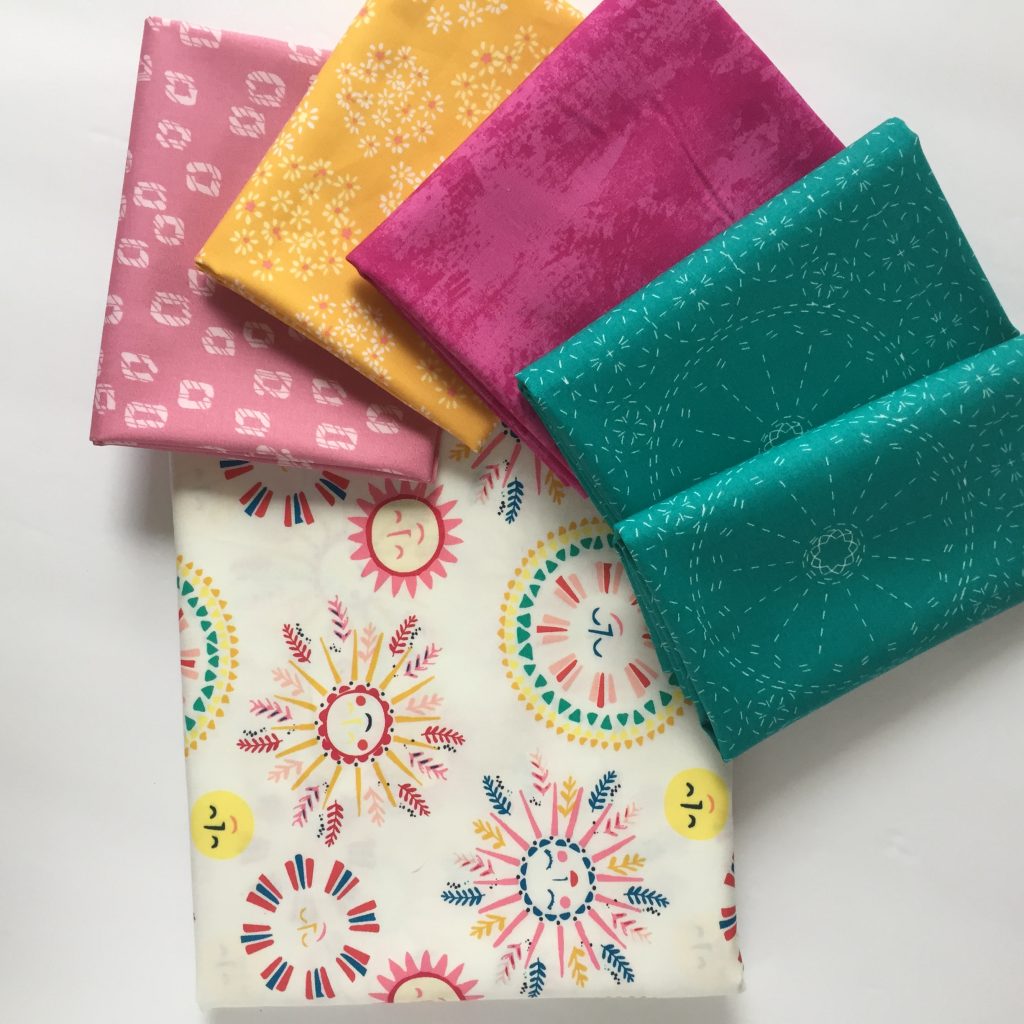
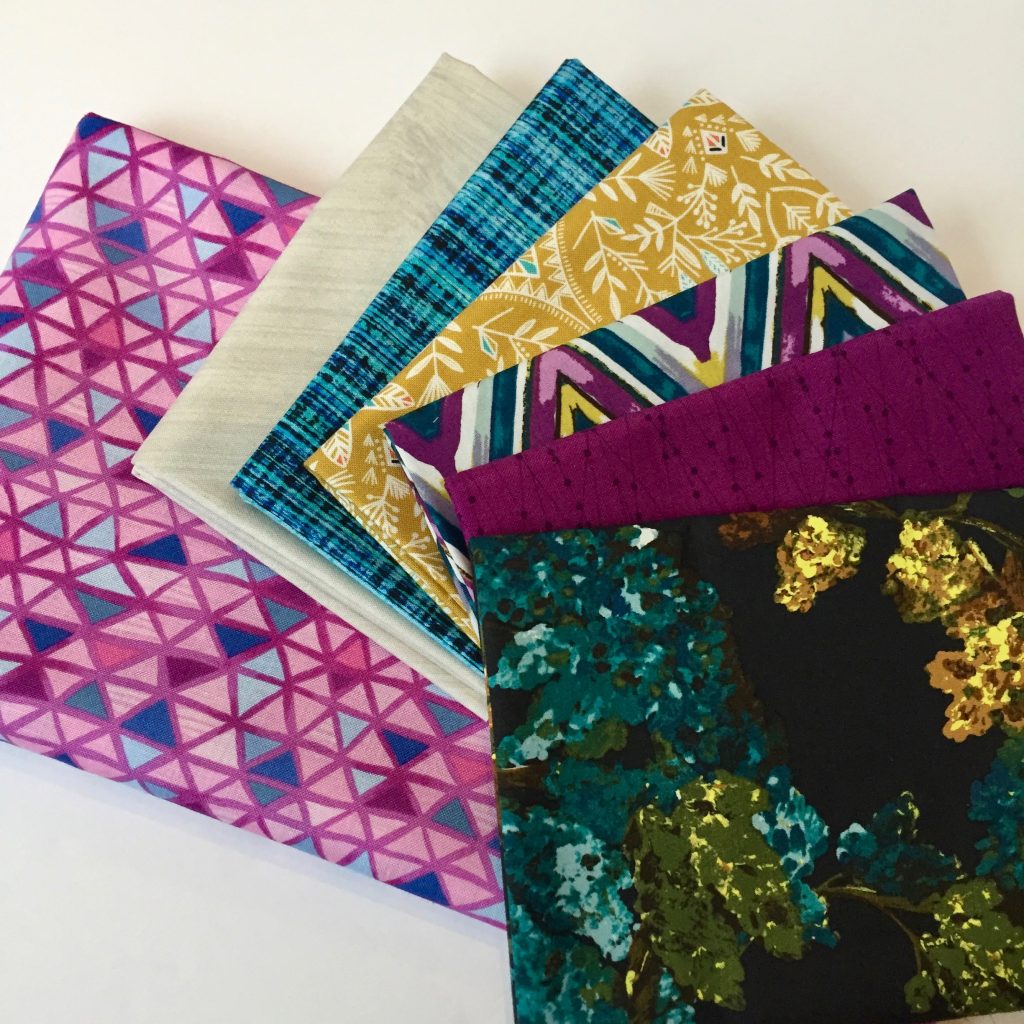
Plus prizes… who doesn’t like prizes??? We have a very generous gift from Art Gallery Fabric. They have donated a fat quarter bundle of Matchmade, a gorgeous new line of blenders featuring deliciously saturated tones. Designed by Pat Bravo, this bundle has 20 different pieces which means this bundle is a gift of five yards of fabric from AGF to one lucky winner!

More prizes!!!

Look, more prizes! Kirsty at Bonjour Quilts has provided three PDF patterns! Have you seen her work? So many wonderful patterns to choose from! Leanne at Devoted Quilter has given a PDF pattern too! Another talented designer, Leanne has an assortment of striking patterns in her shop. She also has several free ones that are tempting me as I write this! Linda of My Sew-Called Quilts has provided two mini charm packs of Grunge. There isn’t one of us that wouldn’t love these cute bits of Grunge!! (Please note – I am limiting the fat quarter bundle prize to the US only. Shipping is so darn expensive and the size of the bundle makes it prohibitive for me to ship outside of the US. If you have a US address I can ship to, go ahead and let me know that so I can include you!)

As for Needle & Foot, one gift certificate for $30 is also in the mix. This makes six fun prizes – awarded by a random drawing of those who link up! Yay! Event begins on April 1st (very appropriate way to celebrate April Fool’s Day!) and closes Friday, April 5th. Winners drawn and announced on Saturday, April 6th.

OK – think about learning to quilt…. remember all of those mistakes and frustrations. Share your experiences so we can all share a laugh and realize no one, NO ONE, was born with a magical ability to create award winning quilts. We all learned, we all began somewhere. That’s real life quilting.

It’s the Little Things

It all adds up, right? I have had a lot going on but each is a small-ish project. Somehow this has filled my days over the past week or so. It’s all good though – creativity takes many forms and, for me, it is always quite satisfying.

Little four patch blocks.

I am working on a project for an upcoming book review. You’ll see the review and more of the project in a couple of weeks or so. But these little scrappy blocks are a lot of fun. The four patch blocks are 2″ finished. I don’t usually opt for small piecing (and for many, this isn’t very small at all!).

They are fun to make and I think the project is going to look really good. Plus I am using up a few scraps. I have not touched my scrap bins in many months so this makes it extra satisfying!

Binding a quilt for our guild

In our local quilt guild, there are many ways one can help with the community service projects. My usual choice is to bring home quilted pieces and machine bind them. Very quick to do and it enables me to contribute. Since we have a guild meeting a week from today, I thought I should finish this one up. That way I can bring it in and grab another one to take home.

A new QAL coming up soon!

My friend Sandra over at MMM! Quilts is hosting her 3rd annual QAL. She is so much fun – which I am sure you already know. She had curated a blogger bundle for me last year (the November bundle). Some of her readers asked if she would do a QAL using the bundle. She graciously agreed and this Beothuk Star the resulting event. Because there are only five or so of those November bundles left (should anyone else want to make it with those fabrics) she and I decided to create a second bundle for the QAL. Sandra curated this one as well and it is so bright and cheerful.

This bundle is built around the Sunny Side Up piece of fabric in center, by Maureen Cracknell

I really love this bundle! The reason there are two of the teal pieces is because one is used as the binding. If you are curious to see it close up, it is available in the shop now.

The other bundle, based on the November Blogger Bundle

Above is the other kit being offered for this QAL. It is based on the November blogger bundle but with two changes.

Additional pieces needed for the November blogger bundle

She needed another fat quarter so the pink and blue triangular print (Mosaic) was added. To have enough for the background, the amount of the sandy off-white piece was increased. This means if you have the bundle already, you might choose to purchase the kit extension for that original bundle. It is available here. Of course it isn’t mandatory. You could certainly use a different background if you have one you prefer. You could also add one complementary fat quarter of your choosing.

Crushed walnut shells – a new item in the shop

I have been adding a few different notions to the shop lately too. Most recent are these bags of crushed walnut shells for filling pin cushions. Yesterday I bagged up a number of them so they are now available too! Each bag holds six ounces and each order will be for two bags (so twelve ounces total).

Handmade Point Turners

These are not yet available but I am excited to show them to you. I asked my woodworking spouse to make a point turner for me. I have seen them and thought maybe I could be using something more effective than the chopsticks I currently use. (Chopsticks are a reasonable choice but the ends of mine are more square than round so I can’t obtain as sharp a point as I would like. He asked me what I thought I wanted and I described the one on the far left. He said ok but when he made that one, he also made two more so I would have something to compare. His designs are so much better (why doesn’t that surprise me???) I like using the fully rounded handle of the middle one. The piece on the far right has a nice point to it but the handle is flatter and it isn’t quite as comfortable to use. So, I am going for the one in the middle. I also like the extra bit of length on that one. They are really pretty aren’t they? Do you use a point turner? What works for you?

Last, but certainly not least, I have a fun event coming up next week! I have written before about the issues with a lot of us using social media for inspiration. Sometimes it is great to see all of this amazing work out there. Other times, it is kind of a downer and leaves us feeling ‘less than’. I know we are not ‘less than’ but it can feel that way seeing so much amazing work and then looking at our progress and feeling a little bit defeated. In an effort to show the real side to all of us, let’s share some of the ridiculous. We have all goofed. We have all made a project and thought, ‘nope, I’m not sharing this.’ Here is the chance to get real. What better day to open the event than on April Fool’s Day!! Think about this and write a post sharing a mistake or misunderstanding you might have had about our craft. Mine is quite ridiculous and I am sure it will entertain you. Share it next week and link up with me. Prizes will be awarded – just by a random drawing – no judging here! I think it is a great way to all get on the same level with our art by sharing these imperfections. If you have questions, leave them in the comments. Hope you will join in!!

Linking up with my favorites. Check them out at the top of the page, under Link Ups.

Flock of Geese Quilt Finish & Kit

As you may know, I began to stock a fun selection of modern quilt patterns in the shop a few months ago. I have been working on building up a variety of patterns so that my customers will have plenty to select from. So far, I am carrying patterns by Meadow Mist Designs, Bonjour Quilts, Devoted Quilter, Quilting Jetgirl, and – most recently – Cooking Up Quilts. There has been really good response to these and I am enjoying seeing the gorgeous patterns from these talented designers.

Flock of Geese Quilt Pattern, designed by Cheryl Brickey of Meadow Mist Designs.

As often happens, one thing lead to another and I asked Cheryl Brickey (Meadow Mist Designs) if she would help me to create a kit for a pattern of hers. Together we decided it would be fun to make a kit for the Flock of Geese pattern. She and I shopped for fabrics in my shop and came up with such a pretty compilation after many emails back and forth.

The kit for the Flock of Geese pattern contains beautiful fabric from Art Gallery Fabric.

Pulling the kit together was lots of fun and Cheryl made a rendering of the Flock of Geese pattern using the fabrics we selected.

With the exception of two, all of the fabrics in this quilt were designed by Sharon Holland. She is one of my all-time favorites and I wanted to use her work specifically. Above you will see fabrics from her Signature line as well as Sketchbook. They work together perfectly!

Half square triangles, ready to go.

I wanted to make up a sample of the quilt and decided to make the baby size. The pattern includes baby and lap size quilt options. The smaller size was better for me as I intend to use it in the booth at the local quilt show I am working in May.

Quilt top with the blocks on point.

This pattern is a very easy make. It contains half square triangles which make up the blocks and then the blocks are set on point. Very fun and not difficult at all. Cheryl’s instructions are crystal clear which this quilter is grateful for!

Love the simple cross hatch quilting

Using a Hera marker (my favorite tool!) I quilted straight lines in a cross hatch pattern. It worked really well for this design. The cross hatch pattern looks good with these blocks set on point. For someone who is really into FMQ, there is a lot of negative space on which intricate quilting could be done.

Such a pretty quilt for spring time!

This quilt is so soft. The batting is Hobbs Heirloom and with the widely spaced quilting, it drapes beautifully. I haven’t washed it yet but we know that will make it even cozier.

For the backing, I selected Texture Slots, a piece from Sharon’s Sketchbook line. Great colors and it coordinates with the fabrics in the quilt top. The binding is from her Signature line and is called Traveler Raindrops. The binding is machine stitched to front and back. My choice on binding method is dependent on my mood. Sometimes I am feeling the urge to hand stitch and others, not so much. Both methods look fine to me so I go back and forth between them.

The finished quilt is so sweet. I am happy as can be with it and equally happy to offer the kit in my shop. Working with Cheryl has been a treat and I look forward to more collaboration with her in the future! If you are interested in the kit, I have it available in both baby and lap sizes. Also, it can be purchased with or with out the Flock of Geese pattern. For those quilters who might already have the pattern, there is the option to purchase just the fabric. Click here for more details.

A new monthly linkup is coming soon!

Linking up with my favorite Linky parties. Speaking of which, there is a new link up happening at the end of the month. Cheryl, of Meadow Mist Designs, will be hosting a new monthly linkup. It opens the last day of the month and is called Favorite Finish Monthly Linkup. The first linkup is on March 30th. Quilters – link up your favorite make for the month using an existing or new blog post or a post from Instagram. This will be a lot of fun as we celebrate our favorite make from the past month!

Loving These Handmade Gifts

My grand daughter turned two years old last week. Her parents and I wondered how this could be?? Those two years have buzzed by and here she is, a toddler who talks a blue streak, is starting to be potty trained, and has perfected the all-important sentence “I can do it myself”.

Oak and walnut step stool created by Grandpa.

My husband and I wanted to make her a gift from each of us. As one would expect, his was made of wood and mine of fabric. Ray made her a pretty step stool. My DIL actually asked him to make this. Recently they converted her crib to a toddler bed and it is a tiny bit tall for her still.

He laminated strips of oak and walnut together to make the top. Then he framed it with walnut. Always one to think of safety, he angled the legs on the bottom so it wouldn’t tip as she stepped on and off of it. He also put little grips on the bottom of each leg making it hug the floor for safety as well as avoiding any scratches on their hardwood flooring.

She loves her little seat. Such a sweet girl.

Gram-gram chose to make a little bassinet for her dollies and stuffed animals. H is at that age where she loves to put things and people to bed. Sometimes a doll or stuffed animal, sometimes her Gram-gram or her daddy – she loves to cover you up with a little blanket and say pat-pat when she tucks you in. Oh my heart.

I used a tutorial on Sew Mama Sew for this project. It was very fun to make. Nothing too unusual in the process at all, just boxed in corners, a lining of a stiff, fusible batting and a ruffle to decorate the outside. I used a home dec fabric from Jo-Ann’s for the outside. I love the whimsical birds. The lining, ruffle and pillow are made with a purple Kona cotton.

The bed was a little bit ‘floppy’ so before adding the band above the ruffle, I lined it with a stiff, fusible interfacing. That seemed to give it more structure.

A soft little dolly quilt too!

Of course a doll bed needs a little quilt! I used this little floral and just quilted a few lines across it each way. It is just the right size to tuck in a dolly or stuffed animal.

She loved it!

My grand daughter was all smiles when I gave it to her. She immediately loaded it up with a little doll and her stuffed elephant. (I blocked out the name on her hat, that is why it looks a little strange!)

How many animals can sleep in one little bed?

I really loved making this for her and hope she will play with it for a long time to come.

Using the little cushion as her own pillow. Testing out the softness for her baby dolls?

Of course she felt the need to do a little bit of quality control and lay on the cushion from the bed. Any good mommy has to make sure her dollies will be cozy, right?

Happy birthday to this two year old. Such a fun time for her as well as Gram-gram and Grandpa. Linking up with my usuals plus two new (for me) Linkys – one is called Show Off Saturday and the other is at The Crafty Quilter. Check the others out at the top of the page, under link ups!!

Remember that this Saturday, March 16th is National Quilting Day. Check your email first thing Saturday morning for a newsletter announcing some fun deals for just that day only! If you don’t subscribe to the Needle and Foot newsletter, this might be a good time to sign up!! Click here to subscribe – and remember, I won’t use your email address for anything else, nor will I share it.

PS – If you would like to see more of my husband’s woodworking, follow him on Instagram! He is @kringelwoods and is a talented kind of guy. (I may be a bit biased, but still….)

Guest Posting at Confessions Of a Fabric Addict Today

Good morning! Just popping in to let you know I am guest posting over at Confessions of a Fabric Addict today. I am thrilled to tell you that Mercyful Quilts is one of the recipients of the quilts made for the 2019 Hands2Help event hosted each year by Sarah!!

Each day this week on Sarah’s blog, a representative for the charitable organizations receiving quilts this year is posting about their group or charity. I have a post about Mercyful Quilts on her blog today. I hope you will hop over to read more about the event and if you choose to, it would be great to sign up and participate! Check back each day this week and learn more about the other wonderful groups you might want to make a quilt for.

Thanks to Sarah for hosting this amazing annual event. This is the ninth year of Hands2Help!! Amazing, right? Thus far, over 1,450 quilts have been made and donated to a variety of groups. I have participated a couple of times and it is very rewarding!

Have a great day everyone!

Vermont Sewing Continues

Time has flown by and I will be heading home on Wednesday. When I was getting ready to come out here I thought three weeks sounded like such a long time but yikes, it has gone by quickly!! We quickly settled into a rhythm and it has been wonderful

H and I have spent a lot of time in the kitchen. She has a new stool to stand on so she can ‘help’ cook and she just loves it. She crawls in and out constantly and has learned to drag it from counter to counter to the sink and back. Washing dishes, stirring and mixing, so many projects. Luckily she and I enjoy baking and we have made SOOO many things. Cookies, focaccia bread, muffins – I have probably put on a couple of pounds during this trip.

Maple Pecan Scones

Yesterday we made these Maple Pecan Scones. She had so much fun and was covered in flour by the end of this round of baking. They are delicious and if you want to try them, here is a link to the recipe on the King Arthur Flour website. I cut them fairly small so she wouldn’t have a huge serving. Actually I put half of them in the freezer so they can have them again after I leave.

As for sewing, I have done quite a bit! I made a table runner for my daughter in law. When I was at Jo-Ann’s, they had the Home Decor fabrics on sale and I picked up this floral print. It is a nice weight and has a linen like texture.

I also grabbed a celery green Kona solid (I don’t know what the real name is – I didn’t check the bolt.) This project took no time at all to make. I cut a rectangle (I think it was 14″ x 50″) and stitched the front and back, right sides together. Once I turned it right side out, I ran two lines of topstitching around the perimeter and called it good. It looks great on their dining room table. However, I removed it after taking the photo so we wouldn’t spill on it before my DIL even gets home!

Another project was to make a super hero cape for my grand daughter. Again, this was a very simple project. I bought a 1/2 yard of red satin fabric at Jo-Ann’s and folded it in 1/2, right sides together. I stitched around two sides and turned it right side out. With the folded side and the two stitched sides, it was finished on three sides of the square. After pressing it (on super low heat) I folded the raw edges to the inside and stitched two seams, one at the top edge and one about 2 inches lower. This left an opening at each side to thread the cord through.

My grand daughter wasn’t thrilled with this. She doesn’t seem to care one way or another about it. However, I suspect she will enjoy it at some point. It is silky and shiny and will catch her eye when she is in the mood for playing dress up.

I have just a few more days with her so I am keeping her home from day care this week. She can go at the end of the week after I leave. Not sure what we will do with our last couple of days but I know it will be fun.

Linking up with the usual parties. Check them out at the top of the page, under Link Ups.

So Much Grammy Time

I have been in Vermont for almost two weeks. That seems crazy – in some ways it is going way too fast but then I stop and realize I really miss my hubs and Julia. But it is all good. H and I are having such a good time together. She is still such a delight. I don’t see very much of the terrible 2’s in her at all. I think this is because she has very good language skills so normally she doesn’t get frustrated when she wants something (or doesn’t want something). She can get her message across. Of course, she is not all angel, all the time. She can be a teensy bit defiant now and then.

I find the gender based differences in children really interesting. I have three boys and a girl, a degree in Early Child Development and have worked in preschools and daycares. There are some very consistent, biologically hardwired, differences between the two genders and other differences that are taught by surroundings, toys offered and parental/caregiver attitudes. Language is a big one. It has been my experience that girls acquire language earlier than little boys and they will often sit for stories and language activities sooner/for longer periods than boys. H is really into singing though her songs are often a mash-up of ABC’s, Twinkle Twinkle Little Star and Wheels on the Bus. If someone sings with her, she can stay with one song. If she is singing solo, all the songs come up at one point or another during her performance. I appreciate that H’s parents have provided all sorts of toys – she has trucks, tractors, blocks, baby dolls, and stuffed animals. I tried to do the same with my kids and in fact, have the silliest picture of my oldest son (at 2 years old) trying to nurse his baby doll when his baby brother came along. Pretend play should be widespread and include all sorts of imaginary ideas and props.

There are also tons of art supplies in this house. It has been fun to spend time with markers, paints and crayons with H this trip. There was a large cardboard box downstairs and she discovered it made a great ‘vibrating noise’ when she scribbled on it. This was a great activity to do with her one morning last week.

Do A Dot Markers – No mess and they last forever!

One of the best art supplies in the house are this set of Do A Dot Markers. I think these were a gift from Santa this year. They are filled with washable liquid and have a little sponge on the top. If the lid is left off and the bottle is laying on its side, there is no leakage. They don’t dry out like other markers. Just give it a shake and press it on the paper a couple of times to wick the liquid back into the sponge at the top.

They also have little textured grips on each side making it easier for younger children to use them. It is very easy for kids to be ‘successful’ artists with these markers.

Pressing the marker up and down creates dots which are really fun. To use them like a paint brush or marker, the child presses down and drags them. The colors are vibrant. Anyway, no affiliation here, this grandma just highly recommends them!

This week I also did some sewing (of course!!) I made a little oven mitt for H. She loves to help cook and has been wearing mama’s huge silicon mitt while I am in the kitchen and then walking to the oven and warning me, “hot Grammy, too hot”. So she now has her own small oven mitt with kitties all over it!

I used a tutorial from IkatBag. There are so many really fun crafty projects on this website. I couldn’t figure out how to get my laptop to print on the printer here so I ended up just drawing out a little mitt and using that for the pattern. There is a layer of lining, fusible Pellon, and the outer layer. Both fabrics were fat quarters from Jo-Ann’s. I made the usual sandwich of inner and outer fabric and the batting, then quilted on the diagonal to hold the layers together. They were stitched right sides together and I did a zig-zag stitch around the edge to control any fraying.

Before turning it right side out, I clipped the curves and especially the slight V between thumb and mitt. The binding had to be stitched by hand both inside and out. The opening is too small to easily stitch it on the machine. H loves it and that is all I need to see!

My other projects for last week included a table runner for my DIL – her birthday is coming up next week so this will be a nice project to leave her for her when she gets back home. Also got the Squared Away quilt top stitched together. I will take pictures and share these later this week. Sewing plans for this week include a red satin cape for H to pretend with and more four patch blocks for the memory quilt I am working on.

Looking out the window, the blue skies make it seem like I should go take a walk but it is only 10 degrees out. Maybe when it gets to a toasty 15 degrees, I will venture out with the dog! Hope everyone is enjoying the week. Make sure to find a little time to create something!

Meet Turtle

Here is another project I made this week. This cute turtle was made with the free pattern, Myrtle the Purl Turtle, from Purl Soho. What a fun tutorial this is.

The shell is a piece from Flea Market Fancy by Denyse Schmidt. I love this fabric and have had it on the shelf for a bit now. I used a linen blend by Andover (available in my shop) for the head and the tops of the feet (or are they paws?) The linen adds a great textural component. Along those lines, the wool felt used for the belly is so soft, adding yet another texture. Two black buttons were sewn on for the eyes. The pattern doesn’t include a mouth. I thought about it for a bit but didn’t come up with a way to add a mouth that I liked. So, eyes only it is!!

Putting the turtle together was really simple. Stuffing the turtle was another story altogether. I couldn’t get the seams at the feet and head stuffed to my liking. If I really packed in the stuffing, everything got really stiff and lost the cozy appeal I wanted. But when I loosened the stuffing these little creases developed. After playing around with it for a while, I opted for the creases and the softer stuffing.

Turtle makes a handy foot rest.

I was happy to see my grand daughter’s excitement when I gave her the turtle. She patiently watched as I sewed the eyes on and then she happily took ownership! I tried to get her to name the turtle but she is too young and just didn’t get it. She calls it Turtle and that is good enough for me.

Sweetest little toes ever.

If you haven’t tried making a stuffed animal, this is a fun one to start with. The joins at the neck are a little tricky but other than that, easy peasy. Thanks to Purl Soho for this fun pattern. They have several other cute stuffed animal patterns (a teddy bear, super cute bunny, penguin and a cat) on their site that I look forward to trying. If you have any stuffed animal patterns you’ve used, I would love to hear about it. Always looking for the next project, right??

Linking up with my favorites. Check them out at the top of the page under Link Ups.

Be sure to check out my shop this weekend where you will find a 20% off sale on ALL fabrics in the Clearance & Remnant section

First Project Done

The first week in Vermont has gone well.  My grand daughter changed quite a bit since I was out here over the holidays.  She is such a happy girl.  Her vocabulary has increased and now she can tell me all sorts of things.  Her favorite line is ‘My do it myself’.  Can you tell she is nearly two years old?  As long as she is given a chance to do whatever it is herself, she is satisfied and if she can’t complete the task, she is ok with being helped.  I am thoroughly enjoying her.  However, it is surprising how she can tire me out.  I relish her two or three hour nap each afternoon.

As planned, I have been doing a bit of sewing during nap time.  (also prepping dinner, making cookies, doing a little laundry  – remember how much was accomplished during those wonderful nap times?) So far, I have been making four patch blocks for the memory quilt I am making for my friend Susie.  Stitching those only holds my attention for so long.  To keep things interesting, I switched back and forth between that  project and making a little purse for H.

I used a free pattern designed by Pat Bravo called Saddle Bag.  It is a small purse which meant I didn’t have to cut it down. The strap was too long so it was shortened quite a bit. Overall, this is a very simple bag to make.

Bright lining peeks out from inside as well as a tiny pocket for treasures.

An interior pocket was not included in the pattern but I thought it would be a fun addition to the little purse. Who knows what treasures will be stored in this pocket!

The only complaint I have about this pattern is the directions for the shoulder strap. I have made many bags, probably a dozen or more, and they were quite a bit more complex than this little one. But the way the instructions explained attaching the strap was just strange. I couldn’t make it work. Finally after fussing around, I remembered this is for a two year old. She absolutely does not care about the way the shoulder straps are attached. Actually I could have used two huge safety pins and all would have been fine! I decided to just stuff them in on each side and top stitch them down. Works fine!

Owning up to my mistake.

There is a mistake though and I may as well point it out! The velcro closure I added is way (as in WAY) off center! I saw this and remembered, yet again, it’s for a two year old and it is a toy. She doesn’t care about this sort of thing. So, even though I had a seam ripper sitting right there, I just left it be. I sewed a button on for a little decoration and there you have it! A lovely purse sporting all sorts of frogs and butterflies!

Off to the grocery store with dad and a brand new purse!

Isn’t she adorable? Actually, they both are. She loves her purse but she usually calls it her diaper bag. I wondered aloud why she said diaper bag instead of purse and my son explained that his wife hasn’t really been carrying a purse. She tends to throw her wallet into the diaper bag so she has just one bag to carry. This makes perfect sense. It is a diaper bag now!

I feel so lucky to have this long stretch of time in Vermont. When I was packing for the trip I was a bit concerned about the cold weather. Fortunately my son and DIL have tons of cold weather gear. It has been a surprise how much the right difference wearing the right gear makes. Today we took two walks. H really loves to be outside so I try to make it a point to be sure she gets to play outside every day. Today it was 16 degrees out and not a problem. She looks adorable with her snow suit on and her rosy cheeks. Of course I really miss Ray and Julia but this is a very special time for H and me. I feel like I am really getting to know her which is just a delight.

Linking up to my favorite places. Check them out at the top of the page, under Link Ups.

Grammy Time in Vermont

As I mentioned, I am going to be spending several weeks in Vermont.  My DIL is away for a 4 week seminar and I have the privilege of hanging out with H for a bit.  Of course, I had to plan for some sewing time. This girl is a good napper so I should have two hours in the afternoon to sew.  Luckily my DIL has a machine she loans me while I am here!

I brought supplies with me – most of which are duplicates so I plan to just leave them here. That way I know I will have the basics when I come to visit. (Thanks Wendy for the great idea!  Up to now, I have been carting them back and forth with each trip.) I think I may have been a bit over-zealous when planning projects but I wanted to have choices!

I plan to make this cute turtle for H.  I thought she would enjoy helping me stuff it when I get the body made.  The (free) pattern is by Purl Soho and can be found here.  I think the Denyse Schmidt print will be so cute for the shell and I have some Andover linen blend for the hands, feet, head and tail.  Wool felt will be used for the tummy.

I also brought a stack of blocks I made last year during the Squared Away BOM hosted by Mari (Academic Quilter). I started this but didn’t finish it.  I do have thirteen blocks though and Mari suggested I just alternate them with a neutral fabric to make a quilt.  I think this looks great!  I need to square the blocks and then will stitch the quilt top together.  It will need some borders but that can wait until I get home.

This pile of scraps is the leftovers from my Twisted quilt.  Some of them are already stitched together and need to be squared but many (MANY) of them need to be stitched and squared.  I am excited to get this done because I think it will be fun to use these somehow.  Maybe a baby quilt or a springy floral mini?  The majority of the fabrics are Kaffe Fassett and it will be fun to have these to play with.  First I need to get through the tedium of squaring them all up though.  Have to pay to play, right?

Other than Myrtle the Turtle, this is probably my top priority.  I posted this picture on Instagram two weeks ago.  My friend Susie lost her husband to lung cancer in September 2018.  She is ready to deal with his clothes now and asked if I would make a memory quilt.  Of course I am happy (honored actually) to do this for her.  I have cut the shirts into four inch squares.  Some of the shirts were kind of thin but she loved them and wanted to include them. I reinforced them with a very light weight interfacing and I think they will work fine.  We looked at patterns and she chose a simple patchwork. I am doing four patch blocks and sashing them with a neutral, low volume fabric in a creamy off-white. She also gave me two photos she had printed on fabric of the two of them. Those will be incorporated as well.  I am hoping to get the four patch blocks stitched up during the trip.

I know, this is sort of ridiculous but I have one more project.  A while ago, Sarah of Sarah Goer Quilts sent me these sweet fat quarters during a book share I hosted.  I love them and thought they might make a cute purse for H to have.   There is a tutorial here, created by Pat Bravo.  I think it will be perfect though I plan to reduce the size a bit.

What do you think?  How much of this will happen during nap time over the next three weeks?  It’s anybody’s guess!  But I look forward to sewing when not playing with H.  She is such a cutie pie and we have lots of plans.  There are tea parties to enjoy, the children’s museum to visit, and maybe a trip or two to the library. Such is life while visiting in Vermont!