I treated myself to a new book last week. I love it. Written by Christina Cameli, it is full of simple ideas for free motion quilting patterns. Christina blogs over at A Few Scraps and I have been following her for quite some time. She creates such lovely quilts and her blog is filled with great information. The patterns in this book are based on common shapes like circles and wavy lines. She then expands on those shapes, creating many different free motion shapes.
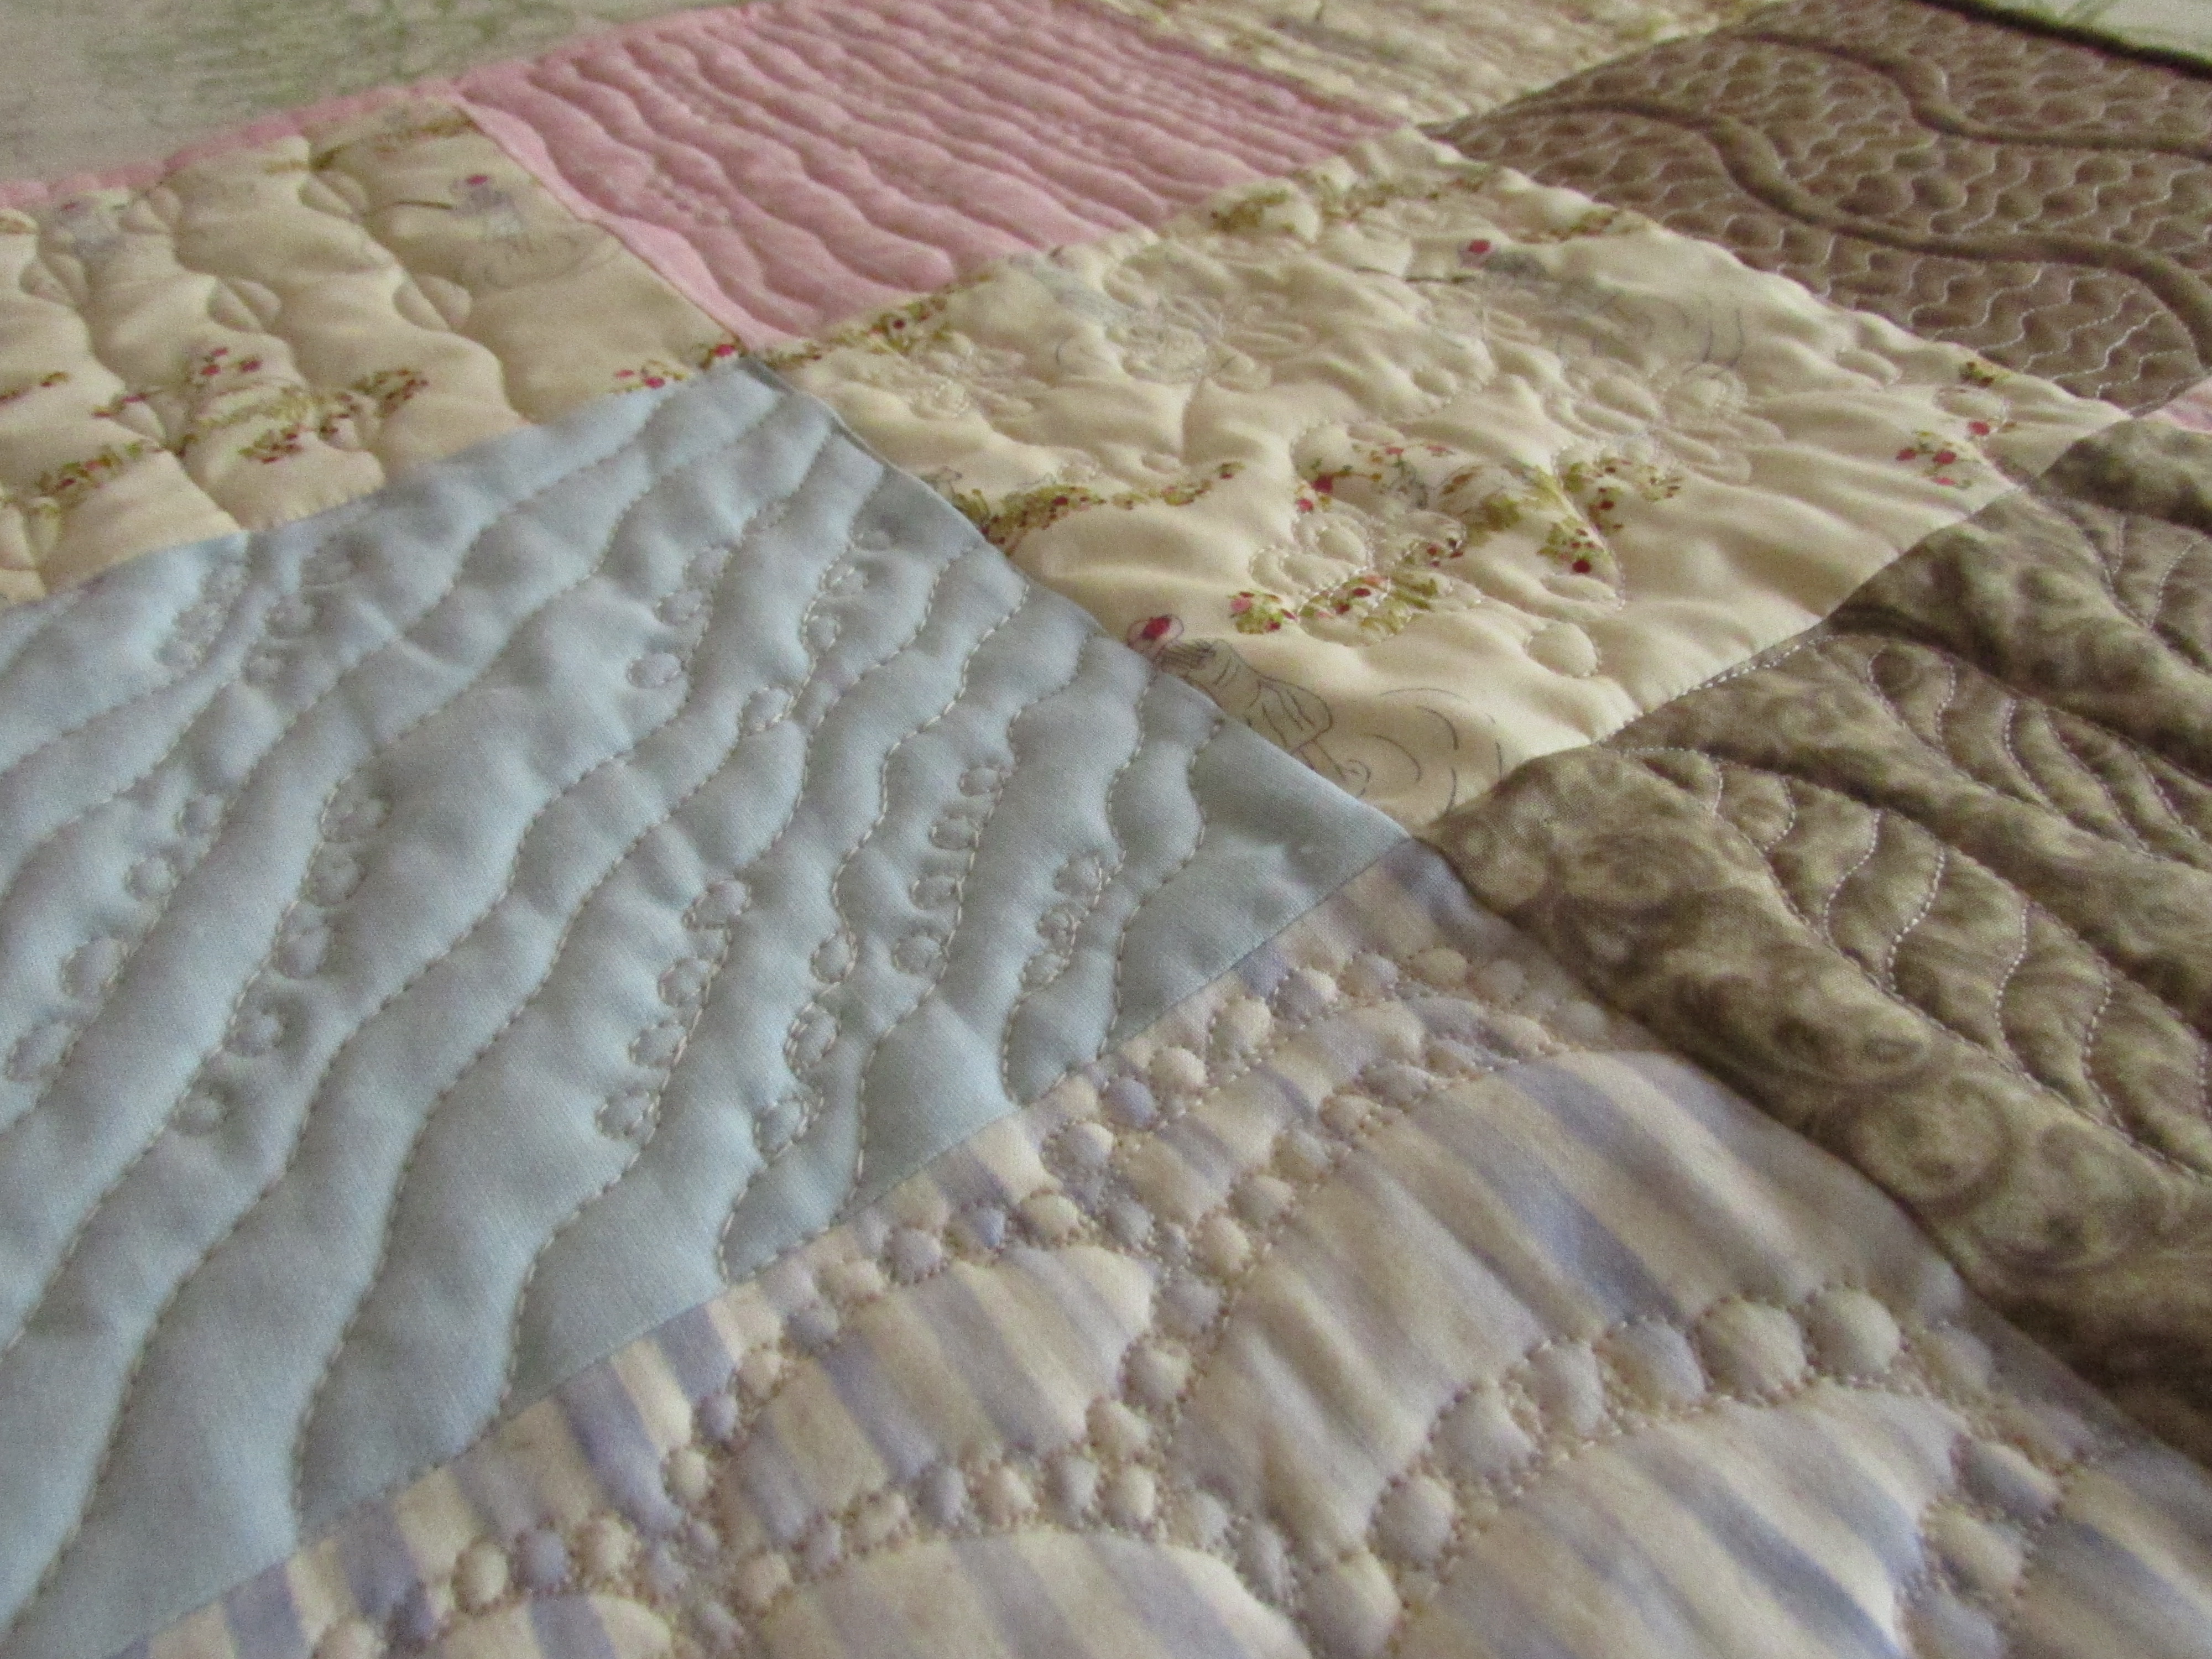
When I first got the book, I started to doodle and draw shapes on paper. Some were really easy, others weren’t. Once I got the hang of doodling the designs, I wanted to practice with actual thread! I made a simple nine patch block, using 6.5″ squares. I thought I would quilt each square with a different pattern.
The quilting is far from perfect but I really enjoyed playing with this. The stitches are fun.
Both of these flower patterns were fun to stitch.
My favorite stitch so far is the one below. I will definitely use it in a project. It is a bit time consuming but I like the effect.
My only disappointment with the book is a minor one. I had hoped there would be some discussion of how to integrate some of the patterns together. She doesn’t touch on that. I know that is a strength of hers as she is great at using all sorts of patterns together. I was looking for some information on that but it isn’t included in the book. Overall, the book makes it so fun to practice because the patterns are broken down into easy steps. I highly recommend it if you are in the market for a little FMQ practicing!!
Linking to Crazy Mom Quilts, Confessions of a Fabric Addict, and Freemotion Mavericks. Links to these sites are always available at the top of this page, under Link Ups.
This has been a good week for sewing. I made progress toward my April goals for ALYOF. Which is a good thing, considering April will be over before you know it. The speed with which time passes seems to increase frighteningly each month. Anyway, it is April 23rd and I am over 3/4 of the way there. My goal was to make two table runners and either a wall hanging or runner. I wanted to complete three smaller projects this month. I finished the chevron table runner which I posted about last week.
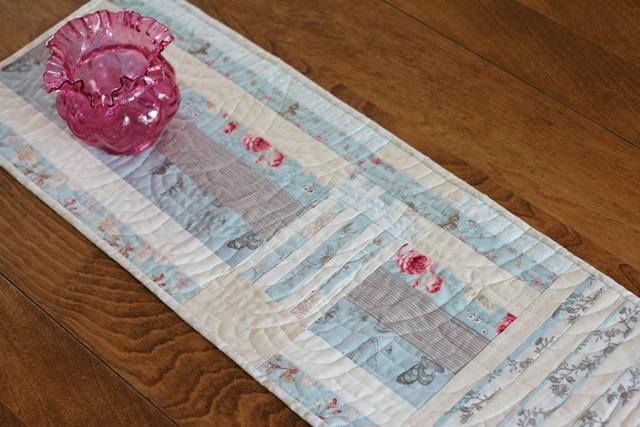
This week I completed the second table runner. The process I used was new for me and was inspired by the way that Victoria Gertenbach at The Silly BooDilly works. I started reading her blog and looking at her style over the past couple of months. She is a modern quilter with a gorgeous sense of line and color. She quilts and does a lot of other work in fiber and paper art. I strongly suggest you take a look at her site as her work is lovely. One of the tutorials she wrote was about pattern-less design. She has developed a way of cutting a piece of fabric and then adding sections to it, thus creating her piece. I love the idea. While I didn’t actually follow her tutorial with this project (because it didn’t work with the fabric I had on-hand) I was surely inspired by her process .
About a year ago, I purchased a scrap bag from an on-line fabric shop. Sorry, I am not positive but I belive it was Alaska Quilting Adventures. I ended up with loads of strips, probably end cuts from the bolts as she was creating bundles of precuts. First I cleaned up the strips so they were (relatively) straight, though I did not cut them exactly the same width. Next, I sewed a set of them together to make a long rectangle of fabric. I cut that into three sections. I then played with more of the strips, creating blocks to add between the sections. Kind of hard to describe, but it was a very simple process. As I have mentioned before, I usually sew from a pattern or tend to copy other’s ideas for inspiration. This was very freeing. I want to try this again with a Kaffe Fassett jelly roll of shot cottons that I have. Here is the resulting table runner.
The colors are soft and soothing. I had fun creating the block in the center which has a bit of extra detail in the piecing.
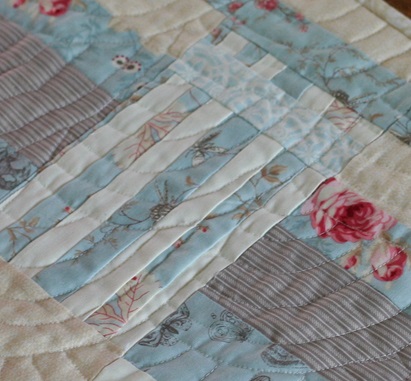
When I was ready to quilt it I decided to use something with curved lines to offset the straight lines of the piecing. I chose the Baptist Fan pattern. I had not done this before so I drew it on newspaper with a sharpie until it was comfortable and then sewed a few fans on a practice piece. It is really a simple shape to FMQ. I didn’t trace it on the runner before quilting. If I had, I am sure my lines would have less wobble.
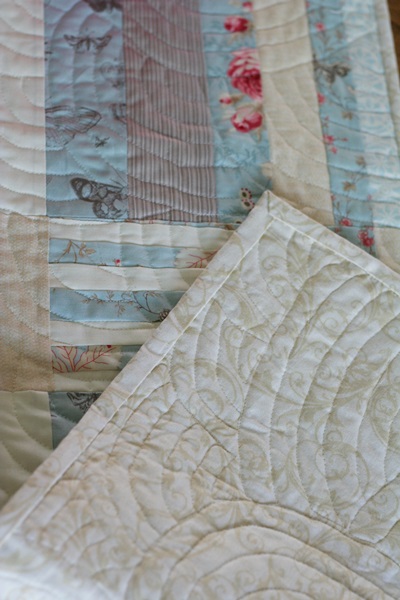
It is backed and bound with the same fabric. Not sure what it was but it used up some of my stash which is always a good thing. Overall, I am happy with the result and it was a huge learning experience, both in piecing and quilting. Yay!
The third April project I worked on is for my first mini-swap. This swap features fabrics by Allison Glass. I was really getting nervous about this project, doubting my abilities till I was just about stuck. I decided to start cutting fabric last weekend and just dive in. I chose the Fireworks pattern by Canoe Ridge Creations. She does a lot of mini quilt pattern design and I have several of her patterns. They are easy to use and her instructions are great. I have the blocks done and need to stitch them together. It should finish out at 24″ x 24″. The swap isn’t due to be mailed out until early June so I am way ahead of schedule. May is going to be a busy month so I’m glad to check this one off. (By the way, for those of you who have done swaps, do you usually put anything on the back for hanging, or is that up to the recipient to do that? Please leave a comment if you have experience here! I appreciate it. )
The colors aren’t showing correctly due to the poor lighting but I am happy with it. The blue in the third section out is much more vibrant than shows here. I really need better light in my sewing room. When this is finished I will take a picture outside. I am hoping to sew the blocks together later today and get it quilted next week. Of course, that leads to the perpetual questions, how do I want to quilt this? Most likely I will straight line quilt it with a narrow spacing.
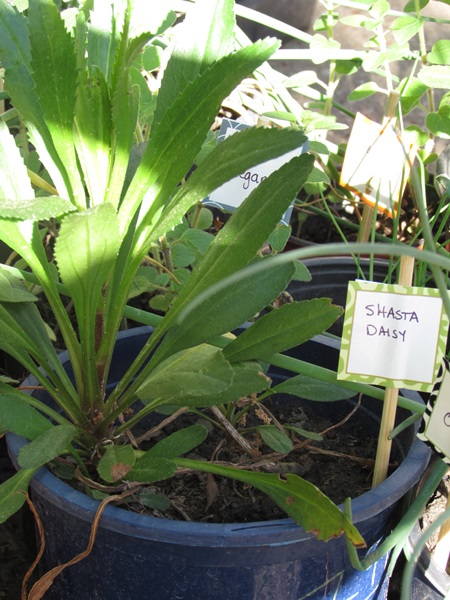
First though I have a garden swap to go to this afternoon. I joined a gardening group and we are exchanging plants from our gardens. About six weeks ago, I potted starts from my Shasta Daisies, Oregano, and Chives.
It will be fun to give these to the group and bring home something different. Hoping for plants that don’t require much in the way of water!
Linking to Let’s Bee Social, Needle and Thread Thursday and Crazy Mom Quilts. Links to these wonderful sites are at the top of the page, under Link Ups.
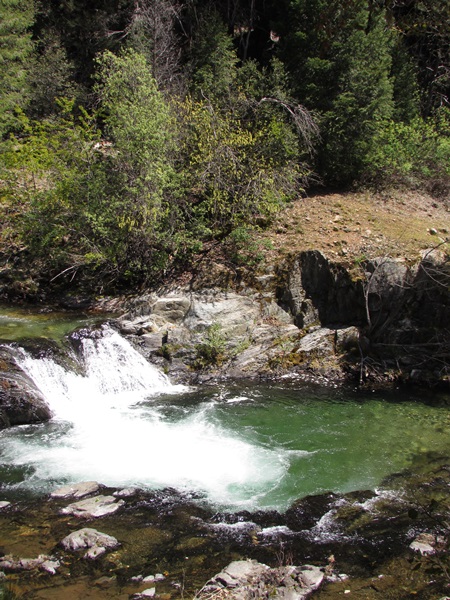
Crazy busy around here this week. We are definitely making progress on the house up in Downieville but it takes time and effort. Much more on Ray’s part than mine but still… On Wednesday I took a drive up to the house (it takes just over an hour’s time to get there) to let in a guy to finish the drywall. He textured the walls which took the better part of the afternoon. While he was working, I took advantage of some gorgeous weather and went for a hike. I was a little bit nervous about hiking alone. I don’t have cell reception and no one knew where I was going. I played it safe and didn’t go too far down the trail. I did find a new one though and the water was gorgeous. With the drought, the river is extremely low. Even so, it was breathtaking in spots.
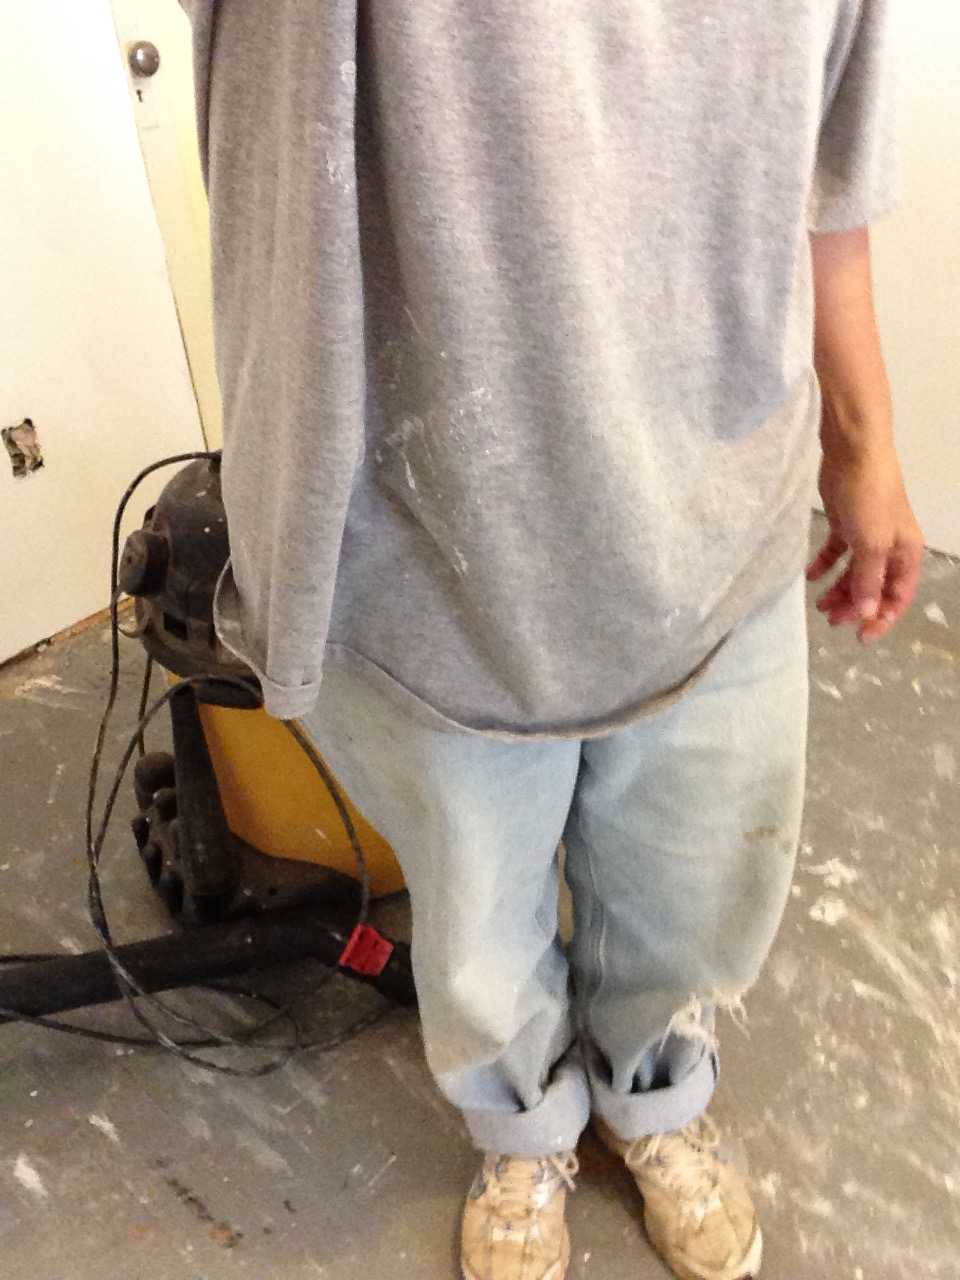
Spending the afternoon on my own up there was really nice. I haven’t honestly spent very much time alone. Four kids will do that to a person. When I got back to the house I was texting with Ray and sending progress pictures of the work being done. We decided I should spend the night so I could: 1.) Continue this alone thing that was going so well – and – 2.) prime the bedroom once the texturing dried. The only issue was that I didn’t bring extra clothes as this was completely unplanned (spontaneity isn’t my strong suit either, so this was a good thing for me to do!) My husband had extra clothes up there. He is a planner and is always well supplied with whatever he needs. I dug into his stuff and came up with a lovely pair of jeans and a tshirt of his to use for painting. Just as a point of reference, he is 8 inches taller than me and probably 80 pounds heavier. As long as no one came to the door, I was pleased with the look I was sporting.
I know, it was an amazing look. I got the room primed and ready for paint. We will go up later this afternoon and finish up the painting. One step closer to having a bedroom. Wahoo!
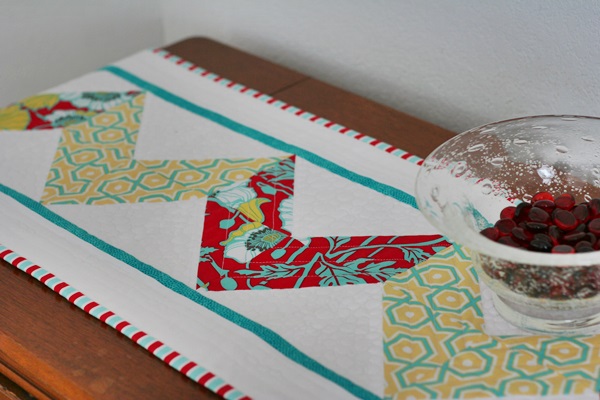
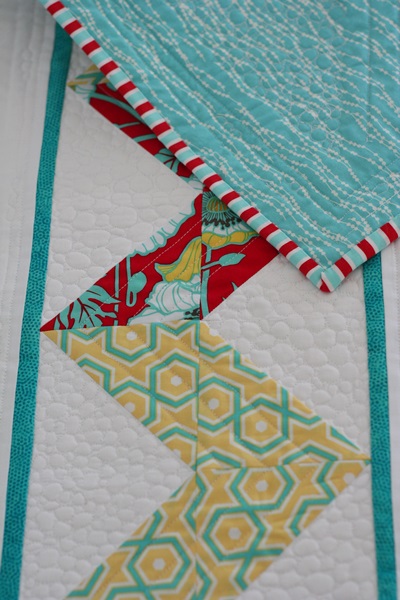
While all of this was going on, I did manage a quick finish. I completed the chevron table runner.
The quilting is inspired by an older quilt along on www.christaquilts.com. I reversed it though and pebbled the white sections and straight-lined the chevron. I didn’t want to pebble over the print fabric or it would have been too busy. The pebbling looks great on the white though. I combined the two stitches and ran some straight lines along the border with circles interspersed on those lines.
You might remember that the chevron fabrics are from a Joel Dewberry line. The backing is called Sphere, a part of Moda’s Zen Chic line. That was scored during a 50% off sale a while back.
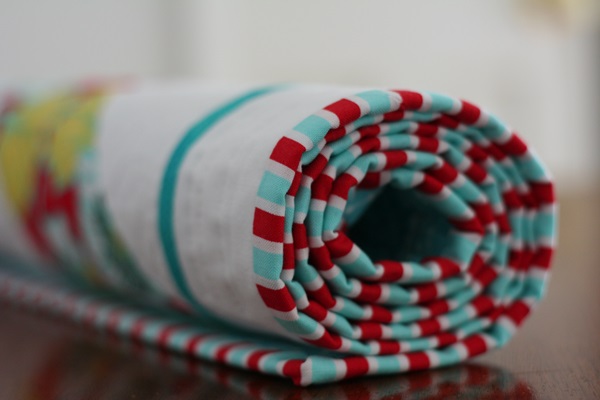
As usual, the binding is my favorite part. I used Daysail, by Bonnie and Camille. I love the stripes. I had originally planned to make a bias cut binding but decided I liked the standard cut better for this project. It is adorable; the blue and red stripe plays well with the Joel Dewberry prints. This is one of three table runners that I am making for my April goal for ALYOF. The second one is nearly done as well, so I am making progress. This table runner is listed in my Etsy shop.
Saturday is my 17th wedding anniversary. Time has flown by. We are celebrating in high style, because that’s the kind of couple that we are. The plan is to paint the bedroom and hopefully finish up some electrical work in there. Jealous, aren’t you? Enjoy your weekend, whatever the plan!
Linking to Crazy Mom Quilts and Let’s Bee Social, my two favorite linky parties. You’ll find these links at the top of the page, under link ups.
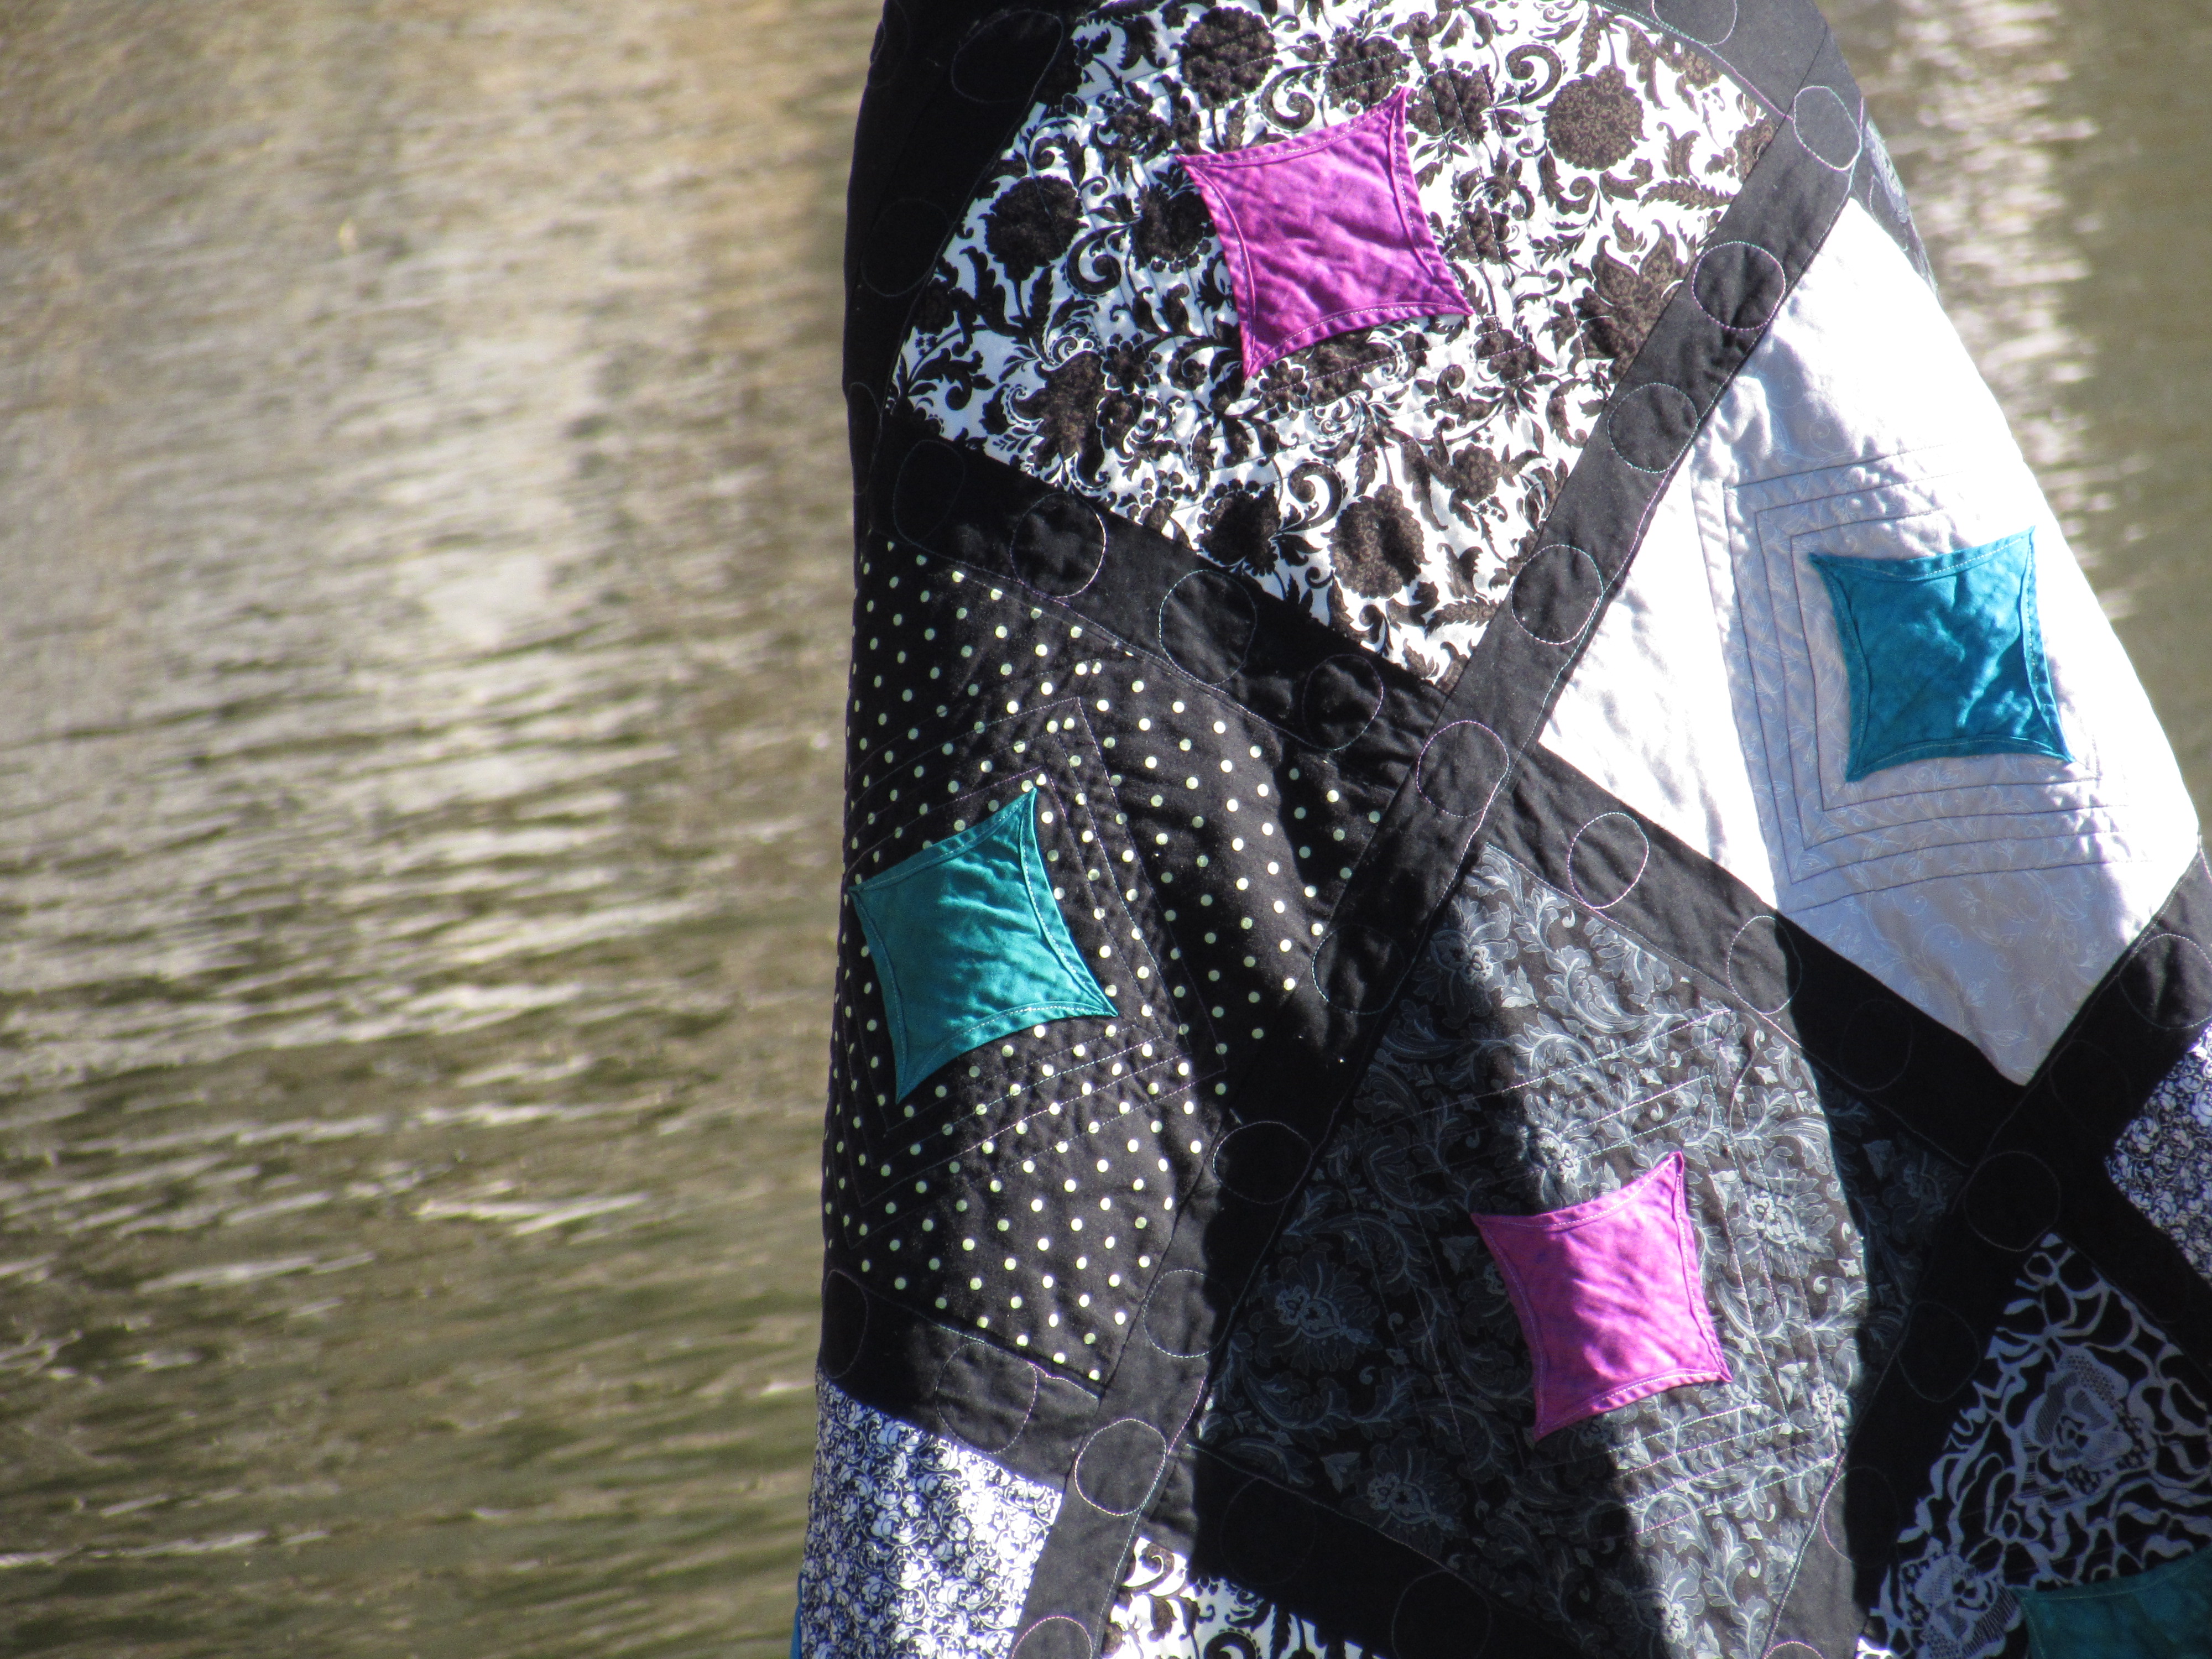
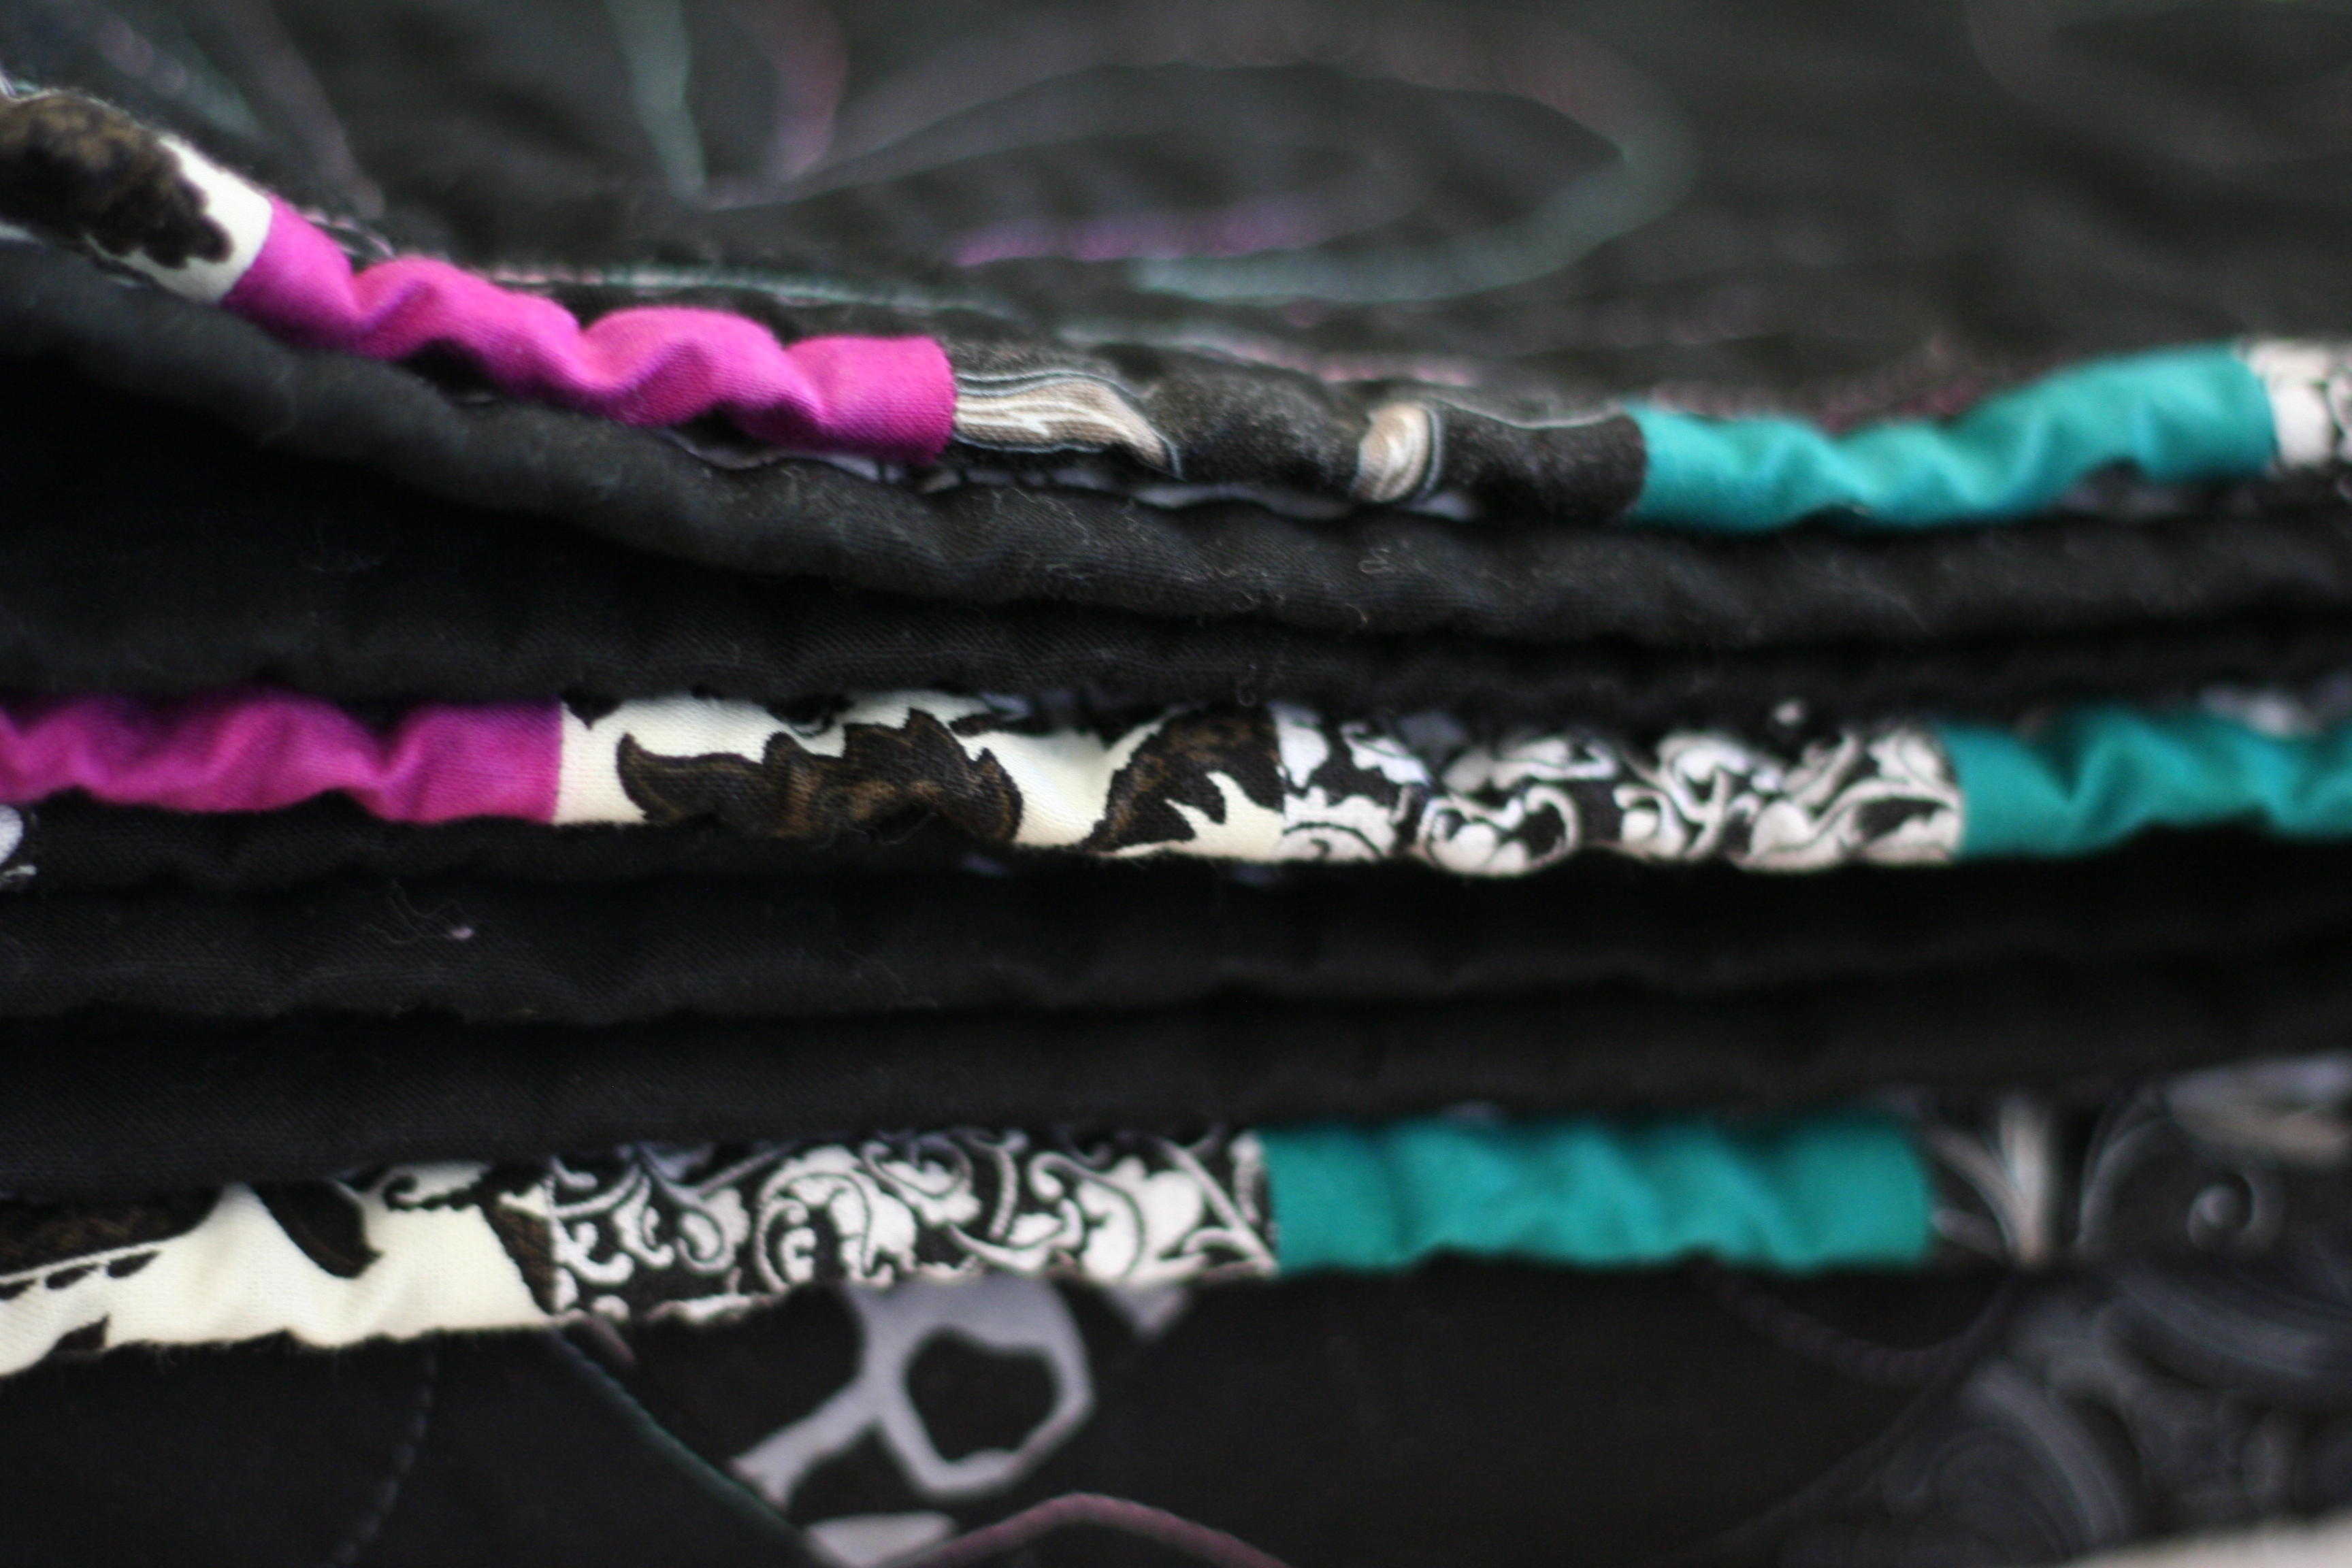
If you are unsure what ALYOF means, it stands for A Lovely Year of Finishes (a fun link up at Sew Bittersweet Designs where you set goals and see what everyone finishes up during the month). Let’s just says some are lovlier than others! I finished my quilt with the black and gray ten minute blocks which was my February goal for AYOLF. Finishing it feels good because I met my goal, but I am not thrilled with the finish. I didn’t like the blocks a whole lot from the get go. I set them on point, sashed them with black and used black for both the corner and setting triangles. Then I remembered that I hate quilting on black…. Ooops.
I have been really working on improving my FMQ skills. Want to know how to highlight the fact that you are not yet highly skilled at FMQ? Quilt with lighter colored thread on black – that will do it. I used a varigated YLI thread which matched the colors of the quilt very nicely. YLI has some heft and it is nice to sew with. It looked ok on the print fabrics. On the black, not so much. Oh well, live and learn!
The saving grace for this quilt, in my opinion, is the scrappy binding. I love a scrappy binding. I had actually gone to the LQS for fabric to bind it and couldn’t find anything so I decided to just bind it in black. Alas, I didn’t have enough black when I got home so I dug through all the scrap left from the project and made a lovely binding. To me a scrappy binding adds charm to a quilt.
Like I was saying, lessons learned…. if I were to be granted a “do-over” on this one, I would quilt it in charcoal gray (dark but a color I could see against the black). The stitching would look reasonable if it wasn’t so darn light. I am not at a skill level (yet) to highlight the stitching by using light colors on a dark fabric. Hard to post pics of your work when you aren’t really happy with it but this is the real deal. It doesn’t all turn out perfect. I am definitely done with black for a while. Luckily, my daughter loves the colors and she doesn’t give a hoot about the quilting. I had planned to use it as a donation quilt but I think this one will stay with us.
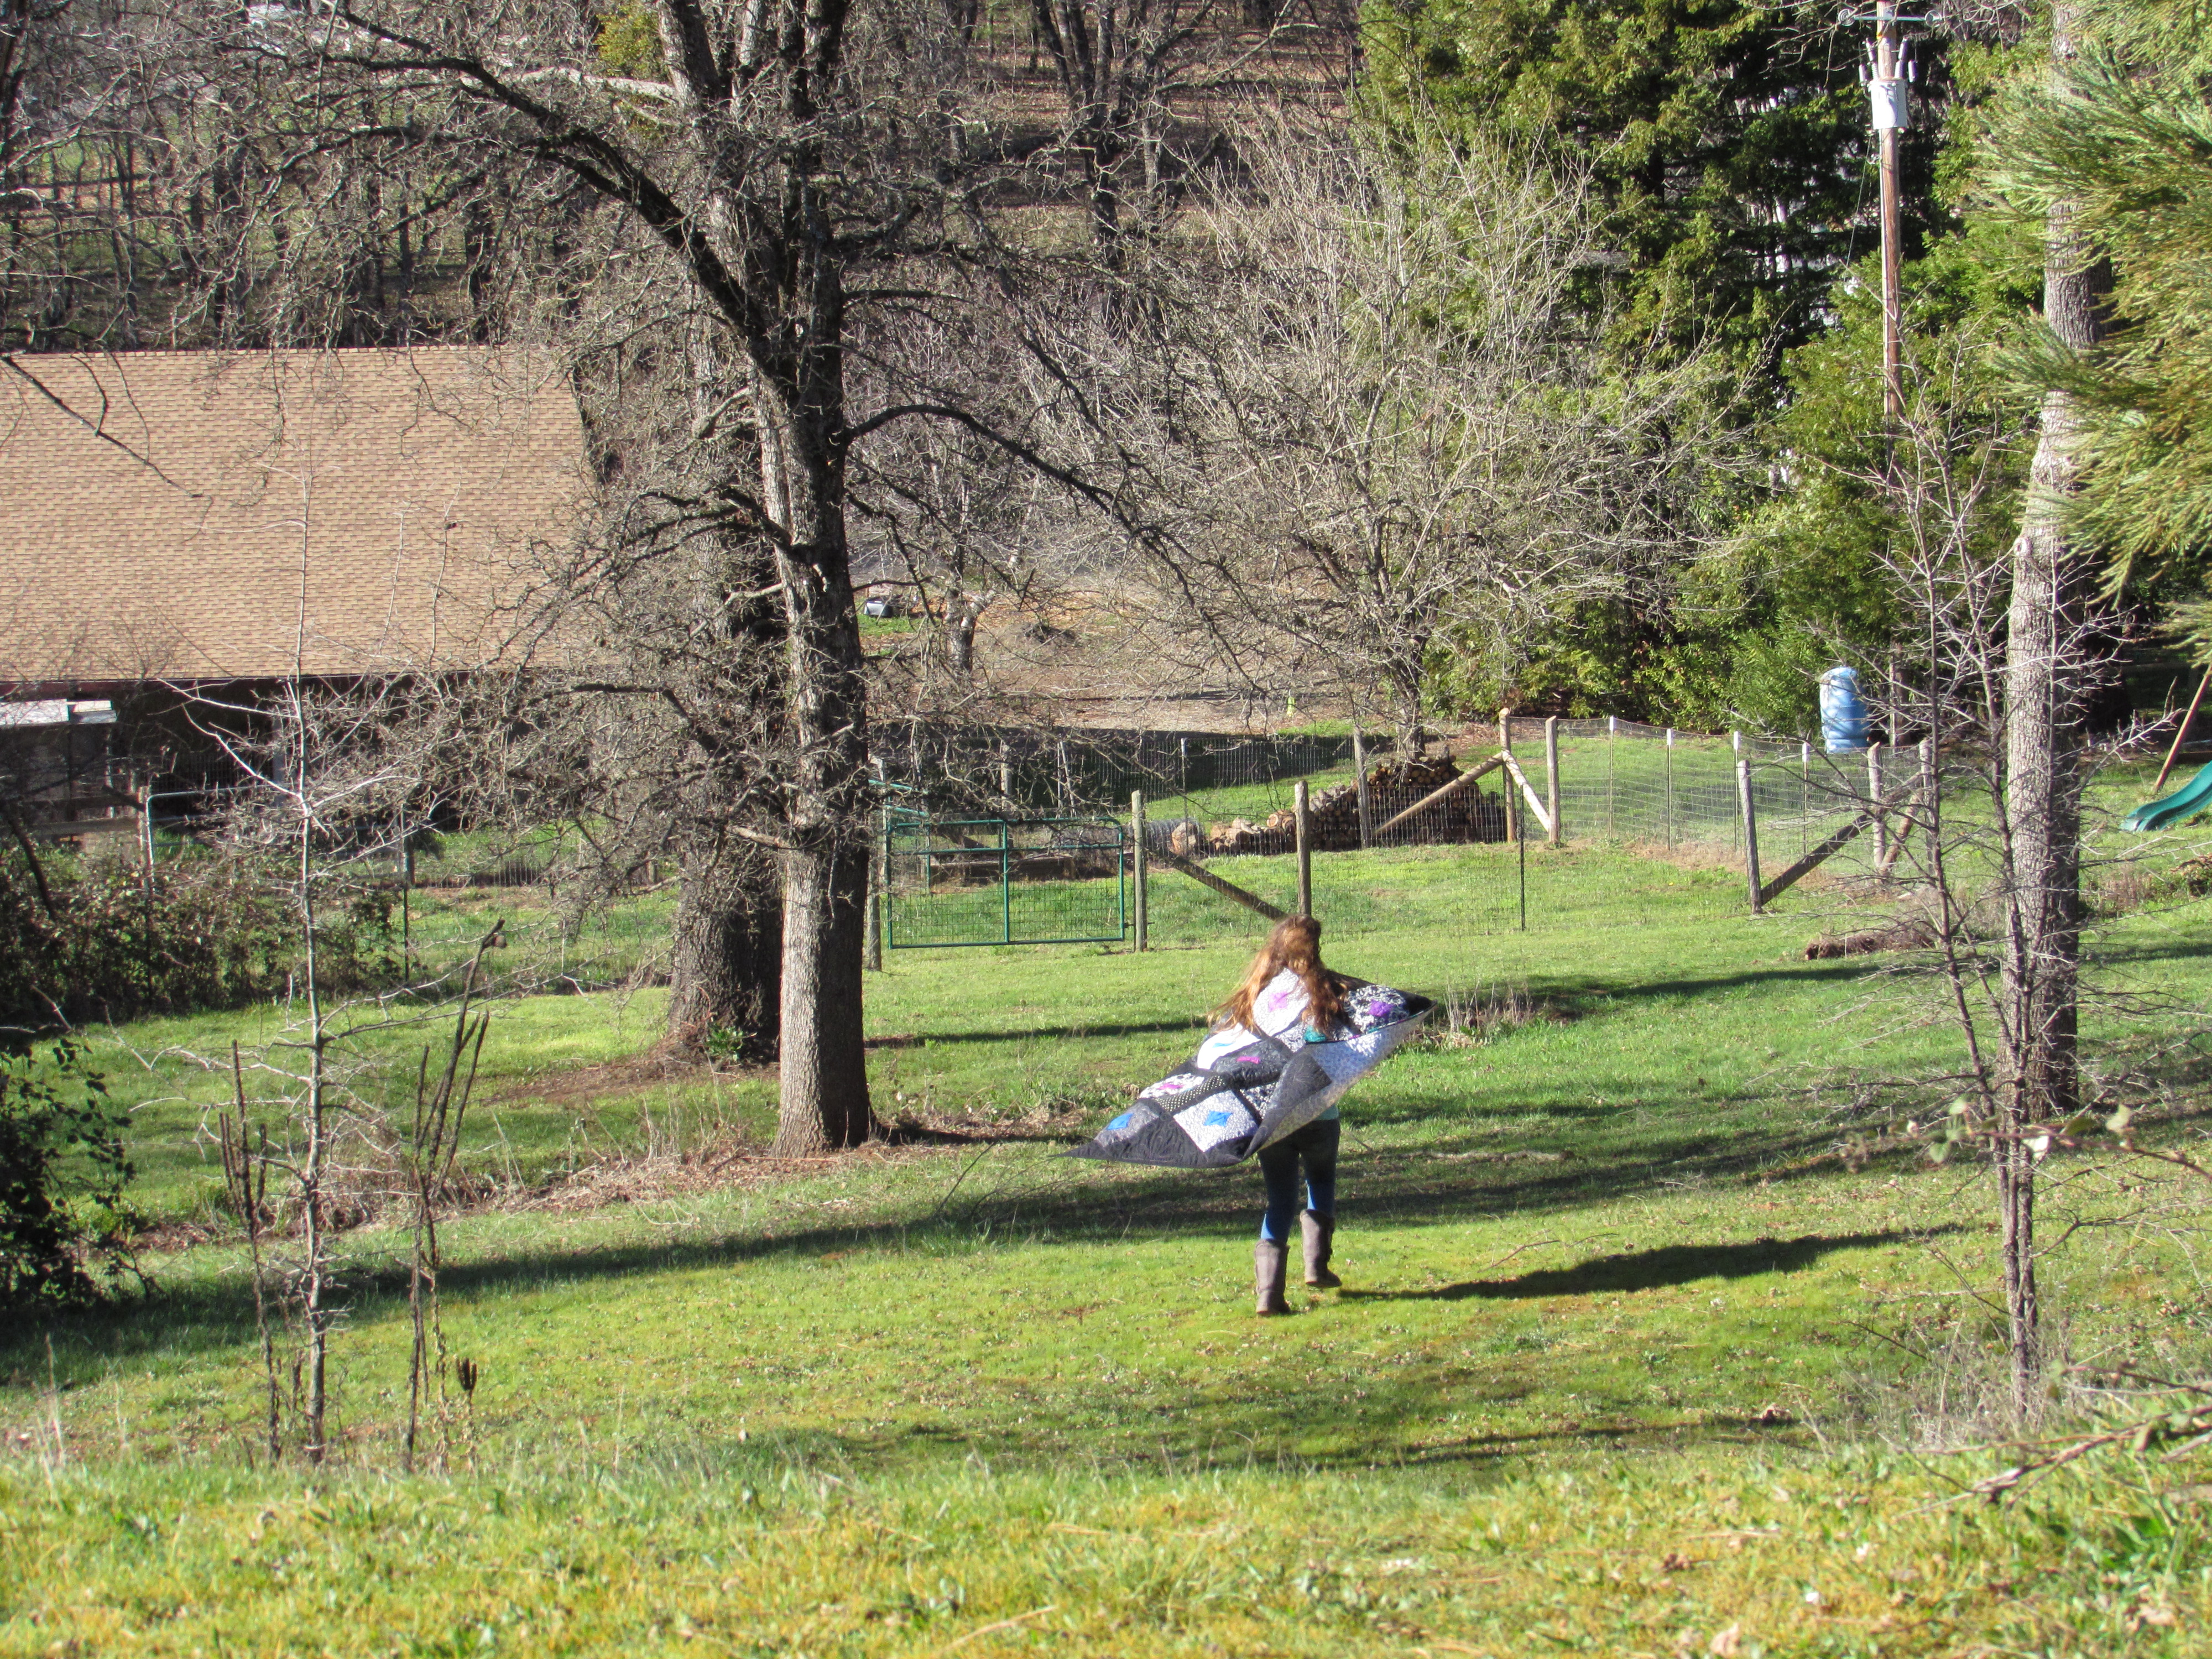
My daughter was my quilt model yesterday. My favorite pictures were of her running down the hill from our pond, back to our house. Put a cape on a kid, no matter the age, and they will run.
Hope everyone is having a good week. As usual, we are crossing fingers for a bit of rain at the end of this week. California has virtually NO snowpack which should make for a horrendous fire season this summer. I am hearing hints that there might be a tiny bit of snow coming our way this weekend. Please, please, please……
Linking to Sew Cute Tuesday, Freemotion by the River and Let’s Bee Social as well as AYOLF at Sew Bittersweet Designs. Links for most of these are at the top of the page under link-ups.
I live just far north enough that we get to enjoy a colorful autumn. Right now it is spectacular. I have lived in Pennsylvania and I know that what we enjoy here is not on par with the colors that splash the countryside this time of year in the East. However, we do have some really lovely leaves on display these days! This was taken in my neighborhood yesterday when I was walking the dog.
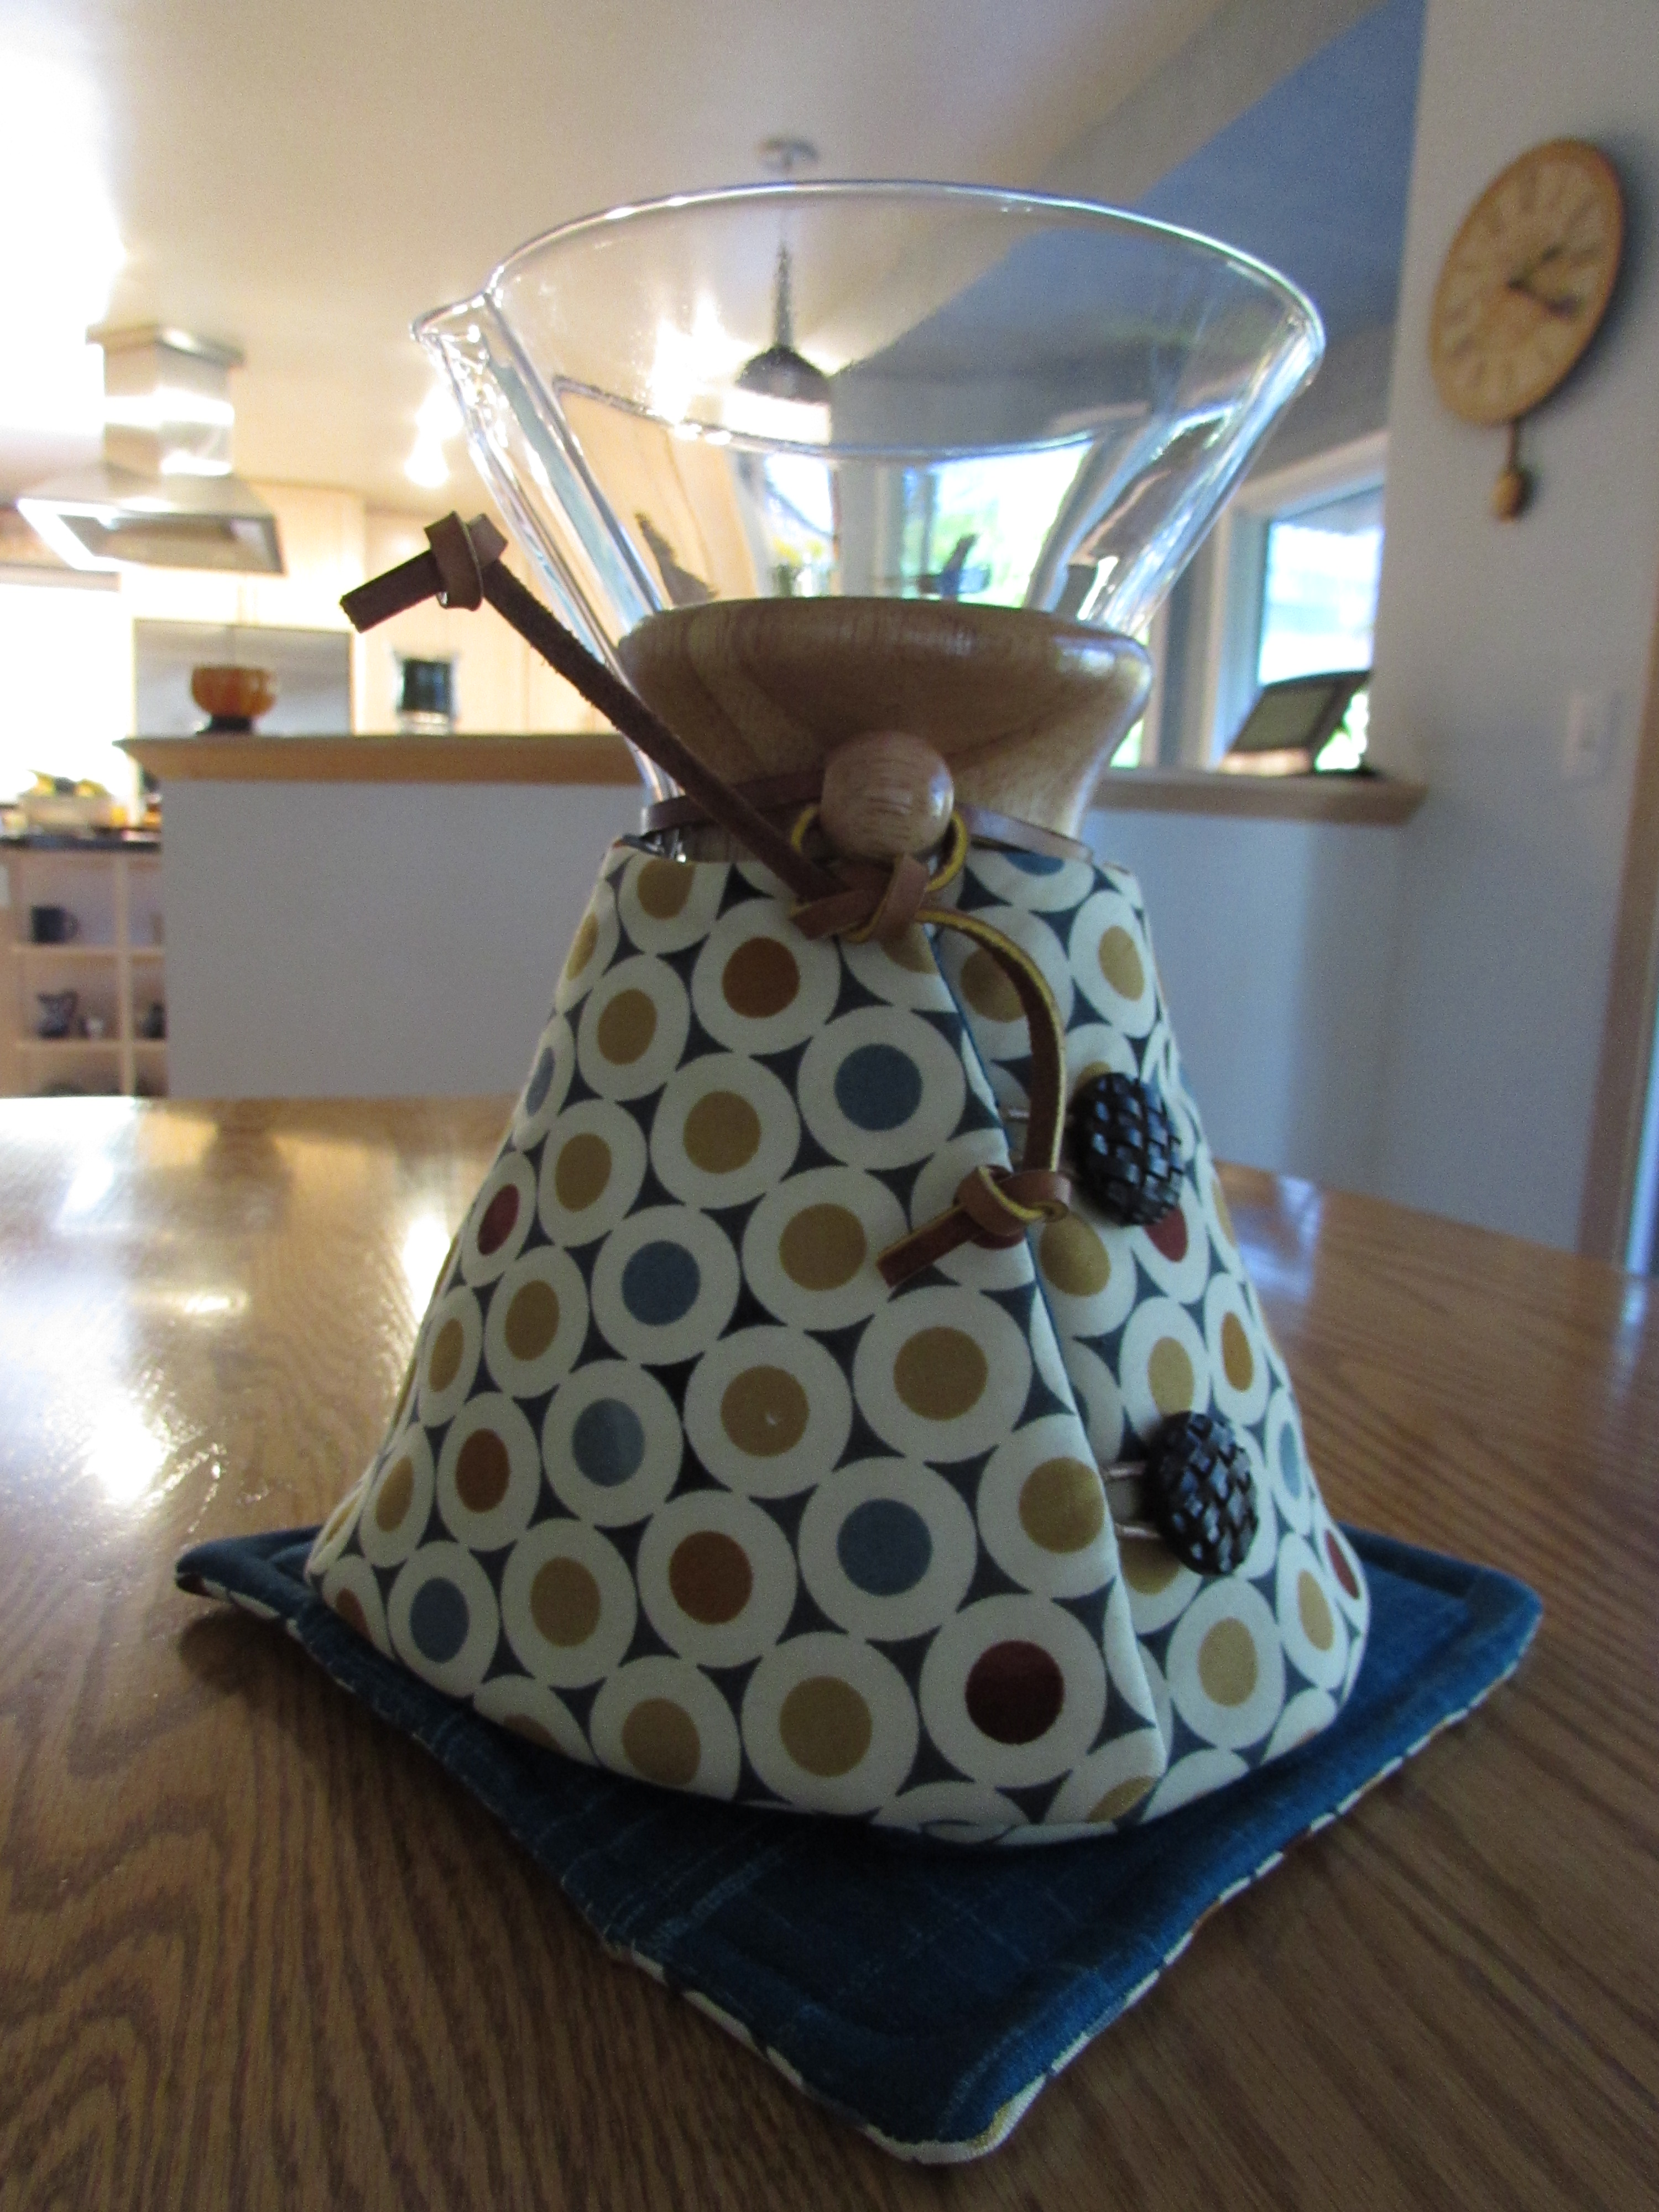
Ok – moving over to the sewing room….. I was really productive this week. For starters, I had a few sales in my Etsy shop which is always exciting. Now that fall has arrived, I have been selling the cozies that I make for Chemex coffee pots. If you aren’t familar with Chemex pots, they make the best drip coffee. However, because the pots don’t sit on a hot burner or stove, the coffee cools quickly. I have been making these insulated covers for a while now. With this mad rush – – on Chemex cozies, I figured I had better make a few more for my shop. These came together quickly. I have been cutting them in batches when I have the time and then sewing them sort of assembly line style. I love the fabric on this one.
Here is another one. I had purchased this home dec fabric to use as a tablecloth but the piece I bought was too small so I am using it here. Lovely!
As an aside, I was taking some packages (Etsy orders) to the post office to mail. When I was there I saw that I had estimated the shipping fairly closely for one and had overpriced one package for a couple of dollars (not quite $2.00) I sighed and was telling the postal clerk that I can’t always come close when I quote the shipping charges and I wasn’t sure if I should refund the overage. She knows me since I have been there regularly lately (benefits of small town life) and said I shouldn’t only consider the post office charge. She asked why am I not considering the time it takes to prepare the package, go to the post office, stand in line. “That’s the ‘handling’ part in shipping and handling.” Honestly, I never really thought about it and was always only charging for the postage. It made me feel better. This little Etsy shop has taught me a lot in the past few months. Very nice!
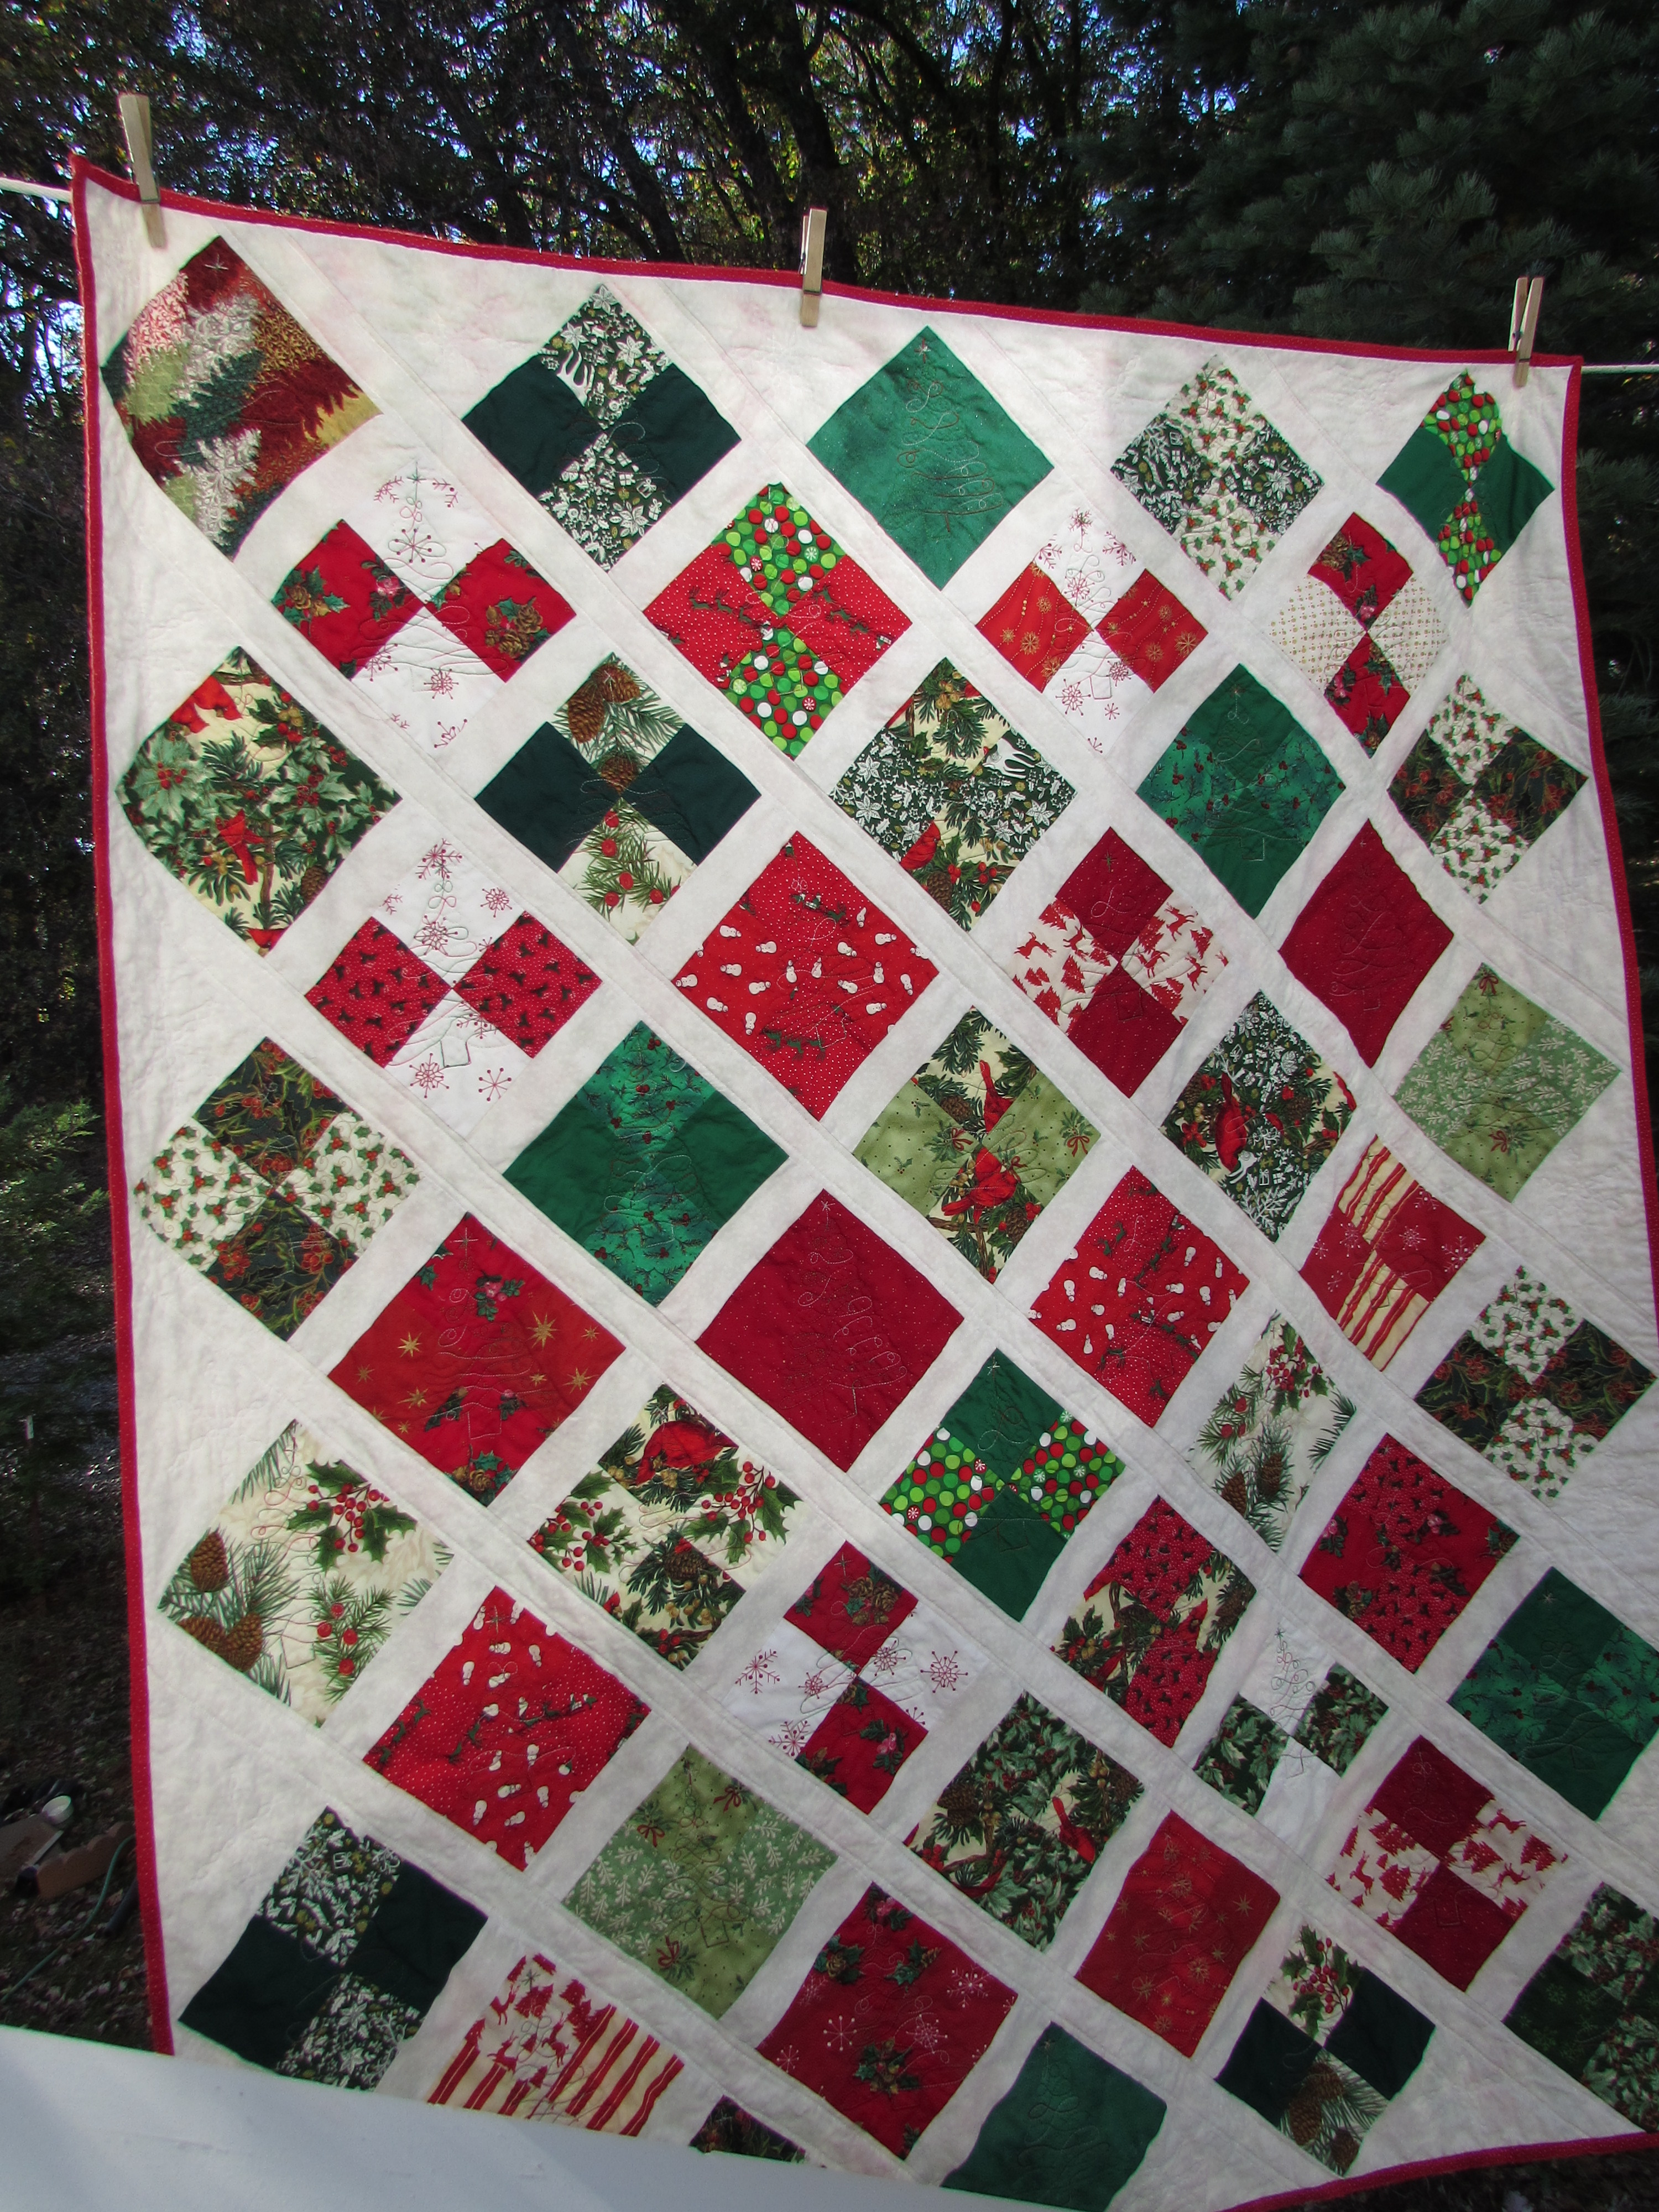
My main finish for this week is my Christmas Lattice Quilt. I finally finished quilting it and even got the binding sewn on. Yay!!
Overall, I am pleased with this project. I quilted it by free motion quilting a little Christmas tree on each block. As always, some turned out great and others, not so much! They were just free-hand, though I did use chalk and draw two guidelines forming a basic triangle to follow. They don’t show up all that well since some of the fabrics are busy prints. I also straight-line quilted the sashing.
On the setting and corner triangles I FMQ’d snowflakes. These were really fun – again just free hand. I’m very happy with how these turned out.
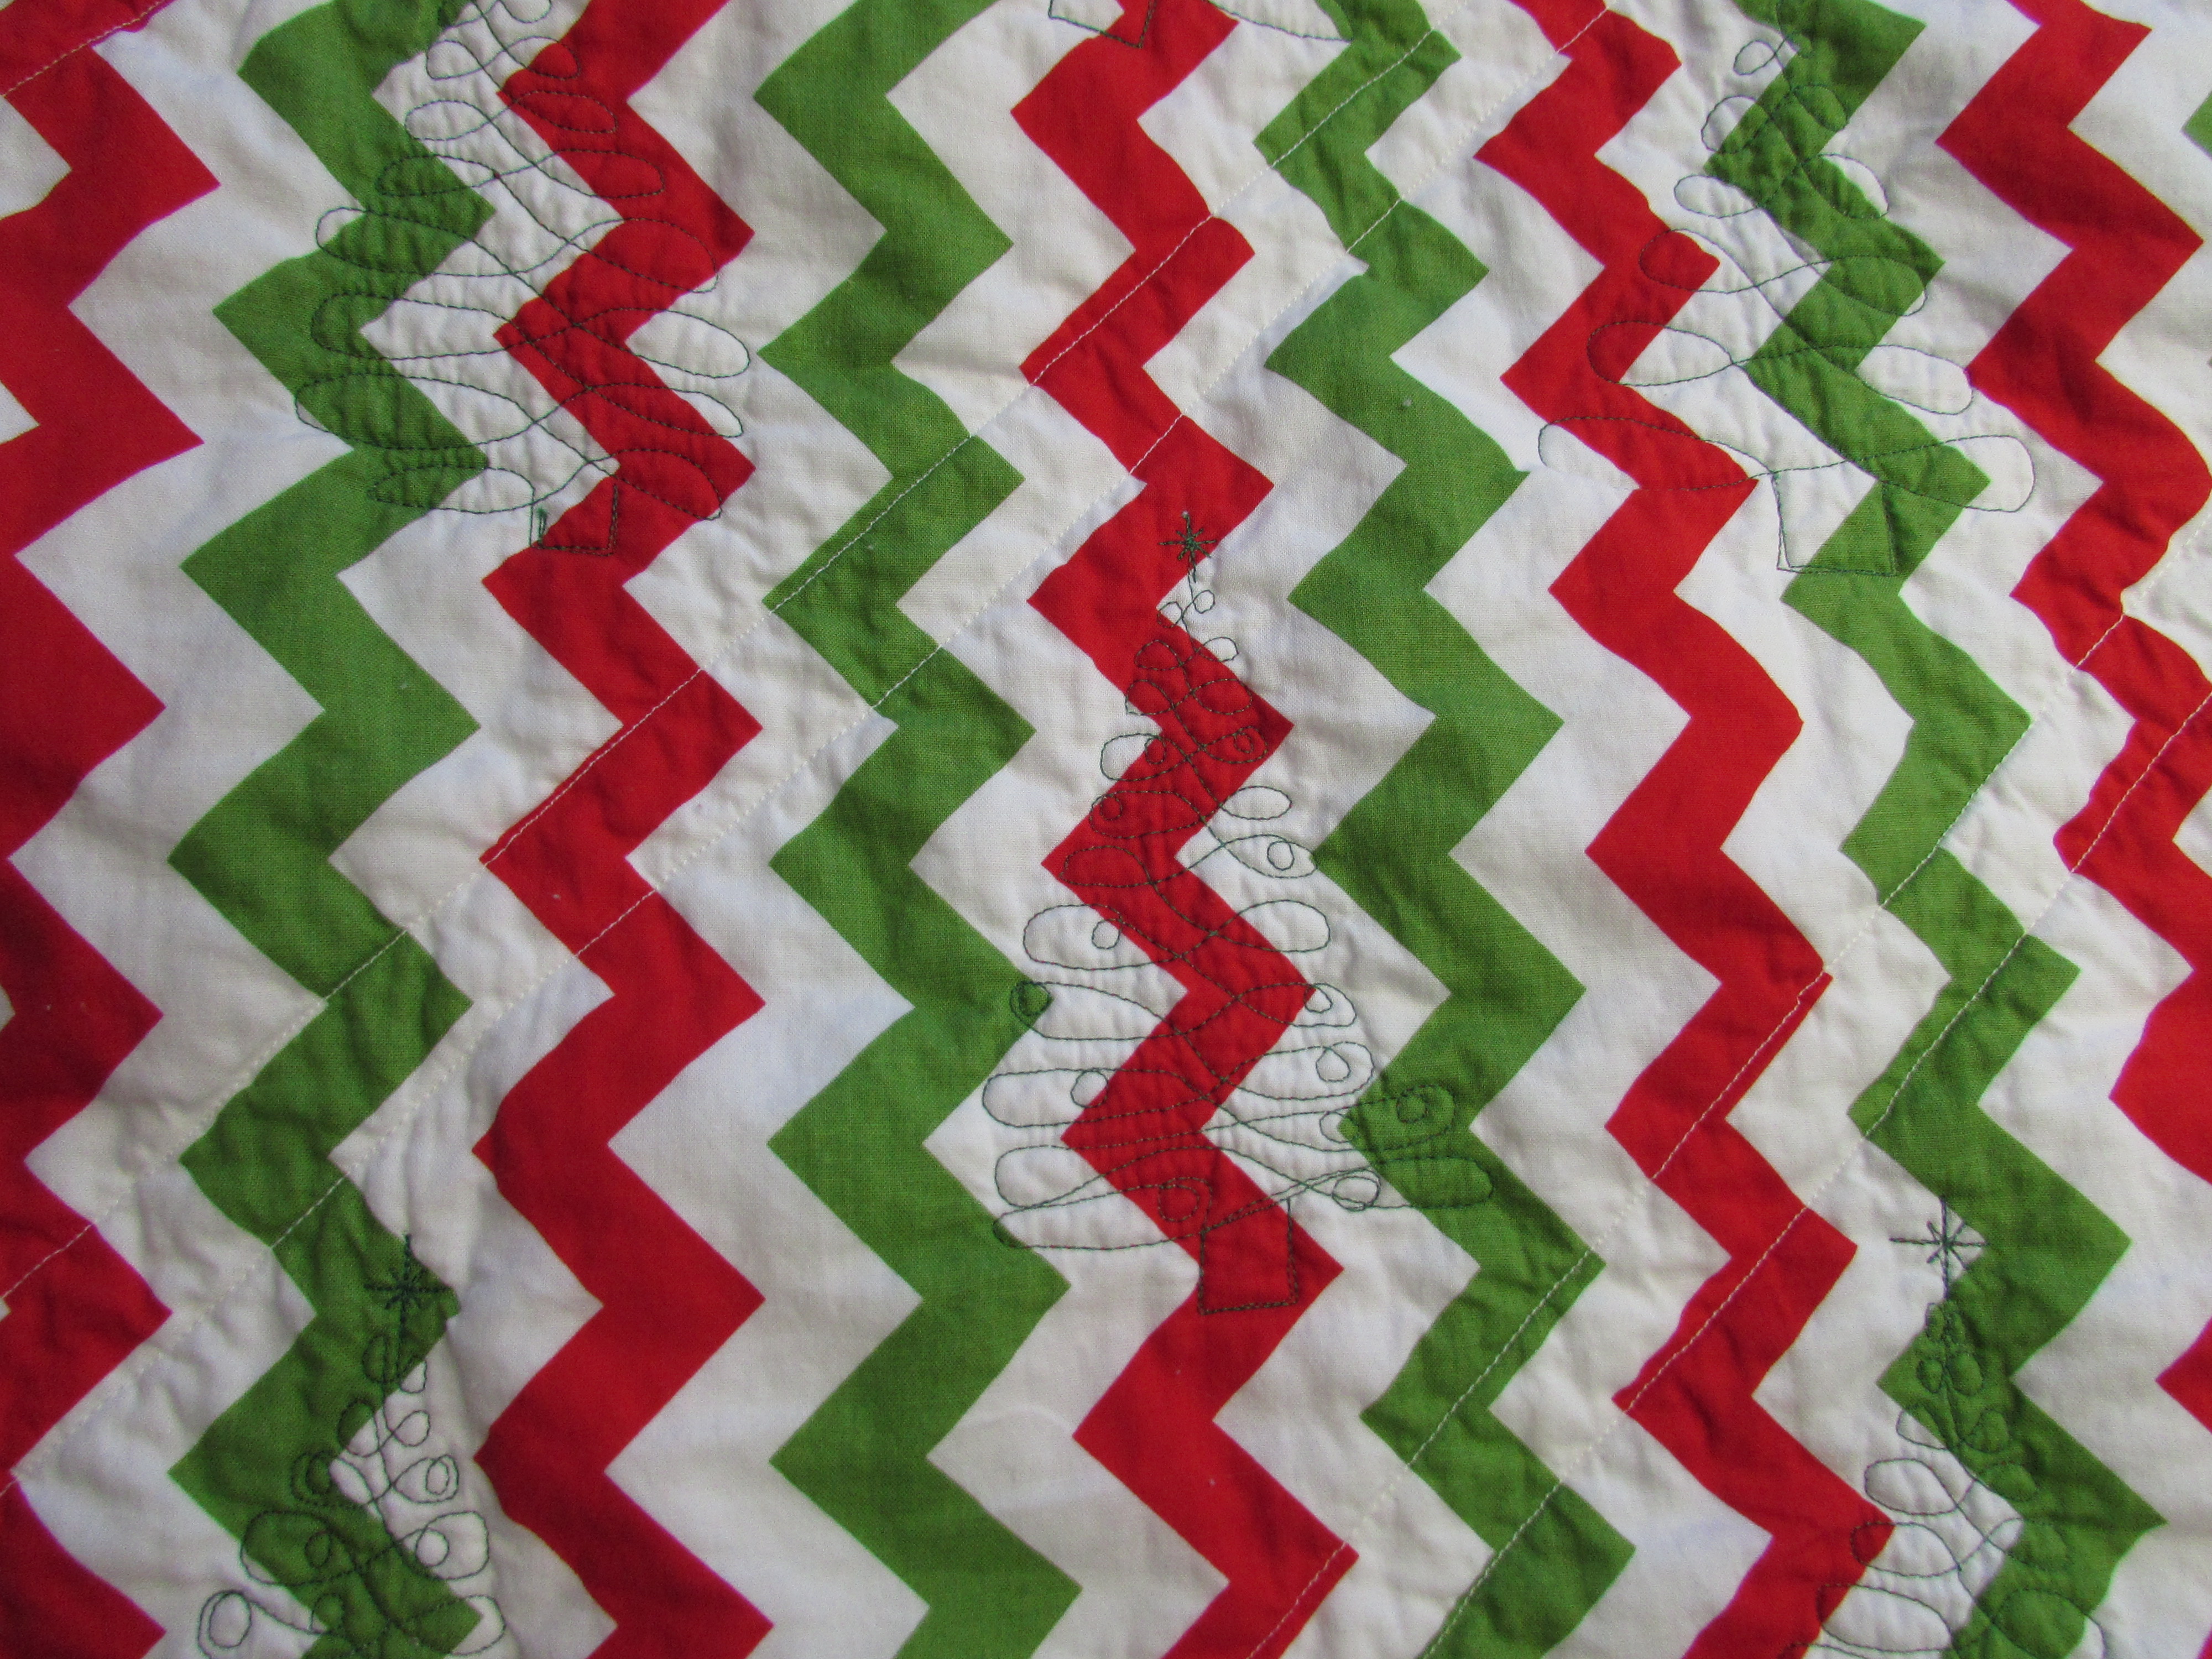
The front of the quilt is pretty. The back….. Yikes! With each project there are lessons learned, right? Let’s just say that this quilt should only be viewed from the front. I had a remnant of a red and green chevron print that I used as the backing. The trees look absolutely awful against the chevron. They don’t line up with the geometry of the print and the bright green thread that I (for whatever reason?!?) used in the bobbin looks, ummm…. horrid. I should have used white and maybe the trees would have been less noticeable on the back. At any rate, by the time I saw how poorly this looked, it was too late to change. So, when I am a world-famous quilter and all of my work hangs in a museum 200 years from now, they will look at this one and just wonder what on earth possessed me. Shudder.
I am really trying to finish all of my WIP. Much as I am dying to make a new quilt top I need to finish up what I have already started. I hate having things stacked up. Tomorrow I will make the backing for the 1600 jelly roll quilt top that I made at the beginning of October. Hope to at least start the quilting on that one over the weekend.
In closing, does anyone need a good book recommendation? I have read a few of the best books lately. Here you go:
Me Before You by Jojo Moyes. Excellent story with the best characters. Total tear jerker so have a box of tissues nearby. Basically the story is about a young woman who desperately needs work and finds a job as a companion to a very unhappy, cynical quadriplegic. There are some really funny parts as well as some very sad. No more details though as I don’t want to spoil the story. Great book though.
The Namesake by Jhumpa Lahiri is wonderful. Again, great character development. This is a story of a couple in India that marries as arranged by their families. They come to live in the US in the mid 1960’s and raise two children. The story follows their assimilation into America and that of their kids. The insights into their culture are so interesting. Loved this book – a really, really good read.
The Birthhouse by Ami McKay is a story about midwifery during the World War I era. The details are fascinating and the story is excellent.
What have you been reading lately? I would love to hear what is good and what’s not so great. Let me know! Have a great weekend all.
Linking to Let’s Bee Social, Needle and Thread Thursday, TGIFF, & Crazy Mom Quilts. As usual, links to all of these wonderful sites are listed at the top of my page, under Link Ups.


 The quilting is far from perfect but I really enjoyed playing with this. The stitches are fun.
 My favorite stitch so far is the one below. I will definitely use it in a project. It is a bit time consuming but I like the effect.


 – on Chemex cozies, I figured I had better make a few more for my shop. These came together quickly. I have been cutting them in batches when I have the time and then sewing them sort of assembly line style. I love the fabric on this one.