Yearly Archives: 2023

Central Coast for Spring Break

Ray and I just got back from five days with Julia in the California Central Coast. Usually Julia comes home for spring break but since this is her ‘last’ one, we decided to enjoy it with her in California. The three of us had such a nice time together. Much of our time was spent beach combing with Julia and Ray looking for rocks and me hunting for beach glass. The shores in Morro Bay did not disappoint. We left with our pockets bulging each time we walked there.

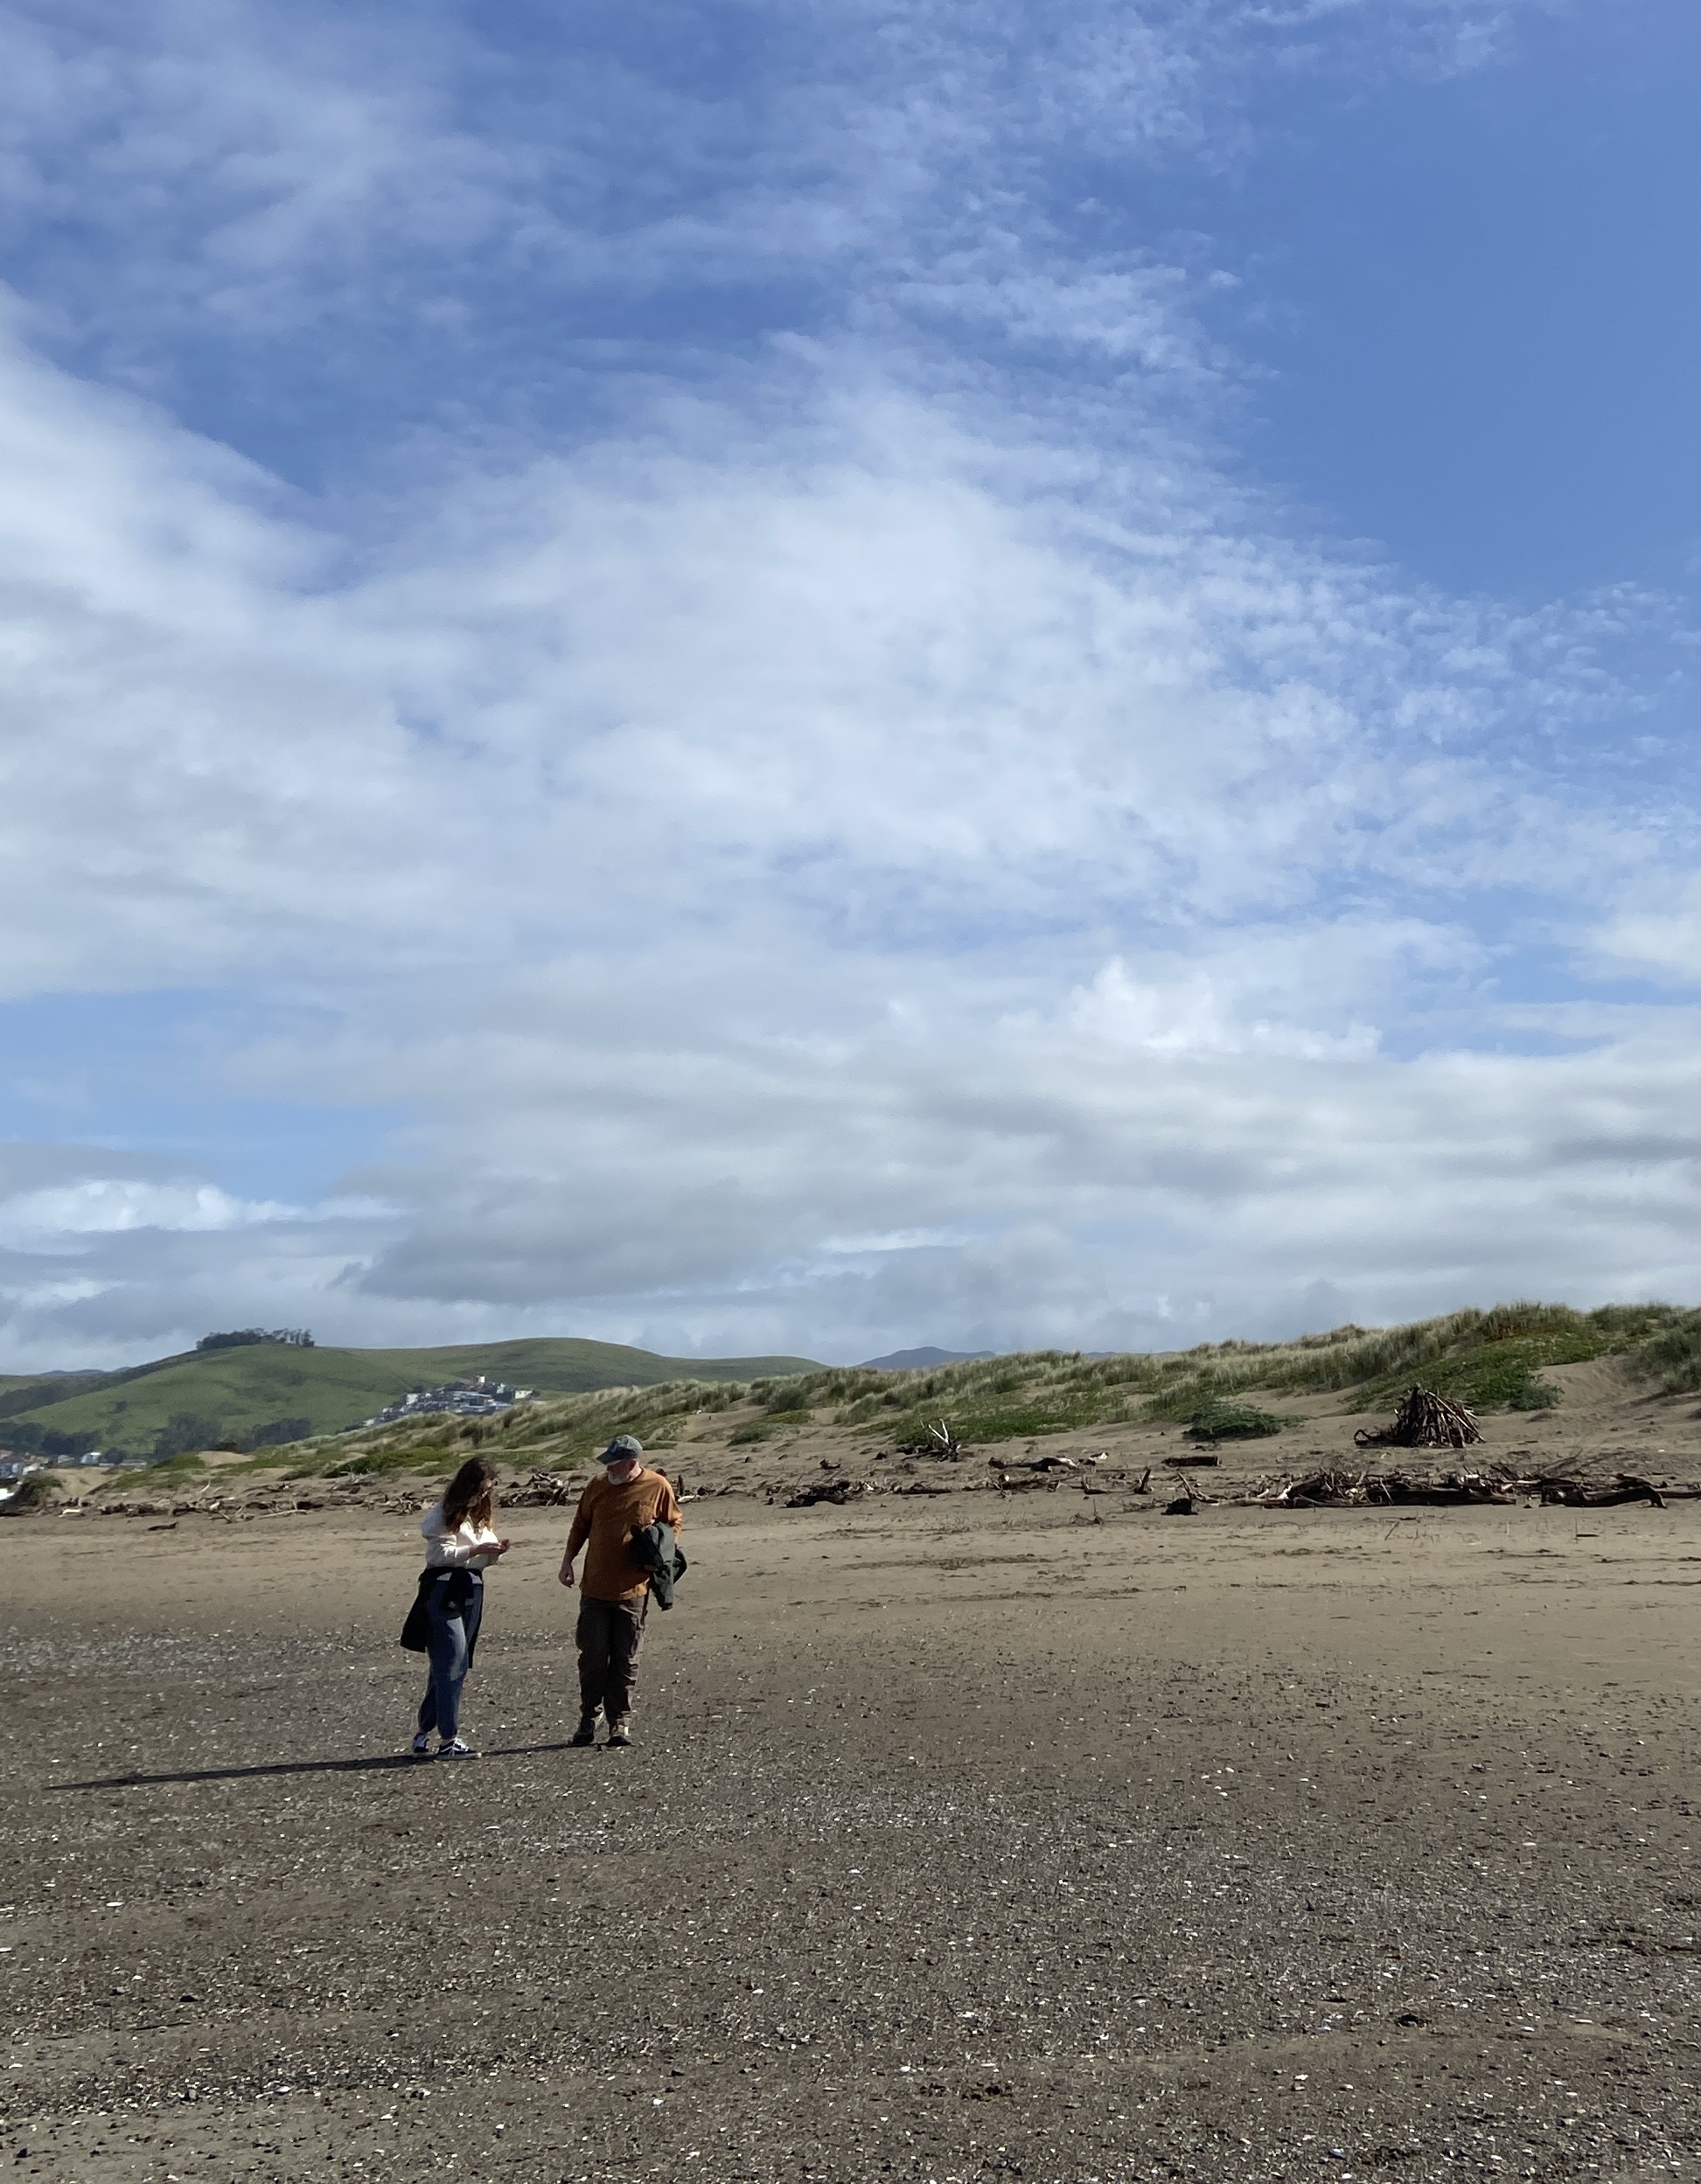
The three of us never seem to tire of beach wandering. We had some sunny days and walked in a bit of rain at other times. But it was all lovely.

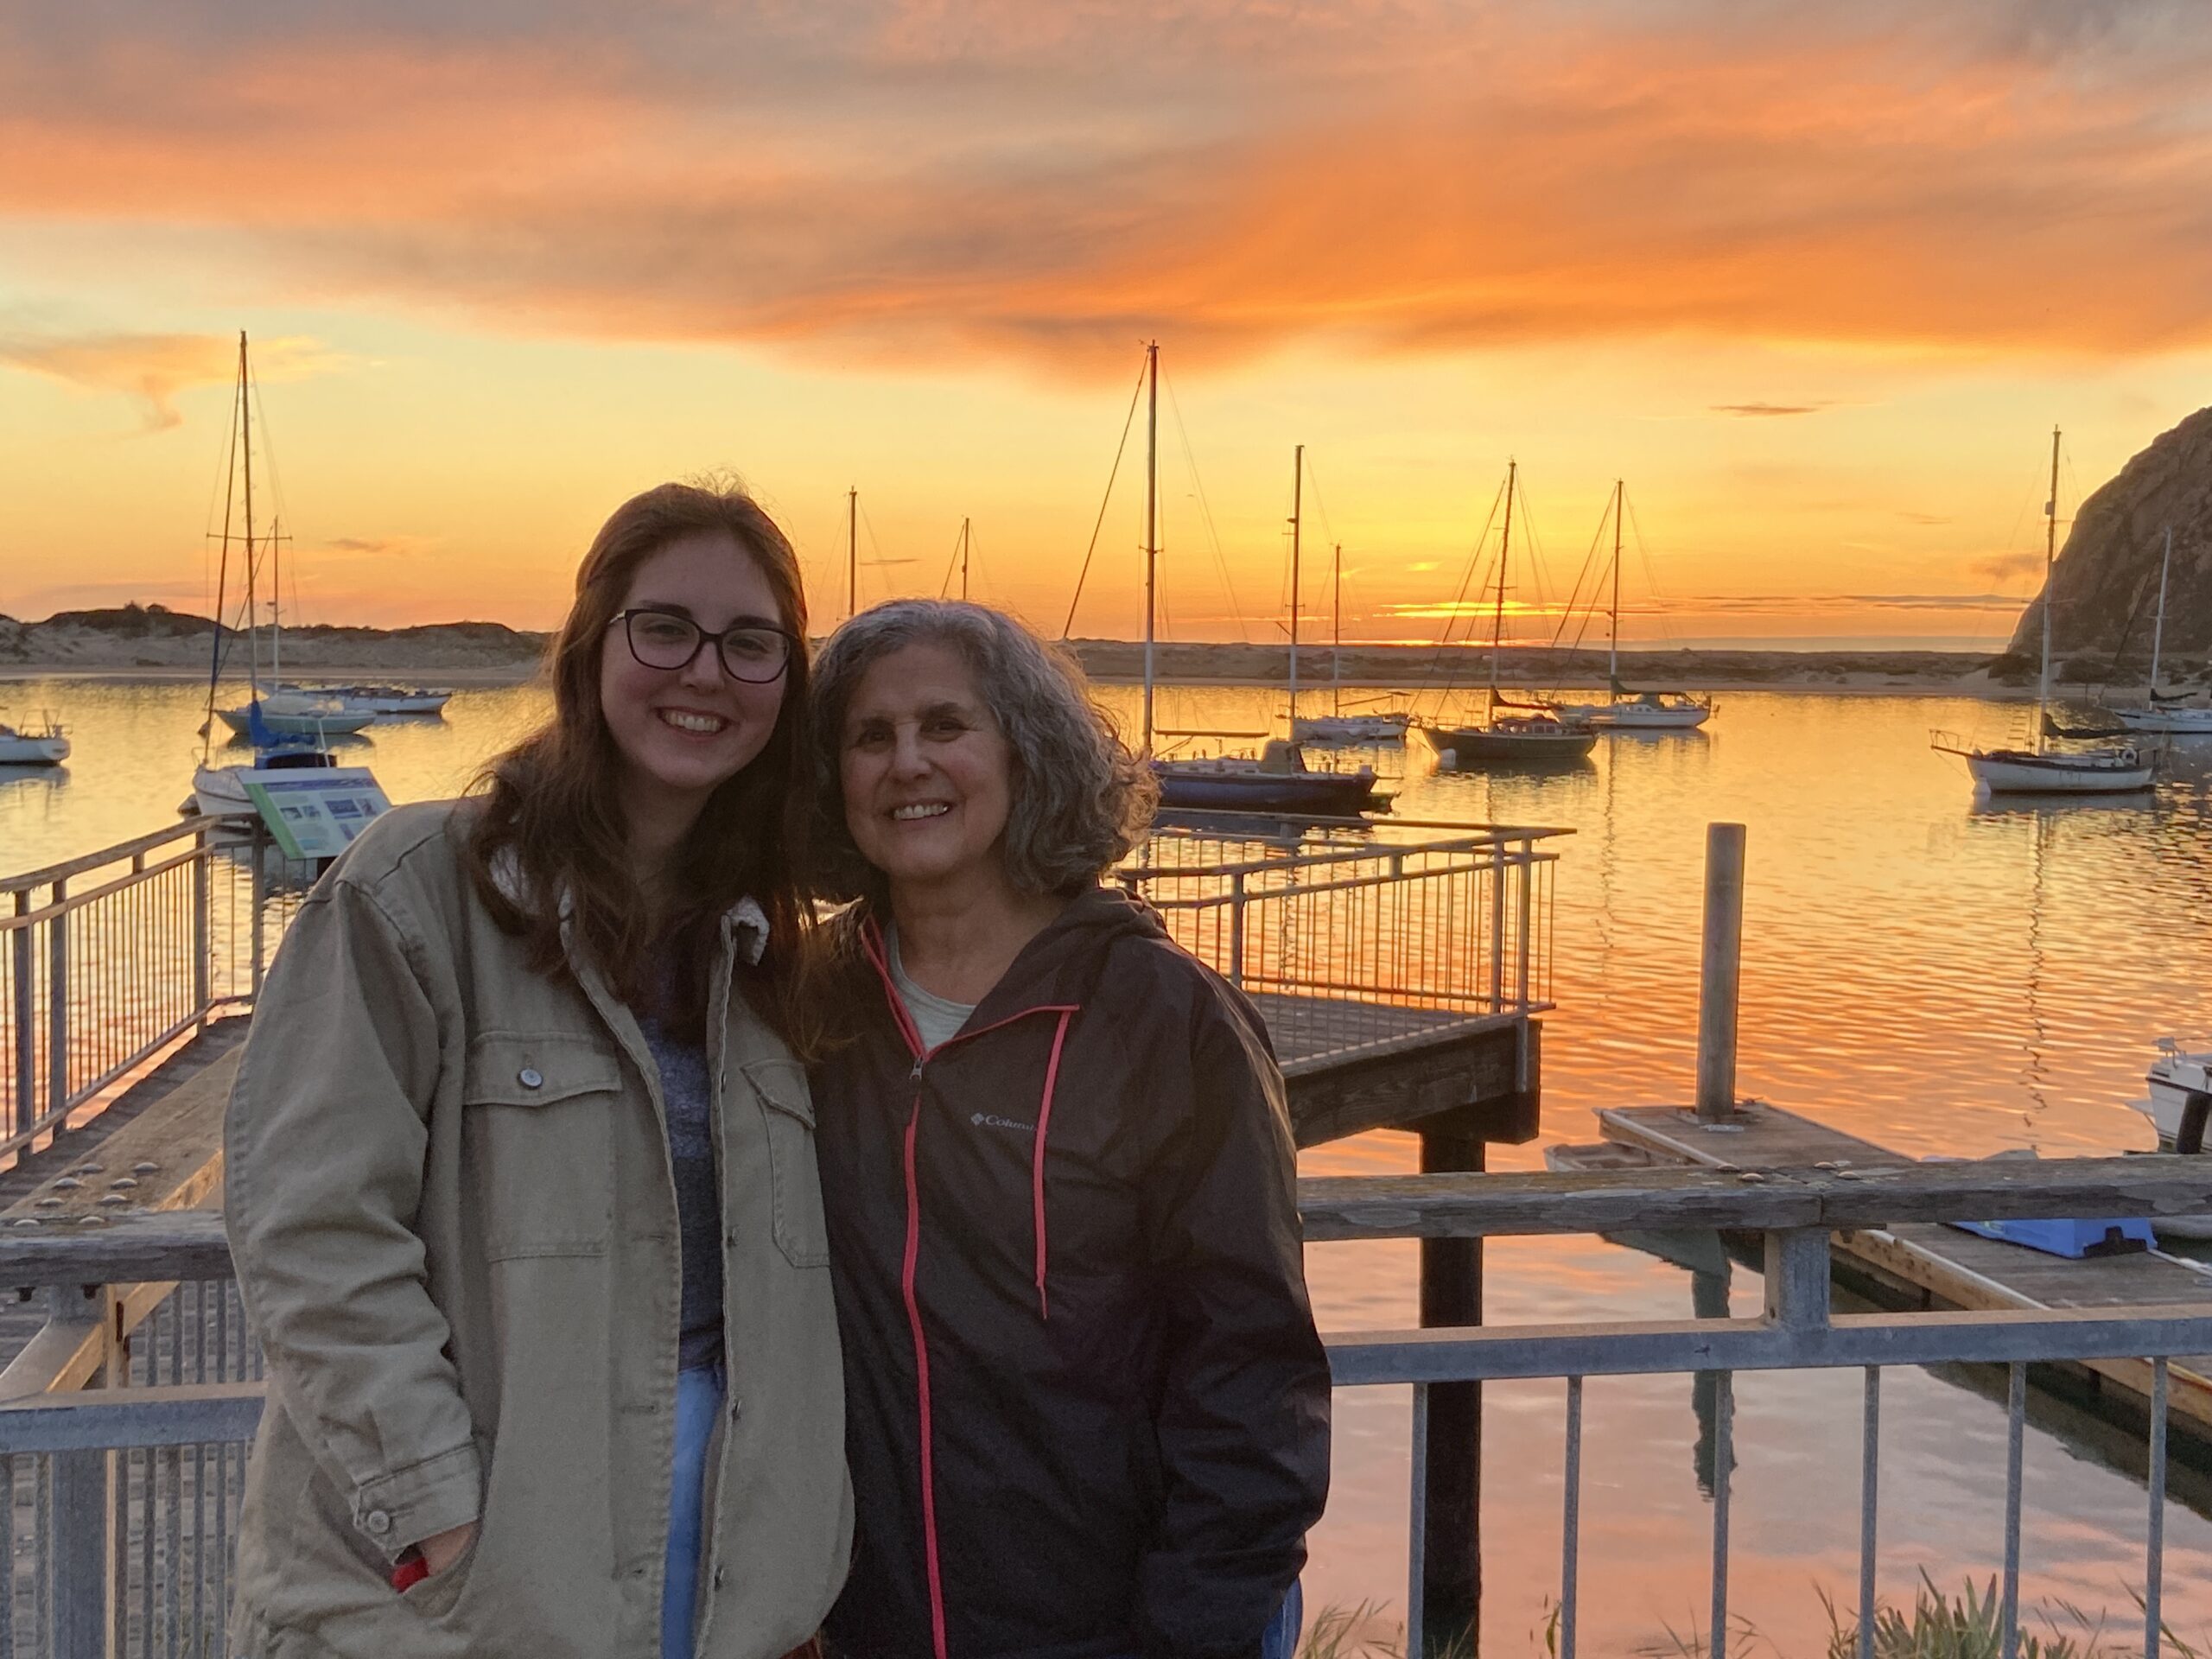
Nothing like a sunset shot on a California beach.

Cal Poly campus

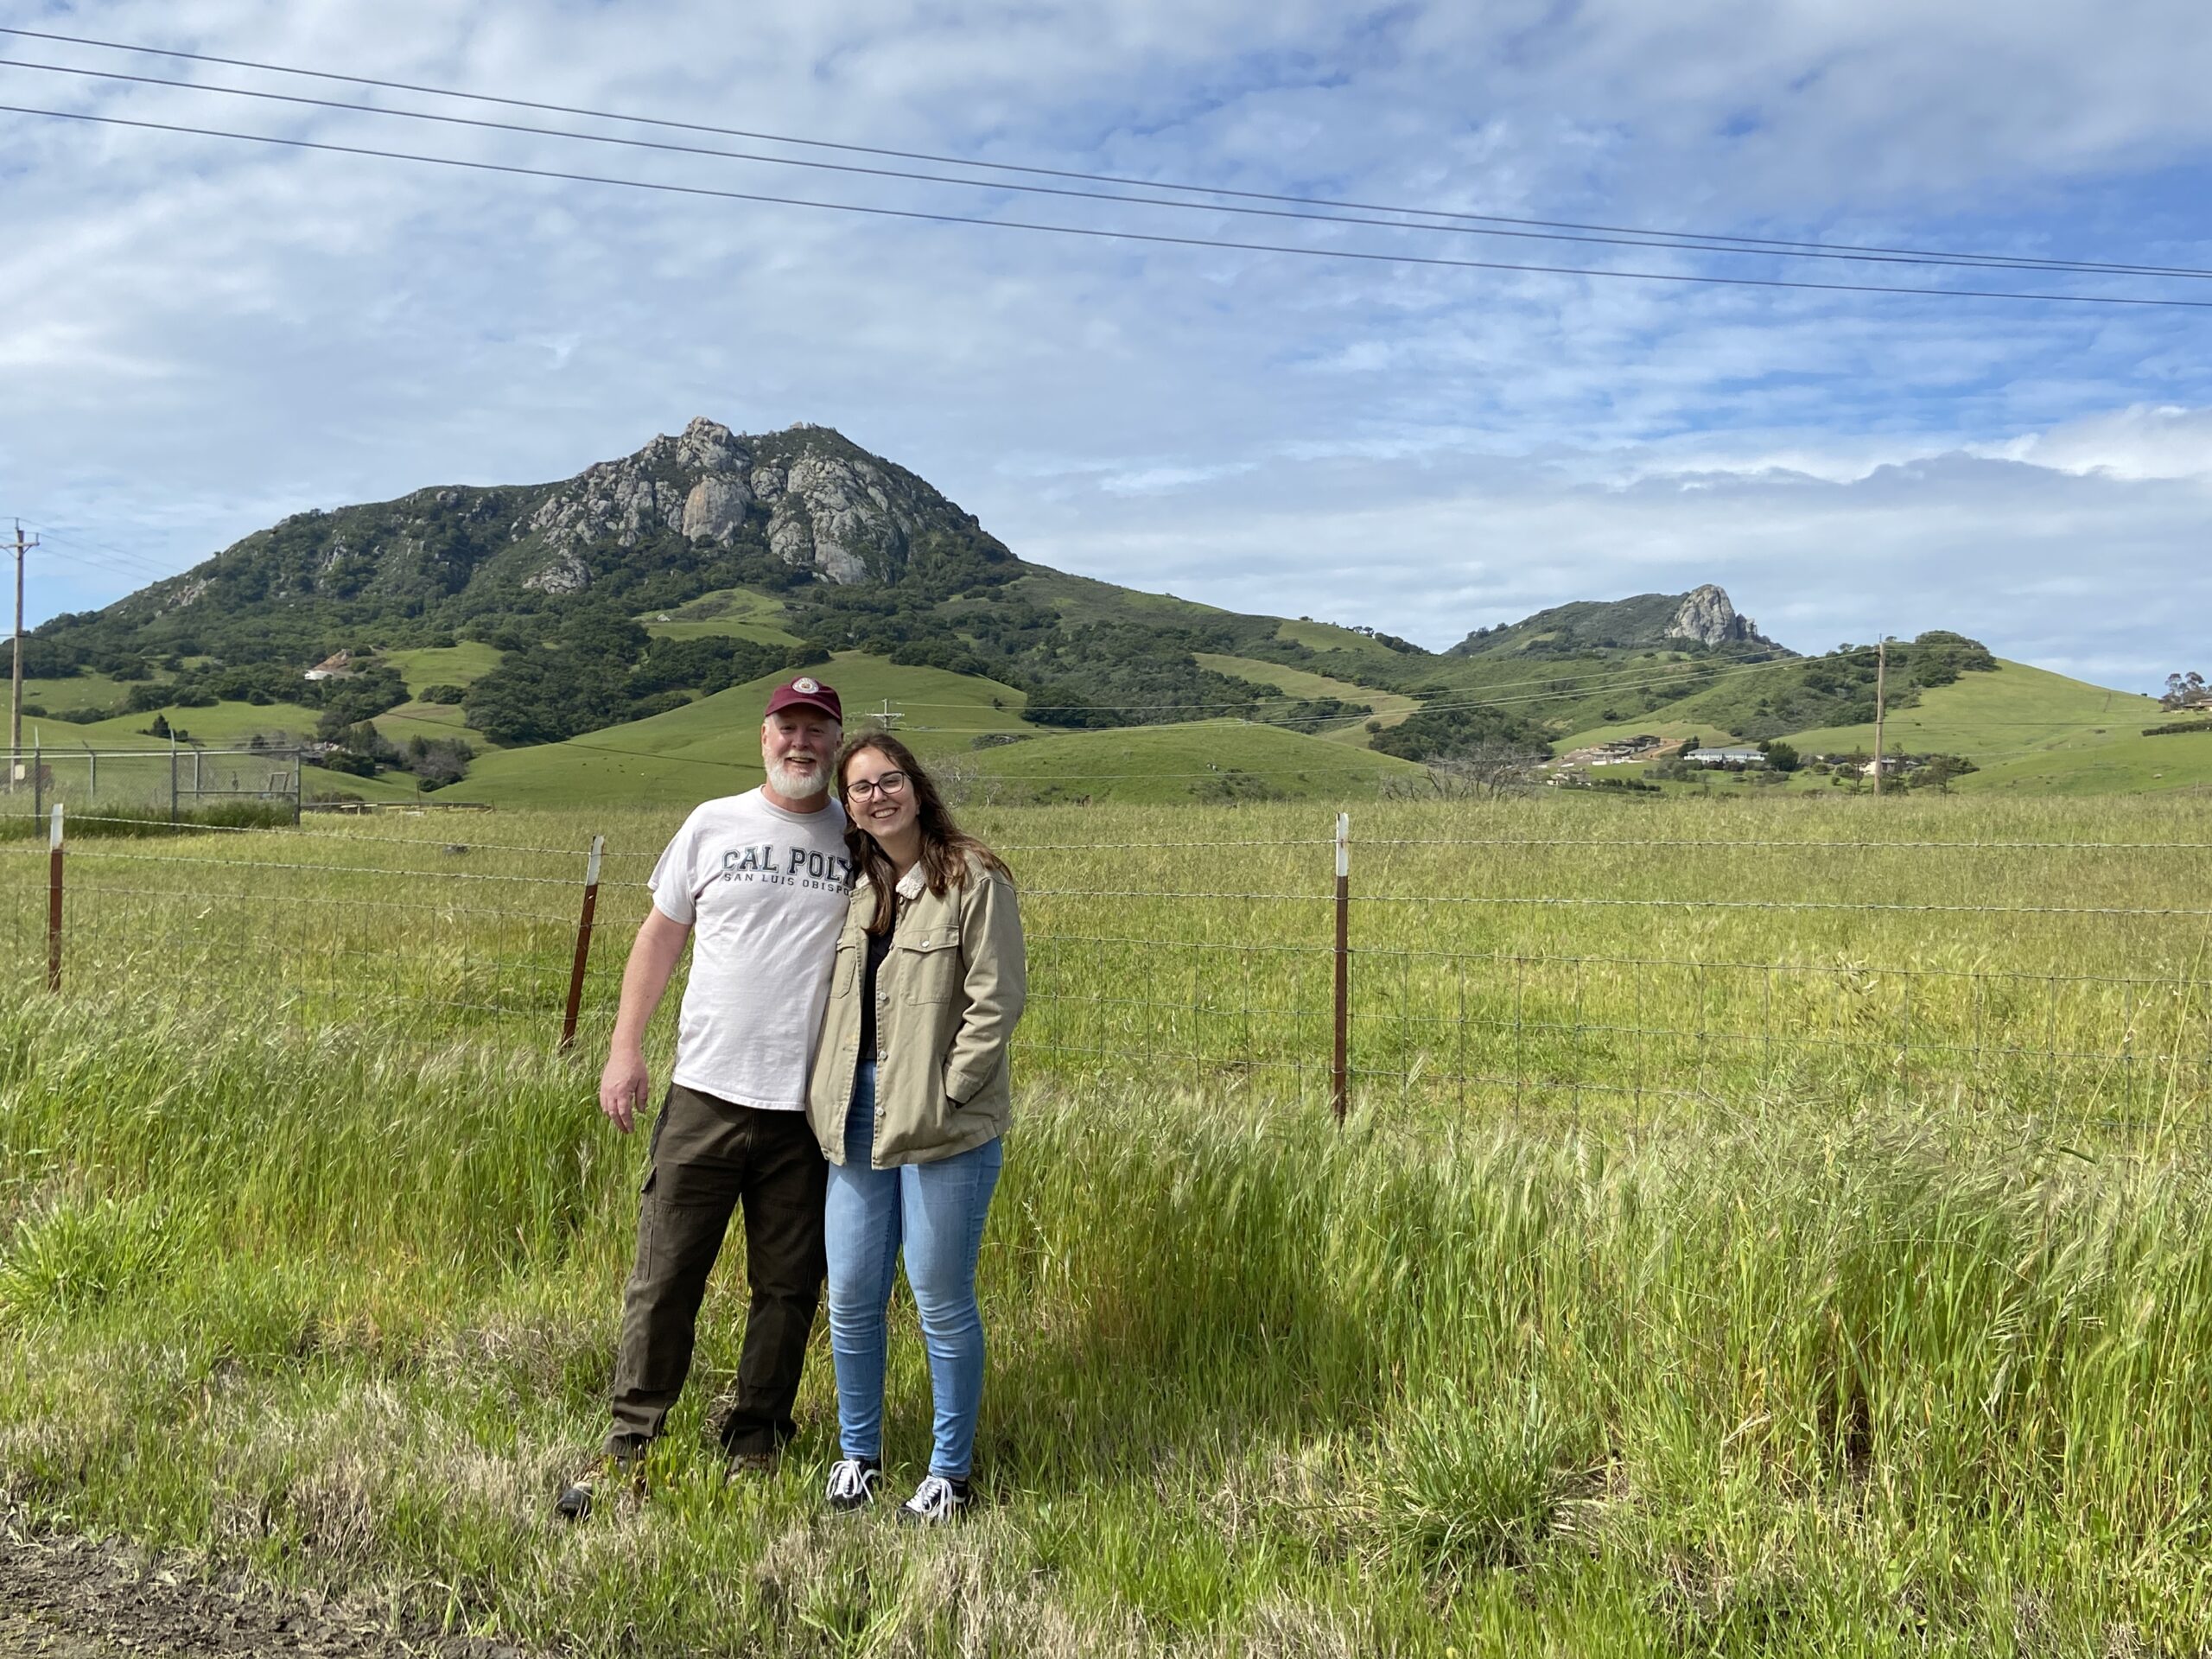
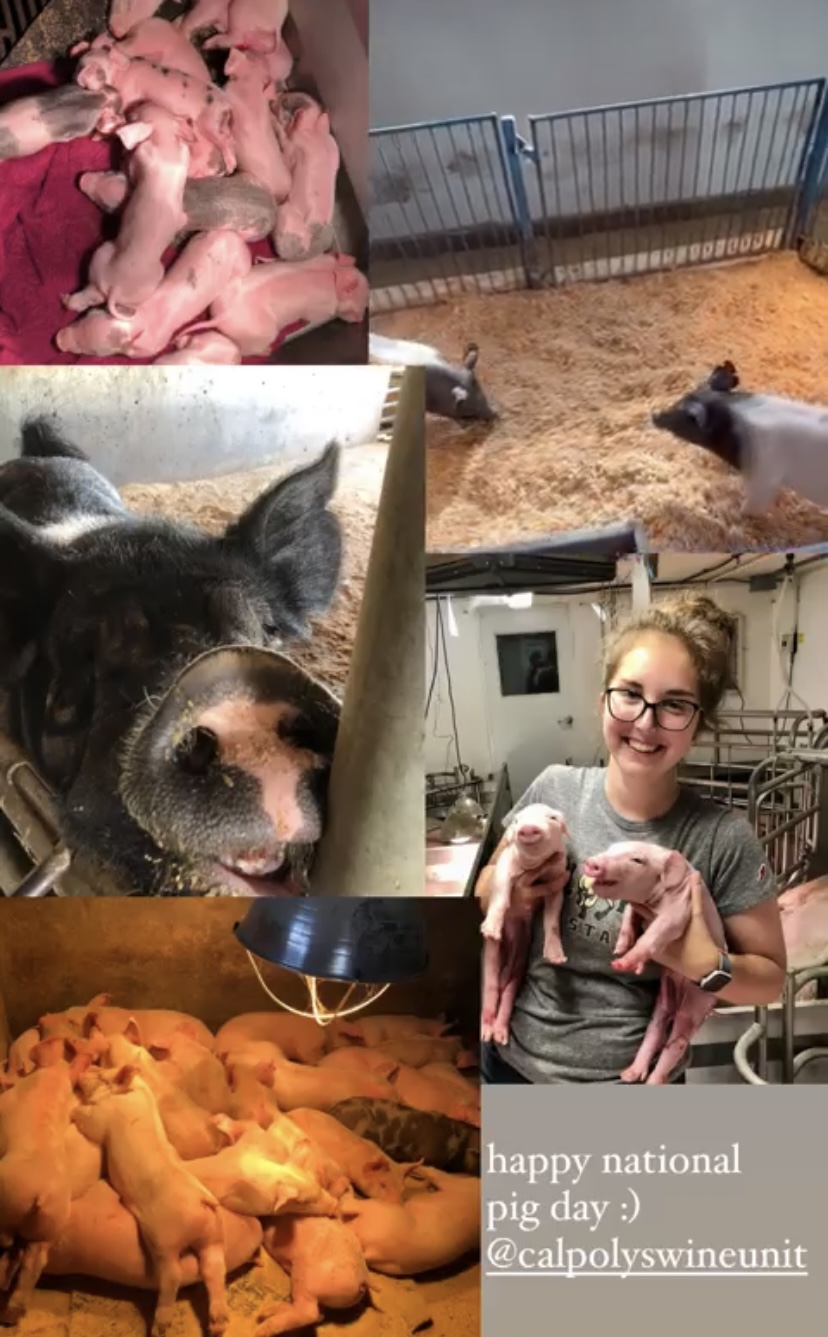
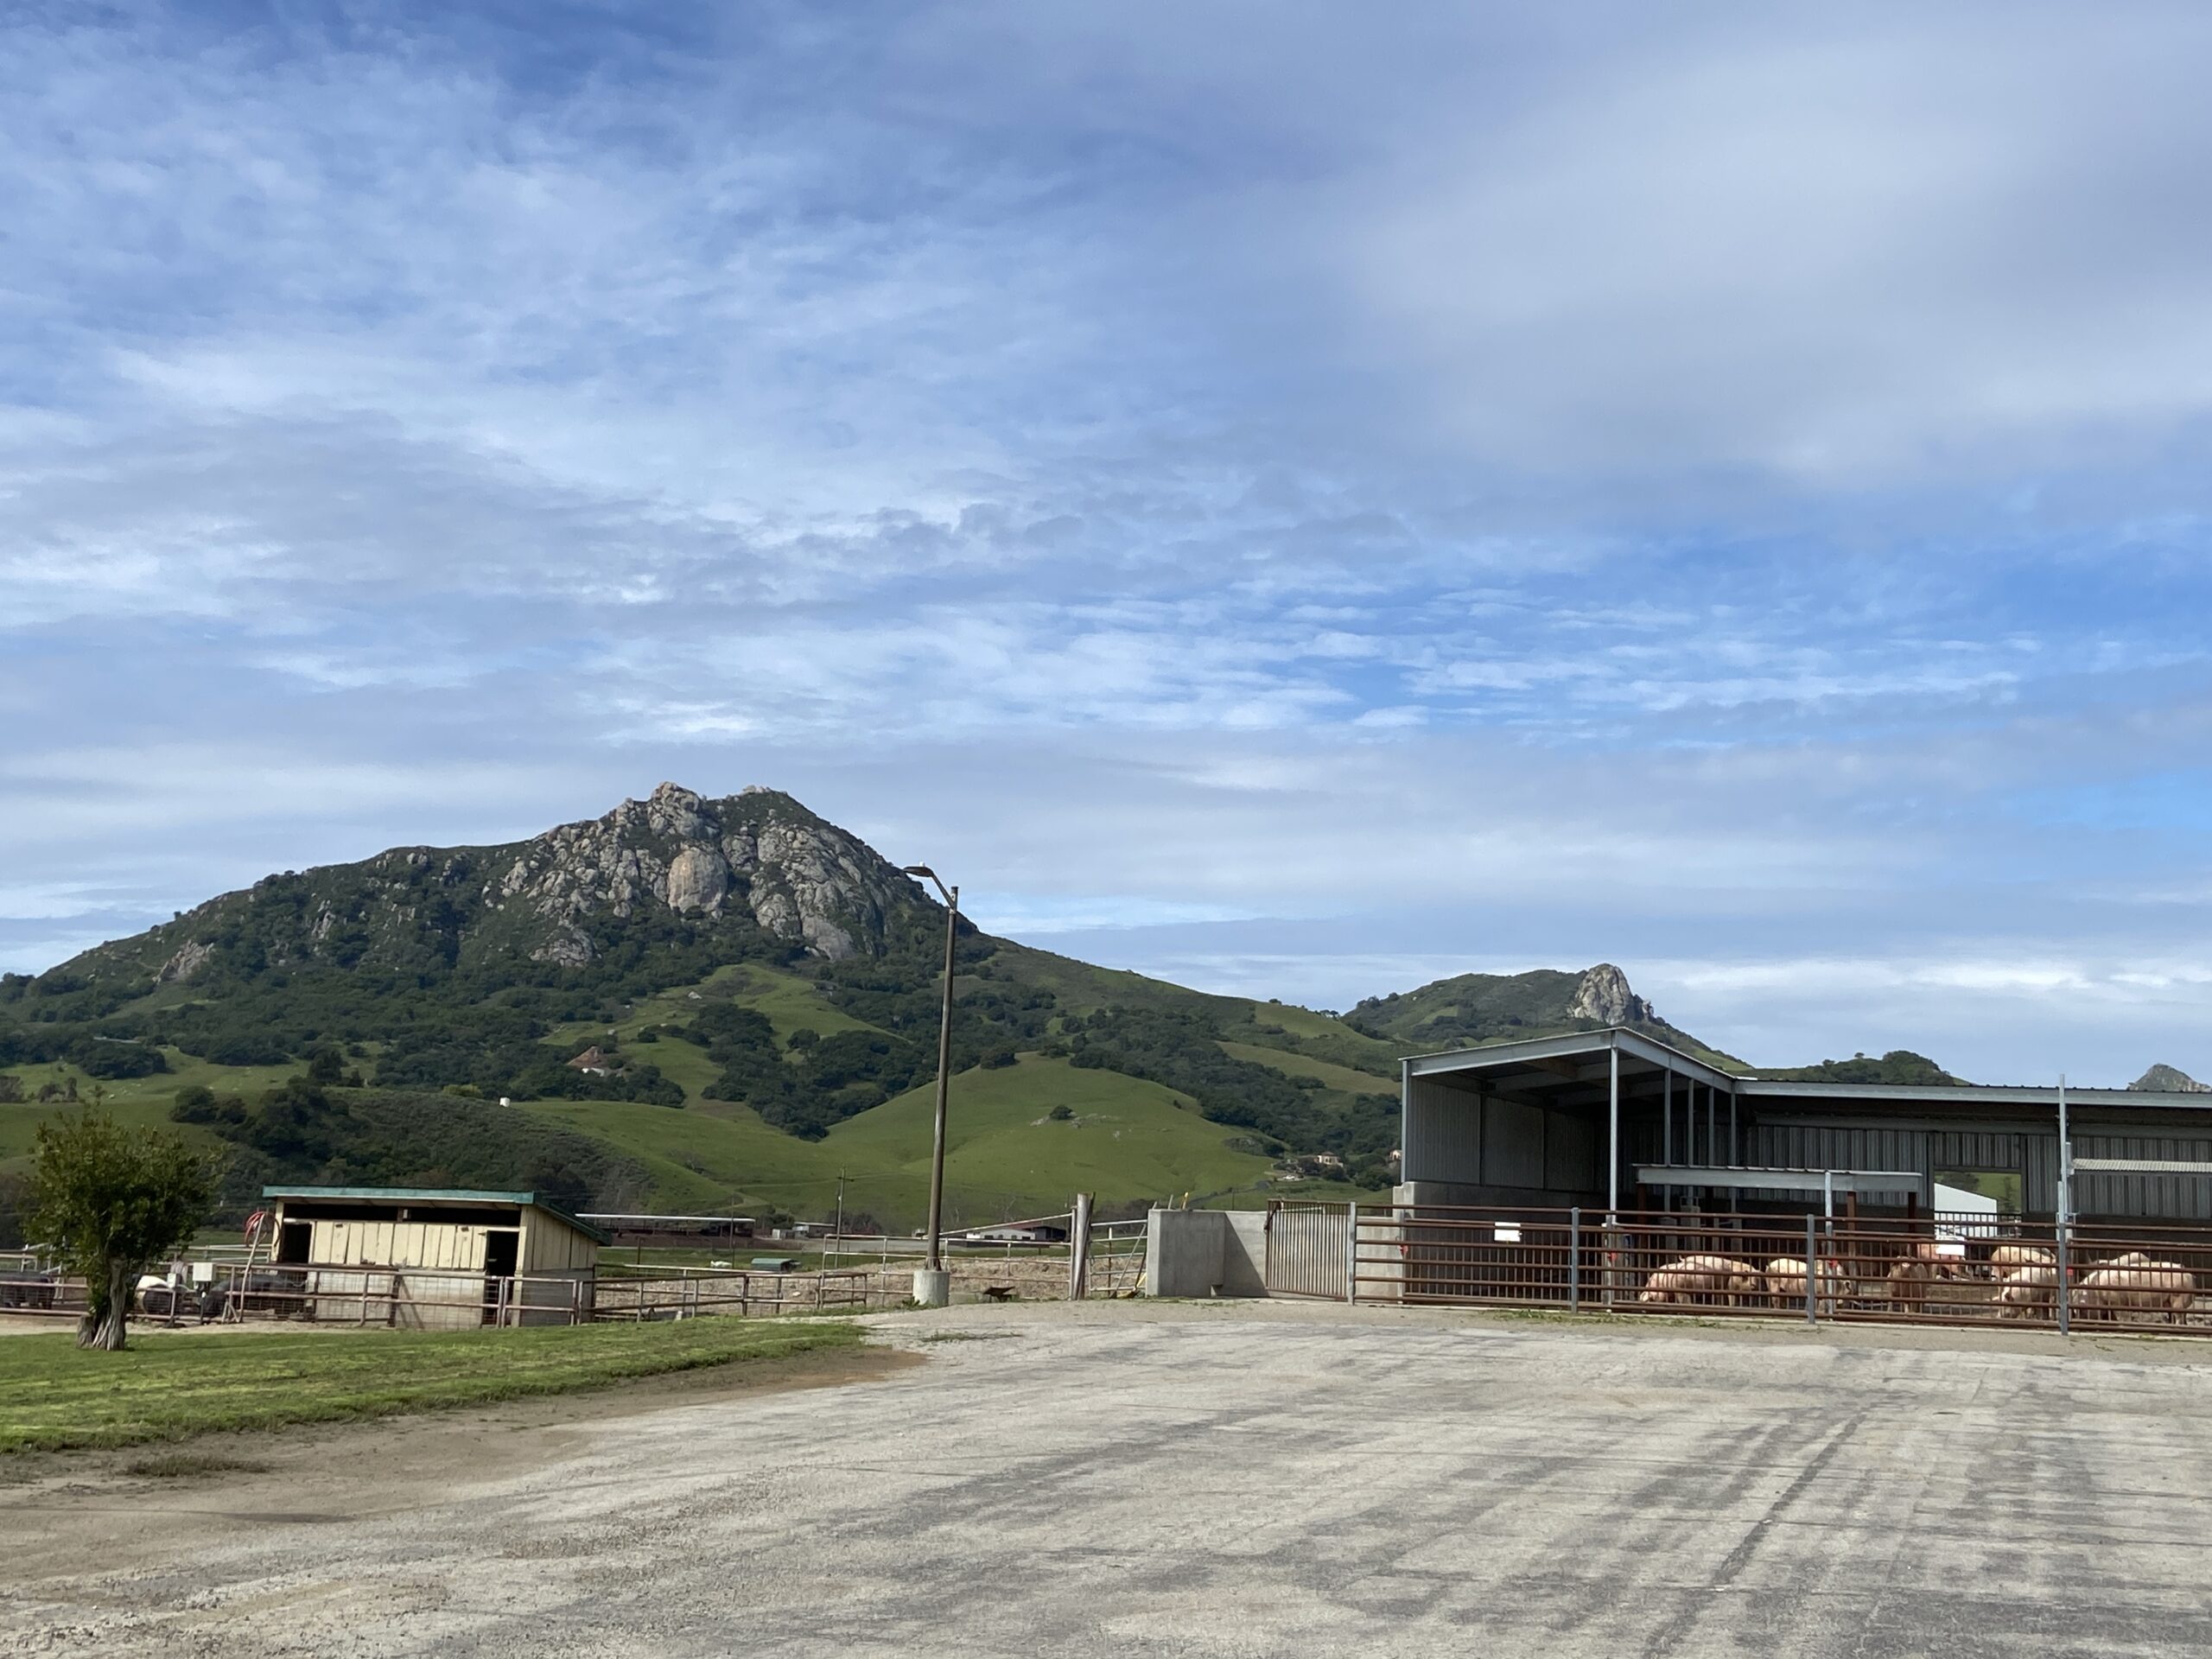
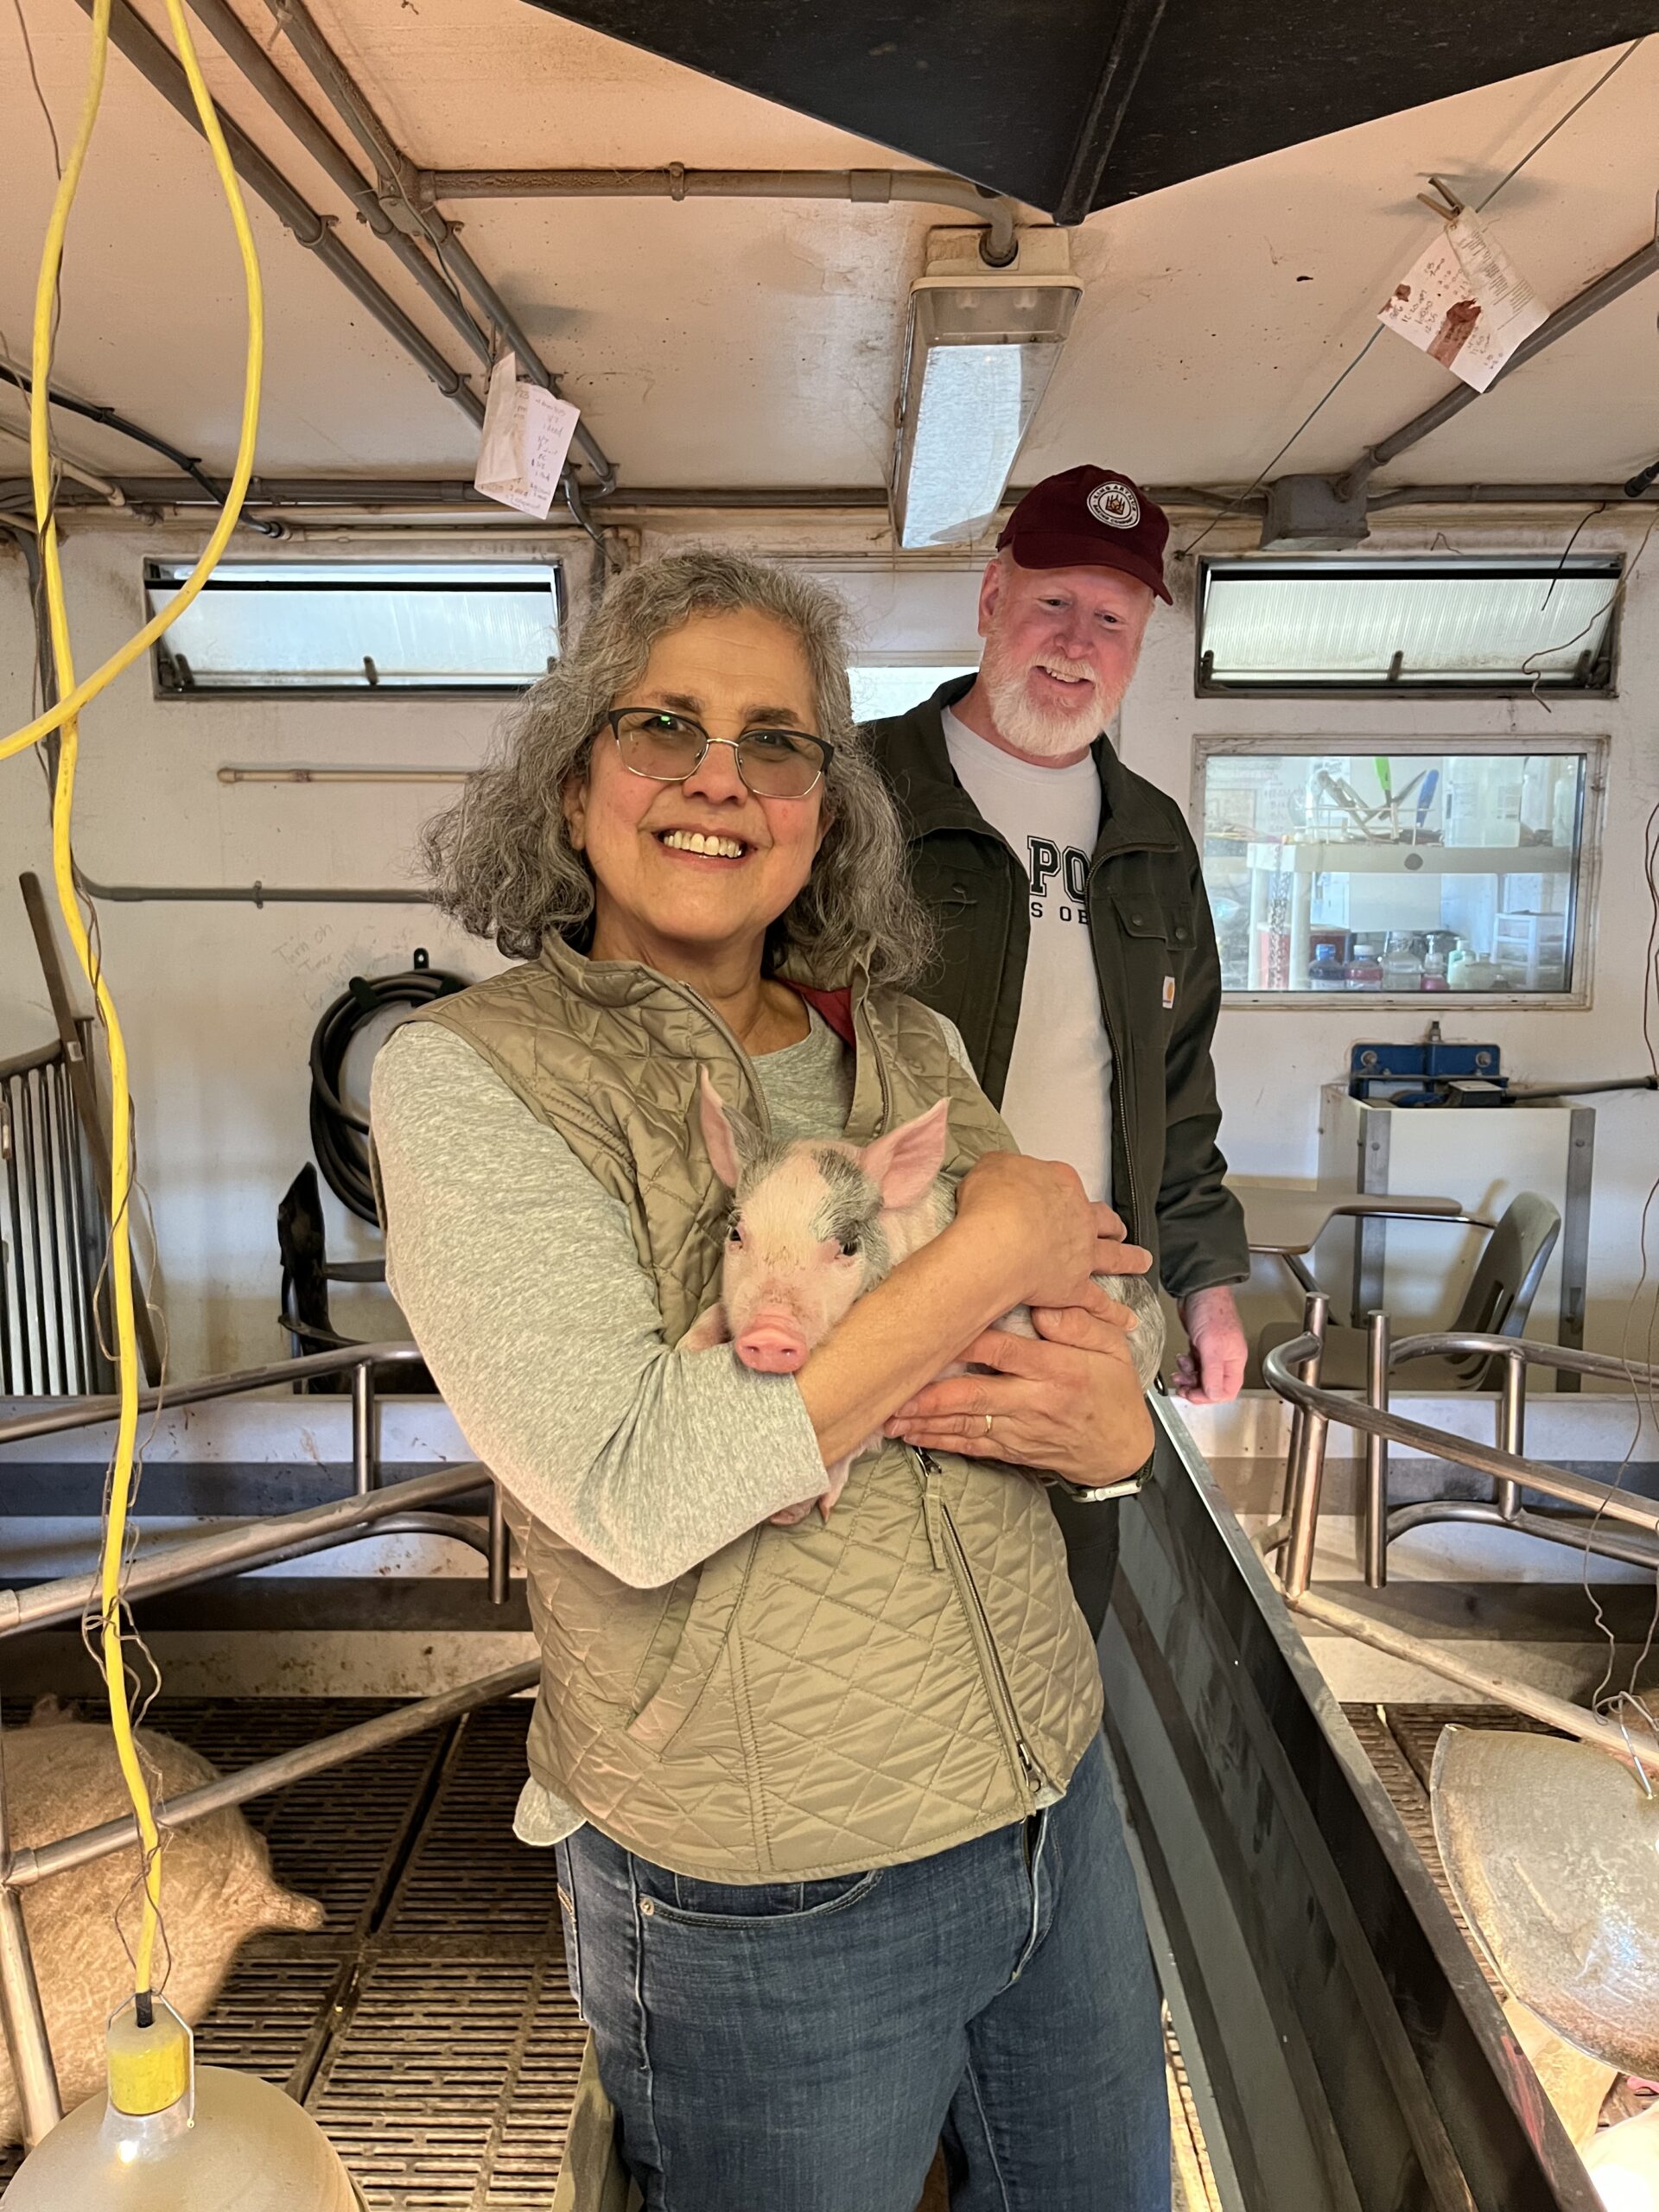
We asked Julia if she would tour us through the Swine Unit at Cal Poly. Since she spends so much of her time there, we wanted to better understand the work she does there.

I don’t know about you, but it is such a treat to see our kids in their world. What they spend their time doing, the jobs they are so knowledgeable about, their favorite parts of their work – it lets us, as parents, see our kids as the adults they are becoming.

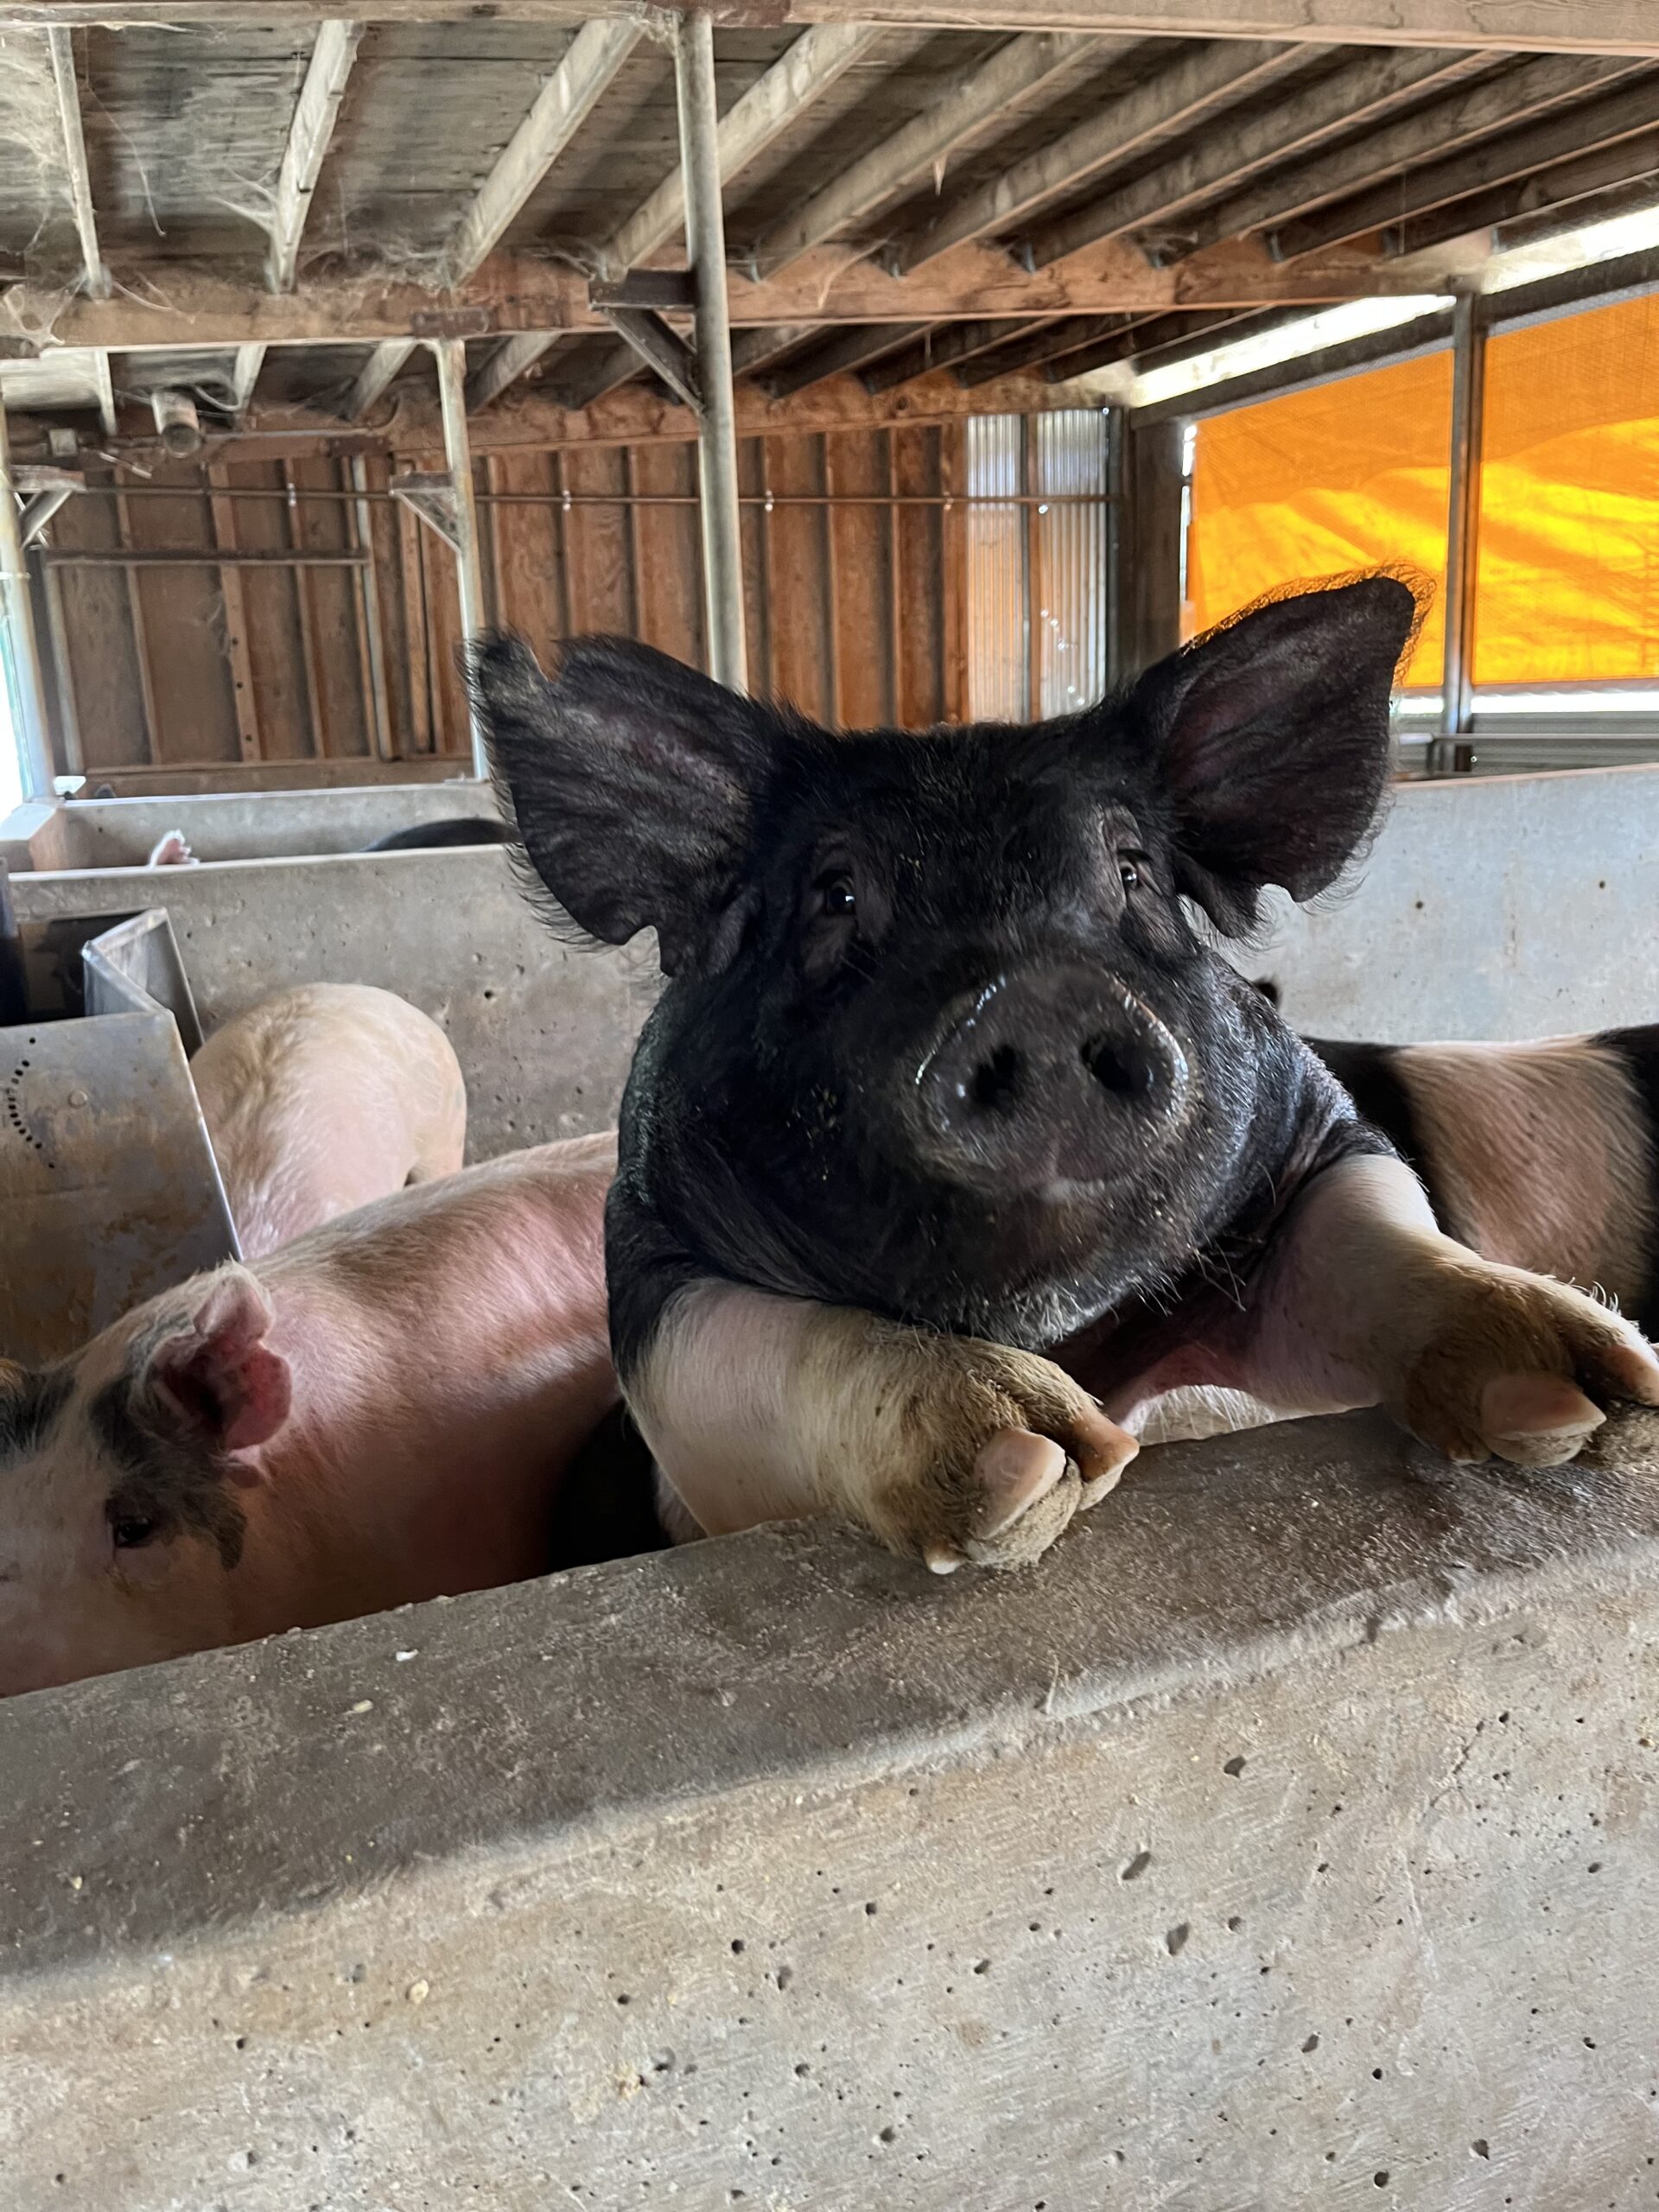
Julia took us through all of the various barns. Some held the boars (like the photo above). Some had the teenagers (piglets who had recently been weaned from mom but not released to run outside yet). Others had sows who currently were not taking care of a litter. There were sooooo many pigs! Julia seemed to know many of them by name and what each one was doing and why. How she could tell them apart was beyond me.

The nursery was my favorite part. When we were watching the mamas (sows) with their babies, the whole nursery was quiet. One of the sows was laying on her belly without exposing any teats to the piglets. Julia said they do this when they don’t want to nurse at the moment. The piglets started to really scream at her and she grudgingly rolled to her side to let them feed. The funny thing was once that litter of piglets was screaming to eat (and they were really screeching!) then ALL of the litters immediately began to screech. The power of suggestion, right? It was hysterical to listen to the whole barn come to life.

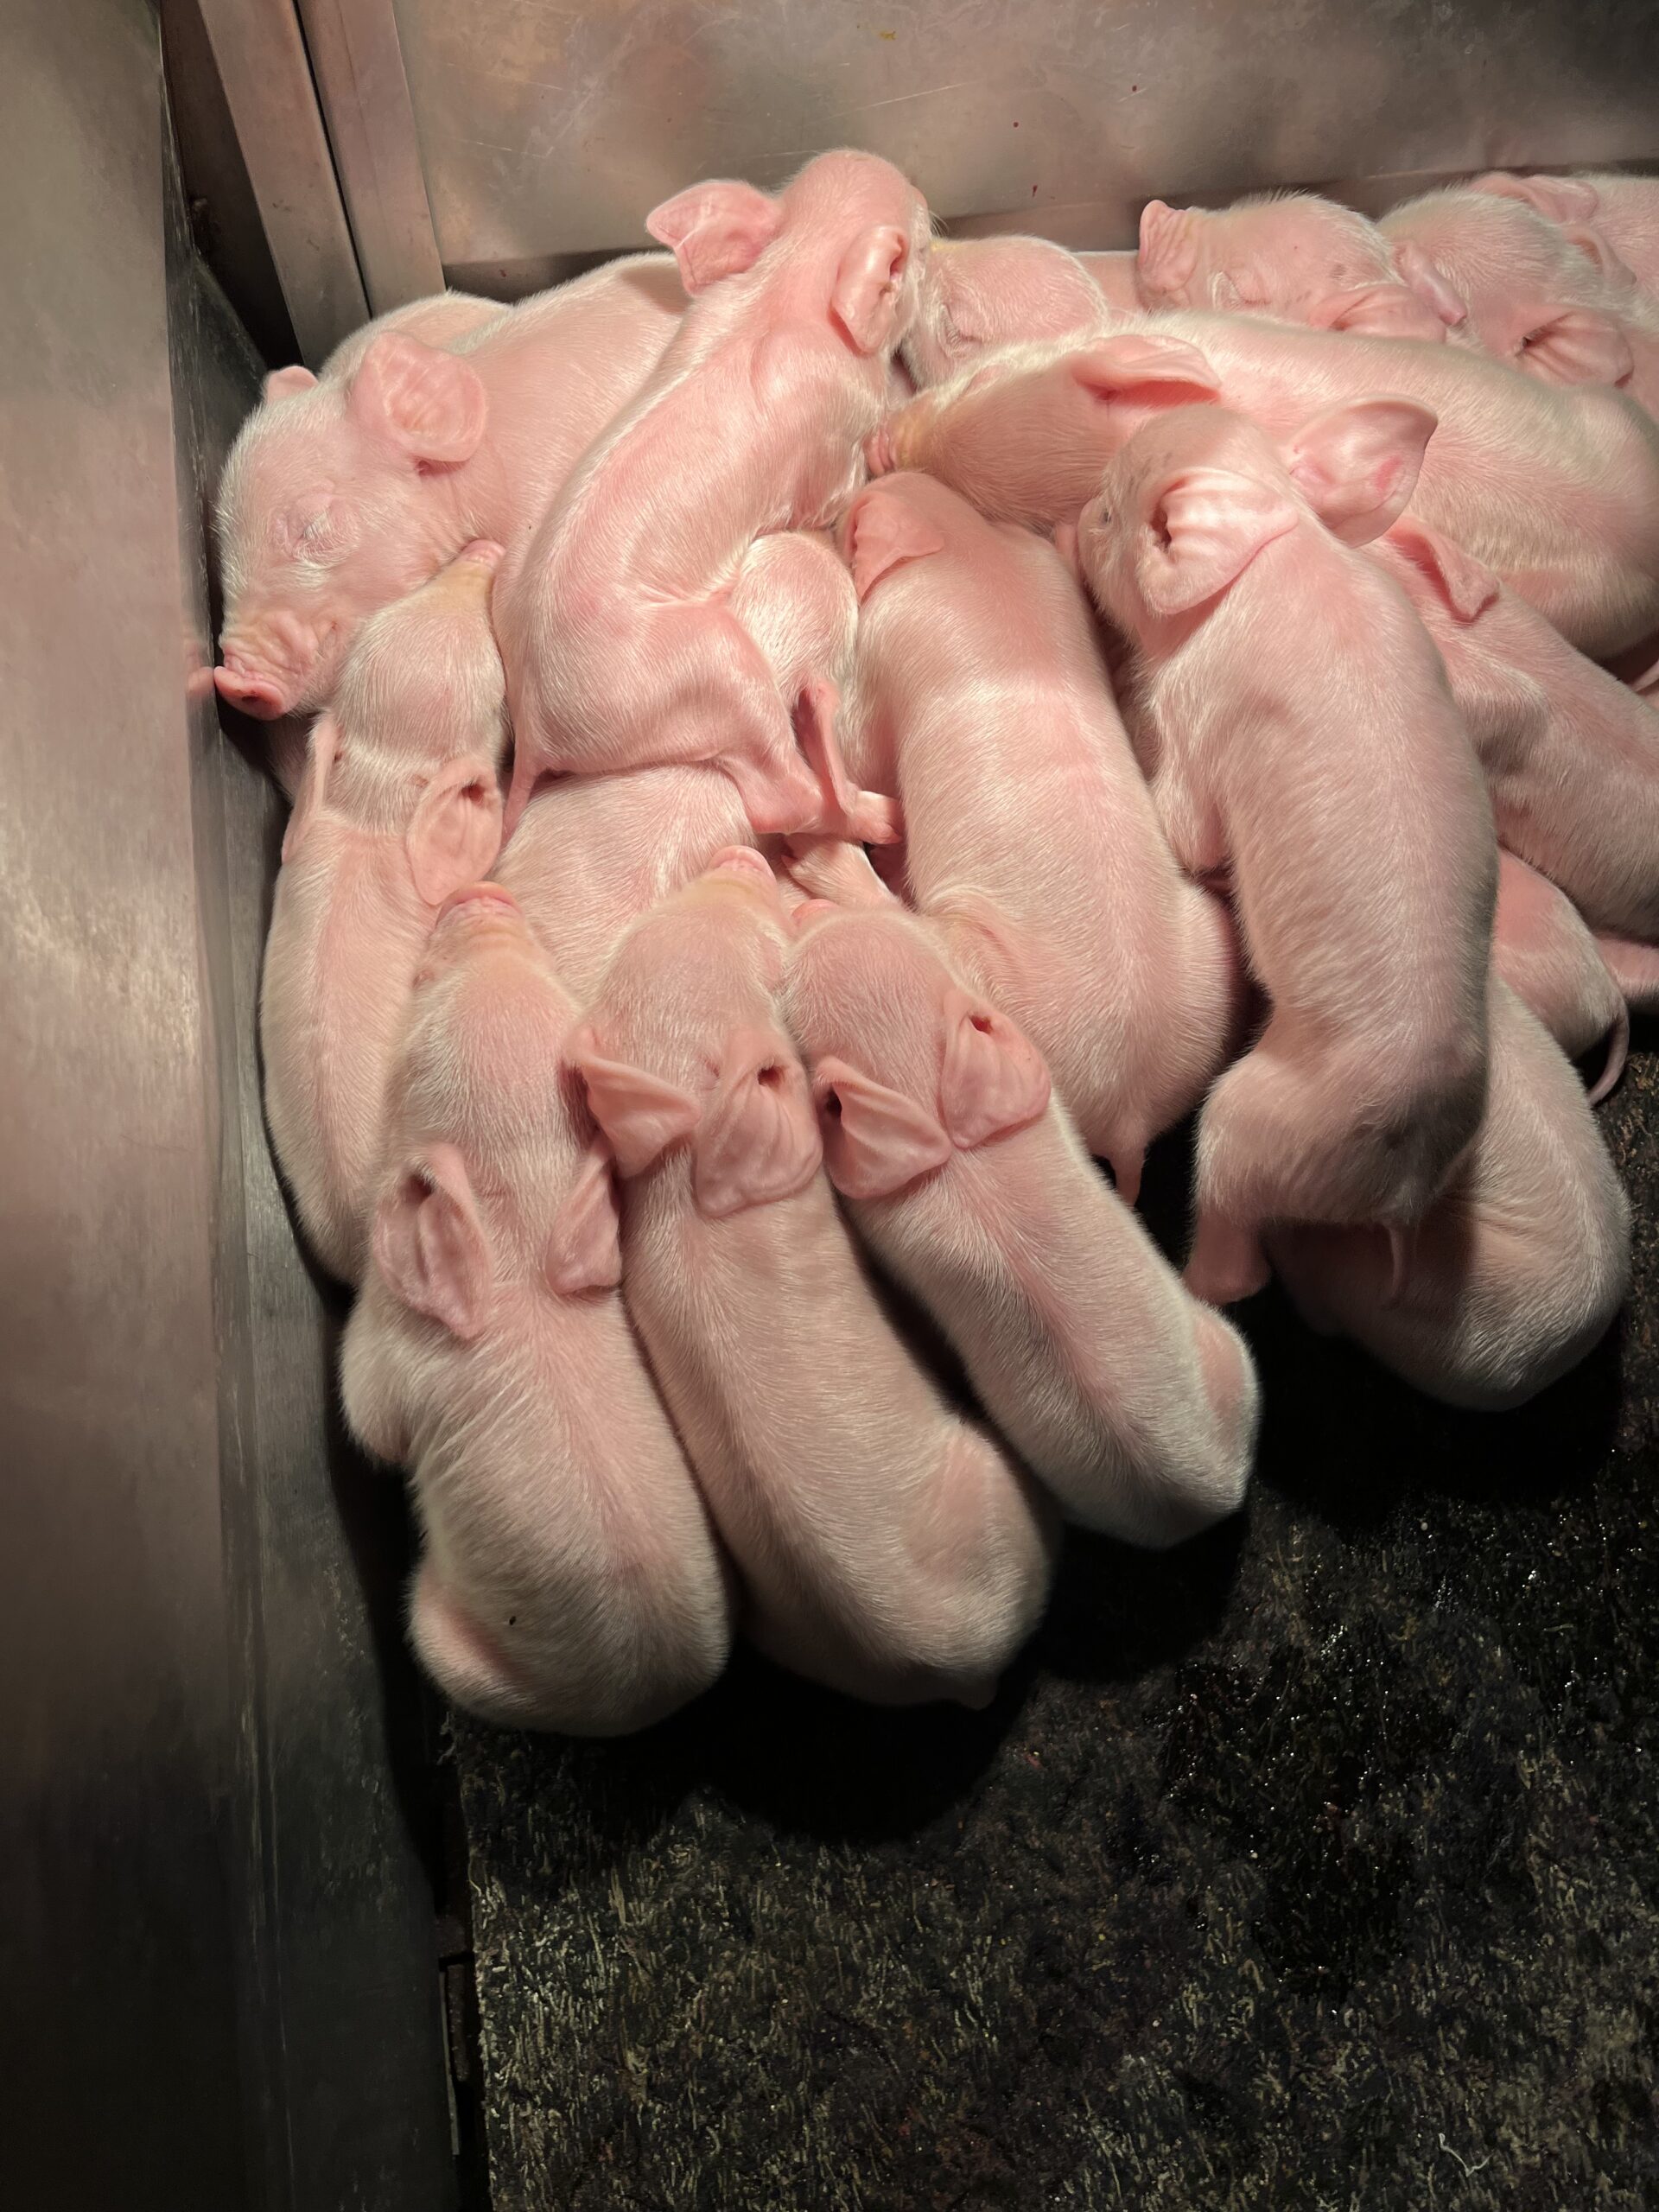
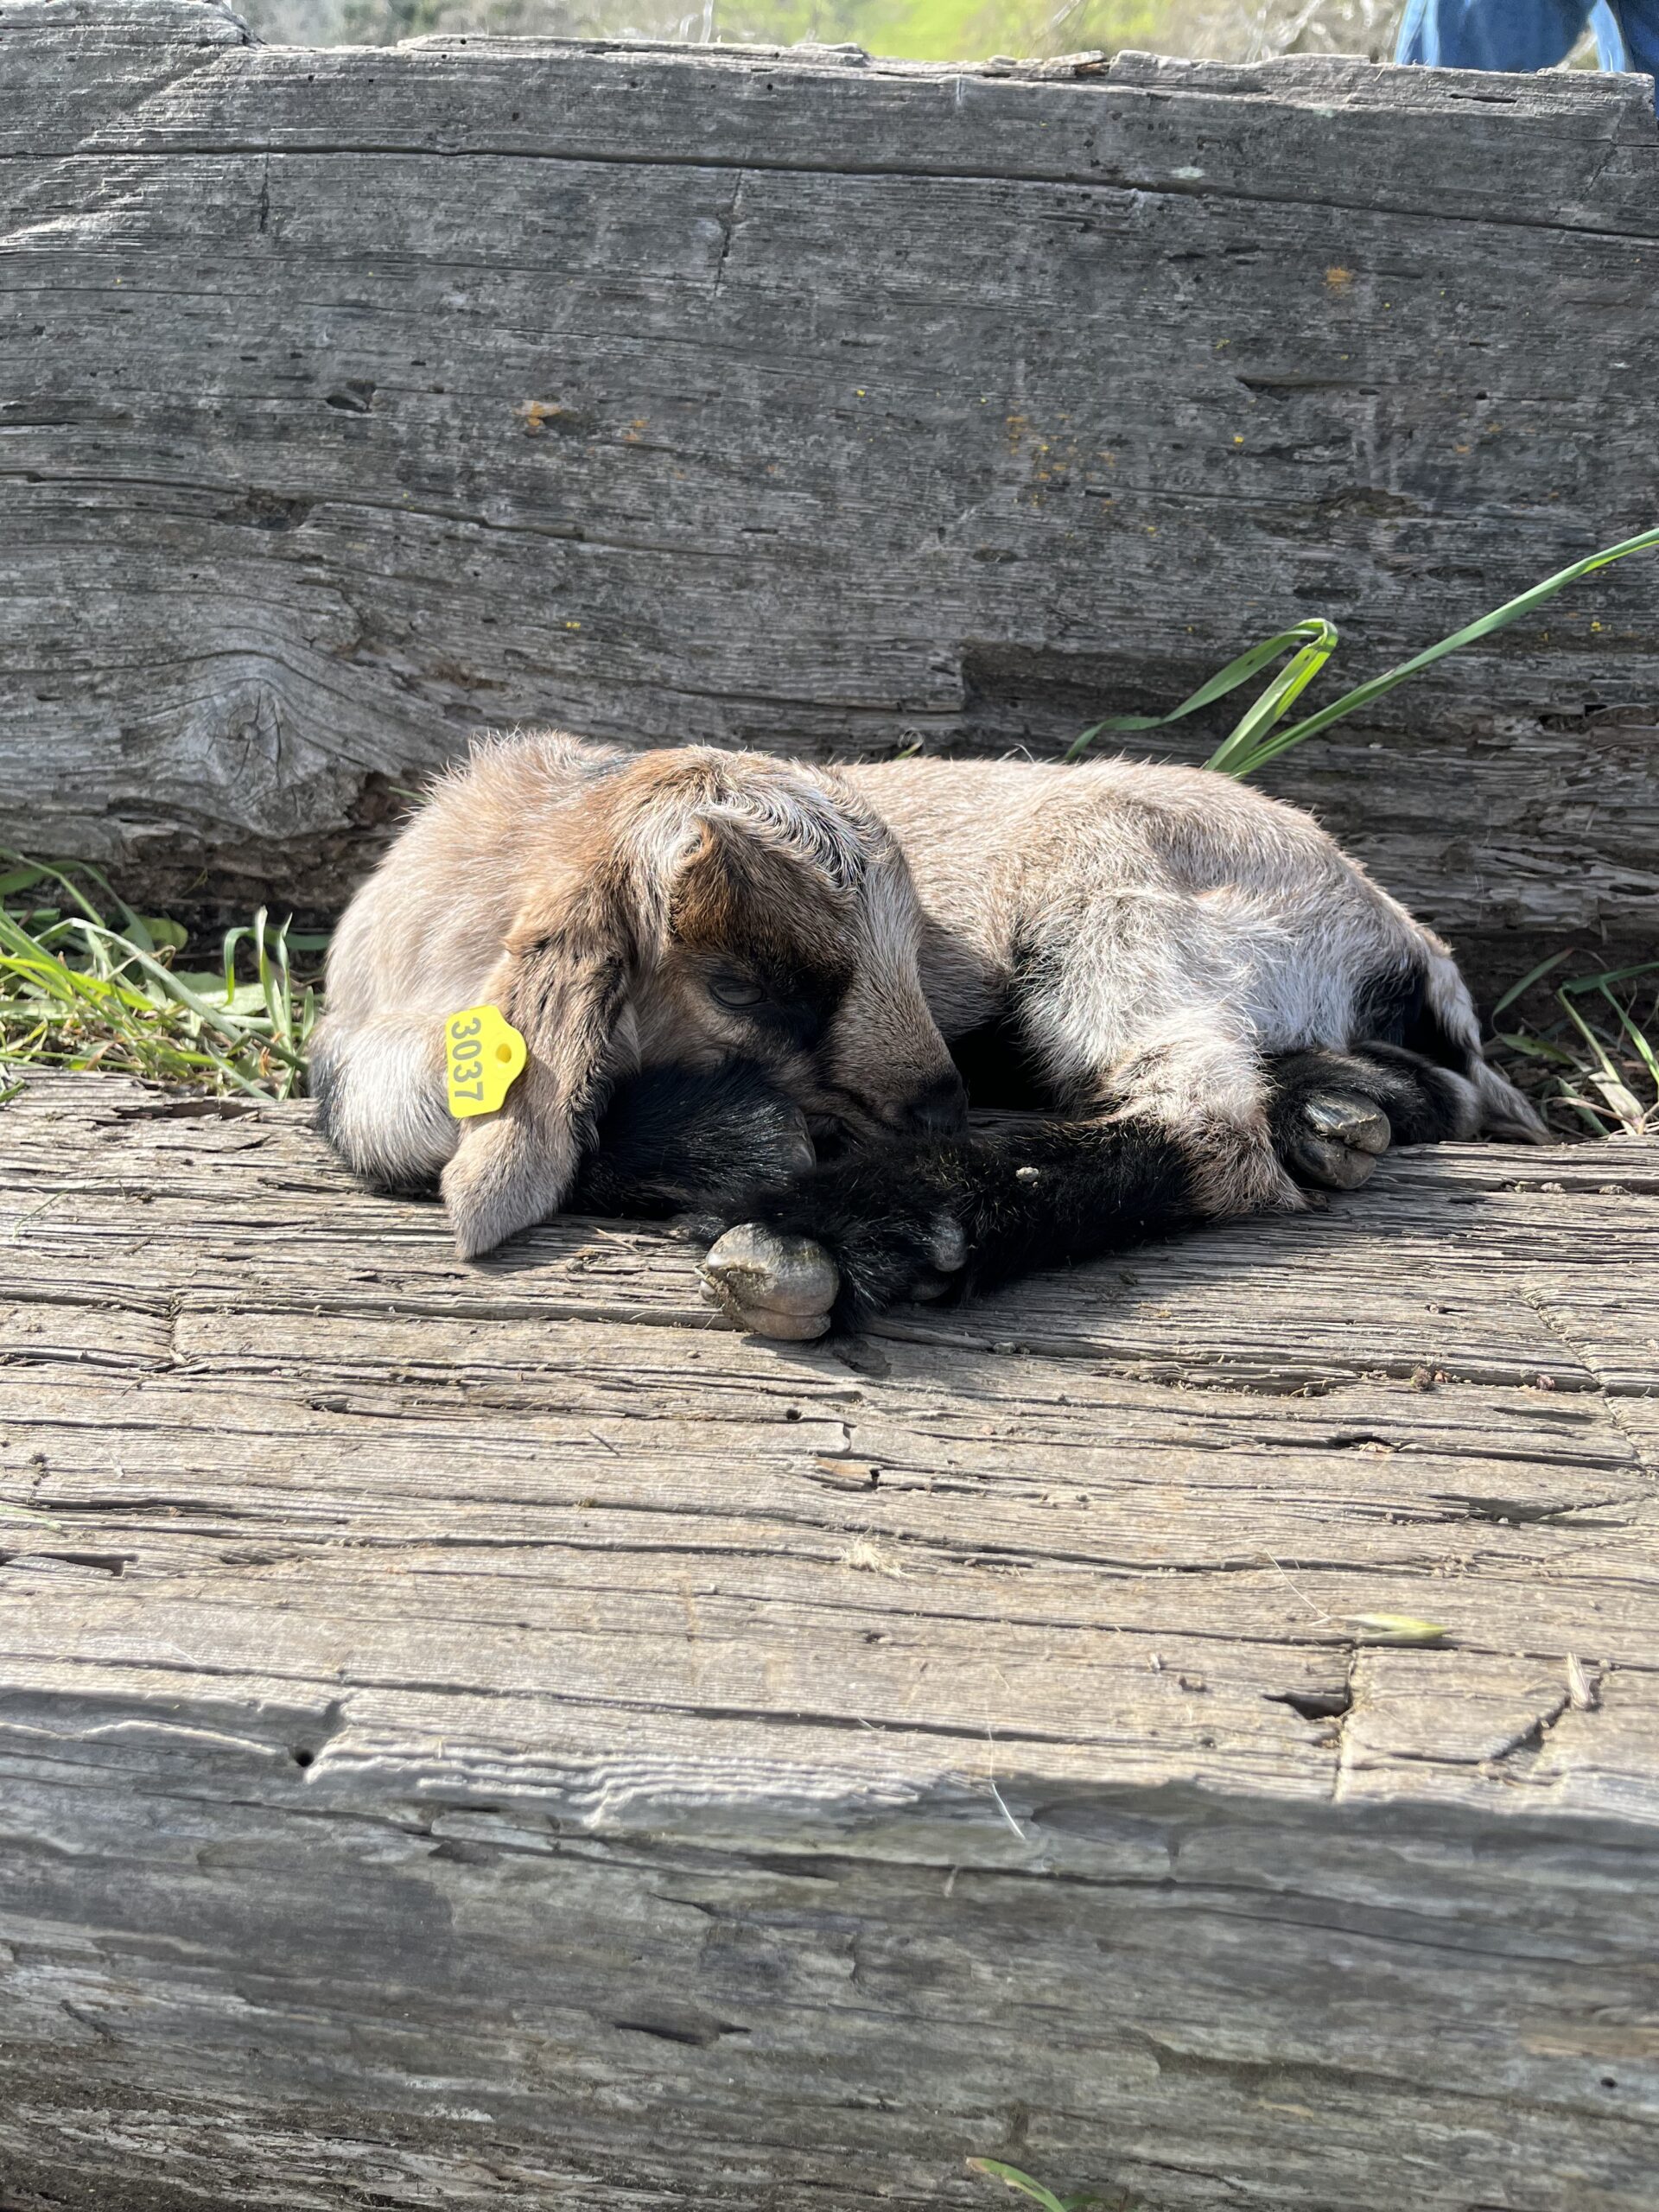
The piglets are so cozy when they are new. They huddle together under the heat lamps and keep each other warm.

When they are just a bit older (the piglets shown above were about 12 days old) they will do whatever it takes to find their place to nurse. Look at this one laying on top of her sibling. I watched these two for a bit. It was so cute.

As they get older, the piglets climb all over the place – exploring their pen. Mama is kept in the farrowing crate. it doesn’t look like it but she does have room to stand, stretch, drink and eat. The piglets end up on the wrong side of her and will then climb up and over to return to the side of their mama that provides breakfast, lunch, and dinner.

I didn’t get any pictures that show this but on (most of) the males there were two little slits where they had all been recently castrated. I asked why they didn’t stitch up the opening but Julia said the environment in which the piglets live isn’t sterile so they would be sealing bacteria into the cut. Instead they just apply antibacterial on the incision and let it heal. It looked so clean and the piglets just ran around like nothing was bothering them.

Look at this cute little piglet.

On another afternoon we drove up the highway to San Simeon to watch the elephant seals. There is a protected area where they congregate in large numbers.

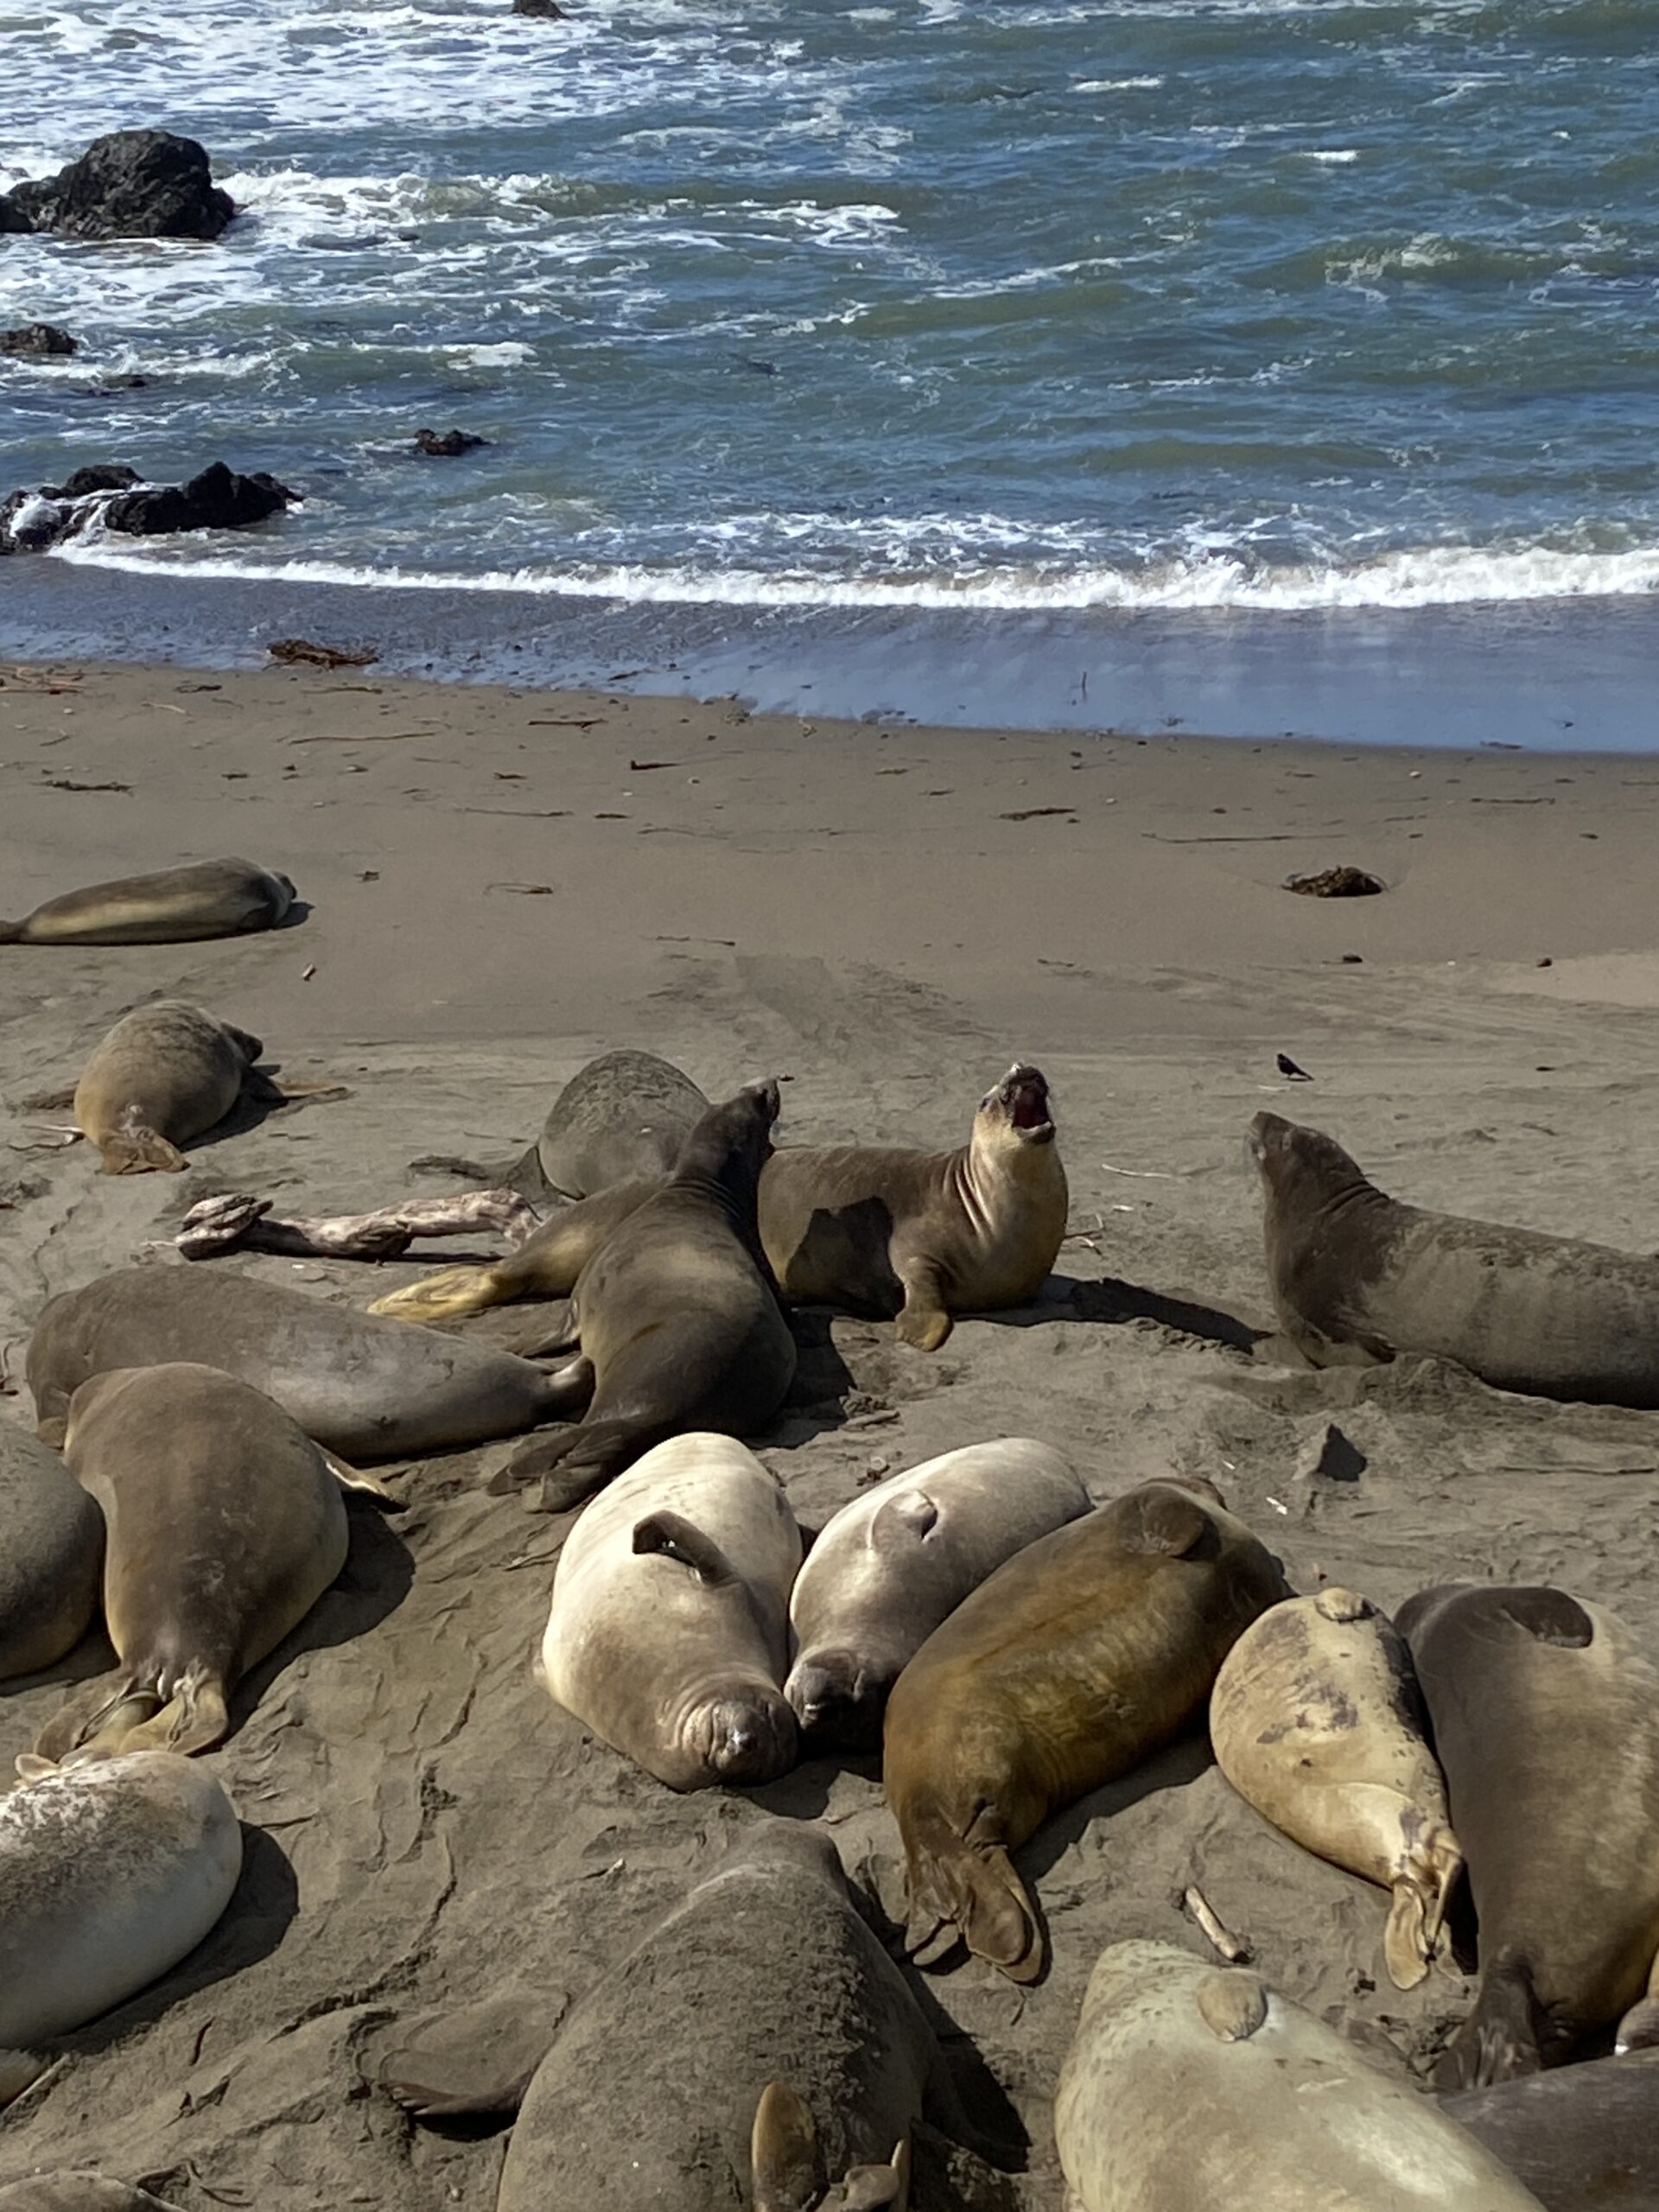
At this time of year, it is the females and the babies who are on the shore. They sure have a hard life – lounging on the sand day in and day out. 🙂

As always, it was nice to get home yesterday. The next time we go down to San Luis Obispo will be in June to celebrate Julia’s graduation. How wild!! Her college experience was less than traditional considering the hiccups due to the pandemic but she is definitely ready for the next phase in her journey.

Books, Libraries, and Minnie Mouse

Believe it or not, that title will make sense after a bit! I have some fun things to share with everyone. Where to start though??

Let’s start with this book. I just finished it today. It is such a great story. I enjoyed the audio version and have high praise for Julia Whelan’s reading of the book. It is a story of the Pack Horse Librarians in Kentucky during the Depression era. Jojo Moyes wrote a riveting story and I found myself listening to it almost non-stop. It was really hard to put it down. These women were brave and so determined to bring literacy to the poorest Kentucky families. For more information on these devoted librarians, check out this article.

Speaking of libraries, a few months ago I mentioned I was looking for some volunteer work within this new community I moved to. I joined the Friends of the Library for the Port Orchard library. So far, I have been working on Wednesday mornings sorting and shelving books in the Friends of the Library bookshop. I am throughly enjoying this and the group of women are very fun to work alongside. The group provides the funds for the children’s and teen programs in the library. I have long been a huge fan of public libraries and this is a good fit for me.

Shall we take a look at how Minnie Mouse might fit into the conversation here?

Several weeks ago, I was in JoAnn’s and came across this Minnie Mouse fusible appliqué. I didn’t know what I would make with it but I bought it anyway. My youngest grand daughter is currently obsessed with Minnie so I knew I would come up with something fun to make with Minnie. We are going to the kids’ house this weekend to celebrate A’s 3rd birthday. Now seemed to be a good time to put Minnie to use. I knew I had several remnants of Mickey Mouse and Minnie Mouse fabric in the bin of novelty fabrics.

After a bit of thought, I decided to make a book bag for her. She goes to the library fairly often and this will be a fun way to carry her books back and forth. Before I constructed the bag, I fused the appliqué to some bright yellow fabric. Then that bit was fused to the outside of the bag and stitched down with a satin stitch on the machine. Before sewing the lining to the outside, I fused some batting scraps to the fabric and quilted a few straight lines to hold things in place. The straps are also filled with fusible batting.

I did get a bit carried away and made this book bag a little too big. If it is really filled, she may need Dad to help carry it. I think she will be excited when she sees her favorite mouse!

Now that my round robin quilt is finished, I have pulled out another project to work on.

RSC 2021 Blocks

These diamond blocks were made in 2021 as Rainbow Scrap challenge blocks. I love the blocks and finally have the time to finish this quilt. They are all going to be sashed with white and there will be six inch blocks of white separating the blocks in each column. I’ll share more on this soon. Makes me happy to be playing with these again!

As you all know, Julia is at her happiest when playing in the barns with the pigs. This photo just makes me laugh. Doesn’t this silly boar look like he wants to come out and play with Julia? Honestly, she takes the best pictures of these funny animals.

That’s it for now – Enjoy your day and I will do the same!

Linking up with a few favorites – check them out at the top of the page, under Link Ups.

Round Robin Finish

Today’s finish leaves me slightly astounded. If you have been reading my posts for any length of time, you know I am not one for finishing a QAL in a timely fashion. This is clearly evidenced by the quilt top I made for the Mosaic Mystery QAL back in 2019 which still awaits completion. The quilt top is so pretty too! The poor thing deserves to be finished. Well, this year I have been trying to change all of this. I decided to start finishing up the projects that have languished. Additionally, I have been working really diligently to use up the fabric on hand (of which there is a large supply).

My fabric stack for the Morewood Mystery Quilt

Further illustrating my point is the stack of fabric I had selected for the next QAL I was going to join. This photo was taken in August 2020. I went so far as to cut most of the pieces and stitch up a large number of half square triangles before I realized I just wasn’t into it. Not sure what happened but I didn’t like where it was headed. Then the pieces sat in a project bag until SAHRR 2023 began. Not knowing exactly how this round robin would work out, I promised myself to use as many of these cut up pieces as possible. It worked out well and I was able to utilize every HST I had made! Of the pieces I had cut for the Morewood Mystery, remaining are a large stack of six inch squares cut in the orange and green batik and an even larger stack of 2″ x 6″ rectangles of the polka dot fabric. These three together should work in some design for another quilt so they are bundled together for future use. Overall, I am super pleased with how many bits were used for the round robin.

Here is a shot of the entire quilt. It is quite joyful to me. This quilt is so colorful and a maybe a bit on the crazy side with the variety of pieces and types of blocks included in it.

There are loads of different quilting motifs used on the quilt. My only plan was to treat each border or section uniquely. I haven’t done lots of free motion quilting lately. In an effort to finish some projects, I have relied on quicker straight line quilting.

To ensure a reasonable level of success, I have been practicing a bit. Also, I have been doodling on a large whiteboard I keep in the sewing room for this. (Do you have one? It is a great way to practice the designs before actually sewing. Doodle, erase and doodle some more!) Above you can see some daisies, stippling and my interpretation of ribbon or ribbon candy on the right.

My favorite motif I used is a flower which I quilted on the center of each square in a square block. Those were super fun and once I got going they were not difficult at all. I did a fair amount of stitching in the ditch as well. Not every bit of the quilt has been quilted down which leaves it nice and soft.

For the backing I used a width of this red print leftover from my shop. I have quite a bit of this – maybe another five yards. It is likely you’ll see this on the back of a few more quilts. Because the quilt ended up being 48″ wide, I had to add a narrow stripe of white to each side. I also have about three more yards of the polka dot fabric (leftover from the shop) and used some of it to bind the quilt.

I did not have a quilt holder available because Ray has been down with a virus all week. Instead, I used the front porch here.

This shot is in a wooded area in our front yard. I like taking outdoor shots when it is a bit overcast. The colors are so accurate here.

This round robin was so much fun and way out of my norm. The fact that I didn’t know what was coming next and no sizes were dictated to me was a stretch. Working this way taught me a lot. While I don’t want to pick apart my finished quilt and decide what I don’t like about it, there are a few takeaways that I hope to remember next time. Learning from each project is a good thing though. Isn’t that how we continue to make progress?

Thank you Gail for dreaming up this event back during the days of lockdown and loneliness. I am super happy I joined in this year and am already crossing my fingers you will host it again next year! (Please???)

Linking up with the final link party (tomorrow) over at Quilting Gail’s as well as Oh Scrap!. I hope you will check out the other SAHRR finishes. It is incredible to see the variety of interpretations of this event. Really amazing.

There is still plenty of time to purchase your ticket to the Color Mixer event coming up on March 30th! If you want to read more about this virtual class, the details are here.

SAHRR Round 6

Woohoo – The final round of the Stay at Home Round Robin is finished and I have a quilt top! This was a super fun event for me and I am so happy Gail thought of this during early Covid days and continued it with a growing popularity.

Gail chose the block for the last round and it is pinwheels. Without any sort of plan, I separated any remaining HST’s from that stack of old prepared bits I have been trying to use up. Then I made pinwheels with them.

After this set of pinwheels I also made some with red/polka dot HST’s. Each set of pinwheel blocks finished at different sizes. I decided the green and blue pinwheels were too small, the blue and polka dot were too big but, of course, the red and polka dot were……………… Just Right! Next I set aside the tiny green/blue version – they will be used elsewhere because they are super cute. The blue pinwheels were trimmed down to 4 1/2″ to match the red version. While I do have quite a bit of the batiks remaining from that previous project, I used each and every HST I had already made. That is a big win for me!

To add length, but not width, I made a top and bottom border with the pinwheels.

The finished top! Next up for this project is to give it a solid pressing and baste it. I prepared the backing already. The width is 46″ so I had to add two narrow strips to my backing to have a wide enough piece.

This was a very fun project – one I learned a lot from. I will be back before the March 13th deadline with a finished quilt!!

For now, linking up with Oh Scrap and Quilting Gail.

Just in case you didn’t know, March 1st was National Pig Day (don’t worry, I didn’t know either). But you can bet Julia knew. 🙂

Comfort Quilts – Who Really Benefits?

It is no secret I enjoy making quilts for other people. I have given them as birthday, wedding, baby and “just because” gifts. But my favorite thing is making comfort quilts. Making a quilt for a person who is going through a rough time for whatever reason is the most rewarding sort of quilting. I love the idea of imagining this person who is sad or feeling blue receiving a handmade gift. The person then knows there is a another person, somewhere out in the universe who felt the desire to lessen their pain even the tiniest bit by spending time making something for them.

Who knows whether this person would understand the time it takes to make a quilt? Or if this person knows there is expense put out to make this gift? That isn’t the issue. For me it is all about wanting this person to have a positive experience in the midst of a negative time in their life.

The quilt I am sharing today happened due to some crazy team work. Somewhere a quilter made the 16 patch blocks. I can tell these blocks were made quite some time ago. They were frayed at the edges and a wrinkled mess. Along the way, the first quilter decided they couldn’t finish the quilt for whatever reason. The blocks were then passed along to another quilter who promised to make a comfort quilt with them. Then these poor blocks languished for a long while, making the second quilter feel a bit guilty for not getting it done. She posted on Instagram that she would send them to anyone who would promise to finish up her promised task. I raised my hand quickly (on Instagram of course) and she mailed the blocks to me. (She actually mailed two sets of unfinished blocks and I have the second set out and ready to work on).

Due to my move up to Washington last spring, it took me some time to get to these blocks but I finally did. Looking at the blocks closely I saw they needed some work. I squared them and reinforced many seams that were coming apart. Next, I set them on point with a solid navy blue background. After laying them out, I realized I would have a few blocks left over. I used them as the border. The fabric was already fraying so I didn’t want to unpick the seams. Instead, I just stitched the blocks in a column and then sliced long strips. (Does that make sense)?? That made a nice border for the quilt.

Straight line quilting makes things easy.

I used this super cute print (I think it was a Moda fabric?). I remember buying it last fall when I was at a fabric sale for a local sewing group. I had gone to that sale looking for pieces large enough to use as backings and this was one of the pieces I picked up.

Zooming in on the backing so you can see it better, check out the cute birds, oak leaves and acorns. I really like this piece and used just over half of it for the backing.

As a result of three quilters working together another quilt will be donated soon. First I want my daughter in law to see this one and the quilt I recently made as part of the Villa Rosa Designs blog hop. Unfortunately, a woman my DIL works with just went out on leave because her husband has terminal cancer and is now under hospice care. My DIL asked me for a quilt for them and I am very pleased to give her one of these.

How about you? Do you get a strong positive feeling making quilts for a person unknown to you? It sends much needed kindness out into the universe. There are many organizations who want quilts such as these for their clients or patients. It makes me happy to participate and do what I can to fill that need. Working with two other anonymous quilters, together we made one more quilt.

Linking up with my favorites – check them out at the top of the page, under Link Ups.

SAHRR Round 5 – Square in a Square

Square in a square quilt block – that is my kind of block. Easy peasy. It is also the block of choice for round 5 of the stay at home round robin event. Emily at The Darling Dogwood chose this round. Her example of the block is extra adorable because she appliquéd flowers to the center of each block. I strongly suggest you take a look if you haven’t seen them yet. She is so creative!

This is where my quilt is so far. It is kind of wild but I am enjoying it. It has been a long while since I have used any batiks and I forgot how much I like them. For this week, I did two plain 4 1/2″ strips up each side. Then I attached a row of square in square blocks to the top and bottom.

When I made the S in S blocks I chose to use a green center (because they were already cut in the stack of fabrics I am using up). Then I used blue smaller squares for the corners (because, guess what – they were already cut)! I did have to trim the polka dot squares for the fourth corner – they were cut but were a 1/2″ too big. These came together so quickly since I didn’t have to cut fabric.

Wonky Flying Geese

You might notice I haven’t yet incorporated the flying geese blocks. They are a little bit weird looking and I can’t decide if I want to use them or now. For now, they can sit and wait. Maybe it will happen, maybe it won’t???

We had a lot of fun helping our son and his wife move into their new house last weekend. It is so exciting to see them settling into the house. Still lots to unpack and organize but they made huge progress last weekend.

Of note is the quality packing job I did with their tray of flatware. Haha.

We had hoped to see the girls this week but the never-ending virus has descended upon their house once again. Big sister had a fever Saturday through Tuesday. We thought it was one and done but little sister decided to join in and spiked a fever today. Ugh. I remember those days of seemingly endless viruses, fevers and runny noses. I feel for the girls (and for their parents).

Rather than close on that dreary note, I will instead share this cutie pie. Little sister has it in her head she must get out of the car and watch the bus take her big sister off to school. This slays me. She truly loves her big sister.

OK – back to the sewing room. I am going to baste a comfort quilt and get it finished up. I will share it soon.

Happy Sewing everyone!!


Linking up with the usuals – check them out at the top of the page, under Link Ups.

Flying Geese, Mountain of Mulch, Woodland Gardens and Baby Gifts

This has been a fun week. I like when there is a little of this and a little of that. Maybe I just have a short attention span. Actually, I don’t have a super long attention span so it is likely that is why these sort of weeks appeal to me.

We had dry (but cold) weather this week so Ray and I did a lot of work outside. My muscles are feeling it but that is a good thing. The perimeter of our property is surrounded by wooded land. The previous owner went with the ‘au natural’ look which is fine to a certain extent. But we wanted to clean up the many, many trees that were down and left to rot. That way we could have some walking paths through the trees. To that end, Ray did loads of chain saw work and even pulled a dead tree down using his car. (That was a bit unnerving!)

We have had an arborist out to take out some larger trees and to clean dead limbs off of others. He and Ray struck it off well and now we have a source of free mulch when we need it. This week the arborist dropped off another load for us. This is so useful when there is lots of property to be maintained.

This mountain of mulch won’t last too long around here!

Lenten Rose, Primrose, Astilbe, Caladium and Snowdrops

Here is the start of my woodland gardens! Not pictured are a bare root rose, two hydrangeas and a rhododendron. All of this was planted except the caladium which will be started in small pots and transplanted when the weather warms up. I am so excited to see some blooms come spring time.

For now, the primroses give me a little burst of color.

SAHRR 2023, round 4

This week’s round for the Round Robin event was decided by Anja (AnjaQuilts). She has declared it to be the week of flying geese blocks. I decided to get all fancy schmancy and try making the Stroked Flying Geese that I saw on a tutorial at Art Gallery Fabrics. They are super cute but the middle stripe is uneven which is a bit bothersome. So…… this is my plan. Today I will try making them again today and if I can get that stripe to be more even, great. If not, I will declare this was on purpose and these are improv geese. More on that as I make some progress. Either way, I am not going to sew this border on. Instead, I’ll wait to see what next week’s round is and decide if I want to combine the rounds.

Who likes a striped binding??

I am sticking to my plan of sewing my stash but come on…. I am out of stripes and who doesn’t love a striped binding? I ordered a 1/2 yard of each of these and they are set aside for use as binding.

On a recent Instagram post I asked everyone if this wall quilt should be finished with a circular quilting design or matchstick quilting. Most people called for circular and I was going that way as well. However when I looked closely at the fused arrows, it seemed like the fuse was not super tight. Matchstick to the rescue. This quilting will reinforce the fused arrows and it looks cool too! The quilt won’t be handled or laundered so this should be great. (Not sure if you remember but I bought this Alison Glass kit of laser cut, fusible pieces at a quilt show last fall – for a buck!!)

Another project that happened was stitching and assembling two cloth books. My niece is having her first baby this spring and I plan to send these off to her. I love these soft books for babies. The colors are bright, the pages won’t tear, and the story is simple. I had the pieces all cut out so this was super quick.

Well that was my week in a nutshell, or a blog post. This weekend my husband and I are heading north a bit to help my son and daughter in law move into their first house. I am so excited for them – home ownership is a huge step in life.

Have a great weekend everyone!!

Linking to my favs – check them out at the top of the page, under Link Ups.

Round Robin, a Comfort Quilt, Princesses & Goats

Well, where to start with this post? How about with the SAHRR? It is coming together nicely with two more rounds to add on. (Remember this is the Stay at Home Round Robin hosted by Quilting Gail. This year marks the third year of the event but the first time I have participated.

Hourglass blocks were the choice for this round. Chris @ Chrisknitssews took us through making these symmetrical blocks. Of course it is up to each quilter how to use them. I made tiny hourglass blocks to utilize the HST’s that I already had. Then I bordered them with strips of batik to get them to finish at 4.5″. At first I was going to put them on the darker blue batik because the colors are so vibrant on the dark background.

However, when looking at the quilt top I decided not to put two dark blue rounds side by side. Instead, I placed the hourglass blocks with the turquoise blue batik. Maybe I will continue to alternate the shades of blue.

16 patch blocks on point

On to the next project. Sometime before we moved I saw a post on Instagram from a woman who wanted to give up some blocks to anyone who would make a comfort quilt with them. I offered and she sent me two sets of blocks. The blue and light brown 16 patch blocks were one of the sets. These blocks had been made quite some time ago but after trimming them and reinforcing seams here and there, I put them together in this simple setting. They look sweet and with the added border, the top is just large enough to be a cozy lap size quilt. I need to look through my yardage and find something for the backing but the rest of this will go together quickly.

Spring has arrived in central California. Julia is happily working with mama goats and their babies. She is having a really busy term and the time she gets with these little guys make such a nice break in her day. Those rolling hills in the background are so pretty!

Soaking up some sun.

My son and his wife took the girls to Disneyland for the first time. It was princess heaven.

I thought the variety of expressions on A’s little face were so funny.

Posing with a princess and holding their dresses just so.

Little sister decided she needed a full hug.

The girls had a quick cuddle while riding the monorail into the park. I love this picture!

OK – that is enough for now. Feels like I have lots to work on this week. Hopefully you are all involved in a project that is causing those creative juices to flow! Linking up with a few favorites. Check the out at the top of the page, under Link Ups.

Make sure to check out the Quilter’s Color Mixer event coming on March 30th. It is going to be a great opportunity to learn all about color and placement from some really talented instructors. For more details on the event, click here to read my previous post.

Color Mixer; Learning More About Color & Fabric

The topic of today’s post is so exciting to me! I have mentioned many times before my difficulties with selecting color, choosing fabric pulls, and understanding the values of various colors. Over the last five years, I believe I have improved. When I look at quilts from some years back and those I have made recently, I see a larger variety in scale and value. But could I learn more or improve? You know it. Fabric selection and especially color palettes, make or break the quilt (in my opinion). It seems like this knowledge knowledge of color and placement is intuitive with many quilters but it isn’t for me.

In order to improve my abilities, I have just purchased the upcoming Color Mixer class being put on by Creative Spark. When I saw this opportunity pop up in my email it seemed so perfect for me. The live event is on March 30, 2023. After the event, recordings of each talk will be available online for quilters and sewists who purchased a spot at the event. This means if you are unable to attend on the 30th, or cannot watch the entire event that day, it is forever available to you beginning April 2nd.

The keynote speaker for Color Mixer is Jean Wells, founder of the super popular Sister’s Outdoor Quilt Show in Oregon each summer. Jean has written many books and is an extremely talented quilter. Honestly, hearing her speak was one of the main draws for me in buying a ticket for this event. Here is the panel of talented quilters who will be giving talks on various subject revolving around color. The collective wealth of talent here is amazing.

There is a tremendous amount of knowledge to be gained by listening to classes given by the quilters on this panel. If you would like to read the specifics about the talk each of these quilters will be giving, click here.

To explain the event a bit further, the live event lasts four hours on the 30th. There will be break out sessions with several talks scheduled for each time. You’ll choose those you want to listen to on the 30th and then when the recorded event is uploaded on or after April 2nd, you can catch up and listen to the rest of the talks. For me, I am most looking forward to listening to Marci Baker, Debbie Maddy, Jennifer Sampou, Cheryl Brickey and Maria Shell. But each of the speakers offers something interesting and helpful. If taking an online class is unfamiliar to you, I wouldn’t worry too much. Creative Spark has great support throughout the event and will be helping attendees get to the class they want.

Here is the schedule of events –

Quilt classes are a lot of fun and I have taken some that I really enjoy. But I am not one to go to any of the really big quilt shows (think QuiltCon) due to the cost of these events and the fact that I truly dislike crowds. This is our chance to hear some of the same designers and teachers who teach at the bigger shows for a really reasonable price and from the comfort of your home. This is my kind of event!!

No event is complete without a swag bag and prizes. There is a grand prize which each student is entered into the drawing for. Also a (virtual) swag bag is provided to each attendant. Fun stuff!

Hope you will join me in attending these classes! If you click here or on the color wheel above, you will receive a discounted price of $29.99 for the event. Are you as excited as I am? Let me know which instructor you would most enjoy learning from in the comments below!

**************************************************

(Likely, you already know this but I am an affiliate and thus will receive a small payment for each person signing up through my post. This happens at no expense to you.)

SAHRR Round 3

I was happy to see that Wendy (Pieceful Thoughts) chose stars (of any sort) for round three. Her example was the friendship star and I decided to go with that block. Friendship stars are sweet and very simple to make.

Isn’t this adorable?

Remember I am using blocks from a tossed aside project. Have to say, I am enjoying having these forgotten HST’s to work with. It is so much easier to cut tiny HST’s from oversized blocks. The bits for this block were cut at 1 1/4″ so they finish at 3/4″. For me, that is very tiny! The finished friendship star measures 2 1/4″.

Before adding the round of stars, I first stitched a border of turquoise to the quilt. I am trying to grow this quilt and will (probably?) keep putting borders on between the pieced borders. With this round of stars the quilt measures 30″ square. There are four more rounds to go.

I wanted the stars to be set into a darker blue. I also decided not to put very many on with this round. The quilt needed to be calmed down a bit. The navy blue border with just a few stars was the ticket. So this round is actually done with a couple of days to spare! Now to wait until Monday to see what comes next.

This popped up on Instagram a few days ago and it sure made me laugh. Likely more than a few of you can relate, right?

Linking up with Pieceful Thoughts today. Hop over there and see lots of interpretations of the SAHRR quilts. Enjoy your weekend everyone.