Tag Archives: baby quilt

Welcome to Another New Year!

The holidays have passed, my Christmas decorations are put away and we are almost two weeks into the new year. At this time of year I used to look at what I did in the past year and outline what I hoped to focus on during the new year. My thoughts on both are sort of rumbling around in my head but I am going to try to jot them down.

The biggest event in 2024 was the birth of my third grand daughter. Clearly she has decided to make her parents crazy from the get go. She arrived a full three weeks early. When my son told me she had been born early in the morning on an October day, I was so surprised. No one was expecting her so soon! On her second day in this world, the pediatrician noticed something awry with her heart. It turned out to be pulmonary stenosis. In brief, this condition is a defect in the pulmonary valve to the heart and it restricts the blood flow from the right ventricle to the lungs. It is a big deal and when a 6 pound newborn is sent by ambulance to Children’s Hospital. It is just terrifying. She was in the ICU for the better part of a week. Her parents were afraid as were we. But the pediatric cardiac surgeon did a very successful procedure to enlarge the ventricle and she is just fine. It is likely this procedure will have to be repeated when she is older. She will also have cardiac care forever, to monitor the valve. However they say she is healthy and it should not be a huge issue. Yikes, this little one threw all of us for a loop in those first days.

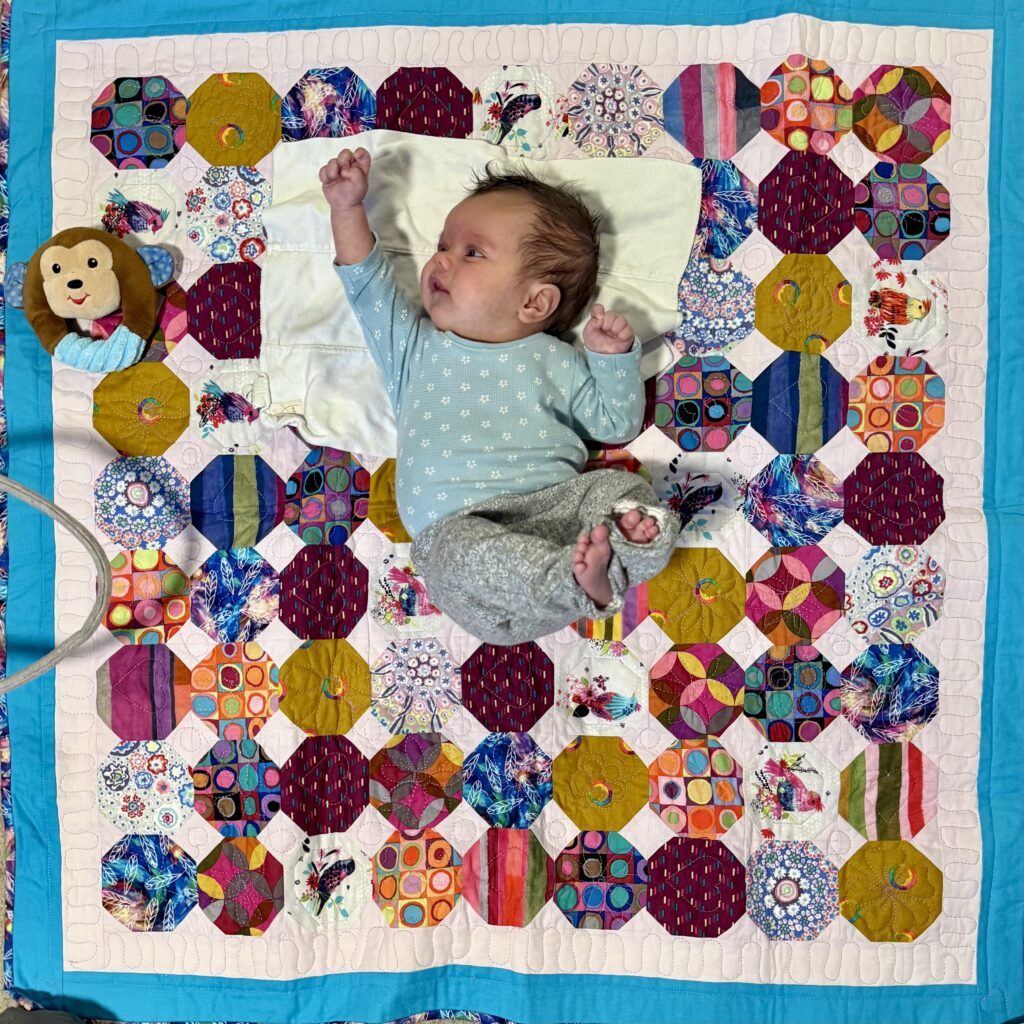
Of course I did make my grand daughter a little quilt. I had a fun time with it and finished in back in September. I gave it to her parents at a baby shower in late September. For the quilt, I chose a stack of nine fabrics (nine was an instrumental number as I will explain in a bit). Each block is a six inch square that is ’rounded’ to a snowball shape using stitch and flip corners. For the corners, while I didn’t sew them on improv style, they were very free-hand. Each circle is a bit different from the last and I squared them up to make the blocks the same size. However, the triangles between them are all slightly different.

The fun part was this. When I was making blocks, I began to dread the process of laying the pieces out and balancing which fabric was where, making sure no two same fabrics touched, etc. I was thinking about how to do this with some logic and less hassle and thought about Sudoko puzzles.
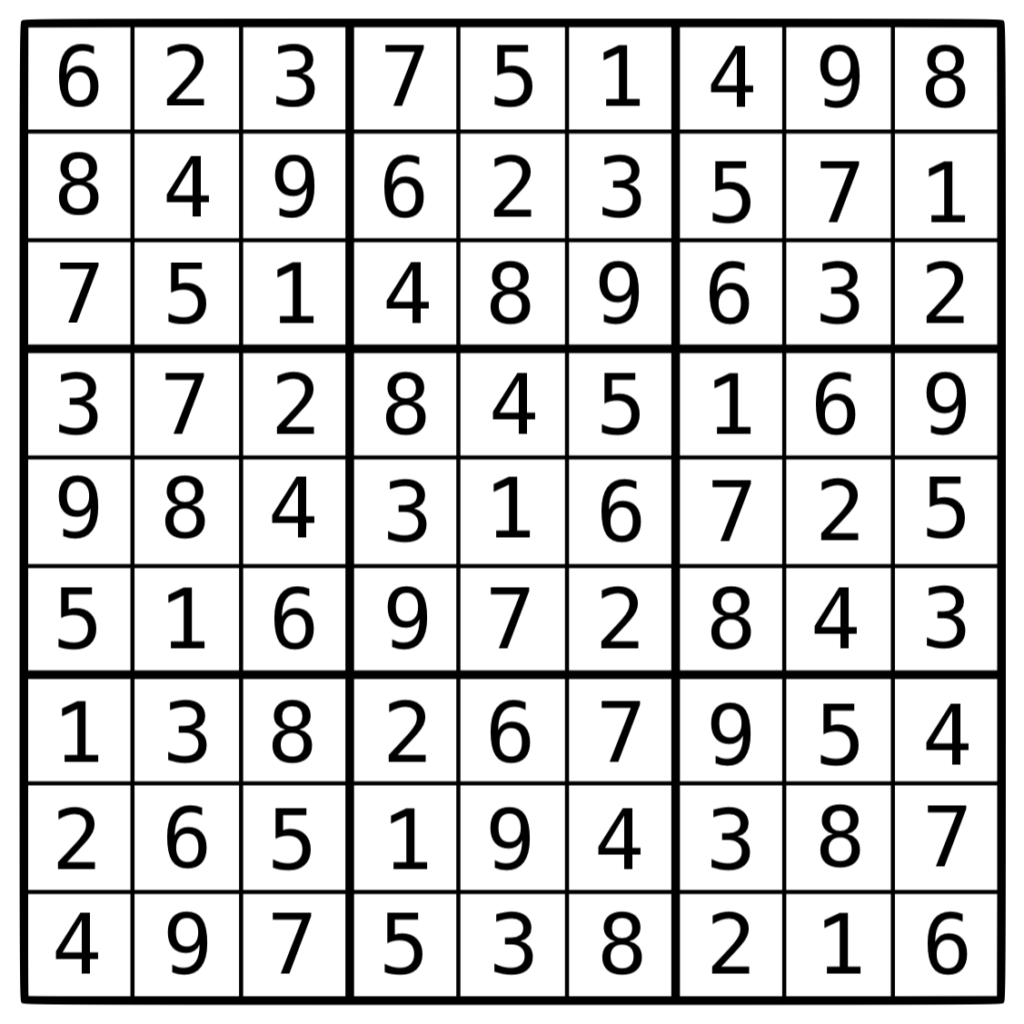
Because I settled on nine fabrics, I was able to assign a number to each fabric and then just place them as they were on the puzzle. This put one of each in each row and column. I didn’t think about it at all and sewed nine patch blocks to match the puzzle. It was so simple. Of course as I sewed the nine patches together, I flipped one the wrong way and the whole thing now had a kink in it but at that point, it didn’t really matter. For the most part the fabrics were laid out in a balanced fashion. There is a print with a bird on it and the birds are pointing all in one direction but in the photo below, the quilt is sideways. So the birds are lying down and resting. 😉

This Sudoku method was super helpful for me and I will totally use it again.
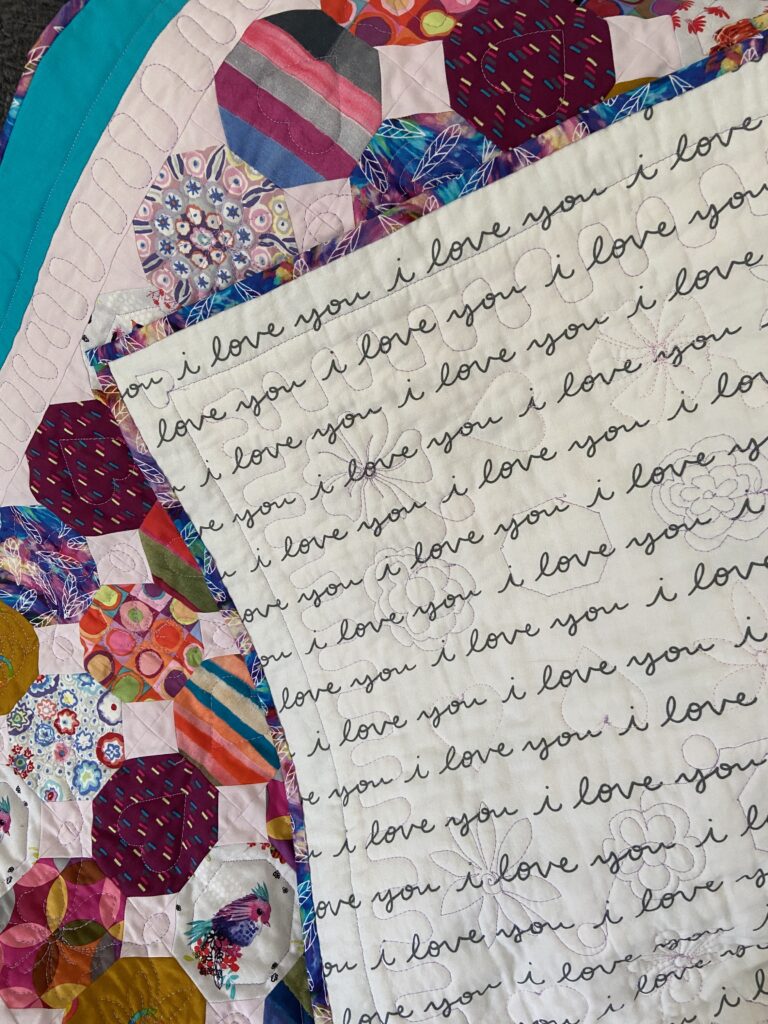
Below you can see the backing and binding. The ‘I Love You’ fabric is actually a crib sheet. Her bed has these sheets and I thought it would be fun to use one on the back of the quilt. I quilted it free motion with hearts and flowers on the snowballs and a curvy line in the first border.
When I looked at my projects for 2024, I found I had made seven quilts. This is the lowest number in years! The bug to sew and quilt was not nearly as strong as it was. I did make some garments which I shared in this post. I have a couple of quilts I haven’t yet shared and will write a post on them soon-ish.

The fact that I made just seven quilts, seemed to create less of a need to post on the blog. In 2024, I wrote only 17 posts! For someone who enjoys writing and talking about whatever to whomever, that isn’t a whole lot of blogging!

This leads one to wonder what the heck I did do all year. Thinking back, plus looking at my photos on my phone (the best way to look back in time) I see my time was spent with family, our grand daughters, running, working on my crochet skills, volunteering for Friends of the Library and reading.

I worked on improving my time for running 3 mile stretches (5 km races) and did shave off a considerable amount. Over the year I ran 224 miles. In the end of April I pulled a muscle in my calf and had to take the entire month of May off from running. But averaging the miles ran over 11 months means I ran about 20 miles each month. Over the year, if I didn’t run, I tried to make sure to walk. My total for walking was 268 miles.

My volunteer work at the library continues to evolve. It is such a great group of women and I very much enjoy working there. I have taken on a few projects and love being able to contribute my time as there is such a direct correlation to increasing the funds raised for the library.

For 2025 – Hmmm…. I don’t have a huge list of goals for sewing. I have been working on donation quilts using up the stacks of charm squares I have. One quilt top is nearly done and a second is laid out on the floor of the sewing room. Simple quilts that will use fabric from my shelves. I want to continue on with this. Also, I bought the DuoLingo app and have been practicing my Spanish. I have only a tiny bit of Spanish that remains in my brain since taking it in high school in the 1970’s. Time to stretch my brain cells and see what I can re-learn! Running to keep fit is still high on the list. Can I squeeze in more than 20 miles each month? I know there is time to do it, mostly I just have to put on my shoes and get out there!

There is always more to be said but for now, this is enough. Wishing you all the best in 2025 – good health, much joy and lots of time to be creative!

Big Stitches and Strip Quilts

Somehow a month passed by and I wasn’t struck with the urge to write. Not for lack of projects to share however. I have found quite a bit of time to be in the sewing room. Let’s take a look at a few projects.

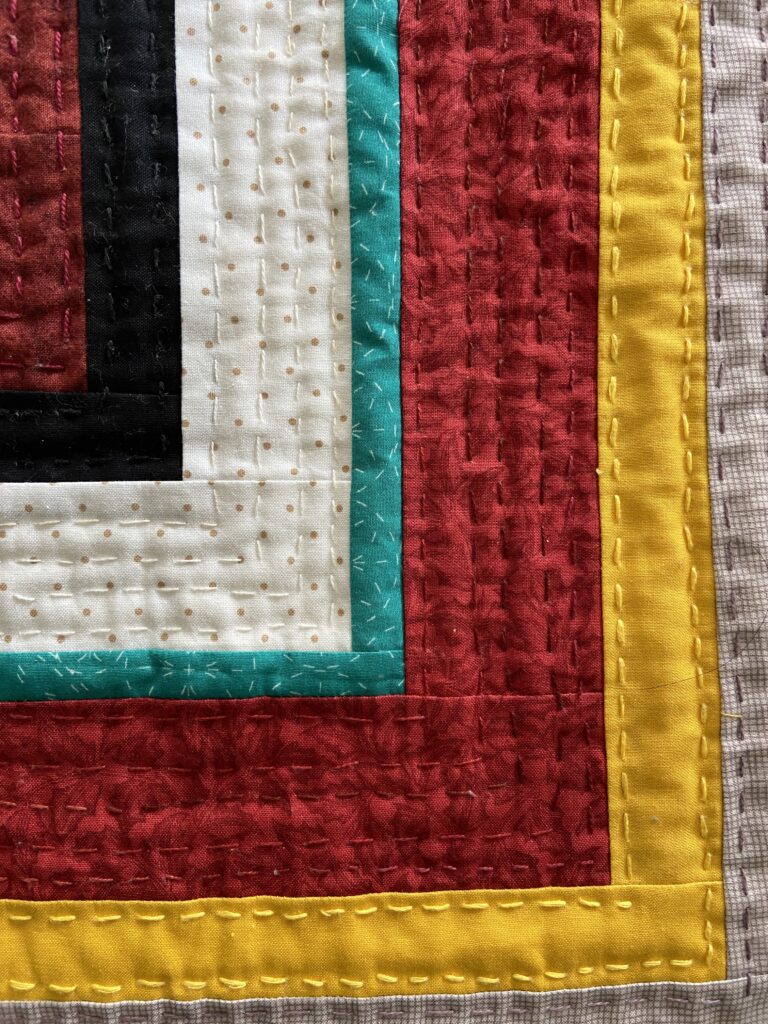
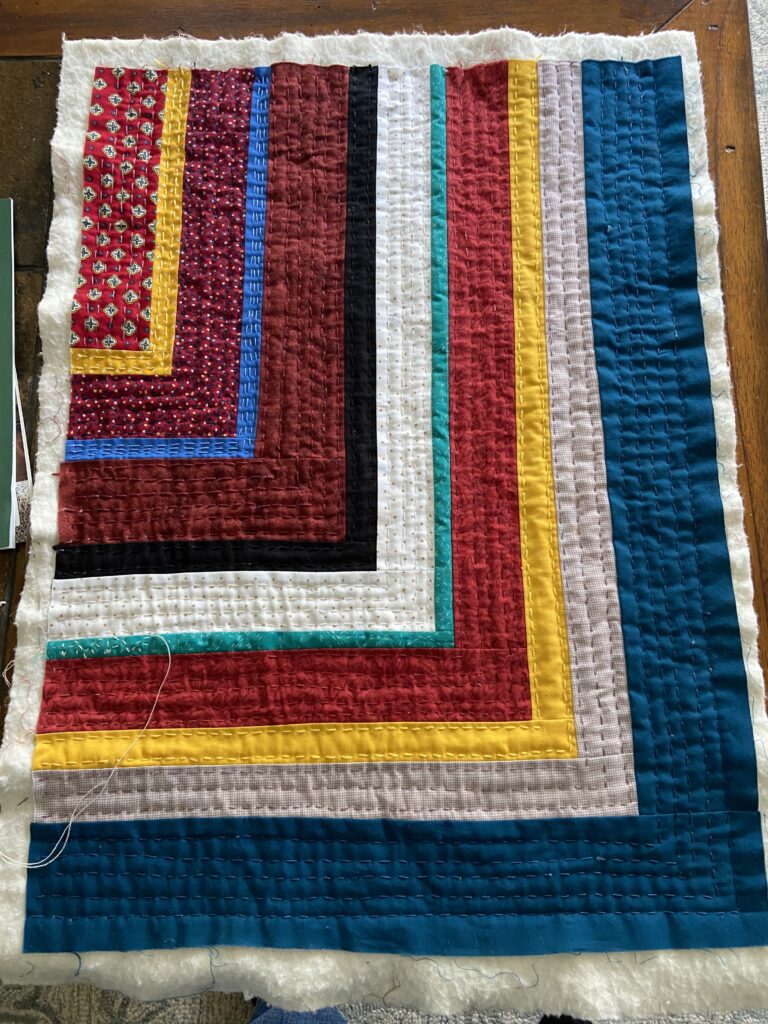
Quite a number of weeks ago, I decided I wanted to make something that I could hand quilt with big stitches. I love the look of hand quilting and have not done a whole lot of it. I wish I could remember where I saw the inspiration for this but I didn’t write it down. It isn’t terribly unique but I did use someone else’s idea.

It took me no time to stitch these strips together. The most time was spent on choosing the fabrics. All came from the scrap bin though!

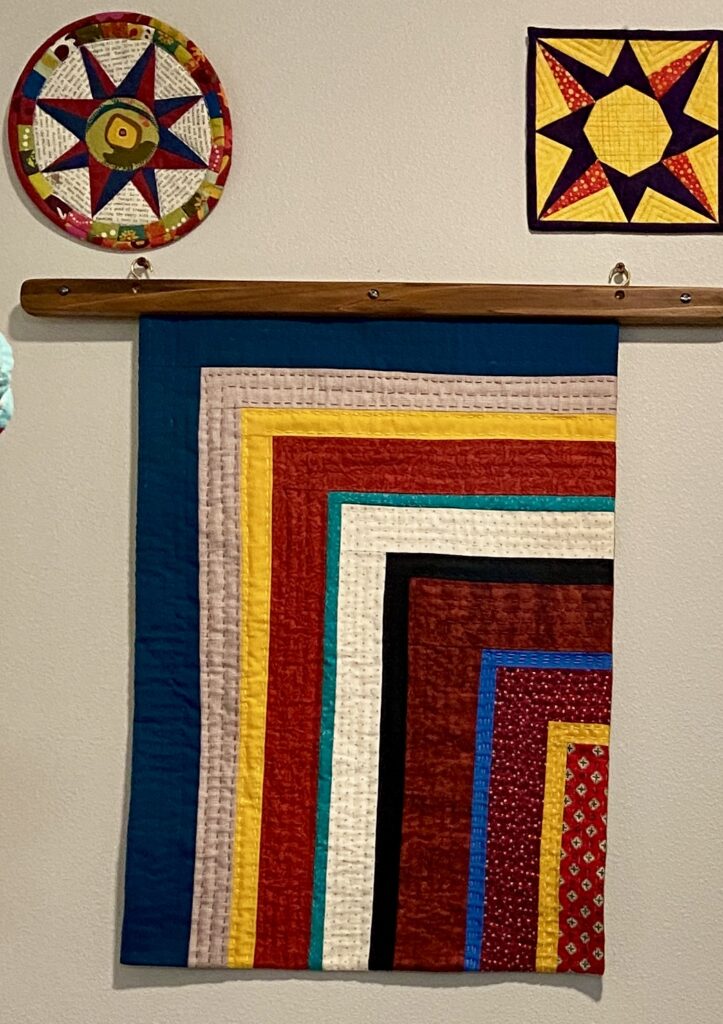
The first fabric I selected was the red print in the upper left corner (actually, this picture shows the project upside down). Not that anyone would know that but in my mind, this is upside down.

After assembling the top and basting it, I began to quilt it by hand. I didn’t use a hoop and maybe I should have. By the time I was done quilting it, it was somewhat distorted and this made it a challenge to square up for binding.

I love the stitching, even with all of the wobbles and wiggles.

Currently I have it hanging on a wall in my sewing room. I like this little hanger (made by my friend’s husband). I switch quilts here fairly often because it can be done easily. You can see this is crooked on the right side. Well, I should clarify, it is actually cut squarely but the strips are distorted. It is quirky but I like it. The colors are right up my alley. This little quilt provided many evenings of hand sewing which I enjoyed greatly.

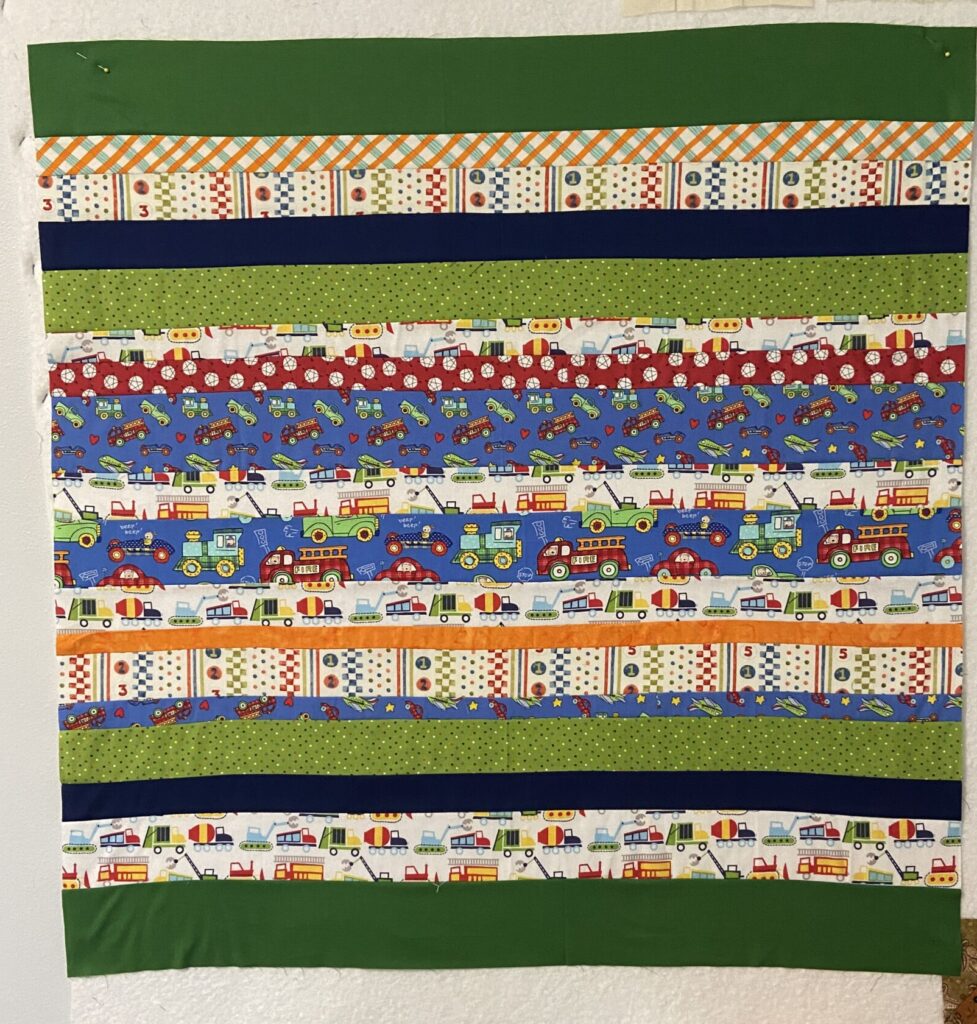
In between times, I have been sorting and cutting a bag of fabric scraps for Project Linus. I was able to cut a large stack of charm squares and 3 1/2″ squares for future projects. In the scrap bag there were loads of strips. Rather than sort and cut them, I decided to just trim them up and make a quick quilt top.

I think I will add another strip or two to both the bottom and top to make it a bit larger. Then it will be finished up. The meetings are the last Sunday of each month so I have time to get this done by the next session. It is cute, kind of busy but it has a lot of fun things to look at. I’ll share it again when it is finished.

In between sewing, we have had lots of good family time. We had my son and his wife out from New York for about 5 days which was so nice. I miss them all the time and treasure when I do get to be with them. We also celebrated Easter with lots of family, including my sister and her husband who came up from Colorado.

I have been waiting for the rain to stop and it looks like it has. Time to get some time outdoors! Hope you will leave me a comment and tell me how you are doing. It has been a long time since we’ve chatted!

First Finish of 2024

Have to say, I am on a tear lately. Lots of sewing has been happening up in my sewing room! Sometimes the mood hits just right and everything lines up – inspiration, enough time, wintry weather which encourages staying inside, plus fun projects to work on.

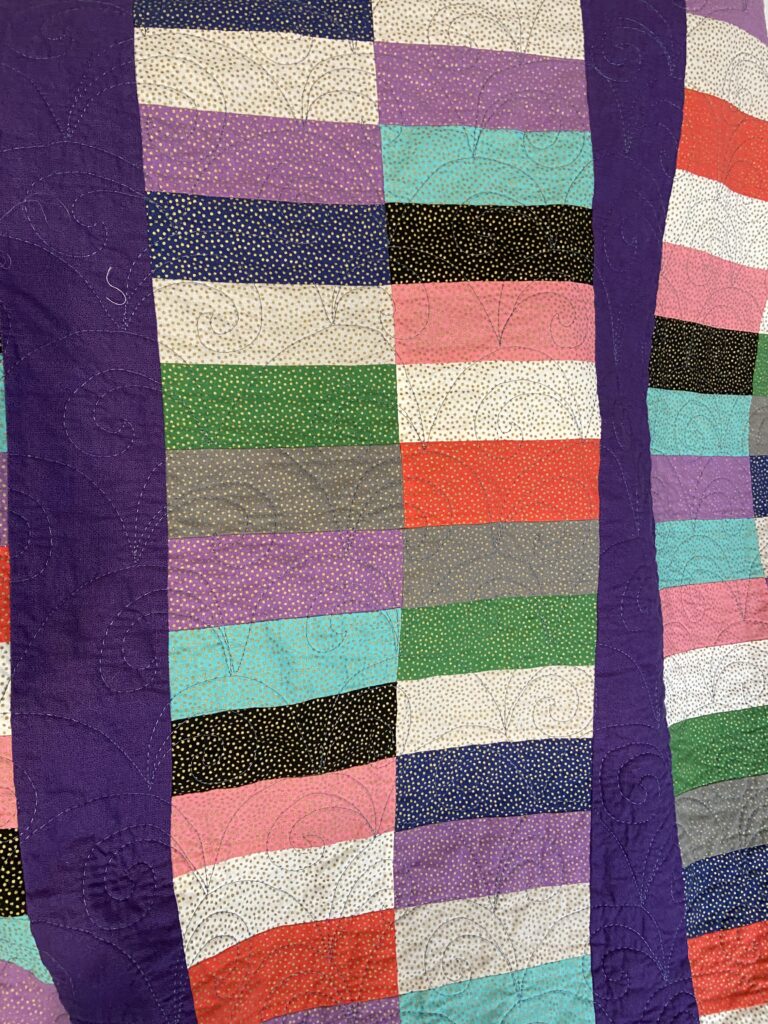
Toward the end of December, I found myself wanting to practice some free motion quilting. I pulled out a small set of 2 1/2″ strips I bought at the thrift store a while back. There were only 20 strips so I decided to make a small quilt. This makes the FMQ practice easier to do. They were odd strips – someone had cut them by hand and each one was off at one point or another. I had to trim all of them – but you get what you pay for and I paid three bucks for these!
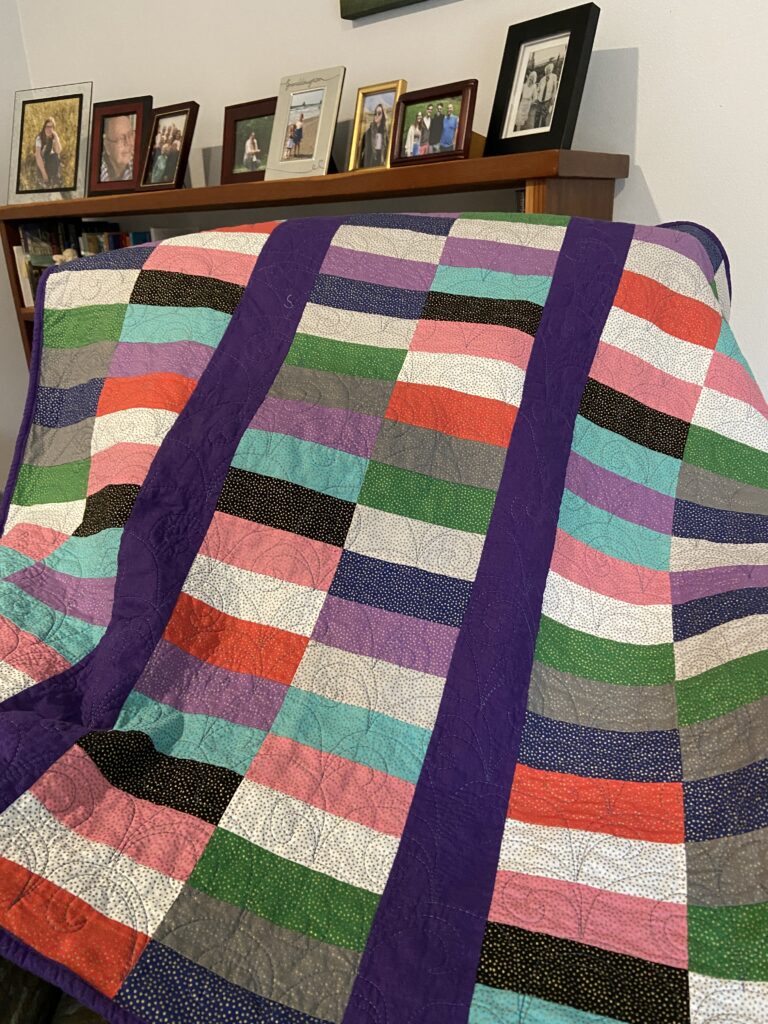
I have no idea what fabric this is but the set has tiny gold metallic dots on a variety of colors. For the most part I keep the red and black strips to a minimum. Otherwise I used the whole set. Simple columns of rectangles with a solid purple strip between them made for a quick quilt top. I strip pieced the strips in sets of six and then cut those into blocks, six inches wide. Rather than sew columns, I chose to sew two of the sets together, making blocks. Then I made the columns.

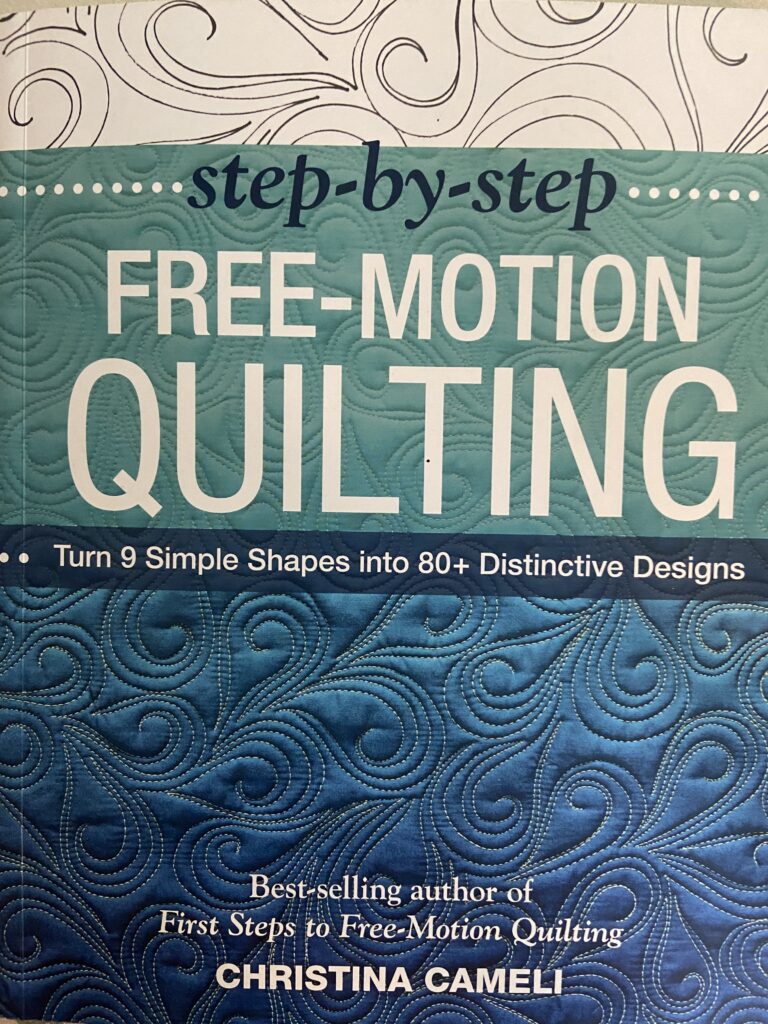
I took a look through my FMQ book by Christina Cameli to find a design to use. I wanted to quilt edge to edge so I would not have to worry about movement, getting stuck in corners, etc. As is my usual, once I settled on a design, I practiced it by drawing it on a large whiteboard I keep in the sewing room. Once it was comfortable, I started the quilting. This was such a pleasant process. Just going back and forth, back and forth – it was finished in no time!
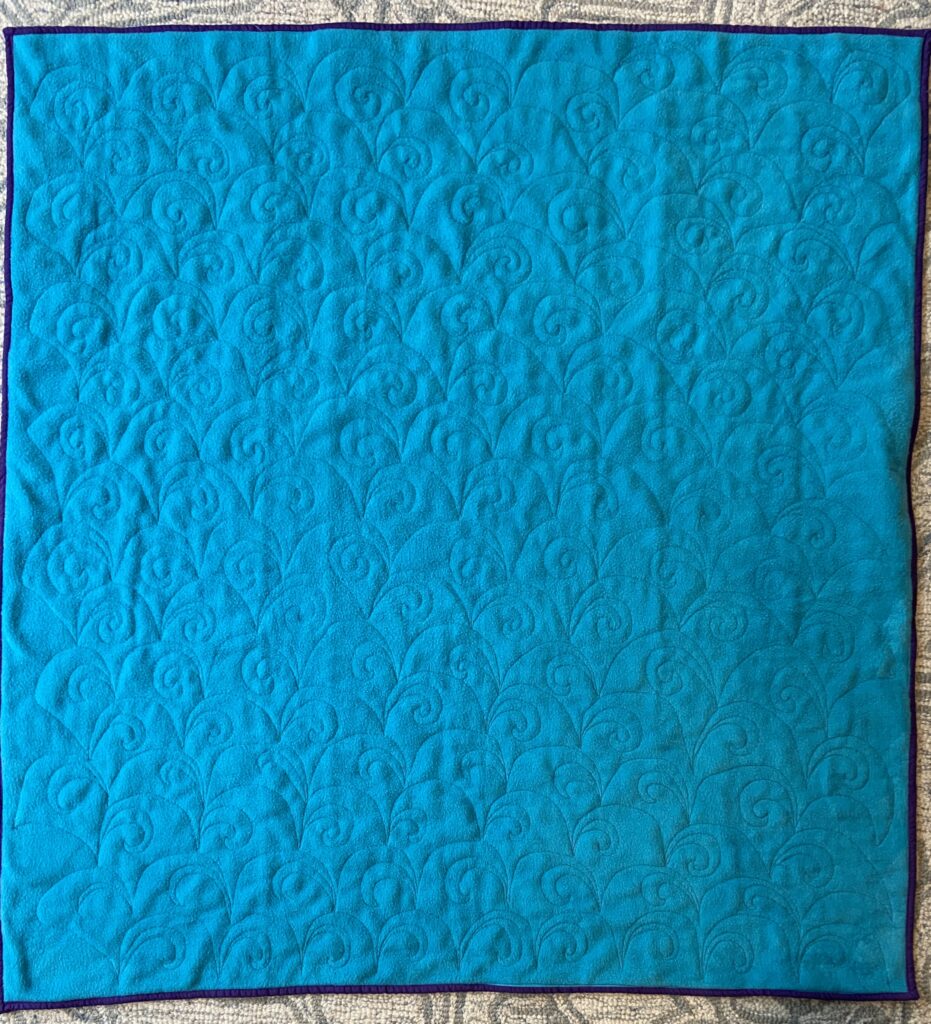
Here is a closer picture of the quilting – it was sort of a clam shell shape with a swirl inside. The motif is super easy. I started at the bottom of the quilt and moved upward. About half way through the stitching becomes so much smoother; proof to me that practice really helps. The repetitive motif gets easier and easier as my brain learns the pattern.

The quilt is backed with fleece, making it really cozy. When our grand daughters are here they tend to use one small quilt I have because it is backed with flannel. They prefer the soft feeling of the flannel. Now we have two soft ones for them. I like seeing the quilting from the back. Sure – I need to continue to practice but seems like with each one I improve just a bit. I spray basted this project but there are some bubbles on the back side. Maybe I needed to use more spray or it could be because it was fleece? I am not sure. There is always something to learn.

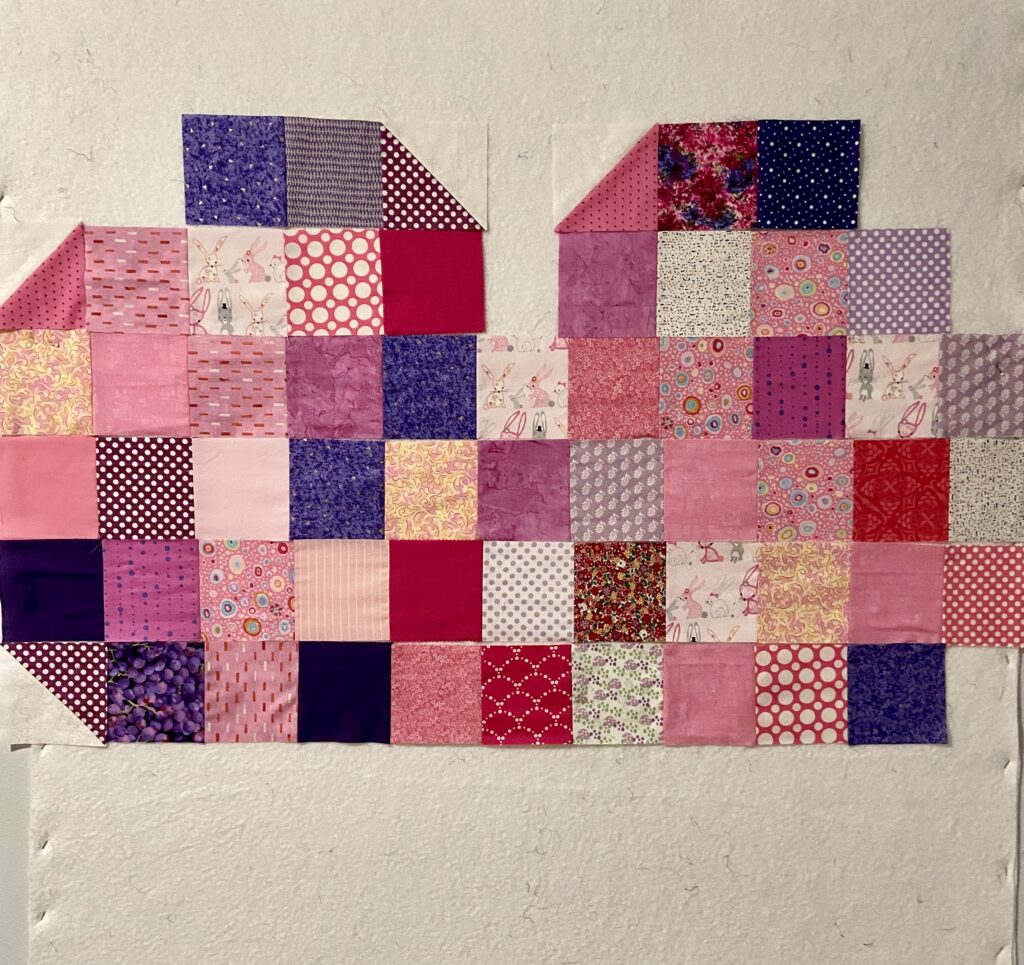
I have already moved onto, and made a lot of progress with, the next quilt. Younger grand daughter has outgrown the toddler bed and we are putting another twin bed in the guest room. The other twin bed (where her big sister sleeps) has a quilt with a huge heart made of charm squares in the middle with white all around it. This quilt was given to me when I moved from California by a wonderful friend. I am replicating the design and making another heart quilt using pink and purple scraps.

Here is a progress shot (with weird color because I took the photo in the evening) . I have some of the rows stitched together but I am still moving things around for color placement. Surely it won’t take long to finish the quilt top. One thing I am pondering though – the quilt made by my friend has a white background which she pieced with white charm squares. I will be using white yardage. Rather than cut the five inch squares it seems to make sense to cut five inch strips. The piecing would certainly take less time. Do you know of any reason not to do it this way? Let me know your thoughts!

OK – that’s it for now. Hope you all have something fun to work on this weekend!

Linking to Free Motion Mavericks and a few others. (Check out the Link Up tab at the top of the page for lots of fun places to check out.)

SAHRR – Border 2

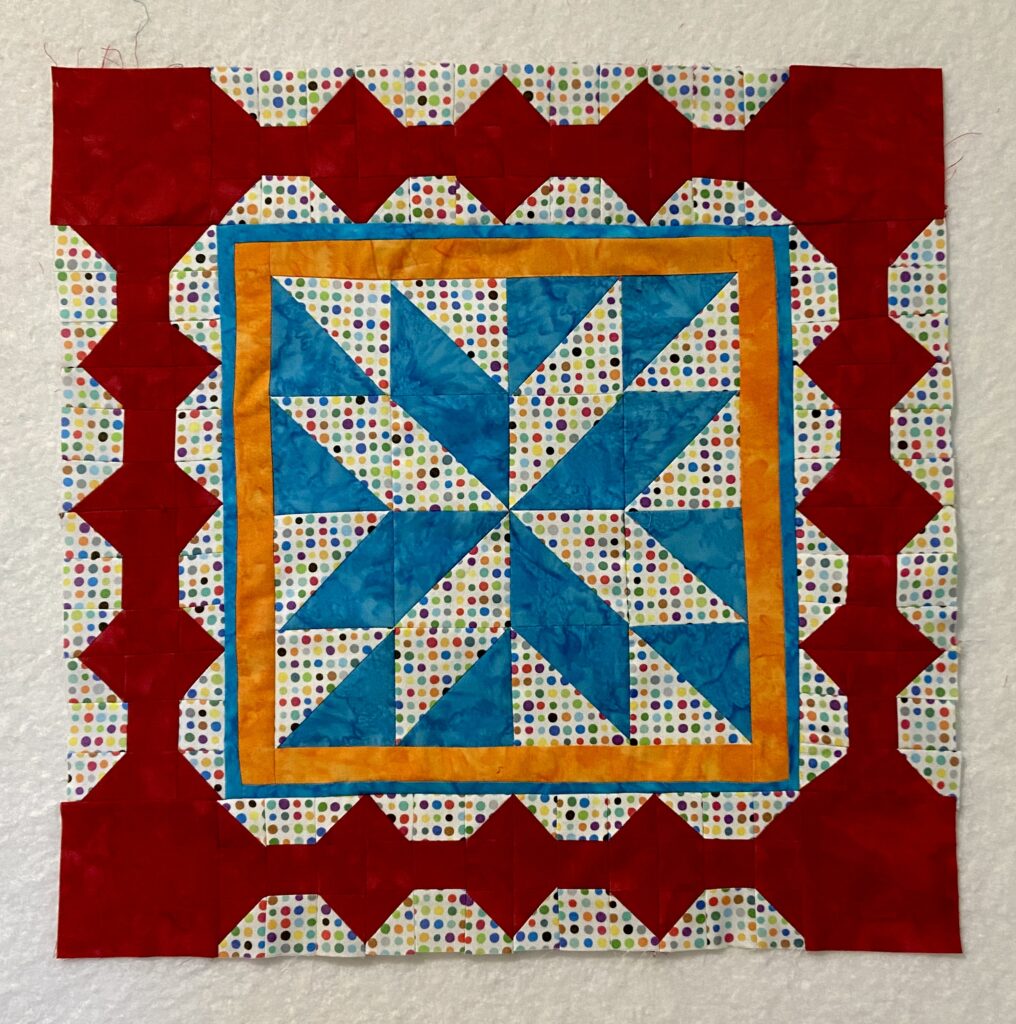
Last night I finished up the bow tie border for my round robin project. As I mentioned before, I am trying to use up pieces I had cut for a previous quilt that never came to be.

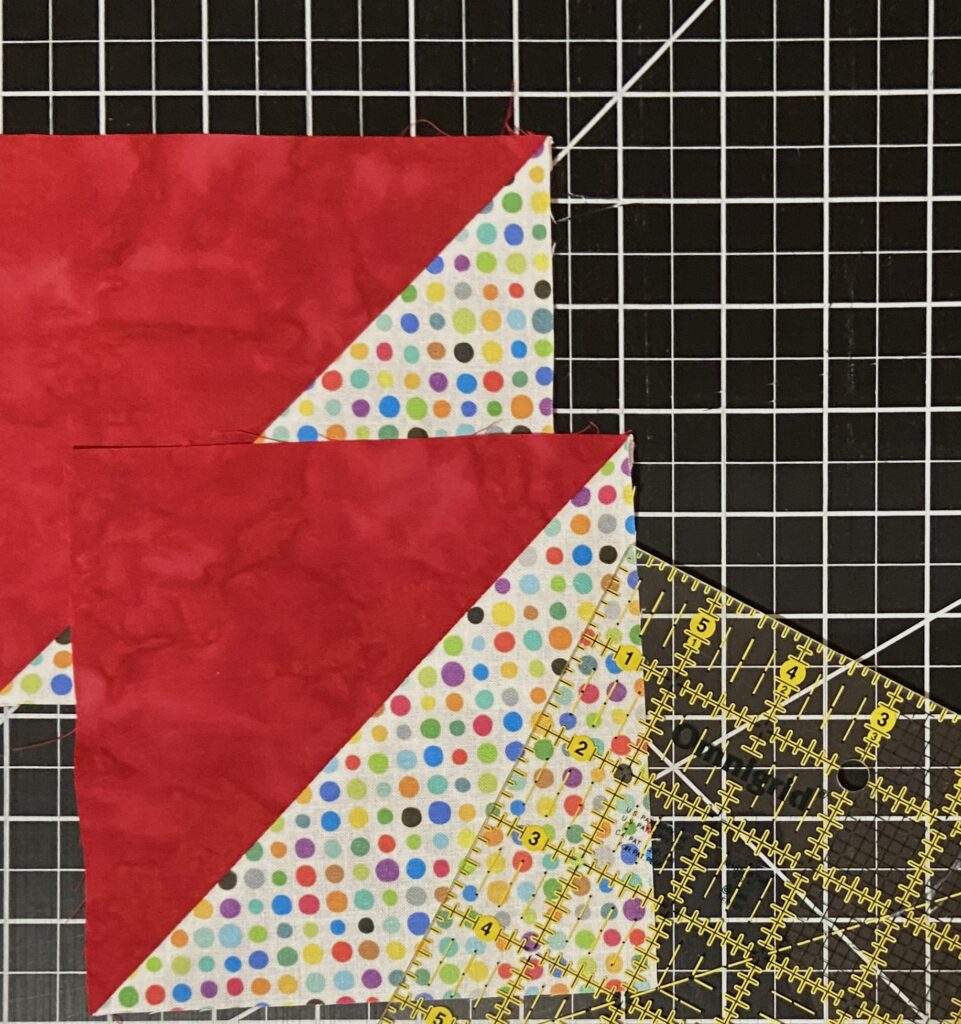
This week, I used a stack of HST’s that had finished at five inches. Using these worked our really well. I was able to cut three 1.5 hst’s from each one (much much easier than sewing new ones!!!) plus all of the 1.5″ squares needed for the rest of the block.

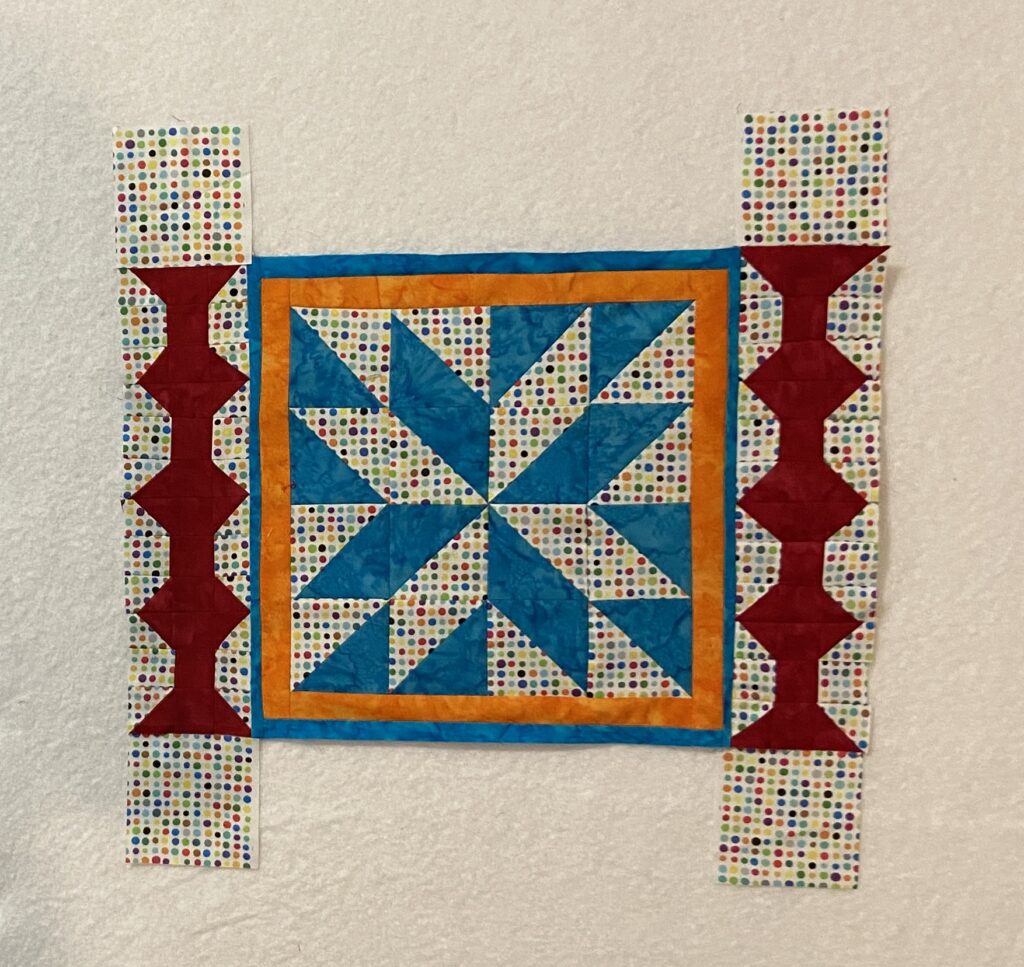
Before attaching the border, I added two narrow borders which brought the center to 12.5″. Then I played around with the orientation of the 3.5″ bow tie blocks. I like the way they look when placed end to end. However, I couldn’t decide how to orient the corner blocks. This led me to using a plain square on the corners. Fortunately, I was able to unpick some uncut HST blocks and use the red portion for these corners.


I finally decided to use red squares at the corners. The solid fabric looks much better than the dots.

For this week, Wendy at Pieceful Thoughts has declared stars to be the choice of blocks for the next round. I am going to somehow fashion tiny stars within a mostly solid border. I need to calm this down a bit. I love the polka dots but if they continue to be heavily used, the quilt will be a bit chaotic for my taste. I also need to decide how big I want this to be. If I want a crib quilt, I need to grow it a bit with some larger spacing rows. Decisions, decisions…. Currently, it measures 18.5 inches square. So, I need to figure out the goal and work backwards from there!

Hope you are all enjoying this fun QAL. It is a surprise to me to see how many quilters are participating! Each quilter’s interpretation of the prompts is unique which makes it so cool to look through the link ups. I missed the link at Roseanne’s but will link this up elsewhere. See my favorites at the top of the page, under Link Ups.

Grandparenting

The last couple of days were such a blast. We have been wanting to have just one of our grand daughters over for a couple of days. Ray and I thought it would be fun to see what it would be like to have just one all to ourselves. Because H has kindergarten it worked best to have A over. I went and spent a night at their house and then brought her home with me the following day. (H will have her turn over one of the holiday breaks in November or December.)

We weren’t sure how this would go, having A over without big sister or her parents. What a pleasant surprise! She was so happy and content. Slept great, played and played, and enjoyed a few adventures with us.

A new set of crib linens and quilt

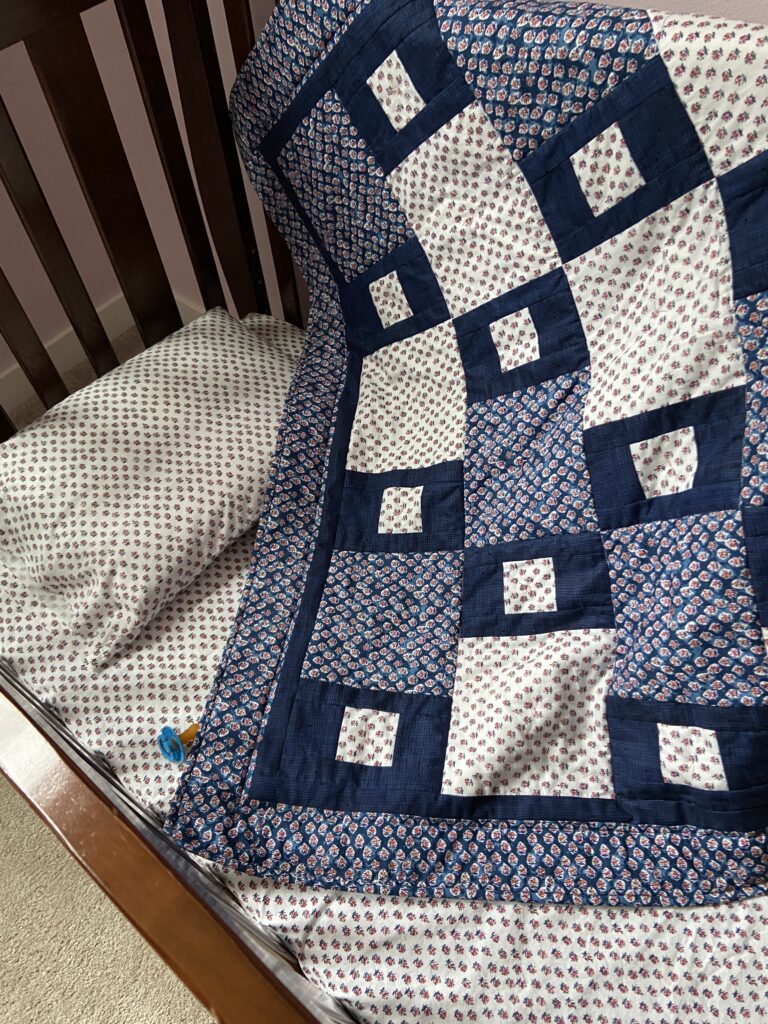
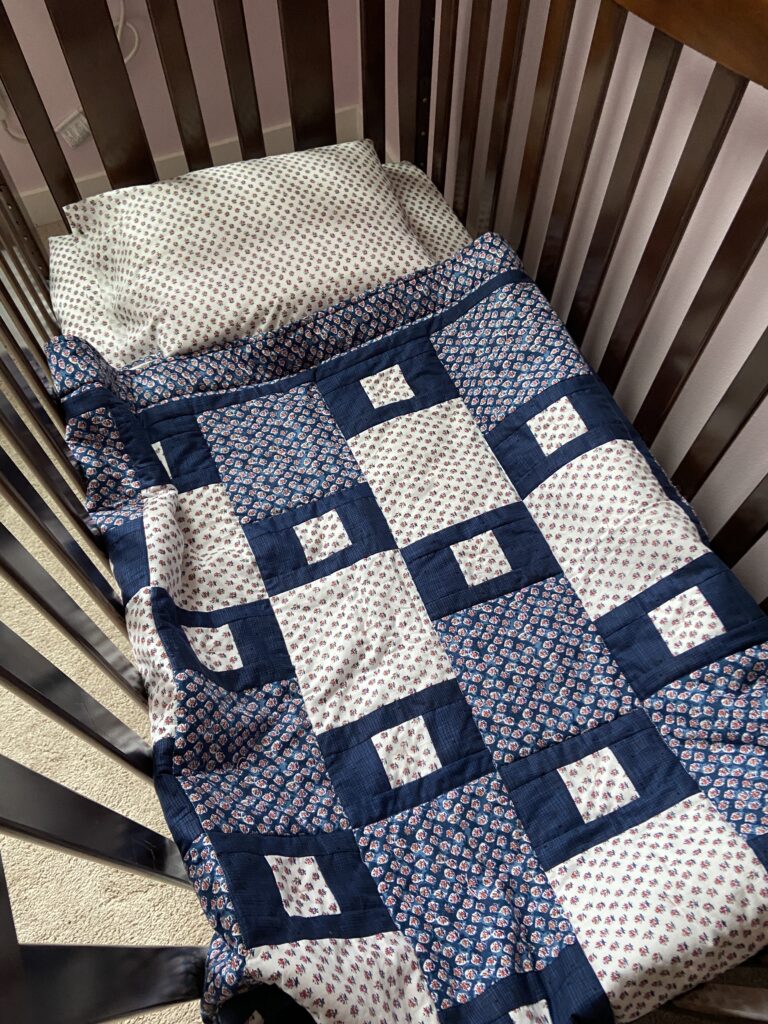
Before she came over, I made a new quilt for the crib. It is getting colder and the quilt she was using is very lightweight. For this one, I filled it with two layers of 80/20 batting and backed it with flannel. It is super cozy.

Very little quilting gave a lot of loft.

I used a Fabric Cafe pattern called Dash for the quilt. It is very simple and requires three, one yard, pieces of fabric. I have a lot of yardage of both of the prints in this quilt and had just enough of the textured blue piece.

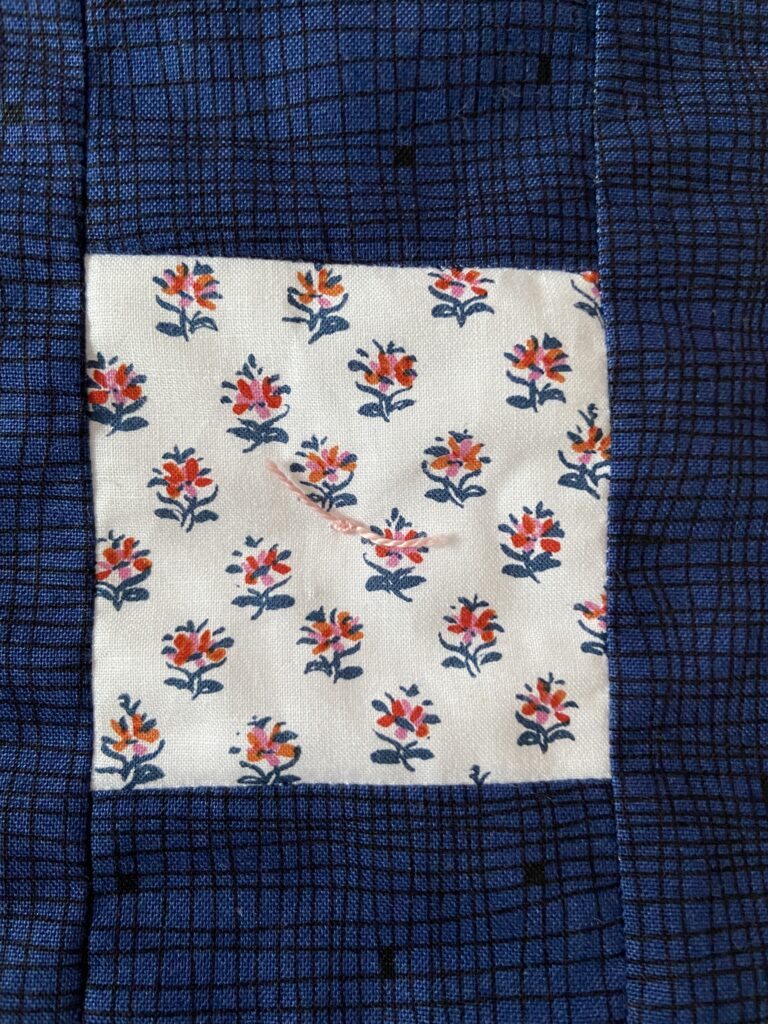
Simple yarn ties

For the quilting, I stitched in the ditch around most of the pieces. Also, I tied simple knots in the center of each square with Perle cotton.

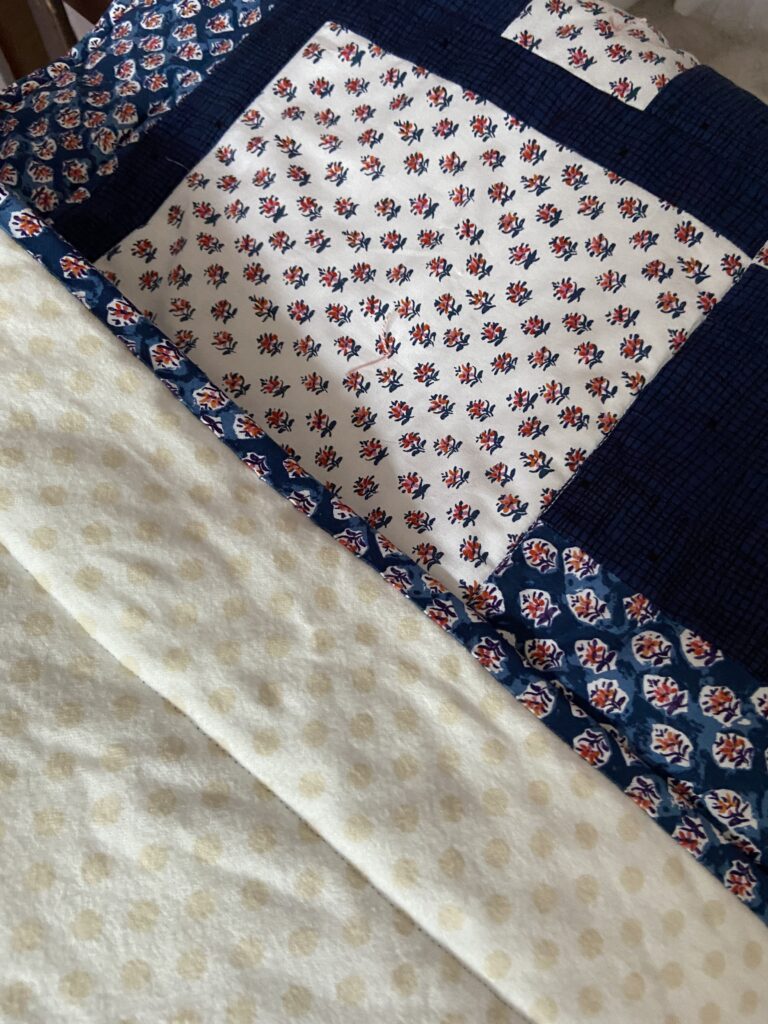
Soft flannel backing

The backing isn’t a fantastic match but I had this piece of flannel in my box and it was big enough. In the interest of using up what I have, I called it good enough. The piece is super soft so it feels very cuddly.

Matching sheet and pillowcase

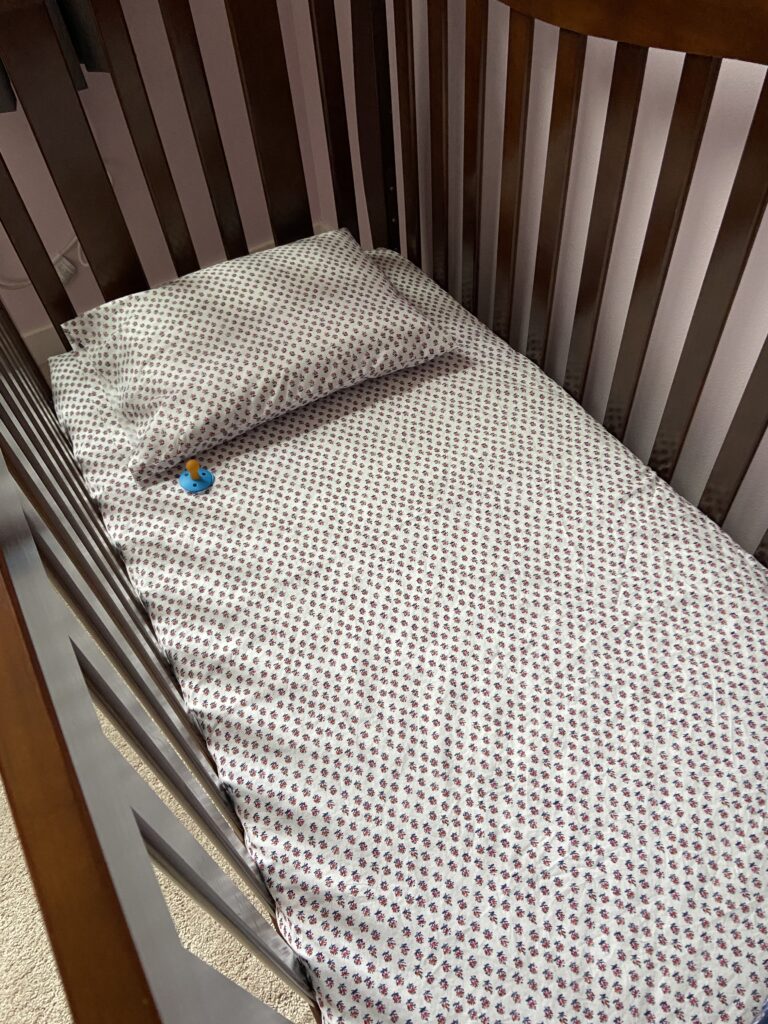
While I was at it, I made a matching crib sheet and pillowcase. Like I said, I have a lot of this fabric on the shelf!! But it looks so sweet to have it all coordinated. This girl was very excited to see her bed with the ‘strawberry’ blankets. She thought the little flowers were strawberries and who am I to argue??

Playing trains with PePaw.

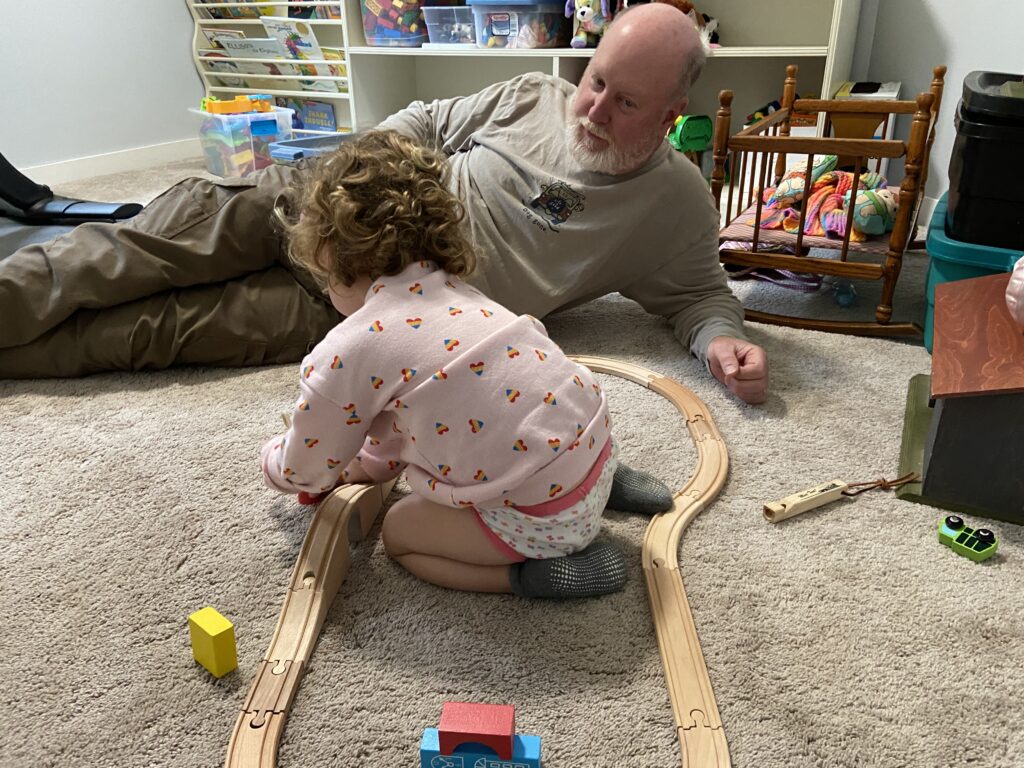
A is in the midst of potty training so she spent lots of time in her panties – I thought it was easier to skip the pants over them in case we had to get to the bathroom quickly. She didn’t have any accidents though so I think she is on her way to success! She and her grandpa played with this wooden train set I found at a thrift shop for $5.99. Great deal and she had a lot of fun setting it up and (mostly) crashing the train so it would derail. Hahaha.

Finding seashells at the beach

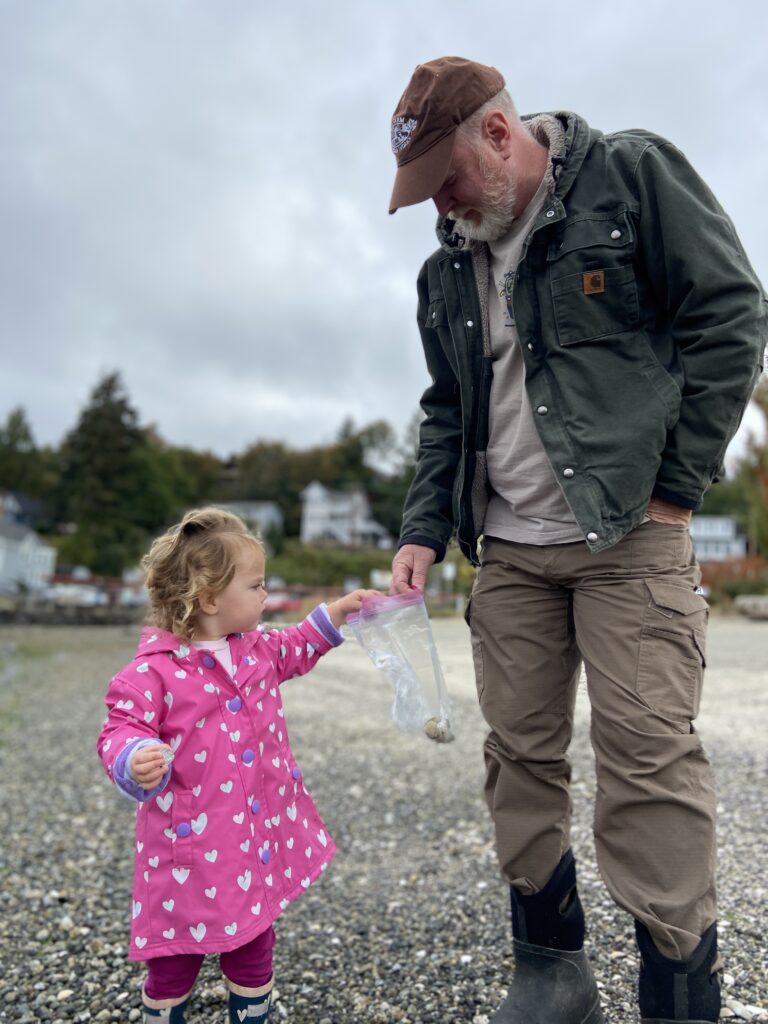
I love this picture! We took A to the beach and hunted for shells. She was really immersed in this whole process. When we set the bag down for a bit to climb on some rocks, a couple of seagulls came over and pecked at the corner of the bag, trying to pick it up. Oh my gosh, she went nuts – clapping and shooing the birds away from her bag. It was really funny. Serious stuff for this two year old.

Playing with her princess.

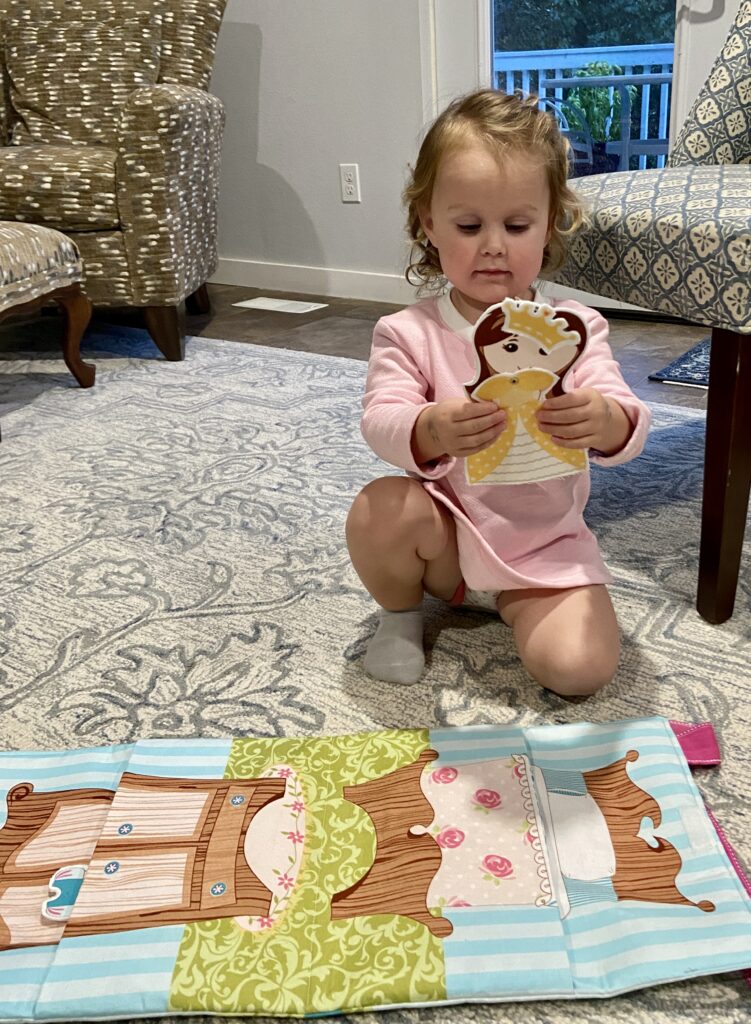
Remember this fabric doll kit I posted about earlier? It was a hit. She understood right away to use the velcro bits to dress her up. It was so sweet – she played with the princess quite a bit.

Simple play with flannel pieces

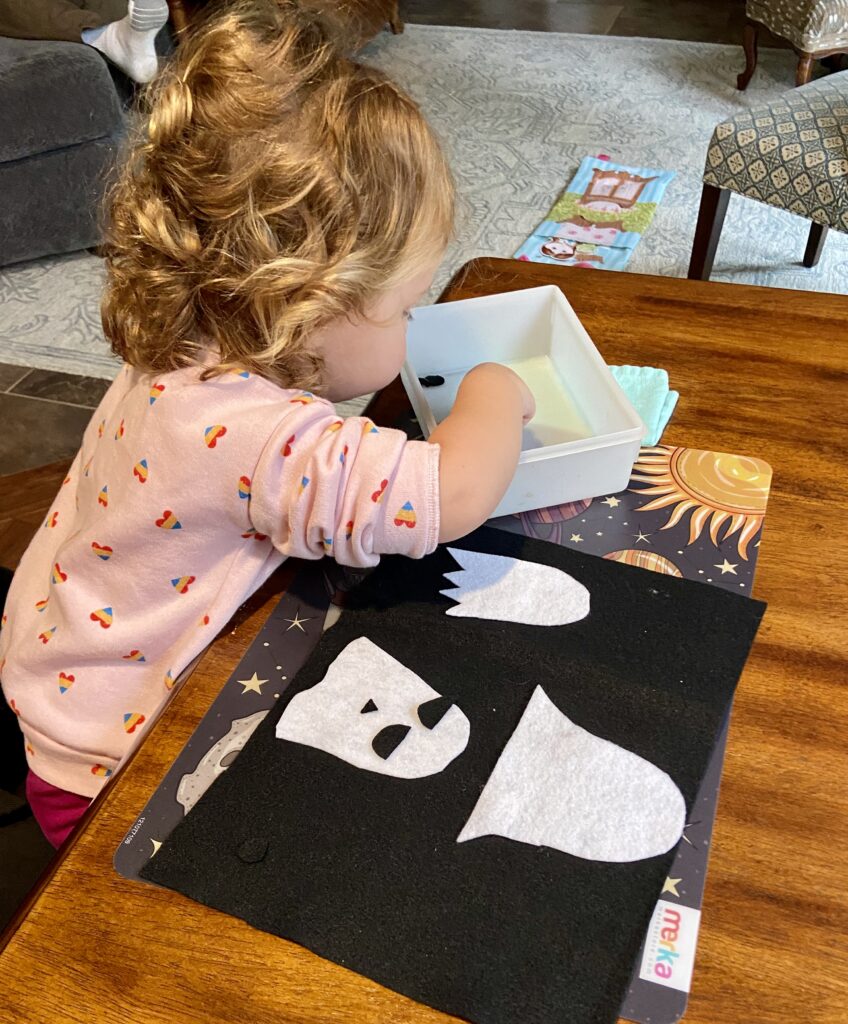
One afternoon I gave her some flannel pieces I had cut out ahead of time. She made Halloween ghosts and was able to use the little bits to create different faces. It is so satisfying to watch her enjoy these simple games and toys. She made happy ghosts, angry ghosts and spooky ghosts; each one’s mood dictated by the shape of the mouth she gave it.

Our time went by quickly. Both Ray and I were thrilled that she was so content to be here. We look forward to having her back soon – well, maybe after we take a couple of naps to recover!

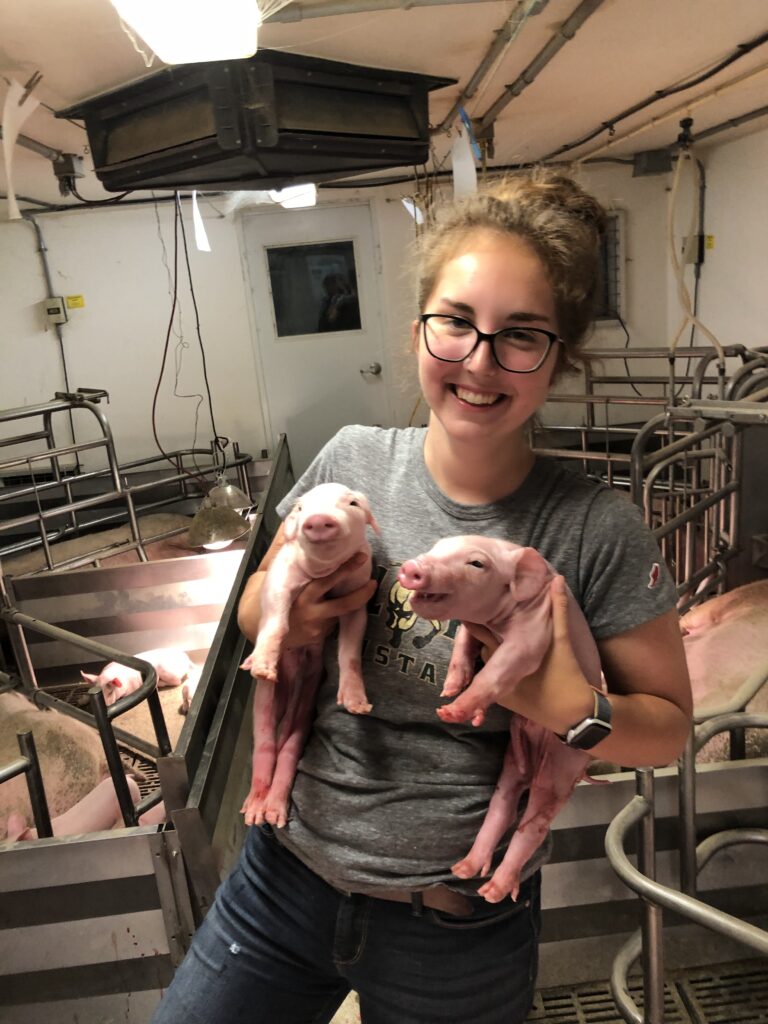
It has been a while since I shared any updates on Julia. She is doing great at school this year. She works at the swine unit on campus and spends a lot of time helping the sows when they farrow. This photo is from the middle of the night when she spent a long while with a mama sow who was struggling to deliver her piglets because they were so darn big. They kept getting stuck and Julia ended up having to manually help them deliver (by reaching in and pulling the piglet out). These little guys are just enormous compared to the newly birthed piglets she usually sees. It is such a great picture because the piglets look so happy to be out in the world and Julia is clearly happy with the outcome of the experience.

That is it for now. I hope all of you have a lovely weekend!!

What??? An Actual Finish?

Can it be? A quilt? Yes, I actually finished a quilt!! It was in December, 2021 that I last finished a quilt. Crazy times around our house the last six months!

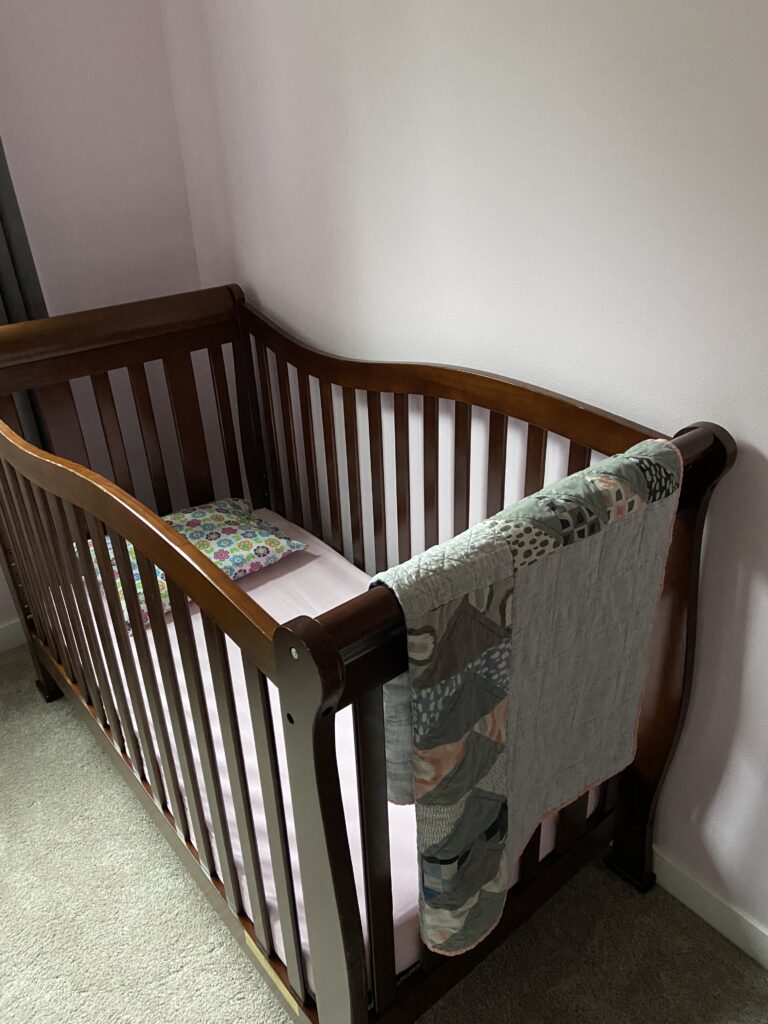
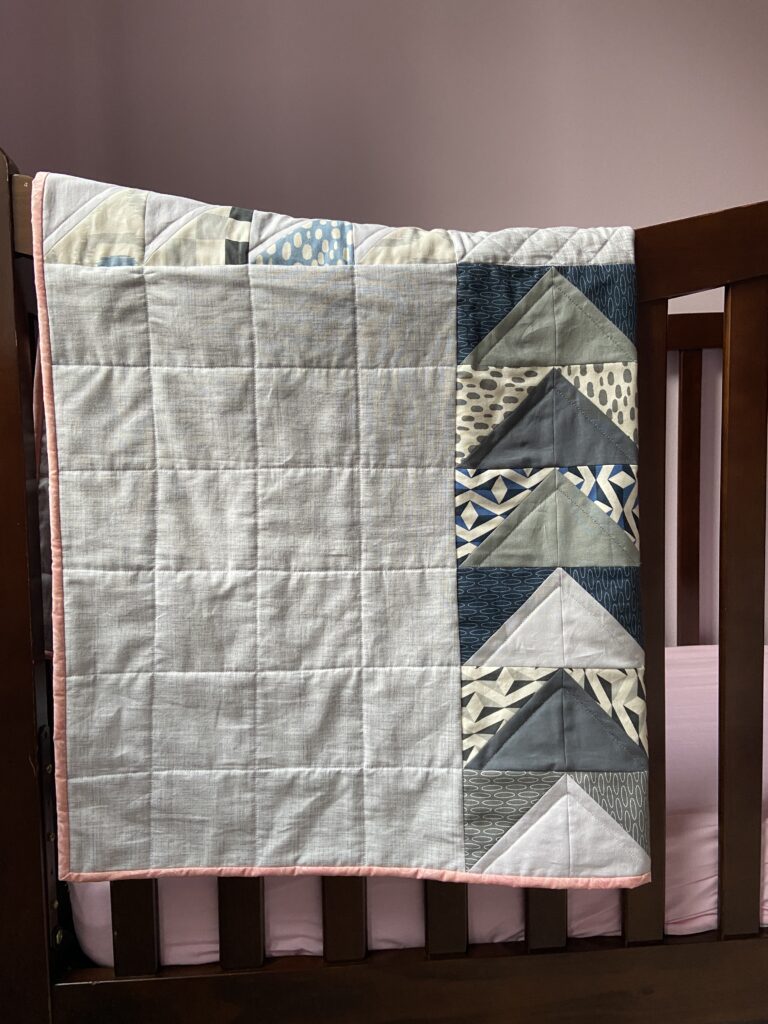
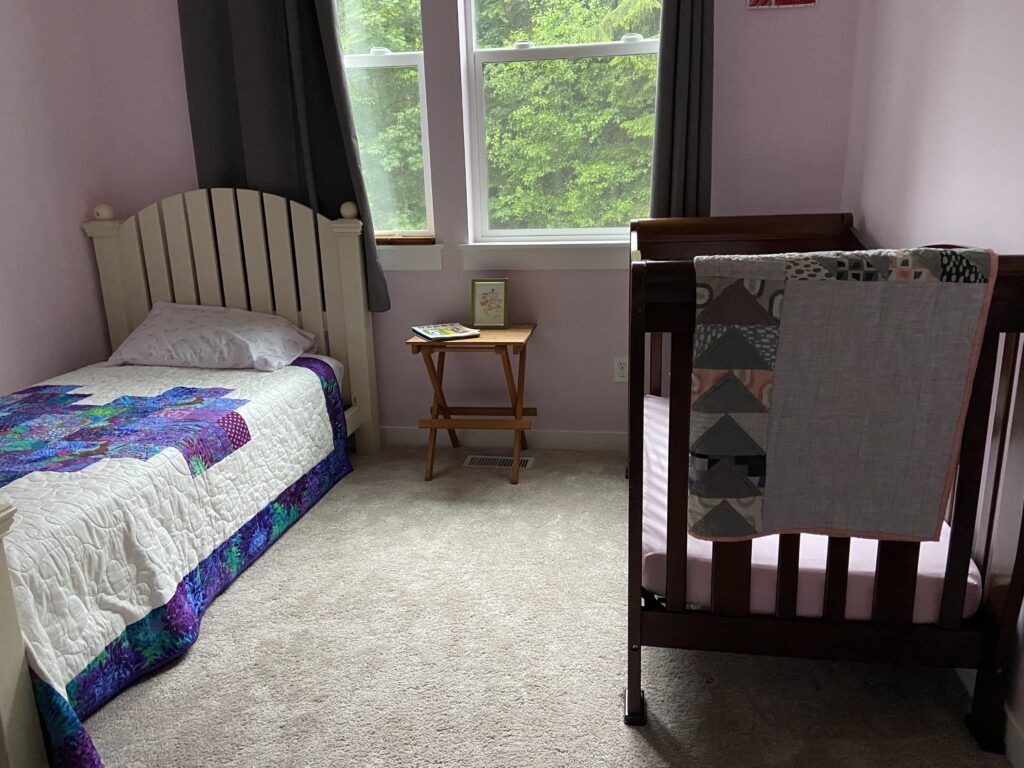
A couple of weeks ago I saw this crib on Facebook Marketplace for $50. It seemed like a good deal as it transitions to a toddler bed as well. My two year old grand daughter is still in a crib but I suspect she will soon be changing over to a toddler bed. This should work for sleepovers for quite sometime.

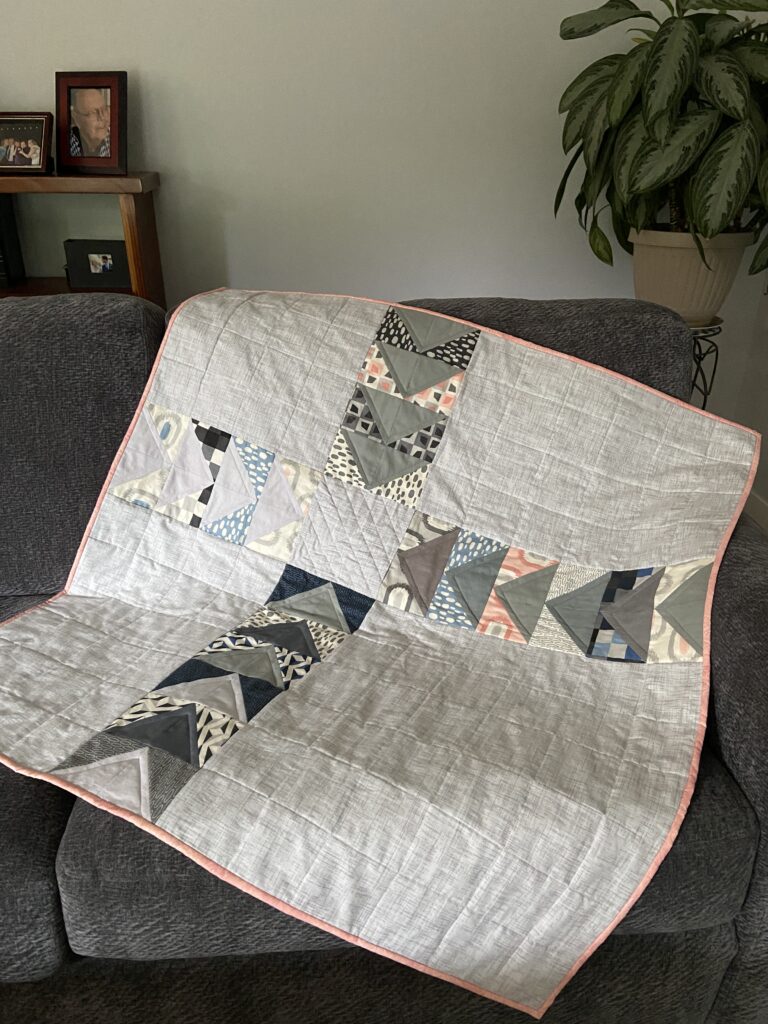
The room that the girls sleep in is pink, like Pepto Bismol pink. If I didn’t dislike painting so much I would repaint it. But the girls like the pink and I don’t like painting so it will stay this way for a bit. I had some pink solid from Art Gallery Fabric and quickly made a fitted sheet for the mattress. This was both a super easy and fun project that I made with this tutorial by See Kate Sew.

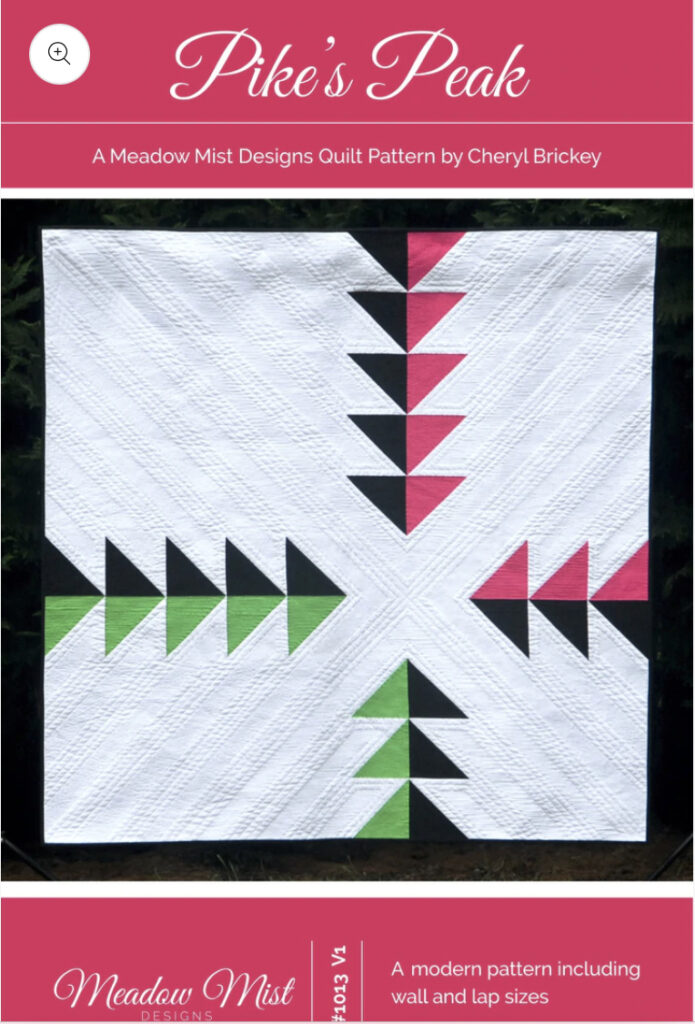
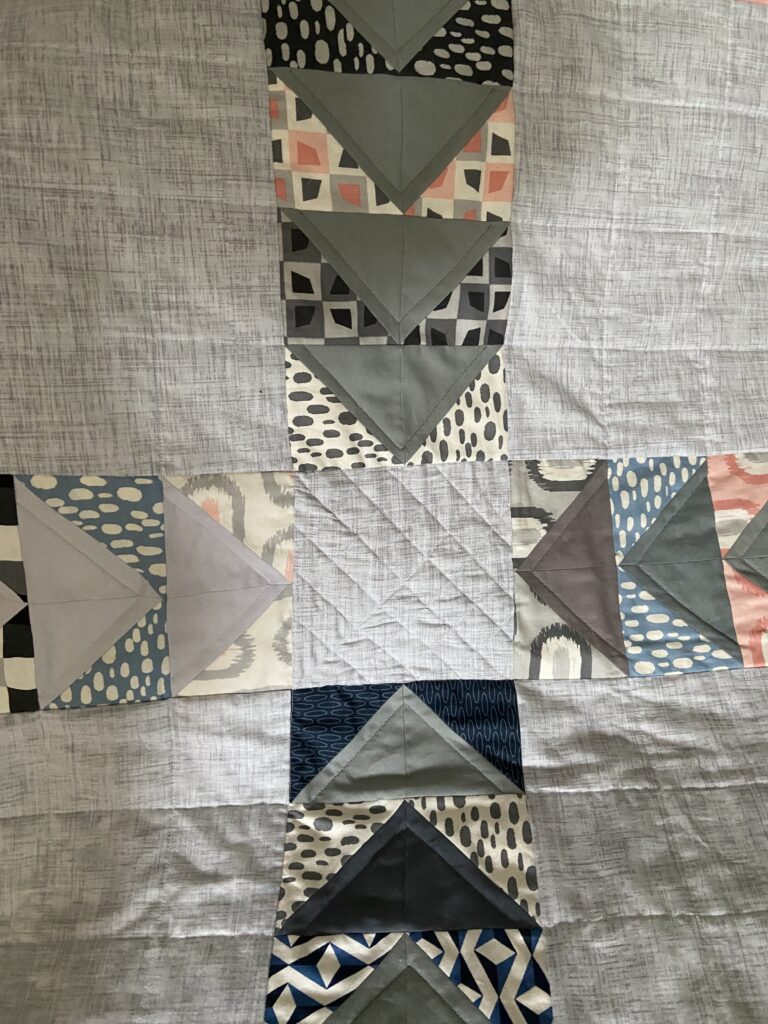
I also had a quilt top ready to go that I made wayyy back in May of 2020. I used a pattern by Meadow Mist Designs called Pike’s Peak.

My version looks very different from the example on the pattern cover. But that is the joy of each interpretation of a pattern. The fabric choices often make it completely unique.

The quilting is very simple. Small cross hatch done on the diagonal completes the center block. Then a straight line every two inches for the open gray spaces. These lines were marked with a Hera marker and took no time at all to stitch. Easy peasy. I figured if this was to be used by a toddler, nothing fancier then that was warranted.

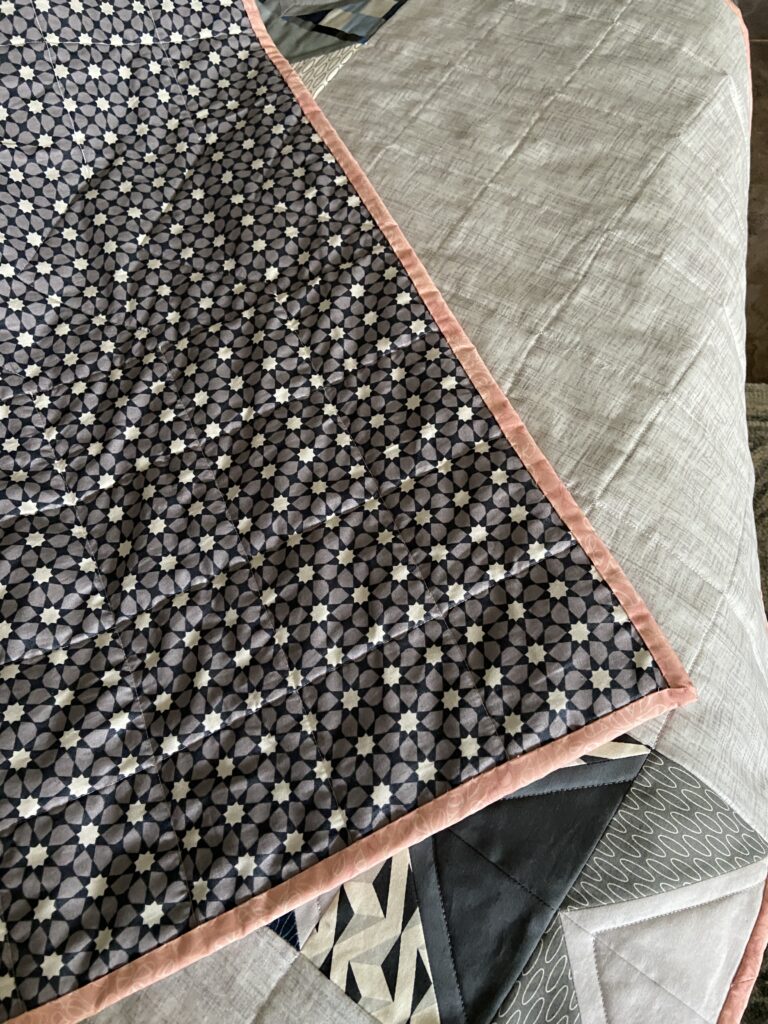
It is backed with a piece of Alison Glass fabric and bound with a tonal fabric from Art Gallery Fabric.

It looks great in the girls’ room. When I showed A her new bed at Grammy’s house she was quite happy and said “cozy, cozy bed”. She loves her bed at home and I think she will be happy in this one too.

We set up Julia’s old twin bed from years ago. My husband made the headboard and footboard so we stored it for the last 12 years or so. I am happy to have it set up for H now. She chose the quilt for her bed. (This quilt was gifted to me from a friend when we moved. It is a pretty quilt with all Kaffe Fassett fabrics and backed in soft minky.) When H saw it, she was taken with it and asked if it could be on her bed. So now we have beds set up for both girls!

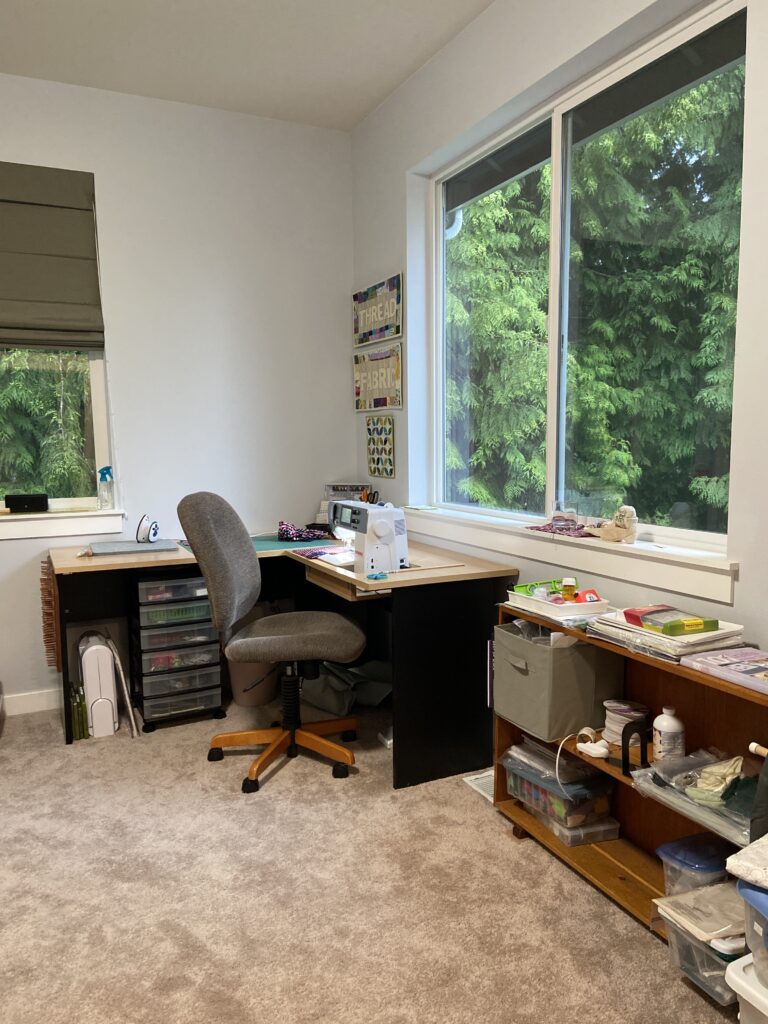
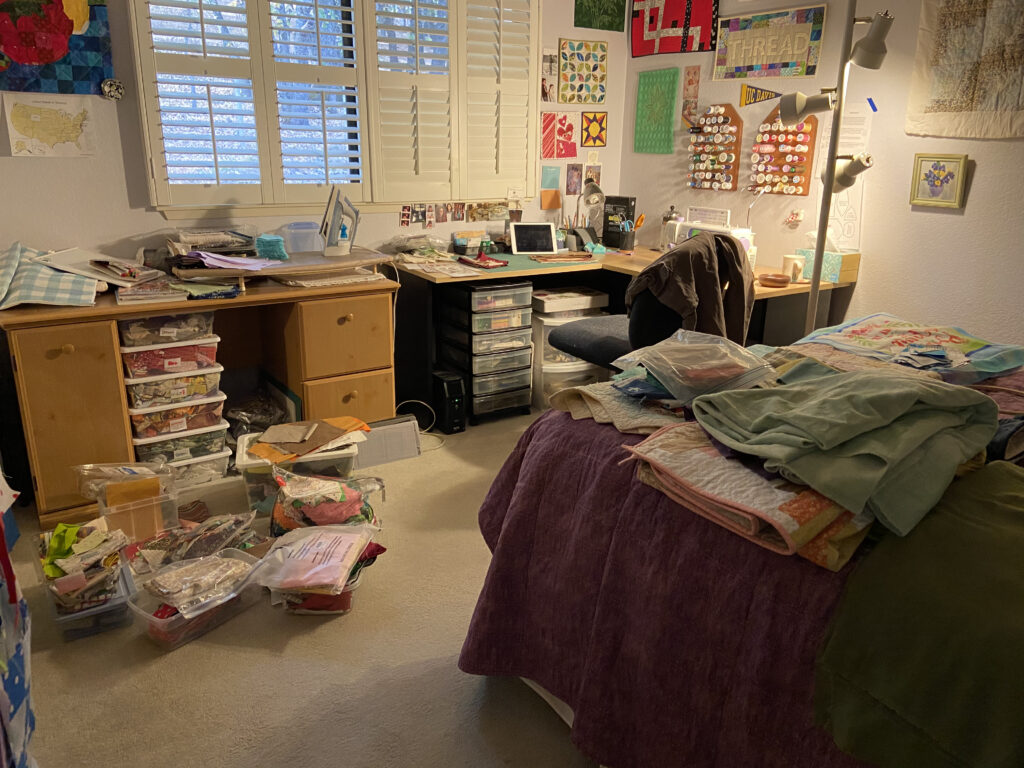
My sewing room continues to improve. Last week Ray spent a day helping me organize it. He got the sewing desk put together for me.

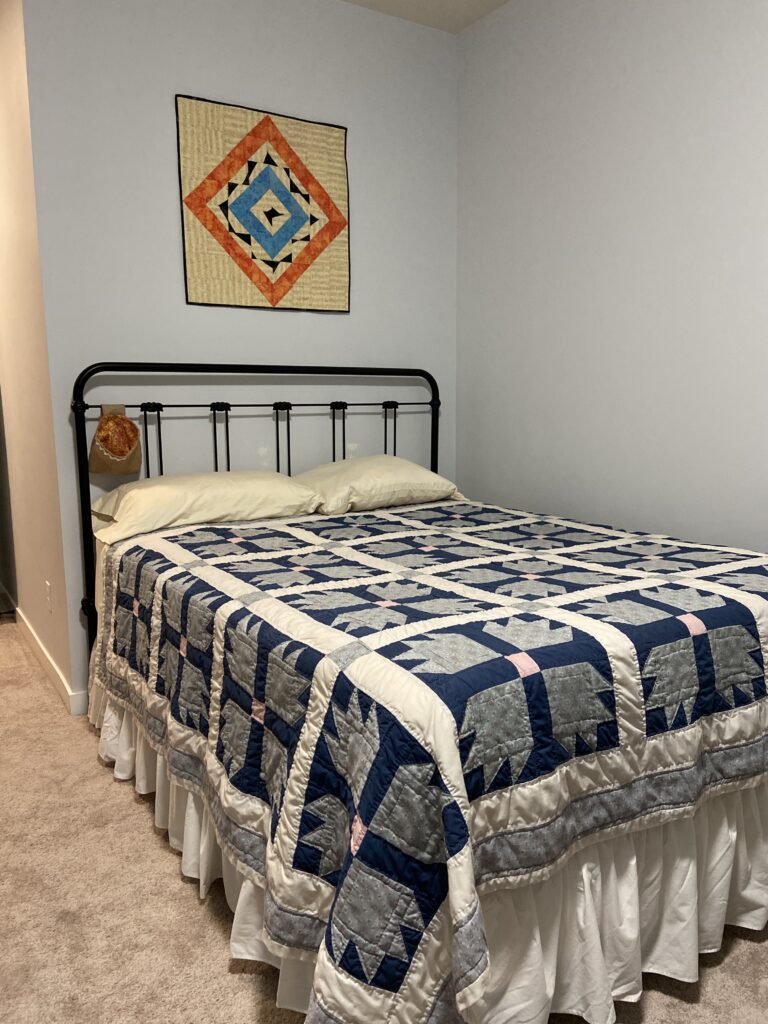
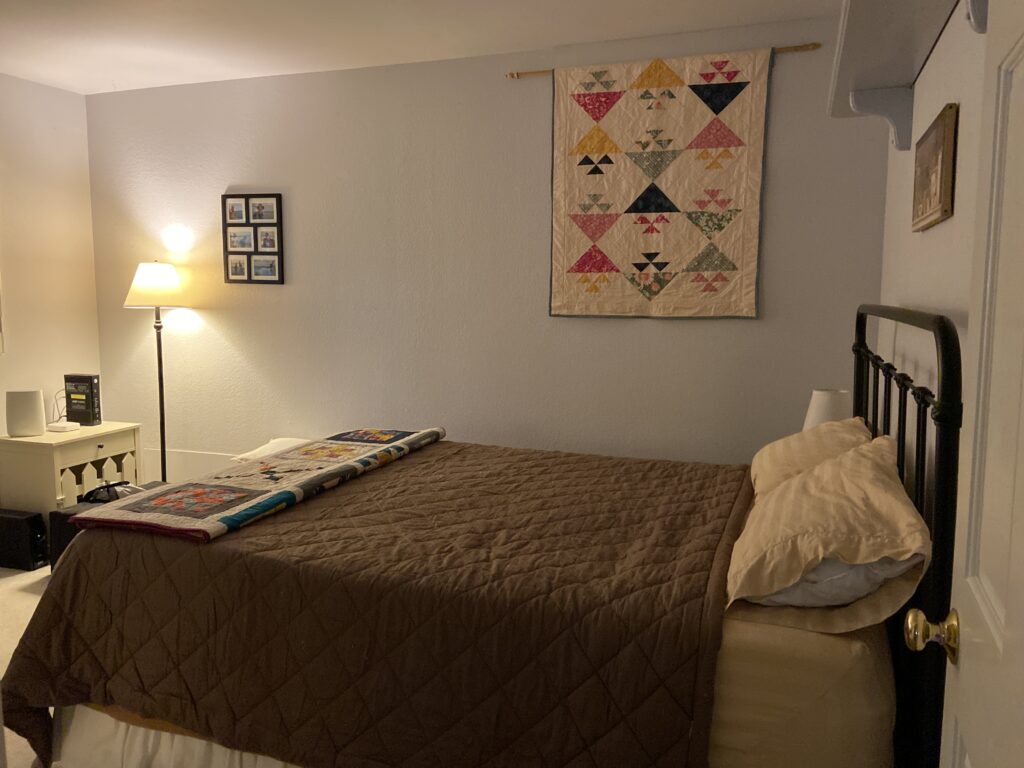
He also got a bed set up in the room for guests. Of course as soon as the bed was set up, I was laying projects on it and now it is covered 1/2 way with my projects. He laughed when he saw how fast that happened! But at least we have a queen bed for guests if needed.

I am working on binding another quilt today. Hard to believe but I have another finish and will share it soon. Back soon with pictures – this one is really looking nice.

Sharing to my favorite link ups. Please take a look at the top of the page for details!

Masala Box is a Finish

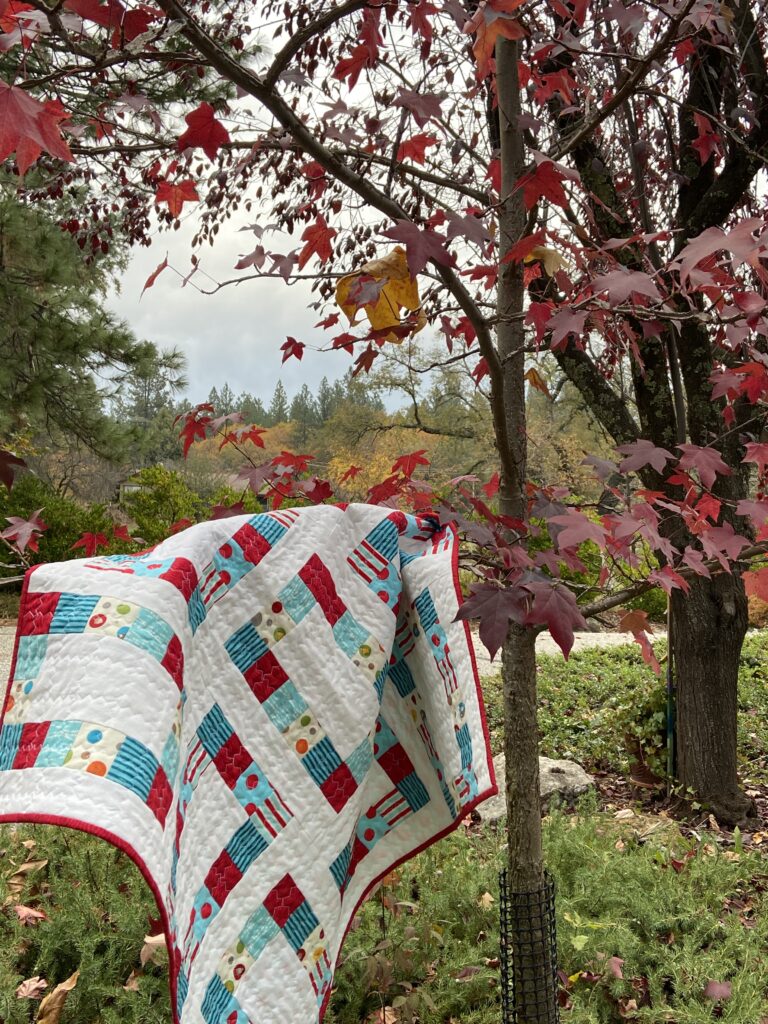
I have finished very few quilts this year so I am excited to share this with everyone. It is a cheerful quilt and a fun pattern to make. As you likely remember, I tested this pattern for Sew Preeti Quilts. Preeti writes delightful patterns and has several listed in her Etsy Shop.

Masala Box Baby Quilt

I did make an internal compromise with this project. I really wanted to spend some time and quilt the center of each block with a picture of sorts. I had them all planned out. However, life is so crazy right now and I decided the free motion quilting would have to wait for another project. Instead I did a version of a zig zag/serpentine stitch going both vertically and horizontally which was a very quick way to finish this little quilt.

Difficult to photograph the white stitching on white!

The zig zag adds some fun texture and will probably be enhanced even more after being washed.

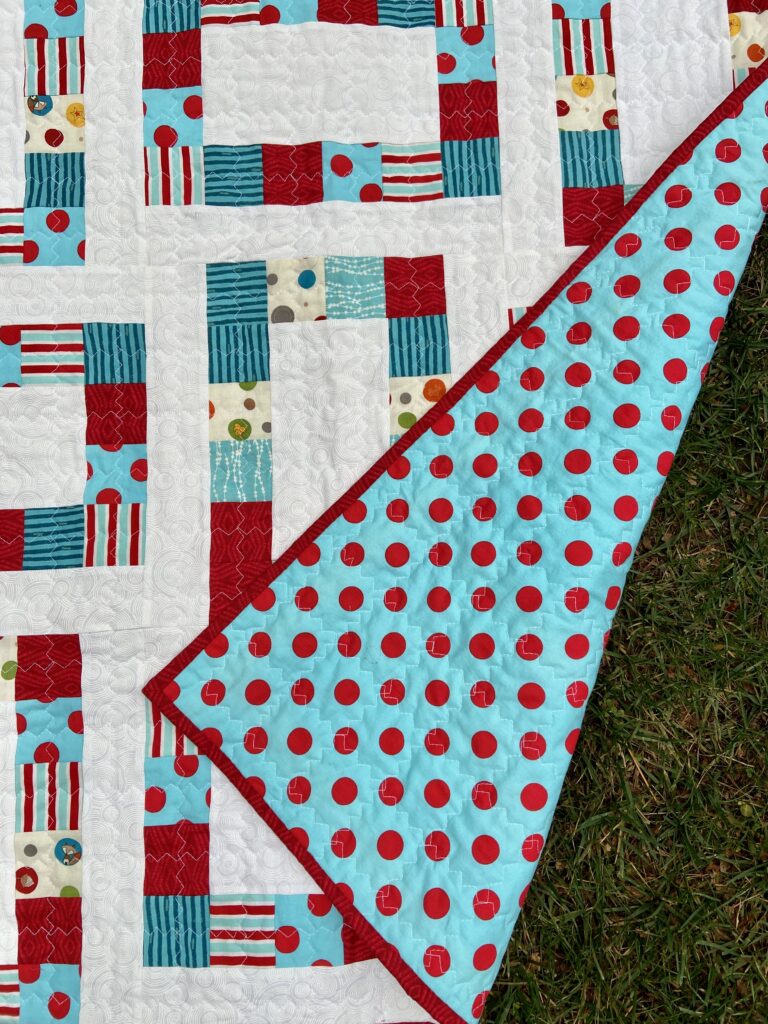
Polka dots for the backing.

I have quite a large piece of this polka dot fabric which made the backing choice a simple one. Binding was done with the same red fabric as used on the front.

The end of the fall leaves in our yard.

Our fall colors were extraordinary this year – most of the trees have dropped their leaves at this point.

Moving on to non-quilting topics, I have exciting news! Ray and I have decided to move from California up to Washington. I am sure you can guess the main reason. Yes, you got it. There are two sweet girls up there we are wanting to see more often. Between the pull of being near the grand children and the drawbacks to California life (mainly very hot summers and the dangerous fire seasons), we decided to go for it.

We have talked to a realtor and made a list of projects to do in order to have the house ready to list in early Spring. To that end, we both have been very busy. Ray bears the brunt of the really hard work but I have a fairly long list as well.

The sewing/guest room

Here is one project – you’ll surely relate to. I moved my sewing supplies downstair to the family room in order to create a guest room.

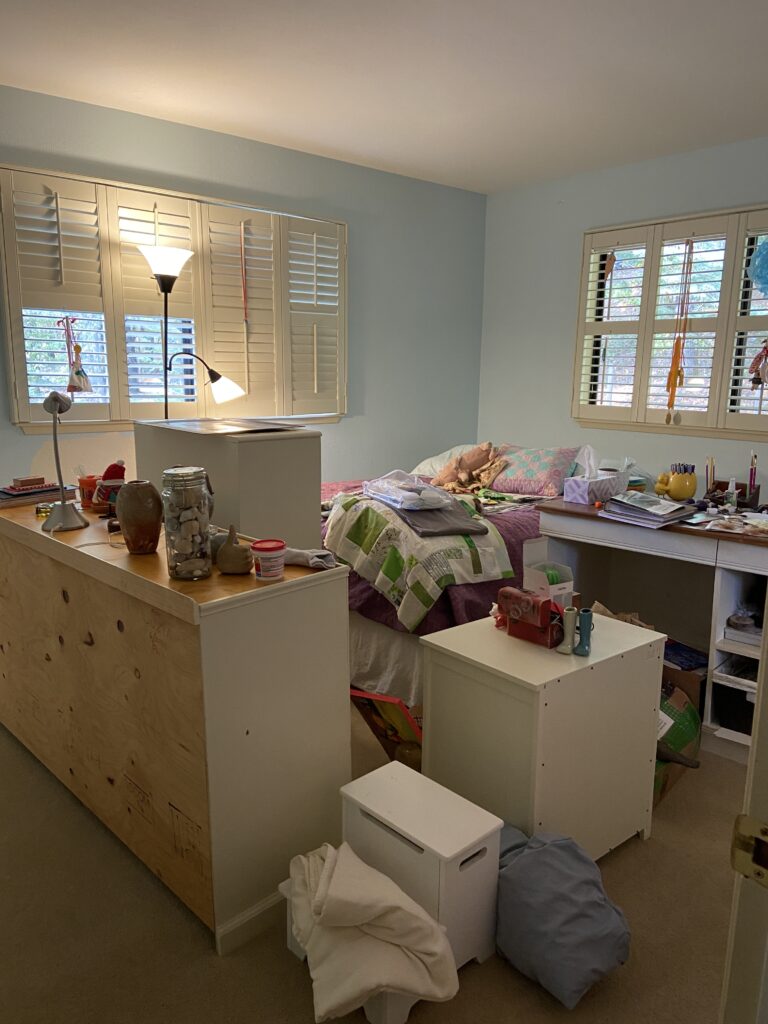
After the massive clean out

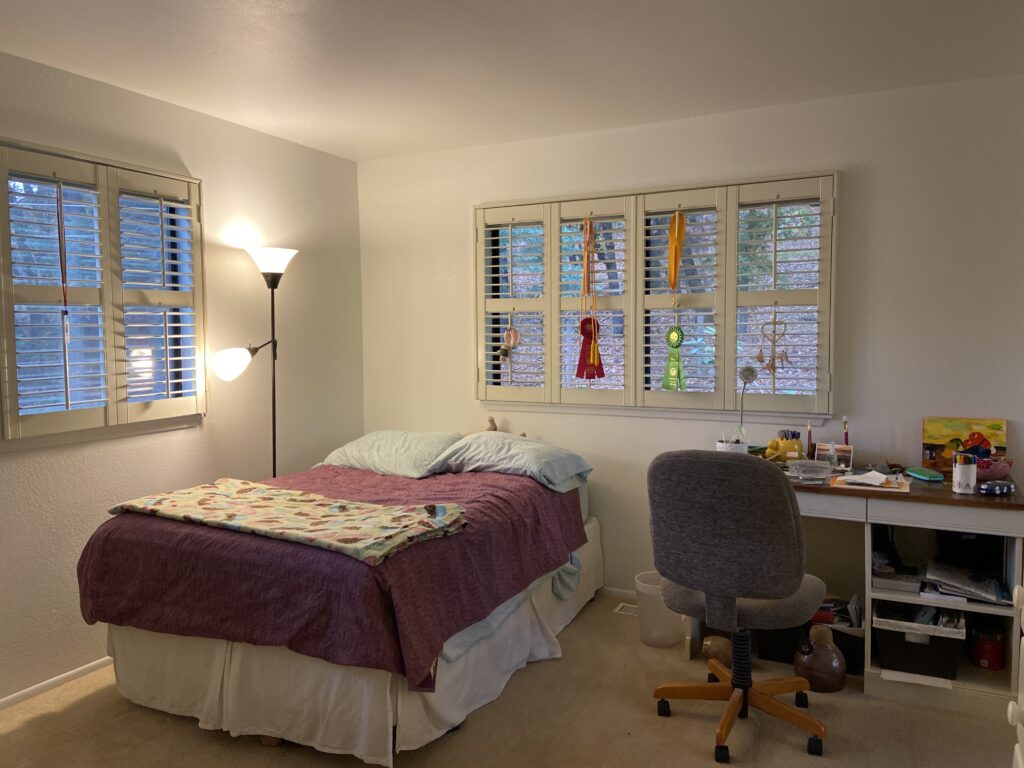
In the twelve years we have lived in this house, this room has never been so clean. After the holidays I will have all the carpets cleaned and the guest room will be staged for showing. For now, I am just reveling in its tidy state.

Julia’s room was in need of sprucing up as well. When she was about 10 years old, she asked if she could have a blue and lavender room. Time took its toll on this room so Ray and I painted it a very pale gray.

As with the guest room, I cannot believe how tidy Julia’s room is. This room will also be rearranged for showing but the hard part is done.

I can’t show you the new sewing space just yet – mainly because I haven’t taken a photo for you. (Let’s be honest, it is a hot mess!)

Another project is underway.

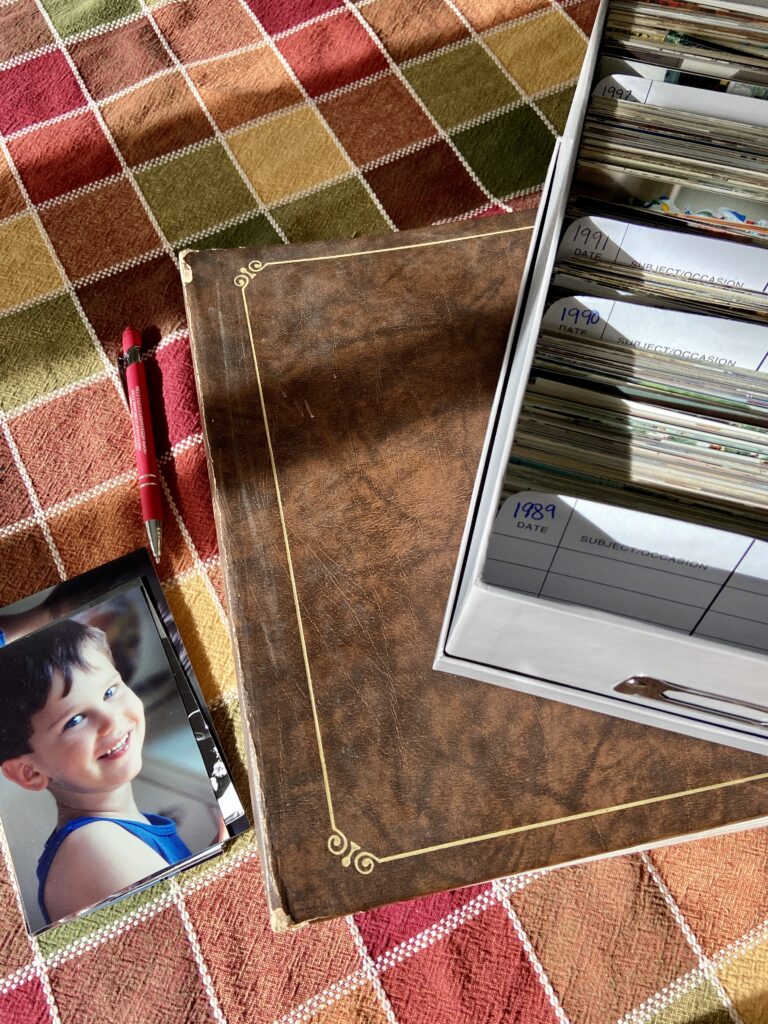
Finally, here is another project I am working on. I am a huge fan of photographs and have so many albums. But they do take up space. Rather than move them all, I decided to pull pictures out and organize them by year in photo boxes. One might think this is a quick and easy task, and it should be. But with each album I get pulled into the nostalgia and memories they contain. So while this is really enjoyable, it is not quick!! Evenings have been spent poring over the books and sharing pictures with my kids via text. It will get done all in good time. I have emptied about eight albums and they fit into two boxes which saves a lot of space.

That is enough for today. I need to get going to the grocery store for a few things. Julia comes home tomorrow for the whole Thanksgiving week. I am so excited! I haven’t seen her for eight weeks which is the longest ever! Have a wonderful day everyone.

Linking up to my favorites since I miraculously have a finish!! You can find them at the top of the page under Link Ups.

Masala Box – The Quilt Top

Last week I mentioned I had been asked by Preeti of Sew Preeti Quilts to test a pattern of hers. She recently released her newest design, Masala Box. The pattern is really adorable. Here is Preeti’s version.

This is the sort of pattern that is right up my alley. I love patchwork and also simplicity. Fussy patterns are not my favorite. This pattern is set up for strip piecing (which is quick and efficient) or if you have a box of 2 1/2″ squares, you could make a scrappy version and use those bits up!

Baby Quilt Size Masala Box

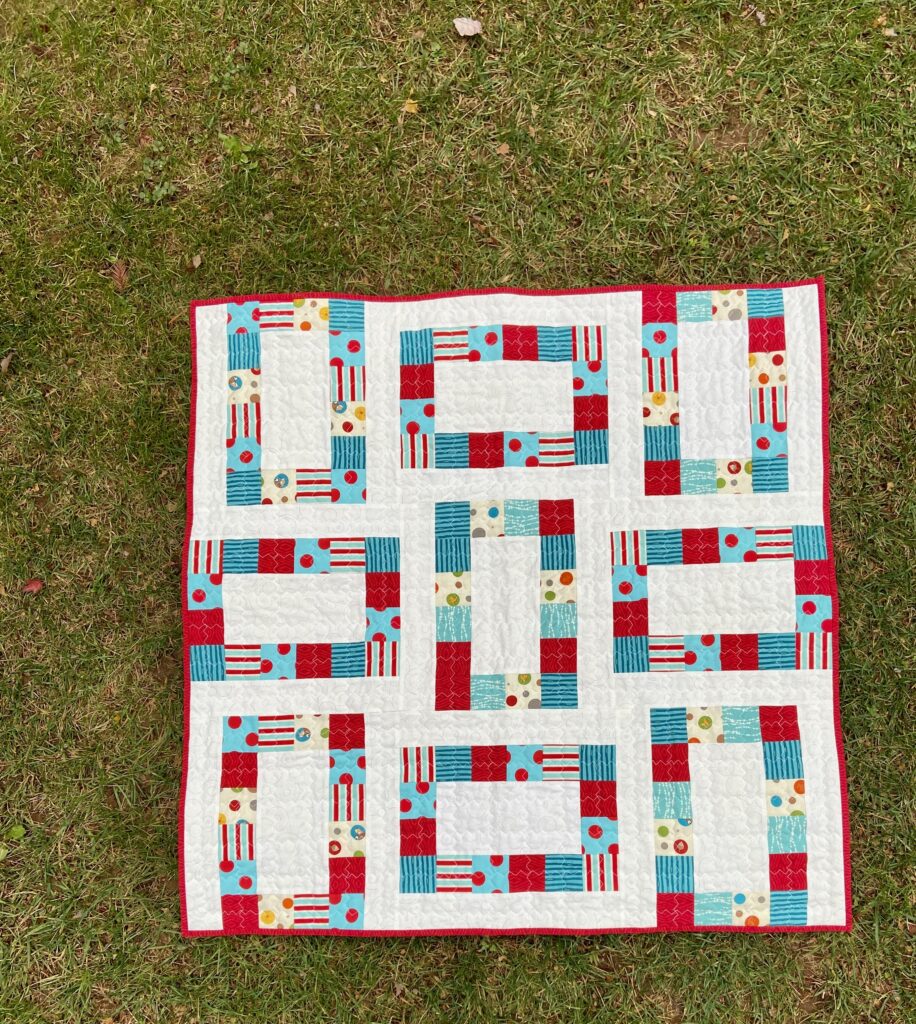
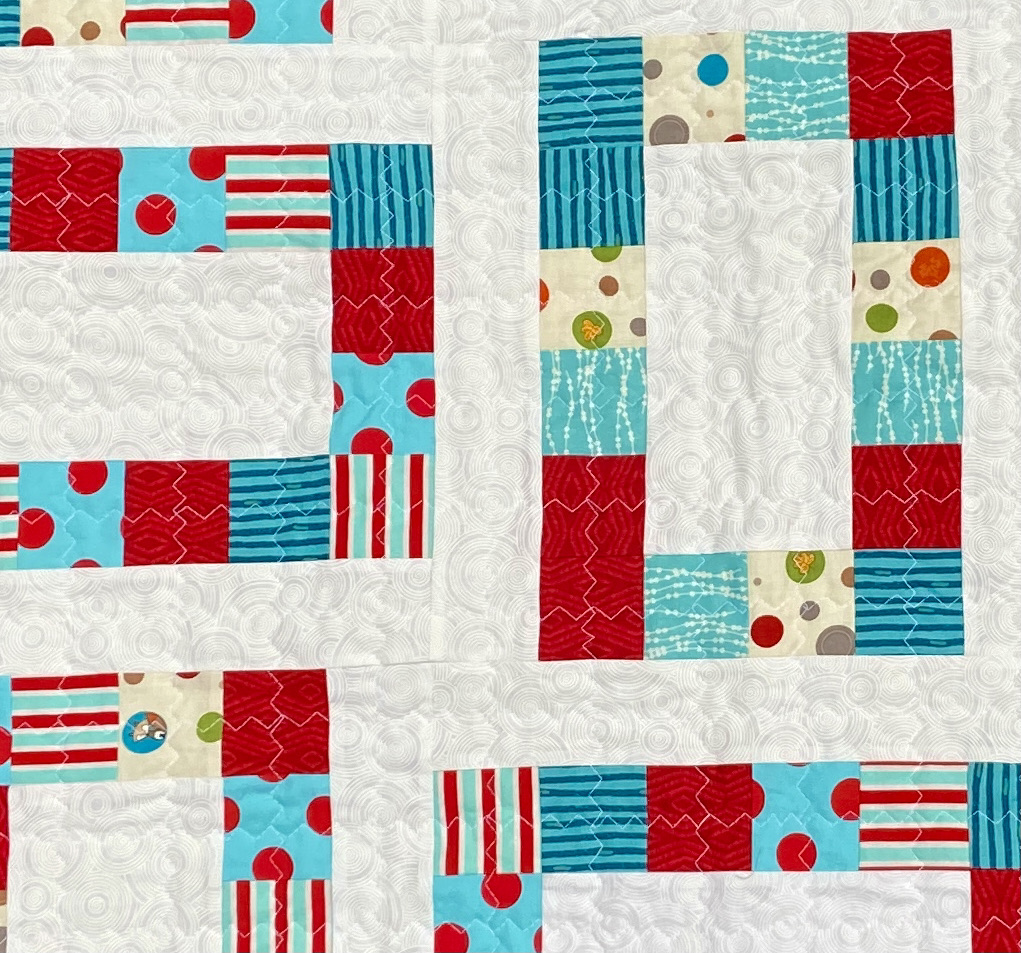
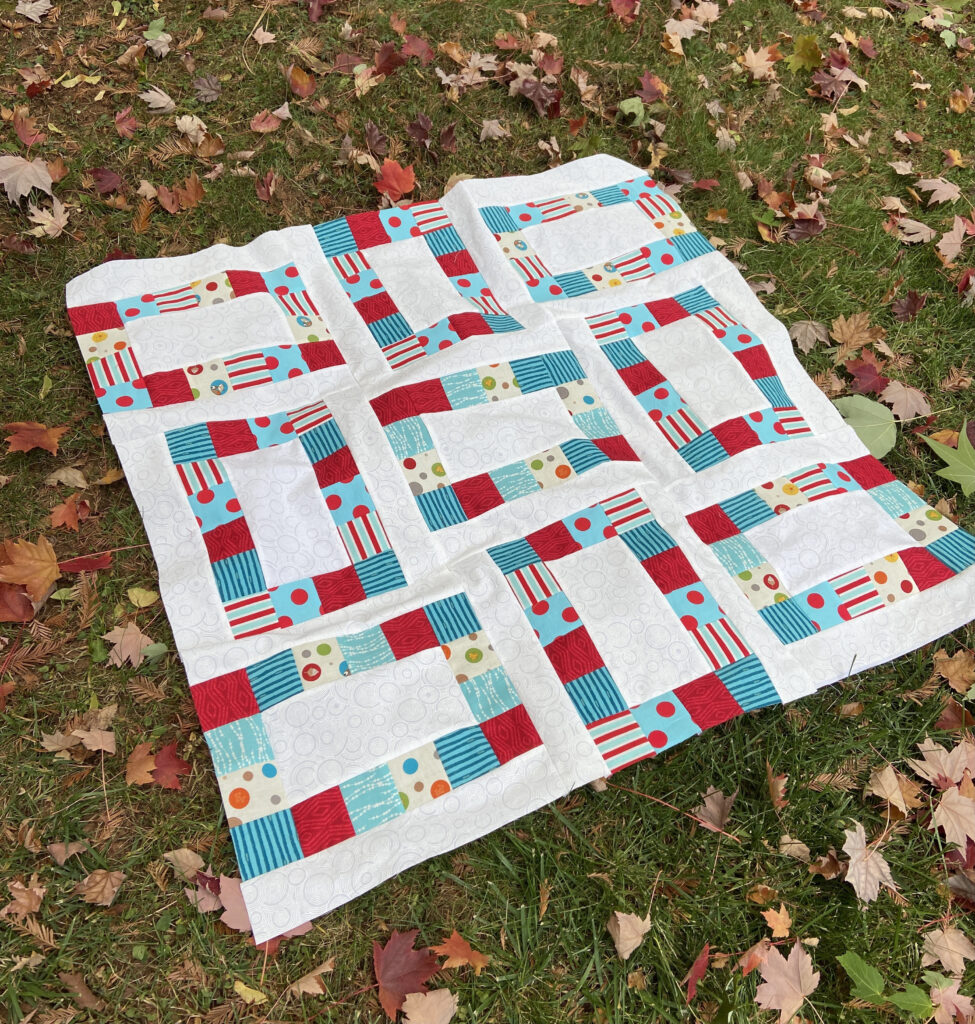
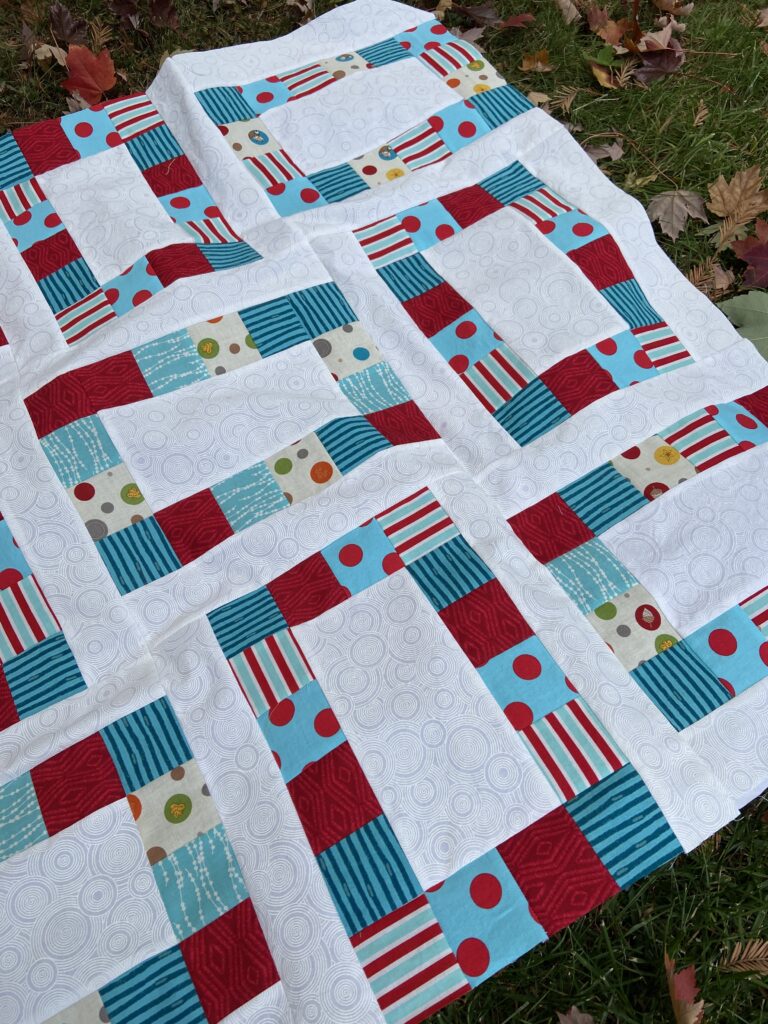
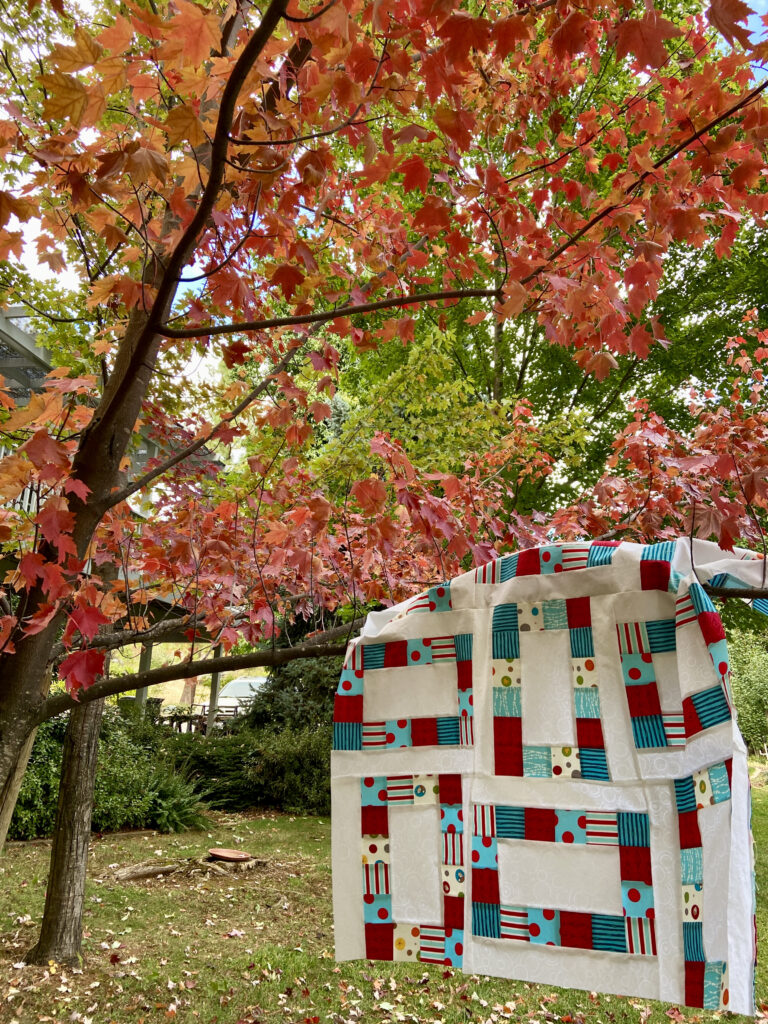
Hoping to finish this quickly so I could share Preeti’s new pattern, I made a baby quilt. It finishes at 36″ square which is the perfect size for Jack’s Basket. I love donating to them and will send this off when it is finished. Looking through my stash, I wanted to put together some bold colors. When I saw the red polka dots on turquoise I decided I would build off that piece. Luckily, I had plenty of red and aqua in the stash and I added a bright polka dot on off-white to break things up a bit.

The pattern features a large rectangle within each set of 2 1/2″ squares. Preeti did a wonderful job writing this pattern up. Her instructions and illustrations are clear and very easy to follow. There are so many ways the rectangle within each block could be used. How about placing appliqué on that center, or featuring a large scale fabric, maybe notes or signatures could be written here in permanent fabric markers – I think it is a creative space with a lot of potential.

I plan to back my quilt with the red and aqua polka dot fabric. As for a quilting plan, I don’t have one just yet. I want to do something special with those white rectangles and am waiting to figure that part out.

If you would like to see another version of the Masala quilt, hop over to The Academic Quilter. Mari made her quilt in tones of blue, green and yellow with an earthy background. It is so pretty and totally different from my version. Isn’t it fun to see the same pattern made with different fabrics?

Congrats to Preeti for the release of this fun pattern. Be sure to go to her shop and add a copy to your quilt pattern collection!

Linking up to my usual favorites – check them out at the top of the page, under Link Ups.

Just One Charm Pack – Blog Hop!

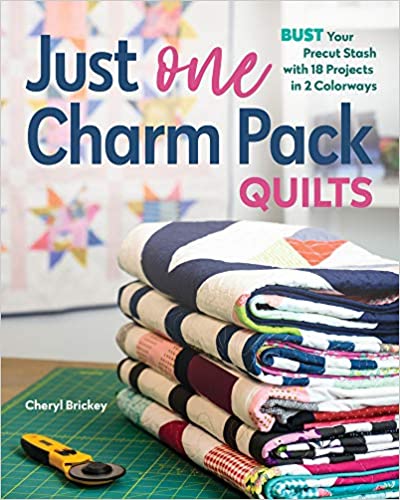
Finally! Today is my day on the blog hop celebrating the release of Cheryl Brickey’s second quilt book, Just One Charm Pack. I have been waiting to play with this book for quite some time. I loved her first book Modern Plus Sign Quilts and knew this book would be at least as creative. Cheryl’s patterns are not new to me. I have made three so far (Postage Plus, Pike’s Peak and Flock of Geese.) Additionally, I have carried her patterns in my shop for a long while and they are very popular. (Note – all quilt patterns, including Cheryl’s, are currently 25% off and have free shipping in the US. Take a peek!)

Just in case you are new to Needle and Foot via Cheryl’s book celebration, welcome! I have been quilting on and off since 1978. Well, I made several quilts in 1978 and 1979 and then didn’t begin again until 2011. But as with most quilters, once the bug bit, I started quilting with a passion! Please take a minute to poke around my blog and visit. I have also had an on-line fabric shop for the last (almost) five years. I am in the process of retiring so all fabric there is on sale. If you’d like to check it out, click here!

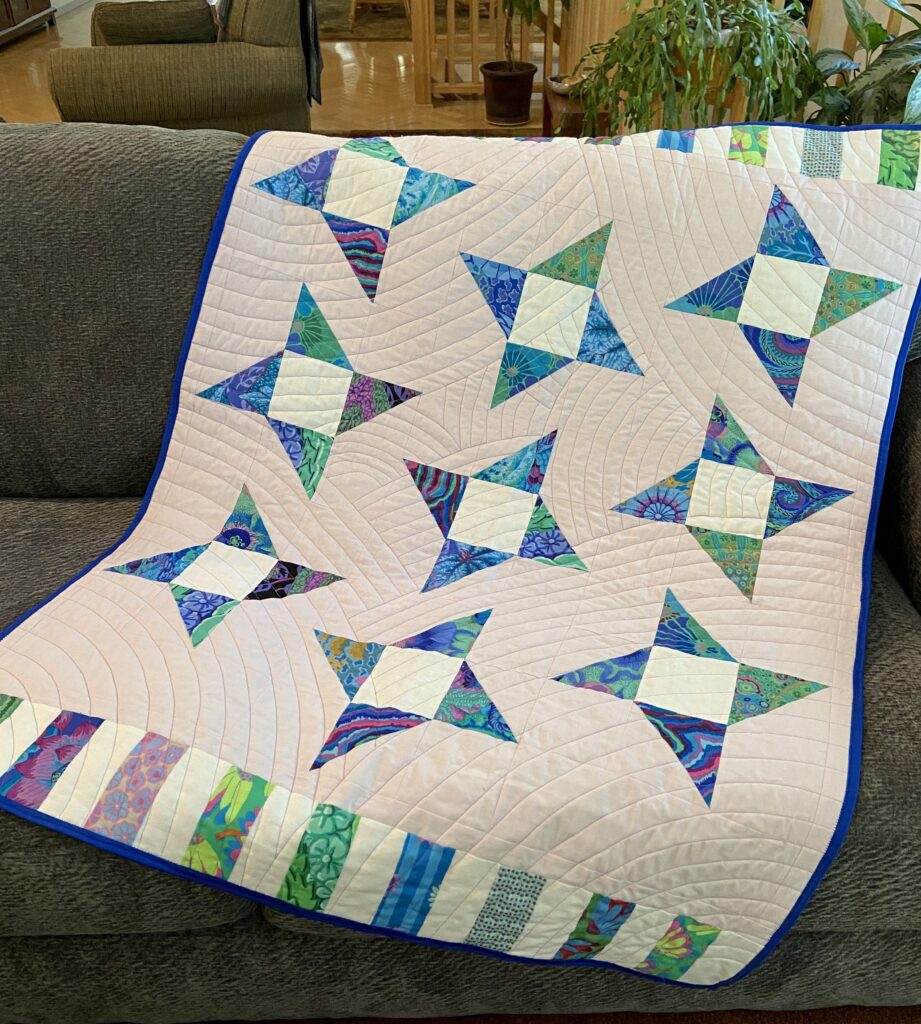
Some time ago, Cheryl invited a group of quilt bloggers to make a quilt from the new book and share it upon the release of the book. We were able to choose which quilt we wanted to make and I chose the Ninja pattern which is based on a variation of the Friendship Star block.

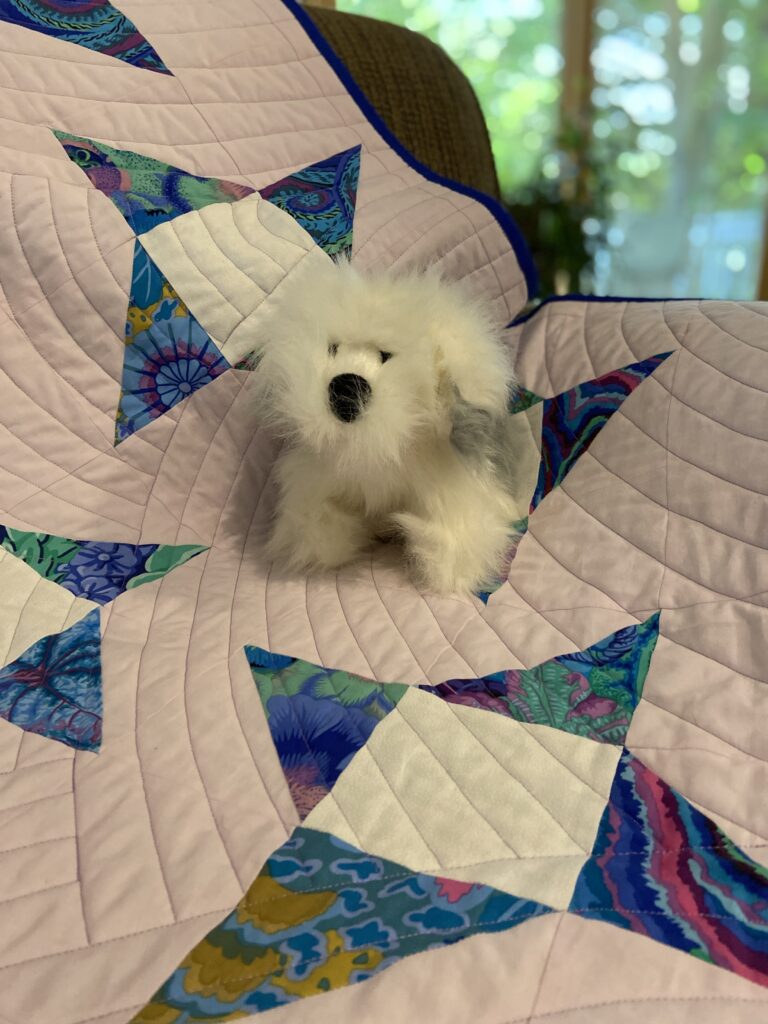
My version of the Ninja quilt was made with 1/2 of a Kaffe Fassett charm pack that I had left from an earlier project. I was thrilled to see I could complete a quilt with just that small stack! I had both the white and the lavender solid fabric in my stash so it was a breeze to pull fabrics for this quilt. The lavender background is actually a solid cotton voile. I hadn’t made a quilt with cotton voile and have to say, I love the extra soft feel it has.

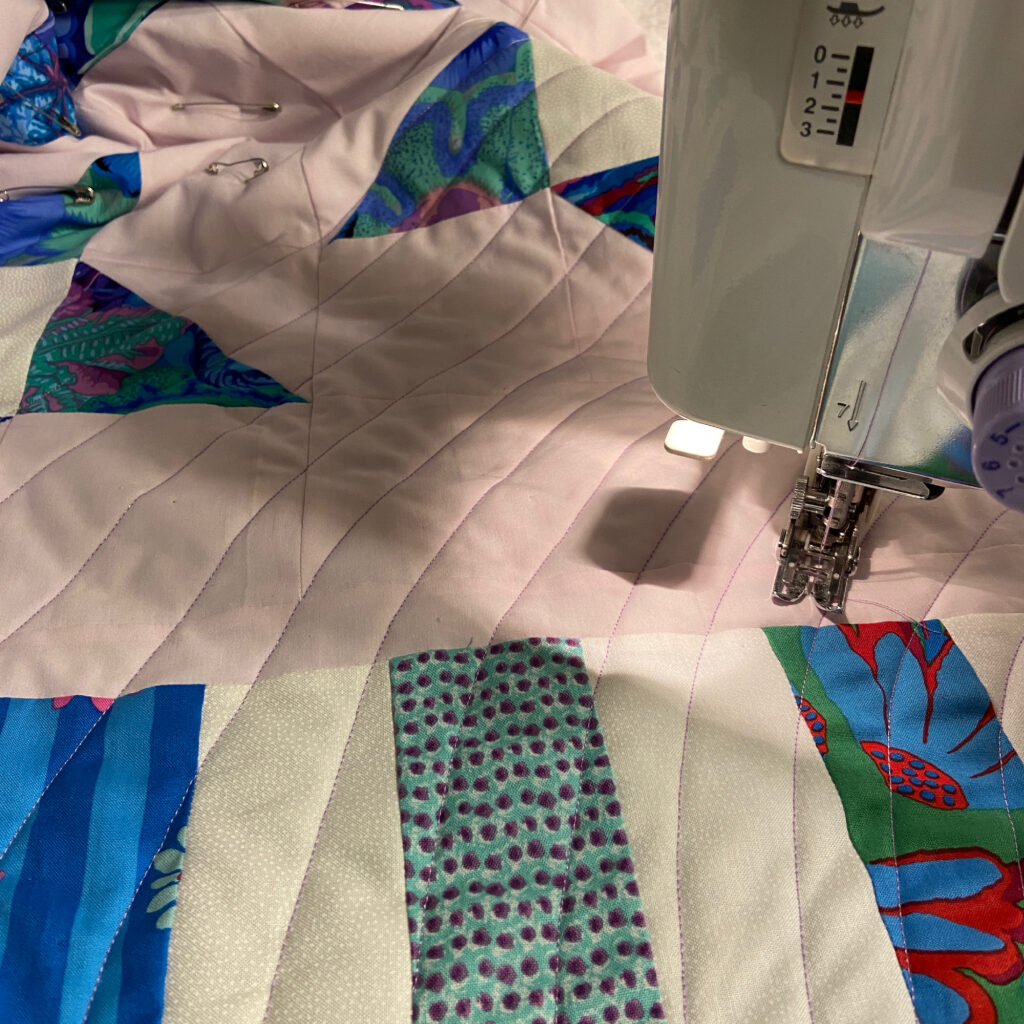
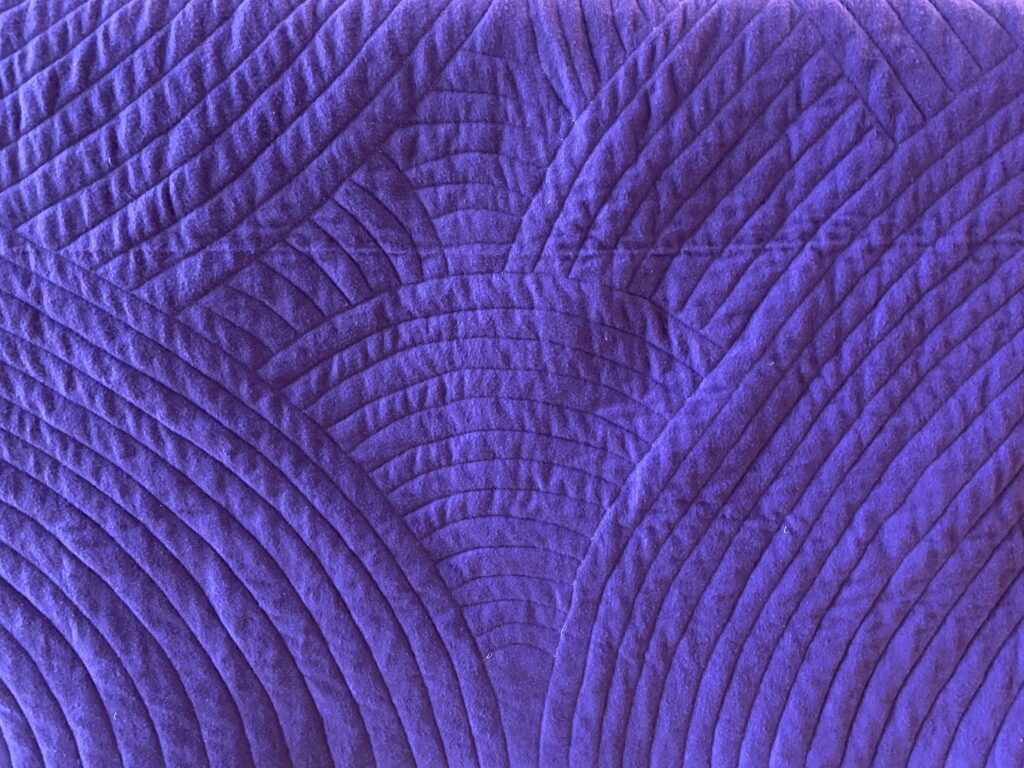
Piecing the quilt was very simple and because of Cheryl’s clear, concise instructions, there were no issues when putting the top together. By off-setting the placement of the Friendship Star blocks, there is nice movement to the design. I played around with ideas for quilting it until I took a closer look at the sample quilt in the book. It was quilted with concentric circles. The curved lines looked so perfect with the angular design. Not willing to free motion quilt that many circles, I chose to use my walking foot and do a pattern similar to a Baptist Fan. It was so simple to just begin in a corner and work to the center. Once I hit the center (or close to it), I just started another corner. Filling in between all four sections was the last step.

The quilt is backed with a dark purple flannel and the quilting shows nicely from the back side.

This cute little quilt (about 36″ x 50″) will be sent to a friend of the family. They just had their first baby, a girl named Natalie. I hope they will enjoy it and use it to pieces!

By the way, the patterns in this book are all traditionally pieced which means no paper piecing. For me, that is a big win! Another win, in my opinion, is that the quilt designs appear to be quite easy to enlarge. It would be no issue to just make more of these blocks and add to the width of the top and bottom border to make this a larger, lap size quilt.

Now that I have shared the quilt I made, I wanted to also show you a peek at some of the other patterns. Honestly, Cheryl designed some really fun, easy patterns.

Pieced by Cheryl Brickey, quilted by Carol Alperin

This quilt is named Fishies, rightfully so, don’t you think? I love the look of the school of fish all traveling together. So sweet.

Pieced and quilted by Myra at Busy Hands Quilt

This pattern is called Ships Ahoy. It was made by Myra of Busy Hands Quilts. Her colors are perfect for a bright addition to a nursery and that quilting is gorgeous. You can read more about her process here

Pieced and quilted by Liz, Savor Every Stitch

Finally, I have to share this version of Cat’s Eye. It was pieced and quilted by Liz at Savor Every Stitch. Just spend a minute adoring the quilting. Liz has such talent. To see more photos and read about Liz’s process, click here.

No doubt there is a quilt for everyone in this book. I encourage you to take a further look by following along with the blog hop. It began on July 15th and goes through July 29th. Cheryl will be posting the newest quilts on her site daily so you can read along.

ABOUT THE BOOK

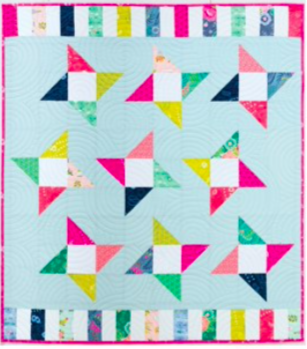
Each pattern in the book uses a single charm pack, an additional fabric (called fabric A in the pattern) and a background fabric).  The book is the Hamburger Helper for charm packs, stretching one into a full quilt 🙂

You can grab a copy of Just One Charm Pack Quilts on Amazon or get a signed copy in Cheryl’s shop.  

As a bonus, if you purchase a signed copy from Cheryl’s shop, you can get one additional free stand alone pattern (digital or printed) by adding the book and a stand alone pattern ($12 value) and then using the coupon code HOPPATTERN (through the end of the hop 7/29) during checkout.

A Cute Quilt and a Cute Baby

My niece just had her first baby! She was due on January 25th and this little tiny girl decided to join the family on January 8th. She must have been in quite a hurry to meet her mama and daddy.

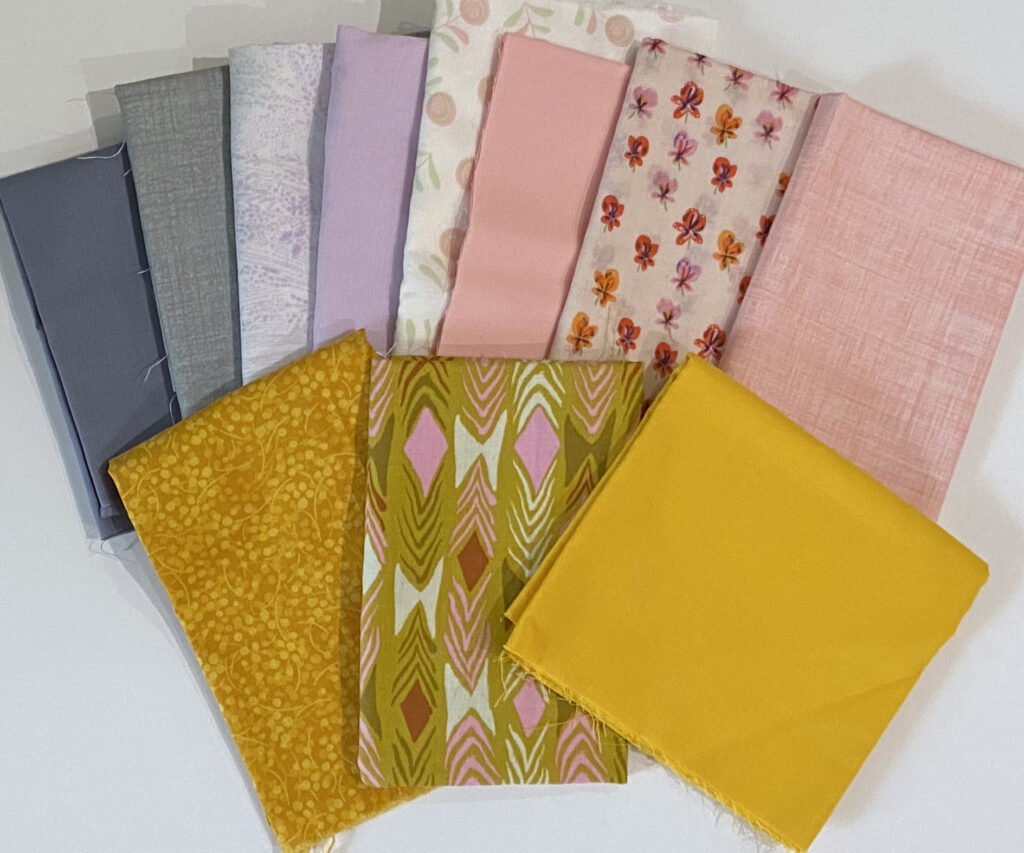
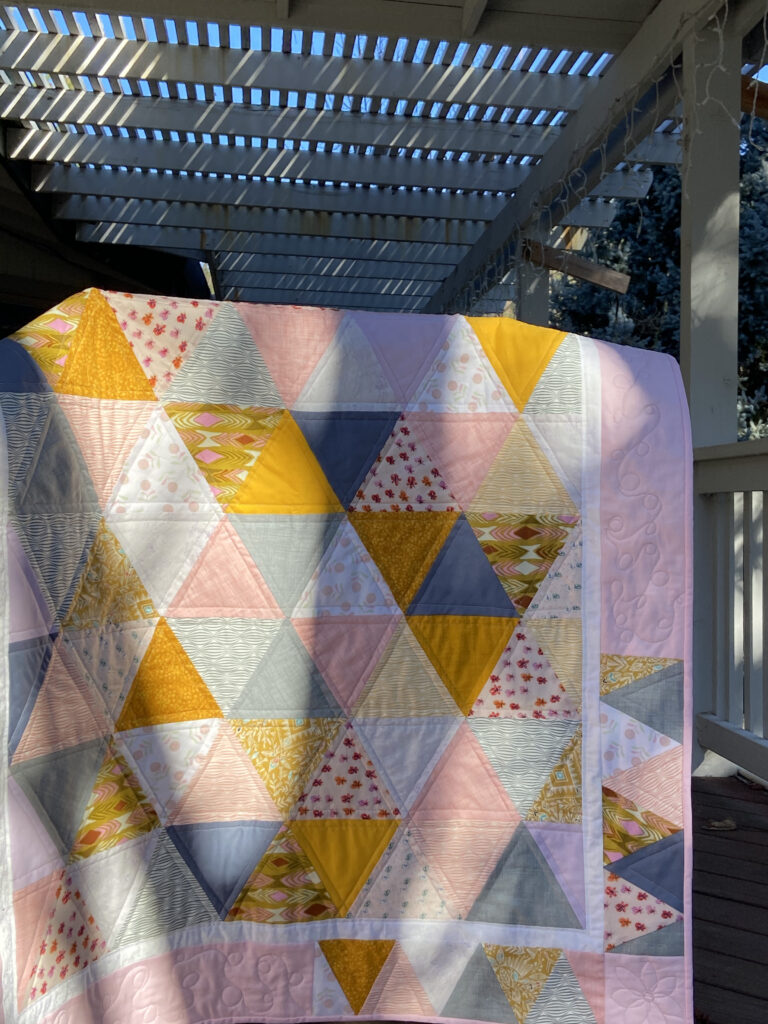
Some months ago (in September I believe) I was talking to my sister and she helped me to choose colors for a baby quilt. After some back and forth, I had a stack of fabric in shades of pink, lavender, gray and cheddar yellow. Really unusual colors but I loved them together.

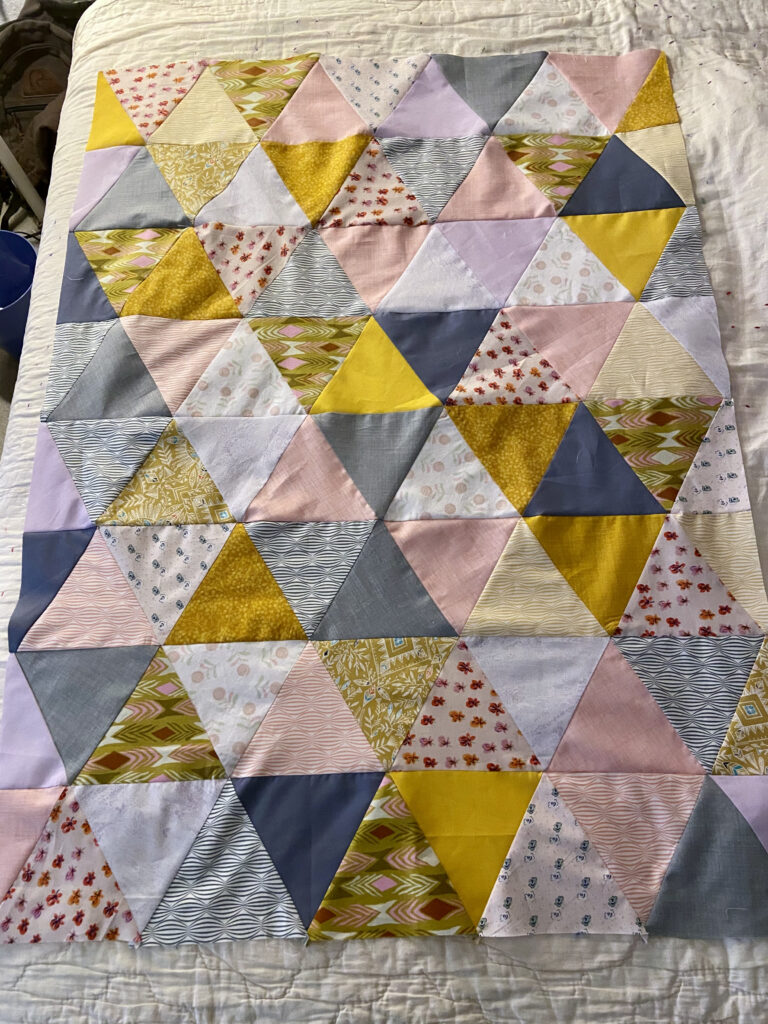
I went back and forth on patterns and finally decided to make a triangle quilt. I have never made one and it seemed like a fun thing to do. My crafty husband cut an acrylic template for me to use to cut pieces. It went really fast and soon enough I had a stack of triangles.

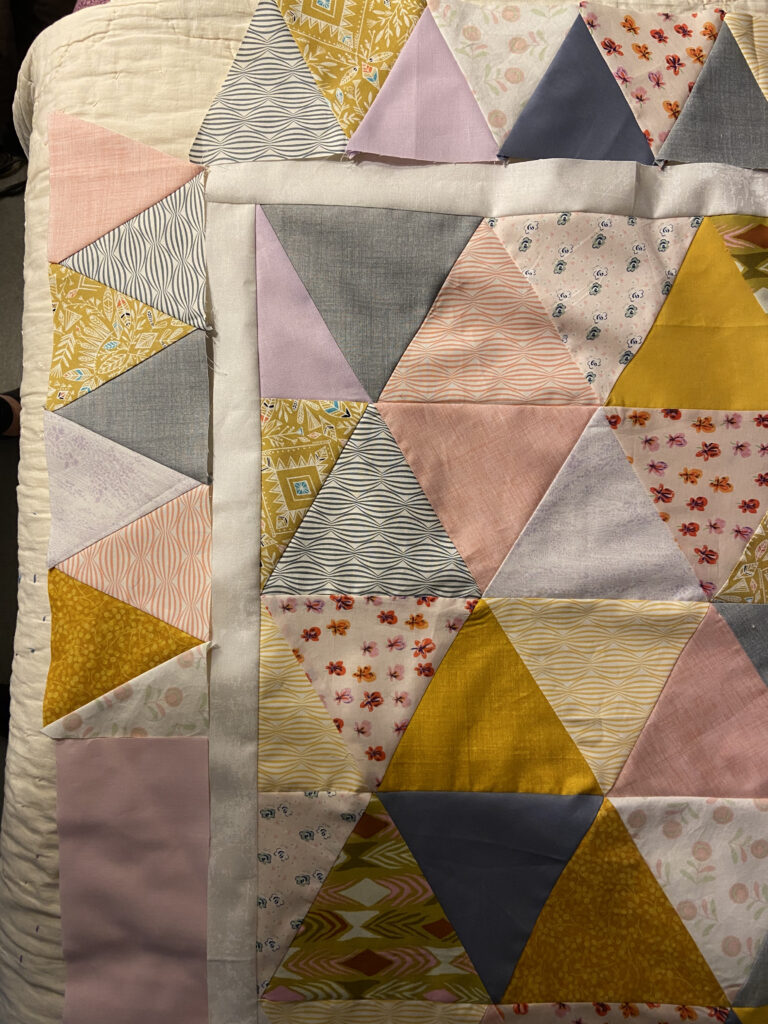
Once I had these rows stitched together I realized it was too narrow. So I sent of this photo to one of my many quilty advisors, Wendy, of Pieceful Thoughts to ask for ideas. She suggested an outer border with segments of triangles within the border. Genius! I loved the idea.

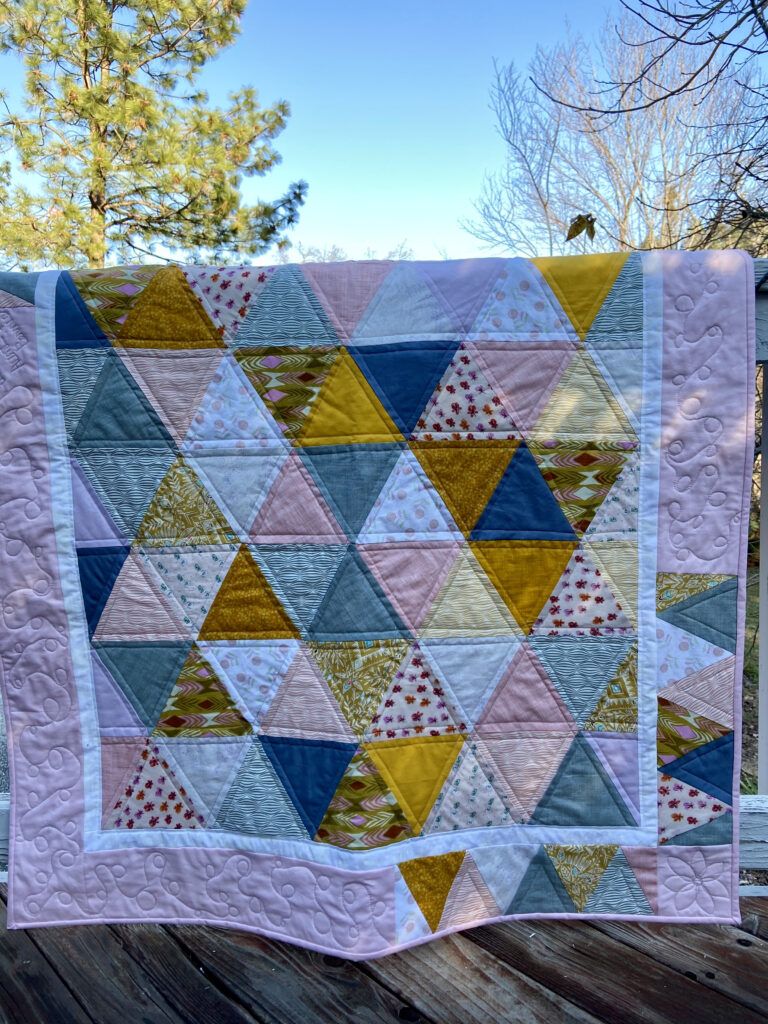
I added a narrow (one inch finished) border to break between the two sets of triangles. Luckily I had another triangle stencil that was smaller and worked well for the border. On opposite corners I put the smaller triangles and then used a pink solid (Ballet from Free Spirit) for the rest of the border.

The biggest hurdle for me was where the points all joined – it became so thick and I knew it would be hard to quilt over that spot. To avoid this, I echoed the lines of the triangles which meant I never had to go through that spot. The quilt is backed with lavender flannel which makes in soft and drapey (I don’t think that is a real word but you know what I mean.)

The two cornerstones between the triangles have flowers quilted on them and the pink sections of the border have loops meandering along.

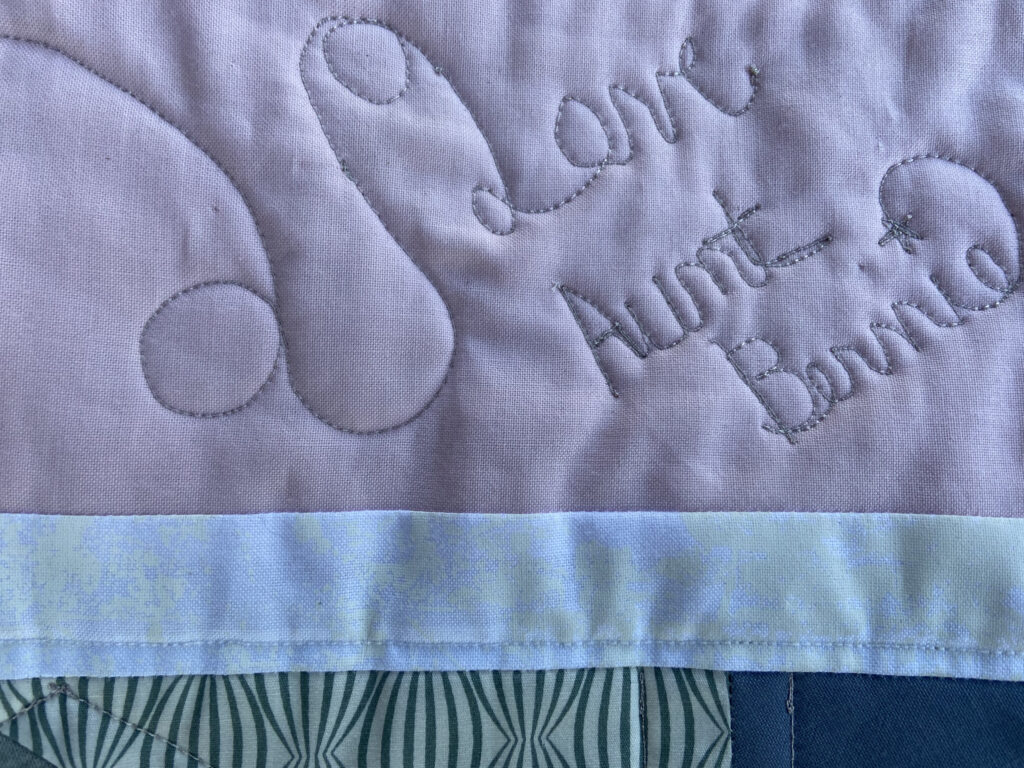
I quilted the baby’s name in one section of the border and in another section I signed my name to it.

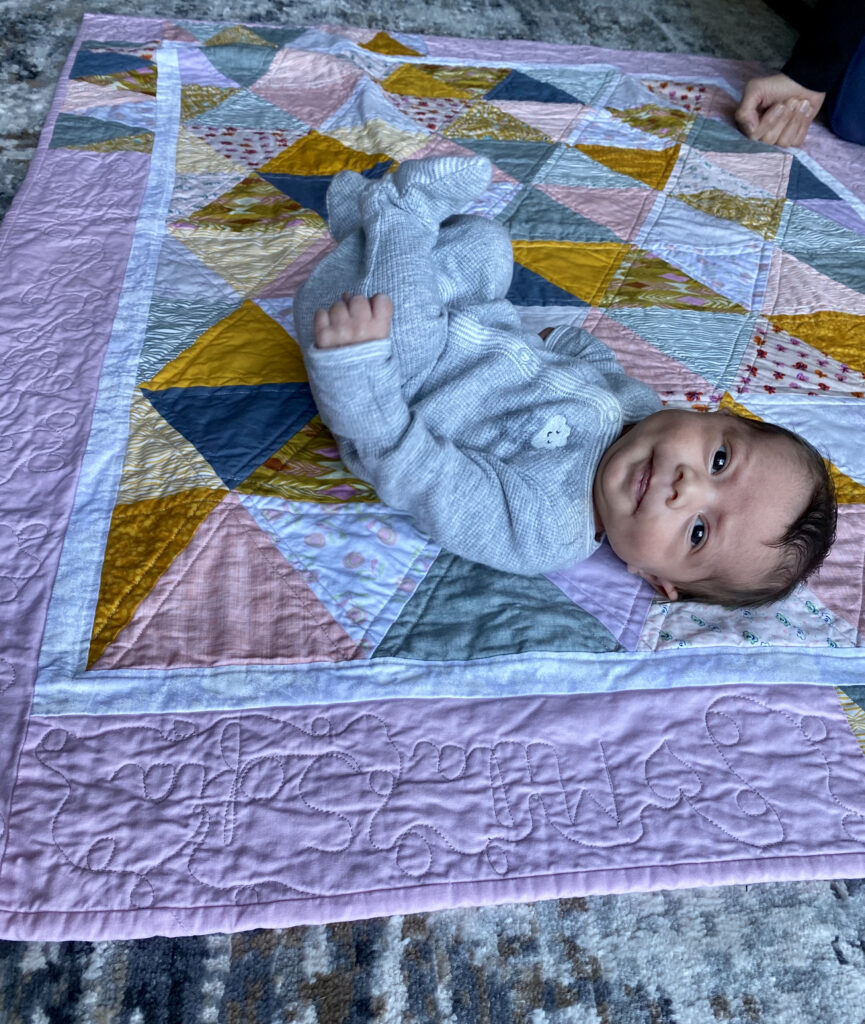
Just look at this tiny peanut! She was just over five pounds when she was born and as often happens, she lost a bit of weight. She is now three weeks old and is over 5 1/2 pounds. I think she is just gorgeous. She is giving her parents a run for it and not sleeping a whole lot unless it is mid-day. Remember that feeling? Sleep deprivation at it’s finest.

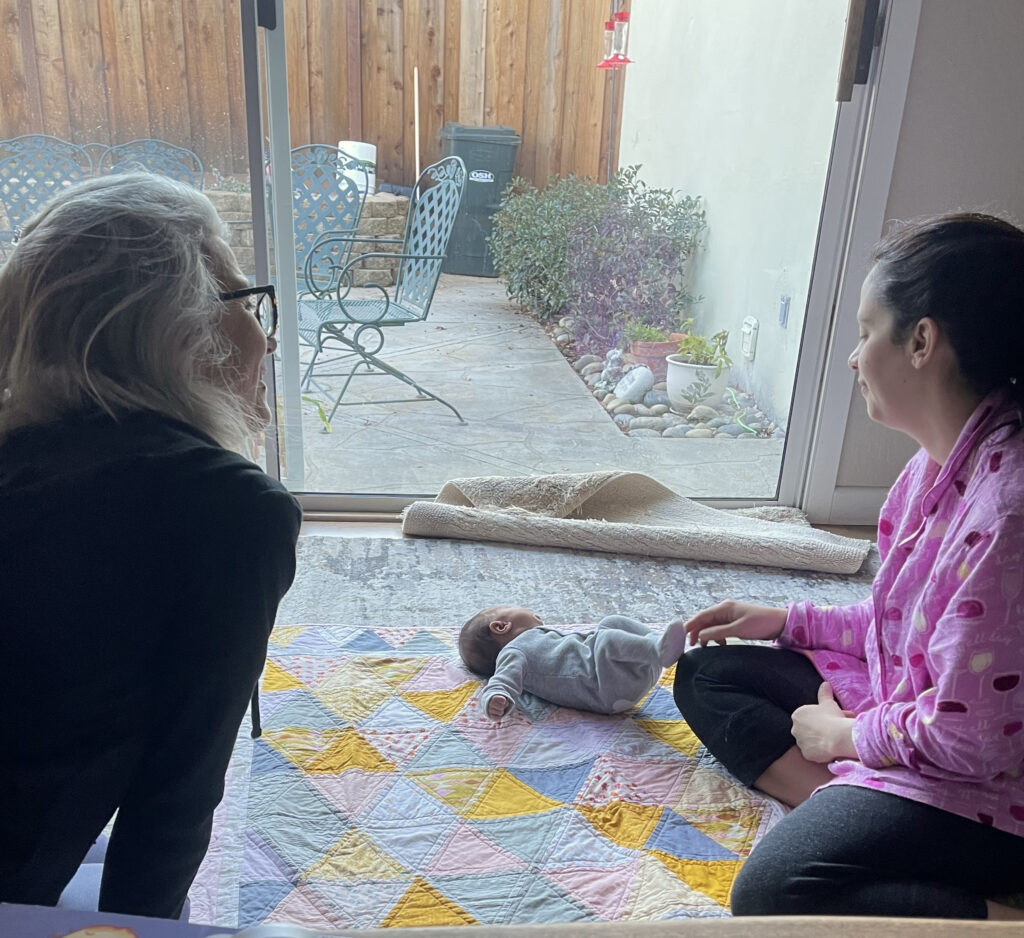
I love this photo. For one, it shows how very tiny this little one is. Those are six inch triangles and she is barely covering three of them. It also reminds me of the times when I had new babies and there was nothing better than to just sit and watch them. A new baby is nothing short of miraculous and sitting with them, soaking it all in, is just the best. My sister is on the left (this is her fifth grand daughter!) and my sleep deprived niece is on the right.

That is it for now. I started quilting the Bloom with Grace quilt and it is coming along nicely. Yesterday I went to drop off the placemats for Meals on Wheels but left the placemats at home. Because that is just how I am. So I guess I will drop them off another day. Silly silly me.

Linking up this post with my favorites. Check them out at the top of the page, under Link Ups.