Category Archives: Affiliate Post

Giveaway Winner, Sneak Peaks and Other Exciting Stuff

In the excitement of the holiday weekend, Black Friday sales activities and other distractions, I forgot to draw the winner of the Make Wall Quilts e-book.  This morning, using my scientifically random system of drawing names ( Hey Julia, what is a number between 1 and 42?), Nancy was selected as the winner of the book.  Nancy, I hope you enjoy it and make some fun projects with it!  Remember, if you want a copy of the book – it is a bargain on Amazon. Truly – only $2.56 for the hard copy of the book.  Great gift for yourself or your quilty friends!

Now that business has been taken care of, want a peak at the quilt I am making?  Sarah Goer is a talented quilter, pattern designer, and blogger. We both started our blogs at roughly the same time and became friends at that time.  This is the second time I have pattern tested for her and I really enjoy it.  Before having children she was a math teacher at the junior high school level.  I think this gives her a great background for pattern writing.  An affinity for math and puzzles gives her the skills to write a clean, well understood pattern.   For now though, this is all I am going to say!  Here is a look at what I am working on.

I asked for opinions on color choices on Facebook and Instagram about a week ago and got lots of feedback.  This blue and yellow combo was quite popular and I am very happy with the look so far!

Finally, I was reading the news this morning and saw an article about Facebook that caught my eye.  Facebook gets a bad reputation from the way fake news is often generated, hysteria builds based on ridiculous, irresponsible posting, the cyber-bullying that occurs etc.  Much of this is due to poor decision making on the part of the Facebook user community as well as lack of parental monitoring of the youth that use social media.  When Facebook introduced live video options last year some really disturbing videos were posted. In response to this, Facebook hired a large team (3,000+ employees) to monitor the videos for harmful content or intent.  For quite a while now, they have monitored text for any disturbing conversation that may indicate children and potentially abusive adults (sexual predators)  They will notify authorities when suspicious text is found.

Now Facebook has expanded their use of Artificial Intelligence to scan posts for text that indicates possible suicidal tendencies.  When such information is picked up, there is a team of interventionists ready to contact the person posting as well as persons who may have responded to the posts with supportive information such as suicide hot line phone numbers and other resources which may be able to assist.  Realizing that this sort of intervention has to happen quickly, Facebook has trained employees available at any hour to speak with authorities in the language of their country if something suspect is found.

Facebook is a powerful social media platform with over two billion users.  Many would say Facebook noses around where they shouldn’t.  That they push annoying ads targeted at users and monitor conversations to be able to do so.  However, it is my belief that people using Facebook are making a decision to be posting on a highly monitored platform and thus making their lives somewhat public.  I think it is a good thing to know that the company uses the tools they have to try to protect the safety of the users. I am curious to hear your thoughts on this. To me it shows a very responsible use of the incredibly powerful technology developed by Facebook.

Off to the sewing room!  I want to make some good progress on the baby quilt I am making with Sarah’s pattern.  Hope everyone is carving out a little creative time in their day.

Note: This post contains affiliate links meaning if a reader clicks a link on my page and makes a purchase, I will be paid a small amount.  This payment does not increase the price of the sale to the customer.

Make Wall Quilts – Book Review & Giveaway

Today I would like to share a book review with you.  C & T Publishing asked me to review one of their new books, Make Wall Quilts: 11 Little Projects to Sew (Make Series). In a nutshell, I would say I love everything about the book except for the title.  The title didn’t grab me and as I clicked on the link to the book, I was going in with a negative attitude.  Luckily the actual book is wonderful.  I suppose this means one shouldn’t judge a book by its title!

This book is a compilation of eleven different wall, or mini, quilts.  Each is from a different, well known quilt designer.  There are projects from Camille Roskelly, Kim Schaefer, Rebecca Bryan and Heidi Staples in the book as well as several others.  Taking projects from books previously published by the designers is a genius idea as it provides a variety of styles in one book.  You probably know just from reading the names above that the book contains modern and traditional projects made with a variety off techniques.  I am a fan of reading quilt books (no surprise there!) but each one usually has a particular theme or style to it.  With this book, the quilter can try a variety of styles and techniques. The projects are not large which means they are easily accomplished.

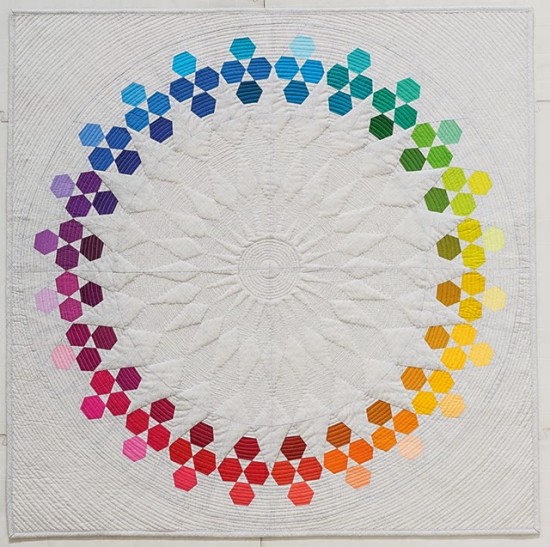
Well, all except one!  For me the Huckleberry Quilt designed by Rebecca  Bryan looks challenging and maybe out of my skill range.  But this is a good thing – it further affirms the book has something for everyone from the beginner to the more experienced quilter.  The fact that this riff on a color wheel requires 72 different color fabrics is enough to intimidate me.  I have enough difficulty choosing color and if I had to choose 72 different solids I might go right over the edge. But while you are here, take a look at the quilting on this piece.  Stunning!

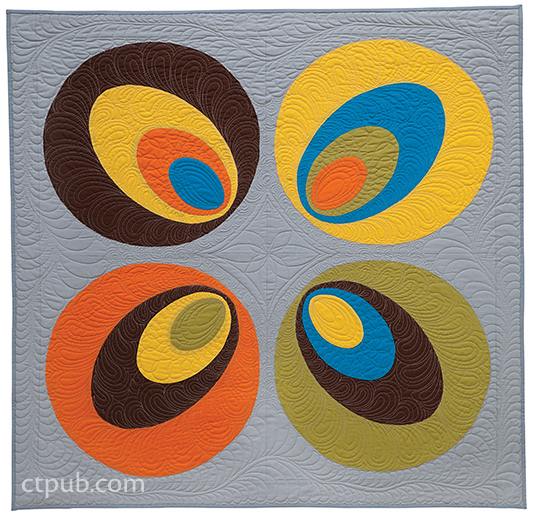
The reader might choose to make a modern applique project or a traditional one. I really like the look of this quilt designed by Jennifer Dick, appropriately called Mod. Again just take a look at the quilting here. Gorgeous!

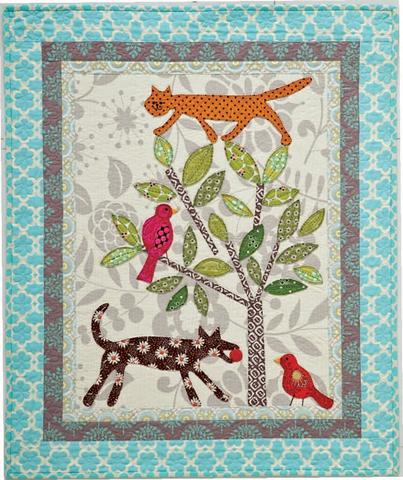
Quilters who favor traditional applique might enjoy this one.  Called Outside In, this project was designed by Becky Goldsmith. It is a larger piece, finishing at 30″ x 36″ but very doable.  I love the cat at the top.  She has attitude.

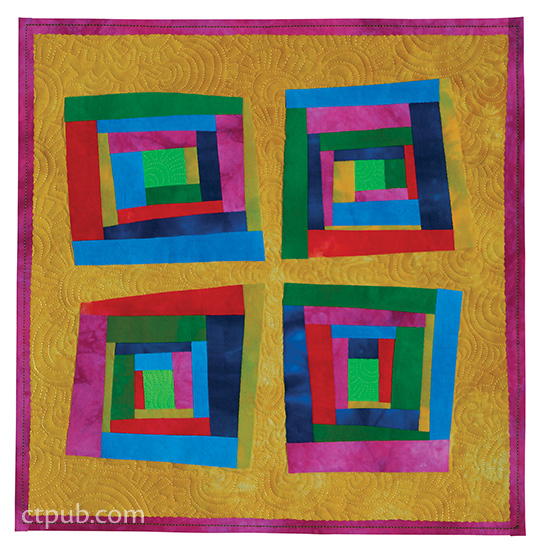
Quilters without improv piecing experience might like to learn from the Lazy Log Cabin project designed by Laura Wasilowski. The blocks in the piece are six inches with the total quilt finishing at 17″ square.  It is Laura’s use of bold color which makes this project stand out to me.

Most of the projects in this book could easily be expanded to a larger size quilt if the reader wanted to make a baby or lap size quilt with the project.  This further exemplifies the flexibility of the book.  I really give high praise to C & T for curating this great selection of projects and publishing them in one book.

C&T has generously offered a copy of the e-book to give away to one lucky reader. But if you are not the winner, I do recommend purchasing this book, either for your library or as a gift.  It is a lovely collection of a variety of projects, truly a something-for-everyone kind of book.

To enter to win a copy, please leave a comment on this post.   Tell me what your favorite quilting technique is at the moment.  Is it EPP, paper piecing, improv piecing, traditional block piecing, applique? What do you enjoy most?  Giveaway will be open until Friday and I will pick a winner on Saturday.

If you would like to purchase the hard copy of the book, it is on sale at Amazon for a steal of a price! (Affiliate Link)

I doubt I will post again this week so let me wish you a Happy Thanksgiving. I do love this time of year. Celebrating gratitude for all we are blessed with feels good and reminds us that even if we are enduring difficulty, we still have much to be thankful for.

Note:  Needle & Foot is an Amazon Affiliate meaning if you were to click through and purchase the book, I will receive a small stipend for the purchase.

Sewing Room News

The season has definitely shifted to full blown fall around here.  We had a great rainy weekend and the colors are gorgeous.  The shot above was taken a few days ago up at the pond on the edge of our property.

I have a few fun things to share with you.  You may have noticed that Craftsy has been evolving and changing over the past year or so.  They started to carry their own brand of fabric (Boundless) as well as yarn (Cloudborn).  Now they are offering a subscription plan to the videos offered for sale on their site.  This is an interesting proposal for those crafters that regularly purchase and view Craftsy videos.

The subscription is similar to that offered on Creative Bug but the Craftsy site offers many, many more classes in all sorts of subjects than Creative Bug does.  Of course, you get what you pay for, right?  The Craftsy subscription comes at a higher price.  For $14.99 per month, or $120.00 per year, the subscriber has full access to all of the classes in the Craftsy library.  There is no contract tying the subscriber to the plan for a certain number of months to enjoy full access.  (Of course if you pay for a year up front, you are subscribing for the twelve months.)

The interactive qualities, class notes, and discussions, are all available with the subscription. But you do not own the class, meaning when you decide to cancel the subscription you will no longer have access to the classes.  I think there is merit to their plan. Right now, Craftsy is offering a two week free trial of their subscription service.  Certainly worth taking advantage of, especially if you were considering purchasing a class in particular.  You now have the chance to watch the class and decide if it covers what you need before purchasing it.  There are lots of options how to utilize this new service.

As for sewing and fabric news, I am working on finishing up the binding on my nephew’s jersey quilt.  I decided to machine stitch it to both the front and back.  I am somewhat sure my nephew will not look at the binding and wonder why his Aunt Bernie didn’t hand stitch the back of the binding.  😉  Also, the quilt is made of jersey knits that have been stabilized.  It is pretty heavy and I don’t want the binding to come apart when the quilt is laundered.  I found one spot where the quilting stitches look a bit funky on the back side and I will take those stitches out and repair it on my machine.  I think I have thread that is close enough so it won’t be noticeable. Hopefully I will finish that up and then have a fun finish to share with you.
Last week I got lucky on my thrift store prowl.  I was having lunch with my mother in law who lives about an hour or so from me.  I saw a local thrift store that looked interesting and stopped in.  They had three rolls of knit fabric, each one 60″ wide.  I really love the color of one roll, a dusty purple and I grabbed it.  It was taped tightly so I couldn’t unroll it and check to see if it was in good shape. But I decided to take the chance on it.  If it didn’t turn out to be clean and in good shape, my $12.00 was going to a good cause (Hospice). But guess what?? It turned out to be really nice fabric and there is probably at least five yards on the roll. It will be fun to sew something up with this. I am not sure exactly what yet.  Nightgown? T-Shirt? There is plenty on the roll so maybe both?? As always, I look at a piece of fabric and it is so fun to think of the potential in it.

Hoping your week is going well and you are fitting in a bit of sewing time here and there!

Linking to Main Crush Monday at Cooking Up Quilts and a few others. Take a peek at the tab at the top of the page, Link Ups, for more linky parties.

(This post contains affiliate links meaning if you were to click through and make a purchase, I would receive a small compensation for that purchase.)


Sew Along Finish!

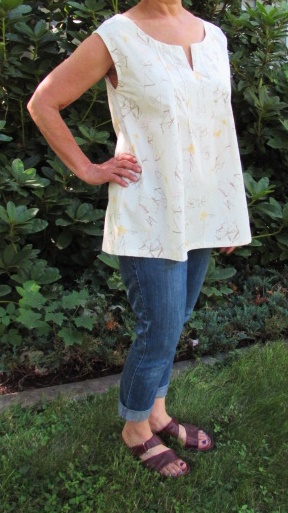
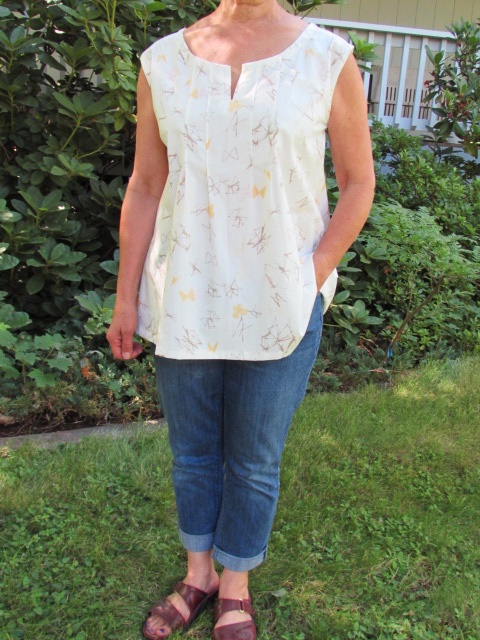
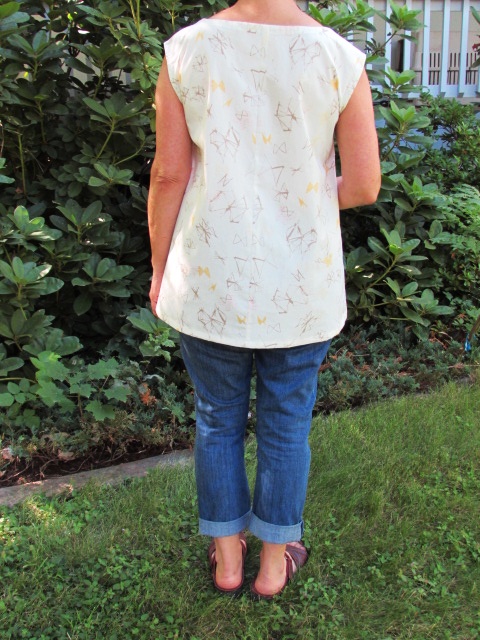
Today we are celebrating the finish of the Summer Sew Along. Together there were about twenty sewists that made a shirt using Butterick pattern number B6024. If you are just seeing this and want to check out the sew along from the beginning, click here.  This is the first time I have hosted a Sew Along. I truly enjoyed every bit of it.  I had a few frustrations as I finished up the shirt and I am anxious to see and hear how everyone else fared with the finishing touches on their shirt.   So, let’s take a look at my finished shirt!

The fabric I selected is called Filaments Ethereal from Art Gallery Fabric’s collection called Gossamer.  Actually of the group of us sewing, there will be at least five people with this shirt in a fabric from the Gossamer line.  It was a popular choice for summer.

For the most part, I am satisfied with the fit. The first time I made it, I decided it was a teensy bit tight across the back and shoulders. So with this one, I made it a little bit larger. I may have gone too far the other way and it is a little bigger than I wanted. I know, I know, I am being too picky. The fit is always the biggest challenge with sewing clothes.

The shirt hangs well and it is super comfortable. The Art Gallery fabric, as always, is so light, making it perfect for summer.

I think, were I to make it again, I would make the version with sleeves. I like it just a bit better. But really, what a fun project this was. I would definitely host something like this again. Sewing with friends, whether in real life or virtual life, is always a fun time.

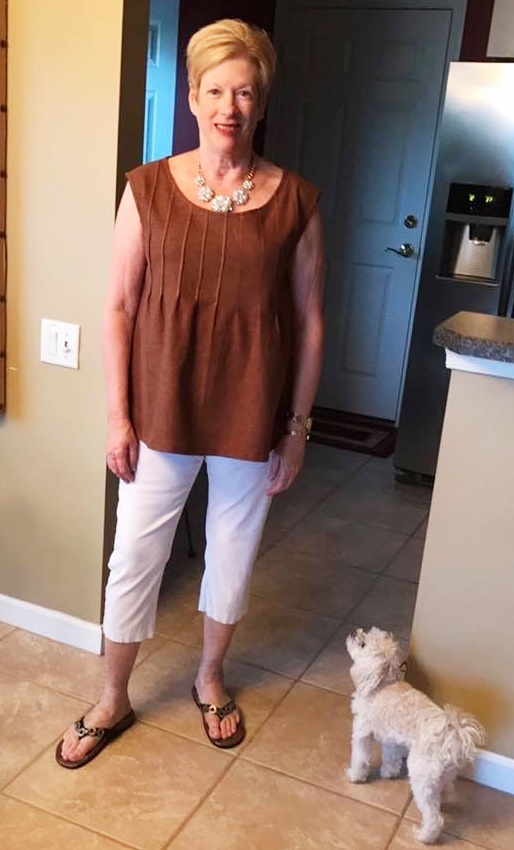
Here is one of the member’s of the sew along.  Rosemary joined in and she chose to make the version with pin tucks across the front. She did such a great job and I think it looks beautiful on her. That fabric is wonderful! It looks like her puppy approves too!

 
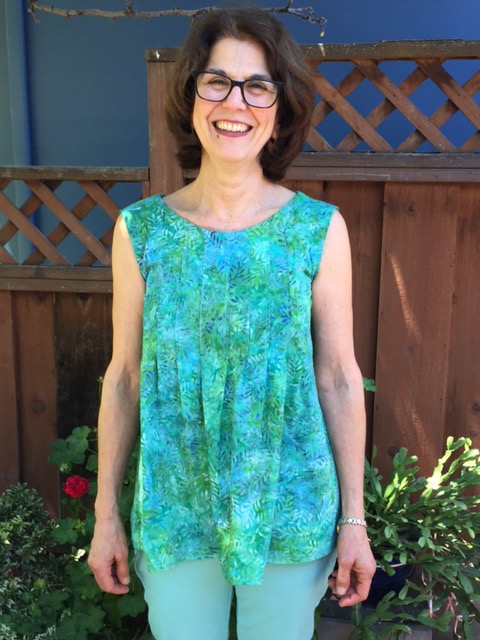
Here is my sister Tina. She joined in and sewed with us. She has been sewing for a long while but hadn’t made any garments for a while and wanted a refresher. She did a great job on the shirt!

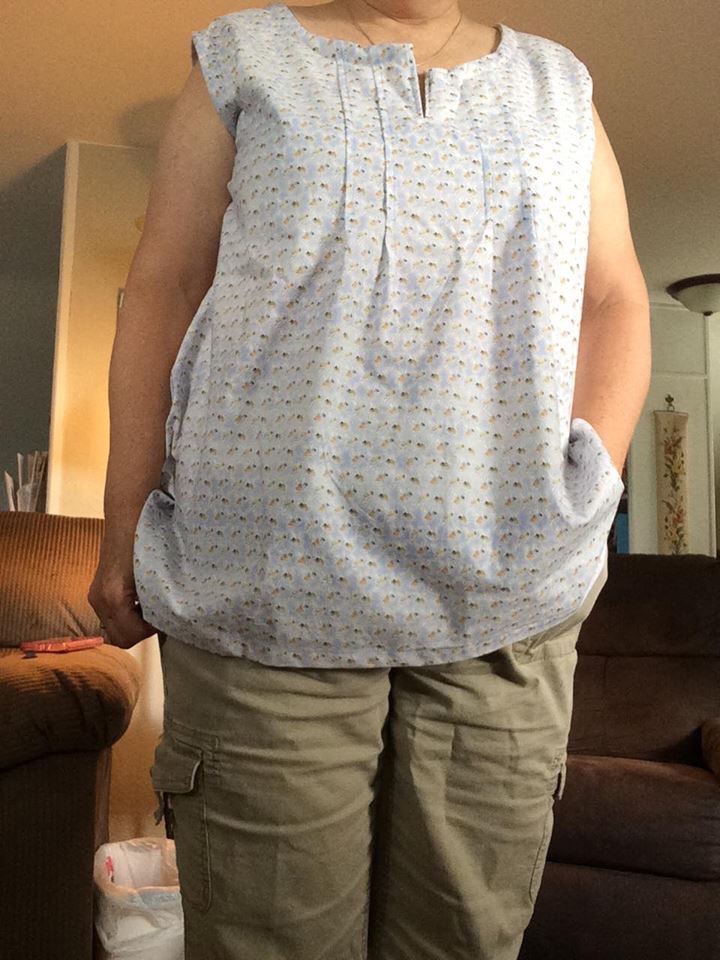
The picture above is from Cate. She chose a lightweight blue fabric for her blouse. It is just perfect for summer.  It looks so pretty!

I have a link up below so people can share their finishes with everyone. I hope you will scroll through and take a look. The link up will remain open for about ten days.  Not everyone has finished their shirt yet so I want them to have the chance to link up when they are done.


Finally here is a heads up on a great promotion over at Craftsy during this long holiday weekend.  Might be the perfect time to select a new class for less than $20.00! So many excellent classes are available and once your purchase it you have it forever. What a great way to build your library. (Affiliate post)

Gemstones is a Finish!

Never have I said good bye so many times. This is getting ridiculous. But last night I finished my Pretty Gemstones quilt. How could I leave and give it away without sharing it? There aren’t that many quilt finishes in a year (for me anyway) to skip one!  This will be a quick post, because you know, the wedding and all.  So much to be taking care of around here.

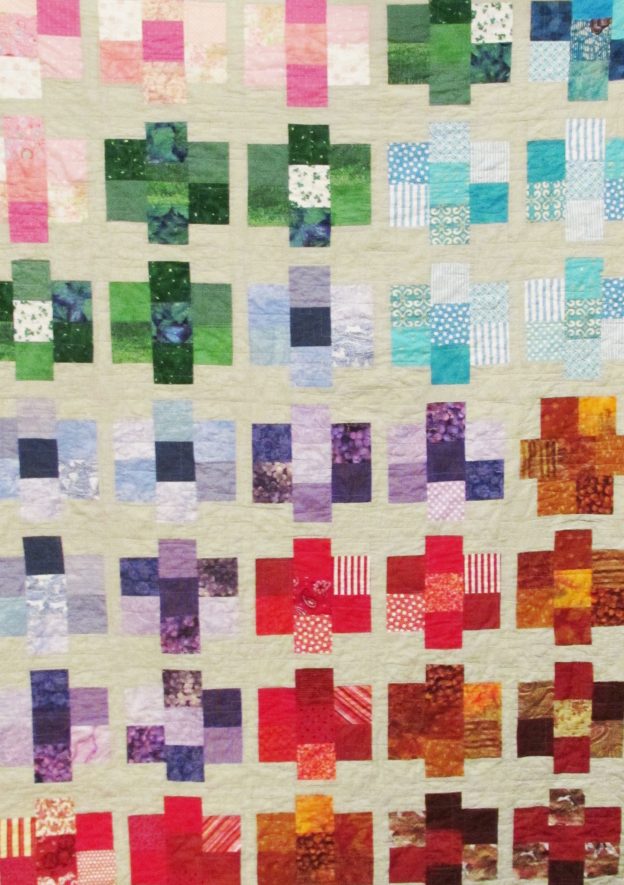
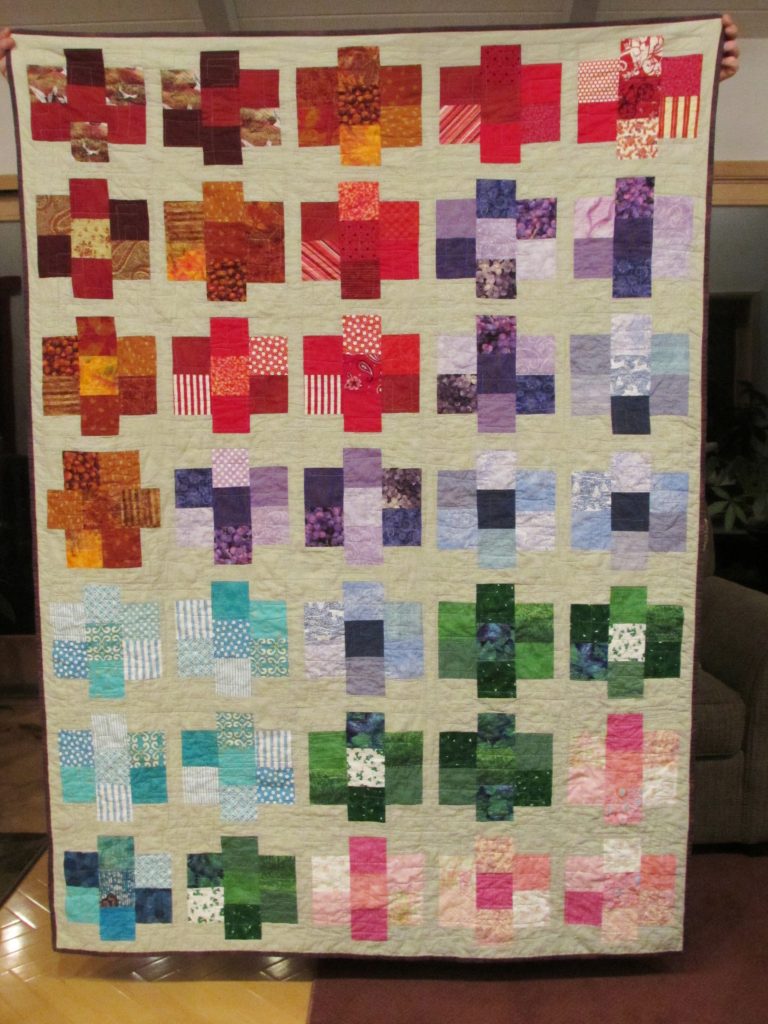
In all it’s glory, here is the first quilt finish of 2017! By the way, pictures were all taken indoors and late at night so they are not of the award winning quality that you have come to expect from me.  😉

This quilt was made with a pattern called Pretty Gemstones. It was designed by the wonderful Cynthia Brunz of Quilting is Better than Housework (which is absolutely true!)  It was published in McCall’s Quilting magazine in the January 2016 issue. The pattern is a breeze to make. I love a pattern with sashing. It means that my less than perfect piecing doesn’t make me go crazy because there are no corners or points to match. (I can be so lazy!)

I started this quilt last January as one of my Rainbow Scrap Challenge projects. But to be honest, I didn’t always follow the color prompts of the challenge. I was trying to use colors that are reminiscent of gems.  I think this came off quite well. There is are blocks which represent sapphires, rubies, topaz, tiger eye, amethyst and rose quartz. I skipped many of the suggested colors because they didn’t work for this project. I am pretty sure that is allowed but, if not, please don’t tell on me.

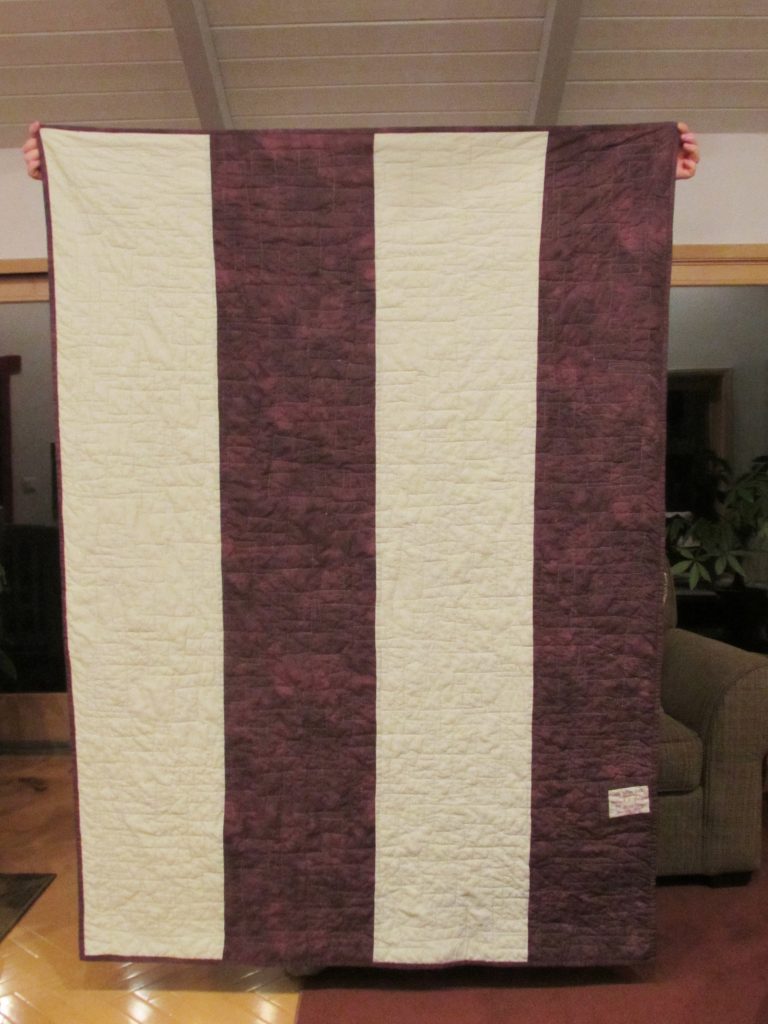
The sashing is done with Kaffe Fassett’s solid (the color is Ecru). I found it difficult to work with this fabric. It is a thin cotton and has a great deal of give to it. It became almost stretchy, especially the long strips for the sashing. Honestly, I doubt I would buy it or recommend it to a friend. (Sorry Rowan Fabric and Kaffe.) I had to starch it and while that helped, it didn’t completely solve the issue. This is the second time I used these solids.  The first time was in the jelly roll quilt I posted about here. I had quite a bit of trouble with awful stretchy waves in this project too. Part of the problem on the jelly roll quilt was I had to rip out stitches several times which distorted the strips. Now I also think it was this fabric. Seriously, it is very thin. After trying it twice, I doubt I would purchase these solids again. I have used Kaffe Fassett’s gorgeous print cottons and they are wonderful. It is this line of solids (and his stripes) that I am not a fan of.  For the backing I pieced the sashing fabric with a deep purple remnant that I picked up a while back. See the label on the back? I am trying to be more diligent about labeling my quilts. The purple fabric was also used to bind the quilt.

I quilted it with a motif of interlocking squares and rectangles of all sizes. This is the first time I have used this pattern and I loved it. The boxes are very forgiving. One interesting thing I noticed is that I can control the machine better with a square pattern than a round. Circles are more difficult for me to keep a consistent speed with as opposed to square. It felt more relaxing to quilt the squares.

On the plus side for Kaffe Fassett solids, they are quite soft – especially after washing. This quilt crinkled up so nicely after a quick rinse. No color bleeding issues either. Yay for Color Catchers!

Finally, take a close look at the quilt. See my rather silly error?  I didn’t catch it until about 1/3 of the quilting was done. Yikes!

I am giving this quilt to my new daughter-in-law’s parents. We wanted to bring them something as a thank you for the events they are hosting for this weekend’s wedding as well as to welcome them into the family. I hope they like it.

I am not going to promise this is the last post for the week. It probably is. But who knows?

Linking up with the lots of fun places. Check out the list at the top of the page, under Link Ups.

If you are shopping for a new Craftsy class, this weekend is a good time to do so. From Friday, January 13th through Sunday the 15th, the classes are Buy One, Get One. BOGO deals are great – two for the price of one! Check it out here.

(Note – I am a Craftsy affiliate. I am paid a small stipend for purchases made after clicking through the links on my site.)

The Busiest Time of the Year

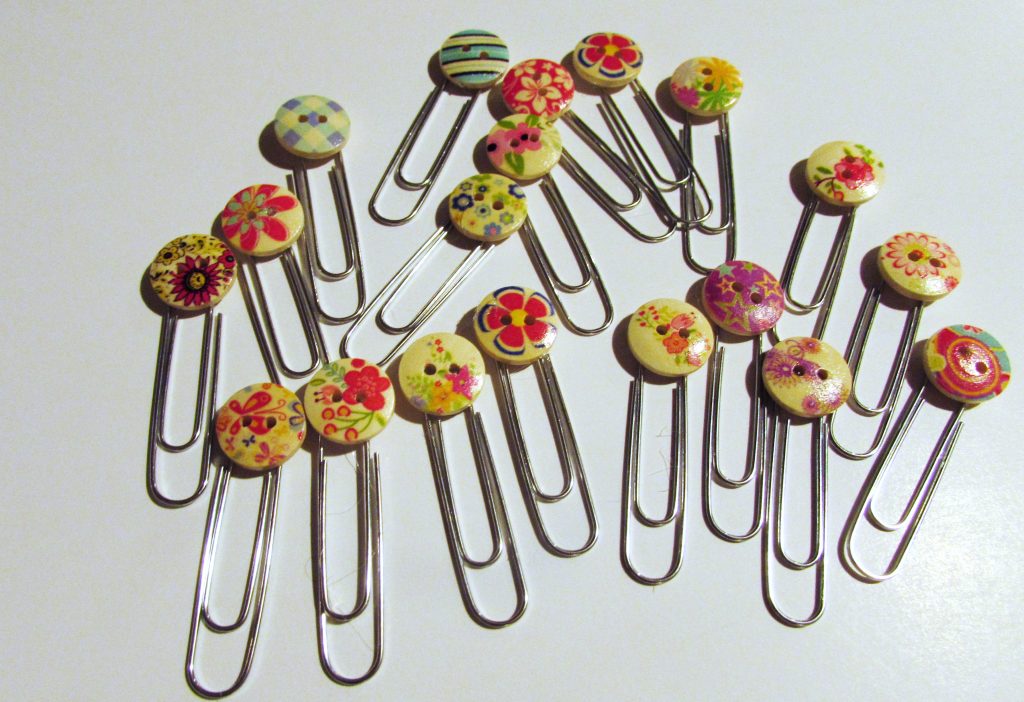
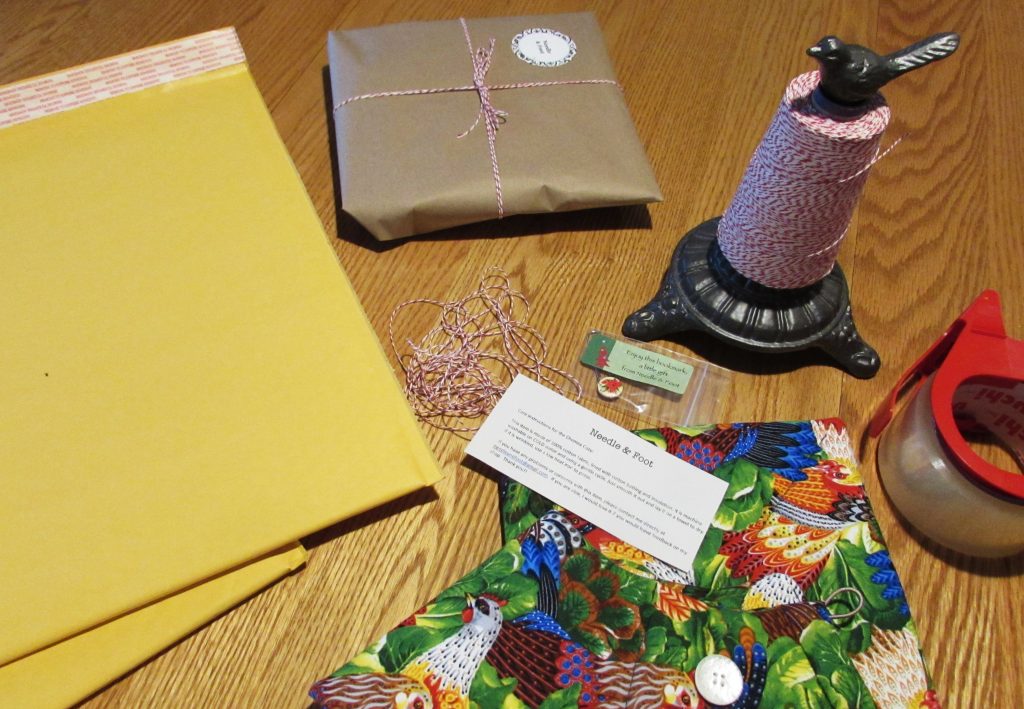
Tis the season  to be busy, right? This week has been packed with a variety of things. Much of my time has been centered around my Etsy shop. I have had a nice number of sales so that means packaging and shipping items. I greatly enjoy this, so it’s all good.  I decided to start including a little freebie with my orders this year. I made a bundle of little book marks with cute buttons, large paperclips and a bit of hot glue. What do you think?

I get a kick out of getting the shipments ready. For one thing, check out the cute dispenser for the twine that I use to wrap orders. 🙂 I love it – I received it as a birthday gift from my father-in-law a couple of years ago. Secondly, I love helping my customers.  This week I did a custom Chemex cozy for a customer who wanted rooster fabric. Love the colors in this piece of material.
Besides Etsy work, I have done about 75% of our Christmas shopping.  I am feeling pretty good about my progress up to this point.  I have a strong hatred for shopping malls and have thus far avoided stepping foot in one. It remains to be seen if I can finish without hitting the mall but so far, it’s looking good! I also found a dress to wear to my son’s wedding in January. The wedding is in Toronto, Ontario so we will be trekking to Toronto in a few weeks.  As always, when they announced their engagement a year ago, it seemed like it would be such a long wait for the wedding. Then, suddenly, we are a few weeks out. Crazy the way time buzzes by.

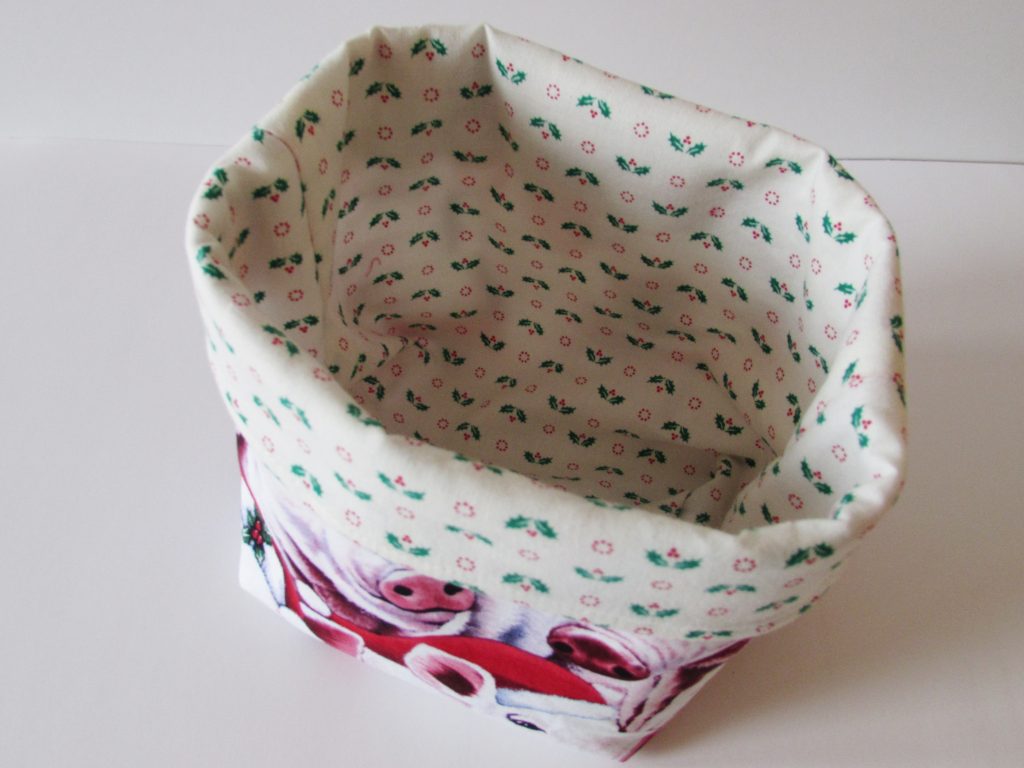
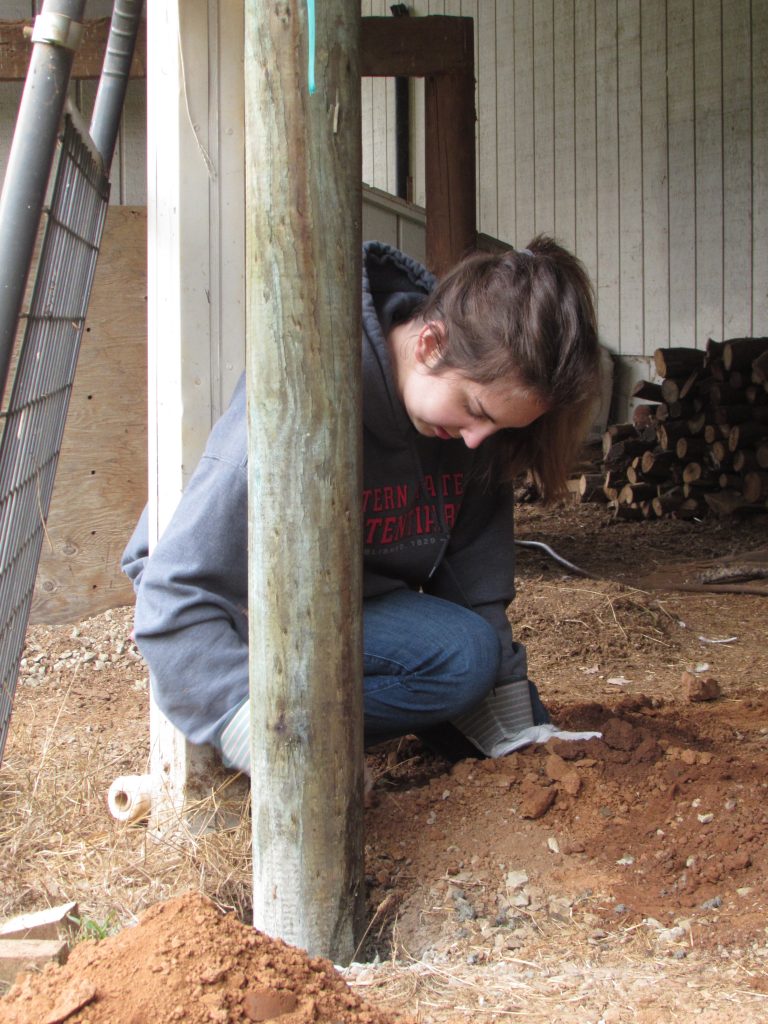
Truly, I have spent very little time in the sewing room this week. I did make a little fabric bucket for a gift.  I think I have mentioned that Julia joined 4-H this year. She wanted to learn about raising market hogs to show and sell at the county fair. It has been quite a project for her. She is committed though and has made time for the meetings and is learning all a girl needs to know about market swine!  Ray is reinforcing an existing pen on our property and Julia is helping. They have been setting posts and running wire fence.

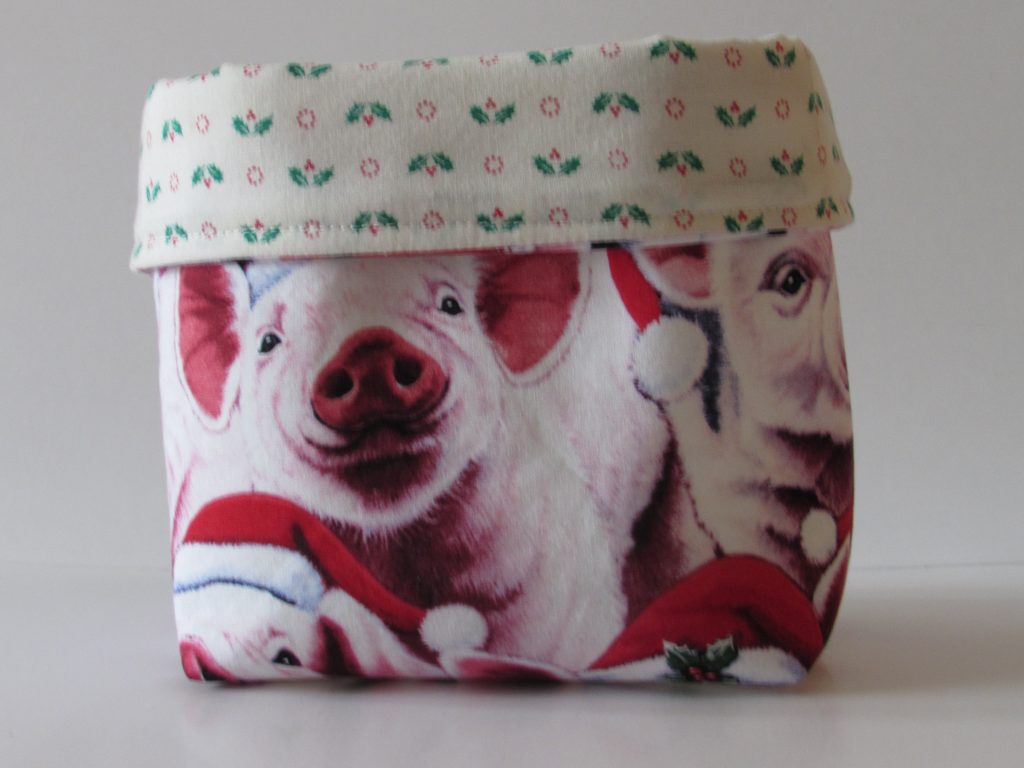
I have been very impressed by her 4-H leader for the swine group.  Tracy puts in a lot of time with these kids and it will be even more once their piglets are born. (Julia should bring her piglets home in late March or very early April.) I wanted to give her a little gift for the holidays. I searched for Christmasy pig fabric and wouldn’t you know… there is such a thing! I wasn’t terribly surprised. I think there is fabric out there for everyone and every possible theme!

Aren’t these guys the silliest thing ever?  It cracks me up. I lined it with a vintage holiday print I had in my stash.

I made the bucket with two 11″ squares of fabric for both lining and outer fabric. I fused a thick fusible interfacing to the outer fabric before sewing this up.  Once I fused the interfacing, I sewed the perimeter of the two outer fabric squares, leaving one long side open.  Next I boxed the corners. Then I repeated the process with the lining. However with the lining, I left an opening of three inches on the bottom seam so I could turn it right side out when I sewed it together.  Nest the outer box inside the lining box, with fabric right sides together and stitch around the top. Turn right sides out and press. Hand or machine sew the opening in the lining.  Fold the top over to the outside and you’re done!  If you want pictures or more detail, this tutorial from Dear Handmade Life is quite good.  The size of the bucket in the tutorial is much bigger though.  Mine finished at 5 1/2″ square – so basically at 5 1/2″ wide, tall and deep. Perfect size to fill with a few treats. Perfect gift for any pig lover.  🙂

I have also been making blocks for the Sew Fresh Quilt Bee, hosted by Lorna of Sew Fresh Quilts. I have two finished but haven’t taken any photos yet. I’ll show them to you soon. They are very cute, improv log cabin blocks.

Ok, that is it for now.  I have to pick up Julia soon. She is in the midst of finals and has been studying like crazy.  She has a few more next week so she will likely have her nose in her Chemistry book all weekend.  Ray and I will drag her away to pick out a Christmas tree but other than that, I doubt very much that she will be doing much besides studying.  Have a wonderful weekend everyone.  Remember that my giveaway for Sew Mama Sew’s Giveaway day is open through Sunday evening, December 12th.  Pop over and enter.  Be sure and head over to Sew Mama Sew as well. There are so many fun bloggers participating in this and tons of great giveaways!

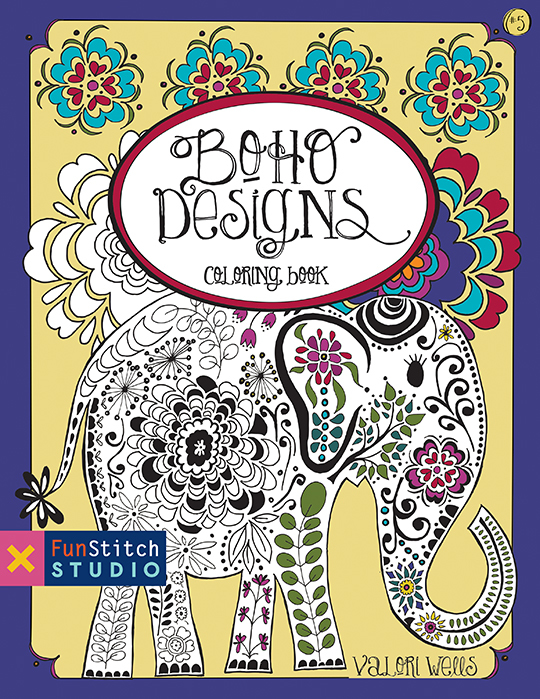
Finally, C&T Publishing is having another $5.00 blowout sale this weekend. Of note, they are offering adult coloring books for $5.00 – buy one get one free.  So, two gifts for $5.00 plus shipping???

My favorite of the books is one by Valori Wells. She designed the amazing elephant fabric that I made a whole cloth quilt from recently.  If you were as smitten with that fabric as I was, this might be fun for you! There are several nice books listed on sale this weekend.

(Note:  I am an affilliate of C&T publishing and will receive a stipend if you click through my site and order from them.)

A Weekly Update

This week I have continued to work on the challenges set forth in Amanda Jean Nyberg’s lesson for the Mighty Lucky Quilting Club.  She suggested a few ideas for creating fabric pulls; not so much to create an actual project, rather just to go through the exercise of gathering fabrics for a certain element. This has been a lot of fun, not as easy as one would think, and a total mess making experience in the sewing room!

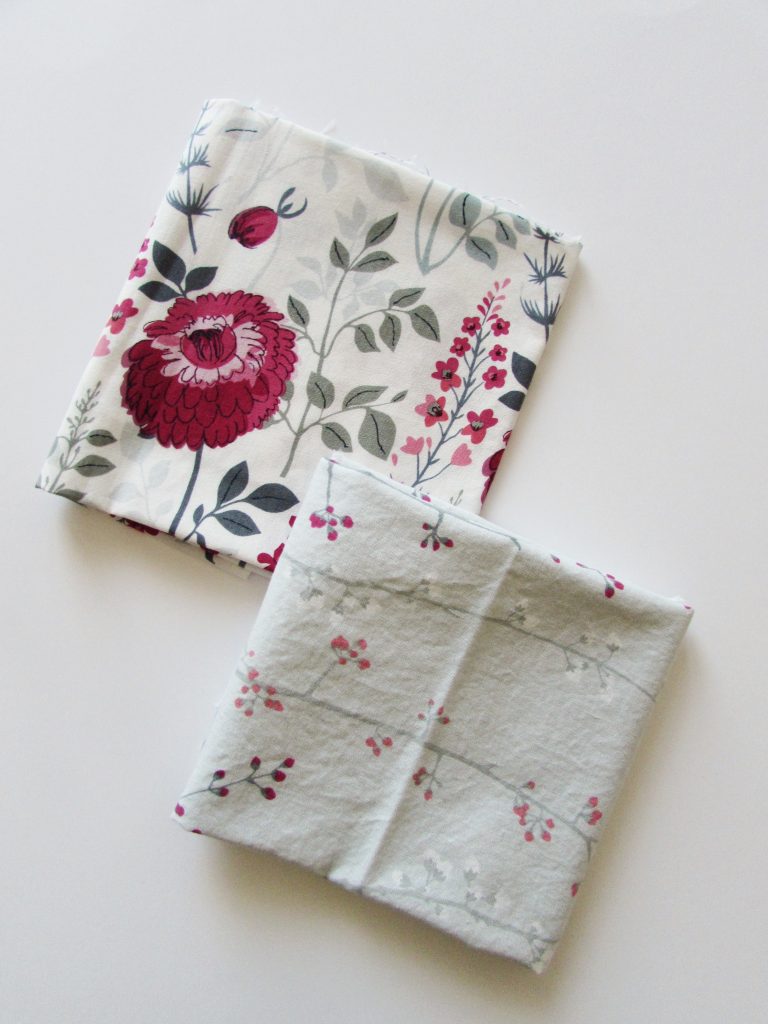
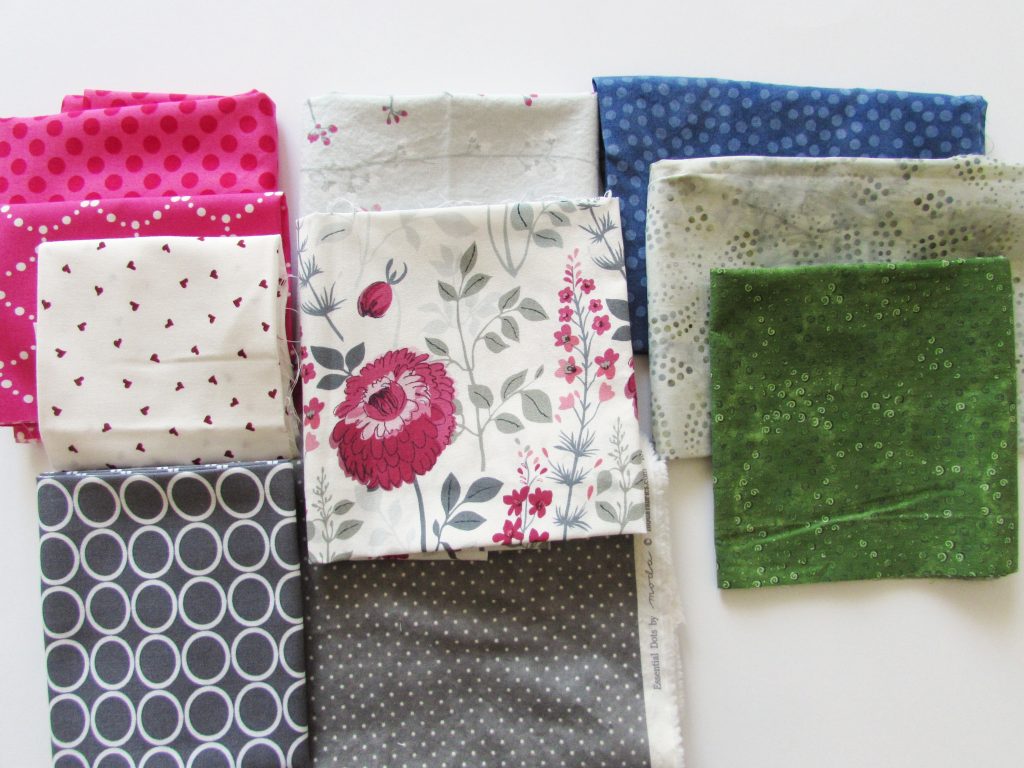
For one pull, I selected two pieces of fabric and pulled a selection that would work with them. This is the fabric I selected as the basis.

img_8038

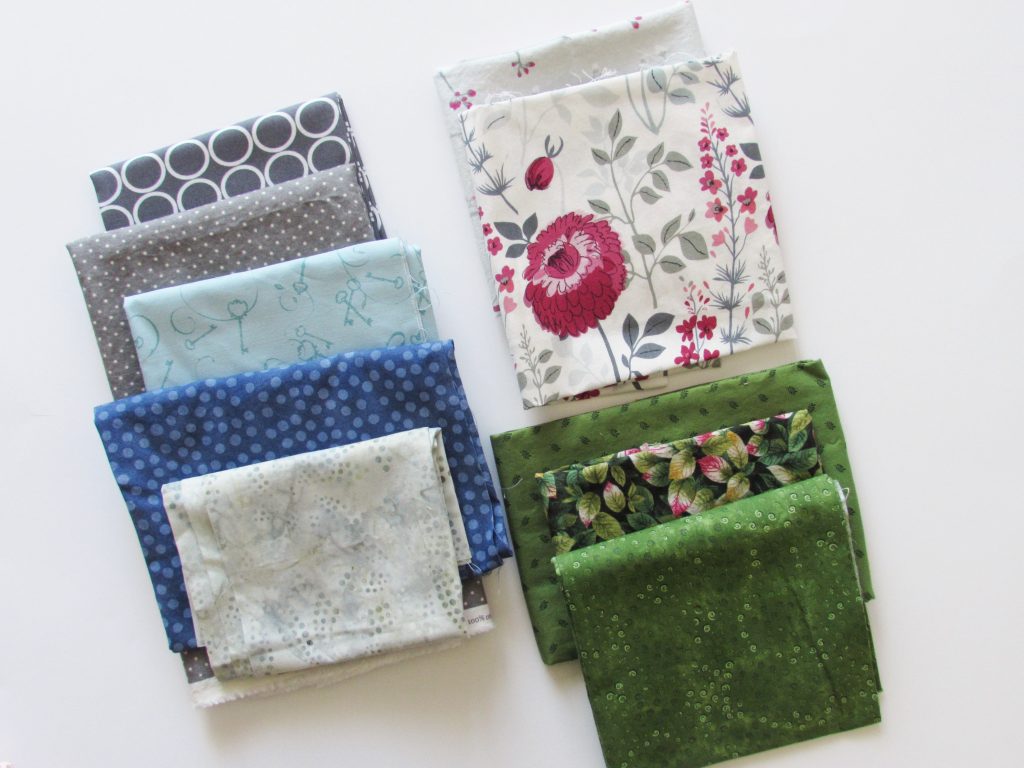
Both of these fat quarters are Dear Stella prints. I bought them a long while back and they sit, along with so many others, waiting to be used. For the initial pull, I just quickly selected pieces of yardage or larger scraps  in grays, blues and greens that might work with them.

img_8039

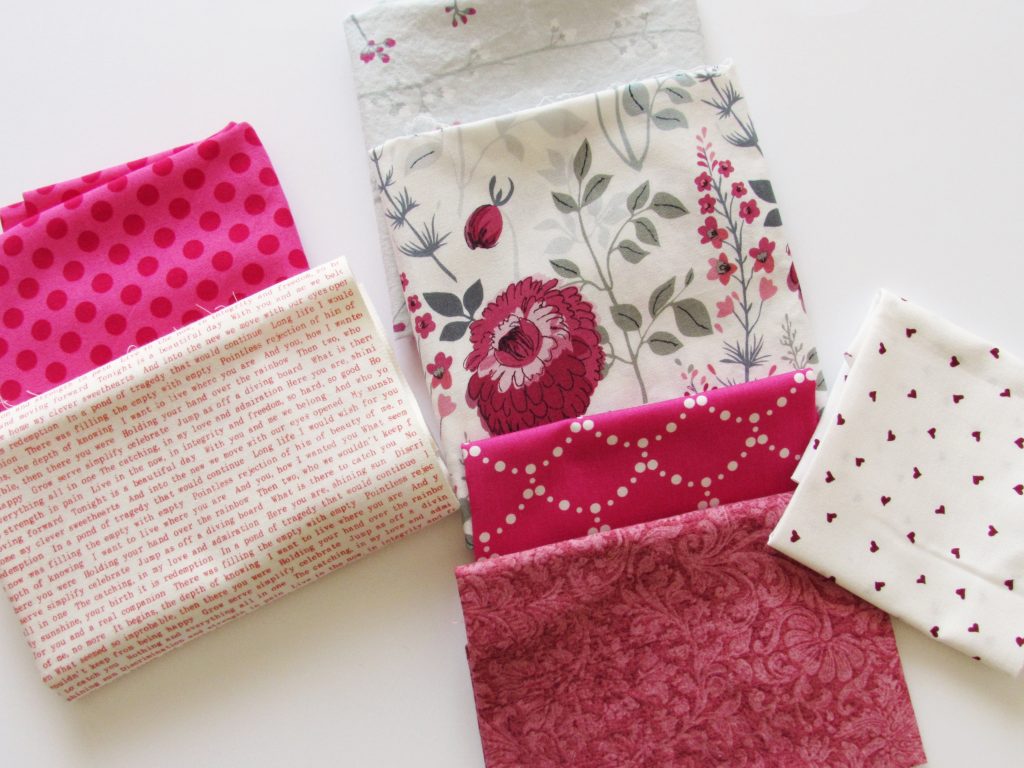
Next, I pulled some pinks and reds that complemented the fabric and added different scale and density to the mix.

img_8040

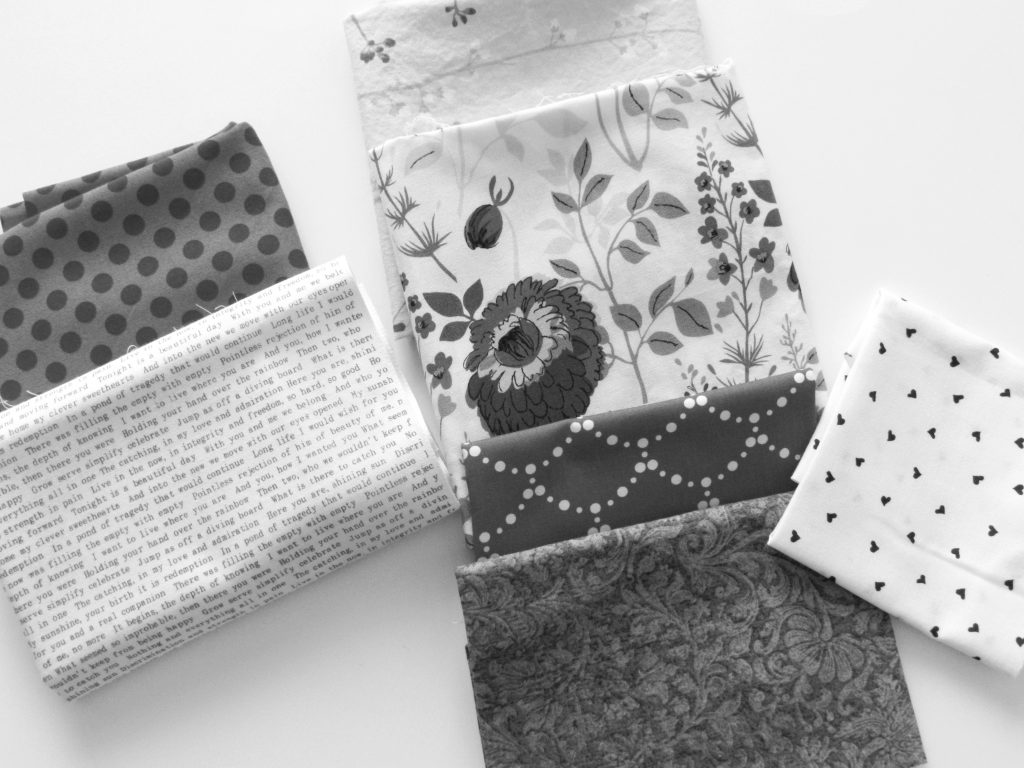
I also took a quick minute to put a grayscale filter on the pictures to check for value differences.

img_8040-grayscale

Finally I just put them all together and took out those that were misfits. The Allison Glass text print was a red that leaned to orange. I wanted reds that leaned to pink.  The green floral print looked weird and the Henry Glass light blue print (with the keys on it) was the wrong shade. Ultimately, I kept these in the group.

img_8041

This would be a fun pull for a project, right?

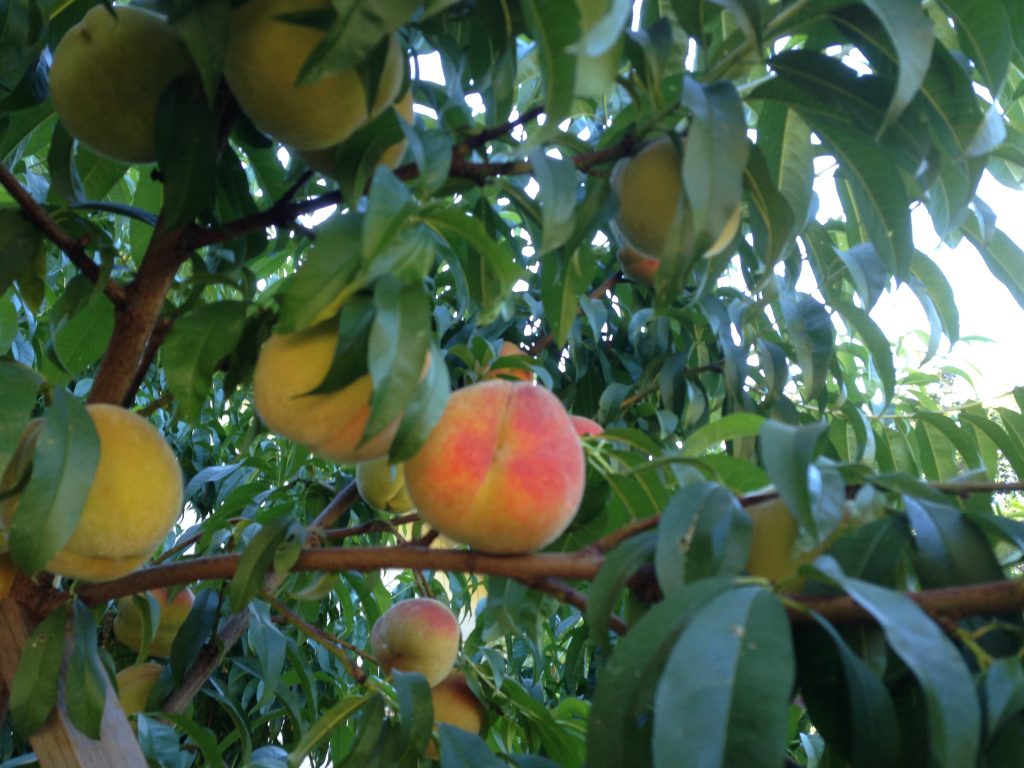
Another idea from Amanda was to take a pretty photograph and develop a pull around it. I chose this picture from our peach tree last summer because there are a limited number of colors in it.

img_3620

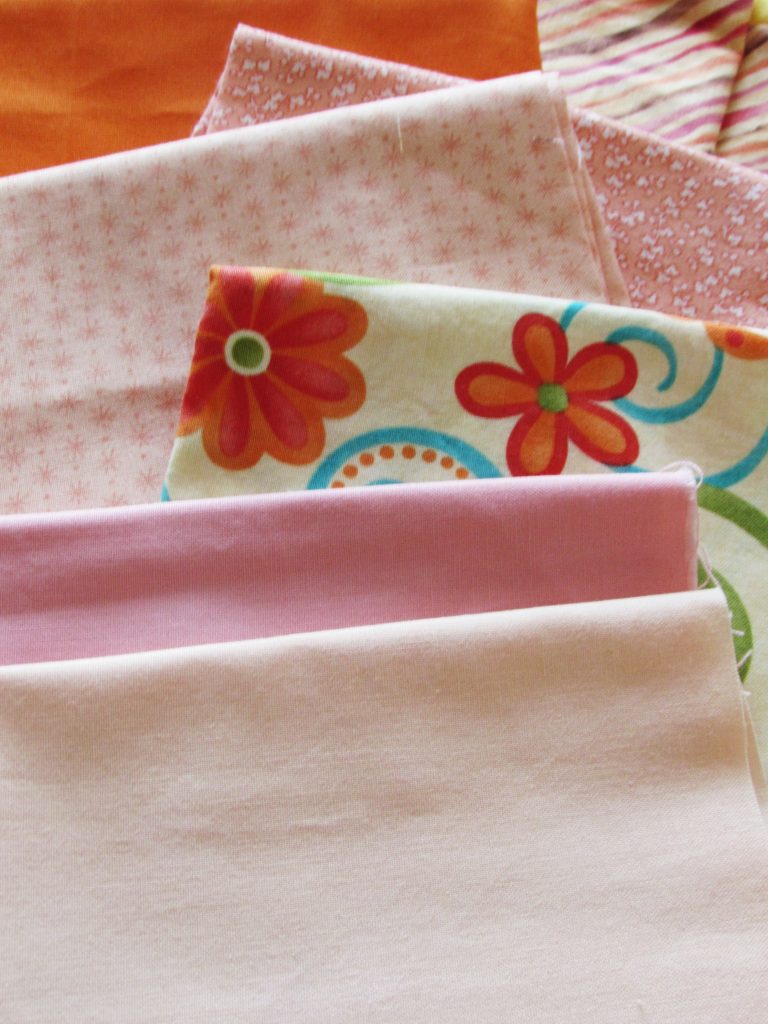
I thought it would be a good challenge to work out a grouping with greens and orange to peachy tones. Here is the first pull.

img_8082

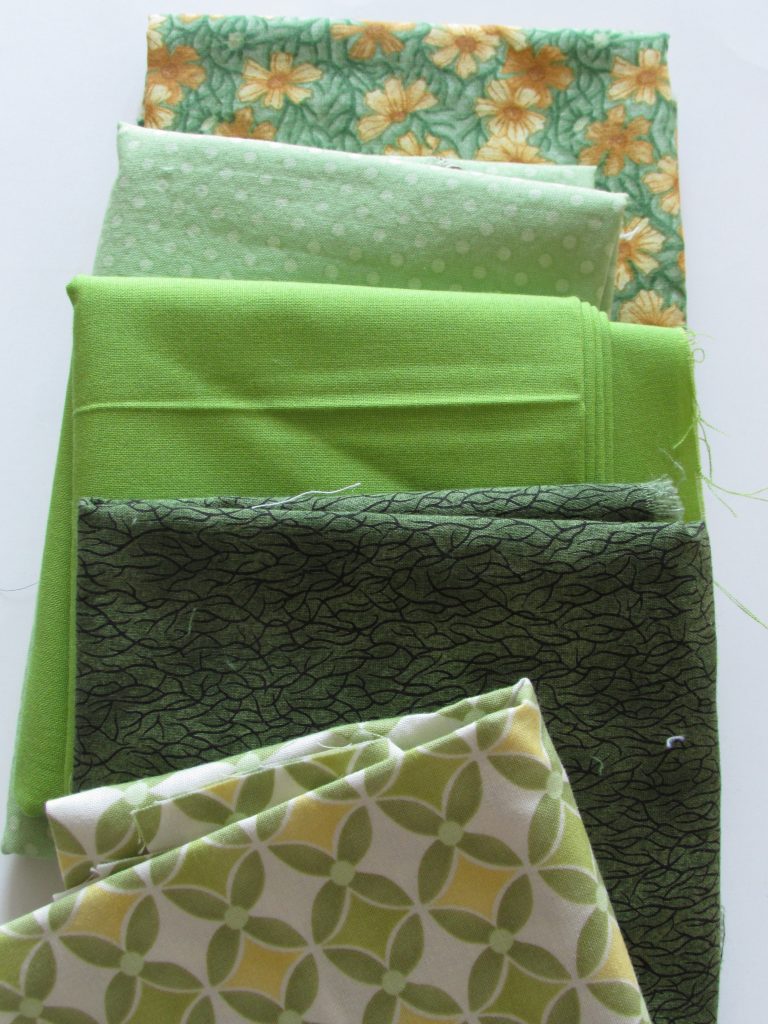
Working quickly, so as not to overthink it, I removed both the brightest green and the green/yellow check – both shades were wrong. That left this set of five greens.

img_8086

Next I pulled the from the orange, yellow and peach grouping, leaving these.

img_8085

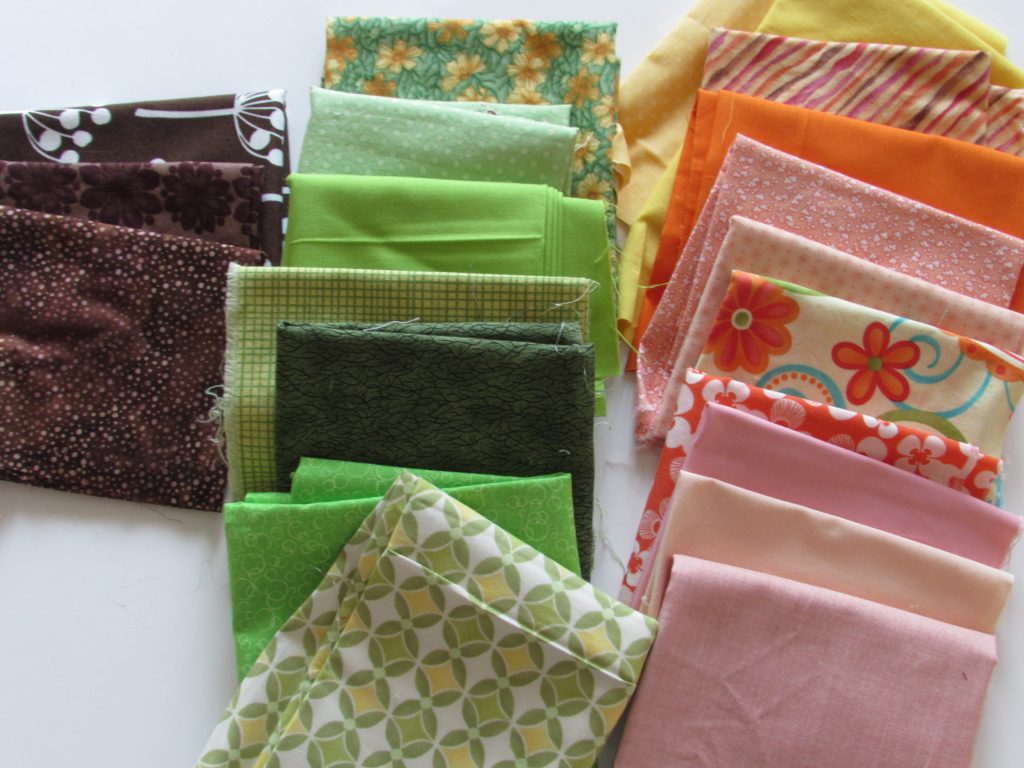
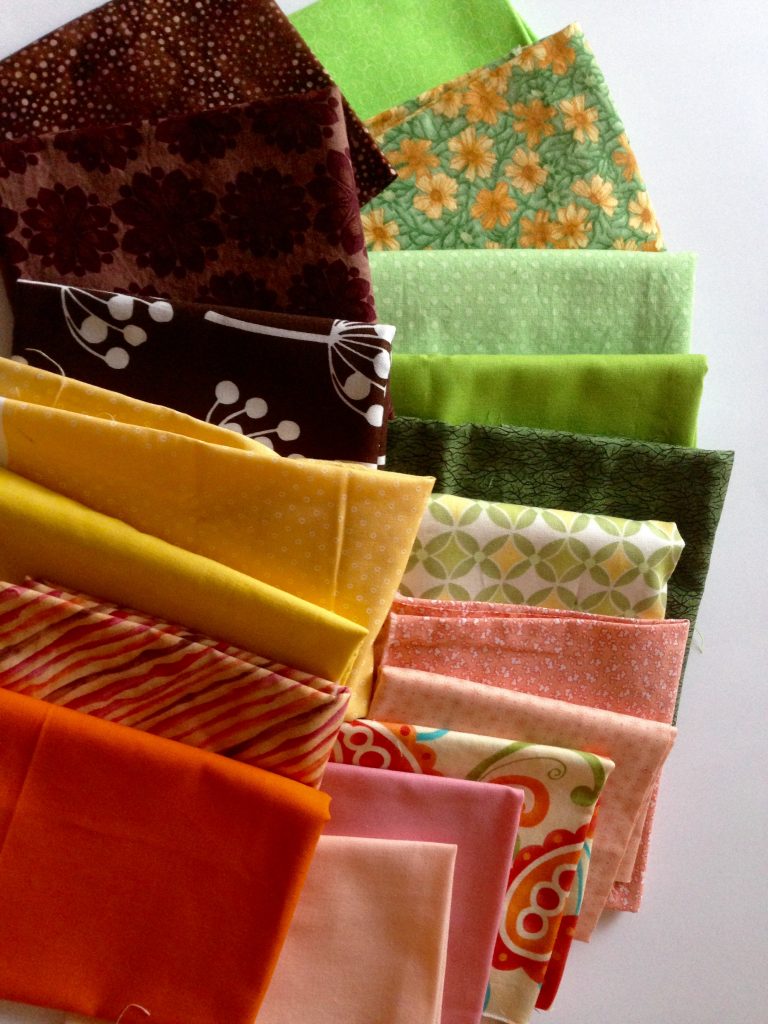
All three of the brown fabrics were kept, making this the final pull.

fullsizerender

This is a good pull of cohesive color, different values and large to small scale fabrics. It was very easy to sort through, leaving me convinced that it just takes practice. I doubt myself when I am putting colors together but these little exercises have really been helpful. I think the second pull is more interesting than the first. What could be added to the first one to make it more exciting??

Playtime is over and I forced myself to put all of these pieces back where they belong and get back to the sewing machine. It was fun though and an easy task to do while I endured a wicked cold that Julia so lovingly shared with her mama.

the-gratitude-sale

A few more quick things… I want to share what I think is a really cool event that is coming up next week. Mari, of Academic Quilter is holding a Gratitude Sale. She has decided to do a huge destash (after recently moving, she unpacked her quilting stash and realized there are lots of pieces of fabric that she doesn’t want or need, as well as quilting books and notions). Rather than do a destash sale on IG, she wants to hold a “sale” where the buyer selects the items they are interested in, contributes to a charity and once Mari sees the receipt, she will ship off the fabric. I think this is hugely generous on Mari’s part. She has a list of three very deserving charities for you to choose from. She asks that the buyer pay for the shipping which won’t be terribly expensive with the use of the flat rate envelopes that the post office offers. If you think about it, purchasing fabric in this fashion has now made it a tax deductible event. It’s absolutely a win-win. Mari’s sewing room will be less chaotic, your stash will grow, charities will be supported, and you have another tax deduction come April 15th. I can’t find a problem in any of it! Check out Mari’s sale, running for the duration of next week! See you there. 🙂

img_1529

If you want an idea for any book lover on your Christmas list, I just read the sweetest book.

Provided to me for review by Blogging for Books, I read through this book in an enjoyable afternoon. Light and interesting, this book takes approximately 50 sayings from various cultures and explains them to the reader. Ella Sanders, the author of the book, does an excellent job of tying the phrases to a similar phrasing used in the English language. It was entertaining to get this small glimpse into other culture’s idioms and colloquialisms and gave me a bit of insight into what that culture values as important. She chose a collection of phrases and proverbs that are sometimes humorous and always very descriptive. Where possible,Sanders gives a bit of history around how the saying came to be. I think this is an excellent book to gift to a lover of language and vernacular. The illustrations are adorable and the brevity of each page (there is a different colloquialism on each page) makes it a fun book for the coffee table.

Another book I just finished is The Girl on the Train, by Paula Hawkins.  I picked up a copy at the thrift store and it grabbed me from the very beginning. Have you read this? It was a thriller that is along the lines of Gone Girl. Crazy good and on the dark side, this was a gripping read. Just a suggestion if you are in need of a suspenseful, somewhat twisted, read. It has been made into a movie which was just released. I haven’t seen it yet though.

Linking to Lorna at Let’s Bee Social today as well as a few others. Find the URL’s at the top of the page, under Link Ups.

Review of From Doodles to Design Class by Lori Kennedy

I was fortunate to spend hours over the past week with Lori Kenedy!  She is the blogger at The Inbox Jaunt and I have mentioned her many times in various posts about practicing and learning to FMQ. She is a rock start when it comes to quilting! She has two classes available on Craftsy and I took one of them this week. 🙂 It was awesome!

I recently signed up with Craftsy to become an affiliate. (Note – this is an affiliate post and if you purchase products through the links in this post, I will be paid.  A very, very small amount, but yes, paid.)  When I finished the process of signing on, Craftsy asked whether I would be interested in reviewing a class. Knowing that Lori’s class “Creative Free Motion Techniques: From Doodle to Design” was recently released, I happily agreed!

Purchasing a class at Craftsy means that you will forever have access to the class on your Craftsy account. It means you can watch it whenever and whereever you would like. For me, living in a rural area without access to a wide variety of courses, this is perfect. I have purchased a few classes so far at Craftsy. I have the Machine Quilting: Small Changes, Big Variety class taught by Angela Walters. Additionally, I have the class, Machine Quilting Wholecloth Quilts, by Cindy Needham. (Cindy’s class is good but the quilting is too advanced for me at this point. Something to strive for though!) And now, I have Lori’s newest class.

Of the three classes I have taken thus far, Lori’s Doodles to Design is by far my favorite. If you have worked with Lori’s tutorials, you already know that she is a huge proponent of doodling, or drawing, your design over and over to build the muscle memory up before stitching it. Doodling it also helps me to spot the paths I will need to take to move around with the design. I tend to get stuck in corners, or on edges, with no way to move out of them. In this class, Lori shows each motif, or design, by doodling it on paper and then she shows how to stitch it. At the end of each “chapter” Lori does a quick trunk show and displays quilting with that actual design. For me, each of these steps reinforces the lesson. By combining visual and auditory tips into each lesson, I was able to pick up my pen and follow along easily. Converting that to stitching was the obvious next step and it came naturally. In full disclosure, I will say that the designs she teaches in this class are available as tutorials on her blog. However, I am not a visual learner. I read blogs continually and love the tutorials and free patterns that are readily available. But it takes me quite a while to read about doing something and then take that knowledge and implement it. Listening to the instructions is how I learn. I need the auditory input. Taking Lori’s class and listening to her describe what she is doing helped me to advance considerably. Everyone has different ways of absorbing information and this was perfect for me. Watching the video and listening to her instructions = personal success.

Watching a Craftsy class gives the student the option to use a 30 second repeat button. I LOVE this feature. I was drawing along with Lori while watching the class. I had large sheets of newspaper laid out on the table and was trying to doodle her designs with a sharpie. If I couldn’t get a section, I would click on the 30 Second Repeat and, as you would think, that clip just plays over and over (much to the annoyance of my daughter when she is in the room.) It is really helpful though. Another cool feature is the ability to post notes to myself, or questions to Lori, at certain sections of the video. When she answers the question, her reply shows up on the side of the screen during that section of the lesson. Other student’s questions and the reply to the question also show at the relevant point in the class. It is nice to see what people are asking and discussing.  Each class comes with a downloadable class materials file. Some classes have templates, required materials lists, or patterns. There is huge value and very high quality in Craftsy’s class offerings.

I did a fair amount of practicing yesterday afternoon on scrappy quilt sandwiches.

Practice Quilting with Lori Kennedy's From Doodle to Design Class on Craftsy

I was enjoying playing with the little rainbows. They remind me of miniature Baptist Fans. But you can see that moving around with the motif is a trick. I need to go back to paper and pen and draw more of them.

img_20160415_4844

I am pleased to see that my stitch length is becoming more consistent. Also, the tension on my machine is so much better. This is in part because I am evening out the speed of my foot in relation to the speed with which I move the fabric. When I take these pictures taken at such a close range, I do cringe a bit at the herky jerky stitching. But I share them anyway.  I am almost certain that Lori or Angela had to stitch like this to become the quilters that they are now. The other day I came across a great quote on Creations by Nina.

“Everything worth doing is worth doing badly. If you ever want to do anything well, you need to be willing to do it over and over again. Badly at first. You need to be willing to weather that through.”  I found the quote on Nina Marie’s blog but she gave credit to Ellen Anne Eddy.  This is perfect, right? With free motion quilting (as with most things) the quilter has to be willing to put in the time to gain skill.

After taking the Doodle to Design class and practicing on scraps, I pulled out a long forgotten UFO and worked on it. I started this art quilt almost two years ago. For whatever reason, I put it in the closet and there it sat. On the far corner of my sewing table, I have had the fabric I was using, the stabilizer and fusible webbing all together in a neat little stack, waiting for me.

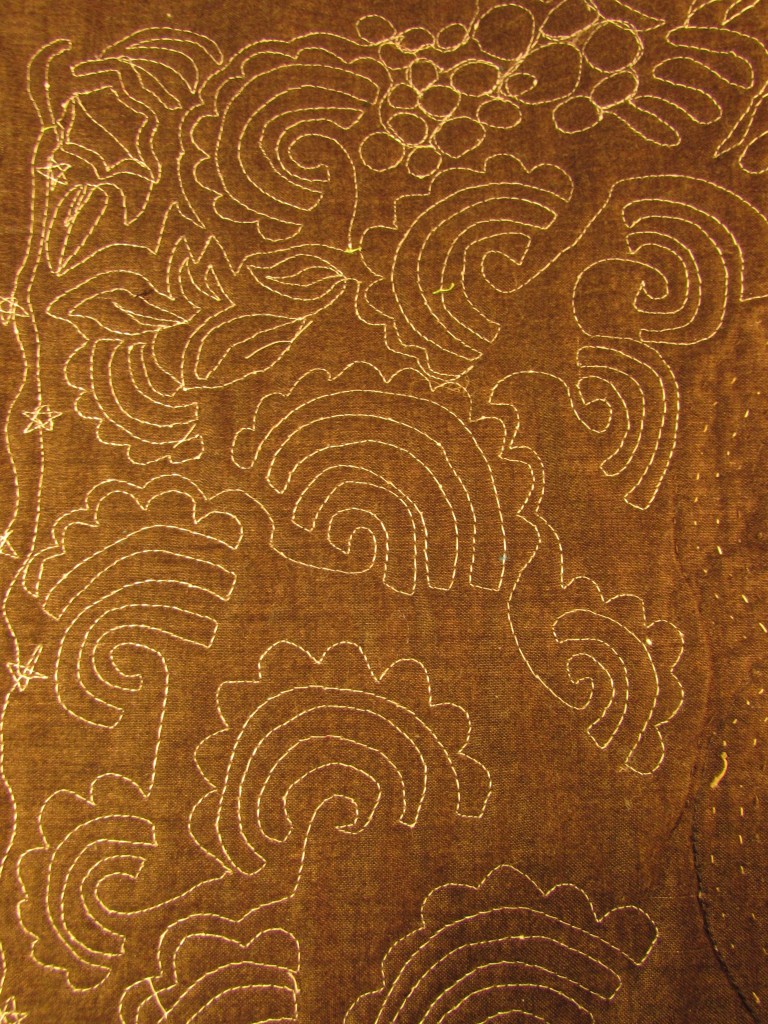
This provided a great project to practice quilting. Here are a few shots of various parts of the project. These swirls are (hopefully) going to represent wind, or swirling clouds.

image

The next shot shows some ribbon candy stitching on the red border. That was really fun to stitch and I am pleased with the result. (Lori went over this thoroughly including variations of it, in her Doodle to Design class.) On the snowflake print, I did wavy lines with little snowflakes. Again, this was covered in Lori’s class. It was satisfying to be able to put the lessons from her class to use right away.

image

I have just about finished quilting this. I am trying to decide between binding it traditionally or facing it. Facing it is winning at this point. Hopefully I will have a finish to show you soon!

Check out the classes on Craftsy. There are so many to choose from. I love to be able to learn on my schedule and also love the quick interaction with the teacher. If you have questions, leave them in the comments. If you do click through to Craftsy from my links, thanks so much!

craftsy long banner

Linking for the first time with Sew Can She, Show Off Saturday! Also linking with Beth at Main Crush Monday. For all other link ups, check the top of the page, under Link Ups.