Yearly Archives: 2023

Modern Wall Quilt

Isn’t that a boring title for a post? I don’t know what to call this quilt. Maybe after you look at the photos and read the post you’ll come up with a clever name for it.
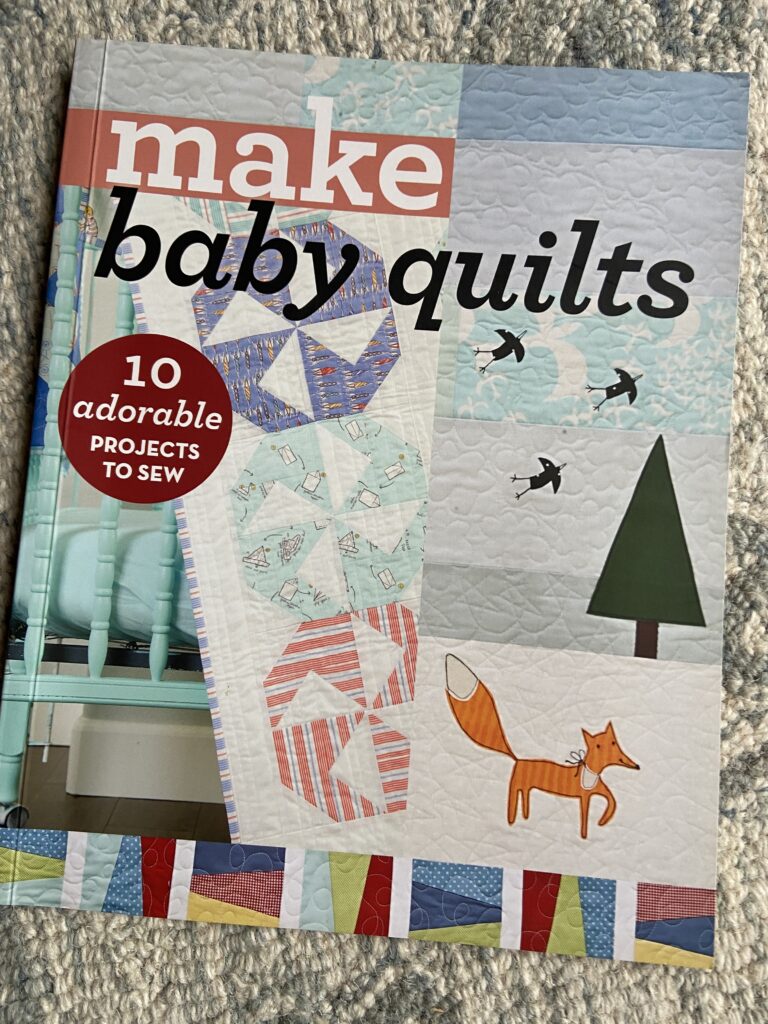
Love this quilt book!

I bought a book for making baby quilts a couple of years ago. There are a few quilts in it that I thought would be very fun to make. There are ten projects, each one by a different designer. C&T Pubs just happens to have the book on sale right now. Make Baby Quilts includes designs by Camille Roskelley, Allison Harris, and Latifah Saafir – among others.
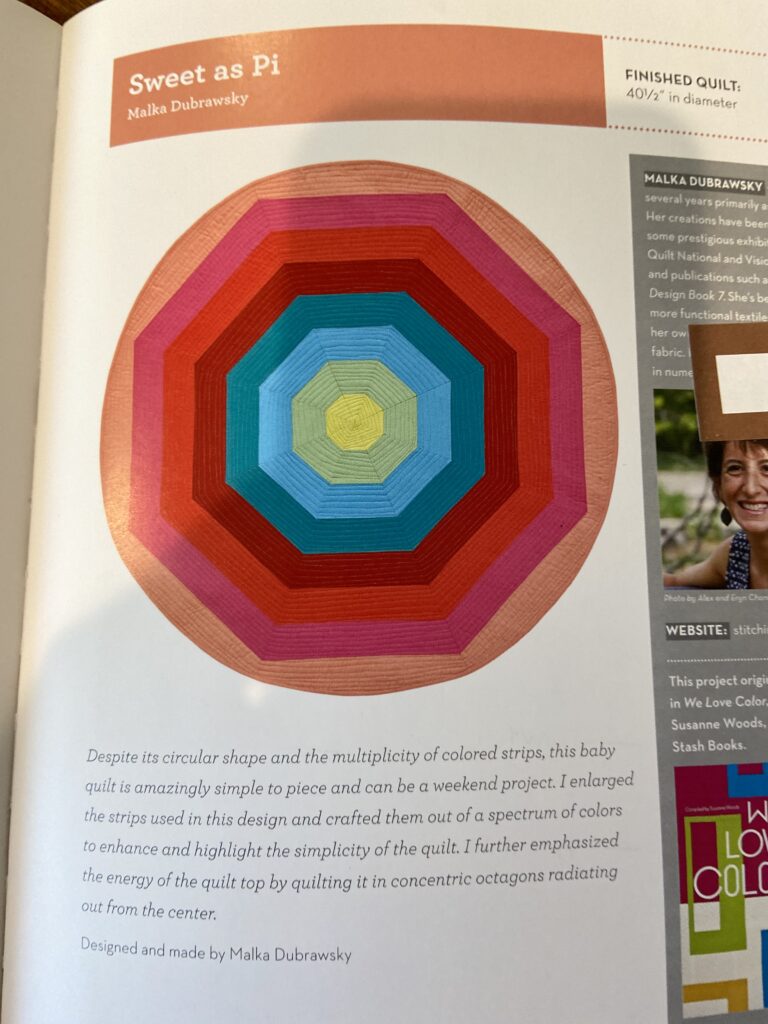
The Sweet as Pi pattern really drew me in though. Sure, it would be wonderful as a floor mat for a baby. Designed by Malka Dubrawsky, it is a strong graphic pattern and the colors could be changed as needed. But I decided to make it as a wall quilt.
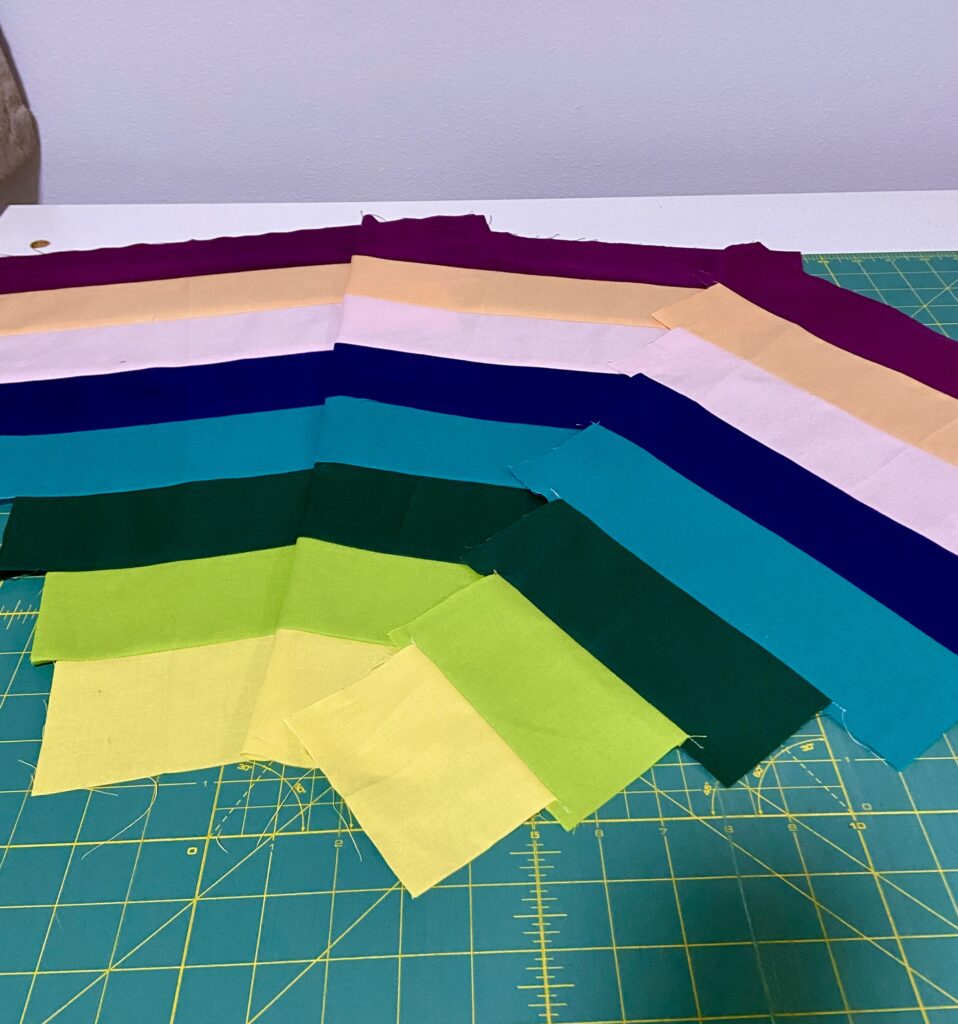
Cutting the strips was easy. Choosing the colors – not so easy! I knew I wanted the colors to be bold and to have a strong presence in the quilt I had just made for our bed. After some back and forth with a stack of solids, these are the fabrics I selected. Assembling the wedges was a breeze. This all happened in early fall. With the holidays and all those silly viruses we all had, it was shelved until recently.
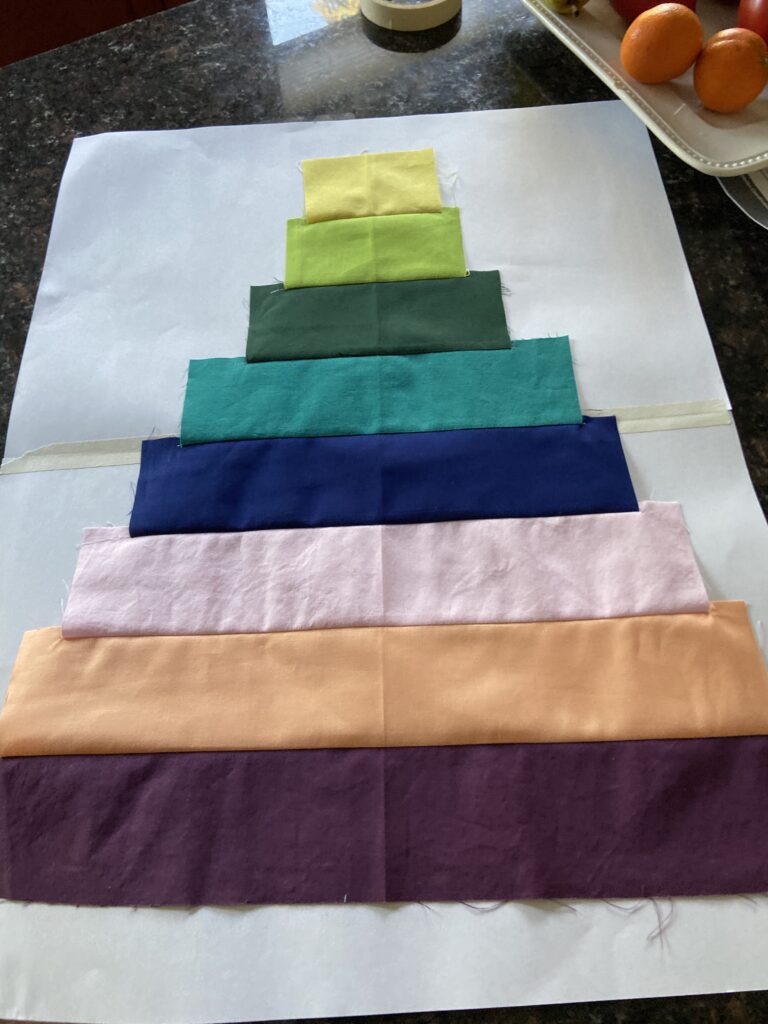
One wedge of the circle

Ignore the wrinkled appearance of this wedge! I was taking pictures to communicate my project to my son in Brooklyn NY. There are instructions for creating the template to cut the strip pieced wedges but I wasn’t getting it. Thank you FaceTime! Kyle was able to take a look and tell me what I needed to know!
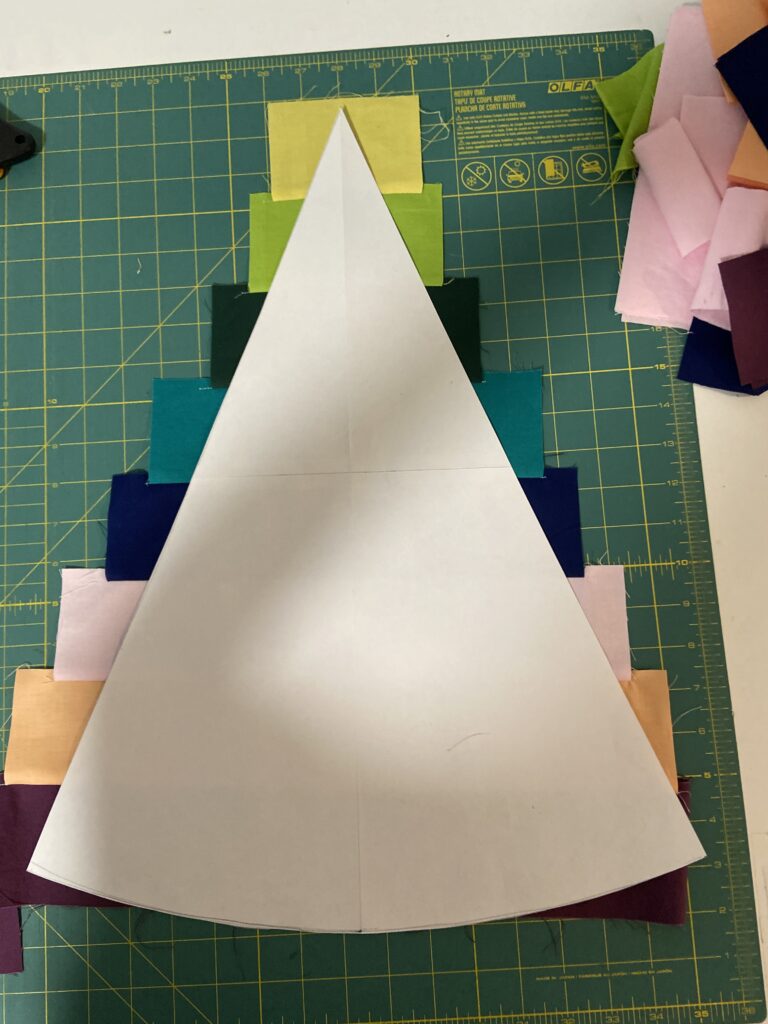
Too long!

Somehow I made the template slightly longer than it should be. My sweet husband was able to trim it just a smidge and it was perfect.
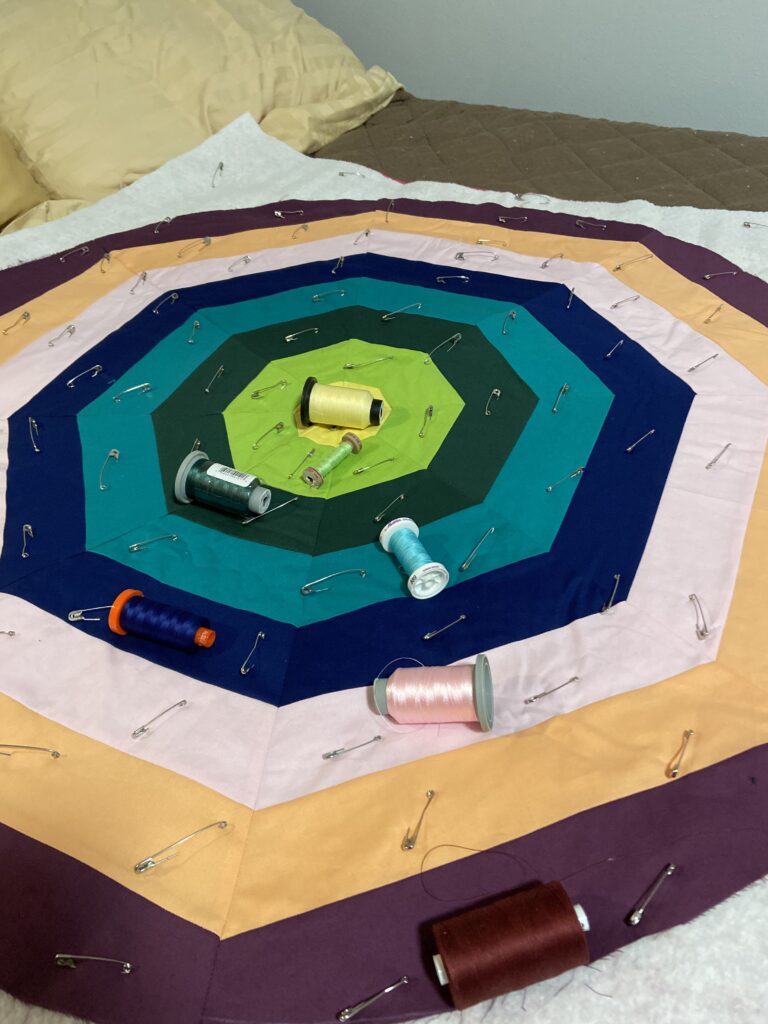
Thread decisions

Once it was put together and basted, it was time to select threads. I normally quilt with a neutral thread and if this was to be a floor mat for a baby, that is what I would have done. However using gray or off white just didn’t cut it for these colors. Each stripe was quilted with a matching thread. I quilted a spiral in the yellow section (center). Then I switched to straight line quilting for the other stripes. No marking was done. It seemed if this was going to be on the wall, above the bed, no one would be face to face with it. (Unless the viewer chose to stand on the bed to get a closer look – haha). Viewing from a fair distance, the placement of the quilting lines wasn’t a huge deal. I basically set the width by using the outermost part of the walking foot as my guide.
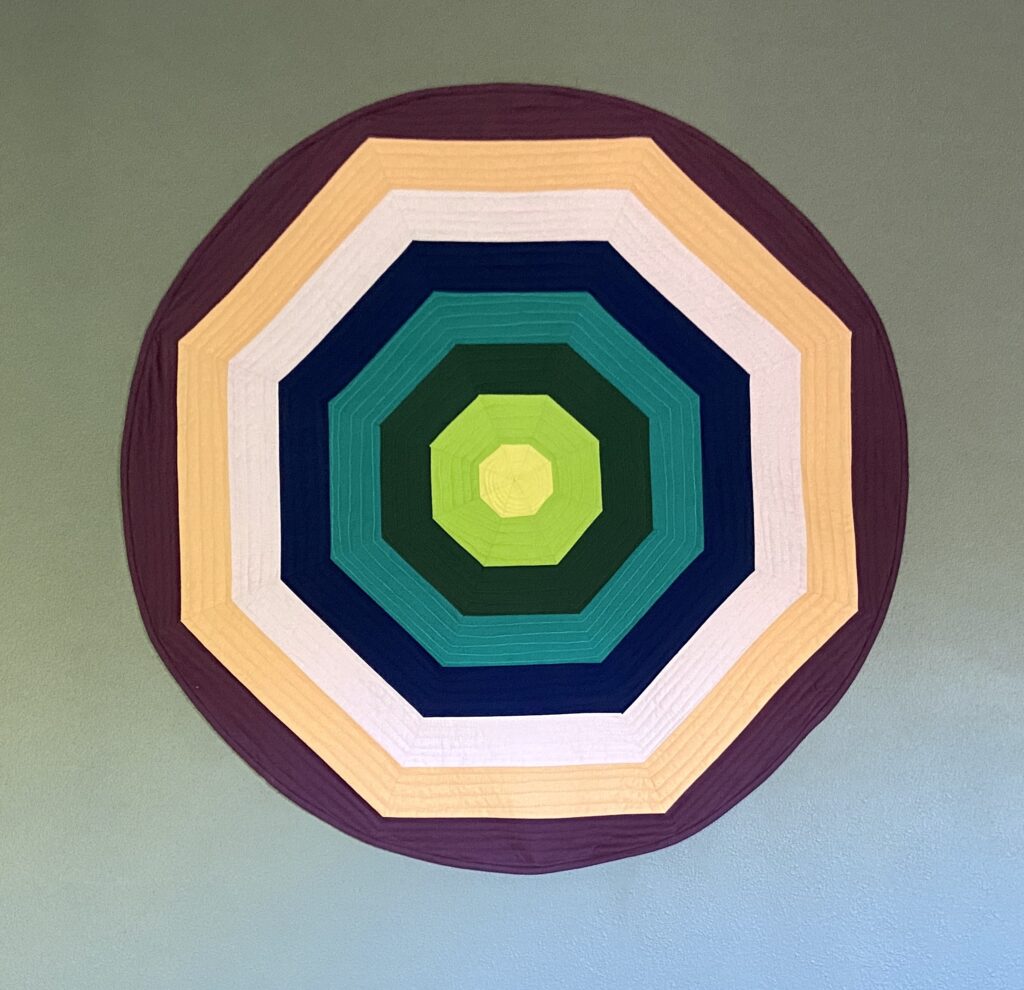
It is done!!

Total honesty here – all the while I was working on this quilt, I never once considered the how heck it would be hung on the wall. It is quite large (approx 40″ across) and with a hanging sleeve on the back, it wouldn’t have laid flat on the wall. I was at a loss for a while. Then I thought about making some sort of circular frame with wire. I had florist wire but it was fairly light weight. So I measured out four (very long) lengths and twisted them into one piece to give it more strength. Then I pinned it around the circumference of the quilt. I wish I had taken pictures of this but I totally forgot. I sewed the wire to the back – butting it up as close as possible to the binding, being careful not to go all the way through to the front of the quilt. This kept the quilt flat and held it’s shape perfectly.

Hanging it was a bit of a chore. Ray was standing on the bed with level, screws and screw gun. He had to put screws all the way around because I really wanted it flat on the wall. Success!
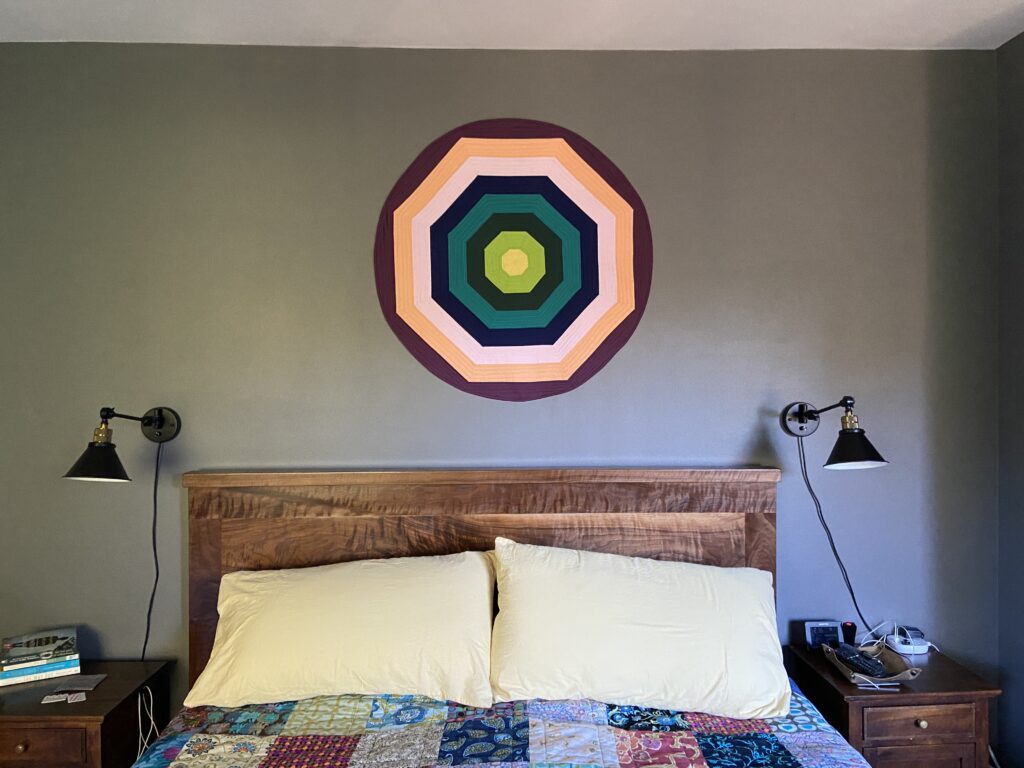
I love it! The wall hanging contains many of the colors of the rather bohemian quilt I made for the bed so it just works.
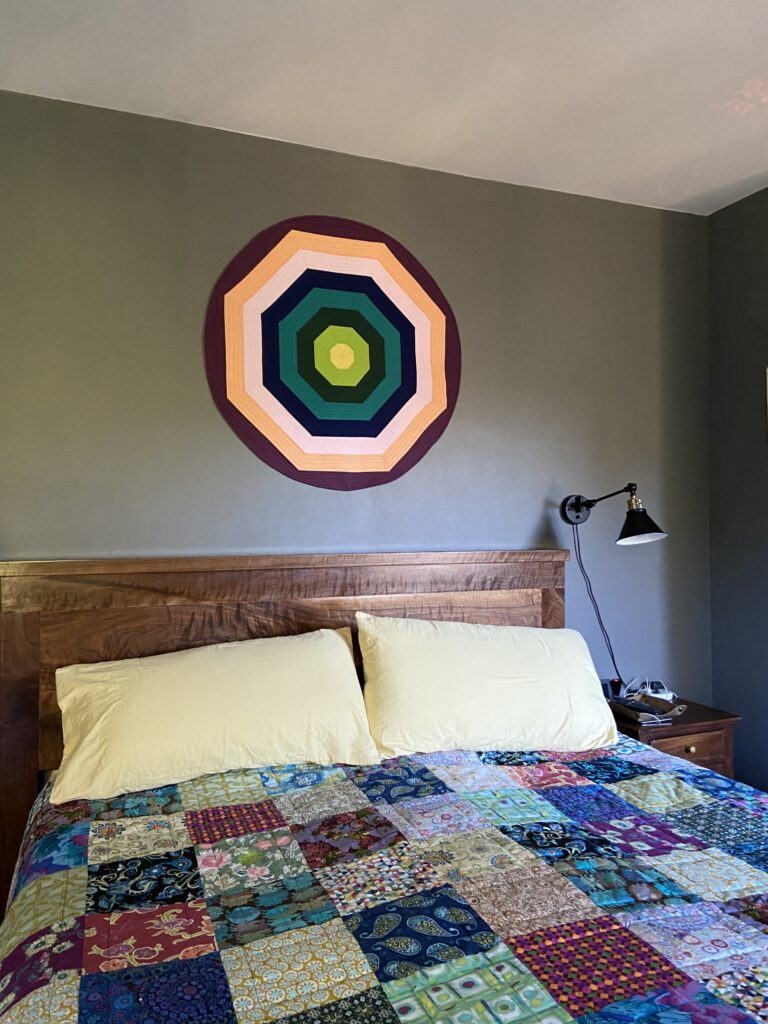
I love looking at the quilt and the wall hanging together. Makes me happy!

It was my goal to finish this wall quilt in January and it is down! I checked it off the list of unfinished projects which is always a good feeling before moving on to the next thing! Now that you have seen it, what do I call it? Many of you are so clever at thinking of names for your finished quilts. This is not my strength. Help a girl out?

Linking to my favorites – check them out at the top of the page, under link ups!

(Note – this post contains affiliate links. Should you purchase something via the link, I will receive a small compensation at no cost to you.)

SAHRR – Border 2

Last night I finished up the bow tie border for my round robin project. As I mentioned before, I am trying to use up pieces I had cut for a previous quilt that never came to be.

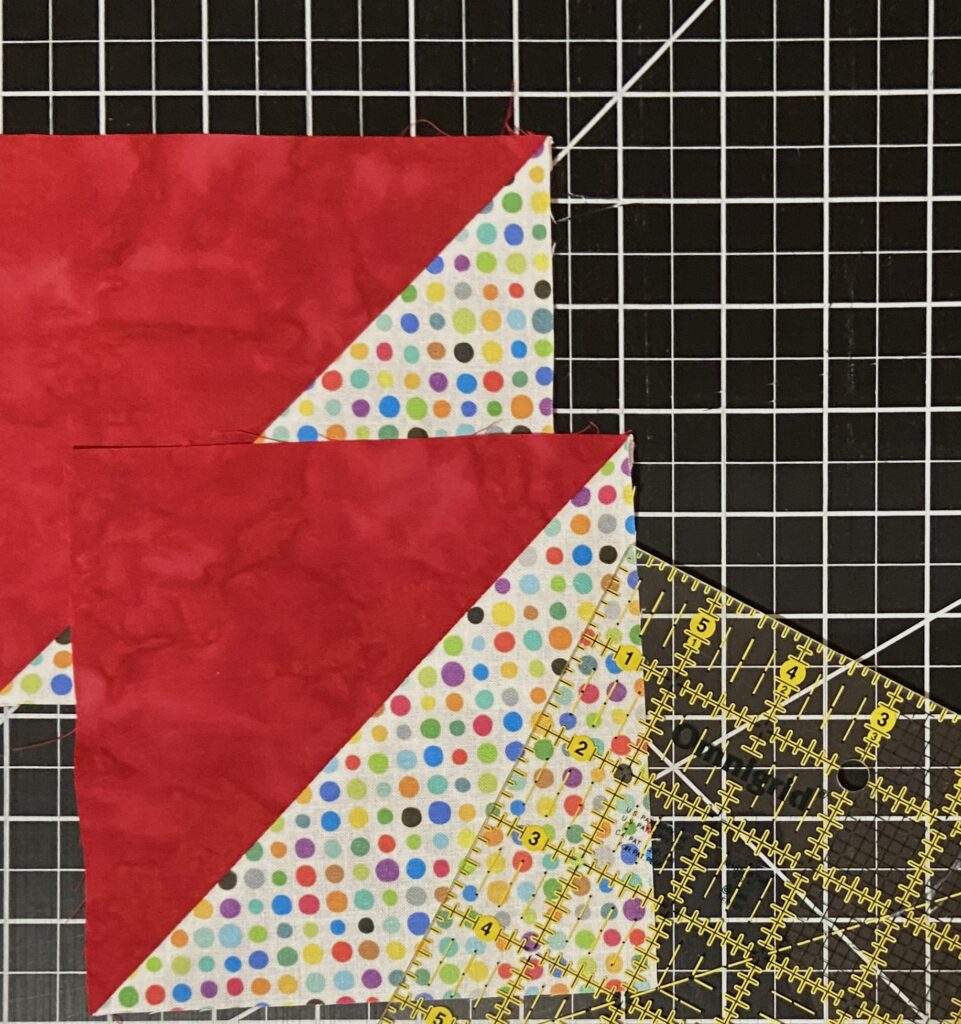
This week, I used a stack of HST’s that had finished at five inches. Using these worked our really well. I was able to cut three 1.5 hst’s from each one (much much easier than sewing new ones!!!) plus all of the 1.5″ squares needed for the rest of the block.

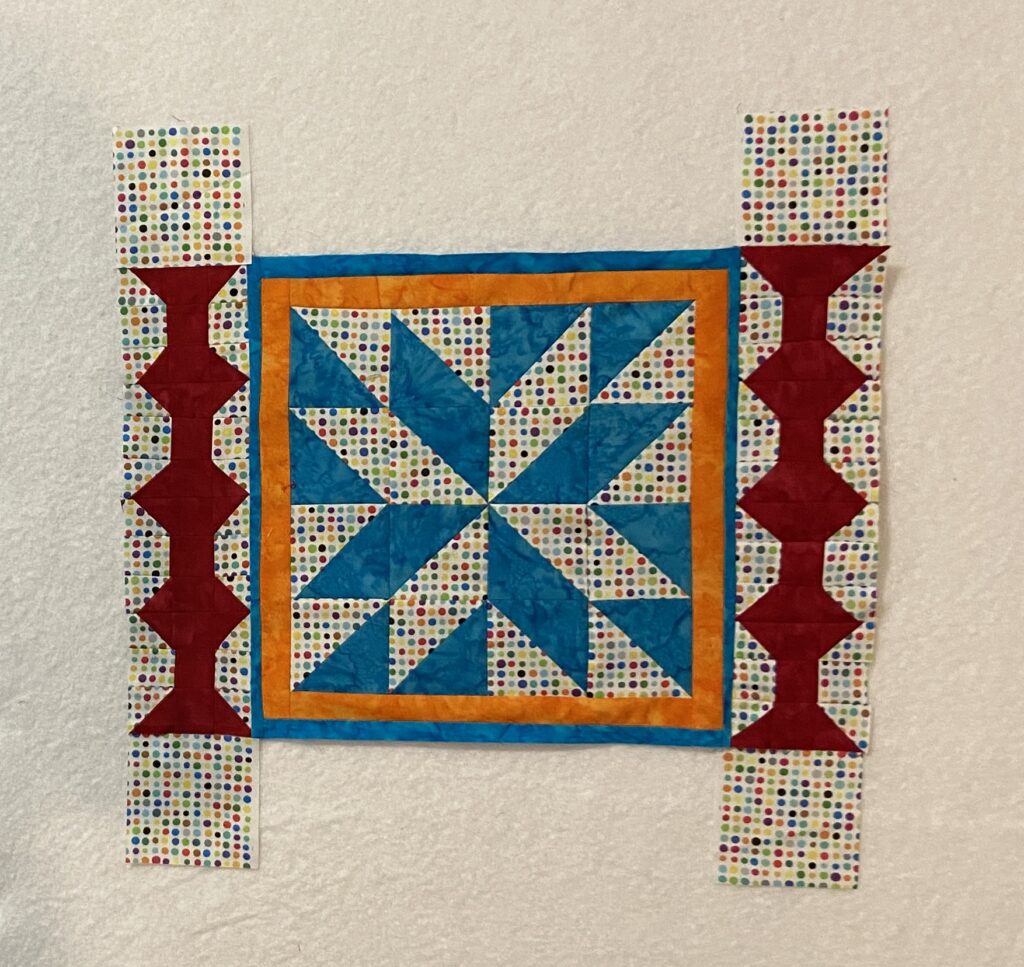
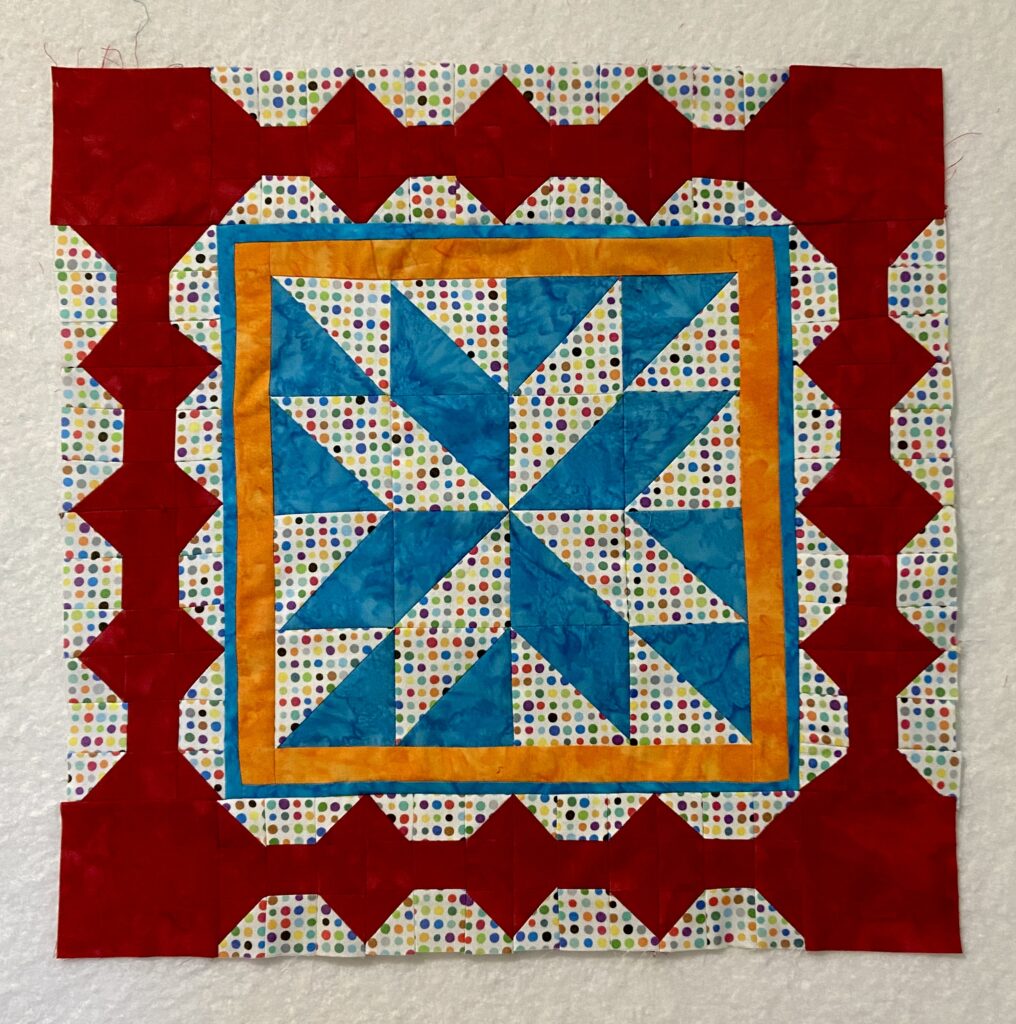
Before attaching the border, I added two narrow borders which brought the center to 12.5″. Then I played around with the orientation of the 3.5″ bow tie blocks. I like the way they look when placed end to end. However, I couldn’t decide how to orient the corner blocks. This led me to using a plain square on the corners. Fortunately, I was able to unpick some uncut HST blocks and use the red portion for these corners.


I finally decided to use red squares at the corners. The solid fabric looks much better than the dots.

For this week, Wendy at Pieceful Thoughts has declared stars to be the choice of blocks for the next round. I am going to somehow fashion tiny stars within a mostly solid border. I need to calm this down a bit. I love the polka dots but if they continue to be heavily used, the quilt will be a bit chaotic for my taste. I also need to decide how big I want this to be. If I want a crib quilt, I need to grow it a bit with some larger spacing rows. Decisions, decisions…. Currently, it measures 18.5 inches square. So, I need to figure out the goal and work backwards from there!

Hope you are all enjoying this fun QAL. It is a surprise to me to see how many quilters are participating! Each quilter’s interpretation of the prompts is unique which makes it so cool to look through the link ups. I missed the link at Roseanne’s but will link this up elsewhere. See my favorites at the top of the page, under Link Ups.

Villa Rosa Designs Fast & Fun Blog Hop

Welcome to Needle and Foot! If you are visiting everyone in the VRD Fast & Fun hop and are new to my site, thanks for popping in. Feel free to take a look around. Like what I am writing about? Maybe you’d like to subscribe (remember I never share emails with anyone else). Today it is my turn to share what I made with a Villa Rosa pattern card for the VRD blog hop.

You are likely already familiar with this company, owned by Pat Fryer, but just in case here is a bit of background information taken from the VRD website.

“Villa Rosa Designs (VRD) was created by Pat Fryer, Owner and Rose Queen, with the idea to provide quick and easy affordable quality fun-to-make quilt patterns for quilters featuring popular quilting fabric cuts.

Since its launch in 2010, VRD has become much more than a handful of quilt patterns. Rose Cards, Villa Rosa’s signature postcard-sized patterns, combine great design with simple packaging and an attractive price, making Rose Cards one of the best-selling pattern brands in the country”.

The fun part for me in all of this is to promote a business located in my old home town of Grass Valley, California. Pat has a fabric store there and also travels to shows all over the country promoting Villa Rosa’s quick and easy patterns. She has several designers working for her and over 500 patterns in the Villa Rosa collection. (You can see them here). Her website also features lots and lots of gorgeous fabric.

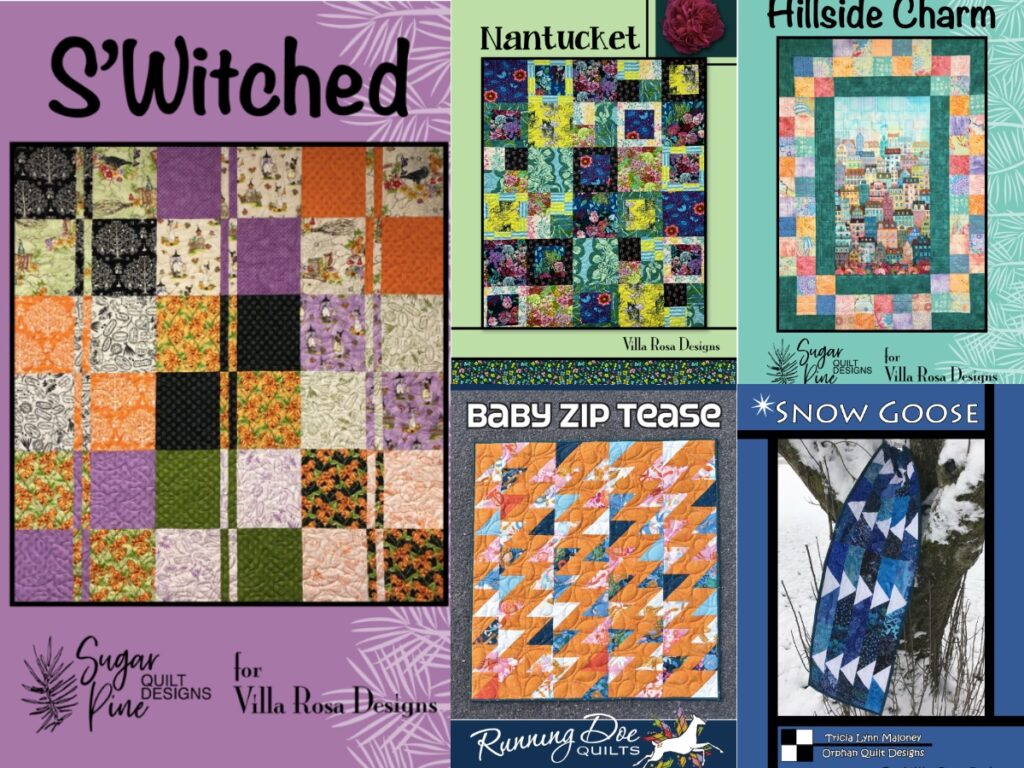
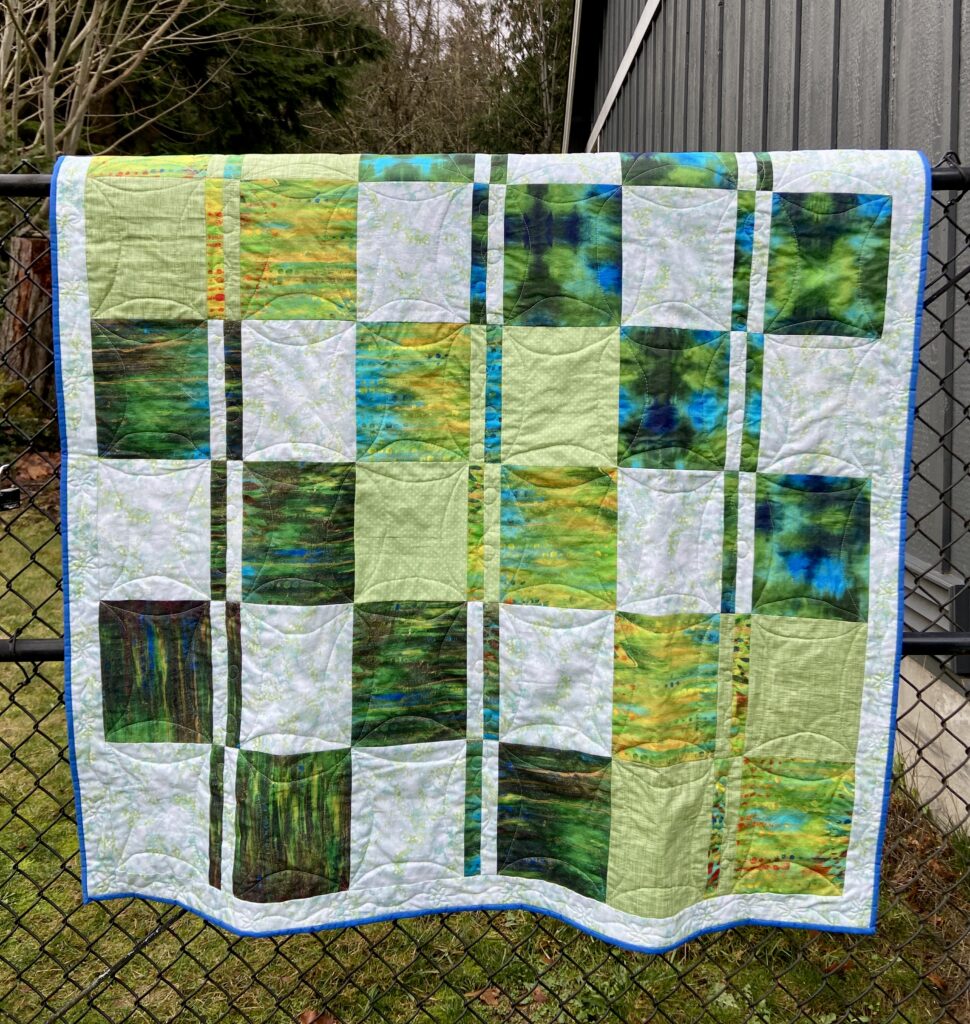
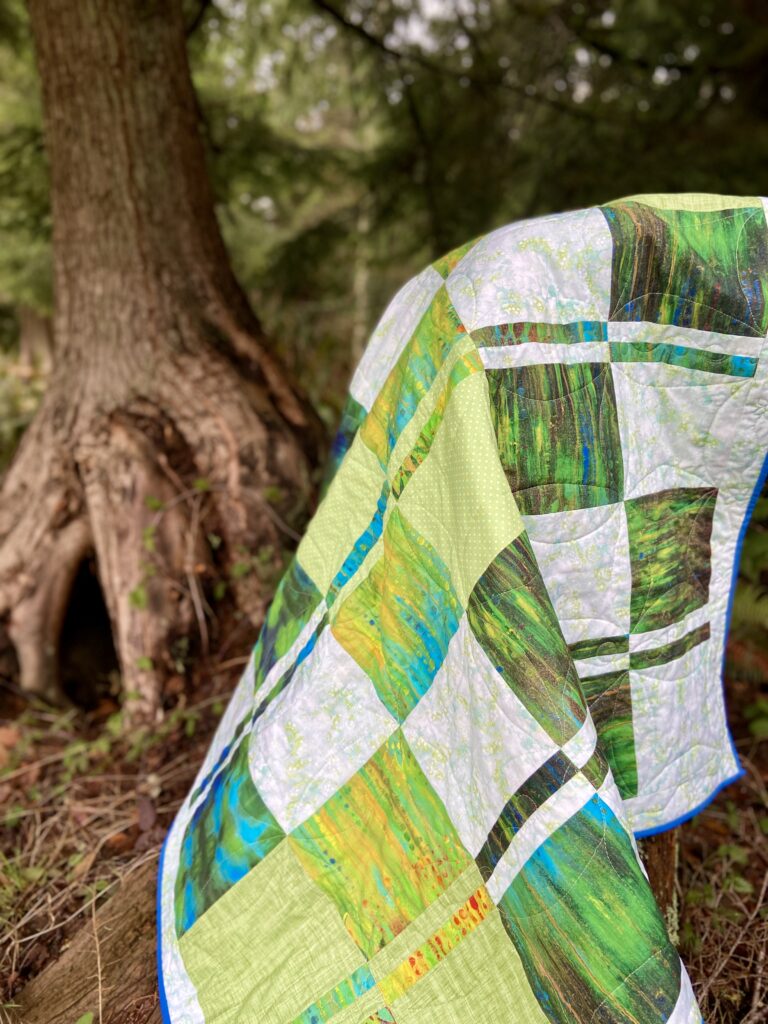
This is the packet of five patterns used in the blog hop. When I looked at the selection of patterns we were to choose from, I decided to make S’Witched. Recently I have been focusing on using up fabric I have and this pattern works well for larger squares of bold fabric. Some years ago, I had cut into a collection of fabric called Garden Bright, by Sue Penn. Life happened and these squares were put into a project bag and shelved. I really like this collection and wanted to use some of it for my S’Witched quilt. The pattern calls for 10″ squares (a layer cake) but my squares were already cut at nine inches. VRD patterns are super flexible though so it worked just fine to change things up a bit.

Because shades of green are my all time favorite, I am super happy with this finish! The lighter backgrounds are from my stash. The really pale background is left over from a wide back I used on a different quilt. Wide back fabric is such a great deal – no piecing the back and there is (almost) always a nice chunk left over for another project. The light green is a cute polka dot from who knows where? I certainly don’t remember! Because my squares were smaller than the pattern called for, I added a border to add some size to the quilt.

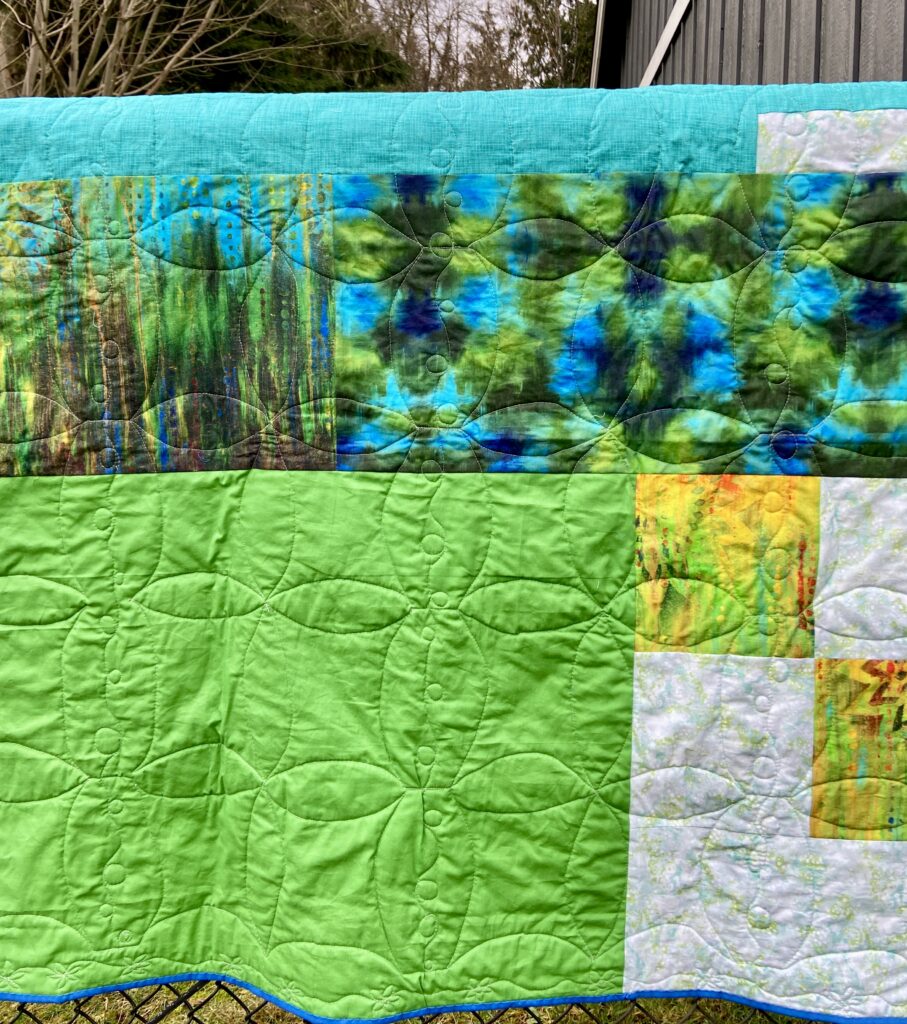
The backing.

I did end up piecing this backing. This has been mentioned many times lately, but I am really trying to use what I have. No matter how much I take from the shelves and bins, there is more to be used! I can happily say that every bit of this quilt came from my stash. This includes the batting which I joined from several large leftover pieces in my tub.

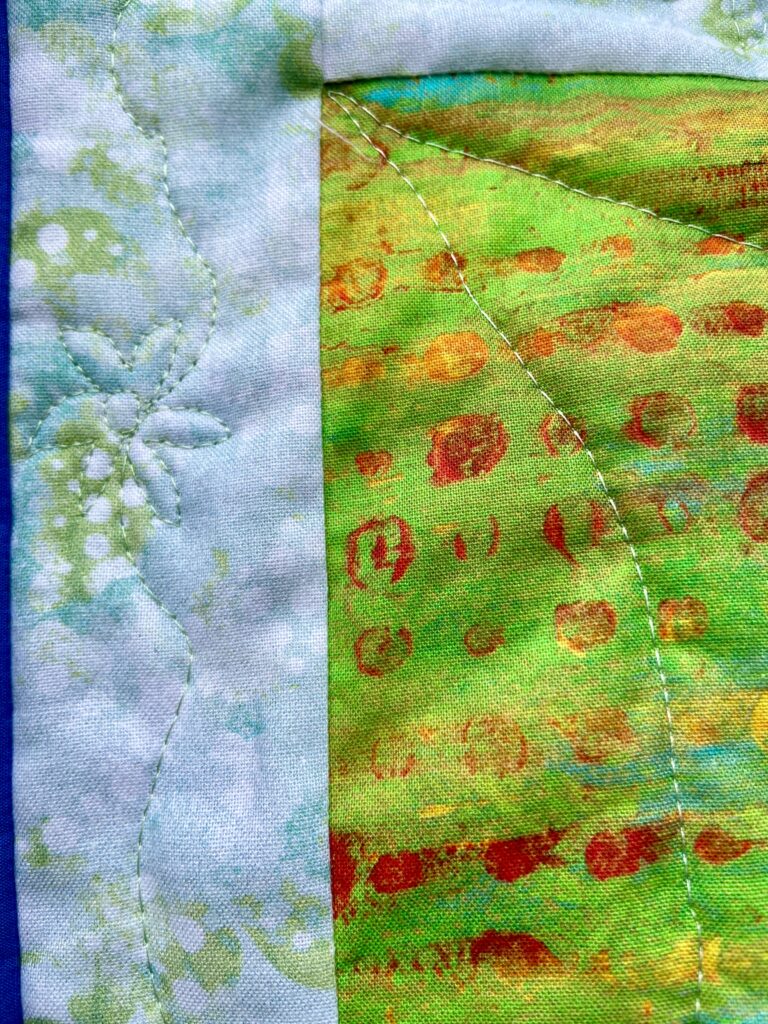
I quilted a lazy run of daisies along the border. For the bigger squares, I tried quilting curves, sort of like orange peels. They look ok but the blocks I quilted with these are actually rectangular and stretching that curve was sort of awkward for some reason. So while I am reasonably happy with it, I don’t love it. Know what I mean?

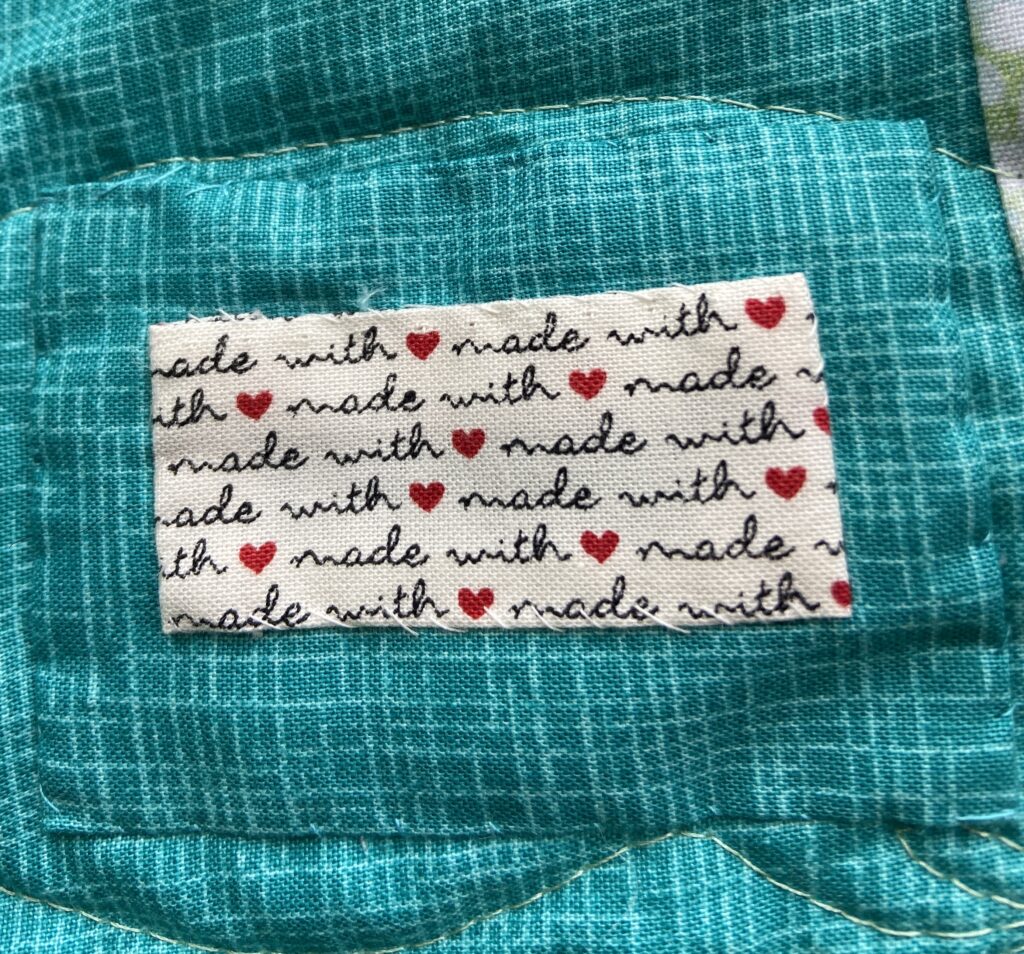
Labeling didn’t really happen. I have a fat quarter of Made with Love fabric and hand stitched a bit of it to the back. If it is donated, that will be enough. If it is given as a gift, I can add a bigger label or replace this little bit.

This pattern is very quick to come together. It is a four patch block which is cut into three pieces. Then stitched back together with the opposite portion next to the narrow center stripe. It would actually be fun to make with charm squares too.

Fabulous Prizes!!

When this hop was put together I was told there would be a giveaway. To me, this meant sets of the pattern cards or something similar. But Tricia, the marketing manager for Villa Rosa, went nuts and procured tons of fun prizes from some very generous sponsors! We invite everyone to enter to win. If your name is selected and you are from outside the US, you will receive a PDF collection of the pattern cards.

  1. Villa Rosa Designs is giving away a 2023 Blog Hop Rose Card pattern collection on each participating blog.
  2. Sponsor prizes have been donated by our lovely sponsors, and even from some of the bloggers, too! These prizes are divided into 2 different categories —
    • Grand Prize Boxes (of which there are 2) are filled with tons of quilting goodies including books, fabric, precuts, notions, patterns, and more.
    • Individual Prizes (each blogger will select 3 winners on their blog) which may be books, patterns, fat quarter bundles, 5″ squares, 2 1/2″ strips, 10″ squares, notions, and more.

There are many ways to enter to win. Visit all of the bloggers (see list below) in the hop and follow along with us. To enter here at Needle & Foot, please leave a comment sharing your favorite pre-cut. All of the VRD patterns start with a pre-cut. Of course you can always cut your own if you don’t have the right size. Or you could adjust the size of your blocks as I did with my quilt. Comments on this post will close on January 29, 2023. Prize winners will be announced soon after! (Usually I respond to comments but I am betting there will be lots of them. So this time I am just going to thank you now instead of responding to each one. I hope you understand.)
01/19/23 ThursdayVilla Rosa Quilts — Where it all begins
01/20/23 FridayFrom Bolt to Beauty 
Kathleen McMusing 
Jaftex Companies
01/21/23 SaturdayPieceful Thoughts  
Little Penguin Quilts
01/22/23 SundayQuilt with a View
MMM Quilts
01/23/23 MondayCheryl’s Teapots 2 Quilting
Devoted Quilter  
Quilts of Valor Foundation
01/24/23 TuesdayNeedle and Foot – That’s me!!!!
Am I Shouting Yet?
Electric Quilt
01/25/23 WednesdayThe Crafty Quilter
Jo’s Country Junction
Keepsake Quilting 
Stitchin At Home
01/26/23 ThursdayVilla Rosa Quilts — Blog Hop Wrap Up

Thank you so much for coming by – I hope you will try out some of the Villa Rosa patterns. They are inexpensive and super fun to sew. Also, if you head over to VRD’s website, there is a great selection of kits to be purchased as well as a fantastic group of sale fabrics! Hope you will enjoy the rest of the hop.

Update – Comments are now closed. Thank you for participating in the hop!

Villa Rosa Designs Blog Hop

Just popping in to let everyone know the Fast and Fun blog hop begins tomorrow! This hop celebrates the patterns created at Villa Rosa Designs. VRD patterns are sold in lovely postcard formats and promote quick and simple quilts. Often graphic and modern in design, these can be used for wall quilts, baby quilts and lap size quilts. They are easily expanded by making more blocks and adding borders if you choose to.

The line up of bloggers promoting these patterns is shown below. Be sure to visit each one for loads of inspiration as well as the chance to enter and win some very generous prizes.

01/19/23 ThursdayVilla Rosa Quilts — Where it all begins
01/20/23 FridayFrom Bolt to Beauty 
Kathleen McMusing 
Jaftex Companies
01/21/23 SaturdayPieceful Thoughts  
Little Penguin Quilts
01/22/23 SundayQuilt with a View
MMM Quilts
01/23/23 MondayCheryl’s Teapots 2 Quilting
Devoted Quilter  
Quilts of Valor Foundation
01/24/23 TuesdayNeedle and Foot
Am I Shouting Yet?
Electric Quilt
01/25/23 WednesdayThe Crafty Quilter
Jo’s Country Junction
Keepsake Quilting 
Stitchin At Home
01/26/23 ThursdayVilla Rosa Quilts — Blog Hop Wrap Up

Check out the sponsors of this event!! Villa Rosa has really put together a great event. You won’t want to miss this!

website

website

website

website

website

website

website

website

website

website

Come back to this post and start visiting the various blogs tomorrow! I will be sharing my pattern and the quilt I made on Tuesday of next week. If you follow me on Instagram, you may have even seen a sneak peek already. Just a hint there…. 🙂

Stay At Home Round Robin

The third annual Stay At Home Round Robin (SAHRR) is starting this week and I am joining in. I have never done any sort of round robin but I am looking forward to playing along with Gail (Quilting Gail) and the other bloggers that are presenting during this event. Several years ago, Gail decided to do a riff on the traditional round robin (where a quilter makes a center block, it is passed along to the next quilter who adds a border of their choice and passes it to the next quilter who does the same). Instead, Gail has lined up five other quilters who have each designed a border for us to use as we see fit. It is very flexible in that a person might choose to use part of the border, to change it a bit or skip it altogether if it doesn’t work for them.
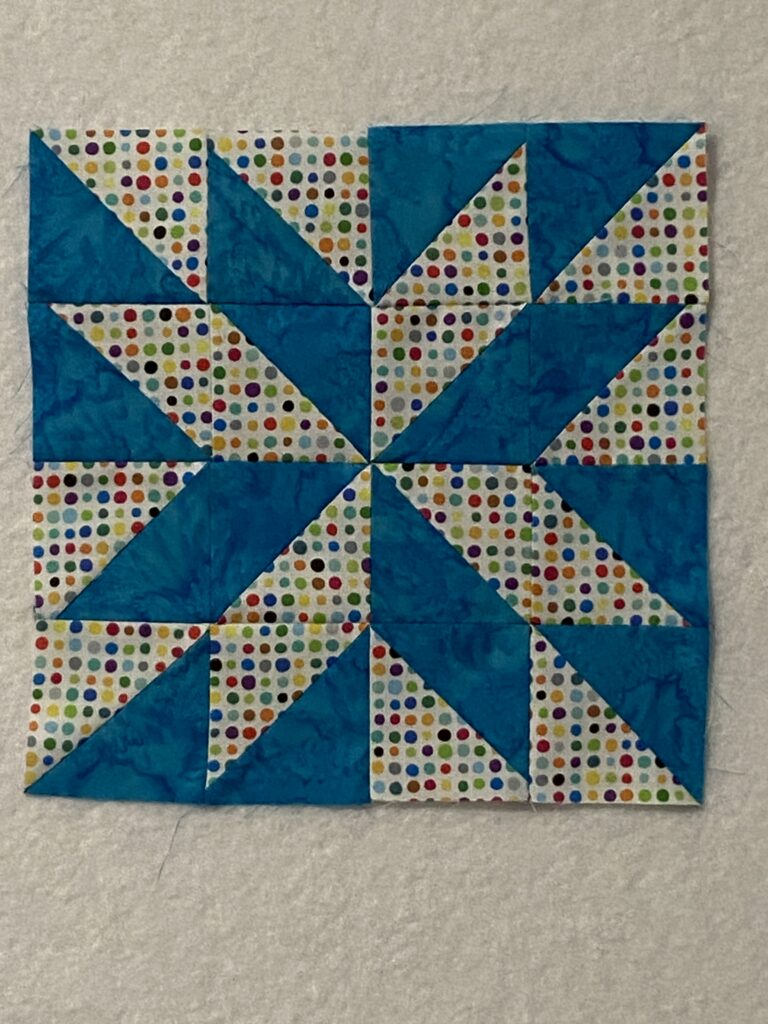
This is my center block. I had a stack of these HST’s and made this star block with them. They were from a quilt I started a couple of years ago and decided I didn’t like where it was headed. In the project bag, I have loads of cut pieces. Several colors of the batik (red, orange, blue, green and purple) and tons of the polka dot fabric cut into various size rectangles and strips. I am hoping to repurpose many of the pieces in this project. If I need to tame it down a bit I may add some solids to the mix. The star block measures eight inches square.

This feels like a mystery quilt since I don’t know what is coming next week. Because I don’t know the plans for the five rounds we will be offered, I have no plan for the size of this project. Wall hanging? Baby quilt? Lap quilt? Who knows! Not being one who is known for spontaneity, this is a reach for me. But this is a way to use lots of pieces that have been sitting patiently waiting to be put into a quilt!

If you want to join in, below is the list of bloggers who will be posting for one round each. If you click through, you’ll be able to see their starting block. For more information on the event itself, click here.

For those who are participating, there is a link up to share your center block. Click here to find that link. I am excited for the next set of instructions which will be provided in a week by Roseanne and Sue. Join in and sew with this group. It is going to be a lot of fun!

Grammy Time

Last October Ray and I had the opportunity to bring our youngest grand daughter home and spend a few days with her, one on one. It was delightful. We promised big sister she would have a turn to have a sleep over by herself too. Then everything got crazy with all of us being sick for weeks on end. Finally the week after Christmas we made it happen.

When I took Julia to the airport to go back to school, my son met me (this is about the 1/2 way point between our homes) and I picked H up. We were worried little sister wouldn’t understand why she wasn’t coming along. However her father had the good idea to meet in the Ikea parking lot and the promise of Swedish meatballs for lunch with dad was a good distraction; everyone was happy!

Spending time one on one with a grand child (or a child) is so special. The dynamic changes and it seems like the relationship deepens. I grew up in a big family and then had a big family (four children) which is wonderful. But having the chance to single out a child and focus on them entirely is such a blessing. (On the flip side, little sister was getting lots of extra attention from her parents while H was at our house.)

Quiet time at Grammy’s

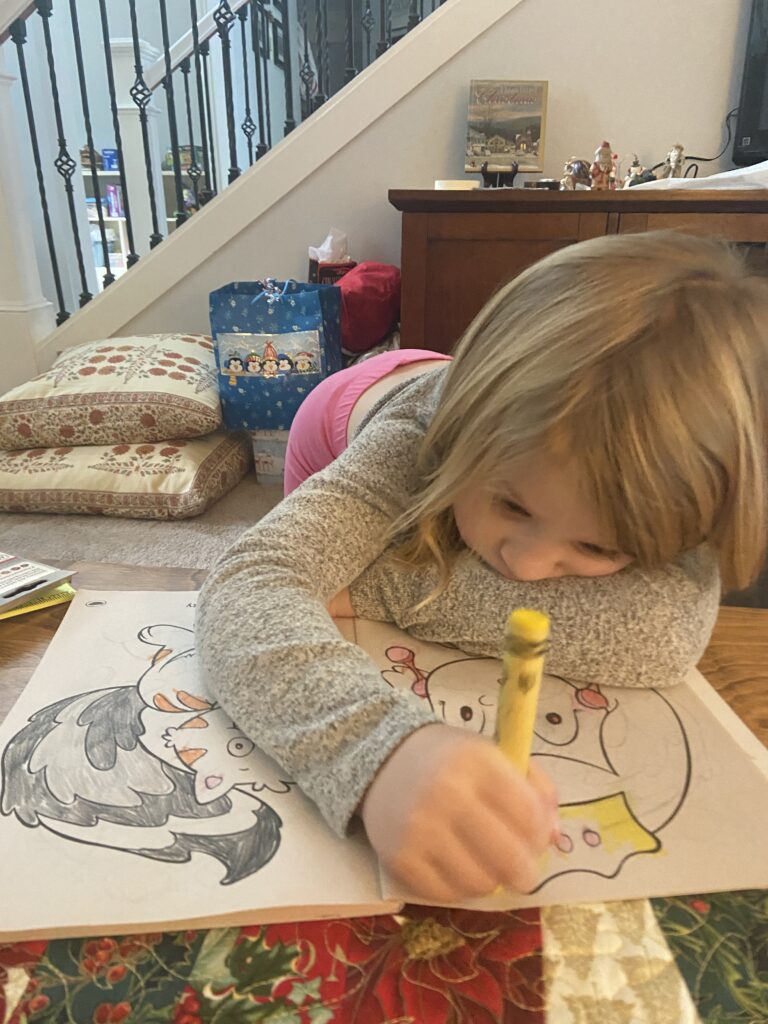
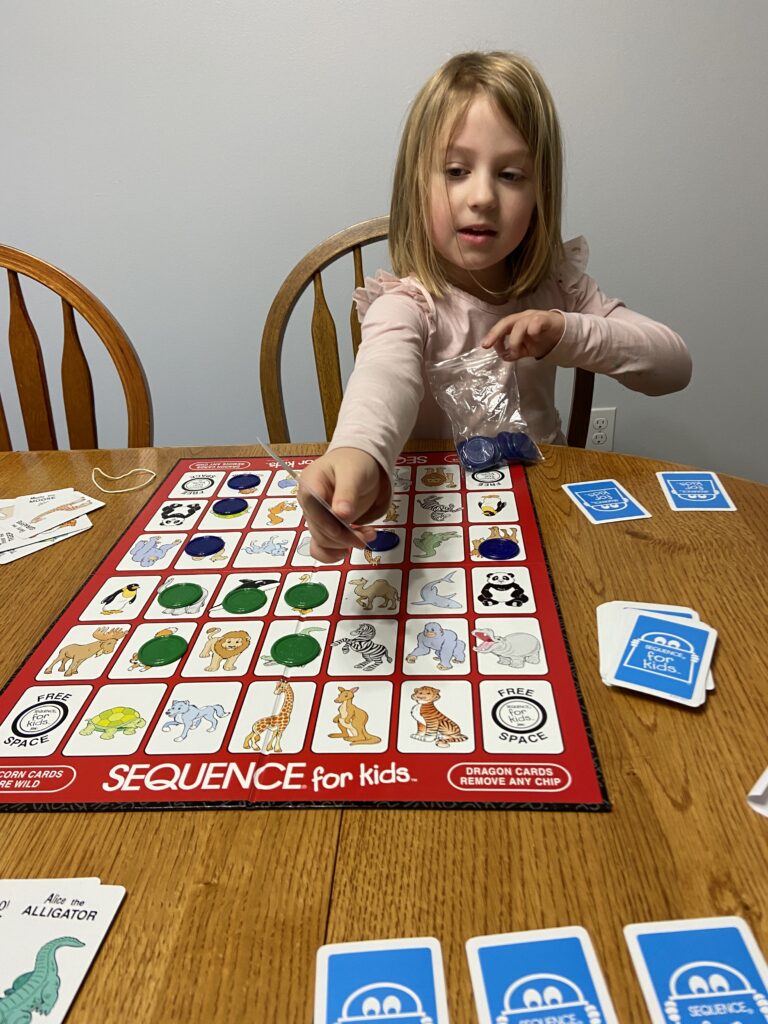
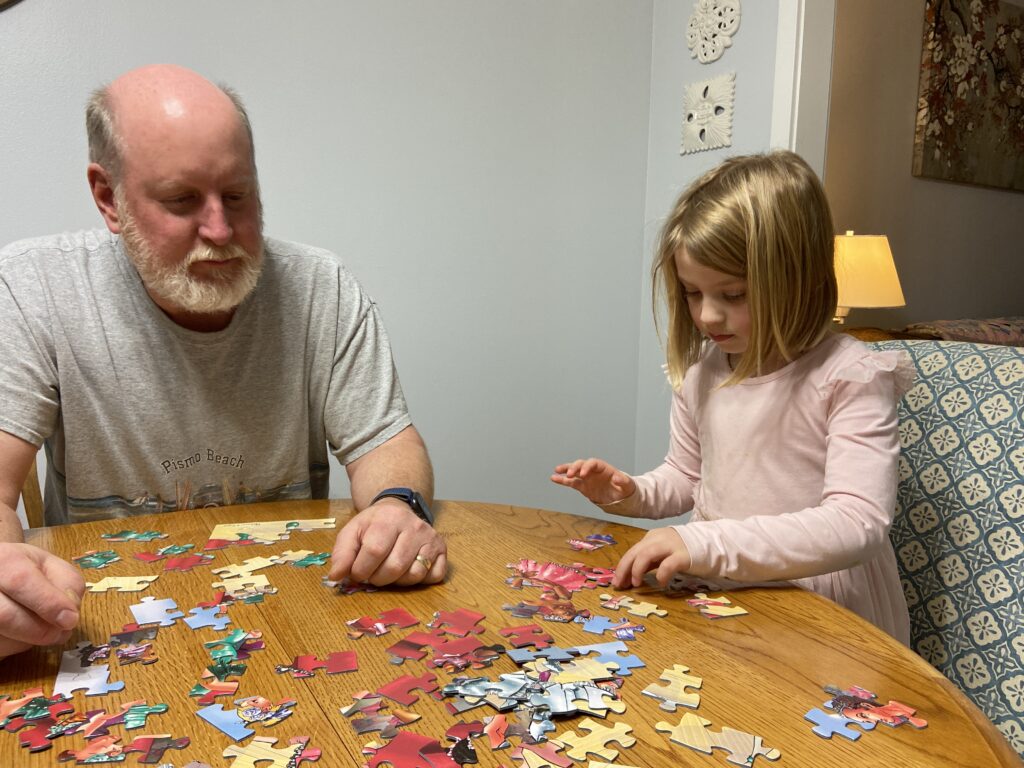
Planning to have this time with H, I had a mental list of fun things we could do. It was supposed to be very rainy so outdoor time would be minimal. Letting her take the lead, we did the things she suggested as much as possible. Board games, jig saw puzzles and coloring are activities she favors so there was lots of that happening.

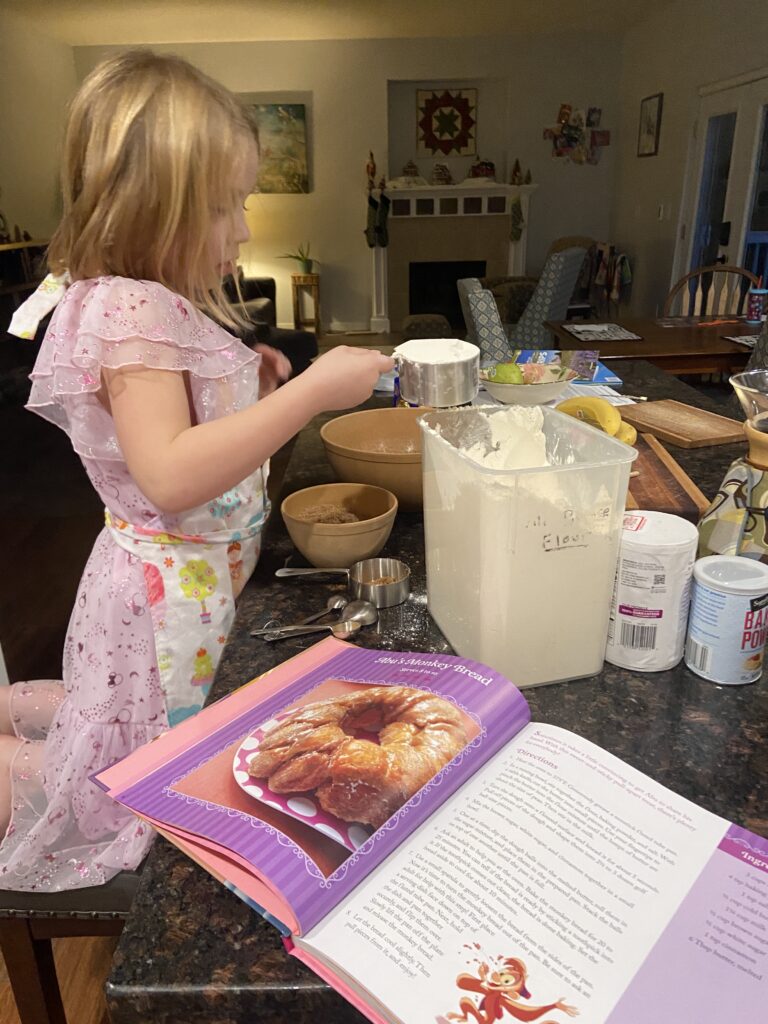
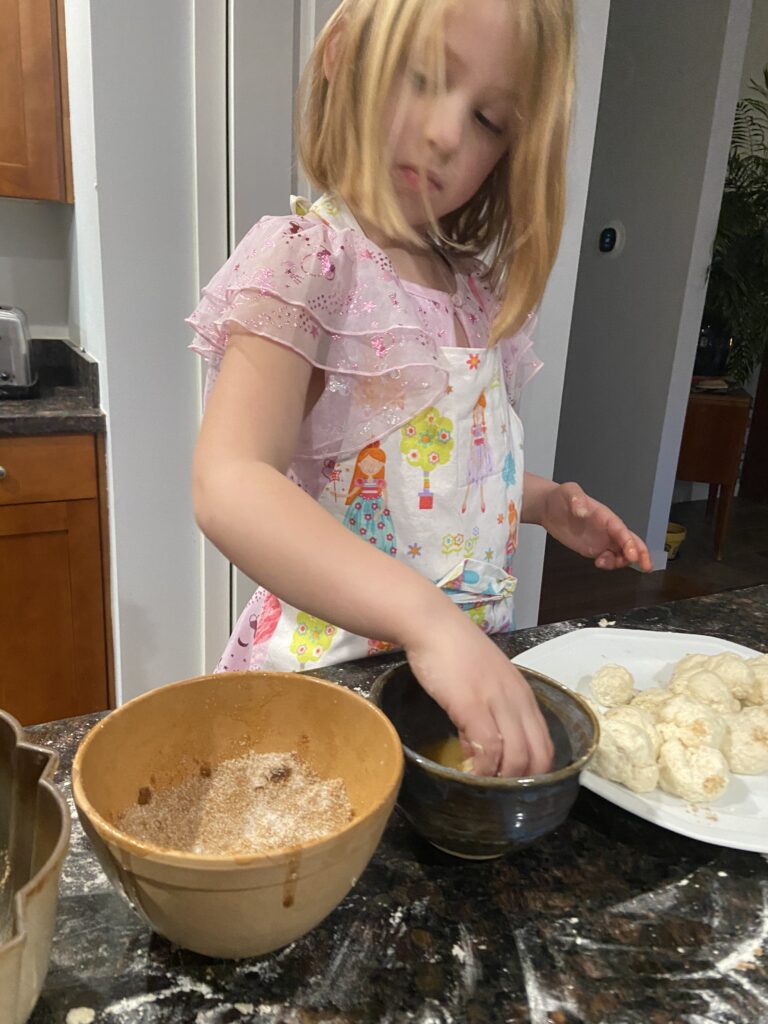
This little girl loves to make things. She also loves to cook. Her parents give her a lot of room in the kitchen and she is developing a really good understanding of how to bake. For Christmas, Santa bought her a Disney Princess cookbook and she brought it over. I asked her what she wanted to make and she chose Monkey Bread. The recipe was simple, biscuit dough rolled into balls and rolled in butter and cinnamon with sugar.

H is careful and able to measure most of the ingredients on her own. ( In the photo you can see the apron I made for her for Christmas. She also got a new nightgown and was looking quite the princess when making her Monkey Bread).

What really impressed me with this part of the process was she controlled that incredible impulse to lick her fingers between rolling the dough balls in the cinnamon sugar mixture. I watched quite closely and at the end of the process we celebrated by licking all ten of our fingers. The Monkey Bread turned out so pretty and H was satisfied. However I made a mistake and forgot to have her put the salt in so it tasted rather flat. Oh Grammy. She didn’t seem to notice but Ray and I sure did. Sigh.

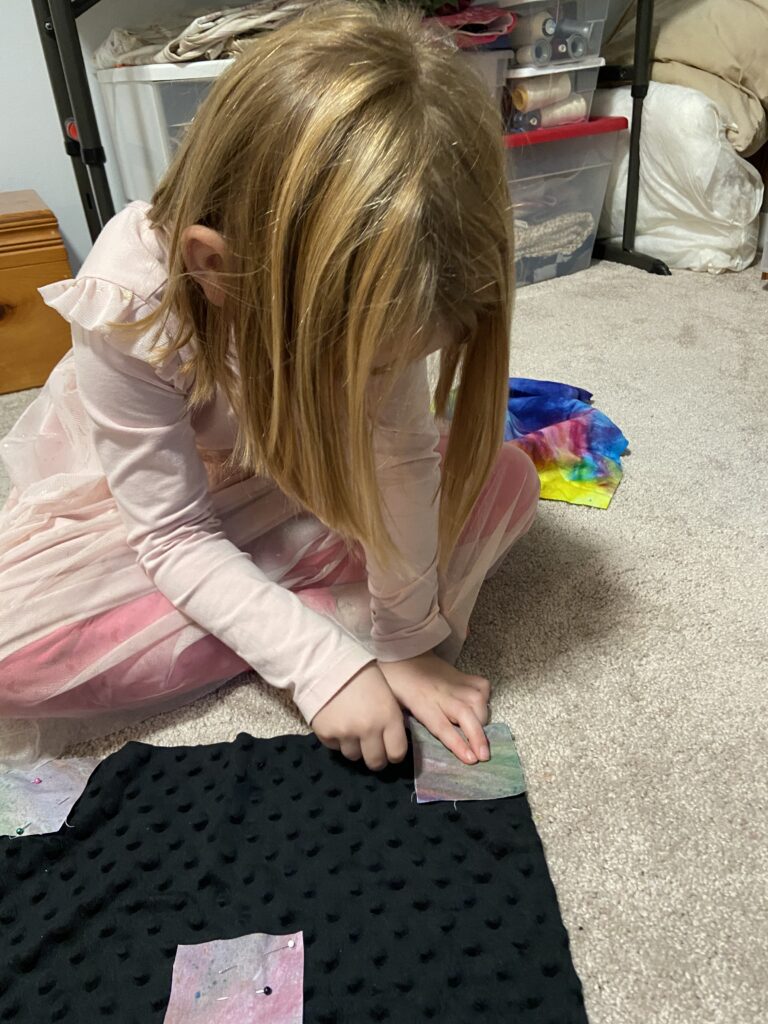
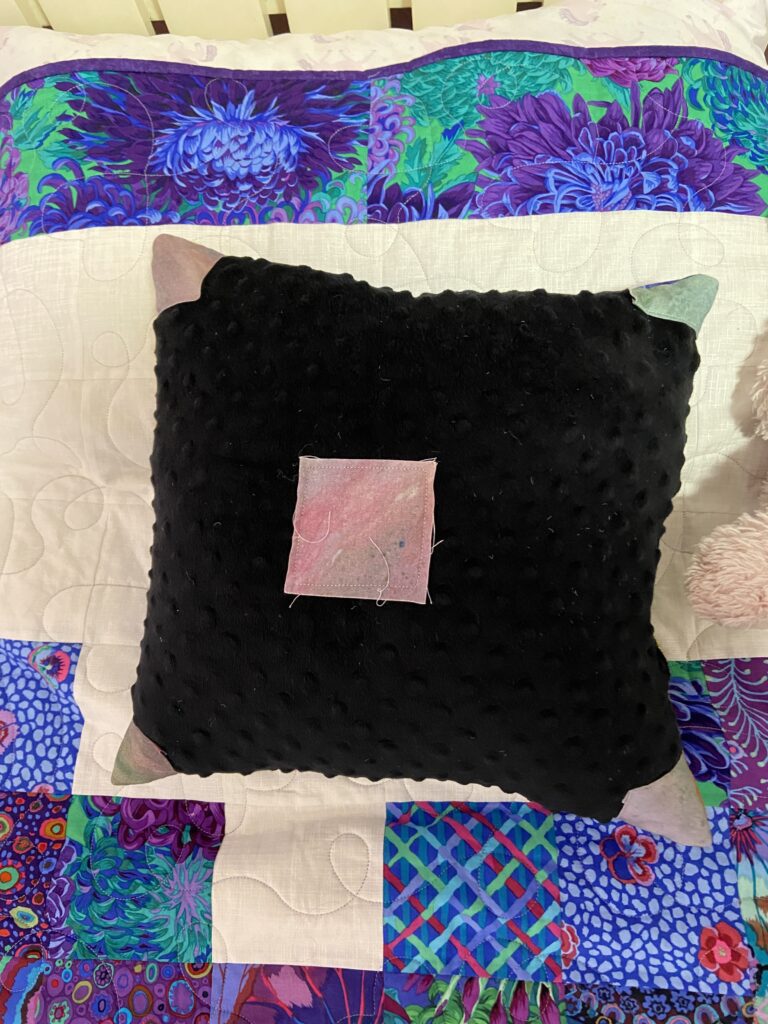
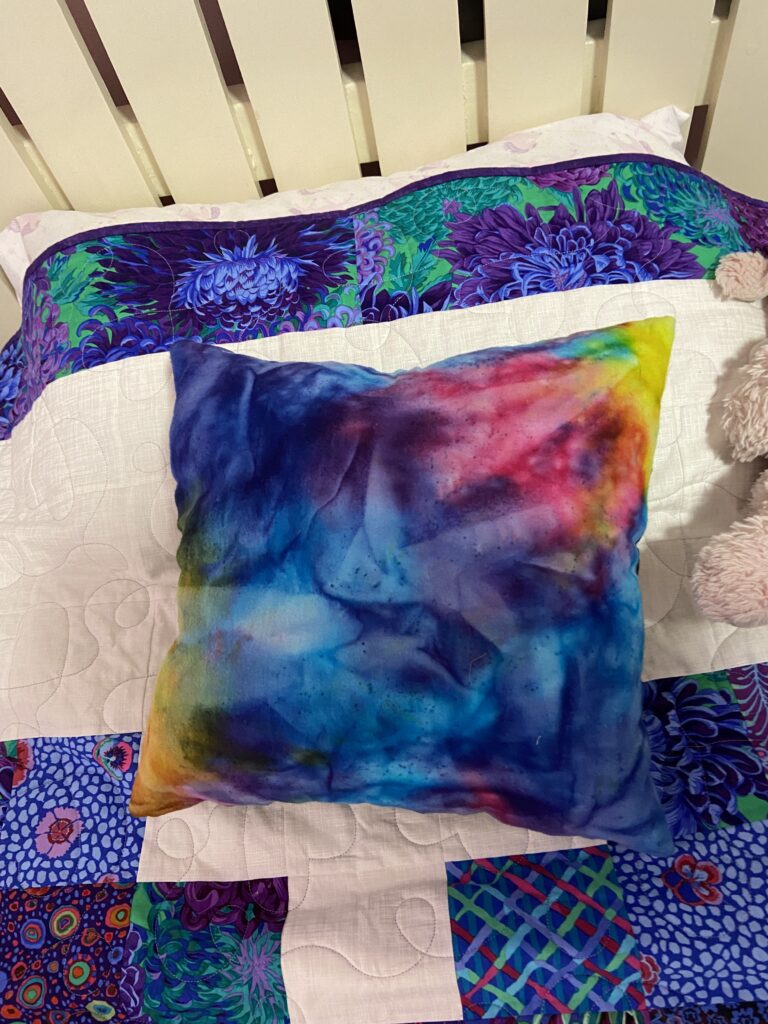
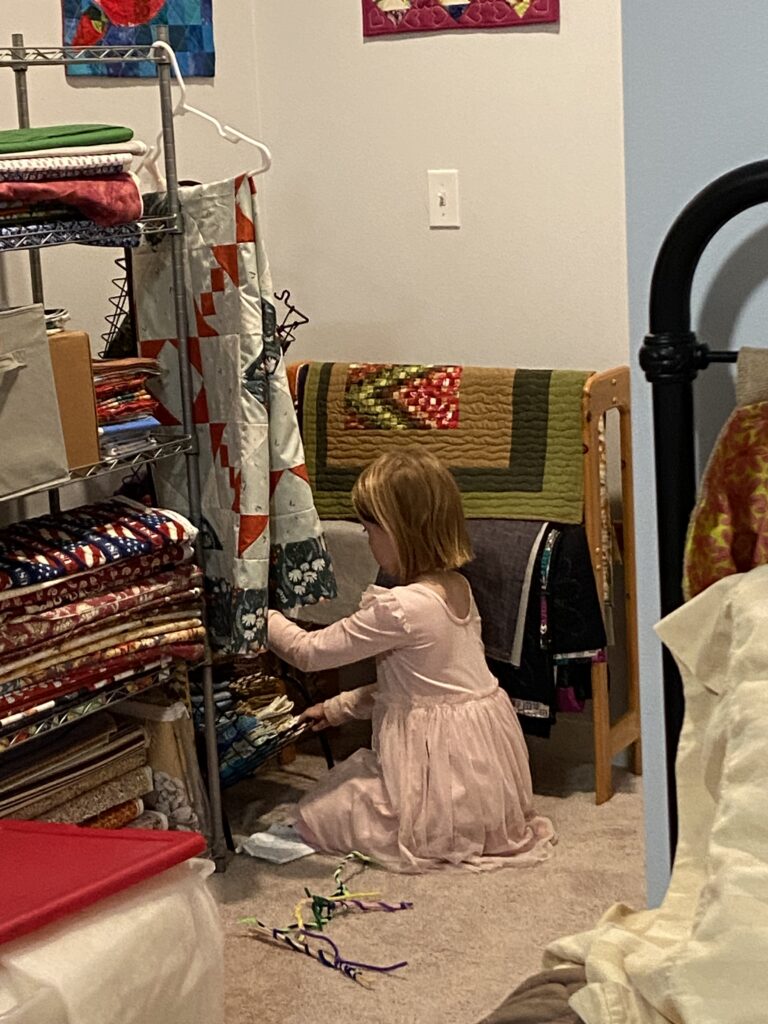
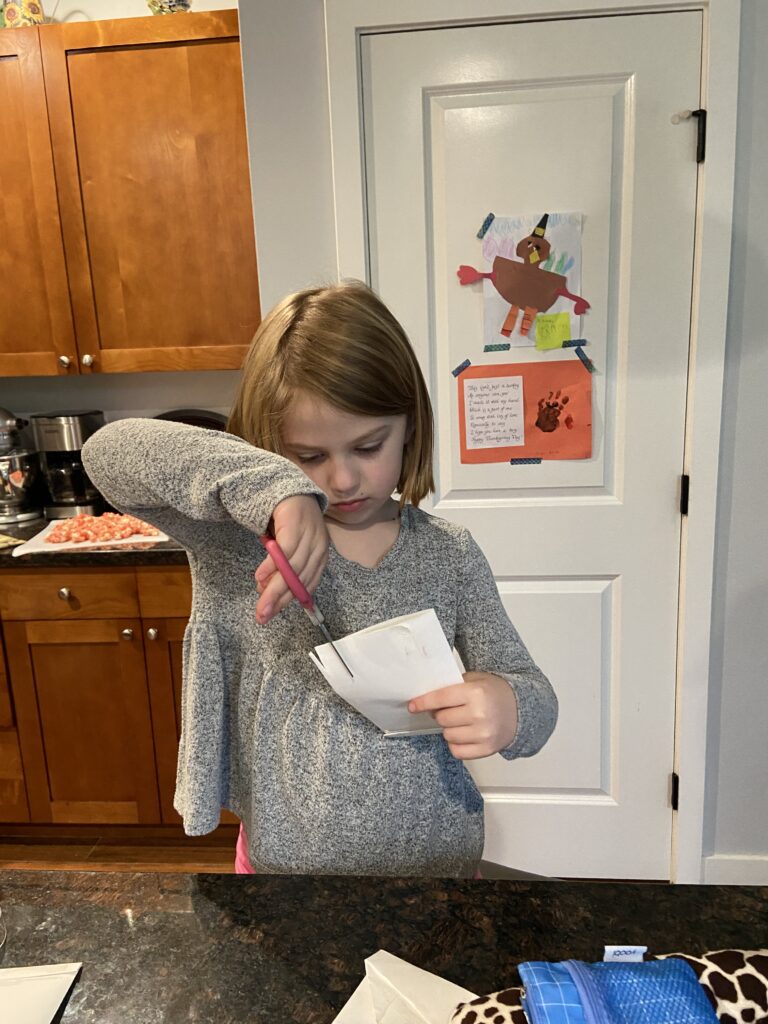
Next this girl went straight for my heart and asked if we could ‘make something in the sewing room’. As if I would say no to that request. Upstairs we went. I have a huge bin filled with flannel and minky scraps. There really isn’t anything in there that I would miss if she cut it up so I let her have at it. Wanting her to take the lead, I worked hard to bite my tongue and not suggest anything. (This wasn’t easy!!!) She was immediately drawn to a scrap of black minky with a bubbled texture on one side. When she asked what we could make with it, I suggested a stuffed animal or a pillow. She chose pillow. I told her she could put a different fabric on each side or the black minky on both sides. She just lit up and went digging through that bin, turning into the Tasmanian Devil with fabric flying everywhere. But this sort of mess is creativity in my book. She chose a crazy tie dyed flannel and then found a pale mottled fabric that she liked. Wanting to incorporate all three, she kept thinking. Finally she decided to cut the mottled cotton fabric into squares for each corner of the minky side of the pillow plus a bigger square for the center.

It was interesting to see how much concentration it took for her to pin her squares where she wanted them. (I couldn’t worry about turning under the edges of the squares. Pinning them was hard enough!) This part took a bit of time. When we went to the machine to sew, she chose to work the foot pedal and I guided the fabric under the needle. My machine has a speed control which was set to slow.

We stuffed the pillow with polyester stuffing and this is the finished result. The project took well over an hour and she started to lose interest during the stuffing. Off she went to shop in the fat quarter baskets for something else to play with. She also found a bag of pipe cleaners and decided she needed to twist them all together.

Honestly I could watch her play in here all day (well actually we did spend the larger portion of the day in there)!

Hmmm, what can I make with this???

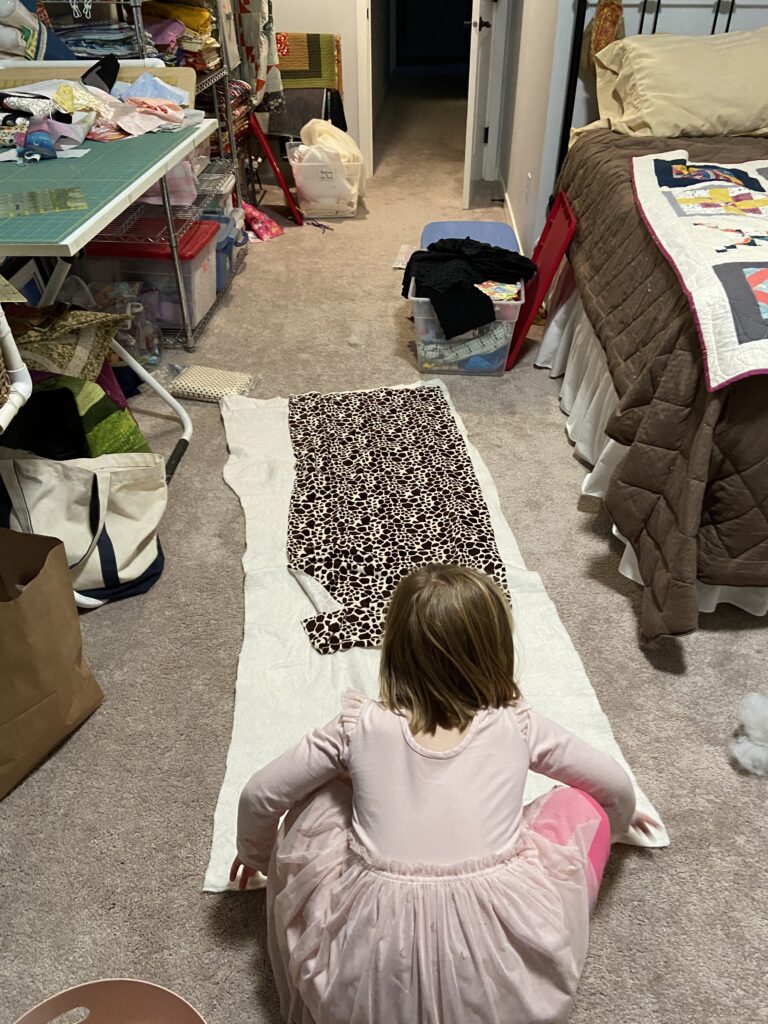
Finding a cheetah print minky scrap, her wheels started turning again. The thinking process for this project was super interesting. H decided she wanted to make a snake. She told me she wanted to “use insulation for the middle, not stuffing.” This was momentarily confusing… Insulation? Then she pointed to the bin of batting. OK – there’s the ‘insulation’. (Why did she even know that word?) Looking at the picture you’ll get an idea of her plan. She wanted to layer the batting and the fabric and roll them up into a snake. She was very firm that she did not want to make a tube and stuff it. I left her to play with it for a bit and she finally figured out she needed to get the fabric under the batting to roll it up or the fabric would be on the inside of the snake. The issue for me was I didn’t want to roll up all that minky to the inside of the snake. I stepped in and suggested she could roll just the batting and then cover the roll with the cheetah print. She understood and that’s what we did. As we rolled, she thought and said ‘you know, a snake’s head isn’t just round’. OK – after we tapered one end to a sort of triangular shape this girl asks for a ‘forked tongue’ and eyes. Out came the tubs of ribbon (tongue) and buttons (eyes).

Success!

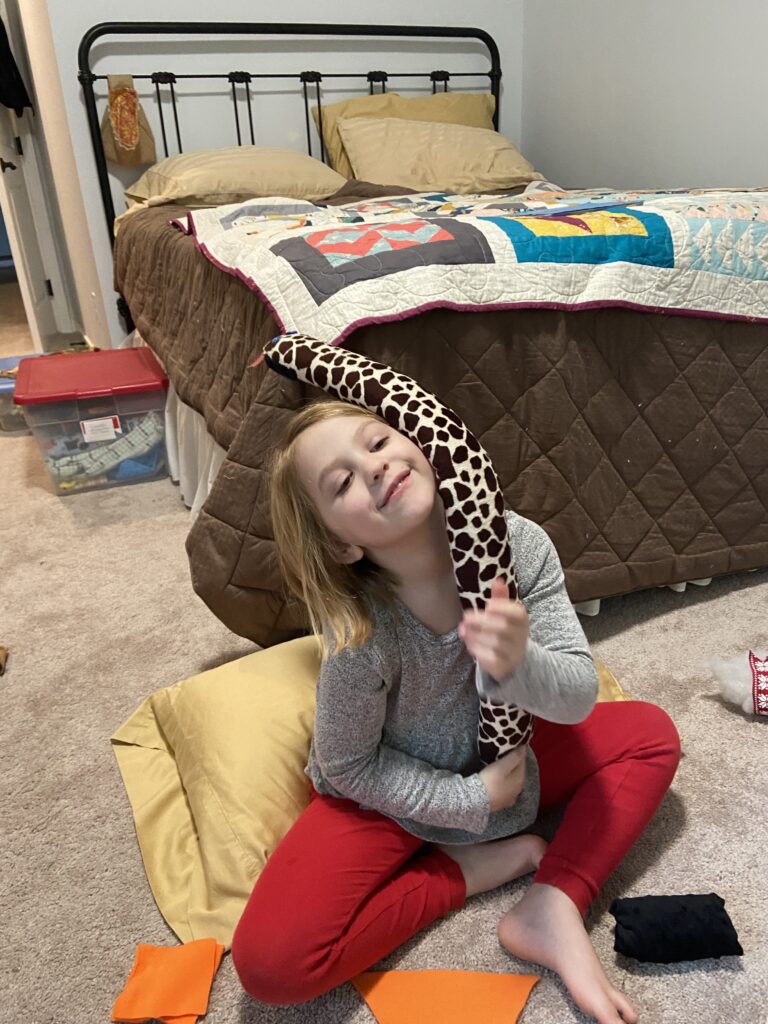
H was so proud of this project. Making Elizabeth (this is what she quickly named her snake) took much thought but what a great finish for her! The minky was wrapped around the batting (aka insulation) that she rolled up. We pinned it tightly and hand stitched a seam the length of the snake. H did about three inches of hand sewing and grew bored of that so I finished it up.

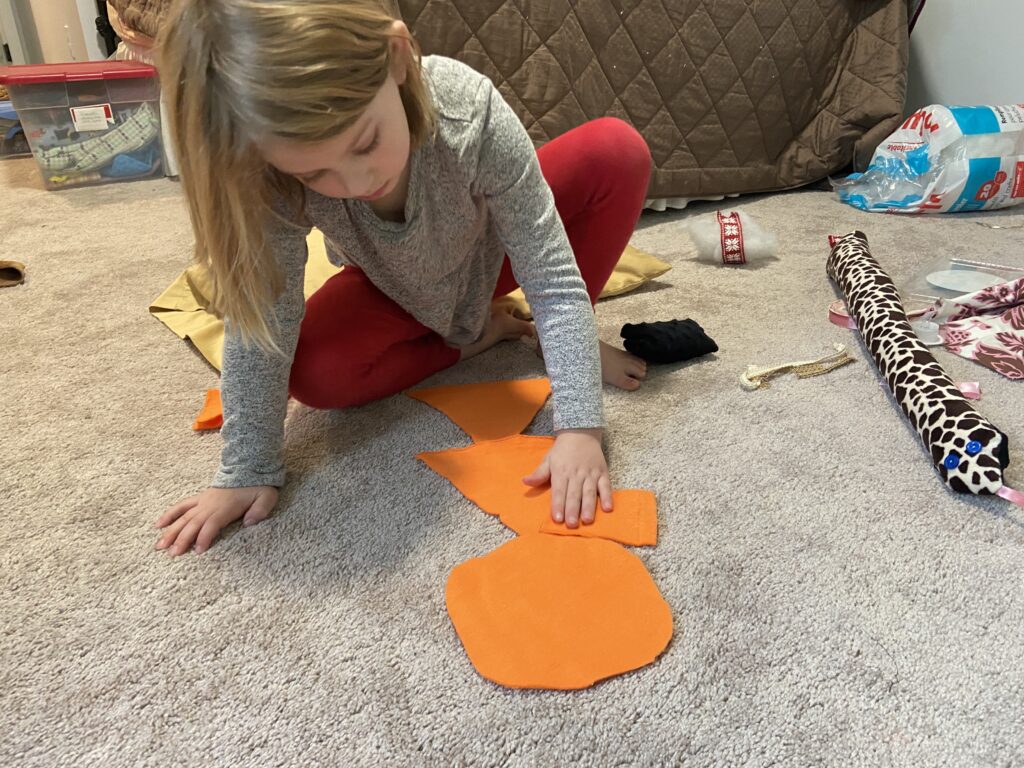
After making her snake, big sister told me that her little sister would be sad if she didn’t have a snake. Back to the tub of flannels! She picked out a piece of solid pink and another of solid purple plus two green buttons for the eye. This time I made a tube with the mandated triangular head and ribbon made to look like a forked tongue. Big sister had no interest in helping to make this – she chose the fabrics and moved on. While I sewed H found scraps of orange fleece from the pumpkin costume I made for her several years ago. She didn’t sew anything with it but played with it for a long while – arranging and rearranging the bits and telling me what it looked like. Also, if you look in the background of the photo, you will see a big fluff of poly stuffing with ribbon around it. She spent a long time tying ribbons around this fluff. She wanted to contain it somehow. Finally she wrapped it in a piece of fabric and then tied it with ribbons.

When a younger child is making something, it often is more about the process than the final product. Playing with the orange scraps, playing with the wad of stuffing – H spent a long stretch of time doing this without any desired outcome. As adults, we often want to ask ‘what are you making’. I think this is a mistake. Much of the time, the child doesn’t know what they are making. When I asked H is she wanted help with that fluff and her ribbons, she said she couldn’t get it to stay together. I suggested she look for fabric to wrap around it and off she went. There doesn’t have to be an outcome or a finished item. She is thinking, playing, and imagining and that is what is important.

Whether it is fabric and ribbons, flour and sugar, or paper and crayons, I love watching this girl make her projects. She gets so absorbed by her ideas. As a grammy, it is my job to step back and just enjoy her. Making the craft supplies available and then keeping my mouth shut unless help is asked for; that is my job!

Linking up with my favorites. Check them out at the top of the page, under Link Ups.

The Year in Books

Lots of us share a love of books. It is a treat for me to read a post where a great book is shared (or a not so great read is shared and thus avoided). Last year I started keeping track of the titles read or listened to. That list was shared here. It isn’t a surprise I read quite a bit less in 2022. There was much to be done.

I was raised to be a reader. My mother, age 87, is a voracious reader and usually has more than one book in progress at any single time. All of my sisters are readers and share their finishes via our group text on a regular basis. My kids read as well – different genres that reflect their personalities, some are fans of reading on a kindle, some on paper or their phone. But they read.

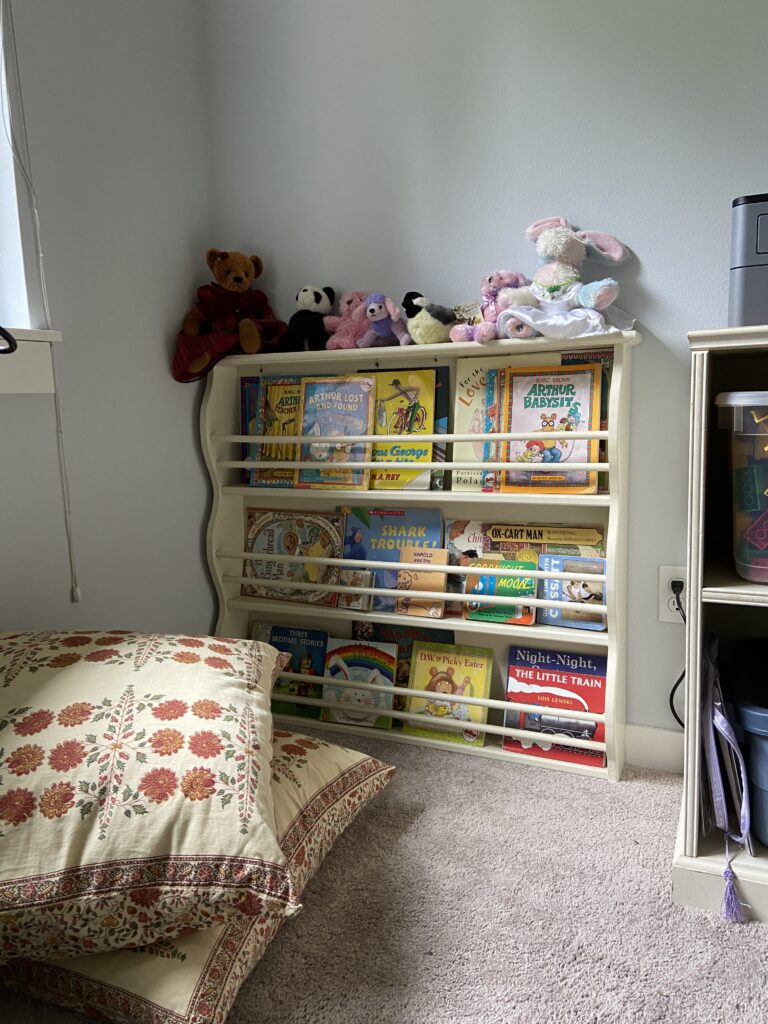
Bookshelf made for Julia by my father

When Julia was a toddler, I asked my dad to make her a bookshelf. I had seen a picture of one like this and he replicated it. I loved it and Julia got much use out of it.

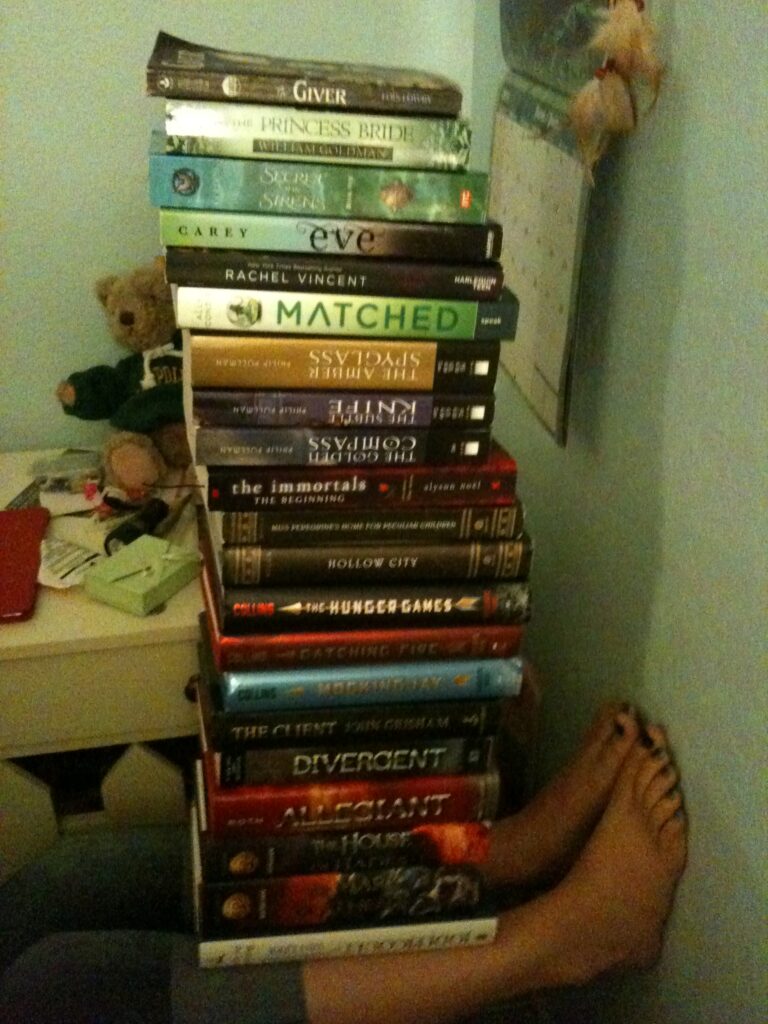
Julia and a stack of books balanced on her legs.

She quickly outgrew this sort of bookshelf so my father built her a more standard shelf for the larger books she was constantly reading. (When she was about 12 or so, I walked into her room and she was sitting between her wall and her bed building a tower of books on her legs. Because you know, sometimes a girl has to do these things.)

Now that we have a room set up for my grand daughters to play in, Papa’s book shelf is back on the wall and they love choosing books to read.

Thirty-five books were read and most of them I really enjoyed. I had a few that were not so great. I listened to Love Warrior by Glenn Doyle Melton and didn’t like it. When Glennon first started her blog years back, I read her posts somewhat regularly. I liked her encouragement of her readers, her warriors. For some reason, this book just annoyed me. Hard to explain – I know she has had a lot of tough times, but the audio book seemed really whiny. Maybe I just wasn’t in the mood for it? I also had mixed feelings about Excuse Me While I Disappear by Laurie Notaro. She writes about being a middle age woman and while some of it is amusing, there is a bit too much self-deprecation for my taste. Note – there was a bit about the NextDoor app that was hilarious. If you have read it, you’ll know what I mean. That part was spot on.

Authors I very much enjoyed included Laurie Frankel, Lianne Moriarty, and Olivia Hawker. Seems I can always count on these authors for a great book. New to me are books by Lee Child. My husband has read many of his books and I picked one up to give it a try. They are not my usual thing but I liked them. Who knew? That Jack Reacher is pretty darn smart. (There is quite a bit of violence in the Jack Reacher books so if that is not your thing, you might not enjoy these.)

OK – here is the list for 2022.

JANUARY 

Where’d You Go Bernadette? by Maria Semple

Minding Frankie – Maeve Binchy

Not Our Kind – Kitty Zeldis

FEBRUARY 

Maisie Dobbs – by Jacqueline Winspear

Where the Crawdads Sing – by Delia Owens (audio)

MARCH

December Wedding – by Anita Shreve

APRIL

Blue Shoe – by Anne Lamott

The Lobotomist’s Wife- by Samantha G Woodruff

Lydia Cassatt – by Harriet S Chessman

The Silent Patient – by Alex Michaelides

MAY

Love Warrior-by Glennon Doyle -audio (meh)

Gray Mountain – by John Grisham 

The Good Sister – Sally Hepworth -audio

Friends, Lovers, Chocolate – by Alexander McCall Smith (meh)

JUNE

One Two Three – by Laurie Frankel

A Serial Killer’s Daughter – by Kerri Rawson (meh)

JULY

Bad Things Happen – by Harry Dolan

The Brighter the Light – by MaryEllen Taylor

Monogamy – by Sue Miller

Apples Never Fall – by Lianne Moriarty

AUGUST

The Not So Perfect Mother – by Kerry Fisher

Child of My Heart – by Alice McDermott

SEPTEMBER

The Lamplighters – by Emma Stonex

The Fire and the Ore – by Olivia Hawker (an excellent book!)

OCTOBER

The Last Thing He Told Me – by Laura Dave

Someone Knows – by Lisa Scotoline

The Memory of Us – by Camille Di Maio 

Excuse Me While I Disappear – by Laurie Notaro

NOVEMBER

Die Trying – by Lee Child

Lost and Found – ??

The Day I Ate Whatever I Wanted – by Elizabeth Berg 

The Year of Pleasures – by Elizabeth Berg 

The Making of Us – by Lisa Jewell

DECEMBER 

Five Winters – by Kitty Johnson

One Shot – by Lee Child


Moving into 2023 I look forward to loads of reading – what better way to spend an hour! If you have a favorite book to share, leave it in the comments. So many times I have found my next read from one of you!! Happy reading to all of you.