Category Archives: Sewing Clothing

Summer Sew Along – Day Two

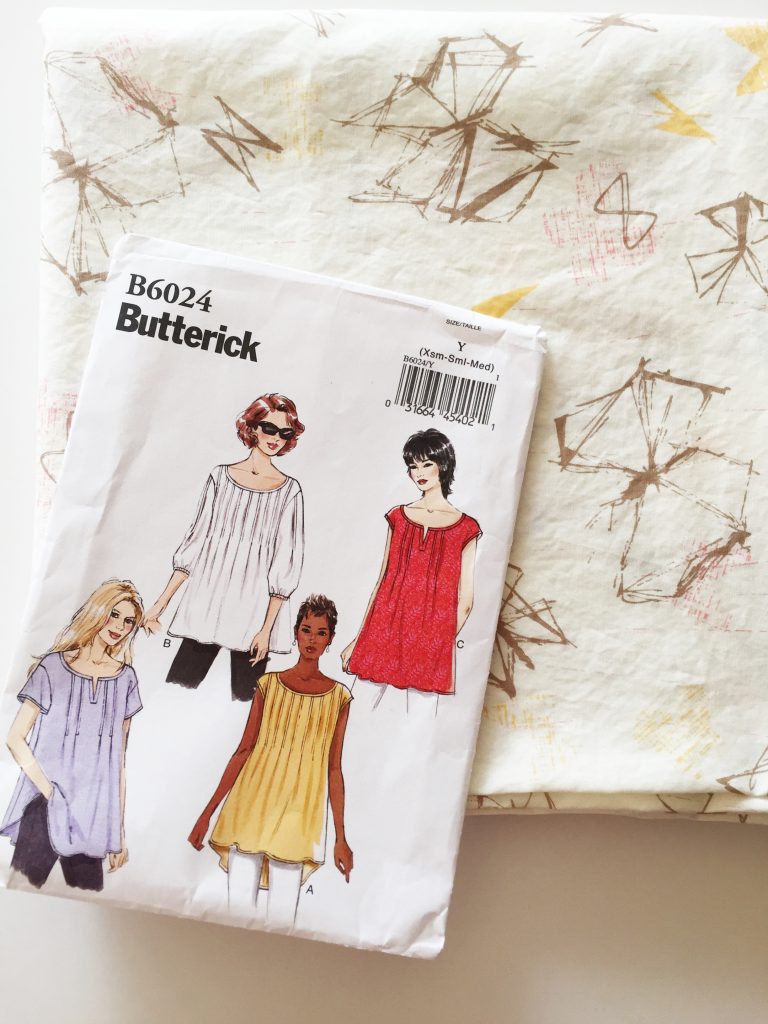
Hi Everyone!  Today we are going to  begin working on our shirt.  I am writing with the assumption that at this point in time, you have received your pattern (Butterick B6024) and have purchased your fabric. (Many thanks to the readers who purchased fabric at my shop!)  Your fabric should have been washed (in cool water) and dried in the drier to be sure any potential shrinkage has already happened. Ok – if you are still with me, let’s begin.  (If you haven’t gotten your supplies yet, don’t worry. You can still catch up. )

NOTE:  before doing anything else, I strongly suggest reading through the instruction sheet that comes with the pattern.  I am going to explain my process as we go through this but they are the professionals and it will help if you sit and read the instructions beginning to end. Then as we work through the pattern, it will likely make more sense to you. Be sure to read all the way through this post and then take your time. Be sure all of your pieces fit BEFORE you cut anything. I have to tell you this has bit me several times…..taking a quick glance and assuming the pieces will all fit properly does not work.  Take the time to lay everything out completely before cutting fabric. Once you begin cutting, it is pretty darn hard to change the layout of the pieces.

In the first post, I mentioned you need to take your measurements and buy the correct size pattern, according to the measurements described on the pattern.  Hopefully, you have done this and have the correct pattern in hand.  Next I want you to cut out the paper pieces that will be needed for this shirt. For View C we will use pieces 2, 3, 4, 6, and 7.

NOTE: Some readers have mentioned that they are making a variation such as using the front from version A or adding a sleeve.  I am not going to go into detail on variations as I think it will get confusing.  If you are veering off the path, so to speak, that is fine. If you get stuck or need some help, please email me or leave a message on our Facebook page. I am happy to help if needed!

As you cut the the paper pieces out, note the various sizes printed on the pattern. Make sure to cut them out with the largest size intact (cutting around that size) so you have the choice each of the sizes when you actually pin and cut your pieces.

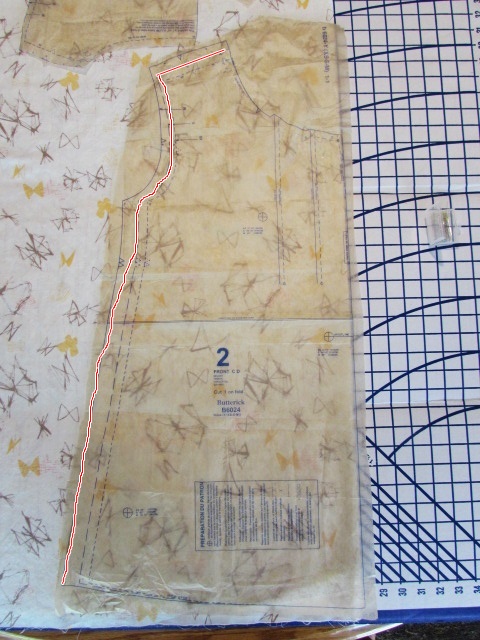
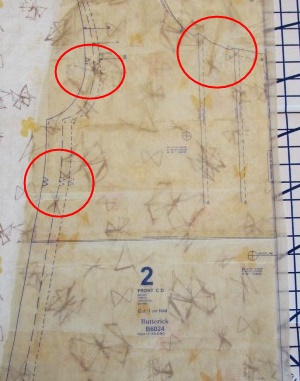
Once you have your paper pieces cut out, take the front piece and stand in front of a mirror. Hold the piece up to your torso with the shoulder seam line laying on top of your shoulder where it would be if sewn.  Press the tissue paper so the armhole goes across the front of your arm and the side seam tucks under and lays down your side.  The front of the top will look wide because we are going to make the pin tucks which will  reduce it.  But the shoulder seam and side seam should fall comfortably.  Check to see if it looks like it fits. Check the length. If it is too short or too long, we can adjust the pattern piece accordingly.  At the bottom, does it seem like the width is going to be comfortable?  The nice thing about patterns with multiple sizes printed on them is that you can cut part of the piece at one size and gradually work to another size, thus altering the shape as you need to.  For example, if your body is pear shaped, you might cut the top parts, the shoulder and armholes at a size small and then as you cut the side seam, you could gradually increase the cut as you go, until you reach the medium size line toward the bottom. I am by no means a graphic artist but I tried to illustrate what I am saying. (Hopefully your stitching line will be much straighter than my wiggly line!!)  Does this make sense?

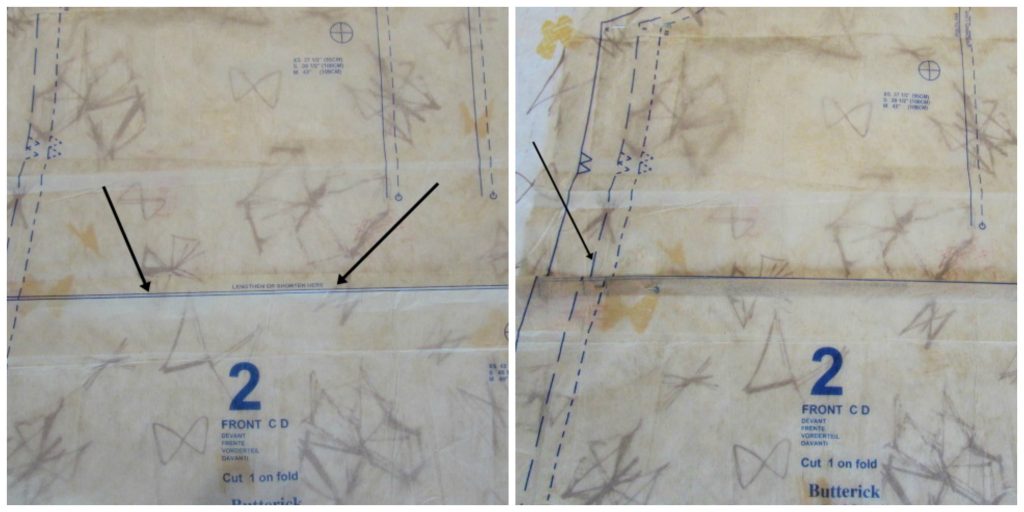
When I make a shirt or dress, I often have to adjust the length. I am just shy of 5′ 4″ tall and usually the pattern is a touch long for me. The length is a very easy adjustment. There is a line at the midpoint of both the front and back pieces.  If the pattern is too long for you, you just make a little fold at the line to shorten the piece. It is much more effective to shorten at the middle of the piece than to just cut it shorter at the bottom.  If you cut off the bottom, you might alter the way the piece drapes around the hip. Conversely, if you are tall and want the shirt to be longer, you would cut the piece at the mid-line and add length to the piece. This shirt is a fairly long one so it is not likely you’ll need to lengthen it. However, if you do, please message me and we can work through that together.

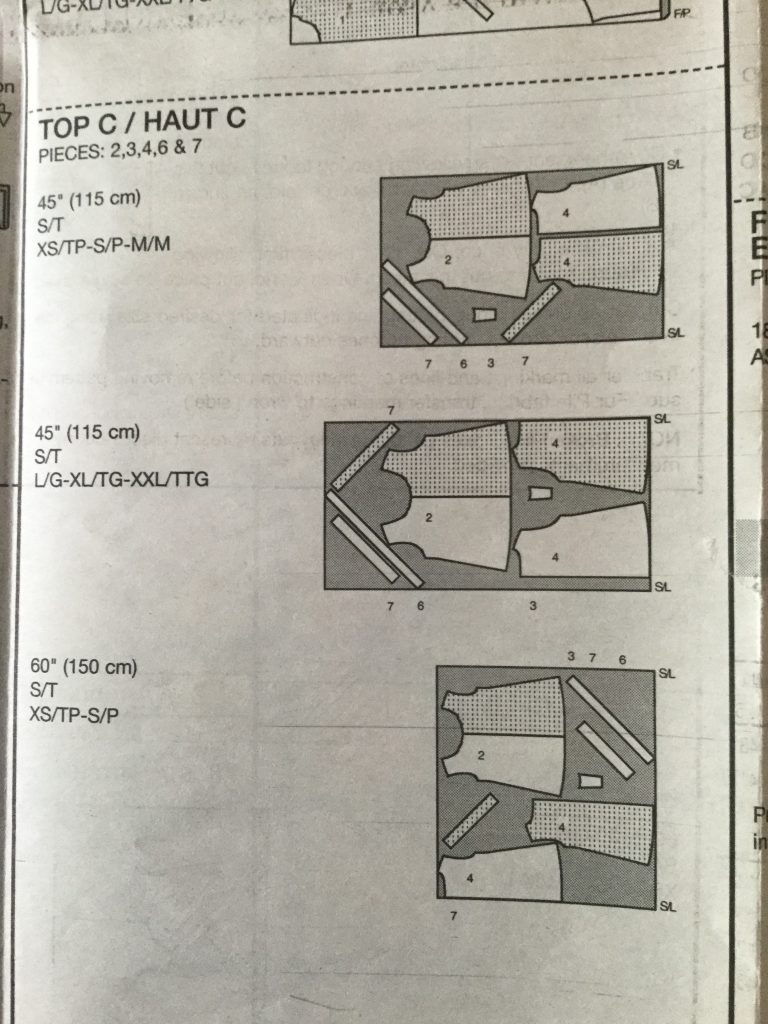
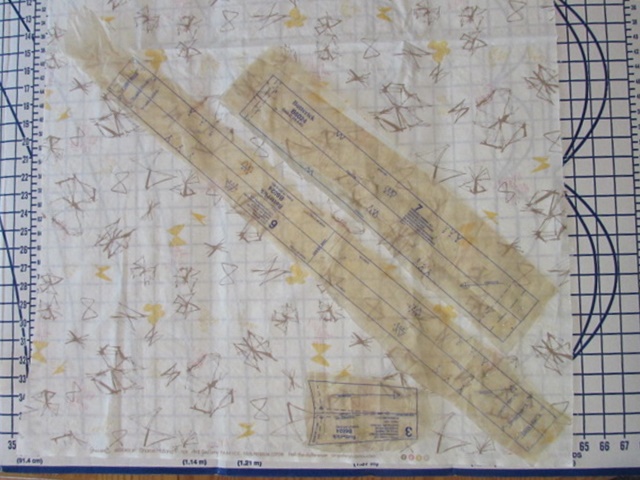
Each pattern always contains a suggested cutting layout. They are showing you how to fit all of the pattern pieces on the piece of fabric. In the photo below, you will see the layout instructions for view C, the shirt we are making. You will see it shows how to lay the pieces out on standard 44″ wide fabric and again for 60″ wide fabric.  Also, they show the layouts in each of the sizes too. Note the pieces are running parallel to the selvage edge.  Pattern pieces always have an arrow on them and that arrow must run in the same direction as the selvage of the fabric.  This ensures the grain of the fabric is going the right way.  If you don’t adhere to this, the fabric will not hang nicely.

The suggested layout in the picture shows the fabric being unfolded and the pieces being cut from a single thickness of the fabric. They are instructing the reader to lay the main pieces (number 2 and 4) down and then to flip it over and cut the second one.  Piece number 2 is the front of the shirt and must be cut as a single piece. So you would cut the one half, unpin the piece, flip it over, pin it and cut the other half.  This all works and you are welcome to lay your pieces exactly as the instructions show them.  I found this process a bit laborious.  Instead, I kept my fabric folded and simply laid piece 2 on the fold.

I pinned it with the center line running along the fold, because that keeps that helpful arrow running parallel to the selvage edge.

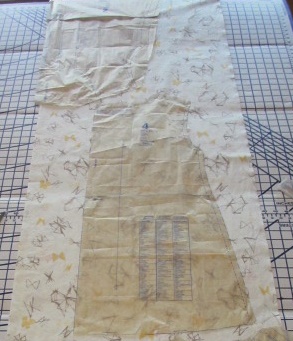
Piece number four is the back of the shirt. There is a seam running down the center of the back.  If possible, it is a good idea to take a look at both layers of your fabric. If you can fold the top and bottom so that the pattern matches, then when you stitch the center back seam, the pattern will match.  This isn’t absolutely necessary and if you have a print like mine, it is not very easily done. I chose not to worry about it.  If you have a very bold print and, if you don’t mind fussing with the fabric, you could try to lay the piece so that the print of the fabric will match. Piece number 4 is not laid on the fold but that long arrow must be parallel to the selvage. Lay the piece just below the front piece, placing it as close as you can allowing room to cut each one out. I placed it closer to the selvage edge than the fold edge. I wanted that folded section to remain whole to keep as a bigger scrap. (We are quilters, aren’t we?)

The above photo shows the basic layout I used.

NOTE:  From the pictures you have shared, I do not think anyone is using a directional print. However, if you are – be sure to lay your front and back pieces so that they run in the correct direction. They should both lay in the same direction so the print runs correctly on both front and back. Similar to when we are quilting, make sure the pieces are cut such that the direction goes the same way on both  the front and back!

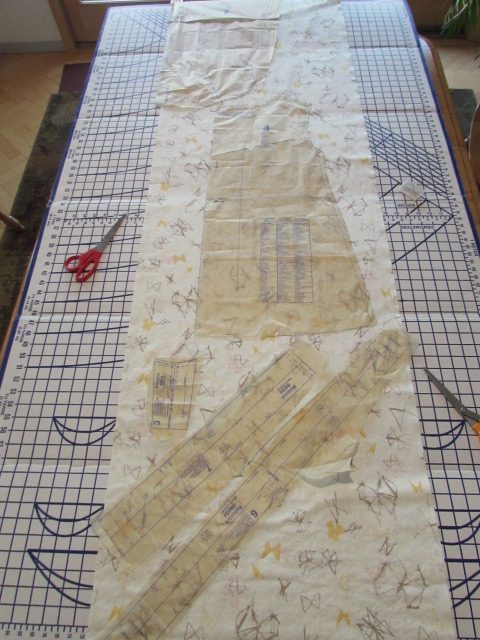
Once I verified all of my pieces fit and figured out what size and length I would be cutting, I pinned the front and back pieces (2 & 4) and cut them out.  After they were cut, I opened the remaining piece and pinned the last three pieces. The final three pieces are simple.  Piece 6 is the neck binding and piece 7 is the armhole binding.  Since they will be used on curves, they must be cut on the bias. Look at the arrows and keep that arrow parallel to the selvage.  Because we only need one neck binding piece, cut it on a single thickness of fabric.

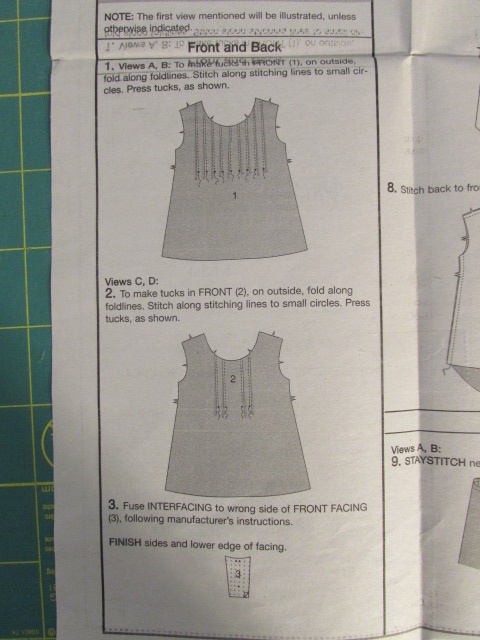
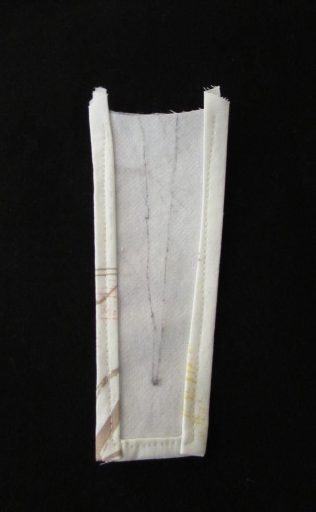
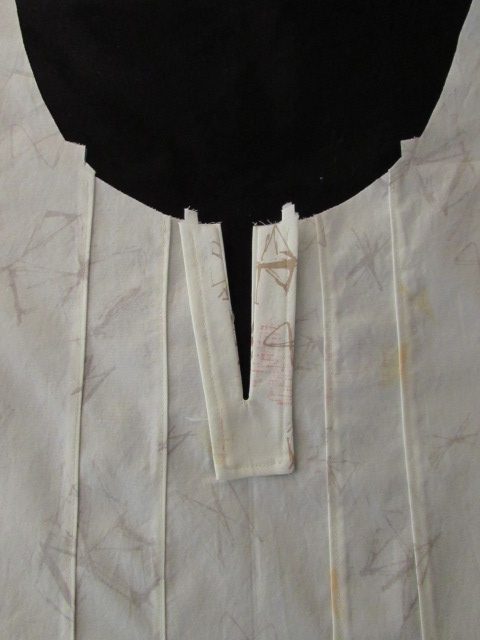
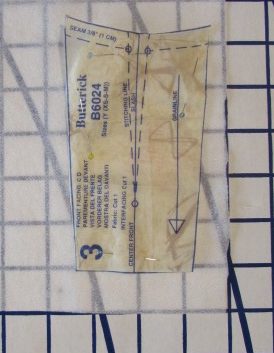
In the picture above, you can see the selvage runs along the bottom of the photo. Pieces 6 and 7 are placed on the bias.  You will need to cut a second sleeve binding piece.  After you cut the first one, take that piece and flip it over (upside down) and cut the second one. You need to cut one with the pattern piece right side up and the other with the pattern piece right side down. The last piece you see is number three. This is the little piece we will use to finish the little slit at the center of the neck line. We only need one of these so cut it on the single thickness with our trusty arrow aligned with the selvage.

If this is your first time cutting out a pattern, you might wonder what the little notches are that are placed on the edges of the pieces in various places. You will cut the notches out and use them when you place your pieces together and pin them before sewing. The notches will be matched up and it helps you with the placement of the pieces.

I always cut the notches pointing outward so they are not within the seam allowance. These notches can be cut into the seam allowance – the same way they are pointing on the piece, however I don’t suggest this. There are times when you want the seam allowance intact in case you need to alter the size (by sewing a smaller seam to make that area larger). If you cut into the seam allowance you will not have the option to enlarge the seam if needed.

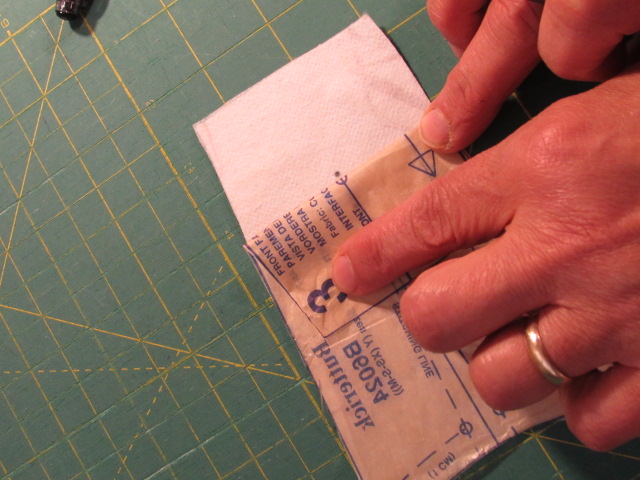
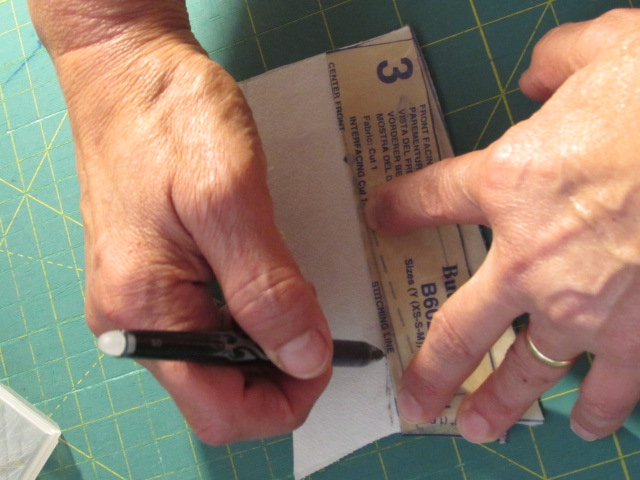
The last step in cutting out the pieces is to cut a piece of interfacing to back piece number three. It is silly that the pattern says to buy a 1/4 yard of interfacing when really you need about a 6 x 6 inch square. I guess 1/4 yard is the minimum that many shops will cut?  Anyway, now you have extra for the next project!

Look at the stack of leftover fabric!  Hmmm…. what could I possibly do with all these scraps?!

Whew — That was a whole lot of reading for what is actually a simple process. I hope I didn’t confuse you!! Because this is my first time hosting a sew along, I would love feedback on these posts. Too much detail?  Too little detail? Is any part of this confusing? Please leave your thoughts in the comments so I can adjust things as we go. It will really help me to learn how these steps should be written.

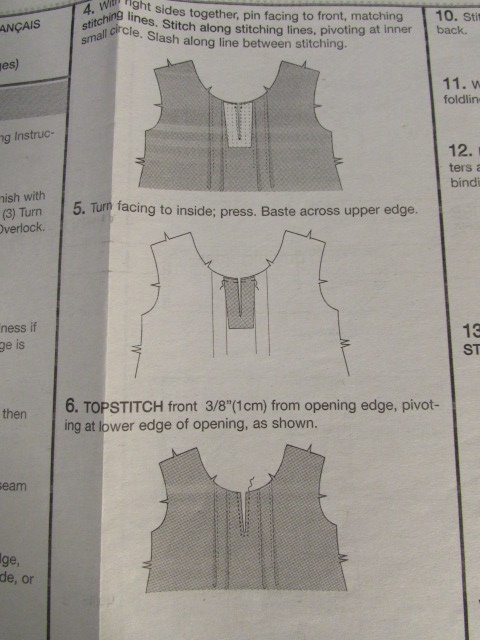
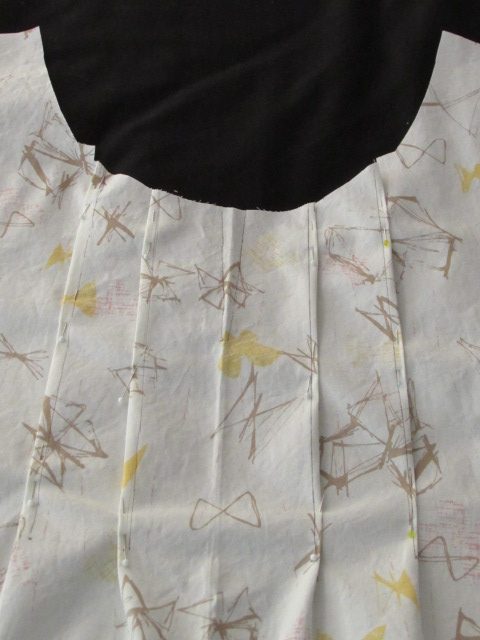
If you need any help with this, please don’t be shy. I want to help you be successful with this and it is a bit different from quilting so there are no silly questions. Have you joined the Facebook group yet? If so, please remember to post pictures of your progress there, offer suggestions or tips to others, or answer any questions that may come up – let’s help each other out. If you are not a Facebook participant, you can also post progress photos on Instagram. Tag me @needleandfoot and use the hashtag #NFsummersewalong.  Be sure to come back on June 19th for the next post. We will be working on the detailing of the front of the shirt (the pintucks and the slit at the neckline).

**If you haven’t yet signed up, I would love to have you sign up for my newsletter. Sent monthly, it contains updates about new fabrics I have in the shop and promotions that will run that month for newsletter readers. Sign up form is on the right side of your screen, toward the top.

Summer Sew Along

I am both excited and somewhat anxious to begin our summer sew along!!  It was the beginning of April when I posted a finish where I made a blouse using a Butterick pattern, B6024. It was a very simple pattern and several readers commented they would like to be able to sew a blouse. I thought about it and decided I would host a sew along where we could make a blouse together. This is the first time I have attempted a sew along, hence the bit of anxiousness. I have been sewing for a very long time, more than 40 years. However, I haven’t taught classes either in person or on-line. So it is with that bit of a disclaimer, I welcome you to sew along with me.
And sew it begins! Today we will talk about pattern and fabric selection as well as necessary supplies or notions.
When I began to plan the sew along, I looked at so many different, simple blouse patterns.  A few readers sent me ideas of blouses that would be fun to make. But the more I looked, the more I came back to this pattern.  Some of the suggested patterns were indie designer patterns that were really cute. However most of them were pdf patterns which means we would have a an additional learning curve. Downloading, printing and assembling pdf patterns can be a bit confusing. The patterns print on A4 (regular size) printer paper and then must be taped together and cut into the pieces.  It isn’t terribly difficult but I thought for the first time it would be simpler to go with a pattern that is available and printed on regular tissue pattern paper. Thus I selected Butterick pattern, B6024.

This pattern is widely available.  I found it in several Etsy shops for a great price as well as on Ebay. If you shop at Jo-Ann Fabric, they carry it as well. Lastly, it is also available directly from Butterick but it is a bit more expensive there.

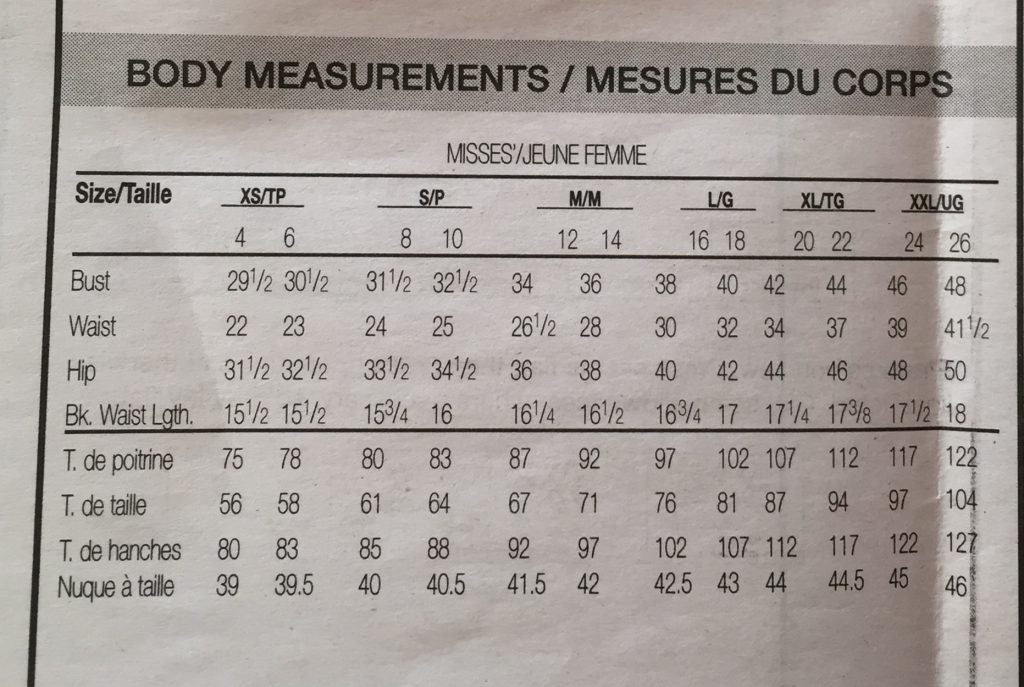
Measurements for pattern B6024

Before ordering your pattern, you must determine the correct size.  Pattern sizes correlate only somewhat to ready to wear clothing sizes.  It is really important you take your measurements and order the size based on your measurements.  If you normally wear a size 10, don’t just automatically assume that is your size when sewing clothing.  Luckily, this pattern (like most patterns) comes to you with multiple sizes available in the one envelope. You will buy it with either XS, Small and Medium combined or with Large, XL and XXL combined and printed on the one pattern. For this particular pattern, you need only be concerned with the bust measurement and hip measurement. It is not a fitted blouse so the waist measurement doesn’t come into play. I will say this patterns runs a teensy bit on the large side. I think that is because of the loose fitting design.

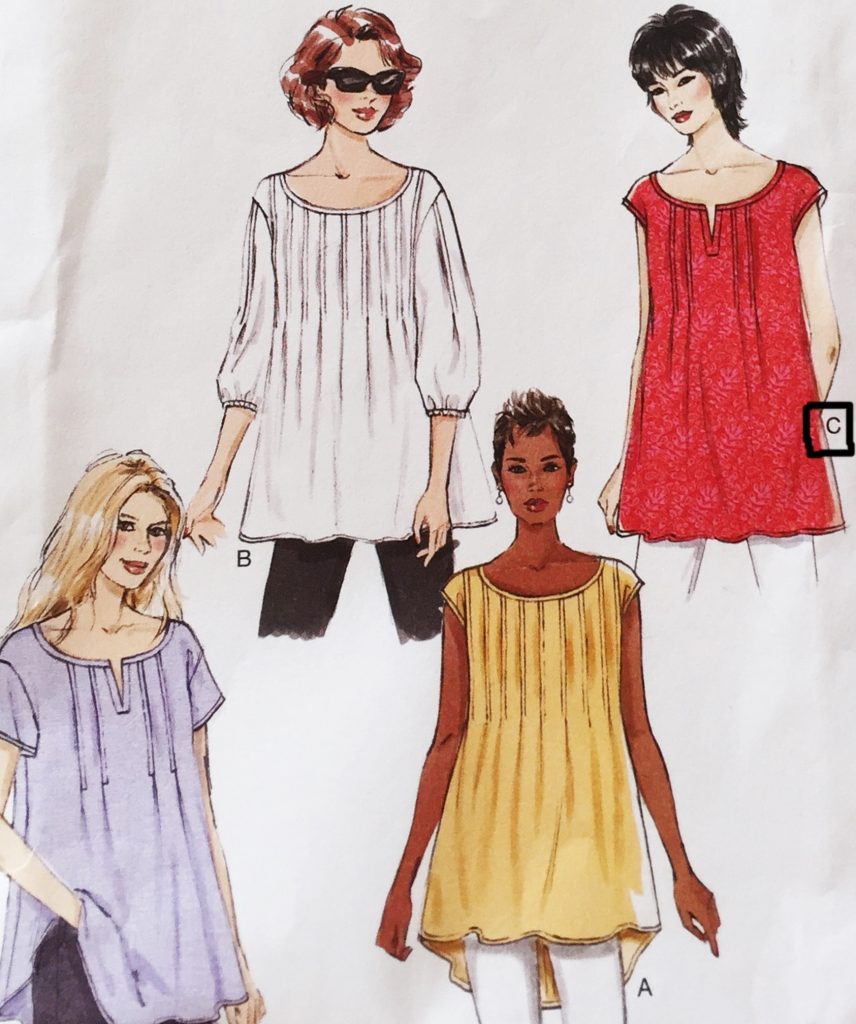
The forgiving fit of this blouse is another reason I selected it.  We will be making view C which has a bit of a cap sleeve (really just an extended shoulder) and two pin tucks on either side of the neckline opening. I also chose view C because the hemline is straight. We won’t have to deal with hemming a curved hem. This loose fitting blouse pattern should make for a good beginner sewing experience.

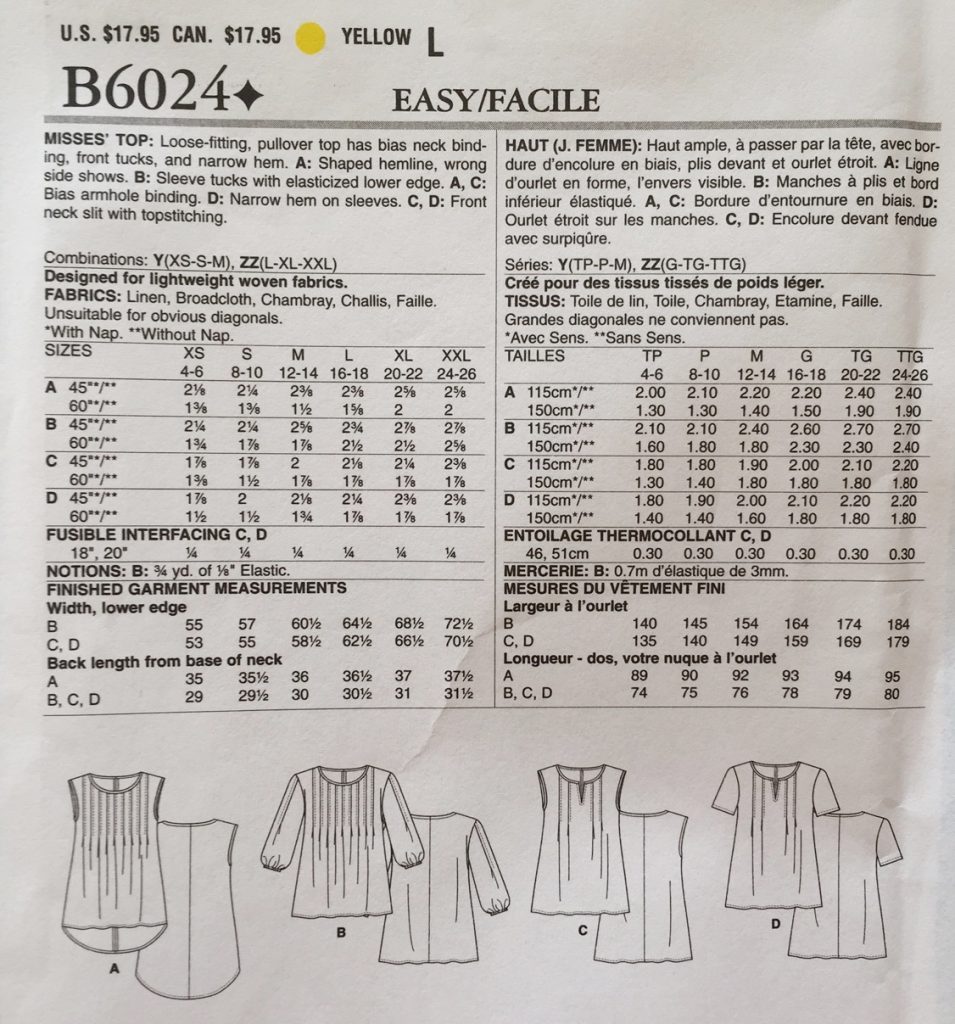
Now that we have selected the pattern, let’s look at fabric choices. You will see the yardage requirements on the back of the pattern envelope. This pattern suggests using lightweight cotton fabrics. These are fabrics such as chambrays, voiles, or rayon.  Most quilting cottons are not considered to be light weight. The exception here would be Art Gallery Fabric.  Art Gallery has a much silkier feel to it than other quilting cottons which allows for more drape.  I have already made this blouse once with Art Gallery Fabric (the Diaphanous Sand fabric from the Gossamer line.)  It is comfortable and hangs nicely. I do usually touch it up with the iron when I wash it though. There are so many fabrics available, both on-line and in the big box stores.  While I am not going to go into detail on each of the types of lightweight cottons, I will say that sometimes the voiles and rayons can be a bit slippery to sew with. Just keep that in mind and use lots of pins.  Chambrays and Art Gallery cottons are a bit easier to use.

To determine how much fabric you need, just look at the chart above.  You will purchase the amount for View C listed under the size pattern you are using.  The fabric you choose will either be 45″ or 60″ wide (some of the chambrays and voiles are wider fabrics than regular cottons). For example, if you are making view C in a size Large, you need either 2 and 7/8 yards of 45″ wide fabric or 2 and 1/2 yards of 60″ fabric.

Once you have your fabric be sure to prewash it according to the manufacturer’s instructions.  Most likely you will wash on a gentle cycle with cold water and dry it on low heat. It is a fairly certain bet that a cotton fabric will have some slight shrinkage. You want to have the shrinking occur BEFORE you cut out your pieces. Otherwise, once you sew the blouse and wash it, it may shrink and then not fit as well afterward.

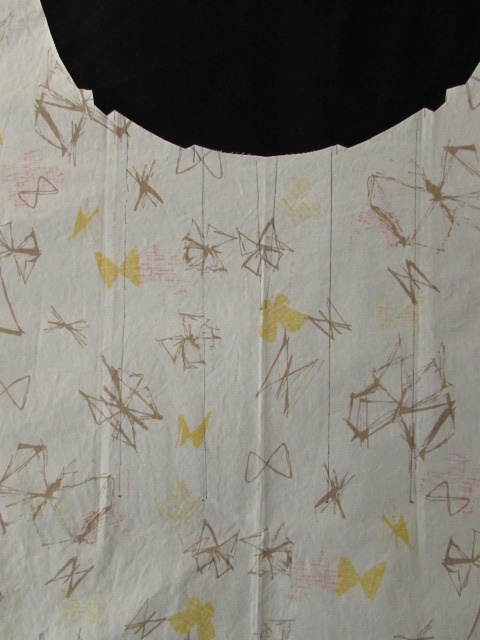
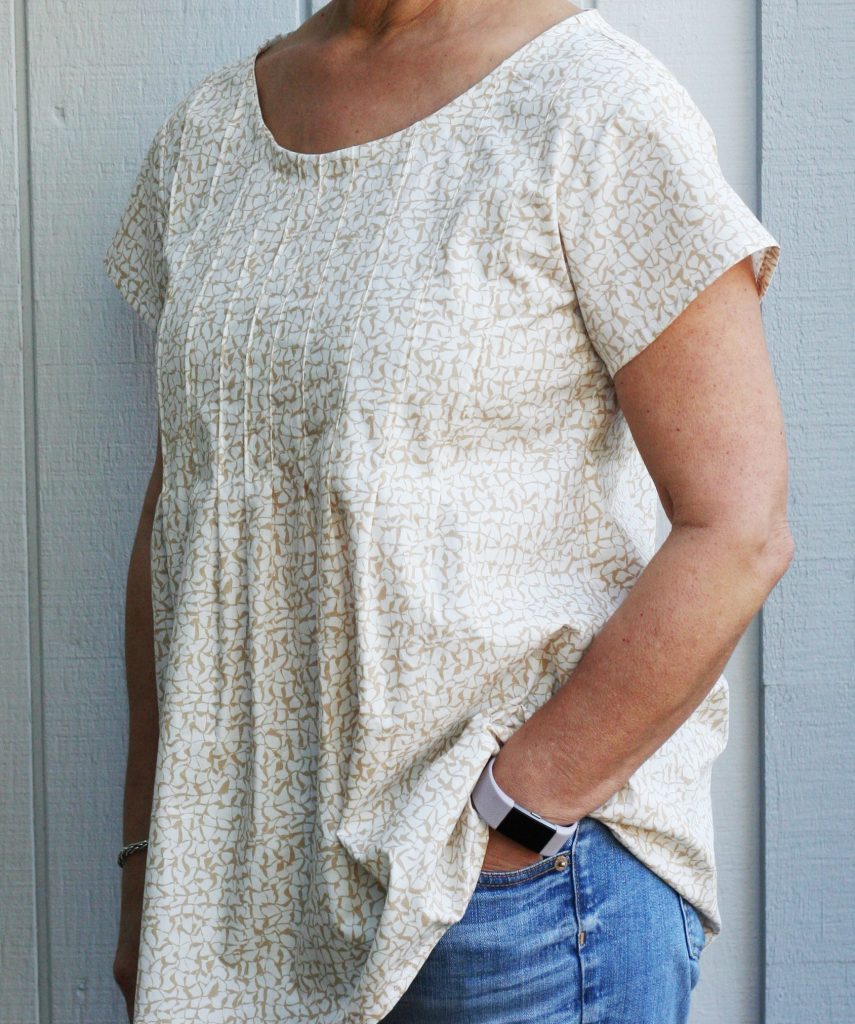
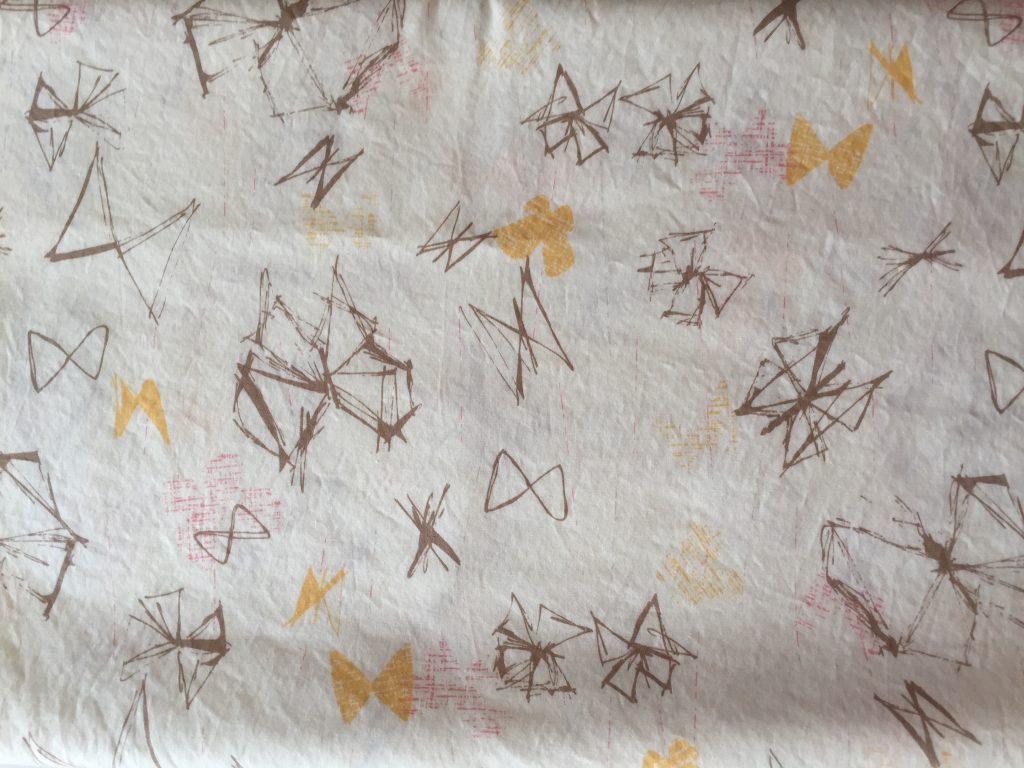
I plan to use this pretty fabric from the Gossamer line.  It is called Filaments Ethereal. I measured the piece and then prewashed it.  It had about 3/8″ shrinkage. The pictures show the fabric as it came out of the dryer. Wrinkled but not terribly so.

As I said earlier, this blouse is a simple one. Therefore, not a lot of supplies are required.  Here is the list of supplies needed for our sew along:

  • Lightweight cotton fabric
  • Butterick pattern B6024
  • 1/4 yard of 18″-20″ wide light weight fusible interfacing
  • Basic sewing machine with straight stitch and zig-zag capability
  • Soft measuring tape (to take your physical measurements
  • Smaller clear ruler (the smallest of your quilting rulers will be fine)
  • Scissors, thread and hand sewing needle

The project will be broken down as follows.

  1. June 6: Fabric and Pattern selection (you are here!)
  2. June 16: Laying out your pattern and cutting the pieces
  3. June 19: Begin sewing – the front piece details (pin tucks & neck slit)
  4. June 22: Shoulder, back and side seams.  Seam finishing lesson.
  5. June 26: Finishing details, including neckline and sleeve finishing as well as the hem.
  6. June 30: Link up our finishes from blog posts or Instagram photos.

All of the posts will live here on the blog. If this isn’t a good time for you to join in, you can always work through the blouse on your own timeline. Comments and questions along the way are encouraged. There is no question too simple. I plan to write the posts assuming the reader has very little sewing experience. This way I will cover the details.  If you have sewn garments before, it may seem simplistic but I want to be sure a reader new to sewing will be successful.

I set up a closed group on Facebook called Needle & Foot Sew Along.  I would love it if you joined in.  Let’s all post progress pictures and any questions we might have.  Also, please help each other. If you have a suggestion or an answer to someone’s question, feel free to post them. The group is a closed group so you will need to click on join and I will approve you. Others will not be able to see our posts. I want to respect your privacy.

If you have a blog and want to grab the button for your sidebar, it is available! Let me know and I will send you the HTML code.

Finally, for participants of this sew along, I would love to offer you a discount on the Art Gallery Fabrics I carry in my shop.  Use coupon code SEWALONG15 for a 15% discount.  The coupon code will expire on Sunday, June 11th. I want to be sure you get your fabric ordered (whether from me or someone else) so that everyone has fabric and pattern ready to go by Friday, June 16th.

Here is the homework that needs to be completed before the next post on June 16th.

  1. Order your pattern
  2. Purchase your fabric and interfacing
  3. Prewash your fabric

Leave any questions or concerns in the comments. Have fun selecting your fabric!!  See you back here on Friday, June 16th! 🙂

How to Create a Simple Pattern from a Garment

I want to share a quick project that I did last week. It isn’t a full-fledged tutorial, but I did take some pictures to give you an idea of how I went about making a new nightgown by tracing my old one.

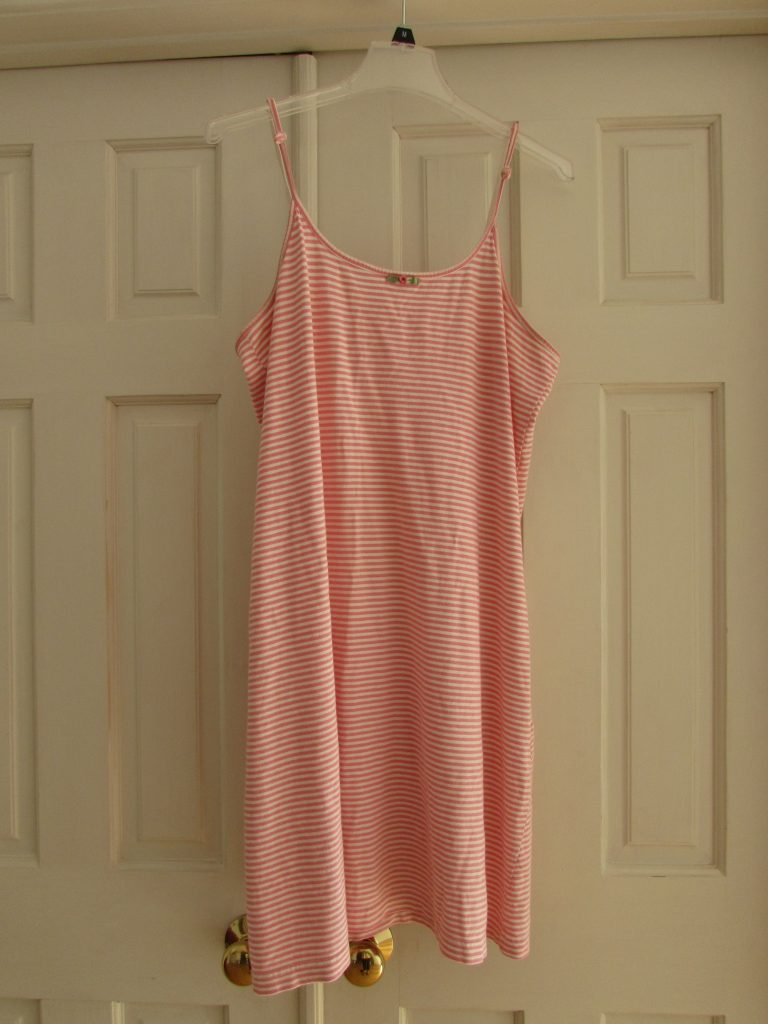
I have a favorite nightgown that I bought some time ago at a very, very expensive store. You might have heard of it, Target?? I have worn it for at least four or five summers and it is worse than ragged. It is the kind of nightgown that I would be afraid to wear in a hotel because if there was a fire in the middle of the night and I had to run to the parking lot in my pajamas, it would be a very embarrassing experience.  See…. it is awful.

IMG_6266

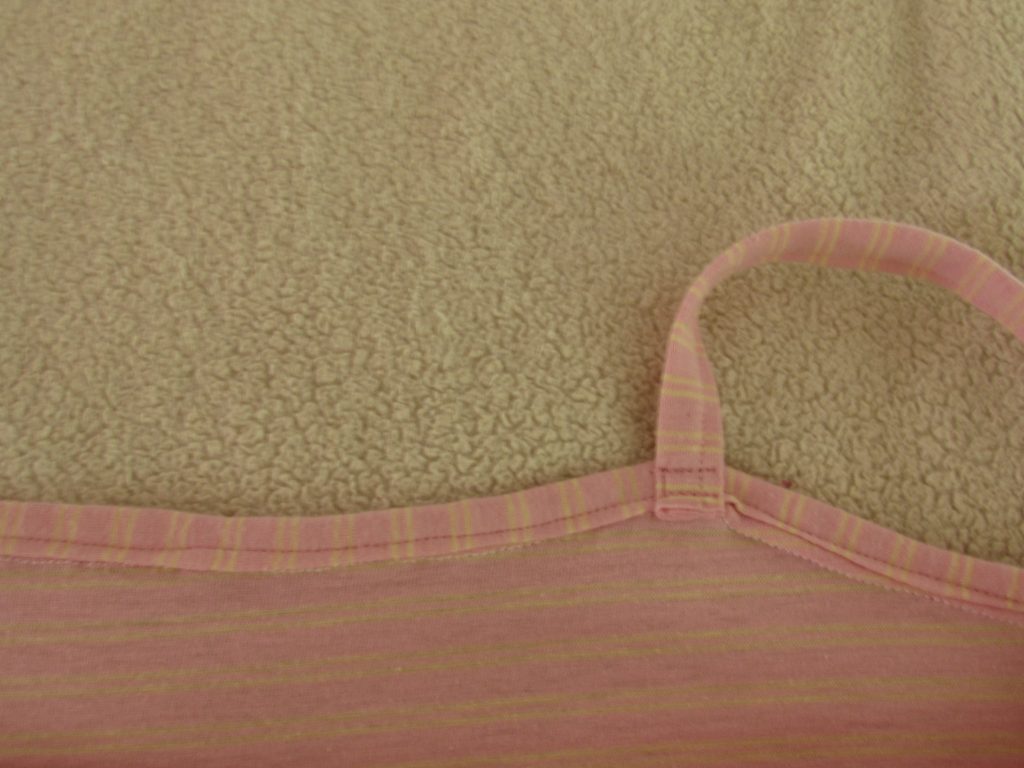
If you look carefully, you can see that I had to tie little knots in the straps because they were so stretched out that it became a bit indecent. (I kind of can’t believe I am showing my worn out pj’s but it’s all for the greater good, right?) Anyway, I really liked this nightgown because it was so comfy.

Several weeks ago, I found a piece of lightweight knit at the fabric/thrift store in our town. It was a bargain. Maybe 2.5 yards long and 60″ wide so I knew I could get a nightgown out of it and, if I screwed up the pattern, I would probably have enough to try again.

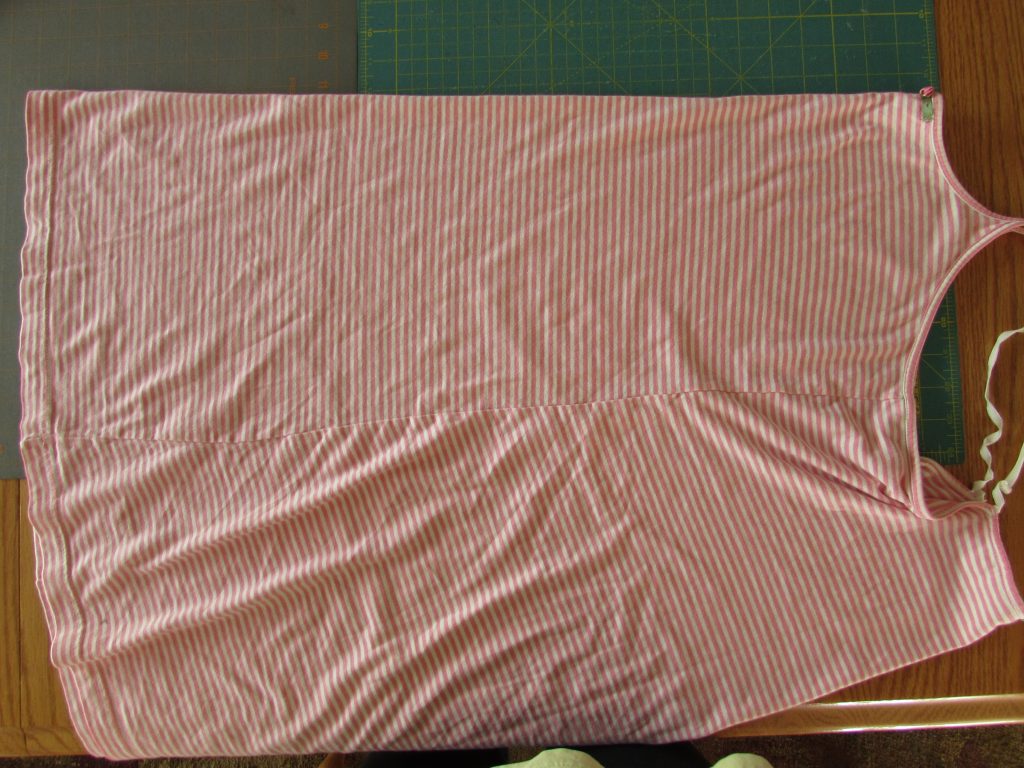
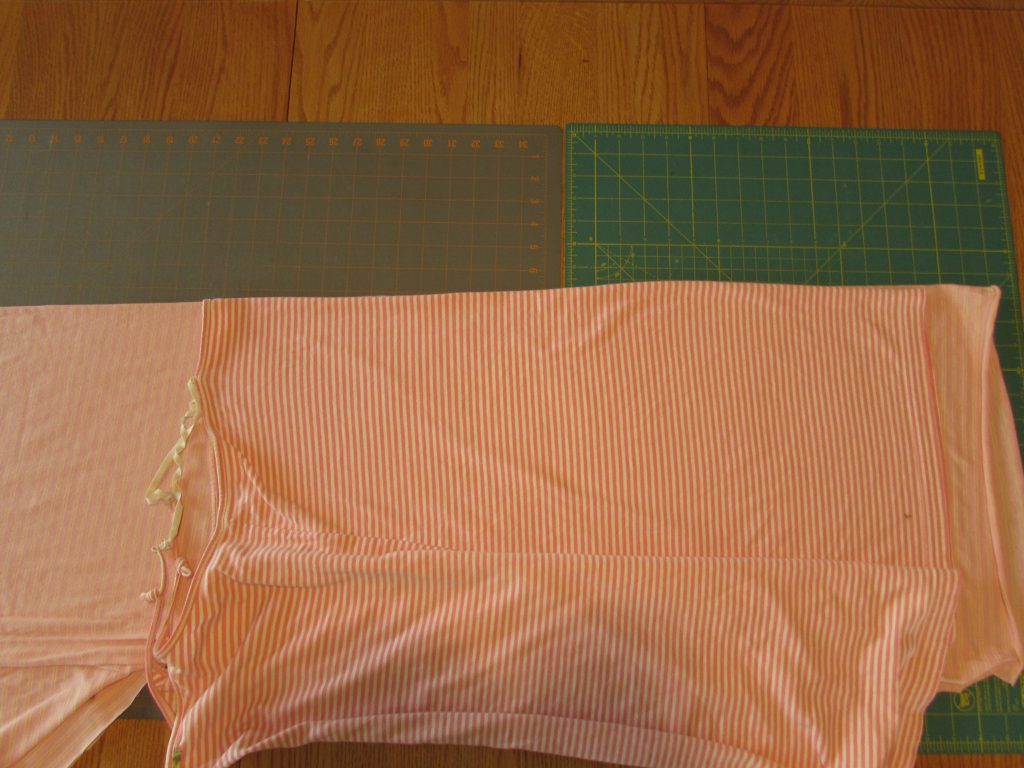
What I did was basically fold the existing nightgown and trace the front and back sections on to the new fabric. The hardest part of this was that the new fabric is basically the same as the original and it was kind of hard to see (and worse to photograph) what I was doing. Also, the old nightgown was worn and the fabric stretched, making it difficult to work with.

IMG_6267

For the front piece, I folded the front of the nightgown, wrong sides together, exactly in half (as close to exact as one can fold an old, stretched out piece of knit fabric.)

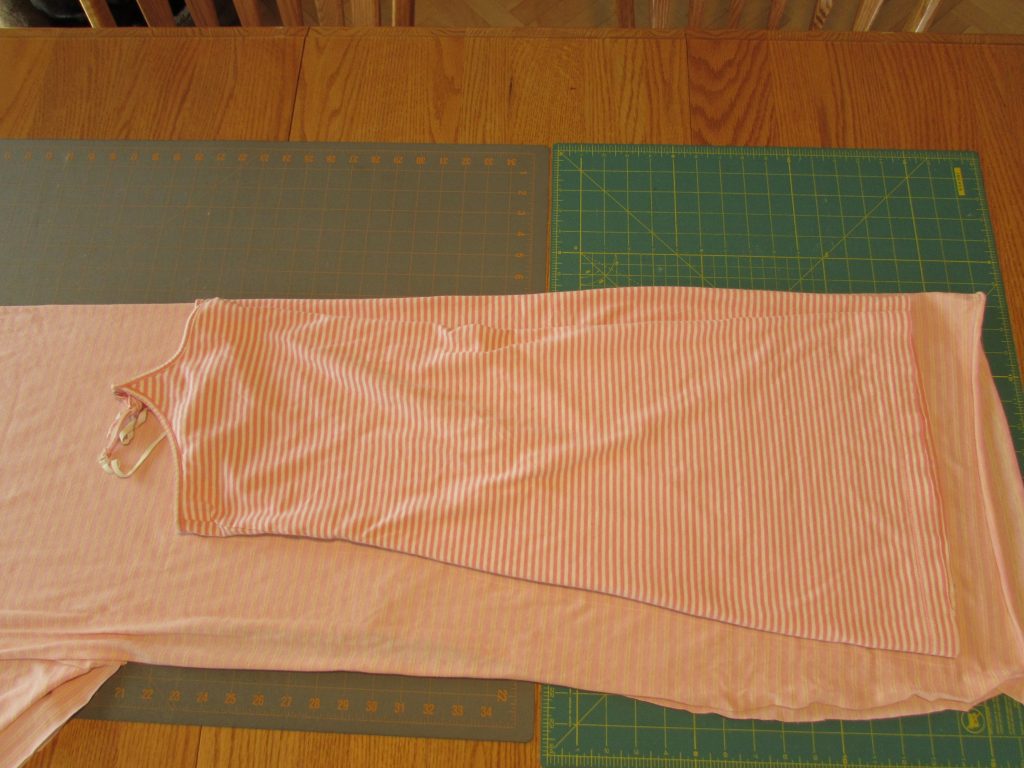
IMG_6268Then I laid out the new fabric. (See how close the colors are?) A quick aside to explain something; when I cut lengths fabric, I use the dining room table. I put my largest cutting mats down end to end first, so I don’t scratch anything. It also gives me the choice of using scissors or a rotary cutter.  Ok – next, I placed the folded nightgown along the folded edge of the fabric and I traced it with a Clover Chaco-Liner pen. It was tricky because I only have white chalk markers and it was very hard to see on the pale pink. Once I traced it, I used scissors to cut it out.

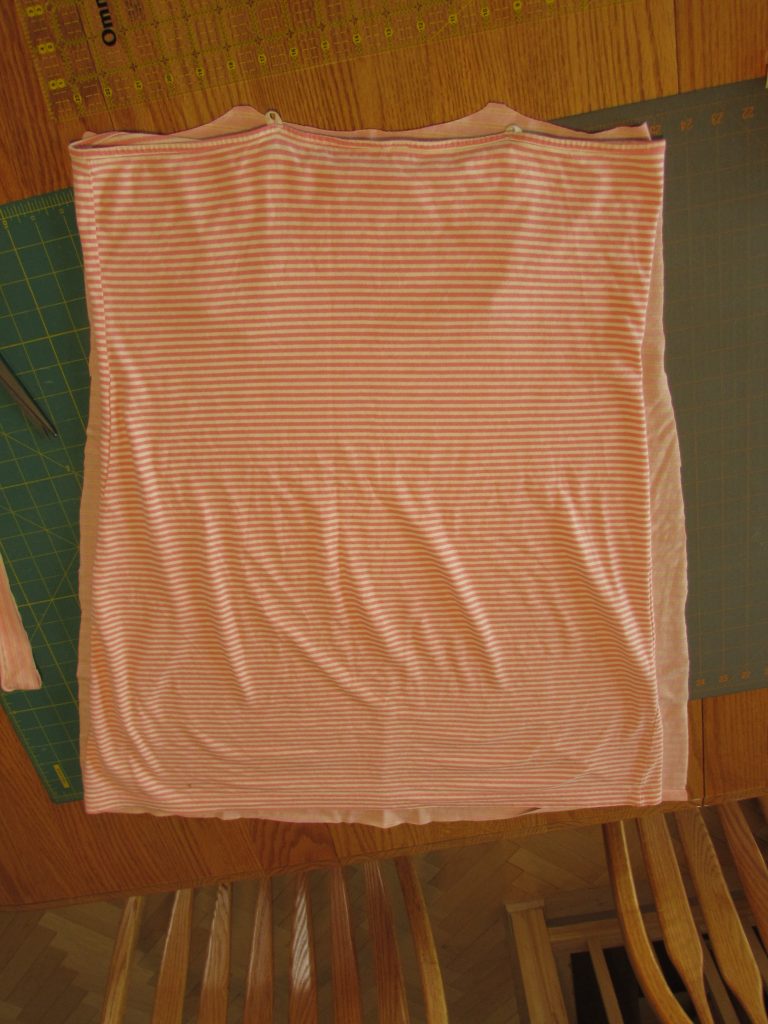
IMG_6269I repeated the same steps for the back of the nightgown. Once it was cut out, I opened the pieces and placed them on top of the existing nightgown to see if they were cut to the right shape and size.

IMG_6270

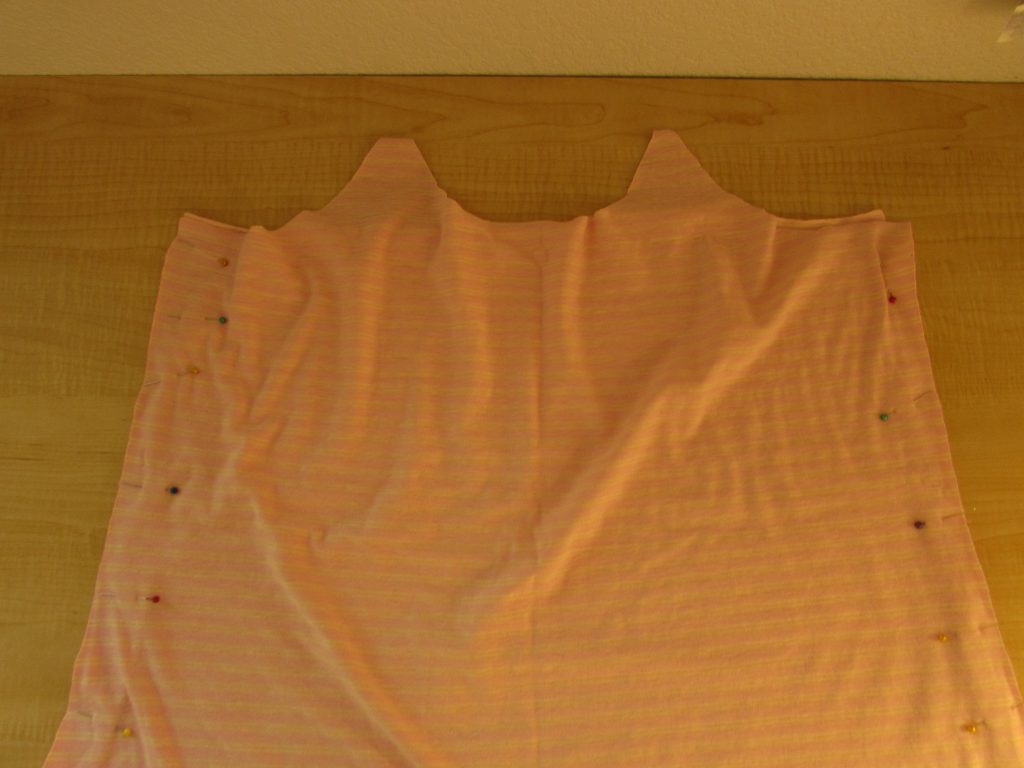
I know it is hard to see but if you look, you’ll notice that the new piece (underneath the old nightgown) is too wide. So I had to do some trimming. After that it was so quick. I pinned front to back, right sides together, and matching the stripes as best I could.

IMG_6274

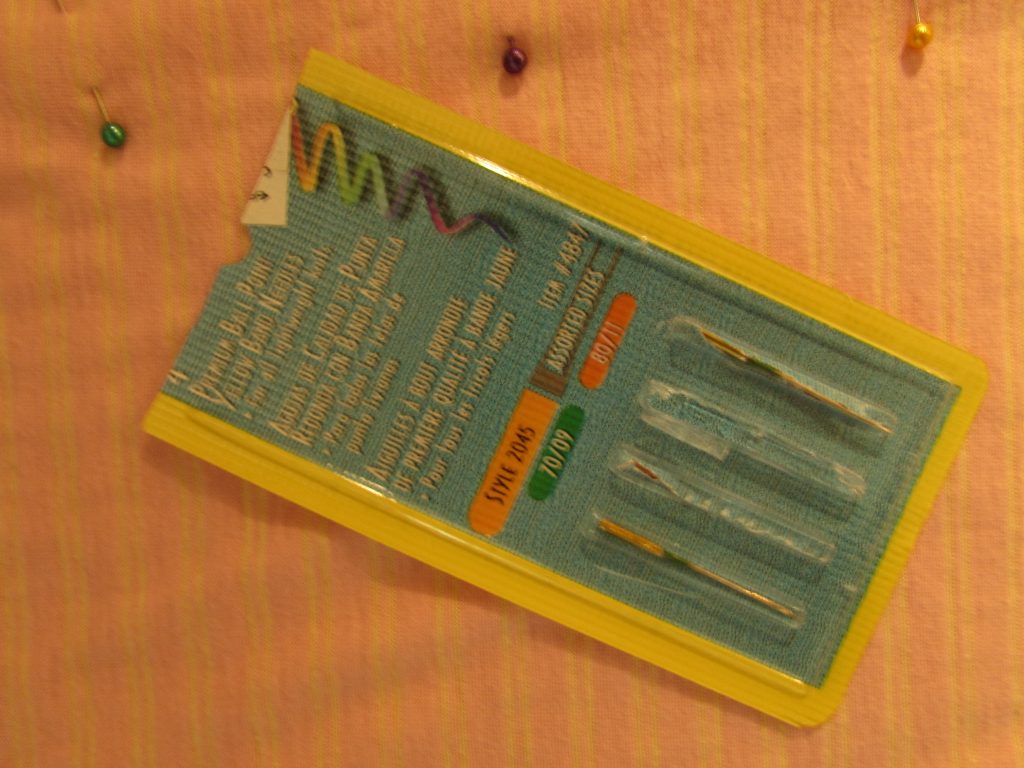
If you aren’t experienced with knit fabrics, you need to know that sewing on knits requires a ballpoint needle. They work best with knits and you won’t experience those annoying skipped stitches that often happen if you sew knits with sharps.

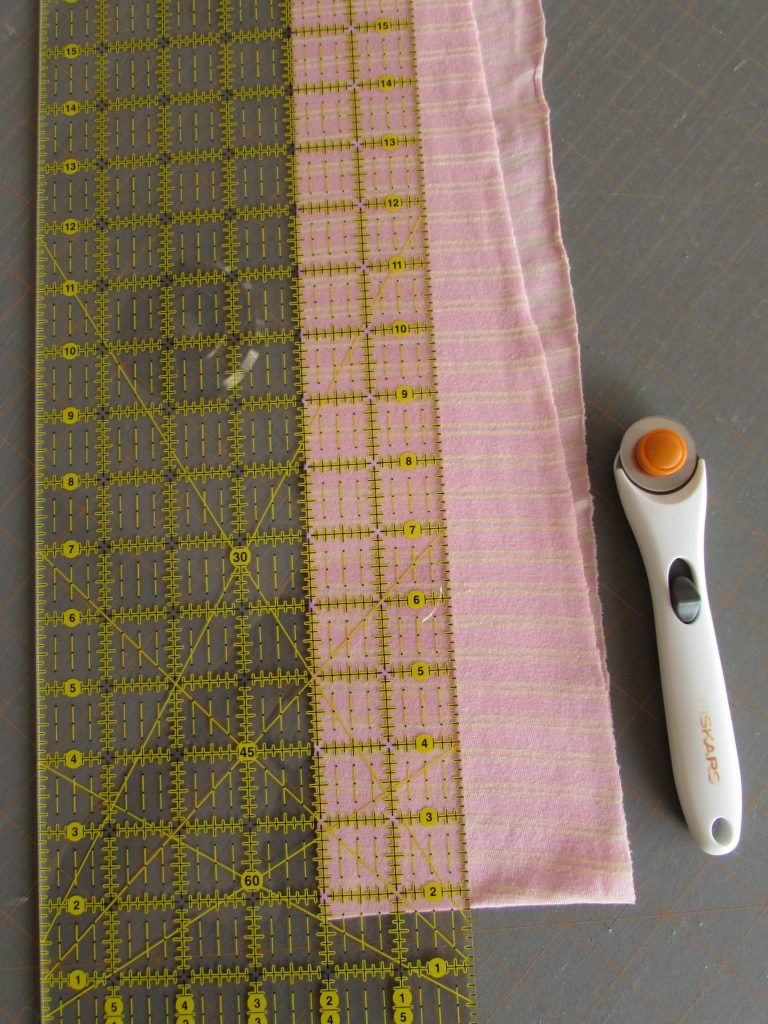
IMG_6275Once the front and back were sewn together, I cut some strips to use to finish the neckline and armhole edges and create straps. Knit fabrics when cut, curl at the edges but a quick spray with some spray starch and a little pressing took care of that. I cut two inch strips. Then I folded one long edge over 1/2″ and pressed it.

IMG_6276

Stitching the facing strips (right sides together) to the neckline was quick. I started at the outer edge on the front, continued along the underarm edge, across the back and along the other underarm, stopping at the other edge of the front of the neckline. (This means I finished both armholes and the back of the neckline.) After pressing the seam, I folded it over, to the inside, and pressed under the raw edge. Finally, I top-stitched the whole length. For whatever reason, I failed to take any pictures of this part of the process. The straps were formed by taking a long piece and pressing it like I did the first piece. It was used to face the front neckline and it continued beyond the neckline to make straps.

IMG_6295

Once that was all top-stitched, I stitched the straps to the outer edges of the neckline on the back. Does that even make sense?? It would if I had taken pictures, darn it.

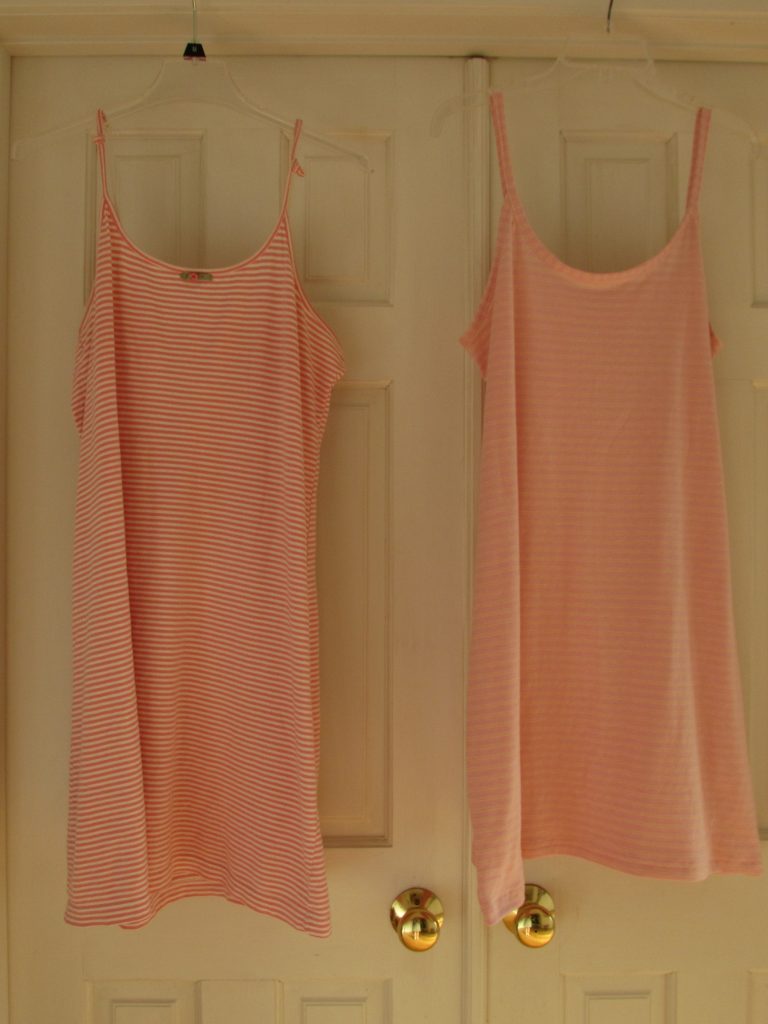
Here is the final result alongside the original. Not bad, right?

IMG_6285

I think it is kind of funny that the fabrics are so similar. That wasn’t intended but the fabric was a great price and the knit felt really nice.
This is the first time I have attempted to use an existing garment as a pattern. It worked well but as always, I learned a few things. The next time I do this I will:

  1. Trace the garment on paper for use as a pattern. That way, I will be able to check the size and proportion before I have cut any fabric. As an added bonus, if the results are good, I have the paper pattern to use again and again.
  2. For this garment, I would have made the bias strips for facing it a bit narrower. The resulting  neckline finish is a bit wider than I like.

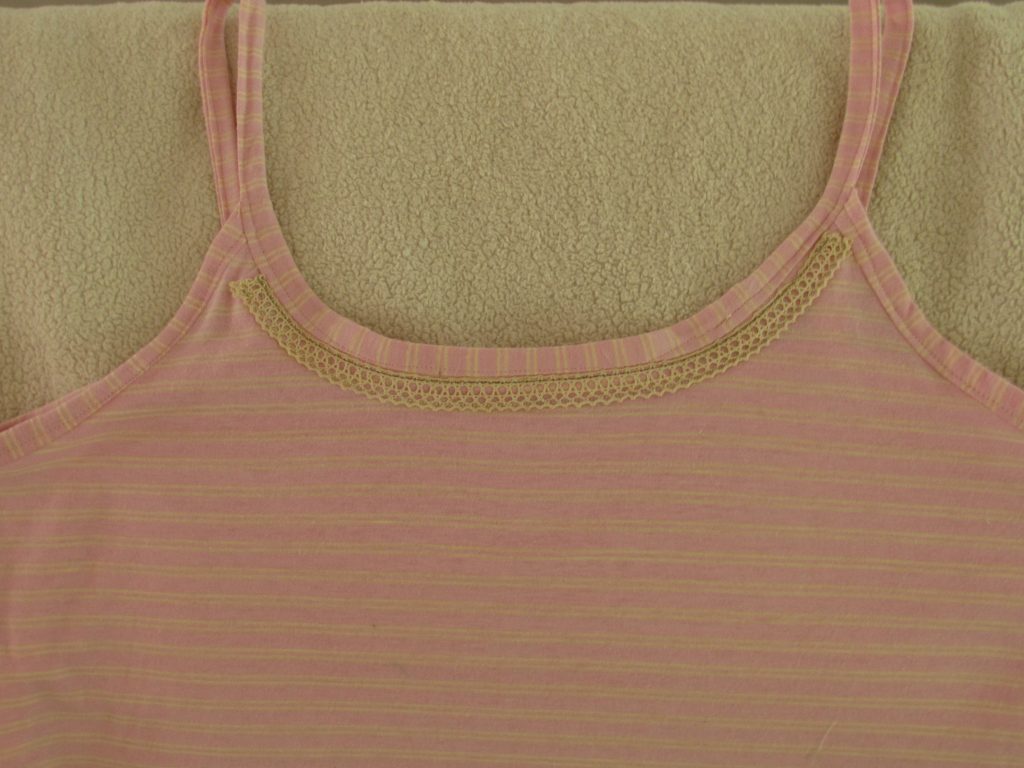
Update:  Once I had the nightgown finished, I decided to add a bit of trim to the neckline to give it some shape. The cotton lace  trim is not a knit so it acts to prevent any stretch at the neck. I like the look of it but of course, if I had added it before facing the neck, it would have a more finished look.

IMG_6293

Another source of instruction on cutting a pattern from a garment is this video produced by Muv at Lizzielenard-vintagesewing.com.  It is really helpful and gave me a good start. I look forward to giving this another try!


Linking to lots of fun places. Check them out at the top of the page, under Link Ups.

Taming the Yellow Beast

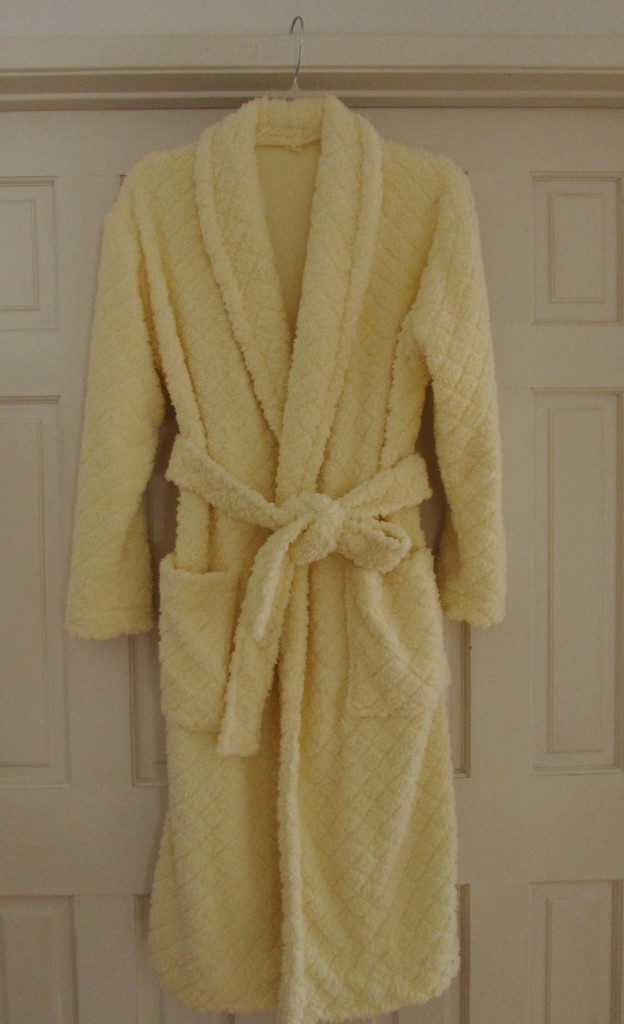
The beast has been tamed. The pile of oversized yellow fluff has been transformed into a cozy bathrobe at last.  I received so much encouragement after that last post that I decided to dive back in and take control of that yellow monster.

It was easy!

First I took a bit of time with the seam ripper and picked out the hem on both sleeves. Turning it inside out, I laid it on the floor and carefully smoothed it out. I pinned two inches or so along the inside of the length of the side seams and the seam of the sleeve. Then I just cut – cut off the two inches along each side.

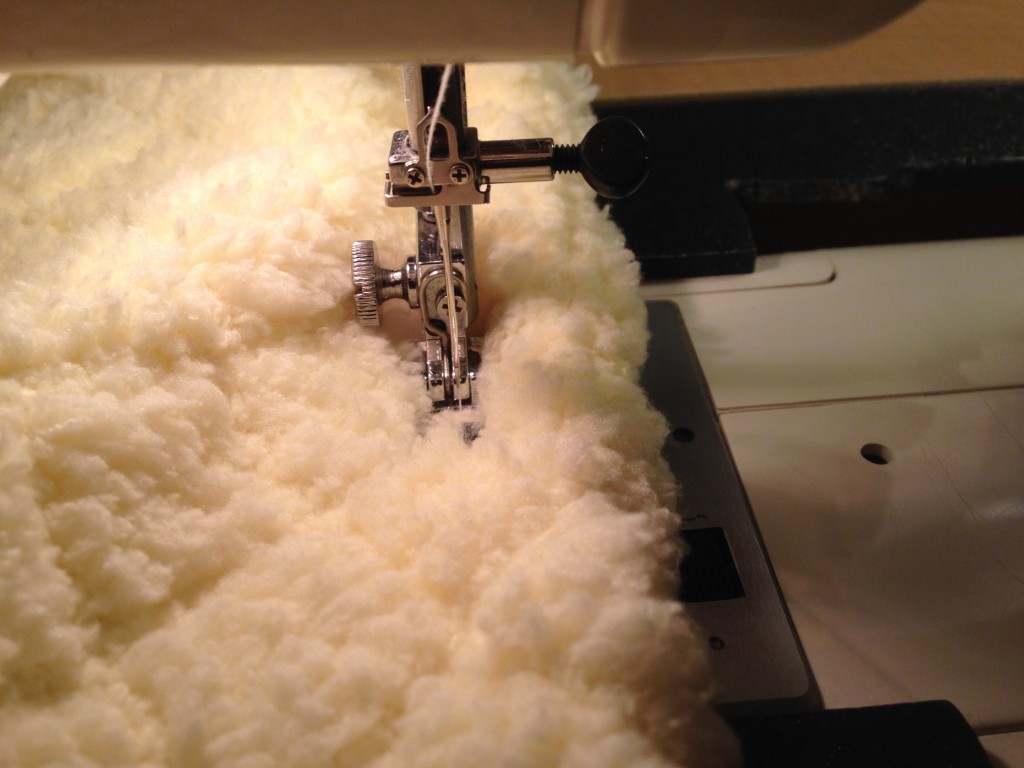
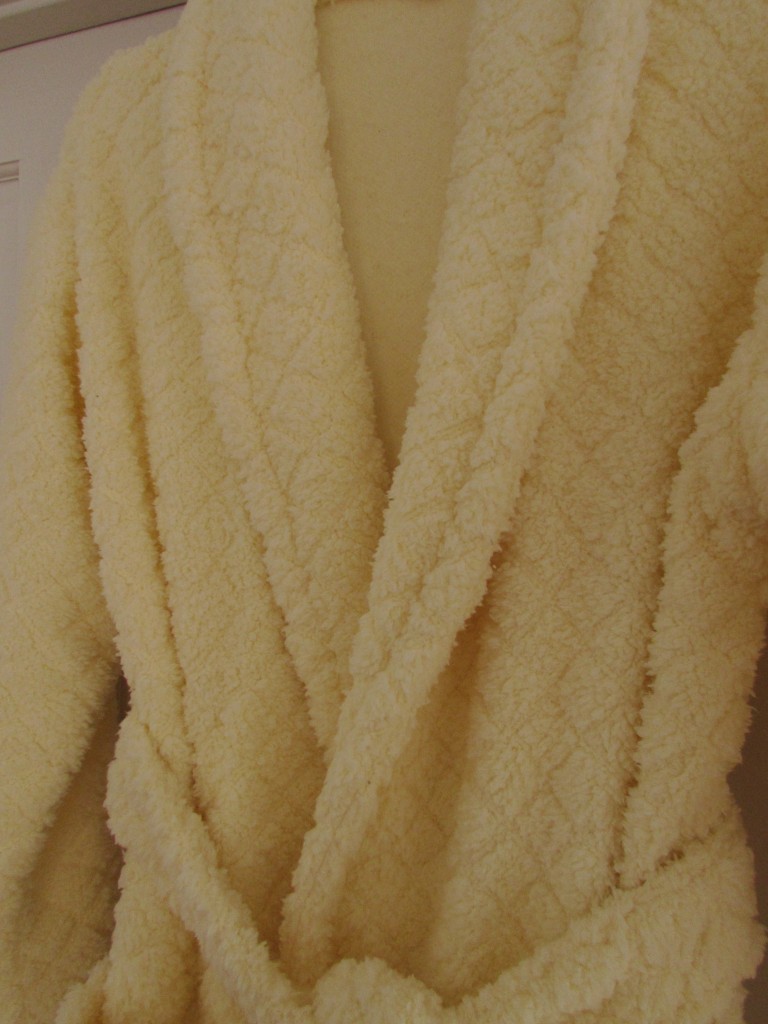
The nice thing about this robe is the fluff. Conversely, the worst thing about this robe is the fluff!  Once everything was stitched back together I tried it on. Amazing how this helped! ( If only I would have thought to do this the first time around!)   It fit much better but was still too puffy. Topstitching around the entire collar and all the way down the front of the robe, on both sides, really helped to tame it. Because of the fluff, it was hard to sew accurate straight seams. When I was sewing on the “wrong” side of the fabric, there was no issue. However sewing on top of the fabric was really tough. My presser foot would get lost in all that fluff! There was a lot of drag on the fabric and my top thread shredded over and over. (I tried my walking foot but that seemed to make it even worse.)IMG_2862

Like I was saying before, the fluff was also a positive attribute in that it didn’t truly matter how straight my seams were. The depth of the fabric made it difficult to see the actual seam, you only see the impression the seam leaves.

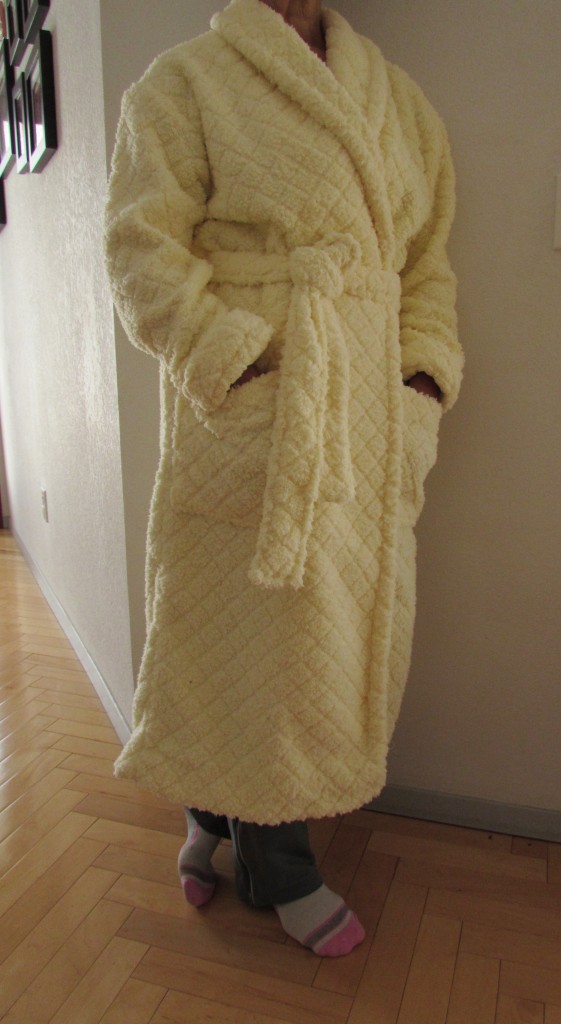
Here is my first attempt at modeling the robe (in my sweats and socks!)

IMG_20151218_4286Photo credits to my kind husband for these modeling shots. I may send them into a bathrobe modeling agency. I feel a new career beginning.

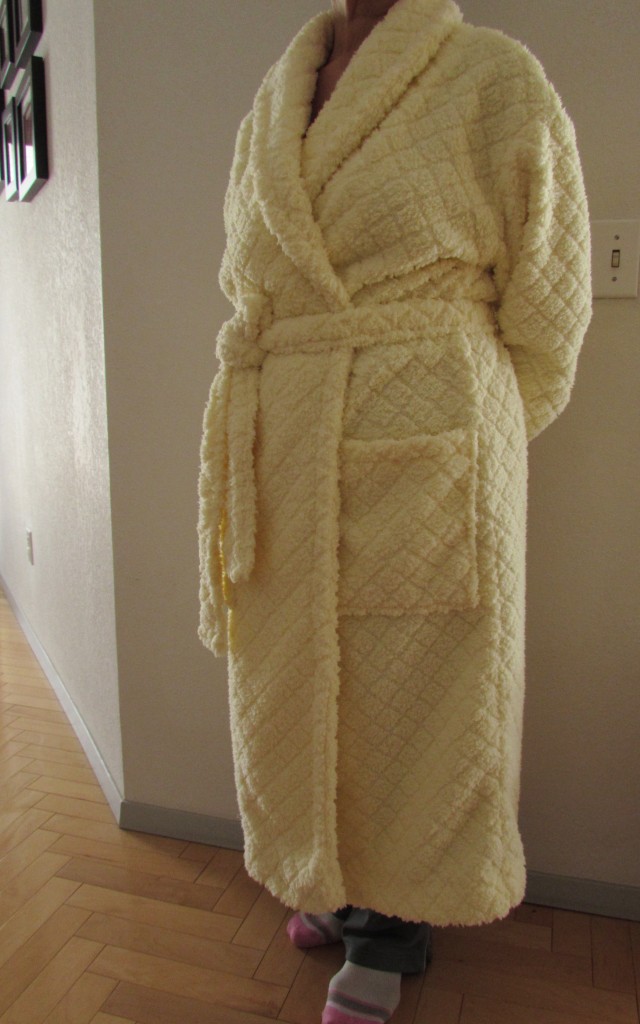
IMG_20151218_4287Looking at these amazing photos, I noticed that the pattern on the fabric almost matches where I put the patch pockets on. I cannot take credit for this – it certainly was not planned! I found that hand stitching was much faster than top stitching so I sewed the hem by hand while watching some TV last night.

IMG_20151218_4288

At this point my only remaining concern is that this is one very warm robe. Maybe too much so for this post menopausal model.

IMG_20151218_4290

Linking to Crazy Mom Quilts and Confessions of a Fabric Addict. Also with Sew Bittersweet Designs, once the December ALYOF link up is posted.  Because, with 13 days to spare, I just completed my December goal!  Woot woot!

Both links are found at the top of the page under Link Ups.


Four Weddings and Four Dresses

As I have mentioned in previous posts, I am so lucky to have grown up with five sisters.  Our house was fueled by huge amounts of estrogen and my dad was surrounded by females.  We argued incessantly and stole each other’s clothing which created more arguing. For the most part though it was the best and I wouldn’t have it any other way.

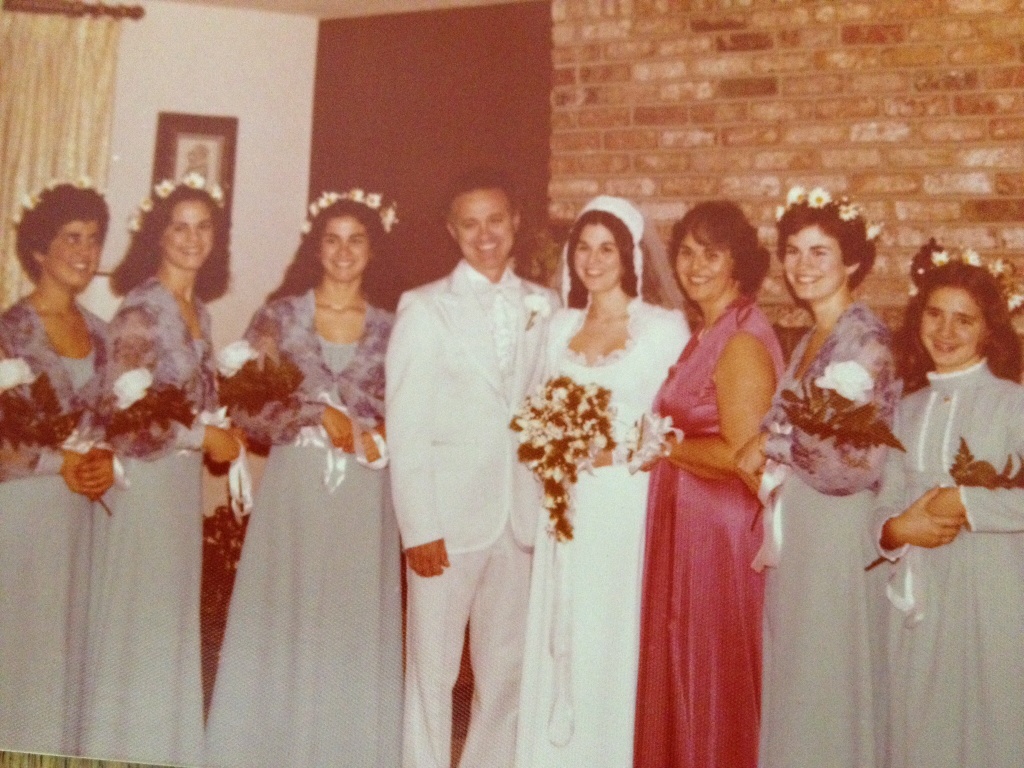
With six girls, my parents knew that they would be shelling out for a lot of weddings. Having the six of us within ten years meant that college for some and weddings for others would all hit at once. What they didn’t know was that the three oldest girls would all be married within ten months of each other.  It seemed that once one got engaged, the other two followed suit immediately.  So in the year 1978 we had three weddings; one in February, the next in August and the last in December.  It was a wild year, to be sure.  I am pretty sure my parents are still exhausted from it.

Growing up we all learned to sew. We tackled shirts, pj’s, shorts, dresses and even the occasional bathing suit (you can only imagine how lovely those were).  One of my sisters even made a three piece suit for my uncle. (She is still an excellent seamstress.) It was only natural that each of these three sisters would make their wedding gowns. I thought it would be fun to share them with you.  When I was searching for pictures I found that my copies had yellowed.  It is hard to preserve pictures from that era.  They have really deteriorated. When I scanned these in, I used a black and white filter. It looks much better then the jaundiced look my sisters had with the yellowed pictures.

Ok.  Here is wedding number one which happened in February of 1978.  Tina made this dress out of Qiana.  Do you remember Qiana?  If you are my age, you’ll probably remember that it was very popular in the 1970’s. It was developed by DuPont in the early 1960’s and was a polyester knit but was so silky.  My sisters and I loved it.  We used it for dresses for high school dances. Lovely.  😉

image

Kind of hard to see the detail but it was a clingy, silky, thin knit that draped perfectly on her. I am fairly certain she made her veil as well.  Here is the detail for the neckline. (She was such a pretty bride.)

image

Tina had each of the five sisters as attendants.  We, of course, made the dresses.  I left this picture in color so you could appreciate the awesomeness of these bridesmaid dresses made of a light blue crepe.  The piece de resistance has to be the “Mother Earth” daisy crowns we so happily wore. I remember loving the chiffon flowery jackets too.

imageWedding number two was scheduled for August.  So, just after hosting this wedding, my parents were off and working on the next one.  The reception was to be in our backyard so there was plenty to do.

Patti made her dress over the summer.  It was sweet and feminine, made of a satin crepe. The sleeves were an opaque chiffon knit. I have this memory of her running out to buy shoes to wear with her dress – on the morning of the wedding! That’s my sister.

image

Here is another view. It looks like she used Tina’s veil. This girl was all of 19 years old when she got married. (Most of us got married really young.) She looked adorable.

imageSummer ended with this wedding and fall was spent planning the next one.  Cathy’s wedding was in December. The reception was also at our home. (My poor parents.) Following suit, she made her dress as well. If I remember right, it was made of a satin type of taffeta. It had a low sheen to it. She went all out and made a new veil which was decorated with a half crown of fresh flowers.

image

Like the others, she was young – she’d just turned 21. Here is a closer picture of Cathy’s dress (aren’t the sleeves pretty?).

imageWell my parents survived the three weddings.  My strongest memory was that the house became so quiet and I was so lonely for all of my older sisters. Even though there were still three of us at home, it was just way too quiet.

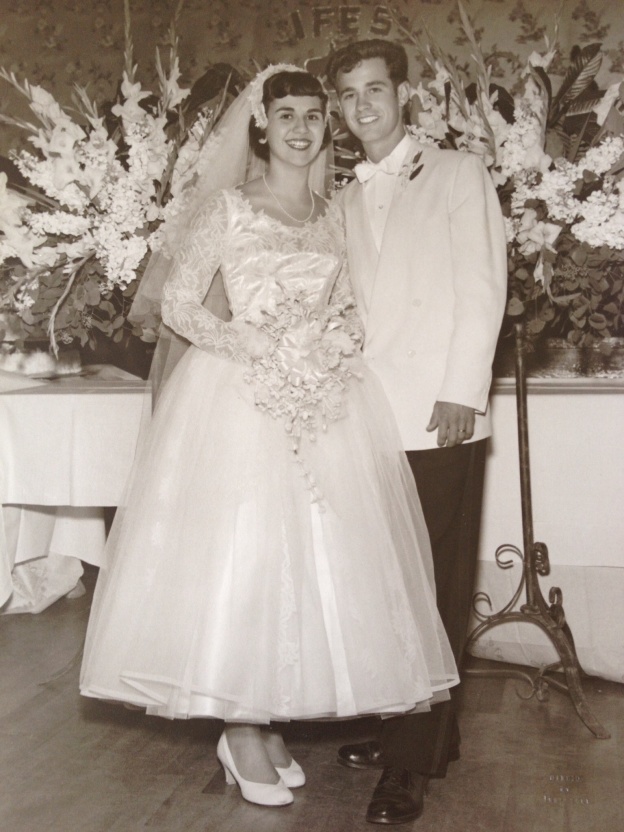
Just three years later I was engaged.  I married the summer after my junior year of college in August of 1981, at the ripe old age of 20. I suppose this may have been the beginning of my love of retro and vintage styles because I asked my mom if I could use her dress for my wedding gown.  (I also used my grandmother’s wedding band as my own.) You can see the original dress at the top of this post. My parents are so cute.  Like their daughters after them, they also married young.  It was spring of 1955 so my mom was 19 and my father was 20.

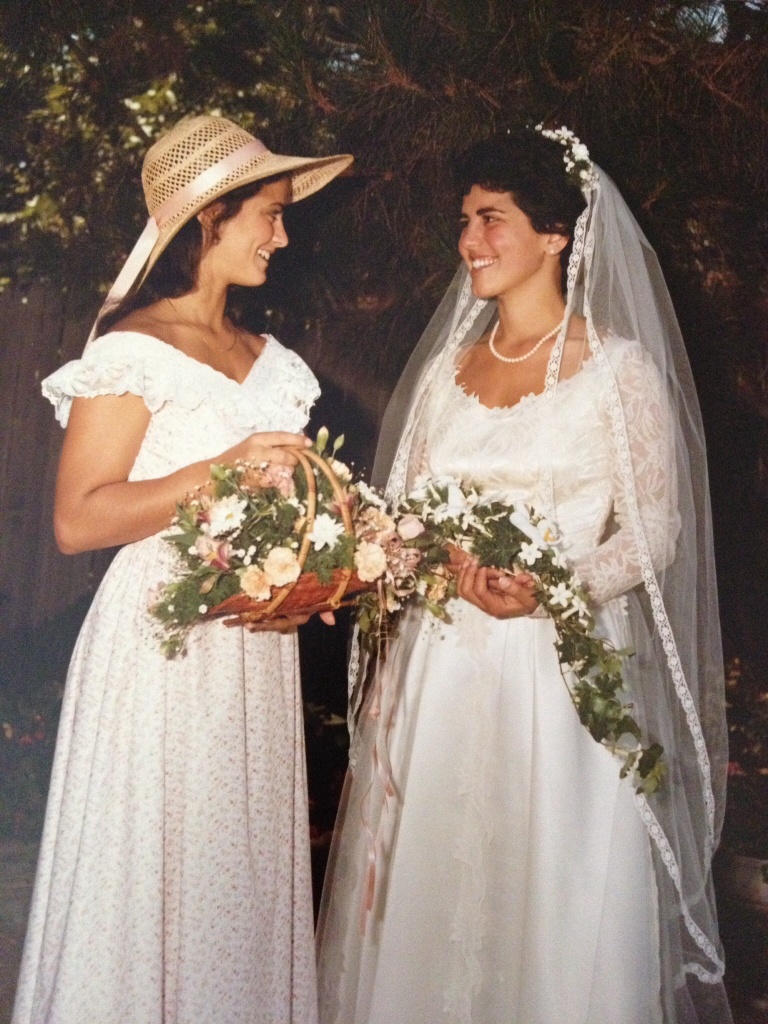
I decided I wanted a full length skirt with a train for my dress.  I took the bodice off of the skirt.  With (lots of) Cathy’s help, I made a new skirt to attach the bodice too.  Cathy and I shopped for satin and about 500 yards of tule. (I don’t know why we bought so much – This was back in 1981 and I still have leftover tule in my sewing room.  Comes in handy for crafts and costumes now and then.) We painstakingly cut the lace out from the skirt of the original dress. Because it was shorter than the new version, we had to piece the lace so that it could extend down the length of the skirt. I pulled out the dress today to look at how we actually made it which was so fun. It had covered buttons in the back which we extended down the back of the skirt. We pleated the front of the skirt and cut a long curved train for the back. I was talking to Cathy the other night and neither of us has much memory of making this. I do know for sure she helped because I wouldn’t have had the skill to do this without her.  I know we didn’t use a pattern of any sort.  I also remember that I used Cathy’s veil.

image

This shot is me with my sister, Juanita. She was my maid of honor. You can see the lace that we hand stitched to the tule on the dress.  I love the dress – it was so sweet to use Mom’s dress and make it my own.

So…. four weddings and four dresses in three year’s time. (The youngest two gave my parents a break and married six and nine years later. Neither of them are into sewing so they went the traditional route and bought their dresses.) Great memories for sure!

Linking to Anything Goes Monday and Let’s Bee Social.  Links to both of these are at the top of the page under Link Ups.

Paying Homage to High School Home Ec

Growing up, I used to sew a lot of my clothes.  Even as an adult I made clothes for myself as well as my kids.  Since I have been spending so much time quilting over the past several years, I haven’t done any garment sewing for a long while.

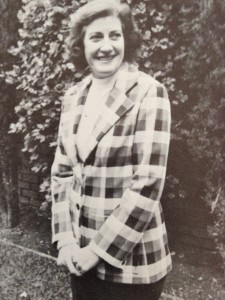
I mentioned in an earlier post that I started sewing when I was in 7th grade. My mom taught me to use the sewing machine and cut a pattern out. Because I went to a small parochial school through 8th grade I didn’t have any home economics classes during junior high school.  Once I got to high school we had all sorts of Home Ec options. I took them all. Let’s face it.  Home Ec was an easy elective. I loved to sew and this class beat Spanish, History, Math and English any day. My sewing teacher was fussy, really fussy (or at least she seemed like it to 15 year old me). She was forever making me rip seams out and fix my errors. The nerve!  I suppose she had to be tough on me. I was a lazy seamstress. I can remember, on multiple occasions, sewing the sleeves in the armholes backward.  The pattern companies try very, very hard to help the seamstress avoid doing this by clearly marking the sleeves with those small and large arrows.  Match the arrows and you are golden.  Sloppy cutting leads to a vague arrow and, hmmmm, which one matches to which?  More than once (probably more than five times!) I got it wrong,  resulting in my shirts having the cuffs on upside down so that the buttons were on top of my wrist.  This didn’t honestly bother me.  My go-to solution was to wear the shirt with the cuffs rolled up. I was going for kind of a casual, sporty look. My teacher, Mrs. H, was not ok with my sporty fashion.  It is really a pain to take the sleeves out.  Not a lot of fun. The lazy 15 year old that I was could usually circumvent this task by finishing the project without letting her see it in progress.  My grade was lowered but at least I didn’t have to rip the sleeves out. We usually had to turn in our projects along the way and it was so irritating to get something back with a veritable list of errors that needed to be fixed. Looking back, I will admit if it wasn’t for Mrs. H and her pickiness, I wouldn’t have learned to sew; or at the very least I would have been wearing lots of shirts with the sleeves rolled up. I found her picture in my yearbook from my sophmore year of high school.

mrs HI haven’t looked at a high school yearbook in many years – at least 20. I remembered Mrs. H as being old. When I was in high school I am sure I thought of her as old. Now that I look at her  picture, she doesn’t look all that old. She was probably in her 40’s? My perspective has changed some 38 years later. I bet anything she made her plaid blazer!

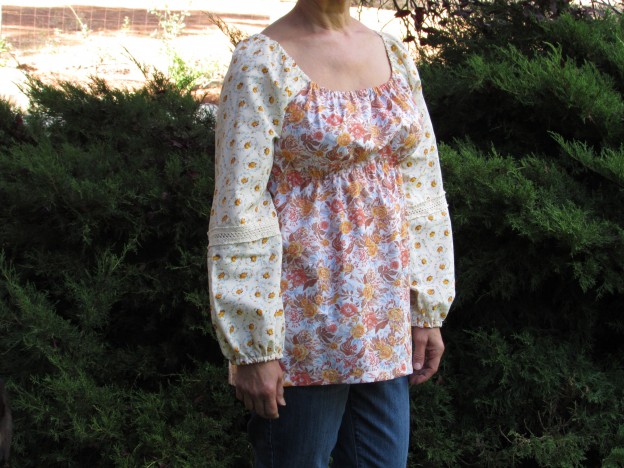
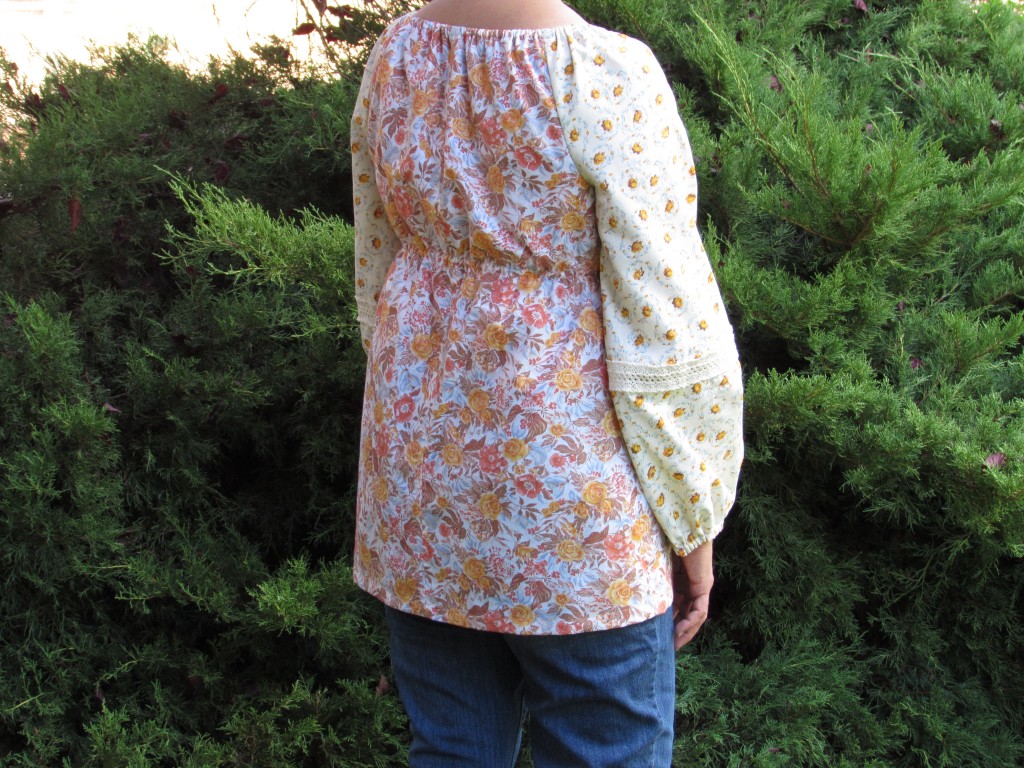
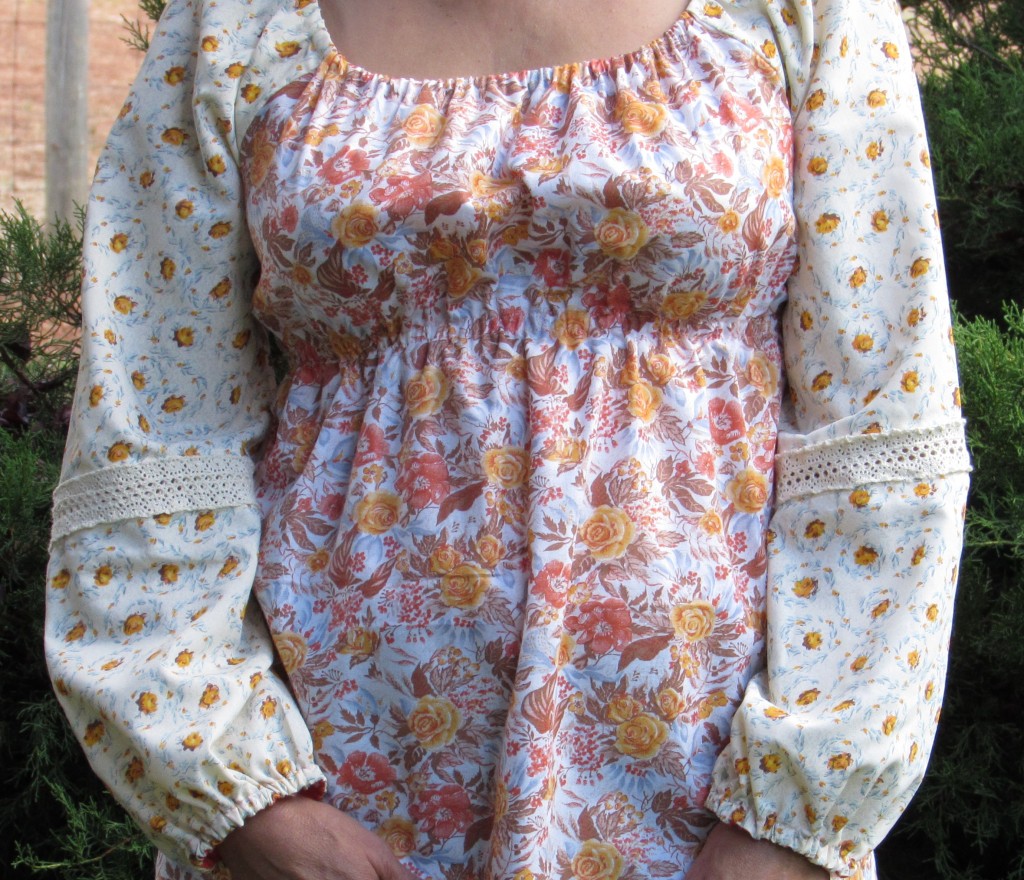
OK – moving on. I had a hankering to make something that was not-a-quilt.  Anything really.  I poked around the fabric in my sewing room and decided to use these two vintage pieces that I bought a while back. I played around with them and decided to make a blouse – my vision was something kind of bohemian or like a peasant blouse. The vintage prints made me think of peasant blouses, the 1970’s, high school and Mrs. H.  One thing led to another and the whole time I sewed this blouse I kept thinking of what Mrs. H would have changed, commented on or corrected.  Lots of nostalgia going on in my sewing room over the past couple of days! First, let’s  take a look at the blouse. It turned out pretty but definitely would not have earned me an “A”.

Here are a couple of things that would have brought the grade down.  First of all, the sleeves. I did a french seam on the first sleeve but then got distracted and did a regular seam on the other sleeve.  The 15 year old me decided this was just fine.  At least one sleeve has a nicely finished seam. Two french seams? Overkill.

20140925_1752Another definite mark-down is the hem.  I didn’t use any sort of hem tape or blind stitch for a nicely finished hem. I am so sorry Mrs. H but I just didn’t feel like it.  I did a quick roll of the fabric and machine stitched the hem.  I know, I know, it should have been hand sewn and she would have knocked my grade for that but I am ok with a machine stitched hem.  Honest, it is fine with me.

20140925_1759Then there is the sleeve length.  I had this idea to cut the sleeves and put a cotton lace trim on them. That worked out nicely except that I didn’t measure the sleeve length correctly and they ended up almost-too-short.  The 15 year old me was not at all concerned about this.  She found some bright orange, single fold bias tape (that was probably purchased back in the 1970’s) and made a casing for the elastic so as not o lose any length on the sleeves by making a casing for the elastic.  If you look closely you can see the orange peeking out of the bottom of the sleeves. I feel this was probably a wash – Mrs. H would have been impressed with the inset cotton lace and irritated with the bright orange bias tape.

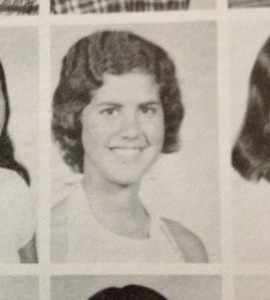
This was a really fun, sweetly nostalgic project.  Just for kicks, here is 15 year old me.  I cannot explain the hair except to say that my hair was never my best feature!  Also cannot explain the halter top on picture day. Remember, this was 1975. We got to wear halter tops to school. Times have changed!

hs pic

Linking to TGIFF, Finish It Up Friday, Link a Finish Friday and Confessions of a Fabric Addict. All of these wonderful sites are listed at the top of my page, under Link Ups.  Take a minute and check out these blogs. I love them all!  Have a good weekend everyone!