I don’t know about you but I am really lazy about getting my sewing machines serviced. I procrastinate, put it off longer and longer with my usual excuse being ‘I clean out the bobbin housing all the time so it must be fine’. But oh my gosh, think about how often I use these machines of mine. The poor things need to be taken care of!
When my smaller Janome refused to stitch more than two inches without giving me grief, I realized it was time. I took it to a woman in town who is a whiz with machine repair and maintenance. She kept it for a few days and worked her magic. Some $80 later, my machine is purring along. What a huge difference!! When I picked the machine up, Debbie had a sandwich size Zip Lok bag filled with lint and gunk. I can’t imagine how she got it all out of there but she did. The machine is like new!
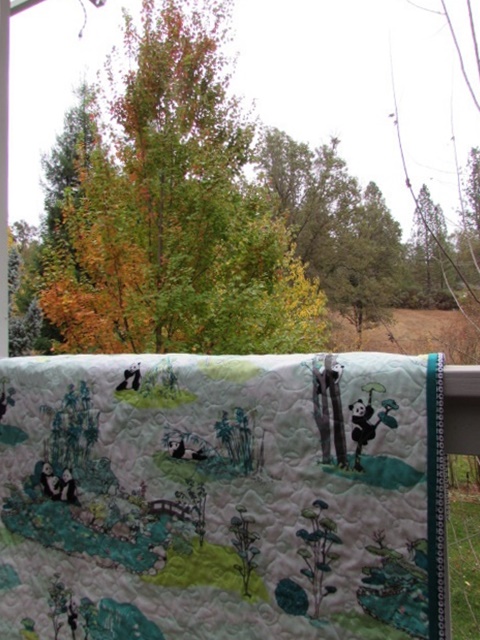
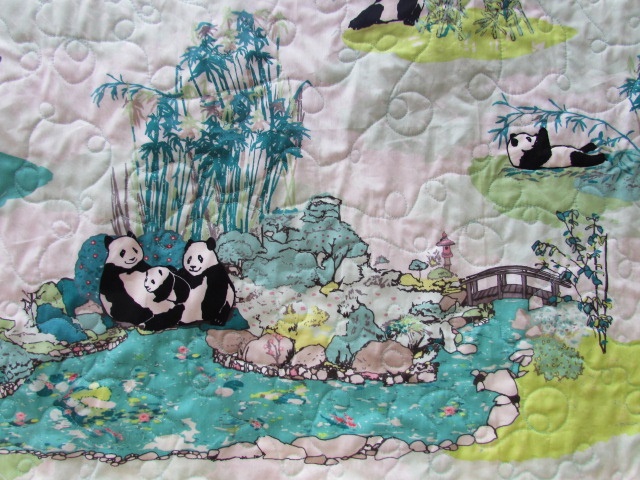
I decided to take advantage of this amazing transformation and practice some free motion quilting. I have not been doing too much quilting at home because the machines were not cooperating (now I know why!) To have a nice big canvas to play with, I chose to do a simple whole cloth quilt. Have you seen Art Gallery’s line of fabric called Pandalicious? Of course it features adorable panda bears. Designed by the very talented Katarina Roccella, these prints are really sweet and just filled with the personality of spunky pandas. I have a few pieces of the line in my shop and decided to play with the feature fabric.
Panda Garden Recess is a large scale print which tells the story of panda families frolicking in a garden of pastel blues and greens. I cut a 40″ piece of this fabric and a 44″ piece of Hidden Panda for the backing. After trimming the top to a 40″ square and quickly pin basting the layers together, I started quilting loops. My machine was entirely cooperative and the tension was perfect. It is much more fun to quilt when my equipment is properly taken care of.
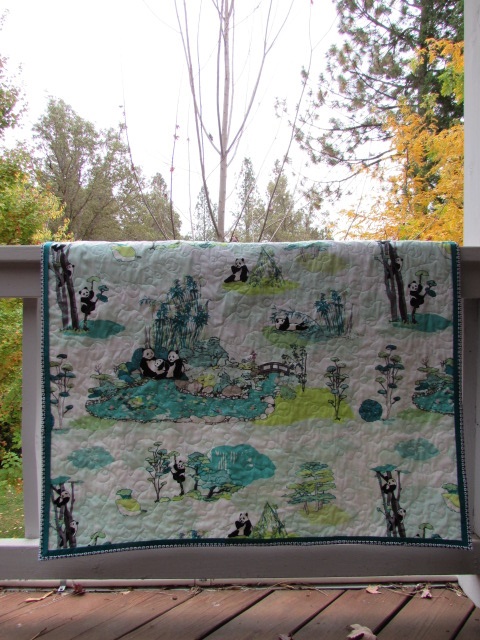
The quilting took no time at all. After squaring it up, I decided it needed something more than just the binding. I had a large scrap of a jade green solid in my stash and cut some 1 1/2″ strips to make a flange. I am always, always a fan of a flanged binding!
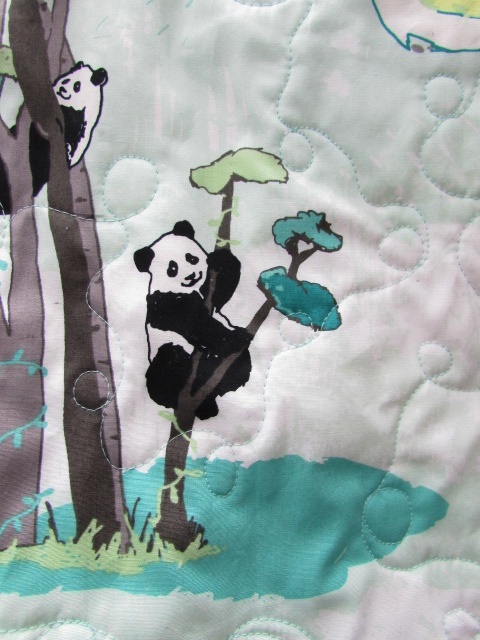
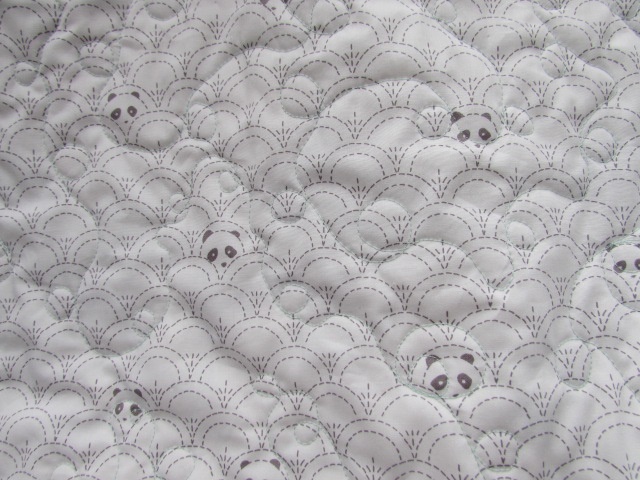
As I mentioned earlier, the adorable backing is called Hidden Panda. It is another of my favorite prints. The loopy quilting I did (which doesn’t really show up in the pictures) works well with the curve of the print. Looking back, it would also have worked to quilt the piece from the back, by quilting along or tracing the curves. Another project for another day!
There you have it. My machine is back to its amazing self and I have a sweet quilt as a result. Next weekend is the quilt show for the Pioneer Quilter’s Guild where I will be a vendor. It is going to be held in Roseville so if you are a local, come out, say hi, and enjoy the show! I will use the quilt to show off this fun fabric in the booth. After that, maybe it is destined for Project Linus or a spot in my Etsy shop. I haven’t yet decided.
We are supposed to have a wet, rainy weekend and I am prepared!! I have two projects currently vying for my time so I am very much looking forward to a quiet weekend in the sewing room. There is also a tiny quilt show scheduled for the weekend and I may hop over there to take a look at the quilts. We shall see! Hope you have something fun planned as well! Enjoy the weekend.
Linking to my usual favorites as well as one new to me; Finished or Not Friday over at Busy Hands Quilts. Check them out at the top of the page, under Link Ups.
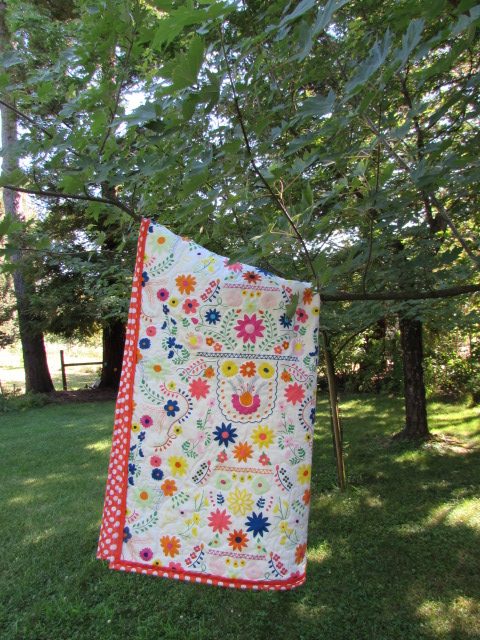
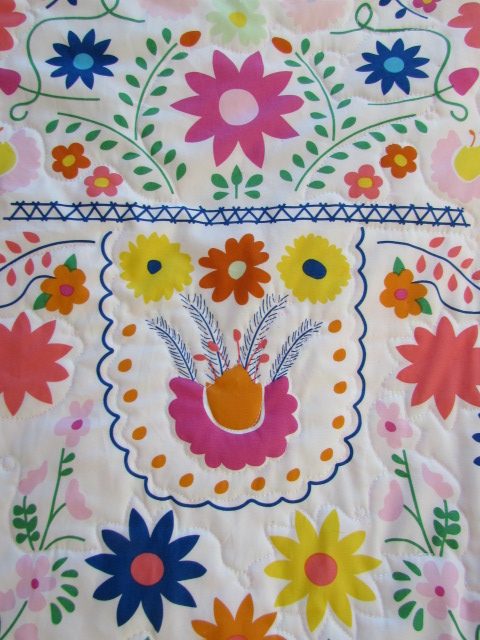
I have such a bright, cheerful quilt to share with you! This is the second time I have made a whole cloth baby quilt for a customer. The first time was last fall, when I did the elephant quilt. Check it out here for the details. I very much enjoy making these. This quilt was a simple project because there is no piecing involved. My customer really loved the Mexican Dress fabric from Art Gallery Fabric’s Fiesta Fun line. This is actually the second time I have used this fabric line in a baby quilt. The first time was when I made the Knock Knock quilt while pattern testing for Sarah Goer. The colors in this line are a fantastic mix of brights and pastels against a pure white background. It is a lot of fun for a baby quilt. There is much for baby to look at!
My customer and I emailed back and forth numerous times one night as she selected the backing and binding fabric. After having two boys, she is expecting a girl. She wanted bold and bright colors so she went with a Ta Dot polka dot fabric from Michael Miller. The polka dots were used for both backing and binding. I really think this was an excellent choice.
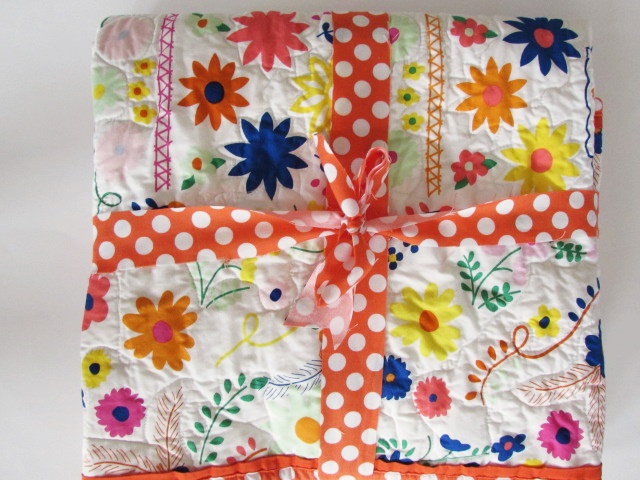
Rather than put the dots right up against the floral fabric, I suggested using a flange in a solid deep orange (Pure Elements in Tiger Lily from Art Gallery also).
I think it is good to have a break between the bold orange dots and the busy floral fabric.
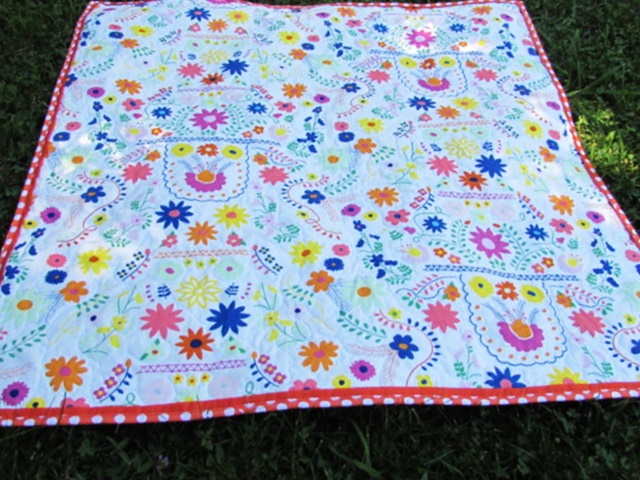
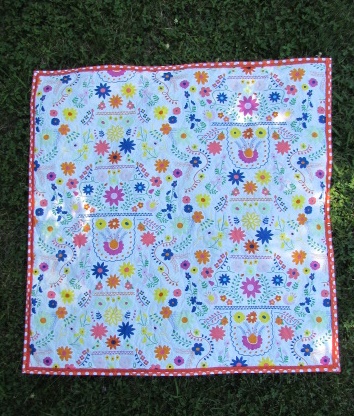
Quilting this was a lot of fun. For the most part, I outlined bits and pieces of the floral design. As I moved from one part to the next, I would add a loop or two. Having this busy print was like having a stencil for the quilting. I didn’t outline everything though. For a baby quilt, I like to have some space between the quilting to keep the quilt soft.
The quilt finished at 40″ x 40″ and I gave it one trip through the wash before packaging it up to send to Texas. Hopefully Baby Camille will get lots of use out of this quilt for a long time to come!
Just in case you are in need of some gorgeous color in your sewing room, I do have all of these fabrics in stock in the shop. I will be linking up this week with a few of my favorites. Check the tab at the top of the page for links!
Also, I want to let everyone know I drew two names for the giveaway of Carrie Bloomston’s book! Congrats to Susan S. and Nancy H. Here are their comments:
Susan S. said: “I would like to design a house that perfectly fits my life style and compliments it’s surroundings.”
Nancy H. said: “Great interview, Bernie. At one time, and not too long ago at that, I would have said that my one wish was owning a cozy, welcoming quilt shop where people felt as though they were home. Now, it’s a tough choice. The simple answer would be to finish my quilt in time for the show in two weeks! But I think it should be more substantial than that. You’ve really stumped me!”
It was so interesting to read the responses to my question, ” what would you try if you were guaranteed success?” There were lots of interesting ideas put forth. Thank you for joining in!
You’re back! I hope that means you were able to lay out and cut your fabric pieces. If you had any trouble, don’t hesitate to email me at needleandfoot@gmail.com. Or, you can always leave a comment on the blog or the Facebook page. I am happy to help.
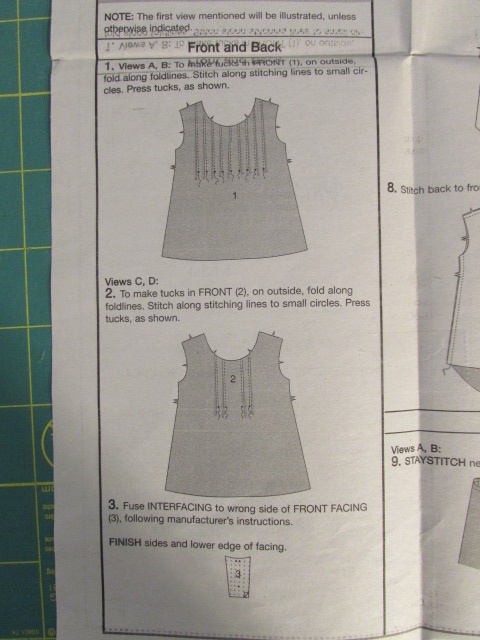
Today we are going to take our time and work on the details that make the front of the shirt unique. I think these details are both challenging and fun. If you take it slow, you will have good results. We are going to mark the lines for the pin tucks and also the stitching and cutting line for the slit at the center of the neckline. The portions of the instruction sheet we will be working on are numbers 1 through 6.
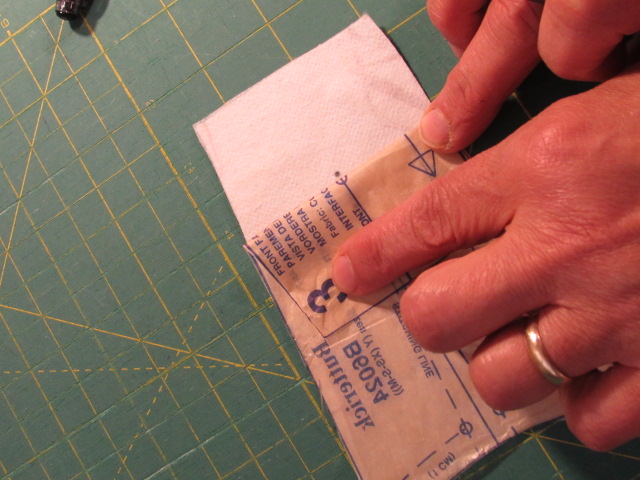
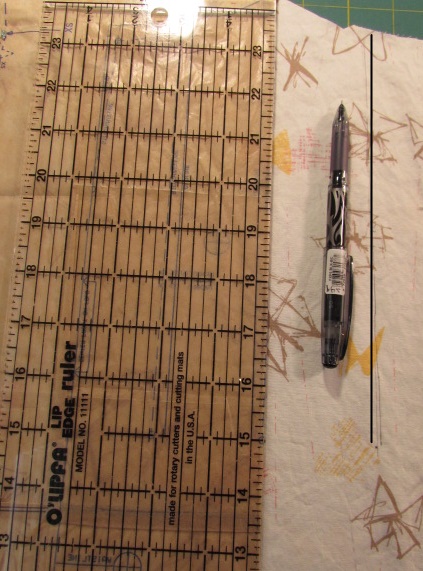
NOTE: For marking, I used a Frixion pen (the one that erases with the heat of the iron.) You should use whatever is comfortable for you. For the pin tucks we are marking on the front of the shirt so make sure it will come out easily. A piece of chalk would be good. Because my fabric is light in color, chalk wasn’t an option for me. Plus I want my markings to show in a photo for the blog so I needed a darker color.
We will mark the center stitching line first. It is easiest to mark this on the facing piece, rather than directly on to the front of the shirt. You need to fuse the interfacing to the wrong side of piece number 3 first. When the interfacing is fused, lay the paper pattern piece back over the interfacing side. Fold back the bottom of the paper and make a mark the bottom of the slit.
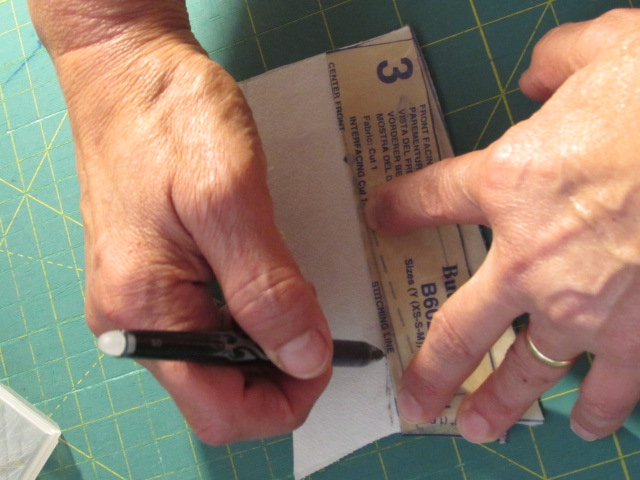
Fold back the paper lengthwise on the dotted line and trace your stitching line. Then fold back the other side along that broken line and trace the opposite stitching line.
I noticed that the drawing of the slit comes to a deep point. I did not sew that far down because there would not be any seam allowance alongside the stitching line at the deepest point of the V. Instead, I traced and stitched a shorter, wider V on my piece.
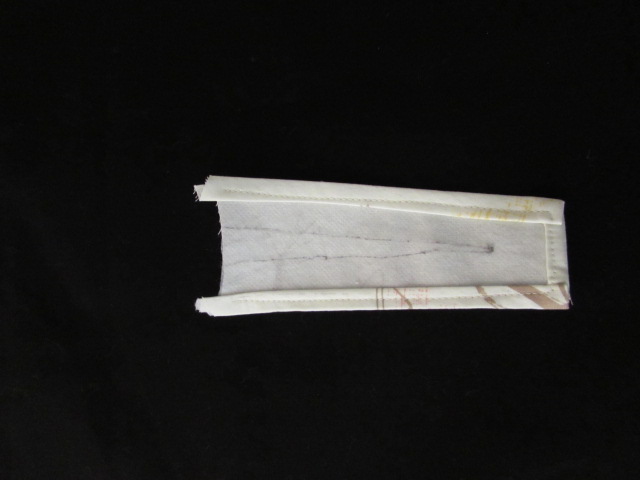
Once you have your facing piece marked, you need to finish the edge of the facing so it doesn’t unravel or fray when it is washed. I always fold a very narrow 1/4″ to the wrong side around the three outer edges (both long sides and the bottom). Press that first fold. Then fold it again and press that second fold. Pin to keep it in place as you stitch.
NOTE: Just like with free motion quilting, it is always best to draw your bobbin thread up to the top before you begin stitching. This will prevent that little rat’s nest of messy stitches that occur now and then. Also, with any stitching on a garment, stitch forward about two stitches, reverse for two stitches and then begin to sew. You need to reverse so that your stitches are locked down and don’t unravel.
Press after stitching. If you are using a Frixion pen, remember not to iron over your markings or you will have to trace a second time. (Ummm….don’t ask me how I know this.) Once your facing edges are finished, set it aside for now.
I feel like explaining the pin tucks with the written word is a bit of a challenge so, with the help of my daughter, I made my first ever YouTube clip. I think this will give you a good idea of how to fold the pin tucks. If the video doesn’t work in your browser, click here.
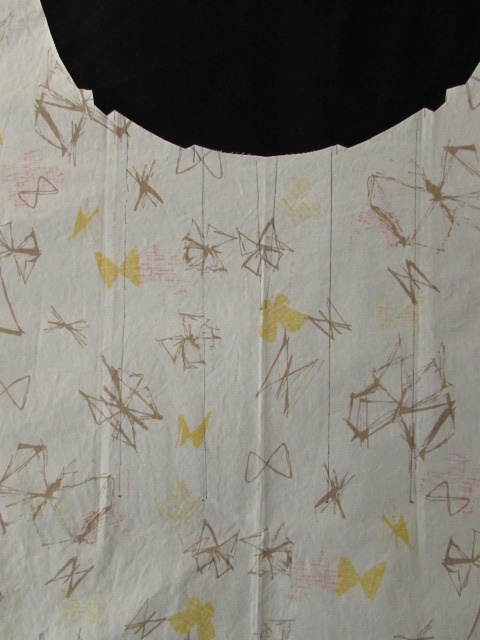
Now let’s mark the pin tuck lines. This will be much like marking the line on the facing piece. This time, fold the paper pattern back on the broken line (your stitching line). Use a clear ruler or straight edge to draw a line on the fabric from the top to the dot at the end of the stitching line. You will mark these twice on each side of the front piece. After you do the first side, remove the pins from the piece and turn the fabric over. Lay the piece down (should be upside down this time) and mark the two lines on the other side of the front piece. It is hard to see my lines so I drew over one to give you the idea of what I mean. Ignore the fact that I couldn’t line my hand drawn line with the computer drawn line! I definitely need some lessons on using graphic art tools!
When you have all four lines drawn, it will look something like this. Again, my hand drawn lines are faint.
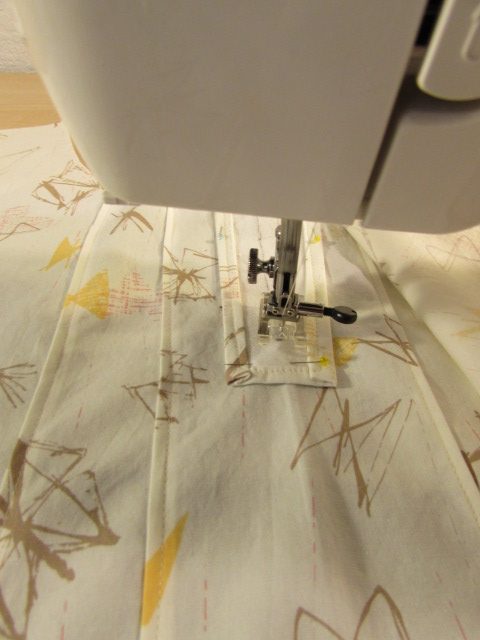
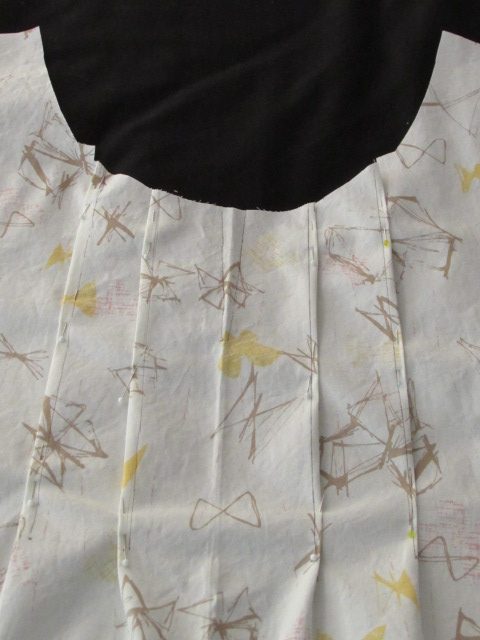
Next we will make the folds and pin the tucks in place. You want to pick up the fold at the notch and take it to the side. Finger press and pin in place. Remember, if it is folded in the correct direction, the notch will make a nice smooth curve for the neckline. Pin down to that dot we marked for the end of the tuck.
Top stitch each of the pin tucks, drawing your bobbin thread to the top before beginning the seam. Also, be sure to reverse for two stitches and then proceed to the end of the tuck. How does it look?
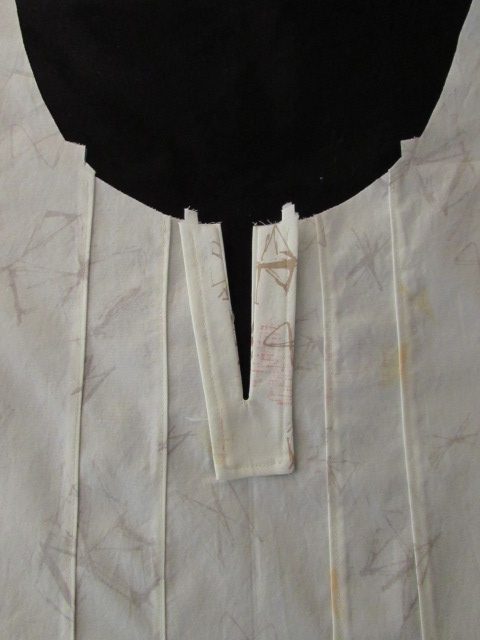
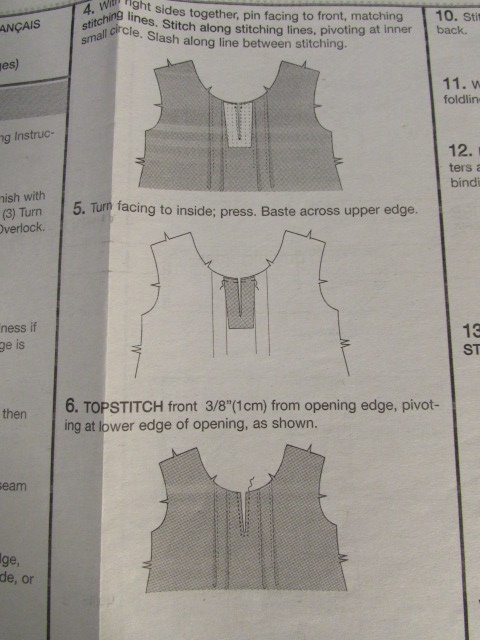
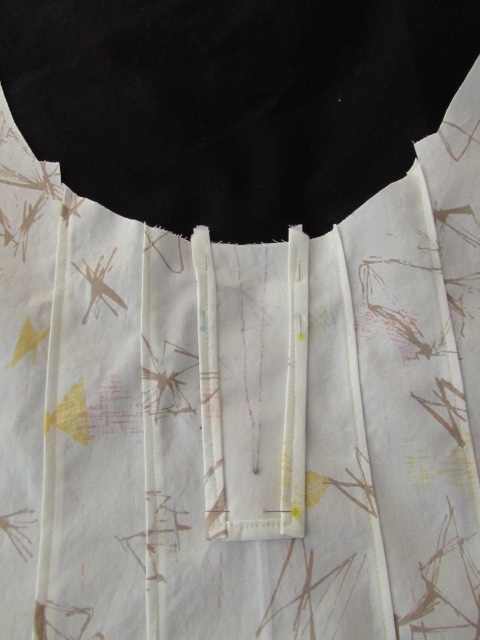
The next step is to attach the facing. Take the piece and lay it right sides together on the front piece. It will be centered between the tucks.
Pin in place. (I know… my markings are a bit wiggly.) Sew just a hair to the right of the stitching line. Take it slow here. This is probably the fussiest part of this project. Stitch down to the point and put your needle down to hold your spot.
Pivot, by turning the fabric, and stitch 2 or 3 stitches. You will need to have this bit of room when you clip this seam. Then with your needle down, pivot the fabric again and stitch back up to the top of the neckline.
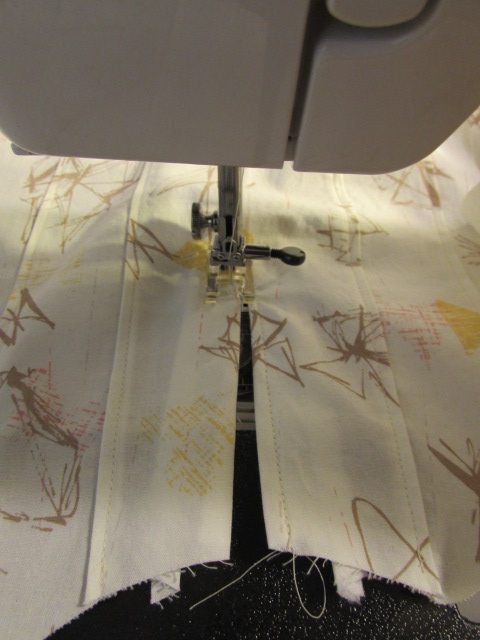
Press your seam. Just press the facing as it lays on the front of the shirt to smooth your seam. Next you will carefully cut the slit between the two long rows of stitching down to the point (where you made those two stitches and pivoted).
Make sure not to cut through the stitches. Now turn the facing to the inside of the shirt. You will likely have to massage the facing a bit to get it to lay flat. Use some steam and iron the front of the shirt with the facing on the inside.
The last step for today is to top stitch the opening in the neckline. Pull your bobbin thread to the top and stitch a uniform line no more than 1/4″ from the seam. I stitched mine at 1/8″ because I wanted to reinforce the facing seam. There is so little seam allowance here and I think a tight top stitching will prevent any problems.
Now that the front of this shirt is complete, you can breathe a sigh of relief. This was the toughest part. Hurray for you!
The next post will be on Friday, June 23rd. On Friday we will check the fit, learn about finishing seams, and sew the back, shoulder and side seams. Easy Peasy! See you then.
Please do not hesitate to ask questions. If you are wondering something, it is likely there is another reader wanting to know the very same thing. Leave a question and I will get back to you!!
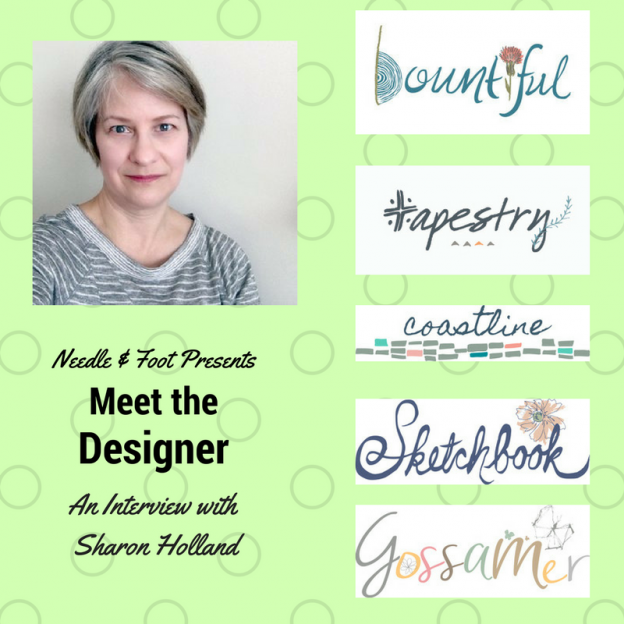
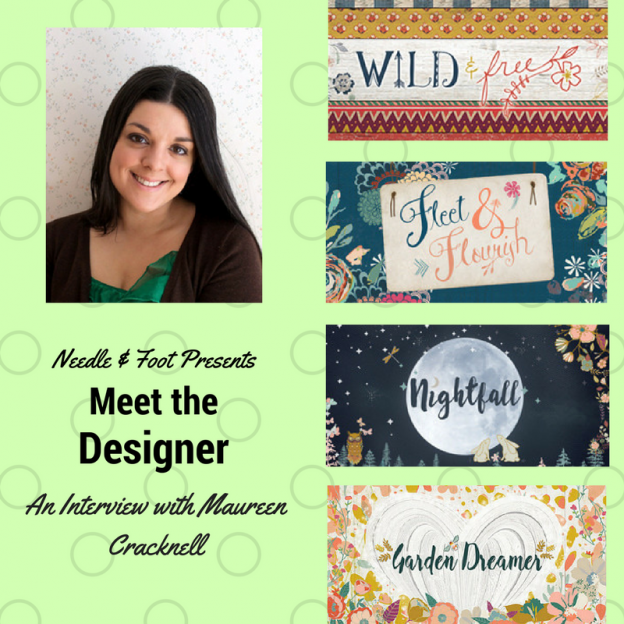
Welcome to the fourth installment of Meet the Designer. I began writing this series of posts in February. So far, we have gotten to know Sarah Golden, Maureen Cracknell and Kim Schaefer. I feel incredibly fortunate to have gotten to know these talented designers.
This month I chatted with Sharon Holland. Sharon is a designer with Art Gallery Fabrics whose fabrics are a mix of muted florals, leaf and vine motifs, and nautical themed prints among others. While each of Sharon’s five fabric lines are different and unique, there is a definite common thread of personality connecting each to the other.
When Sharon and I spoke, we talked about how we each began quilting, way back when. Sharon grew up as one of three children. Both of her parents were quite creative. Her father was an electrical engineer who had some very artistic hobbies. He was a woodworker, loved drawing and drafting, and also enjoyed gardening. Her mother was a stay at home mom who was often knitting, sewing, and crocheting. She was able to draft patterns (which is something I very much admire) and made her clothes as well as clothes for the children. Clearly, Sharon grew up in a household where making things was a favorite past time.
However, neither her mom or her grandmother quilted. Sharon was in high school when she decided to try quilting. Going through her mother’s fabric scrap box and looking at the various prints was intriguing to Sharon. She decided she would make a patchwork pillow. She selected her fabrics and hand stitched the squares into a patchwork, often using stripes to create patterns. She made the patchwork into a pillow cover. Not long after, while in college, Sharon was married. At around 20 years old, or so, she decided to make a quilt. Checking books out of the library and reading up on the process, she made a queen size quilt with a rather complicated block. She couldn’t remember the name of the block but definitely remembered the pesky Y seams that were involved. When she described finishing her quilt with an envelope style backing (no binding required!) and yarn tying the blocks, I had to laugh. That is exactly how I finished my first quilt back in 1979. I had no idea about binding and the idea of actually quilting it was daunting so I yarn tied it. Sharon has been quilting ever since.
I think one of the things I enjoy about Sharon is the scope of her talents. She writes, paints, draws, designs fabric, quilts, sews clothing, and drafts patterns. She seems to approach new ideas and experiences with gusto. After graduating from college with a BA in Art and Design she found herself raising her family in Coal City, Illinois. Around this time she began upcycling retro or vintage objects and selling them at an antique mall. Some years later the family moved to Ohio when her husband’s job took them there. She continued to pursue creative outlets which lead her to take some classes at the local community college to learn to use software for desktop publishing and printing. Her love of fabric and her newly learned computer software skills enabled her to start playing with surface designs and block printing. She designed four lines of fabric for Fabri-Quilt as well as several quilts for various quilting magazines. Following this she was hired by Valu-Publishing to bring two magazines to print. As the Assistant Editor, Graphic Designer and Photographer, she was instrumental in developing Quilt It…Today and Sew It…Today to the customer. This experience developed her skills in fabric design as well as graphic design. The perfect combo! Leaving the magazines, Sharon decided she really wanted to design for Art Gallery Fabric. She developed a portfolio and made an appointment with AGF owner and designer, Pat Bravo, to meet at the 2014 Spring Quilt Market. (How scary and exciting that must have been to put herself out there like that!!) Pat was very pleased with Sharon’s work and hired her on the spot!
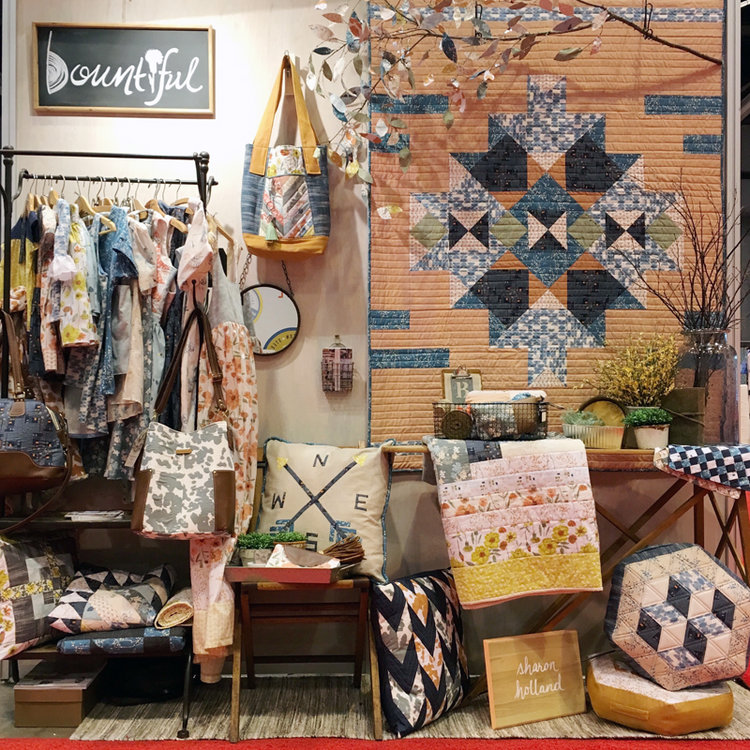
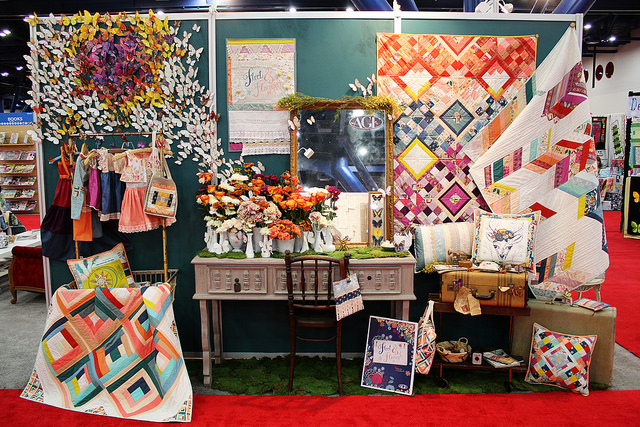
Quilt market booth, celebrating the release of Bountiful.
This brings us to Sharon’s current work! She has completed five lines of fabric for Art Gallery Fabrics over the past several years. Her fabric collection is a beautiful compilations, each incorporating gorgeous color schemes with nature, coming together to tell a story. Her newest line is Bountiful.
I enjoyed hearing about the process Sharon goes through when working on a new line. She explained deciding on the theme, or the story, the fabrics will tell is the first step in her design process. For example, her latest line, Bountiful, tells the story of living in the mid-west. I remember when I was looking at this line when it released a few months ago I had not yet read about Sharon’s intent. However I knew right away the collection was a depiction of rural life in America. When I ordered the selection I offer in my shop, I loved the nostalgic mood of these fabrics. Perennial Optimism, a main focus fabric, is a gorgeous floral that is reminiscent of the vintage sheets I enjoy collecting. Tartan Field Midnight reminded me of looking down over the Sacramento Valley whenever I am flying home from a trip. The organized squares of farmland are perfectly represented in this print. Hearing her explanation of the inspiration for this line confirmed my thoughts. What a lovely way to tell the story of life in the mid-west.
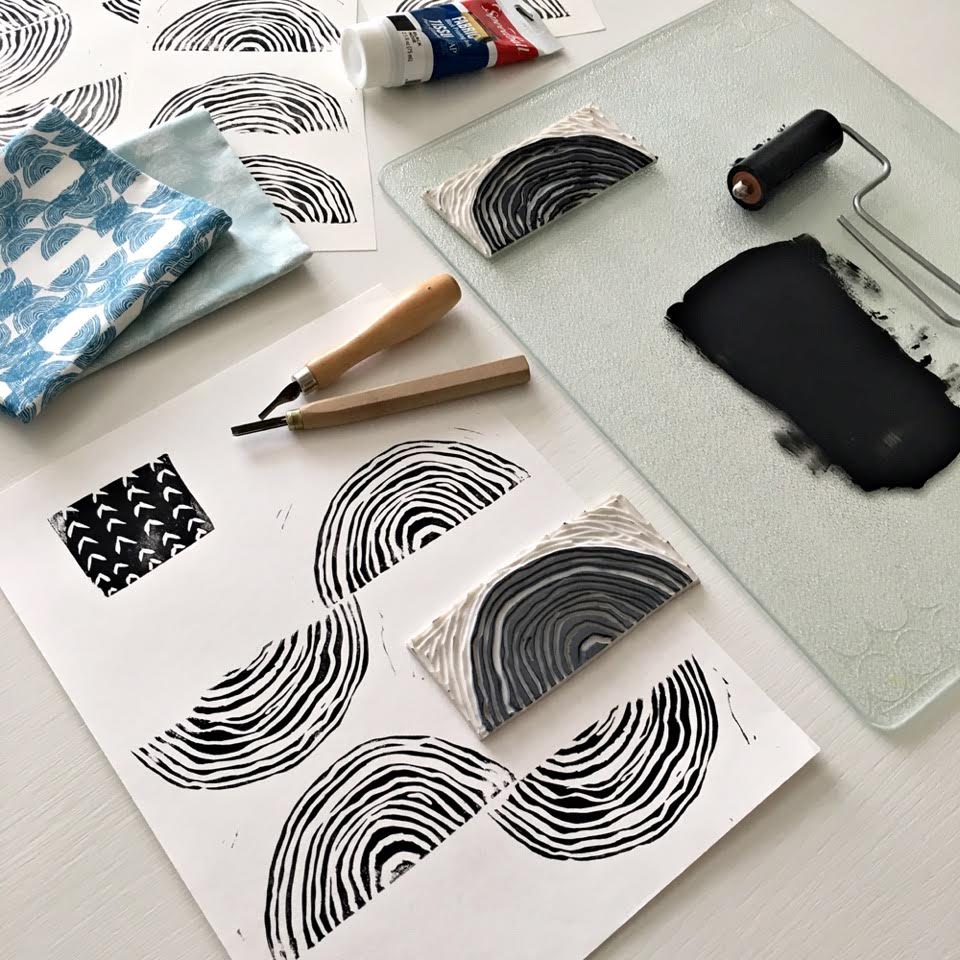
Creating the design for Haymow.
Each fabric from a collection is treated as an art project of its own . When she was drawing the pattern for Tartan Field, it took her about five iterations before she got to a version she loved. She came up with the idea for this print while flying home from a Quilt Market show. Creating Perennial Optimism, Sharon said she was channeling her love of artist, Vera Neumann. This makes total sense when I look at Vera’s work and Sharon’s Perennial Optimism print as they are quite similar in style and mood. To created Haymow, she cut a wood block to the shape she liked, printed the pattern and uploaded it to the computer for further manipulations.
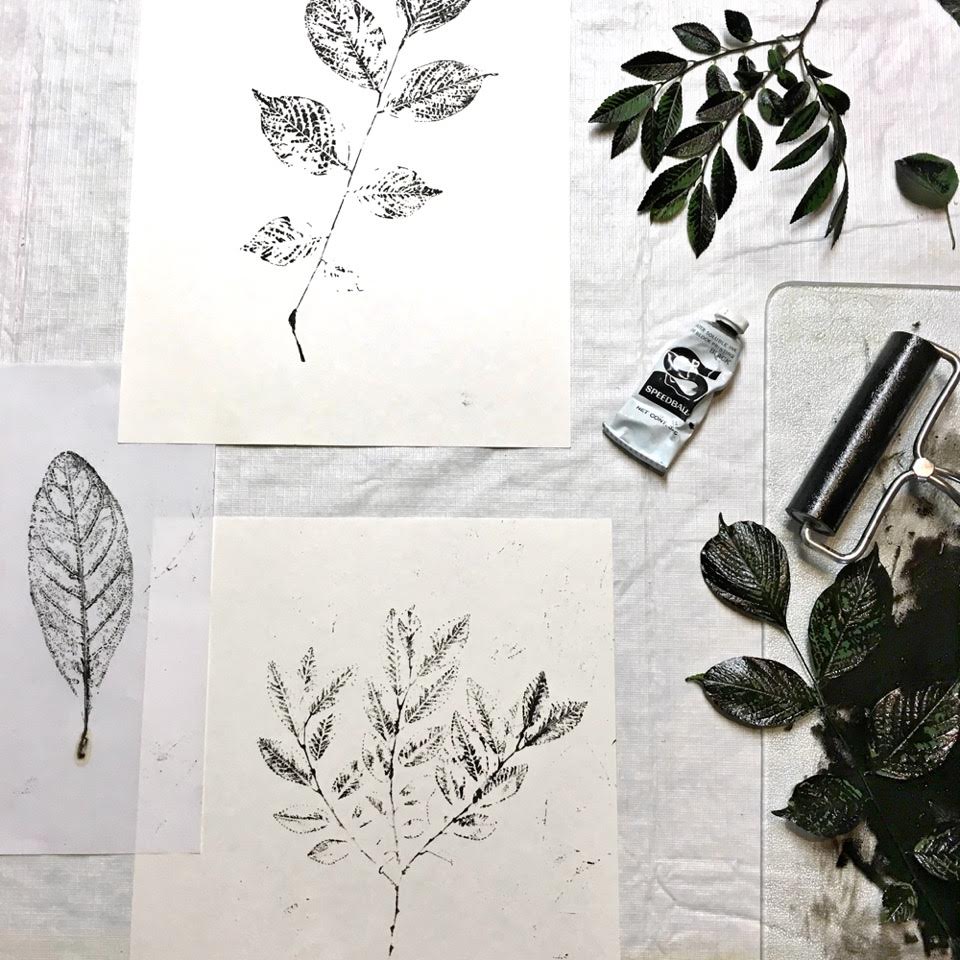
Creating the leaf prints for Aborescent.
Finally the Aborescent piece, a combination of leaves and flowers, was made with some leaves she picked up while walking her dog. She took the leaves and painted them to make prints. These were uploaded and manipulated on the computer to the finished version we see. It was really interesting to learn that Sharon first works on the inspiration or story behind her line. As she creates the designs for the fabrics to tell her story, she is working in black and white at first. Color is not important when she is developing the initial designs. The process of determining the scale and the repeats in the print are treated as a puzzle. She enjoys working out these details in the design process.
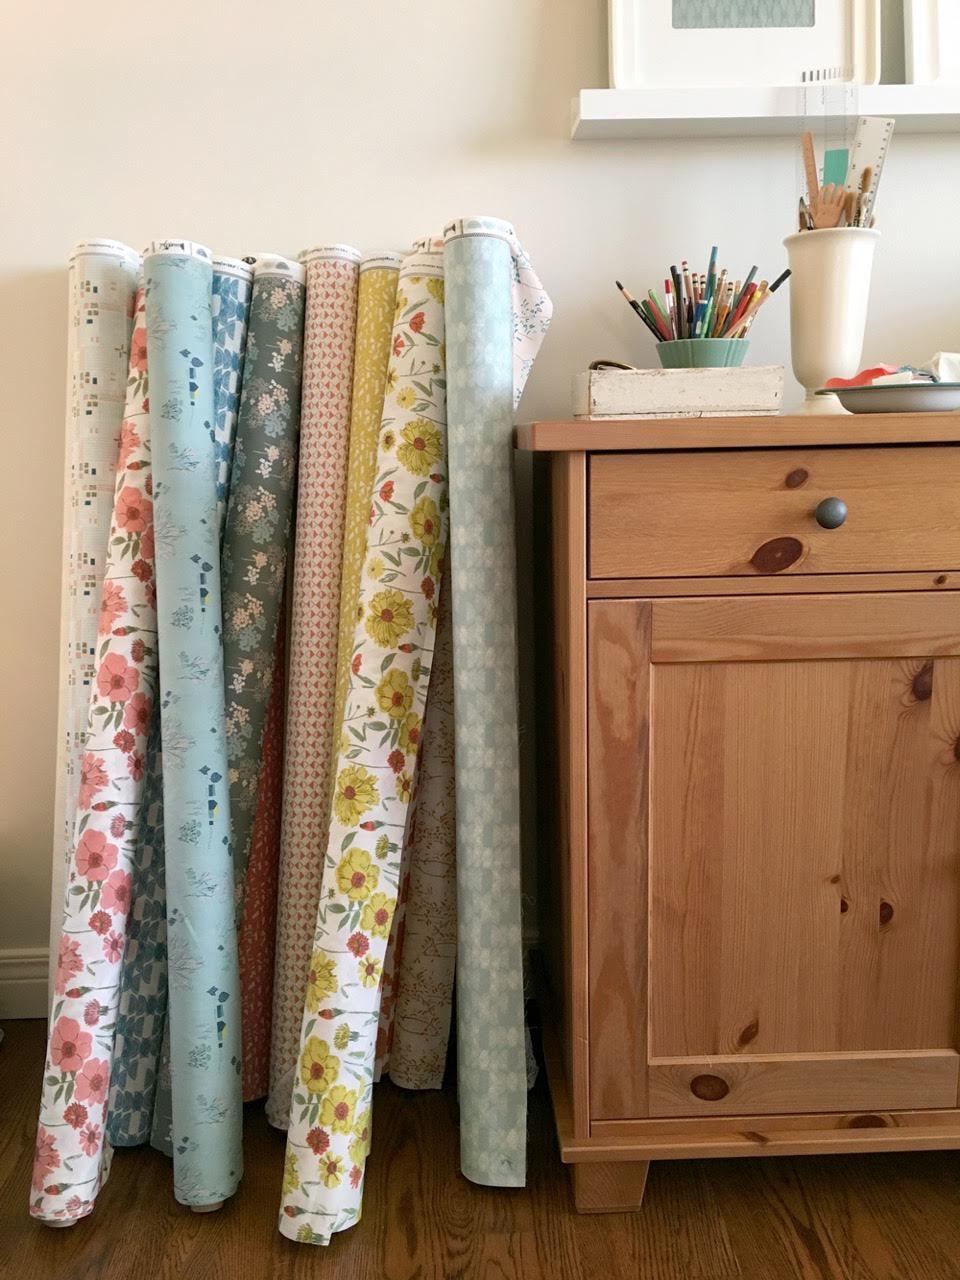
These rolls of the Bountiful collection sing. Think of the potential in this bundle of fabric!
We talked a bit about all five of her lines. She, like many designers, could not name a favorite. She said she usually favors the line she is currently working on and considers each line to be it’s own unique experience. I mentioned how easy it was to mix her fabric lines together because many of the colors are shared between lines. She said she usually tries to pull a few colors from the previous line forward into the new line so people can mix them. I really appreciate this as we so often purchase a number of pieces (if not all of them) from a line. After using them we have leftovers, right? It is great to continue to use them with the next line. Curiously, Sharon also mentioned that she is working on a new line (hopefully it will release at the end of the year or the first of 2018) where she is pushing herself to work with colors that are outside her norm. If you are familiar with her fabrics, you will remember she often uses muted tones with lots of blues, greens, and pinks. I cannot wait to see what comes with the next line.
Each time I interview a prolific artist I am impressed by the amount of work produced. So much effort goes into developing a fabric line, from the first ideas, to creating each design, working with the colors, telling the story.
Once the fabric is created, there is the promotion of the line – samples to be made, social media to interact with, trade shows to attend. Asking Sharon how she manages all of this, she told me she has to focus on one thing at a time. She doesn’t multi-task when she is creating something. This makes sense and it clearly leads to a lovely result for her. She only maintains a presence on her blog and Instagram. There just isn’t enough time for too many social media platforms.
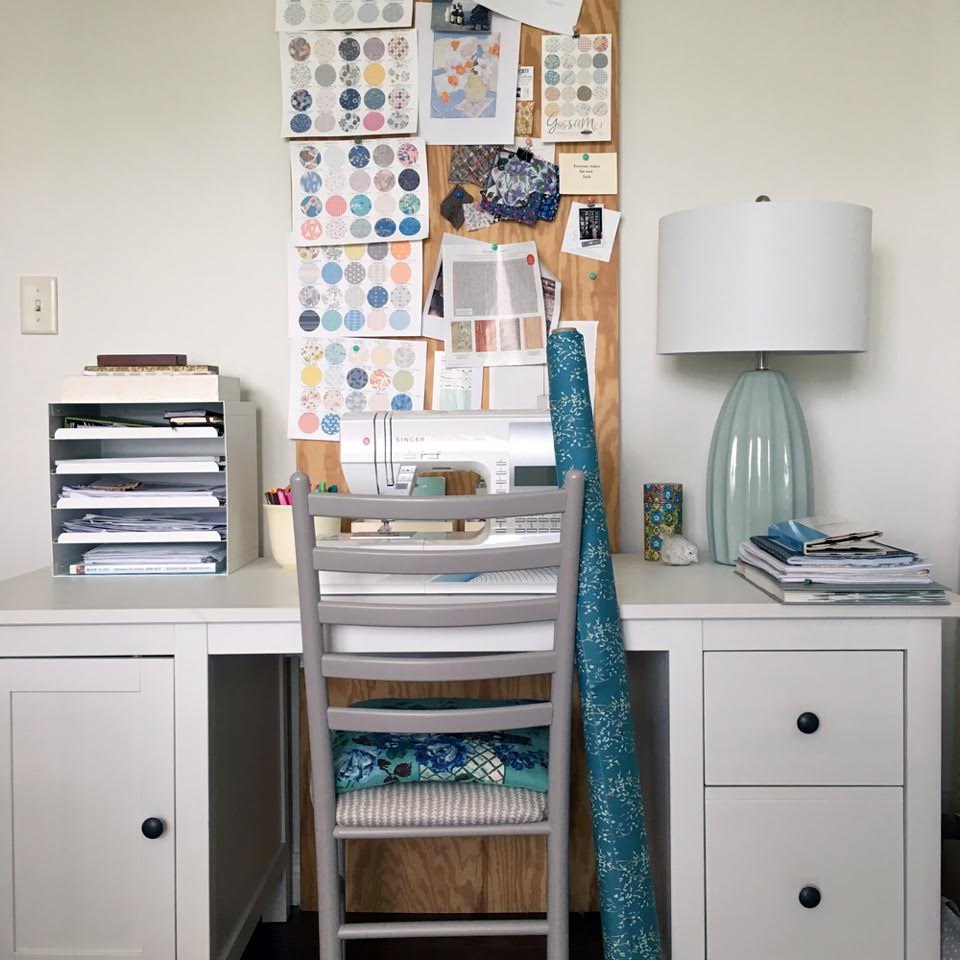
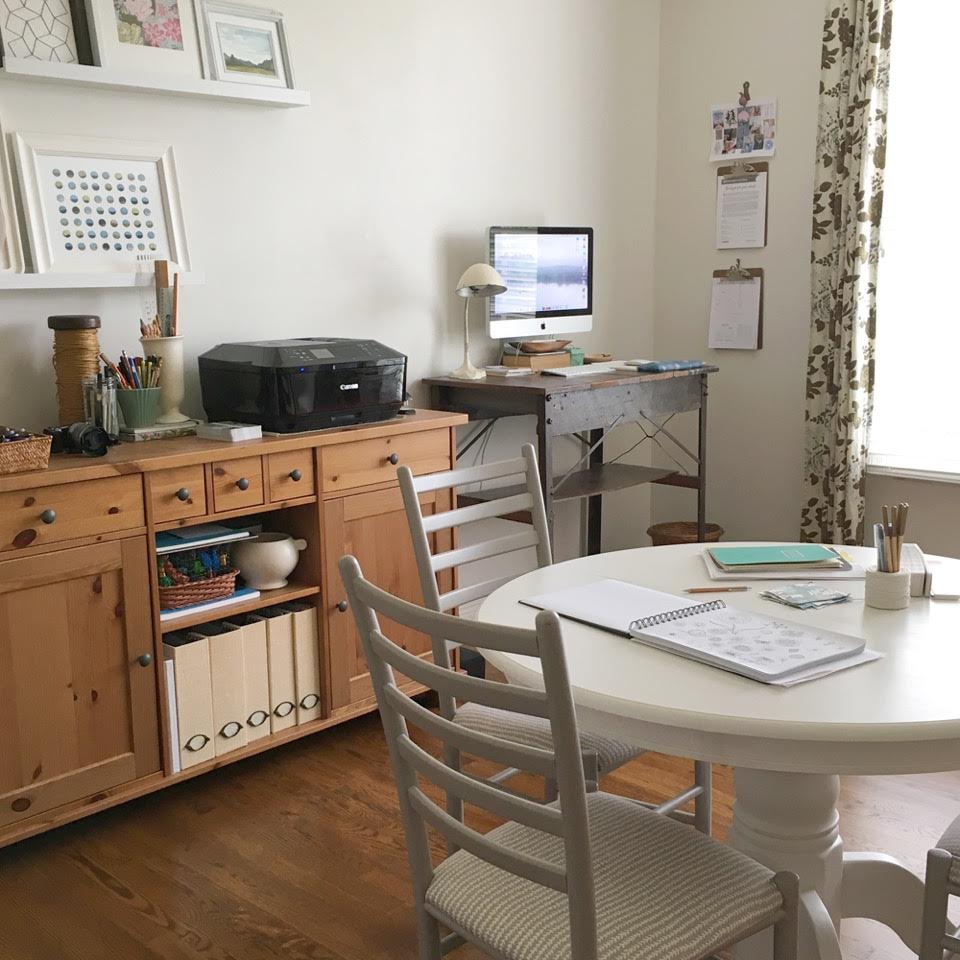
A peaceful place to work and to write.
We talked at length about the effects of increased usage of social media. It is difficult to have this barrage of images of all of these wonderful creations without feeling somewhat disillusioned by it all. Does that ring true for you? There are times I come away from Instagram thinking my work is sub-par after looking at so many amazing quilts; such gorgeous artistic work made by others. Sharon’s take on this is to use social media less often. In order to stay focused on your project, leave the phone or tablet alone while you are making. It is all to easy to derail the creative process with the abundance of imagery out there. Each of us is in our own place creatively and to compare our work with that of others can defeating. She (wisely) suggests each of us “own and experience our individual creativity”. She admits to sometimes overusing social media and refers to it as “feeding the monster”. All things in moderation, right?
I am one of many people who claim ‘I am not an artist because I cannot draw’. When I said this to Sharon she was very kind and encouraging. She has a degree in art but said as a young girl she was not one who could draw beautifully. However her sister was a wonderful artist. She envied this a bit and was determined to learn to draw. In Sharon’s opinion, people can learn to draw. It requires we learn from the right teacher or book. Then practice, practice, practice. She suggested a book titled Drawing With the Right Side of Your Brain, by Betty Edwards. Originally published over 40 years ago, this book is readily available on Amazon and there are tons of used copies to be bought inexpensively. Just after we talked about this book I read some reviews of it. I am going to give it a try. I have reserved it at our local library. Hopefully it will help me get past the idea that I can’t draw so I am not artistic. (Why are those two so heavily linked in my mind?)
As you might remember, I have been sewing along with the Sewcial Bee Sampler quilt along, hosted by Sharon and her dear friend Maureen Cracknell. This has been a great event which was created by Sharon and Maureen’s desire to further build community amongst quilters on-line. I am incredibly impressed by the organization and quality of this event. Sharon and Maureen decided to do this last fall. They spent several weeks working on nothing else until they had blocks designed, instructions written, sponsors signed up (I am one!! Look for a giveaway by Needle & Foot once in June and again in July!). There are many people sewing together and it has been a blast. If you haven’t checked it out, please do. My quilt is coming along so well and really, it isn’t too late to join in.
Finally, I asked Sharon how she spends her time other than designing fabric and hosting sew alongs (is there even any time left over at this point!?) She surprised me by saying she has a book in process. Titled, Utility Style Quilts for Every Day Living, it is being published by Landauer Books. The quilts she designed for this book are based on traditional blocks with a scrappy look. She encourages the reader to use up their stash with these fun projects that were in part influenced by Gees Bend quilts. I am looking forward to seeing the book when it comes out in the early fall. With the modern slant Sharon gave to the blocks we are making in the Sewcial Bee quilt, I know this book will have some great ideas and patterns in it.
I hope you have enjoyed getting to know more about Sharon. She was just a joy to chat with and I feel fortunate for having had this opportunity to learn about her and share it with you! In celebration of Sharon’s work, I have a sale going this week on her Bountiful fabrics as well as her Gossamer line. Both of them are lovely and if you desire, they play together nicely. No coupon code needed as the prices have already been reduced 15%. The sale runs through the end of the day on Friday! Click here to see what I have in the shop.
If you haven’t already done so, you might want to sign up for my newsletter. Look to the right side of the page and scroll down a bit. I would love to let you know of new fabrics and promotions going on in my shop!
Welcome back! Today I want to share a bit more about Maureen Cracknell and her gorgeous work. If you haven’t yet read it, part one of this interview was posted here yesterday.
When I spoke with Maureen last week I became intrigued by her stories and her developmental process as an artist. What most impressed me though, was her humility. She spoke with such a genuine tone and it was incredibly easy to have a great conversation with her. I asked her to talk about what inspires her when she is working on a line of fabric and she told me some wonderful stories.
It seems that sometimes, drawing, painting and then designing a line of fabric is very therapeutic for Maureen; it is a way to process and work through a life experience. She shared two of these stories with me.
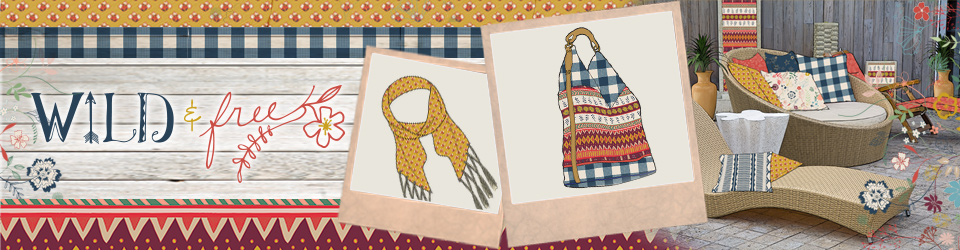
The first one was when she designed her very first collection, Wild and Free. This was the first line Maureen designed for Art Gallery Fabrics. Her mentor, Pat, had been encouraging her to take the step and design a line of her own. However, Maureen held herself back by worrying it ‘wouldn’t be perfect’, that maybe her work would be only ‘mediocre’. She was afraid to put herself out there and kept saying she wasn’t ready yet.
In June of 2013, Maureen’s father passed away. This was a time of intense grief, as one would expect. Out at a restaurant, sharing a meal with her family, Maureen ran into a friend of her father’s. He was expressing his condolences to her and he asked her if she was designing fabric. Maureen was somewhat taken aback and replied no, she was not. This friend told her that her father had mentioned Maureen would be using her artistic skill to design fabric. Her father told this friend that he was so very proud of her and knew she would do well as a designer, that he was proud she was going to be ‘making fabric’. This conversation between her father and his friend stuck with Maureen and she took it as a message from her dad that she could indeed do this.
At about the same time, Maureen received a call from her mentor, Pat Bravo. They talked and Pat mentioned that the whole Art Gallery booth was ready for the upcoming Fall Quilt Market show. She said they were only missing one thing. Maureen, of course, asked “what is that”? Pat’s reply was, “you, we are missing your fabric”. Maureen was blown away and this was just the gentle push she needed to jump in and begin.
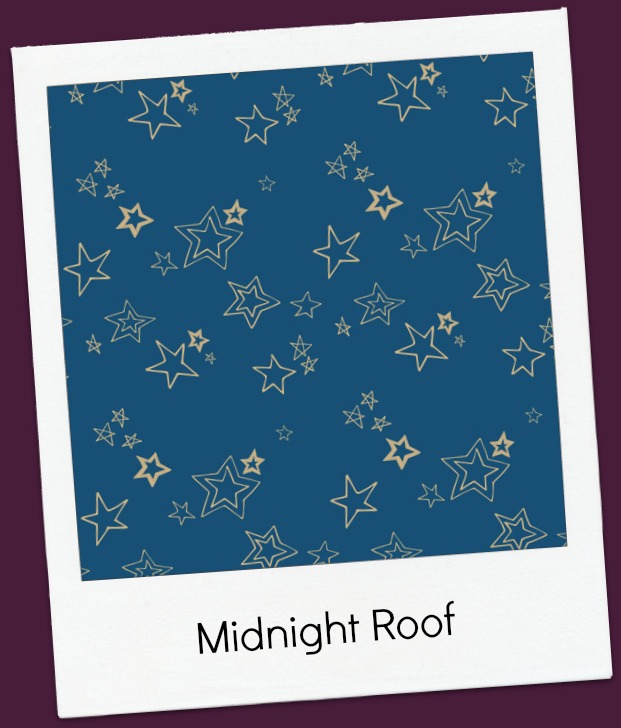
In Wild and Free, Maureen used drawings she already had as well as new pieces of art to create the line. There is even a design based on drawings she made with her children. The star fabric, Midnight Roof, is one of these. This simple blender is based on a game Maureen often played with her children where she would draw a line and then the child would add a line. They continued this back and forth sharing and together, they would create stars. She and her children also played this game to create hearts (with each person drawing half of the heart) as well as portraits where they each add to the portrait, turn by turn.
When Maureen agreed to jump in and start designing her own line, Pat generously made herself available to Maureen, teaching her how to use Illustrator for design purposes. They had many Skype sessions with Pat guiding Maureen through the design process as well as teaching her to use the software. Not long after they began, Maureen’s first line, Fleet and Flourish, was displayed in the Art Gallery Fabric booth at Quilt Market. Maureen won Best New Exhibitor that year! What an amazing start to her career as a designer.
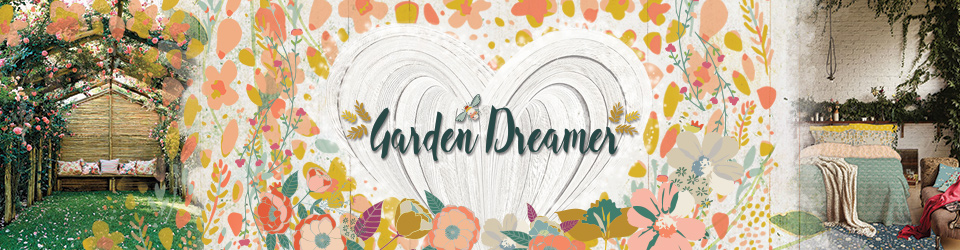
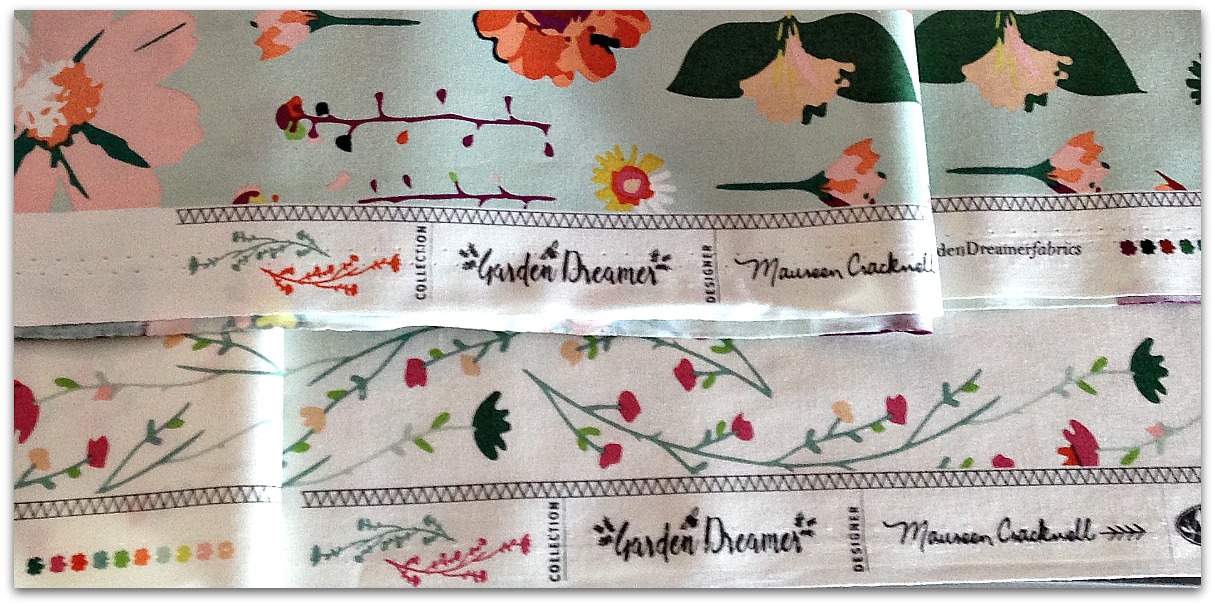
The next story is as heartwarming as the first! The current Maureen Cracknell line that is flooding quilter’s stash everywhere is Garden Dreamer. It is just a fantastic collection of florals, both large scale and small, with shades of greens, blues, corals and purples. Truly a gorgeous line of fabric, she told me the story of how it came about.
When her children were little the Cracknell family lived in a house which happened to have a very small yard. Her neighbor, Leslie, kindly asked if Maureen would like to bring her children to play in her yard so they would have a little more space to run around. As any sane mother of three young children would, Maureen happily accepted the offer. She and her neighbor became very close and their children grew to be friends. While the children played, Leslie taught Maureen to garden. They spent many playdates together in the yard, weeding and tending the garden. This was Maureen’s introduction to gardening and she enjoyed being in the yard with her friend and both of their children. Her neighbor had a very green thumb and grew gorgeous perennials in her yard. She took the time to teach Maureen how to garden, what the names of the plants were and what sort of environment they would grow in. Sometime later the Cracknell family moved to a larger house. When they moved, her neighbor dug up plants, dividing them from her perennials so that Maureen could plant them in her new yard. Unfortunately, not too much later, her neighbor was diagnosed with an aggressive cancer. Maureen was very supportive of Leslie during the treatment phases but ultimately she passed away. Grieving this loss in her life, Maureen created Garden Dreamer in tribute to her neighbor. She says that “Leslie passed away just before I began sewing but I know she would be thrilled about all of this.”
I think the emotion Maureen pours into her work translates to beautiful color and composition. Her fabrics are full of joy. I asked Maureen whether she had any input into the adorable selvages that Art Gallery puts on her fabrics. She explained it was actually up to the in house designers at Art Gallery. They design her promotional materials as well as the beautiful selvages. I don’t believe I have bought a piece of fabric just to get the cute selvage, but it is a fun bonus to see a pretty selvage trimming the fabric I bring home. Art Gallery for the win here!
Fleet & Flourish Booth at Quilt Market
We had a nice time reminiscing about her experiences at Quilt Market as a part of the Art Gallery team. It was heartwarming to hear the love Maureen has for her partners at Art Gallery. She is both indebted to them for all she has learned from them as well as invested in the company as a loyal member of their team of designers. She spoke about the way that Art Gallery fosters an environment of collaborative teamwork.
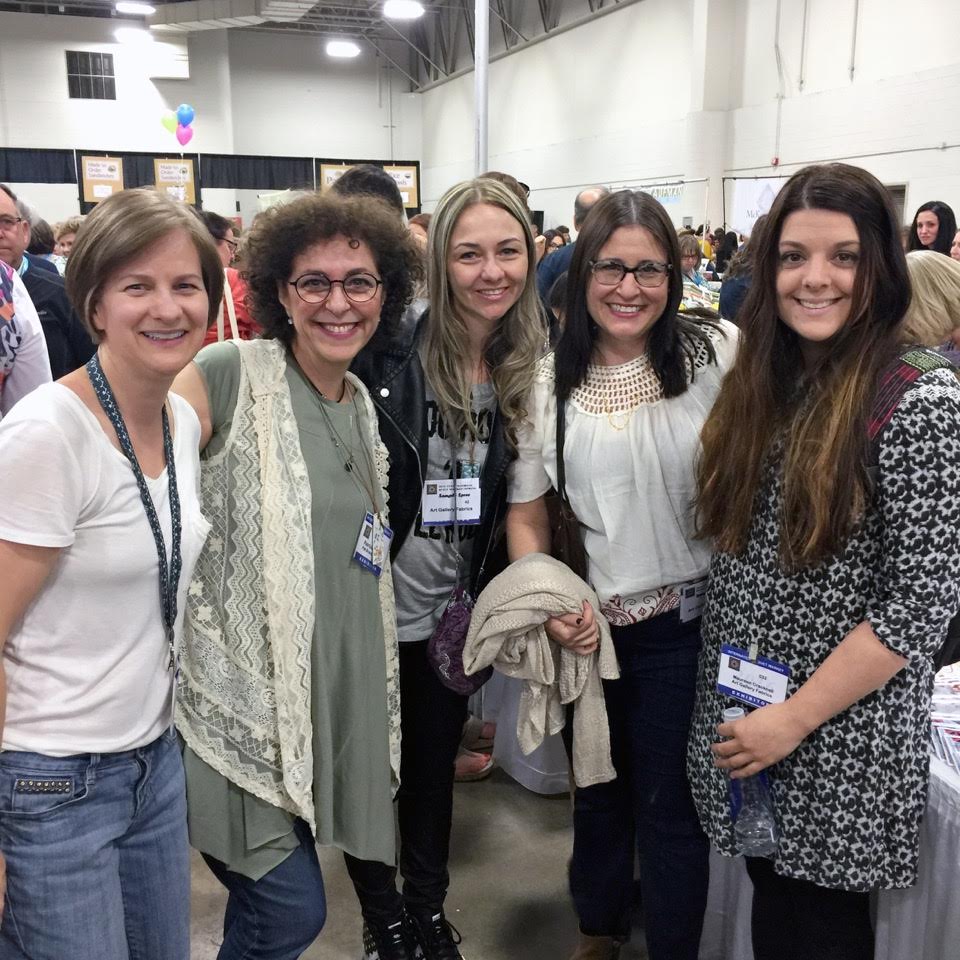
From left: Sharon Holland, Pat Bravo, Katarina Roccella, BariJ, and Maureen Cracknell
I want to interject here. My experience thus far with Art Gallery as a new shop owner has been superb. I have called numerous times with questions on process, delivery dates, shipping cost, etc. Each time I have been greeted with warmth and a kind hello. Sometimes I find myself talking with a knowledgeable customer support person and other times my call is taken by none other than the owner, Walter Bravo. He treats me with as much attention as he would a large operation; I am never made to feel less important because my orders are usually five bolts at a time. This impresses me deeply. Prior to retirement, I managed a Human Resources group for quite a few years. I know first hand the benefits of fostering an atmosphere of teamwork and collaberation within a group of employees. The team becomes like a family and the positive effect of this trickles down and is felt by customers, thereby increasing their loyalty to the company. I am an example of this. I am proud to carry Art Gallery Fabrics in my shop.
Being the curious sort and not wanting the conversation to end, I also asked who makes the decision to make her fabric into the usual gorgeous cottons that Art Gallery produces as well as knits, canvases, voiles and, soon, rayon fabrics. This is a collaborative decision made by the designer and the team at Art Gallery but the head designers have the final say. I am happy to see the other types of fabric offered as it allows for so many different sorts of projects. Art Gallery does an awesome job with their lookbooks. If you haven’t taken a peek, it is worth your time. There are samples of everything from home decor, quilts, dresses, skirts, totes, bags, pillows and more. Free patterns are offered on many of the examples. If you want to see the book for Garden Dreamer, click here.
I hope my posts have given you a peek into Maureen’s work and creative process. I feel like I made a new friend after chatting with her and I am grateful for that.
As I mentioned yesterday, Maureen’s Garden Dreamer fabric is on sale through Sunday, March 19th. Save 15% this week only. No coupon code needed, prices are already adjusted.
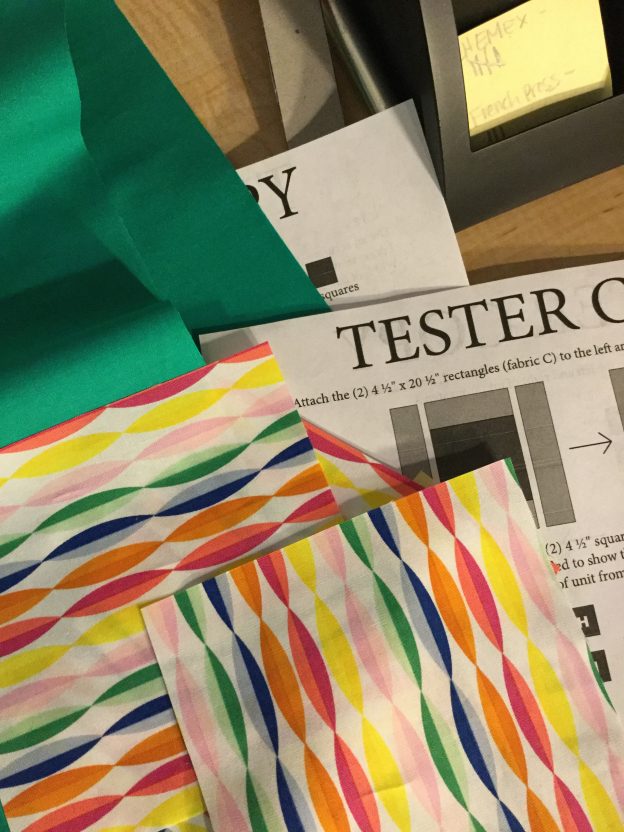
I have followed Sarah Goer’s blog, for a long while now. We both began blogging around the same time and somehow we became blogging buddies. Sarah is crazy busy these days. A stay at home mom of two little ones, she also blogs, quilts, and spends a lot of time teaching her two (very young) children to quilt. Now she is adding pattern design to her list of talents. When I heard she was soon to release her first pattern, I threw my name in the hat to be a pattern tester for her.
This is the second quilt pattern I have tested. Last year I tested for Mihaela of A Beautiful Day. You can read about that here if you like. Sarah’s pattern is very different from Mihaela’s Urban Folk Quilt pattern. She wanted to develop a pattern for beginner quilters. I think this design is just perfect for new quilters. It has very basic cutting and piecing which ensures success. That is just what a new quilter needs so they will gain confidence and feel good about their progress. Sarah did an excellent job with the pattern. Her instructions are very clear and easy to follow.
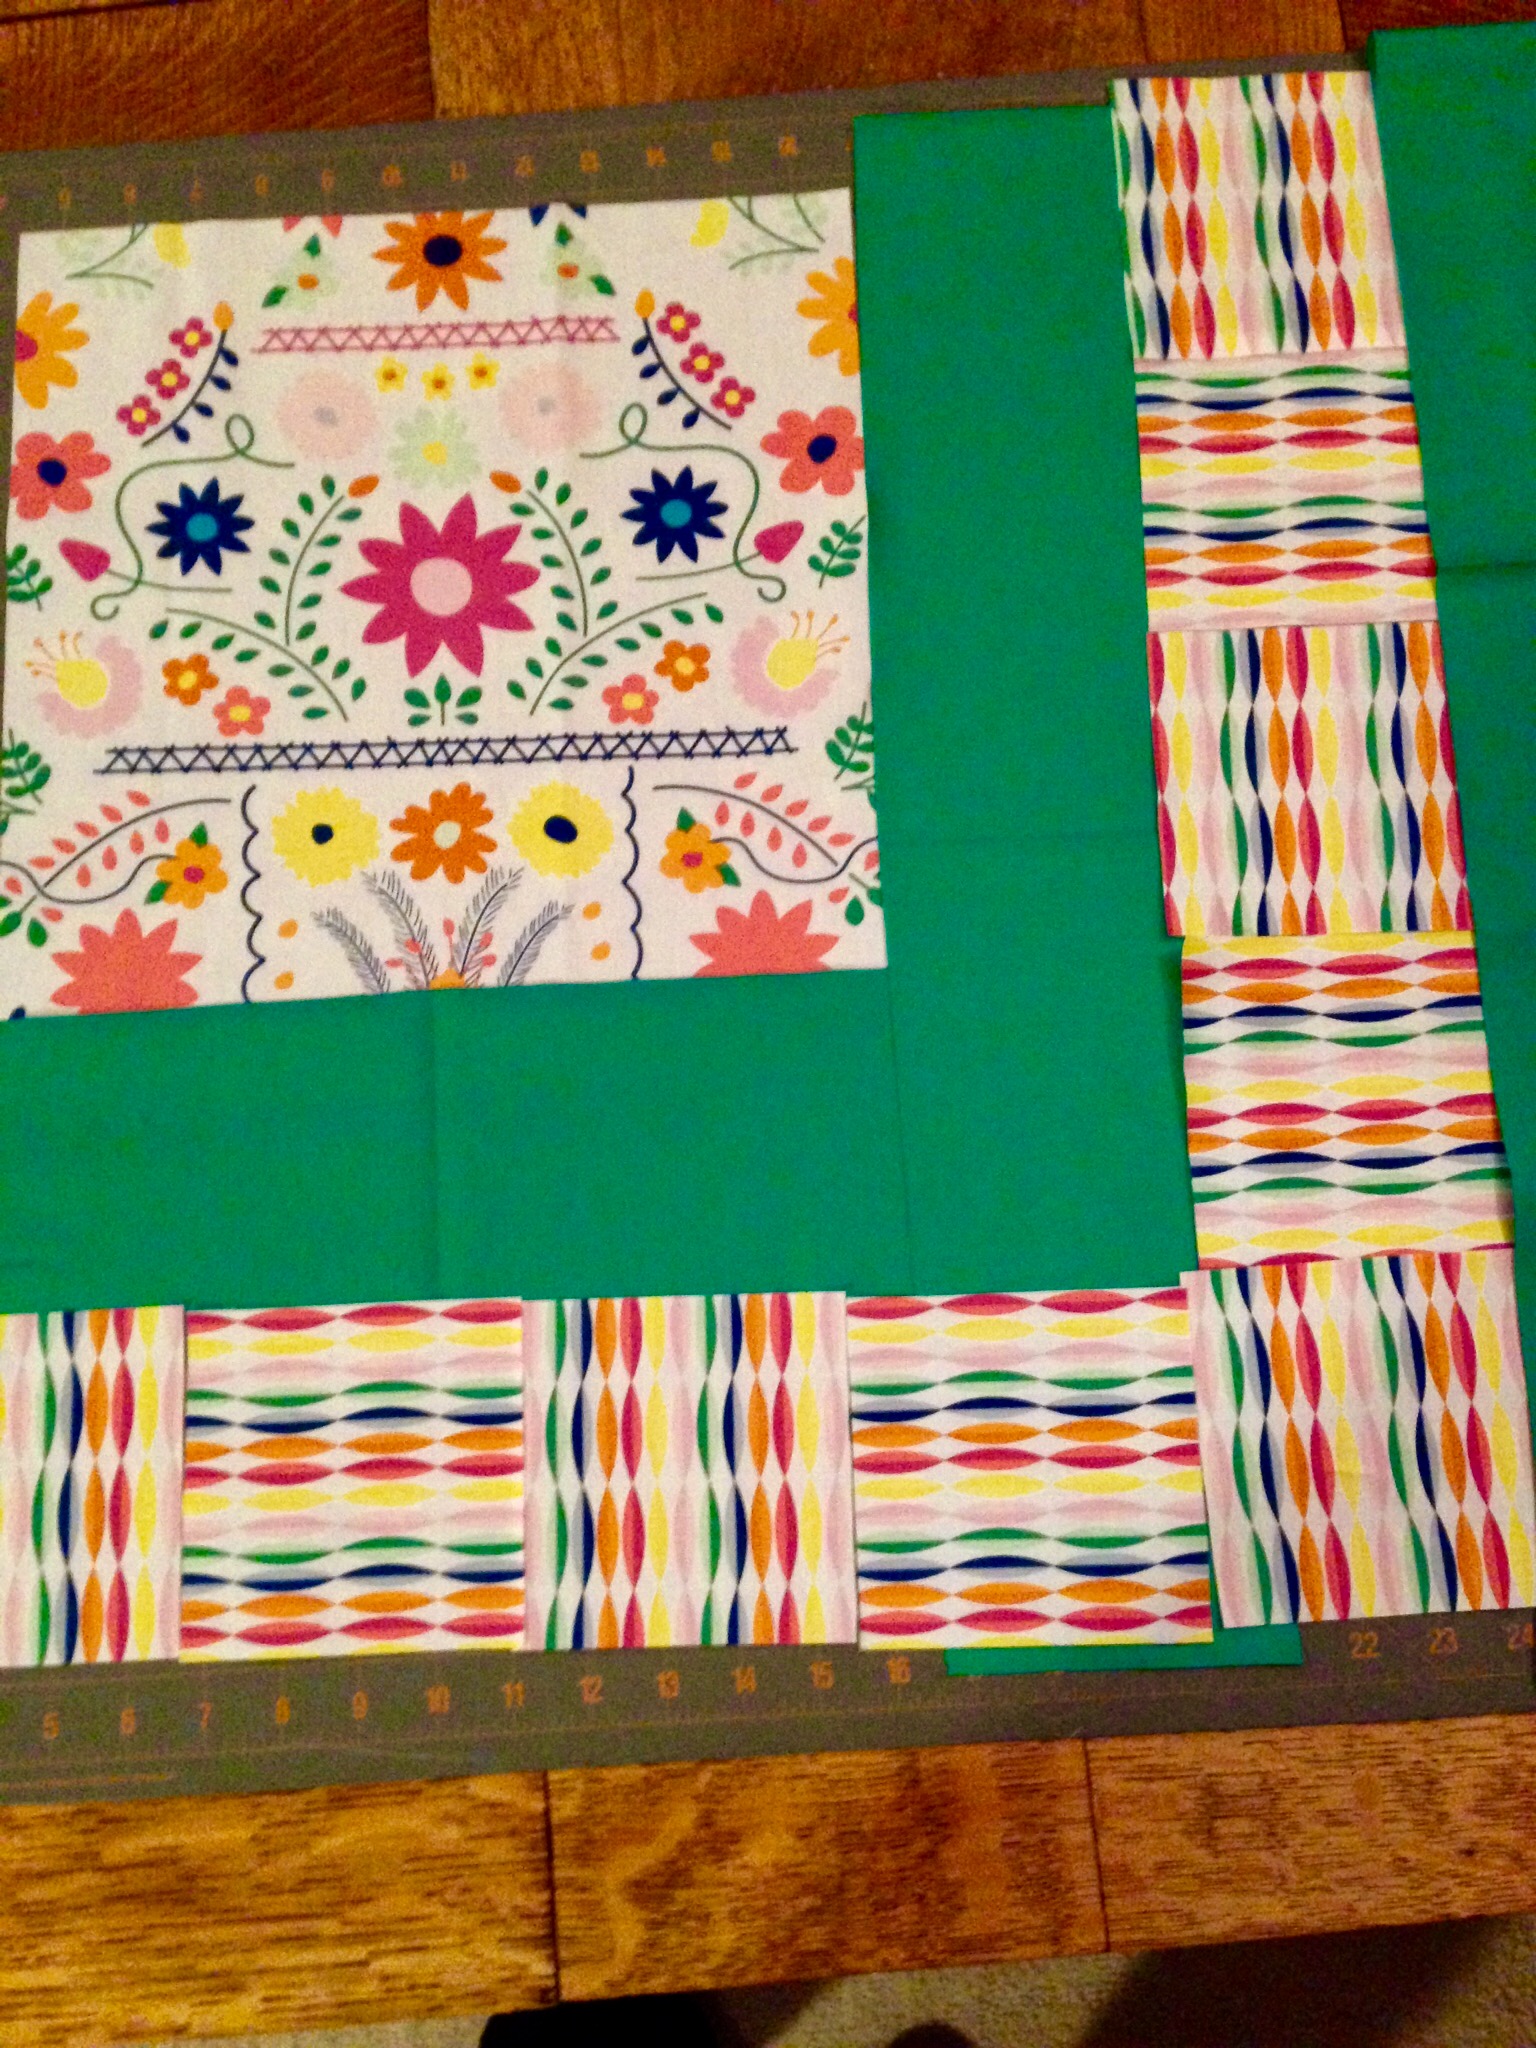
I chose to make Sarah’s pattern with this colorful bundle of fabric from the Fiesta Fun line produced by Art Gallery Fabric. Sarah’s pattern uses directional fabric to create some movement within the design. A focal fabric is placed in the center and the directional fabrics surround it. This pattern came together in an afternoon. I cut it and pieced most of it the day before we traveled to Toronto. Because of its simplicity, I think this would be an excellent pattern for quilting instructors teaching a Basic Beginner Quilting class.
I love the bright colors used in this quilt. The top finished at 36 inches square; perfect for a baby quilt. I have some fun ideas on how I want to quilt it. Maybe with a spiral? Maybe a spiral that begins in a corner and works its way across the quilt? Time for some doodling to figure out which motif to go with and then there is the torturous decision about thread colors (never an easy one for me). I also need to dig through my stash and find a backing fabric. I do have the perfect binding though, a bright polka dot fabric. Hopefully I will get it quilted soon. The size is reasonable and won’t take too long to do.
This pattern will be given to anyone who signs up for Sarah’s newsletter. Her first issue will be published next week. If you are interested, you can sign up here. I am looking forward to receiving the first issue.
Linking to my favorites this week. See the list at the top of the page, under Link Ups.


 I think it is good to have a break between the bold orange dots and the busy floral fabric.
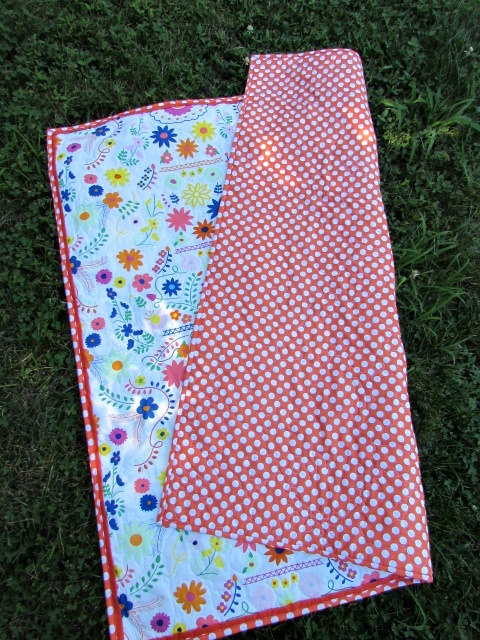

 Pin in place. (I know… my markings are a bit wiggly.) Sew just a hair to the right of the stitching line. Take it slow here. This is probably the fussiest part of this project. Stitch down to the point and put your needle down to hold your spot.