
You’re back! I hope that means you were able to lay out and cut your fabric pieces. If you had any trouble, don’t hesitate to email me at needleandfoot@gmail.com. Or, you can always leave a comment on the blog or the Facebook page. I am happy to help.
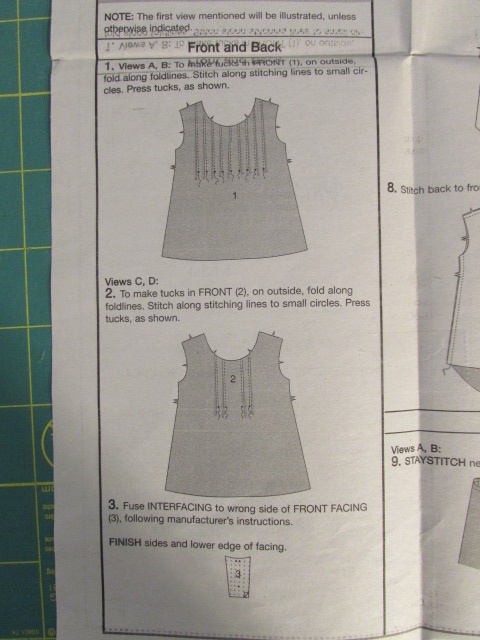
Today we are going to take our time and work on the details that make the front of the shirt unique. I think these details are both challenging and fun. If you take it slow, you will have good results. We are going to mark the lines for the pin tucks and also the stitching and cutting line for the slit at the center of the neckline. The portions of the instruction sheet we will be working on are numbers 1 through 6.
NOTE: For marking, I used a Frixion pen (the one that erases with the heat of the iron.) You should use whatever is comfortable for you. For the pin tucks we are marking on the front of the shirt so make sure it will come out easily. A piece of chalk would be good. Because my fabric is light in color, chalk wasn’t an option for me. Plus I want my markings to show in a photo for the blog so I needed a darker color.
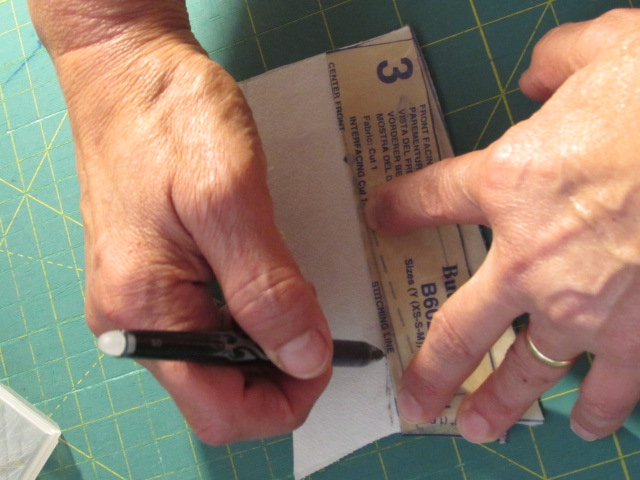
We will mark the center stitching line first. It is easiest to mark this on the facing piece, rather than directly on to the front of the shirt. You need to fuse the interfacing to the wrong side of piece number 3 first. When the interfacing is fused, lay the paper pattern piece back over the interfacing side. Fold back the bottom of the paper and make a mark the bottom of the slit.
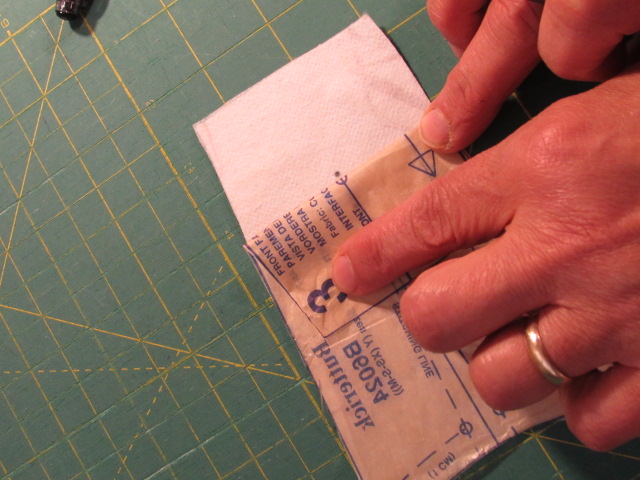
Fold back the paper lengthwise on the dotted line and trace your stitching line. Then fold back the other side along that broken line and trace the opposite stitching line.
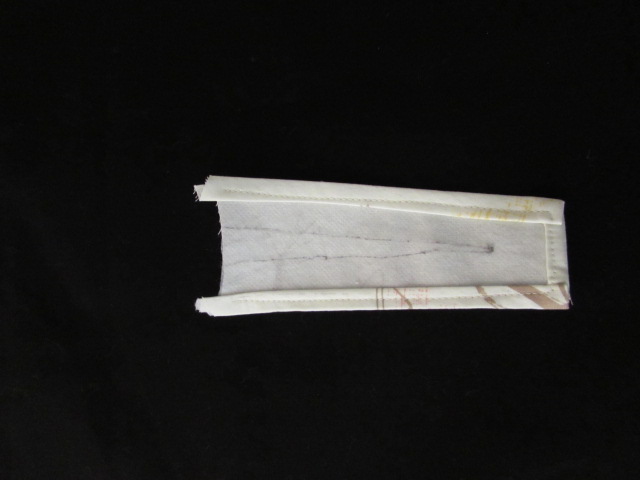
I noticed that the drawing of the slit comes to a deep point. I did not sew that far down because there would not be any seam allowance alongside the stitching line at the deepest point of the V. Instead, I traced and stitched a shorter, wider V on my piece.
Once you have your facing piece marked, you need to finish the edge of the facing so it doesn’t unravel or fray when it is washed. I always fold a very narrow 1/4″ to the wrong side around the three outer edges (both long sides and the bottom). Press that first fold. Then fold it again and press that second fold. Pin to keep it in place as you stitch.
NOTE: Just like with free motion quilting, it is always best to draw your bobbin thread up to the top before you begin stitching. This will prevent that little rat’s nest of messy stitches that occur now and then. Also, with any stitching on a garment, stitch forward about two stitches, reverse for two stitches and then begin to sew. You need to reverse so that your stitches are locked down and don’t unravel.
Press after stitching. If you are using a Frixion pen, remember not to iron over your markings or you will have to trace a second time. (Ummm….don’t ask me how I know this.) Once your facing edges are finished, set it aside for now.
I feel like explaining the pin tucks with the written word is a bit of a challenge so, with the help of my daughter, I made my first ever YouTube clip. I think this will give you a good idea of how to fold the pin tucks. If the video doesn’t work in your browser, click here.
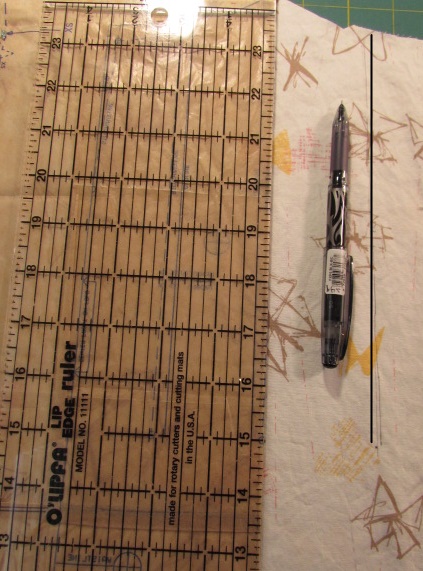
Now let’s mark the pin tuck lines. This will be much like marking the line on the facing piece. This time, fold the paper pattern back on the broken line (your stitching line). Use a clear ruler or straight edge to draw a line on the fabric from the top to the dot at the end of the stitching line. You will mark these twice on each side of the front piece. After you do the first side, remove the pins from the piece and turn the fabric over. Lay the piece down (should be upside down this time) and mark the two lines on the other side of the front piece. It is hard to see my lines so I drew over one to give you the idea of what I mean. Ignore the fact that I couldn’t line my hand drawn line with the computer drawn line! I definitely need some lessons on using graphic art tools!
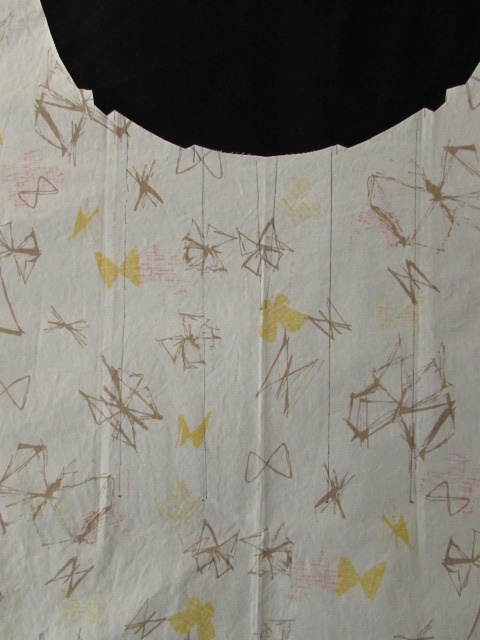
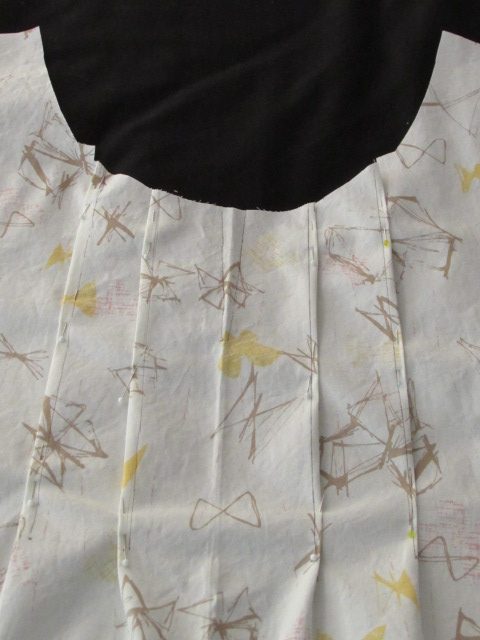
 When you have all four lines drawn, it will look something like this. Again, my hand drawn lines are faint.
Next we will make the folds and pin the tucks in place. You want to pick up the fold at the notch and take it to the side. Finger press and pin in place. Remember, if it is folded in the correct direction, the notch will make a nice smooth curve for the neckline. Pin down to that dot we marked for the end of the tuck.
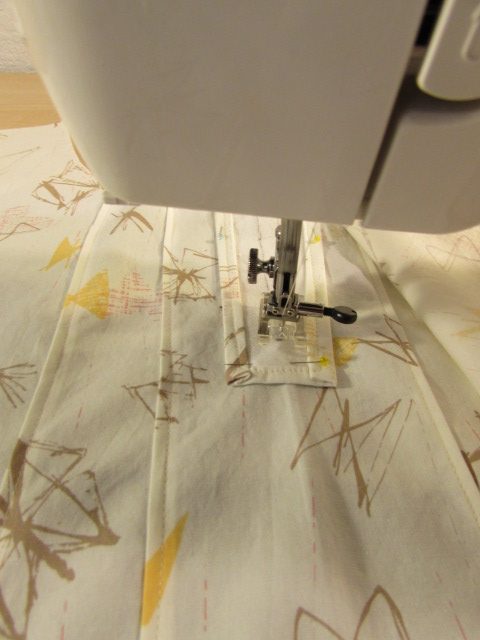
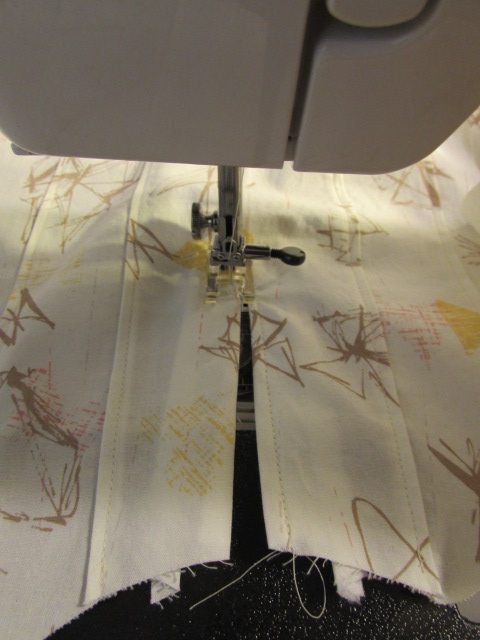
Top stitch each of the pin tucks, drawing your bobbin thread to the top before beginning the seam. Also, be sure to reverse for two stitches and then proceed to the end of the tuck. How does it look?

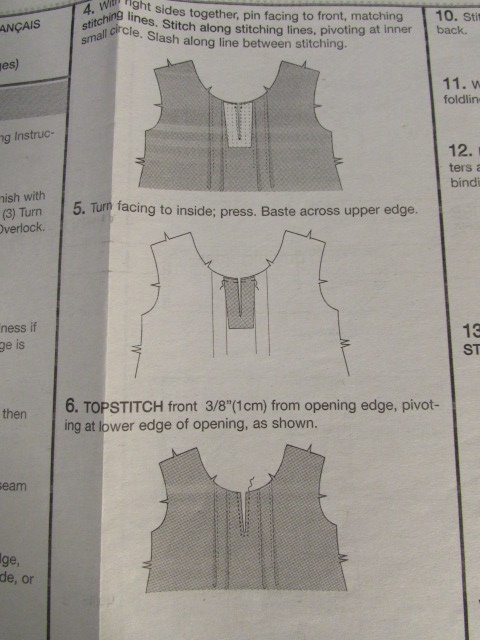
The next step is to attach the facing. Take the piece and lay it right sides together on the front piece. It will be centered between the tucks.
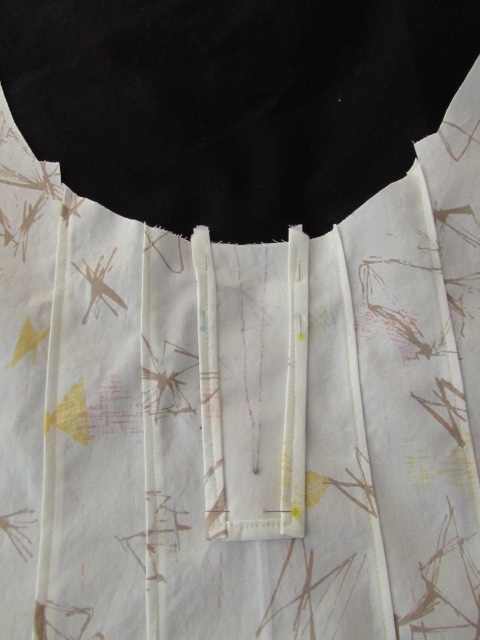 Pin in place. (I know… my markings are a bit wiggly.) Sew just a hair to the right of the stitching line. Take it slow here. This is probably the fussiest part of this project. Stitch down to the point and put your needle down to hold your spot.
 Pivot, by turning the fabric, and stitch 2 or 3 stitches. You will need to have this bit of room when you clip this seam. Then with your needle down, pivot the fabric again and stitch back up to the top of the neckline.
Press your seam. Just press the facing as it lays on the front of the shirt to smooth your seam. Next you will carefully cut the slit between the two long rows of stitching down to the point (where you made those two stitches and pivoted).
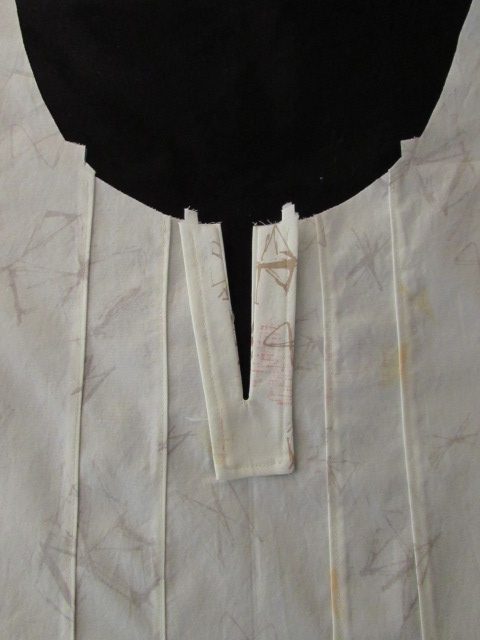
Make sure not to cut through the stitches. Now turn the facing to the inside of the shirt. You will likely have to massage the facing a bit to get it to lay flat. Use some steam and iron the front of the shirt with the facing on the inside.

The last step for today is to top stitch the opening in the neckline. Pull your bobbin thread to the top and stitch a uniform line no more than 1/4″ from the seam. I stitched mine at 1/8″ because I wanted to reinforce the facing seam. There is so little seam allowance here and I think a tight top stitching will prevent any problems.

Now that the front of this shirt is complete, you can breathe a sigh of relief. This was the toughest part. Hurray for you!
The next post will be on Friday, June 23rd. On Friday we will check the fit, learn about finishing seams, and sew the back, shoulder and side seams. Easy Peasy! See you then.
Please do not hesitate to ask questions. If you are wondering something, it is likely there is another reader wanting to know the very same thing. Leave a question and I will get back to you!!
Do you have any suggestions about thread for garment sewing?
Samantha, I don’t have a strong preference for garment sewing. I am fine with basic Dual Duty by Coats & Clark. I am using a spool of Madeira because it was the only off-white thread I had on hand. I tend to be pickier with quilting and usually use Aurifil, mainly because I think Dual Duty leaves too much lint when quilting. But for a shirt there is not nearly as much stitching so I don’t think it is problematic.
Nice video Bernie! Did your multi-talented daughter video you?
I’m not joining in, but I do love your pattern. Reading through reminds me of the days when I sewed clothes for myself and my kids. It has been a long, long time, and I realize I miss the satisfaction of following a pattern to make something to wear. I sewed from age 14, and it is definitely a lost art for young people today. Cheers to you for doing a sew-along – you are doing a great job!
Yes, my daughter was the videographer!
I am really enjoying this series and getting to know the group that is working on the shirt. It is a bummer that home ec classes have gone by the wayside (at least in California anyway) I think there is a resurgence of interest in garment sewing though so I am happy to see that.
Well Bernie: Life has been way to crazy for me to start this project but I’m keeping it on the back burner.
Oh my gosh, I think you have plenty on your plate right now Lisa. We can sew together another time. give that baby a hug for me!
This is such a fun sew along, a nice diversion from piecing quilts! Your a genius! Although I’m not participating, I am enjoying how much others are getting into it. Who knows! You might just start a renewed revolution! I remember, back in the day, sewing up all my daughter’s clothes and at least half of my own. What a great feeling of accomplishment.
Hi Bernie, I’m confused do we sew the pin tuck on the right side of the fabric or on the wrong side? Thanks for your patience.
Shirl
Shirl, sew it on the right side. Make the fold and take it to the outside, toward the armhole so your notch creates the nice curve at the neckline. Press and then top stitch. Does that make sense? If not, we will try to work through it.
Super instructions! The video was perfect! I am off to pin tuck!!!! I am just using a pencil to mark…it is all I have ever used…I can’t imagine the fabric knows it is a shirt instead of a quilt…I am counting on it washing out? This is sew exciting!!!