Monthly Archives: April 2016

Spring Veggies

I have been looking at the weather on the East coast and reading about snow and freezing temperatures this first week of April. Yuk. We lived in Pennsylvania for a couple of years in the early 1990’s. While I did love living in State College, I remember those winters felt really long.  One year my mother ordered an arrangement of blooming daffodils because she knew I was green with envy that she was having spring in Northern California while I was still dealing with snow.

Now that our temps are warm, my husband has our spring veggies planted. He put in lettuce, kale, broccoli, chard, and seeds for green beans, snow peas and carrots. All of these can handle our nights which are still dipping down into the 40’s. I decided to share a quick idea with all of you, but especially those of you who aren’t yet able to be outside digging in the dirt and planting veggies. Have you grown sprouts before? I love fresh sprouts in salads and sandwiches and have them growing regularly in my kitchen. It is especially nice in the winter months when I can’t grow anything outside.

This is all you’ll need:IMG_0822

  • One bag of Mumm’s Sprouting Seeds (they have various flavor combinations and one bag will last for a very long time!)
  • One quart size Mason jar
  • A scrap of netting or tule & an elastic band

To start a batch, place one tablespoon of seeds into the clean Mason jar. One tablespoon will fill the jar once they all sprout.

IMG_0824

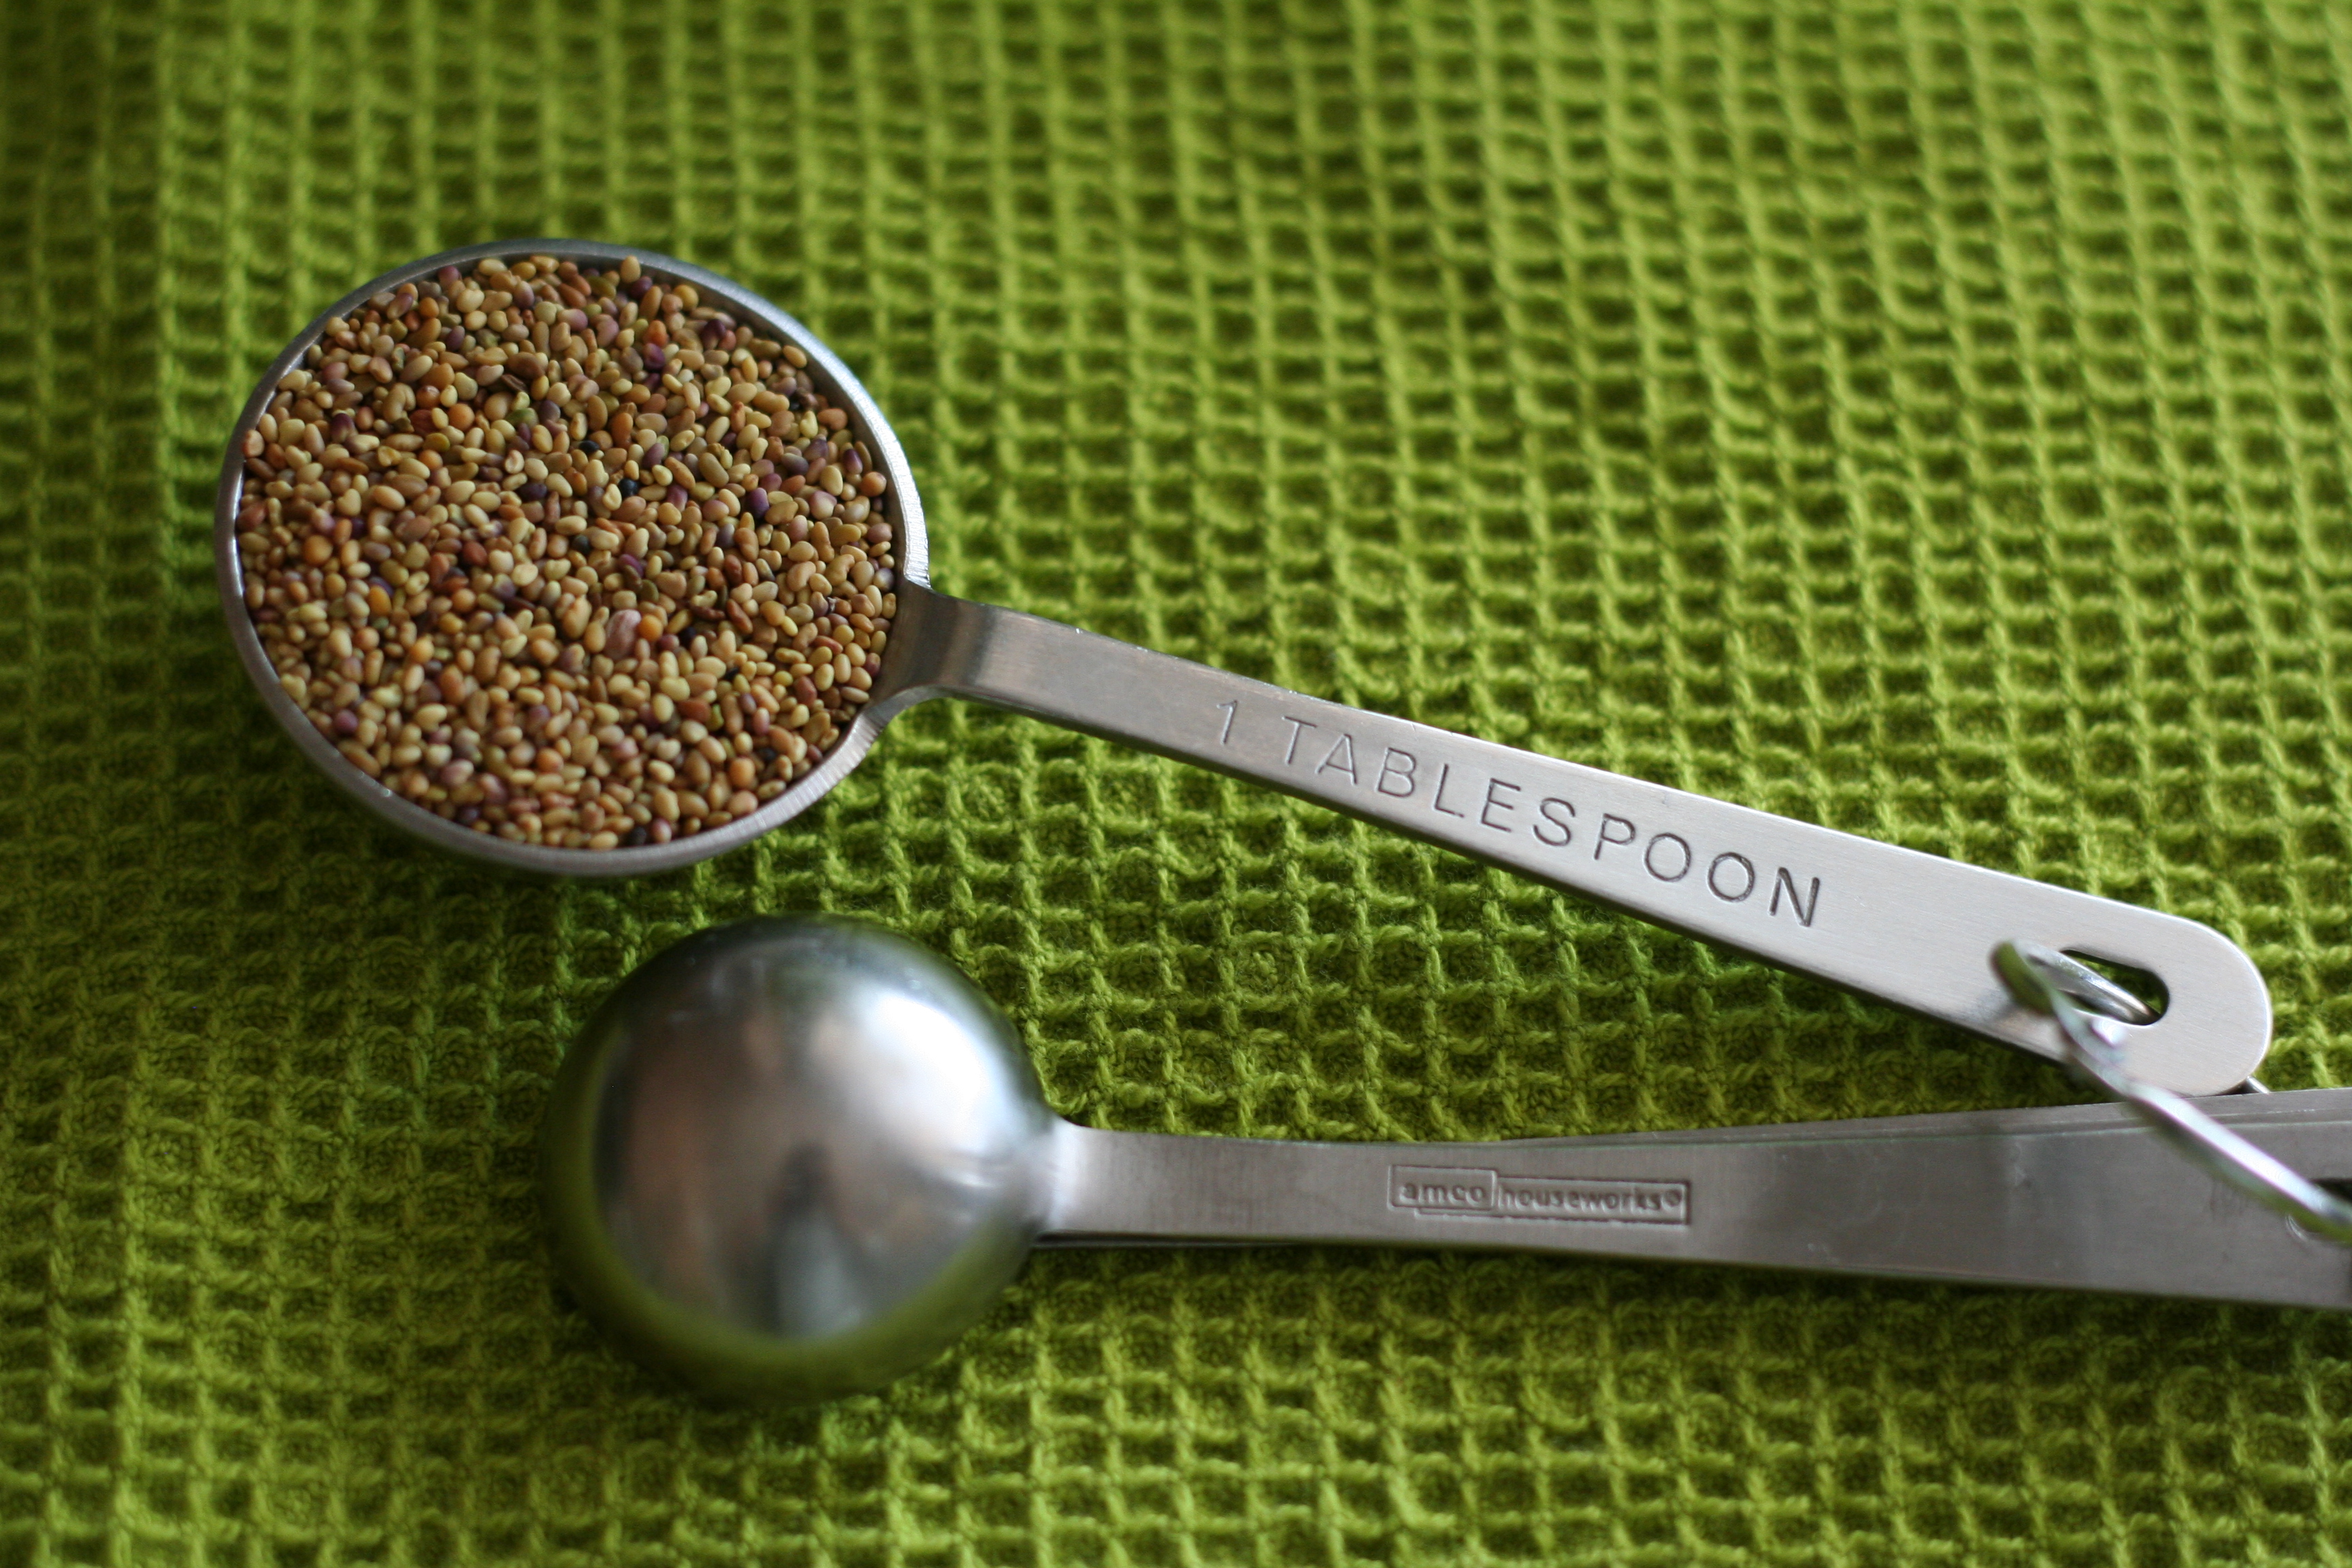
I keep the extra seeds in the freezer. They will keep indefinitely if frozen.  Put cool water in the jar to cover the seeds by an inch or two.

IMG_0826
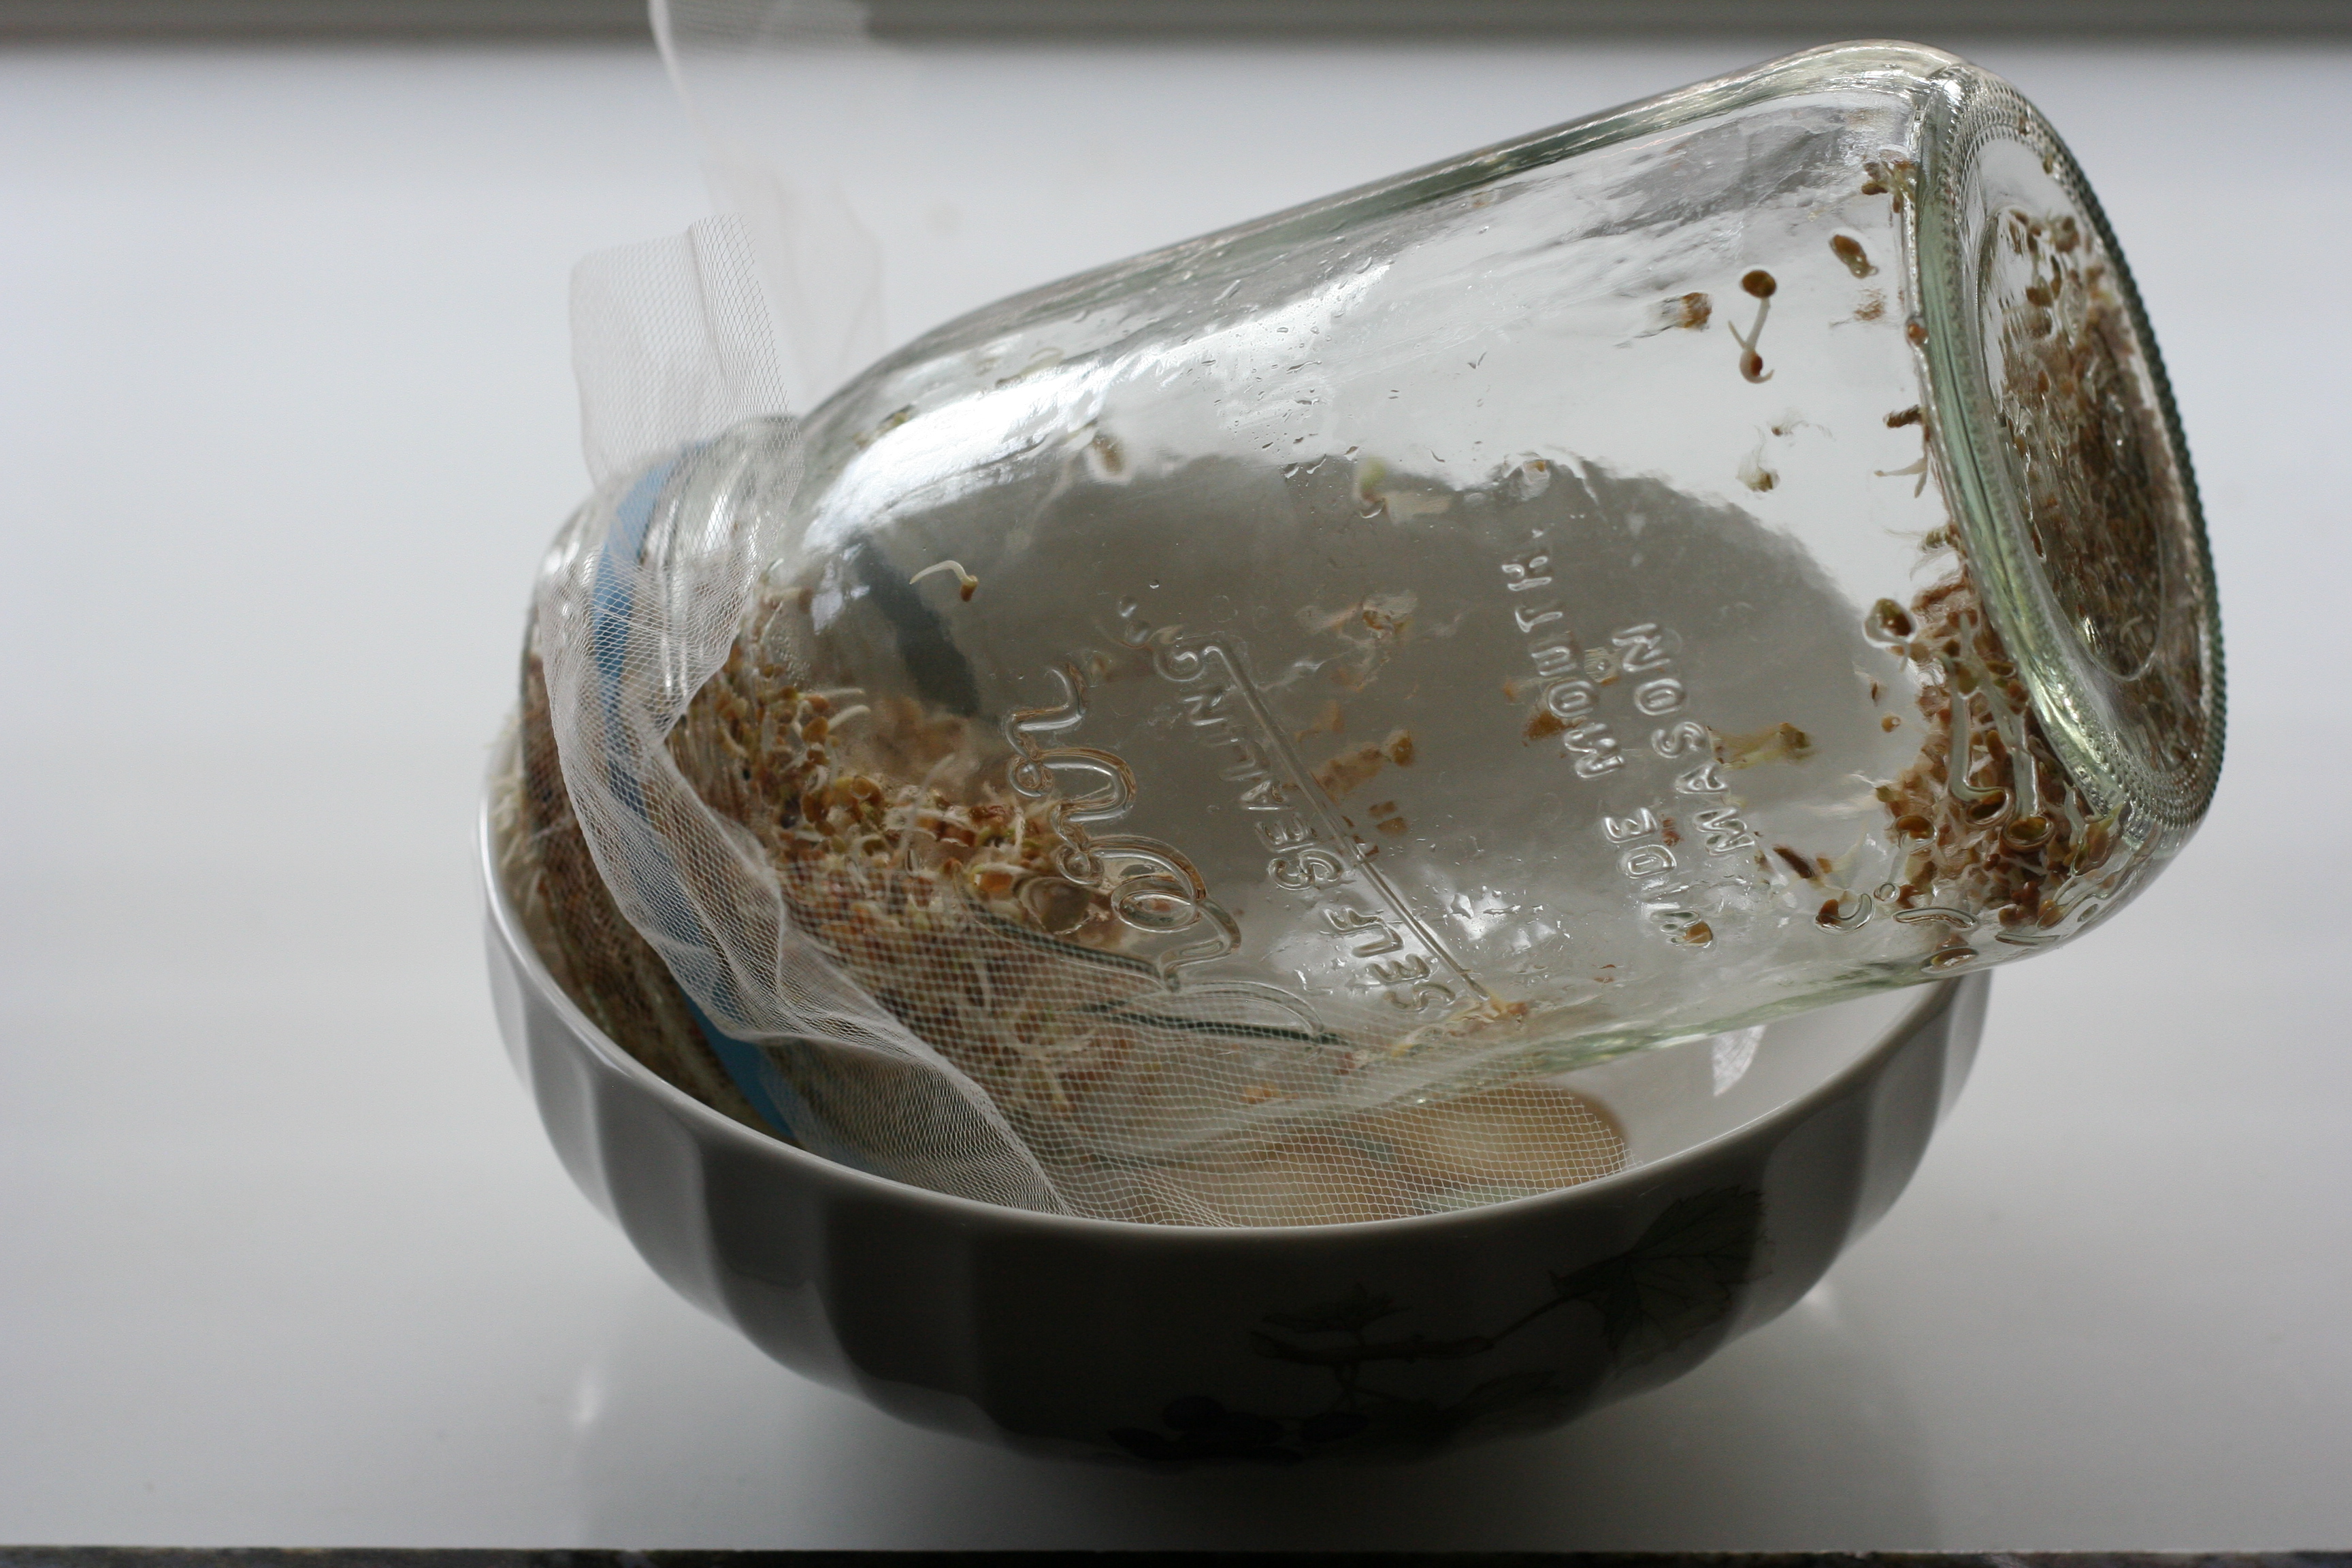
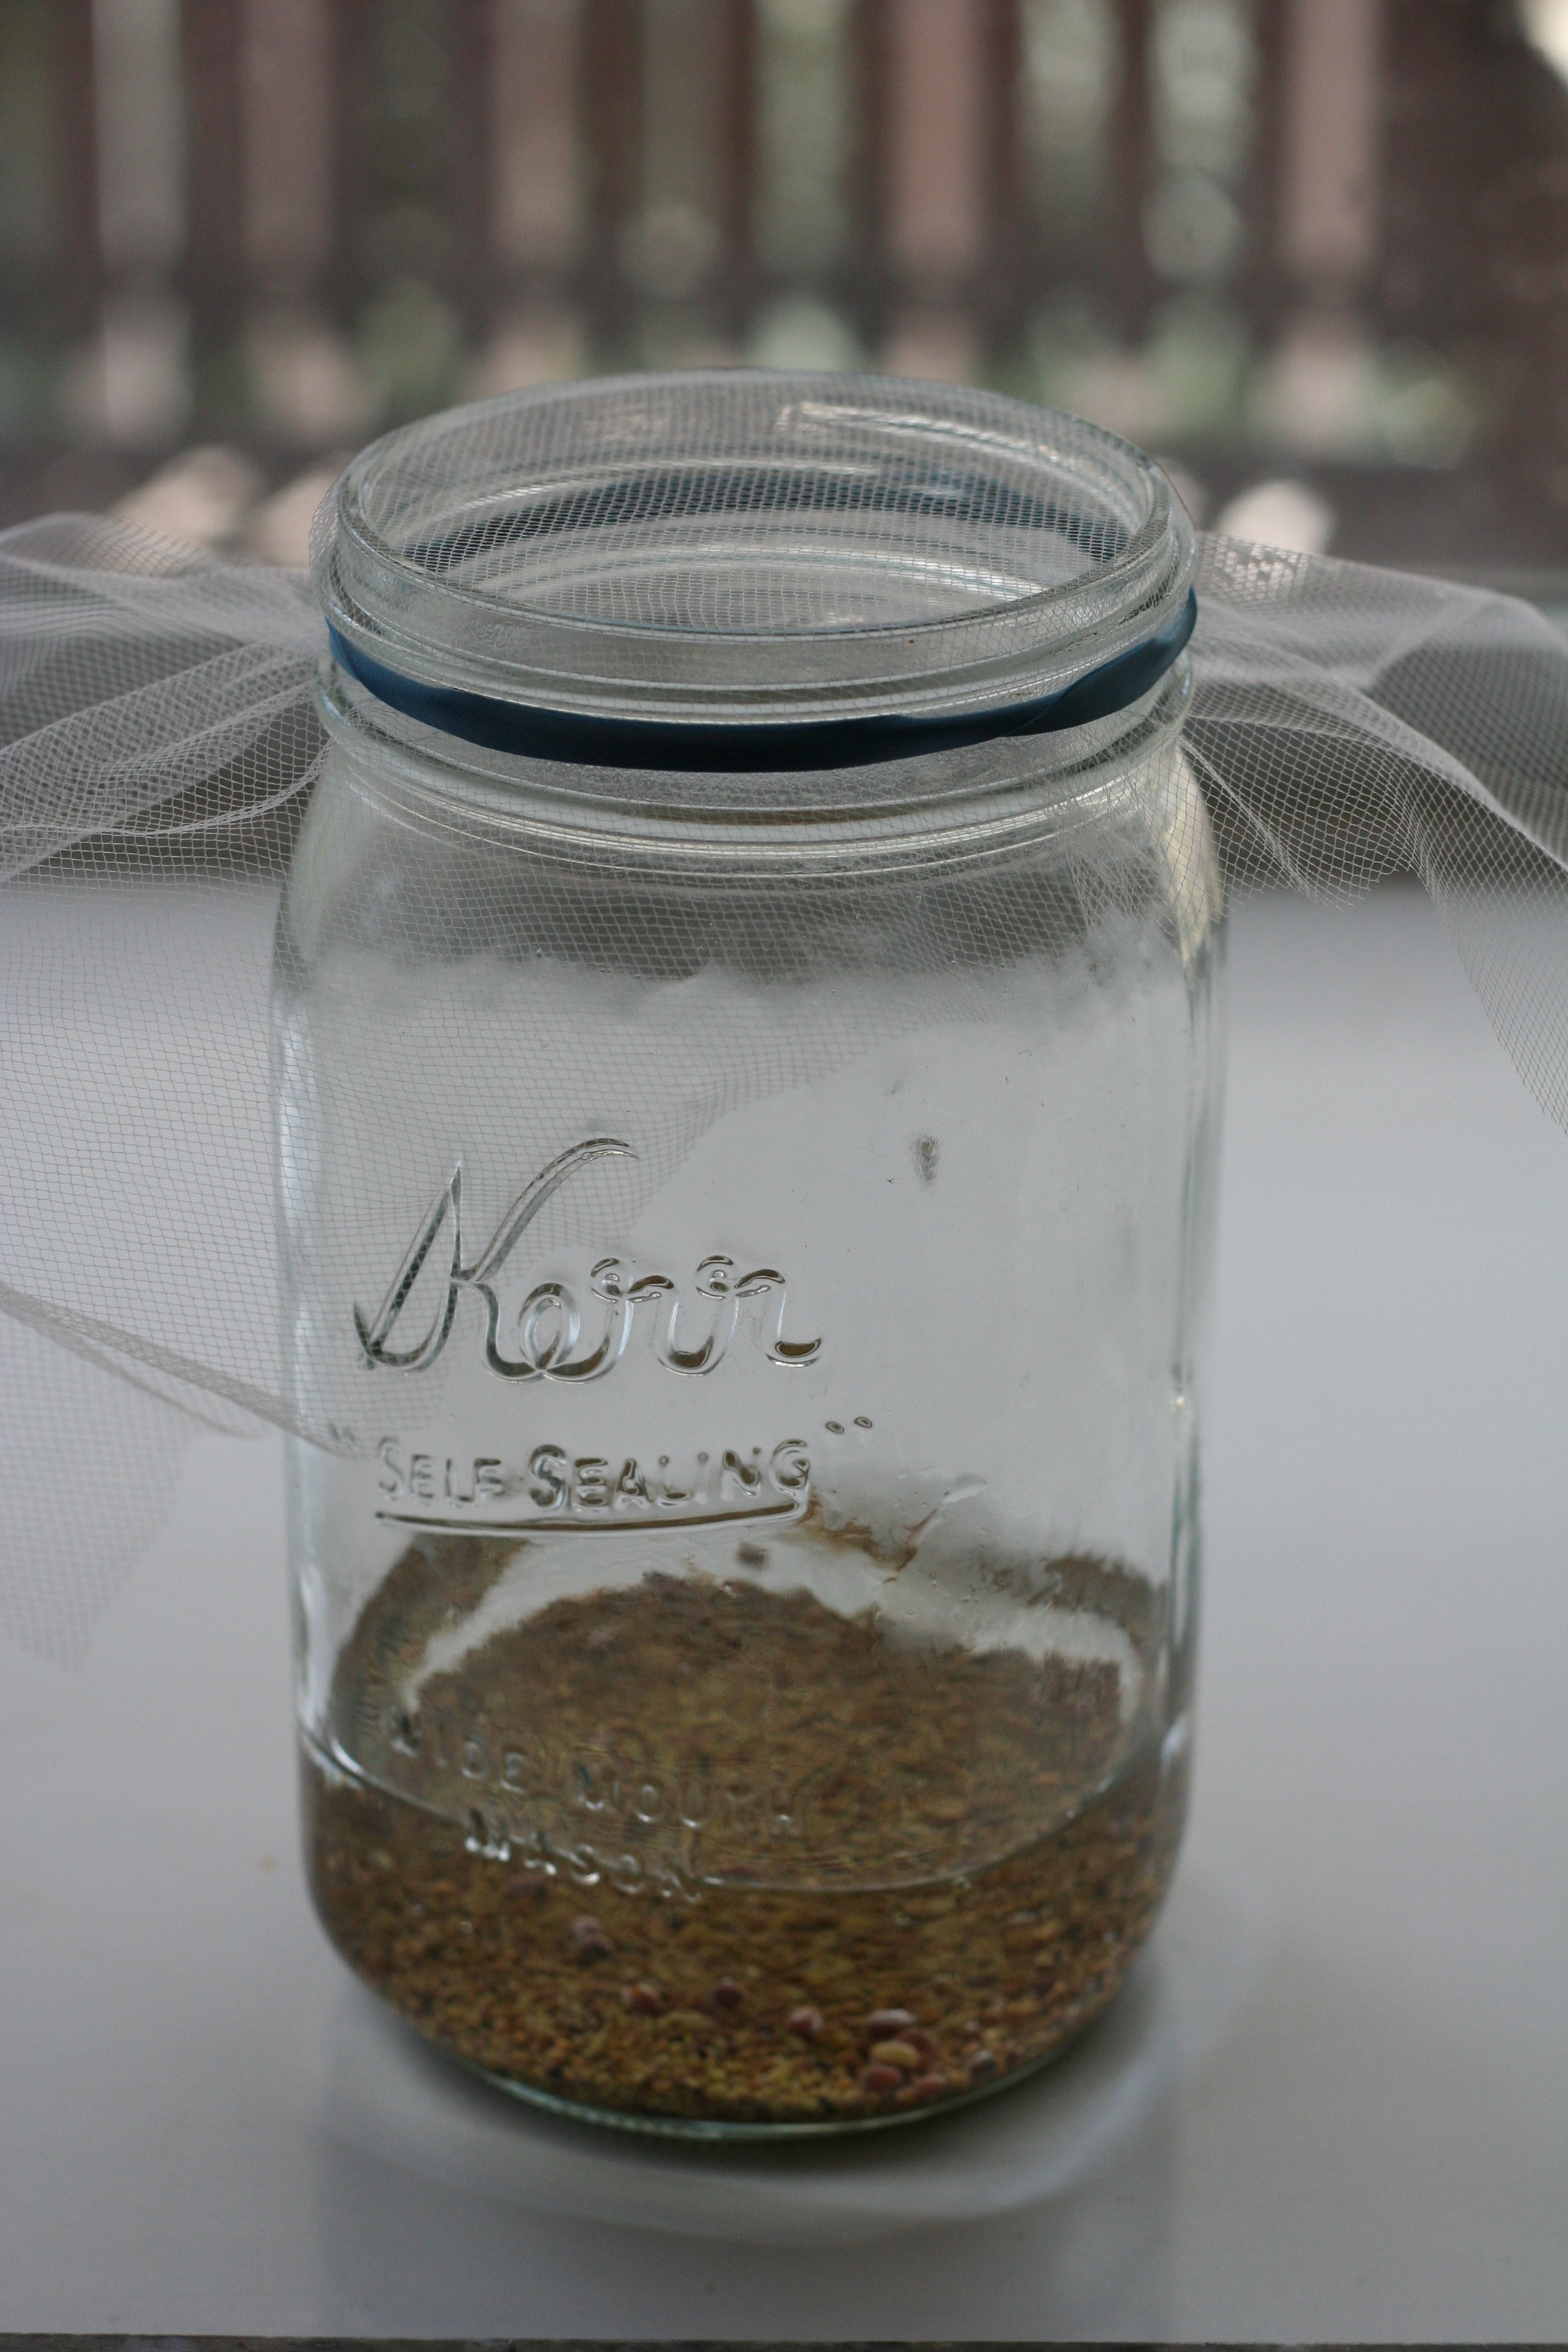
.Cover the jar with the tule and secure it with an elastic band. Let the seeds soak in the water for about 4-6 hours. After the time has passed, drain off the water. Set the (inverted) drained jar of wet seeds in a bowl.

IMG_0850

Leave the seeds like this. Rinse the seeds twice each day, morning and evening. To rinse them, add cool water to cover however much they have grown.

IMG_0849

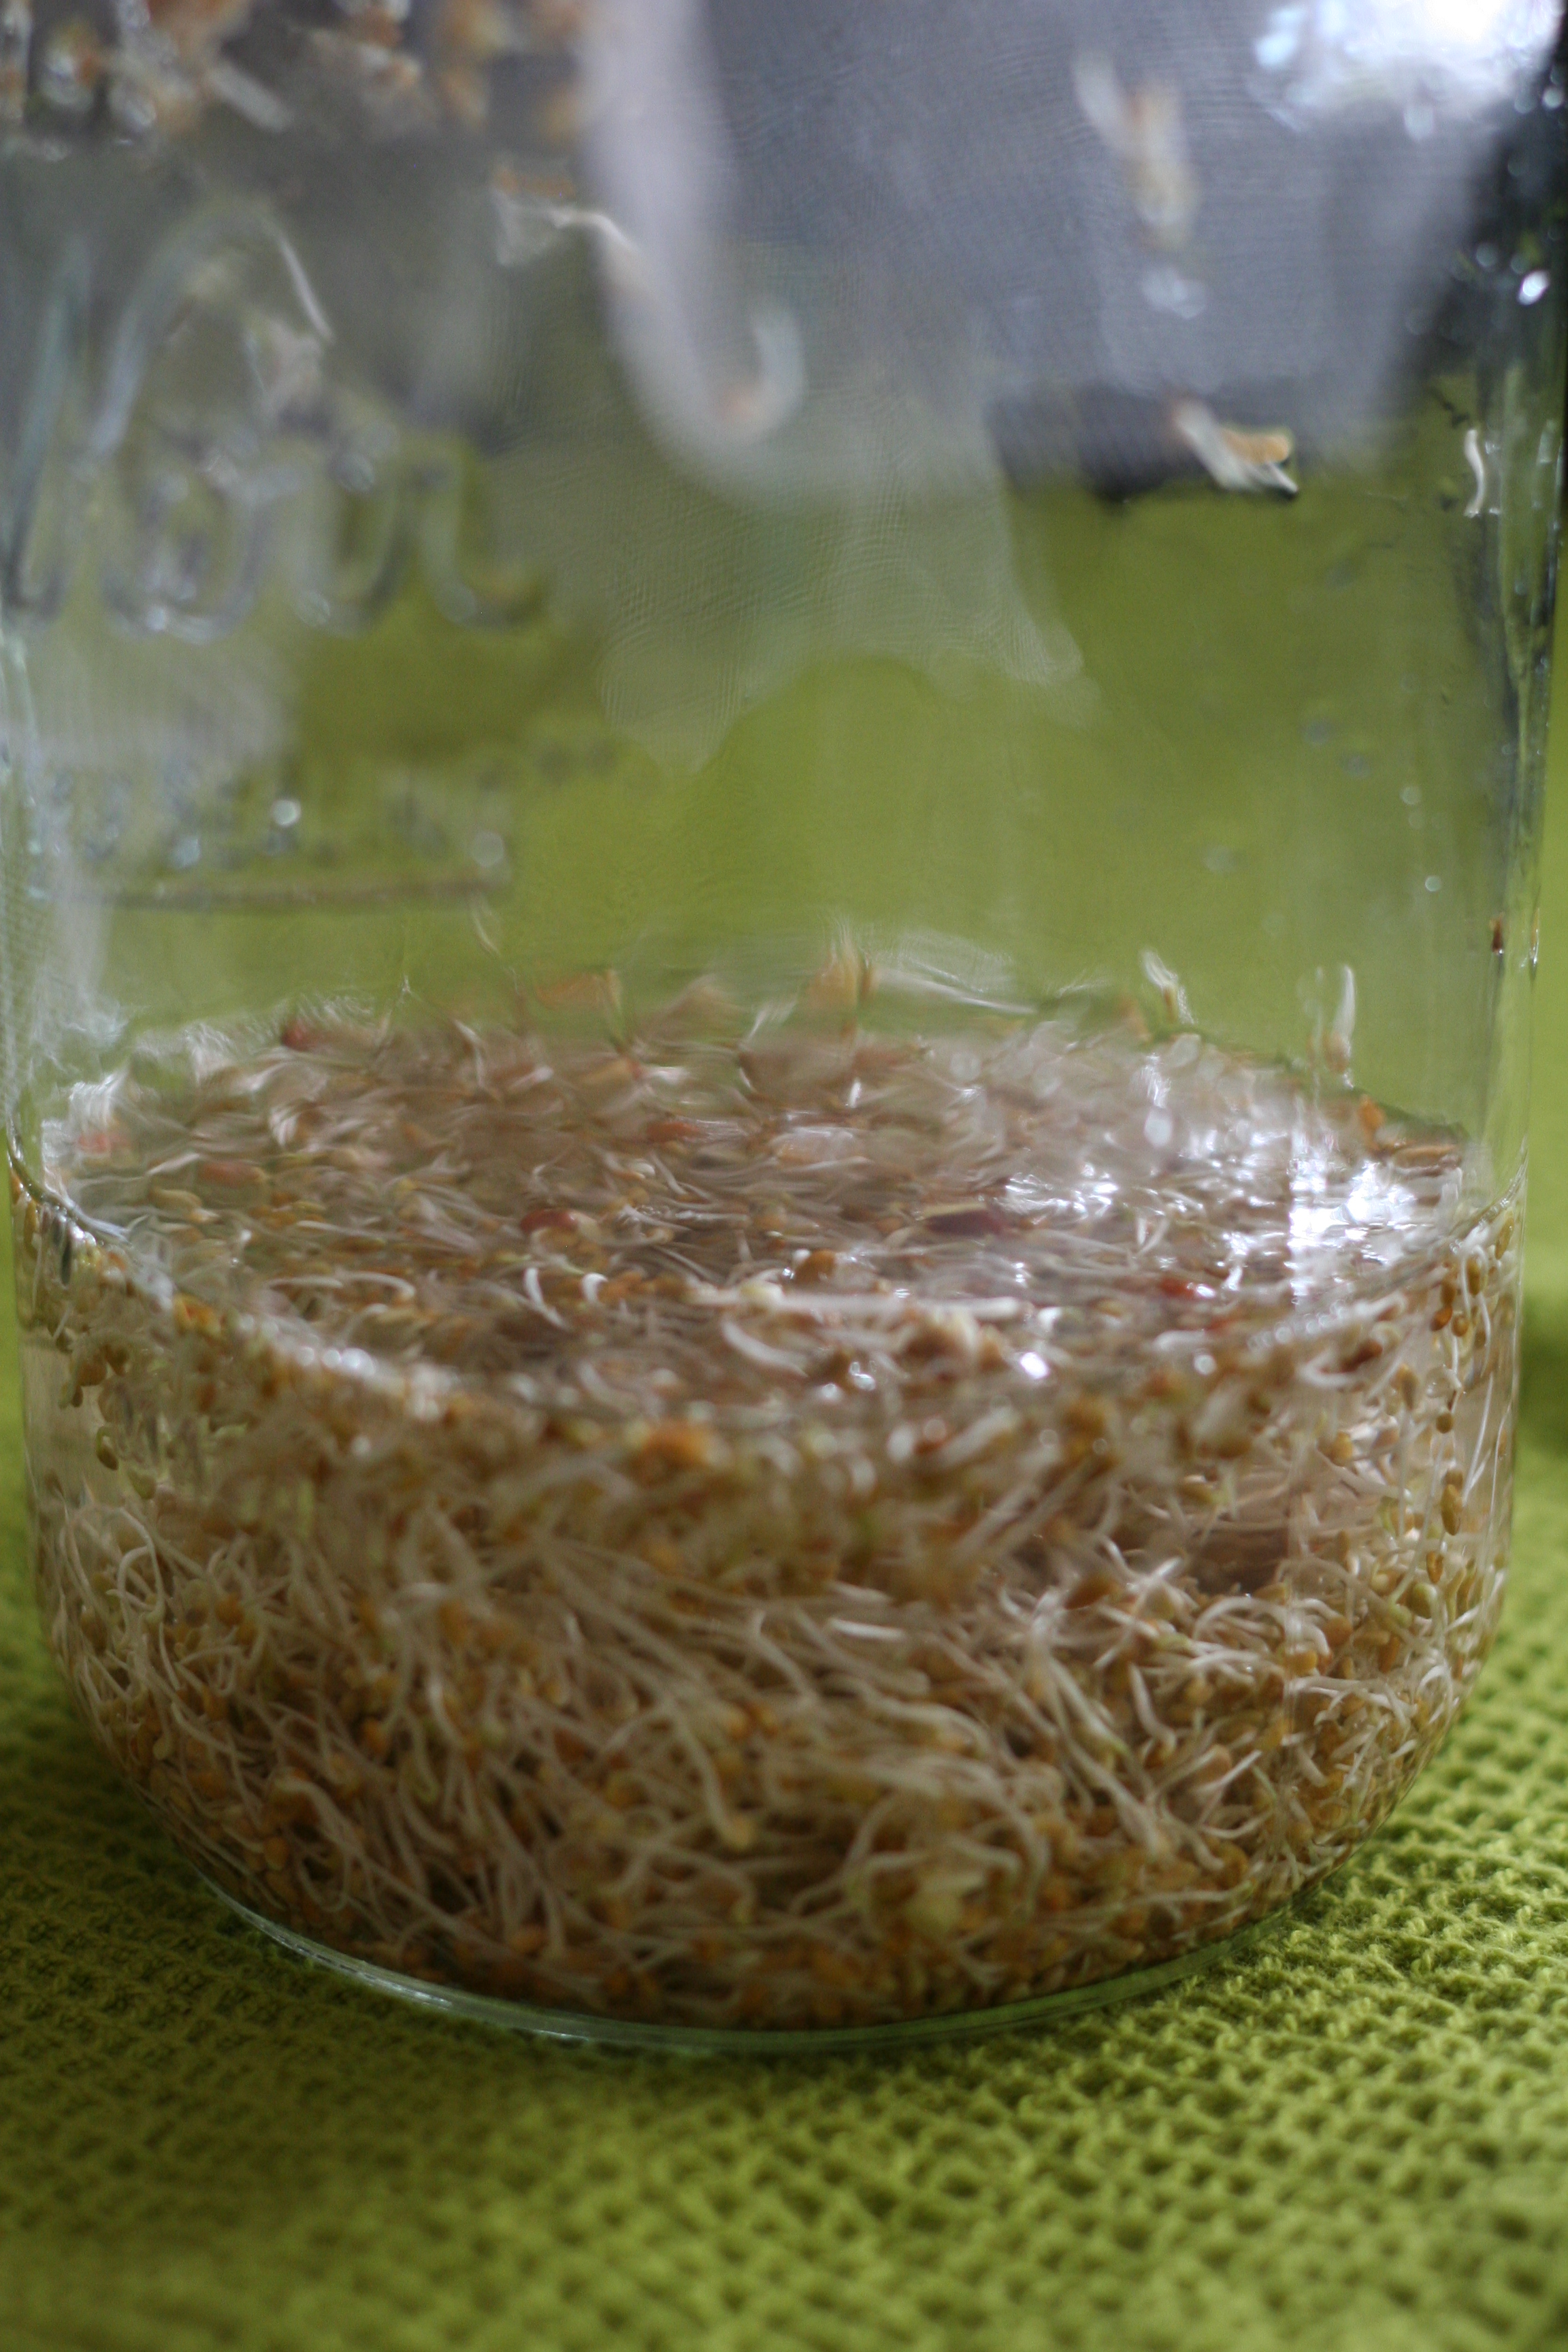
Give a gentle swish and then drain off the water. These twice daily rinsings will keep the sprouting seeds moistened. (If a child is draining the seeds, have them hold the jar with two hands that are gripping the elastic band. That will help to ensure they don’t dump al the seeds out if they drain “vigorously”.) They can sit wherever you have a spot, but if they are in a window with a bit of sunshine, they will sprout faster. You’ll see they grow quite fast. With warmth and consistent rinsing, you’ll have a jar of sprouts within about five days.  If your house is cool, it may take a bit longer but they will grow.

IMG_0848

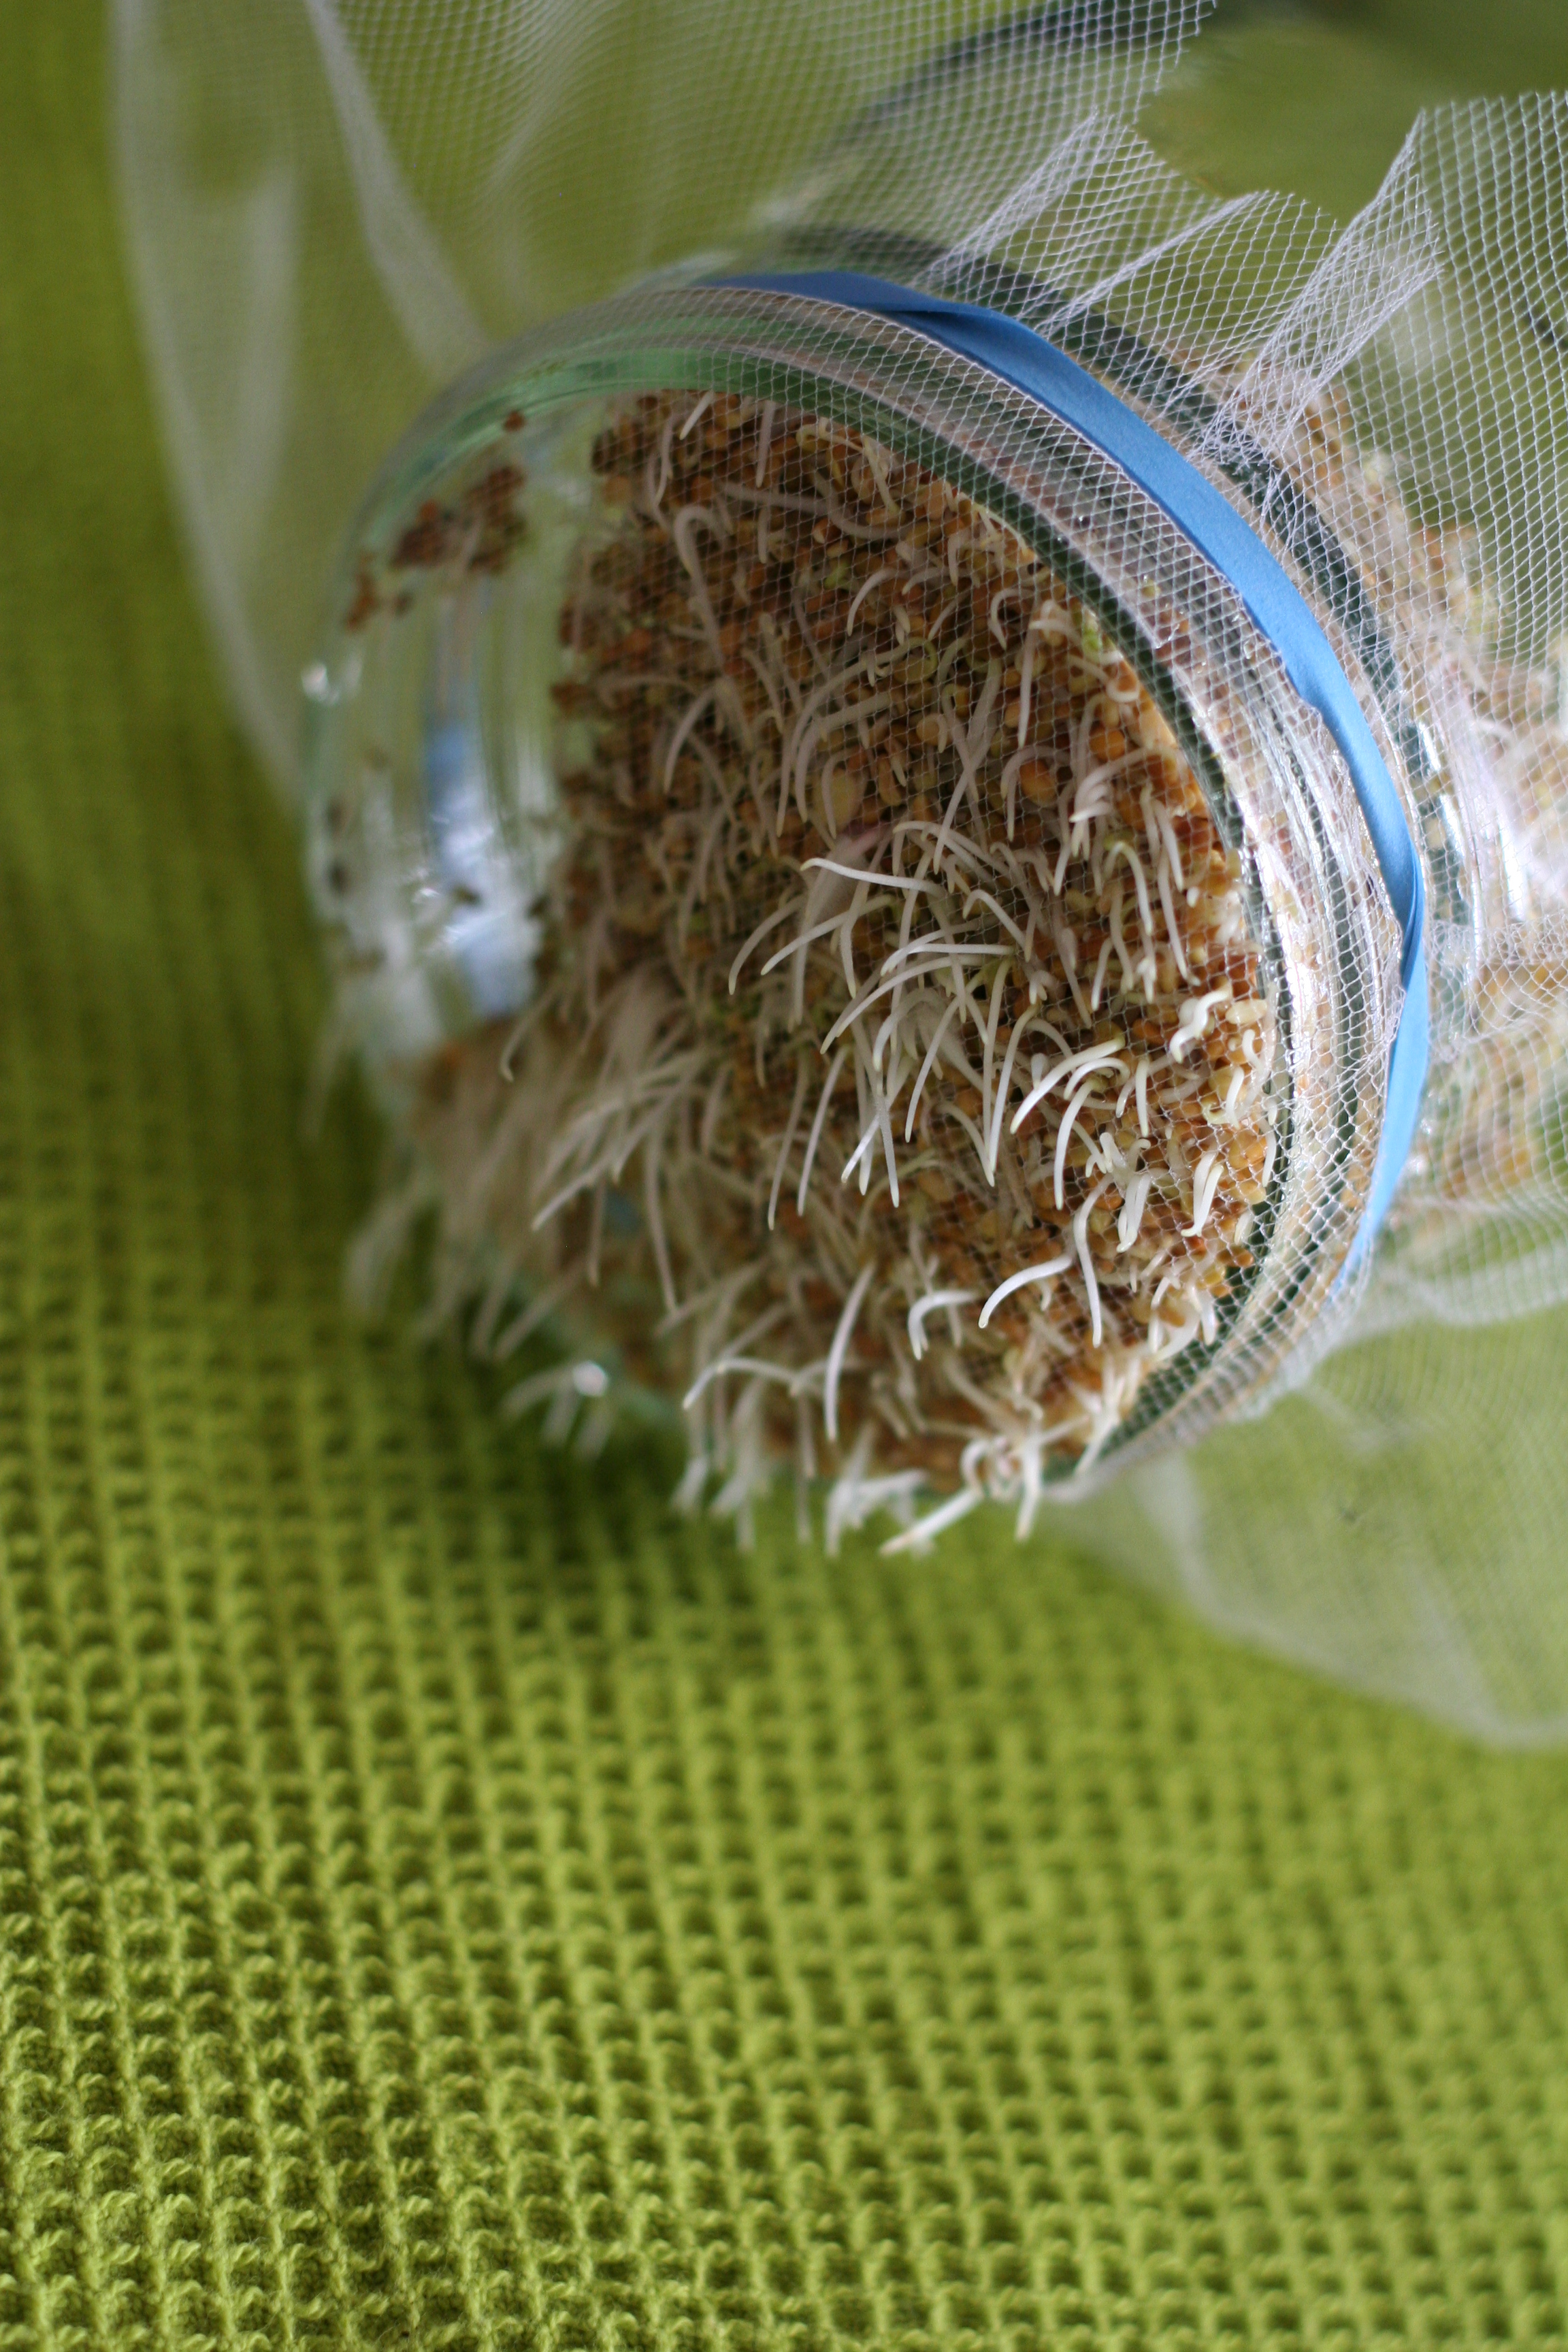
Because they are stored upside down, the sprouts will be peaking through the netting. Just give them a gentle shake before you rinse them to get them into the water. Soon your jar will be brimming with fresh sprouts.

image

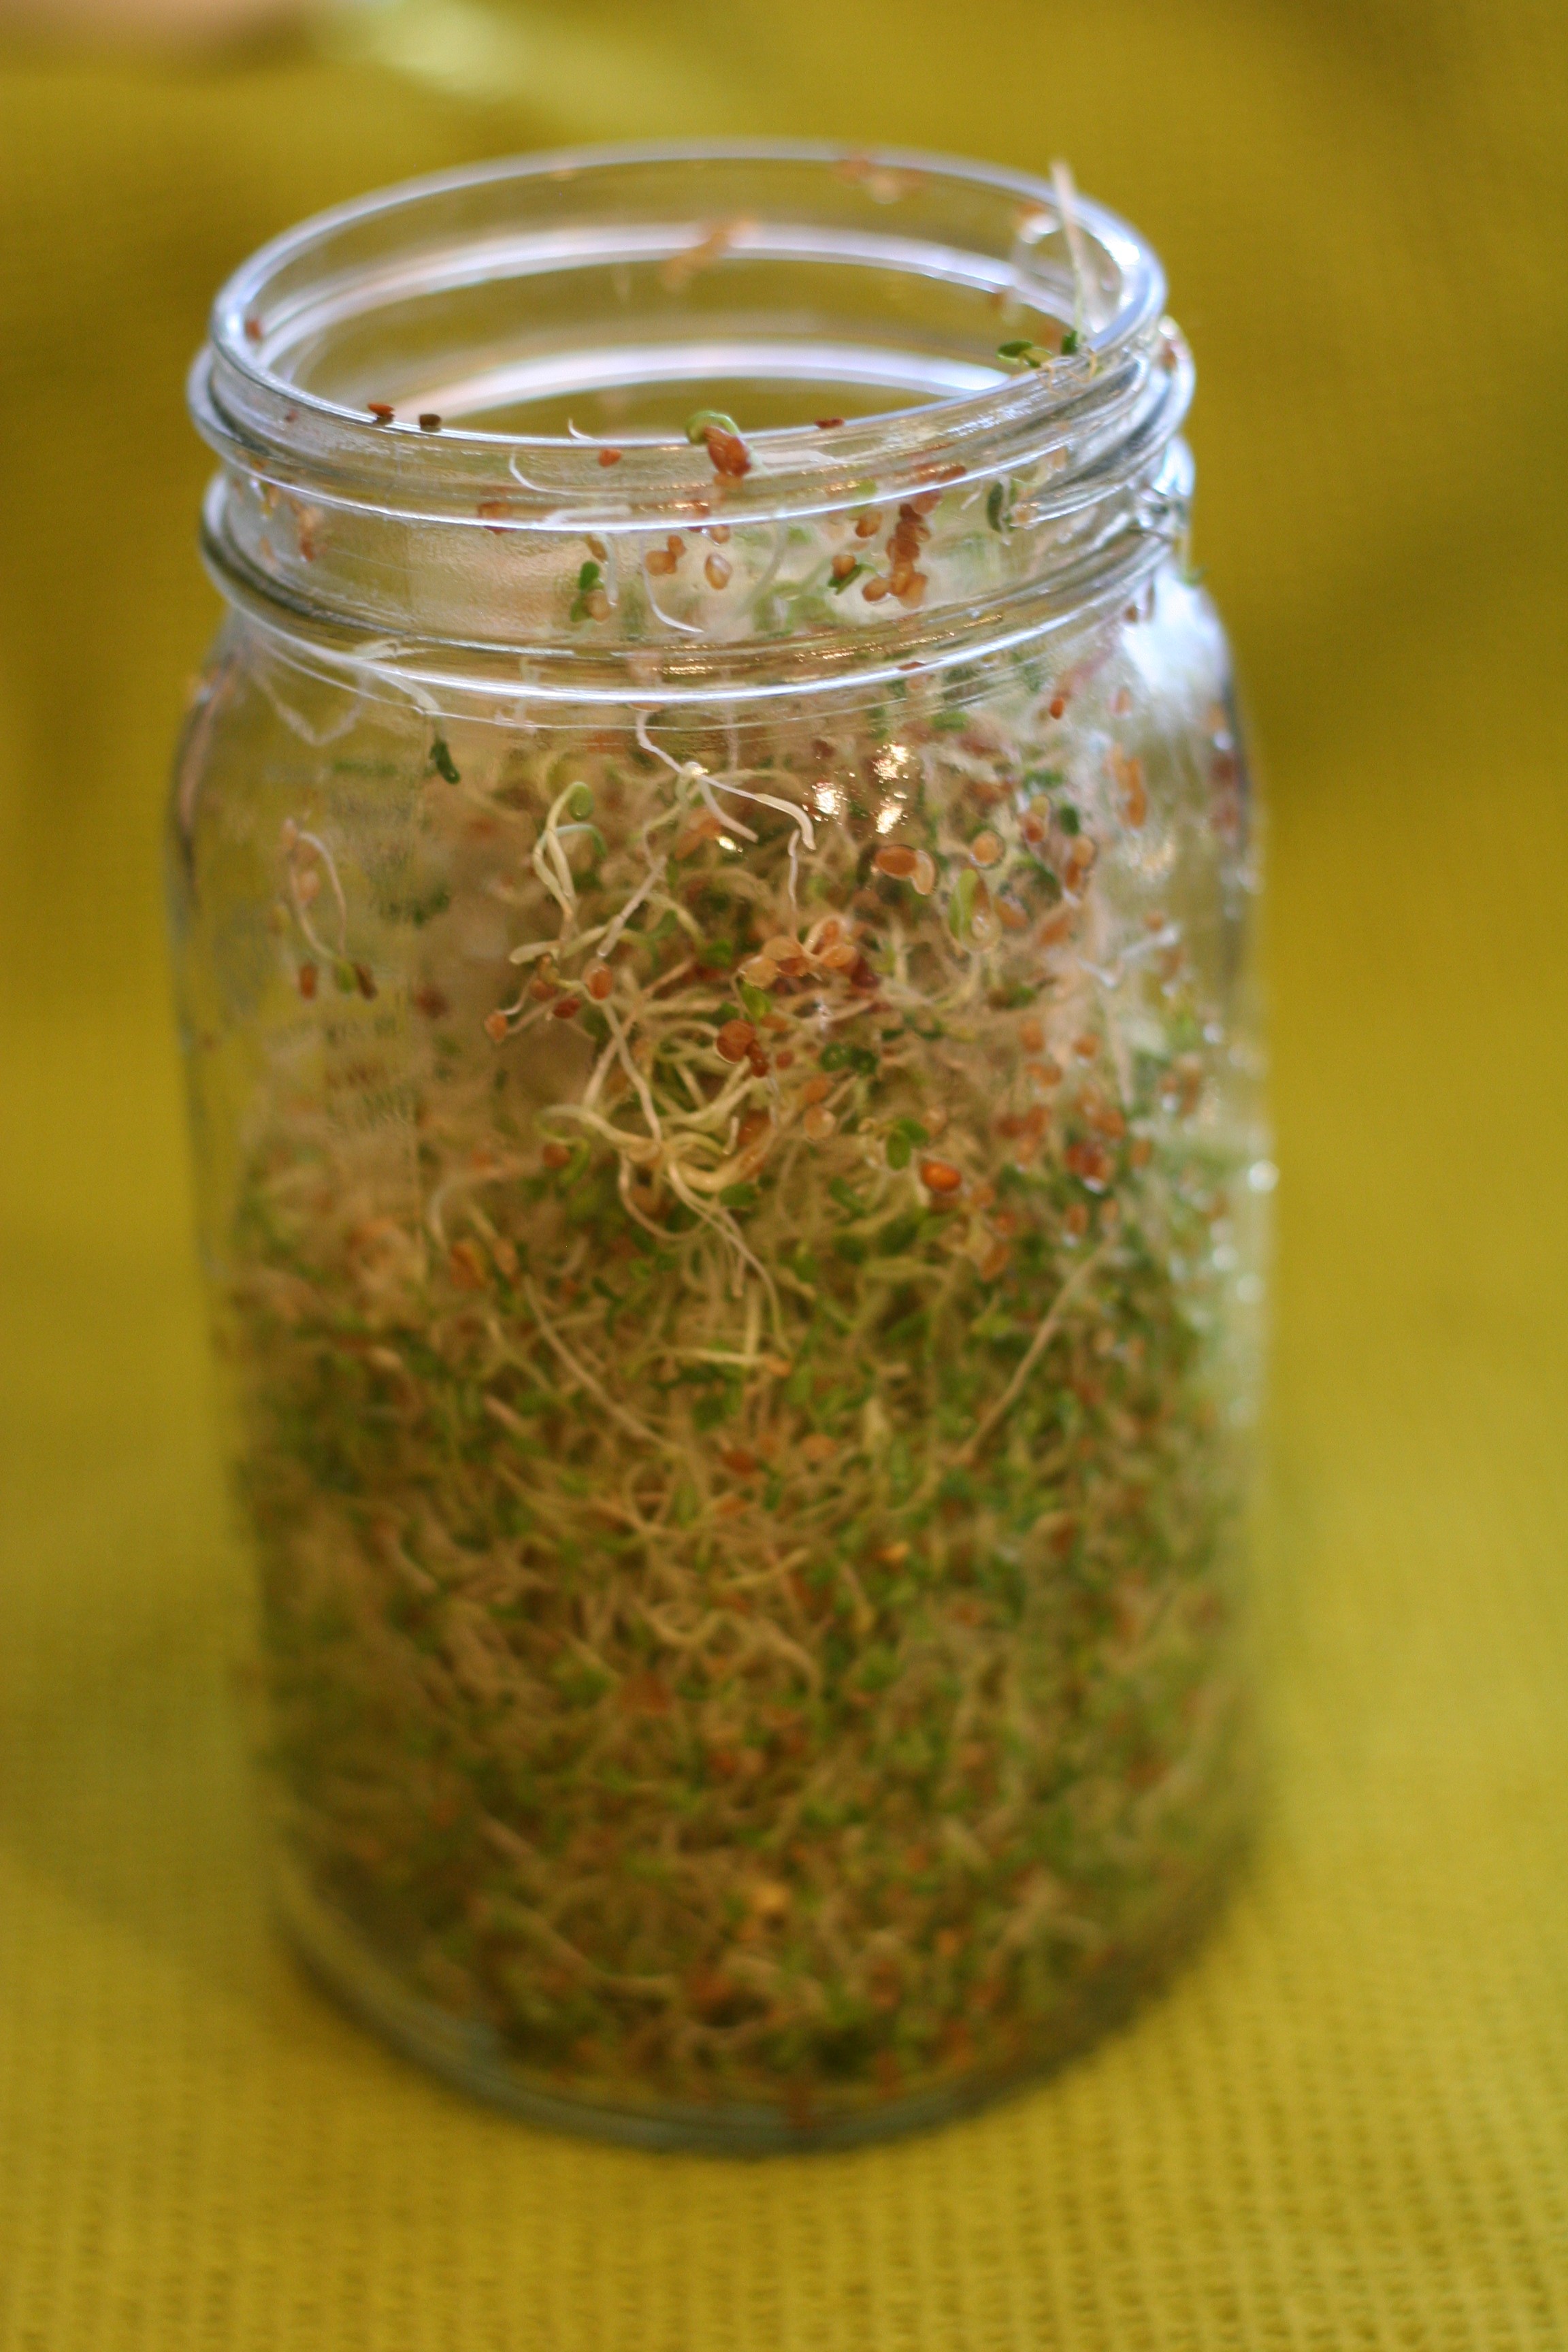
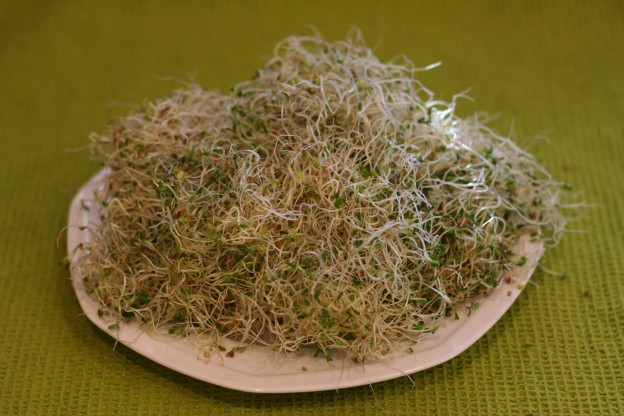
At this point, gently pull them from the jar. It is likely they will be in a tight clump. Gently pull them apart so air can flow through them.

image

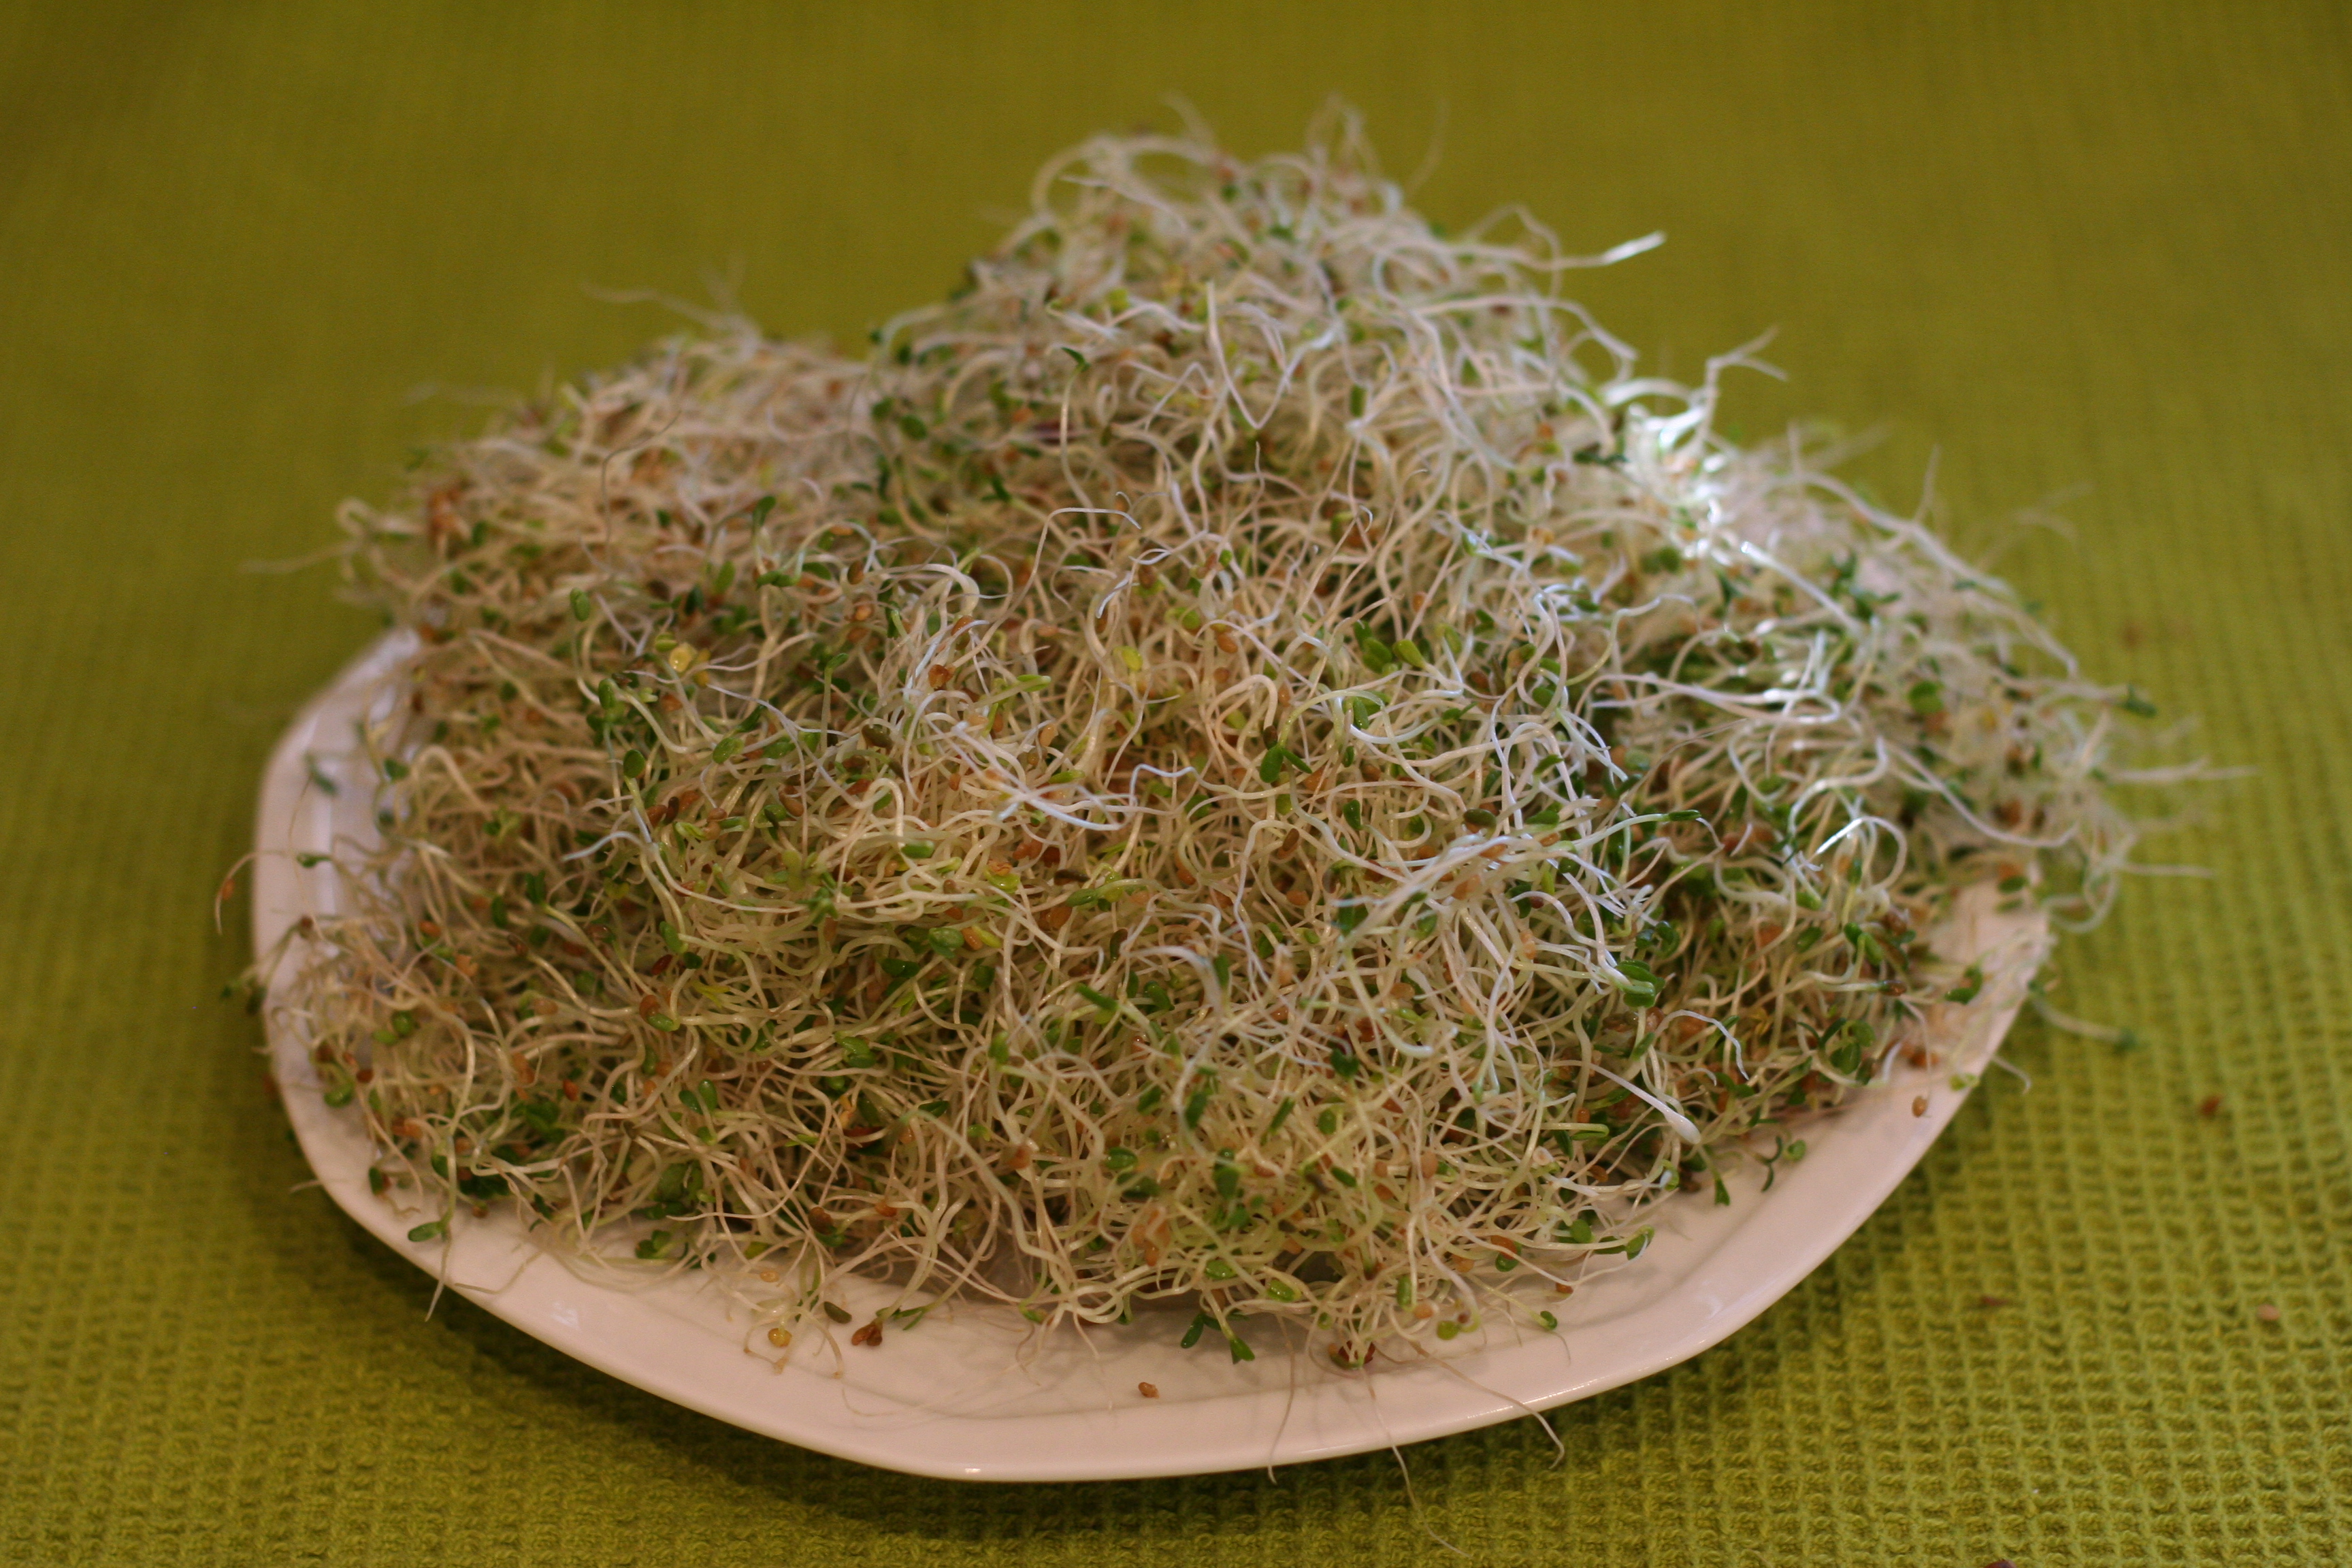
They will keep in the refrigerator, in a covered container, for about five days. The fresh sprouts seem to stay fresh longer than those I buy in the market. I think this is a fun project for children. There is enough change day by day to keep them interested. It is a wonderful experience for them to grow something on their own and this is completely doable for school age children.

If you have any questions, leave them in the comments. Hope you will give this a try and soon after you will be out in your yards enjoying spring!

Linking up, for the first time, to A Little Bird Told Me.

Projects, Projects, Projects

I am currently working on lots of different projects. I don’t normally do this but I am enjoying it. It allows me to enjoy bits of the process, depending on what I am in the mood for (piecing, trimming, stitching etc.)

I have been hand stitching the binding on my Square Dance quilt. I found a cute red and yellow print on a sale table that works well with this pallette. Picking this up in the evenings and stitching a bit is perfect. I brought it up to Downieville over the weekend for some hand sewing but only worked on it for a short while. I should have it finished up by the end of the week.

image

Knowing that we were going to be up at the house in DV, I made a little curtain. In our bedroom, there is a door leading to a tiny room which will someday be a sewing room. For now, it is where Ray keeps his tools and supplies for all of the work he is doing on the house. But someday…. it will be a perfect place to sew. This door has a window that I wanted to cover for privacy. The sewing room has windows that one can look through to the bedroom. I used a great piece of Tula Pink in gray and blue. I took the photo at a weird angle because the sun was coming through and when I took it straight on, the colors were way off.

image

Now that April is here, there is a new color for RSC16, orange.  Not at all my favorite color, I was surprised to see how many scraps I had to work with. Last night I worked on “making” fabric (as discussed in “15 Minutes of Play” by Victoria Findlay Wolfe.) It is coming together well.  I had a patchwork block left over from RSC14’s quilt so I unpicked some seams and used bits of patchwork for the new blocks.


image

These colors will add a huge pop to my scrappy HST quilt. I won’t use them for the Gemstones  quilt though. After a little back and forth with Cynthia Brunz, she suggested swapping out orange for a deeper rust (think of Topaz gems). I love this idea but don’t have enough choices in my stash. I will pick up a few FQ’s for this.

Finally, I made huge progress on the Stepping Stones QAL that I am doing with Jennifer over at Inquiring Quilter. Participating in the QAL has been the perfect way to keep me on task. After many years of working to a deadline (which is so common in the HR world) I am finding that having the deadline is really helpful to me. I have pieced the 143 HST’s needed. I also cut some extra charms. After counting what I had, I came up slightly short. Take a look at these black and white FQ’s that I picked up to supplement my charm squares with.

FullSizeRender (1)

I love all of these! The fabric at the top is a Tula Pink which I found interesting – I don’t think she uses black and white very often. It is gorgeous though.

2016 Advice and Tech Helpfor New Quilt Bloggers

Finally, I want to let you know that signups are open for the 2016 New Quilt Blogger session with Quilting Jetgirl, Late Night Quilter and Meadow Mist Designs. I participated in this activity last year. If you are relatively new to the quilt blogging world, I highly recommend participating. It was a valuable experience offering tips and techniques that taught me so much. Working with a large (we had about 70) group of bloggers, I became acquainted with many new bloggers. Opportunities were available which helped to push me to learn and grow (such as the block hops sponsored by Paint Brush Fabrics.) Be sure to check out the information at any of the three websites I have linked to and see what if this is right for you. If you have questions, leave them in the comments. Here are the criteria for participating in this event.

  1. If you have been blogging mainly about modern quilting (modern quilting to you is modern quilting to us.),
  2. for less than 2 years,
  3. writing at least 4 posts a month,
  4. are willing to agree to be actively involved in the blog hop through visiting and commenting on the other blogger’s hop posts,
  5. and have or are willing to open a Facebook account to participate in the group discussions.

**If you are interested, sign up here!

Hope you are all having a wonderful week. Springtime is certainly long in coming to the east coast but we are in full swing on the west. My lilacs are fully blooming. I tried to cut some for inside the house but the fragrance was powerful and I couldn’t leave them. We were all sneezing after just a short while!

image

Linking to lots of fun places. Check out the links at the top of the page, under Link Ups.