

Today marks the first day of the Paintbrush Studio 2016 New Block Blog Hop! Last year I participated in a block hop that was sponsored by Fabri-Quilt. This year I am participating again, except Fabri-Quilt is now known as Paintbrush Studios. The fabric company has provided each of the participants with a set of fat quarters and we created a unique block using their curated bundle of gorgeousness, Painters Pallette. This three day event is led by Yvonne @Quilting Jetgirl, Cheryl @Meadow Mist Designs, and Stephanie @Late Night Quilter.
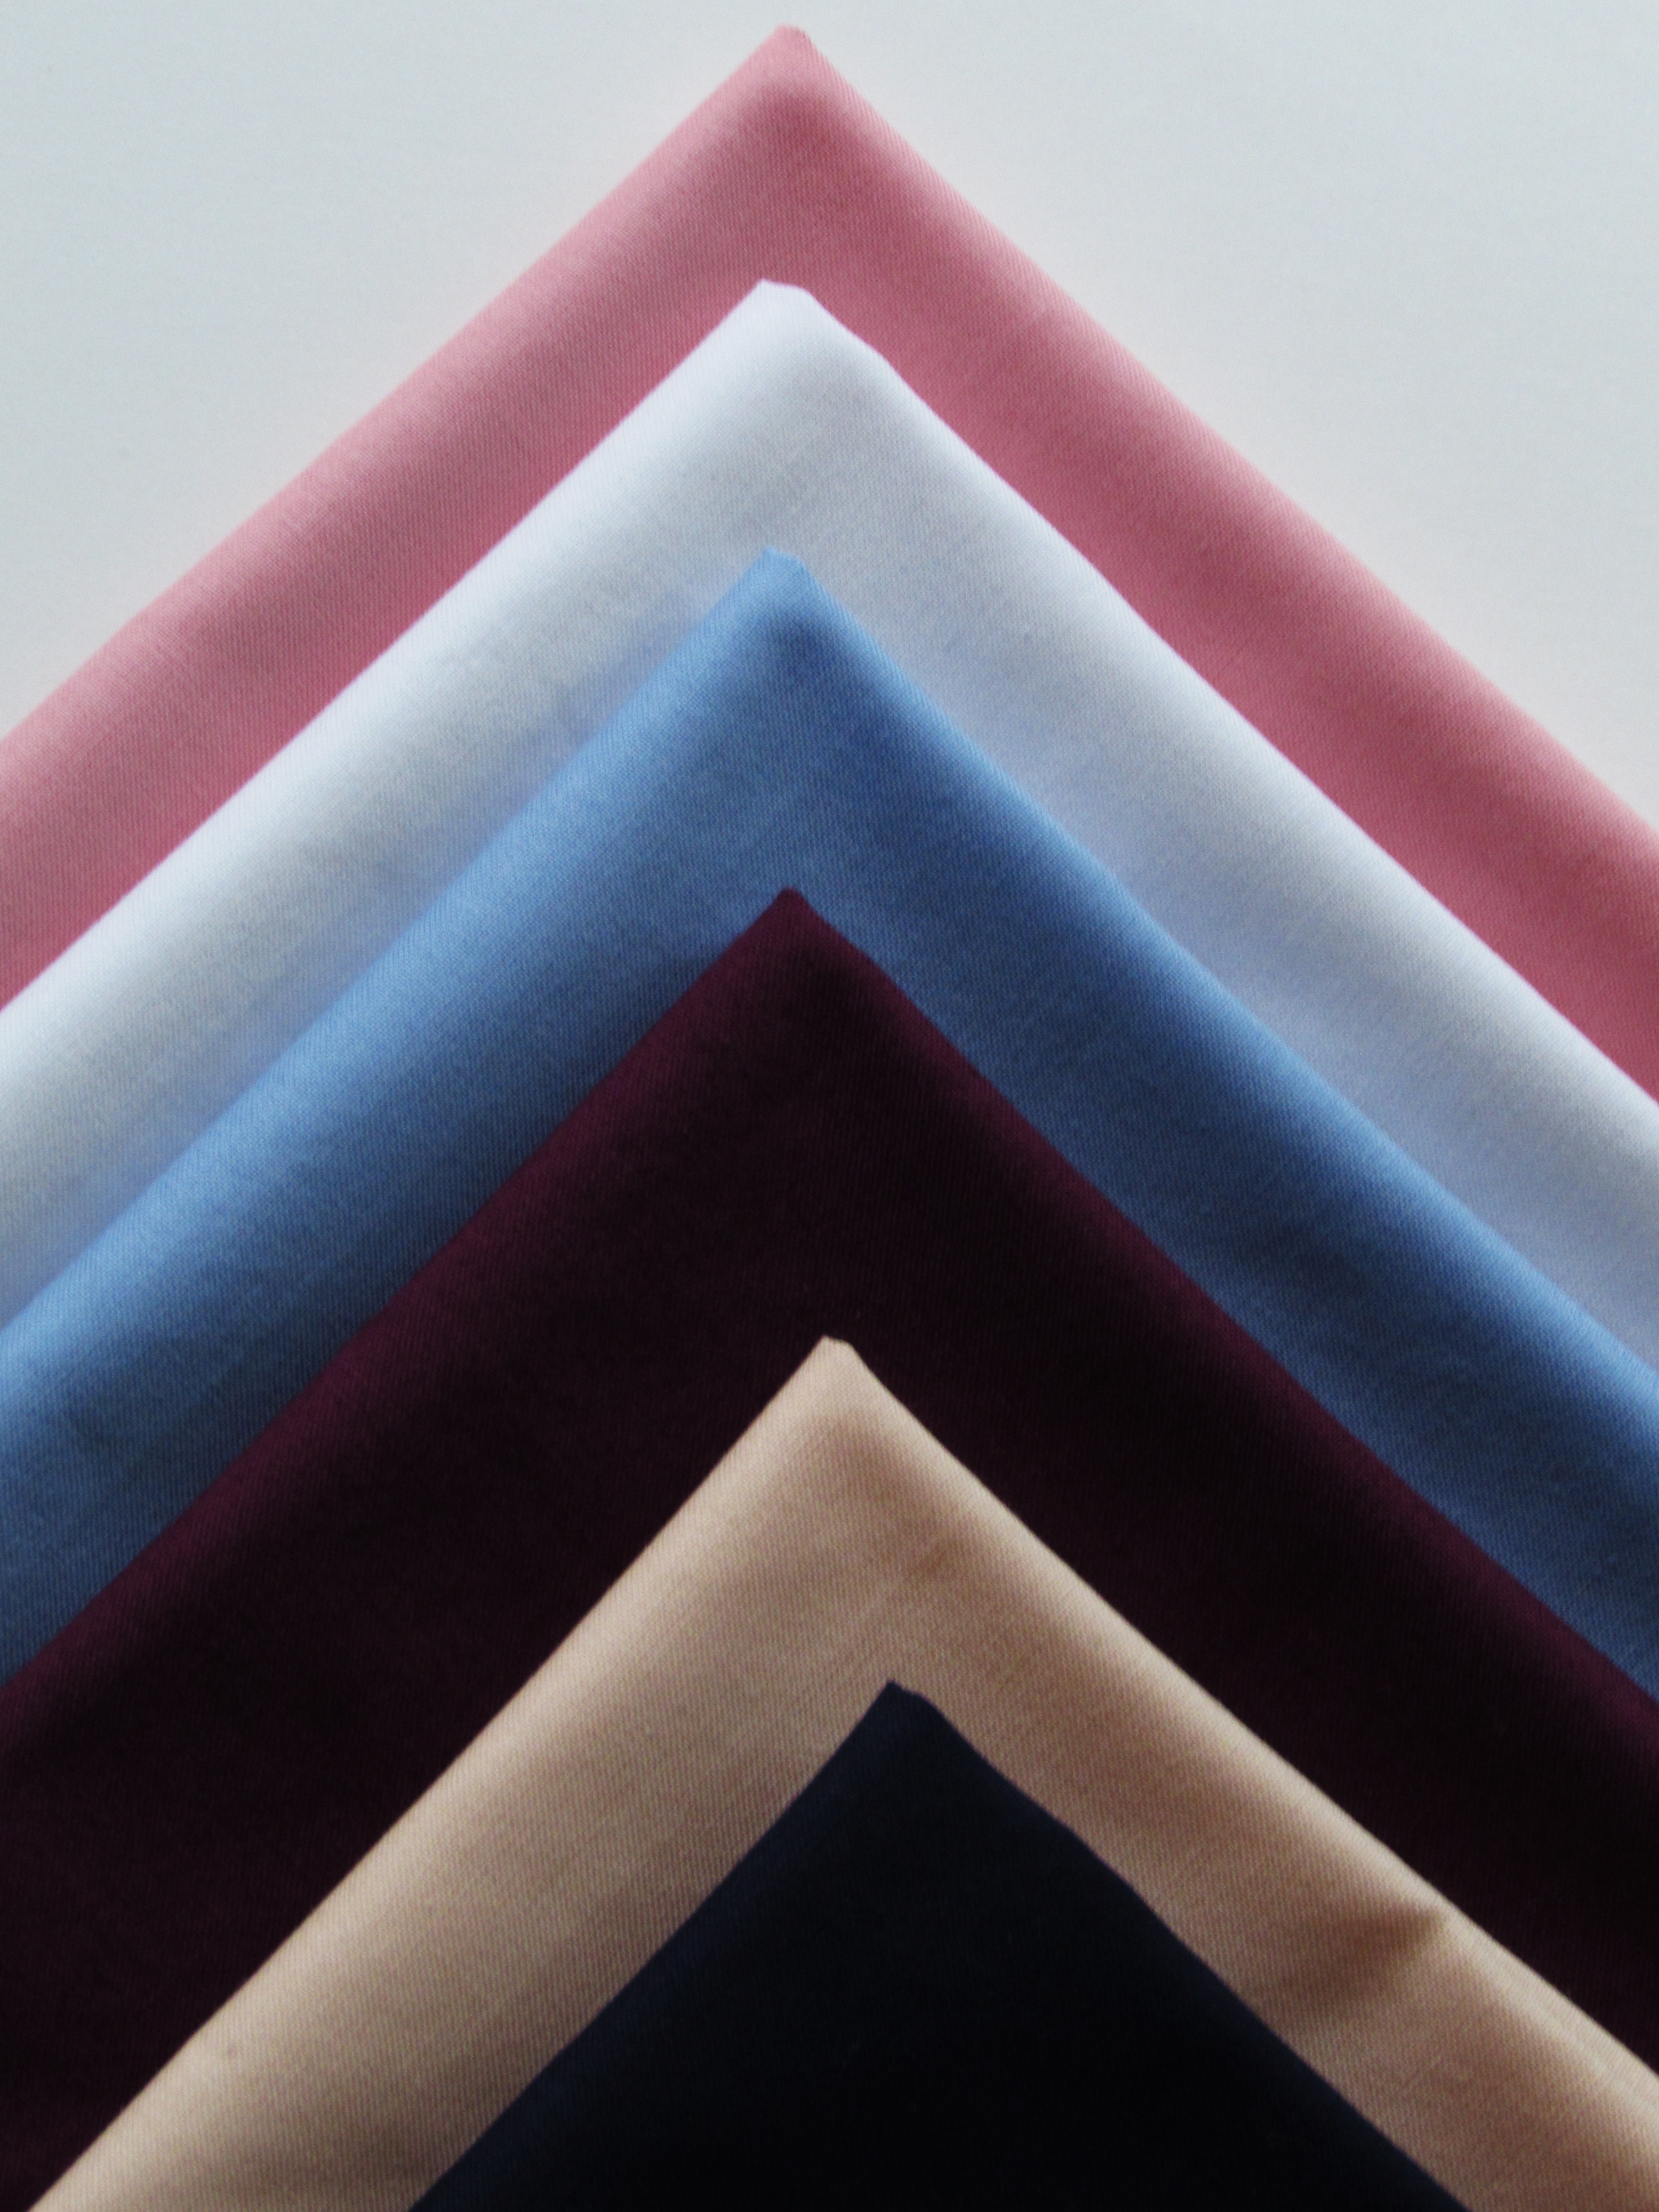
Each participant is to make a block which finishes out to 12″ square (12.5″ unfinished). The blocks are sent to the team lead, Yvonne of Quilting Jetgirl, who will then assemble them into at least two donation quilts. The fabrics this year are exceptional. Wonderful colors and the hand of the fabric is lovely. I did prewash mine to prevent any issues with potential bleeding from the darker colors. However my color catcher came up clean and there wasn’t any color issue.
To create my block, Intermingled, I took inspiration from Alissa Carlton’s book, Modern Minimal. I love this book – the quilts are modern with clean lines and are uncomplicated. My kind of projects! She has a quilt in this book which served as inspiration for my block. I emailed Alissa and checked to see if I could replicate her quilt as a block. She was so kind as to reply right away (this was a few days before QuiltCon and I was amazed that she answered so fast!) I am not always sure of the etiquette so I think it never hurts to go the extra mile and ask for permission. Anyway, Alissa created this design as a bed size quilt and I reduced it to block size (with a few additional modifications.)
While this block does require a fair amount of piecing, it is not difficult to create. There are no points to match up and it comes together quickly.
I have attached a full PDF document that contains the cut list for the size of each piece, as well as assembly directions. For the purpose of this post, however, I will show basic pictures of how the block goes together.
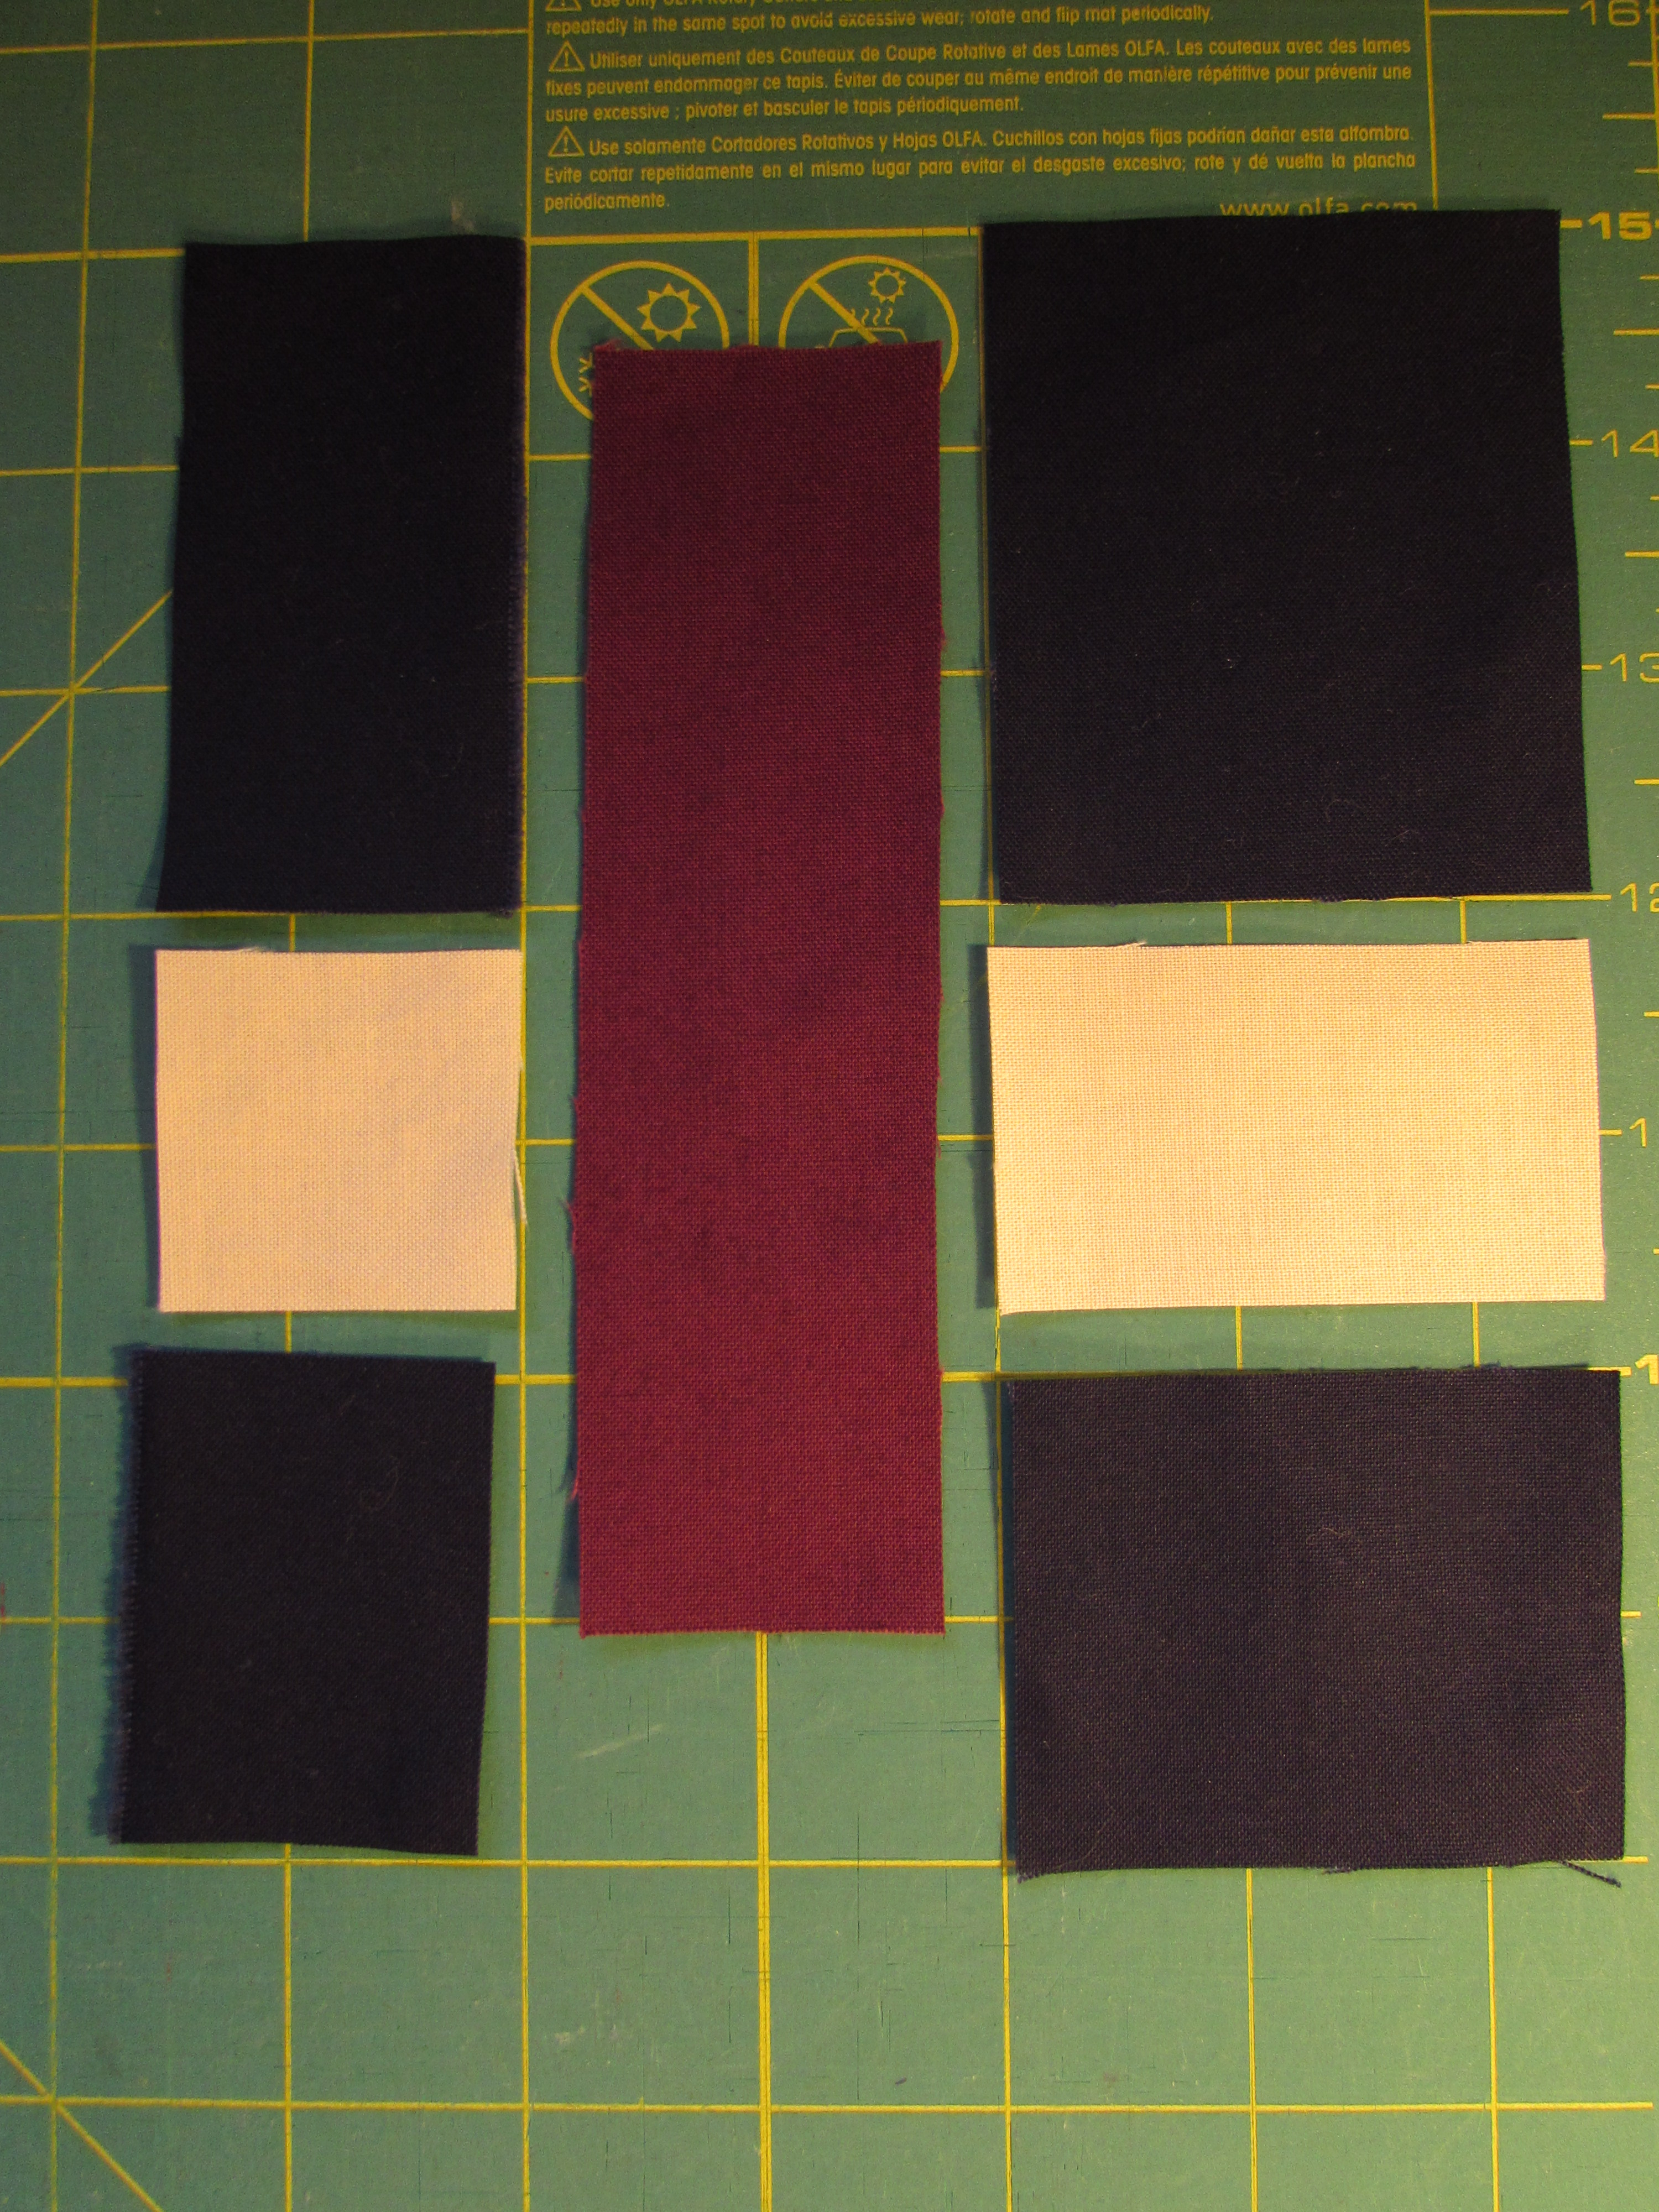
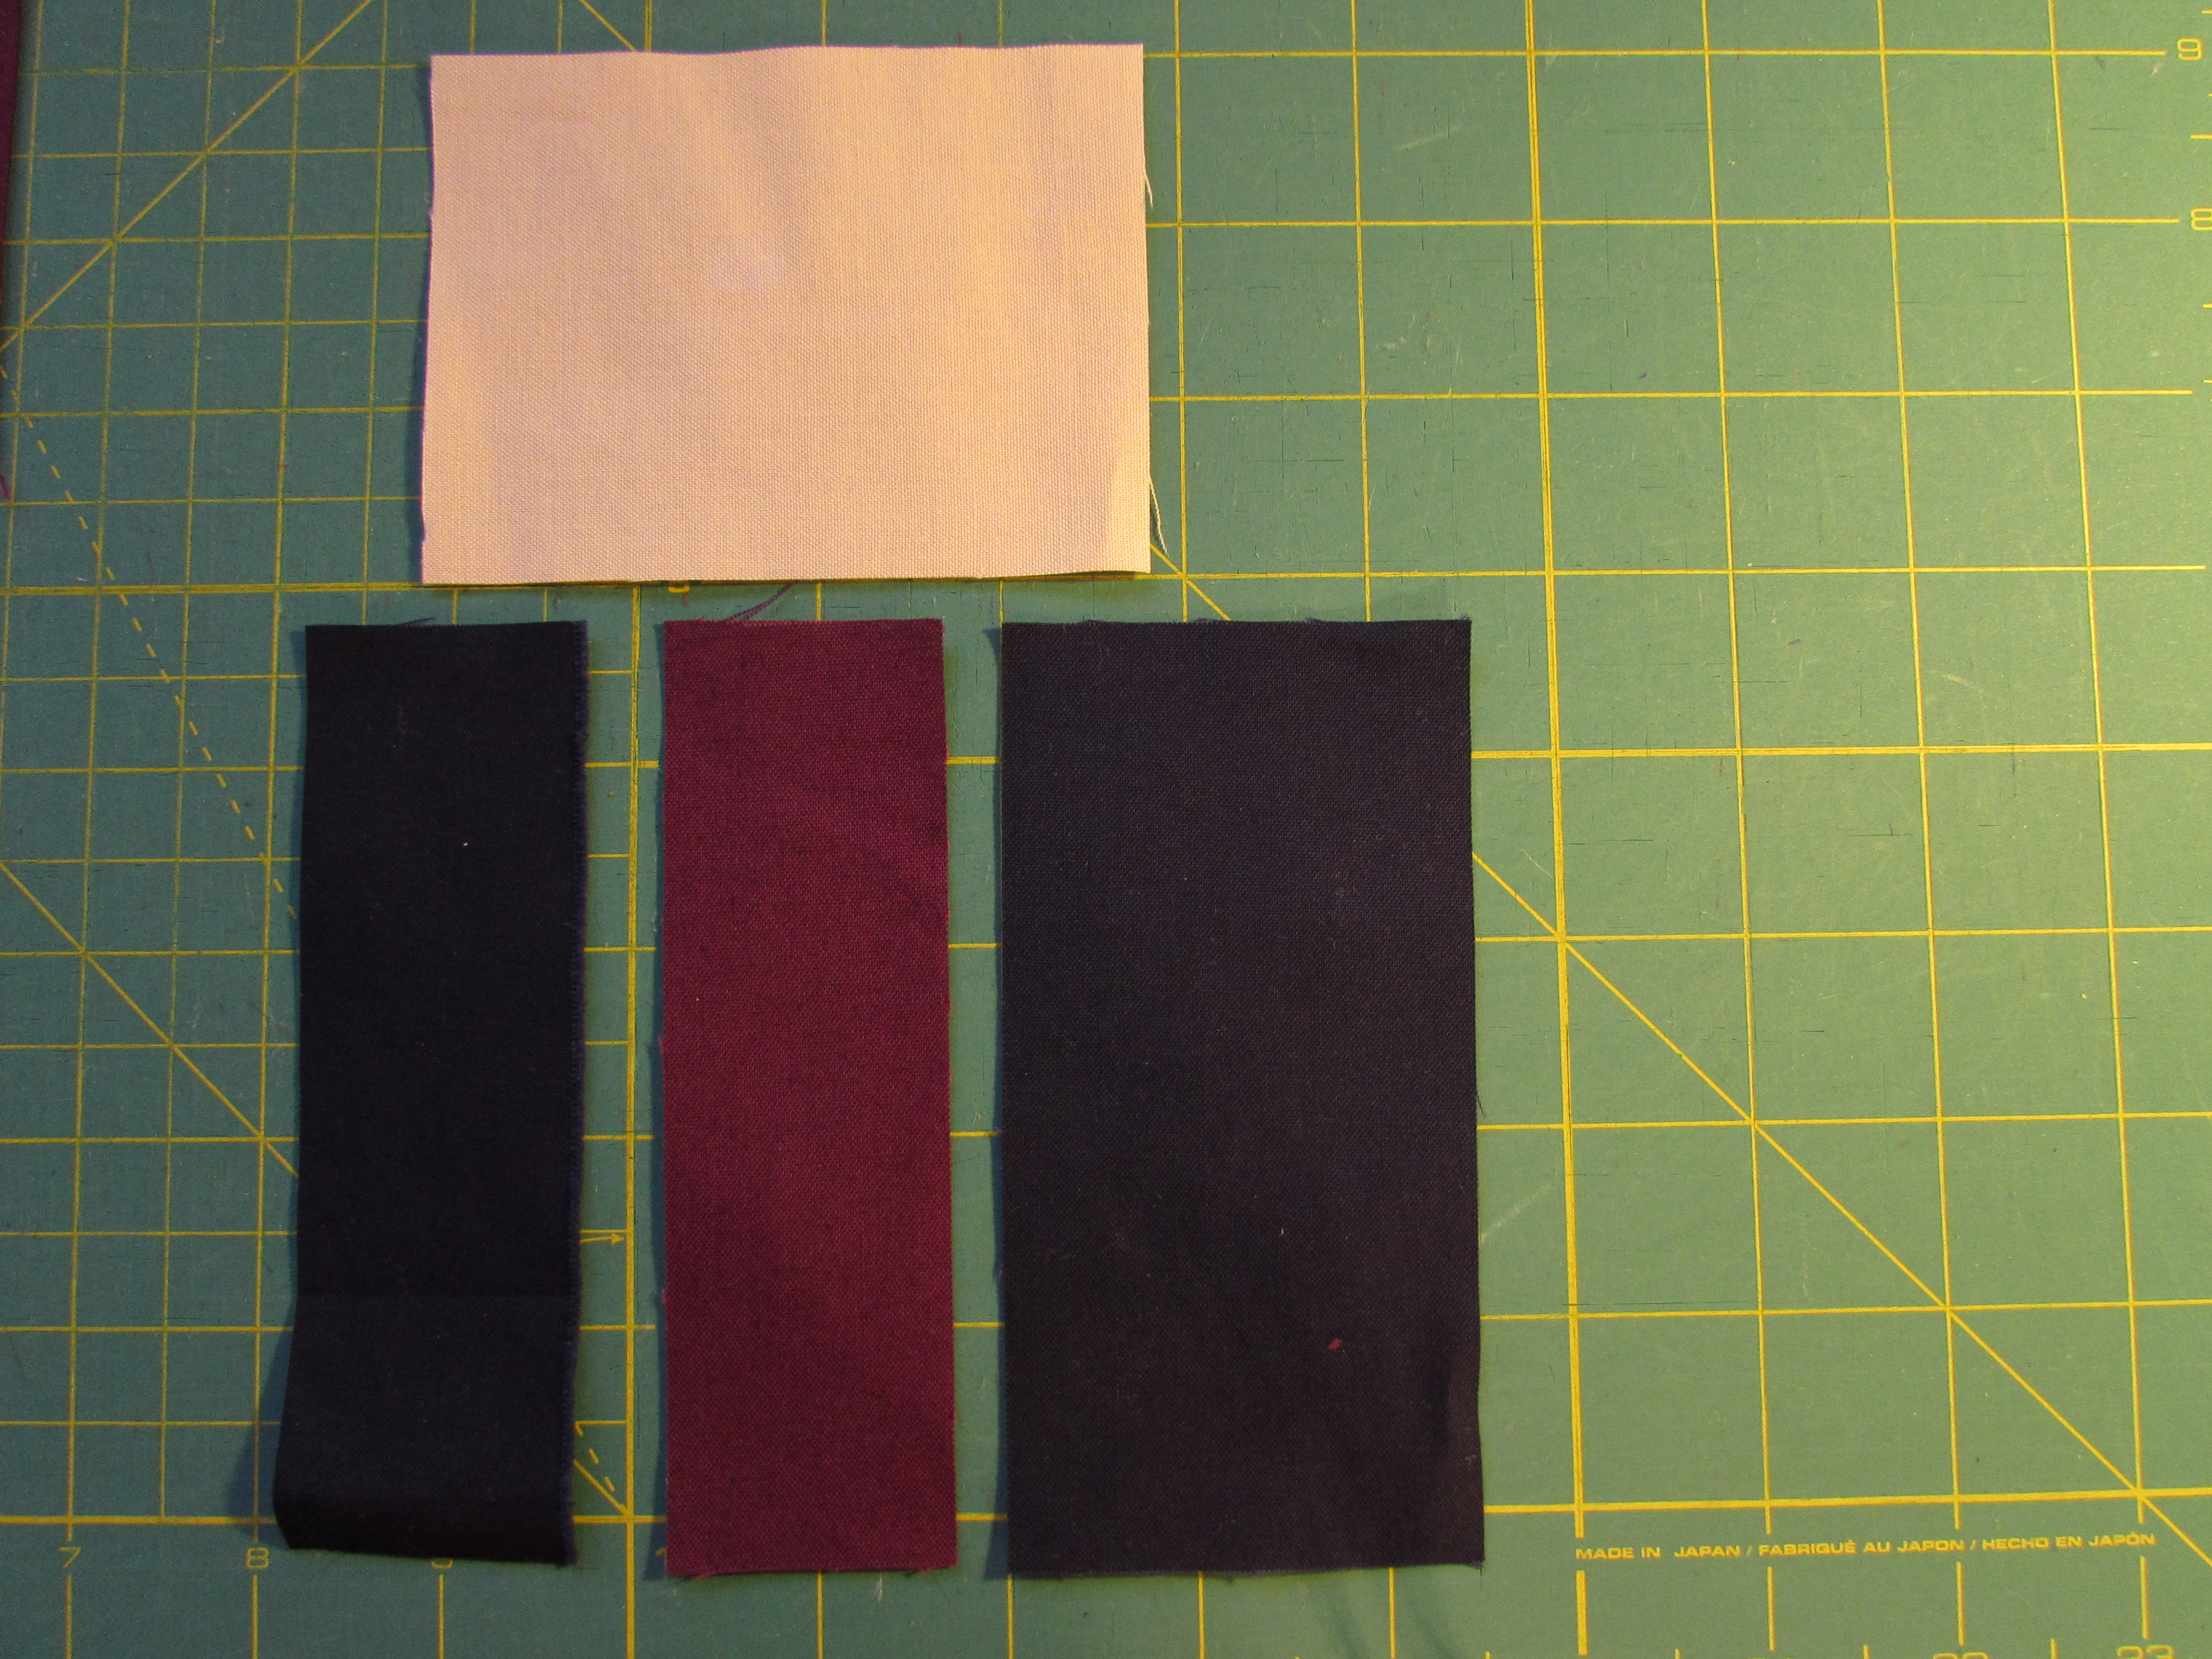
I made this block in three sections. The first section is the left side of the block.
 These pieces are stitched to form the first panel. The middle section of the block looks like this:
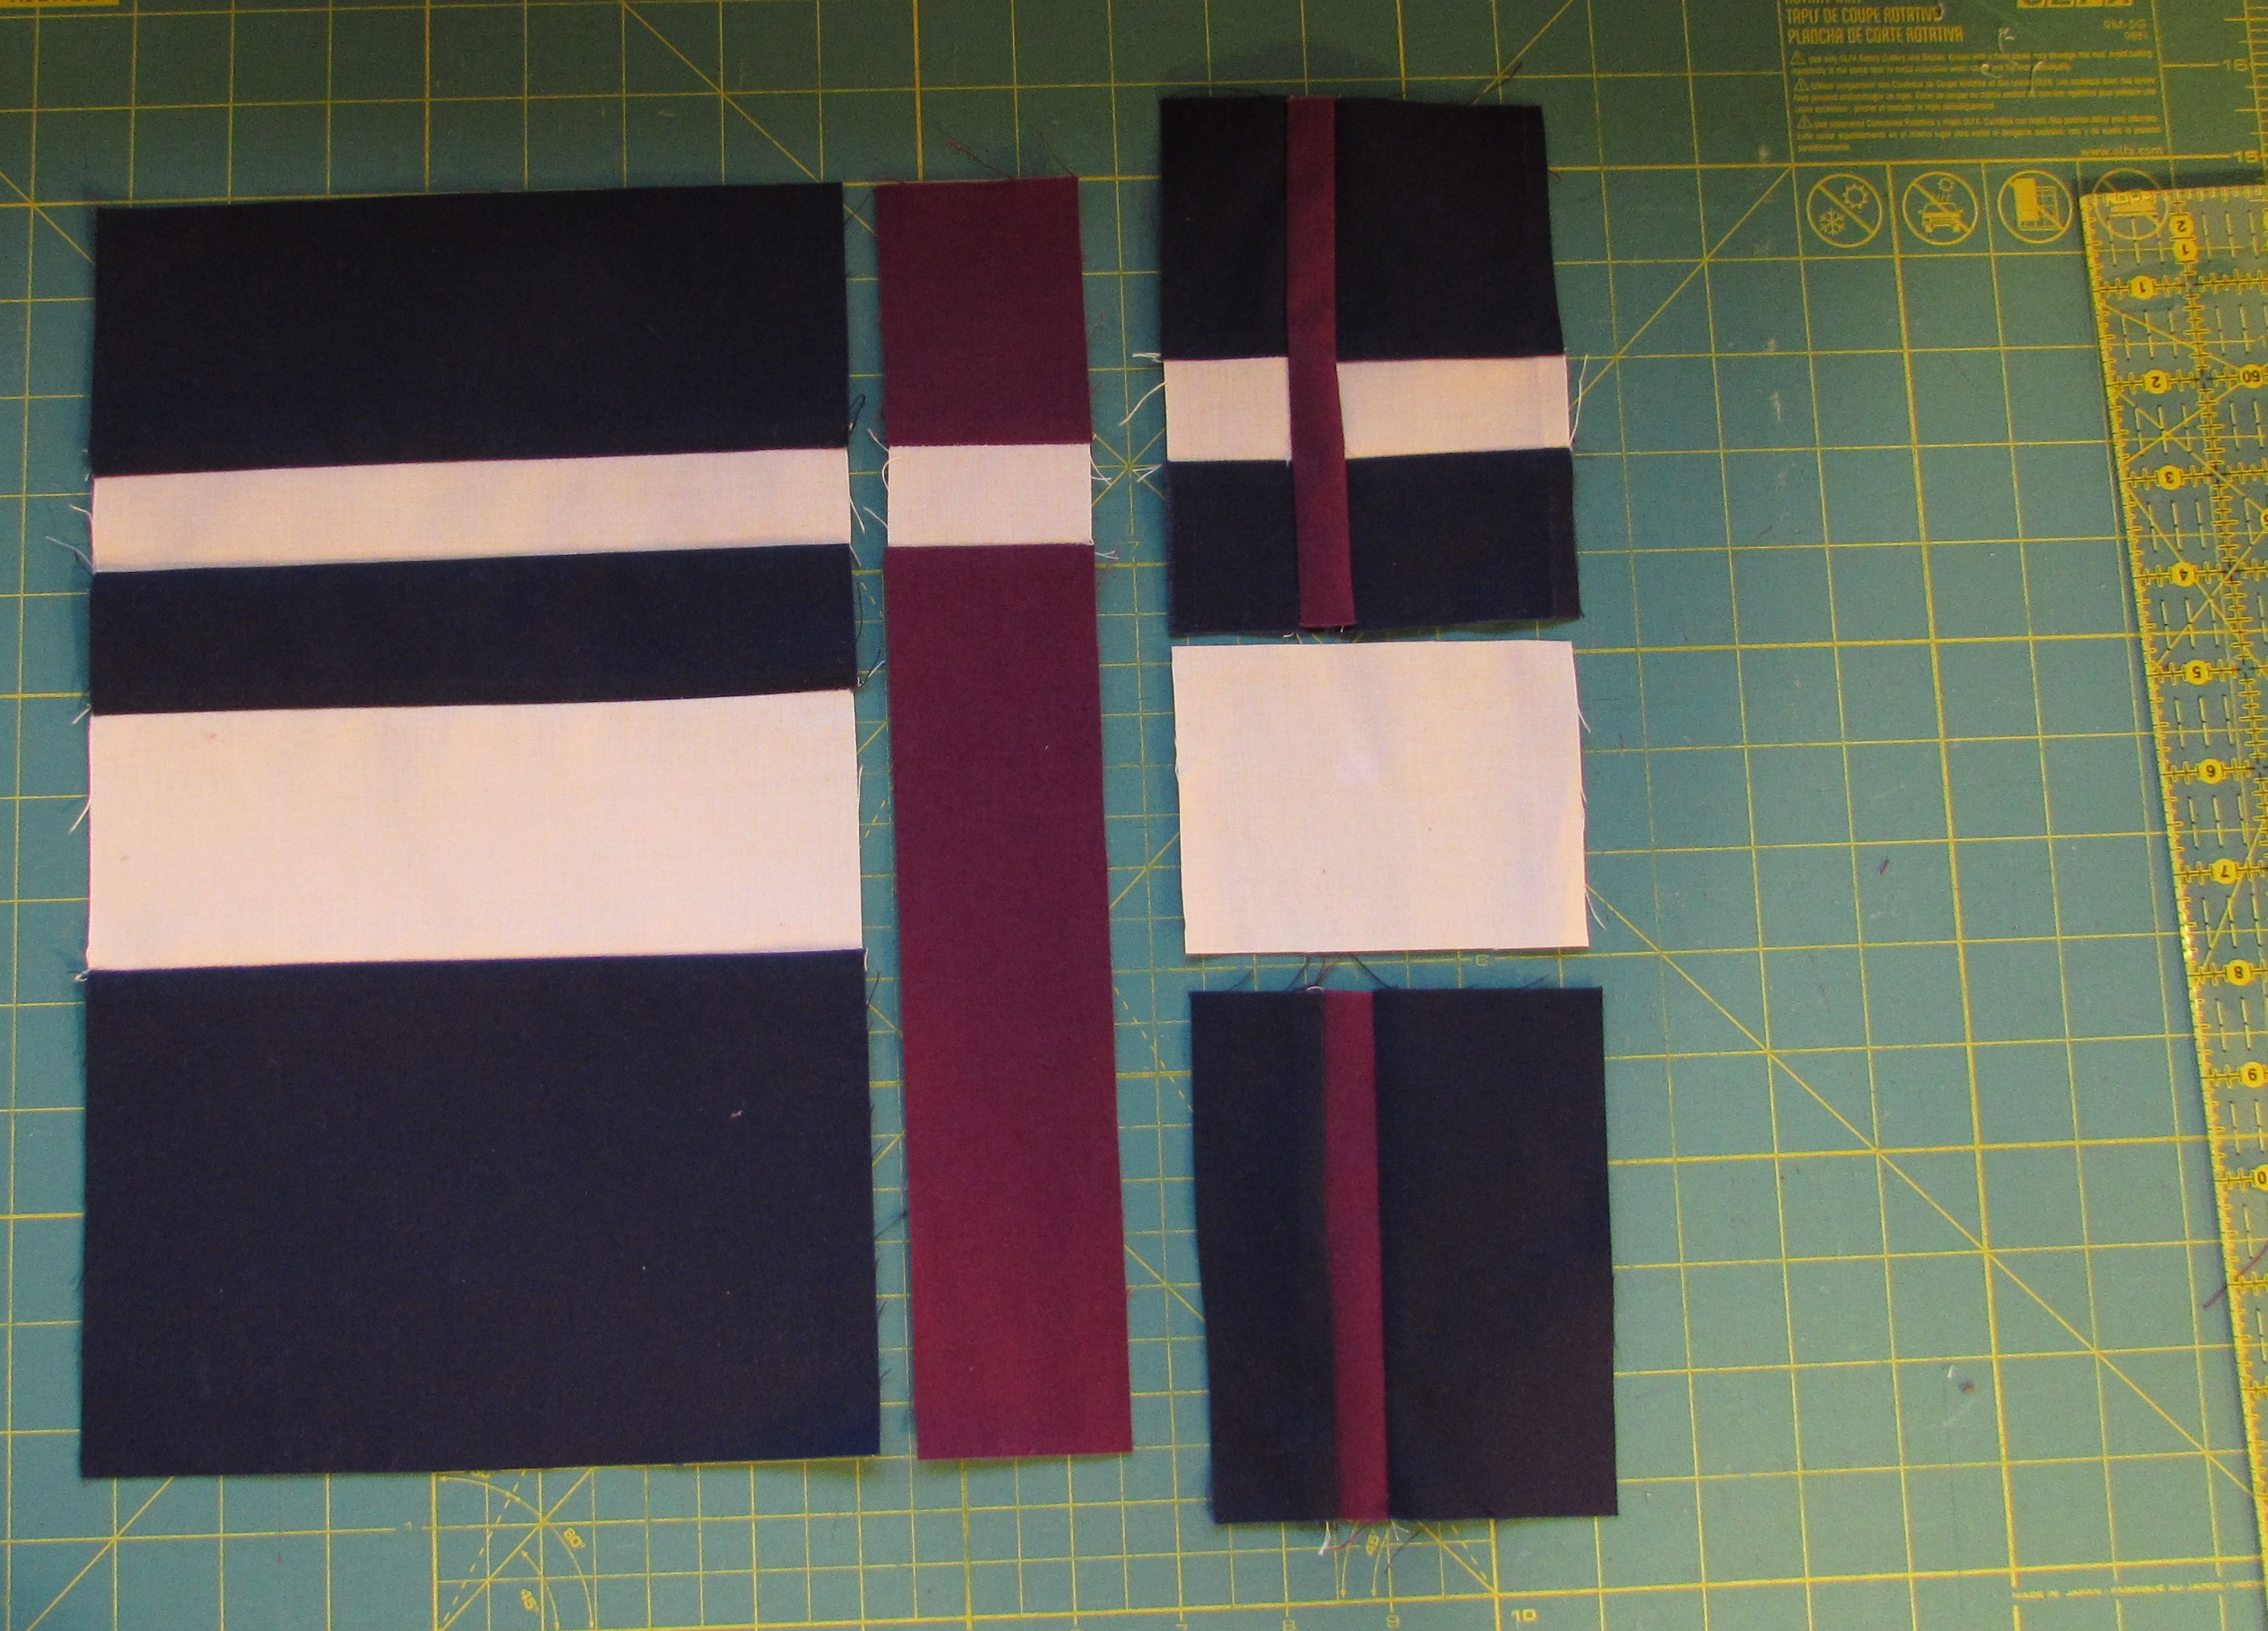
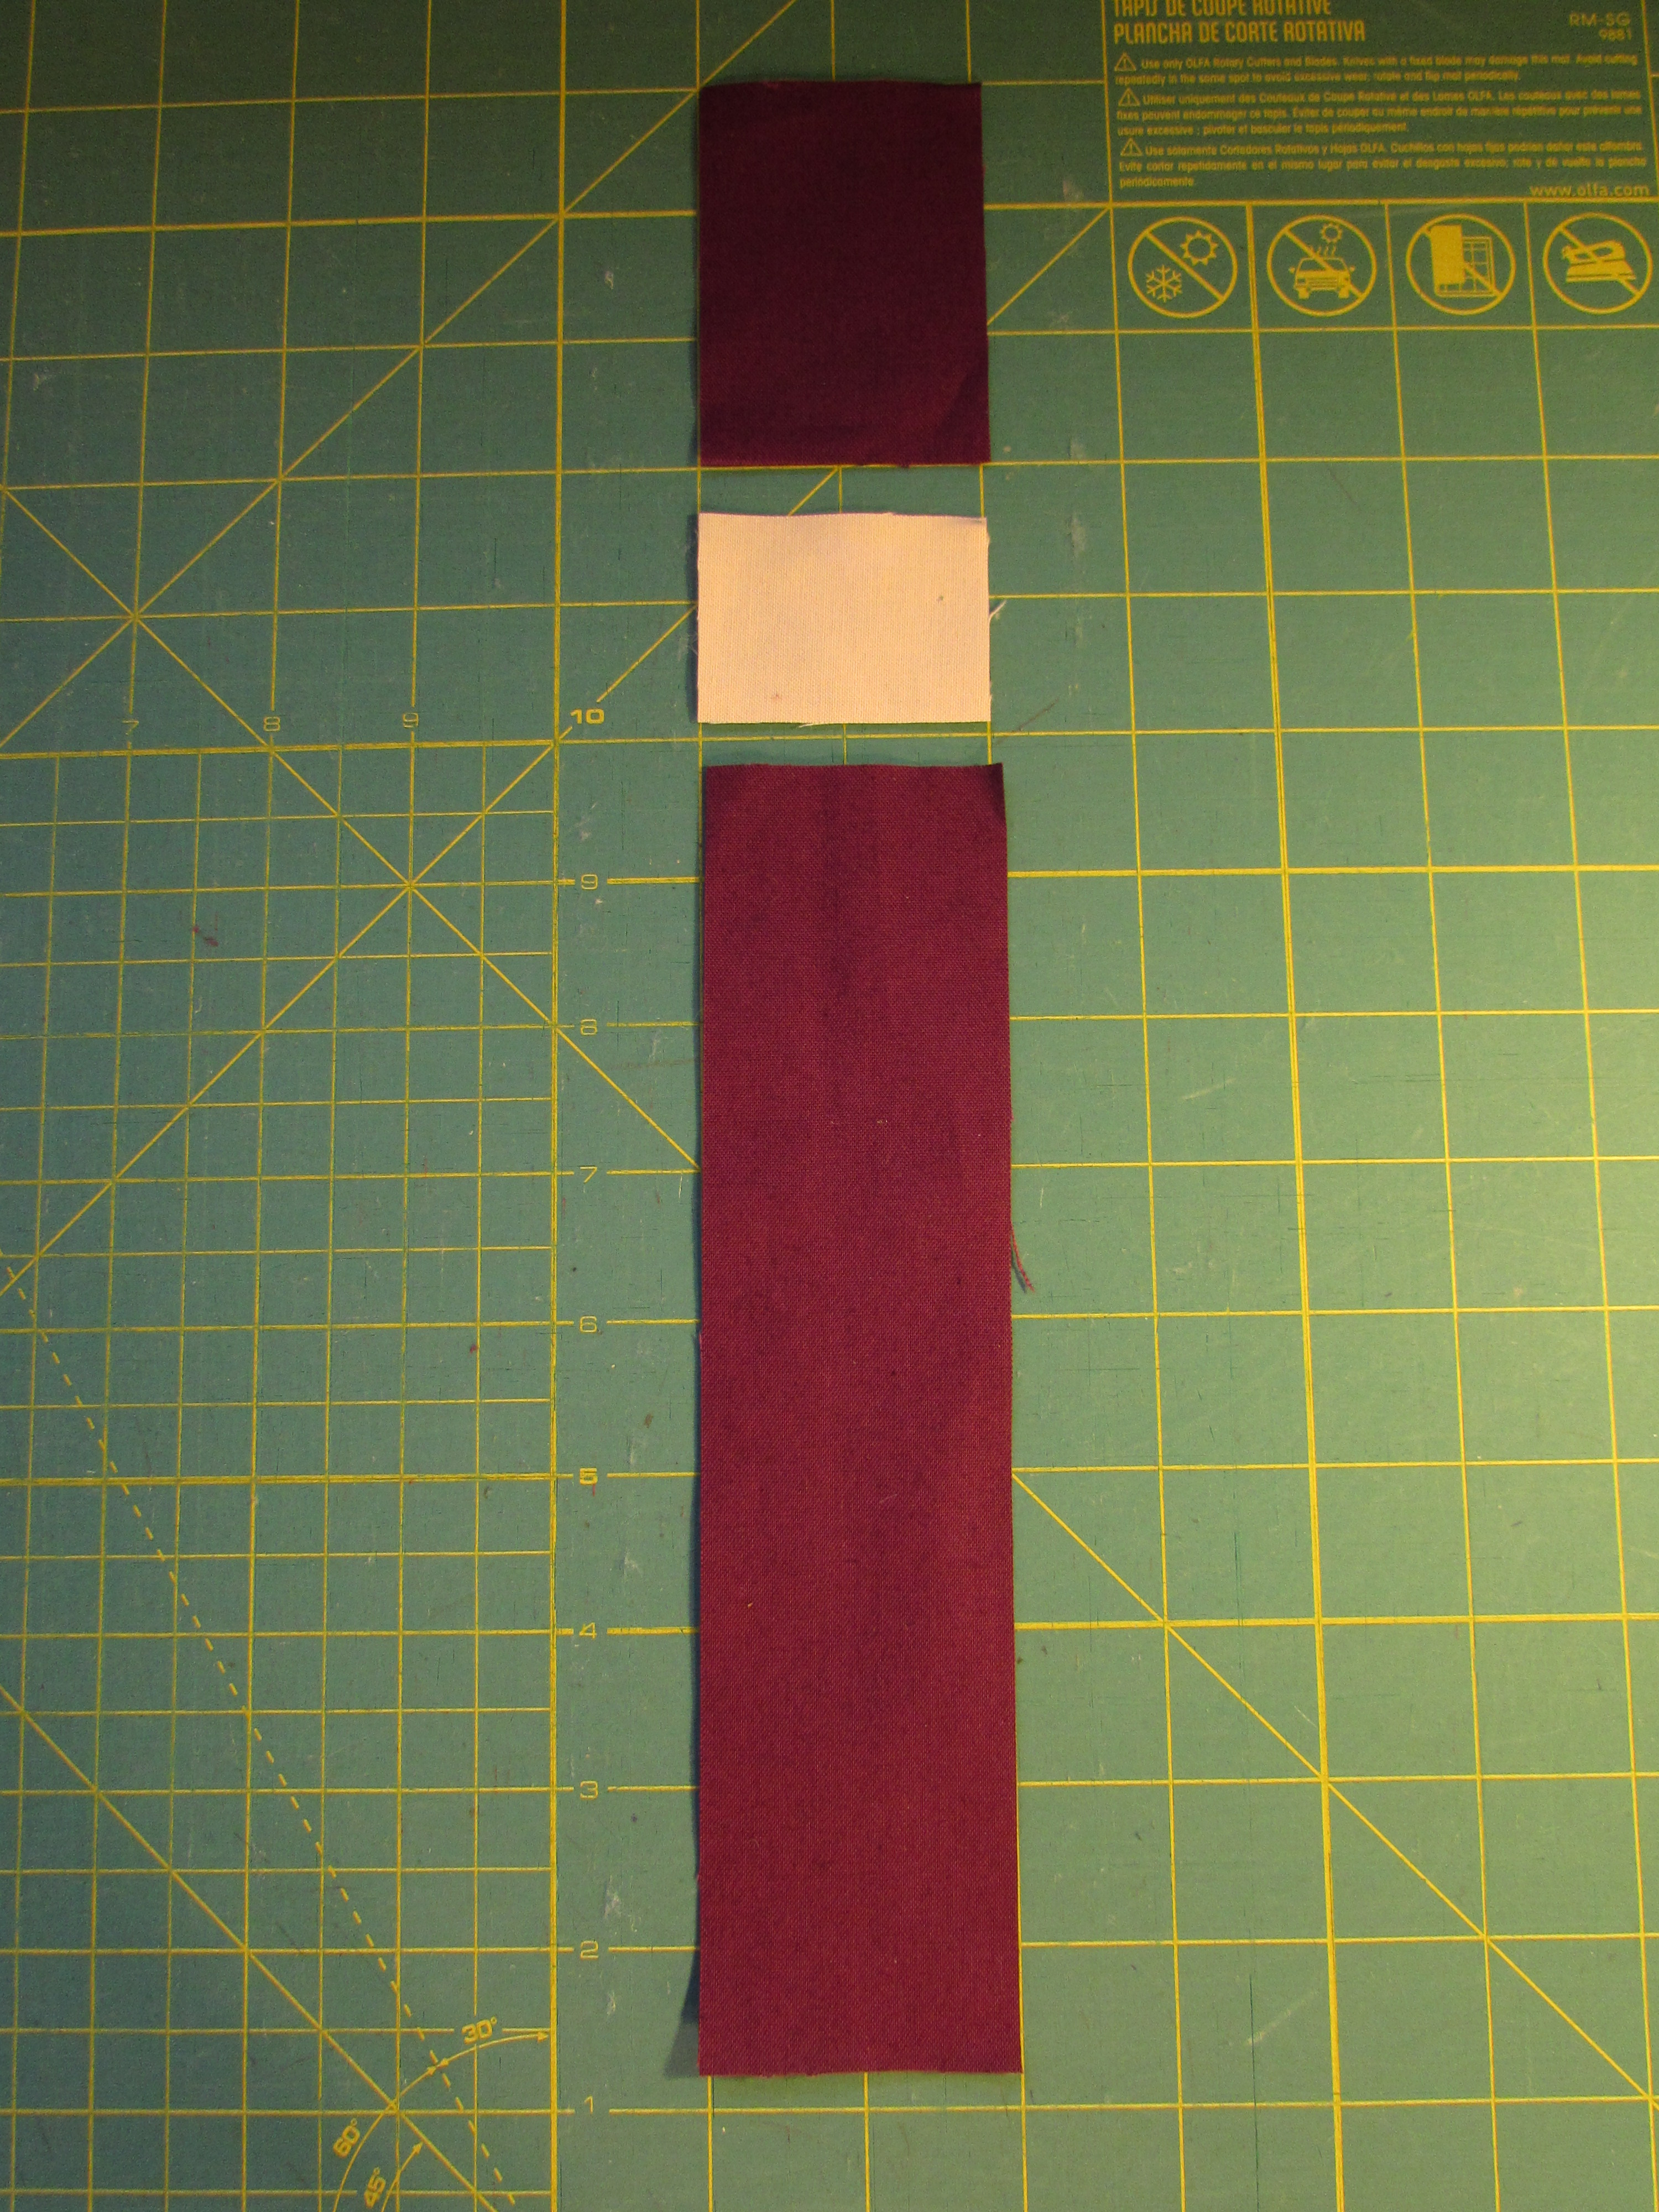 It only takes two quick seams to assemble the middle panel. The third panel requires some piecing. Here is the upper portion of the third panel.
Here is the lower portion.
 Once each panel is assembled, it looks like something like this. At this point, the sections of the third panel need to be stitched together.
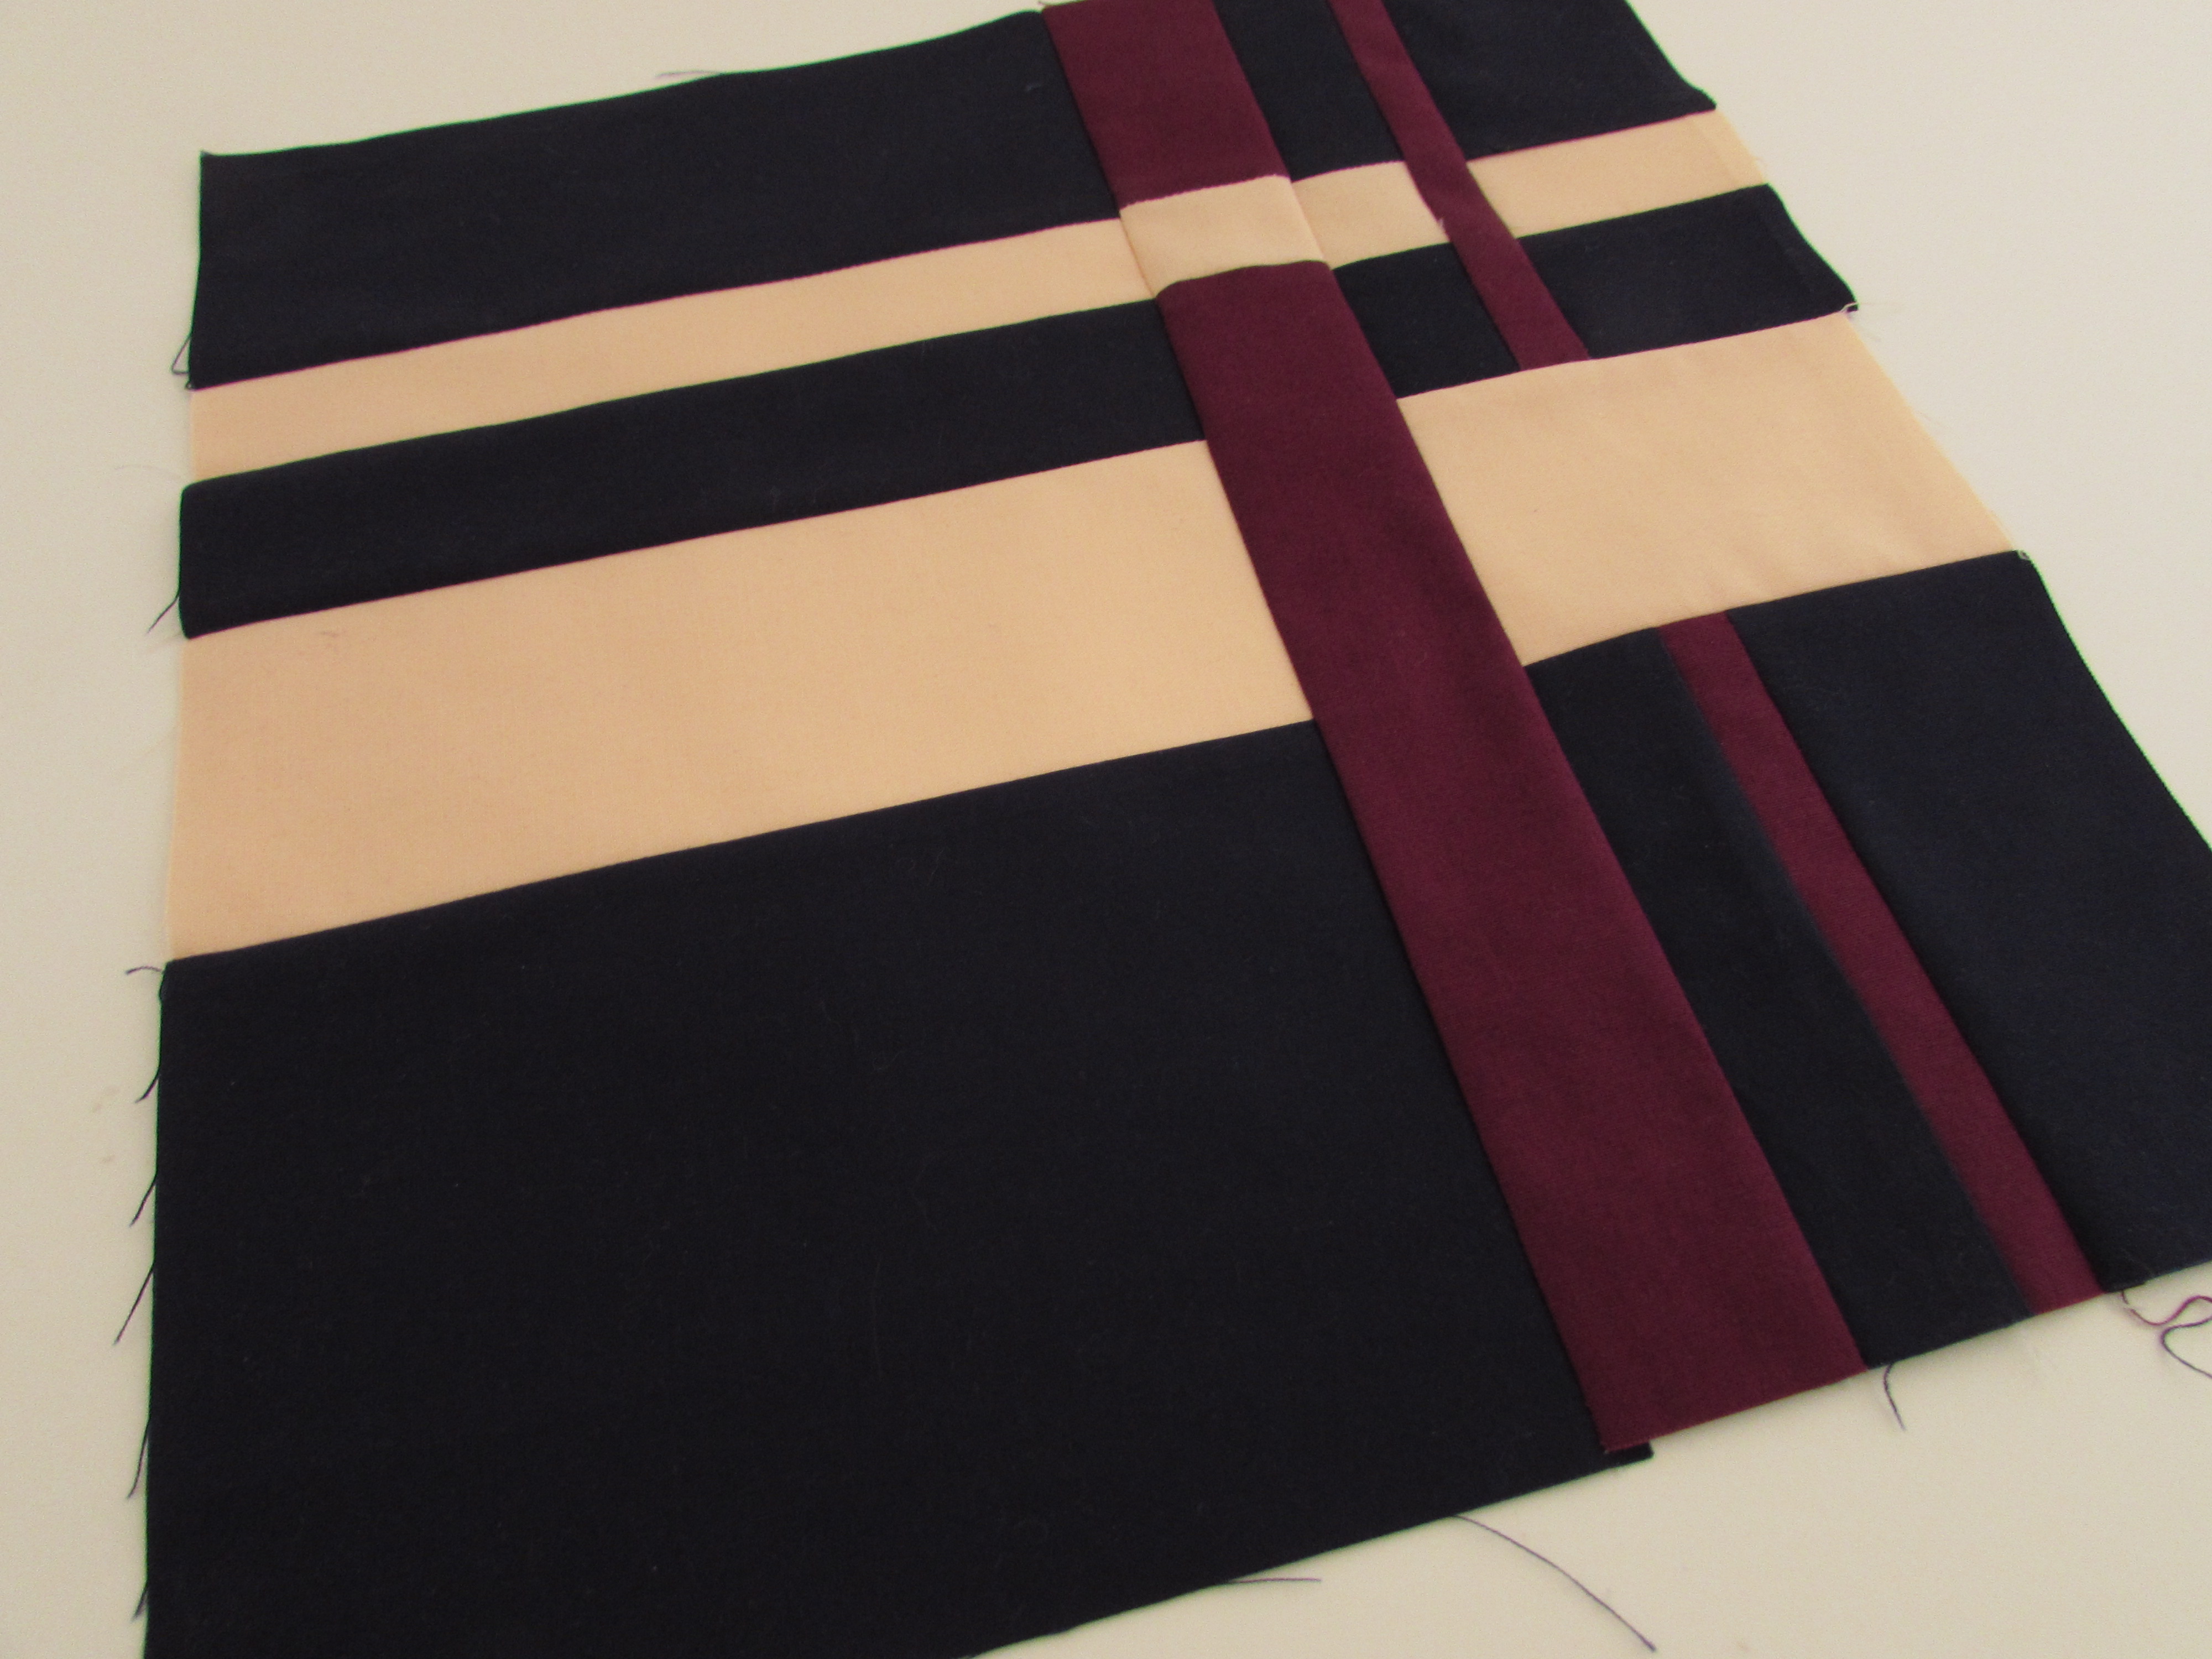
Once each panel is complete, they are joined together along the length. Here is the finished block.

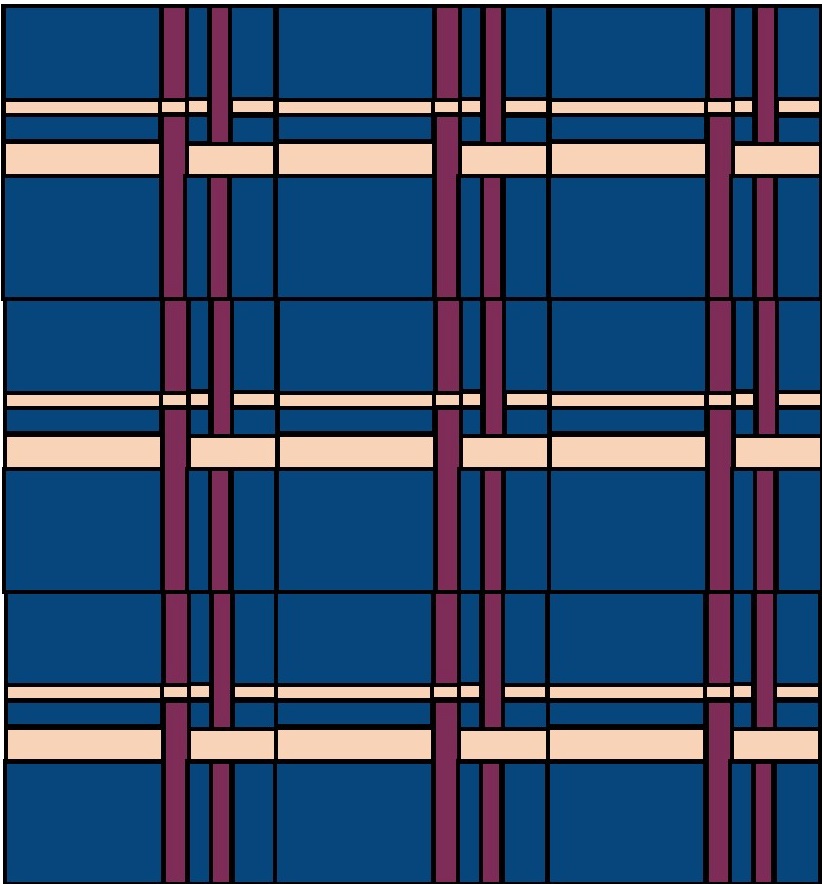
Placing these blocks side by side in a quilt might look like this:
Download the instructions and cut list for Intermingled here – Intermingled Tutorial
There are over 35 block tutorials that will be posted during this blog hop. Wouldn’t a modern sampler quilt with a dozen of your favorite blocks be a great project? Today’s hop includes the following quilters. Be sure to take a look – these talented quilters are sure to inspire you!
Host: Yvonne @Quilting Jetgirl
Jess @Quilty Habit
Silvia @A Stranger View
Cristy @Love You Sew
Kelly @Quilting It Out
Renee @Quilts of a Feather
Bernie @Needle and Foot You’re Here!
Terri Ann @Childlike Fascination
Chelsea @Patch the Giraffe
Mary @Quilting is in my Blood
Diana @Red Delicious Life
Sarah @123 Quilt
Linking up with my usual favorites. Links are available at the top of the page, under Link Ups.
By the way, have you entered my giveaway yet? If not, today is the last day. Check it out here!!
I can definitely see Alyssa’s influence in this block design. I think asking for her permission was a smart step and I am so glad she was receptive. This is a great block and I am so excited to see all of the blocks come together in the donation quilts.
Me too! With the color palette used on this hop, the donation quilts will be spectacular.
Pingback: Paintbrush Studio New Block Blog Hop & Giveaway! | Quilting Jetgirl
I love A H-C designs….this would be fun in so many fabric combos!
Thank you Sarah!
I love blocks that look intricate but are pretty easy once you break them down. And I agree, it’s always better to go the extra step to ask for permission instead of inadvertently stepping on toes. Great job Bernie!
Thank you Diana.
It looks so complicated, but you make it easy! And I too see Alyssa’s influence here!
Hi Jayne,
Thanks for coming by. I am loving taking a look at all of the blocks this morning!
B.
Nice tutorial, I like the block it reminds me of weaving.
Yes, it is just like a weave. Or woven ribbons. Thanks for visiting!
I love Alissa’s work, so I obviously love this block. Great job! This would make a fun quilt.
Thank you Silvia. I like the simplicity of the block. Have a wonderful day!
I really like the woven effect of this block. Such fun!
Thank you Sarah! It looks like ribbons to me.
Great job! Your block looks complicated, but seems simple to make. Thanks for sharing.
Cecelia,
Thanks for stopping by. So glad you like the block!
Great tutorial and a lovely block. I like the woven effect. I wonder what a quilt of these blocks in different colors would look like? Have a wonderful day!
Bernie, your block is great!!! I loved reading about your inspiration for the block.
Thank you Stephanie. Alyssa was very sweet about the whole project!
your block is wonderful. thank you for the pattern.
You’re very welcome Lori. I’m glad to hear that you liked it!
You’re very welcome- so glad you liked it!
Love the simplicity of the block’s design Bernie! Sometimes the simplest shapes can make a great impact as you’ve shown here with the woven designs on this intermingled block. Thanks so much for sharing!
Thank you Terri Ann. I appreciate the compliment!
Nice block and tutorial.
Great block! I agree going the extra mile to ask permission when you’re not sure is worth it. Usually you get a really positive response too!
Like they say, it never hurts to ask! Glad you like the block. ?
I love woven look blocks, and this one is terrific. It’s so neat how small goes big, (I think of one giant Swoon block quilts) and now big goes small (minis). Yours is great, and yay for a generous designer to let you take a spin on her block. Guess I’m heading over to your giveaway!
This is a fun block. I like the woven effect.
Wonderful modern graphic appeal.
Pingback: Pacific Sunset Block Tutorial | The Sewing Fools
Pingback: 2016 Paintbrush Studio New Block Blog Hop–Midnight Starfish | Quilting is in my Blood
Pingback: Spiked Star - Free 12" Paper Piece Quilt Block - Childlike Fascination
I’m mad for plaids, and this is super fun and a great use of the colors! Great job and thanks for sharing!
Very cool block! I really like the woven look to it.
Pingback: 2016 Paintbrush Studio New Block Blog Hop - Avocado Quilts
Oh beauty!!!!!
I also like the clean lines and woven look of the block. So cool that you were able to get permission to recreate Alissa’s quilt as a block for this blog hop.
Pingback: 2016 Paintbrush Studio New Block Blog Hop - Vintage Bathing Suit Ocean Sunrise •
Pingback: 2016 Paintbrush Studio New Block Blog Hop - Vintage Swimming Bathing Suit Ocean Sunrise •
Pingback: Vintage Womans Bathing Suit Quilt Block Tutorial •
Pingback: 2016 Paintbrush Studio New Block Blog Hop | Love You Sew
Wonderful! You really knocked the woven feeling of this block out of the park! Your block visualized as a quilt top is really wonderful! Thank you.
Thank you Amanda. I love the block. I have only made a few of them as I worked out the tutorial, but they sure come together quickly. So glad you stopped by!