
Hi Everyone! Today we are going to begin working on our shirt. I am writing with the assumption that at this point in time, you have received your pattern (Butterick B6024) and have purchased your fabric. (Many thanks to the readers who purchased fabric at my shop!) Your fabric should have been washed (in cool water) and dried in the drier to be sure any potential shrinkage has already happened. Ok – if you are still with me, let’s begin. (If you haven’t gotten your supplies yet, don’t worry. You can still catch up. )
NOTE: before doing anything else, I strongly suggest reading through the instruction sheet that comes with the pattern. I am going to explain my process as we go through this but they are the professionals and it will help if you sit and read the instructions beginning to end. Then as we work through the pattern, it will likely make more sense to you. Be sure to read all the way through this post and then take your time. Be sure all of your pieces fit BEFORE you cut anything. I have to tell you this has bit me several times…..taking a quick glance and assuming the pieces will all fit properly does not work. Take the time to lay everything out completely before cutting fabric. Once you begin cutting, it is pretty darn hard to change the layout of the pieces.
In the first post, I mentioned you need to take your measurements and buy the correct size pattern, according to the measurements described on the pattern. Hopefully, you have done this and have the correct pattern in hand. Next I want you to cut out the paper pieces that will be needed for this shirt. For View C we will use pieces 2, 3, 4, 6, and 7.
NOTE: Some readers have mentioned that they are making a variation such as using the front from version A or adding a sleeve. I am not going to go into detail on variations as I think it will get confusing. If you are veering off the path, so to speak, that is fine. If you get stuck or need some help, please email me or leave a message on our Facebook page. I am happy to help if needed!
As you cut the the paper pieces out, note the various sizes printed on the pattern. Make sure to cut them out with the largest size intact (cutting around that size) so you have the choice each of the sizes when you actually pin and cut your pieces.
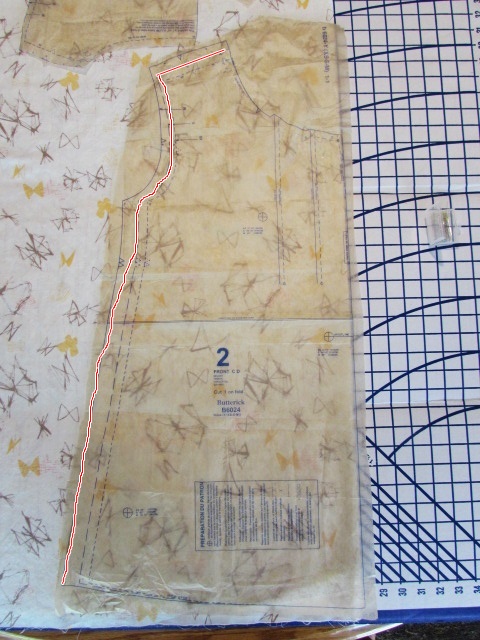
Once you have your paper pieces cut out, take the front piece and stand in front of a mirror. Hold the piece up to your torso with the shoulder seam line laying on top of your shoulder where it would be if sewn. Press the tissue paper so the armhole goes across the front of your arm and the side seam tucks under and lays down your side. The front of the top will look wide because we are going to make the pin tucks which will reduce it. But the shoulder seam and side seam should fall comfortably. Check to see if it looks like it fits. Check the length. If it is too short or too long, we can adjust the pattern piece accordingly. At the bottom, does it seem like the width is going to be comfortable? The nice thing about patterns with multiple sizes printed on them is that you can cut part of the piece at one size and gradually work to another size, thus altering the shape as you need to. For example, if your body is pear shaped, you might cut the top parts, the shoulder and armholes at a size small and then as you cut the side seam, you could gradually increase the cut as you go, until you reach the medium size line toward the bottom. I am by no means a graphic artist but I tried to illustrate what I am saying. (Hopefully your stitching line will be much straighter than my wiggly line!!) Does this make sense?
When I make a shirt or dress, I often have to adjust the length. I am just shy of 5′ 4″ tall and usually the pattern is a touch long for me. The length is a very easy adjustment. There is a line at the midpoint of both the front and back pieces. If the pattern is too long for you, you just make a little fold at the line to shorten the piece. It is much more effective to shorten at the middle of the piece than to just cut it shorter at the bottom. If you cut off the bottom, you might alter the way the piece drapes around the hip. Conversely, if you are tall and want the shirt to be longer, you would cut the piece at the mid-line and add length to the piece. This shirt is a fairly long one so it is not likely you’ll need to lengthen it. However, if you do, please message me and we can work through that together.

Each pattern always contains a suggested cutting layout. They are showing you how to fit all of the pattern pieces on the piece of fabric. In the photo below, you will see the layout instructions for view C, the shirt we are making. You will see it shows how to lay the pieces out on standard 44″ wide fabric and again for 60″ wide fabric. Also, they show the layouts in each of the sizes too. Note the pieces are running parallel to the selvage edge. Pattern pieces always have an arrow on them and that arrow must run in the same direction as the selvage of the fabric. This ensures the grain of the fabric is going the right way. If you don’t adhere to this, the fabric will not hang nicely.
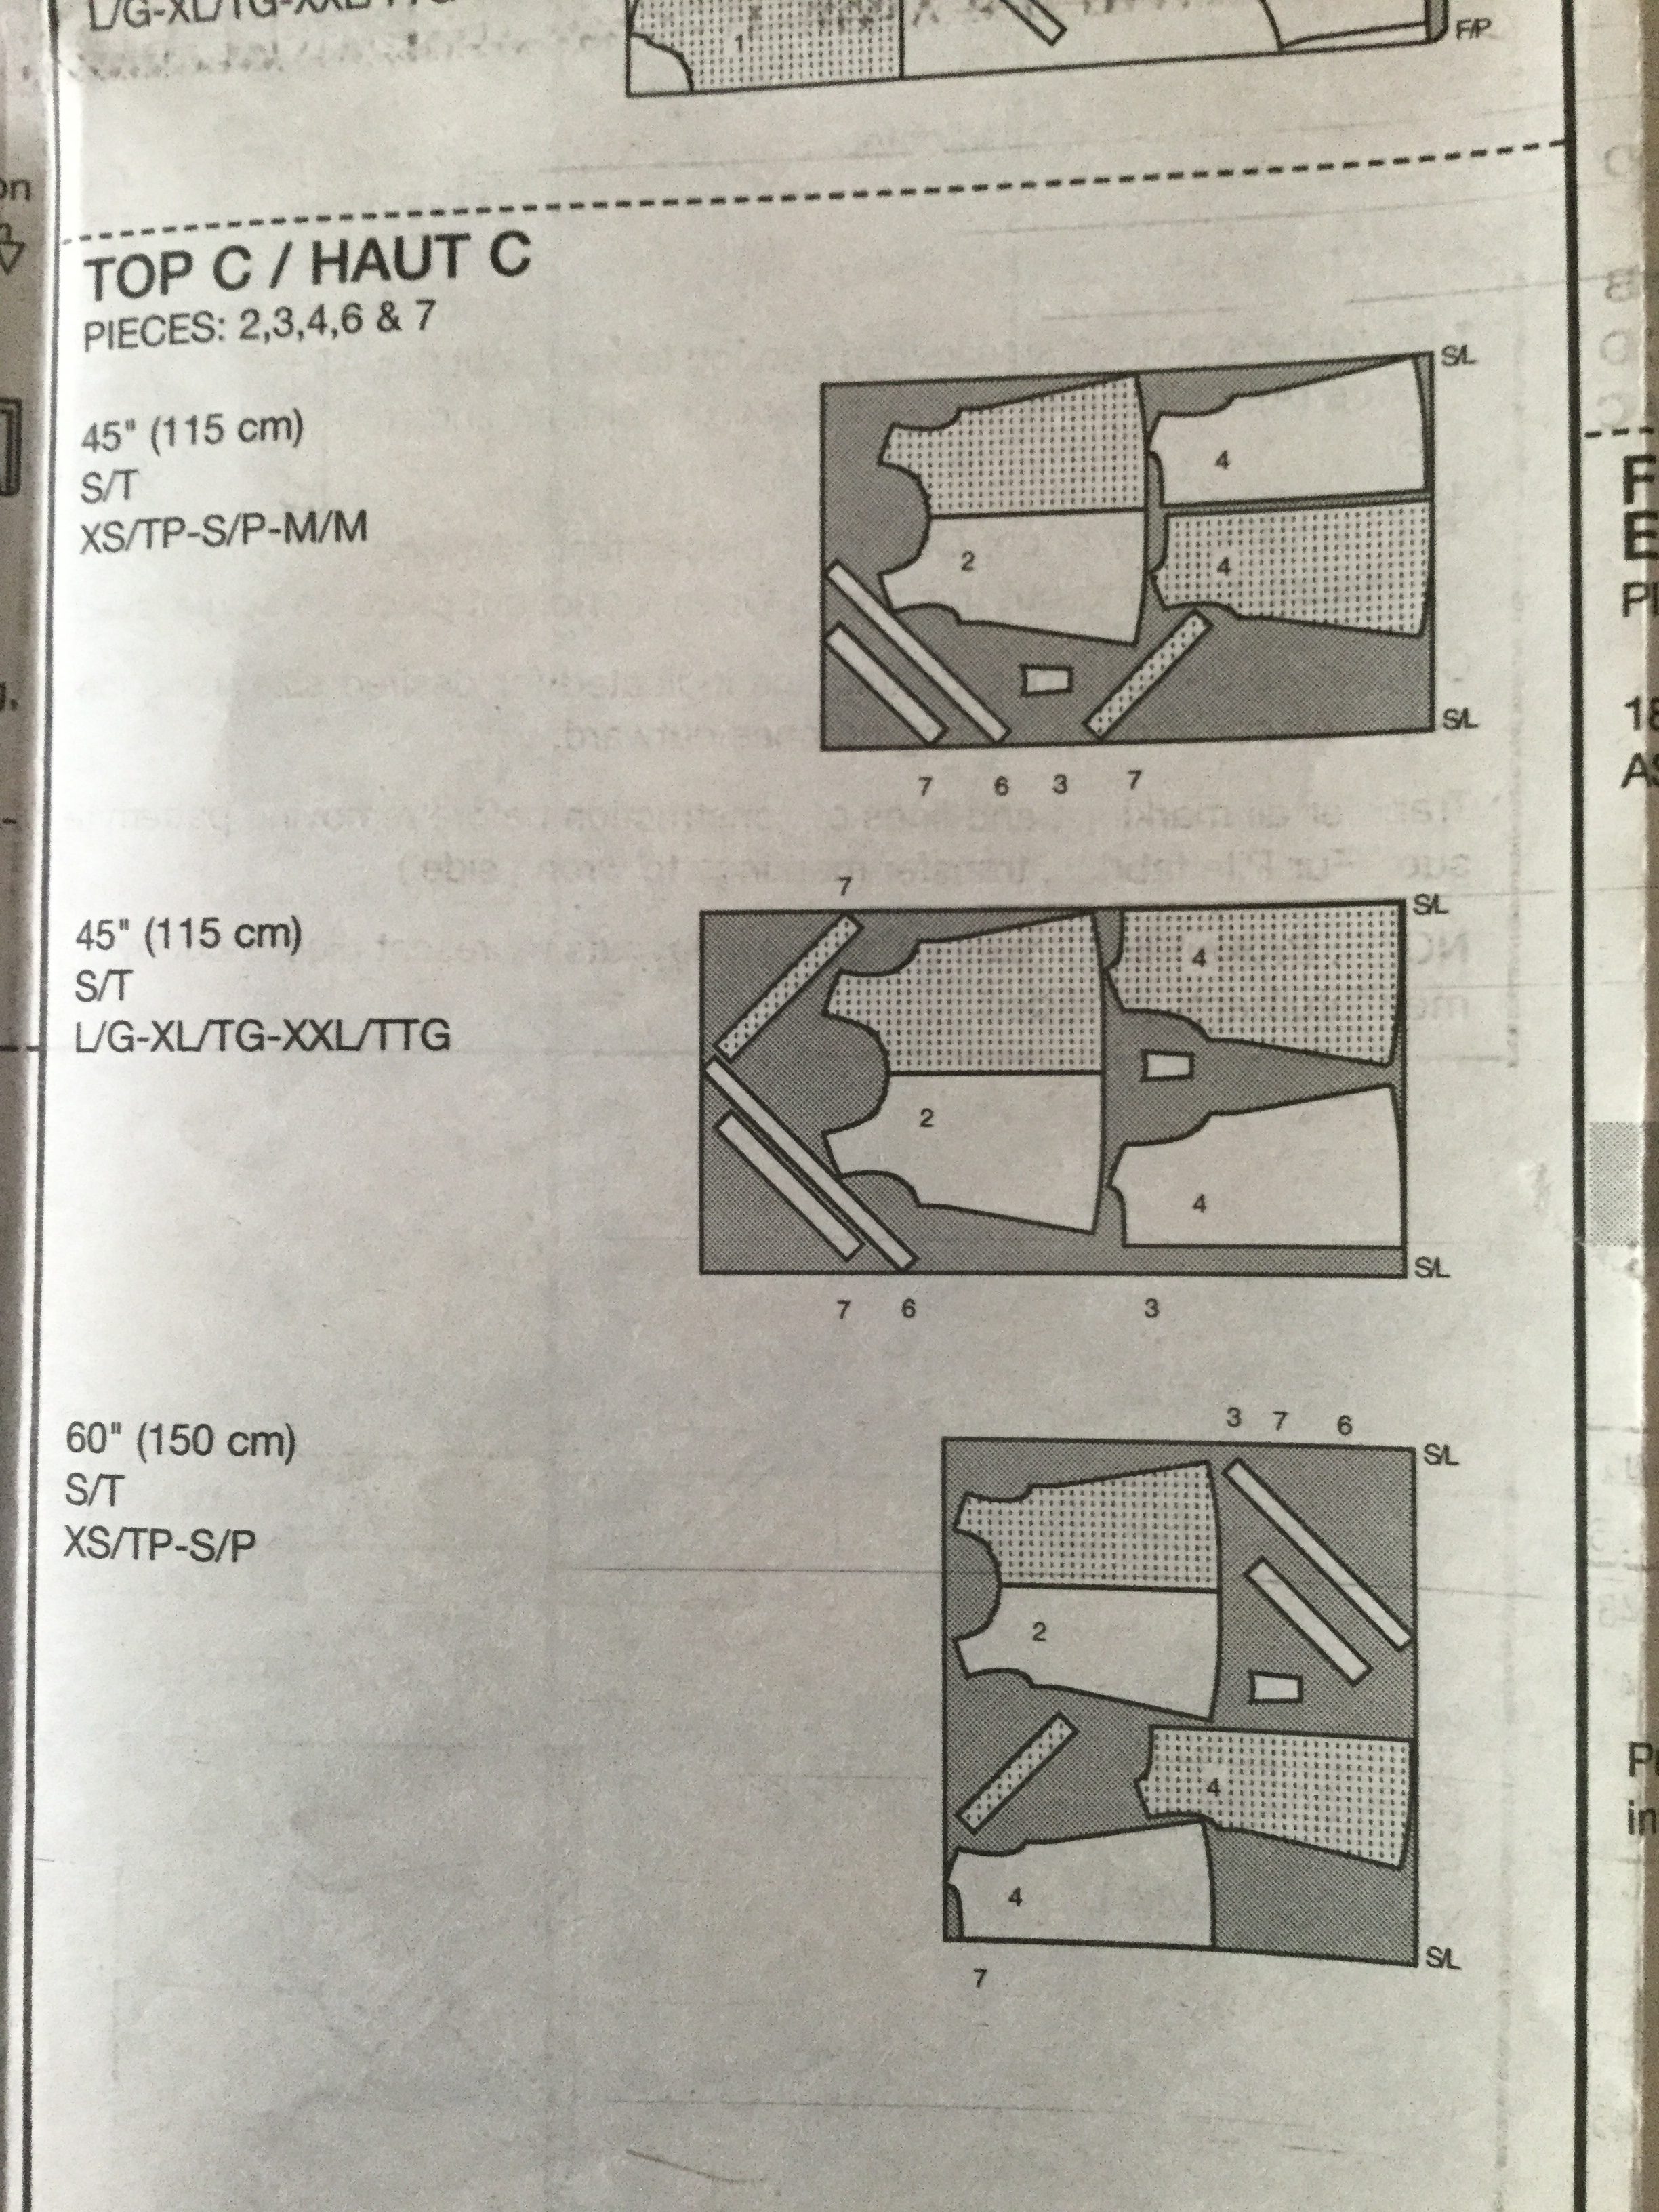
The suggested layout in the picture shows the fabric being unfolded and the pieces being cut from a single thickness of the fabric. They are instructing the reader to lay the main pieces (number 2 and 4) down and then to flip it over and cut the second one. Piece number 2 is the front of the shirt and must be cut as a single piece. So you would cut the one half, unpin the piece, flip it over, pin it and cut the other half. This all works and you are welcome to lay your pieces exactly as the instructions show them. I found this process a bit laborious. Instead, I kept my fabric folded and simply laid piece 2 on the fold.

I pinned it with the center line running along the fold, because that keeps that helpful arrow running parallel to the selvage edge.
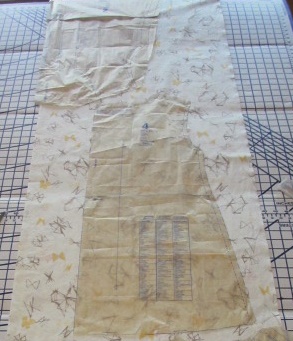
Piece number four is the back of the shirt. There is a seam running down the center of the back. If possible, it is a good idea to take a look at both layers of your fabric. If you can fold the top and bottom so that the pattern matches, then when you stitch the center back seam, the pattern will match. This isn’t absolutely necessary and if you have a print like mine, it is not very easily done. I chose not to worry about it. If you have a very bold print and, if you don’t mind fussing with the fabric, you could try to lay the piece so that the print of the fabric will match. Piece number 4 is not laid on the fold but that long arrow must be parallel to the selvage. Lay the piece just below the front piece, placing it as close as you can allowing room to cut each one out. I placed it closer to the selvage edge than the fold edge. I wanted that folded section to remain whole to keep as a bigger scrap. (We are quilters, aren’t we?)
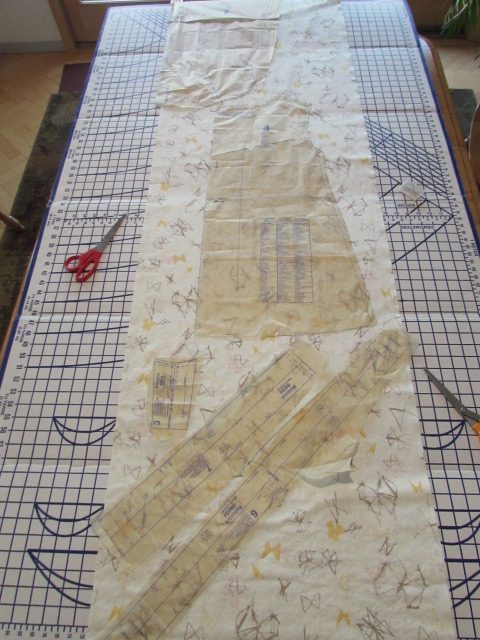
The above photo shows the basic layout I used.
NOTE: From the pictures you have shared, I do not think anyone is using a directional print. However, if you are – be sure to lay your front and back pieces so that they run in the correct direction. They should both lay in the same direction so the print runs correctly on both front and back. Similar to when we are quilting, make sure the pieces are cut such that the direction goes the same way on both the front and back!
Once I verified all of my pieces fit and figured out what size and length I would be cutting, I pinned the front and back pieces (2 & 4) and cut them out. After they were cut, I opened the remaining piece and pinned the last three pieces. The final three pieces are simple. Piece 6 is the neck binding and piece 7 is the armhole binding. Since they will be used on curves, they must be cut on the bias. Look at the arrows and keep that arrow parallel to the selvage. Because we only need one neck binding piece, cut it on a single thickness of fabric.
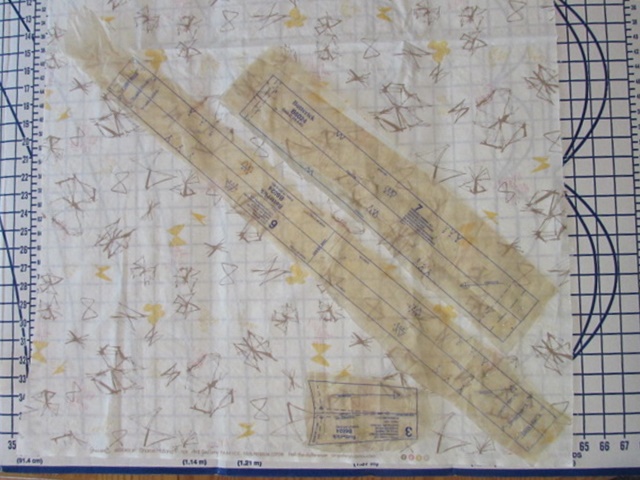 In the picture above, you can see the selvage runs along the bottom of the photo. Pieces 6 and 7 are placed on the bias. You will need to cut a second sleeve binding piece. After you cut the first one, take that piece and flip it over (upside down) and cut the second one. You need to cut one with the pattern piece right side up and the other with the pattern piece right side down. The last piece you see is number three. This is the little piece we will use to finish the little slit at the center of the neck line. We only need one of these so cut it on the single thickness with our trusty arrow aligned with the selvage.
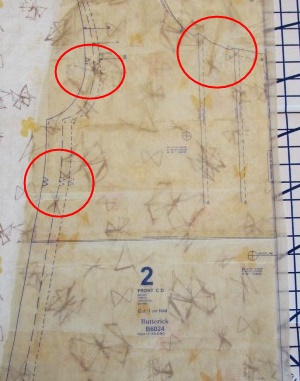
If this is your first time cutting out a pattern, you might wonder what the little notches are that are placed on the edges of the pieces in various places. You will cut the notches out and use them when you place your pieces together and pin them before sewing. The notches will be matched up and it helps you with the placement of the pieces.

I always cut the notches pointing outward so they are not within the seam allowance. These notches can be cut into the seam allowance – the same way they are pointing on the piece, however I don’t suggest this. There are times when you want the seam allowance intact in case you need to alter the size (by sewing a smaller seam to make that area larger). If you cut into the seam allowance you will not have the option to enlarge the seam if needed.
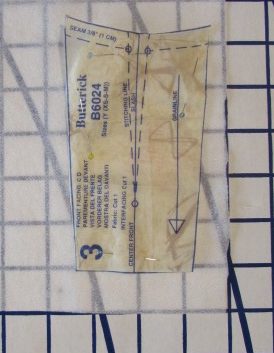
The last step in cutting out the pieces is to cut a piece of interfacing to back piece number three. It is silly that the pattern says to buy a 1/4 yard of interfacing when really you need about a 6 x 6 inch square. I guess 1/4 yard is the minimum that many shops will cut? Anyway, now you have extra for the next project!

Look at the stack of leftover fabric! Hmmm…. what could I possibly do with all these scraps?!
Whew — That was a whole lot of reading for what is actually a simple process. I hope I didn’t confuse you!! Because this is my first time hosting a sew along, I would love feedback on these posts. Too much detail? Too little detail? Is any part of this confusing? Please leave your thoughts in the comments so I can adjust things as we go. It will really help me to learn how these steps should be written.
If you need any help with this, please don’t be shy. I want to help you be successful with this and it is a bit different from quilting so there are no silly questions. Have you joined the Facebook group yet? If so, please remember to post pictures of your progress there, offer suggestions or tips to others, or answer any questions that may come up – let’s help each other out. If you are not a Facebook participant, you can also post progress photos on Instagram. Tag me @needleandfoot and use the hashtag #NFsummersewalong. Be sure to come back on June 19th for the next post. We will be working on the detailing of the front of the shirt (the pintucks and the slit at the neckline).
**If you haven’t yet signed up, I would love to have you sign up for my newsletter. Sent monthly, it contains updates about new fabrics I have in the shop and promotions that will run that month for newsletter readers. Sign up form is on the right side of your screen, toward the top.
This post brings back memories of Mrs. Handley’s sewing class at LAHS: ) I always went too fast and something never quite matched. Even though I am not actually sewing a new shirt I will be following along vicariously with all of your seamstresses.
Oh my gosh, so did I. How many shirts I made where I put the sleeves in backward and the cuff would button in top of my wrist.???. I would just wear them with the sleeves rolled up abut so the cuff didn’t show. Haha- we probably drove the woman crazy!
Great instructions Bernie! I’ve started my top and one thing I wish I had done is matched up the print for the back seam (quilter brain) . The hardest thing for me is switching to a larger seam allowance in garment sewing! Quarter inch seams just wont do! (quilter brain again) Thanks for doing this sewalong!
Pam, Thank you for the reminder! That is a good detail to watch out for. I will update the post with this tip about that back seam and will put it on our group board on Facebook. Thank you!!
Your instructions are spot-on, Bernie! For me, the details are a great reminder as to what to pay attention to, especially getting the fit right before cutting.
*My husband reminded me this week that we’ll be leaving next week for a trip. I’d had it in my mind that the trip was the END of June! I will try to get the cutting done this weekend, but will not be sewing til later in June. Sorry!
Thank you for the feedback Kathy. Enjoy your trip! The sew along will be here when you get back. Safe travels
It’s all coming back now–hours sewing in the basement when I was a teenager. I would get so obsessed, I’d sew and sew trying to get something made all in one day. I usually got myself worked up and worn out and then my mom would have to rescue me and help me fix my errors. So thank you for “making” us do this just a little at a time. I like that your instructions are so detailed. That’s really good for beginners and a great reminder for those of us who haven’t looked at a pattern in a long time. I put a link up on the facebook group to the pattern on the website, because it gives a little more info than the pattern envelope about the finished garment measurements. That might help some of us who are not quite pattern proportioned (all of us?) to determine how the fit might be. I plan to measure some favorite shirts to see how they compare before I start cutting.
Actually, I just noticed that the finished measurements are printed right on the pattern pieces. Duh! Still, the website info is is helpful for people trying to decide which size pattern to buy.
Thank you. Those are great ideas. I am glad you are sharing this with me. Now I will go take a billion photos of the next step!
I think you did an excellent job explaining the process! When think about doing something it seems so simple but explaining it to someone else in writing always takes longer. For those looking, the finished garment measurements are on the back of the envelope at the bottom. Measurements for the different sizes are on the envelope flap. A little different than some other patterns. Now it’s time for me to cut! ?
Thank you Kristie! Hope the cutting went well. I am sure it did.
Looks like you covered all the bases! I may make a muslin myself, just because I don’t want to be surprised and have the blouse not fit when it’s finished.
Eileen–If you a concerned about the fit that is a great idea. Just baste it together with some inexpensive fabric and see how it fits. Let me know how it is going