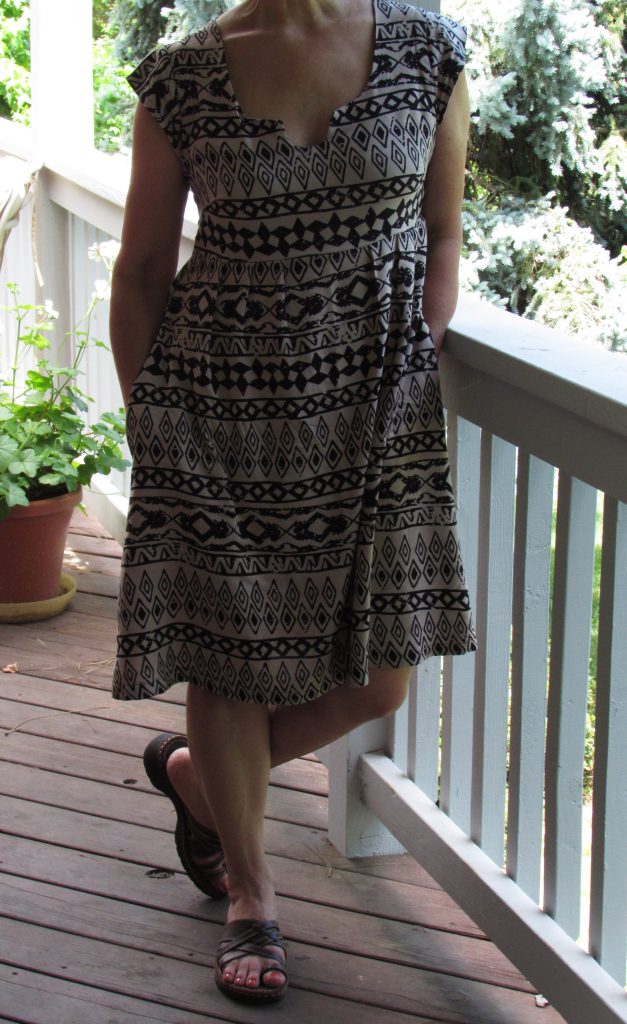
As part of May is for Makers, I bought the pattern for the Washi dress. Designed by Rae over at Made by Rae, this dress pattern has been around now for several years. For no particular reason, I haven’t made clothing for myself in a very long time. When Julia was younger, I made her lots of dresses, shorts, pj’s and halloween costumes. Same with the boys when they were younger (well, except for the dresses.) I decided it is time to refresh my memory on garment sewing.
This dress was a breeze to make. The pattern is very simple (read no zippers or buttonholes to deal with.) There are a few design elements that add style to the dress. First of all, the scooped cut in the neckline (which is totally optional) is very cute. There were hints included with the pattern instructions that I found very helpful. An example of this was the suggestion to add some fusible interfacing behind the front of the neckline so the scooped cut would lie flat. It worked like a charm.
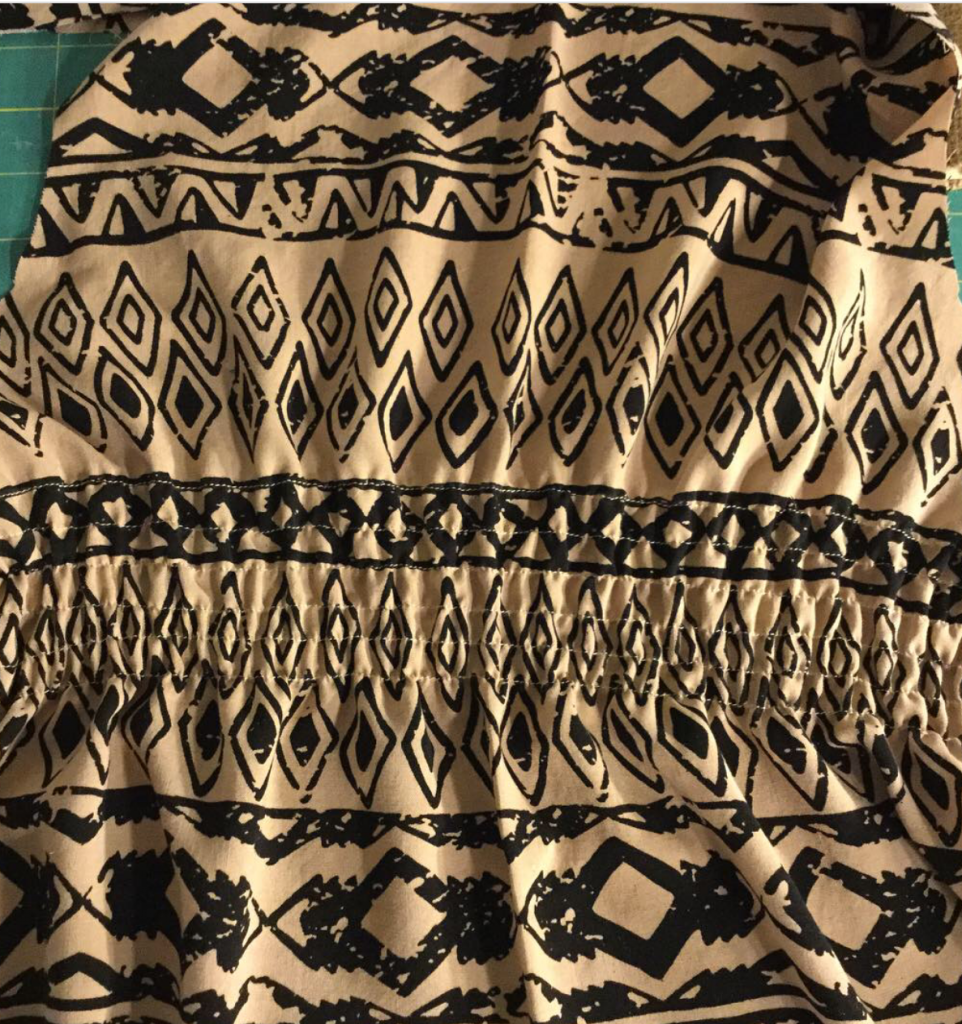
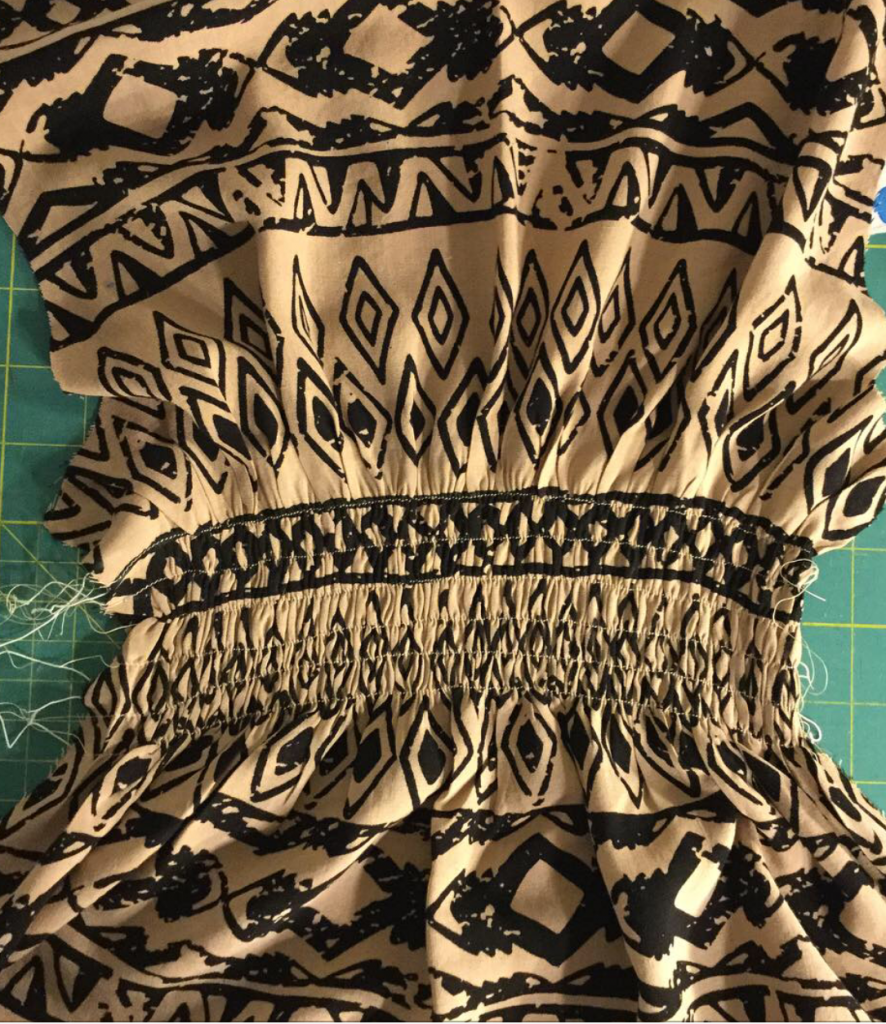
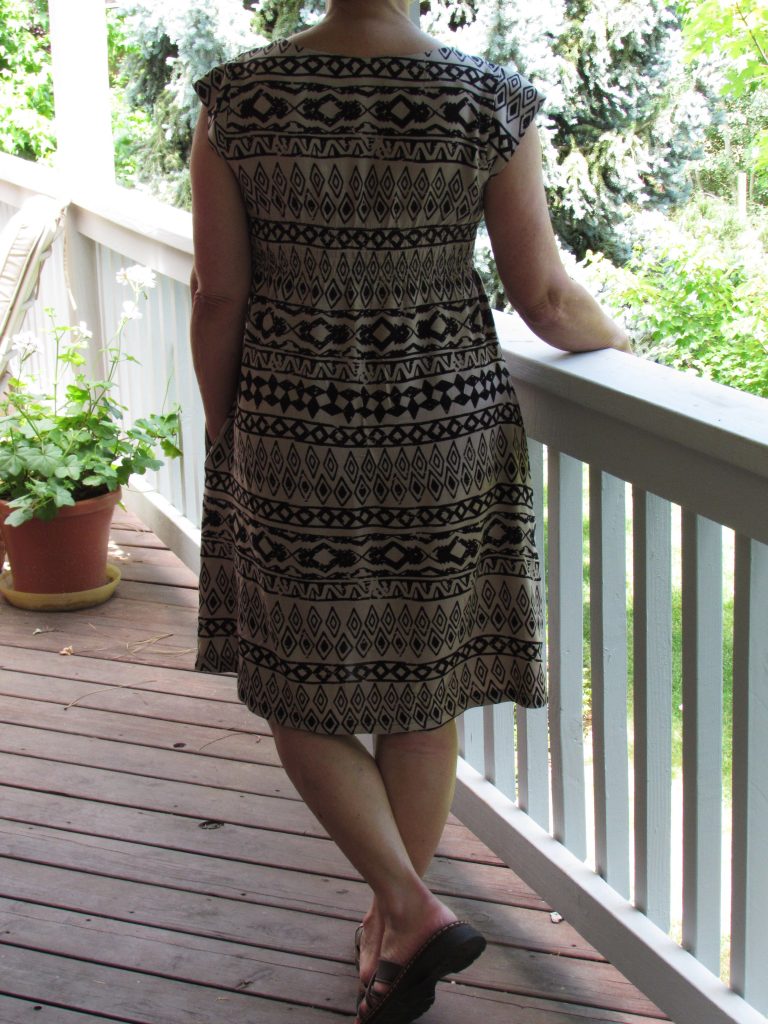
Another feature that I really like is the shirred back on the dress. Never in my long (40 years or so) sewing career have I done any shirring. It was fun. First I practiced a bit on a scrap of the dress fabric to see how it would behave. I used a rayon fabric which feels wonderful and has a very nice drape. But being somewhat slippery, it was a pain to sew with. If the print on the fabric had not been so linear, it would have been less of a problem but I had to work hard to keep the lines straight and the print matching at the seams. I’m off track here, let’s get back to the shirring. To gather the fabric, normal thread is used on the top and elastic thread is used in the bobbin. The thread must be wound by hand on the bobbin. After marking the lines on the fabric, you just stitch along the line. I tied off the threads by hand, rather than backtacking the stitches at the start and end of each row. The first row looks like it will be too loose but as more rows are stitched, it gathers up a bit tighter. My machine didn’t have a problem with the elastic thread except, for some odd reason, after the end of each row, I had to take the bobbin out and reseat it. I have no idea why but I couldn’t just start the next row. If I lifted the bobbin and reseated it, I had no problem. This was only a minor inconvenience. The fun part of shirring (and I didn’t know this would happen) was the magical shrinkage after pressing the shirred portion. Take a look. Here is the shirring just after I finished the six rows. It looked fine but was quite loose.
The instructions said to press it so it would shrink up. Yikes, it was magical.
Pretty interesting, right? Once the shirring was done, everything came together quickly. I think the dress was easily completed in an afternoon.
I am going to buy a knit fabric and make a second dress. This one is so comfortable and I think it would be even more so in a knit. There are some pleats in the front and I don’t want them to be ‘poochy’ – no 55 year old tummy needs that – so I will look for a thin knit to minimize any potential issues! The sizing was spot on. I made a medium and it fits great. While I wouldn’t say this is a pattern for a someone just learning to sew, it is a fun one if you have a little sewing time under your belt.
Finally, tomorrow is the two year blogaversary for Needle and Foot! I want to celebrate with a giveaway. I hope you will come back and join in!
Linking to Can I Get a Whoop Whoop and Finish it Up Friday – you’ll find links to both of these at the top of the page, under Link Ups.


