
Today I am celebrating Autumn! Our maple trees are filled with color. Fortunately, we have several different varieties which means the leaves all change at different times, enabling us to savor the season for a bit longer. It is gorgeous.
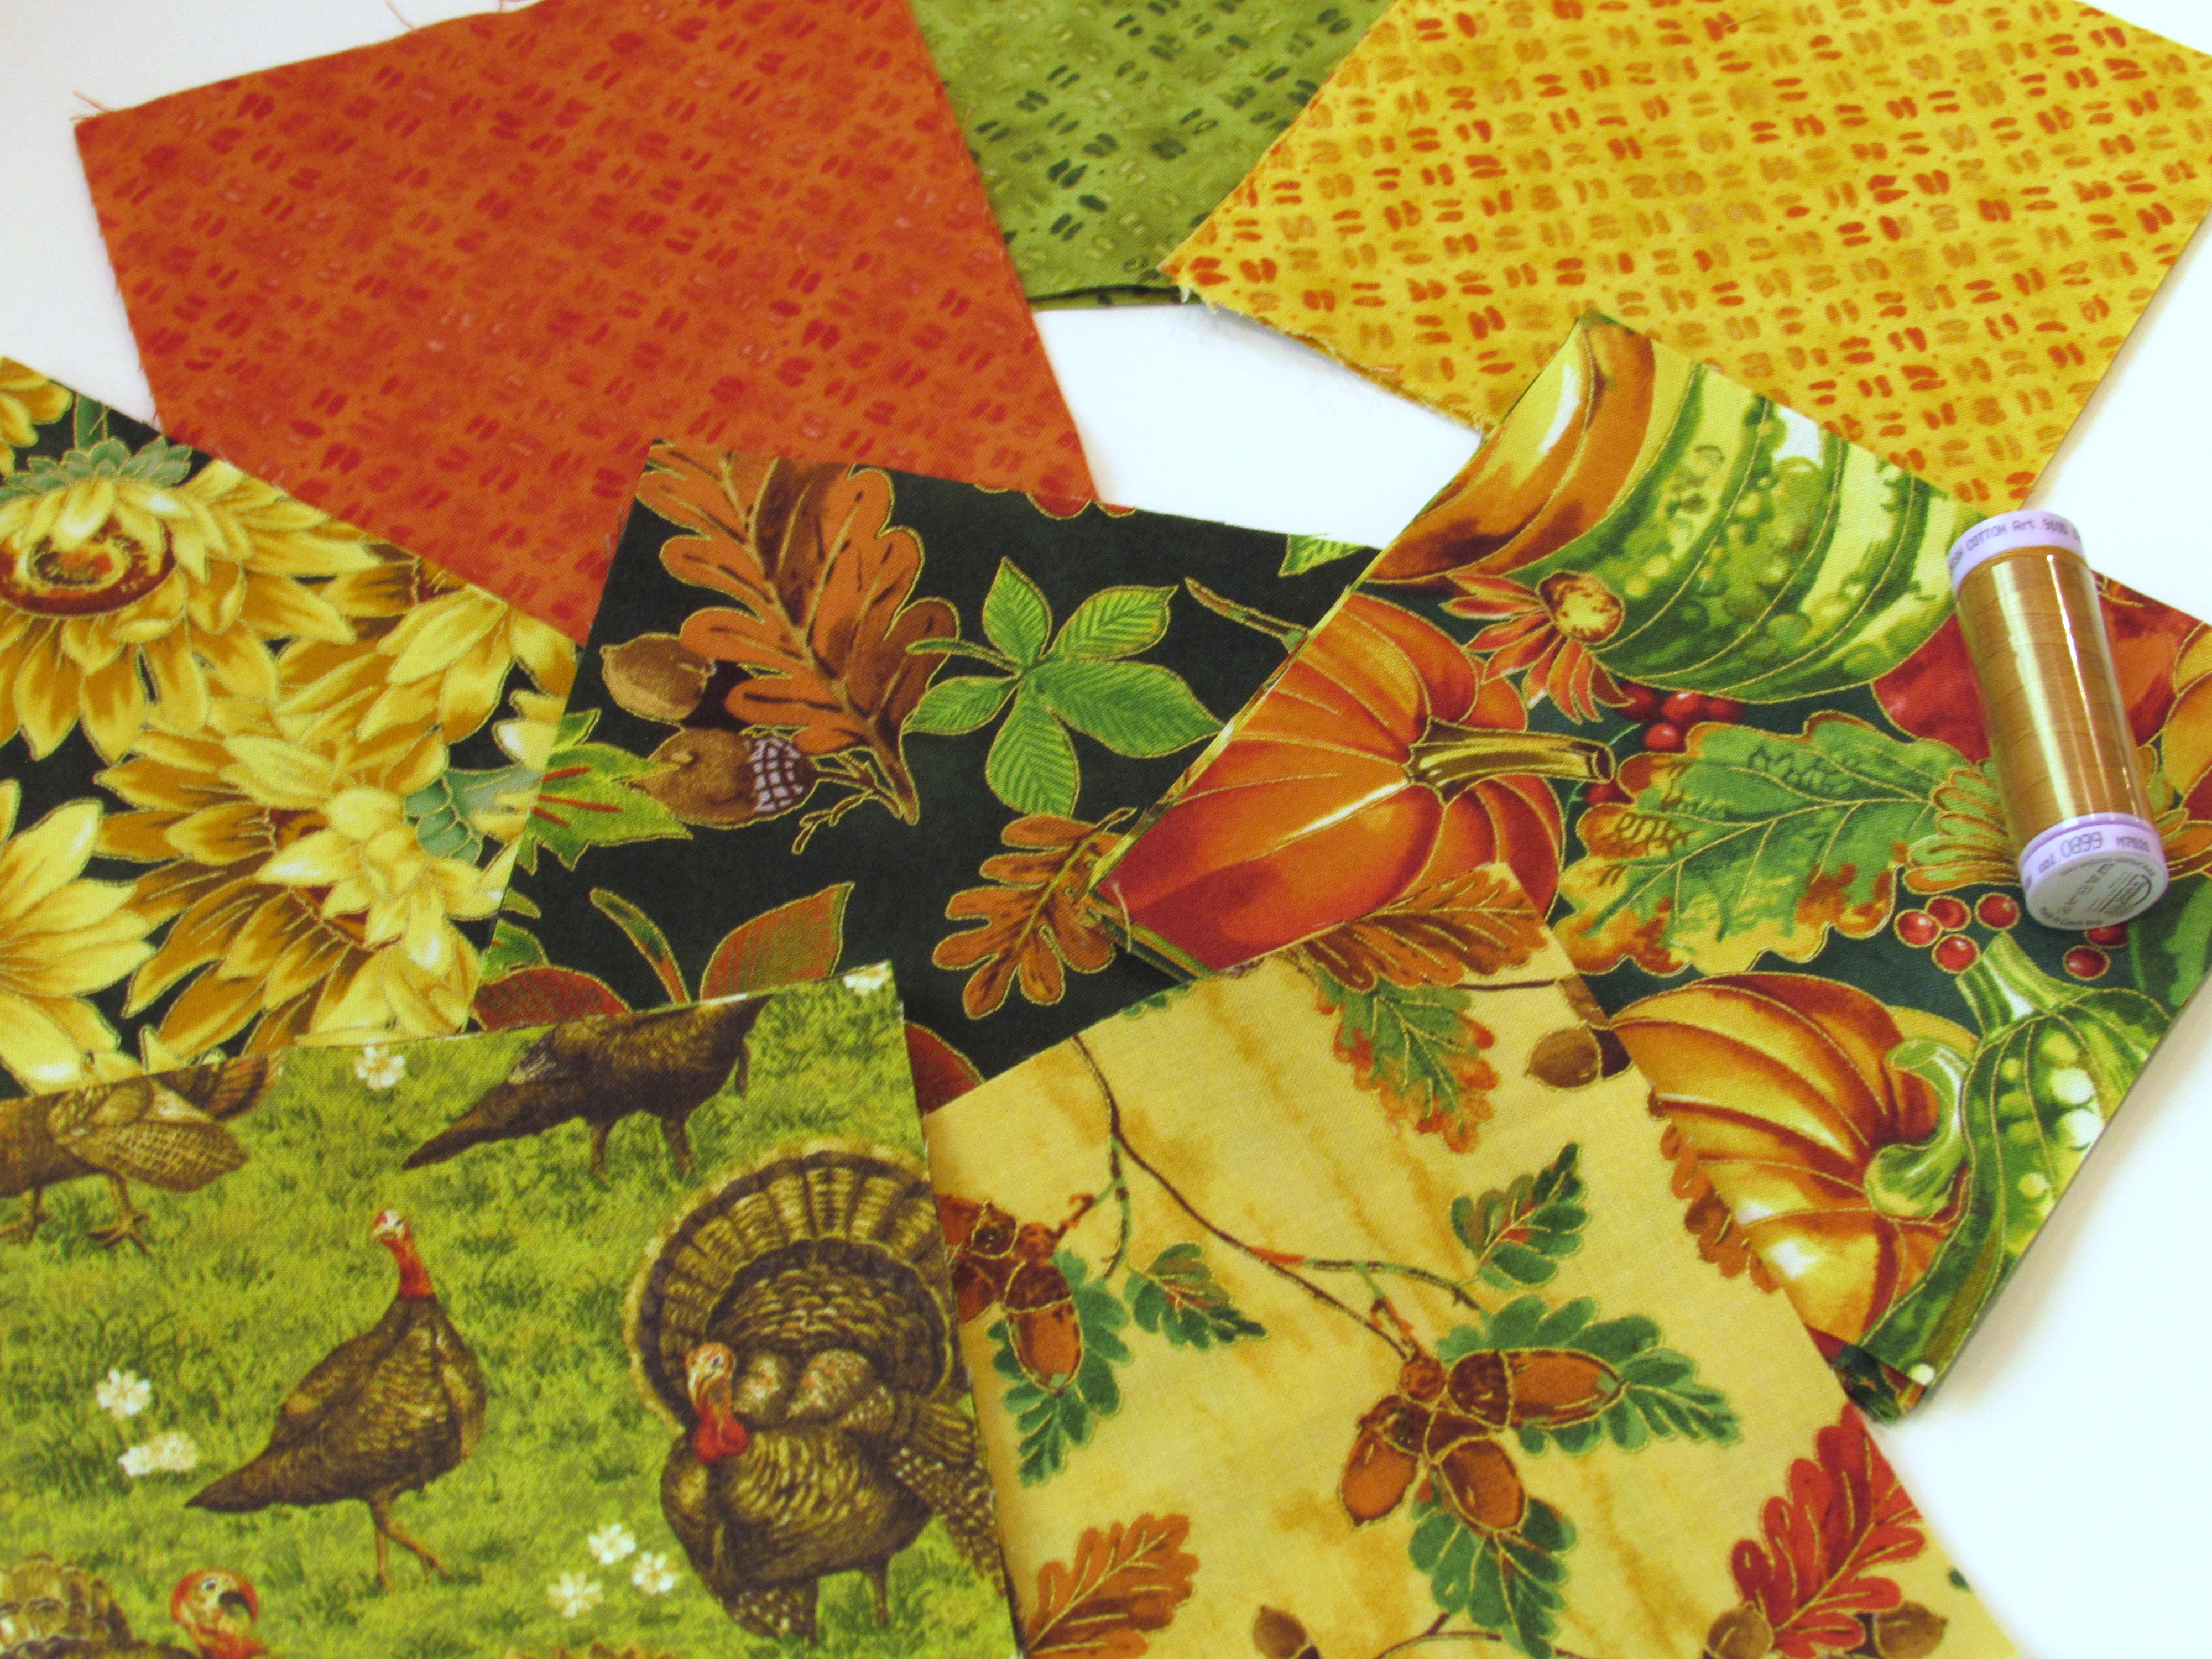
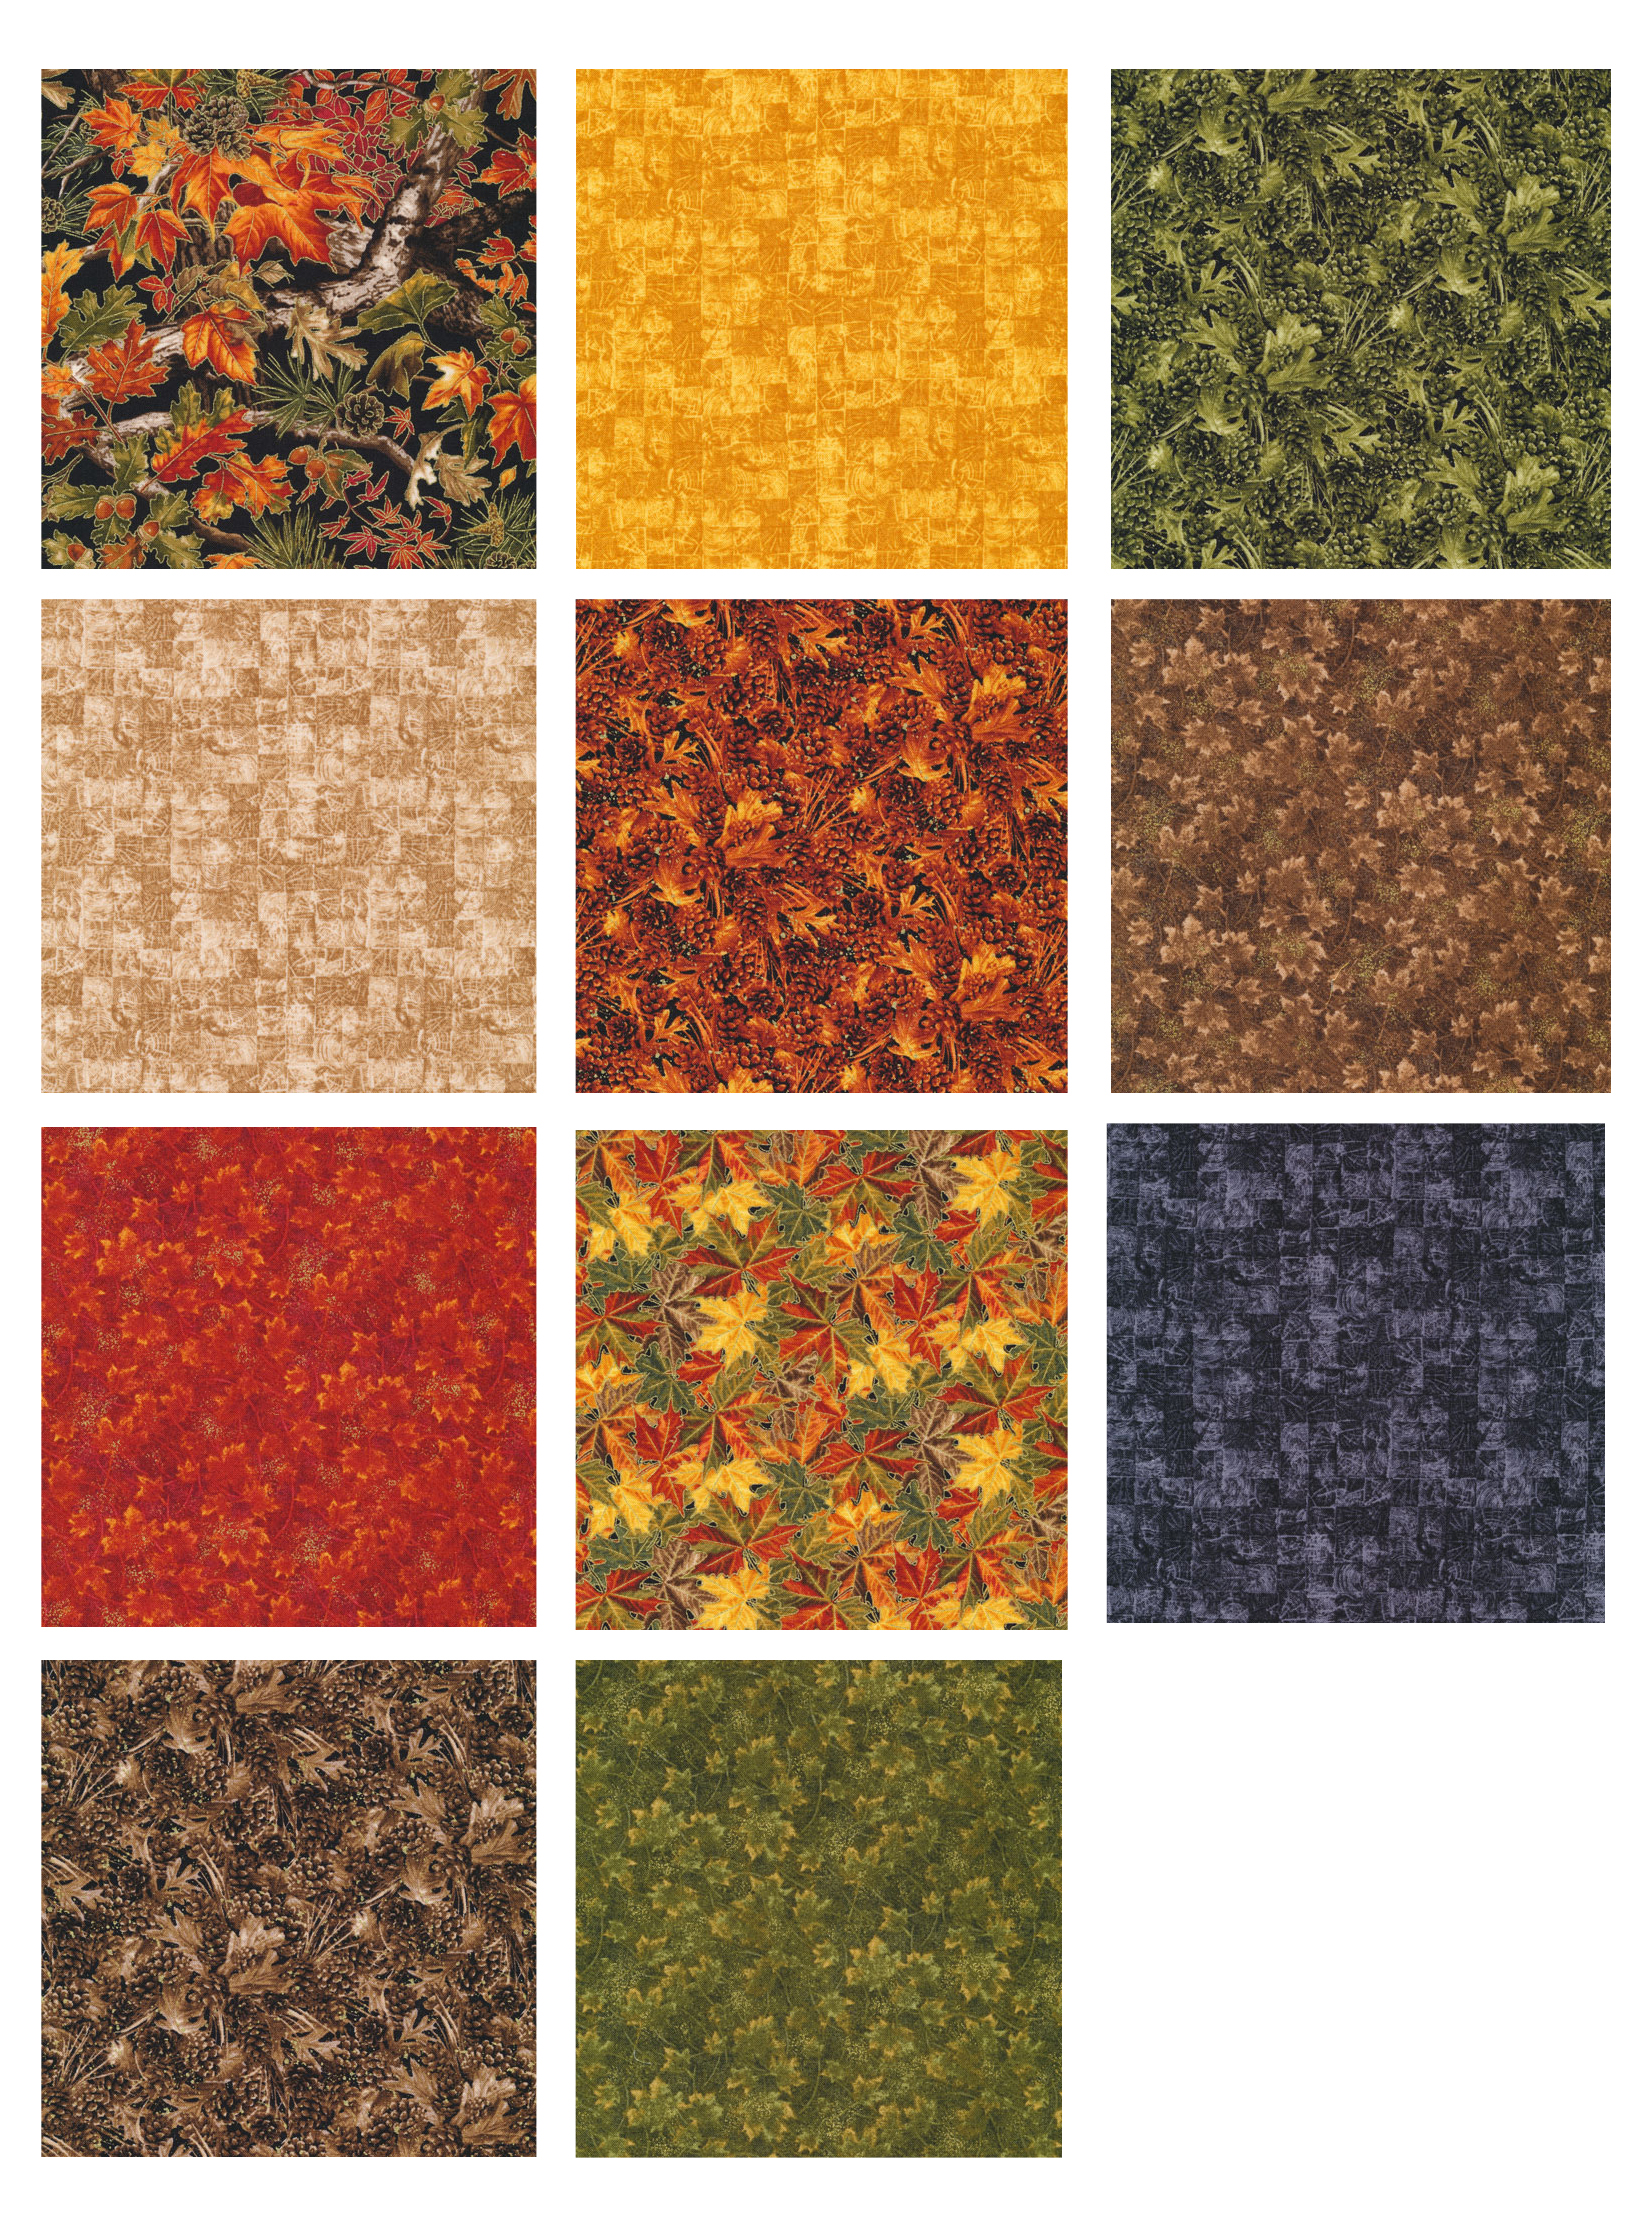
In preparation for this blog hop, I have been working with a line of autumnal fabrics provided to me by Paintbrush Studios. PB Studios has been a very generous sponsor. They provided me and four other bloggers with the fabrics of our choice in different fall lines and we have each made a project showcasing their beautiful fabrics. The line that I selected for my project is called Golden Harvest.
Here is the schedule for the Autumn Abundance Hop this week.
- October 24th – Needle and Foot – You’re here!
- October 25th – Janine at Quilts From the Little House
- October 26th – Mari at Academic Quilter
- October 27th – Tish at Tish’s Adventures in Wonderland
- October 28th – Sandra at MMM! Quilts
When considering my options for what sort of project I wanted to make, I decided I wanted to have something to hang during the Thanksgiving season. Thanksgiving is my all time favorite holiday. It centers around family and food – what else does one need? I have been having a lot of fun doing some relief quilting (remember my THREAD and FABRIC pieces?) and thought it would be a good idea to do another one.
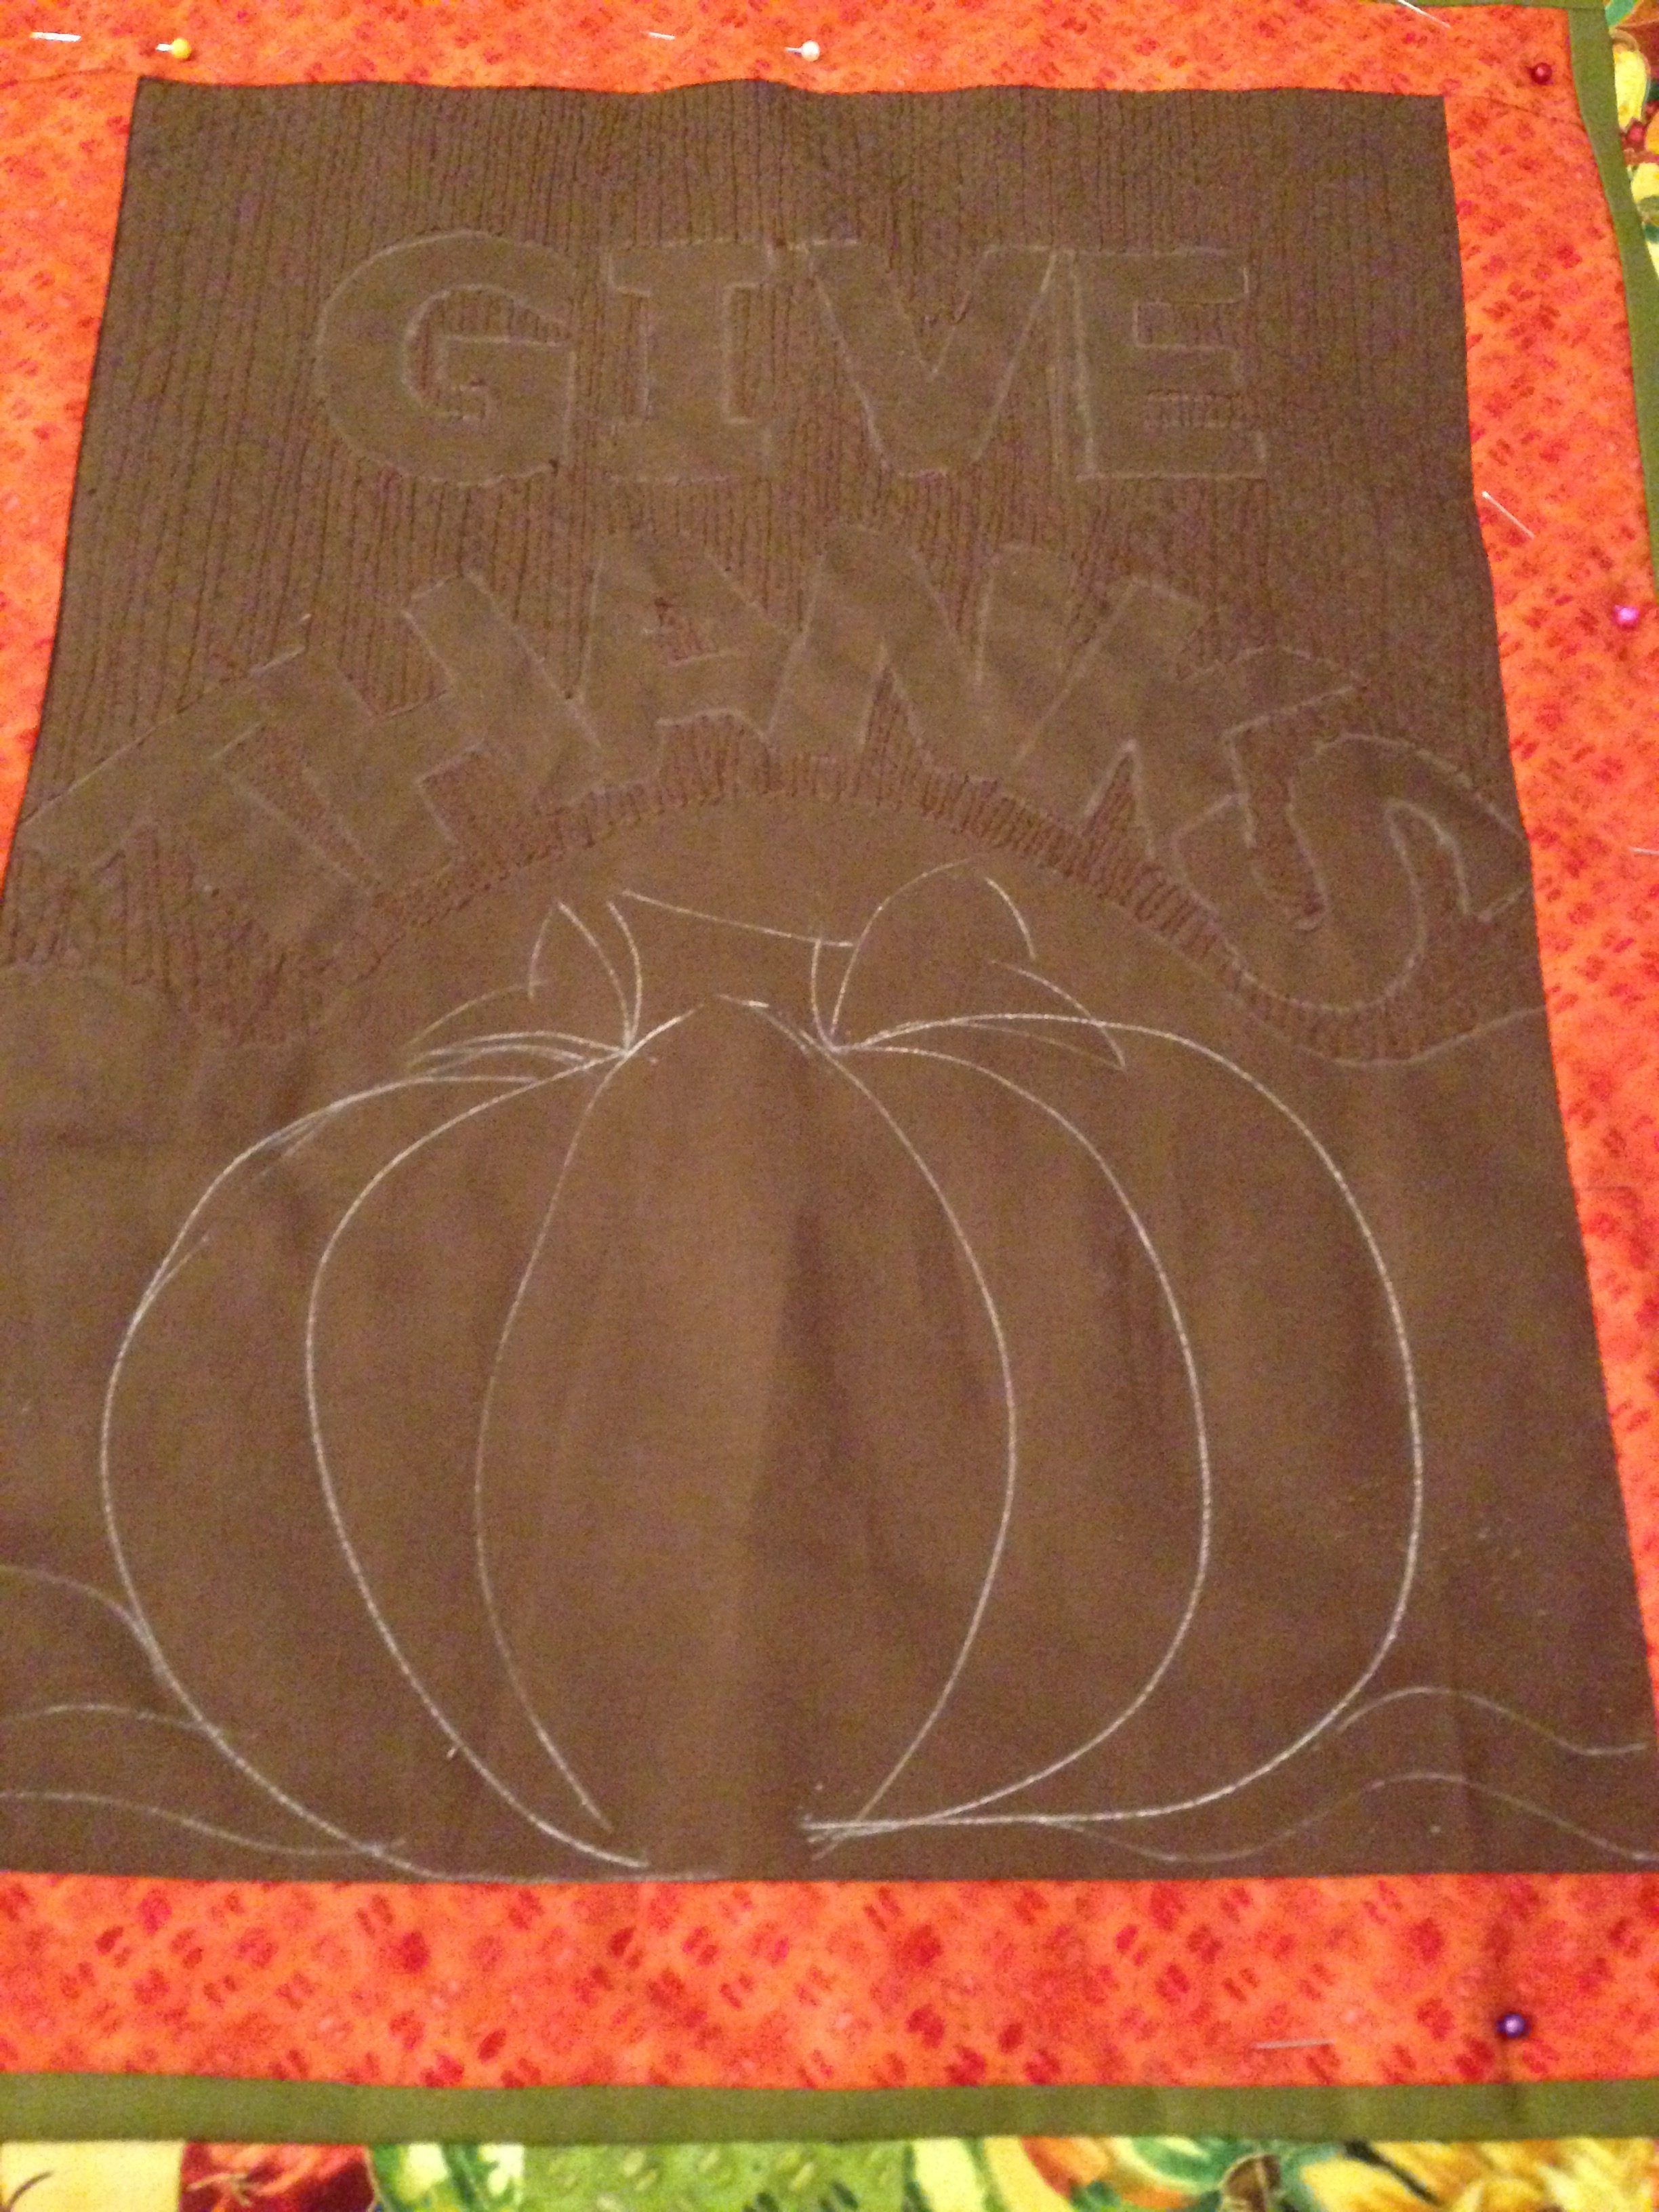
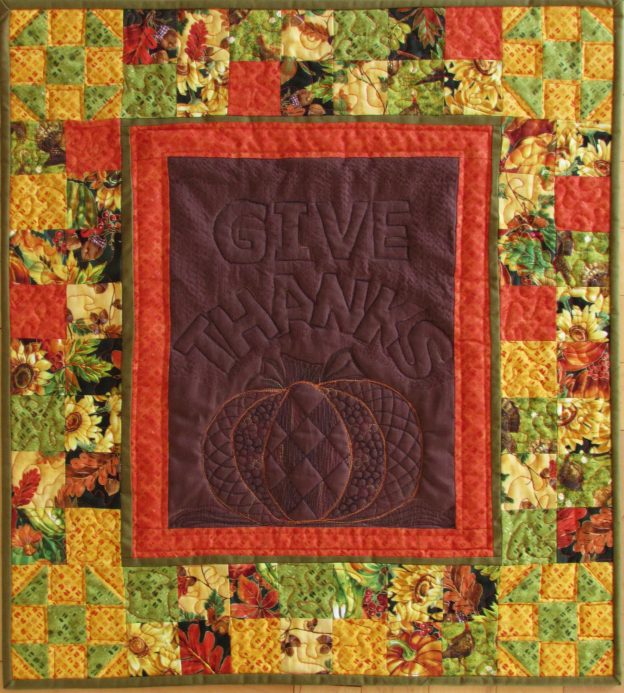
I did a quick sketch but didn’t really plan too much beyond that. I began with the center piece. I had this gorgeous brown solid (PB Studios calls is Espresso) and I cut a rectangle and played around with the placement of the lettering. GIVE THANKS was my focus. With the stabilizer fused to the back, I quilted the letters. This goes quite quickly. Especially since Muv over at Lizzie Lenard Vintage Quilting encouraged me to free motion this instead of using a walking foot. She is absolutely right – it worked just fine! Much, much faster to get the lettering done.
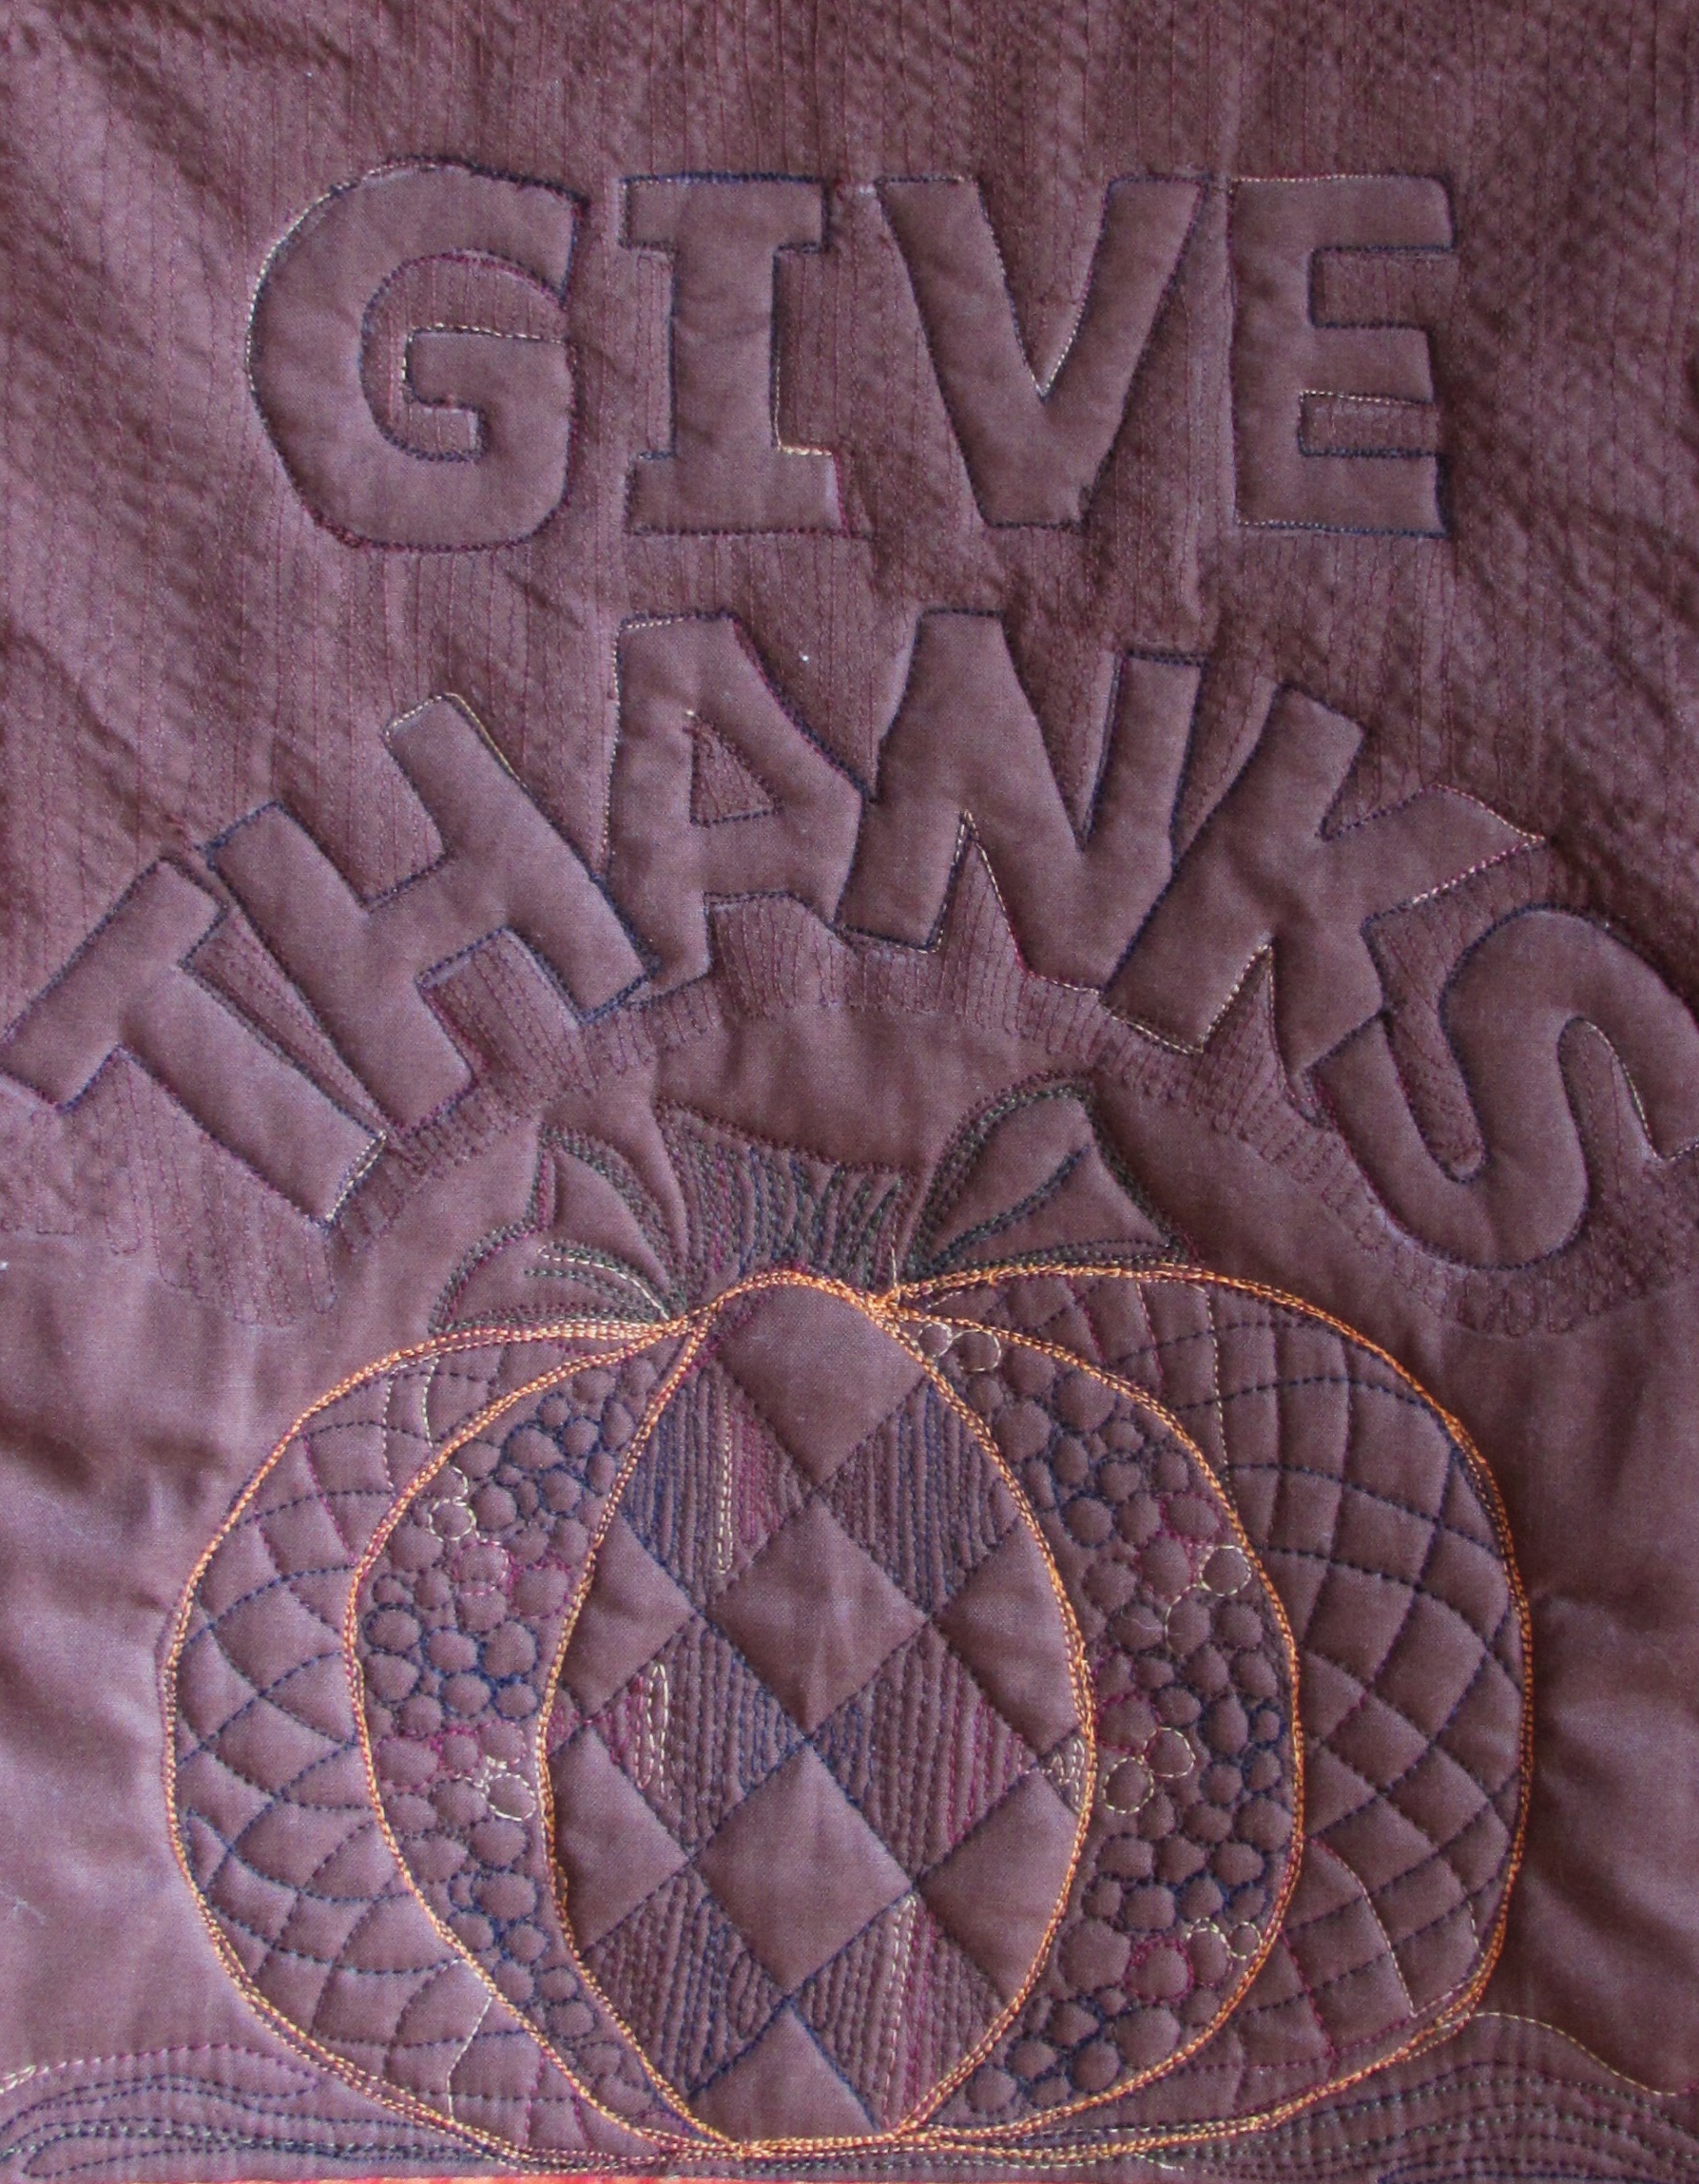
Once I had accomplished that, I thought about what sort of design should be placed below the words. At first I thought of doing some applique but the more I thought about it, I decided I wanted to quilt a design instead. I love playing with thread and here was an open space to do with as I pleased. I decided on a pumpkin and took a look at Lori Kennedy’s site, The Inbox Jaunt, for some inspiration. She never fails me. Never! This pumpkin is taken directly from this tutorial. It came together easily.
Using YLI variegated thread, I started by outlining the pumpkin, stem and leaves. Next I filled in the sections of the pumpkin. Following that I added to the outlining to give it some depth. The stem and leaves were also filled in and outlined a couple of times. So much fun!
The next step was to put a narrow border of the olive green solid. I had already decided to do a patchwork border to set off the center. I wanted to use a 2 1/2″ square because of the scale of the fabrics I was playing with.
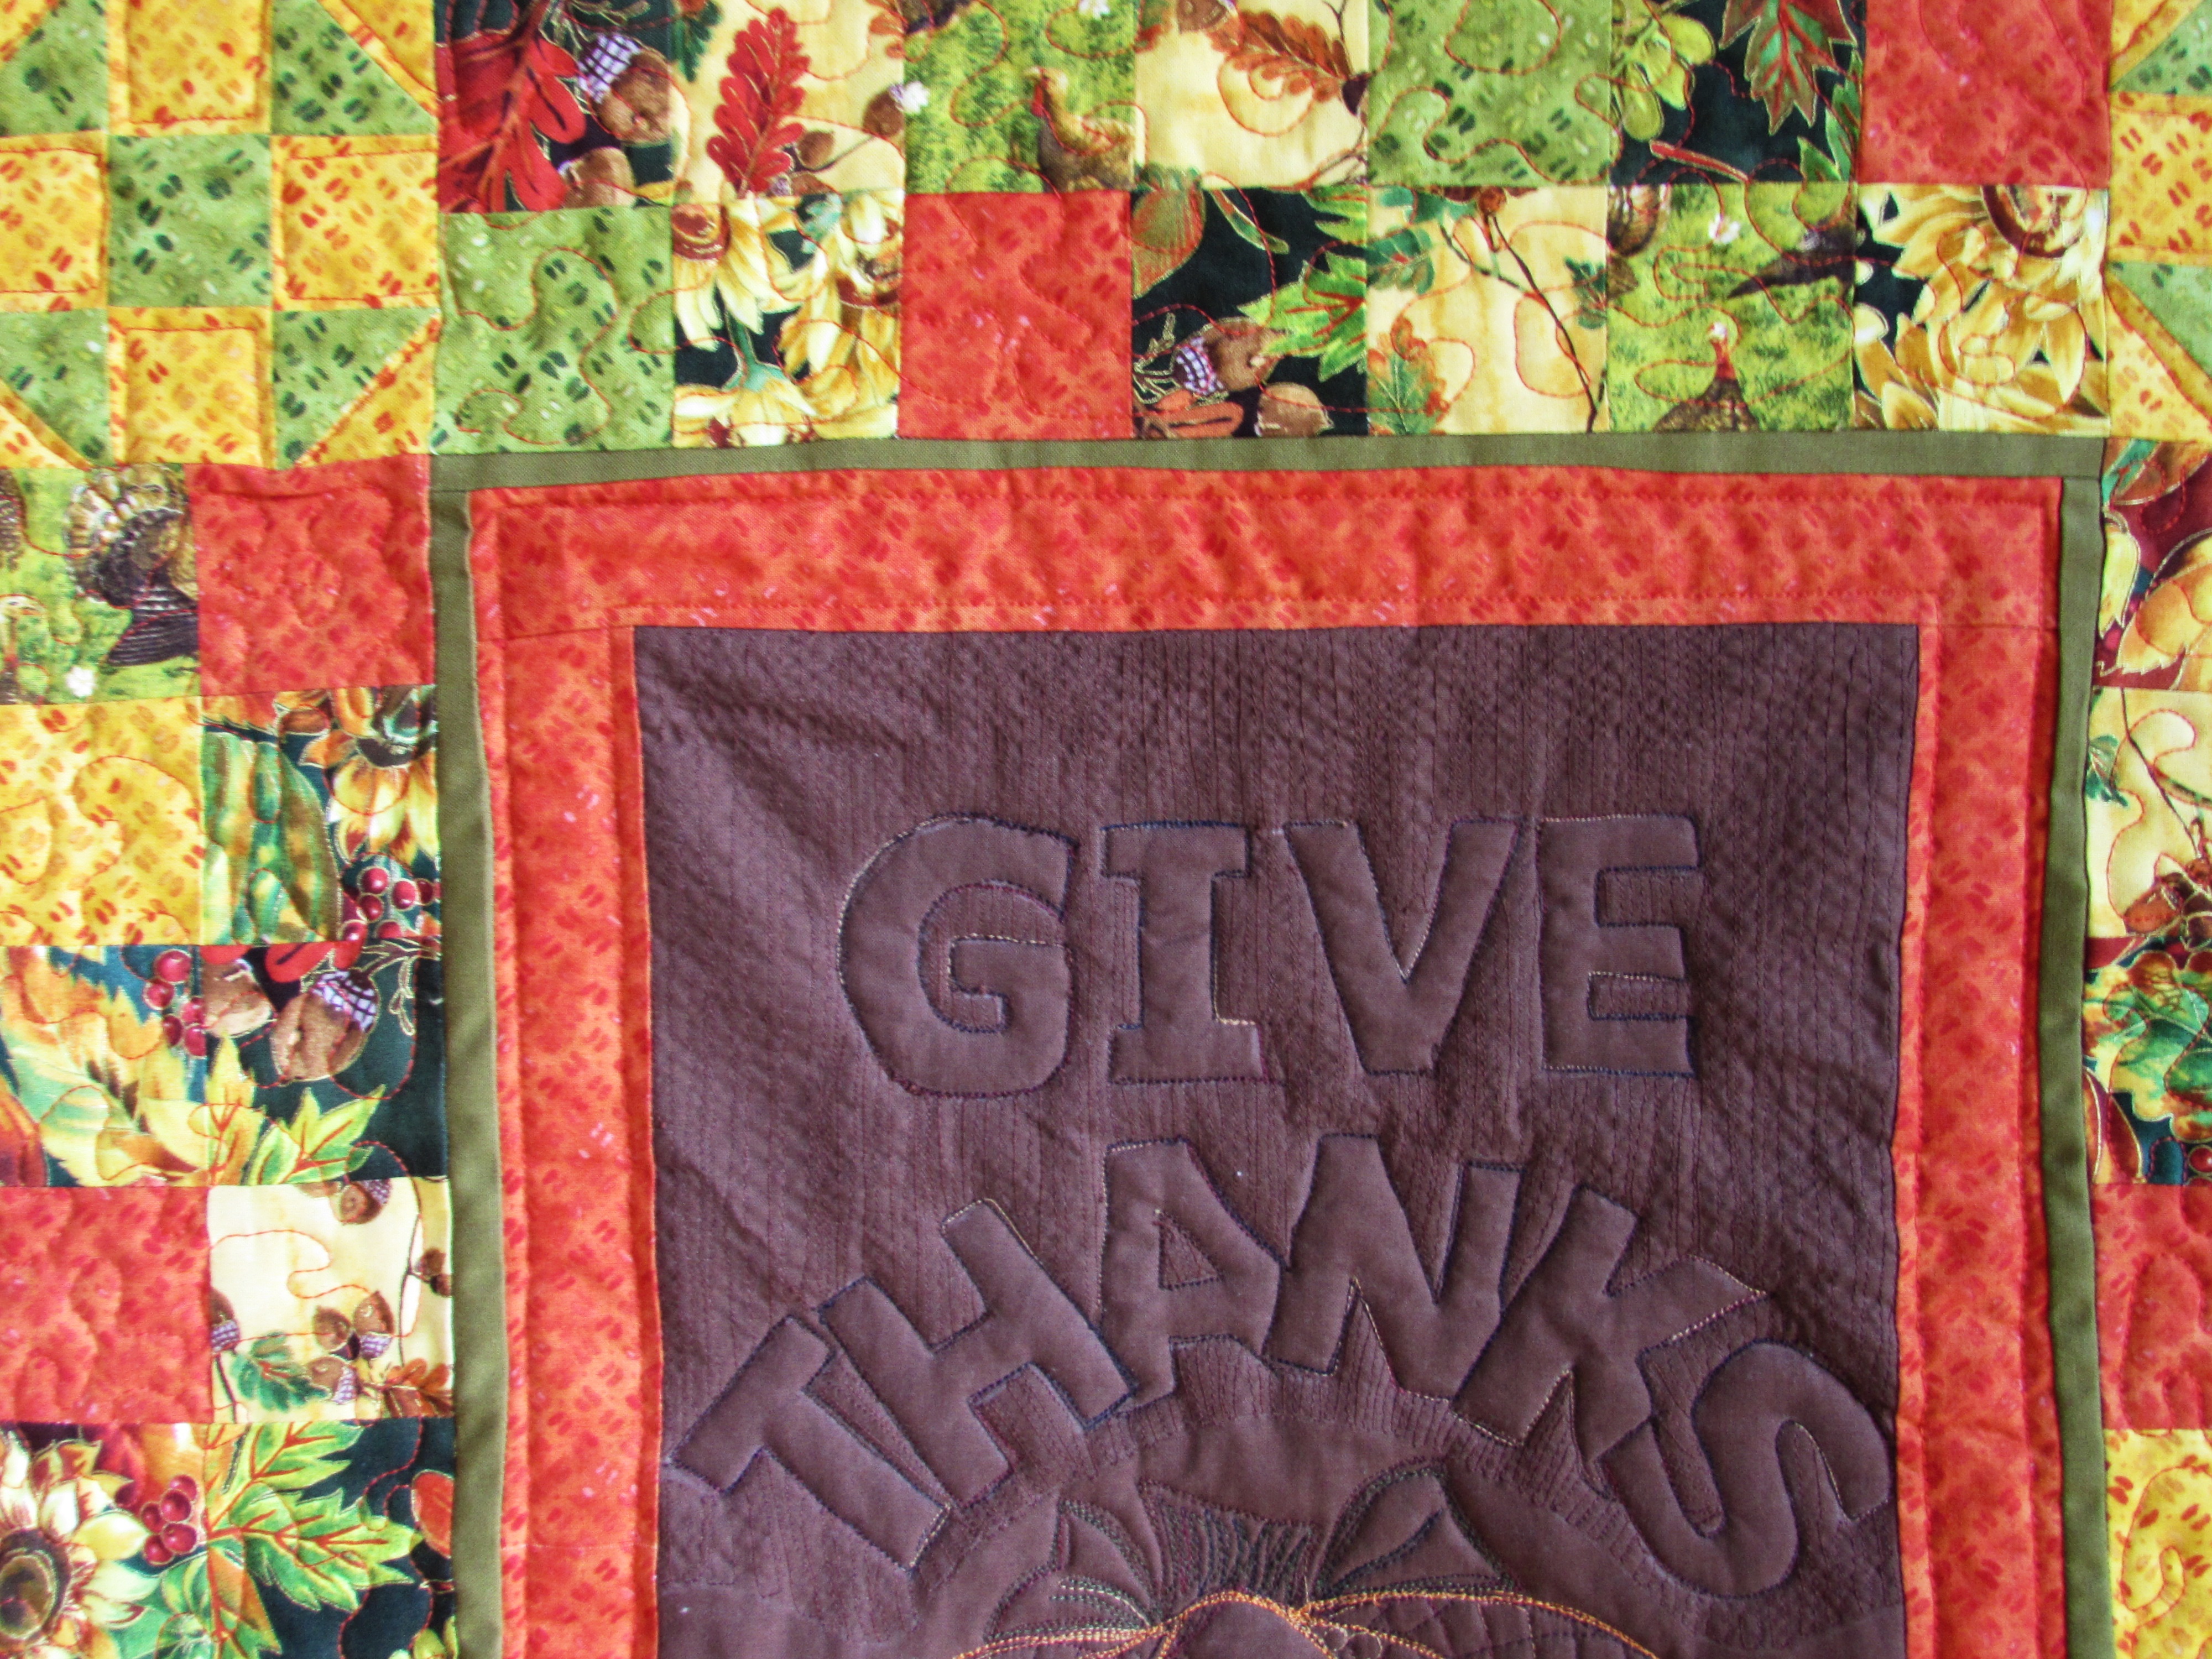
While I worked things out with the patchwork border, I was thinking about the corners. I made some pinwheel blocks but thought they looked too flat. Following that I made some churn dash blocks and liked these much better.

As it always does, the quilt came together with the sum being so much greater than its parts. I really love this project. The sunflowers, pumpkins, leaves and turkeys are so cheerful. The fabric really is adorable. The green, orange and yellow blender prints worked well to tone down some of the color within the borders. The traditional colors and themes of this line are just right – they made me happy just playing with them. I used a brown print that was in my stash to back it and then used the olive green fabric to bind it. The quilt finished out at 23″ x 25″ inches.
As with most projects, there are a few things I learned. One is better planning equals better results. While it is fun to just sew and see how things come together, I should have done a bit of measuring and planned the patchwork border in more detail. I had to fuss with trimming borders and such to get everything to work together. Also, when I was trimming the piece, after quilting it, I somehow forgot that about the bits that the binding would consume. This is a little bit ridiculous considering the number of quilts I have bound. But I trimmed too deeply, forcing myself to cover points on the churn dash squares on each corner. I was going too fast without considering the details.
I will enjoy hanging it this season and bringing it out again with each Thanksgiving. This simple message of gratitude will remind us of all that we have to be thankful for.
Something I am very thankful for is the generous support of Paintbrush Studios. They were a pleasure to work with and the fabrics they sent to me are just lovely. They are a nice weight and have a very nice feel to them.
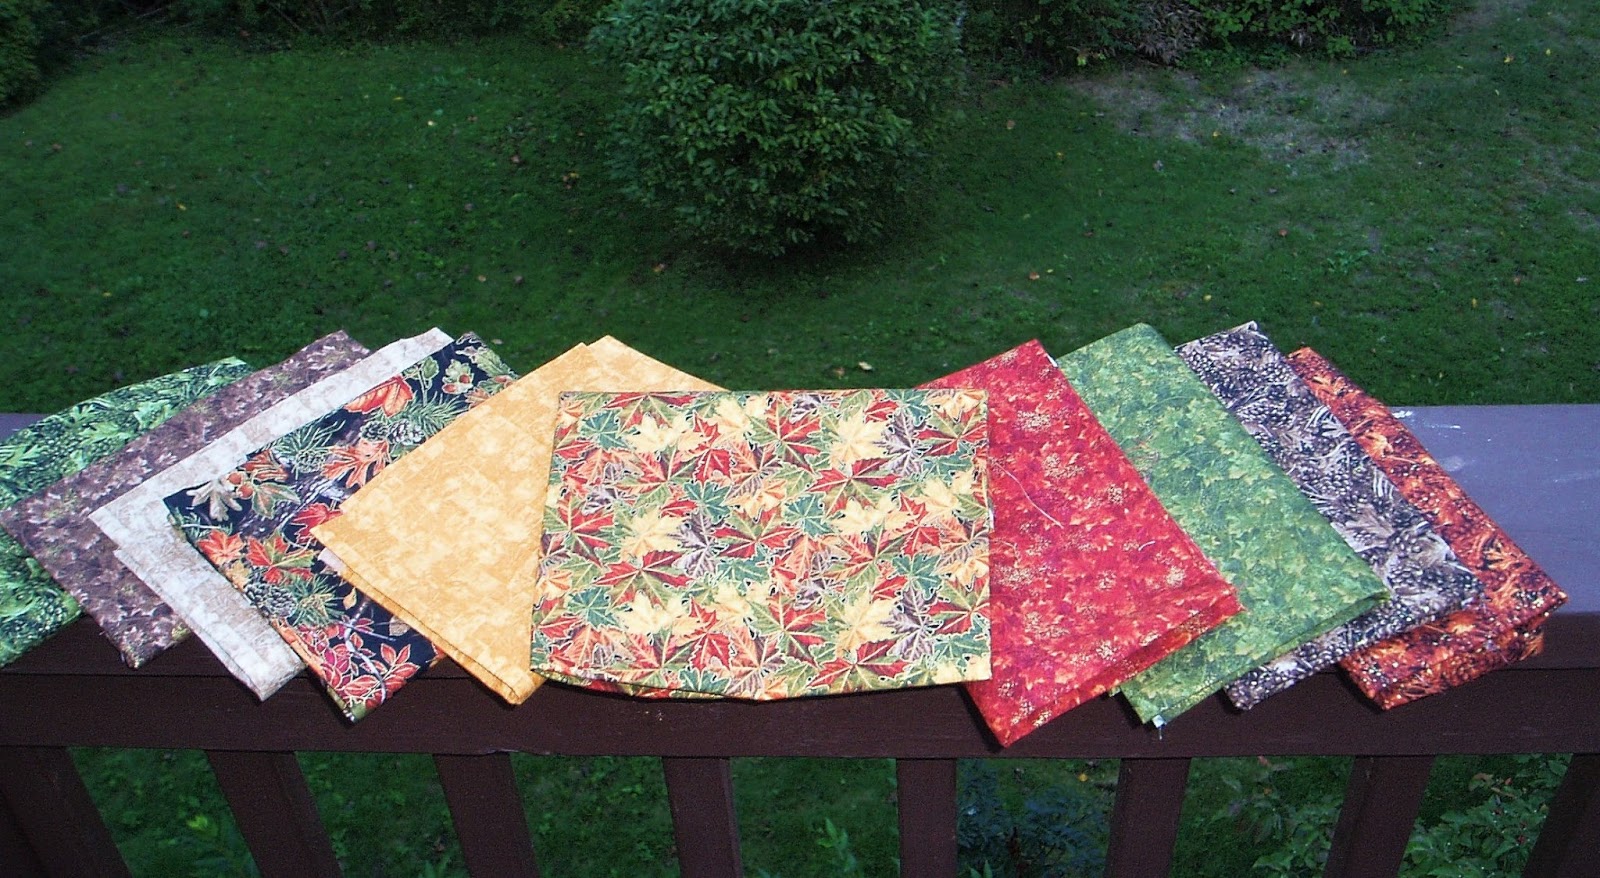
Photo courtesy of Academic Quilter
Paintbrush has also provided me with a fat quarter bundle of Into the Woods to offer to one lucky winner. Enter the giveaway by telling me about your favorite part of Thanksgiving Dinner. (Mine is definitely stuffing followed closely by homemade cranberry sauce. Way back when, I posted the recipe for the cranberry sauce I make at Thanksgiving…. just in case you want to try something new.) Leave me a comment and tell me about your favorite. If you are following the blog, leave a second comment and tell me how for an additional entry.
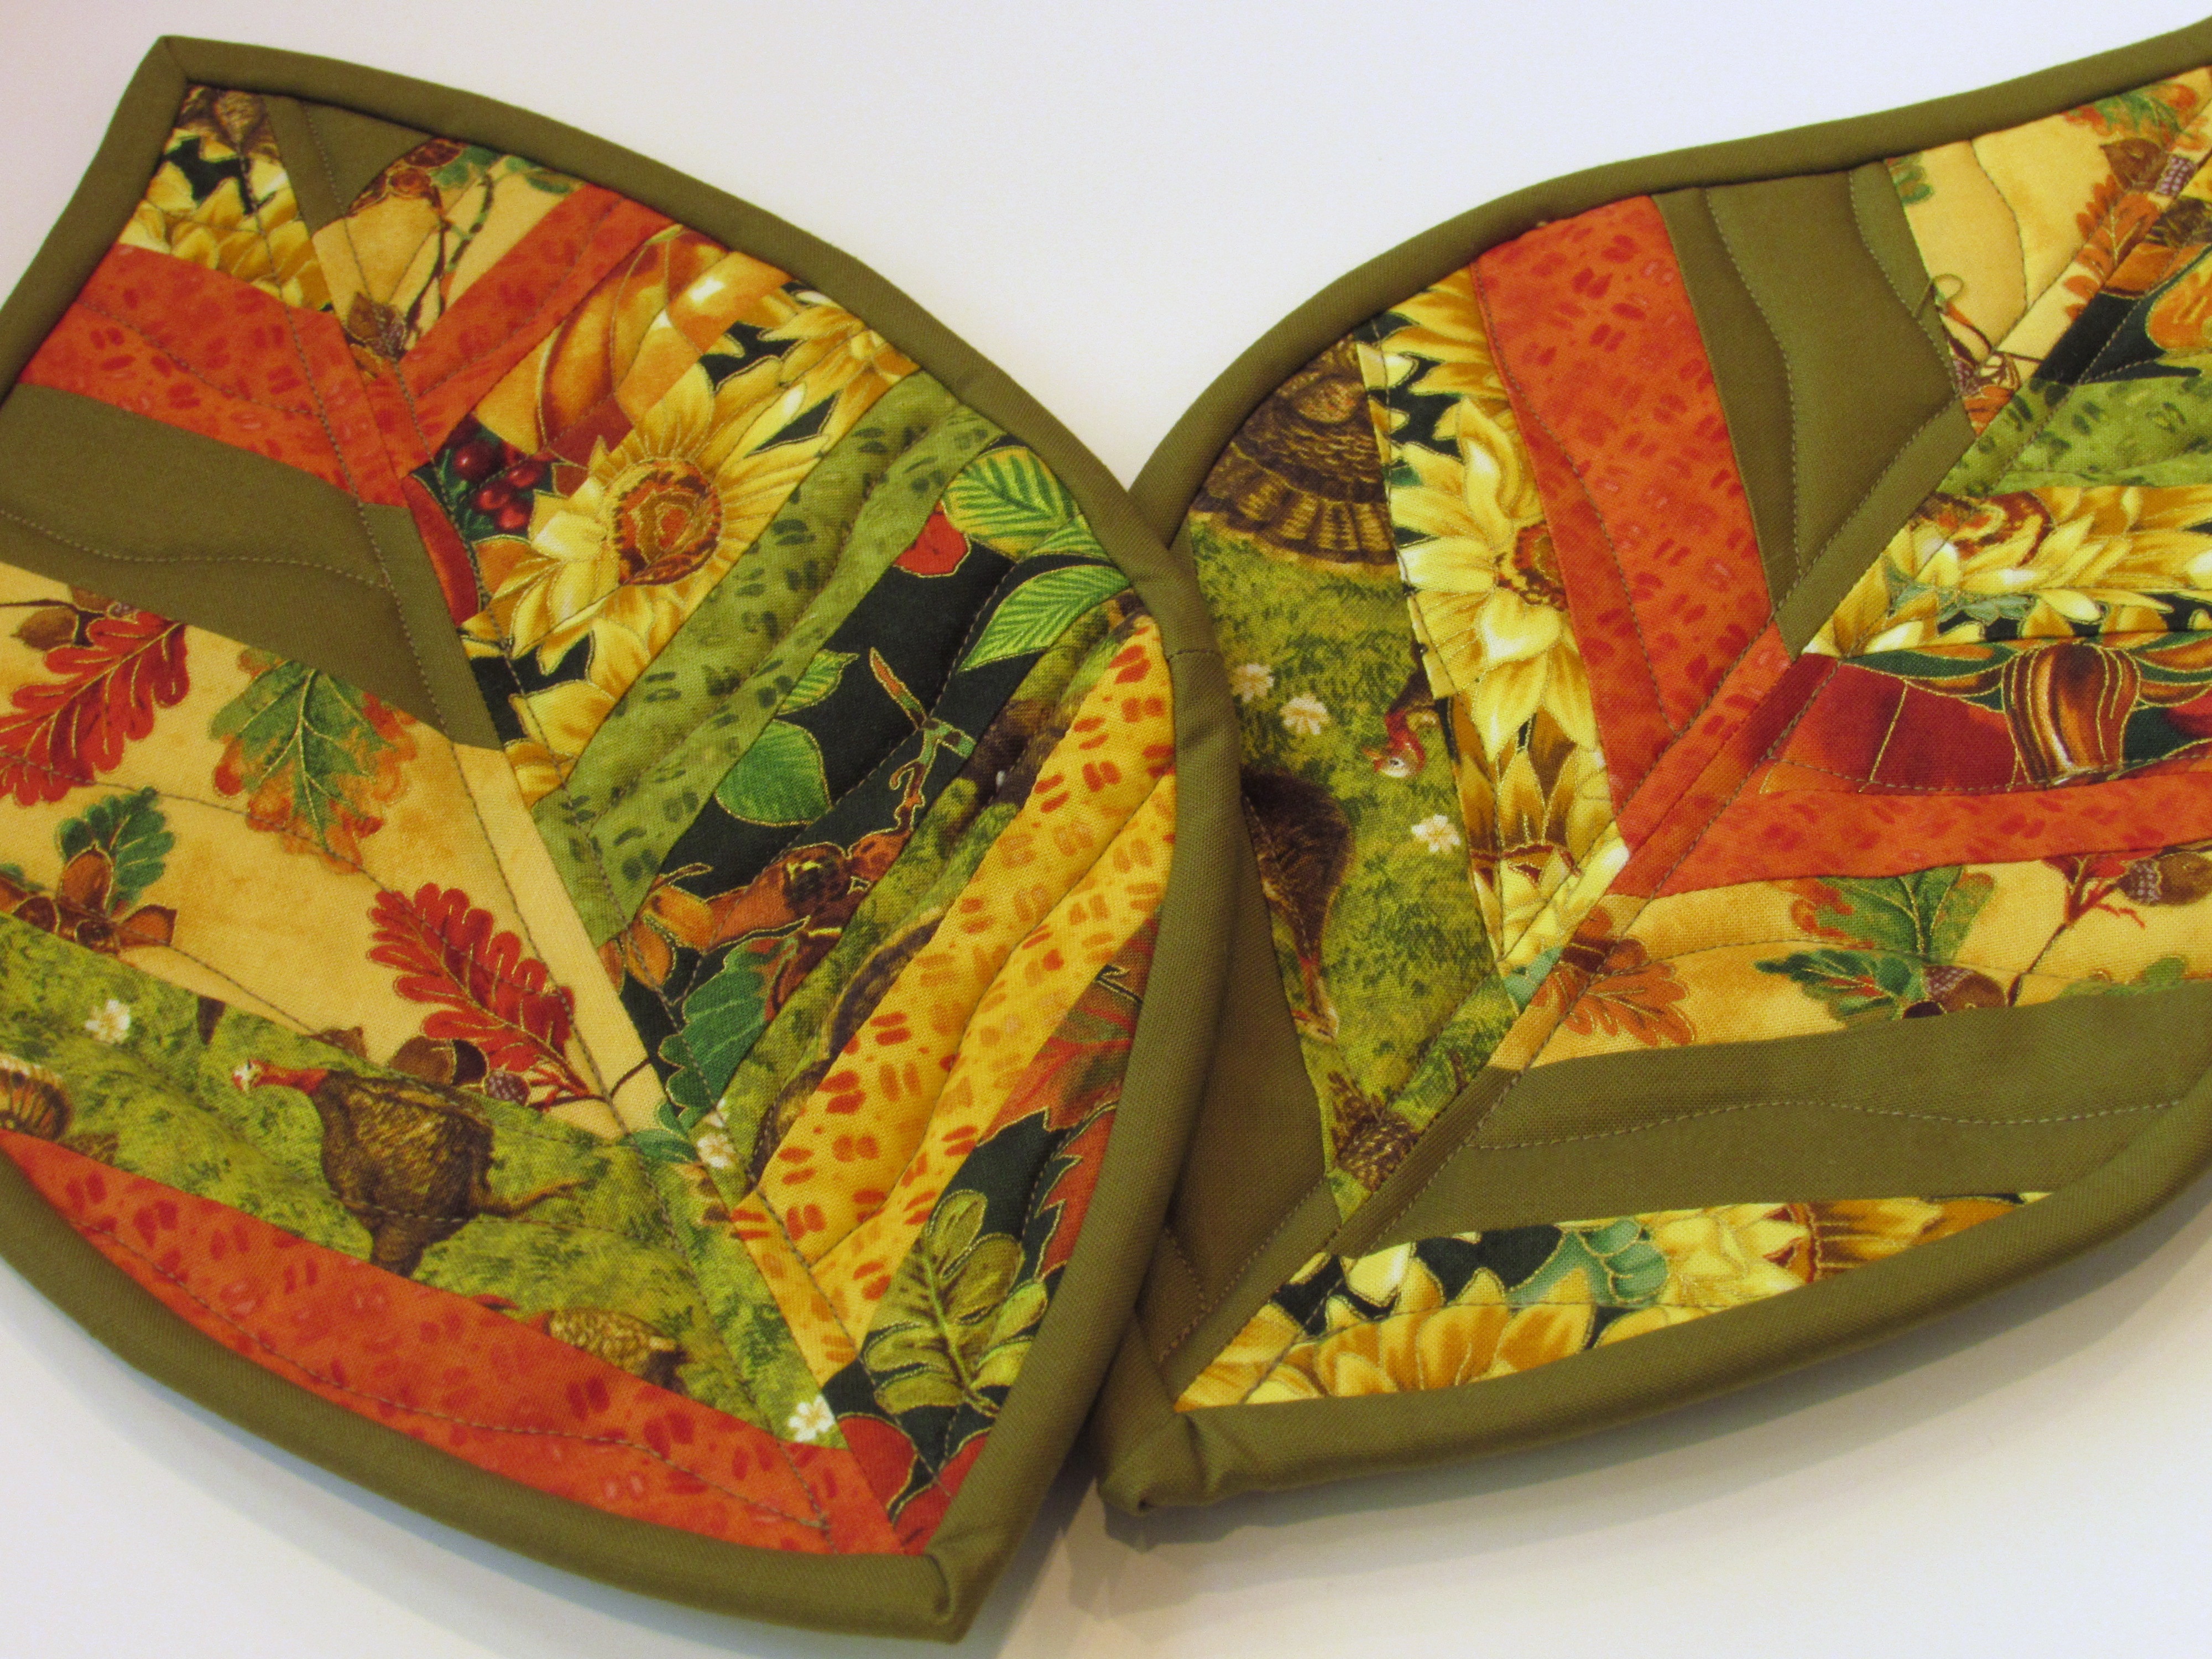
Now for my giveaway. I wanted to make something to give as thanks for all of the friends, inspiration, and community that happens within our online group of amazing quilters. Using this tutorial from Buttons and Butterflies, I made a pair of potholders from some of the scraps. I will pick a name from the comments to win these two potholders as well.
After finishing the potholders, I decided to cut the remaining scraps into charm squares. I was able to cut a set of 40 charms. So, let’s give those away as well!
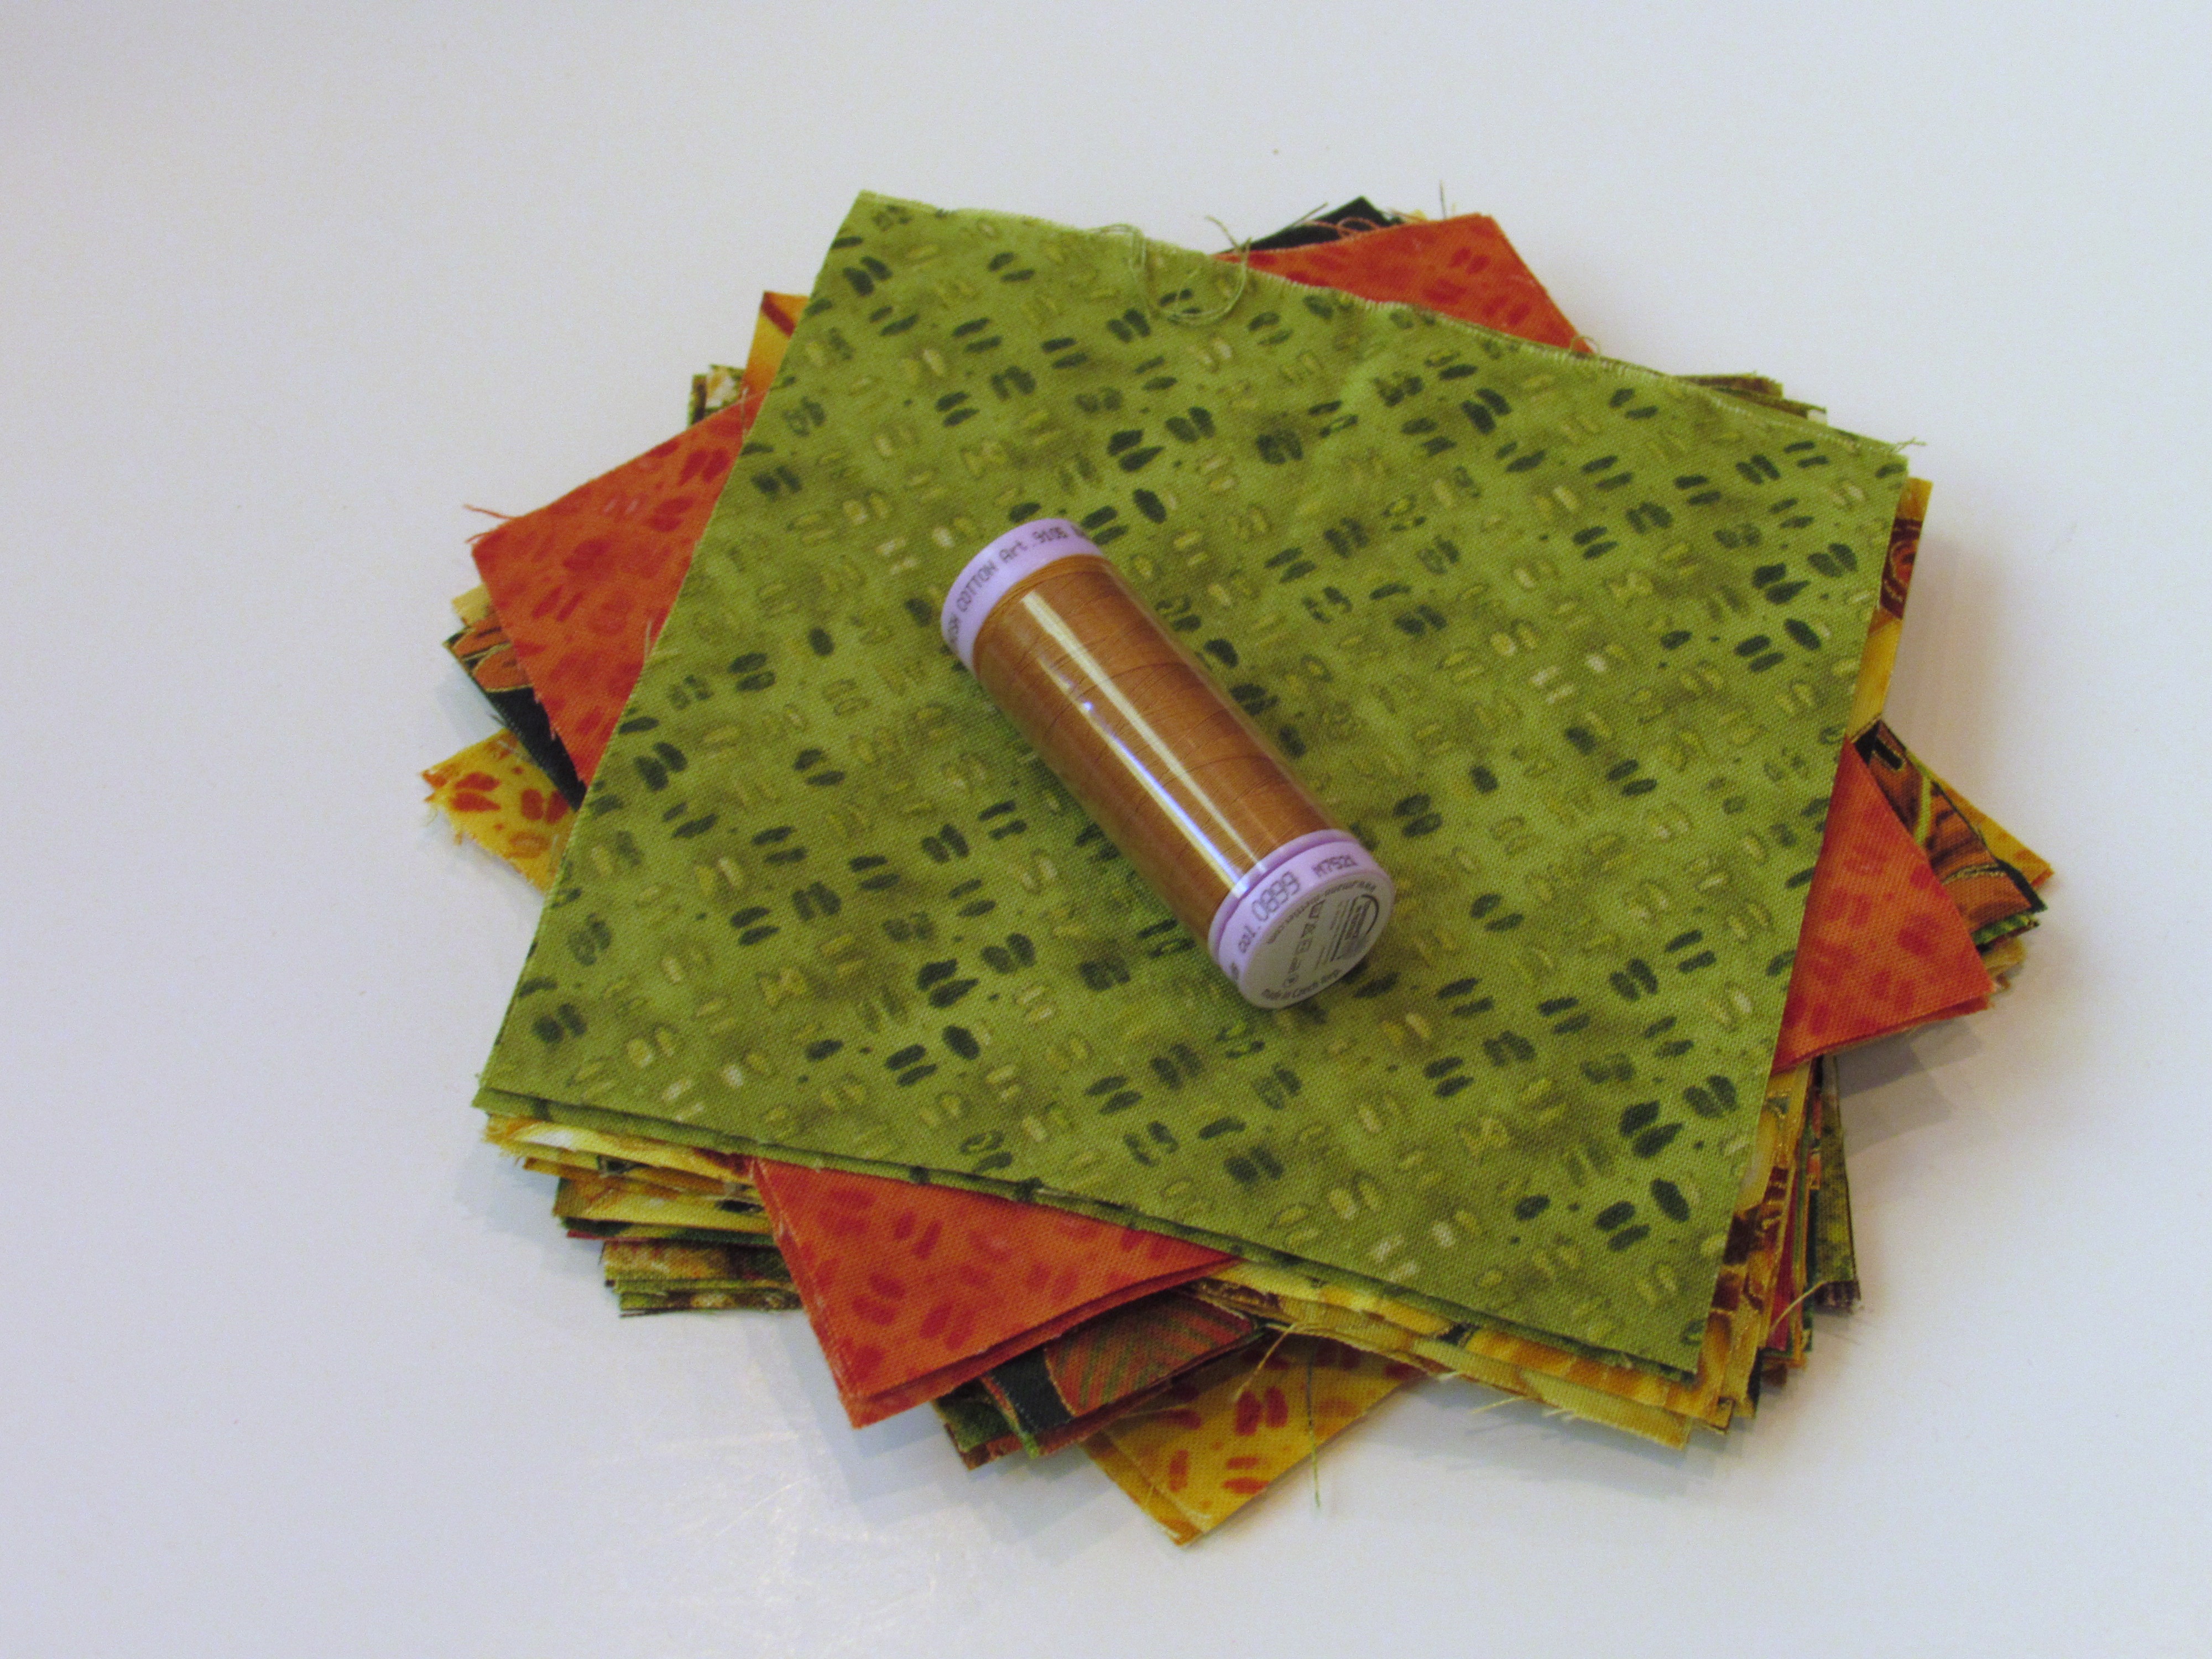
I added a small spool of coordinating Aurifil so you can make a fall inspired project of your own!
Good luck! Winners for all three giveaways will be drawn on Friday evening, October 28th. I will email winners and announce them the following day on the blog. Make sure I have an email address to contact you!
Be sure to check back each day this week with the others on the hop. They have been working on wonderful projects for fall and have used gorgeous Paintbrush Studios fabrics that are different from mine. You are sure to enjoy their work. There may just be some giveaways on their sites as well. Enjoy this season of brilliant colors, family and friends, and some darn good food.
THIS GIVEAWAY IS NOW CLOSED. Thanks everyone!
Linking this post to She Can Quilt as a part of the Q4-FAL event.

If you are wanting to gain confidence in your free motion quilting skills, today might just be the day to purchase a Craftsy Class! Just today, all classes are $14.99. Can’t beat that. I know I learned a great deal with the classes I have taken. I have taken this one from Lori Kennedy and this one with Angela Walters.
(Note: I am a Craftsy affiliate)