Category Archives: Quilting Skills

Farm Quilt Finish

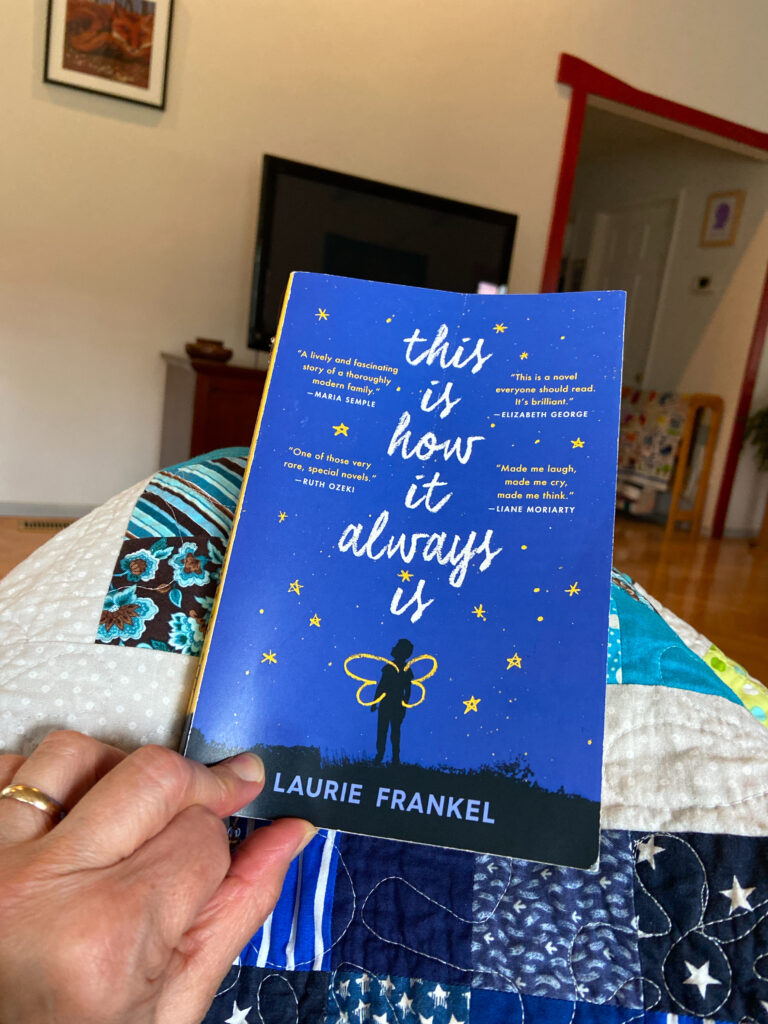
I am in a quilting and reading phase. Quilt a little, read a lot, quilt some more. There are always so many projects to make and books to be read, am I right?

But – the sewing! I have been getting lots done. Today I will share this cute picnic quilt I made for my grand daughters. I carried this line of fabric (it is all gone – sold so fast!) and before I sold out, I stashed away some of the red and yellow yardage as well as a panel of the animals.

I love seeing red and yellow together. It makes for a really cheerful combination. I need did use the green fabric with this project. I decided to save it for another day.

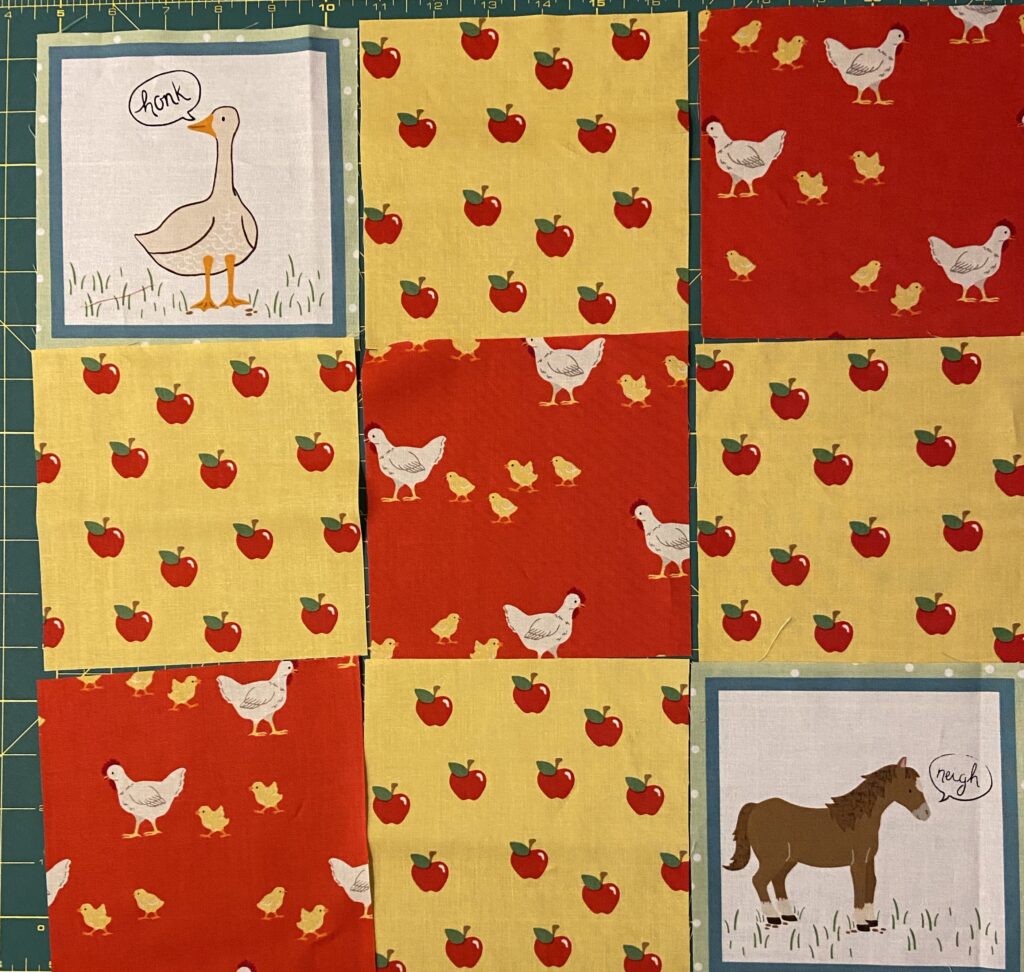
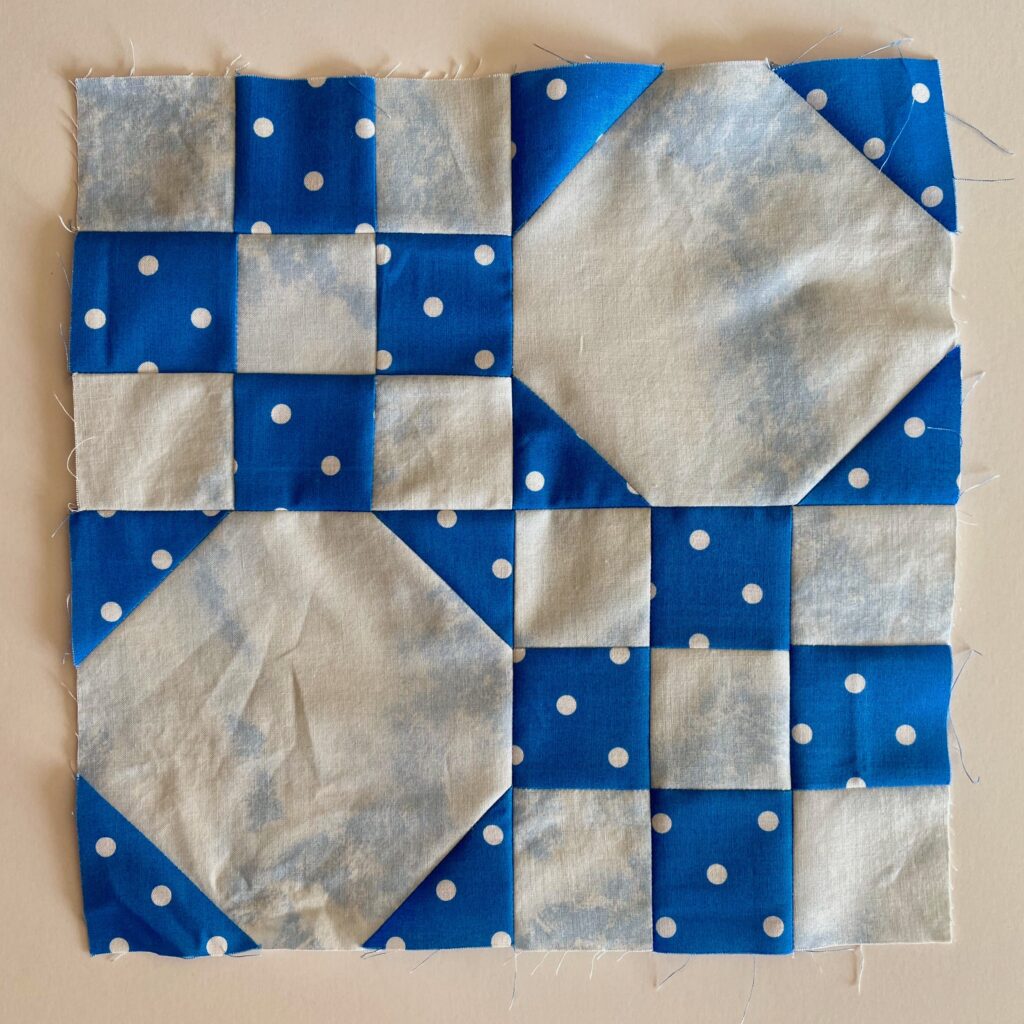
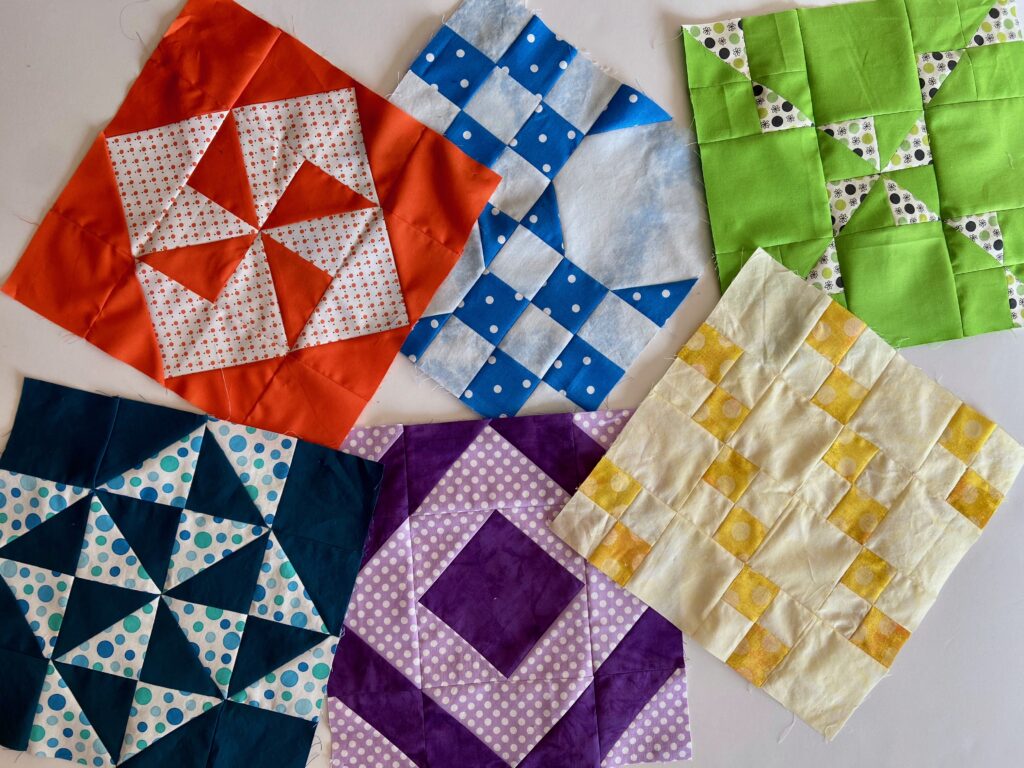
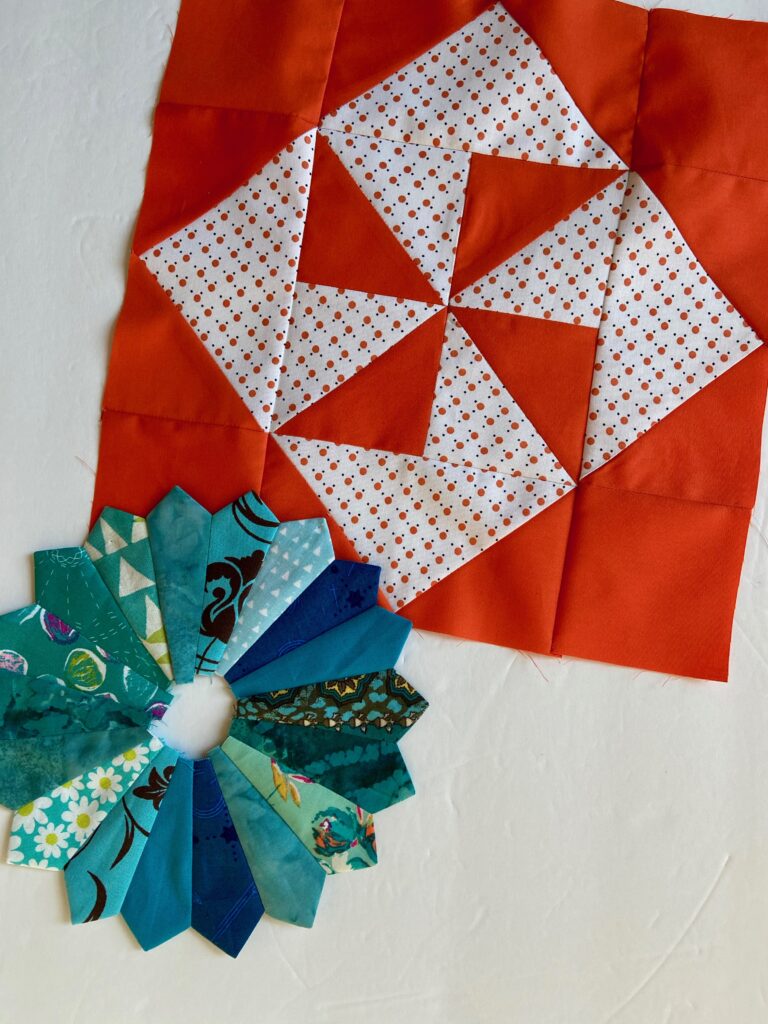
I started to make nine patch blocks last January and split them up, sewing them back together for a disappearing nine patch design.

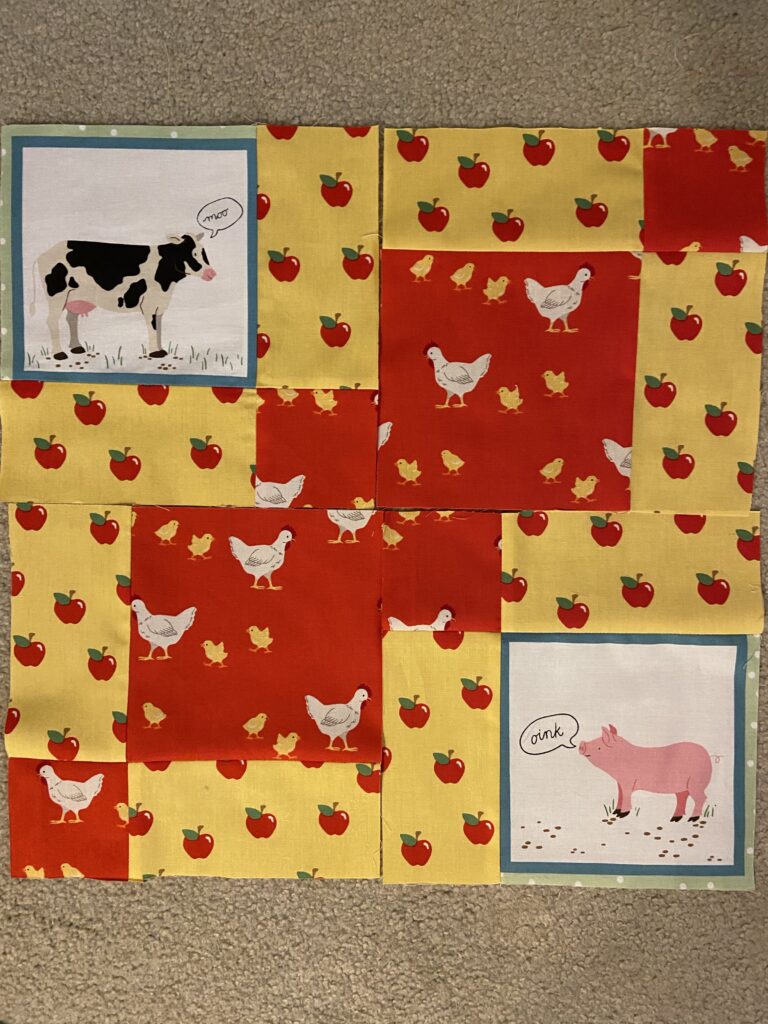
Some had red centers.

Some had yellow centers. But once made, the blocks were always set aside for some other project.

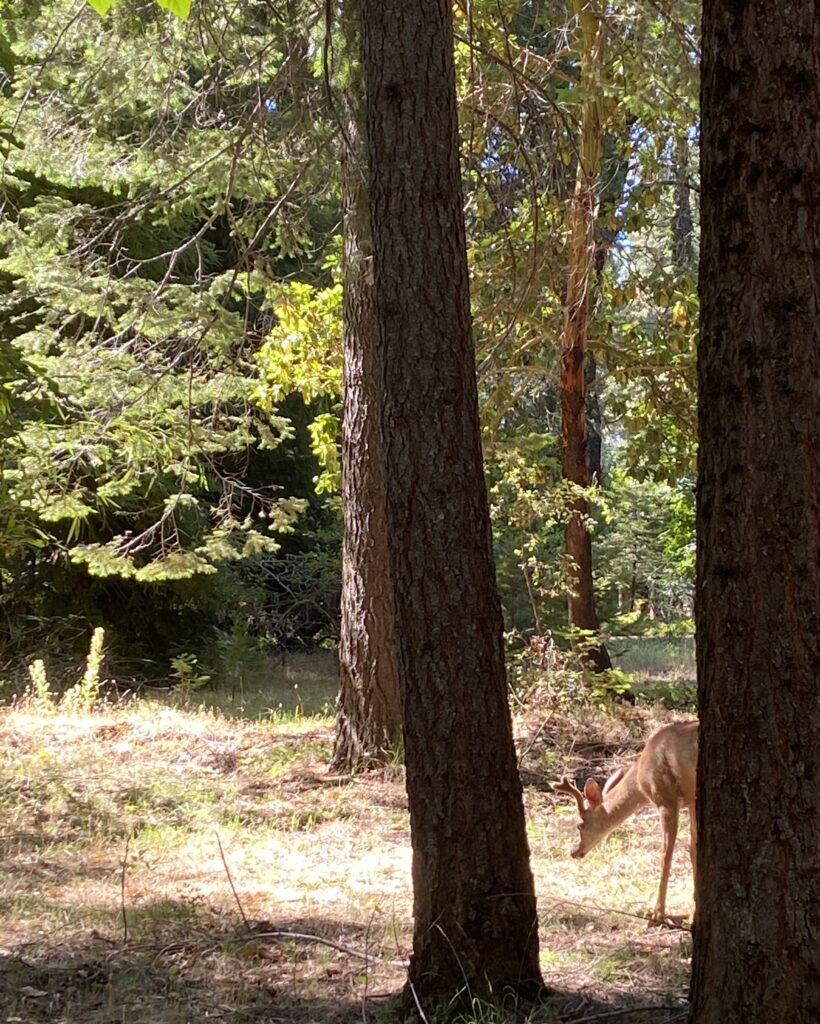
Well my son and his wife recently bought a house outside of Seattle and we have been calling it “the Farm House”. It isn’t really a farm but it is on 1.5 acres and has a lot of raised beds, greenhouses, and a chicken coop. So, farm enough in our opinion.

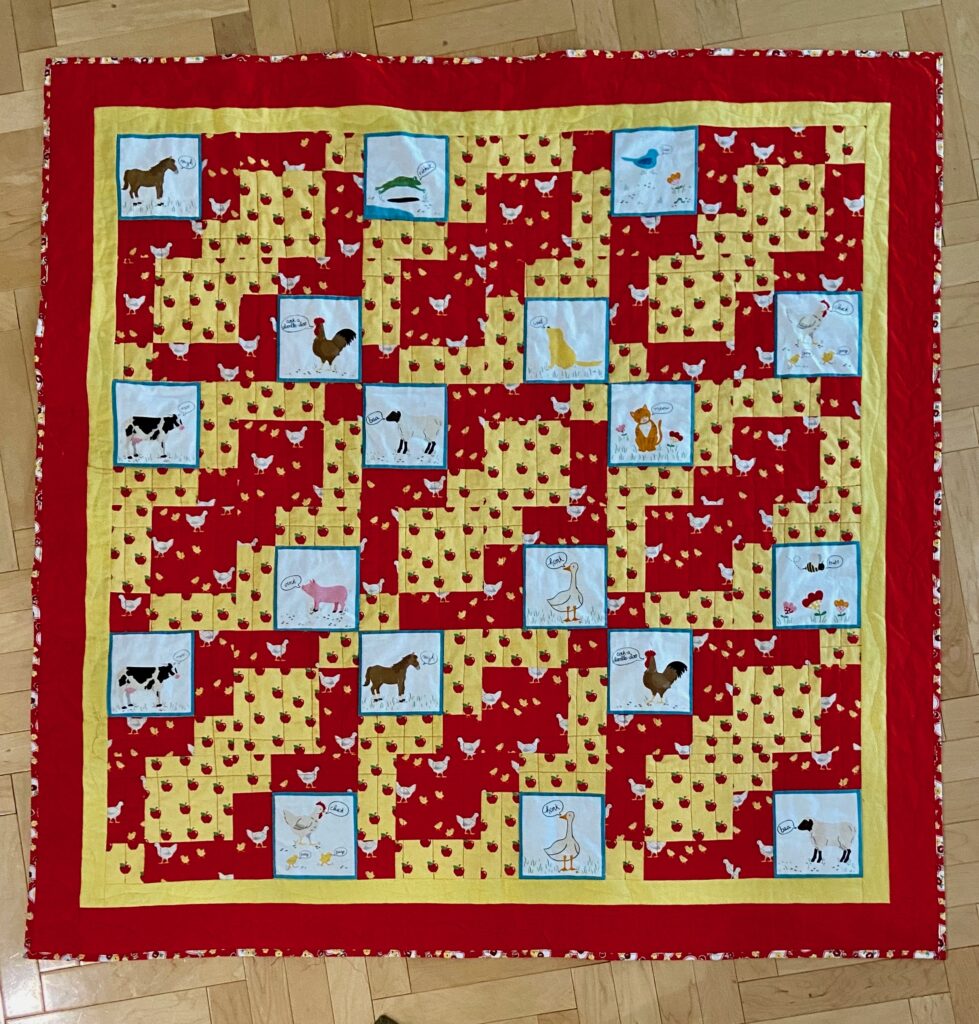
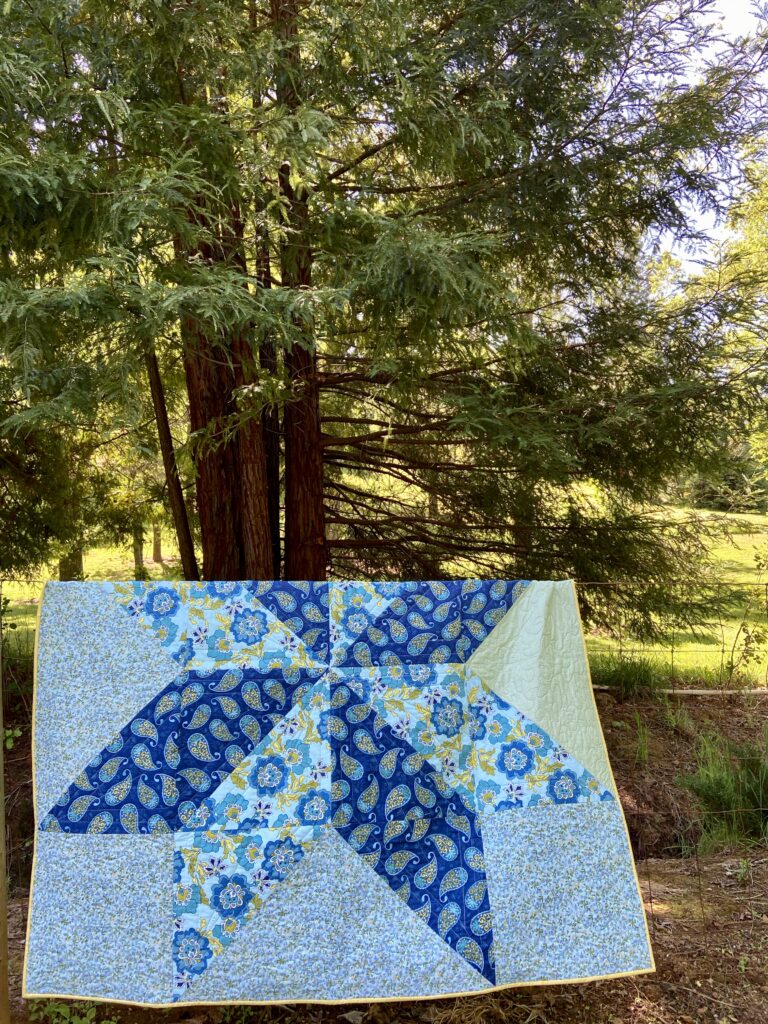
I decided I needed to finish the quilt so the girls could sit on it outside and eat a snack or bring their lunch outside. The three year old is always filled with energy and I know she will love their big yard. This property is perfect for them.

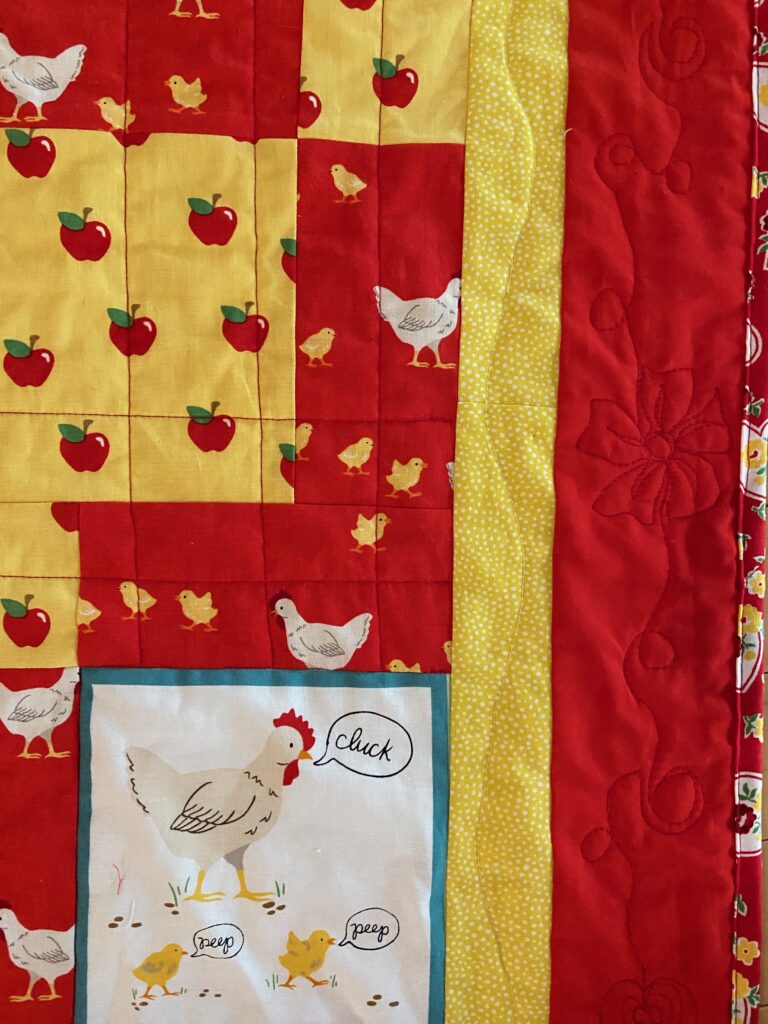
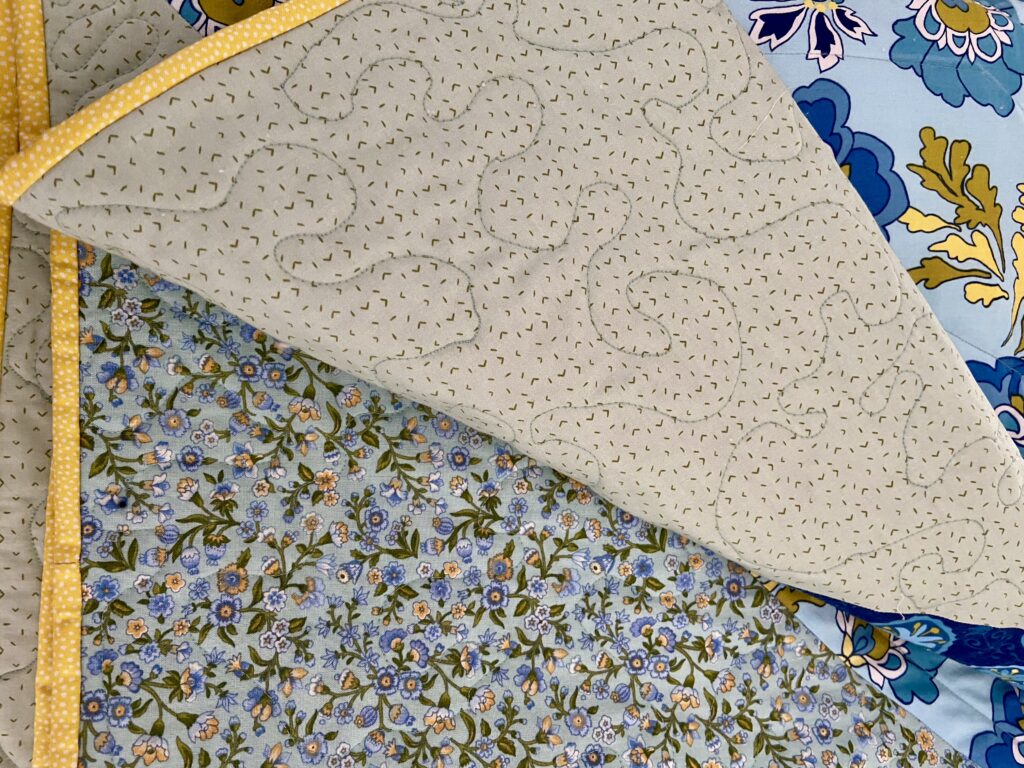
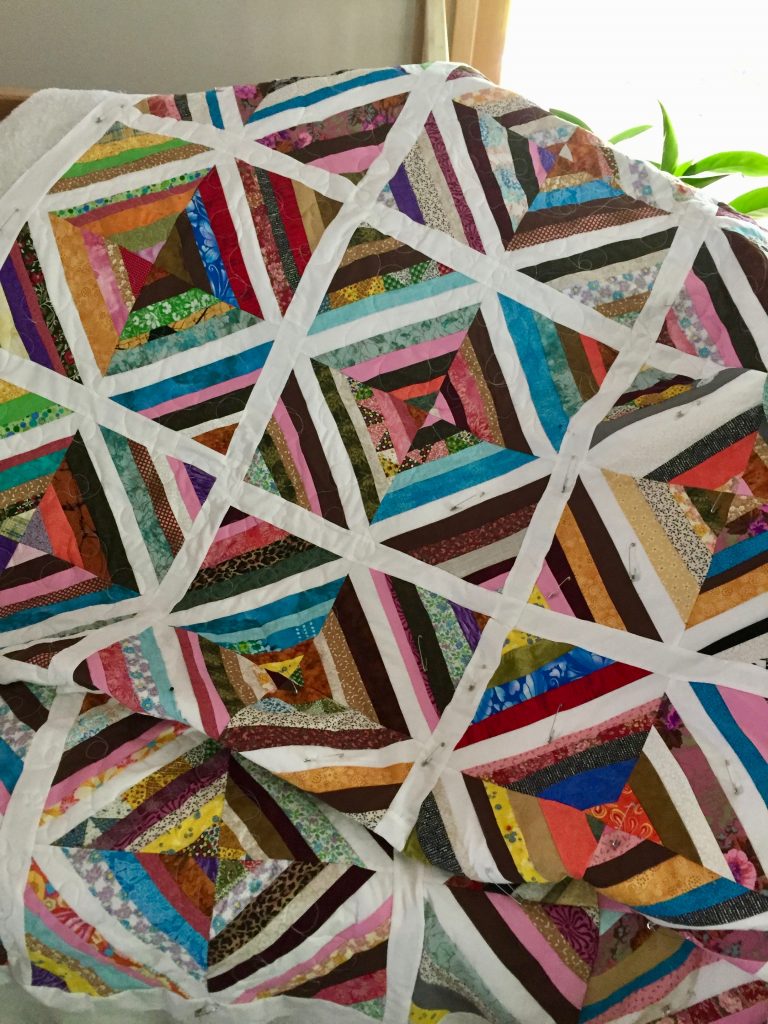
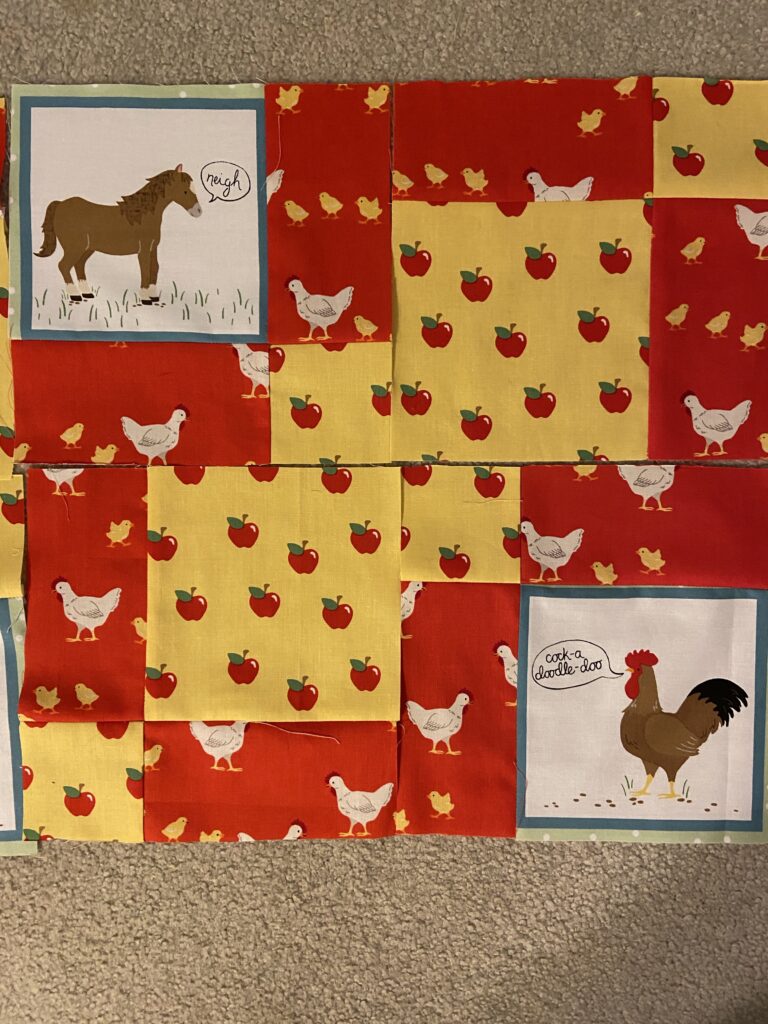
I had some fun quilting this. In the center, I stitched in the ditch around the white animal squares. Then I used vertical and horizontal straight lines at various intervals. In the yellow border I just did a wavy line through each one.

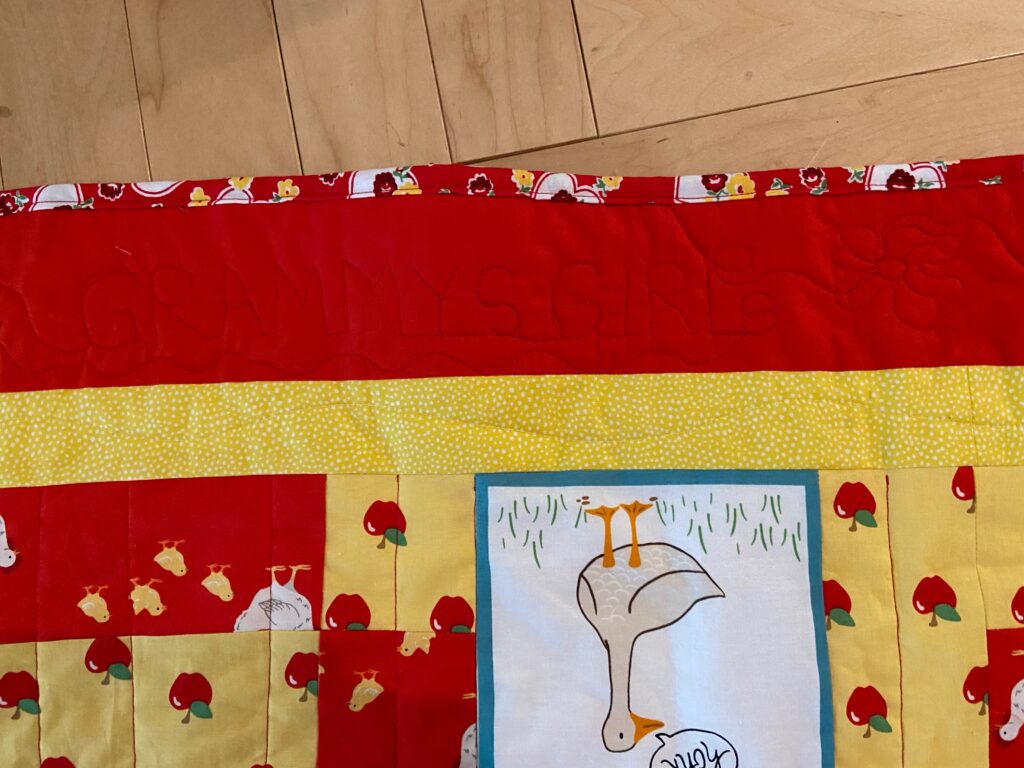
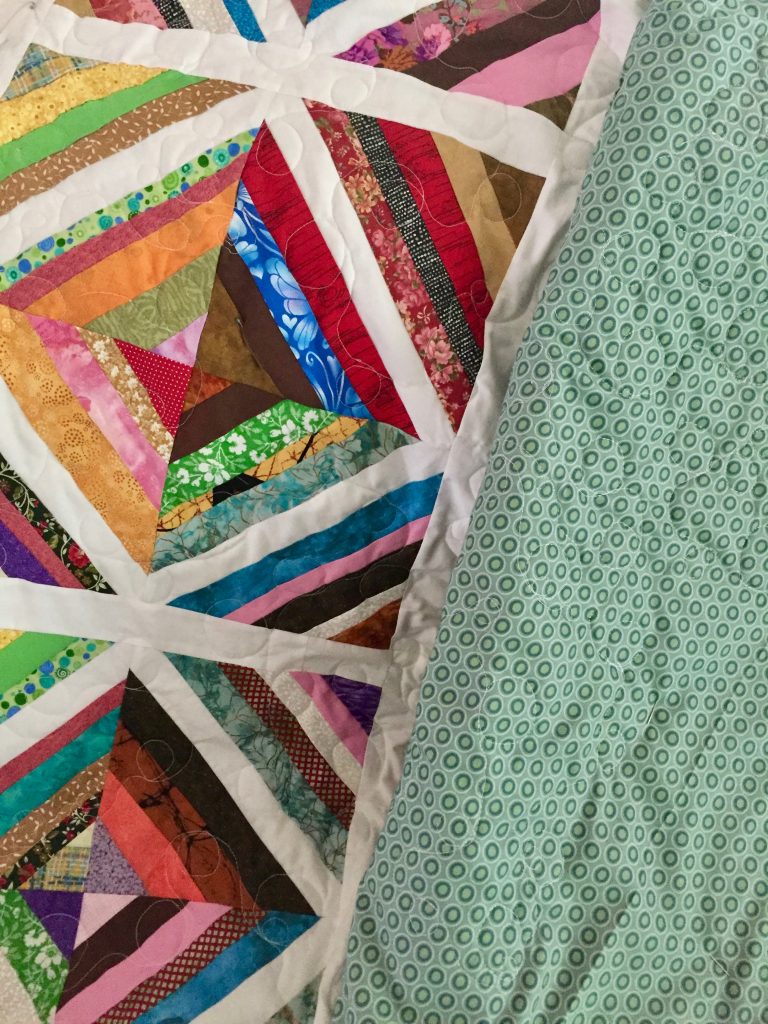
I played with the red border. I did swirls, hearts, flowers and whatever else came to mind. On two corners I put the girl’s names which was fun. On the bottom border I stitched “Grammys Girls” but wasn’t thinking of the orientation so it is upside down. Sigh. Not a huge deal but I do wish I had thought to flip it before I stitched the words. Not enough to spend the time unpicking the stitching though. Haha.

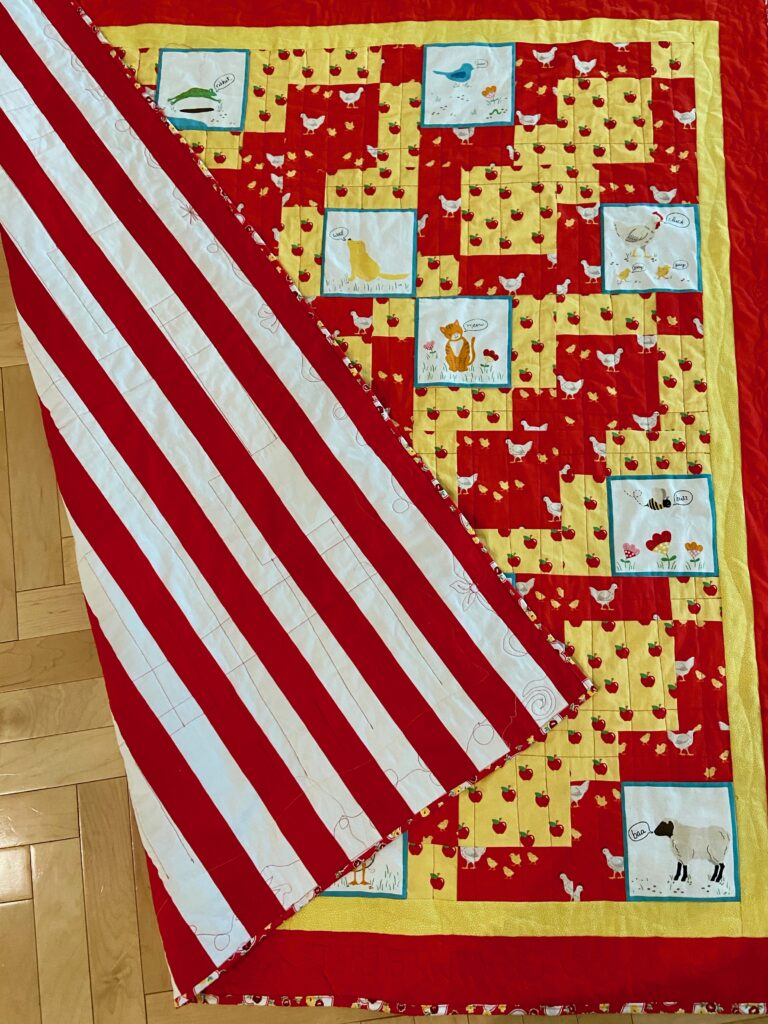
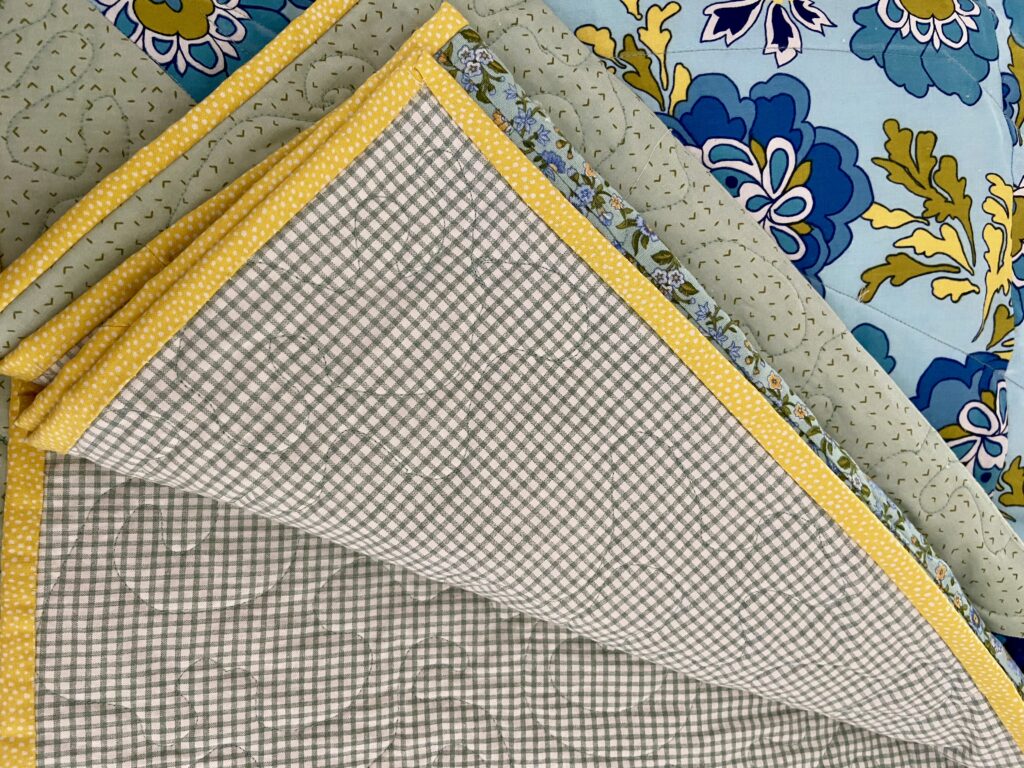
The backing is a super wide stripe from Michael Miller. My sister was clearing her sewing area a couple of years ago and gifted me this piece and a few others. I knew it would come in handy at some point. The binding is a repro feed sack print I have in the shop. I like the little flowers framing the quilt, though this picture doesn’t really show the binding off very well.

I ran into a snag when I washed the quilt last night tho. The red bled onto the white animal squares. (I was too annoyed to take any pictures.) Ugh. I haven’t experienced this and was a little freaked out. Both Wendy of Pieceful Thoughts and Jan of Colorful Fabriholic recommended this method by Vicki Welsh to removed the red. By the time I asked these lovely women, I had already cold water washed it twice and rinsed it two more times. After reading Vicki’s method, I chose to alter it a bit. My washer is large and the quilt is about 50 x 50″ so not terribly big. I put it in the wash on the “deep water wash” cycle with hot water. The hot water was the part that scared me but Vicki says that is what needs to be done. Before I put the quilt back in I decided to spray each of the white squares liberally with OxyClean stain remover. I didn’t rub it in aggressively but I did sort of massage it into the stained areas. Then I used a fragrance free “free and clear” type of laundry detergent and put in more than I normally do. Once the machine was filled with hot water I stopped the cycle and let it soak, making sure it was all under water. Finally I let the machine finish its cycle and ran it through a couple of extra rinse cycles since there was a lot of soap in there. It worked! The animals are back in their little white squares as opposed to the pale pink squares that I saw last night. Phew! Thank you Wendy, Jan and Vicki!!

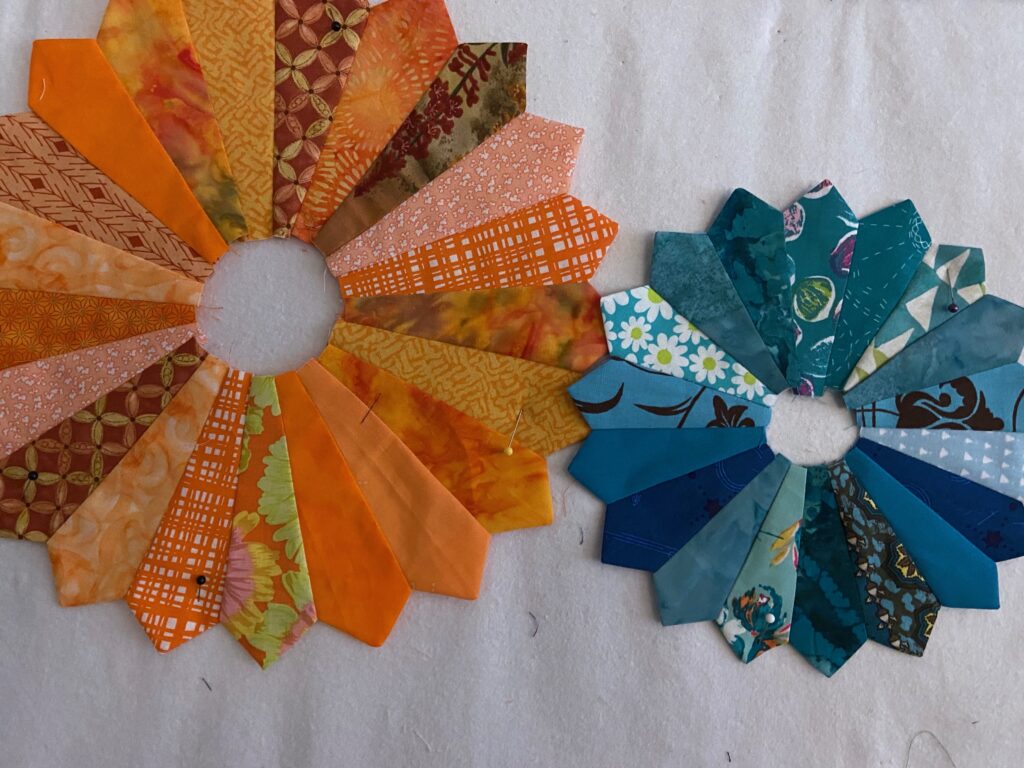
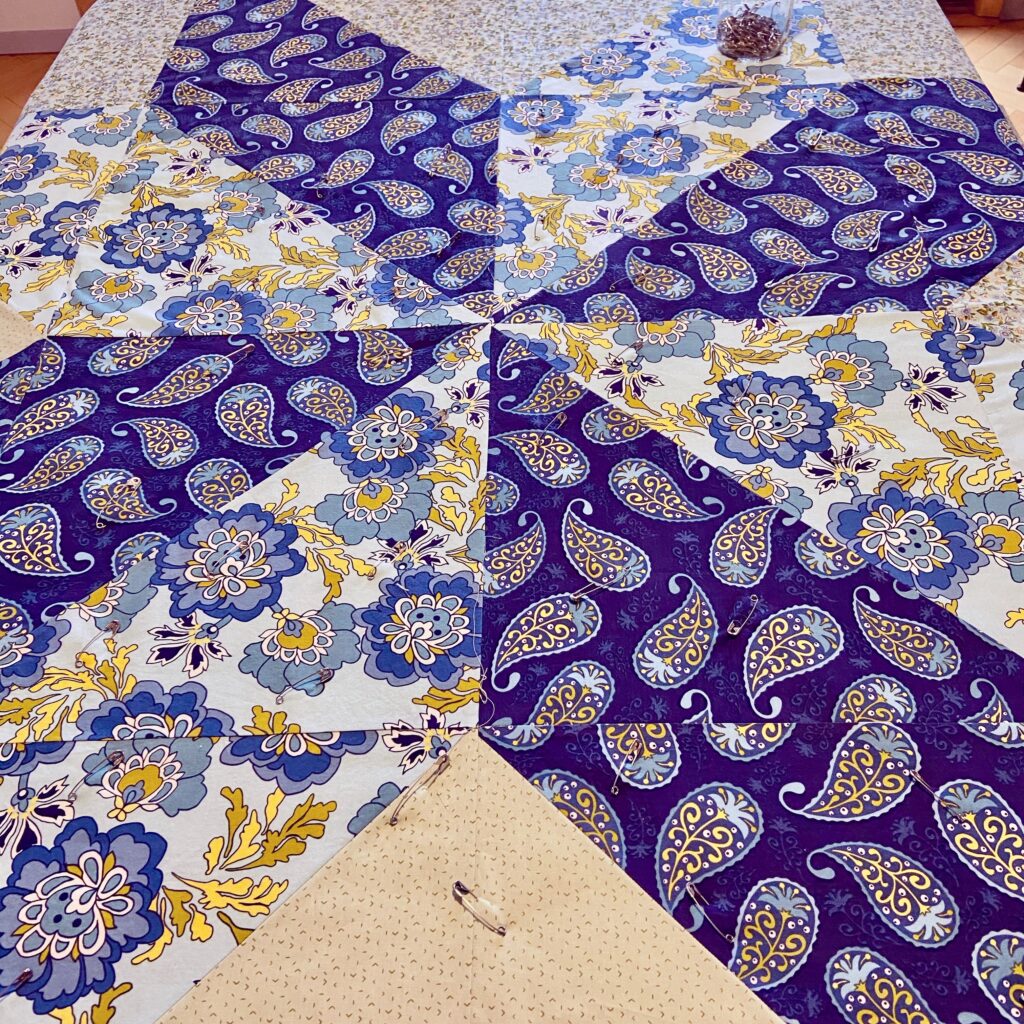
Now that this is finished, I have moved on to another quilt top. I basted it yesterday and plan to quilt it this weekend. It is miserably hot and smokey outside – I did get a little yard work done early this morning but will be inside all afternoon. We don’t have any plans for the long weekend. Hope you are all well. Enjoy your long weekend and make sure to spend a little (or a lot) of time sewing!

Linking to:

Brag About Your Beauties, Whoop Whoop, Tish’s UFO Busting & TGIFF

Covid Crafting

Quarantine life goes on and the days are somewhat repetitive. Julia and I continue to look for projects and crafts to keep us busy and mix things up a bit. Recently we decorated two clay pots we found in the garage.

Julia has been into house plants this summer and has quite a few in her room. We thought it would be fun to take a plain clay pot and make it pretty. Wanting to use supplies we had at home (always frugal, right?) we browsed Pinterest for ideas.

When we came across a link for using decorative paper napkins and Mod Podge we decided that would be a fun way to go. We took our inspiration from that post but didn’t do all they suggested.

First coat of paint

First step was to paint the outside of the pot with basic, water soluble acrylic paint. Again, we used whatever we had. Julia chose white and I chose yellow.

We made sure to paint to upper part of the inside of the pot. The instructions said to seal the inside of the pot. My guess is to prevent any water from soaking through and damaging the paint or decoupage. But we skipped that part. Whatever happens is fine with us. 😉

We had two choices of decorative paper napkins in the closet. Either Christmas theme or these yellow, blue and white flowers. Guess what we chose. Julia and I cut out bits and pieces that we liked. Then we carefully peeled away the second ply of paper. These napkins are fairly thick and it looks nicer if you just use one ply of thickness. Then we painted the spot we wanted it to adhere to on the pot. After smoothing the napkin bit over that glue, we carefully painted a layer of Mod Podge over the paper. It looks all thick and white but dries very clear.

Julia chose to paint a layer of Mod Podge over her whole pot. For some reason, this layer did not dry clear. It has a brown-ish tone to it but I think it just looks rustic.

Julia’s finished flower pot
My finished pot.
Aren’t these cute?

These were really fun to make and a good way to fill another afternoon at home. Kind of satisfying to make something with supplies we have on hand. Much like sewing from the stash in my closet!! Honestly, the Covid quarantine has had some upside in that we are much less inclined to run to the store for odds and ends. We eat more out of the pantry and freezer and projects are often made with what is on hand. This has been a nice change for us.

Now, for a little sewing related chit chat. Have you all been wondering and waiting to hear whether I have kept up with the 2020 Monthly Color Challenge BOM? I know, I know – how rude of me to forget to post the June block. My apologies to all of you. Hahaha. I did get the block done and it is a cute one.

Kind of wrinkled but still so cute.

Now that the year is half way done (and that alone is very, very strange) I enjoyed putting the first six blocks together for a quick look. I am really happy with the polka dot theme.

These blocks look so happy together.

This month’s block looks to be a nice one but I haven’t even cut it out yet. I have three weeks to go so there is plenty of time!!

That’s is the news from here. Like everyone else, we are trying to make the best of these strange times. Lots of time to make things, bake things, play cards, and take pretty walks. Here are two pictures from this morning’s hike up in Nevada City.

This buck had only one antler. I am guessing he got into it with another buck and lost the argument?
I love this look-out about 1/2 way up the trail. It is just gorgeous.

OK – time to go get to work. The kitchen is a mess and I have a number of orders to cut and ship. What have you been up to?

I hope all of you are staying healthy and sane. Reach out to each other and keep in touch. I think staying in contact is super important these days. I am one who enjoys time to myself but with all of the current restrictions, too much alone time isn’t good. We need to talk, visit, and stay in touch with friends and family. Hang in there. 🙂

In Honor of Paula

Today is the kick off of a blog hop honoring Paula B. Paula was a kind and generous quilter who blogged at Paula B Quilts for a number of years. She loved thrifting (we certainly had that in common), studying antique quilts and making quilts for charity. One of her favorite organizations was Project Linus. Our quilting community was saddened to hear of Paula’s death on February 8, 2020 after a short and unexpected illness.

Some weeks later, I received an email from Kate of Smiles From Kate and Janice of Color Creating and Quilting, asking if I would like to be involved in a blog hop as a celebration of Paula’s life. Kate and Janice thought it would be nice to have quilters make a quilt to donate to the organization of their choice. The hop is being held this week as Paula would have celebrated her birthday today, on May 6th. I can’t think of a better way to honor the life of this very generous quilter.

Ok – let’s talk about the quilt I made. Some time back, I posted about thrifting some pretty blue and yellow fabric. I knew I wanted to make a quilt with large pieces so I wouldn’t have to chop of the fabric. To this end, I chose to make a large star quilt. The tutorial is available here on In Color Order. I love this pattern and it can be made in an afternoon. It looks great with bold, large scale prints. This is the second time I made one. Years back, I made a smaller one which hangs in the shop downstairs.

Quilting this up was enjoyable. I did straight lines within the star, echoing the shape of each point. I did a large, loose stipple over the background. My goal was a loose pattern to keep the quilt nice and soft after washing it. The bright yellow fabric used to bind it sets it off perfectly.

Love the tiny yellow frame made by the binding.

Finding a backing fabric was easy. I had a piece of sage green gingham in my yardage stash that worked nicely with this quilt top.

Loose, wavy quilting over the background of the quilt.

This quilt is destined for Mercy Hospital in Sacramento. I am still organizing Mercyful Quilts for them and I think this will be well loved by the family who chooses it. If you are not familiar with Mercyful Quilts, please read about it by clicking here and here. It is a wonderful opportunity to provide comfort for a family as they say good bye to a loved one. I have recently received a number of quilts donated on behalf of the 2020 Hands2Help event. I will share some of those in a later post.

Let’s get back to the hop! It will be happening through the end of the week.Below you will find the schedule of the bloggers who are participating in this hop. I plan to visit them and see what each came up with and where they are donating to. I love finding out about organizations supported by other quilters. There are many and it is great to know who needs what!

Also a number of wonderful prizes have been donated. Each time you visit one of the blogs below, be sure to leave a comment. Each comment left on any of these posts is an entry into the prize drawing!! The giveaway is open until May 15th. Prizes will be awarded after that date. Enjoy and good luck! I know Paula would be just thrilled to know of all of these quilts being made and gifted in her honor! To see the prizes donated for this event, scroll to the bottom of this post!

Thank you for stopping by today. Enjoy the hop in Paula’s memory – I know I plan to!

Wednesday, May 6 

Karen @ KaHolly

Kate @ Smiles From Kate

Wendy @ Pieceful Thoughts of my Quilting Life

Bernie @ Needle and Foot – You are here!

Linda @ My Sew-Called Quilts

Cathy @ Crazy By Design

Sue @ From the Magpie’s Nest

Thursday, May 7

Kate @ Smiles From Kate

Diann @ Little Penguin Quilts

Rose @ Something Rose Made

Nann @ With Strings Attached

Mari @ The Academic Quilter

Louise @ My Quilt Odyssey

Susan @ Desert Sky Quilts

Friday, May 8

Janice @ Color, Creating and Quilting

Kate @ Smiles From Kate

Joy @ The Joyful Quilter

Susan @ Quilt Fabrication

Edi @ Edi’s Crafting Life

Carol @ Quilt Schmilt

Preeti @ Sew Preeti Quilts

Emily @ The Darling Dogwood

Prizes!!

Sew Fresh Quilts, $50 gift certificate for her pattern shop.

Quilting Jetgirl, 2 PDF patterns of choice.

Needle and Foot, $25 certificate for her shop.

Figo Fabrics, A fat quarter bundle

A set of quilty gift cards from Initial Thought by DMF  Note cards set 1

Sugar Free Quilts, A pattern of choice

A $30 gift certificate for Doris, Cactus Queen Quilt Co

Canuck Quilter Designs – A PDF pattern of choice

$25 gift certificate to Fat Quarter Shop, donated by Janice Holton

The Enlightened Spaniel (Book 1 & 2) by Gary Heads

Scrappy Dresden and Monthly Color Challenge Block

Happy Saturday Everyone. It is National Quilting Day so I really hope you each find a few minutes to work on a project or at the very least look at fabric and plan the next project!

I got my two monthly scrappy projects done for March! For RSC2020, the color is teal and I decided to make a smaller Dresden plate. I will combine it with the larger orange one I made in February and likely need to make one or two more before I put them together into some sort of wall quilt.

For the Monthly Color Challenge, hosted by Patterns By Jen, the color is orange. You might remember I did the January and February blocks with polka dot fabrics. That caused me to do a quick search though my scraps to see if I have enough polka dotted scraps to make this a theme for the sampler. I believe I do! So this month, I continued with the dotted fabrics.

March Scrappy Blocks

The block was a breeze with a pinwheel block in the center and then some flying geese to surround it, making it a square in a square. Easy peasy and very cute!

Next up is another quilt I am working on for Mercy Hospital. I had thrifted some pretty fabrics about a week or two ago. I knew I wanted to use them in a large block design because they are quite large in scale of print. I gathered another piece from my scraps plus a cut from a blender in the shop and pieced a Giant Star Quilt using a tutorial by Jeni Baker from In Color Order. This pattern is super simple and a lot of fun. Side note: I actually made something very similar when I was about 19 or 20 years old for my parents. I remember I saw the pattern in a magazine and made with in tones of burgundy, navy blue and it had a muslin background. I filled it with a puffy polyester batting and yarn tied it. That was a whole lotta years ago!

At this point, I have the quilt basted and did some ditch stitching to stabilize everything. This weekend I should be able to get it quilted. I need to find something fun to use for the binding.

Since all of California is mandated to now ‘shelter in place’, there is plenty of time for sewing and also lots of time to read. I am LOVING this book and highly recommend it if you want something to read while we wait out this Covid-chaos. My girlfriend loaned it to me and it is such a great read.

Let’s close with a picture of my sweet grand daughters, shall we? Little sister has decided she isn’t terribly fond of sleeping in her bed and is creating some sleep deprived parents these days. Coincidentally, big sister is thinking afternoon naps are passe`. Yikes, this doesn’t make for a good combination. Hoping the baby starts to cozy up to the idea of sleeping in her bassinet soon!!

Linking to lots of fun places including Brag About Your Beauties and Oh Scrap!

Bushfire Tree Blocks for Australia

Currently many quilters are making tree theme quilt blocks to donate to the Woolongong Modern Quilt Guild in Australia. This chapter of the MQG is making quilts for the families who lost their homes in the currently raging bushfires. As a native of California, I am too familiar with the devastation of wildfires and am happy to contribute a few blocks to the cause.

Here is some of the information as posted by the Woolongong MQG on their Facebook page. If you hop over to their Facebook page, there are some blocks shown for inspiration. You will likely see many on the other quilt blogs right about now. Side note – if you are following RSC2020, this is the perfect month to make the tree blocks since the scrap color for January is green.

How you can help:
We have decided to make tree blocks. The tree is a symbol of growth and nourishment. A tree symbolizes the generations of a family; a tree sprouts from a seed, the roots provide strength and stability, and whilst the new sapling is young and vulnerable they are protected by the other trees until they grow and flourish. In time the branches spread and then create new fruit that gives life to the next generation.

There is no restriction to one type of tree block. We would love our quilts to be beautiful and diverse just like our wonderful communities ….. If you would like to help, please make a tree block of a generous 12.5 inch square using a low volume / white or pale grey background. Once completed please send to:

Wollongong Modern Quilt Guild
PO Box 54
Jamberoo New South Wales 
AUSTRALIA 2533

We are going to distribute the quilts made to the families who have lost everything. We would like to ask that blocks be mailed for arrival by the end of February. We thank you in advance for your support#bushfireblocks

For my blocks, I chose to use the tutorial written by Kirsty Cleverly over at Bonjour Quilts. It is a bit different than some of the other blocks and I like the look of it. Plus, they come together quickly. Aren’t they cute? I like the three tones of green in each one.

There are certainly other tree blocks you might choose to make. This pine tree block is really cute and simple. The tree portion (it was drafted for a pillow) creates a 12 1/2″ block which is great for this. The Tree of Life block is traditional and lovely but oh my, so many HST’s. If you are interested though, here is a tutorial over at Fat Quarter Shop.

Created by Linda, FlourishingPalms.com

Post Update: I just learned of an incredible tutorial for another tree block! Designed by Linda at Flourishing Palms, she created the tree to emulate the shape of Australia. I love it! Click here for a well written tutorial for this cool block.

I know there are plans to set up a station at QuiltCon in February to collect blocks. If you know someone going to the show, or if you are going, it might be nice to gather blocks from quilters local to you and contribute them there. This will certainly will save on mailing expenses. Our local guild is making blocks and I am hopeful there will be quite a few to mail in. (If you happen to be a local member, please bring your blocks to the Tuesday night meeting in February!). Hoping you’ll be moved to make a block or two for this worthy cause – Happy Weekend everyone!!

Linking to my usual places including Brag About Your Beauties over at From Bolt to Beauty and Finished or Not Friday at Alycia Quilts and Oh Scrap! at Quilting is Better Than Housework.

One Adorable Pumpkin

Happy Halloween!! Your recent two weeks of family time in Vermont were wonderful. The goal was to hang out with our son and his wife and spend as much time as possible with our grand daughter. 

Grandpa was her favorite during our visit!

While there my grand daughter came down with a miserable virus and had terrible croup. Poor little girl was sick for a long stretch and toward the end of it, my husband came down with it.  Not a fun bug at all!  The two days before we left, my son and his wife were starting to come down with it but it didn’t look like they were going to be quite as sick.

Since we were having some quiet time at home and H was taking long naps due to being sick, i did have time to do some sewing. I pulled out my DIL’s sewing machine to make a Halloween costume for H. She and her mom found a cute picture of a little girl dressed up as a pumpkin with green leggings and t-shirt on underneath. 


I used a Simplicity pattern for the costume. There is a Jo-Ann’s in the next town over so off I went in search of orange fabric. At first I planned to use a wool felt but it was so stiff. I knew H wouldn’t have fun running around in that at her Halloween party (at her daycare).  I was with my son Kyle (he and his wife drove over from New York for a weekend) and he spotted a bolt of orange fleece way up on a top shelf, not yet unwrapped. Lucky for me he is 6’ 2” and was happy to hop up and down to grab it. This was perfect. 


The pumpkin is lined with fleece and filled with batting. Even trick or treating in Vermont, this girl is going to be quite warm. Her outfit is so heavy!!  There was a stencil for the face but i felt like it was too big so I ended up cutting the pieces out free hand. Using a few bits of ‘Wonder-Under’, I fused the face to the front and appliquéd them with a simple zig zag stitch. 
The pattern called for a casing to be made at the hemline with elastic inserted to make it puffy. However with the fleece, there was already a nice shape to the pumpkin. Instead, I trimmed the fleece lining to be about two inches shorter than the outer layer.  Turning one inch of the outer layer to the inside, I machine stitched the hemline. 

She was trying on the hat when I first finished it. But it was a bit too big.

Ok- my favorite part of the whole costume is definitely the hat. When I made it, H was quite happy to wear it about the house for an afternoon so I really hope she wears it on Halloween. It looks so darn cute on her. I made it during a nap time, guessing at the sizes and it was too big for her.  There wasn’t a clean way to fix this without doing a lot of seam ripping. I had to rip one seam on the  pumpkin and it was difficult to manage with that puffy fleece fabric. So I cheated and took a little tuck and just stitched it up. The hat is still a bit large but better than before. 

So darn cute!

When I left I had not had time to run out and buy some velcro which was needed for the shoulder straps. So I left it unfinished and my daughter-in-law took care of it. I received some really cute pictures of H having fun with her costume today.

Getting ready for daycare earlier this morning. So much excitement!

I am glad they had a little party at her daycare. I hear they are supposed to have a lot of rain tonight so that may put the kibosh on any trick or treating.

I love the green and white striped leggings and t-shirt under her pumpkin costume.

Just in case there was a chance for trick or treating, I also made her a tiny treat bag to carry.

This was designed off the cuff and I didn’t write down any measurements. If I had to guess, I would say it finished at about 8″ x 11″ or so. Maybe even a bit smaller. I had that polka dot ribbon on hand (actually had all of the supplies on hand) and I took two pieces and sewed them together (wrong sides together) just to make it a bit heftier.

The bag is lined, which makes it a bit stronger. Since she does not yet know what trick or treating really is, she won’t be disappointed this year if they skip it due to weather. She can play with this bag or use it next year.

While I was there H and I made a festive bandana for their dog Wusha. I think Wusha looks a bit embarrassed to wear it but this dog will do anything my grand daughter asks of her. I had the triangular pieces cut and pinned and then had H sit on my lap and help me feed the fabric through the machine. I tried to take a selfie because it was so sweet but I am really, really not good at those and didn’t get much of a picture! But we had fun and she was thrilled to help Gram-gram sew for a few minutes.

Introducing Georgie Ghost

One last project while we were there was to make a little ghost to hang in the dining room. We had been taking walks around the neighborhood and she really liked looking at the neighbors decorations. She loved the ghosts and a few little scarecrows we saw. I asked her if she would like to make a ghost and she was so excited.

This was super easy. One styrofoam ball from Wal-Mart and a packet of cheesecloth from the grocery store. I cut the cheesecloth in two strips and with the help of one happy two year old, layered the ball with the cheesecloth. Then we worked together to cut the eyes, nose and mouth. I had gotten her a glue stick that starts out purple and dries clear. This way she could see where she was putting the glue to put the pieces on. The addition of the bow on her head turned this little ghost into a girl. H and I had so much fun with this project and it was the perfect amount of work for a two year old.

Checking to see if Georgie Ghost can fly.

My son took the photos of H and her ghost – they are so sweet! We really enjoyed our time with the kids and can’t wait for our next visit. Grand parenting is the best and it would be even better if we all lived on the same side of the country!! Someday…

Linking up with a few fun places, including the monthly Favorite Finish party at Meadow Mist Designs. Be sure to check the top of the page under Link Ups!

Grammy Time

Guess what? I am in Vermont hanging out with the cutest two year old ever! We arrived on Sunday last weekend. We are staying for two weeks which is just a treat. My husband came along on this trip which pleased H no end. She does love her Grandpa.

We have been on grand parent duty a bit and have also had a couple of days to do some touring around. As you can imagine, the beautiful fall leaves are at their peak right now. Tuesday and Wednesday Ray and I spent time driving east and south to the bottom of Vermont and then up the western side. Of course, this state is small so it doesn’t take long to do this. We stopped along the way though to enjoy the sites.

I will share my two favorite places we visited! First of all we found a place called Vermont Salvage in White River Junction. It is a huge building with three floors of all sorts of things that were kept during various home renovations. Ray and I spent a long time looking through pile and piles of fun things that would be great to have if we were fixing up a house

The selection was incredible. Everything from tubs and toilets to mantles and stained glass windows. There were bins filled with hardware, hinges, door handles, cabinet pulls and more.

If only we could have thought of a way to use these old jail cell doors!

Here we found a wooden phone booth. Where did this come from? I just loved it.

This wooden slide was so fun. It was quite rickety and I found myself wondering if it was made by some devoted father (or grandfather?) for their children.

I allows was thinking that my bum would in no way fit this slide! It was clearly made for little kids. Also, it was so steep. Think of how many kids flew down that slide and scrambled up the ladder for another turn!

The other place we really enjoyed was a trip to King Arthur Flour. I love their website and use their recipes quite often. Our local grocery sells quite a variety of their flours too. When Julia was out here last summer she had lunch here with her brother and sister-in-law. She told me about it and said the shop was something I would love. Know what? She was so right!

The store is enormous and is filled with baking tools, kitchen decor, linens, cookbooks and baking mixes of all kinds. The only thing that restrained us was the fact that we would have to tote things home to California and the fact that lots of the items are available online.

Being there made me want to go home and bake. I really love cooking and baking as does my husband.

They make wonderful breads and baked goods onsite. Samples were everywhere which was a great selling technique! I liked the huge windows which allowed us to watch the baking in process.

Even more, they have a beautiful classroom set up. The day we were there the class was on making hot water pastry as well as short pastry crusts. I wish I could have snuck in the room just to listen for a while!

The restaurant is great too. We had a fantastic lunch after shopping and wandering. So yummy.

We did purchase a number of the mixes and plan to make some over the weekend. My middle son and his wife are driving over from Brooklyn where they live. So family time means lots of food (at least in our family!)

I will close now with this fun announcement! Guess who is going to be a big sister?? We are so excited for grand daughter number two! She is due to arrive in mid-March. Big sister seems to have some understanding of what is to come. She has told me the new baby will cry a lot, want a pacifier and lots of bottles. However she clearly doesn’t get the difference in boy names or girl names. She has asked that this child be called Ferdinand. I am really hoping her parents can talk her out of this!

That is my news for now. Hope all is well with you!

Susie’s Quilt is Finished

Months ago I started to make a memory quilt for my friend Susie. Her husband passed away in September of 2018 and some months later she gave me a stack of his shirts to make a quilt with. I first posted here about this project if you want to see earlier pictures.

That weird little curved line at the too right is a branch from a tree. Creative photography?!

Yesterday I had lunch with Susie and (finally) gave her the quilt. She is really happy to have it and I am hoping she enjoys snuggling up with her quilt and a good book now that cooler weather is upon us. I think it finished at about 65 x 75″ so that is a nice size.

This quilt is rustic and cozy. Because all of the shirts were plaids, I chose to make each four patch block with a solid (from various pairs of shorts) and a plaid. The shirts were Rick’s favorites and he had worn some of them quite a bit. This made it nearly impossible to get a straight cut on the plaids. But I didn’t worry about it. This is a memory quilt and it will serve its purpose well.

My favorite part of the quilt is the red flannel that was used as the border and for the two red heart appliqués. The fabric was taken from Rick’s bathrobe and it frames the quilt perfectly. I love the deep red color. The binding is a soft creamy flannel that is in the shop. It seemed to be just the right choice with that rich red border. It complements the pale green gingham backing too.

I don’t know the name (or if there is a name) for this pattern I quilted on the four patch blocks. I quilted a diagonal line and then swooped up one side and down the other creating a leaf shape. It was so easy to do and it looks pretty. I first started with a free motion foot and had a heck of a time getting across the main intersection of the four patch. It made me crazy that I couldn’t get over that point without jumping all over the place. When I finally made the switch to the walking foot, it was just a breeze. I didn’t even think of that in the beginning but this design works really well with a walking foot.

I rarely remember to label quilts but I did put one on the back of this quilt. My handwriting isn’t the best but I am glad I labeled it.

There are some tucks on the backing that really gave me trouble. Other than that, this was a wonderful project and I enjoyed making it. I hope Susie takes comfort in it and loves having the quilt as reminder of her many happy years with Rick.

If a Tree Falls on My Driveway

You would think I would hear it, right?? On Saturday night, sometime between Julia getting home at 10:30 pm and 10:30 the next morning, a huge portion of an even bigger Heritage Oak tree crashed to the ground at the top of my driveway.

Standing at the top of my driveway

I can’t believe I didn’t hear it but nope, I didn’t hear a thing. This fuels the whole philosophical debate about ‘if a tree falls in the forest and no one hears it, does it make a sound’. It is hard to describe the size of the gorgeous tree. If the fallen limb were upright and Julia and I were trying to reach our arms around the trunk, our hands would not meet. They wouldn’t even be close. The tree is estimated to be over 400 years old. Isn’t that impressive? 400 years!

There were four main trunks coming off of the tree and a bit of a well in the center. I suppose, over the many years, the rainwater settled in that little valley and slowly rotted the base. Our neighbors, whose property this tree is actually on, are very careful people and had an arborist check the tree regularly because of its massive size. He thought the tree was quite healthy. Which it was, really, but for the center of that massive base which had rotted.

Sunday morning my parents came by for a visit and had to tell me my driveway was blocked and this tree had fallen. What a surprise, I had no idea! Dad and I took a closer look and saw the split that went all the way though the base of the tree. It was clear the other portion of the tree would likely fall. However, when this portion fell, it would hit a series of power lines overhead. This was really scary and we called the power company immediately. It took about four hours for the emergency team to get out here but as soon as they saw what was going on, they shut off the power to that line.

Within the hour, they had a team of tree trimmers out to the site. I felt badly about these guys having to work on a Sunday afternoon but was very grateful they were there. It felt even worse to see them chopping the tree up, bit by bit. We watched them work for quite a while. Neighbors were coming out and lamenting the loss of this enormous shade tree.

The tree trimmers were actually still working in the dark when we went to bed Sunday night. This morning we walked up the driveway to see how it looked. They had done a great job of trying to clear pathways so we and the neighbors could get in and out of our properties. There is still much work to be done however. It is astounding how much wood and debris are up there all from the one tree.

In the picture above one can see the close proximity from the tree stump, on the left, to the power pole, on the right. It was really a dangerous situation one the tree was found to be at risk of falling. Now that the danger has been taken care of, my neighbors can be heard with chain saws trying to clear some of the wood. We are all comforted by the fact that nothing was damaged and no one was hurt by this. It surprises me how bothered I am by the loss of the tree, something that has been the landmark to our house all these years. When giving directions we always tell people to look for the massive oak at the top of our driveway. Now it isn’t there anymore. Something is always changing and right now, for us, it is the look of our neighborhood.

Spring Equals Birthdays & Proms

May has been such a busy month! School is winding down – senior year is coming to a close for Julia. Plus we have celebrated her 18th birthday and she went to her Senior Prom. Crazy to see this girl finishing up high school because it was only a few weeks ago that I felt like such an awful mother as I left her crying on the first day of Kindergarten. Such is life, right?

A few weeks ago, I posted this desperate plea on Instagram and Facebook. Julia’s prom dress didn’t really fit well and she asked if I could fix it. This was the week before prom. Being the confident sewist, I immediately suggested we return it and quickly find another dress. But she #1 – threw away the receipt and tags and #2 – said she loved this dress and wanted to wear it. OK, I promised to do what I could. The main issue was the lining was too snug around her waist. I looked at letting it out and adding some width to the side seams. But I suspected I would end up with something bulky that wouldn’t lay flat. My brilliant daughter, who doesn’t sew, asked if I couldn’t just lift the lining up, folding it right sides together, sewing all the way around, which would make it a little wider at her ribs. Does this make sense to you? It worked like a charm and was super easy. Sort of hard to explain though.

Photo credit to Natalie Webster.

The next issue was the hem. It was really long and she didn’t want to be tripping over it at the dance. I was a bit leary of this task because the outer fabric was a slippery chiffon. But with the help of YouTube, it was not hard at all. The video I watched instructed me to pin it about 1/4″ longer than I wanted it to be. Press it and stitch all the way around. Then trim the excess as close as possible to the seam line. Finally, roll that stitched line to the inside, pin and press and stitch again. I was amazed by how wonky the original hem was. There was no way to straighten it so Julia and I figured if we hadn’t noticed how wavy it was before, no one else would either and I just stitched it – crooked as can be.

Photo credit to Natalie Webster.

Hiding under that pretty dress are black sneakers because my daughter won’t wear much else!

Following the prom, we celebrated Julia’s 18th birthday. Not sure if you remember but last year I made a cake for her 17th birthday and was not entirely successful!

This was one ugly cake!

This year Julia asked for the same yellow cake with strawberry filling and chocolate frosting. I wanted to use a cake mix again but with better results. My trusty internet sources advised adding an extra egg yolk and replacing the required water with milk. I did both of these, though I used almond milk to keep it dairy free for my husband. Also, another site suggested adding a couple of tablespoons of any pudding mix that would match the flavor of the cake. I had an old box of butterscotch pudding that likely expired in 2010 or so. I opened it and added two tablespoons and tossed the rest. Guess what? It worked wonderfully.

Such an improved version!

Julia was happy and we are hoping her wishes come true for this year!

With all of this, plus two different awards nights at school, I haven’t done tons of sewing. One thing I am working on though is quilting a top given to me by a family friend. She actually donated three finished quilts to Mercyful Quilts. Then she sent me four tops she had, asking if I would finish them and donate those as well. I don’t normally do this because it takes a bit of time which I am sorely lacking, but she was so sweet to donate the other quilts and I agreed. I know they all won’t be finished terribly soon but I am working on the first one.

This string quilt was probably made a while back. There are many fabrics that look to be circa 1980’s and it is very pretty. Unfortunately, it doesn’t lie anywhere close to flat. I don’t think these string blocks were pieced with any sort of foundation paper or fabric, making them quite stretchy. I pressed it and starched it before pin basting. While pin basting, I took little tucks all over the place and hand stitched them which really helped. When I get to those bits, I quilt heavily over them so they won’t come apart. I am just using a loopy meander which is quite forgiving when I come to a section that is wavy. After binding and washing this it will, hopefully, crinkle up and be very cozy.

The backing is from the sale section in my shop. It is an Oval Elements piece from Art Gallery Fabric. Fabric for the binding has yet to be selected though. I am just about out of thread (which is silly since I am quilting it with white thread) so I won’t get too much farther on this today. I am counting this as my one project for Hands 2 Help and it should be finished early next week.

The quilts continue to arrive for Mercy Hospital and the Mercyful Quilts drive. The Hands 2 Help event at Confessions of a Fabric Addict has been amazing. I cannot even believe the number of quilts made for all of these deserving organizations . Just so inspiring. Some quilters have made 4 or 5 quilts – some even more than that. I have this stack and another box full ready for pick up. Judging by the emails I have received and blog posts I am reading, there are many more on the way. Thank you to all of you generous quilters!!

I hope everyone has a lovely long weekend. In the US, Monday is Memorial Day which many mark as the beginning of summer. We have had rainy, gloomy weather all week so it sure doesn’t feel summery here!