Category Archives: Garment Sewing

A Sweet Finish

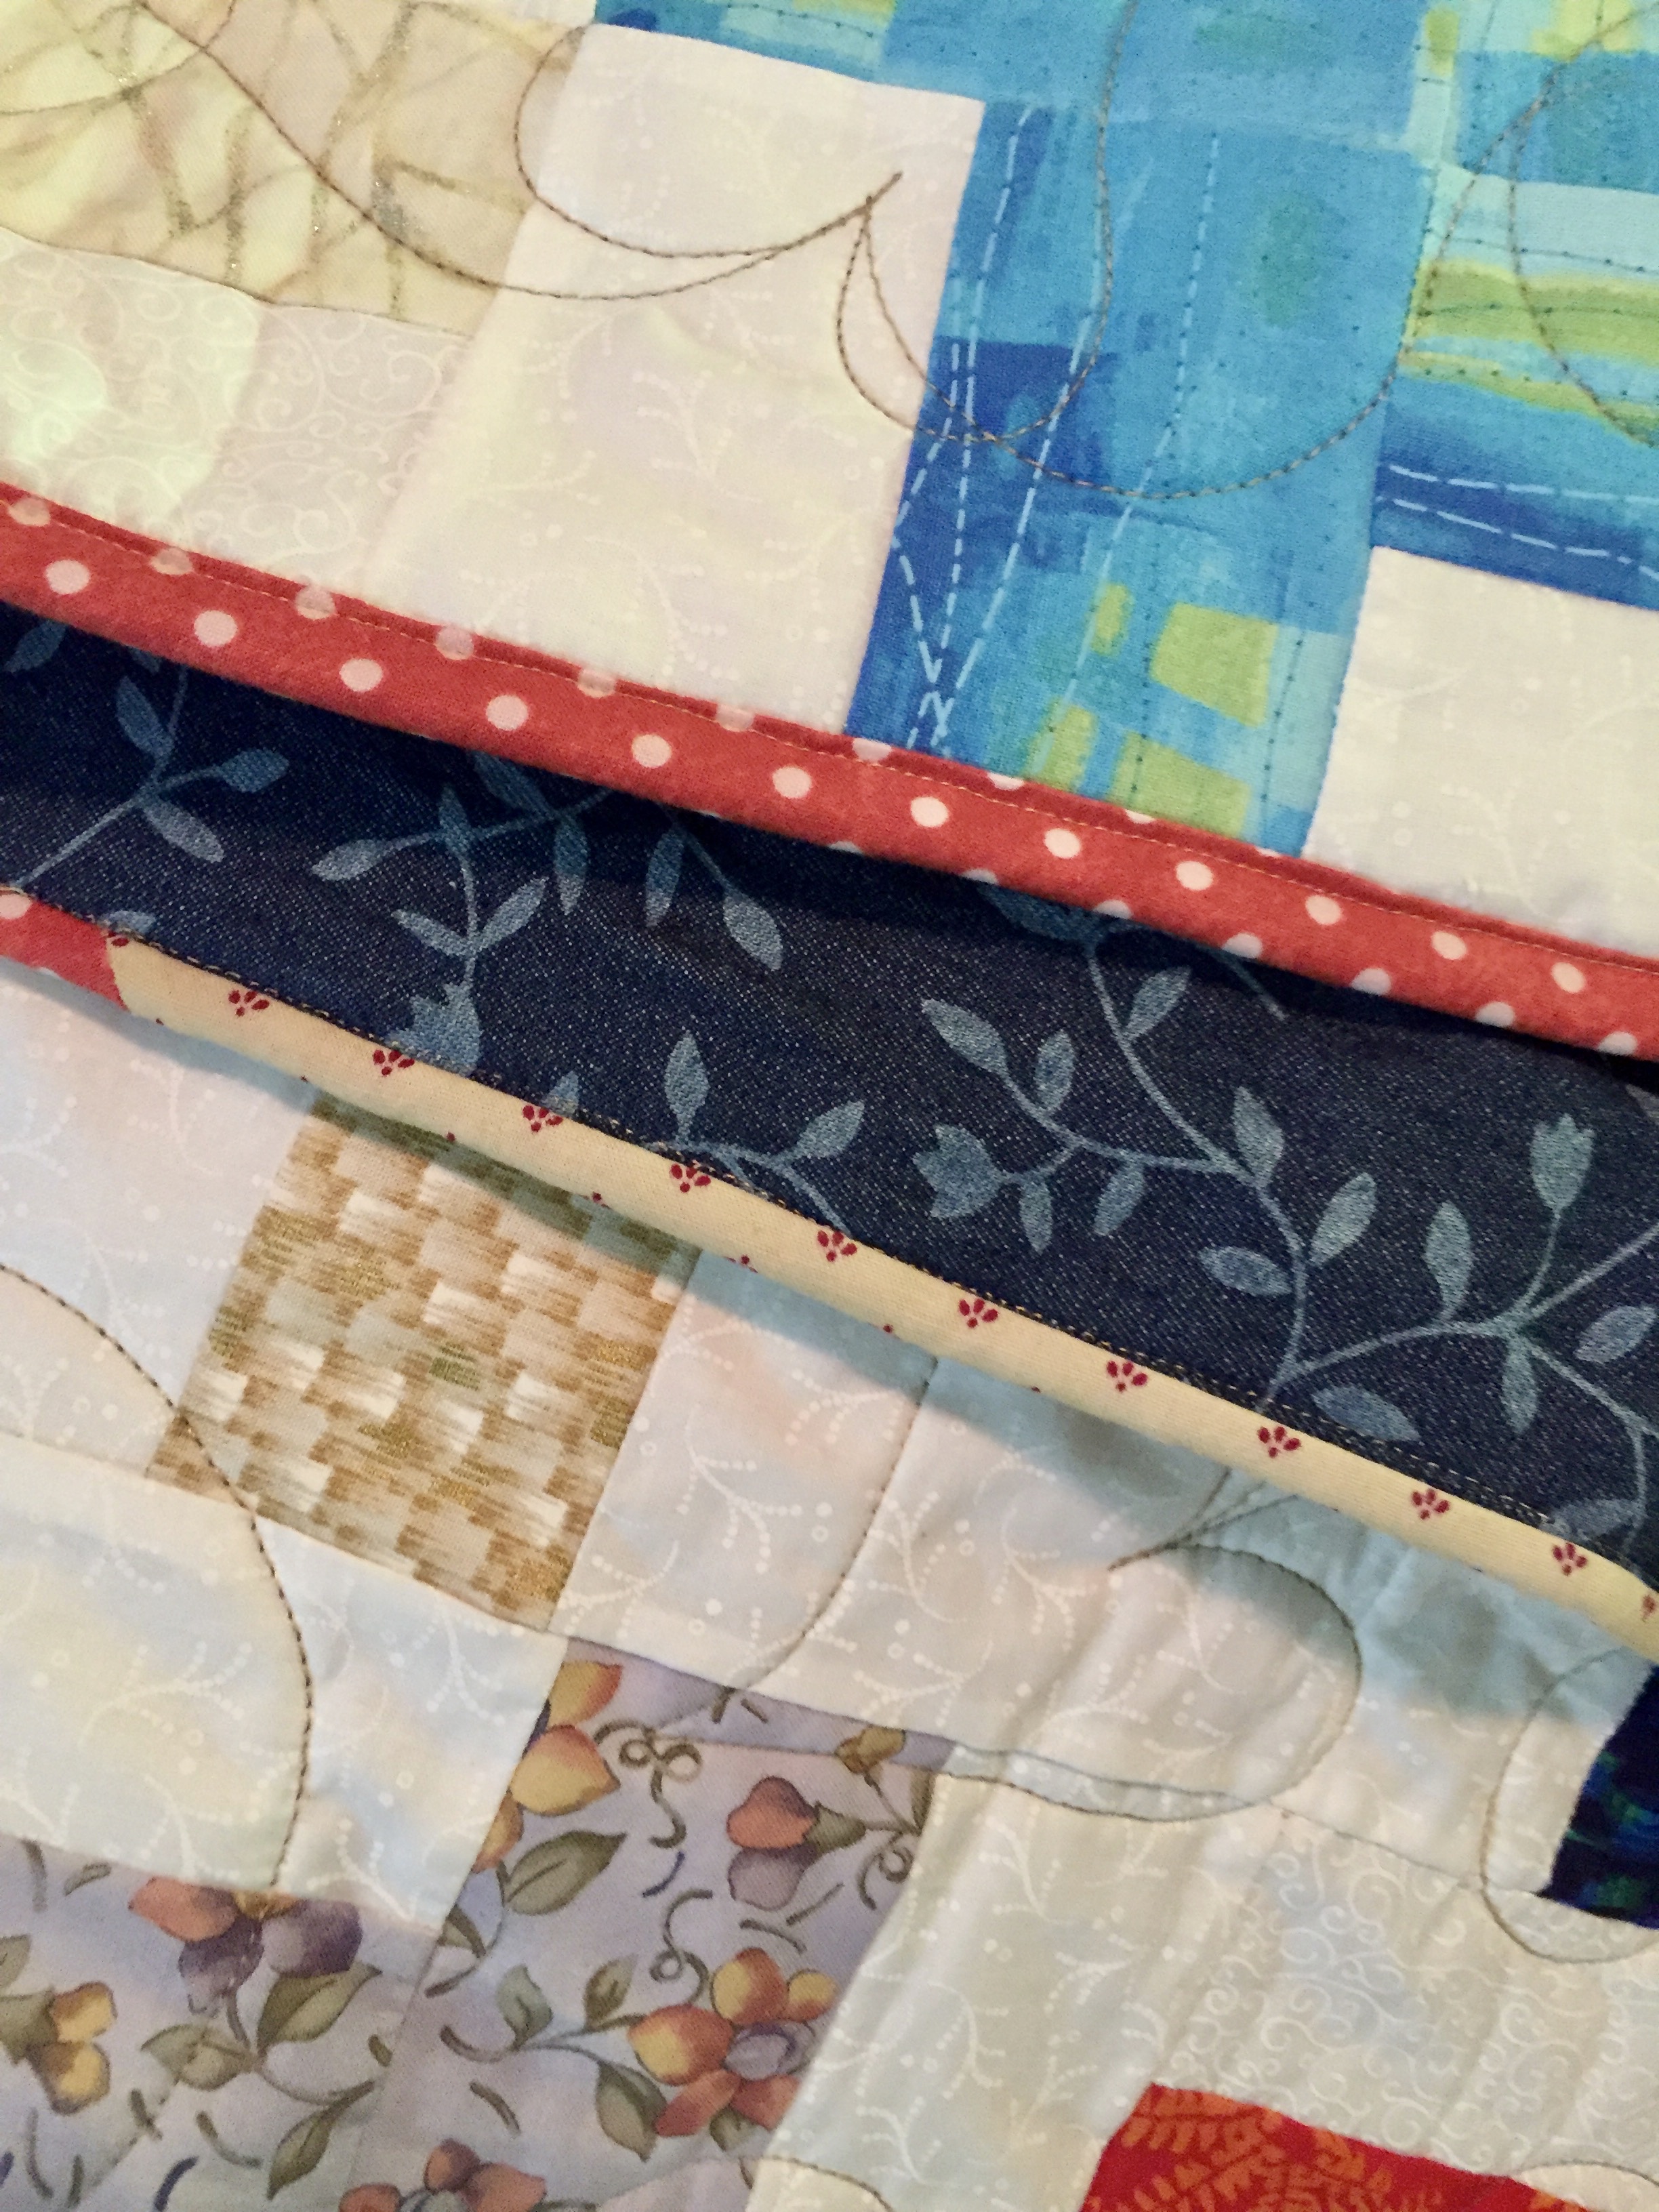
Today I found myself getting frustrated because I have so much I should be doing and no energy.  After a two day migraine it usually takes me two or three days to get back on track.  This weekend is a big one because my son is getting married on Saturday.  My kids all come home on Thursday which is so great.  Anyway, I felt like I should be cleaning house or doing yard work, etc and really my body is rebelling and saying I should take it easy.  So I went in the sewing room.  Time in the sewing room is often a cure-all, right??

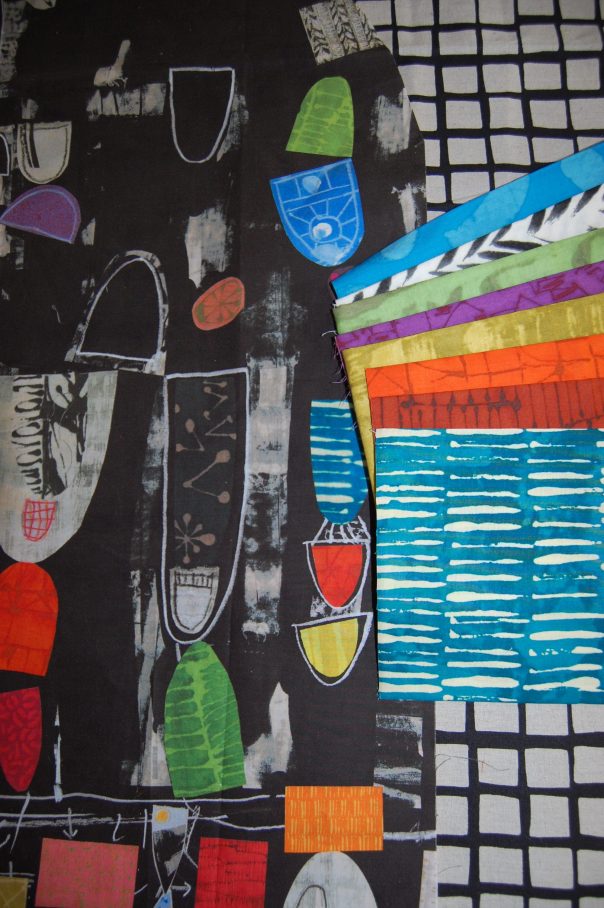
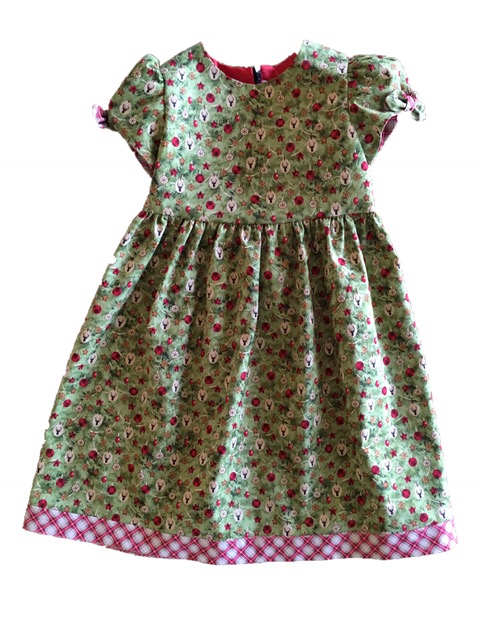
New Look Pattern 6578 and Radiant Menagerie Fabric by BariJ

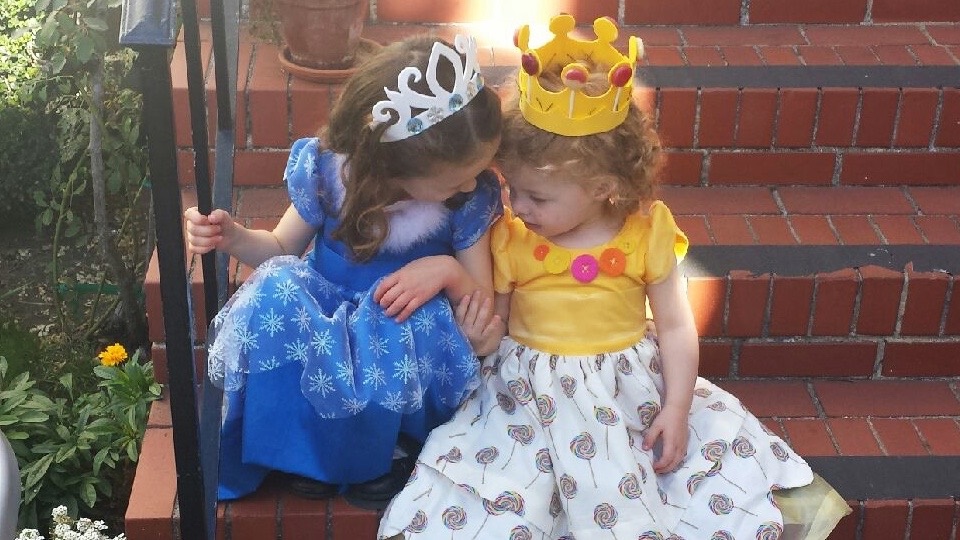
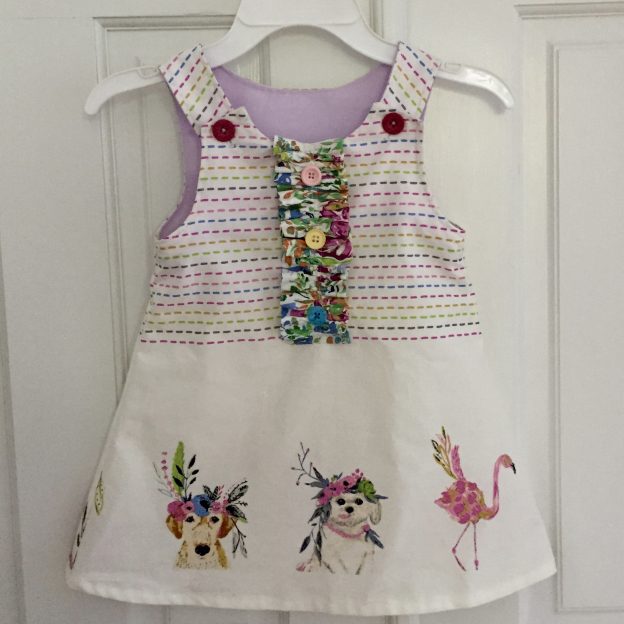
I had most of this cute little dress made already.  I started it at the beginning of August and when it came time to put the buttonholes on it (a task I dislike) I hung it up in the closet and pretended it wasn’t there. But it is so cute and it called to me this morning so I pulled it out. I wanted to make it for my grand daughter but it is late in the season so I made a size 3T in the hopes she will wear it next summer.

The fabric is called Radiant Menagerie (from Indigo & Aster) and was designed by the talented BariJ.  I LOVE her aesthetic and carry a lot of her fabric in my shop (Wild Bloom, Indigo and Aster and now Virtuosa.)  If you aren’t familiar with BariJ, she is a talented artist whose work is often quite feminine and usually features large floral designs.  Her paintings are very pretty and some are quite whimsical.  Take a look at her work here.

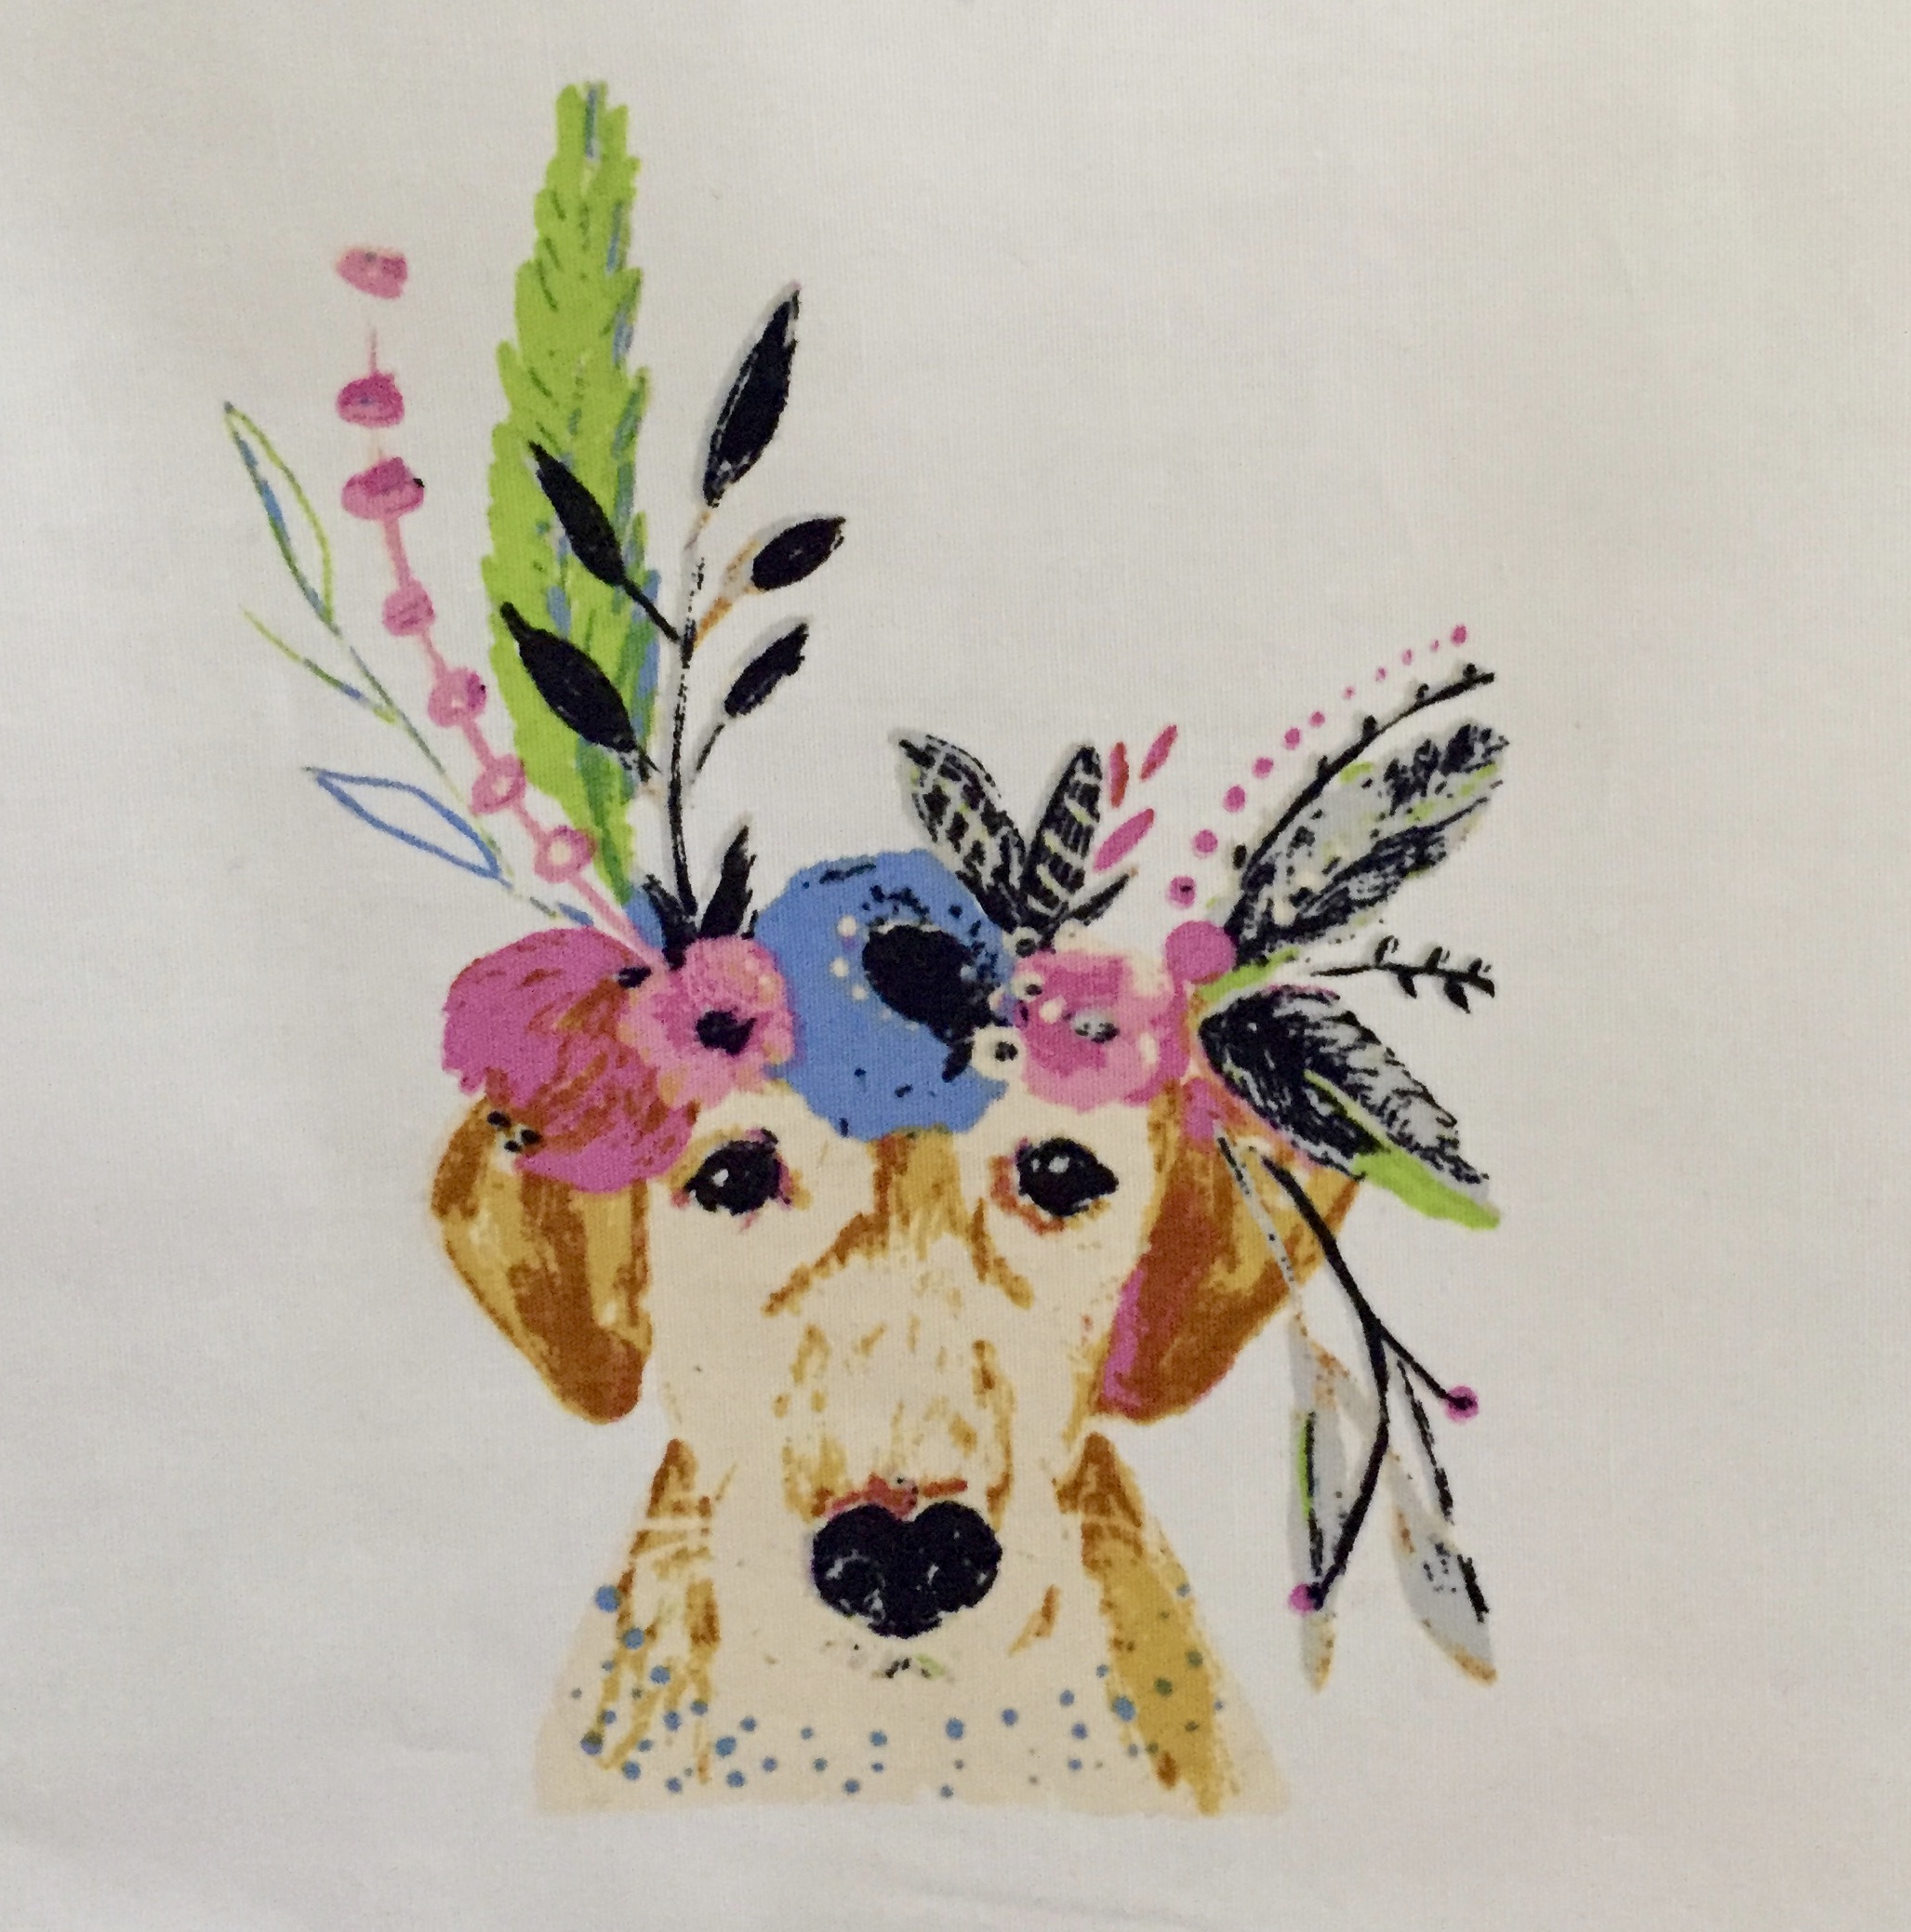
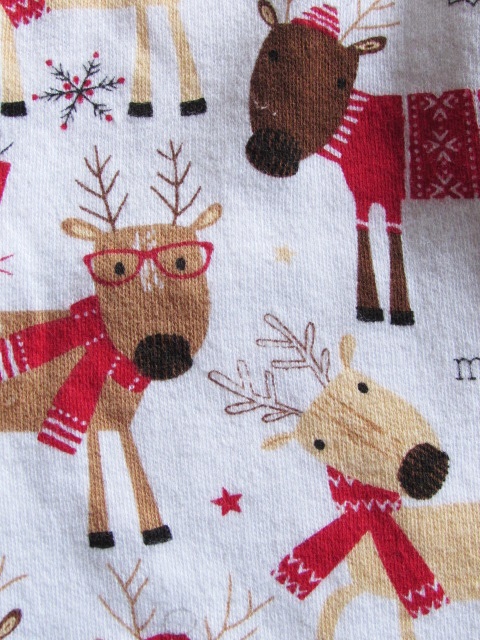
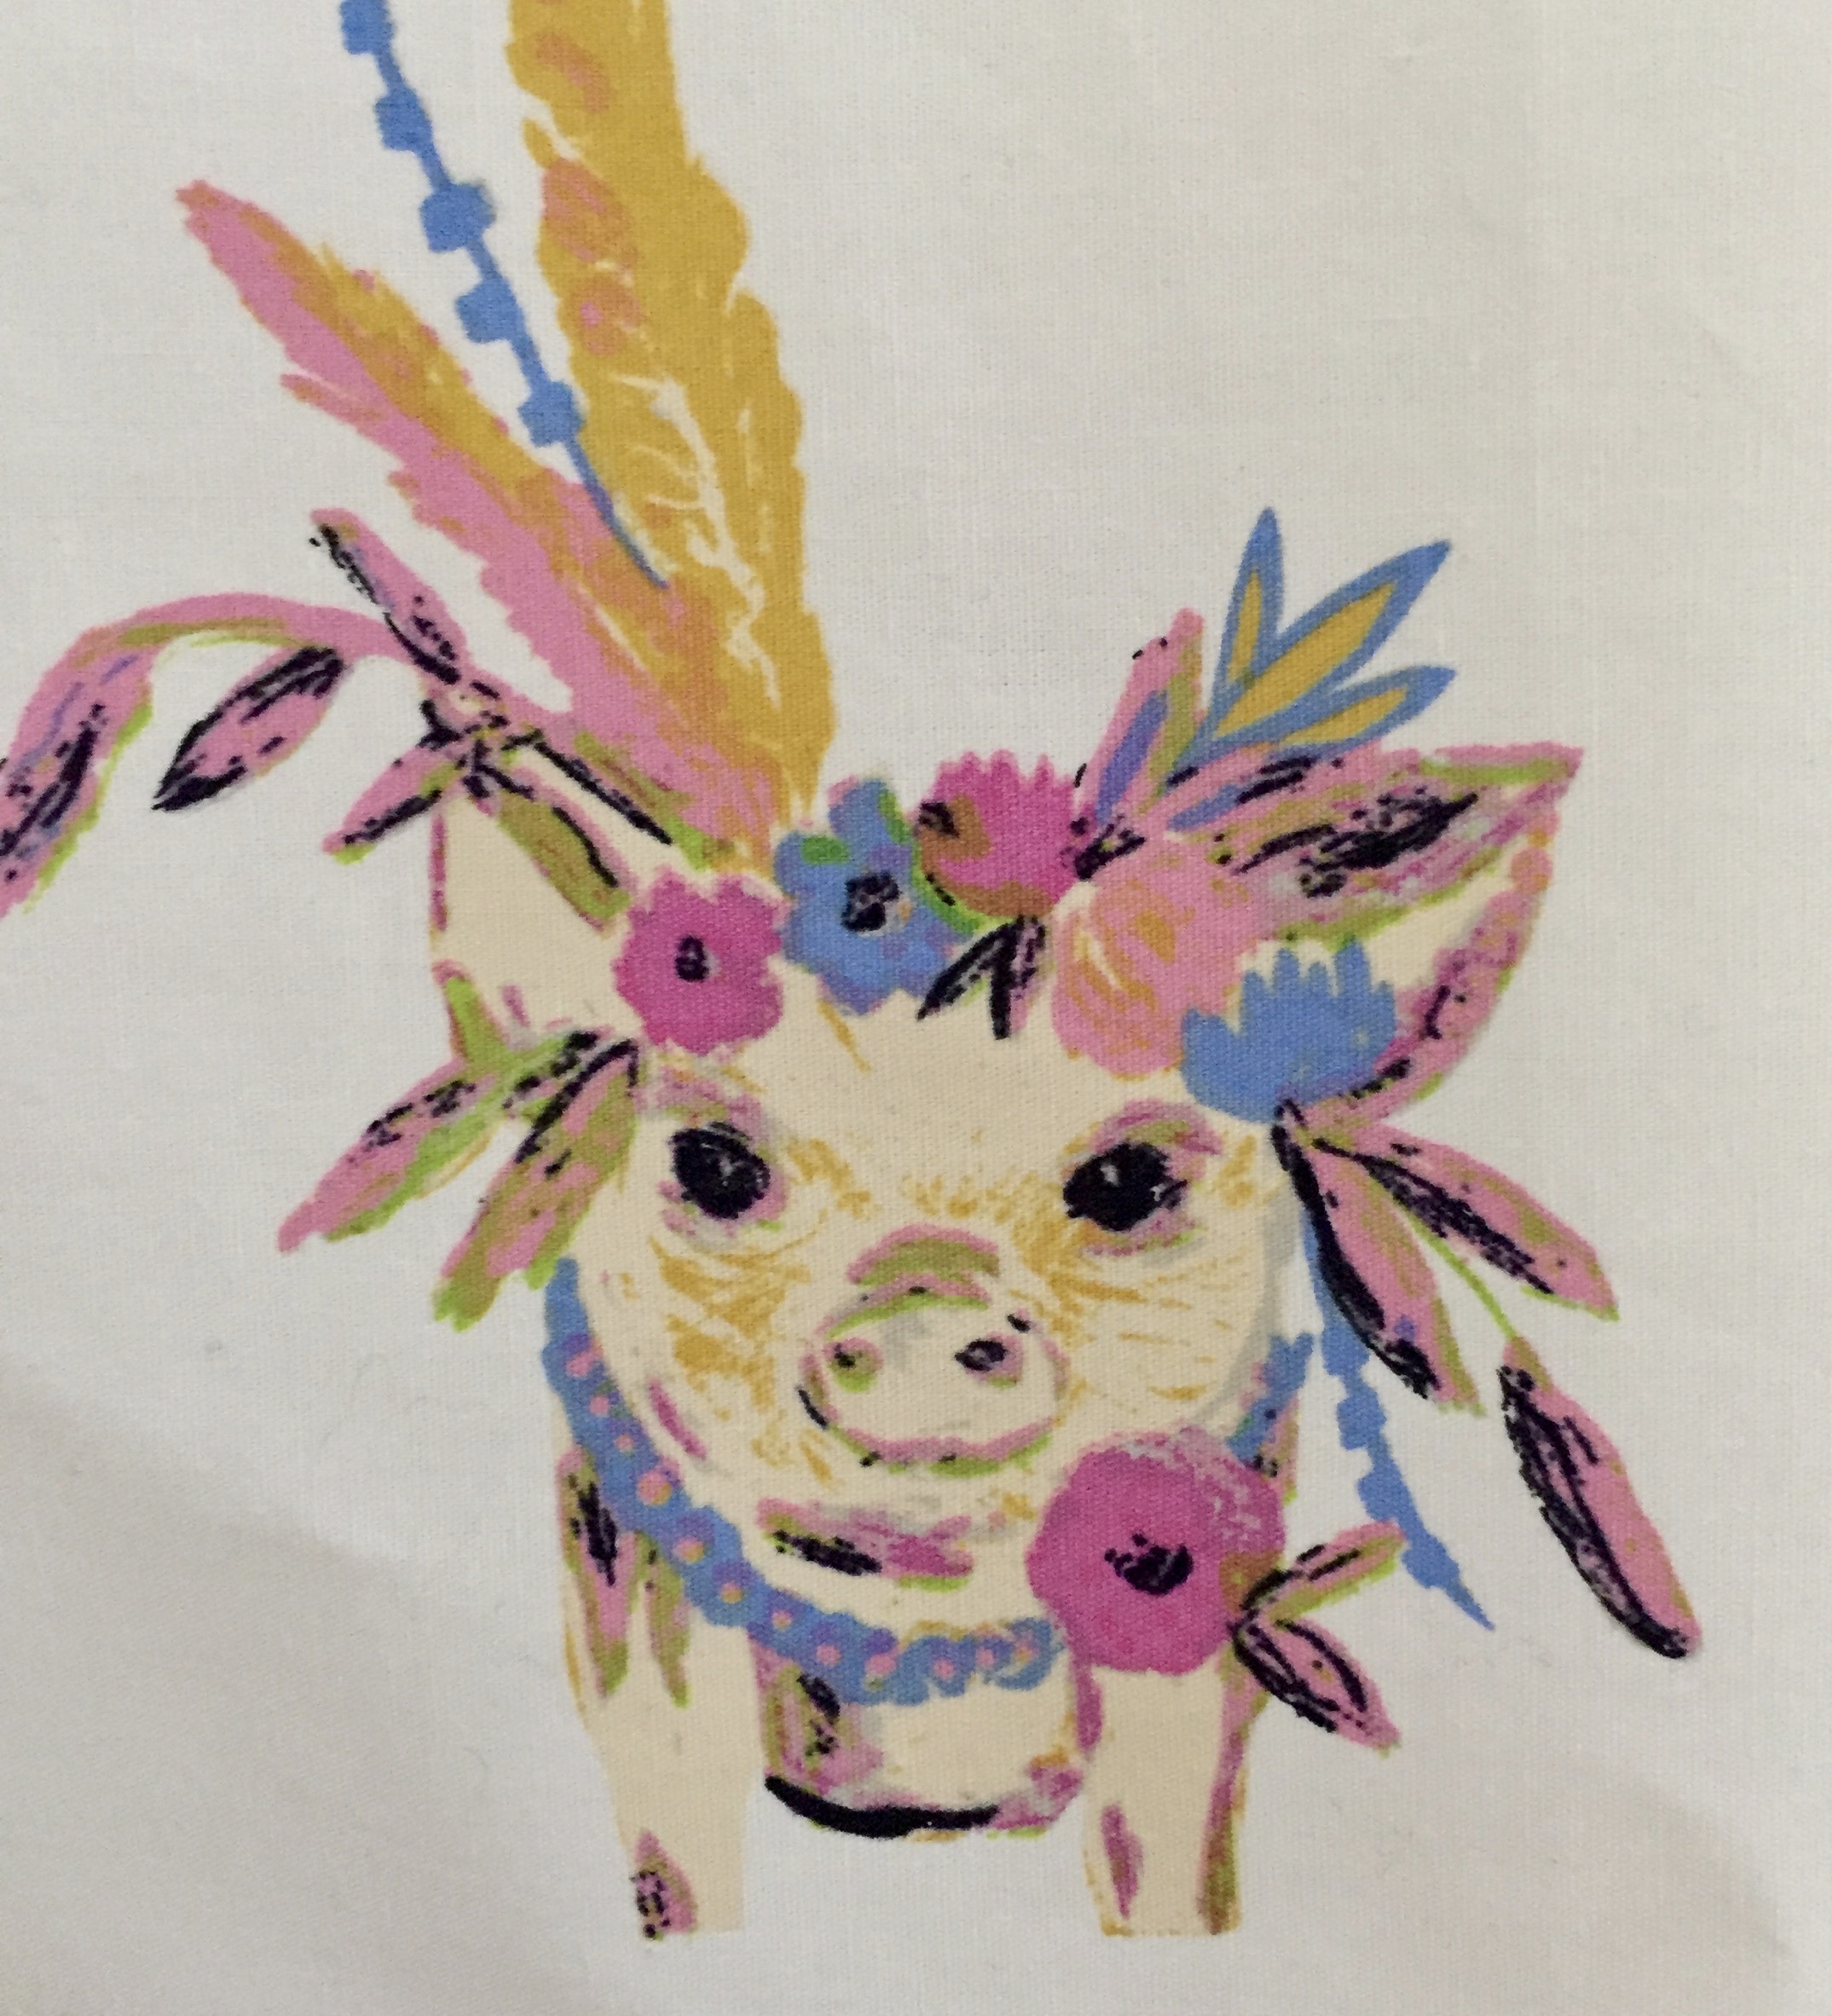
She has a lot of animals sporting floral crowns and I was thrilled to see her include them in the Indigo & Aster line (produced by Art Gallery Fabric).

Probably my favorite of the animals, no surprise there, right?

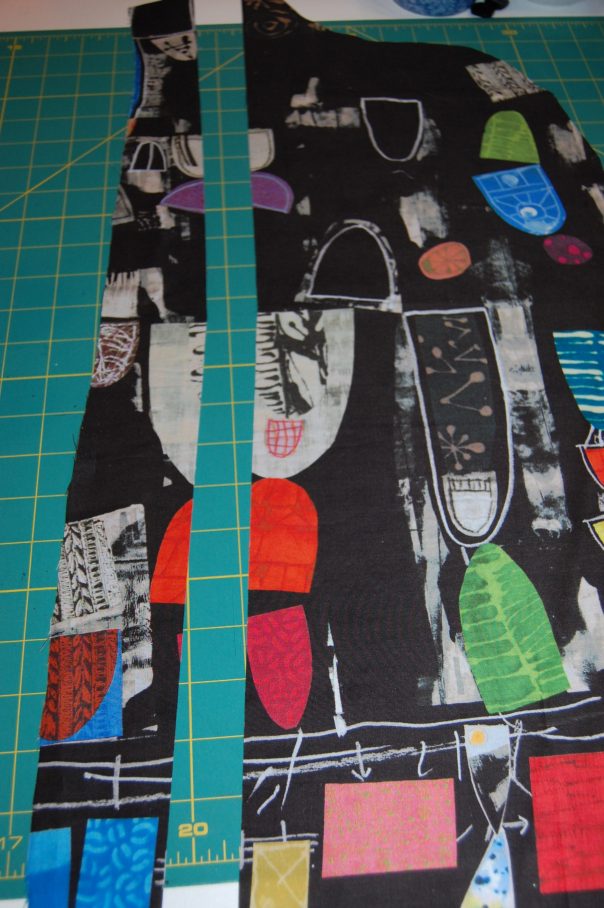
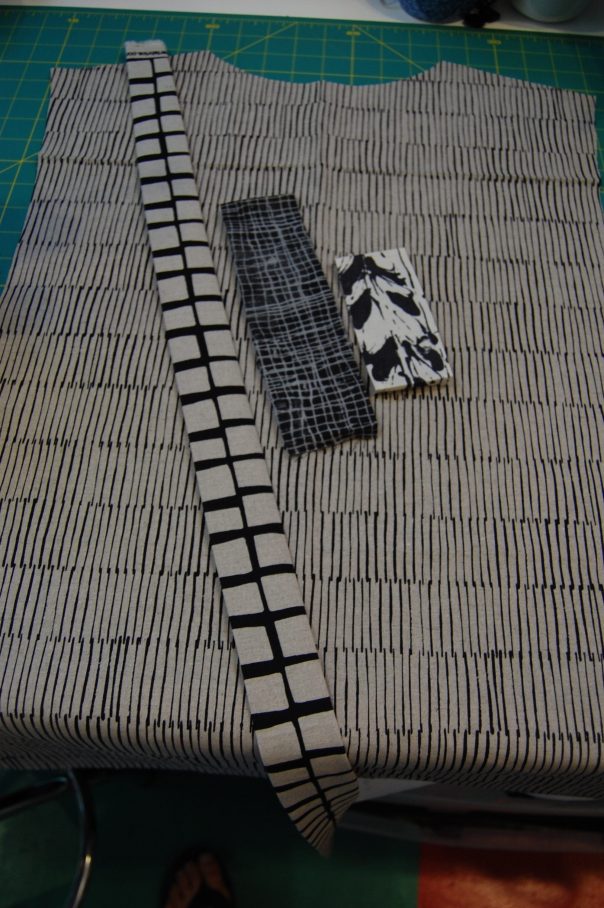
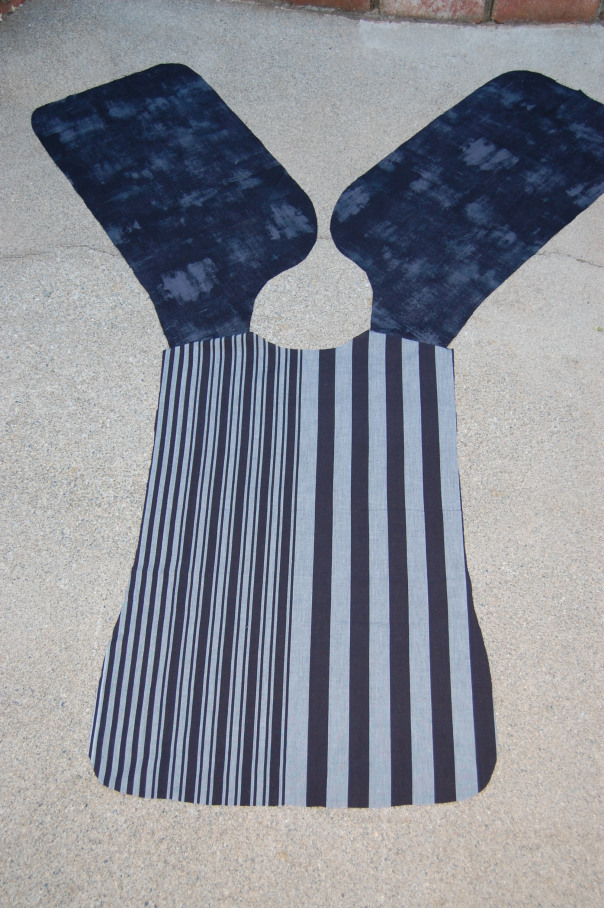
The fabric that features the animals is called Radiant Menagerie and is a border fabric of sorts.   Each selvage edge is lined with the various animals.

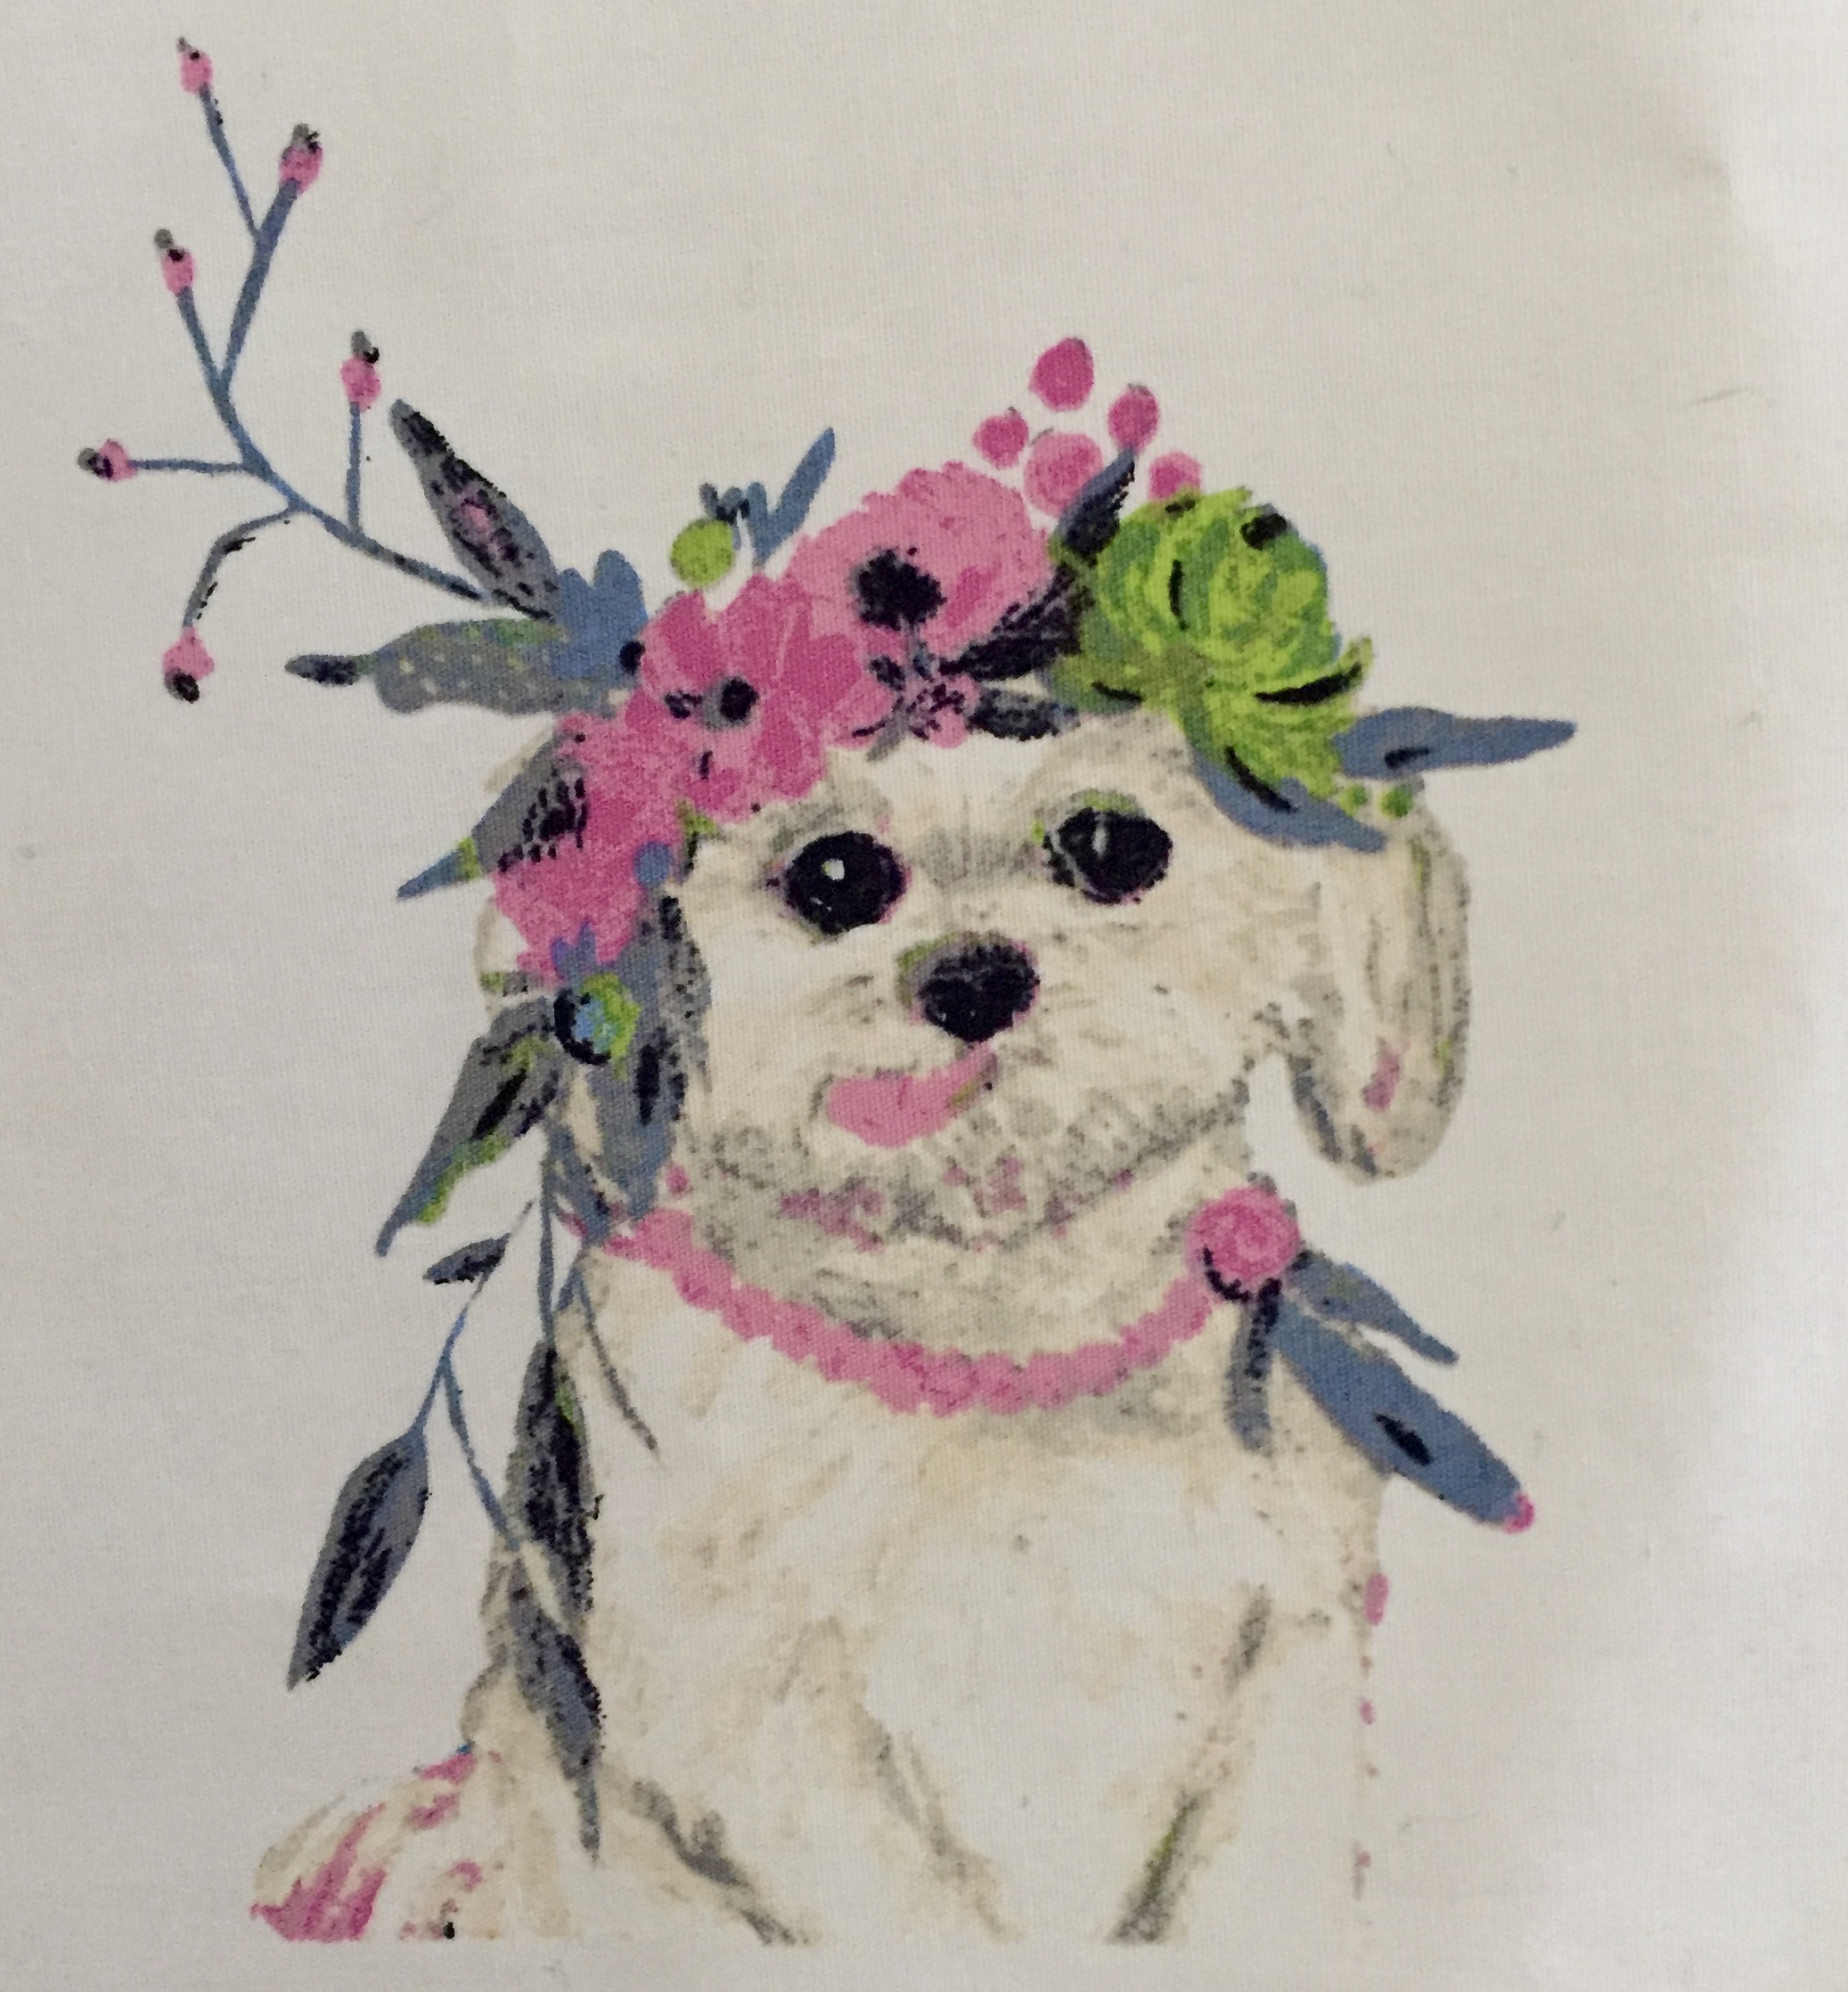
In between the selvages are stripes in coordinating colors or pink, orange, green and blue.  The stripes are actually dotted lines. So when using this piece in a quilt, it is simple to fussy cut the animals and then use the stripes as a coordinate.

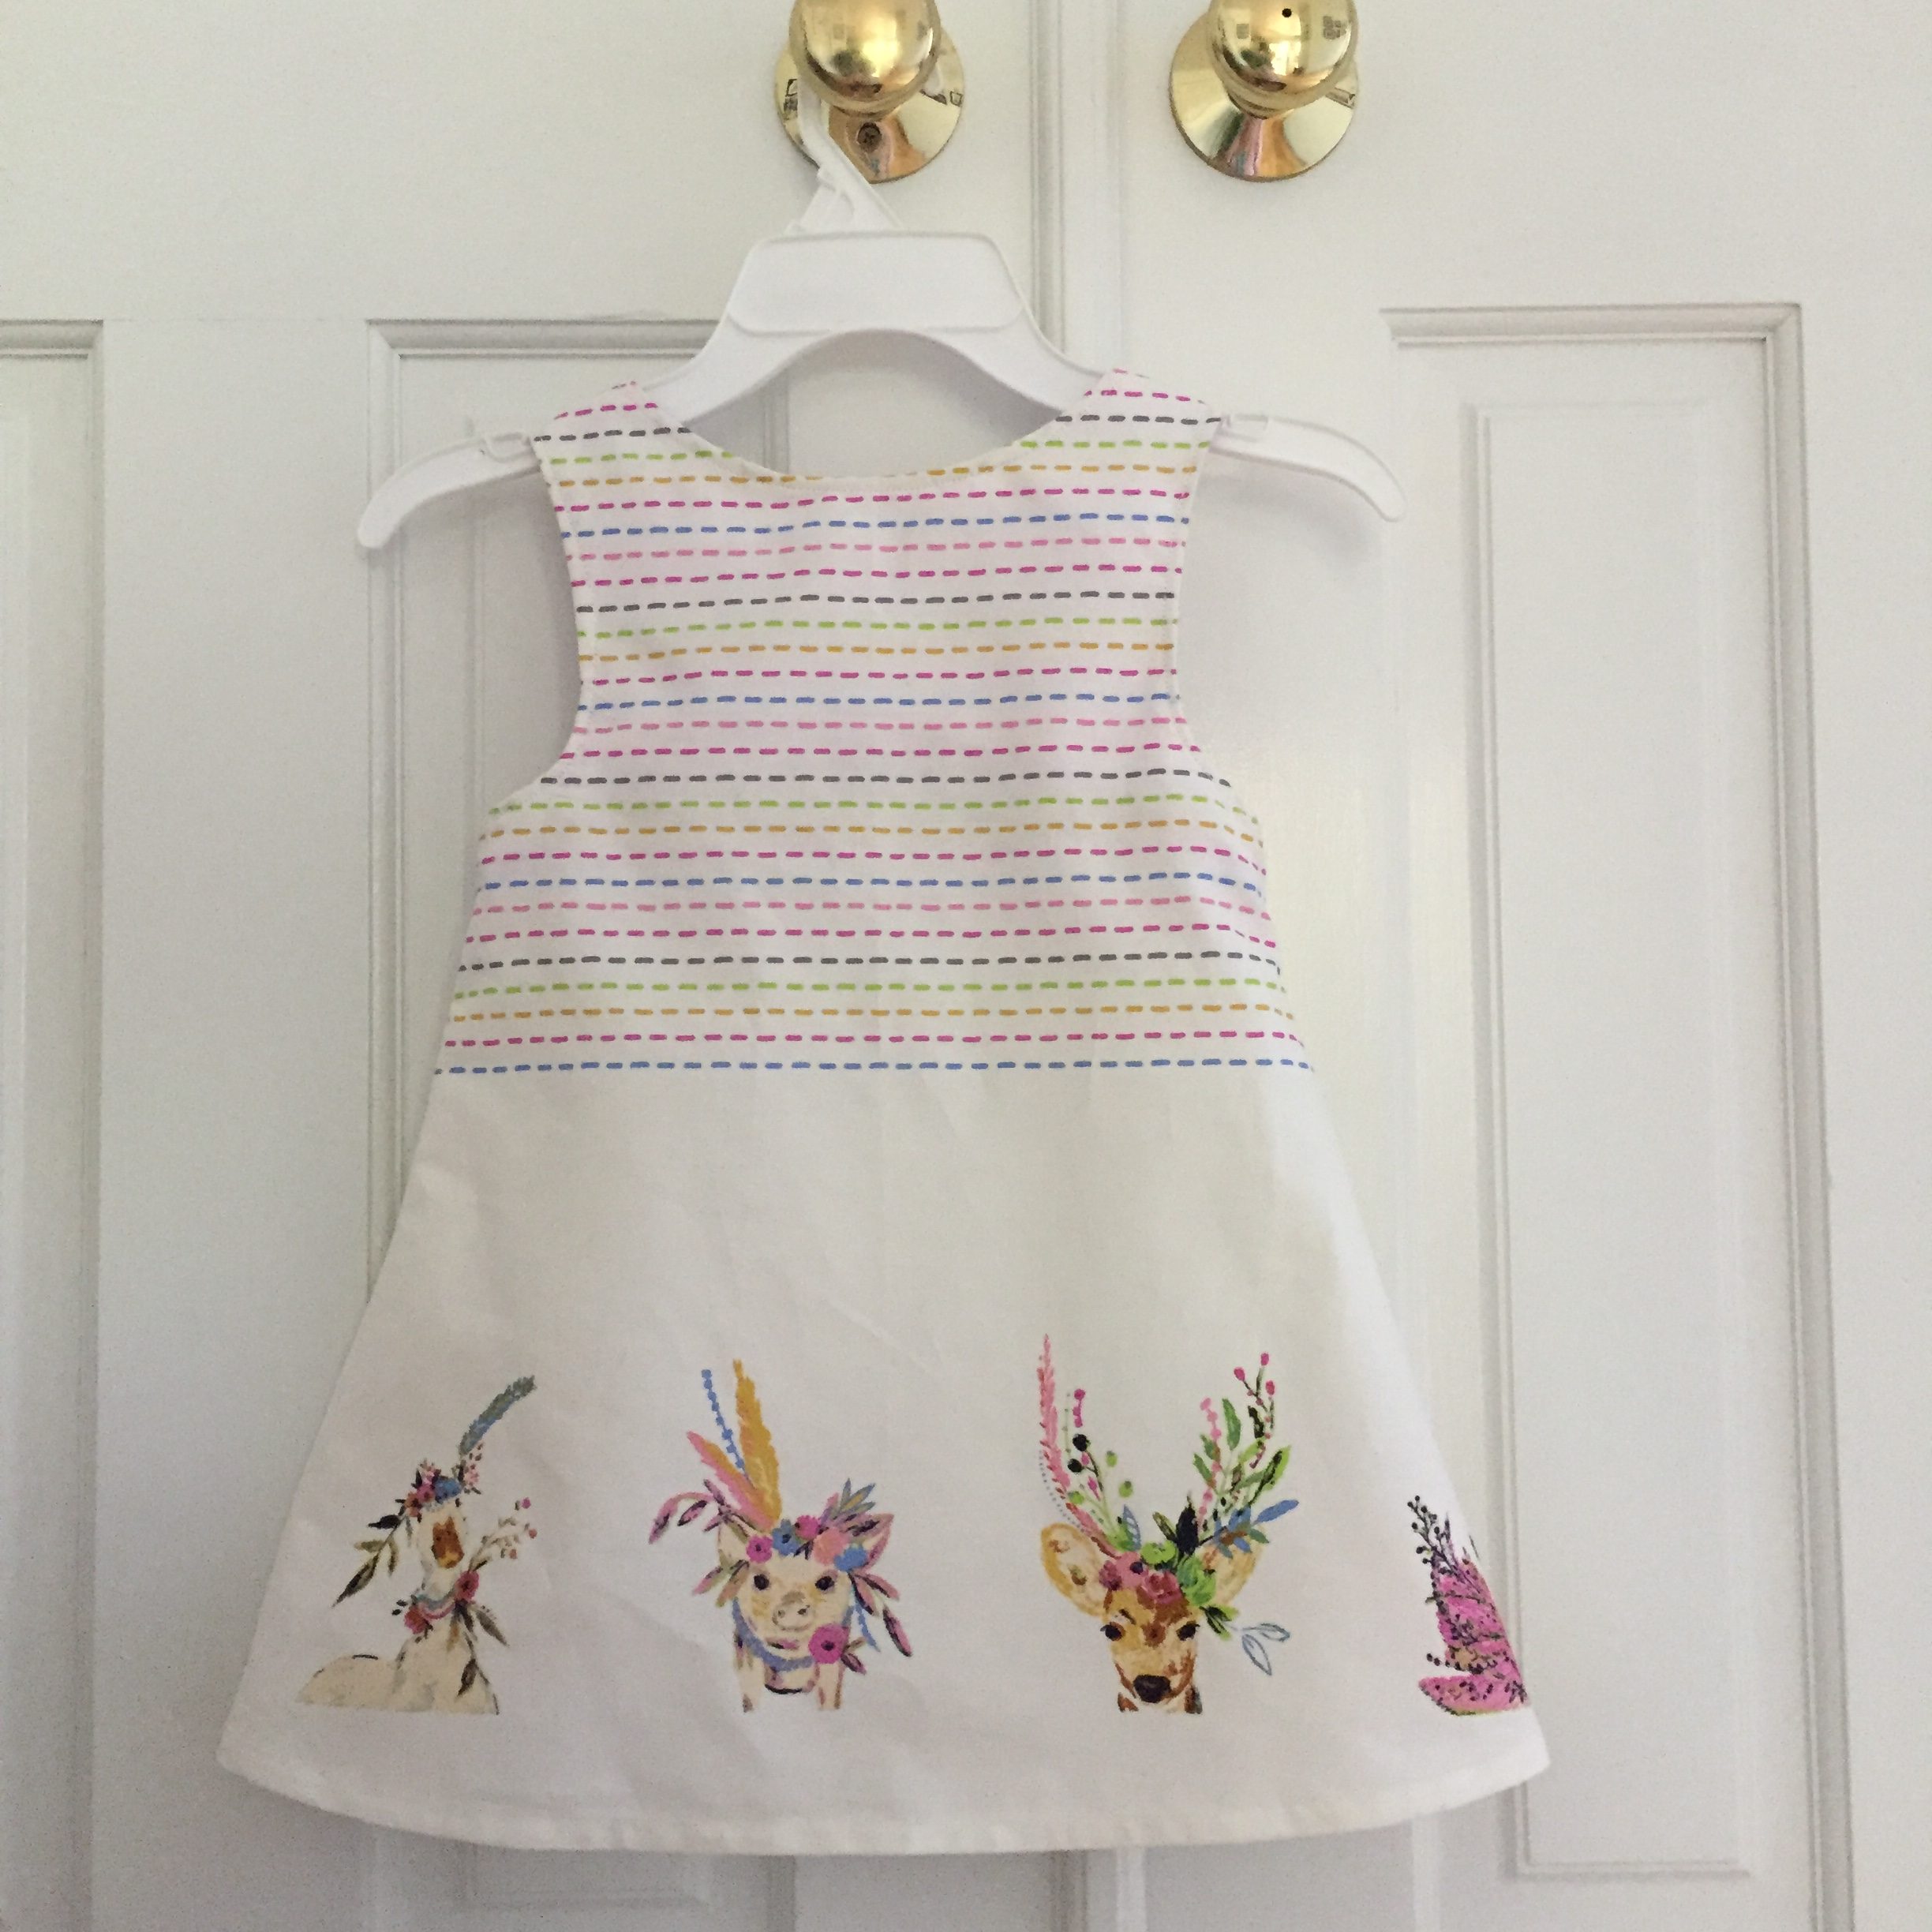
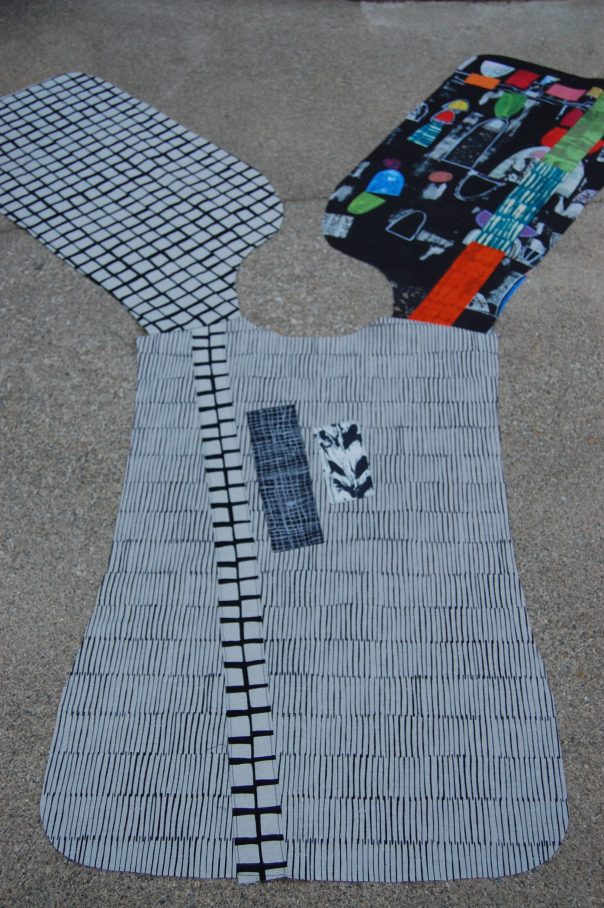
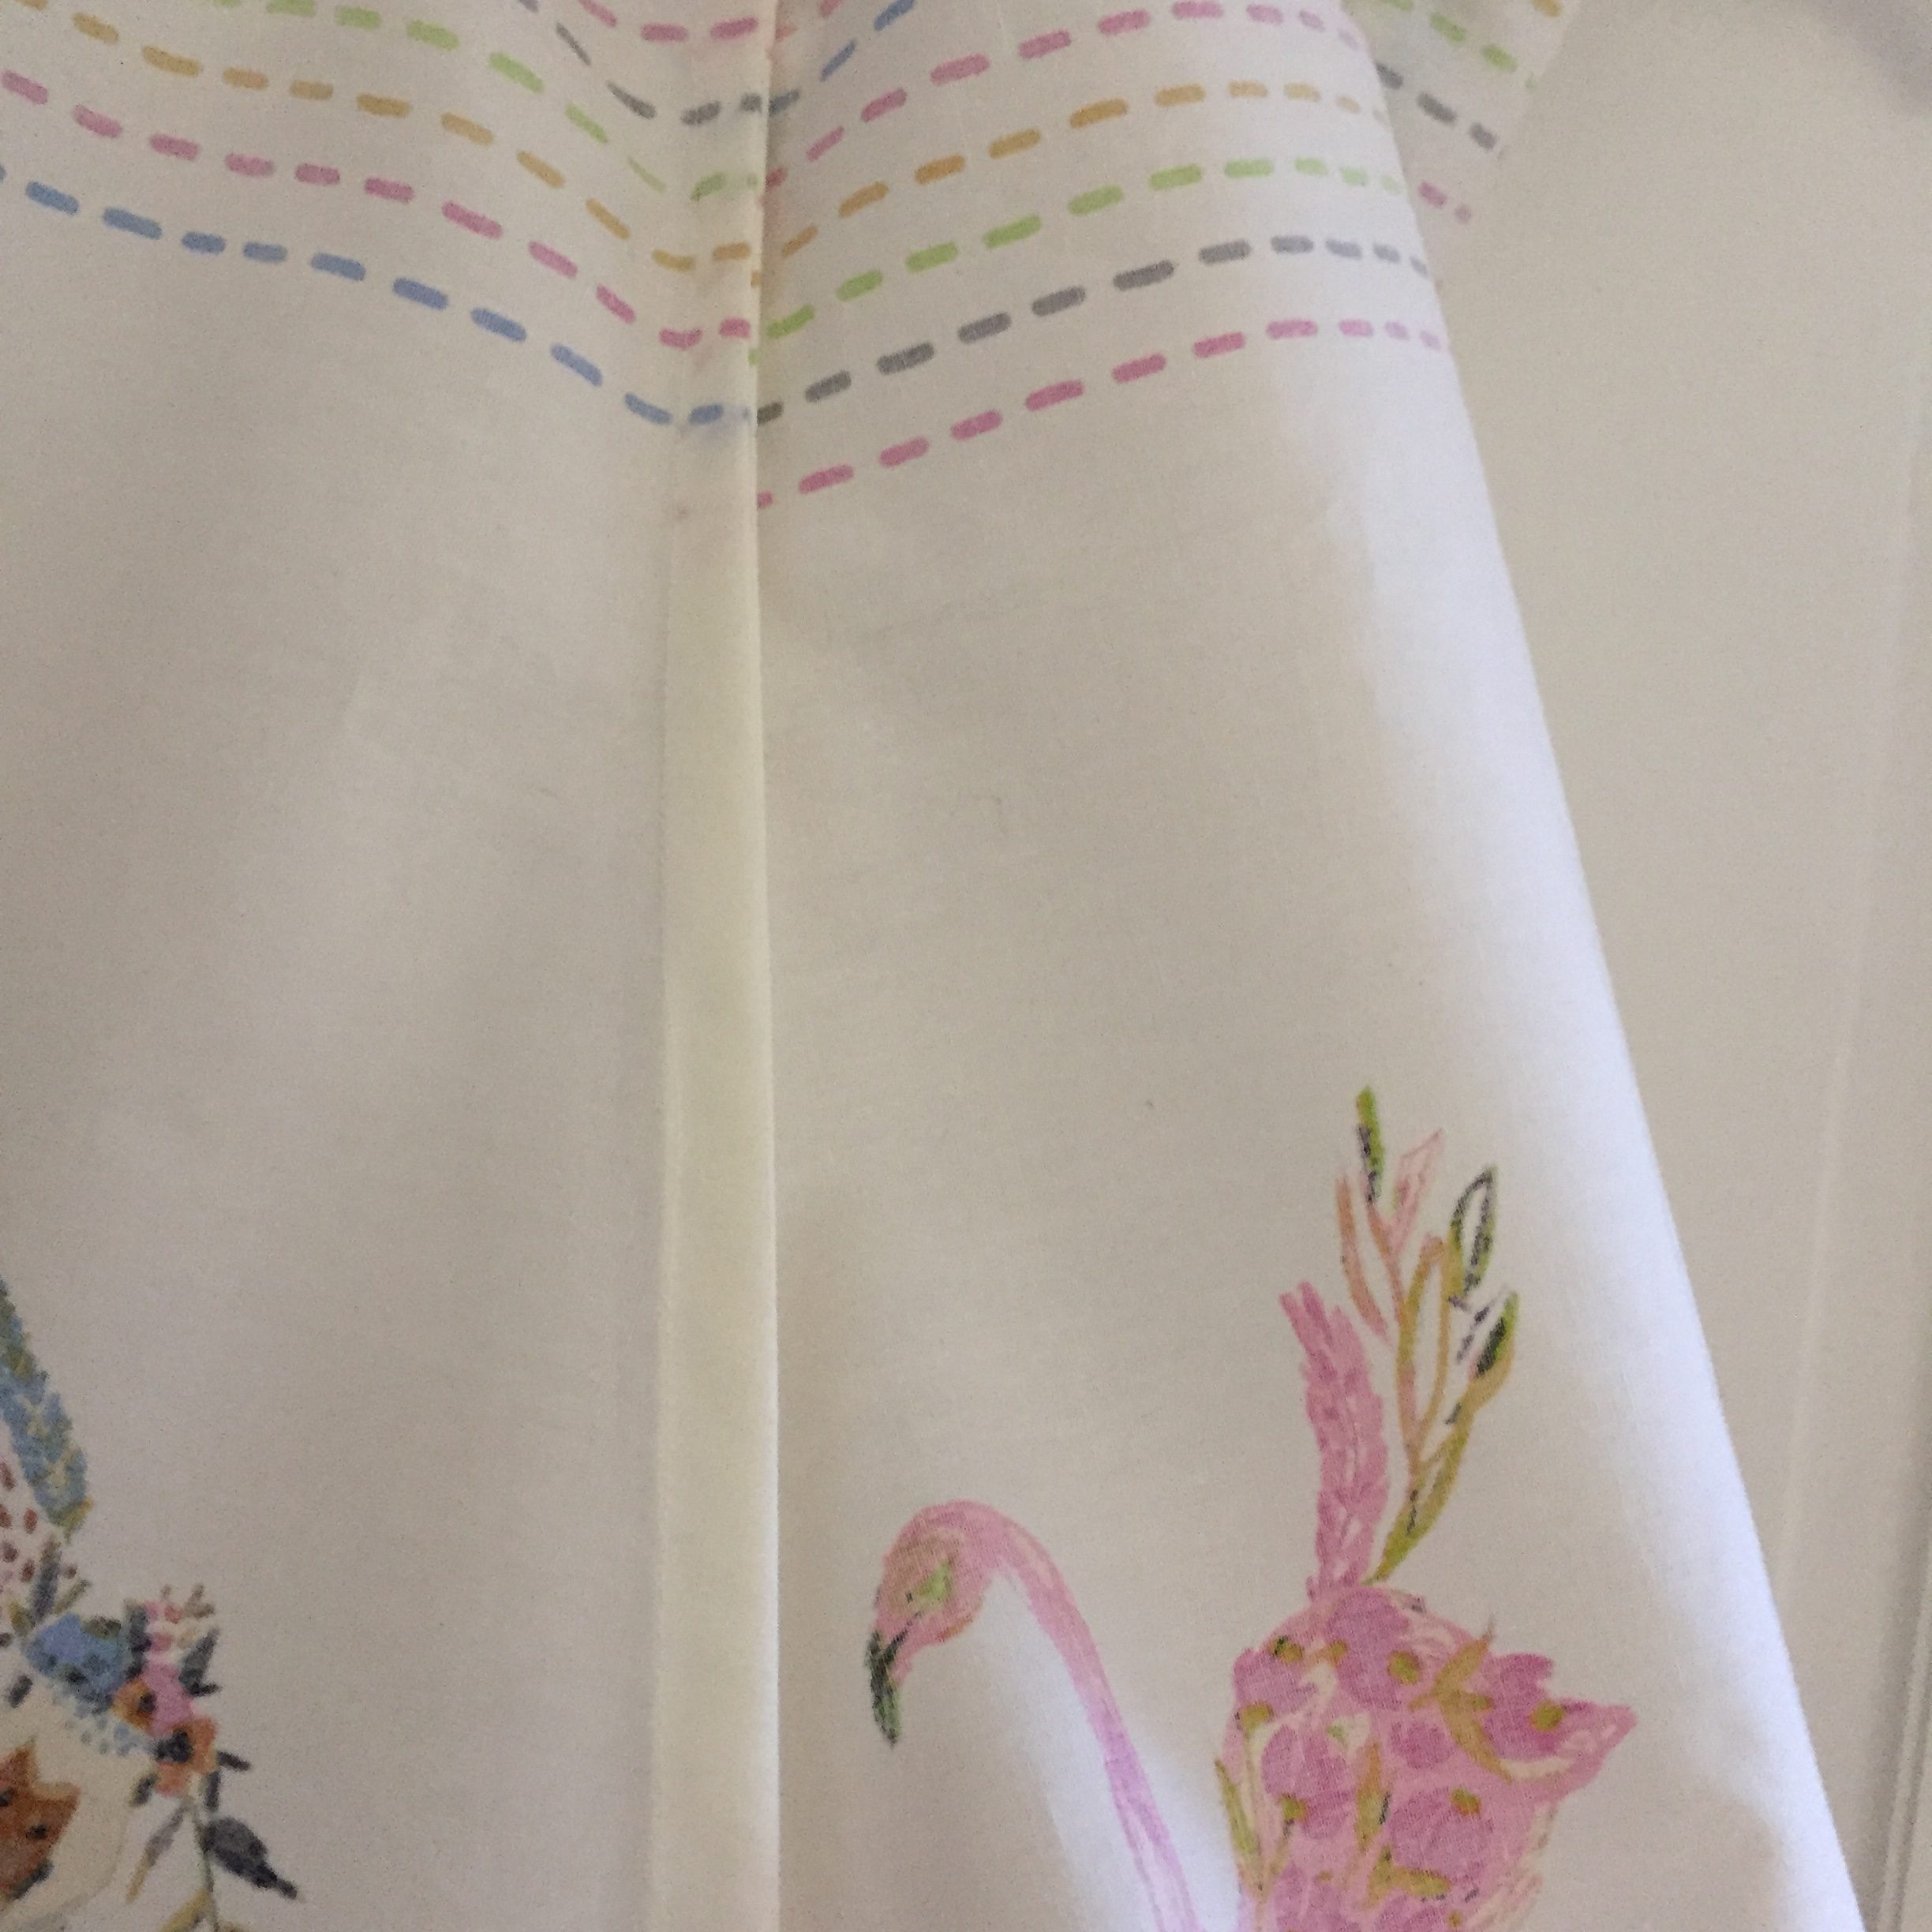
I wanted to use this as a dress so I was careful to choose a simple pattern with a straight hemline (as opposed to curved.)  This enabled me to use the striped portion as the bodice of the dress and the animals as the bottom.  The back side of the dress mirrors the front with animals parading across the bottom and the colorful stripe at the top.

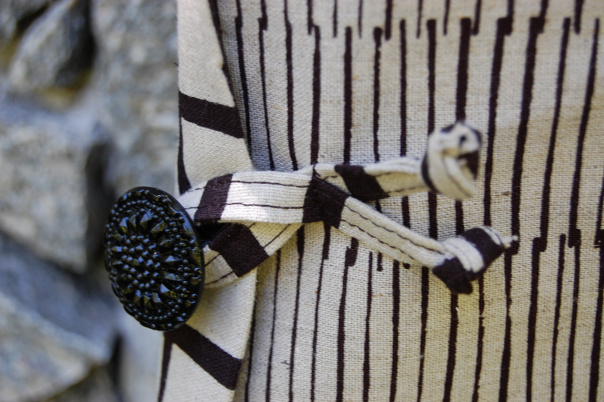
Front ruffle detailing.

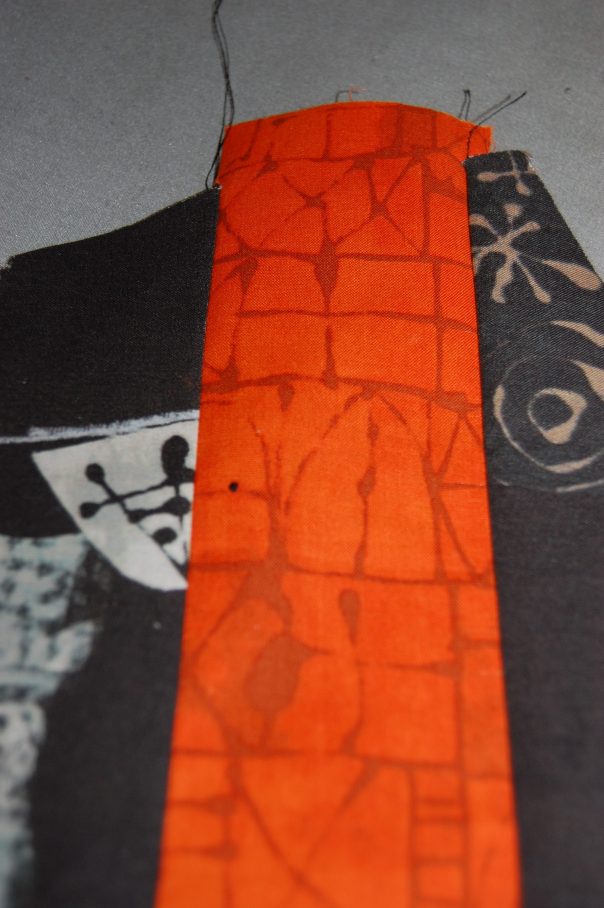
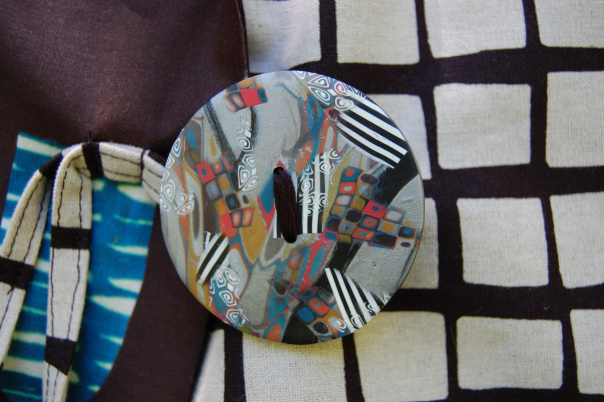
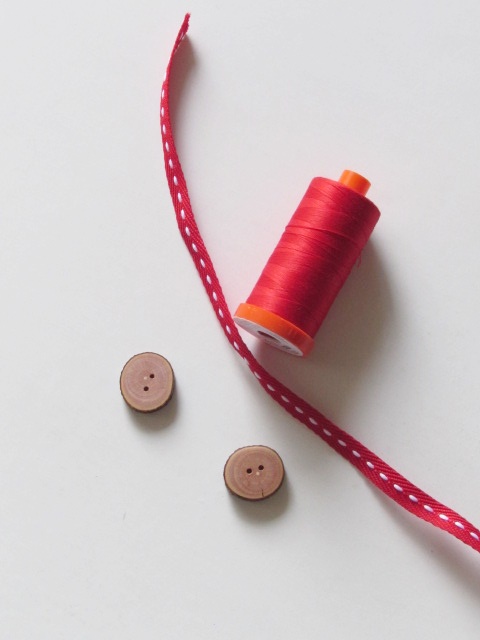
As if it wasn’t colorful enough already, I decided to take it a step further.  Using a four inch wide strip of La Floraison Lit (another piece in the line) I sewed a tube with the fabric and turned it right side out.  Then I ran two lines of stitching down the center (with a long, loose stitch) so I could gather that tube into a ruffle.  A quick hunt through my buttons resulted in these cute, colorful buttons to add to the ruffle.  I really like the extra detail this adds to the dress..

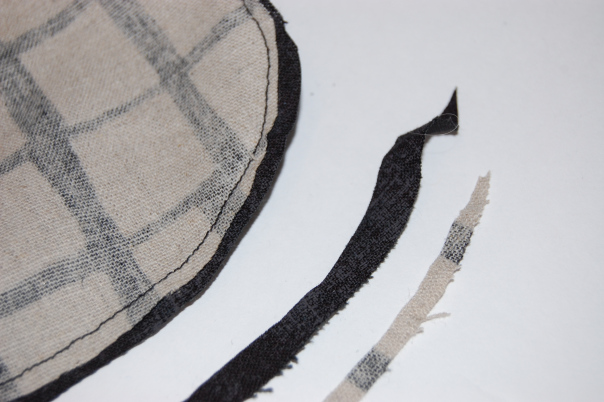
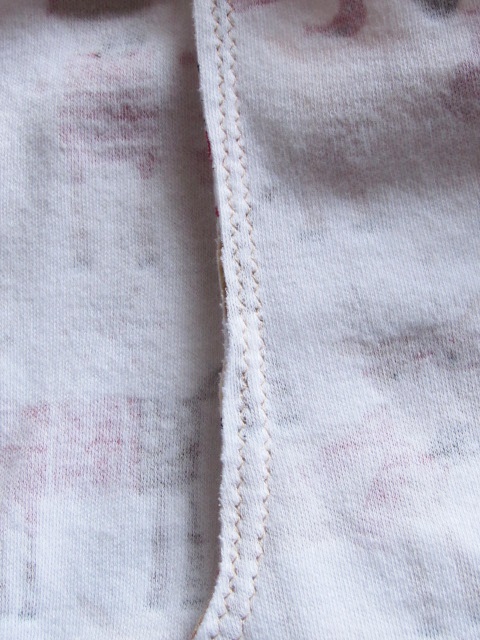
Finished French Seams

My serger is (still!) not cooperating with me so I finished the seams with French seams.  This will prevent any fraying.  I do love French seams.  They are easy and give a really nice finished look to the garment.

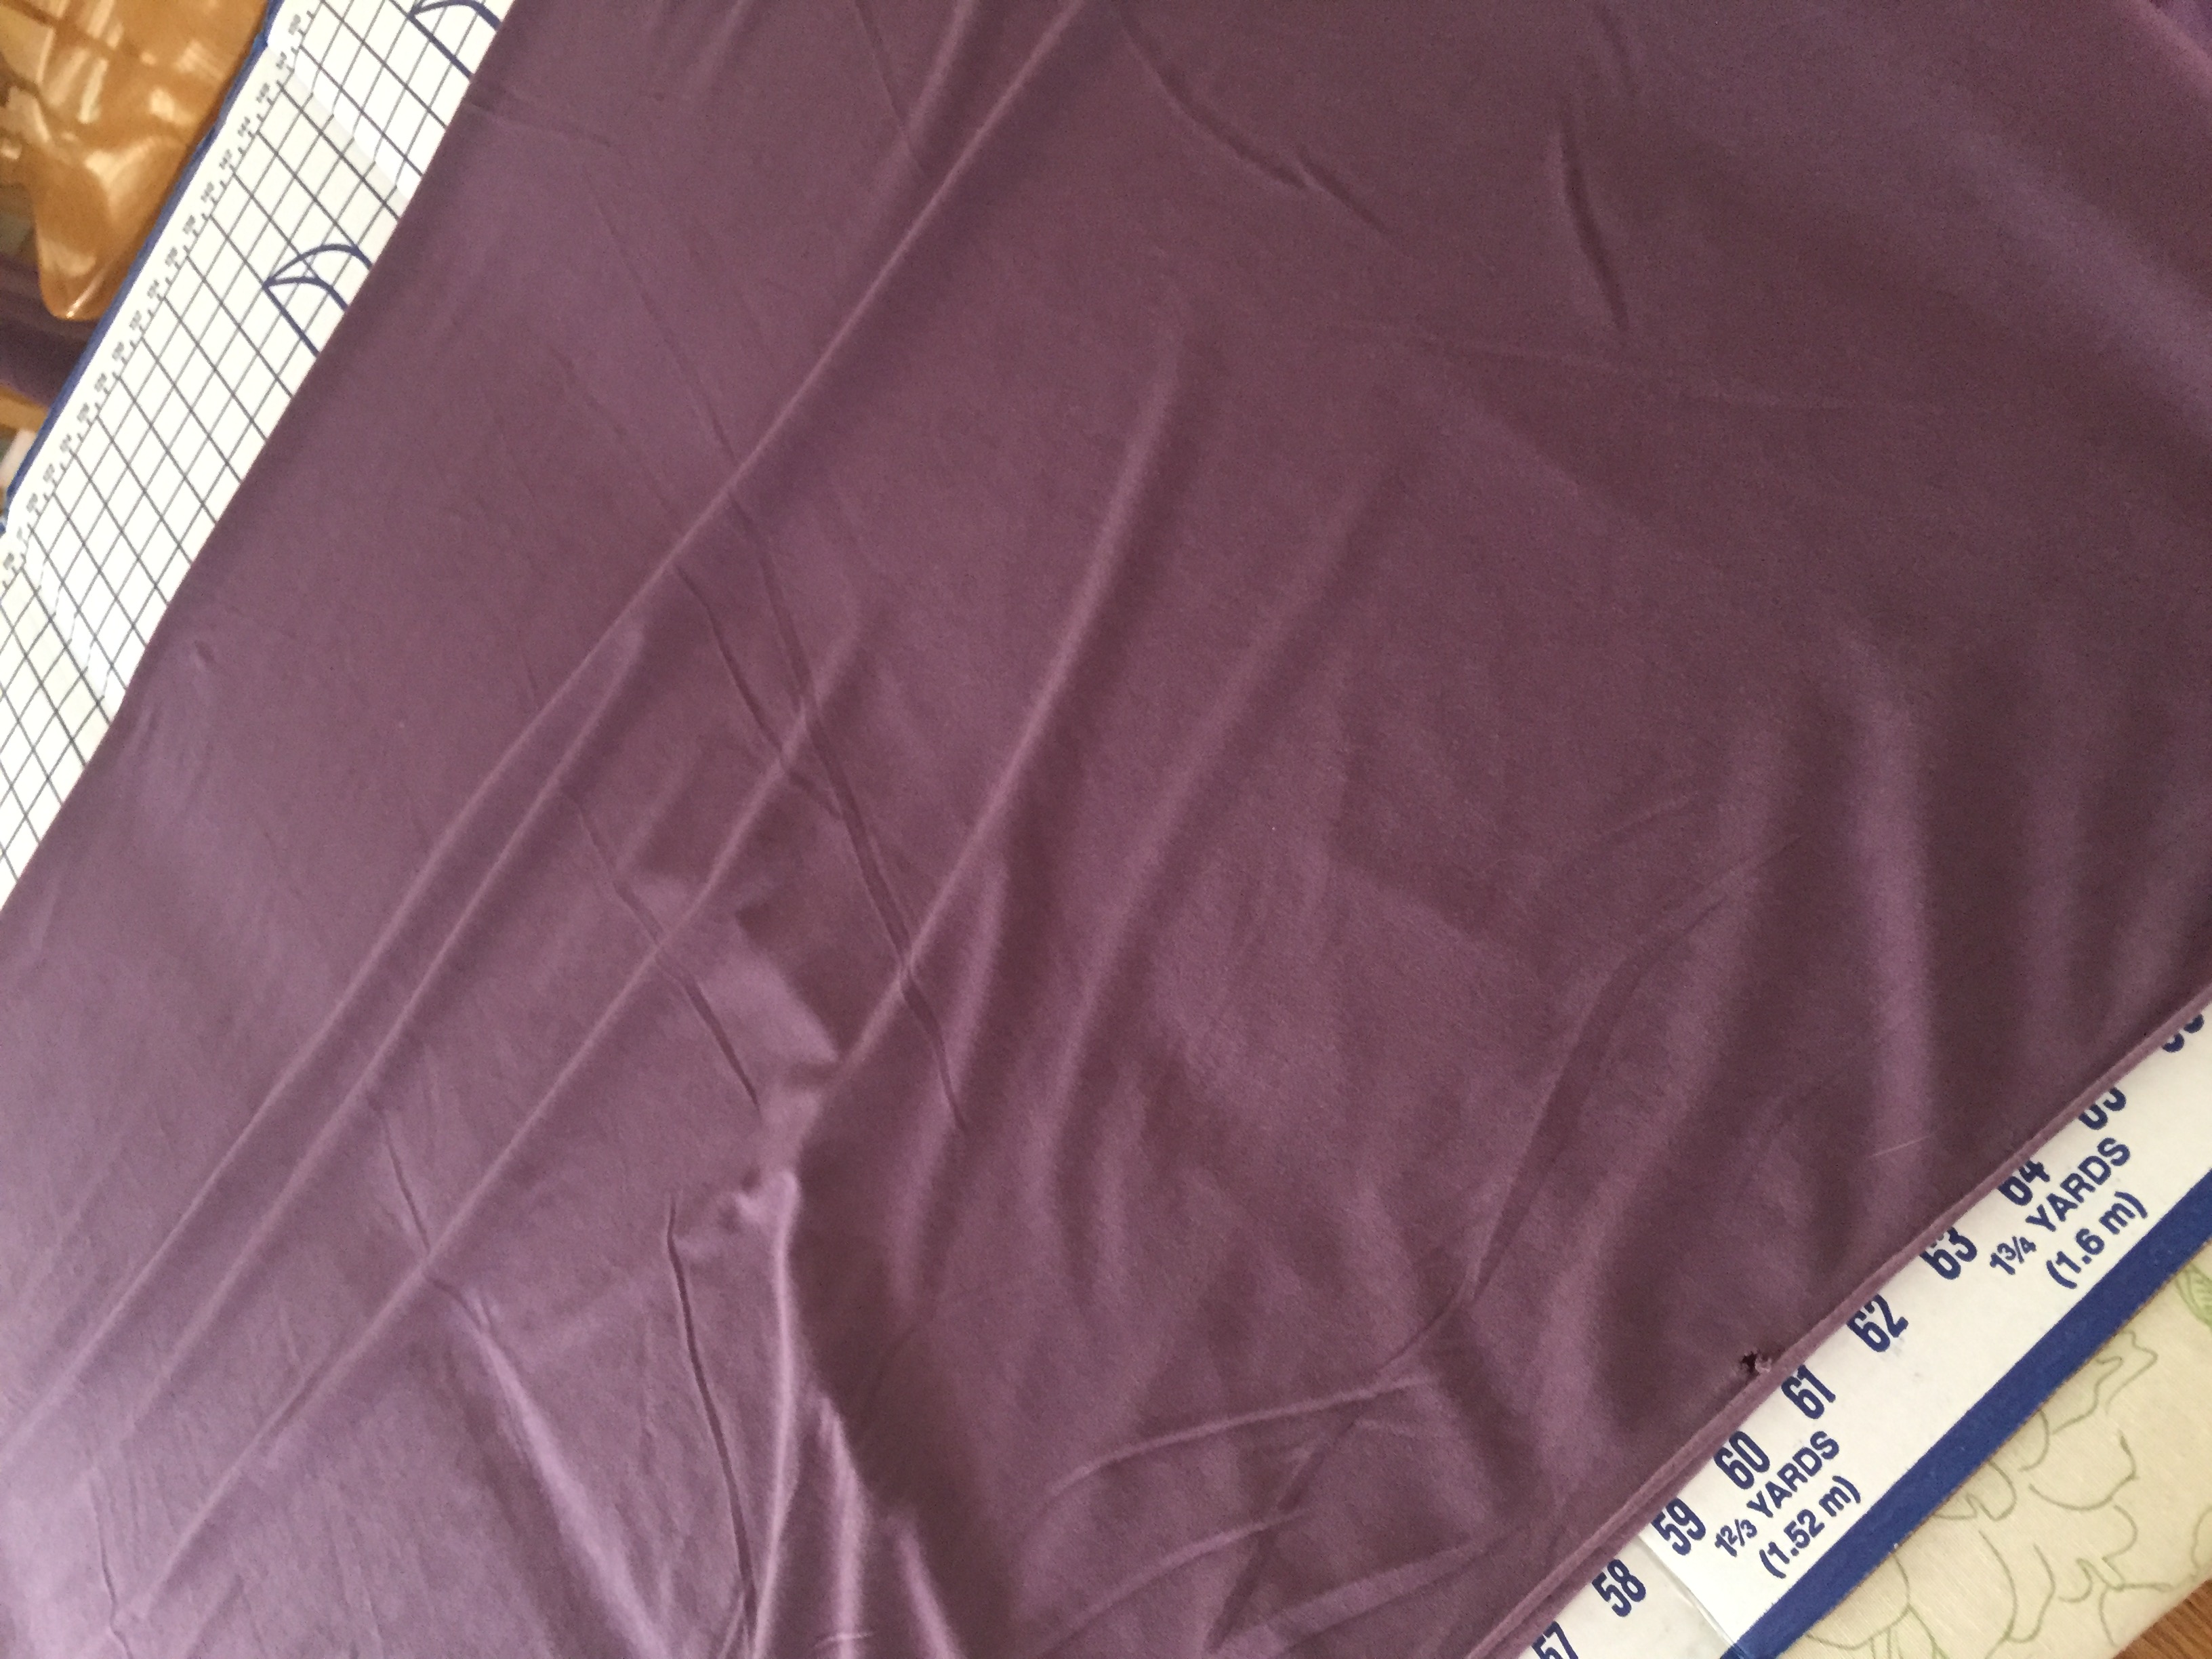
Lavender facing on the inside.

Because the fabric in a nice lightweight cotton, I didn’t want to use the dress fabric for the interior facings around the neckline and armholes.  It showed through and didn’t look very polished.  Instead, I used a scrap of a lavender solid (I think a Moda Bella piece)). It looks pretty to see that lavender bit popping through.

The dress is adorable and while I am certain it will be too big for now, I can look forward to seeing it on her next spring or summer.  These little projects are so much fun.  They don’t take a whole lot of fabric and I love seeing her in something I made.

It felt good to sit and sew the bits needed to finish this little dress up.  Tomorrow I should have a lot more energy to be able to get things done for our big weekend.  I am over the moon about this wedding as I really think these two are perfect for each other. We are so happy to welcome Shar into the family! I will share more about the wedding once everything quiets down again.


Sharing with my favorites, including a new linky party hosted by Michelle at From Bolt to Beauty.  It is called Brag About Your Beauties and happens on the 2nd, 3rd and 4th Fridays of the month.  Be sure to check it out!

Newsletter!

Have you signed up for my newsletter?  It is published every month or so and is full of information about my shop, new arrivals, sales, and events.  Click here to sign up!


Friday Finish – Chambray Pants

Happy Friday!  Before I get going here, I want to thank everyone for the great response to the July Blogger Bundle.  It is a beauty and I am happy to announce that Kathie L will be receiving a bundle in the mail soon.  She won the drawing for the giveaway!  Yay for happy, squishy mail – it’s coming your way Kathie!

I actually do have a finish to share – not a quilt finish but something to check off the WIP list nonetheless.  I began making a pair of pants in May – Well, I actually bought the fabric over a year ago and it sat on a shelf until May.  But then Me Made May rolled around and I got excited about making some clothes.  I got these nearly done in May – they only needed to be hemmed.  It took me until mid-July to hem them.  Why??  Now it is too hot to wear pants.  Silly me.

So these were a very easy make. The pattern for these was Vogue 7294.  The pattern was from 2001 and the pants had a high waisted cut.  I took a few inches out of the rise so they would hit me below the waist. There isn’t a waistband – just a simple elastic waist.  I don’t tuck my shirts in so this won’t be an issue.

The biggest issue I ran into was the fabric I chose for the pants.  It was not a good choice at all!  It is too light weight and it frayed continually, making it a pain to sew with. I did the best I could, making sure to finish each seam with a zig zag stitch to help with the fraying.  My plan is to hand wash these (in the washing machine – my washer has a “hand wash” cycle) and hang them to dry.  I really have no idea how long they will last?  For all I know, they may disintegrate upon first wearing.

Chambray Pants

I was concerned that this lightweight material would make the pants look like pajamas.  To be honest, they do look a lot like pj’s.  But I like them anyway.  They are comfortable and they have pockets in them!!  However, I am afraid to use said pockets because of the lightweight, easily frayed fabric.  Yikes, these are going to be some high maintenance pants!  😉

In closing, does anyone need a good book to read over the summer?  I just finished two and both of them were excellent.  The first one was The Spool of Blue Thread, by Anne Tyler.  I am a huge fan of Anne Tyler’s.  She writes such great stories about regular people. I love how she develops her characters. The reader always comes away feeling like he really knows those people.  Great read!

The second book I read is the The Book of Unknown Americans, by Cristina Henriquez.  It iss a timely novel about several families who came to the US from various countries such as Mexico, Puerto Rico and Venezuela.  The relationships between the families, their history, and a love story between two young teens make this book hard to put down. Have you read anything good lately?  I am ready for another book.

Hope everyone has a great weekend.  We are having lunch with my in-laws on Saturday and then we will be home all day Sunday.  Supposedly it isn’t supposed to be over 90 degrees this weekend so that will be a nice break from this crazy heatwave.

Linking to lots of linky parties.  See them at the top of the page, under Link Ups.

Newsletter!

Have you signed up for my newsletter?  It is published every month or so and is full of information about my shop, new arrivals, sales, and events.  Click here to sign up!


SaveSave

SaveSave

SaveSave

SaveSave

Designs by Heidi – Guest Post

Hi Everyone – I am back from our back-to-back vacations! Both trips were awesome but as always, home sweet home!  After a relaxing time away, I am ready to jump back into my blogging/sewing/shop routine.  Today I have a really special post to share with you.  I would like to introduce you to Heidi Emmett.  Heidi is a really talented pattern designer and I am proud to carry a number of her patterns in my pattern shop. To do justice to this introduction, I need to tell you a bit more!  Heidi lives in Grass Valley and we are both in the same quilt guild.  Heidi makes both quilts and garments, designs clothing patterns, teaches sewing classes at an annual retreat up at Lake Tahoe and is generally a creative maker at heart.  She also owned a brick and mortar fabric shop in Grass Valley for quite a few years.  She is a person with what seems like unlimited energy and is constantly making or designing something.  About a month ago, she and I chatted at a guild meeting and we were brainstorming ways we could work together since we both have so many common interests.  As a result, I have begun to carry her patterns in my pattern shop.  She had purchased some of the Sarah Golden linen blends from me at the quilt show last May with the intent to make one of her Terrific Tabard vests. Today she will share the vest she made and explain the process she used to make it. I hope you enjoy the post.   If you have any questions for Heidi, be sure to leave them in the comments and she will post a reply to you there. I hope you all will enjoy getting to know Heidi as she is a creative force to be reckoned with!

Hello! Designs by Heidi is who and what I am. I have a line of “Art to Wear” patterns. You can find some of my patterns for sale at Needle and Foot. A BIG thank you to Bernie, for inviting me show off some of the fabric she sells using one of my patterns, Terrific Tabard.

I’m going for a whole new look (than the cover shot above) with the linen blends I got from Bernie’s Etsy shop. Let me show you what I did to create a sophisticated and smooth Terrific Tabard. I started with two linen blends from Bernie. I absolutely LOVE linen! And these two linens by Andover Fabric are neutrals that will work with ANY  other palette of colors. The piece with the columns of lines is called Lines (appropriate enough!) and the piece with the checked pattern is called Squares on Tailored Cloth.  Both were designed by Sarah Golden and are available in Bernie’s shop.

tabard

I went to Quilt Market in Portland, OR this past May and was able to buy a modern black and brightly colored panel by Marcia Derse. This panel won’t be available in stores until October. I immediately thought to use it as a part of my Tabard vest!

Fortunately, I also snagged some very small pieces from Marcia’s newest collection, again available in October.  The linen fabric is just perfect with these prints.

Most of my patterns have tissue pattern pieces included (I always include a range of sizes in one pattern). Notice I have taken a lengthwise fold in some of the tissue (closest to the side, not the center). I did this because I want to insert some improv strips to add color and visual interest to the vest.

I love lots of bold color and plan to use bits of the smaller Marcia Derse pieces to create a long strip of fabric.  Remember when I cut out this piece I pinched out some, so now I have to fill it back in with something.

I first cut the panel apart near the pinched out area all the way up through the shoulder area. Tip: Always cut wherever you pinch it out, then you can replace that space with your accent fabric and bring it back to size again. It is a fun and creative trick.

I cut up a few of those colorful pieces and sewed them together and then stitched them to either side of what I cut apart.

Always line up other seams and plan to have extra on either end to trim off. I do not like to run short. I will just snip, snip, the orange fabric in line with the shoulder seam.

While I let the fashion layer dictate what each section will look like, I always, ALWAYS, strive for a long and lean look. I want your eyes to see the whole design in an up and down fashion as this tends to be much more flattering than looking side to side.

Preparing the embellishments for the back of the vest

When I created the back piece, I wanted to add some embellishment to it as well.  For this, I used an applique process rather than slicing and inserting a strip.  I cut the pieces I wanted and folded the raw edges under and pressed them. Next I pinned them in place and top-stitched around the edges to attach them to the back as well as finish those raw edges.  I didn’t fuse them first though you certainly could if you preferred that method.

After stitching the front pieces to the back, in most other “quilted” version of Terrific Tabard, I would be layering the vest with batting right now (sometimes even before the shoulder seams are stitched together) and quilting all three pieces. Then the vest would be finished off with quilt style binding (albeit much narrower than a quilt binding). These instructions are included in the pattern. But THIS vest will have no batting. I chose to line it traditionally which means no binding necessary! This version really goes together quickly.

Front and back lining pieces stitched at the shoulders

The two front lining pieces are “Grunge” in black. The back piece lining is a very old (no longer being made) Kaffe Fassett stripe. To line this I pinned it, right sides together, and stitched all the way around using a 1/4″ seam allowance. I made sure to leave about a 6-8″ opening on one side so I could turn it right side out.

Grading a curved seam.

Very carefully grade the seams on the curved portions. Grading just means trimming one piece smaller than the other. When you turn the whole piece inside out and begin to press, press, press (that’s the secret to a beautifully lined piece), all the rounded edges will fall into place as you press. Tip: On dark fabrics use a press cloth (a piece of muslin works) on top of the fabric before you press. Sometimes you get a shine, even on linen.

Handmade buttons by Sandra Bruce

I have a rather large collection of buttons. Here is a group of handmade polymer buttons by the talented Sandra Bruce. I love to buy the buttons I like, knowing that someday, I’ll have the perfect button for a project. Forget buttonholes. I use strips of fabric that have been folded and pressed and stitched into place.


The polymer button I chose for the front is very intricate and it’s really BIG, but I think it blends in nicely.

The two side buttons are from my glass button stash. I know, I know, it’s a sickness, but one I don’t want to get over. Ha, ha.

It’s finished!!

I love my new vest. I can’t wait to wear it (not sure when since it is still summer!), but I’ll be ready when cooler weather comes.

Here is the finished back side of the vest.  I love the look of the larger scale linen print slicing through the narrower lines.

Worn with just one lapel folded out.

One last way to style this Terrific Tabard, fold back the lapel on just one side.

If you like what you have seen, please join me at Designs by Heidi for more fun and creative happenings. I love sewing “Art to Wear.”  You can also follow me on Instagram to see the latest patterns and classes I offer. Thank you again Bernie for letting me join in with you all at Needle & Foot.

Hugs, Heidi Emmett

New Shorts for Summer

Honestly, I cannot remember the last time I sewed a pair of shorts?  Its been a long time, like a really long time! Maybe sometime in the 1980’s or so?  Anyway, during one of my obsessive trips to a thrift store, I picked up a Simplicity easy-to-sew pattern for pants, shorts and a skirt made with woven fabric and a knit fold-over waistband.  I have a knit skirt like this and it is really comfortable.  I was a bit curious about making this combination of woven and knit fabric and decided to give it a try.

The first (and only) hurdle was deciding what size to cut.  I am sure I am not alone when I say I dislike measuring my hips and waist.  The number is never what I think it should be, which is to say I think I should be the same size as when I made that last pair of shorts.  Ha.  Guess what? I am not.  When I took measurements and looked at the pattern, it indicated I should make the shorts as a size 14.  The vanity running through me said, well that is clearly a mistake because I don’t wear that size.  Truth be told, I almost cut the pattern out as a 10 (which is my ready to wear size).  Vanity runs strong and deep my friends. At that point,  I had to have a very firm talk with myself. It went something like this:  What does it matter if you cut a size 14?  Well, of course it matters – it means I have gone from a size 10 to a 14.  No, no it doesn’t and if you cut these at a size ten, they won’t fit and you will be so irritated. On and on we went, the two of us inside my head.  Finally the pragmatist won and the vain side lost.  I cut them as a size 14 and here I am telling all the world about it – well, at least the portion of the world who reads my blog.

Shorts that actually fit!!

Guess what?  The shorts took maybe an hour to make and THEY FIT GREAT!!  Shout that to the world – in handmade shorts, I wear a 14 and I made a pair that fit!!!

Woven shorts with a knit waistband = comfortable!

I debated whether to actually take a photo of the waistband but decided I should because I am being all mature and accepting of whatever size I am and the waistband is the cool part of the shorts. (If that isn’t a run-on sentence, I don’t know what is.). I love the fabric I used – it is from Alison Glass’ Handcrafted line of batiks and is called Artifact in Navy. (Click the link if you want to check it out in the shop.). Overall, I love these and will wear them a lot.  My only disappointment is I didn’t put pockets on them.  I like having a pocket for my phone and car or house key if I go for a walk.  I think I can put a patch pocket on the back side still and that will fix things right up!  The next pair are going to be in knit fabric for top and bottom.  I want to see how that changes things up.  I suppose my take away from this project has to be that the numbers are just numbers.  My hips are what they are and if you want something to work, just follow the size and measurements as laid out on the pattern.  They didn’t put those numbers there to make me mad, rather they put them there so I could be successful with the project.

Community Service Quilt, Pine Tree Quilt Guild

One other quick sewing project I did last week was to bind a quilt that someone in my guild made for Community Service.  This project was pieced and quilted, it just needed someone to bind it.  I happen to enjoy binding so that was an easy one to help with. When I got it home, I saw the binding was made and was quite narrow.  The maker cut a two inch strip where I usually cut 2 1/4 and sometimes 2 1/2″ strips.  I decided to machine stitch it to both front and back sides so it would be really durable.

As I came to the end of the binding strip, I realized it wasn’t going to be long enough.  I should have checked it before I started but I made the assumption that the maker had done that.  Looked like it was going to be a scrappy binding.  I found a little print that seemed to work with the polka dot binding provided with the quilt.  It all looks fine.

Pieced binding for the win!

I especially like the backing for the quilt.  It is a nice denim with a printed pattern.  This quilt will last for a long time.  It is earmarked for the local foster youth program.  When the kids age out of the system at 18 years old, our guild gives them a quilt to add to their belongings. This one will work for a guy or girl.

Delicious boysenberries, or are they?

Last story of the day…..  on Saturday, over the weekend, I was picking berries early in the morning.  It was gorgeous out and there are a zillion berries right now.  I popped one in my mouth and guess what?  There was a beetle on the underside of the berry.  Ugh!  It was horrible.  There I was having my zen moment picking berries all alone and all of a sudden, I was spitting beetle out of my mouth.  Yuk!!!  I will be a little more careful before tossing another berry in my mouth.  🙂

Reminder – I will be back on Wednesday this week with the June Blogger Bundle.  It was curated by Paige Alexander of Quilted Blooms and I am really excited to see what she has made with the fabrics!  See you there!!

Linking to Cooking Up Quilts, Lets Bee Social, and TGIFF.  Info is at the top of the page, under Link Ups.

Newsletter!

Have you signed up for my newsletter?  It is published every month or so and is full of information about my shop, new arrivals, sales, and events.  Click here to sign up!

boatneck t-shirt

Boatneck T-shirt Finish

Today is the last day of May, which means it is also the last day of Me Made May for this year. I had hopes of making one new garment each week.  While I didn’t quite get there, I am close!  I made a mauve t-shirt, a black and white t-shirt dress, a boatneck tank top and almost finished a pair of pants.  Not too bad!  I also cut out a pair of shorts but didn’t get farther than that. It was really a fun series of projects and I feel like my rusty garment sewing skills are improving.

Let’s take a look at the simple tank top I made.  In actuality, it wasn’t as simple as I had hoped!  Combining a McCall’s pattern (M7322) with a great piece of knit fabric called Morse Dot Blue, I cut out a boatneck tank top. The knit is from Art Gallery Fabric (it is available in my shop) and is just lovely – great quality and feels so comfy.  I chose to make a size large because I thought it would be easier to size down than up and my measurements showed me to be between a medium and a large. I also skipped cutting out neck and armhole facing pieces as I don’t like having that extra fabric to tuck into place. It is a cleaner, simpler, finish to bind the arms and neckline with bias tape.

It became apparent right away that the shirt was going to be too boxy in shape.  I decided to cut in the armholes to give it more shape at the shoulders.

Yikes, the armholes look terrible!

When I did this, it made the armhole openings too big.  Look at the photo above and you’ll see they are cut too deeply.  Somehow I didn’t notice how far off the fit was until taking photos! The camera doesn’t lie.  🙂

Ugh, at this point, the armholes and shoulder seams were sewn with a stretch stitch and then a zig zag beyond that. Determined to fix this, I decided I would need to take a wider seam at the shoulders to lift the shirt and then tighten up the underarms. This photo is a close up and you can see how tiny the seams of the stretch stitch are.  I couldn’t unpick these without damaging the fabric, plus it was taking forever to rip out the seams.  Instead, I decided to cut the shoulder seam off completely and restitch it.  The seam binding finish wasn’t as clean but it worked.  For the underarm, I cut a narrow strip out of the first three inches of the seam and sewed it back together on an angle.  Not pretty but at least it was served the purpose of closing up that armhole a bit.

boatneck t-shirt

Looking back, I should have taken a picture with my hand on my hip again so you could compare, but it does fit much better.

boatneck tank

The fit is so much better with those two alterations. The shape of the armhole is what I was going for in the first place.  Side note, looking at the pictures, one has to wonder how on earth did my hair get so gray!? When Julia took the photos for me, I specifically asked her to make me appear taller, less gray and about 35 years old.  She promised to do her best but I am pretty sure I look at least 57 and barely 5’4″ in all of these shots.  (It is so weird to post pics of myself – Sigh…)

As I made these changes to the shirt, I pondered why I was willing to spend the money and more importantly, the time, to make such a simple shirt.  I can pop into Target or Ross and pick up a tank top for not a lot of money and no time at all.  Sewing something for myself is satisfying and I enjoy the challenge.  It makes me so happy to see a resurgence of interest in sewing, both in quilting and garment sewing.  Seems like the high school Home Ec classes I took are a thing of the past (unfortunately) so it is nice to see the hobbies being taken up.  Hopefully this means they will be taught to others and passed along to new generations of kids and grandkids.

The pants I made are pretty cute.  Once I hem them, I will share them with you.  The shorts will be set aside but not for too long.  I want to have them to wear this summer.

Linking up with my favorites.  To see the links I use, go to the top of the page and click on Link Ups!

Newsletter!

Have you signed up for my newsletter?  It is published every month or so and is full of information about my shop, new arrivals, sales, and events.  Click here to sign up!

SaveSave

T-Shirt Dress Finished!

Inspired by all of the wonderful makes being shared on Instagram this month for the Me Made May event, I made a simple t-shirt dress last week.  Three weeks ago or more, I spied this black and white knit fabric at Ben Franklin’s.  It was 20% off which made it a good deal.  When I first saw it, I thought it would be a cute t-shirt.  However, once I got ready to cut it out, I realized I had more than enough for a dress.

t-shirt dress

Because I liked the fit of the Blanc t-shirt I made with that mauve fabric, it seemed reasonable to just extend the length of the pattern and create a dress. I figured if it didn’t look right, I could trim the length and wear it as a shirt.  Once I had the pattern pieces and fabric laid out, I took an old t-shirt dress I have worn for the last couple of summers and put it on top to determine the length and width of the lower part of the dress.

After cutting it out, it is just a couple of seams to put it together.  The neckline is finished with bias tape and each seam is finished with a wide zig zag stitch. (I know, I should have used the serger but it is in the shop.  A story for another post!)

Once I had the shoulder seams together, I slipped it on and saw the length was a bit shorter than I wanted.  I debated adding a block of solid black to the bottom for length but honestly, I didn’t feel like driving to the store.  (Living where we do, a run to Ben Franklin is about a 20 mile round trip.) Instead, I finished the hemline with the same black bias tape.  That way I didn’t lose any length to turning under the fabric for a hem.  It worked really well and made it just long enough to wear.

Overall, I like the dress.  The fit isn’t perfect but I will enjoy wearing it. I have really been enjoying making things to wear lately. Me Made May was a great way to jump back into garment sewing.  How about you?  Do you have the itch to make something too? I have a pair of pants in process that I am unsure about.  The seem like they are going to fit well but the fabric is very soft and I fear they are going to look like pajama pants.  If this is the case, well I guess I will have a new pair of pj pants! We shall see.

I am linking up with all sorts of fun linkys.  Please check them out at the top of the page, under Link Ups!

SaveSave

SaveSave

Me Made May

Do any of you follow, or get involved in, Me Made May each year?  This event is one to encourage garment sewing and was started years ago.  Now in its ninth year, it is a very popular sewing celebration that happens on many social media platforms. It is the creation of Zoe from So Zo, What Do You Know.  She is a sewist living in the UK and she often blogs about garment sewing and sustainable sewing.

Me Made May is a unique event in that each participant really sets up their own challenge.  Many, many of the sewists will challenge themselves to wear only their handmade clothing each day of the month (some even take it as far as handmade underwear, camisoles and/or bras).  Others may set a personal challenge to wear something handmade once each week.  Others might set out to create some handmade garments during the month.  There really isn’t a right or wrong way to go about it.  I also like that there is no judging, no voting, no huge prizes driving everyone. People share their makes, their sewing ideas and plans with each other – usually on Instagram #mmm18 or #memademay2018 or by blogging.  (Just to give some perspective on the size of this event, it began 6 days ago.  As of this writing on Sunday afternoon, there are over 4,000 posts in#memademay2018.) It celebrates a mutual love of sewing – be it incredibly intricate and fitted garments, or a basic t-shirt.

blanc t-shirt

Which is exactly what I made last week!

Several months ago, I thrifted a bolt (yep, I have a lot of it) of this mauve stretch knit fabric.  I had no idea what I would do with it at the time but I figured I would think of something.  The fabric in general is in great condition.  There are a few spots on the selvage that have a small hole which don’t really cause any issue since they are on the selvage. Thinking I wanted to make a t-shirt, I scouted the internet and posed the question on Facebook, asking for pattern recommendations. One pattern designer that was recommended is Blank Slate Patterns. I liked both the look and simplicity of the Blanc T Shirt.  You can buy the pattern, or if you are a member of their Facebook group, it is a free download.

blanc t-shirt

The pattern has two pieces. Well actually, it is a pdf download and there are 20 pages to print. But 16 of those pages create two pattern pieces. It is sized from XS to XL.  Really, this is a simple process – just takes a little bit of tape and scissors. Not a big deal.

I decided this first round would be a practice session.  I purposely cut it out as a size large because it is easier to size down than up. Plus I was hoping for a loose, kind of flowy look?  Is flowy a word?  Probably not but you know what I mean.

It takes no time to sew front to back. Once I tried it on and decided I liked the fit, I ran a loose zig zag stitch over each seam to finish it off.  Really I should have set up the serger to do this and get a nice finish but you know… it was in the closet…. the sewing table was a mess…. it just seemed like to much work. Maybe next time.

After finishing the seams, all that was left was a bit of finish works. Hemming the bottom and the sleeves came next.  Finally I finished the neckline with purchased bias tape. The only hiccup in the project was the bottom hem.  I ran two lines of stitching and there are several wobbles in the second line.  I am not sure why it happened.  It doesn’t bother me enough to rip it out though. If I were to want a double stitched line I think I would try using a double needle.  I bought one a long time ago but have not yet practiced with it.

blanc t-shirt

I love these little projects because of the quick finish. It is really satisfying to cut out a couple of pieces and then have a t-shirt to wear the next day.  I am going to make one more in this pretty black knit that I bought.  My plan after that is to make something a bit more challenging. I have two patterns sitting out that I keep looking at and debating which to try first.  Stay tuned for more in Me Made May!

Linking up all over the place.  Check out the link parties I enjoy!  They are listed at the top of the page, under Link Ups.

Christmas Project Finish

Last weekend I made the cutest leggings for my Vermont grand baby.  This morning I took a few pictures to share with you. They will go off in the mail this afternoon so she can wear them for the holiday season.

I was in Jo-Ann’s about a month ago and picked up this adorable reindeer fabric.  I love the expressions on the face of these deer.  At the time, I was hoping to make one-piece pajamas or a little dress with the fabric but I didn’t buy enough.  Drat .  I had enough for leggings though.

As usual, I perused Pinterest and found this free pattern. It was just perfect, very simple and it went up to size 2T. My sweet grand daughter is a chunk and I didn’t want the pants to be too tight. The pattern is from Toddah.net and prints out on four pieces of 8 1/2 x 11 paper. The instructions are simple and if you are just learning to sew, I recommend this project. It is beginner friendly.

It took all of 45 minutes to cut and sew the legging.  I used a tiny zig zag stich while sewing so there is some give with the knit fabric.

Each seam was finished with an extra zig zag stitch. I wasn’t exactly sure about the length. I had an inseam measurement of ten inches from her mama but it seemed long. I put elastic at the ankles. That way if they are long, they can bunch up at the ankles.

Last finishing touch was to stitch an X at the back of the waist so it is easier to tell front from back. I can’t wait to see how these fit.

While I was working on these, I kept thinking about the kids’ Christmas stockings. I felt like they needed an embellishment at the top. I took a run to Ben Franklin and found this red twill tape with a white stripe. It has a rustic look that I thought worked great with the Winter Friends fabric. When I got home, I asked my husband to make some rustic buttons for me.  He found a maple branch and sliced some rounds from it.  Then he drilled two needle-size holes for stitching, sanded and put some finish on them.  They are SOOOOO cool.  I was thrilled with the finish of the buttons. (You can bet I will ask him for more of these in the future. He whipped them out in no time. What a talented guy!)

The twill tape would surely fray over the years so I stitched a teensy hem at each end and painted a bit of white glue over the ends.  I think that will help the tape remain intact.

What do you think?  I feel like this is the icing on the cake. The stockings feel finished now.

Do you want to see a button up close?  Yes, I thought so.

OK – This is it. No more blogging until after Thanksgiving Day.  This afternoon Julia and I have a date to make pumpkin pie, fudge and the dough for tomorrow’s rolls.  Happy holidays to you and your family!

Linking up with my favorites.  You’ll find the URL’s at the top of the page, under Link Ups.

Finally, if you haven’t yet signed up for my newsletter, now is a good time.  I have a fun Black Friday event planned.  Sign up here.

Mickey Mouse – A Simple Halloween Costume

Julia has always come up with fun ideas for what she wants to be for Halloween.  Over the years, she has dressed up as Wednesday Addams, a devil, a ladybug, and a bat to name a few. This year she decided to dress up as Mickey Mouse.  She is long past the age of trick-or-treating but her high school has an annual Halloween Dance and they all dress up for that.

Did you know that Mickey Mouse was developed by Walt Disney and the very talented Ub Iwerks in 1928? He is the official mascot of the Walt Disney Company and has been making people smile for years.

“I only hope that we never lose sight of one thing – that it was all started by a mouse.”

— Walt Disney, Disneyland; October 27, 1954

Simple Mickey Mouse shorts!

Let me tell you, Mickey Mouse was such an easy costume to put together.  Julia had black leggings and a black t-shirt to use so the main task was to make the red shorts and the Mickey ears.  For the shorts, we dashed out to Ben Franklin and bought a 1/2 yard of red fleece.  I used a pattern I had for pajama pants and did a few alterations to the pattern pieces before cutting them out.  I had to make the waist sit a bit lower, shorten the inseam quite a bit and add a pocket to the right side. (Pockets are a must-have on all clothing so she can keep her phone nearby!) Between cutting, fitting, adjusting, and sewing them — the shorts took about an hour or so to make.  Julia cut two white ovals out of felt and I lightly tacked them to the shorts. She plans to use them as pj shorts so it will be easy to take the buttons off when she is through being Mickey.

The only challenge (and it wasn’t a huge deal) was making the Mickey Mouse ears.  I had a remnant of black vinyl on hand and we cut circles out of that.  But the vinyl proved to heavy and the ears constantly flopped over.  Browsing ideas on Pinterest, we found a great alternative using black poster board and a head band. This called for another trip to Ben Franklin!  I was extremely proud of my self control when I was able to go into the shop, grab the head band and poster board and not even wander through the fabric department.  Didn’t even go near it!  This is probably the first time I have achieved this feat and may well be the last! While I did go get the supplies, I didn’t actually make the ears.  Julia and Ray took care of that.  Here is a link to the site they used if you need inspiration.

It would appear Mickey is tiring of this photo shoot!

We couldn’t think of an easy way to achieve yellow shoes so she skipped it.  But really, she looked so cute – Seemed like they all had fun at the dance too.  Living out in the country, we don’t really get trick-or-treaters so Halloween night is usually quiet for us.  I hope you all have more treats than tricks tonight!


Ferrari Handmade – Grand Opening Celebration

Today I have something really fun to share with you. This week my sister Patti is celebrating the grand opening of her shop, Ferrari Handmade!!  She has been working incredibly hard on this for several months now and she is ready to invite you to come and browse her shop.

Let me take a few minutes to introduce you to Patti.  Of the six of us sisters, she is number three and I am number four which means…. yes, she is older than me. I will admit this gives me satisfaction in a sort of unhealthy way.  It is readily apparent in the photo above. I am the baby and she is to the right of me — even at this age, she is clearly older and wiser than I. (I love this picture – two more girls were born not long after this.)

Patti and I shared a bedroom growing up and we fought constantly.  Like, really and truly — all the time. Funny how once you live apart you miss the person that drove you nuts for so long. We would love to live near each other again.  We share a love of sewing and we both took sewing classes from Mrs. Handley back in high school.  She haunts us somewhat and if we have a sewing mistake or a major project fail, we will say “Mrs. Handley would be so disappointed.”  (I wrote about Mrs. Handley a long while back if you want to hear more about our esteemed sewing teacher.)  Yes, Patti and I have been sewing a long while now.

We both made lots of our clothes during high school (remember,  my father owned a fabric store so we had ‘easy access’.). Not long after high school, Patti moved to Southern California, married and started her family. (Click here for a post about the bridal gown she made for her wedding.)

Once Patti started having children, her sewing changed a bit and she began sewing for her kids.  She has a five children, three girls and two boys. One of the things Patti really enjoyed was making costumes for her children. Her girls were very involved in theater when they were in high school and she made costumes for them.

Maria playing the part of Tina Denmark, in the play “Ruthless”

As Patti’s kids grew up and began their own families, she shifted her sewing priorities yet again and began to focus on her grand children.  Hers are very lucky grand kids because she has made some really fun costumes for them.

When her first grandson, Jack, was just a baby, his mother, Maria (same girl as the one that played Tina Denmark in the costume above)  had to speak at Comic Con in Southern California. She asked Patti to make a costume so she could dress him up as Jack-Jack, from the kids’ movie, The Incredible’s.

Last year, two of her grand daughters wanted to dress up as Princess Lolly and Queen Frostine from the kids’ Candyland game.  Grandma came through and the girls were adorable.

The older grand daughter (Queen Frostine) had a recent obsession of Veruca Salt, the character in Charlie and the Chocolate Factory movie.  She was thrilled with this costume from her Grandma.

Am I getting the idea across?  She loves to sew and she sews a lot! It came time to think of another way to put her sewing to work for her.  Now that her children are out of the house, she has a lot more time.  I have written before about how helpful she has been by working the quilt shows with me.  As we spent time together preparing for and working the shows,  the more she thought about having her own business.  She loves creating these wonderful outfits for her kids and wanted to expand on this hobby of hers.

And so it began. Ferrari Handmade came to fruition just days after she decided to open a shop. Once Patti decides to do something, there is no going back.  She epitomizes the phrase, “Go big or go home”.  She commits and dives in. Patti began researching fabrics and selecting designs and creating dresses. She had a soft opening at the last quilt show we worked and she was quite successful. She sold a number of dresses and little tote bags and took home orders for custom work.

She has been sewing fiend over the past weeks.

She is lucky to have a great studio to work in. I may be a wee bit envious. Ok, yes, I am envious – it is a lovely space. (Real life crafting comment though…. she made me promise to tell you it never looks this clean. She wasn’t ready to go public with a picture of a messy space just yet.)  😉

Her inventory grows daily as does her selection in her Etsy shop. Right now she is focused on creating a dress in each of the fabrics she has on the shelf. She is making sizes 2T through girl’s size 8.  I really like the system she utilizes for stocking her shop. She lists at least one finished dress which the customer is welcome to order, or the customer can place an order for that dress in a size that works for her child. Patti will take the order and ship the dress within five business days (though she is usually faster than that– she does not seem to require very much sleep.)

I think one factor  setting Patti’s product apart from others, is her use of trim work and unique accents. Most of her dresses have piping accents at the sleeve, bodice or neckline and many have ruffles or under skirts in coordinating fabric.

Her fabric selections are the perfect combination of pretty and practical.  She uses quality cottons which are easily washed, so her dresses are beautiful but also practical for children; ready to be worn and played in.

Of all she has made for this season, this is my favorite.

I love the dark blue celestial pattern with that bit of gold trim peeking out at the sleeve and from the hem of the lining.


How about these snowmen on blue – it is great for the holidays but could easily be worn all through the winter months.

This dress features snowflakes on a deep red background. I should note that Patti uses a very generous hem so these can be worn for a long while before the child out grows the dress.


This sweet holiday dress has a rustic feel to it.  Patti chose a print featuring Christmas ornaments decorating a background of pine. I love the bias strip of plaid she used to accent the bottom of the dress.

Handmade doll dresses to match your little one’s dress.

One more thing I have to show you.  Patti also makes doll dresses that fit American Girl Dolls, or other dolls that are 18 inches tall.  I love this!! How fun to surprise your little one with a matching dress for her doll. If you are shopping and select a dress for your special girl, you can also order a matching dress.  She has some in stock but will happily take orders for others to match the dress you are purchasing.

Hopefully you now have an idea of the style and excellent quality of the items made by Ferrari Handmade. Because so many of you either have children or grandchildren, or a special child in your life, I know you will be happy to hear Patti is offering a custom dress to one lucky winner.  To enter the giveaway, you need to do two things.  First hop over to her shop and take a peek at the dresses she has listed so far.  Come back and comment here to tell us which dress is your favorite. (Hoping this will provide some input on the fabric choices she is using and then she can plan accordingly.)  The other requirement is to either like her Etsy shop so you can keep track of what she is offering, or to follow @ferrarihandmade on Instagram. Either way, you will then be able to hear about any promotions or new product that might be available in her shop. So, you have two simple tasks to complete and you may win a lovely handmade dress for your special girl.

Additionally, readers can use the coupon code GRANDOPENING20 to receive 20% off any orders at Ferrari Handmade.  This coupon is valid through the end of day on October 10th.  Definitely a great deal on a gorgeous gift for a little one.

Thank you for taking part in this celebration of Ferrari Handmade. I am so proud of my sister and the work she has done to get this up and running. If you feel so inclined, please share the  news of her shop with any of your friends who might appreciate Patti’s work. It takes a village and I love the way our community supports each other!  Good luck with the giveaway!