Last November (a full six months ago) my sister asked if I would make two small runners to put in the window boxes in her flat in London. She shares her time between Colorado and London due to her husband’s career. Once their kids were up and out, it became possible for her to travel back and forth so she could actually spend some time with her husband. It is an exciting time for her as she makes new friends and learns to live the city life.
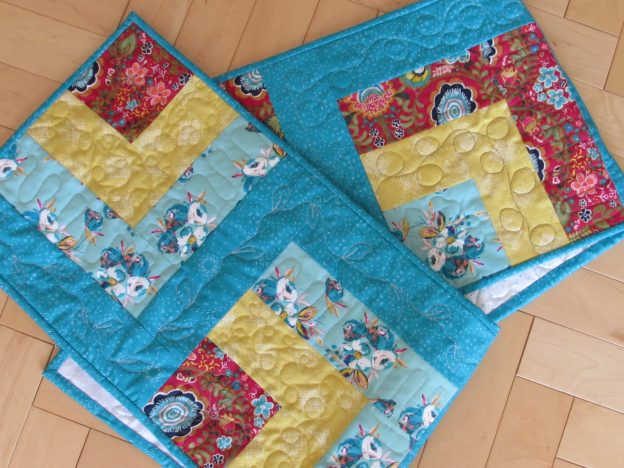
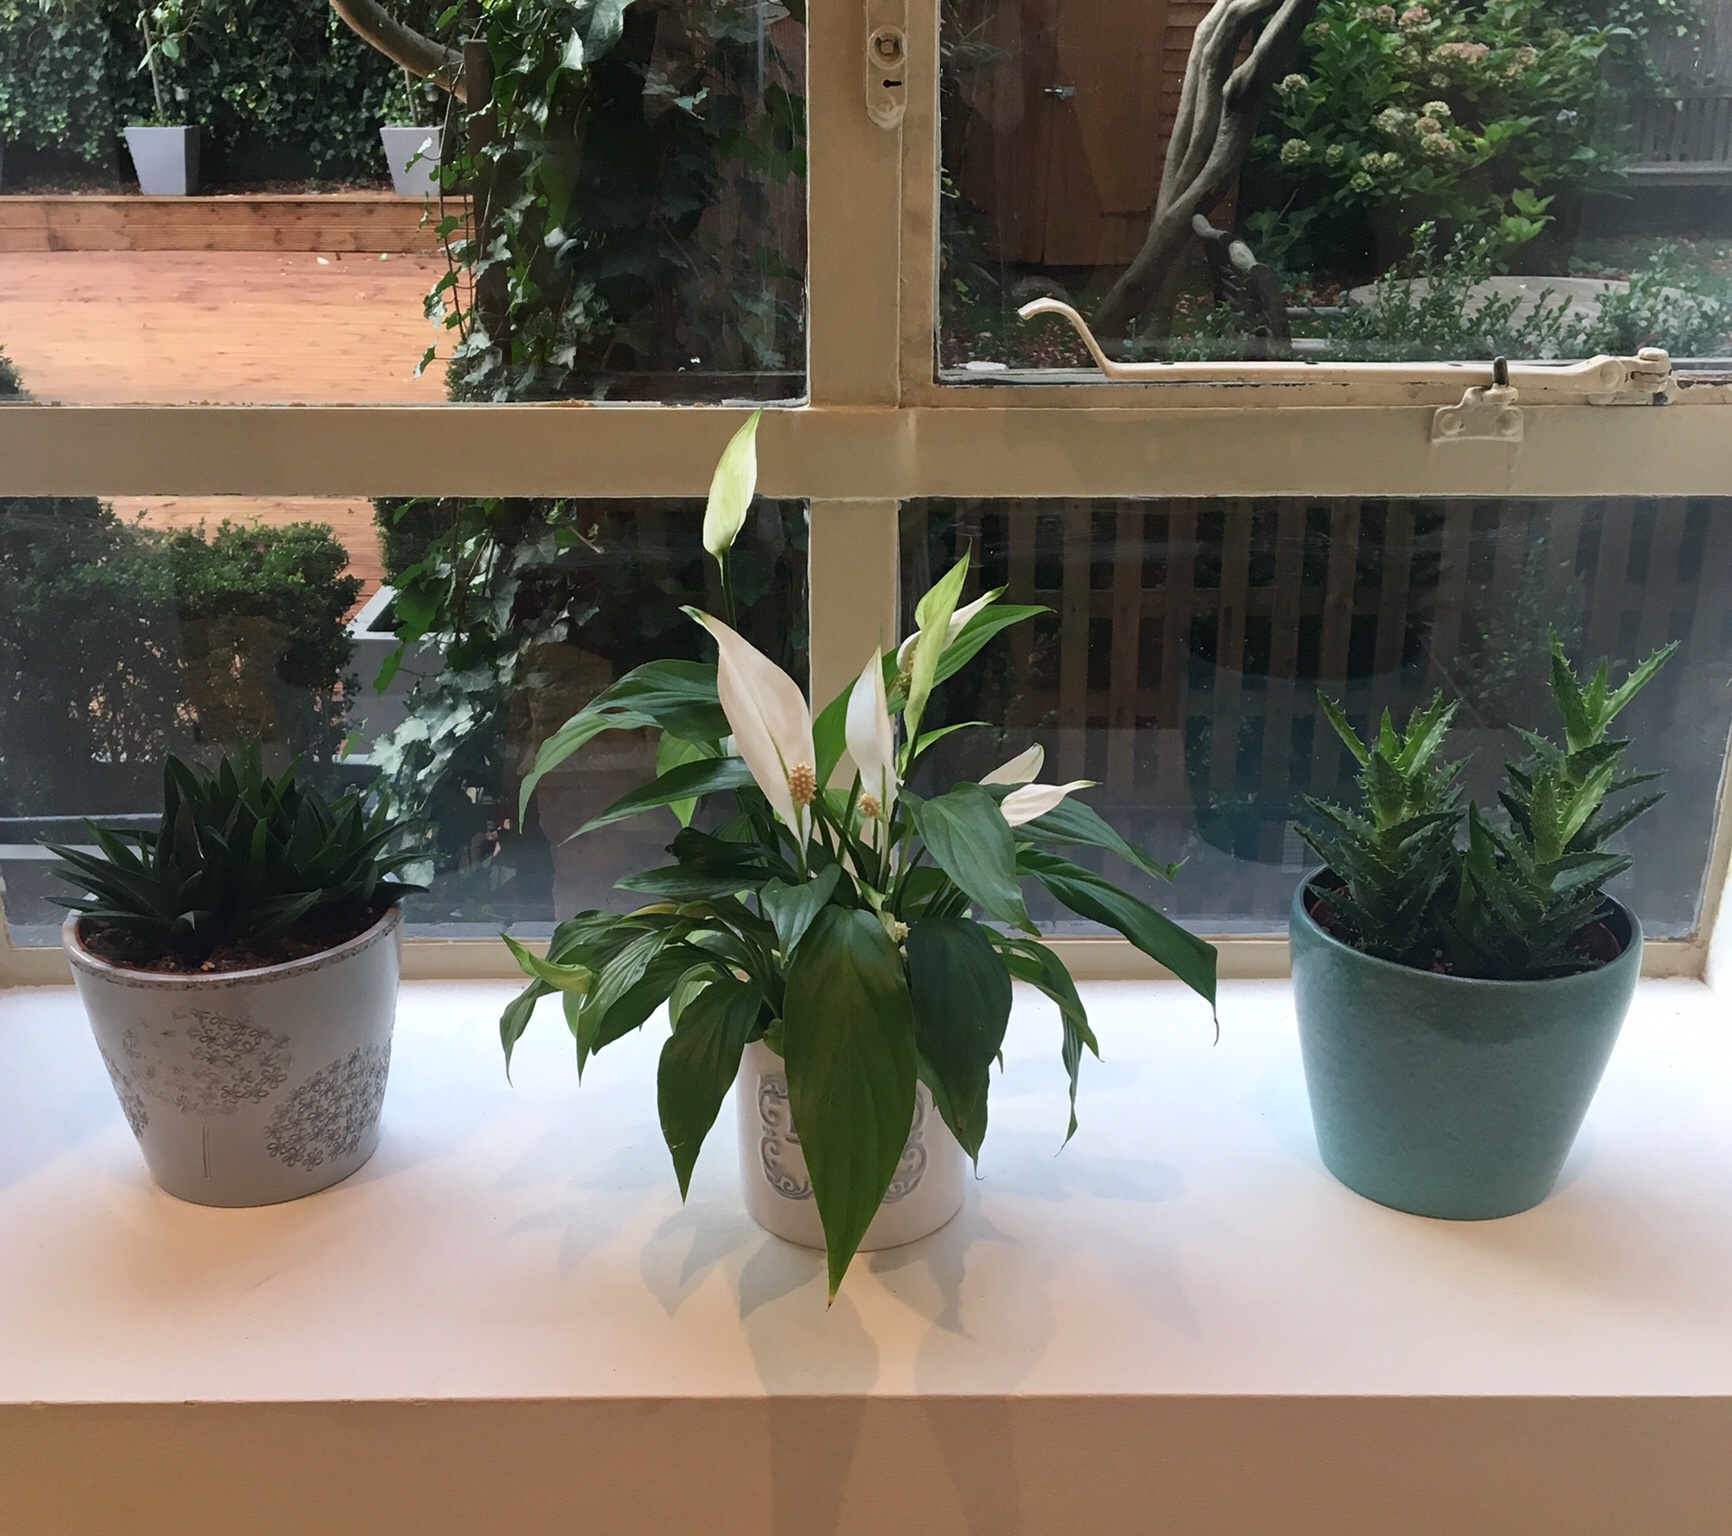
When they rented a little flat, she started to fix it up and make it feel like home. She has plants in the windows and wanted a runner to put under them. The window sill is about 14″ x 36″ and the runners measure 12″ x 35″. They (hopefully!) will fit just fine.
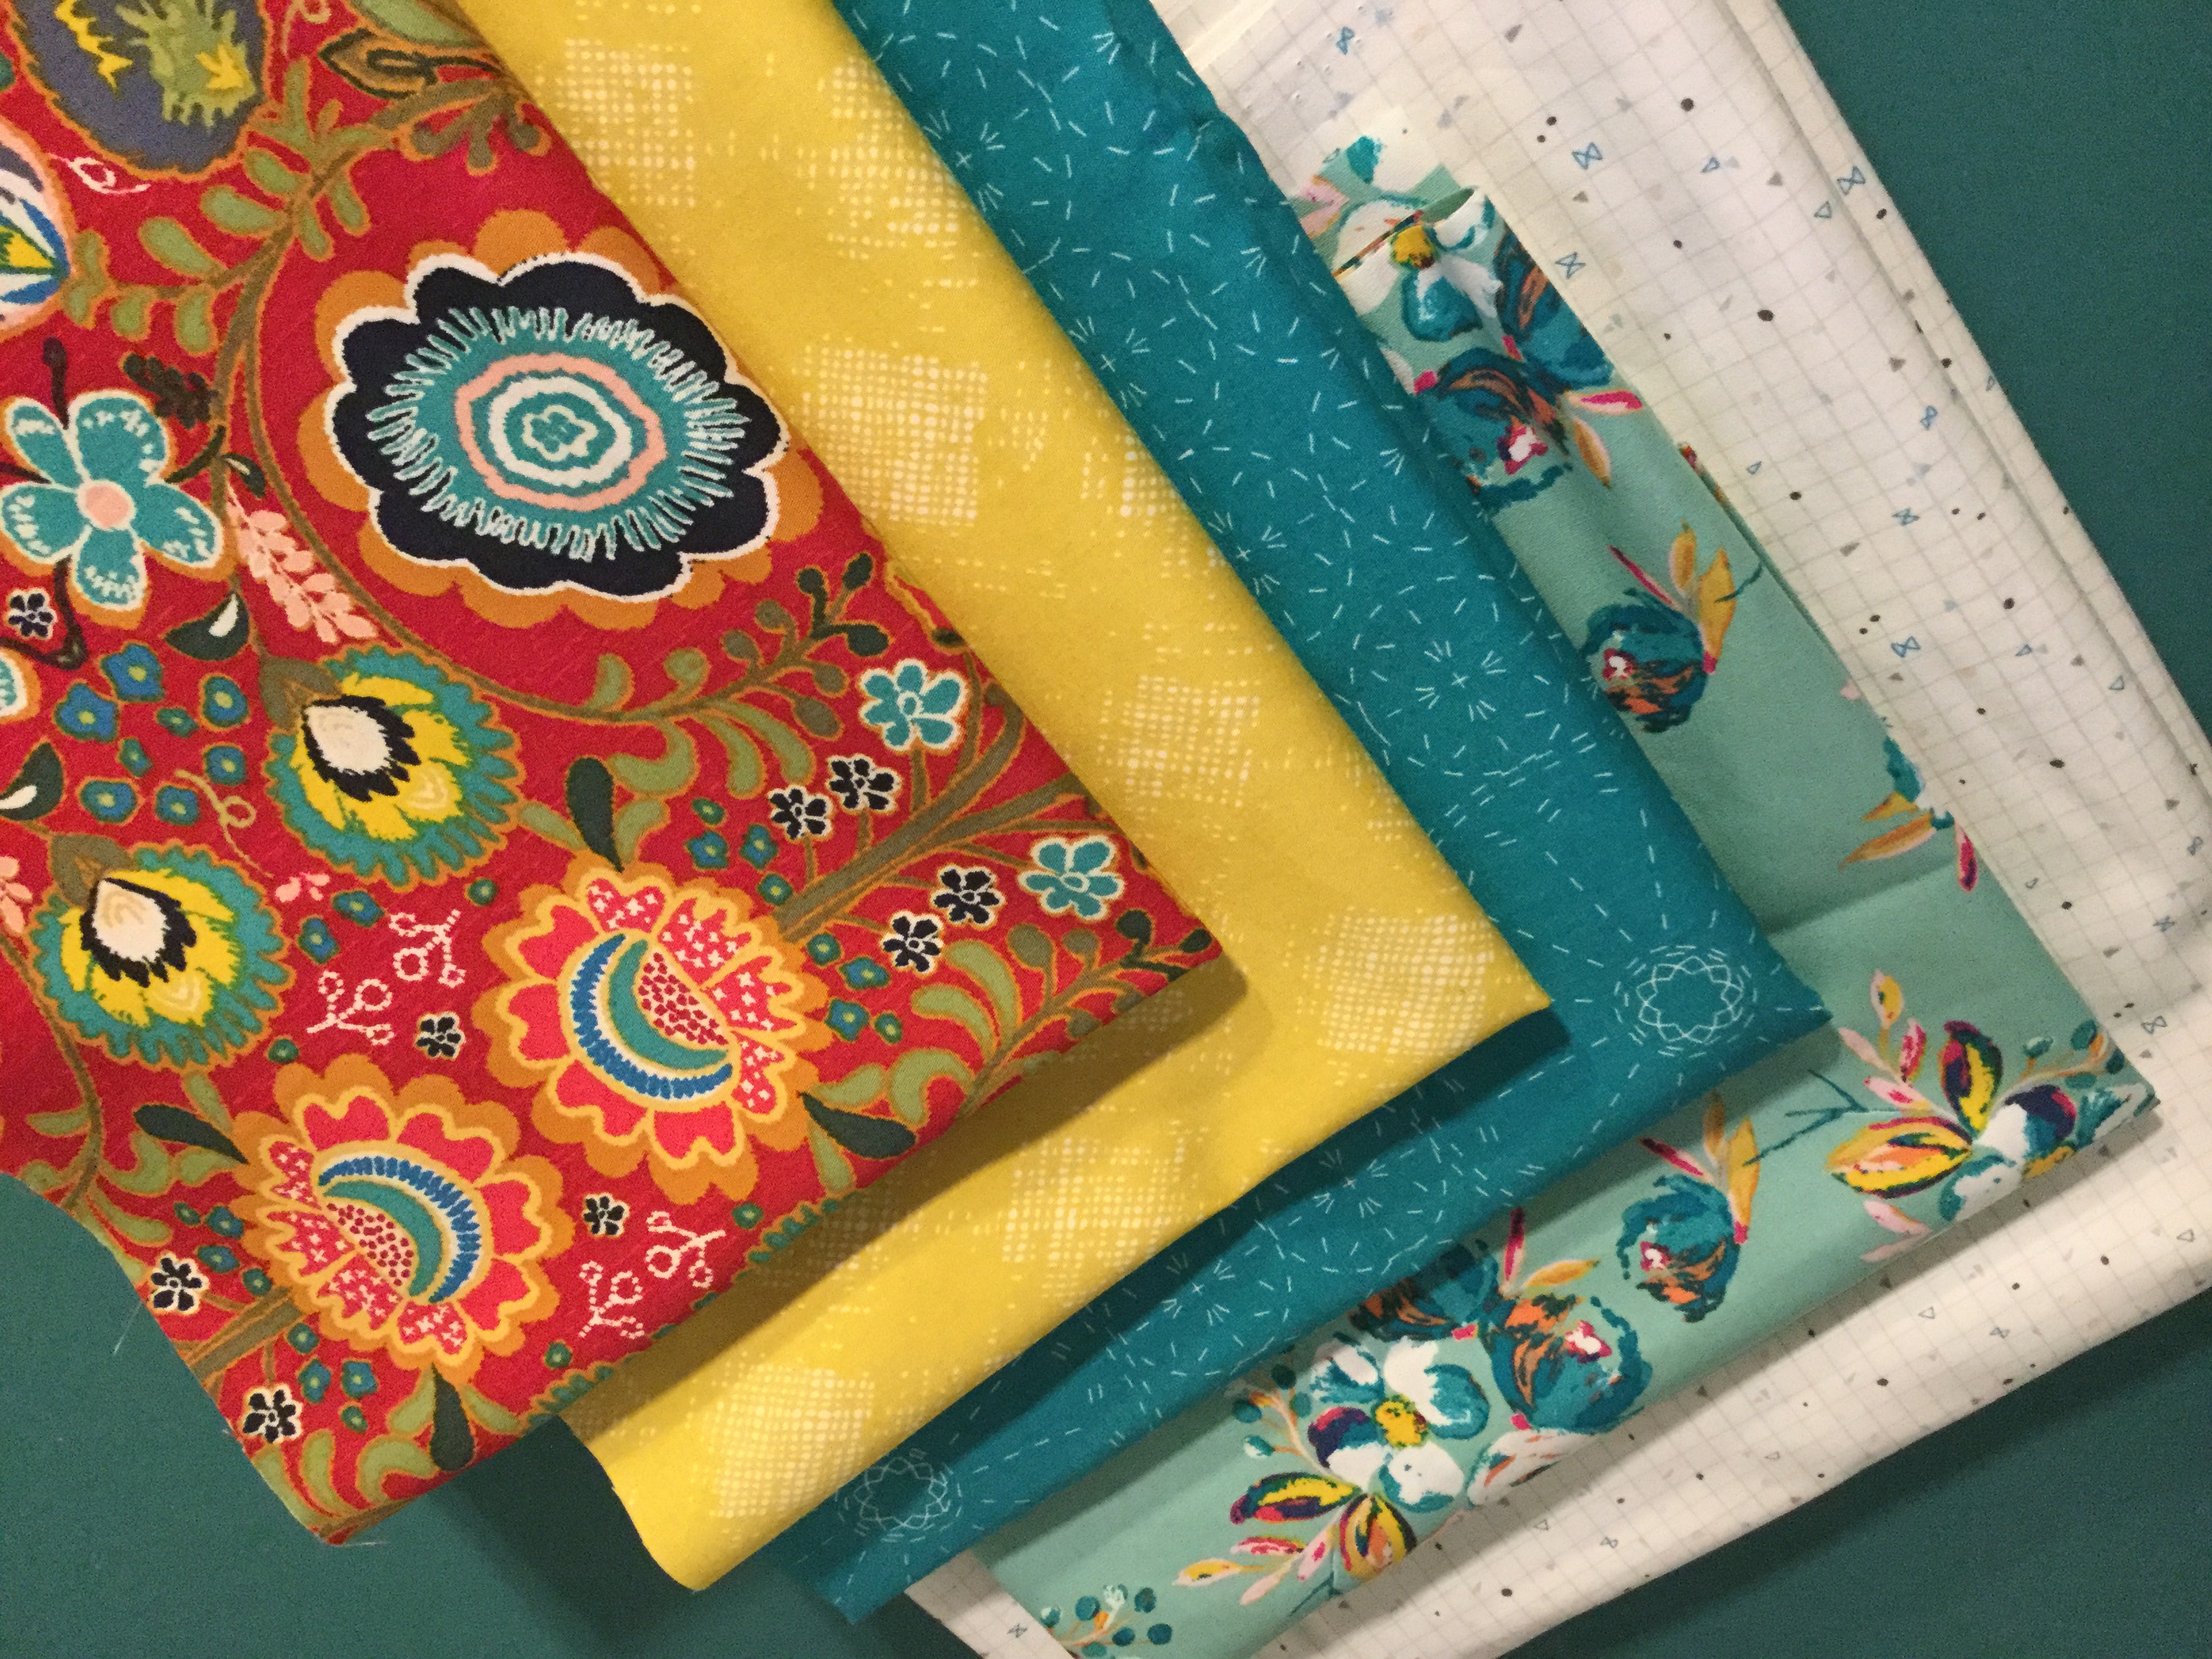
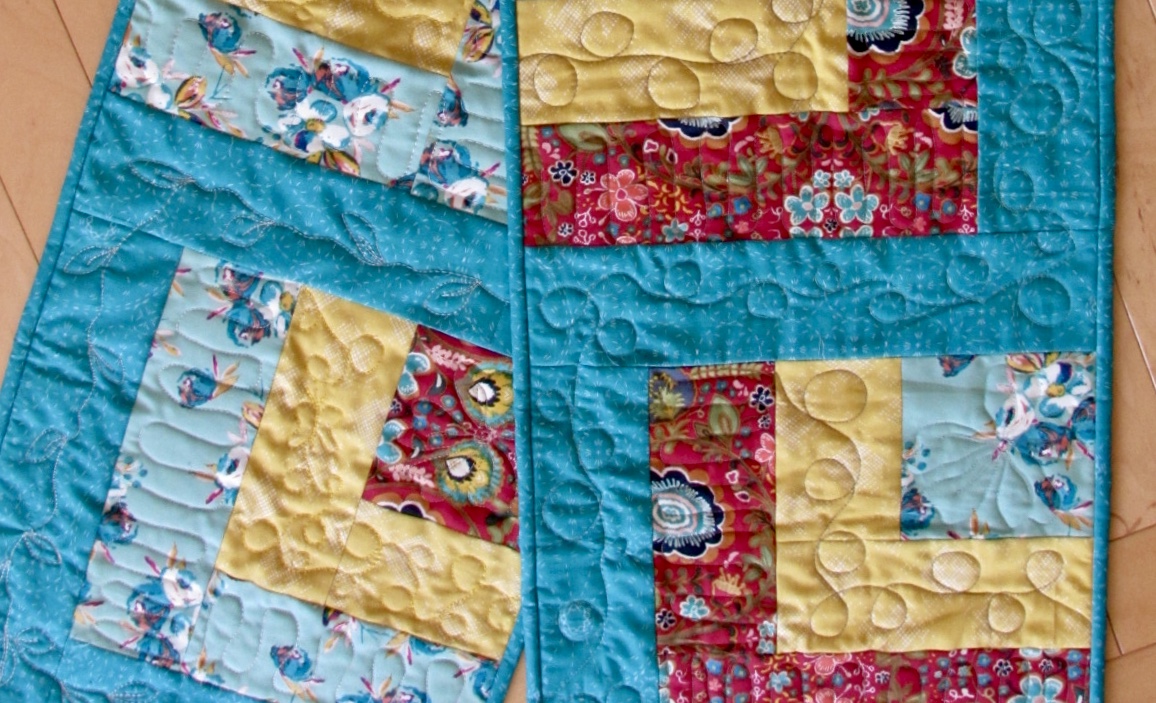
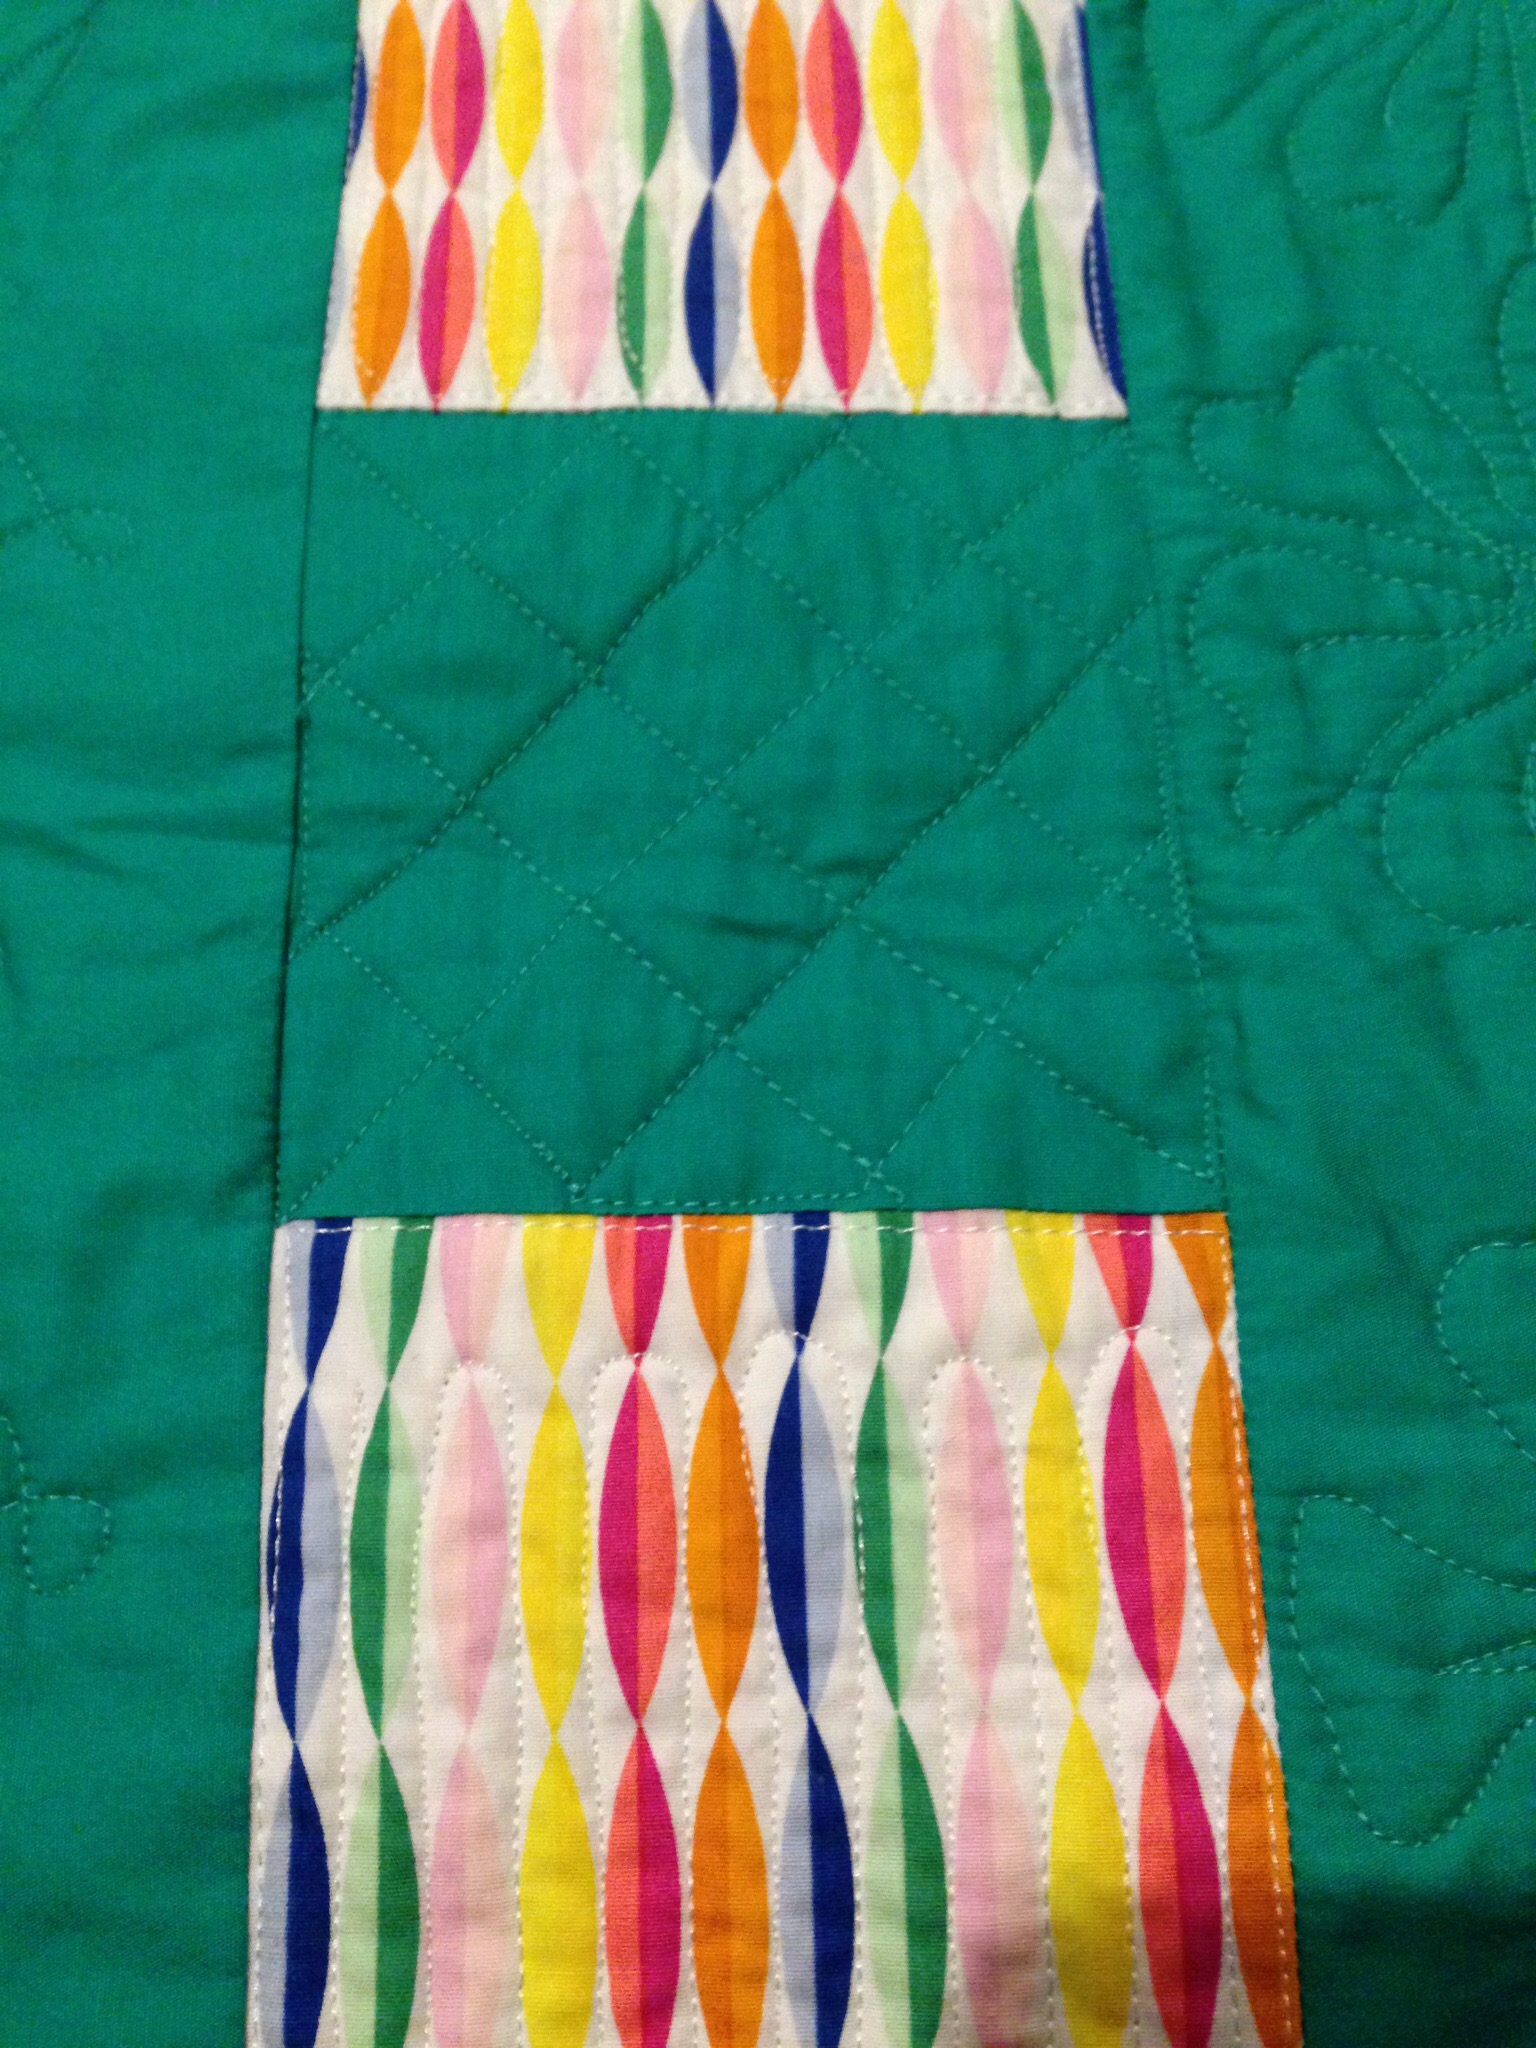
It was fun to pick colors for these. My sister asked for teal and some red. I sent a few ideas and we ended up with this combination of Sashiko Florette (teal), Corsage Charm, Terra Firma Sunlit, and Kohkhloma Burgundia for the pop or red. All of these are Art Gallery fabrics from my shop and as always, even though they are from three different lines, they look great together.
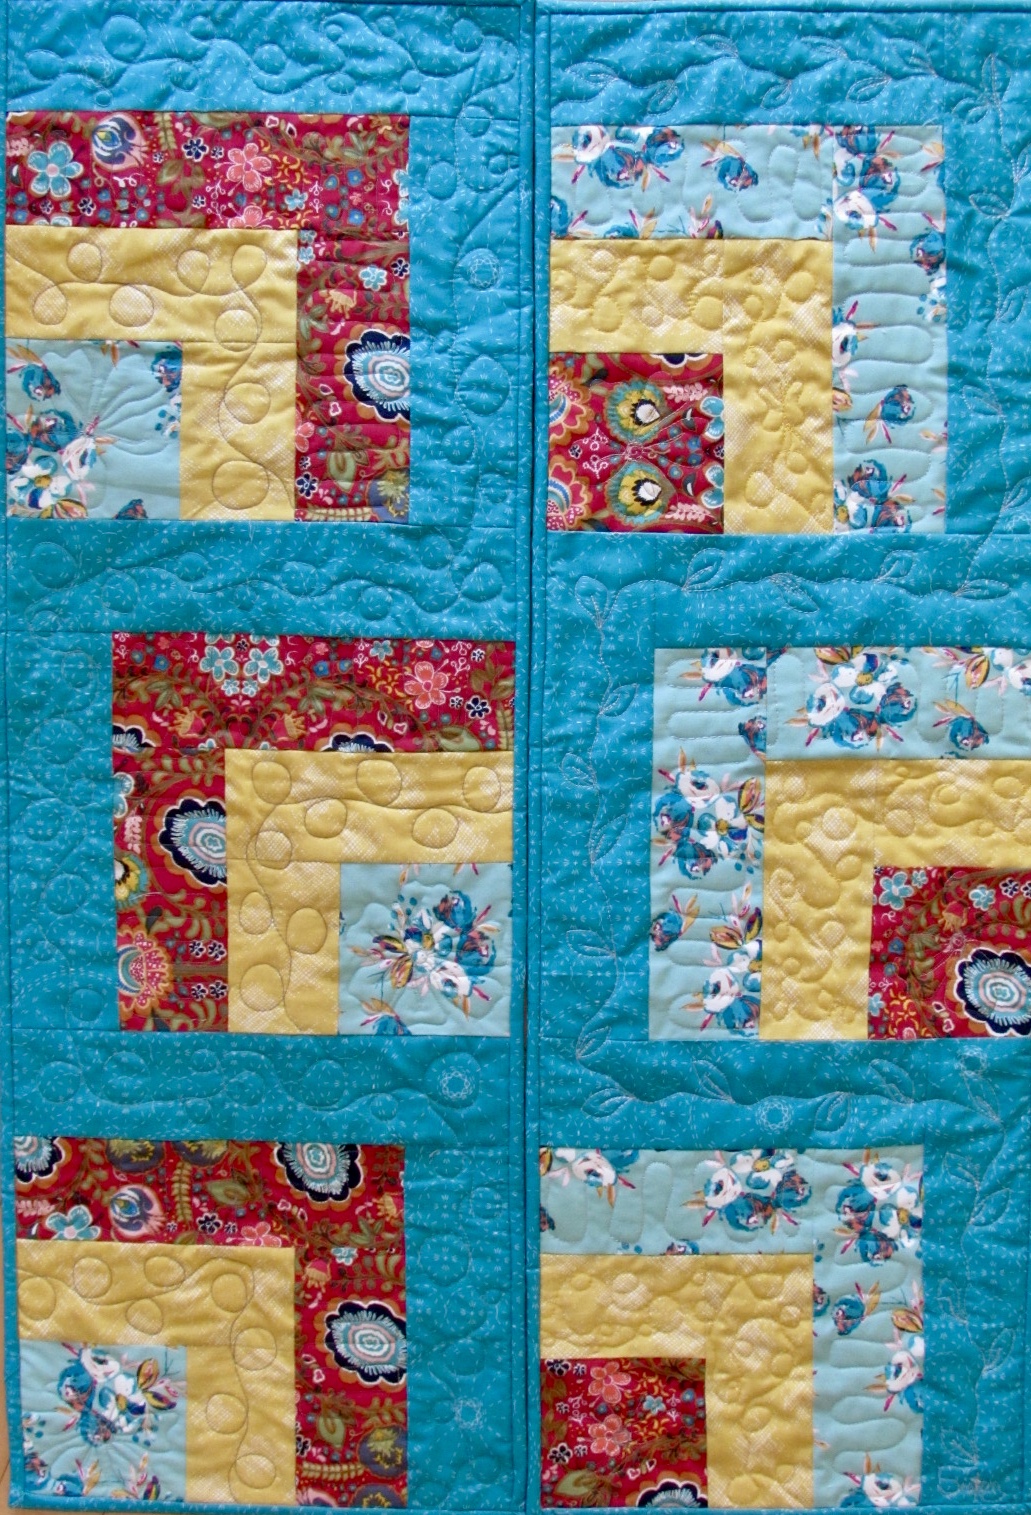
This simple pattern was inspired by Anorina’s tutorial over at her blog, Samelia’s Mom. I made it a bit smaller and only made three blocks for each runner. It came together quickly.
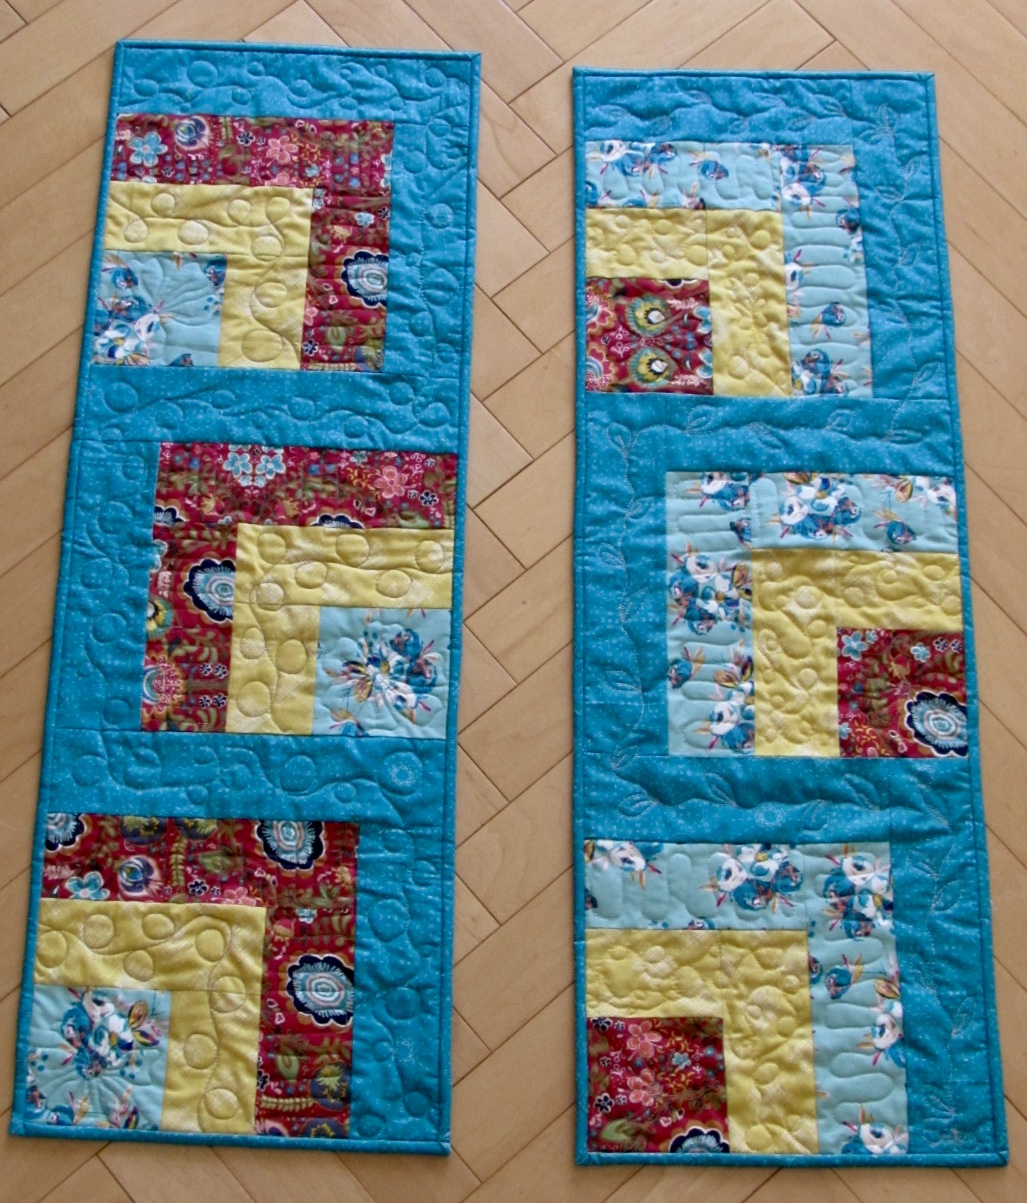
While I did use the same fabric for each, I reversed the red fabric with the light blue floral on each runner, just to mix things up a bit. I looked at this project as a great opportunity to practice some free motion quilting.
For the four inch square blocks on both pieces, I quilted a large flower. The other sections were filled in with loops, squiggles and leafy vines.
When I put these side by side, I could picture it as a larger quilt and it would look great.
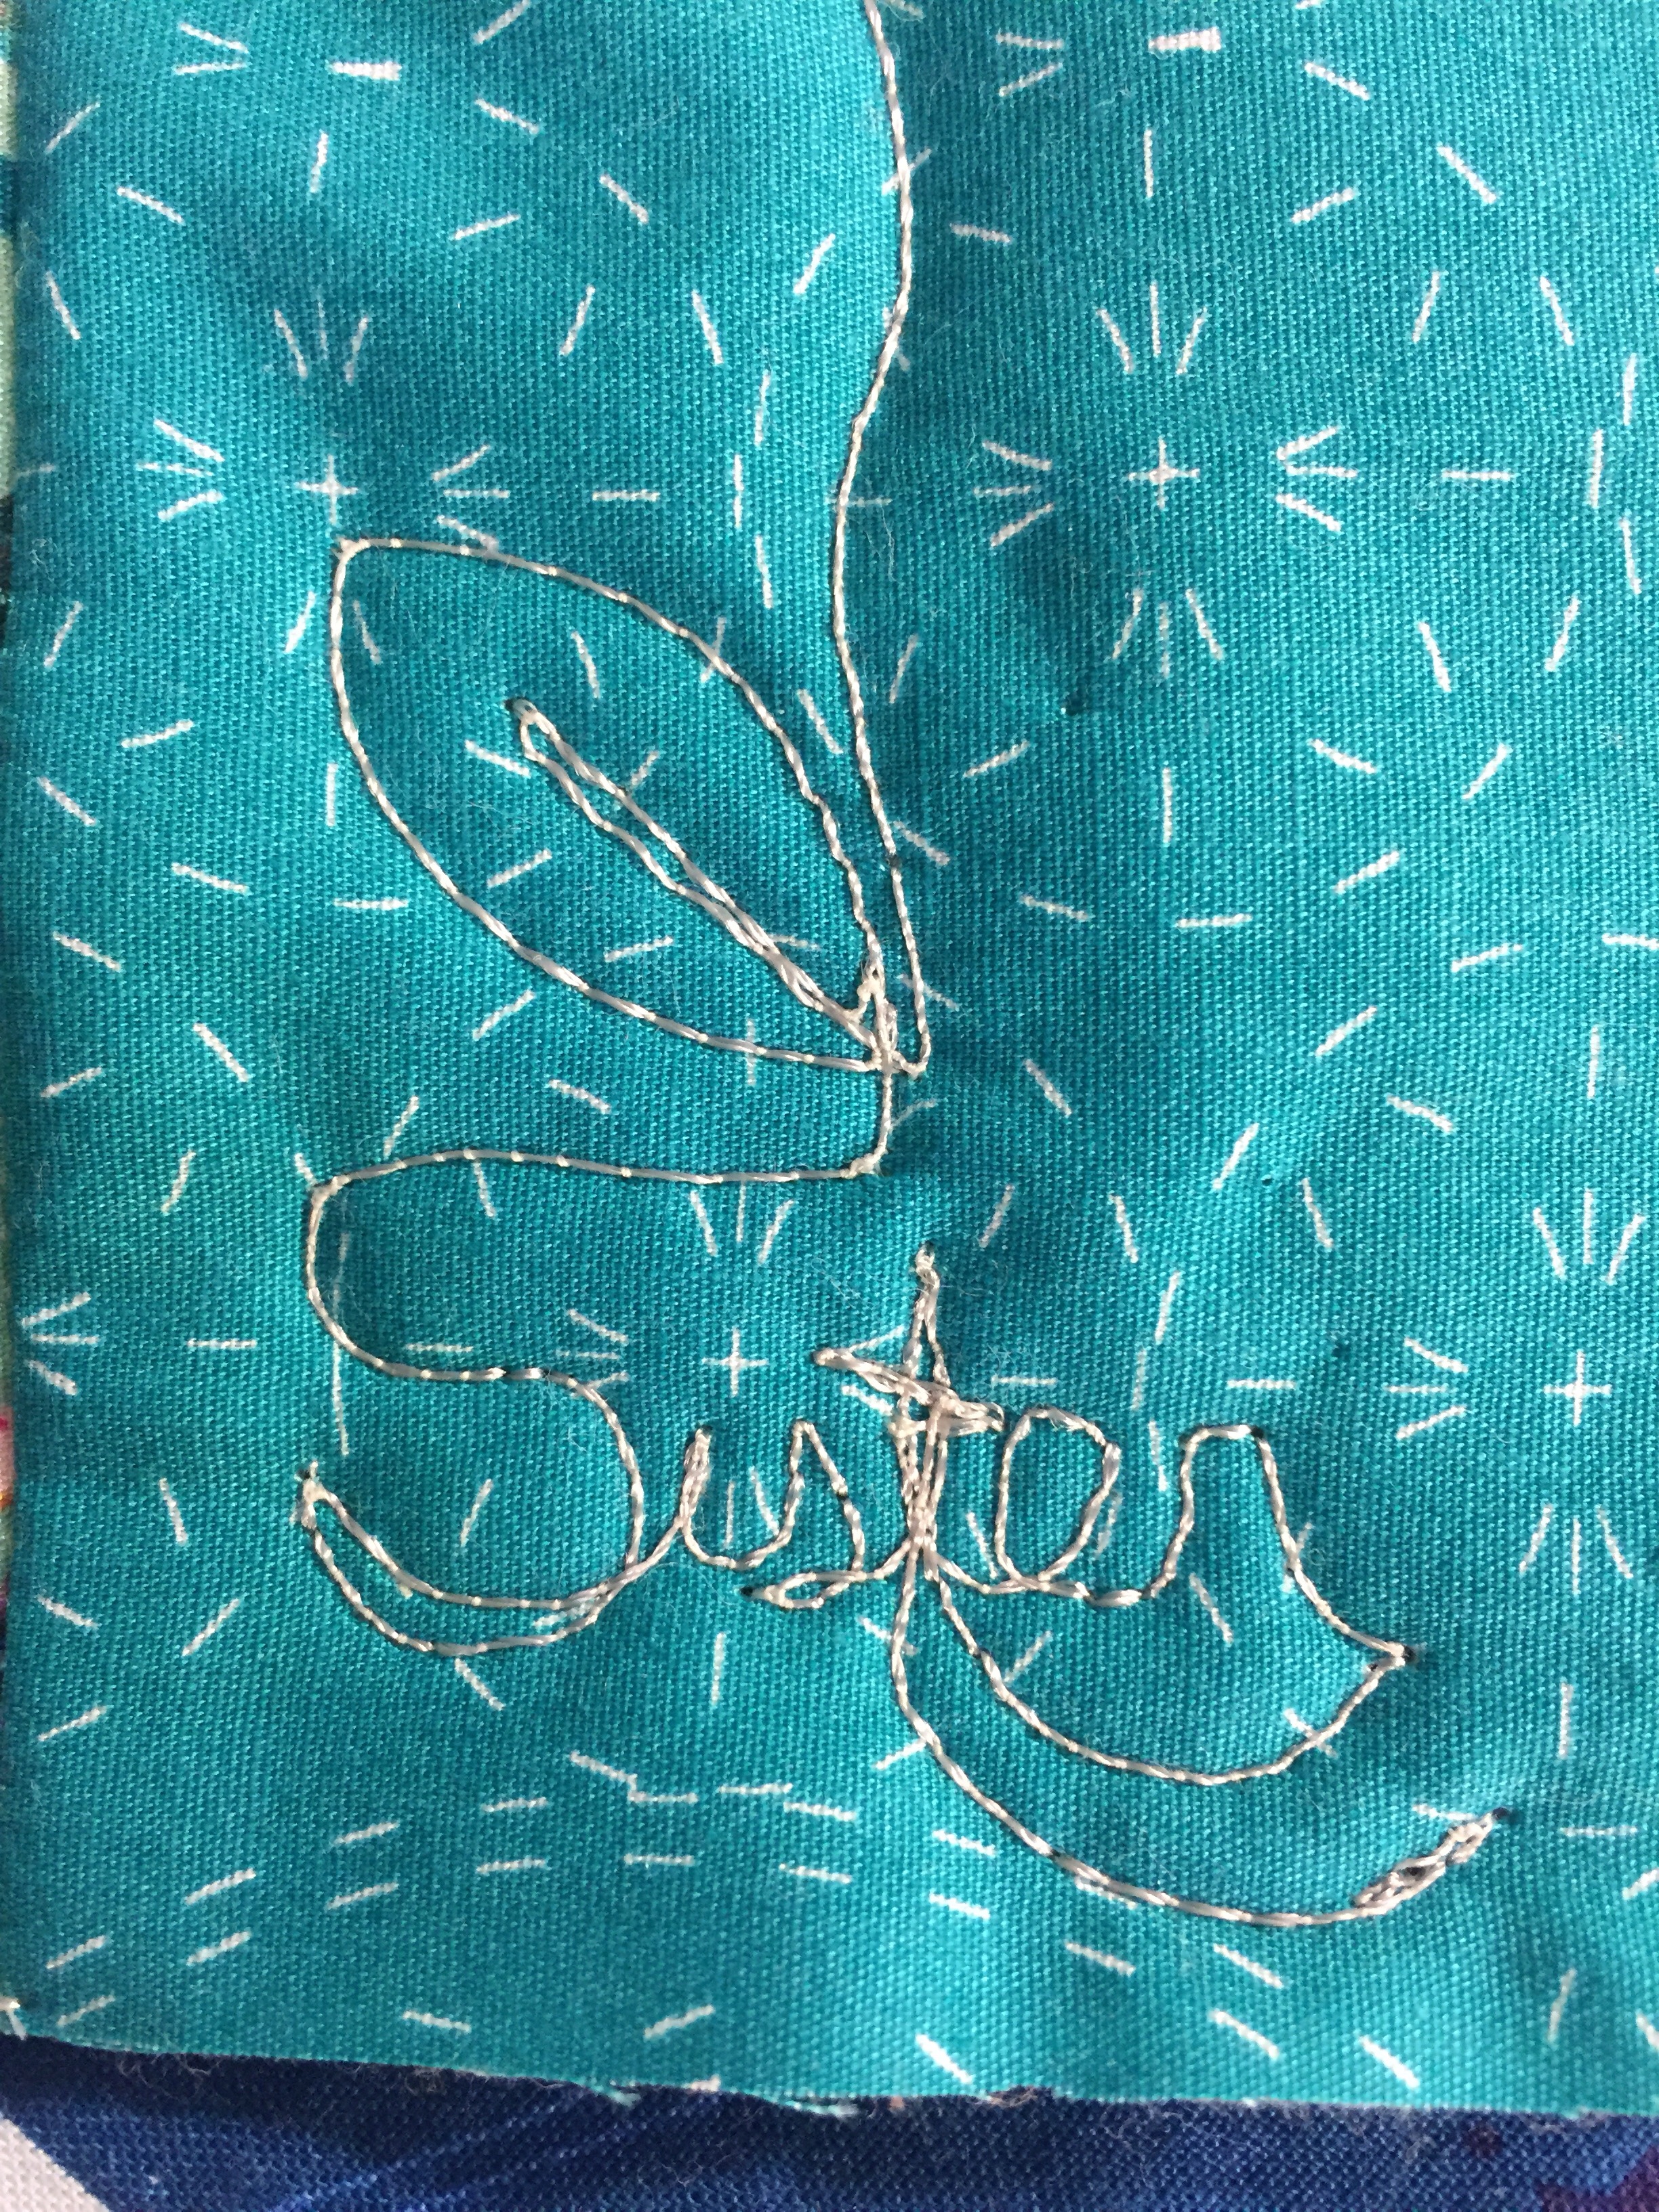
When I was just about done quilting these, I remembered I wanted to quilt a word or something more personal on the runner. But seriously, I was at the very end! I managed to squish in the word sister. Not terribly creative but i didn’t think of it in time.
Anyway, it took far too long to make these little guys but they are done and ready for the mail. My sister is heading back to England soon so frugal side motivated me to get them done and in the mail so I will be mailing them to Colorado and not to England. Saves a couple of dollars….
Now that I can check this project off the list, I am ready to move on to something else. Much as I am itching to start something new, I will be disciplined and pick up one of my unfinished projects and get going!
However, sewing will have to wait until next week. This weekend is going to be busy with my husband continuing to pull out that lower deck. This afternoon I had a dumpster delivered for the huge piles of scrap wood that are piling up on the property. Hope you have an equally fun weekend planned!! Whatever is on the agenda, enjoy your weekend.
I don’t know about you but I am really lazy about getting my sewing machines serviced. I procrastinate, put it off longer and longer with my usual excuse being ‘I clean out the bobbin housing all the time so it must be fine’. But oh my gosh, think about how often I use these machines of mine. The poor things need to be taken care of!
When my smaller Janome refused to stitch more than two inches without giving me grief, I realized it was time. I took it to a woman in town who is a whiz with machine repair and maintenance. She kept it for a few days and worked her magic. Some $80 later, my machine is purring along. What a huge difference!! When I picked the machine up, Debbie had a sandwich size Zip Lok bag filled with lint and gunk. I can’t imagine how she got it all out of there but she did. The machine is like new!
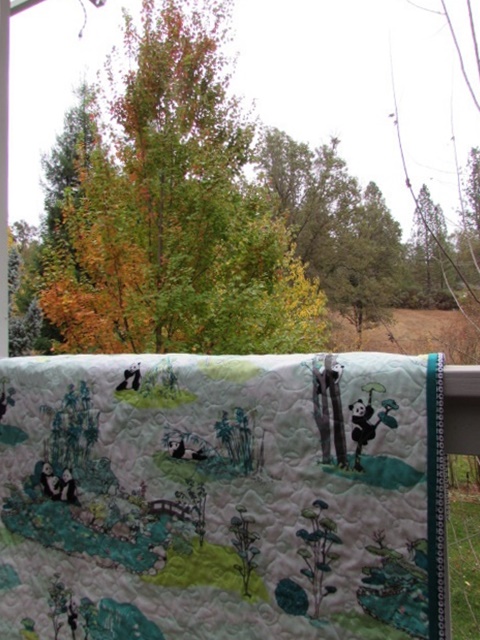
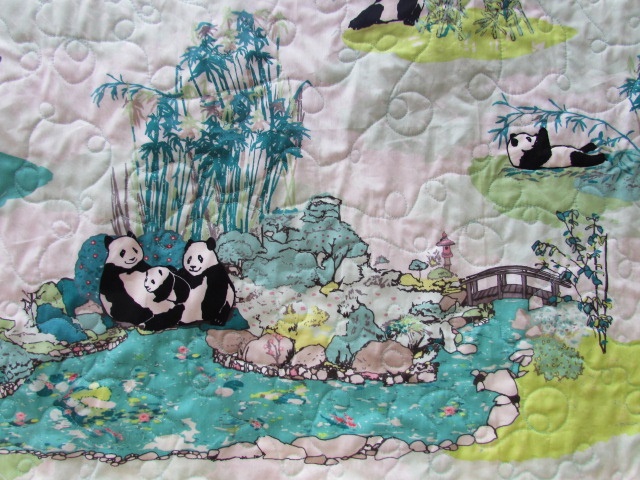
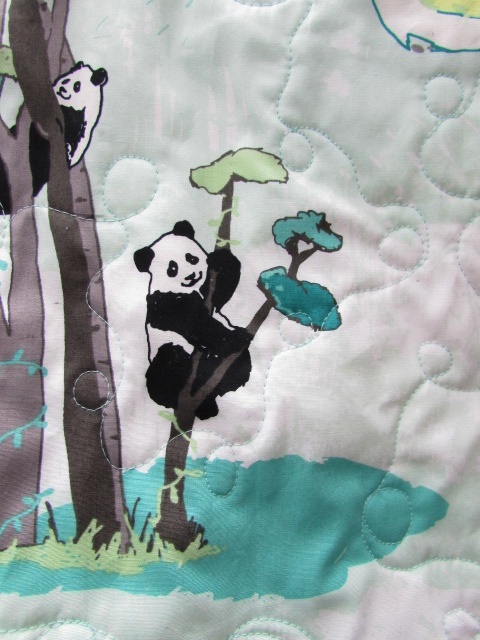
I decided to take advantage of this amazing transformation and practice some free motion quilting. I have not been doing too much quilting at home because the machines were not cooperating (now I know why!) To have a nice big canvas to play with, I chose to do a simple whole cloth quilt. Have you seen Art Gallery’s line of fabric called Pandalicious? Of course it features adorable panda bears. Designed by the very talented Katarina Roccella, these prints are really sweet and just filled with the personality of spunky pandas. I have a few pieces of the line in my shop and decided to play with the feature fabric.
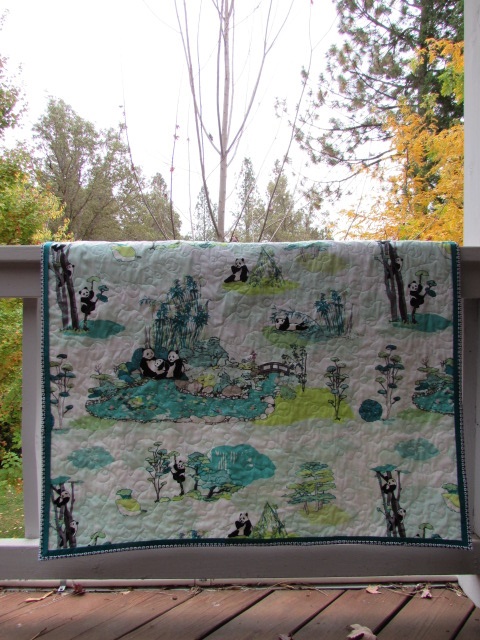
Panda Garden Recess is a large scale print which tells the story of panda families frolicking in a garden of pastel blues and greens. I cut a 40″ piece of this fabric and a 44″ piece of Hidden Panda for the backing. After trimming the top to a 40″ square and quickly pin basting the layers together, I started quilting loops. My machine was entirely cooperative and the tension was perfect. It is much more fun to quilt when my equipment is properly taken care of. 🙂
The quilting took no time at all. After squaring it up, I decided it needed something more than just the binding. I had a large scrap of a jade green solid in my stash and cut some 1 1/2″ strips to make a flange. I am always, always a fan of a flanged binding!
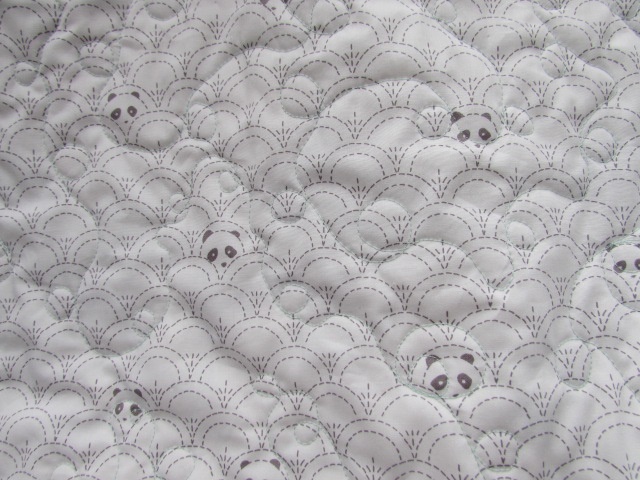
As I mentioned earlier, the adorable backing is called Hidden Panda. It is another of my favorite prints. The loopy quilting I did (which doesn’t really show up in the pictures) works well with the curve of the print. Looking back, it would also have worked to quilt the piece from the back, by quilting along or tracing the curves. Another project for another day!
There you have it. My machine is back to its amazing self and I have a sweet quilt as a result. Next weekend is the quilt show for the Pioneer Quilter’s Guild where I will be a vendor. It is going to be held in Roseville so if you are a local, come out, say hi, and enjoy the show! I will use the quilt to show off this fun fabric in the booth. After that, maybe it is destined for Project Linus or a spot in my Etsy shop. I haven’t yet decided.
We are supposed to have a wet, rainy weekend and I am prepared!! I have two projects currently vying for my time so I am very much looking forward to a quiet weekend in the sewing room. There is also a tiny quilt show scheduled for the weekend and I may hop over there to take a look at the quilts. We shall see! Hope you have something fun planned as well! Enjoy the weekend.
Linking to my usual favorites as well as one new to me; Finished or Not Friday over at Busy Hands Quilts. Check them out at the top of the page, under Link Ups.
About two weeks ago, I was contacted by C&T Publishing asking if I would provide a review of one of their newest quilting books. Always up for learning something new or reading pretty much anything about quilting, I was happy to help.
The author, Dorie Hruska, is a long arm quilter, mom, and blogger. She has her website, Forever Quilting, set up as both her blog and her professional site for her long arm business. I really enjoyed looking at her gallery to see the work she has done for others. Her quilting style is lovely with many intricate patterns.
The book, Making Connections, is all about free motion and long arm quilting. The goalof the book is to help the quilter choose a motif or pattern for the quilt and then to set a travel path up for moving around the quilt in the most efficient manner, with the least amount of starts and stops possible. This is really appealing to me. Like many of you, I struggle with how to quilt something once that quilt top is done.
Reading this book through, I noticed two things that I really liked. It is written as a workbook with very clear illustrations and directions. The practice builds in complexity as the reader learns the steps. Also, there are lots of grids printed in the book to draw on. The grids are bigger than graph paper but not quite big enough. When I practiced, I copied the page and enlarged it on our printer. Finally, the book is printed in landscape orientation, not portrait. This makes it much easier to use as you don’t have the binding on the left side making it awkward to draw.
I took away a few really helpful ideas from Dorie’s book:
Doodle the design before quilting. I know this, we all know this, but it helps so much! There is such muscle memory in free motion quilting and by drawing it several times over, that routine settles into our brain before we begin quilting.
While doodling the design and then while quilting, think, or say, the pattern you are moving in to keep you on track. For example, Up, Down, Over, Up, Down, Over – or whatever works. When Dorie maps out a path in the book, she sets this up for the quilter. As a beginner quilter at best, this was pretty helpful. Seems so simple, but that little mantra was kinda cool. 🙂
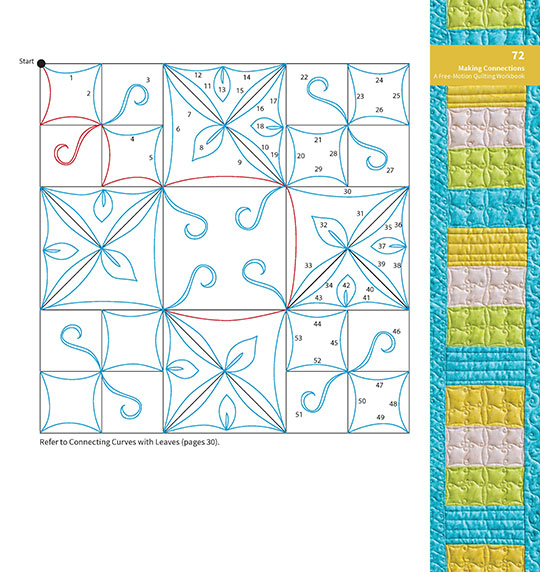
Don’t try to quilt the whole design in one pass. Dorie layers the design so you might do one pass, the come back and add a layer to add another detail. I get this and think, eventually, it will be helpful to me. I am not quite there yet. Some of the designs she illustrates for the reader are quite complex. She does use different colors so you know which pass you are working on each time. Also, she numbers the path so you can see what direction she is taking you in. This is quite helpful.
Note the complexity of the design, stitched in several passes.
The method used in this book is based on grids. The perfect example is basic patchwork, or nine patch blocks, where there is an obvious grid. The more experienced quilter would be able to apply it to more complicated blocks.
I didn’t have a quilt top on hand that would work for this so I didn’t actually quilt anything. I did do some drawing to get that path ingrained into my brain though. After drawing a bit, I made a quilt sandwich with some scraps of fabric and batting. I drew a 3″ grid on it to practice. Once I got going, my sewing machine gave me fits. So, I had to quit and I took the machine in for service. I have been putting it off and now it was sending me very clear messages that it wasn’t going to perform well! But ugly as the stitching was, the idea worked – I knew how to move along the design without getting stuck in a corner somewhere. This methodology requires planning though. It isn’t one where you move freely around on the quilt top, filling in sections as you go along.
If I were asked, I would tell the readers this is probably a book for an intermediate quilter. I think I could follow it for the basic design and travel flow but I don’t think, as a beginner, I could layer the designs and achieve a nice result.
Overall, I enjoyed the book and think it is a valuable resource for my library. As I continue to practice, this will be very helpful. Dorie and C& T Publishing have generously provided a book for me to giveaway to a lucky reader. If the winner lives in the US, a hard copy will be sent. For winners outside of the US, an Ebook will be provided. For those of you that want to go ahead and purchase the book, it is available through C&T Pubs or directly from Dorie’s website (she will send an autographed copy!)
To enter to win, please leave a comment on this post. If you follow me on Instagram or Facebook, you are welcome to leave a 2nd comment for another entry. Sign up for my newsletter (which is sent out every month) for another entry. (Sign up form is at the top of the page on the right side.) That is three possible chances to win!!
THIS GIVEAWAY IS NOW CLOSED.
For even more chances, please visit the other bloggers involved in this hop. Lots of gorgeous quilting has been done to display all this book offers. Go check it out! Here is the schedule:
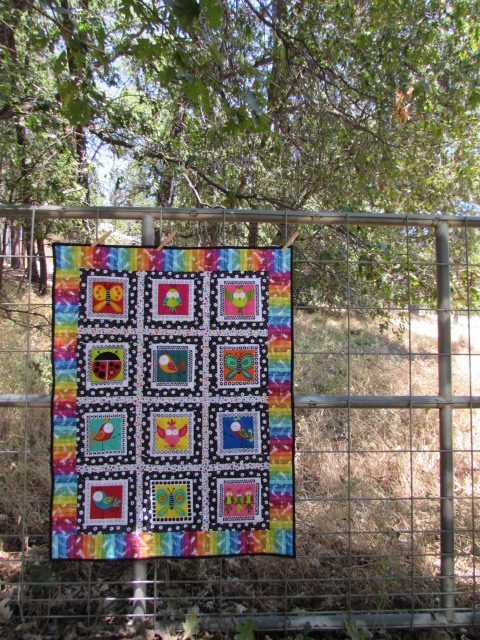
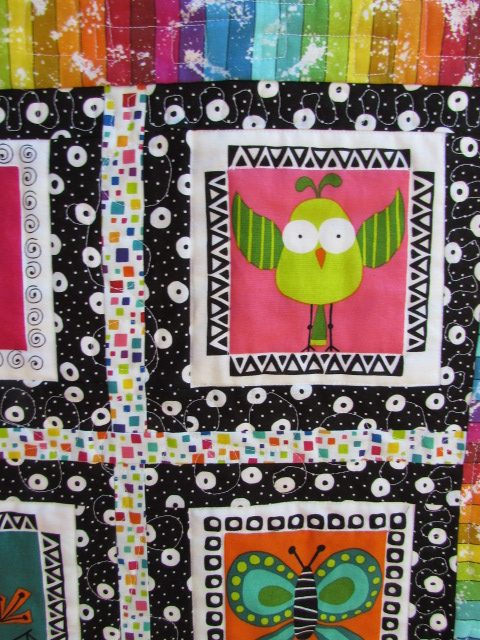
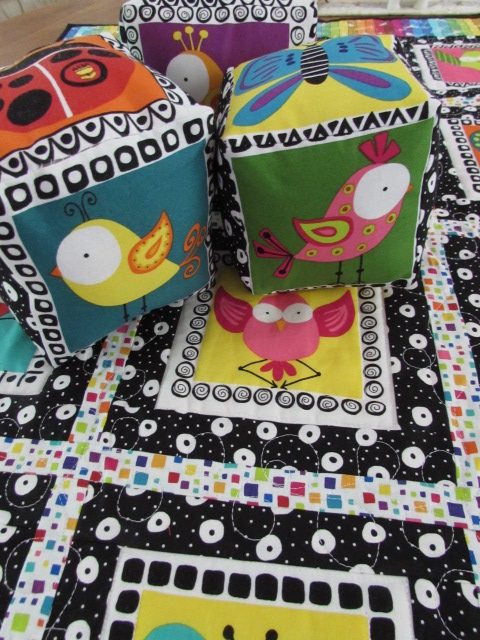
I have a finish to share with you this morning! I began this little quilt a couple of months ago when I had the Sweet Tweets fabric (by Kim Schaefer for Andover) in stock. There was a panel fabric with these fun critters and I made both a quilt top and three stuffed blocks out of it (with a few pieces to spare!) I wanted to wait a bit before finishing the quilt though. I sold out of the rainbow stripe that I wanted to use as a border. I knew Kim Schaefer was coming out with a new line that had a similar rainbow stripe and I had it on order for my shop. (Note: I am sold out of the Sweet Tweets panel now and Andover has told me they will not be reprinting any of this line. It is kind of unfortunate because it is such a cute one.)
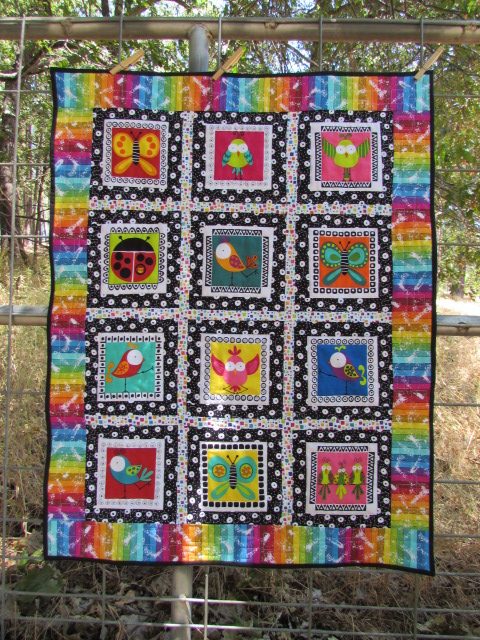
The new rainbow fabric is from an Andover line called And Z (from the alphabet song… W, X, Y And Z!) It also has a sweet alphabet panel and lots of fun coordinating fabrics, including a new rainbow stripe, which I used as the border on this project. I greatly appreciate when a designer works to make sure successive lines work with the one prior. It makes it much easier to use your stash. Anyway, this rainbow stripe was perfect for the Sweet Tweets quilt border.
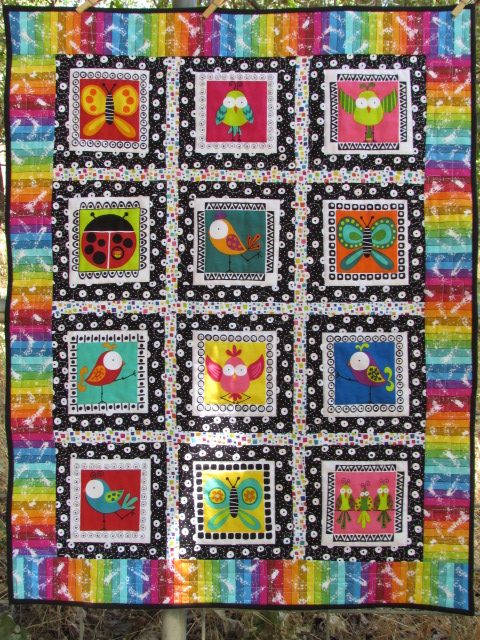
Once I had the borders on, it was time to quilt it. There is a whole lot going on with this quilt, cute focal fabric, stripes and dots, and all sorts of color. I thought it best to keep things simple. I outlined the critters with my walking foot which anchored everything down.
Next I free motion quilted large and small loops between the critters. I was using Glide thread in basic white and it was wonderful. I am really impressed with this thread and I need to get a few more colors to have on hand.
For the small row of sashing between the critters and the rainbow stripe border, I quilted a little wavy pattern. Finally when I got to the border, it was time to switch from curves to a boxy motif. (Side note – look how dry the pasture next door to us is…. We have had such a heat wave and the grasses are really dry now. )
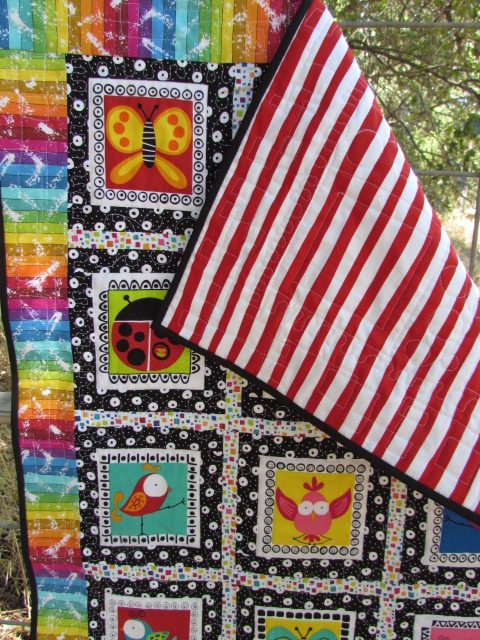
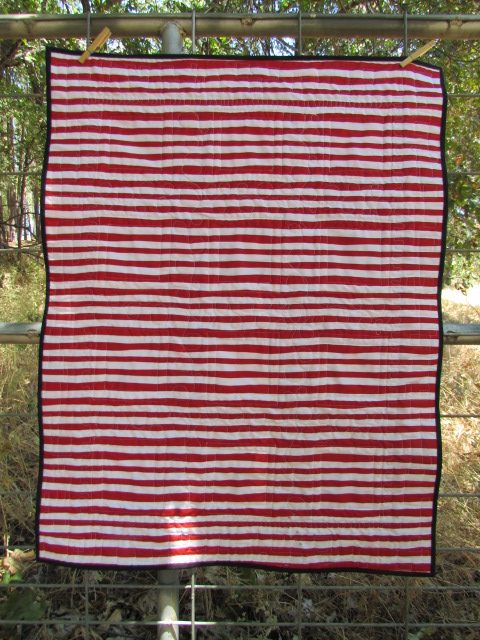
For the backing, I used a red stripe given to me by my sister last fall when she was purging her closets. It is perfectly bright and cheerful. The binding was a bit of a decision for me. I posted a photo on Instagram, asking people for input or suggestions. When someone said solid black to frame it off, I agreed. I think this quilt needed a simple binding for the finish.
The back side actually displays the quilting better than the front (as is often the case.
Look at the combination of the blocks and the quilt. This was such a fun way to use this panel fabric.
This quilt finished at 30″ by 38″ which is a nice size for baby. The quilt makes me happy and I am sure it will look cute in a nursery with a baby playing on it. There are so many colors, patterns, and critters to look at!
Linking to my favorite places. Find them at the top of the page under Link Ups.
Also, remember to sign up for the Needle & Foot newsletter to hear the latest on new fabric arrivals and fun promotions offered to my subscribers. Sign up form is on the right side of this page.
Finally here is a heads up on a great promotion over at Craftsy during this long holiday weekend. Might be the perfect time to select a new class for less than $20.00! So many excellent classes are available and once your purchase it you have it forever. What a great way to build your library. (Affiliate post)
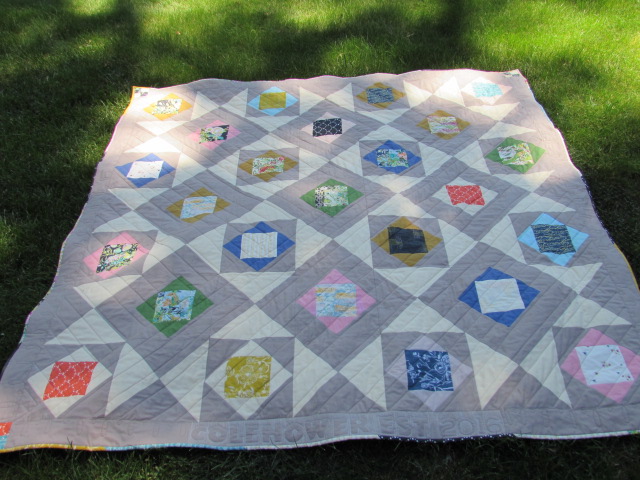
This week I finished my Harmony quilt. I will finally be able to send it off to my nephew and his wife as their wedding gift. Doesn’t some rule of etiquette say you can give a wedding present within the first year and it is still ‘proper’? According to this post on Manners Monday of the Huffington Post, I am still within the time frame. Though really, who would refuse a wedding gift because it was late? At least I am finally giving it to them!!
You might remember I made the quilt top a long time ago. I used a fat eighth set of Millie Fleur by BariJ for the centers and Moda solids, Fig Tree Cream and Stone. The pattern is one that alternates hourglass blocks and economy blocks, each of which finished at 9 1/2″. I love the look of this pattern and feel proud to have drawn it myself and figured it out without a pattern (I don’t do that too often.)
I wanted to quilt it on a long arm because there is lots of cool negative space and it would have been fun to play with it. However, that just never worked out and in the interest of time and wanting to complete this quilt, I opted to quilt it at home. It is fairly large at 74″ square so I decided against free motion quilting and settled for straight line with my walking foot. I did a diagonal line across the middle. For one side I did vertical lines all the way out and on the other side I quilted horizontal lines. I like the effect.
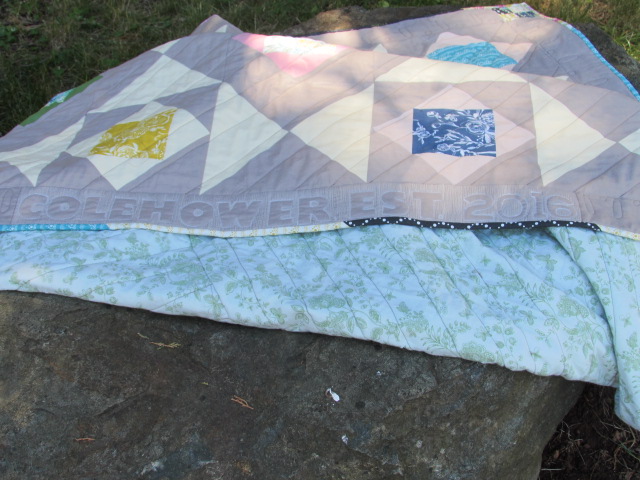
My favorite part of the quilt is the bottom border where I relief quilted their last name and the words EST. 2016. It is a sweet reminder of when they married and established their family of two (plus a couple of dogs!!) As with my other relief quilting projects, I fused stabilizer to the back of the border strip (before it was attached to the quilt) Once the letters were traced on to the border, I used my darning foot and created the design by free motion quilting around the shapes of the letters and numbers. After attaching the border strip and quilting the body of the quilt, I took the darning foot and FMQ’d the outline of each letter and number to quilt that section of the border and make the letters stand out and puff up a bit.
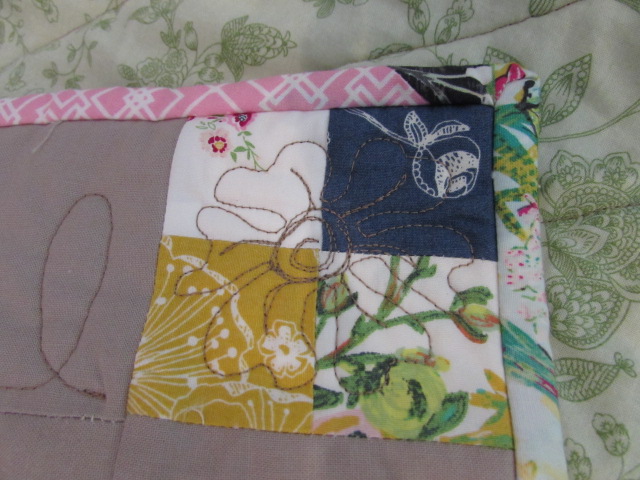
On the corners I used a four patch block as a cornerstone. On each of these I quilted a little flower. The borders were free motion quilted with a pattern of loops, alternating small and large ones.
To finish it off, I made a scrappy binding! I am such a fan of scrappy bindings. Luckily, I had just enough of the Millie Fleur fabric left to make the binding.
The backing is a green, floral wide back I purchased long ago and I couldn’t honestly say what it is. I can say I love the ease of a wide back for backing. Pieced backs are very cool and give you sort of a double sided quilt but wide backs (108″ wide) provide ease of use and a speedy finish. (Plus I have a large piece of it leftover which is kind of nice!) In fact, I recently bought the first bolt of wide back, a small gray polka dot by Red Rooster and it is listed in my shop. Just in case you need some. 🙂
I can’t wait for the kids to receive their quilt. I was really sad to have missed this wedding last year. From the pictures they shared, it was just a gorgeous day for my nephew and his new wife. I am sharing a picture of them dancing at their wedding. Breathtaking, aren’t they? I hope they love the quilt and use it happily for years to come.
If you haven’t yet signed up, I would love to have you sign up for my newsletter. Sent monthly, it contains updates about new fabrics I have in the shop and promotions that will run that month for newsletter readers. Sign up form is on the right side of your screen, toward the top.
Linking to my favorites, each of which can be found at the top of the page, under Link Ups.
We are playing the waiting game for Baby Girl (my first grandchild) to arrive. Everyone is so excited to meet her but she seems to be taking her own sweet time. My daughter-in-law is great about my constant texts – although I had better knock it off or she might block my number. 😉
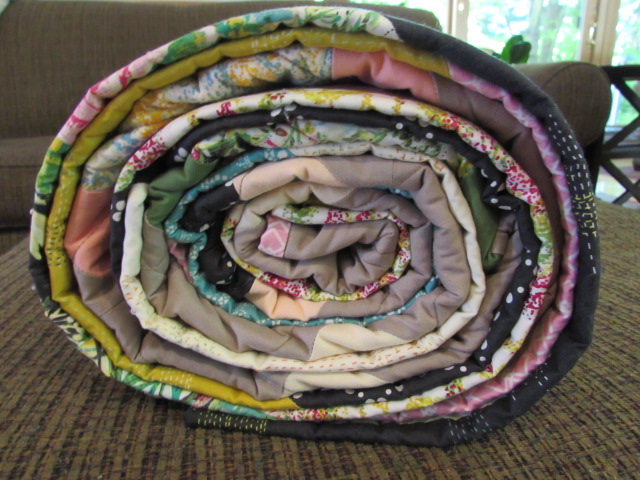
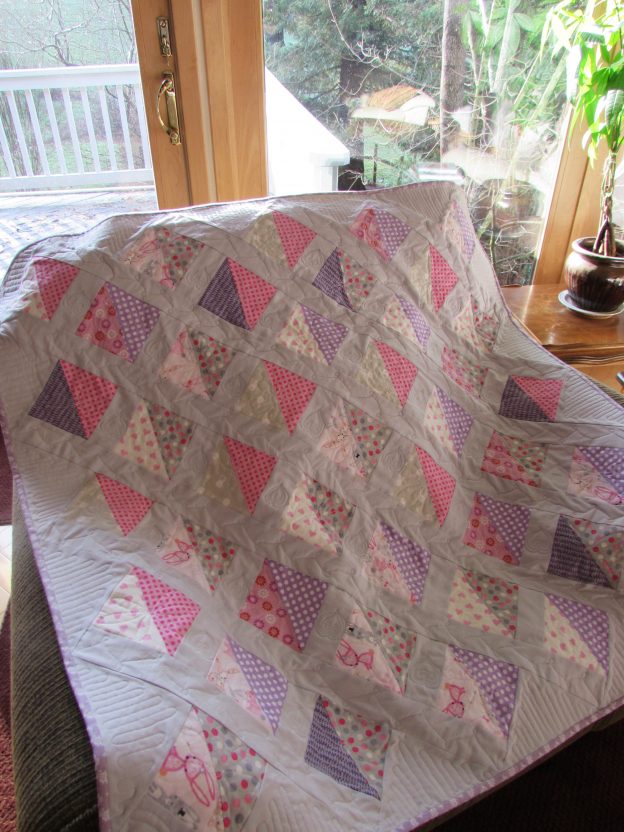
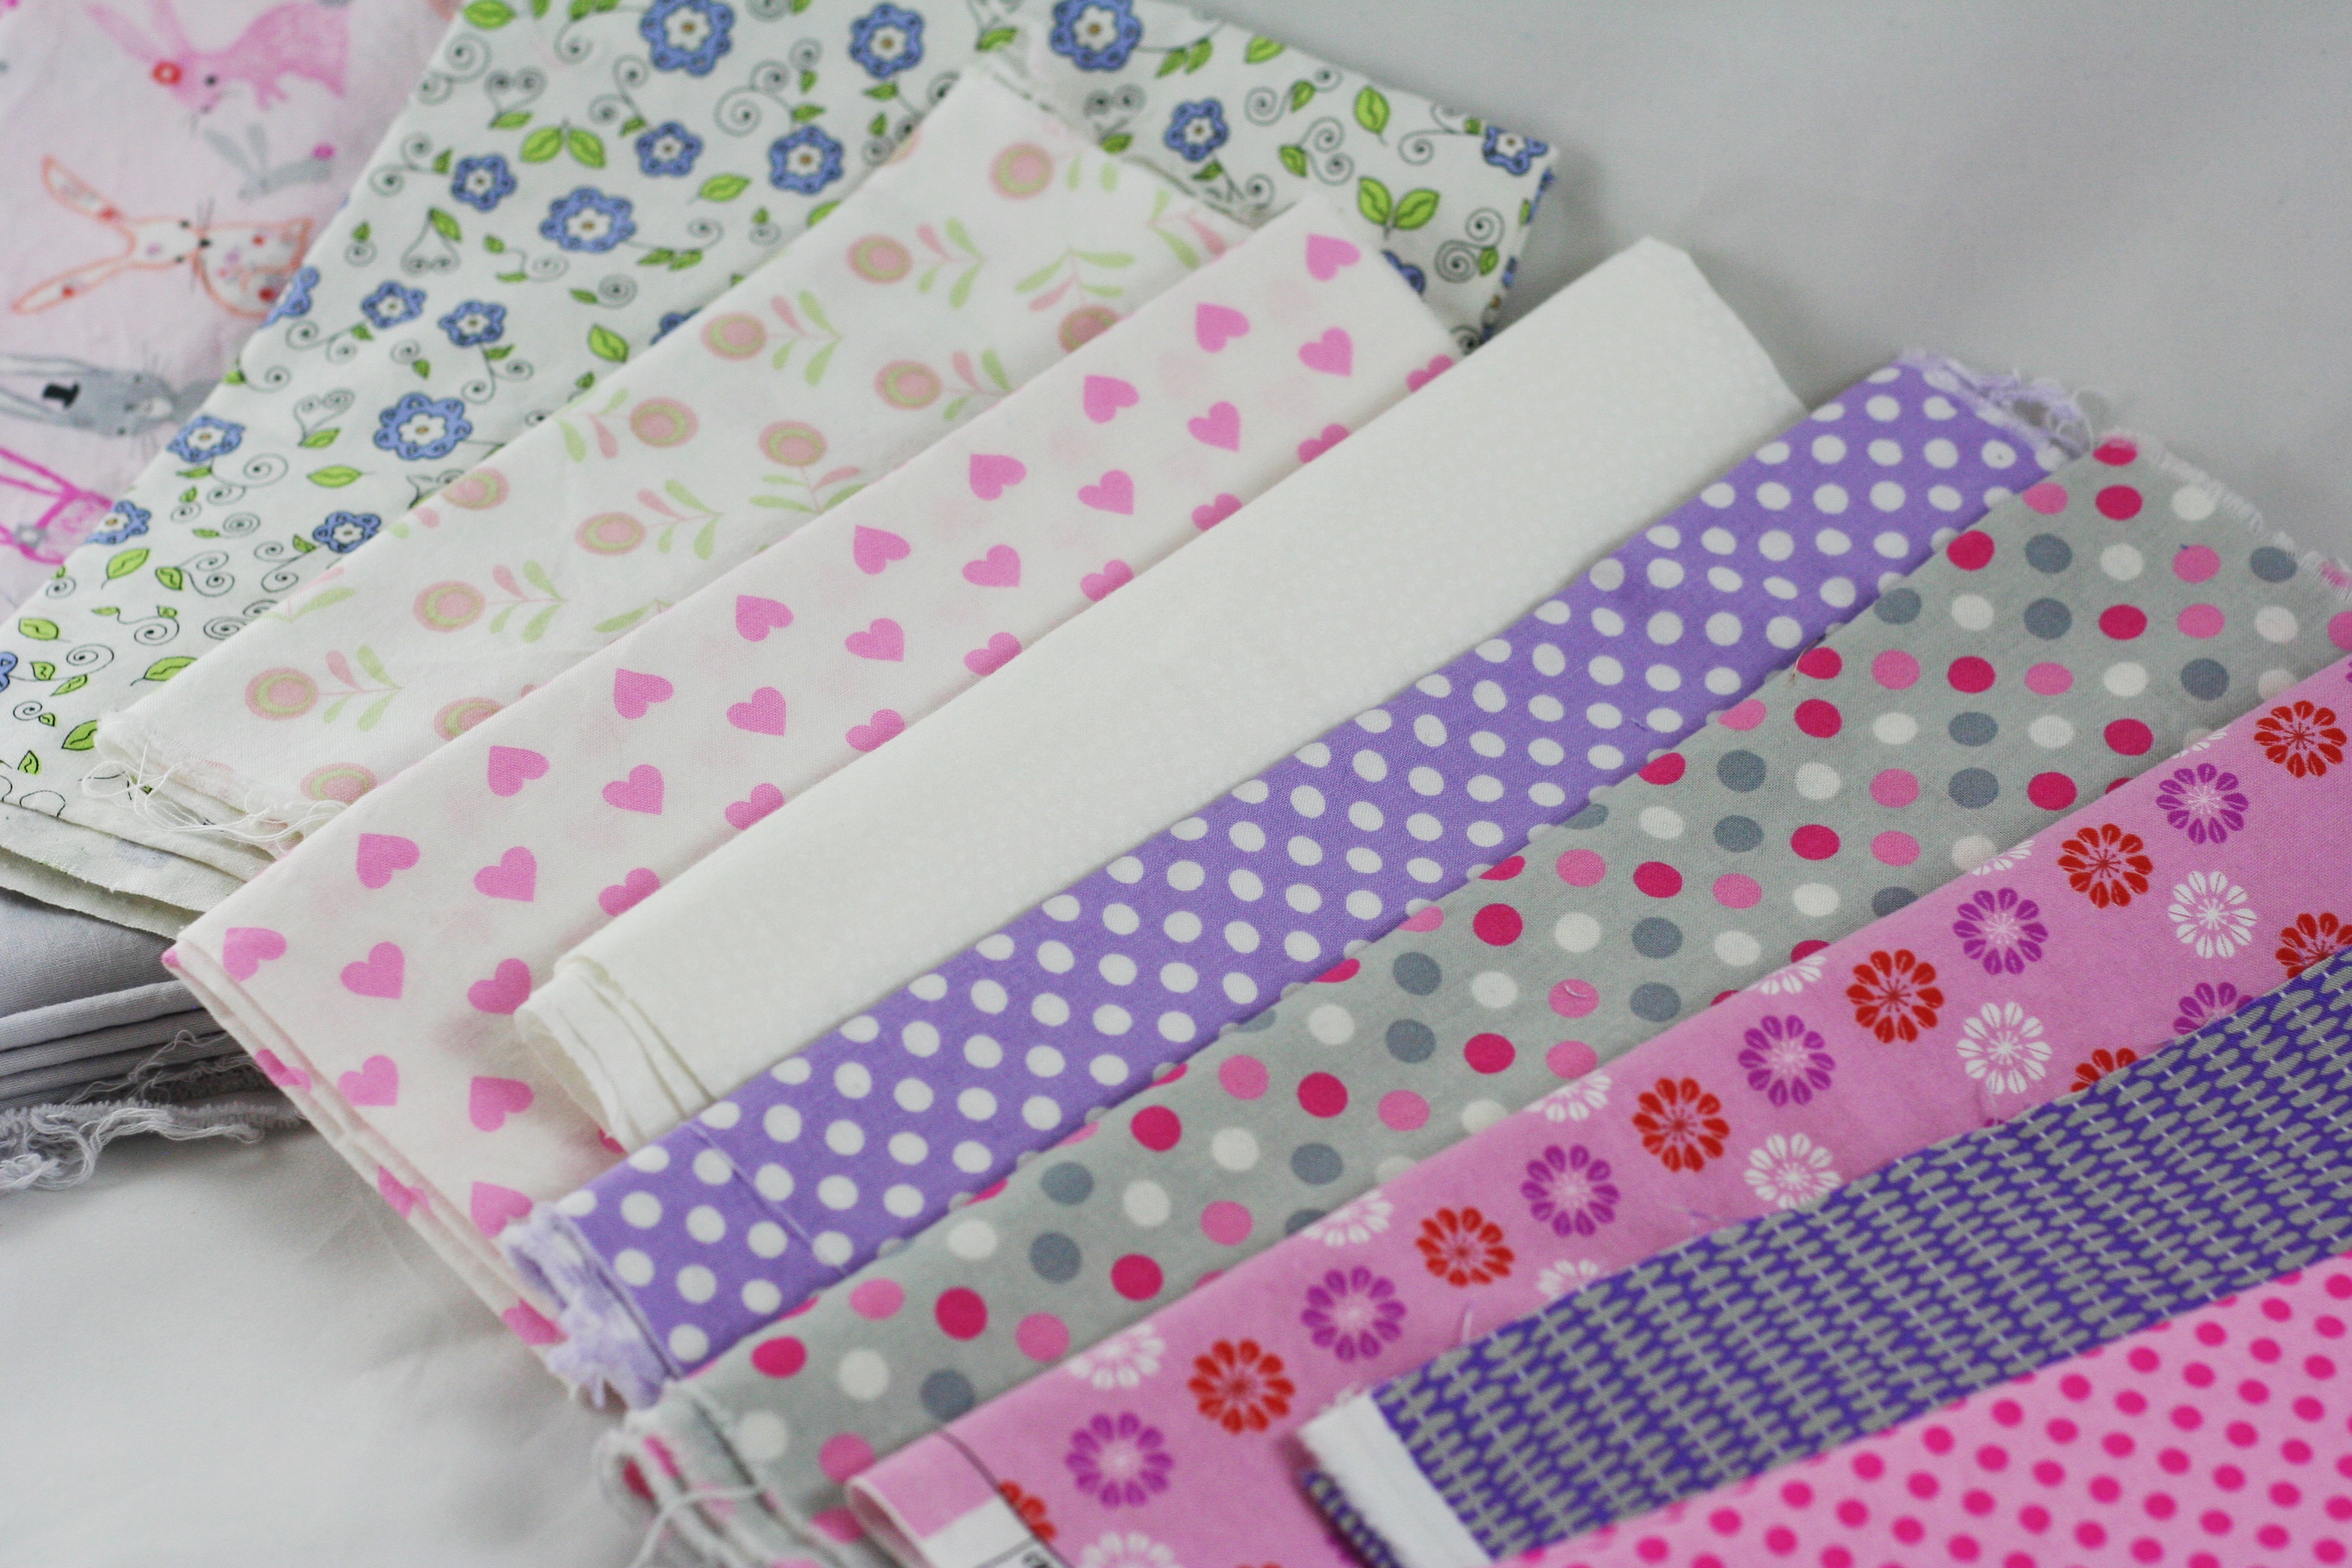
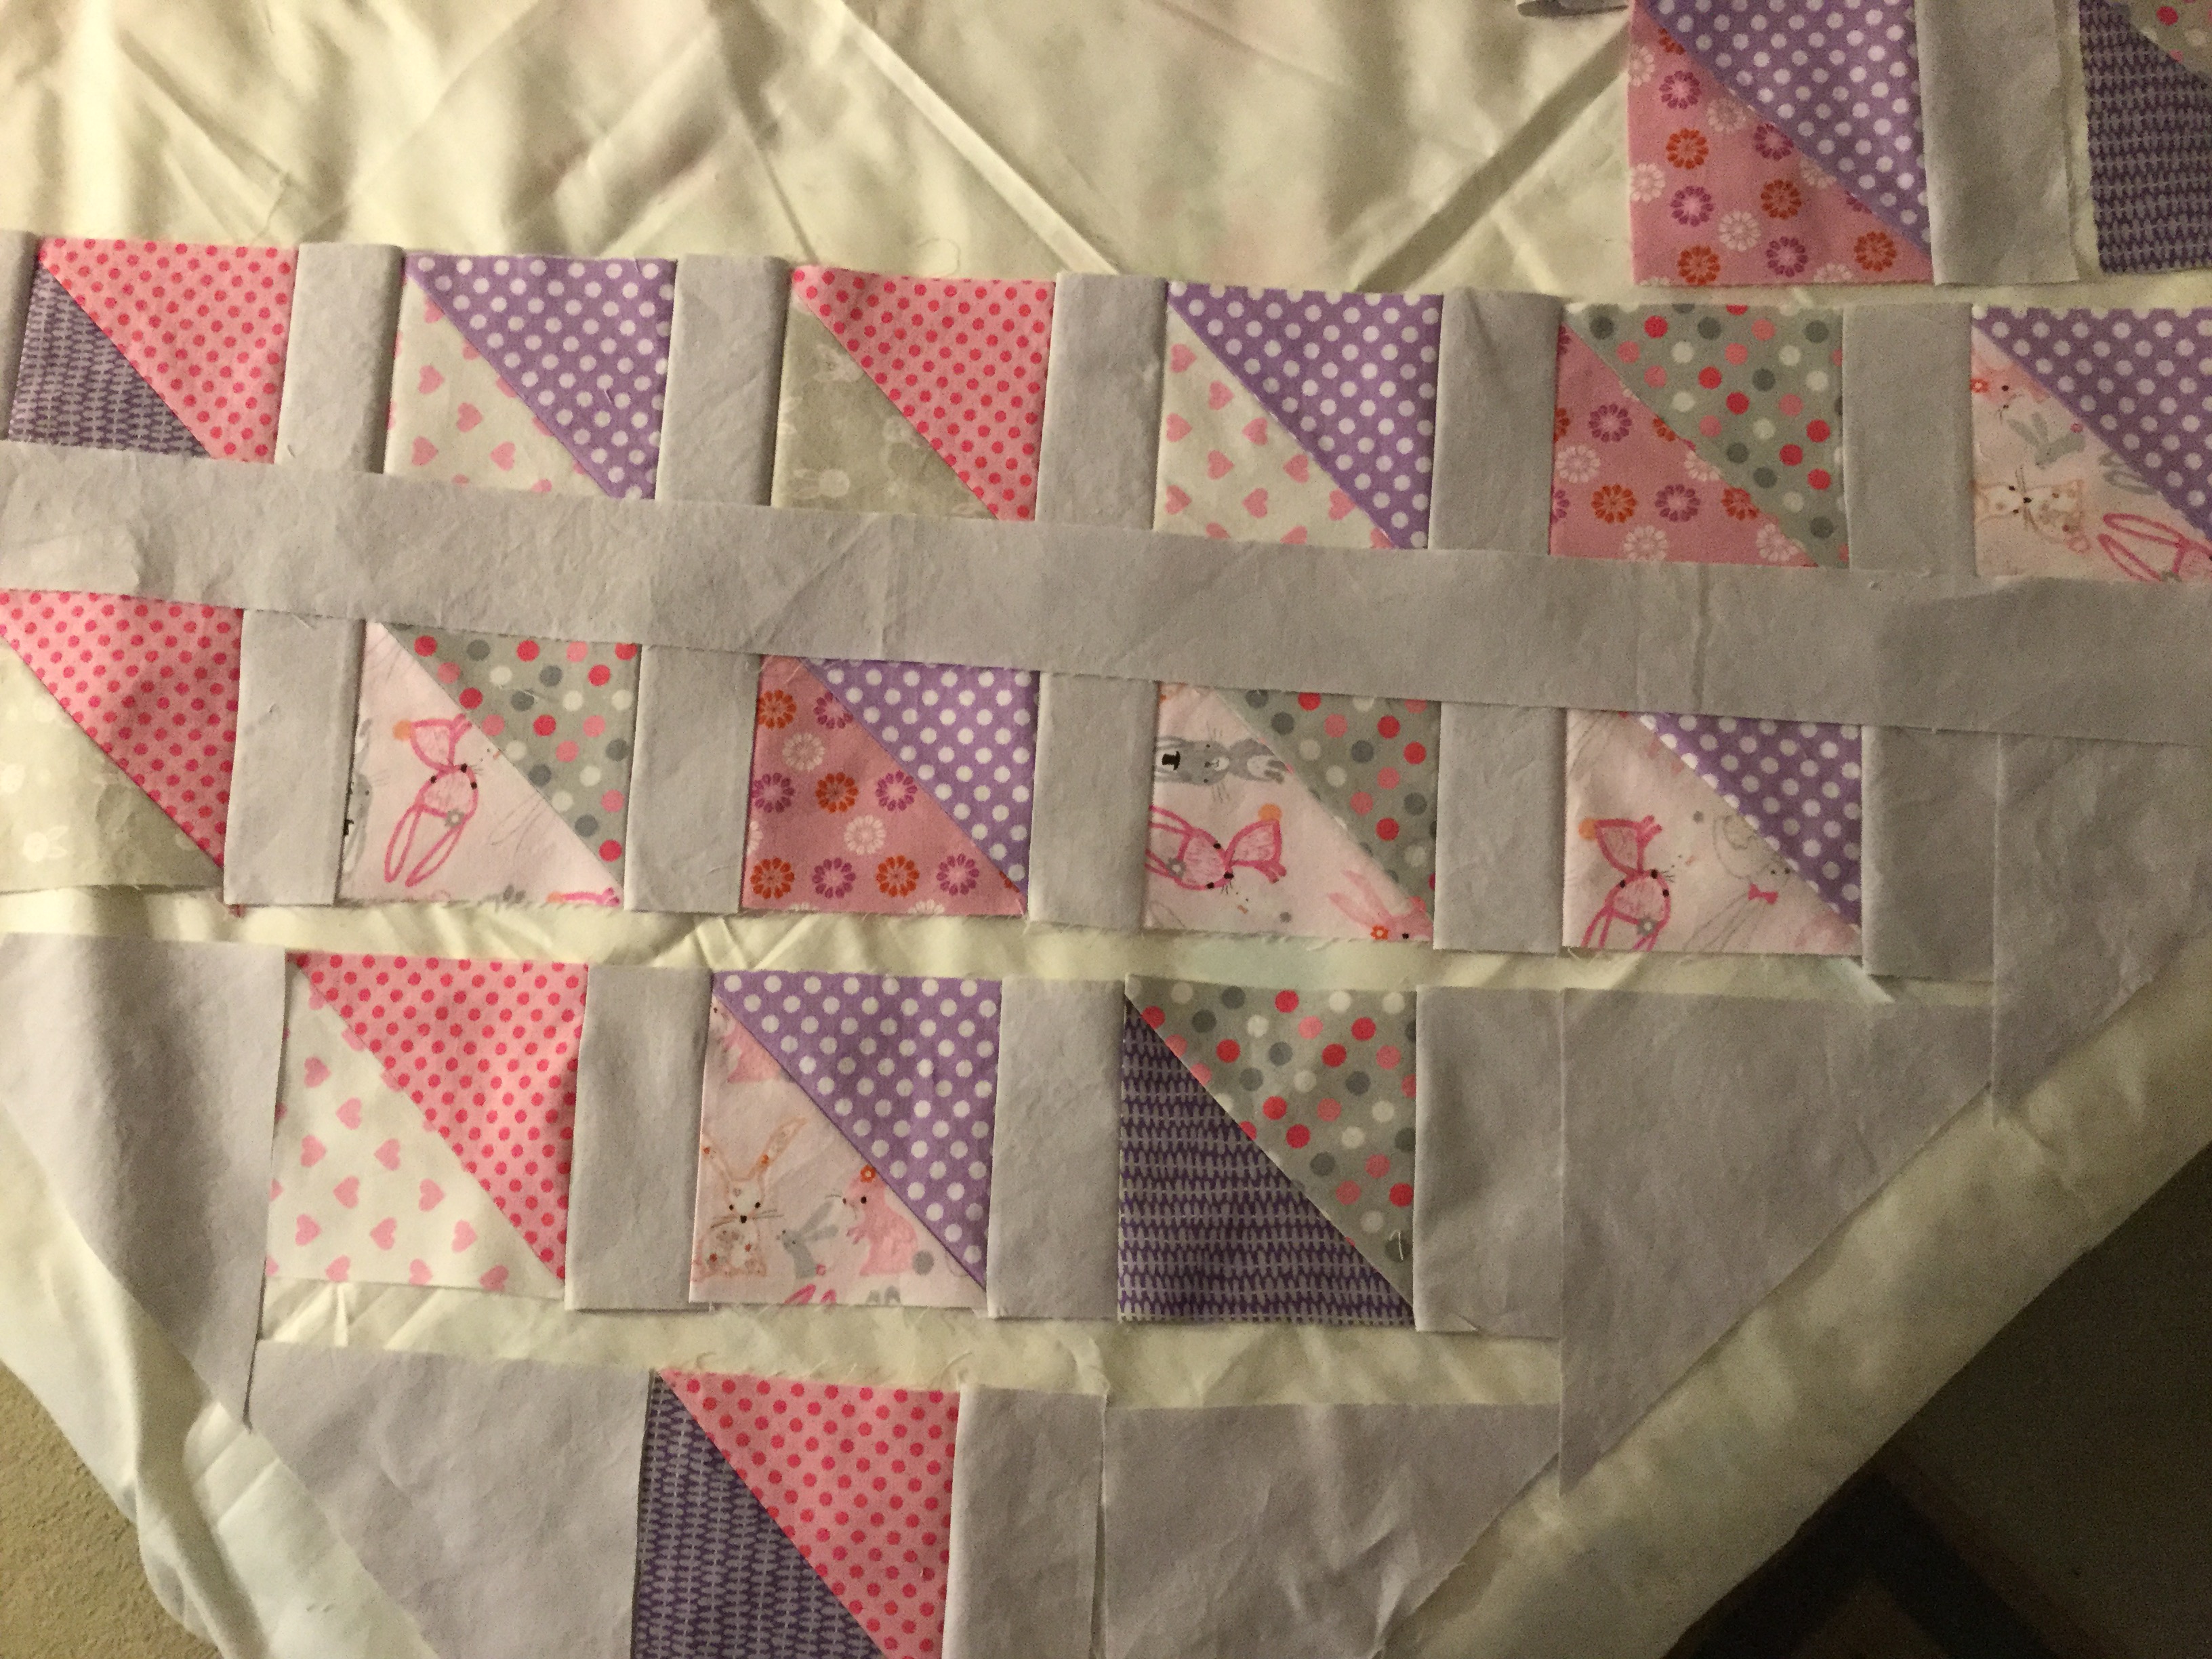
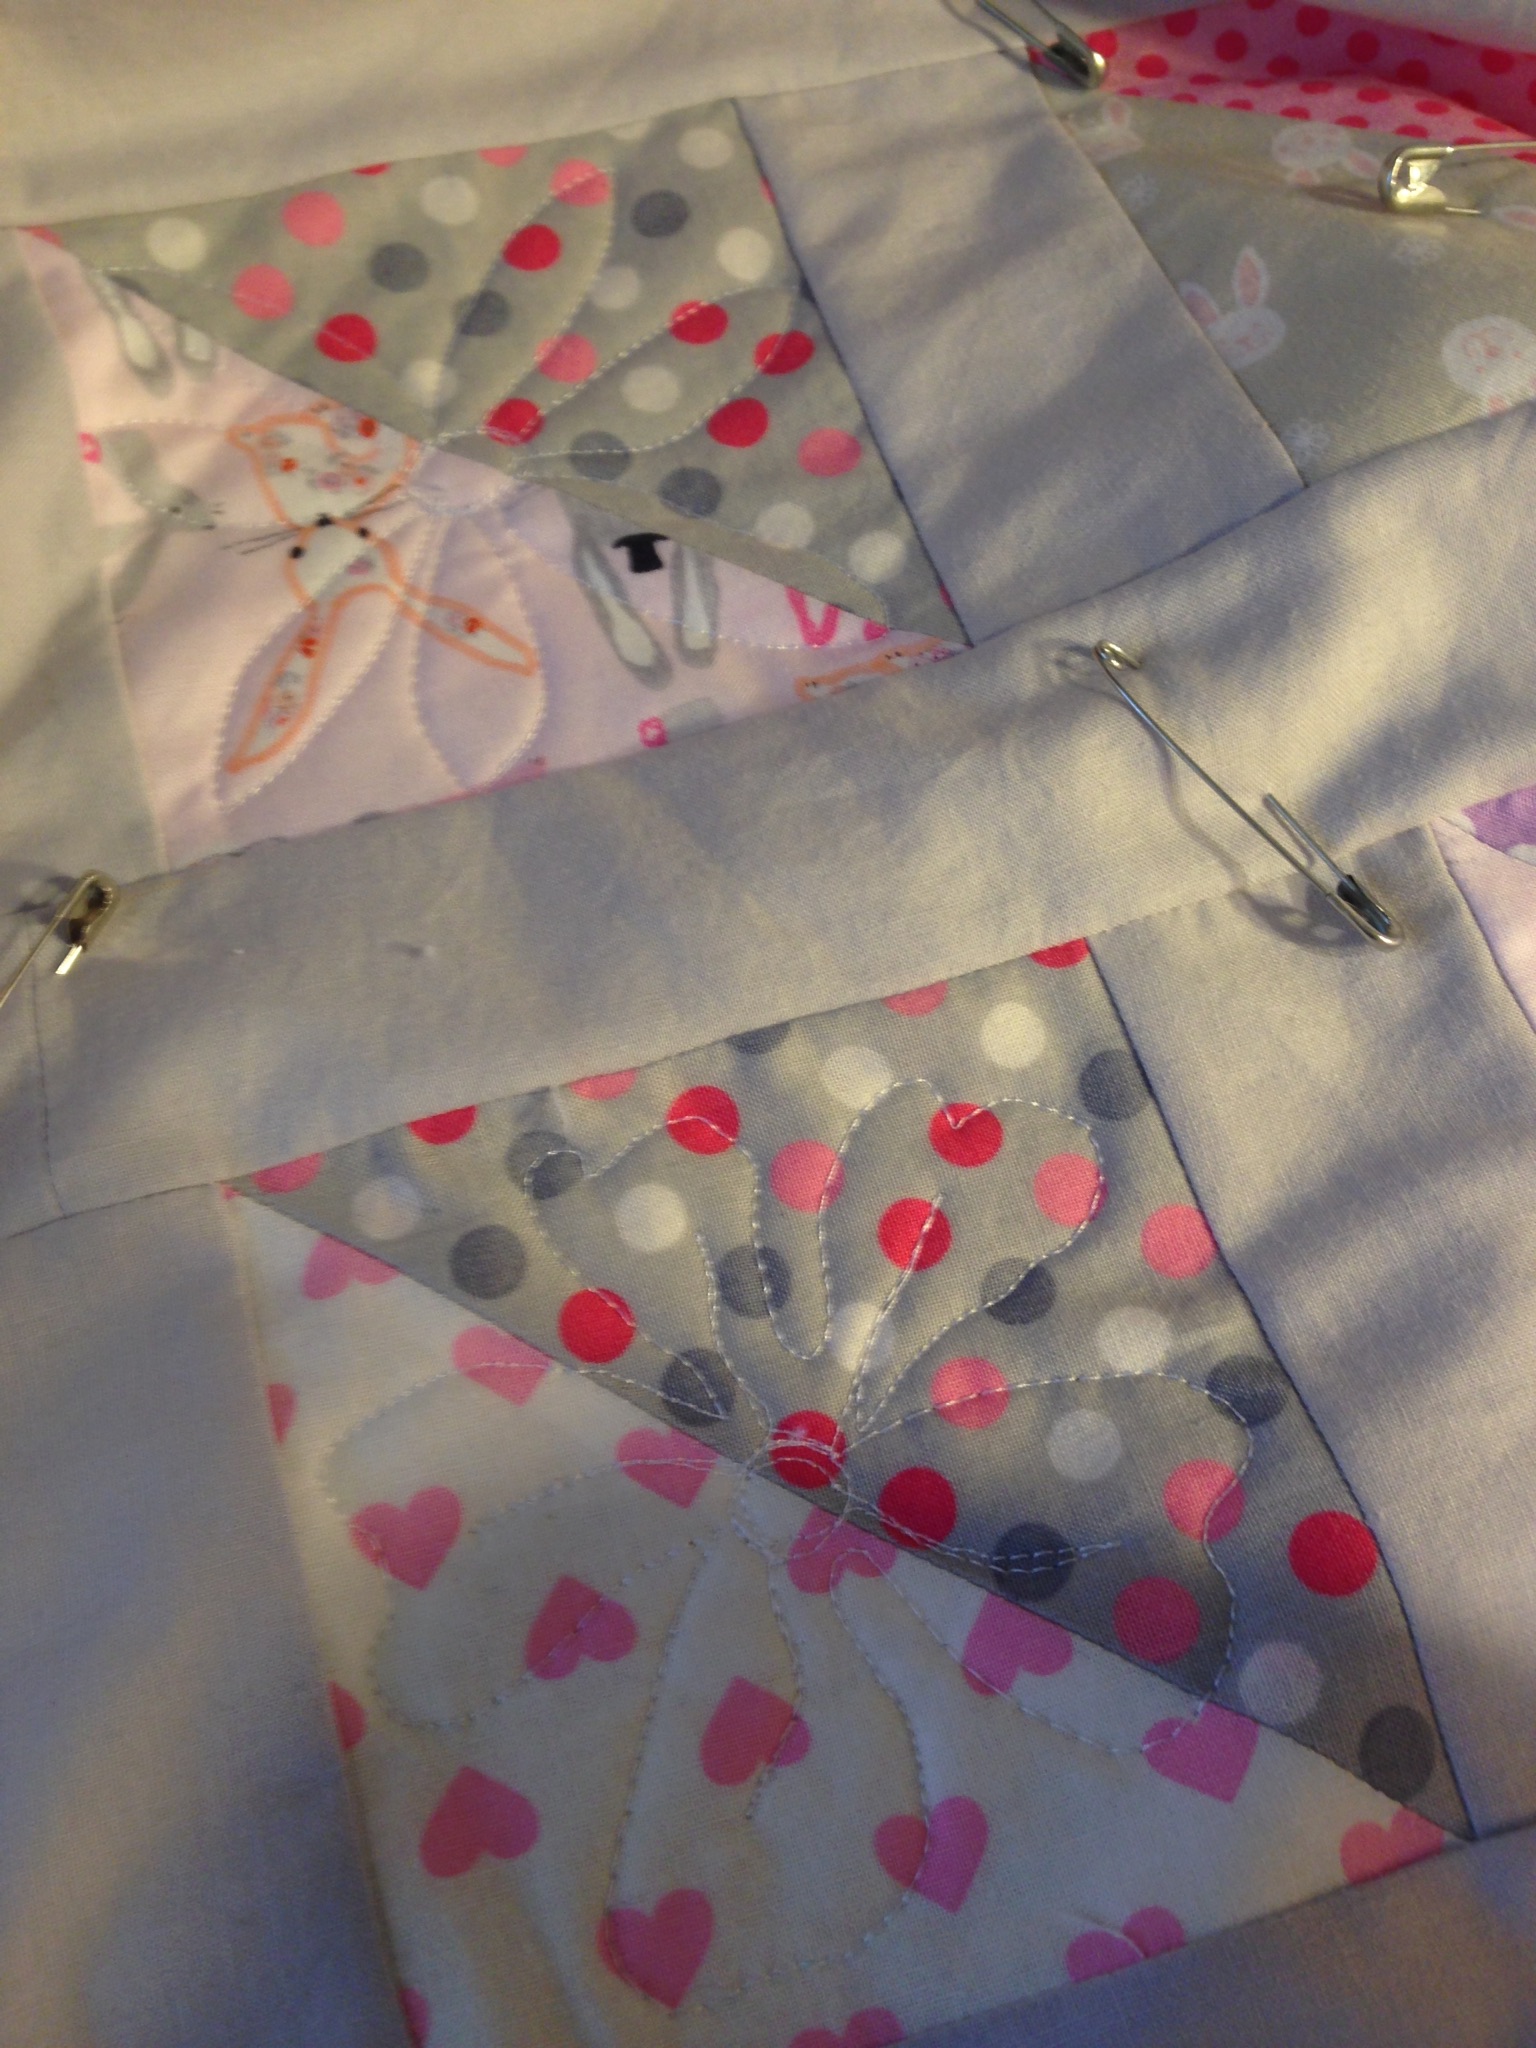
I did get the baby quilt finished and sent off. It turned out so cute! Remember I used the Simply Snuggly pattern by April Rosenthal, making adjustments to size it down just a bit. The baby’s room is lavender and white. My daughter-in-law asked for lavender, gray, white and pink for quilt colors. I had fun shopping for these. This was the initial fabric pull but I didn’t end up using all of them.
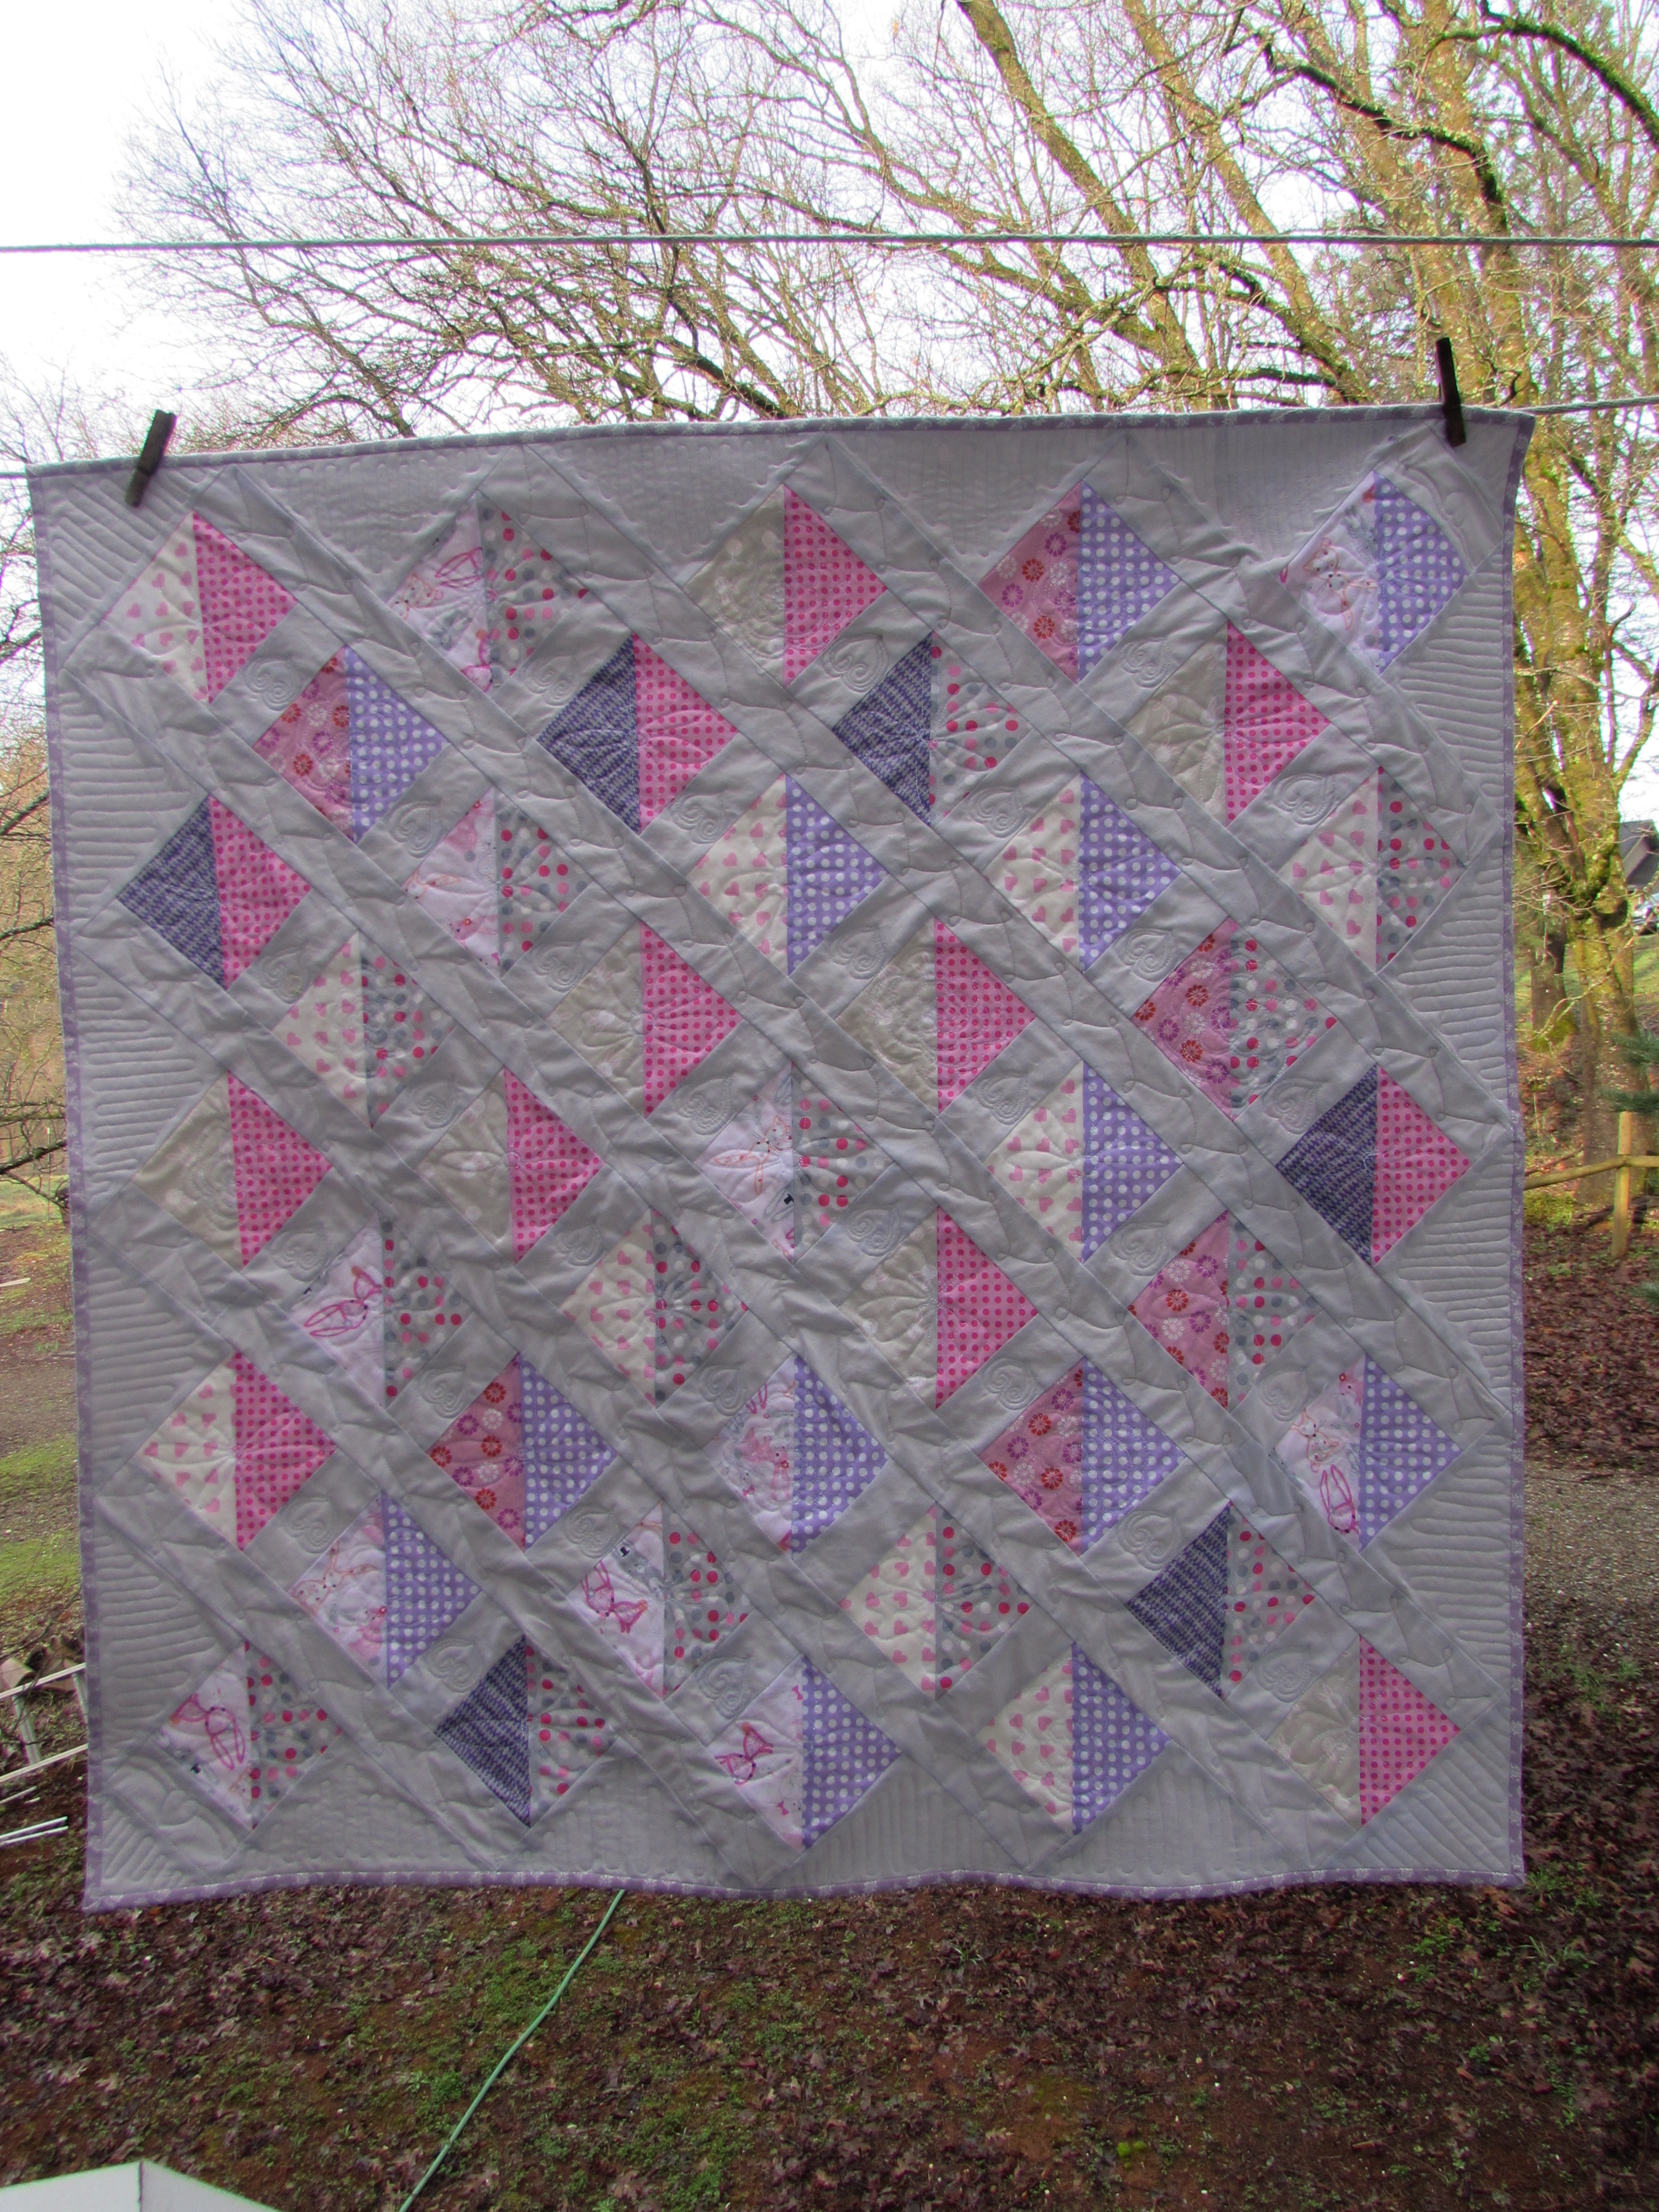
The quilt is a collection of HST’s set on point with sashing between each one. It was very simple to piece.
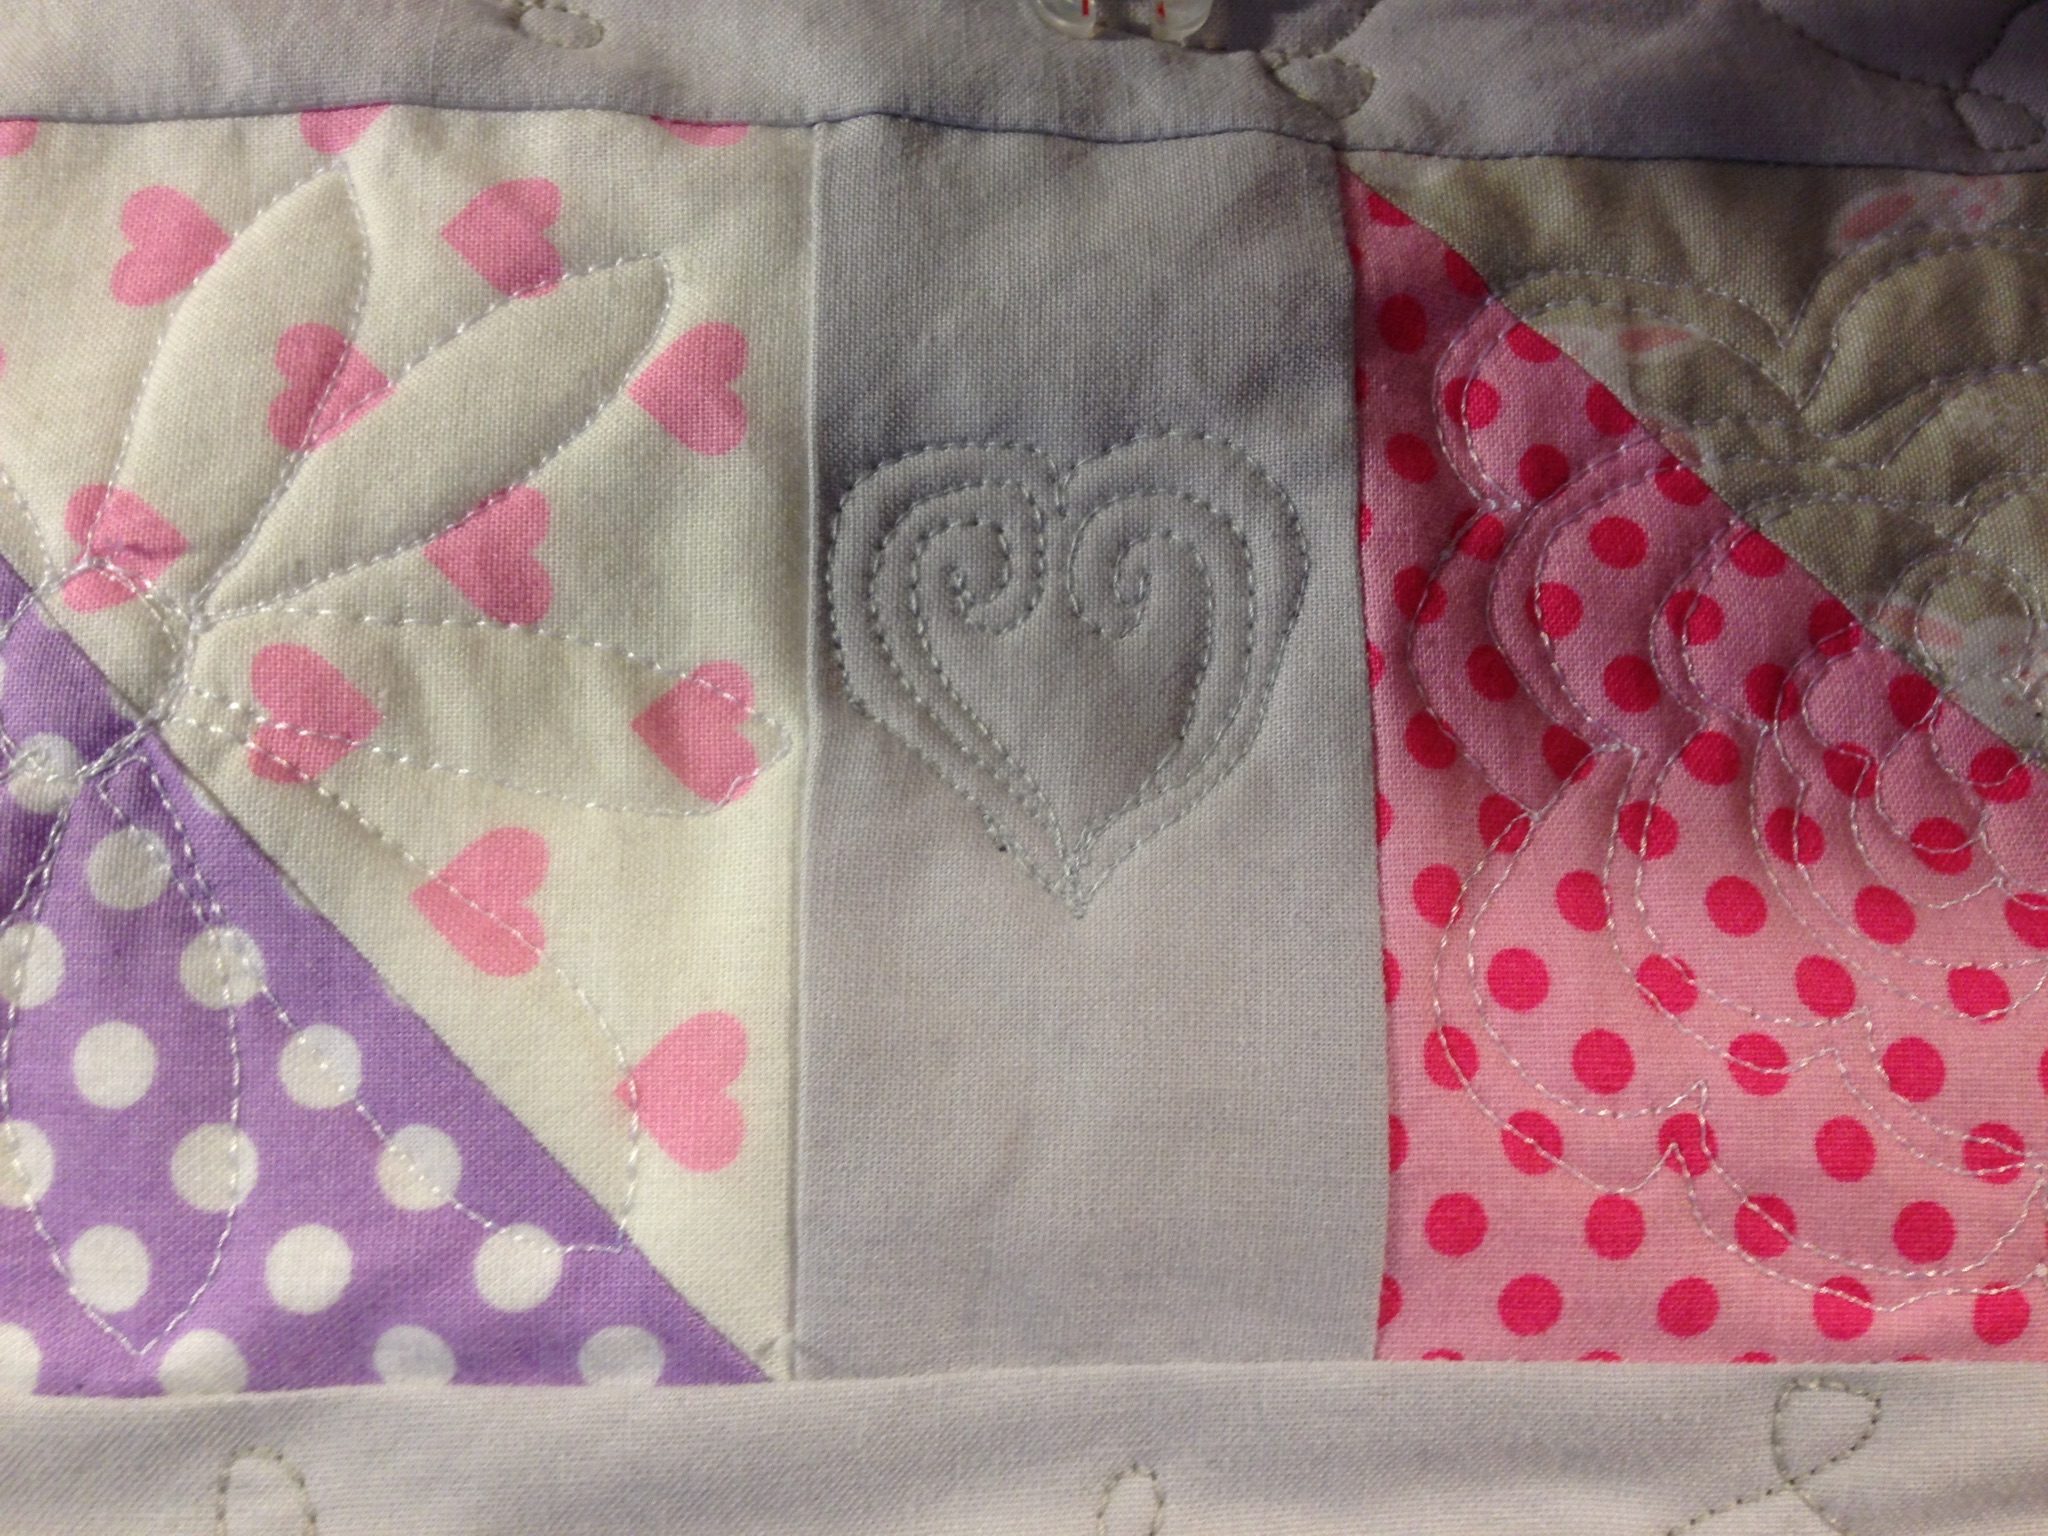
I enjoyed quilting this sweet little project. I free motion quilted a flower on each HST. Once those were finished, I did little loops on the long sashing rows and a little heart on the sashing between each block.
Simple and sweet for Baby Girl.
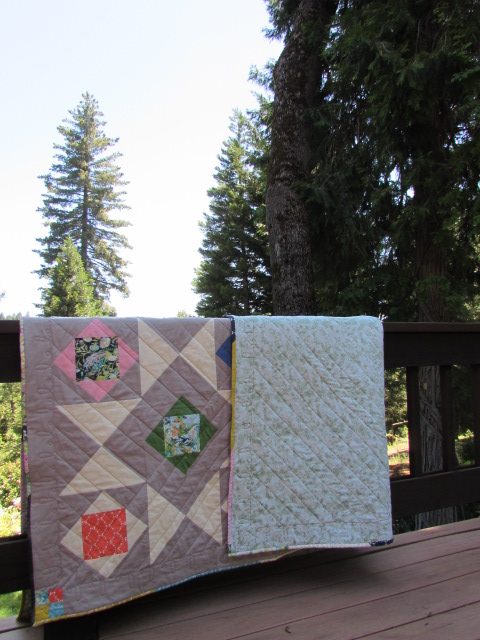
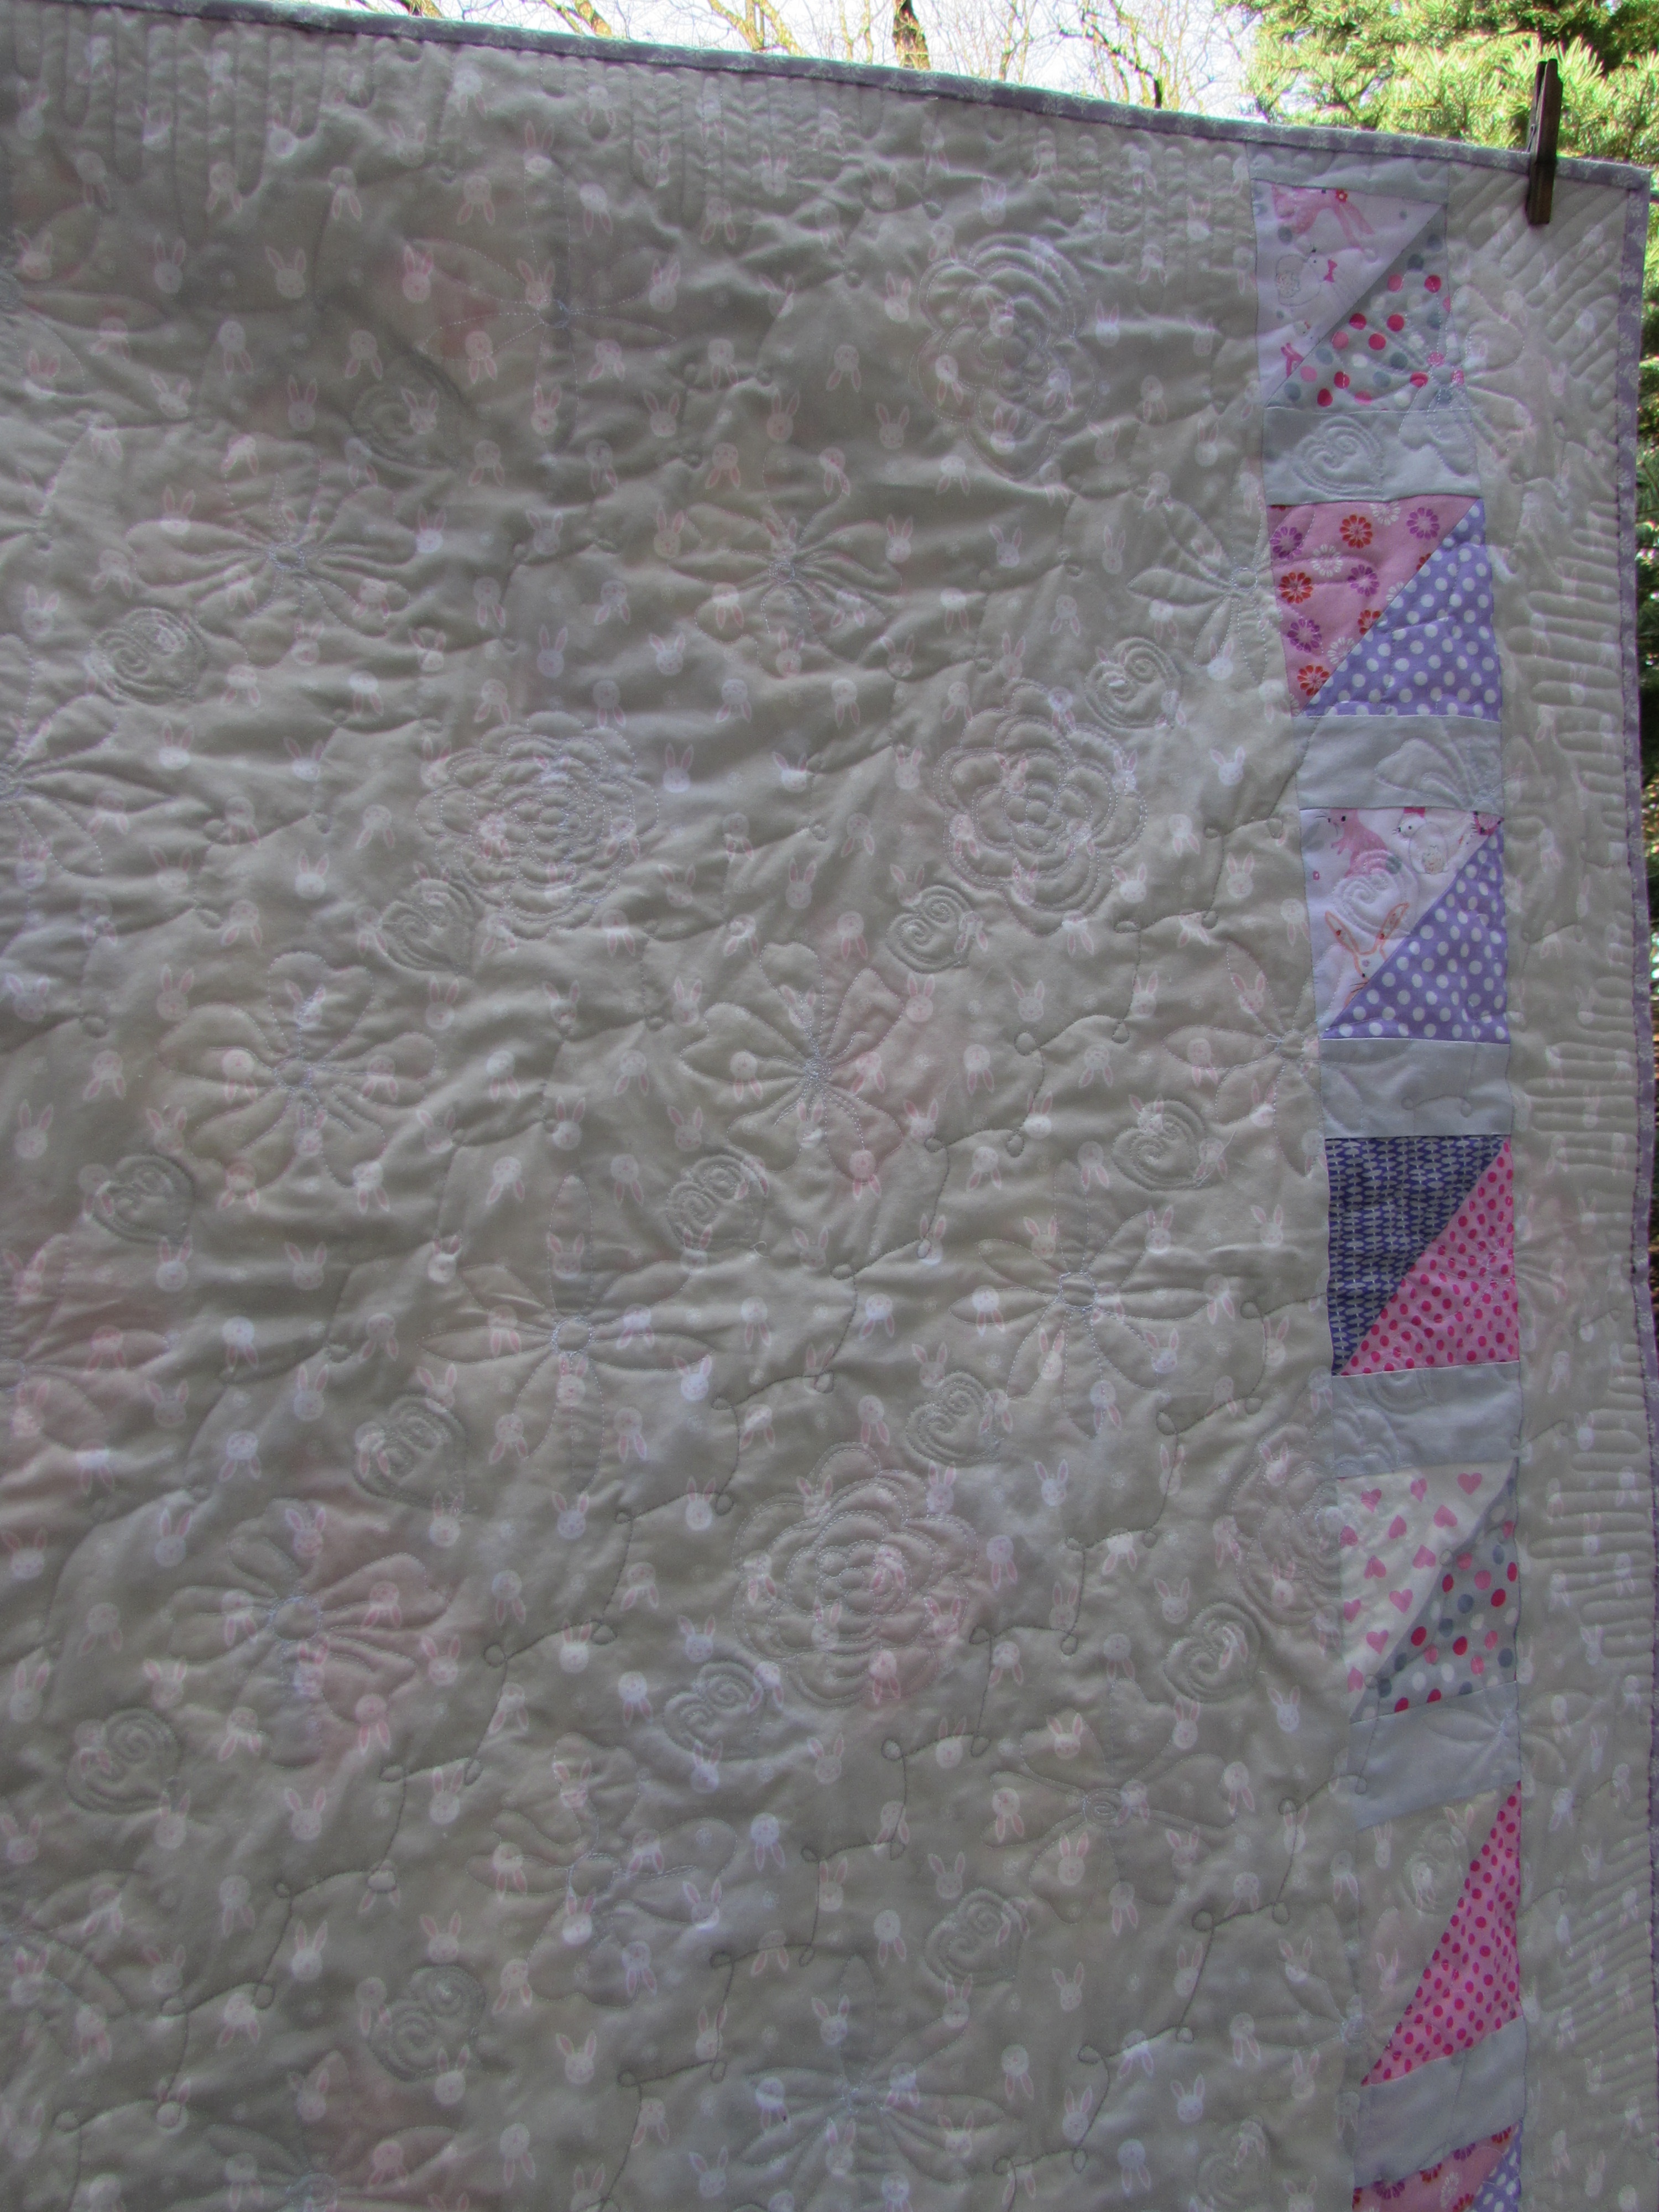
The backing was made with a cute bunny print and I added a few leftover HST’s to jazz it up a bit.
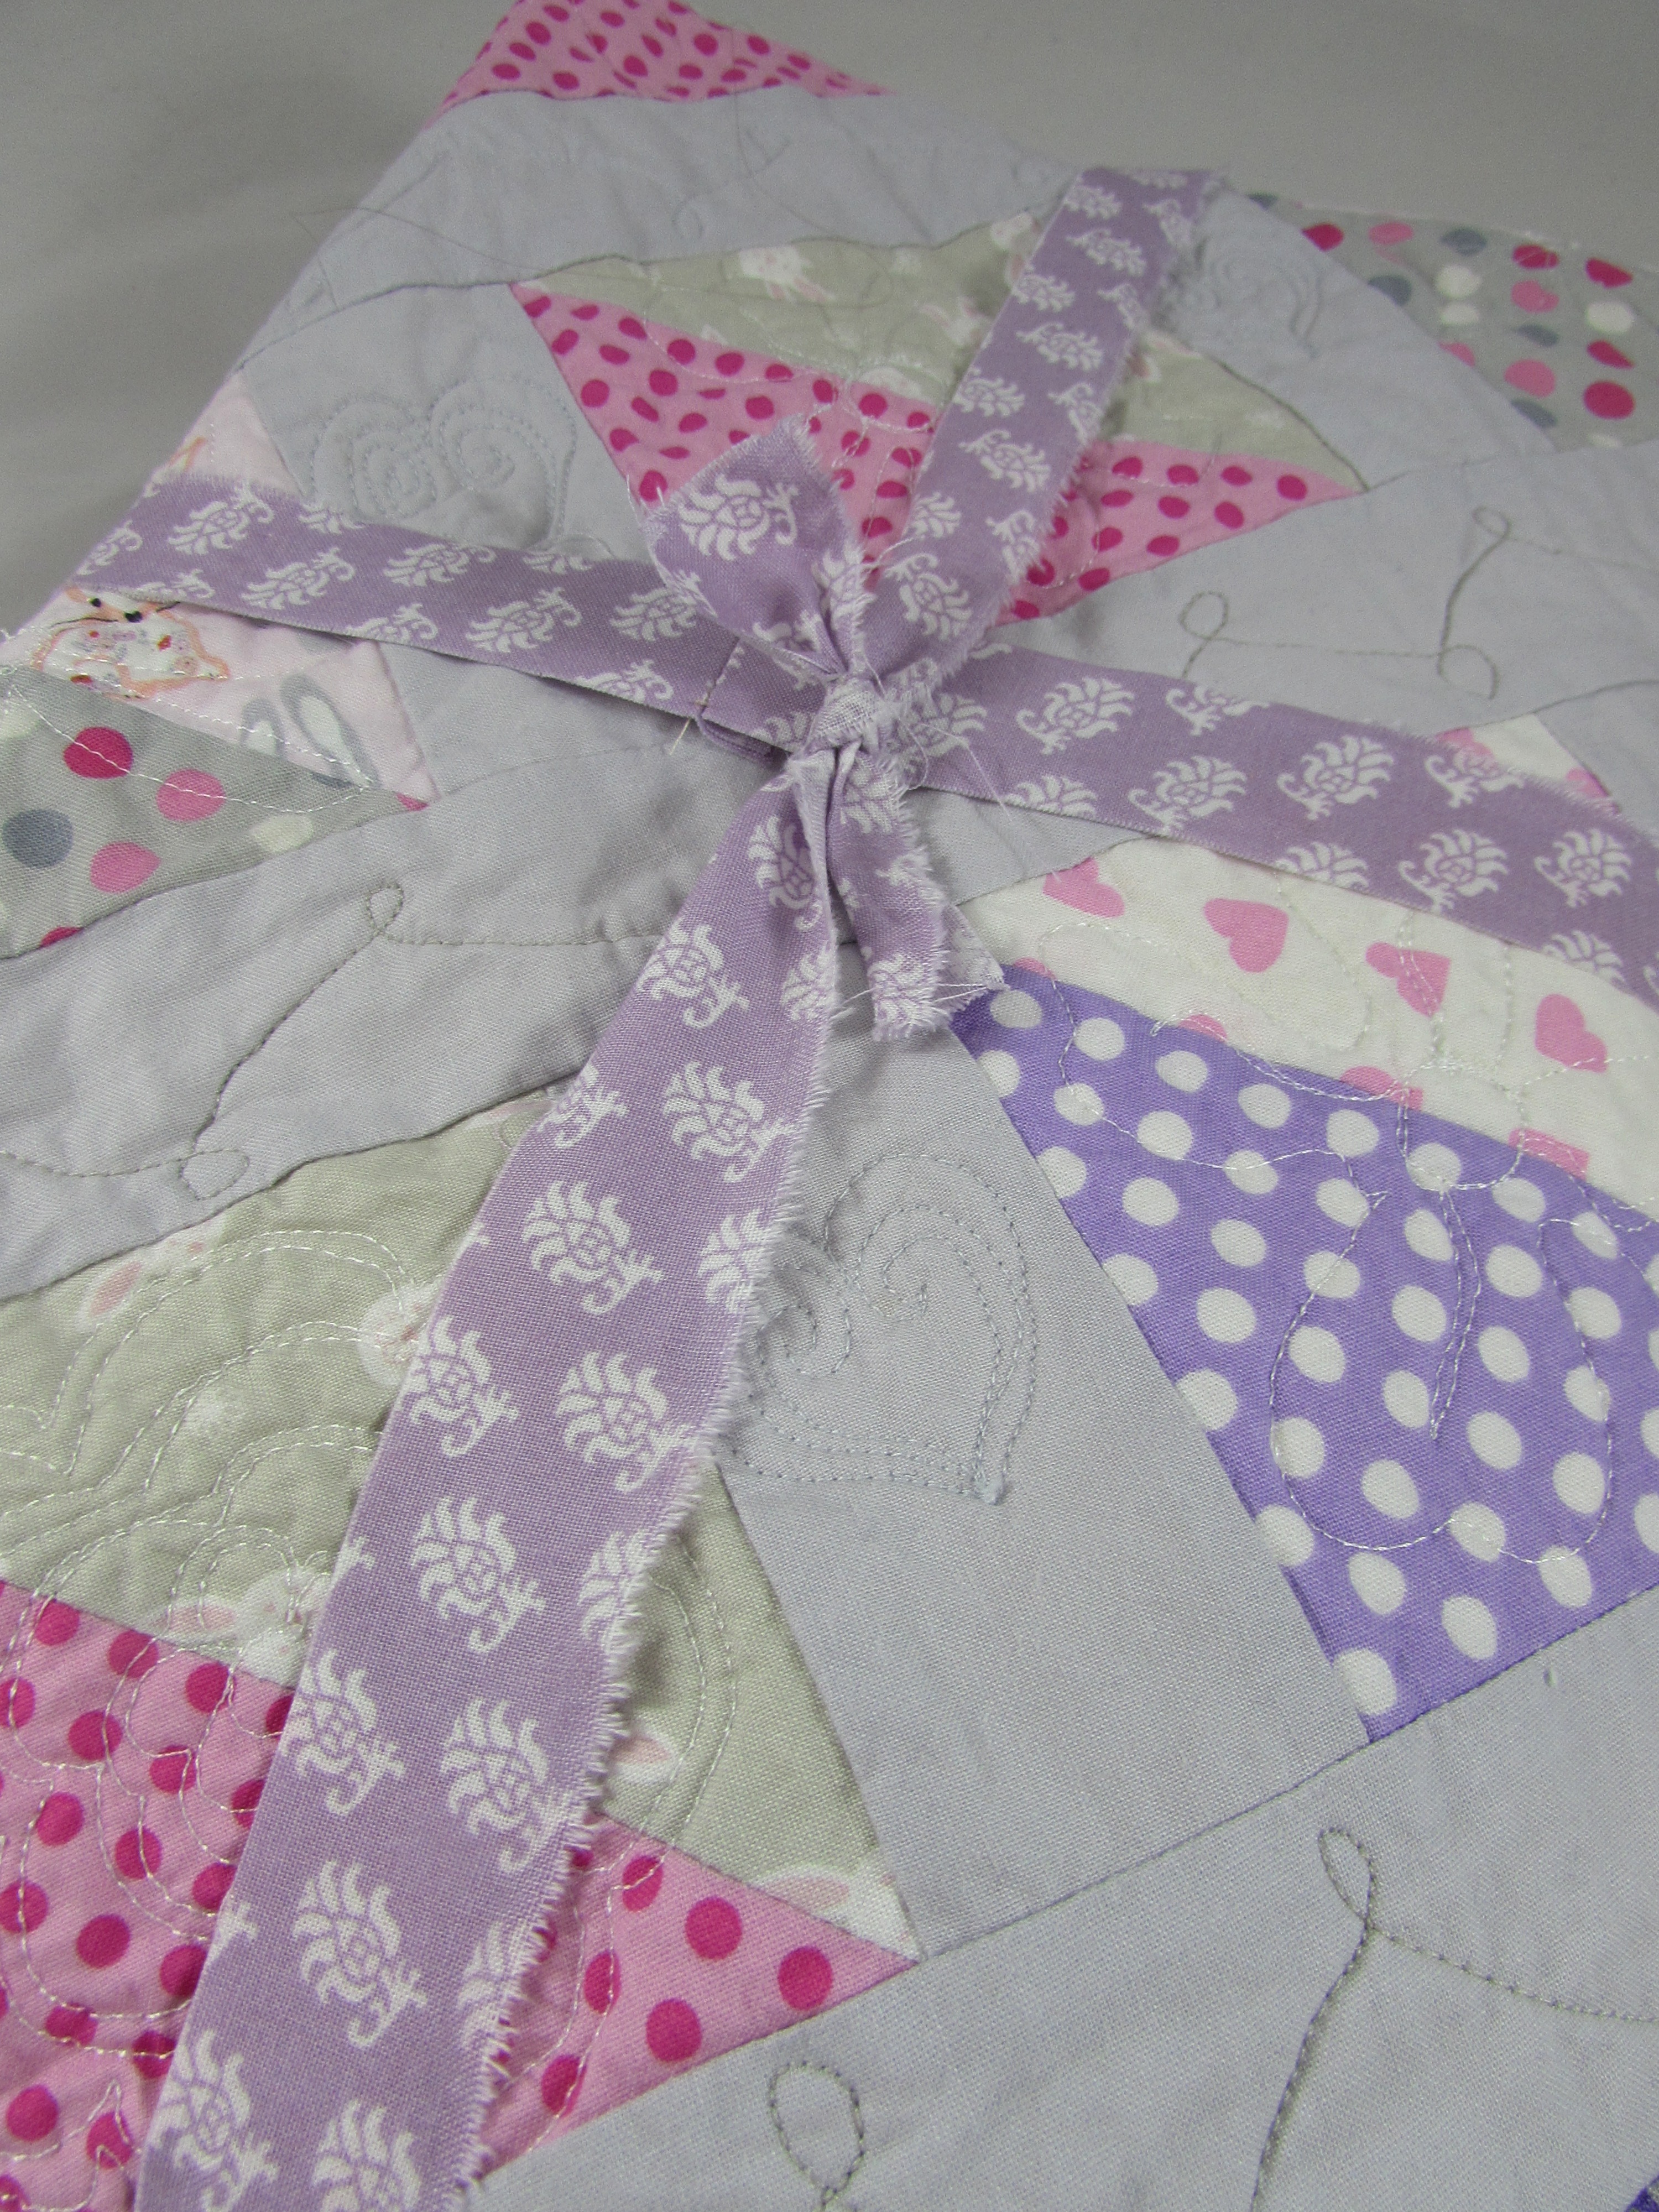
The quilting shows nicely from the back. There are some puckers, or ripples, where I quilted the sashing. I am guessing it might be from the order in which I quilted it? Quilting the blocks and then coming back to the sashing might not have been the best choice? Maybe I should have been more methodical and quilted each row in its entirety and it may have given me a smoother finish. But it is what it is, right? I washed it and it is all crinkled up and ready for Baby Girl to use it.
I bundled it up and sent it off. The strip of fabric I used to bundle it up is actually a scrap from the binding fabric. Sweet lavender and white flowers.
Hopefully I will have news of the baby to share with you soon. Until then, I will try to be patient and leave the kids alone! Believe me, it isn’t easy. 🙂
Linking to my usuals, as well as She Can Quilt for the end of Q1 FAL link up. Check the Link Ups tab at the top of the page for the details.
A little of this and a little of that – this has been the routine in my sewing room this week. For the most part, I have been quilting the baby quilt for my almost-here grandbaby. She is due March 3rd and I know my daughter-in-law has reached the point where she is done being pregnant. Those last few weeks are just miserable. I hope this little girl makes an appearance soon! The quilt top is finished and the quilting is nearly finished.
The quilting is coming along fine though. It is hard for me to sit and quilt for long periods of time. My neck becomes very grumpy if I sit for longer than 1/2 hour or so. It is better this way. I break it up and get other things done in between. I have been quilting a flower on each HST and a little heart on the sashing between the squares. So cute.
The hearts are a bit on the wonky side but such is life. I have a feeling the baby won’t be too critical of her Grammy’s stitching.
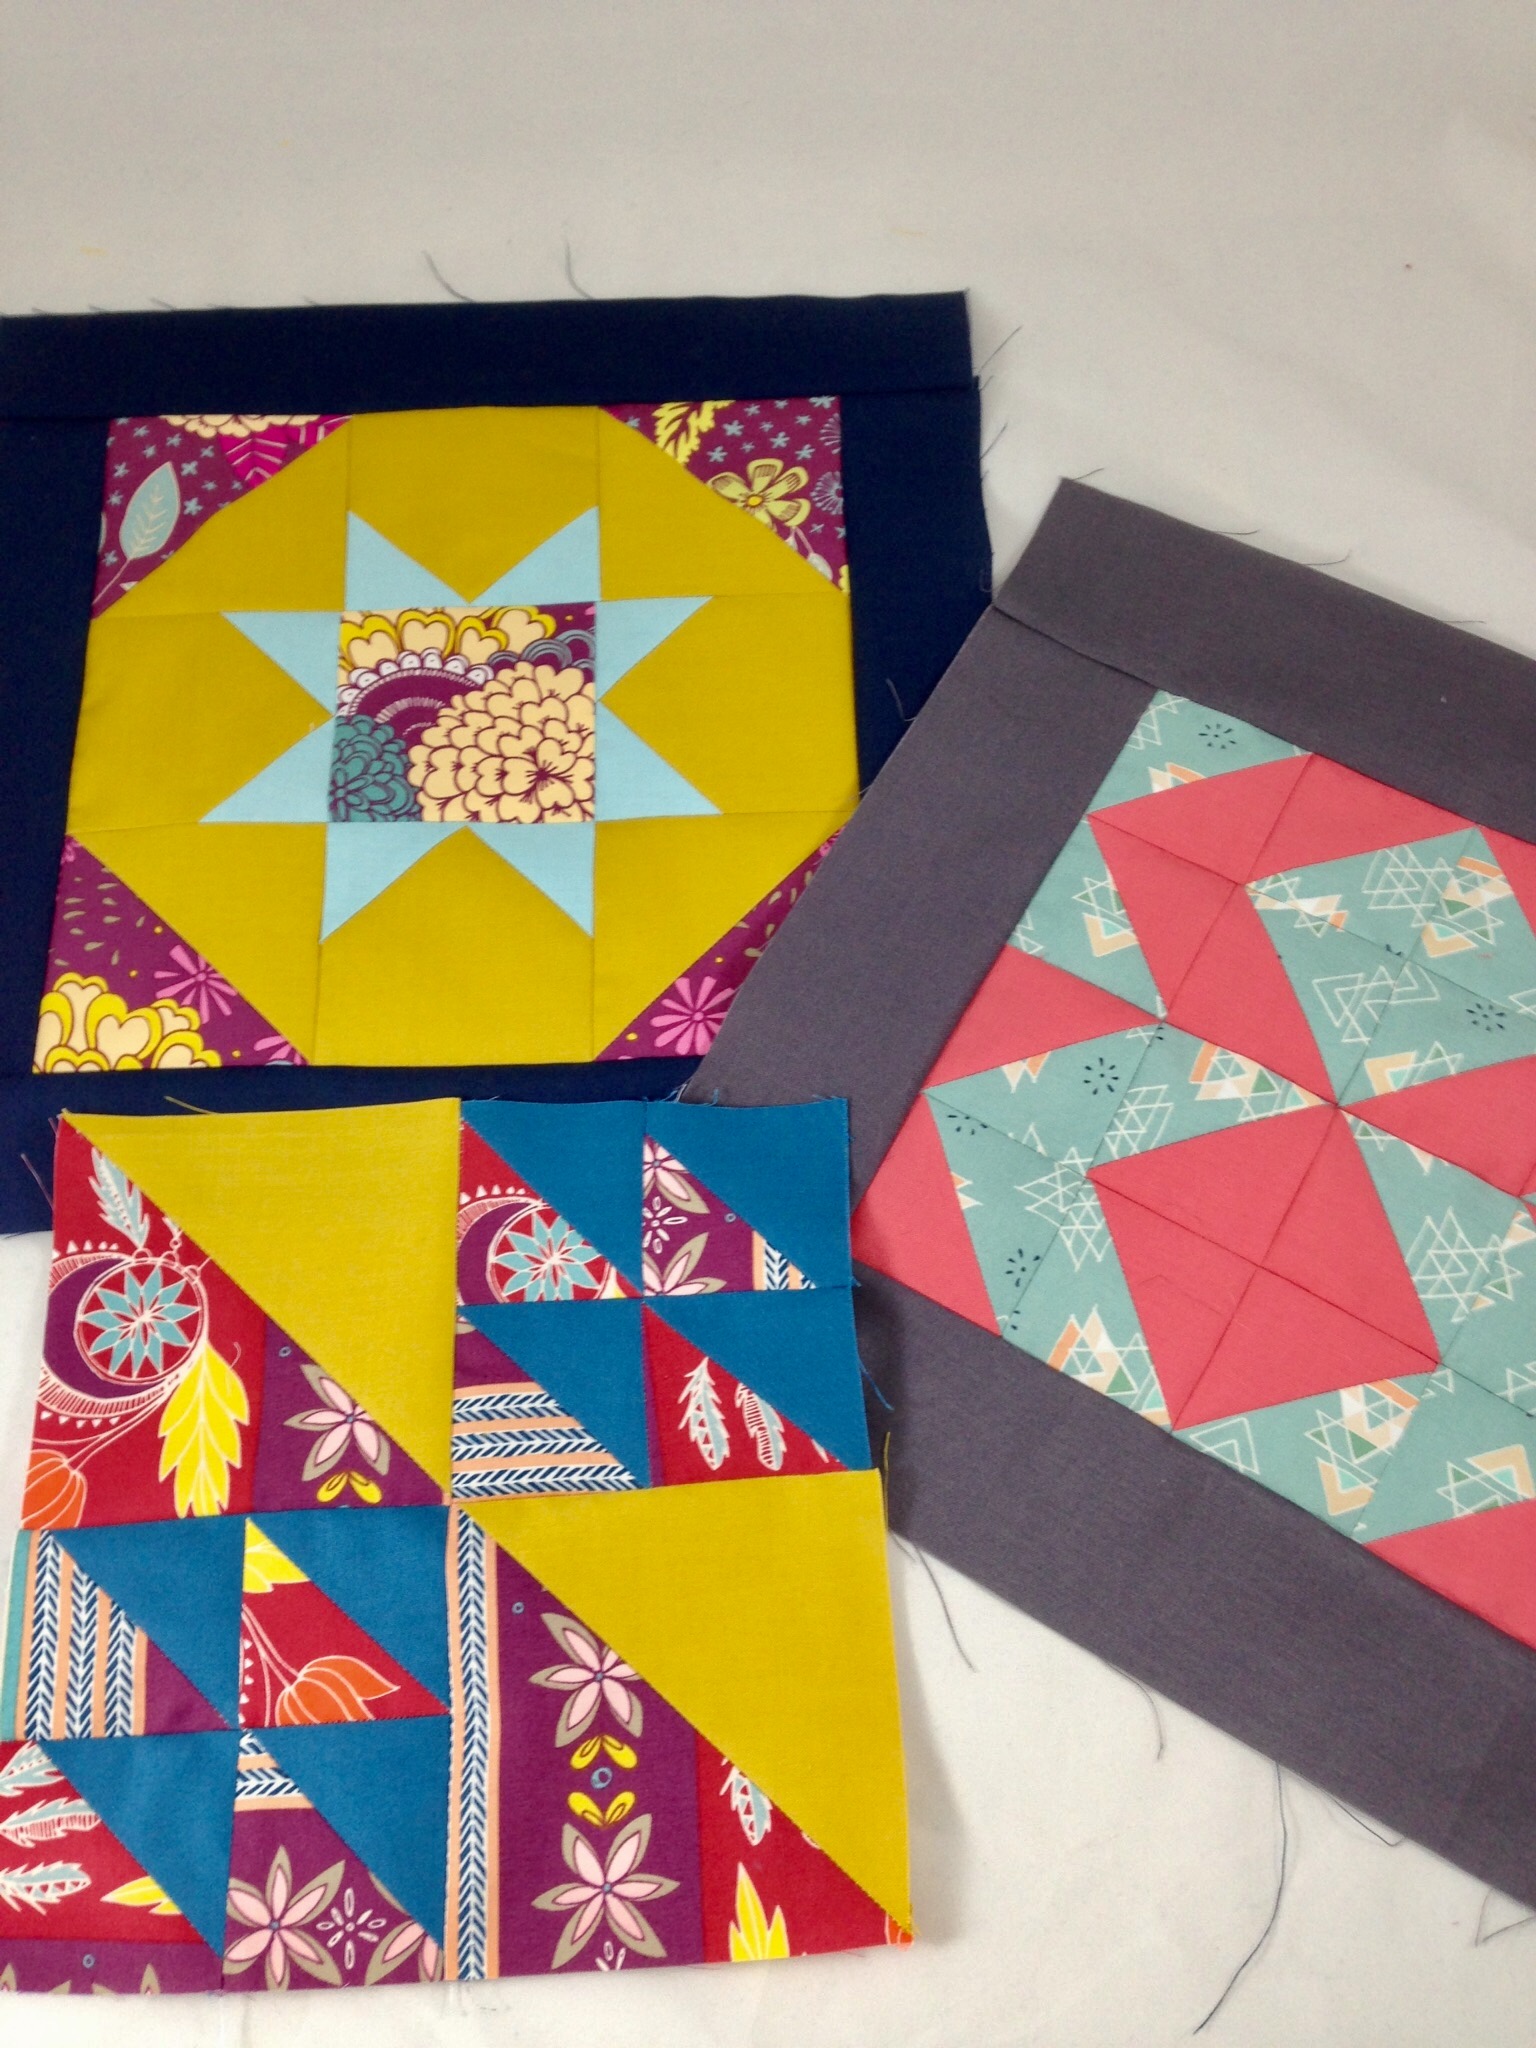
I have jumped in on a quilt along. It is hosted by Maureen Cracknell and Sharon Holland, both are designers for Art Gallery Fabric. They are calling it the Sewcial Bee Sampler. A block design is released each Wednesday and today is week three. If you are interested, there is plenty of time to catch up.
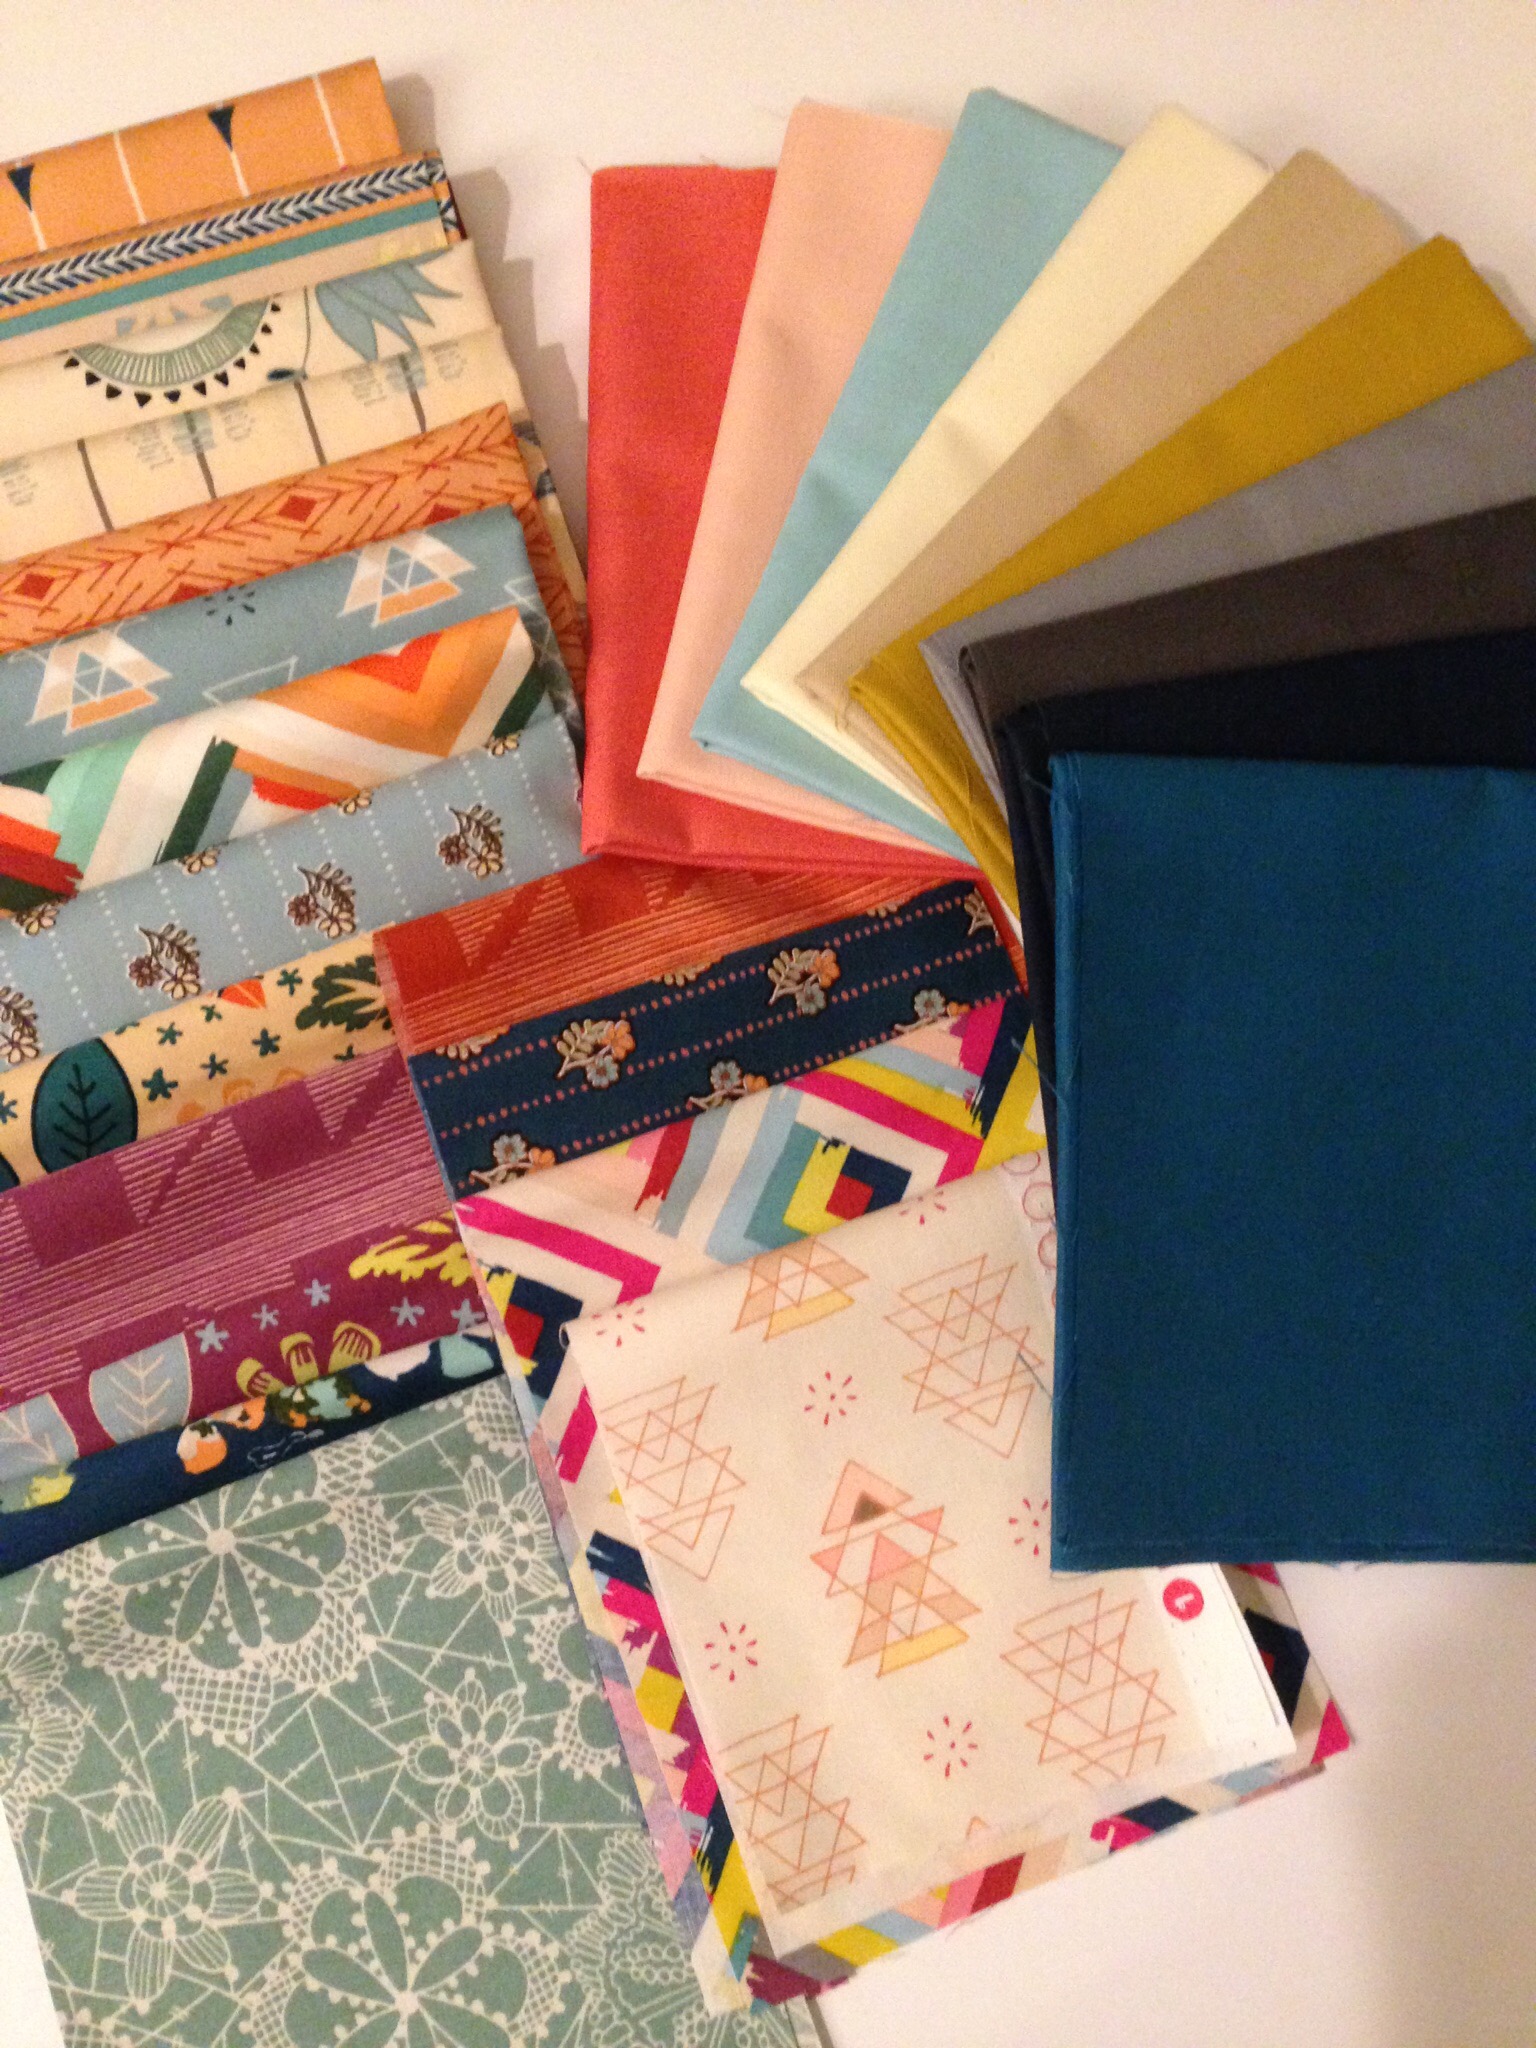
With each week, there are giveaways for those who participate. Needle & Foot will be sponsoring two of the giveaway Fridays; one in June and one in July!! Here is the pull I selected for the Quiltalong.
I am using the rest of my fat eighth collection of Fleet and Flourish (designed by Maureen Cracknell). I added a fat quarter bundle of solids from the Pink Castle subscription I received for my birthday. I am being very judicious with the Fleet & Flourish and hoping I have enough. We shall see!
The first three blocks look great!
Each block is framed but when I got to the third block, I decided to wait before framing it. I am wondering about my choice of gray and navy blue as frames. So, I need to ponder that one for a bit.
Ok – that is the update for now. Projects are moving right along. 🙂 Hope the same is true for you! Linking to Let’s Bee Social and Needle & Thread Thursday. Links are available at the top of the page, under Link Ups.
I had a finish this week! Remember I did some pattern testing for Sarah of Sarah Goer Quilts? I was able to quilt and bind it over the last week or so. The quilt is just adorable. If you would like a copy of this pattern, click over to Sarah’s blog and sign up for her newsletter. I just read the second newsletter and I am enjoying them.
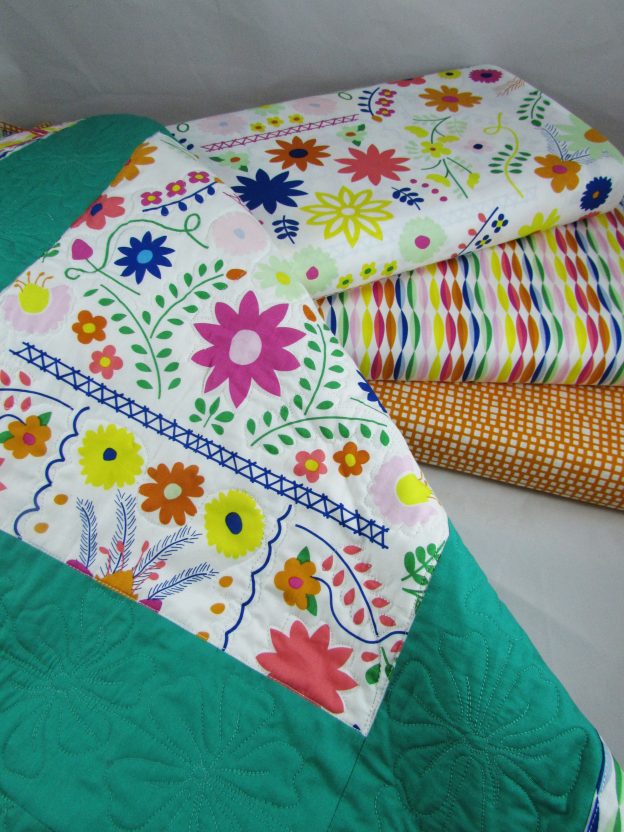
This quilt has been a multi-faceted project for me. It began with pattern testing the new pattern for Sarah. I made the quilt with fabrics from the Fiesta Fun line (which I just happen to carry in my shop!) I chose the Fiesta Fun fabric so I would have something to display the brightly colored fabric. When I looked at the quilt top, I knew it would be a fun one to quilt. The quilt is filled with big open spaces to play with. At about the same time Fil-Tec provided me with a lovely spool of white Glide thread to play with.
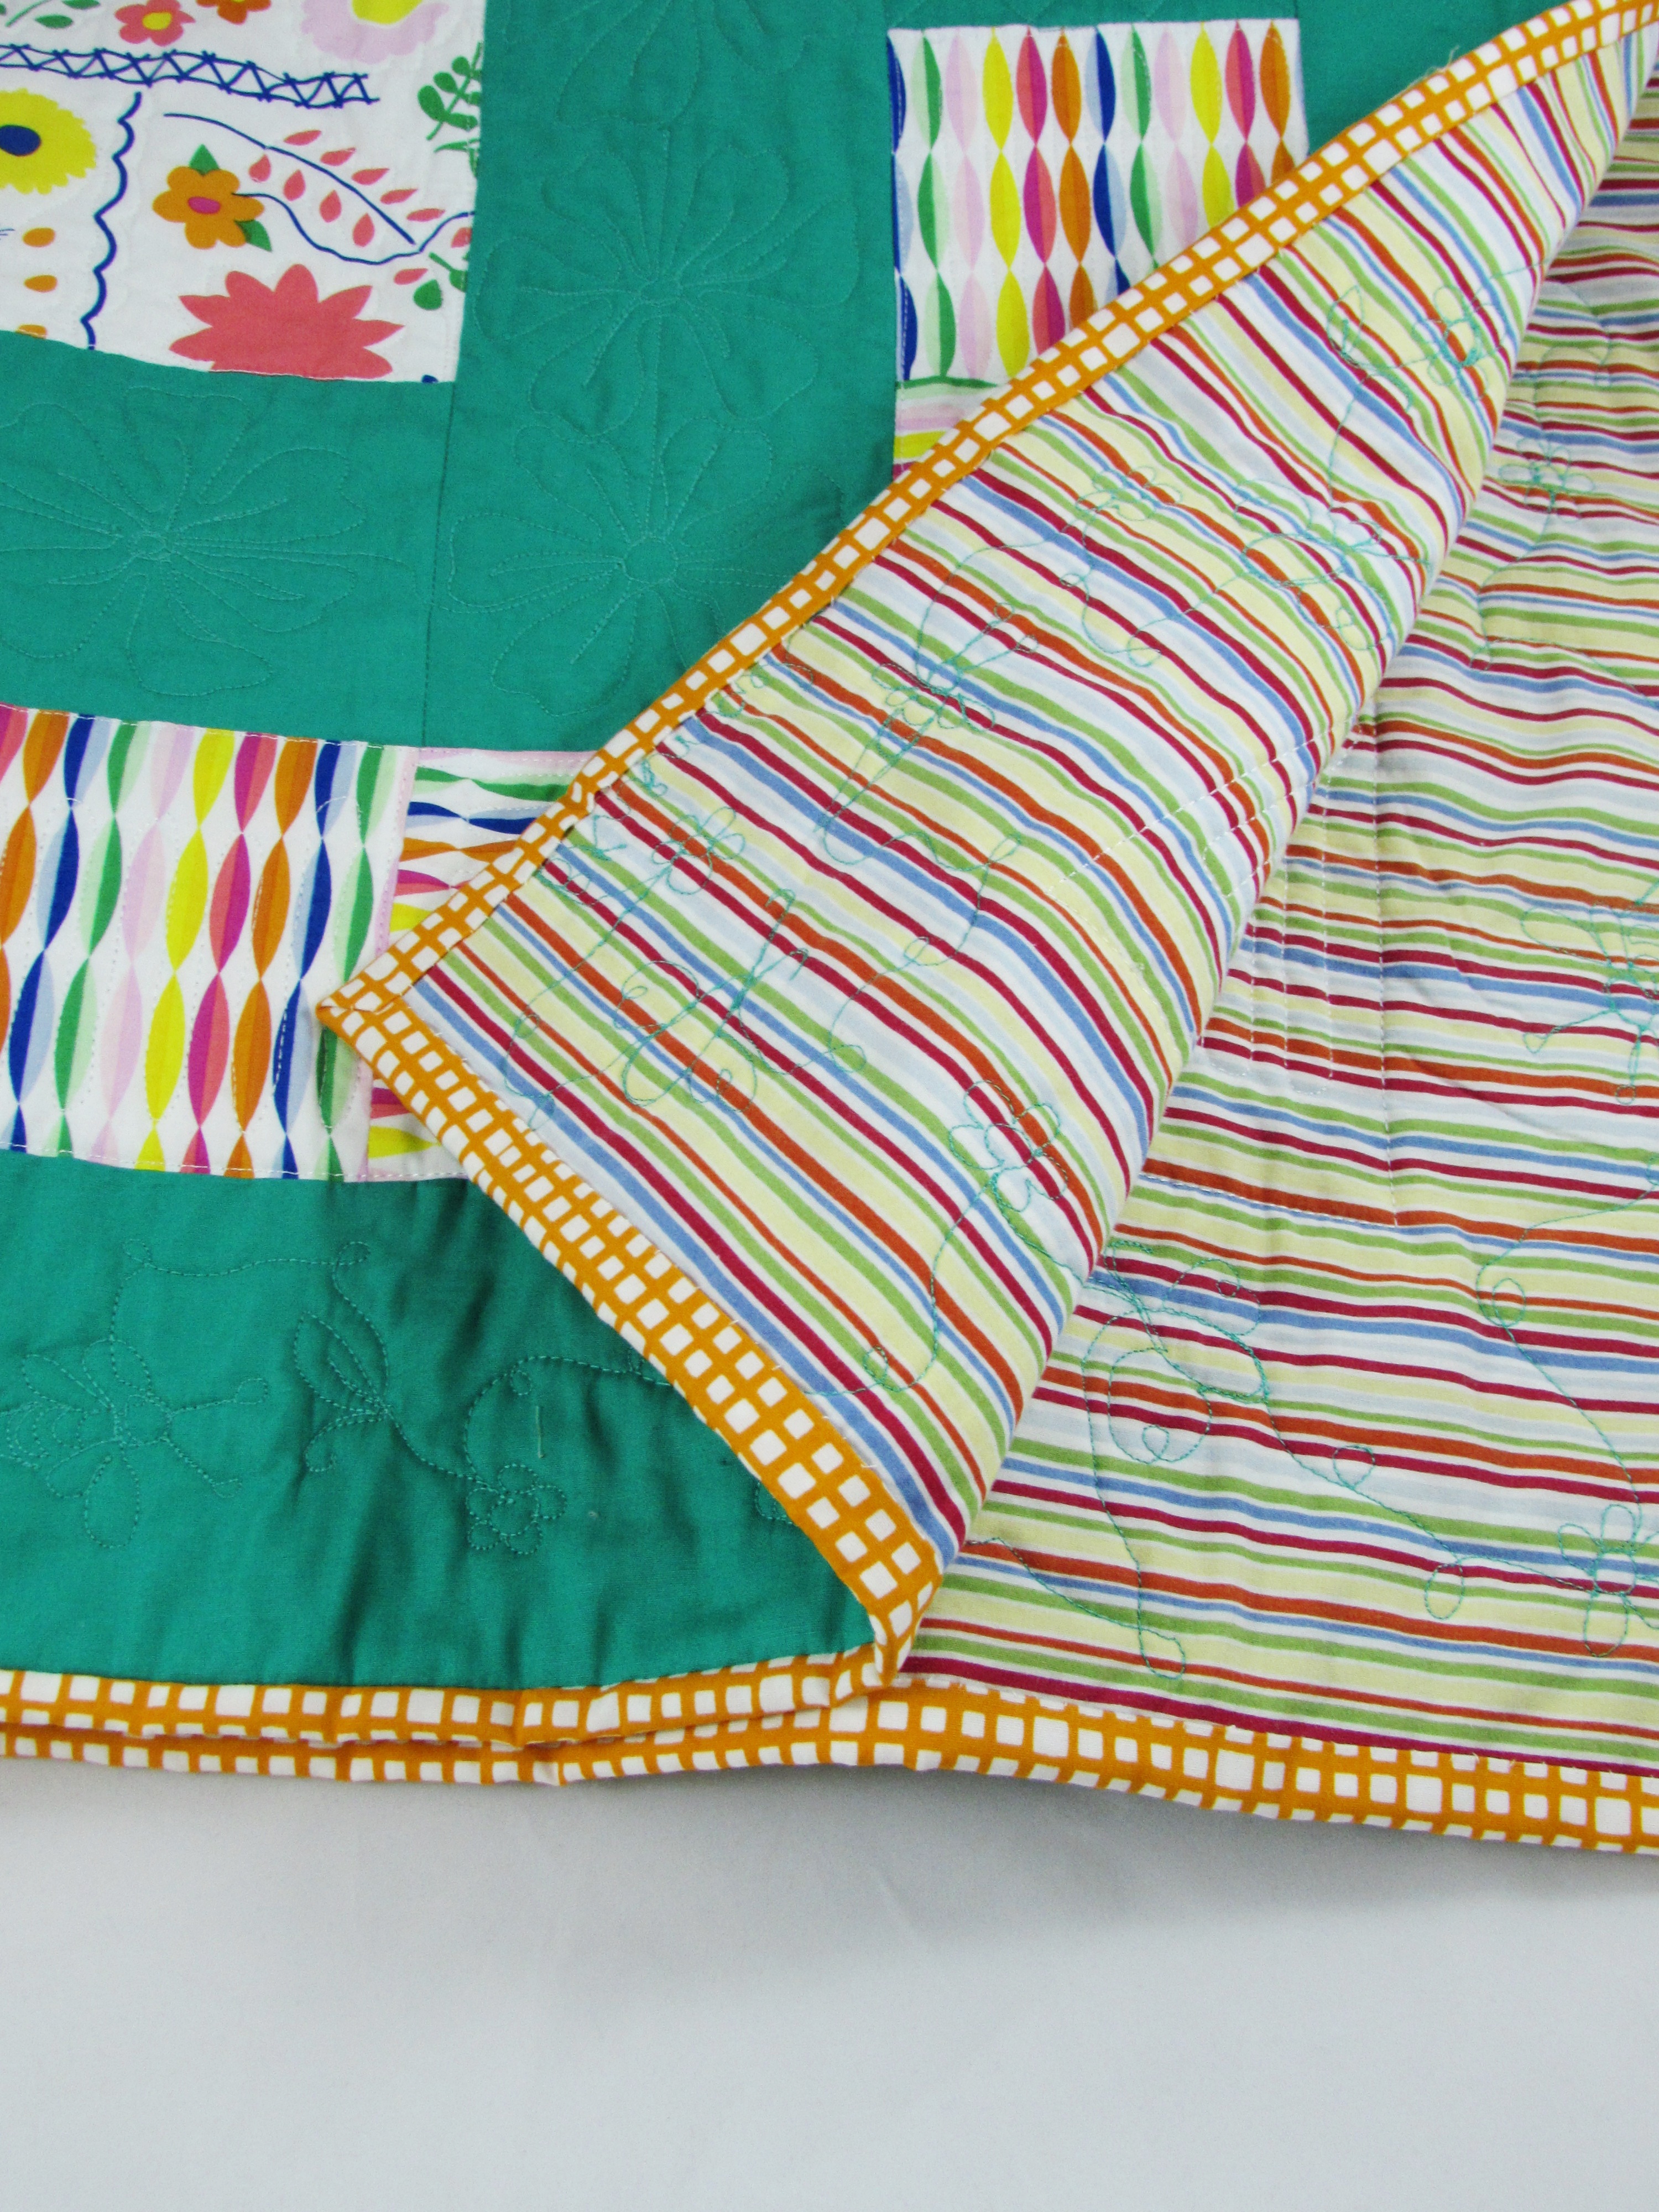
I decided to quilt the floral block and the striped blocks with the white spool of Glide. Wow. I loved it! Glide is a polyester thread with a very pretty sheen to it. It was a dream to quilt with – honestly, just amazing. It is very clear where the thread earned its name – I felt very little pull when I was quilting. I will absolutely stock up on a few more colors. Ok – back to the quilting. For the floral block, I basically outlined some of the flowers and leaves. Very simple and quite fun. For the striped blocks (made with the adorable Happy Streamers fabric from Art Gallery) I followed the pattern of the stripes, stitching on the white space between the streamers. When the fabric is as busy as this Happy Streamers is, I think it works well to keep the quilting simple.
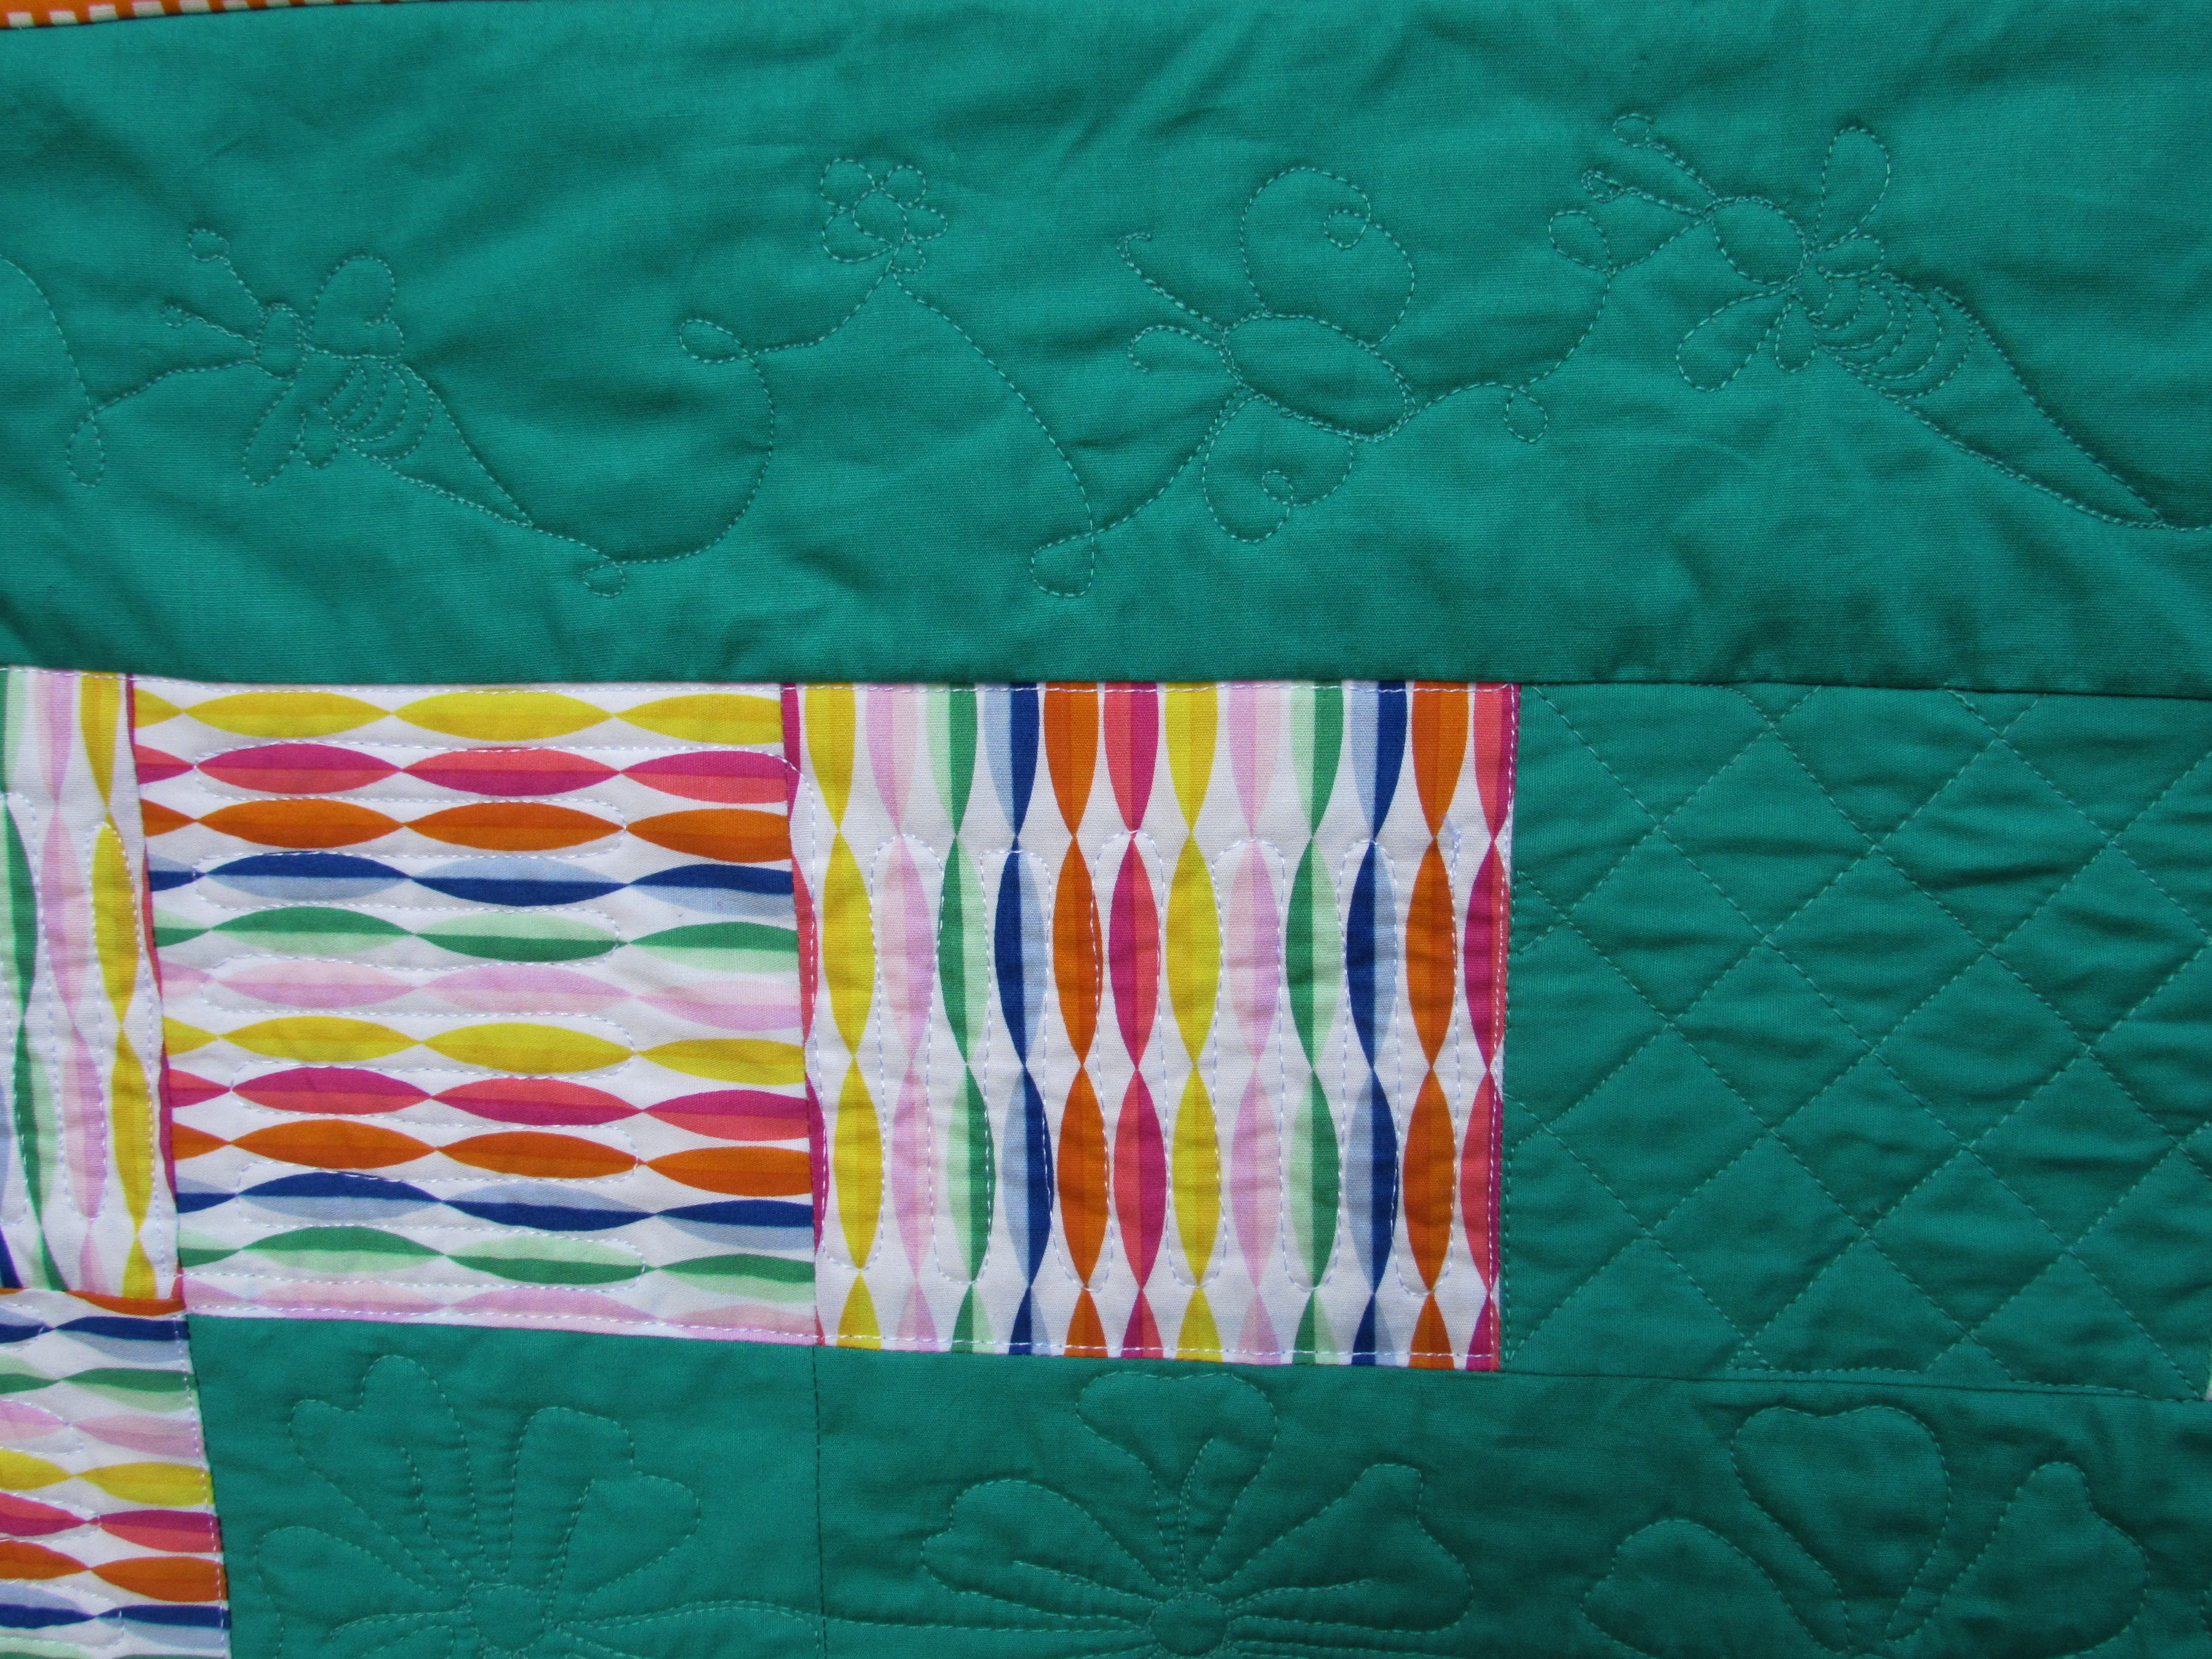
Then I worked on the green background. I used a spool of Mettler thread to quilt this because I had a spool that worked well. Honestly though, I am not a huge fan of quilting with Mettler. It gives off quite a bit of lint and I fight the tension more when I use Mettler. But I had a good time quilting this. For the inner border I used large, free form flowers.
On the outer border, I did a an organic wavy vine with small flowers, bumblebees and butterflies.
For the bees and butterflies, I found inspiration at The Inbox Jaunt. Lori Kennedy has a vast library of tutorials for different quilting motifs. I think the bees and butterflies are so cute. Some of the butterflies are a bit lopsided, which adds a lovely touch of whimsy to the quilt (right?). Finally, on the block between each section of directional fabric, I quilted a cross hatch pattern.
The backing was cut from a sheet that I thrifted a long while back. I think the bright, primary colors work well with the top.
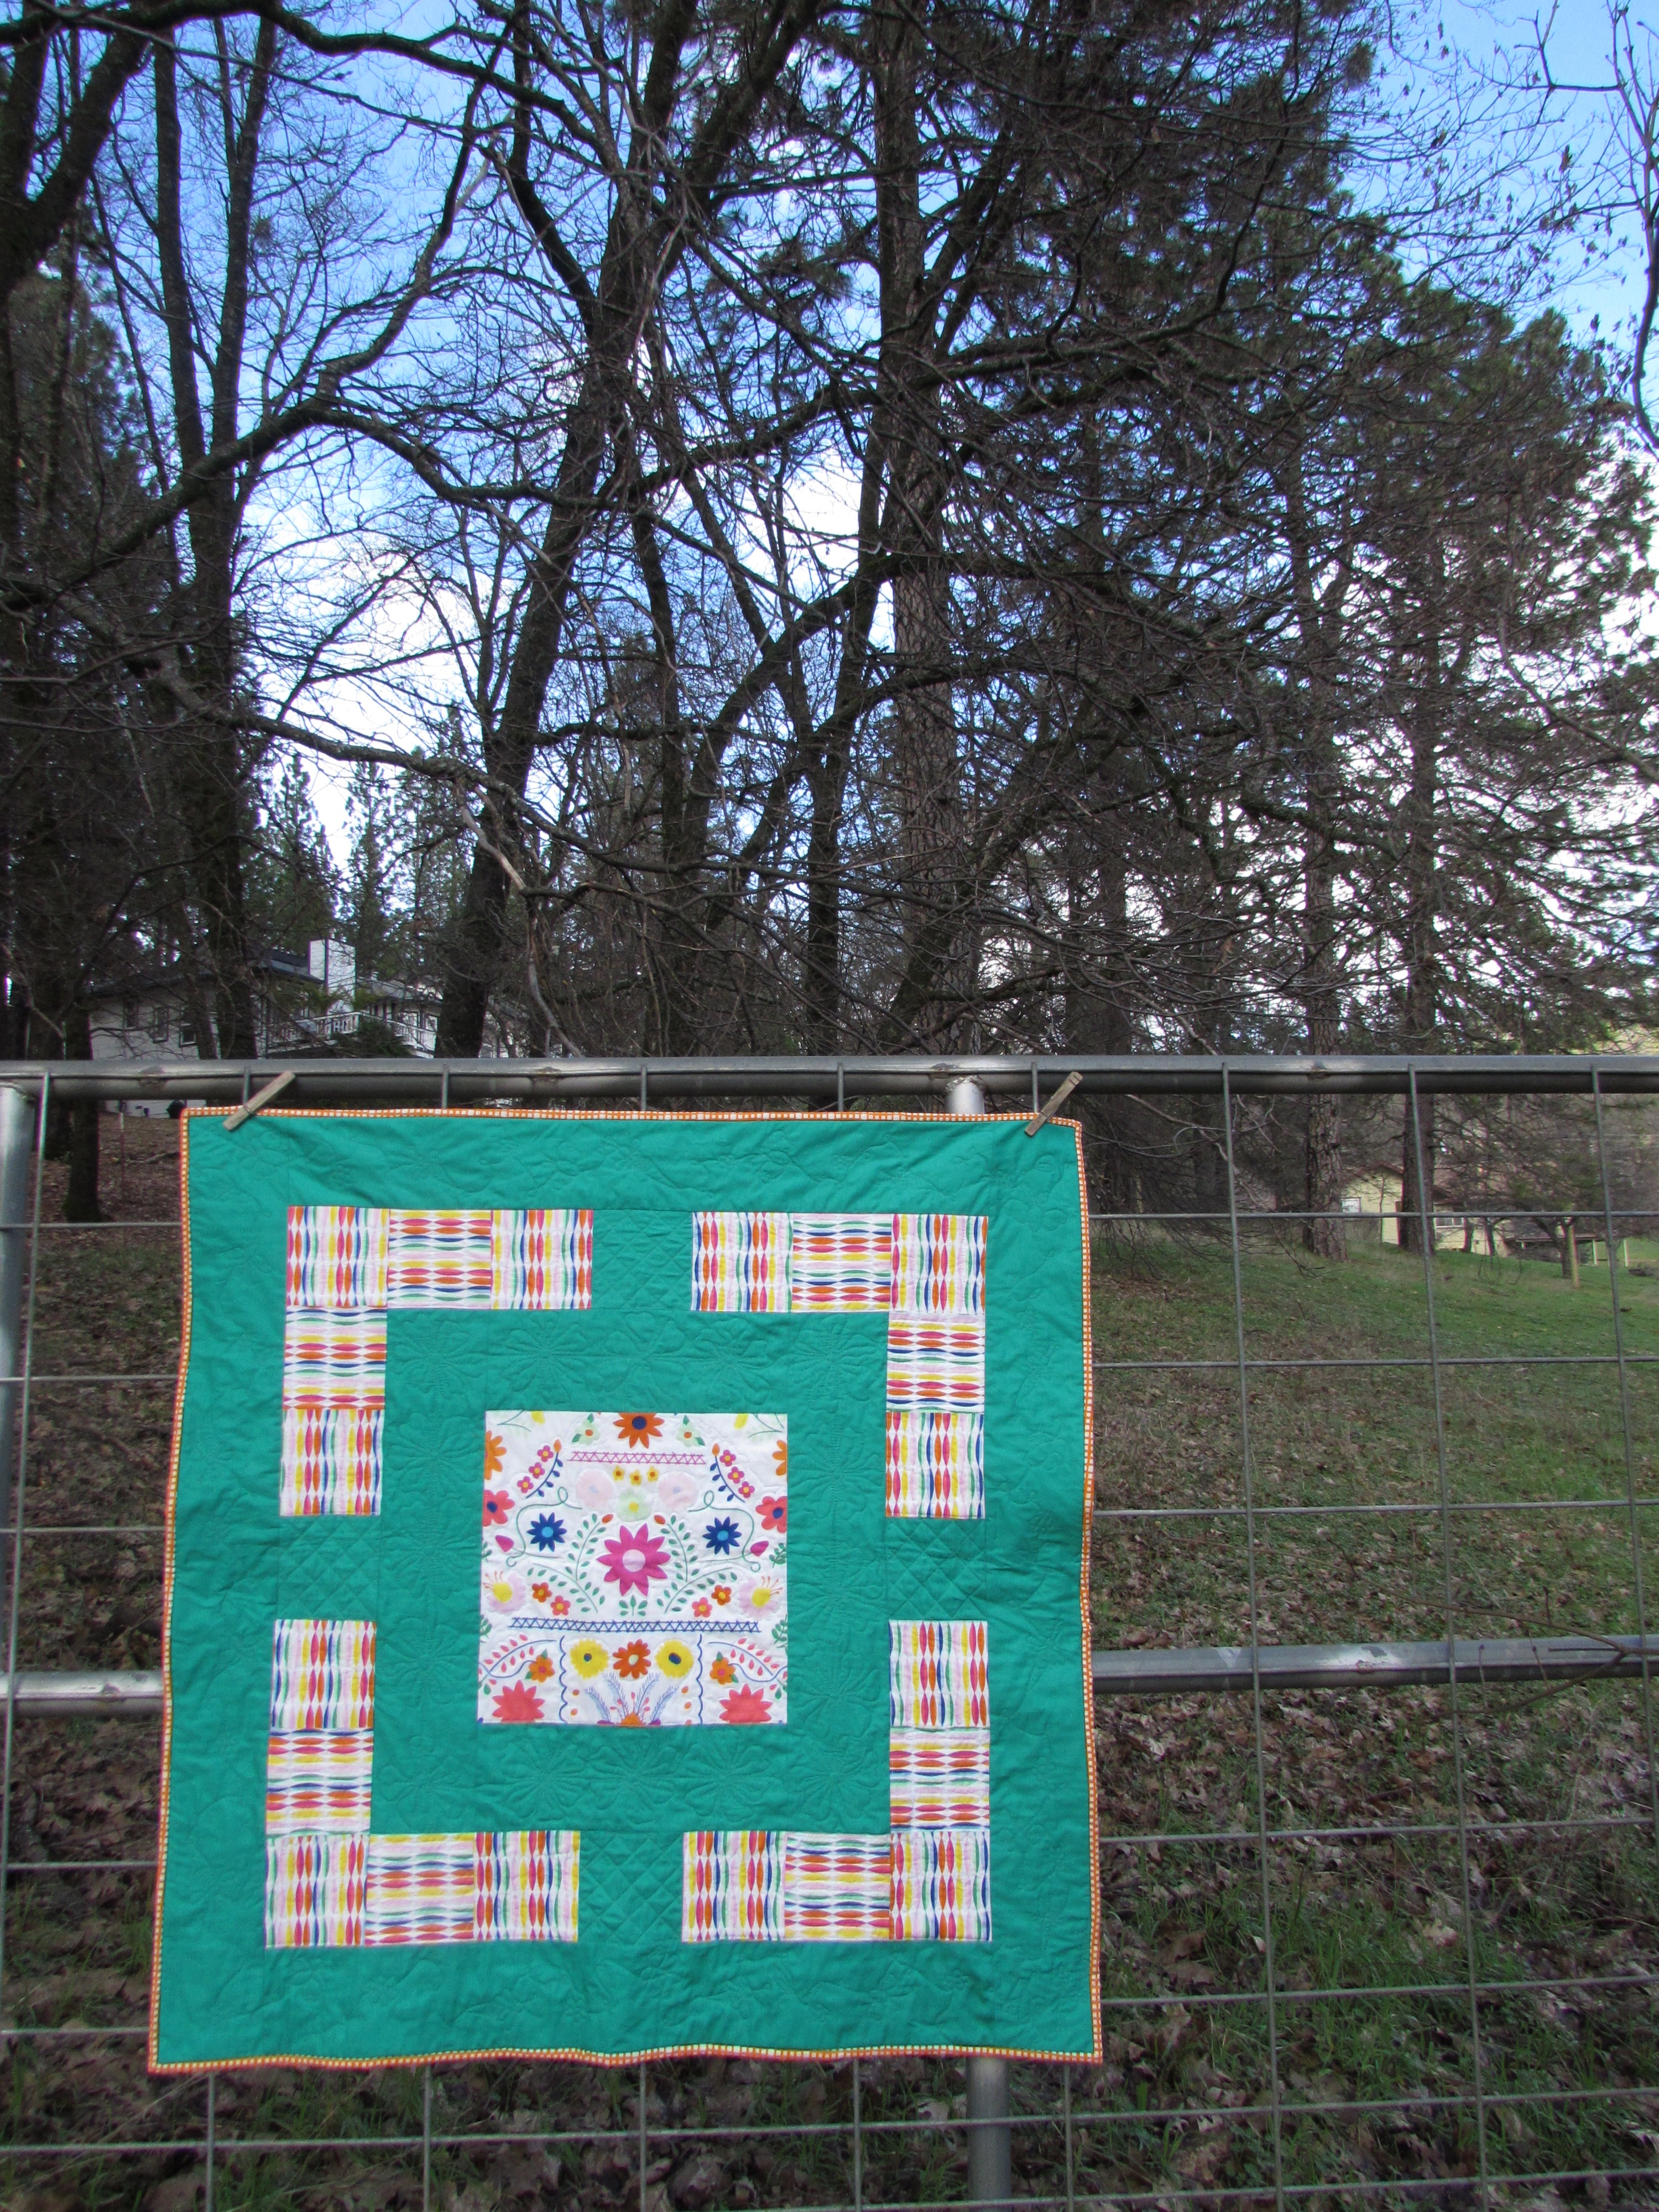
I am happy to call this one done. Bright and colorful, perfect for these gray, rainy days we have been having. (But I am not complaining. I welcome the rain!!)
I would like to thank everyone for your support of my shop. I really appreciate it. The discount code for Needle and Foot readers is good for just a few more days. Enter NANDFREADERS15 follow meand receive a 15% discount on orders of $5.00 or more. This code is valid through February 12th. Next week there will be a giveaway on Instagram. If you , keep an eye out for that. If you don’t, now might be a good time to start! 😉
Linking to my favorites. Check the list at the top of the page, under Link Ups.
Never have I said good bye so many times. This is getting ridiculous. But last night I finished my Pretty Gemstones quilt. How could I leave and give it away without sharing it? There aren’t that many quilt finishes in a year (for me anyway) to skip one! This will be a quick post, because you know, the wedding and all. So much to be taking care of around here.
In all it’s glory, here is the first quilt finish of 2017! By the way, pictures were all taken indoors and late at night so they are not of the award winning quality that you have come to expect from me. 😉
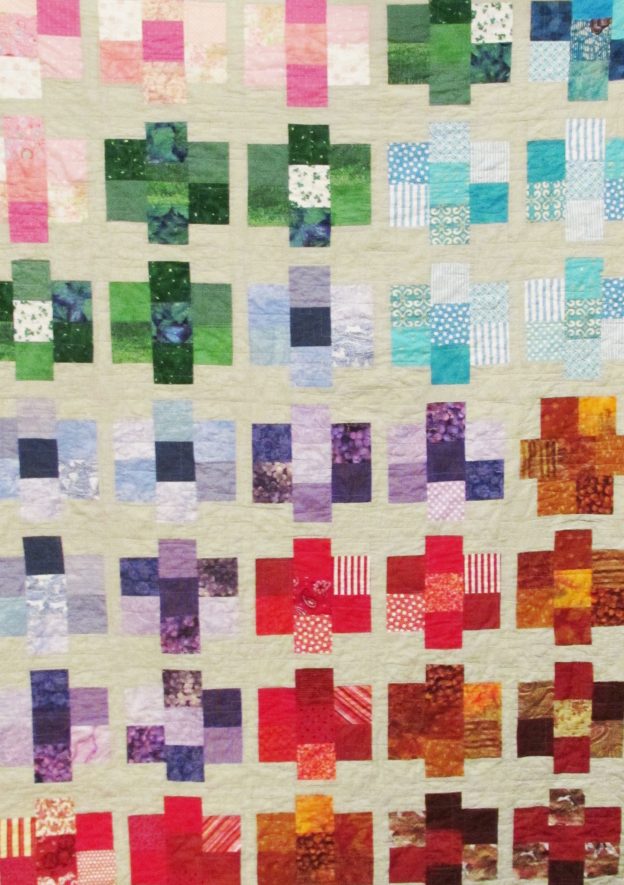
This quilt was made with a pattern called Pretty Gemstones. It was designed by the wonderful Cynthia Brunz of Quilting is Better than Housework (which is absolutely true!) It was published in McCall’s Quilting magazine in the January 2016 issue. The pattern is a breeze to make. I love a pattern with sashing. It means that my less than perfect piecing doesn’t make me go crazy because there are no corners or points to match. (I can be so lazy!)
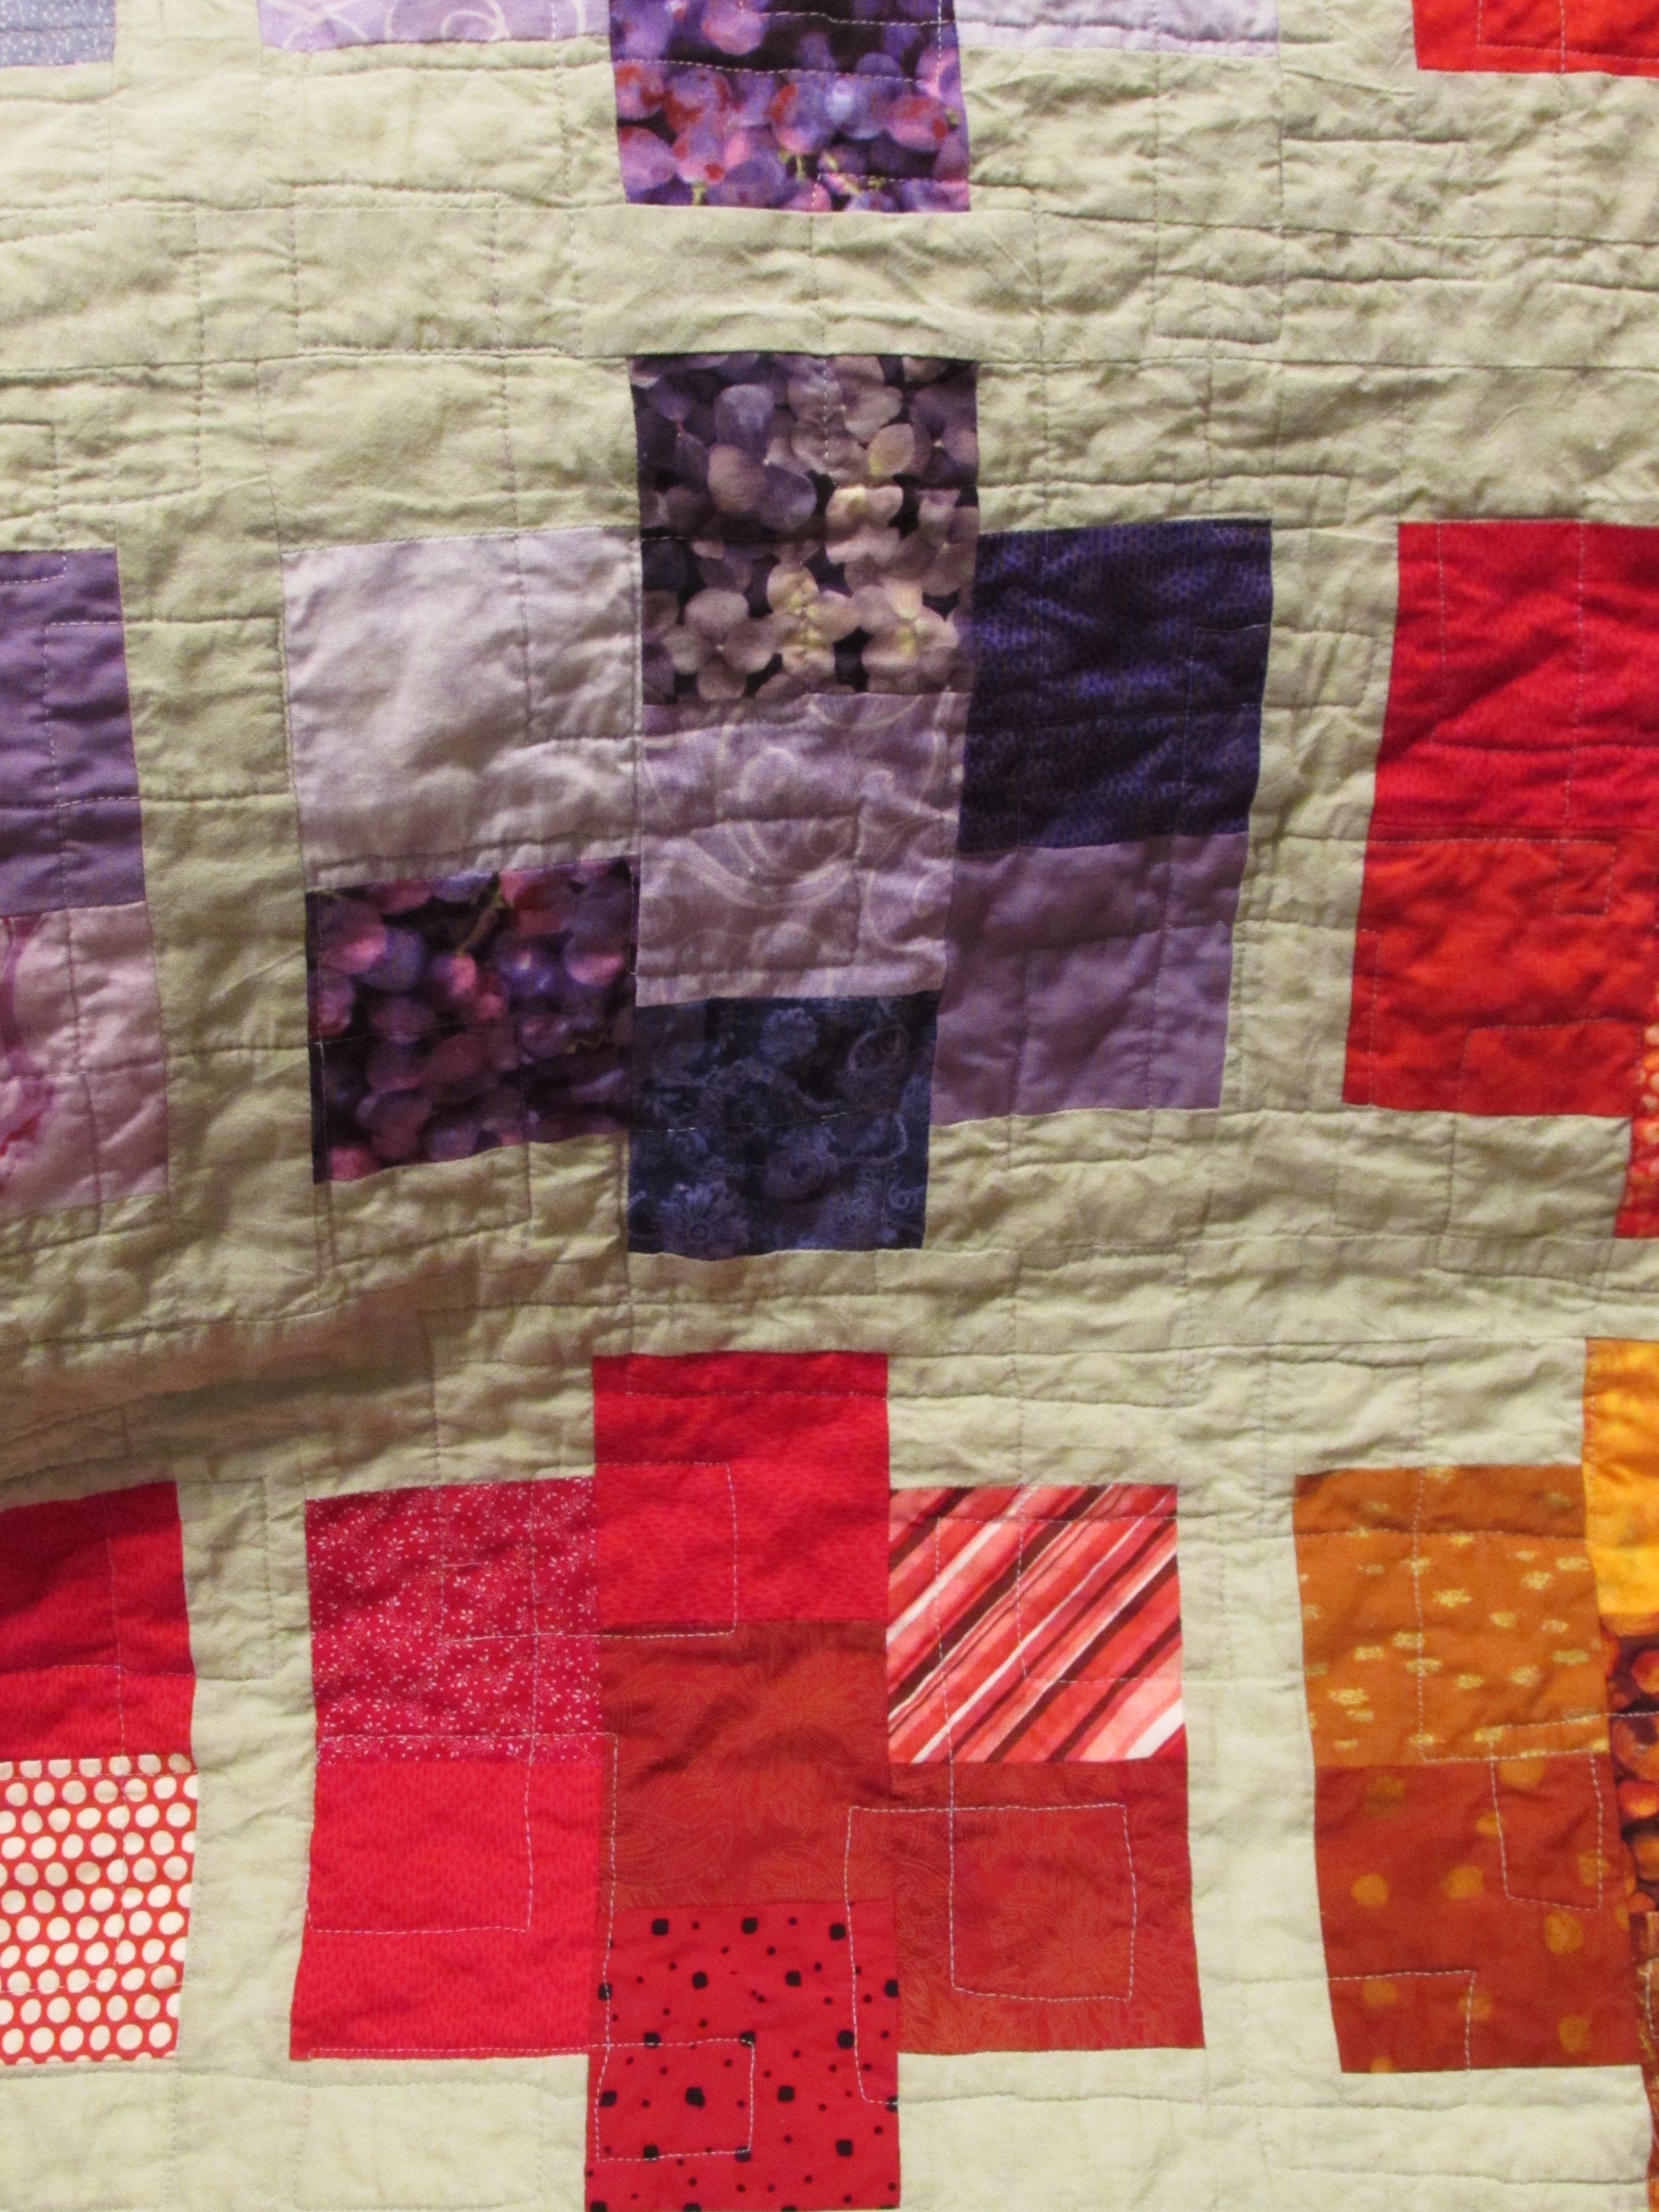
I started this quilt last January as one of my Rainbow Scrap Challenge projects. But to be honest, I didn’t always follow the color prompts of the challenge. I was trying to use colors that are reminiscent of gems. I think this came off quite well. There is are blocks which represent sapphires, rubies, topaz, tiger eye, amethyst and rose quartz. I skipped many of the suggested colors because they didn’t work for this project. I am pretty sure that is allowed but, if not, please don’t tell on me.
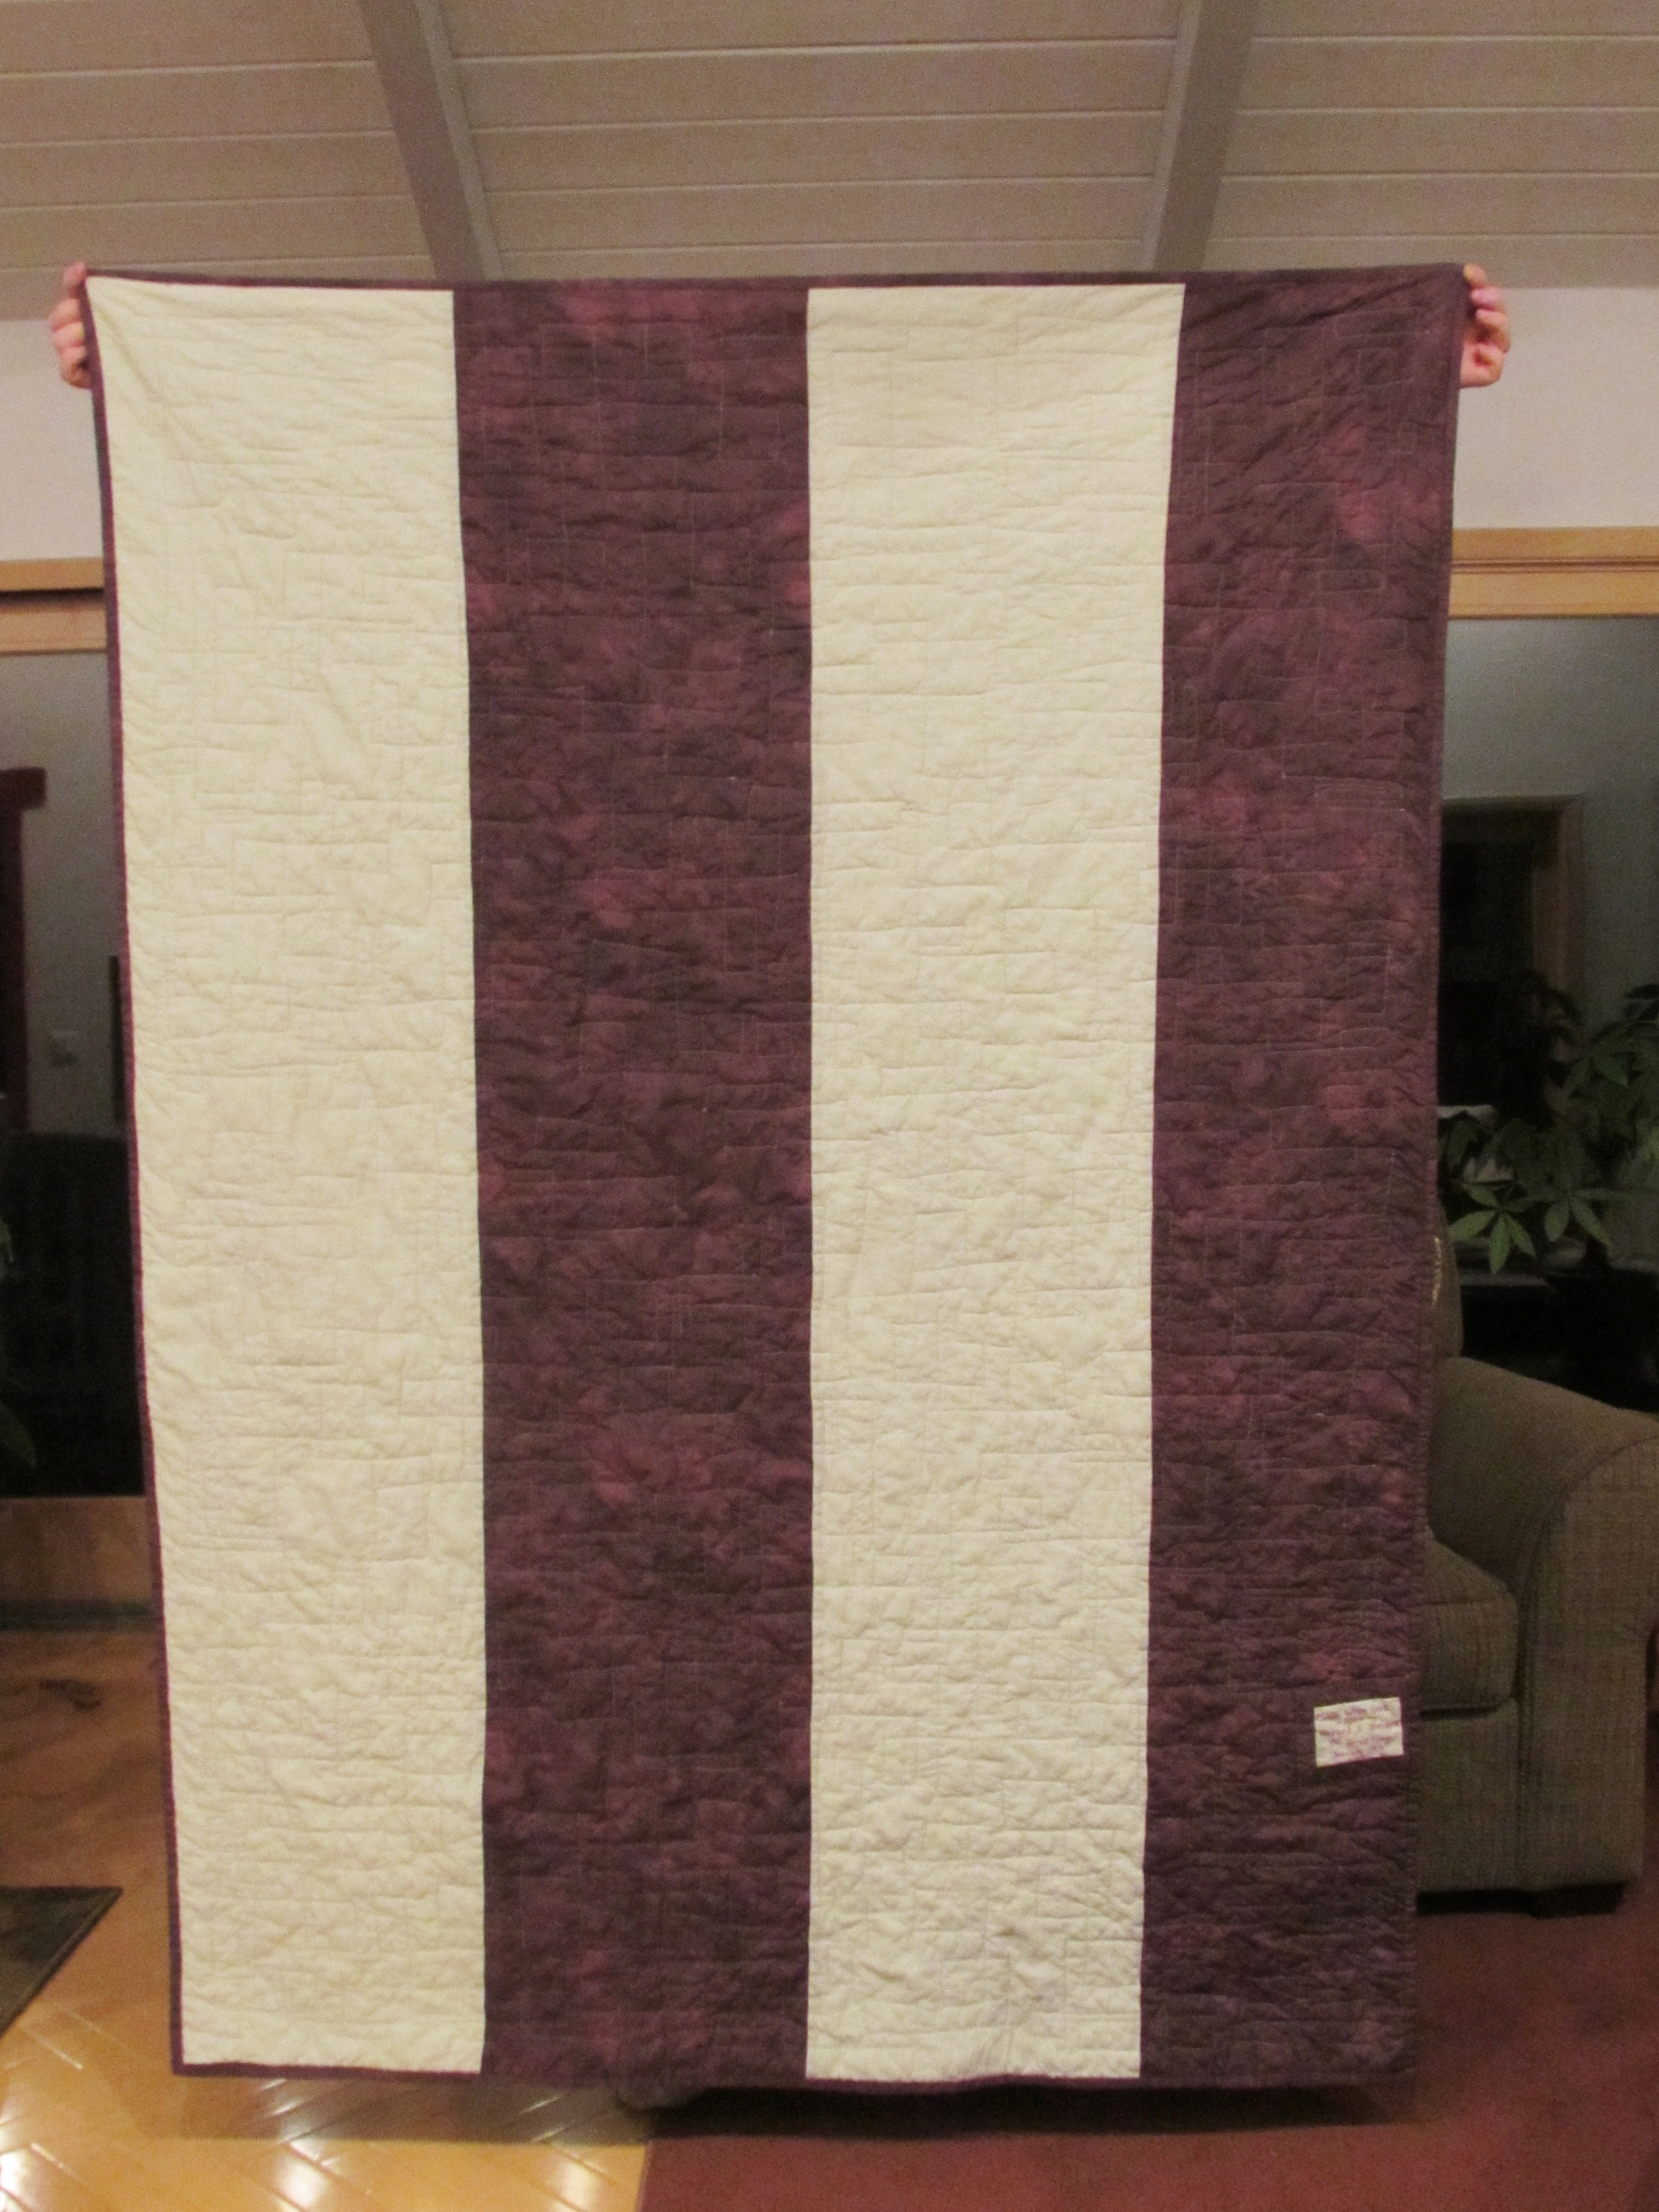
The sashing is done with Kaffe Fassett’s solid (the color is Ecru). I found it difficult to work with this fabric. It is a thin cotton and has a great deal of give to it. It became almost stretchy, especially the long strips for the sashing. Honestly, I doubt I would buy it or recommend it to a friend. (Sorry Rowan Fabric and Kaffe.) I had to starch it and while that helped, it didn’t completely solve the issue. This is the second time I used these solids. The first time was in the jelly roll quilt I posted about here. I had quite a bit of trouble with awful stretchy waves in this project too. Part of the problem on the jelly roll quilt was I had to rip out stitches several times which distorted the strips. Now I also think it was this fabric. Seriously, it is very thin. After trying it twice, I doubt I would purchase these solids again. I have used Kaffe Fassett’s gorgeous print cottons and they are wonderful. It is this line of solids (and his stripes) that I am not a fan of. For the backing I pieced the sashing fabric with a deep purple remnant that I picked up a while back. See the label on the back? I am trying to be more diligent about labeling my quilts. The purple fabric was also used to bind the quilt.
I quilted it with a motif of interlocking squares and rectangles of all sizes. This is the first time I have used this pattern and I loved it. The boxes are very forgiving. One interesting thing I noticed is that I can control the machine better with a square pattern than a round. Circles are more difficult for me to keep a consistent speed with as opposed to square. It felt more relaxing to quilt the squares.
On the plus side for Kaffe Fassett solids, they are quite soft – especially after washing. This quilt crinkled up so nicely after a quick rinse. No color bleeding issues either. Yay for Color Catchers!
Finally, take a close look at the quilt. See my rather silly error? I didn’t catch it until about 1/3 of the quilting was done. Yikes!
I am giving this quilt to my new daughter-in-law’s parents. We wanted to bring them something as a thank you for the events they are hosting for this weekend’s wedding as well as to welcome them into the family. I hope they like it.
I am not going to promise this is the last post for the week. It probably is. But who knows?
Linking up with the lots of fun places. Check out the list at the top of the page, under Link Ups.
If you are shopping for a new Craftsy class, this weekend is a good time to do so. From Friday, January 13th through Sunday the 15th, the classes are Buy One, Get One. BOGO deals are great – two for the price of one! Check it out here.
(Note – I am a Craftsy affiliate. I am paid a small stipend for purchases made after clicking through the links on my site.)
I remember when I was a kid, I didn’t really like the New Year’s Holiday. I think it was because to me it signified Christmas was over (oh how sad I was to see my mom take down the Christmas tree) and school was starting up. I didn’t like school a whole lot as a child – I would much rather be at home! Anyway, New Year’s wasn’t my thing, that’s for sure.
Now it is signifies a clean slate, opportunity, and a new beginning. While I do love putting the tree up and decorating for Christmas, by New Year’s Day, I am ready to take it down and clean the house. Time to embrace the new year and the awesome opportunity that lies within!
For 2017 I have a few major goals:
The first of which is to greatly expand my Etsy shop. I have a plan blocked out for this but I believe I will save the details for another post. I am excited to share this with you but need to finish a few things up before I do. Now you’re all curious, right??
The second goal is to continue to improve my free motion and long arm quilting skills. I feel like I made great strides in 2016 and want to keep the momentum going. To this end, I am plan to:
Make some smaller projects (baby quilts and several minis) because I can quilt those with ease on my home machine which provides lots of practice.
Additionally, last night I made a stack of small-ish quilt sandwiches to practice on. Using batting scraps that I stitched together and old fabric, I pinned four sets to be used strictly for practice. For whatever reason, I usually think I need to actually “make” something before quilting. Really, I just need to practice. Using up scraps and weird fabrics will be an economical, quick way to get some practice in.
I have two larger quilts planned for this year which will be provide practice on the long arm that I am able to rent. Also, I still have one quilt in my UFO pile and will quilt it on the long arm as well. (It is the Harmony quilt that was made for a wedding gift for my nephew. He was married in September and I still haven’t finished this. Not for lack of trying though! I have made two different appointments to rent time on the long arm but both times woke up with a migraine and had to cancel. Lucky for me, they are very kind about these things. Hoping to schedule time later this month to finish this up and then I can mail it off to the newlyweds.
Next on the list is to fit in a few garment projects. I have several really nice patterns that I would like to make. These are patterns I have picked up while collecting product for my Etsy shop. Refining my skills in actually fitting a garment would be wonderful. Seems like the main thing that holds me back from making clothing is the difficulty around fitting the pattern. There are a billion tutorials for this, many of which are found at www.collete.com. I subscribe to their newsletter and follow their blog. This year I am going to actually implement some of what I read on their site! First off, there is a vintage fabric I found a long while back. It is a border print and I think it would be cute for a simple skirt. Wish me luck!
Last on the list is time management. There is SO much I want to accomplish. The best way to ensure I can do this is by managing my time wisely. Between sewing, blogging, my Etsy shop and taking care of the house, I seem to run out of hours in the day. To achieve this I plan to:
It is my hope to use the Quilter’s Planner even more this year. (I was fairly good about using it last year too.) If I can set goals for each week and plan blog posts out for a few weeks at a time, that would be great. Last year I tried to sketch my week out each Sunday. This year I would like to sketch out farther than one week at a time.
Stop multi-tasking. Seriously. This is my downfall every time. If I start one thing, invariably I stop to “just do one quick thing” and then I don’t finish the first thing. I need to stay put. Finish the quilt block, complete the Etsy listing, write the entire blog post, etc. Finishing what I have started would be hugely advantageous. Texting is a big distraction. Turning off the sound on my phone is very helpful
Meal plans also help. I do love to cook but if I don’t have a plan for the week’s meals, it feels like a chore. Trying to come up with something at the end of the day often results in dinners like omelets (thanks to our ever diligent hens). Let’s just say Julia is sick and tired of eating eggs! I love knowing what I plan to make for dinner. It allows me to put more energy into the rest of the day, especially if I prep meals ahead. Meal planning is something that I do sporadically. It would be so helpful if I planned at least four meals weekly – so that is the goal here. It makes grocery shopping much more efficient as well. I make more quick runs to the grocery store when I don’t have a meal plan. (This is actually a fallacy; from my house to the grocery store is a 14 mile round trip which means there is no “quick run” to the grocery store!)
With these goals listed, I have a plan. Each objective is easily broken down into steps which makes achieving them much more likely. Go 2017!!! I am off to begin reaching for these goals. Later this week I will share the book that I selected for the Winter Book Share. Stay tuned! Happy New Year everyone!